1
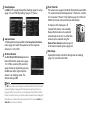
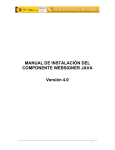
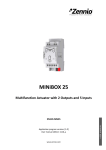
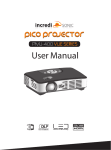
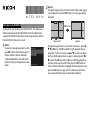
*L753 2911*
New Features for the GR DIGITAL III
Thank you for your purchase of a GR DIGITAL III. This document
details new features for the GR DIGITAL III not described in the
supplied GR DIGITAL III Camera User Guide. Page numbers refer to
the GR DIGITAL III Camera User Guide.
1
Date List
To view a list grouping pictures by date,
press 9 in the 81-frame view (page 31).
Pictures taken in the last seven days
are identified both by date and by the
number of days since the pictures were
taken.
List
2 Page
To page through pictures in the 20- and 81-frame views (page
31) and date list, press the DISP. button. A list of pages will be
displayed.
DISP. button
Thumbnail list
Page list
To page through pictures in 20- and 81-frame views, press !,
", #, or $, press the ADJ. lever left or right, or rotate the updown dial. In date-list view, press ! or " or use the up-down
dial to scroll through pictures a page at a time and press # or
$ or press the ADJ. lever left or right to scroll through pictures
by date. To view a picture full frame, press the DISP. button to
return to the thumbnail list, highlight the desired picture, and
press the ADJ. lever in or press the 8 button once (20-frame
view), twice (81-frame view), or three times (date list).
Menu Page Advance
3 Use
9 and 8 to page through the shooting (page 54), setup
(page 112), and “Edit My Settings” (page 117) menus.
9
8
Distance
4 ASnap1.5Focus
m option has been added to the Snap Focus Distance
menu (page 64). Select this option to set the snap focus
distance to 1.5 m (4.9 ft.).
ADJ. Direct ISO Control
5 An
ADJ. Direct ISO Control option has
been added to the setup menu (page
112). If On is selected, ISO sensitivity
(page 84) can be adjusted by pressing
the ADJ. lever left or right when the
camera is in shooting mode. The
default setting is Off.
Caution
The ADJ. lever can be used to adjust sensitivity while the shutter button
is pressed halfway in program shift and aperture priority modes (in
program shift mode, sensitivity can be adjusted even after the shutter
button is released, as long as shutter speed and aperture are displayed).
Note that once sensitivity has been adjusted in this manner, Auto and
Auto-Hi can not be re-selected.
GF-1 Flash Unit
6 The
The camera now supports the Ricoh flash interface and offers
TTL-auto flash control with optional GF-1 flash units. See the
GF-1 manual or “The GF-1 Flash Unit” on page 167 of the GR
DIGITAL III Camera User Guide for more information.
To choose a flash mode, press F
(manual flash mode is not available).
Manual flash mode must be selected
with controls on the GF-1, but the flash
amount can be selected using the
Manual Flash Amount option (page 73)
in the camera shooting menu (page 54).
Changes
7 Other
Optional flash units will not fire during interval shooting
(page 75). Use the built-in flash.