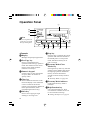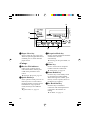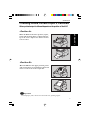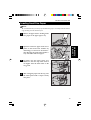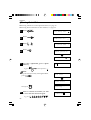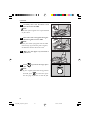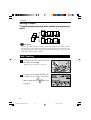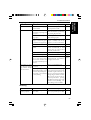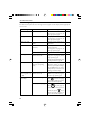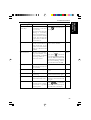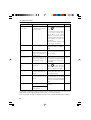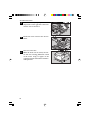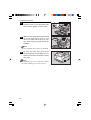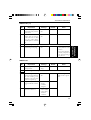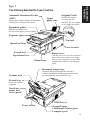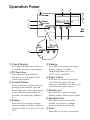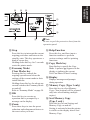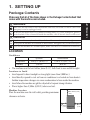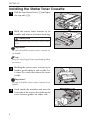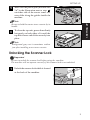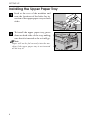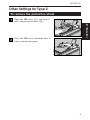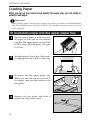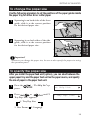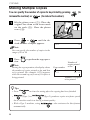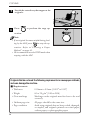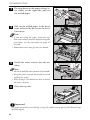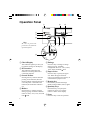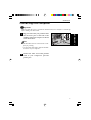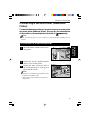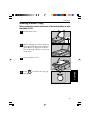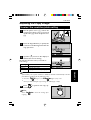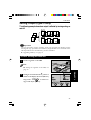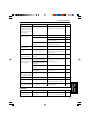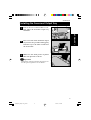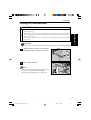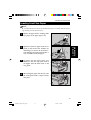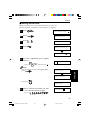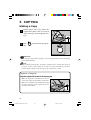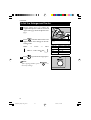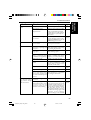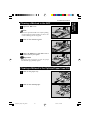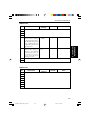
1
Overseas Affiliates
Spain
RICOH CORPORATION
5 Dedrick Place
West Caldwell, New Jersey
07006
Phone: +1-973-882-2000
RICOH ESPAÑA S.A.
Avda. Litoral Mar, 12-14,
08005 Barcelona
Phone: +34-(0)93-295-7600
The Netherlands
Italy
RICOH EUROPE B.V.
Groenelaan 3, 1186 AA,
Amstelveen
Phone: +31-(0)20-5474111
RICOH ITALIA SpA
Via della Metallurgia 12,
37139 Verona
Phone: +39-(0)45-8181500
United Kingdom
Hong Kong
RICOH UK LTD.
Ricoh House,
1 Plane Tree Crescent,
Feltham,
Middlesex, TW13 7HG
Phone: +44-(0)181-261-4000
RICOH HONG KONG LTD.
23/F., China Overseas
Building,
139, Hennessy Road,
Wan Chai, Hong Kong
Phone: +852-2862-2888
Germany
Singapore
RICOH DEUTSCHLAND
GmbH
Mergenthalerallee 38-40,
65760 Eschborn
Phone: +49-(0)6196-9060
RICOH ASIA PACIFIC
PTE.LTD.
260 Orchard Road,
#15-01/02 The Heeren,
Singapore 238855
Phone: +65-830-5888
France
Operation Manual
U.S.A.
Operation Manual
Read this manual carefully before you use this product and keep
it handy for future reference. For safety, please follow the
instructions in this manual.
RICOH FRANCE S.A.
383, Avenue du Général
de Gaulle
BP 307-92143 Clamart
Cedex
Phone: +33-(0)1-40-94-38-38
SUPPLIES MODEL NAME
The correct model name of supplies for
your Bizworks is:
RICOH TONER CASSETTE TYPE 1120D BLACK
RICOH CO., LTD.
15-5, 1 chome, Minami-Aoyama, Minato-ku, Tokyo,
Phone: Tokyo 3479-3111
Printed in The Netherlands
EE G025-8600
106_GB_1~4
1
99.8.3, 6:14 PM
Introduction
This manual contains detailed instructions on the operation and maintenance of this machine. To get
maximum versatility from this machine, all operators should carefully read and follow the instructions in
this manual. Please keep this manual in a handy place near the machine.
Please read the safety information on pages i - iii of this manual. It contains Important Information related
to user safety and preventing equipment problems.
Operator Safety:
This machine is considered a class 1 laser device, safe for office/ EDP use. The machine contains a 5milliwat, 765 - 805 nanometer wavelength, GaAIAs laser diodes. Direct (or indirect reflected) eye contact
with the laser beam might cause serious eye damage. Safety precautions and interlock mechanisms have
been designed to prevent any possible laser beam exposure to the operator.
Declaration of Conformity
“The Product complies with the requirements of the EMC Directive 89/336/EEC and the Low Voltage
Directive 73/23/EEC.”
In accordance IEC 60417 this machine uses the following symbols for the main switch:
a means POWER ON.
b means POWER OFF.
The following label is attached on the machine.
This label can be found when opening the bypass tray.
CLASS 1 LASER PRODUCT
IN ACCORDANCE WITH IEC 825
LASER KLASSE 1 nach IEC 825
Laser Safety:
The optical housing unit can only be repaired in a factory or at a location with the requisite equipment. The
laser subsystem is replaceable in the field by a qualified Customer Engineer. The laser chassis is not
repairable in the field. Customer engineers are therefore directed to return all chassis and laser subsystems to the factory or service depot when replacement of the optical subsystem is required.
Notes:
•
•
•
Model names for the machines do not appear in the following pages. Check the type of your machine before reading this manual.
Bizworks 106
Some illustrations may be slightly different from your machine.
Certain types may not be available in some countries. For details, contact your local dealer.
Two kinds of size notation are employed in this manual. With this machine refer to the metric version.
For good print quality, Ricoh recommends that you use genuine Ricoh toner.
Ricoh shall not be responsible for any damage or expense that may result from the use of parts other than
genuine Ricoh parts in your Ricoh office product.
Power Source: 220 ~ 240 V, 50/60 Hz, 2.2 A
Please make sure to connect the power cord to a power source as above. For details about power connection, refer to page 8.
Trademarks
Microsoft®, Windows®, and MS-DOS® are registered trademarks of Microsoft Corporation in the United
States and/or other countries.
Other product names used herein are for identification purposes only and might be trademarks of their
respective companies. We disclaim any and all rights in those marks.
© Copyright 1999, RICOH CO., LTD.
106_GB_2~3
1
99.8.3, 1:34 PM
Safety Information
When using your machine, the following safety precautions should always
be followed.
Types of warnings used in this manual
WARNING
Ignoring this warning could cause serious injury or even
death.
CAUTION
Ignoring this caution could cause injury or damage to property.
Symbol examples
The d symbol means a situation that requires you take care.
The
symbol means you MUST NOT carry out this operation.
This example means “Do not take apart.”
The ● symbol means you MUST perform this operation.
This example means “You must remove the wall plug.”
Microsoft®, Windows®, and MS-DOS® are registered trademarks of Microsoft Corporation in the
United States and/or other countries.
Other product names used here in are for identification purposes only and might be trademarks of
their respective companies. We disclaim any and all rights in those marks.
i
WARNING:
• Use of controls or adjustment or performance of procedures other than those
specified in this manual may result in hazardous radiation exposure.
• Only connect the machine to the power source described on the inside of the
front cover.
• Avoid multi-wiring.
• Do not damage, break or make any modifications to the power cord. Do not
place heavy objects on it, pull it hard or bend it more than necessary. These
actions could cause an electric shock or fire.
• Do not plug or unplug the power cord with your hands wet. Otherwise, an
electric shock might occur.
• Make sure the wall outlet is near the machine and freely accessible so that in
event of an emergency it can be unplugged easily.
• Do not remove any covers or screws other than those specified in this manual.
Some parts of the machine are at a high voltage and could give you an electric shock. Also, reflected eye contact with the laser beam may cause serious
eye damage. When the machine needs to be checked, adjusted, or repaired,
contact your service representative.
• Do not take apart or attempt any modifications to this machine. There is a
risk of fire, electric shock, explosion or loss of sight.
• If the machine looks damaged or breaks down, smoke is coming out, there
is a strange smell or anything looks unusual, immediately turn off the power
switch then unplug the power cord from the wall. Do not continue using the
machine in this condition. Contact your service representative.
• If metal, liquid or foreign matter falls into the machine, turn off the power
switch, and unplug the power cord.
Contact your service representative. Do not keep using the machine with a
fault or defect.
• Do not put any metal objects or containers holding water (e.g. vases, flowerpots, glasses) on the machine. If the contents fall inside the machine, a fire
or electric shock could occur.
• Do not incinerate used toner or toner cassettes. Toner dust might ignite when
exposed to an open flame. Dispose of the used toner cassettes according to
local regulations for plastics.
ii
CAUTION:
• Keep the machine away from humidity and dust. A fire or an electric shock
might occur.
• Do not place the machine on an unstable or tilted surface. If it topples over,
it could cause injury.
• When you move the machine, unplug the power cord from the wall outlet to
avoid fire or electric shock.
• When the machine is not be used for a long time, unplug the power cord.
• When you pull out the plug from the socket, grip the plug to avoid damaging
the cord and causing fire or electric shock.
• If you use the machine in a confined space, make sure there is a continuous
air turnover.
• Do not reuse stapled paper. Do not use aluminium foil, paper containing
carbon or any other conductive paper. Otherwise, a fire might occur.
• When removing misfed paper, or replacing the toner cassette and the cleaning pad, do not touch the fusing section because it could be very hot.
• This machine has been tested for safety using this supplier’s parts and
consumables. We recommend you only use these specified supplies.
iii
Energy Star program
Energy Star®
As an Energy Star partner, we have determined that
this machine model meets the Energy Star Guidelines for energy efficiency.
The Energy Star Guidelines intend to establish an international energy- saving system for
developing and introducing energy-efficient office equipment to deal with environmental issues, such as global warning.
When a product meets the Energy Star Guidelines for energy efficiency, the Partner shall
place the Energy Star logo onto the machine model.
This product was designed to reduce the environmental impact associated with printing
equipment by means of energy-saving features such as Low Power mode.
• Low Power Mode
This machine automatically lowers its power consumption 15 minutes after the last
printing job has been completed. To exit Low Power mode, press any key on the
operation panel.
The machine returns to the ready condition in about 22 seconds. To change the low
Power delay, see page 105.
Specification
Low Power Mode
(Economy Mode)
Power consumption 15 W
Default delay
15 min.
Recovery time
22 sec.
Recycled paper
Please contact your sales or service representative for recommended recycled paper types
that may be used in this machine.
iv
Contents
Safety Information .............................................................................. i
Energy Star program .......................................................................... iv
Part Names ......................................................................................... x
Operation Panel .................................................................................. xii
1. SETTING UP
Package Contents ...............................................................................
Location ..............................................................................................
Installing the Starter Toner Cassette ...................................................
Installing Other Hardware ..................................................................
Removing the Protective Sheet ......................................................
Installing the Upper Paper Tray .....................................................
Preparing the Output Tray ..............................................................
Connecting to a Computer ..................................................................
Choosing Where Printed Output is Delivered ....................................
Connecting the Telephone Line and Optional Telephone Handset ....
Turning On the Machine ....................................................................
1
1
2
4
4
4
5
6
7
8
9
2. GETTING ACQUAINTED
Paper and Other Media .......................................................................
Loading Paper.....................................................................................
Loading Plain Paper into the Upper Paper Tray .............................
Loading Small Size Paper ..............................................................
Loading Other Media .........................................................................
Loading Envelopes .........................................................................
Loading Transparencies..................................................................
Loading Label Paper ......................................................................
Second (Additional) Printer................................................................
Connecting to a Second Printer ......................................................
Paper Feed Unit (Option) ...................................................................
Paper Feed Unit Part Names ..........................................................
Installing the Paper Feed Unit ........................................................
Loading Paper into the Paper Feed Unit ........................................
Changing the Paper Size ................................................................
Specifying the Paper Size ...............................................................
10
11
11
13
15
15
15
15
16
16
17
17
17
19
20
20
v
Installing the Paper Size Indicator ................................................. 21
Selecting the Paper Source ............................................................. 22
Upgrading Memory ............................................................................ 23
3. PRINTING AND SCANNING
Setting up ............................................................................................
Installing the Software Drivers ......................................................
Features You Can Access From the Printer Driver .............................
Using the Second Printer (Additional Printer) ...................................
Printing to the Second Printer ........................................................
25
25
27
28
28
4. FAXING
Switching between Fax Operation and Copy Operation Mode ..........
Entering Characters on the Operation Panel ......................................
Entering Numbers ..........................................................................
Entering Letters, Symbols and Spaces ...........................................
Deleting Characters and Moving the Cursor ..................................
Setting up ............................................................................................
Please Read This First ....................................................................
Connecting to the Telephone Line ..................................................
Storing your Own Name/TTI .........................................................
Setting the Dial Mode ....................................................................
Storing your Own Fax Number ......................................................
Setting the Date and Time ..............................................................
Turning Summer Time (Daylight Saving Time) on/off ..................
Sending Faxes.....................................................................................
How to Send a Fax .........................................................................
Entering Pauses and Tones in Fax Numbers ..................................
Entering Pauses ....................................................................
Entering Tones .....................................................................
Redialling a Number ......................................................................
Automatic Redial............................................................................
Cancelling Automatic Redial ...............................................
Cancelling Transmission of a Fax ..................................................
Receiving Faxes .................................................................................
Choosing a Reception Mode ..........................................................
FAX Model ..........................................................................
vi
29
30
30
30
31
32
32
32
33
34
36
38
39
40
40
42
42
42
43
43
43
44
45
45
45
TEL Model ...........................................................................
Switcing between FAX Mode and TEL Mode .....................
Receving calls in TEL Mode ................................................
Screening out Unwanted Faxes with Authorized Reception ..........
Turning Authorized Reception on/off ..................................
Cancelling Reception of a Fax .......................................................
Making Telephone Calls .....................................................................
Faxing During a Telephone Call ....................................................
Sending a Fax During a Telephone call ...............................
Receving a Fax During a Telephone call .............................
Monitoring the Line while Dialling with On Hook........................
Remote Change ..............................................................................
Storing Fax and Telephone Numbers .................................................
Quick Dials .....................................................................................
Storing Quick Dials..............................................................
Editing Quick Dials..............................................................
Clearing Quick Dials............................................................
Name Dials .....................................................................................
Storing Name Dials ..............................................................
Deleting Name Dials ............................................................
Dialling with Name Dials ....................................................
Reports and Lists ................................................................................
Printing the Journal ........................................................................
Printing the Dial List ......................................................................
Transmission Result Report ...........................................................
Error Report....................................................................................
Power Failure Report .....................................................................
Unauthorized Call Report...............................................................
Advanced Features .............................................................................
Making Machine Sounds Louder or Quieter ..................................
Sending Faxes Over Unreliable Lines-Slow (4800bps) .................
RDS ................................................................................................
Page Header....................................................................................
Changing On/Off Settings ..............................................................
45
46
46
46
47
48
49
49
50
50
51
51
53
53
54
55
57
58
58
60
61
62
62
63
63
64
64
64
65
65
66
67
67
67
vii
5. COPYING
Making a Copy ...................................................................................
Making Multiple Copies .....................................................................
Reduction and Enlargement ...............................................................
To Set the Reduction Factor ...........................................................
To Set the Enlargement Factor .......................................................
Zoom (In 1% Increments) ..................................................................
To Use Zoom ..................................................................................
Adjusting the Copy Image ..................................................................
To Select the Resolution/Photo Setting ..........................................
To Adjust the Image Density ..........................................................
Sorting Output ....................................................................................
Sorting Copying .............................................................................
69
72
73
73
74
75
75
76
76
77
78
78
6. TROUBLESHOOTING
General ...............................................................................................
Printing and Copying..........................................................................
Printing ...............................................................................................
Copying and Faxing ...........................................................................
Scanning .............................................................................................
Error Messages ...................................................................................
When the Receive File Indicator is Lit ...............................................
Clearing a Paper Misfeed ...................................................................
Clearing a Feed in the Main Unit ...................................................
Clearing a Misfeed in the ADF ......................................................
Clearing a Misfeed in the Optional Paper Feed Unit .....................
When Paper Will Not Feed.............................................................
80
80
81
82
83
84
87
88
88
90
90
91
7. USER MAINTENANCE
Daily Maintenance .............................................................................
Replacing the Toner Cassette and the Cleaning Pad ..........................
Storage ................................................................................................
Paper ...............................................................................................
Toner Cassette ................................................................................
viii
93
94
97
97
97
8. TECHNICAL REFERENCE
Printing the Help List ......................................................................... 98
Customising Default Settings with the User Parameters.................... 99
Changing the User Parameters ....................................................... 99
User Parameter Switch Summary .................................................. 100
Function List....................................................................................... 103
Selecting the Language ...................................................................... 104
Economy Mode .................................................................................. 105
Changing the Economy Mode ........................................................ 105
9. SPECIFICATIONS ........................................................................ 106
Index ............................................................................................... 109
ix
Part Names
Operation panel
Automatic Document
Feeder (ADF)
Holds up to 10 sheets of paper
for automatic feeding. Place
originals face down.
Document guides
Slide the left guide to fit
the size of the paper you
are feeding.
Key panel for controlling the
machine.
Upper paper tray
Holds up to 100 sheets of
plain paper.
Original guide
Guides the original correctly
into the machine. Make sure
your original fits under this
guide.
Front unit
Power switch
Turns the machine
on and off.
Lower output slot
Copy and printing output comes
out here when the ADF is pushed
down, copie, prints and faxes are
delivered here face-up.
Output bin
When the ADF is pushed up,
output is delivered here
face-down.
x
Scanned documents are
delivered here.
SIMM cover
Open this cover when you
want to install a SIMM
and expand memory.
Upper tray
extension
Extend to support
originals.
Small size paper
feed access panel
This panel can be
lowered to provide
easier handling
when printing on
or copying to
small size paper.
Power socket
Second (Additional)
Printer port
You can connect a second
printer to this port.
Computer port
Connect your computer here.
TEL/LINE
Connect your telephone line
and optional handset here.
xi
GENERAL
DESCRIPTION
Document output
tray
Operation Panel
1
D
E
F
Note
Be sure to panel the
protective seet from
the operation panel.
G
<General>
1 Display
Messages and prompts appear here.
2 Fax/Copy key
Press to switch between fax
operation mode and copy operation
mode. The indicators to the left of
this key show which mode the
machine is currently in.
3 Numeric keypad
Use these keys to enter the number
of copies, dial a fax number or
specify values.
4 Clear key
Press to delete the character to the
left of the display cursor. When the
cursor is located at the far left
position, pressing this key deletes all
of the input characters (when
programming functions only).
5 Start key
Press to start copying or begin
sending or receiving a fax.
xii
H
I
B
2
6 Stop key
Press this key to interrupt the current
operation and return the machine to
the standby state. To reset printer
mode, hold down this key for at
least 3 seconds.
7 Economy Mode/Clear
Modes key
Pressing this key clears any selected
settings to their defaults and cancels
the ongoing operation. Hold down
this key for more than about 3
seconds to turn Economy mode on
or off.
☛ Economy Mode, see page 105.
8 Economy Mode indicator
Lights when Economy mode is
turned on.
9 Help/Function key
Use to print the Help List. Press
once and enter a number for access
to various function settings.
☛ Printing the Help List, see page 98.
GENERAL
DESCRIPTION
0 9
8
A
7
6
5
C
4
3
0 Zoom keys
In copy mode, press these keys to
fine-tune the preset reduction and
enlargement ratios. Also use to
select function settings and navigate
the function menus.
A OK key
Press to enter values or execute an
operation when prompted by a
message on the display.
B Original Type Select key
Press to select a setting that best
matches your copy original or fax
document.
☛ Image Type, see page 76.
C Density key
Press to make copies/faxes lighter or
darker. Select Auto Image Density
to let the machine choose a suitable
setting.
D Check Display indicator
Blinks to alert you to read a message
on the display.
E Busy indicator
Lights during a fax operation and
when making telephone calls.
F PC Interface indicator
Lights while the machine is
receiving data from a connected
computer.
<Copying>
G Sort/Memory Copy key
Press to change order in which your
copy sets are delivered.
☛ Sorting Output, see page 78.
H Reduce key
Press to reduce the size of an image
when copying.
☛ To Set the Reduction Factor, see
page 73.
I Enlarge key
Press to enlarge the size of an image
when copying.
☛ To Set the Enlargement Factor, see
page 74.
xiii
M
K
Q
L
J Paper Select key
Press to select the copy paper size.
When the optional paper feed unit is
installed, press to switch between
paper sources.
<Faxing>
K Receive File indicator
Lights to let you know there is
received fax data in memory that
could not be printed for some
reason.
☛ Substitute Reception, page 45.
L Quick Dial keys
In fax operation mode, press one of
these keys once to recall a fax or
telephone number you have stored
beforehand. In copy operation
mode, these keys have different
uses.
☛ Quick Dials, see page 53.
xiv
J
M Reception Mode key
Press to choose whether the machine
should answer all calls
automatically.
☛ Choosing the Reception Mode, see
page 45.
N Name key
Press to recall a fax or telephone
number stored in a Name Dial.
☛ Name Dials, see page 58.
O Pause/Redial key
Press this key in fax standby mode
to recall the last number dialled.
While entering a fax number, press
this key to enter a pause (shown on
the display as a hyphen).
P On Hook Dial key
Press this key to establish a
connection with the telephone line
connected to the machine for
dialing.
☛ On Hook, see page 51.
GENERAL
DESCRIPTION
O
N
P
<Printing>
Q Second Printer key
Press this key to select between
printing to this machine (indicator
off), and printing to a second printer
connected to the machine (indicator
on).
xv
This page is intentionally blank
xvi
1. SETTING UP
Package Contents
WARNING
Make sure the wall outlet is near the machine and freely accessible so that in event of an
emergency it can be unplugged easily.
Do not put any metal objects or containers holding water (e.g. vases, flowerpots, glasses)
on the machine. If the contents fall inside the machine, a fire or electric shock could occur.
CAUTION
Keep the machine away from humidity and dust. A fire or an electric shock might occur.
Do not place the machine on an unstable or tilted surface. If it topples over, it could cause injury.
If you use the machine in a confined space, make sure there is a continuous air turnover.
Location
Environment
Temperature
Humidity
Acceptable
Recommended
10 to 35°C (50 to 95°F)
15 to 25°C (59 to 77°F)
15 to 80%
30 to 70%
• The machine must be level within 3mm (0.11") both front to rear and left to right.
Locations to Avoid
• Areas exposed to direct sunlight or strong light (more than 2000 lux).
• Areas exposed to cool or heated air (from air conditioners, heaters etc.). Sudden temperature changes can cause condensation to form inside the machine.
• Areas where the machine might be subjected to frequent strong vibration.
• Areas higher than 2500m (8,221 feet) above sea level.
Machine Clearance
Place the machine near the wall outlet, providing minimum
clearance as shown.
1
1. SETTING UP
Make sure that all of the items shown in the Package Contents sheet that
comes with the machine are included.
SETTING UP
Installing the Starter Toner Cassette
Raise the document trap.
1 1
2 Lift up the tabs located on the sides
of the machine and open the front
unit.
2
Hold the starter toner cassette by its
handle, and remove it from its vinyl bag.
CAUTION
Keep all plastic bags out of the reach of children.
Important!
Be sure to hold the starter toner cassette by
its handle.
Note
Keep the vinyl bag for later repackaging when
necessary.
3
Holding the starter toner cassette by its
handle, gently shake it side to side 5 or
6 times to evenly distribute the toner
inside.
Important!
Be sure to hold the starter toner cassette by its
handle.
4
2
Look inside the machine and note the
locations of the arrows that indicate the
toner cassette guides on either side.
Handle
SETTING UP
5
Make sure the plastic pins (marked with
“*” in the illustration next to step 3 )
on either side of the starter toner cassette slide along the guides inside the
machine.
Note
6
1. SETTING UP
Be sure to hold the starter toner cassette by its
handle.
To close the front unit, press down
firmly but gently on both sides of it until
the front unit closes and clicks securely
into place.
Note
Background gray cast is sometimes evident
just after installing a new toner cassette.
7
Lower the ADF as shown.
3
SETTING UP
Installing Other Hardware
Removing the Protective Sheet
1
Open the ADF cover (1) and then remove the protective sheet (2).
2
Close the ADF cover and make sure it
locks securely into place.
Installing the Upper Paper Tray
1
Look at the rear of the machine and
note the locations of the slots for insertion of the upper paper tray on both
sides.
2
To install the upper paper tray, press
down on both sides of the tray, making
sure that it is inserted as far as it will go.
Note
Paper will not be fed correctly into the machine if the upper paper tray is not inserted
all the way in.
4
SETTING UP
Preparing the Output Tray
Pull out the output tray extension as
shown.
1. SETTING UP
1
5
SETTING UP
Connecting to a Computer
Important!
Make sure that the power of both the machine and your computer is turned off
before making the connection.
1
Plug one end of the provided parallel
cable into the lower port on the side of
the machine, and secure it in place as
shown in the illustration.
Note
• The machine must be connected to a computer for printing.
• Use the cable that comes with the machine to connect to your computer.
2
6
Connect the other end of the parallel
cable to your computer’s parallel
printer port.
SETTING UP
Choosing Where Printed Output is Delivered
Where printed output is delivered depends on the position of the ADF.
<Position A>
1. SETTING UP
When the ADF is in the lower position, copies,
prints and incoming faxes are delivered faceup at the lower output slot. Sheets stack in
reverse order.
<Position B>
When the ADF is in the upper position, prints
and receving faxes are stacked face-down and
in the correct order in the output bin.
Important!
To avoid paper jams, do not move the ADF once printing begins.
7
SETTING UP
Connecting the Telephone Line and Optional Telephone Handset
There are two similar sockets located at the rear of the machine.
• LINE – the telephone line connection
• TEL – for an optional handset when sharing the line
with a telephone
1
Plug the line cable into the LINE socket
at the rear of the machine.
2
Connect the other end of the line cable
to your telephone line wall socket.
If you have the optional telephone handset, now do the following:
3
Plug the telephone handset cable into
the TEL socket at the rear of the machine.
4
Connect the other end of the telephone
handset cable to your telephone.
Note
If you wish to also be able to receive incoming telephone calls, you must set the Reception mode to Telephone.
☛ Choosing a Reception Mode, see page 45.
8
SETTING UP
Turning On the Machine
• Only connect the machine to the power source described on the inside of the front cover.
• Avoid multi-wiring.
• Do not damage, break or make any modifications to the power cable. Do not place heavy
objects on it, pull it hard or bend it more than necessary. These actions could cause an
electric shock or fire.
• Do not plug or unplug the power cable with your hands wet. Otherwise, an electric shock
might occur.
Important!
Whenever you turn on the machine, make sure that no paper is loaded beforehand.
1
Attach the power cable to the machine
and plug the other end into an outlet.
2
Turn on the machine.
Note
You can select your preferred language used
on the operation panel and on reports.
☛ Selecting the Language, see page 104.
9
1. SETTING UP
WARNING
2. GETTING ACQUAINTED
Important!
☛ The default display language is English. For how to change to your preferred
language, see page 104.
Paper and Other Media
The machine supports printing on the following types of paper/media from
the upper paper tray.
Refer to the following pages for details.
Envelopes
Plain paper
Paper/Media type (Paper size)
Display
Page
A4 (210mm × 297mm)
A4
p.11
A5 (148mm × 210mm)
A5
p.11
F4 (81/4" × 13")
81/4 × 13
p.11
Letter (81/2" × 11")
Letter (81/2 × 11)
p.11
Legal (81/2" × 14")
Legal (81/2 × 14)
p.11
C5 Envelope (162mm × 229mm)
C5 Env
p.13, 15
C6 Envelope (114mm × 162mm)
C6 Env
p.13, 15
DL Envelope (110mm × 162mm)
DL Env
p.13, 15
Transparencies
p.15
Label paper
p.15
Note
Do not attempt to use the following types of paper: wrinkled or creased paper,
curled or rolled paper, paper containing carbon, carbon-backed paper, coated
paper, onion skin or other very thin paper.
CAUTION
Do not reuse stapled paper. Do not use aluminium foil, paper containing carbon or other
conductive paper. Otherwise, a fire might occur.
10
GETTING ACQUAINTED
Loading Paper
After you have set up the machine you need to load paper then specify the
paper size using the procedure below.
Important!
When loading paper into the upper paper tray, do not load more than 100 sheets of
plain paper (80 g/m2 or 20 lb). Overloading the upper paper tray can cause misfeeds.
1
Fan the stack of paper to make sure that
all pages are free and are not sticking
together. The upper paper tray holds up
to 100 sheets of plain paper (80 g/m2
or 20 lb).
2
Straighten up all four sides of the stack
by tapping them on a desk or tabletop.
3
Set paper into the upper paper tray.
Make sure that the top of the stack is
not higher than the limit mark on the
tray guide.
4
Squeeze the tray guide and slide it
against the edge of the stack.
2. GETTING
ACQUAINTED
Loading Plain Paper into the Upper Paper Tray
11
GETTING ACQUAINTED
5
Press
6
Press
7
Press
.
Prt Help List
.
Function no.: _ _
.
61 Tray Pap.Size
Note
If the paper feed unit (option) is installed,
refer to page 19 for details on how to specify
the paper size.
8
Press
.
9
Press
. Then press
Tray guide OK?
OK
or
until the correct paper size
A4 ?
appears.
10
When the correct paper size is on the dis. If the paper feed unit
play, press
(option) (page 17) is installed, you can
also select its paper size at this time.
Note
Do not carry out any operations while “Registered” appears on the display.
11
Press
display.
to return to the standby
Tip
If the paper feed unit (option) is not
installed and the machine is in copy
operation mode, you can press
in place of
5 . Next, skip step 6 and
directly to step 8 .
12
in step
7
, and jump
Registered
6 Others
OK
GETTING ACQUAINTED
Loading Small Size Paper
Note
1
Remove all paper before loading small
size paper in the upper paper tray.
2
Open the small size paper feed access
panel on the back of the machine by
unlatching it as shown in the illustration. Opening the small panel makes it
easy to handle small size paper.
3
Set paper into the upper paper tray.
Make sure that the top of the stack is
not higher than the limit mark on the
tray guide.
4
After setting the paper into the tray, raise
the small panel until it snaps securely
into place.
2. GETTING
ACQUAINTED
We recommend that you always feed small size paper vertically with the shorter
edge feeding into the machine first.
13
GETTING ACQUAINTED
5
Press
6
Press
.
.
Press
7
Prt Help List
Function no.: _ _
.
61 Tray Pap.Size
Note
If the paper feed unit (option) is installed,
refer to page 19 for details on how to specify
the paper size.
8
Press
9
Press
.
Tray guide OK?
. Then press
OK
or
until the correct paper size
A5 : ?
appears.
10
When the correct paper size is on the
.
display, press
Registered
6 Others
Note
OK
Do not carry out any operations while “Registered” appears on the display.
11
Press
display.
to return to the standby
Tip
If the paper feed unit (option) is not
installed and the machine is in copy
operation mode, you can press
in place of
in
step 5 . Next, skip step 6 and 7 ,
and jump directly to step 8 .
Important!
Be sure to specify the paper size again before copying, printing or receiving faxes
onto A4 or Letter size paper. If you do not, you will not be able to receive faxes.
14
GETTING ACQUAINTED
Loading Other Media
Use the following procedures to load envelopes, transparencies, and label paper.
Loading Envelopes
Load up to 5 envelopes at a time using the same procedure for loading small
size paper on page 13.
• Envelope flaps should be securely folded down, so the envelope is “closed”.
This is especially important when printing on envelopes with adhesive on the
flaps because heat generated during the printing process can cause the adhesive to melt and get on rollers.
☛ Refer to the paper select operation on page 14.
Loading Transparencies
Load only one transparency at a time using the plain paper loading procedure on page 10 for large transparencies, and the small paper loading procedure on page 13 for small transparencies.
☛ Refer to the paper select operation on page 12 for large transparencies or
page 14 for small ones.
Loading Label Paper
Load only 10 sheets of label paper at a time using the plain paper loading
procedure on page 11.
☛ Refer to the paper select operation on page 12.
15
2. GETTING
ACQUAINTED
• Insert envelopes print side up with the stamp
position as shown.
GETTING ACQUAINTED
Second (Additional) Printer
This machine features a port for connecting a second printer. When connected, press the
key to switch between the two printers.
Note
Make sure that the power of your computer is turned off before making the connection.
Connecting to a Second Printer
1
Turn off both the machine and your second printer.
2
Connect one end of a parallel interface
cable to your second printer.
3
Connect the other end of the cable to
the second printer port, securing it in
place with the screws.
Note
• Only use a standard IEEE 1284 compliant
36-pin parallel cable.
☛ Using the second printer, see page 28.
16
GETTING ACQUAINTED
Paper Feed Unit (Option)
This section describes how to install the paper feed unit (option) and how
to load paper in it. Addition of a paper feed unit provides you with a second
paper source that holds up to 250 sheets of A4 or Letter size paper.
Important!
Make sure that machine power is turned off and that the power cord is unplugged
from the power socket before installing the paper feed unit.
Paper Feed Unit Part Names
3
2
6
4
1
7
Installing the Paper Feed Unit
1
Remove all the packing tapes from the
paper feed unit and pull the paper tray
out of the unit.
2
After removing all tapes and cardboard
from inside of the paper tray, insert the
tray back into the machine until it locks
into place. Locate the paper feed unit
where you plan to use the machine.
Note
Be sure to place the paper feed unit on a level
surface.
17
2. GETTING
ACQUAINTED
1 Front guide
2 Side guide
3 Limit mark
4 Paper size indicator
5 Connector
6 Corner guides
7 Metal plate
5
GETTING ACQUAINTED
3
The machine has handholds at the locations shown in the illustration. Note
that the illustration shows the machine
as viewed from above.
• This illustration shows the handhold location on the right side of the machine.
• This is the handhold location on the left
side of the machine.
4
Carefully lower the machine onto the
paper feed unit, making sure that the
dowels on the paper feed unit fit into
holes in the bottom of the machine
properly.
CAUTION
When lifting the machine, make sure your
hands are at the locations indicated by “ ” in
*
the illustration. This protects against pinching
your fingers between the machine and paper
feed unit.
Note
After the above installation, attach the power cord to the machine and plug the
other end into an outlet.
☛ Refer to page 8 for details.
☛ Loading Plain Paper in to the Upper Paper Tray, see page 11.
18
GETTING ACQUAINTED
Loading Paper into the Paper Feed Unit
1
Pull out the paper tray and remove it
from the paper feed unit.
2
Press down on the metal plate in the
bottom of the paper tray until the plate
locks into place with a “click”.
3
Up to 250 sheets of plain paper (80 g/m2
or 20 lb) can be inserted into the paper tray as shown in the illustration.
Make sure that the top of the stack is
not higher than the limit mark on the
side fence.
2. GETTING
ACQUAINTED
You can load either A4 or Letter size paper into the paper feed unit.
Refer to page 20 for details on how to change the positions of the paper
guides inside of the tray to match the type of paper you are using.
Note
Make sure the leading corners of the paper
fit under the corner guides.
4
Slide the paper tray back into the paper feed unit until it locks into place.
19
GETTING ACQUAINTED
Changing the Paper Size
Use the following procedure to set the positions of the paper guides inside
the paper tray for either A4 or Letter paper.
1
Squeezing in on both sides of the front
guide, slide it to the correct position
for the desired paper size.
2
Squeezing in on both sides of the side
guide, slide it to the correct position
for the desired paper size.
Important!
Whenever you change the paper size, be sure to also specify the paper size using
the procedure below.
Specifying the Paper Size
After you install the paper feed unit (option), you can select between the
upper paper tray and the paper feed unit as the paper source, and specify
the size of paper in the paper feed unit.
1
Press
2
Press
3
Press
20
.
Prt Help List
.
Function no.: _ _
.
61 Tray Pap.Size
GETTING ACQUAINTED
Press
4
.
OK
Lower Tray?
Note
The actual message that appears on the machine's display depends on the paper source
you last used. If "Upper Tray?" appears, press
or
to display the
"Lower Tray?" message before proceeding
with step 4 .
Press
. Then press
or
A4 ?
until the correct paper size
appears.
6
When the correct size is on the display,
press
.
Registered
OK
6 Others
Note
Do not carry out any operations while “Registered” appears on the display.
7
Press
display.
to return to the standby
Installing the Paper Size Indicator
1
Remove the paper size indicator (1).
Positioning the indicator so the side that
shows the paper size you are using (A4
or Letter) is facing outwards, insert it
into the front of the paper tray (2).
1
2
21
2. GETTING
ACQUAINTED
5
GETTING ACQUAINTED
Selecting the Paper Source
1
22
Press
until the desired paper source appears.
100%
U 01
The upper paper tray is selected when "U"
is on the display, and the paper feed unit
is selected when "L" is on the display.
100%
L 01
GETTING ACQUAINTED
Upgrading Memory
You can install a Single Inline Memory Module (SIMM) to upgrade the onboard memory of the machine.
The machine is shipped from the factory with a 4MB SIMM which can be
replaced with an 8MB, 16MB or 32MB SIMM.
Use the following procedure to install an 8MB, 16MB or 32MB SIMM.
Note
The following are the required specifications for a SIMM used with this machine:
72-pin, 60ns, Extend Date Out (EDO), parity/non-parity.
1
Turn off the machine.
2
Remove the SIMM cover located on the
left side of the machine.
3
Pull apart the hooks on the both sides
of the SIMM board that hold it in place.
SIMM
23
2. GETTING
ACQUAINTED
Important!
Make sure you touch some grounded metal object with your hand to discharge any
electrostatic charge from your body before handling the SIMM.
GETTING ACQUAINTED
4
Carefully lift out the currently installed
SIMM board.
5
Angle the new SIMM board as shown in
the illustration, and insert it down into
the slot. Gently rock it back and forth
until you hear it snap into place.
Important!
Make sure the SIMM board is oriented correctly when you insert it into the slot.
6
Make sure the hooks on the sides of the
SIMM board snap securely into place.
SIMM
7
24
Replace the cover by inserting its tabs
into the holes provided, as shown in
the illustration.
3. PRINTING AND SCANNING
When connected to a compatible PC, you can use this machine as a high
performance laser printer and black and white scanner.
Important!
• Make sure that your PC parallel port is set to ECP. If it is not, please consult your
PC manual on how to change it.
Note
• For information on PC hardware and software requirements, please read the
README file on the CD.
• Printer drivers are provided for both Windows® 95/98 and Windows® 3.1, but
the scanning feature requires Windows® 95/98.
Setting up
Before you can start printing and scanning you need to the following if you
have not done so already:
• Connect the machine to your PC
Installing the Software Drivers
Follow the steps below to install the printer/scanner drivers on your PC.
1
Switch the machine on.
2
Make sure the machine is connected to your PC and paper is loaded in
the upper paper tray.
☛ Connecting to a computer, see page 6.
☛ Loading Paper, see page 11.
3
Insert the provided software CD into your CD-ROM drive.
25
3. PRINTING
AND SCANNING
• Install the software drivers on your PC
PRINTINGAND SCANNING
4
Do one of the following according to your operating system:
• Windows® 95/98
Run the setup application. For example, if your CD-ROM is assigned to D, run “D:\Scanin\Setup.exe”.
• Windows® 3.1
First copy the disk images under the directory named “3.1” on the CD-ROM to floppy disks.
Then insert the first floppy disk into your floppy disk drive and run “install.exe”.
Note
You cannnot install from CD-ROM under Windows 3.1.
Only the printer driver will be installed under Windows 3.1.
5
Follow the instructions that appear on the display.
For detailed information on how to print and scan from your PC, please
refer to the online help provided.
26
PRINTINGAND SCANNING
Features You Can Access From the Printer
Driver
Printer Driver Contents
■ Paper Defaults
Paper size
Page orientation
Output
Paper source
About
■ N-Up Printing
Select a Layout Option
:
:
:
:
Size, Measurement Unit
Portrait, Landscape
Copies, Print in reverse order
Source
: Normal, Reduce for N-up printing
(Print page borders ; 2 pages up/sheet ; 4 pages up/sheet)
■ Document
Automatic
Graphics Mode
Font Resolution(dpi)
Graphics Resolution
Halftone
Job Settings
Raster
600
High
Screening
Photo
Desktop
(Grayscale) Publishing
Raster
GL/2
600
600
High
High
Screening Screening
High Speed
Draft
Raster
300
High
Screening
Business
Graphics
Raster
600
High
Dithering
: True Type Mode, Name
■ Configuration
Device Configuration
: Feeder ; Toner Save Mode ; Time-out
■ Fonts
Font Manager (To add printer fonts)
■ Overlays
Overlay Assignments : None, All pages, Odd/Even pages, First/Other pages
Cover/Divider page Overlays
Create New Overlay
Manage Overlays
: Get files from other sources to use as overlays, Send created overlays
to other sources, Rename overlays, Remove overlays
Important!
After printing a large number of pages, wait a few minutes before turning off the
machine.
Note
Be sure to use online help and Read me file of the printer driver to get the most
out of all the printer features and functions.
27
3. PRINTING
AND SCANNING
Document Type Settings
PRINTINGAND SCANNING
Using the Second Printer (Additional Printer)
Use the following procedure to switch between this machine and a second
printer when a second printer is connected.
Important!
If the second printer has a bi-directional mode, make sure you turn it off.
☛ Refer to page 15 for details on connecting a second printer.
Printing to the Second Printer
1
Press
indicator lights.
. The Second Printer
Important!
Whenever you change printers, be sure to also
change to the appropriate printer driver on
your computer.
Note
While the Second Printer Indicator is lit, print
data from your computer passes through the
machine to the second printer.
2
28
Perform the required print operation
with the application you are using.
4. FAXING
Your machine is furnished with superior faxing capabilities and wide a range
of powerful fax features. Here are some of the things you can do:
• Send and receive fax messages
• Store fax numbers you often use and recall them with a single key press
• Redial the previous fax number
• Share your fax line with a telephone
• Keep track of machine usage through printed reports
• Customise default settings to suit your requirements
Note
Please read the Setup section before you start. It explains how to set up the fax
feature to suit your needs.
Switching between Fax Operation and Copy
Operation Mode
4. FAXING
This machine has two modes: fax operation mode and copy operation mode.
You can still receive fax messages when the machine is in copy operation
mode, but if you wish to send a fax you must make sure the machine is in
fax operation mode.
To switch back and forth between copy operation mode and fax operation
.
mode, press
The Fax and Copy indicators indicate which mode the machine is currently
in.
Note
When the machine automatically switches to Economy Mode, all indicators turn
off. Press any key to exit Economy mode.
☛ Economy Mode, see page 105.
☛ You can select the default mode the machine starts in. See User Parameters on
page 100.
29
FAXING
Entering Characters on the Operation Panel
Entering Numbers
Enter digits when dialling inputting or fax numbers, specifying function
codes, or registering various information, such as your own fax number.
To enter digits - , press the appropriate key on the numeric keypad.
E.g. to enter the number 12345678, press
12345678
☛ Entering Pauses and Tones in Fax Numbers, see page 42.
Entering Letters, Symbols and Spaces
When the display asks you enter a name, you can use the numeric keypad to
enter characters and symbols.
To enter a character, press the appropriate key on the numeric keypad until
the character appears. Then press the
key to move the cursor
forward.
Press this key repeatedly
To enter these characters:
1
ABC2abcÄä
DEF3def
GHI4ghi
JKL5jkl
MNO6mnoÑÖñö
PQRS7pqrs
TUV8tuvÜü
WXYZ9wxyz
*
[Space] . - 0 + ? / : * % & ! ( ) [ ] ”
#
30
FAXING
Note
Some special characters in lower case appear identical in upper case on the
display due to space limitations. These characters are printed correctly on lists
and reports.
Deleting Characters and Moving the Cursor
When entering names and storing numbers:
•
To delete the character to the left of the cursor, press
.
Note
If the cursor is at the far left of the display, pressing
and number.
To move the cursor left, press the
•
To move the cursor right, press the
key.
key.
4. FAXING
•
deletes the whole name
31
FAXING
Setting up
Please Read This First
Before you can send or receive faxes you must connect the machine to a
telephone line and store the following settings:
☛
☛
☛
☛
☛
☛
☛
☛
Own Name/TTI, see page 33.
Dial Mode, see page 34.
Own Fax Number, see page 36.
Date and Time see page 38.
In addition, you may wish to adjust the following:
Selecting the Language, see page 104.
Summer Time (Daylight Saving Time) see page 39.
The volume of sounds the machine makes, see page 65.
If you wish to share the line with a telephone handset, you may need to change the reception
mode.
Choosing a Reception Mode, see page 45.
Connecting to the Telephone Line
There are two similar sockets located at the
rear of the machine.
• LINE—the telephone line connection
• TEL—for an optional handset when sharing the line with a telephone
1
Insert the line cable into the LINE socket at the rear of the machine.
2
Connect the other end of the line cable to your telephone line.
32
FAXING
Storing your Own Name/TTI
Store your name or name of your organisation. When you send a fax, this
identification appears at the top of the page when printed at the other end.
It is also shown on the other party’s display during communication. It can
be up to 32 characters long.
☛ Entering Characters on the Operation Panel, see page xii,29.
☛ If you do not want this identification printed on faxes you send, see Page Header
on page 67.
1
Press
.
2
Press
.
3
Press
4
Press
5
Enter your name or name of your
organisation.
Prt Help List
Function no.: _ _
.
16 Own name/TTIO K
E.g. press
4. FAXING
.
XYZ CO.
Note
To clear the entire setting, make sure the
cursor is at the far left position then press
.
Press
to clear the setting, or press
to cancel this operation
XYZ CO.
Delete?
O
K
33
FAXING
Press
. The display opposite will
flash briefly on the display and then the
function menu will reappear.
Note
6
Do not carry out any operations while “Registered” appears on the display.
Registered
1 Set up
O
K
Do one of the following:
7
• Enter another function number.
to return to standby mode.
• Press
Setting the Dial Mode
Specify the type of telephone line you are using (tone or pulse dial). If you
are unsure of what this should be, please consult your line provider.
If your machine is behind a PABX, you should also provide the following
details:
• The PABX number that gives you an outside dial tone— You can enter 0, or a value between 01 and
99 (00 is not possible).
• The PSTN access method. This will depend on your locale and the PABX system you are using.
The machine will not function correctly if these settings are not correct.
Consult your systems administrator if you are unsure.
1
Press
.
2
Press
.
3
Press
4
Press
5
Press
or
Pulse or Tone.
34
Prt Help List
Function no.: _ _
.
.
12 Dial Mode
O
Mode: Tone?
O
Mode: Pulse?
O
to select
K
K
K
FAXING
Press
6
.
Mode: PABX? No?
• If the display opposite does not appear, press to
finish.
7
Press
or
to select
whether your fax machine is behind a
PABX.
8
Press
.
1 Set up
• If you chose “No” in step 7 , proceed to step
12 .
• If you chose “Yes”, proceed to step 9 .
Enter the digit or digits that give you an
outside dial tone on the numeric
keypad, e.g. enter 0.
9
Mode: PABX? YesO K
O
K
Postline by:_
Postline by:0_
O
Method:0?
O
Method: Flash?
O
K
You can enter 0, or a value between 01 and 99 (00
is not possible).
Note
When changing an existing setting, press
to clear it, then enter the new number.
Press
.
11
Press
or
lect the PSTN access method.
to se-
K
K
Three methods are available.
<number>:Access the outside line by dialling the
number you entered in step 9
Ground: Ground Start
Flash:
Flash Start
35
4. FAXING
10
FAXING
12
Press
. The display opposite will
flash briefly on the display and then the
function menu will reappear.
Note
Registered
1 Set up
Do not carry out any operations while “Registered” appears on the display.
13
O
K
Do one of the following:
• Enter another function number.
• Press Help/Function to return to standby mode.
Storing your Own Fax Number
Store the telephone number of the line your machine is connected to.
This will appear on the other party’s display during communication and be
printed on their and your own reports.
Note
In some locales you cannot store your own fax number.
If the other party is using Authorized Reception or a similar feature to handle messages from certain senders differently, they should specify this information when registering Specified Senders on their machine.
To increase the legibility of your number, you can insert a “+” character and
spaces. To enter a “+”, press . To enter a space, press .
Note
The fax number can be up to 20 digits long.
☛ Entering Numbers, see page 30.
1
Press
.
2
Press
.
36
Prt Help List
Function no.: _ _
FAXING
3
Press
.
4
Press
.
5
Enter your own fax number on the
numeric keypad.
17 Own Fax No.
O
K
+12 3 456
E.g. press
Note
To clear the entire setting, make sure the
Delete?
O
K
cursor is at the far left position then press
. The display opposite will appear.
Press
to clear the setting, or press
to cancel this operation.
6
Press
.
Registered
Note
1 Set up
7
O
K
Do one of the following:
• Enter another function number.
• Press
to return to standby mode.
37
4. FAXING
Do not carry out any operations while “Registered” appears on the display.
FAXING
Setting the Date and Time
This is printed on reports to help you keep track of machine usage.
• If you make a mistake when entering a value, press the
and
keys to position
the cursor and enter the value again.
1
Press
.
2
Press
.
3
Press
Prt Help List
Function no.: _ _
.
11 Date/Time
• Press
to return to standby mode.
4
Press
.
5
Press
6
Enter the year on the numeric keypad.
Time:
8
Press
K
Year:
99O K
Year:
00O K
Month:
02O K
Month:
05O K
.
.
Enter the month on the numeric keypad.
E.g. press
38
O
.
E.g. to enter the year 2000, press
7
01:13
.
FAXING
Press
9
10
Enter the date on the numeric keypad.
E.g. press
11
.
01O K
Day:
23O K
.
Press
. The display opposite will
flash briefly on the display and then the
function menu will reappear.
Note
Do not carry out any operations while “Registered” appears on the display.
12
Day:
Registered
1 Set up
O
K
Do one of the following:
• Enter another function number.
• Press
to return to standby mode.
This feature is useful if local custom requires advancing or setting the clock
back.
One minute after you turn Summer Time on, the clock advances by an
hour. Similarly, one minute after you turn Summer Time off, the clock is
put back an hour.
☛ For how to switch this feature on or off, see Changing On/Off Settings on page 67.
39
4. FAXING
Turning Summer Time (Daylight Saving Time) on/off
FAXING
Sending Faxes
How to Send a Fax
This is the basic procedure for sending a fax message. For detailed information and explanations of the advanced features available, see the following
pages:
☛ Economy Mode, see page 105.
☛ Quick Dials, see page 53.
☛ Name Dials, see page 58.
☛ Redialling a Number, see page 43.
☛ Entering Pauses and Tones in Fax Numbers, see page 42.
1
Check that the standby display is shown.
100%
• If the display is blank, press any key to exit
Economy mode.
2
3
If necessary, press
to switch to
Dial/Set orig.
fax operation mode.
Carefully insert the document stack
face-down into the ADF until the display
changes to “Dial number”.
• Make sure this message appears. If it does not,
your document will not be scanned from the ADF.
Dial number
40
01
FAXING
4
Adjust the scan settings if necessary.
• E.g. if your document is a photograph, press the
Original Type Select key twice to select Photo 1.
Setting
[Text]
[Text Fine]
[Photo1]
[Photo2]
Use for:
Standard text
Detail text
Photographs
Mixed text and photographs
☛ To select the Resolution/Photo setting 76.
5
Dial the fax number in one of the following ways:
12345678_
• On the numeric keypad.
E.g. press
.
• Press a Quick Dial key with a number stored in it.
E.g. press
• Press
B: XYZ CO.
( ).
then enter the first letter of a previABC CO.
ously stored Name Dial.
E.g. press
then press
until the Name
6
Press
4. FAXING
Dial you require appears.
.
Dialing...
41
FAXING
Entering Pauses and Tones in Fax Numbers
You can enter pauses and tones when dialling, or store them in Quick Dial
and Name Dial numbers.
☛ Quick Dials, see page 53.
☛ Name Dials, see page 58.
●Entering Pauses
In some situations, you may need to insert a pause in fax numbers. For
example:
• If your telephone line is behind a PABX (you have to dial an access code to access outside numbers),
insert a pause between the access code and the telephone number.
• For international numbers, enter a pause after the country code.
To enter a pause in a fax number, press
.
001-
The pause is shown on the display as a “-”
character.
●Entering Tones
Some organisations offer you special services by telephone which you can
access using Touch Tone or DTMF tones.
To enter a tone, press the
or
keys.
☛ Setting the Dial Mode, see page 34.
42
FAXING
Redialling a Number
The machine remembers the last fax or telephone number dialled with the
numeric keys, a Quick Dial or a Name Dial. To redial a fax number, follow
the procedure below.
Note
• If you dialled the last number with a Quick Dial or Name Dial, the number will
be displayed instead of the stored label.
• You cannot redial a number dialled with the handset keypad.
1
Make sure the machine is in fax operation mode.
2
Set your document.
3
Press
.
4
Press
.
5
Continue the standard procedure for
sending a fax.
If the machine cannot connect to the other party for some reason (e.g. the
line is busy) when sending a document it will wait a while and then attempt
to dial again. This will be repeated until the connection is made, or the
redial count maximum is reached.
Redial in:1'29"
Note
The redial interval and count maximum vary according to your locale.
●Cancelling Automatic Redial
To cancel redialling, remove your document from the ADF.
43
4. FAXING
Automatic Redial
FAXING
Cancelling Transmission of a Fax
To cancel a fax transmission while dialling
or during transmission, press the Stop key
and remove your document.
Trans. canceled
Note
Once a connection has been established and transmission has begun, you cannot
cancel transmission of data already sent.
44
FAXING
Receiving Faxes
Choosing a Reception Mode
This machine has two reception modes:
• FAX mode
• TEL mode
●FAX Mode
In this mode the machine automatically answers incoming calls. When a
call is received, the machine rings a few times to alert you that a message is
being sent, then starts receiving and printing the message.
FAX mode is ideal for a dedicated fax line.
Note
• The machine cannot switch between FAX mode and TEL mode automatically.
●TEL Mode
In this mode, the machine does not answer incoming calls automatically.
The machine will continue ringing until you pick up the handset (option),
or start fax reception manually.
This mode is useful if you are sharing the line with a telephone. If the caller
is a person, you can answer the telephone normally, but if it is a fax machine
you can still receive the message.
45
4. FAXING
Note
• On Hook dialling is not available in some locales.
• This mode requires someone to be near the machine to receive fax messages. If
nobody answers the call, fax messages will not be received.
☛ Receiving Calls in TEL Mode, see page 46.
FAXING
●Switching between FAX Mode and TEL Mode
Press the Reception Mode key to switch
between FAX mode and TEL mode.
●Receiving calls in TEL Mode
When the machine is switched to TEL mode, follow these steps to answer
incoming calls.
1
When the machine rings, press
Telephone call
or lift the handset and listen.
• If you hear a voice and you lifted the habdset,
continue the conversation as normal and replace
the handset when finished.
• If you hear another fax machine, make sure the
machine is in fax operation mode (press Fax/
Copy if necessary), then go to step 2.
2
Press
and replace the handset.
Connecting ...
The machine will start receiving the message.
Screening out Unwanted Faxes with Authorized Reception
This feature lets you screen out unwanted incoming fax messages.
In this manual, the fax number of another machine which you wish to allow
to send you fax messages is referred to as a Specified Sender.
When Authorized Reception is turned on, your machine will only receive
fax messages from Specified Senders—all other incoming messages will be
rejected and not printed.
46
FAXING
When a fax message comes in, the machine checks to see if the sender’s fax
number is stored in any of the Quick Dials or Name Dials. If it is found and
you have used that Quick Dial or Name Dial to send at least one message to
that destination, the message is accepted.
Note
You can store up to 30 Specified Senders (25 Name Dials and 5 Quick Dials).
To set up your machine for Authorized Reception, you need to:
1
Turn Authorized Reception on.
2
Make sure all the Specified Sender fax numbers are stored in Quick Dials or Name Dials.
3
Make sure that you have sent at least one message to all the Specified
Senders using their Name Dials or Quick Dials. After one message has
been sent, the Specified Sender is enabled and you can receive fax messages from them.
Note
If you turn Authorized Reception on and omit steps 2 and 3 above, the machine
will not be able to receive any fax messages.
☛ Storing, Editing and Deleting Quick Dials, see page 53.
☛ Storing and Deleting Name Dials, see page 58.
☛ Unauthorized Call Report, see page 64.
●Turning Authorized Reception on/off
1
Press
2
Press
3
Press
4
Press
5
Press
the setting.
.
.
Function no.: _ _
.
21 Author. RX
.
or
OK
Mode:
Off?O K
Mode:
On?O K
to adjust
47
4. FAXING
Prt Help List
FAXING
6
Press
. The display opposite will
flash briefly on the display and then the
function menu will reappear.
Note
Registered
2 CommunicationO K
Do not carry out any operations while “Registered” appears on the display.
7
Do one of the following.
• Enter another function number.
• Press
to return to standby mode.
Cancelling Reception of a Fax
If for some reason you want to cancel reception of fax while it is being
received, do the following.
1
Make sure the machine is in fax operation mode.
2
Press
.
Note
A portion of the fax message may still be
printed.
48
Recep. canceled
FAXING
Making Telephone Calls
If you connect an optional telephone handset, you can use the same line for
both telephone calls and fax messages.
Note
If you wish to be able to receive telephone calls, be sure to select TEL mode.
☛ Choosing a Reception Mode, see page 45.
1
Do one of the following:
• Pick up the telephone handset and dial with the handset keypad
• Make sure the machine is in fax operation mode, pick up the telephone handset and dial
using the operation panel numeric keypad, a Quick Dial, a Name Dial or the Pause/Redial key.
• Make sure the machine is in fax operation mode, press the On Hook key and dial using a
Quick Dial, a Name Dial or the Pause/Redial key. When the other party answers, pick up
the telephone handset.
Note
• In some locales, On Hook dialling is not available and/or you cannot dial using a Quick
Dial , Name Dial , the number keys or Redial key when the handset is lifted.
2
Continue your conversation as usual.
Faxing During a Telephone Call
• The other party shares their line with a similar fax machine and you wish to send or receive a message after your conversation.
• You wish to check that the number is indeed a fax number before attempting to send your message.
Note
The other party’s machine must support this feature.
1
Do one of the following:
• Pick up the telephone handset and dial with the handset keypad
• Make sure the machine is in fax operation mode, pick up the telephone handset and dial
using the operation panel numeric keypad, a Quick Dial, a Name Dial or the Pause/Redial key.
• Make sure the machine is in fax operation mode, press the On Hook key and dial using a
Quick Dial, a Name Dial or the Pause/Redial key. When the other party answers, pick up
the telephone handset.
Note
• In some locales, On Hook dialling is not available and/or you cannot dial using a Quick
Dial , Name Dial , the number keys or Redial key when the handset is lifted.
49
4. FAXING
You can also have the machine take over the line and send or receive a fax
message at the end of your telephone call. This is useful when:
FAXING
2
Listen to the line.
• If a voice answers, continue your conversation as normal.
• When you wish to send a fax, listen for the fax tone of the other party, then continue from
step 3 below.
• When you wish to receive a fax, listen for the fax tone of the other party, then continue
from step 5 below.
●Sending a Fax during a Telephone Call
3
Make sure the machine is in fax operation mode, set your document and adjust any scan settings as required.
4
Press
and replace the handset.
Connecting...
●Receiving a Fax during a Telephone Call
5
Make sure the machine is in fax operation mode.
6
Press
and replace the handset.
Note
Fax reception is not possible while there is a
document in the ADF.
50
Connecting...
FAXING
Monitoring the Line while Dialling with On Hook
This feature lets you dial a telephone number without lifting the optional
external handset. You can listen to what is happening on the line through
the machine’s internal speaker.
1
If necessary, press
to switch to
Dial/Set orig.
fax operation mode.
2
Press
.
3
Dial the telephone number using the
numeric keypad, a Quick Dial, a Name
Dial or the Pause/Redial key.
4
If you hear a voice answer, pick up the
Dial number
12345
again
external handset, press
and continue your conversation.
Note
5
.
Replace the handset when you have finished the call.
4. FAXING
To cancel the call, press
Dial/Set orig.
Remote Change
If you have set the reception mode to TEL mode and turn this feature on,
you can use the telephone handset numeric keypad to start fax reception
when you hear another fax machine on the line.
When you hear a fax machine through the handset, press the Remote Change
digit on the telephone handset twice to initiate fax reception, then replace
the handset.
You need to specify the Remote Change digit using when you turn this
feature on with the following procedure.
51
FAXING
1
Press
.
2
Press
.
3
Press
4
Press
5
Press
or
Remote Change on or off.
6
Press
ing:
Prt Help List
Function no.: __
.
32 Remote Change
.
8
OK
Change with 7
OK
.
Note
Do one of the following.
• Enter another function number.
52
Change with 2
.
8 .
Press
. The display opposite will
flash briefly on the display and then the
function menu will reappear.
• Press
On?O K
7
Do not turn off the machine while “Please
wait” or “Registered” is shown on the operation panel display.
9
Mode:
and do one of the follow-
Press a digit on the numeric keypad to
select the Remote Change digit.
E.g. press
Off?O K
to turn
• If you turned Remote Change on, go to step
• If you turned Remote Change off, go to step
7
Mode:
to return to standby mode.
Registered
3 Fax Switch
OK
FAXING
Storing Fax and Telephone Numbers
This machine provides two useful methods for storing fax and telephone
numbers:
• Quick Dials
• Name Dials
Note
The maximum length of a fax number you can dial, or store in Quick Dials/Name
Dials, is 40 digits.
Quick Dials
If you store a number in a Quick Dial, you can also give it a name up to 10
characters long.
If you press a Quick Dial key when the display below is shown, the stored
name will come up on the display so you can check it.
Dial/set orig.
B:XYZ CO.
You can store one fax number in each of the five Quick Dial keys labeled A-E.
To check the fax numbers stored in Quick Dials, print out the Dial List.
☛ Printing the Dial List, see page 63.
☛ Name Dials, see page 58.
☛ For how to dial with a Quick Dial, see page 41 step 5.
53
4. FAXING
If you often dial certain numbers, you can save time and effort by storing
them in Quick Dial keys. Once stored, instead of entering a fax number
directly on the numeric keypad, just press the Quick Dial key the number is
stored in.
FAXING
●Storing Quick Dials
☛ Entering Characters on the Operation Panel, see page xiv.
☛ Entering Pauses and Tones in Fax Numbers, see page 42.
1
Press
2
Press
3
Press
4
Press
.
Prt Help List
.
Function no.: _ _
.
13 Quick Dial
.
Press Quick or
Blink
Print List
5
To select a Quick Dial, press a Quick
Dial key.
E.g. press
B:
to select Quick dial ( ).
Note
To print a list of currently stored Quick Dials,
press
.
Dial List
Blink
Press Start
Then press
6
Enter or edit the fax number you wish
to store with the numeric keypad.
E.g. press
54
Printing...
.
.
123456789
O
K
FAXING
7
Press
.
8
Enter or edit the name for this Quick
Dial.
B:
B:XYZ CO._
E.g. press
Press
9
.
Registered
Note
Do not turn off the machine while “Please
wait” or “Registered” is shown on the operation panel display.
Print List
Blink
Press Quick or
10
Do one of the following:
4. FAXING
• To store another Quick Dial, go back to step 5 .
• To return to standby mode, press
twice.
• To access another function, press
then
enter a function number.
●Editing Quick Dials
1
Press
.
2
Press
.
3
Press
Prt Help List
Function no.: _ _
.
13 Quick Dial
O
K
55
FAXING
Press
4
.
Print List
Blink
Press Quick or
5
Press the Quick Dial key you wish to
edit.
6
Press
twice then press
.
111234567989
123456789
1203456789
Note
To clear the Lefrmost digit, press
Then press
.
123456789
.
23456789
7
Press
.
8
Edit the name stored in this Quick Dial.
B:XYZ
B:AXYZ
E.g. Press
.
• To move the cursor, press
or
.
Press
9
.
Registered
Note
Do not turn off the machine while “Please
wait” or “Registered” is shown on the operation panel display.
Print List
Blink
Press Quick or
10
56
Do one of the following:
• To edit another Quick Dial, go to step
• To return to standby mode, press
twice.
5
.
FAXING
●Clearing Quick Dials
1
Press
.
2
Press
.
3
Press
4
Press
Prt Help List
Function no.: _ _
.
13 Quick Dial
.
O
K
Print List
Blink
Press Quick or
5
Press the Quick Dial key you wish to
delete.
E.g. press
6
Press
1112345
to select Quick dial ( ).
.
Delete?
4. FAXING
Note
If you do not wish to clear this Quick Dial,
press
mode.
7
Press
twice to return to standby
.
Deleted
B:■
8
Press
standby mode.
twice to return to
57
FAXING
Name Dials
Name Dials are a handy way of storing fax numbers that you dial regularly
in machine memory. When you store a number in a Name Dial, you must
also give it a name up to 10 characters long. When dialling, you enter the
first letter of this name to quickly find the Name Dial you require.
Office B
You can store multiple Name Dials with identical first letters and step through
them to find the one you want when dialling.
You can store up to 25 Name Dials.
Note
You cannot store two Name Dials with the same name.
To check which Name Dials are currently stored, print out the Dial List.
☛ Printing the Dial List, see page 64.
☛ Quick Dials, see page 54.
●Storing Name Dials
☛ Entering Characters on the Operation Panel, see page xii, 30.
☛ Entering Pauses and Tones in Fax Numbers, see page 42.
1
Press
2
Press
3
Press
4
Press
.
5
Press
.
58
.
Prt Help List
.
Function no.: _ _
.
14 Name Dial
Register?
■
OK
OK
FAXING
Enter the fax number you wish to store
with the numeric keypad.
6
123456789■
E.g. press
7
Press
.
8
Enter or edit the name for this Name
Dial.
Name: ■
E.g. press
Press
9
Name:XYZ CO. ■
.
Registered
Register?
Note
OK
10
4. FAXING
• Do not turn off the machine while “Please
wait” or “Registered” is shown on the operation panel display.
• If a Name Dial with the same name is already stored, “Name exists” will flash on
the display. Enter a different name.
Do one of the following.
• To store another Name Dial, go back to step
• To return to standby mode, press
twice.
• To access another function, press
once and enter another function number.
4
.
59
FAXING
●Deleting Name Dials
1
Press
.
2
Press
3
Press
4
Press
5
Press
6
Enter the first letter of the Name Dial
label.
Prt Help List
.
Function no.: _ _
.
.
14 Name Dial
OK
Delete?
OK
.
Select letter
E.g. press
Marty
.
• If Name Dial you are looking for does not appear, keep pressing the key until it does.
again
E.g. press
Note
You can also search through Name Dials that
begin the same initial letter with the
and
keys.
7
Press
.
8
Do one of the following.
Delete?
• To delete the Name Dial, press
to step 9 .
and go
Deleted
Delete?
60
OK
FAXING
• To cancel this operation, press
ei-
ther enter another function number, or press
to return to standby mode.
9
Do one of the following.
• To delete another Name Dial, go to step
5
.
• To return to standby mode, press
twice.
• To access another function, press
once and enter another function number.
●Dialling with Name Dials
Instead of dialling the number on the numeric keypad, do the following in
fax operation mode.
☛ How to Send a Fax, see page 40.
1
Make sure the machine is in fax
operation mode.
2
Press
2
Enter the first letter of the Name Dial
label.
Select letter
Marty
.
• If the Name Dial you are looking for does not
appear, keep pressing the key until it does.
E.g. press
4. FAXING
E.g. press
.
Dial/Set orig.
Main Off
again.
Note
You can also search through Name Dials that
begin the same initial letter with the
and
keys.
61
FAXING
Reports and Lists
Printing the Journal
The Journal is a record of fax messages that were recently sent or received by
your machine. By default, it is printed automatically after every 35 communications.
You can print it out whenever you wish to check on machine usage, or to
find out if a communication was successful or not.
The following items are included on the Journal:
• Own name—this machine’s Own name/TTI identification
• Transmission—list of recent fax transmissions from this machine
• Reception—list of recent fax messages received by this machine
• Date and Time—when the communication took place
• Address—the fax number/identification of the other party
• Duration—how long the communication took
• Page—how many pages the message contained
• Result—whether the communication completed successfully
☛ For how to turn automatic printing of the Journal on/off, see User Parameters,
see page 100.
1
Press
.
2
Press
.
3
Press
4
Press
5
Press
62
Prt Help List
Function no.: _ _
.
41 Journal
.
Press Start
.
Printing...
FAXING
Printing the Dial List
Print this list to check on the names and numbers of Quick Dials and Name
Dials stored in the machine.
You can print the Dial list using the procedure below, or when storing Quick
Dials.
The following items are included on the Dial List:
• Own name—this machine’s Own name/TTI identification
• Own fax number—this machine’s fax number
• Quick Dial—list of Quick Dial labels and numbers
• Name Dial—list of Name Dial labels and numbers
1
Press
2
Press
.
Prt Help List
.
Function no.: _ _
Press
4
Press
5
Press
.
42 Dial List
.
.
O
K
Press Start
4. FAXING
3
Printing...
Transmission Result Report
By default, this report is turned off. If you turn it on, this report will be
printed after every fax you send.
The following information is listed:
• From (Owner)—this machine’s fax number/identification
• To—the destination fax number/identification
• Page(s)—number of pages in document
• Date, Time—when the communication took place
63
FAXING
• Duration—how long the communication lasted
• Result—whether the transmission was successful
☛ To turn automatic printing of this report on or off, see Customising Default Settings with the User Parameters, see page 100.
Error Report
By default, this report is printed automatically if a reception or transmission fails.
The following information is given:
• From (Owner)—the sender’s fax number/identification
• To—the receiver’s fax number/identification
• Date, Time—when the communication failure happened
• Duration—how long the communication lasted
• Reason for error
Power Failure Report
If power is lost while sending a message, receiving a message, or while a
message has been stored in memory when the Receive File indicator is lit,
this report will be printed out when power is restored.
☛ When the Receive File Indicator is lit, see page 87.
Unauthorized Call Report
If you have set up Authorized Reception, and turned this report on, a report
is printed if an unauthorized sender tries to send you a message.
By default this report is turned off. Turn it on with the User Parameters.
☛ Authorized Reception, see page 46.
☛ User Parameters, see page 100.
The following items are recorded:
• From—the fax number/id of the sender
• Date, Time—when they tried to send the message
64
FAXING
Advanced Features
Making Machine Sounds Louder or Quieter
This machine makes various sounds during operation. You can adjust the volume of these sounds, or turn them off completely according to your taste.
You can change the following:
• TX—the sound of a fax being sent
• RX—the sound of a fax being received
• On Hook—sounds made when using the On Hook feature
• Dialling—tones you hear after pressing Start
• Buzzer—warning beep (e.g. when cover is opened) and the sound made every time you press a key
on the operation panel
• Ring—ringing sound when a call comes in
Note
1
Press
.
2
Press
3
Press
4
Press
5
Press
or
to make
the volume louder or quieter.
6
Press
Prt Help List
.
Function no.: __
.
31 Adjust Volume
.
TX: ■
TX: ■■
OK
OK
.
65
4. FAXING
On Hook is not available in some locales.
FAXING
7
Repeat steps 5 and
able volumes.
6
for all adjust-
After adjusting the Ring volume and pressing
, the display opposite will appear. Now go
to step 8 .
Registered
Note
Do not turn off the machine while “Please
wait” or “Registered” is shown on the operation panel display.
8
Do one of the following:
• Enter another function number.
• Press
3 FaxSwitch
OK
to return to standby mode.
Sending Faxes Over Unreliable Lines-Slow (4800bps)
If you experience problems sending faxes due to bad telephone lines, you
can reduce the speed at which your machine sends fax messages to 4800 bits
per second.
Note
This setting does not affect the speed at which your machine receives faxes.
Use the following procedure to turn this feature on/off.
1
Press
2
Press
3
Press
4
Press
66
.
Prt Help List
.
Function no.: _ _
.
.
22 Slow(4800bps)
4800bps:
No?
OK
FAXING
5
Press
the setting.
or
to adjust
6
Press
. The display opposite will
flash briefly on the display and then the
function menu will reappear.
Note
Do not carry out any operations while “Registered” appears on the display.
7
4800bps:
Yes?
OK
Registered
2 CommunicationO K
Do one of the following:
• Enter another function number.
• Press
to return to standby mode.
RDS stands for Remote Diagnostic System.
If your machine has a problem, a service technician can perform various
diagnostic tasks over the telephone line from the service station to try and
find out what is wrong. The service technician can also use this feature to
change some of your machine’s settings if you request it.
For this feature to work, you must turn it on before the service technician
starts the RDS operation on your machine.
☛ For how to switch this feature on or off, see Changing On/Off Settings, see page 67.
Page Header
By default, your TTI/Own Number appears on top of faxes you send when
printed at the other end. If you wish, you can turn this feature off.
☛ For how to switch this feature on or off, see Changing On/Off Settings, see above.
☛ Storing your Own Name/TTI, see page 33.
Changing On/Off Settings
Use this procedure to turn the following features on or off:
☛ Page Header, see above.
☛ Turning Summer Time (Daylight Saving Time) on/off, see page 39.
☛ RDS, see above.
67
4. FAXING
RDS
FAXING
1
Press
.
2
Press
.
3
Press
4
Press
5
Press
or
until the
setting you wish to change appears on
the display.
Prt Help List
Function no.: _ _
.
51 Select
.
E.g. press
Press
7
Press
the change.
8
Press
. The display opposite will
flash briefly on the display and then the
function menu will reappear.
OK
Summer Time
OK
Mode: Off?
OK
Mode: On?
OK
.
or
to adjust
Note
Do not carry out any operations while “Registered” appears on the display.
68
Page Header
once.
6
9
OK
Do one of the following:
• Enter another function number.
• Press
to return to standby mode.
Registered
5 Select
OK
5. COPYING
Making a Copy
You can load up to 10 sheets of plain paper (80 g/m2 or 20 lb) at a time into
the Automatic Document Feeder (ADF).
Important!
Check to make sure that the ADF cover is
securely closed before using it.
1
Fan the stack of originals. Never try to
place more than 10 sheets of plain paper onto the ADF.
2
Straighten up all four sides of the stack,
by tapping them on a desk or table top.
5. COPYING
Before you start, make sure the machine is in copy operation mode and the
display opposite is shown.
To switch between copy operation mode and fax operation mode,
press
.
69
COPYING
Carefully insert the document stack
face-down into the ADF.
3
Note
The side of the original to be copied should
be face down.
Insert the stack of originals along the
document guide into the ADF.
4
Note
Insert your stack of originals into the ADF
until it stops. If you do not push it right in,
the machine will not detect the stack.
5
Make sure the upper tray extension is
pulled out.
6
Press
tion.
to perform the copy opera-
Note
• If your original jams while being fed into
the ADF, press
to cancel the operation. See page 90 for how to clear the jam.
70
GS10(GB)_Chapter 05_p69-75
70
99.8.3, 1:38 PM
COPYING
Originals that do not meet the following requirements can cause paper misfeeds,
and even damage the machine.
• Uniform page size
• Page condition
0.05mm to 0.2mm (0.002" to 0.08")
60 to 90 g/m2 (16lb to 24lb)
Markings on the originals must be clear to be read
correctly.
All pages should be the same size.
Avoid using originals that are bent, curled, damaged,
or stapled, and originals printed on coated paper,
carbon paper, or photographic paper.
5. COPYING
■ Requirements
• Thickness
• Weight
• Clear markings
71
COPYING
Making Multiple Copies
1
Carefully insert the document stack
face-down into the ADF.
2
Enter the number of copies you wish to
make using the numeric keypad.
E.g. to make ten copies, press
100%
10
.
Note
If your document is not scanned in even when
you press
, there is a chance it is not set
correctly in the ADF. Reset your document
and try again.
3
Press
tion.
to perform the copy operaPage number
Note
During the copy operation, the display shows
the number of copies printed so far and that
to be printed. For example, 02/10 appears
while the second copy of a run of 10 copies is
being printed.
P.01
02/10
Number of copies
to be printed
Tips
• After copying finishes, press
72
Number of
copies printed
so far
to clear any settings.
COPYING
Reduction and Enlargement
Press
or
the copy operation.
to select preset reduction or enlargement factors for
To Set the Reduction Factor
1
Carefully insert the document stack
face-down into the ADF.
2
Press
until the desired size ratio appears. The sizes change in the following order.
100% → 93% → 87% → 82%
50% ← “71% A4
Press
tion.
Ratio (%)
93
87
82
71
50
01
Original ➝ Paper size
A little reduced.
A4 ➝ B5
B5 ➝ A5
A4 ➝ A5
Reduced by 1/4.
to perform the copy opera-
Note
After copying finishes, press
clear any settings.
to
5. COPYING
3
A5”
100%
73
COPYING
To Set the Enlargement Factor
1
Carefully insert the document stack
face-down into the ADF.
2
Press
until the desired size ratio
appears. The sizes change in the following order.
100%
→
115%
200% ← “141% A5
3
Press
122%
A4”
to perform the copy opera-
tion.
Note
After copying finishes, press
clear any settings.
74
→
to
100%
Ratio (%)
115
122
141
200
01
Original ➝ Paper size
B5 ➝ A4, B6 ➝ A5
A5 ➝ B5
A5 ➝ A4
A6 ➝ A4
COPYING
Zoom (In 1% Increments)
Zoom allows you to tune the preset reduction and enlargement factors to exactly the value you want. You can change the zoom factor in increments of 1%.
To Use Zoom
Setting Range
200 to 50%
50 to 200%
1
Carefully insert the document stack
face-down into the ADF.
2
Press
Press
100%
01
99%
01
to perform the copy opera-
tion.
Note
After copying finishes, press
clear any settings.
to
5. COPYING
3
(decrease) or
(increase) until the desired
size ratio appears.
75
COPYING
Adjusting the Copy Image
To Select the Resolution/Photo Setting
1
Carefully insert the document stack
face-down into the ADF.
2
Press the Original Type Select key to
specify the resolution or halftoning
method for the copy operation.
3
A pointer (T) moves on the display to
indicate the current setting.
Choose a setting that matches your original:
Setting
[Text Fine]
[Photo1]
[Photo2]
Use for:
Copying text
Copying photographs
Copying mixed text and photographs
Note
If the memory size of your machine is 4MB, the machine automatically switches
from Photo2 to Photo1 when you make multiple copies using the ADF.
4
Press
tion.
to perform the copy opera-
Note
After copying finishes, press
clear any settings.
76
to
COPYING
To Adjust the Image Density
1
Carefully insert the document stack
face-down into the ADF.
2
Press the Density key to select the image density.
• Select [Lighter] to make the image lighter.
• Select [Darker] to make the image darker.
Press
tion.
to perform the copy opera5. COPYING
3
Note
After copying finishes, press
clear any settings.
to
77
COPYING
Sorting Output
The following example shows how output is affected by turning sorting on
and off.
Important!
The sort operation requires scanning of all your originals into memory before
starting the copy operation. The number of originals that can be scanned at one
time depends on how much memory you have installed. Refer to page 23 for details on increasing memory capacity.
Sort Copying
1
Carefully insert the document stack
face-down into the ADF.
☛ How to set originals, see page 69.
2
Sorting is activated when the T pointer
is visible on the display above Sort/
Memory Copy. Press
to turn
sorting on.
78
GS10(GB)_Chapter 05_p76-79
78
99.8.3, 1:39 PM
COPYING
When you press
to start the copy
operation, all of the originals on the
ADF are scanned into memory before
they are printed.
Note
After copying finishes, press
clear any settings.
to
5. COPYING
3
79
6. TROUBLESHOOTING
General
Status
Nothing happens
when the machine is
turned on.
Paper misfeeds when
the machine is turned
on for the first time
after the installation.
After installing a SIMM
board, the memory
value that appears on
the machine's display
does not match the
amount of memory installed.
Cause
Remedy
Power cord is not con- Correctly connect the power
nected.
Cable to the machine and plug
it into a outlet.
SIMM is not installed correctly. Install the SIMM correctly.
SIMM does not meet the Use a SIMM with the required
required specifications.
specifications.
Paper was loaded in the Remove the paper, turn the mamachine before the ma- chine off and then back on. Afchine was turned on.
ter machine initialization is
complete, load the paper back
into the machine.
SIMM does not meet the Use a SIMM with the required
specifications.
required specifications.
Page
p.9
p.23
p.23
p.9
P.23
Printing and Copying (1/2)
Status
Cause
Remedy
Frequent paper mis- The upper paper tray is not Set the upper paper tray corset correctly
feeds.
rectly.
Improper paper.
Use paper of the correct size and
thickness.
Paper is not set correctly in Realign the paper with the pathe upper paper tray.
per guide, and if necessary, fan
the paper stack.
Paper is curled or damp. Uncurl the paper.
Insert paper into the upper paper
tray from the least-curled side.
Set paper face down if necessary.
Avoid using damp paper.
Too much paper is loaded Remove some of the paper.
in the machine.
Paper is loaded incorrectly. Check the paper and realign it
if necessary.
80
Page
p.4
p.10
p.11
p.11,13,19
p.11,13
p.11,13,19
—
p.11,15
p.11,19
Printing and Copying
Status
2)
Cause
Remedy
Page
Frequent paper mis- Attempting to print on both Print on only one side. Two-side p.11,19
feeds.
sides of the paper.
printing is not supported by this
machine.
Printing onto loosely Flatten the envelopes to expel all p.15
stacked envelopes.
air.
Misfeeding of the envelope Make sure that envelope flaps
p.15
flap.
are closed (folded down).
Part of the image is Toner is distributed un- Remove the toner cassette, gen- p.94
unclear.
evenly in the toner cassette. tly rock it left and right a few
times, and replace it into the
machine.
Black lines on the Heat damage to the toner Replace the toner cassette.
p.94
printout.
cassette caused by turning
off the machine too soon
after copying a large
number of pages.
Dark areas along the Turning off the machine too Replace the toner cassette.
p.94
sides of the printout. soon after printing or copying a large number of
pages.
Printing
Status
Cause
Remedy
Page
Abnormal or unex- Use of wrong cable.
pected printing results.
Wrong printer driver settings.
Attempting to print from a
DOS application at 600 dpi.
Parts of the image are The correct paper size is
not printed out.
not specified .
Cannot print from a Second printer is not consecond printer.
nected correctly.
Use the cable that comes with
this machine.
Change to the correct printer
driver settings.
Change to 300 dpi.
p.6
Specify the paper size using the
operation panel.
Check connections and make
corrections, if necessary.
p.20
Second printer is not selected.
Incorrect settings of the
second printer driver.
Press
so the indicator above it is lit.
Use the printer driver of the second printer to turn off bi-directional printing.
p.28
p.25
p.102
p.16
p.28
81
6. TROUBLESHOOTING
TROUBLESHOOTING
(2/
TROUBLESHOOTING
Copying and Faxing (1/2)
Status
Cause
Remedy
Page
p.39,69
Frequent original mis- Original is not set correctly. Set the original correctly.
feeds with ADF.
Curled original(s).
Straighten out the original(s). p.39,69
Insert the original(s) from the p.39,69
least-curled side.
Incorrect original specifi- Use originals of the correct size,
p.70
cations.
thickness, and quantity.
Close the ADF cover.
p.69
Original is not fed ADF cover is open.
from the ADF.
Document is not set cor- Set the document properly. p.39,69
rectly in ADF.
p94
Periodic black marks Cleaning pad is not in- Correctly install the cleaning
stalled.
pad.
on printed output.
Black and white lines Dirty ADF transport path. Clean the ADF transport path.
p.93
on printed output
when using the ADF .
Output too light.
p.78
Low contrast original.
Adjust the print density.
Unclear photographic Copying in Text Fine Mode. Use the Original Type Select key
p.76
images.
to select the Photo1 or Photo2
Mode.
Parts of the original The correct paper size is Specify the paper size using the p.11,13,19
image are not copied. not specified
operation panel.
Cannot send or receive The power is off.
p.9
Turn on the power.
faxes.
The machine is not con- Check the line connection.
p.32
nected to the telephone Make sure that one end of the
line.
line cable is connected to the
LINE socket at the rear of the
machine and the other to your
telephone line socket.
The Dial Mode settings are Make sure you have selected the
p.34
correct line type (pulse or
not correct.
tone). If behind a PABX, make
sure the PABX settings are correct.
82
Copying and Faxing (2/2)
Status
Cannot send faxes.
Cause
Remedy
Press the Fax/Copy key to switch
to fax operation mode.
Cannot receive faxes
Fax reception is not possible
while the machine is processing
or printing PC print data.
Fax reception is not possible
while making copies.
Load more paper. If small size
paper is loaded, load A4 size
paper so you can receive faxes.
Install a new toner cassette.
Press the Reception Mode key to
switch to FAX mode, or read
about how to receive faxes
manually in TEL mode.
Clear all jammed paper.
Paper is jammed.
Close the front unit.
Front unit cover open.
The machine has been set Turn Authorized Reception off
up to only receive faxes with function 21, or read how to
from certain senders with configure this feature.
the Authorized Reception
feature.
Even when you press Remote Change is not Turn it on with function 32.
the Remote Change turned on.
digit, Remote Change You are pressing the wrong The default Remote Change digit
will not function.
Remote Change digit, have is 2. If pressing this digit on the
pressed a key on the opera- handset keypad still does not
tion panel or the machine work, try changing the Remote
Change digit to another number.
is busy dialling.
Do not press any key on the operation panel before pressing
the Remote Change digit. If the
machine is busy dialling, Remote Change is not available.
The machine is in copy operation mode.
The machine is busy
processing or printing a PC
print job.
The machine is busy making copies.
The machine has run out of
paper, or small size paper
is loaded in the upper tray.
Toner has run out.
The machine is in TEL
mode.
Page
p.29
—
—
p.11
p.94
p.45
p.87
p.3
p.47
p.51
p.51
Scanning
Status
Cause
Remedy
PC scanning does not The PC parallel port is not Consult your PC manual on how
function properly.
set to ECP.
to set your parallel port to ECP.
Page
p.25
83
6. TROUBLESHOOTING
TROUBLESHOOTING
TROUBLESHOOTING
Error Messages (1/3)
The table below explains the error messages that may appear on the display and the appropriate
action to take.
Message
“Close cover”
“Add paper”
“Toner near end”
“Add Toner”
“Clear paper”
“Memory overflow”
“Remove original”
(when original is set
in ADF)
“Memory full” and
“Press Stop”
Remedy
Cause
Too many sort copy pages.
P.23, 78
Press
to print pages al-
ready stored in memory. To cancel the job, press
. If you
need to print big copy jobs, increase the memory capacity.
84
Page
Close the front unit.
P.3
If a copy job is in progress, set
the copy quantity again.
Load paper.
Machine is out of paper.
P.11,19
If a copy job is in progress, set
the copy quantity again.
Machine is almost out of Prepare a toner cassette for re—
placement.
toner.
P.2
Toner cassette is not loaded Correctly load the toner cassette
into the machine.
correctly.
If a copy job is in progress, set
the copy quantity again.
Replace the toner cassette.
Machine is out of toner.
P.88
Remove the misfed paper. If a
P.88
Paper misfeed or paper
copy job is in progress, set the
will not feed at all.
copy quantity again.
If paper persistently misfeeds, carry
out the procedure on page 89.
Either lower the printer driver
P.23
Not enough memory
Resolution setting, or increase
capacity. (PC printing
memory capacity by installing a
only)
larger SIMM. Press any operation panel key to clear the error
message from the display.
Original misfeed or paper Remove the original from the
P.69
ADF. If a copy job is in progress,
will not feed at all.
set the copy quantity again.
Too much sort copy data.
P.23, 78
to cancel sort copying.
Press
If you need to print big copy jobs,
increase the memory capacity.
Front unit is open.
Error Messages
Message
“Transm.error” and
“Press Stop”
3)
Cause
An error occurred during
transmission, or the other
line was busy.
If power was lost during the
dialing or connecting
phases of transmission, or
in fax transmission standby
mode, this message will
appear when you next turn
the machine on.
“Too many numbers” Either the maximum
number of Name Dials have
been stored (25), or you
tried to enter more than 40
digits for a destination fax
number.
“No connection”
The line is busy while dialling with On-Hook, connection failed, you dialled
the wrong number, or
there is no answer.
“No loop current”
“Printer in use”
“Machine busy”
“Name exists”
“Unable”
Remedy
Press
message.
to clear the error
Page
—
Delete some Name Dials or
enter a shorter number.
P.61
If scanning from the exposure
P.51
glass, press
and remove
your document. When scanning
from the ADF, the machine will
automatically enter redial mode.
To cancel redialling, remove
your document from the ADF.
The line current was not Check the line connection.
detected-the line may not
be connected.
The machine is busy print- Wait until it has finished and try
again.
ing.
The machine is busy com- When until the current operation has finished and try again.
municating.
The name you input for this Either use a different name, or
Name Dial already exists. delete the other Name Dial and
try again.
The machine is unable to
to exit funcprint the report or list be- Press
cause there is a problem tion mode and rectify the problem indicated on the display.
with the printer.
P.8
—
—
P.58
—
85
6. TROUBLESHOOTING
TROUBLESHOOTING
(2/
TROUBLESHOOTING
Error Messages (3/3)
Message
Cause
“Check fax no.” and Multiple attempts at
“Press Stop”
communication with this
number failed.
“No dial tone”
“Set A4 paper”
No dial tone was detected.
Remedy
Press
to cancel the transmission.
In some locales, if this number
was stored in a Name Dial,
Quick Dial, or the redial
memory, the number will be
erased completely from the machine memory to comply with
regulations.
Check the number is correct and
store it again if necessary.
Check the line connection and
if behind a PABX, the PABX settings.
Load A4 size paper in the upper
tray and register the correct paper size setting.
Page
—
P.34
Small size paper is loaded
p.11
in the upper tray (A4 size
paper is required for receiving faxes)
“Set paper size”
The actual length of the Make sure the registered paper
p.20
paper is less than the reg- size matches the paper loaded
and register the correct paper
istered paper length.
size setting.
“Error” and “Press An error occurred during
—
to clear the error
Press
Stop”
reception.
message and inform the other
party to send their fax again.
“Not registered”
The Redial memory or Print the Dial List to check on p.53, 64
pressed Quick Dial key is which Quick Dials have numbers stored in them.
empty.
“Name: No entry”
No name Dial exists with Make sure you selected the cor- p.53, 63
the initial letter you se- rect search letter for this Name
Dial. You also can print the Dial
lected.
List to see currently stored Name
Dials.
“Error XX”
Possible machine defect. Turn power off and then back
P.9
on again.
There is a problem with
your machine.
If you have a problem with the machine and you cannot resolve it by referring to the
information in this chapter, please contact your service representative.
If an “Error XX” message is displayed, be sure to turn off the machine before calling.
86
When the Receive File Indicator is Lit
This indicator lights to inform you that a page of an incoming fax message
could not be printed for some reason (e.g. paper has run out) and that page
has been stored in memory.
Important!
The machine cannot receive any more messages until you solve the problem.
Turning off the power will erase any message stored in memory.
To print the page out, check the display and rectify the problem (e.g. paper has run out). When the
problem is resolved, the page will automatically be printed out.
Note
If there is not enough memory, all or some parts of the message will not be stored
or printed.
The machine will only store a page in memory if a problem occurs while reception is in process.
The line will be disconnected immediately and following pages of the same message will not be
received.
87
6. TROUBLESHOOTING
TROUBLESHOOTING
TROUBLESHOOTING
Clearing a Paper Misfeed
This section describes how to clear a paper misfeed when one occurs.
CAUTION
When removing misfed paper, do not touch the fusing
section because it could be very hot.
Important!
Hold a misfed sheet with both hands and slowly pull it out. Do not use a tool, such
as a screwdriver or tweezers as this may damage the unit.
Note
If “Clear Paper” is still displayed after you clear the jam, there may be paper
jammed in another part of the machine. Check all areas described in this section
Clearing a Feed in the Main Unit
1
1 Raise the document trap.
2 Lift up the tabs located on the sides
of the machine and open the front
unit.
2
Pull out the toner cassette.
Note
• Be sure to hold the toner cassette by its handle.
• Keep the toner cassette horizontal to avoid
spilling the toner.
88
TROUBLESHOOTING
Push back the blue paper release lever
located on the right.
6. TROUBLESHOOTING
3
Note
The lever releases pressure on the paper. If
you do not push it back, you could damage
the machine when removing paper.
4
Pull out the misfed paper in the directions indicated by the arrows in the illustrations.
Note
• If you are using the paper feed unit (option) and cannot clear the misfeed using
this procedure.
☛ Clearing a Micffeed in the Optional Paper
Feed Unit, see page 90.
• If toxner gets on your hands, wash them
immediately.
5
Install the toner cassette into the machine.
Note
• Be sure to hold the toner cassette by its handle.
• Keep the toner cassette horizontal to avoid
spilling the toner.
☛ Installing the toner cassette, see page 2.
6
Close the front unit.
Note
If “Clear Paper” is still displayed after you
clear the jam, there may be paper jammed in
another part of the machine. Check all areas
described in this section
Important!
If a paper misfeed occurs during a copy job, be sure to specify the desired copy
quantity again.
89
TROUBLESHOOTING
Clearing a Misfeed in the ADF
1
Open the ADF cover.
Note
Be sure to open the ADF cover before pulling
out the misfed original. Failure to do so can
result in damage to the original.
2
Pull out the misfed original.
3
Close the ADF cover, and make sure it
locks securely into place.
Important!
If copying was in progress, be sure to specify
the desired copy quantity again.
Clearing a Misfeed in the Optional Paper Feed Unit
1
Pull out the paper tray.
2
Pull out the misfed paper.
90
TROUBLESHOOTING
Slide the paper tray back into the paper feed unit until it locks into place.
6. TROUBLESHOOTING
3
Note
☛ For how to set paper in the optional paper
feed unit, see page 19.
Tip
If you cannot find a remedy for unexpected printout results here,
check the printer driver's online help for other useful information.
When Paper Will Not Feed
If paper has completely stopped feeding, check using the following procedure.
1
Remove all paper.
2
1 Raise the document trap.
2 Lift up the tabs located on the sides
of the machine and open the front
unit.
3
Pull out the toner cassette.
91
TROUBLESHOOTING
4
Pull the blue key-shaped pawl located
deep inside on the right where the toner
cassette was set forward.
5
Install the toner cassette into the machine.
6
Close the front unit.
When the front unit is closed, the motor will start running. When the sound
of the motor stops, set paper in the
original position and continue with normal operation.
92
7. USER MAINTENANCE
Daily Maintenance
Clean with a damp cloth and wipe dry.
Note
7. USER MAINTENANCE
Turn off the machine before cleaning
ADF
Lower output slot
Output bin
93
USER MAINTENANCE
Replacing the Toner Cassette And the
Cleaning Pad
Printing on A4 size paper under the recommended temperature and humidity conditions noted in the table under “Environment” on page 1, you
can expect a toner cassette to print approximately 3,000 pages when you are
printing typical business letters that have text covering 5% of the total surface. The starter cassette that comes with the machine can print approximately 1,000 pages. Pages that contain graphics use more toner and shorten
the life of a toner cassette.
WARNING
Do not incinerate used toner or toner containers. Toner dust might ignite when exposed to an
open flame. Dispose of the used toner cassettes according to local regulations for plastics.
This machine has been tested for safety using this supplier’s parts and consumables.
We recommend you only use these specified supplies.
CAUTION
When replacing the toner cassette and cleaning pad,
do not touch the fusing section because it could be
very hot.
1
Open the box of the new toner cassette
and check to make sure it contains a
toner cassette and cleaning pad.
Note
Be sure to hold the toner cassette by its handle.
2
94
1 Raise the document trap.
2 Lift up the tabs located on the sides
of the machine and open the front
unit.
USER MAINTENANCE
3
Hold the toner cassette by its handle and
pull it out.
Note
4
7. USER MAINTENANCE
Keep the toner cassette horizontal to avoid
spilling the toner.
Remove the old cleaning pad.
Note
Be sure to grasp the green handle when removing the cleaning pad.
5
Grasp the new cleaning pad by the green
handle and insert it into place.
6
Press down gently but firmly on both
sides of the pad to make sure that it is
inserted as far as it can go.
Do not forget to install the cleaning
pad whenever you install a new toner
cassette.
7
Prepare the new toner cassette. Holding the toner cassette by its handle, gently shake it side to side 5 or 6 times to
evenly distribute the toner inside.
Note
Be sure to hold the toner cassette by its handle.
95
USER MAINTENANCE
Look inside the machine and note the
locations of the arrows that indicate the
toner cassette guides on either side.
8
Make sure the plastic pins (marked with
“*” in the illustration next to step
above) on either side of the toner cassette slide along the guides inside the
machine.
9
Note
Be sure to hold the toner cassette by its handle.
10
To close the front unit, press down
firmly but gently on both sides of it until the top unit closes and clicks securely
into place.
Note
Background gray cast is sometimes evident
just after installing a new toner cassette.
96
USER MAINTENANCE
Storage
Paper should always be stored properly. Improperly stored paper might
result in poor image reproduction, creased copies, or paper misfeeds. Generally, avoid paper curling and absorption of moisture.
• Avoid storing paper in humid areas. In high-temperature and high-humidity, or lowtemperature and low-humidity conditions, store paper in a vinyl bag.
• Do not store paper where it will be exposed to heat.
• Store on a flat surface.
• Use older stock first.
• Do not lay heavy objects on paper.
• Keep open reams of paper in the package, and store as you would unopened paper.
Toner Cassette
• Keep the toner cassette inside the packaging that it comes packed in whenever it is
removed from the machine.
• Store horizontally in a cool, dark place.
• Never store a toner cassette where it will be exposed to heat.
• Do not lay heavy objects on the toner cassette.
CAUTION
Keep toner cassettes out of children’s reach.
97
7. USER MAINTENANCE
Paper
8. TECHNICAL REFERENCE
Printing the Help List
Print this list to get a quick guide to frequently used fax features.
1
While the machine is not performing any
other operation, press
.
2
Press
3
Press
.
Press Start
to print the Help List.
Note
Print on A4, Letter, or Legal paper.
98
Prt Help List
OK
TECHNICAL REFERENCE
Customising Default Settings with the User
Parameters
Changing the User Parameters
The User Parameters allow you to customise various machine settings and
features to suit your requirements.
They are four User Parameter Switches numbered 00 to 03. Each switch has
8 adjustable “bits” which can set to either 0 or 1.
For the meaning of each bit and how changing them affects the machine,
see page xx.
Note
Take care when changing the switch values. Only change the bits whose meanings are described in this manual.
Note
Do not turn off the power while adjusting the User Parameter bit switches.
The following procedure describes how to change the User Parameters.
1
Press
.
2
Press
.
3
Press
4
Press
5
Press
or
until the
switch you wish to edit appears.
E.g. press
Prt Help List
Function No.:__
.
52 User Param.
.
O
K
00 :1000 1011
O
02 :1110 0000
O
K
K
twice to show switch 02.
99
8. TECHNICAL
REFERENCE
→
7654 3210 ← bit number
Switch number → 00: 0000 1011 ← bit values
TECHNICAL REFERENCE
To toggle the value of a single bit, press
the number on the numeric keypad that
corresponds to the number of the bit
you wish to change.
6
E.g. press
02 :1110 1000
Please wait
Note
Registered
Do not turn off the machine while “Please
wait” or “Registered” is shown on the operation panel.
8
K
to change bit 3.
Press
. The display opposite will
flash briefly on the display and then the
function menu will reappear.
7
O
Do one of the following:
5 Select
• Enter another function number.
• Press Help/Function to return to standby mode.
O
K
User Parameter Switch Summary
The following tables summarize the User Parameter bit switches and their
meanings.
SWITCH 00 (1/2)
Bit
Explanation
7
Width scanned when faxing
a document
Display “Original left on
glass.” Warning when scanning from the ADF and an
original is left on the exposure glass
Maximum length of document when scanning from
the ADF
Automatically print the
Transmission Result Report
after every successful transmission
6
5
4
100
Available
Settings
Default
Notes
0: 210 mm (A4) 210mm (A4)
1: 216mm (LT/LG)
0: Yes
Yes
1: No
This setting takes effect
from the next power on.
0: 400mm
1: 1200mm
400mm
This setting takes effect
from the next power on.
0: No
1: Yes
No
TECHNICAL REFERENCE
SWITCH 00 (2/2)
Explanation
3
Automatically print the
Journal after every 35 communications
Print the Unauthorized Call
Report when an unregistered caller tries to send
you a fax ( when Authorized Reception is switched
on)
Do not change this setting
2
1
0
Available
Settings
Default
0: No
1: Yes
Yes
0: No
1: Yes
No
Automatically reduce re- 0: No
ceived images to fit page
1: Yes
Yes*
Notes
* This function turned
off by default in some
locales.
If you turn this function off, some parts of
the printed image
may be lost.
SWITCH 01
Bit
7
6
5
4
Explanation
Available
Settings
Copy/Fax Operation mode 0: Fax
home position.
1: Copy
Do not change these settings
Reset the image density and
resolution to the values below after sending a fax,
switching to fax operation
mode or on power up.
3 & 2 Image density home
position when bit 4 above
is 1.
1 & 0 Resolution home position
when bit 4 above is 1.
0: No
1: Yes
Default
Notes
Copy
Yes
These settings have no
affect on the copy feature.
b3 b2
Auto
0 0: Auto
0 1: Darker
1 0: Lighter
b1 b0
Text (STD)
0 0: Text (STD)
0 1: Text (Fine)
1 0: Photo 1
1 1: Photo 2
101
8. TECHNICAL
REFERENCE
Bit
TECHNICAL REFERENCE
SWITCH 02
Bit
7
6
5
4
3
2
1
0
Explanation
Available
Settings
Default
Notes
Do not change these settings
PCL Resolution
0: 600dpi
Set the printer to 300 dpi 1: 300dpi
if the designated output is
not obtained when printing
using a DOS application
compatible with the 300
dpi PCL printer.
Toner Saving mode
0: Off
When Toner Saving is 1: On
turned on, the machine
prints using less toner. Use
this mode if you wish to
save on toner and do not
mind lighter prints.
Do not change these settings
600dpi
Off
SWITCH 03
Bit
7
6
5
4
3
2
1
0
102
Explanation
Do not change these settings
Available
Settings
Default
Notes
TECHNICAL REFERENCE
Function List
11
12
13
14
15
16
17
21
22
31
32
41
42
51
52
61
Function Name
Date/Time
Dial Mode
Quick Dial/Print Dial List
Name Dial
Language
Own name/TTI
Own Fax No.
Authorized Reception
Slow (4800bps)
Adjust Volume
Remote Change
Journal
Dial List
Page Header
Summer Time
RDS Mode
User Parameters
Tray Paper Size
Page Reference
38
34
53
58
104
33
36
47
66
65
51
62
63
67
39
67
99
11
8. TECHNICAL
REFERENCE
Function Number
103
TECHNICAL REFERENCE
Selecting the Language
1
Press
.
2
Press
.
3
Press
and press
or
until the desired language
Prt Help List
OK
15 Language
OK
appears.
Press
4
.
Registered
Note
1 Set up
• Do not turn off the machine while “Registered” is displayed.
• If you do not press
changed.
5
104
Press
display.
, the setting is not
to return to the standby
OK
TECHNICAL REFERENCE
Economy Mode
Economy mode is a power saving feature and is turned on by default. If no
operation is performed for 5 minutes, the display becomes blank and all the
indicators go out. If no operation is performed in the next 10 minutes or
235 minutes (according to the setting), the heater turns off.
Operation panel
Heater turns off after
turns off after
ON (default setting) 5 minutes 15 minutes (including time when operation panel is off)
Economy mode
OFF
5 minutes 240 minutes (including time when operation panel is off)
• In Economy Mode, the heater turns back on in the following cases.
♦ When any key on the operation panel is pressed
♦ When paper is set in or removed from the upper paper tray
♦ When the tray of the paper feed unit (option) is pulled out or pushed back
into the machine
♦ When the front unit is opened.
♦ When an original is set in or removed from the ADF.
♦ On initiation of fax operations, such as fax reception, lifting the headset etc.
♦ On initiation of PC printing.
• When a key on the operation panel is pressed to turn the heater on, the key does
not perform its normal function.
• After the heater is turned back on, the previous %, quantity, Sort settings, entered fax number, original type and various other settings are cleared.
Changing the Economy Mode
Hold down the Clear modes key for approximately 1 second until the
Economy mode indicator lights or goes out, as required.
Economy Mode ON
Economy Mode OFF
105
8. TECHNICAL
REFERENCE
Note
9. SPECIFICATIONS
General Specifications
Paper Capacity
Machine Life
Upper tray
plain paper (80 g/m2: 20 lb.) 100 sheets
Optional paper unit
plain paper (80 g/m2: 20 lb.) 250 sheets
ADF (Auto Document Feeder) Capacity
plain paper:
A4, LT · LG (80 g/m2: 20 lb) 10 sheets
Output tray
plain paper (80 g/m2: 20 lb.) 50 sheets
Memory
4 MB (Expandable to 8 MB, 16MB or 32MB)
EDO SIMM, 60 ns, 72 pin
Dimensions
297mm × 352mm × 576mm (H× W× D)
11.70" ×13.87"× 22.69" (H× W× D)
Weight
15.5 kg (34.18 lb)
Power Supply
AC 220 to 240 V
50/60 Hz
Power Consumption
Max
Printing (Average)
Copying (Average)
Stand-by (Average)
PC-Scan (Average)
Sending Faxes (Average)
Receving Faxes (Average)
Economy Mode
Operating Environment
Temperature /Humidity
10°C (50°F) to 35°C (95°F)
15% to 80%
106
640 W
230 W
250 W
75 W
75 W
75 W
230 W
15 W
30,000 sheets/5 years
Printer Duty
6,000 sheets/1 month
Scanner Duty
2,000 sheets/1 month
Paper Sizes
Plain paper
A4 = 210 mm × 297 mm
A5 = 148 mm × 210 mm
Letter (LT) = 8 1/2" × 11"
Legal (LG) = 8 1/2" × 14"
Half Letter = 51/2" × 81/2"
F4 = 81/4" × 13"
Envelopes
C5= 162 mm × 229 mm
C6 = 114 mm × 162 mm
DL = 110 mm × 220 mm
Other
Transparencies
Label paper
SPECIFICATIONS
Printer Language
Resident Font
PCL 5e compatible
• Dutch 801 SWC
• Dutch 801 Italic SWC
• Dutch 801 Bold SWC
• Dutch 801 Bold Italic SWC
• Swiss 742 SWC
• Swiss 742 Italic SWC
• Swiss 742 Bold SWC
• Swiss 742 Bold Italic SWC
• Swiss 742 Condensed SWC
• Swiss 742 Condensed Italic SWC
• Swiss 742 Condensed Bold SWC
• Swiss 742 Condensed Bold Italic SWC
• Incised 901 SWC
• Incised 901 Italic SWC
• Incised 901 Bold SWC
• Fixed Pitch 810 Courier Roman SWC
• Fixed Pitch 810 Courier Bold SWC
• Fixed Pitch 810 Courier Italic SWC
• Fixed Pitch 810 Courier Bold Italic SWC
• Fixed Pitch 850 Letter Gothic 12 pitch/text SWC
• Fixed Pitch 850 Letter Gothic Bold 12 pitch/text SWC
• Fixed Pitch 850 Letter Gothic Italic 12 pitch/text SWC
• Flareserif 821 SWC
• Flareserif 821 Extra Bold SWC
• Ribbon 131 SWC
• Wingbats SWM
Print Resolution
600 dpi × 600 dpi
1200 dpi × 600 dpi (enhanced)
Print Speed
6 ppm (pages per minute)
Paper/Media Types
Plain paper
Envelopes
Transparencies
Label paper
Paper Weight
60 to 90 g/m2 (16 to 24 lb)
Interface
IEEE 1284
Scanner Specifications
Configuration
Grey scale
Flatbed / ADF
256 levels (8-bit)
Document Size
Interface
LG, LT, HLT,A4, A5, B5
IEEE 1284
Optical Resolution
Compatibility
300dpi
TWAIN
Scanning Resolution
ADF
1bit
100 × 100, 150 × 150,
200 × 200, 300 × 300,
400 × 400, 600 × 600 dpi
8bit
300 × 300 dpi
ECP mode
Up to 10 pages of 80g /m2(20lb), Plain paper
Maximum scanning size
212 × 351.6 mm
OS
Windws 95/98 only
107
9. SPECIFICATIONS
Printing Specifications
SPECIFICATIONS
Copying Specifications
Copy Speed
Paper Weight
6 cpm (copies per minute)
60 to 90 g/m2 (16 to 24 lb)
Warm-up Time
Original Types
30 seconds or less
Exposure glass
Sheet/Book
ADF
Up to 10 pages of 80g /m2(20lb), Plain paper
First copy
17 seconds or less
Mulitiple Copies
Up to 99 copies
Copy Reduction and Enlargement
50%, 71%, 82%, 87%, 93%,
115%, 122%, 141%, 200%
Maximum Original Size
Legal(LG) = 8 1/2 " × 14"
Copy Resolution
600 dpi × 600 dpi
Paper/Media Types
Plain paper
Envelopes
Transparencies
Label paper
Fax Specifications
Modem Speed
Fax Resolution
14400 bps
Text (Standard) :203 × 98dpi
Text Fine (Detail) :203 × 196dpi
Protocol
ITU Group 3
Compression Method
MH/MR/MMR
Quick Dials
5
Name Dials
25
108
INDEX
INDEX
A
Additional printer ................................................ 16
Auto image density .............................................. 76
Automatic Document Feeder (ADF) ..................... x
Setting an original ......................................... 69
Authorized reception ........................................... 47
Automatic redial .................................................. 43
B
Busy indicator ................................................... xiii
C
Cancelling taransmission of a fax ...................... 44
Changing On/Off settings ................................... 67
Check display indicator ..................................... xiii
Clearing a paper misfeed .................................... 88
Clear key ............................................................. xii
Cleaning pad ....................................................... 97
Computer port ..................................................... xi
Connecting a second printer
(Additional Printer) ............................................ 16
Connecting to a computer .................................... 6
Connector .............................................................. 6
Copy operation .............................................. 29, 69
Corner guides ................................................ 17, 19
D
Daily maintenance .............................................. 93
Date and time ...................................................... 38
Density key ......................................................... xiii
Dial mode ............................................................ 34
Display ................................................................ xii
Document guides .................................................. x
Document output tray ......................................... xi
Installing .......................................................... 4
E
Economy mode ................................................. 105
Economy mode/Clear modes key ...................... xii
Economy mode indicator .................................. xii
Enlarge key ........................................................ xiii
Enlargement ....................................................... 74
Entering numbers ............................................... 30
Entering pauses ................................................... 42
Entering tones ..................................................... 42
Envelopes ............................................................. 15
Error messages .................................................... 84
Error report .......................................................... 64
Exposure glass ....................................................... x
F
Fax/Copy key ...................................................... xii
Fax mode ............................................................. 46
Fax operation ...................................................... 29
Front guide .................................................... 17, 19
H
Help list ................................................................ 98
Help/Function .................................................... xii
I
Image density ...................................................... 77
Installing
Document output tray...................................... 5
Software drivers .............................................. 25
Toner cassette ................................................... 2
Upper paper tray ............................................... 4
L
Label paper .......................................................... 15
Language ........................................................... 104
Limit mark .............................................. 11, 17, 19
Lines-slow (4800 bps) ......................................... 66
Loading Paper ..................................................... 11
109
INDEX
1
1 to 1 Copy ........................................................... 69
INDEX
Loading
Plain paper ..................................................... 11
Small size paper ............................................. 13
Other media ................................................... 15
Location ................................................................. 1
M
Metal plate .....................................................17, 19
Multiple copies .................................................... 72
N
Name key ............................................................ xiv
Name Dials
Deleting Name Dial ........................................ 60
Dialling Name Dial ........................................ 61
Storing Name Dial ......................................... 58
Numeri keypad ................................................... xii
O
OK key ............................................................... xiii
On hook ............................................................... 51
On hook dial key ................................................ xiv
Operation Panel ...................................... x, xii, xiv
Original
Setting (ADF) ............................................ 40,69
Requirements (ADF) ...................................... 78
Original guide ....................................................... x
Original type select key ..................................... xiii
Output tray ............................................................ x
Output tray extension ........................................ x,6
P
Page header ......................................................... 67
Paper and other media ....................................... 10
Paper select key ................................................. xiii
paper size
Changing ........................................................ 20
Specifying (upper) ................................... 13, 15
Specifying (lower) .......................................... 19
110
Paper size indicator ....................................... 17, 19
Paper feed unit .................................................... 17
Pause/Redial key ................................................ xiv
PC Interface indicator ....................................... xiii
Photo1 .................................................................76
Photo2 .................................................................76
Platen cover ........................................................... x
Power socket .......................................................... x
Power switch .......................................................... x
Printer driver
Windows 95/98 ...............................................25
Windows 3.1 ................................................... 25
Printer driver contents ........................................ 26
Printing the dial list ............................................ 63
Printing the journal ............................................ 62
Power failure report ............................................ 64
Q
Quick Dials
Clearing Quick Dial ....................................... 57
Editing Quick Dial ......................................... 55
Storing Quick Dial ......................................... 54
Quick Dial key .................................................... xiv
R
Receive file indicator .......................................... xiv
Receiving faxes .................................................... 45
Reception mode key ........................................... xiv
Redialling a number ........................................... 43
Reduce key ......................................................... xiii
Reduction ............................................................73
Remote change ................................................... 51
Replacing
Toner cassette ................................................. 97
Cleaning pad .................................................. 97
Resolution/Photo setting .................................... 76
RDS ...................................................................... 67
INDEX
Safety information ................................................ i
Scanner lock .......................................................... x
Unlocking ......................................................... 4
Second (Additional) printer ................................ xi
Connecting ..................................................... 16
Using .............................................................. 28
Second printer key ............................................... xv
Sending faxes ...................................................... 40
Setting up
Connecting to the telephone line .................. 32
Software drivers .............................................. 25
Side guide ...................................................... 17, 20
SIMM cover ............................................................ x
SIMM ................................................................... 23
Small size paper feed access panel ....................... x
Small size paper .................................................. 13
Sort ...................................................................... 78
Sort/Memory key ............................................... xiii
Sounds ................................................................. 65
Specifications .................................................... 106
Start key .............................................................. xii
Stop key .............................................................. xii
Storing your own fax number ............................ 36
Storage ................................................................. 97
Summer time ...................................................... 39
Transparencies .................................................... 15
Troubleshooting .................................................. 80
TTI ....................................................................... 33
U
Unauthorized call report ..................................... 64
Upgrading memory ............................................. 23
Upper paper tray .......................................... x, 4, 11
Upper try extension ............................................. xi
User parameter .................................................. 100
Using the second (Additional) printer ................ 28
Z
Zoom key ........................................................... xiii
Zoom (In 1% increments) .................................. 75
INDEX
S
T
TEL/LINE ........................................................ xi,32
Tel mode .............................................................. 45
Telephone call ..................................................... 50
Text fine ............................................................... 76
Toner cassette
Installing .......................................................... 2
Replacing ....................................................... 94
Top release lever .................................................... x
Top unit .................................................................x
Transmission result report .................................. 63
111
INDEX
EE G025
112
GS10(GB)_index p109-112
112
99.8.3, 1:39 PM
Overseas Affiliates
U.S.A.
Spain
RICOH CORPORATION
5 Dedrick Place
West Caldwell, New Jersey
07006
Phone: +1-973-882-2000
RICOH ESPAÑA S.A.
Avda. Litoral Mar, 12-14,
08005 Barcelona
Phone: +34-(0)93-295-7600
The Netherlands
Italy
RICOH EUROPE B.V.
Groenelaan 3, 1186 AA,
Amstelveen
Phone: +31-(0)20-5474111
RICOH ITALIA SpA
Via della Metallurgia 12,
37139 Verona
Phone: +39-(0)45-8181500
United Kingdom
Hong Kong
RICOH UK LTD.
Ricoh House,
1 Plane Tree Crescent,
Feltham,
Middlesex, TW13 7HG
Phone: +44-(0)181-261-4000
RICOH HONG KONG LTD.
23/F., China Overseas
Building,
139, Hennessy Road,
Wan Chai, Hong Kong
Phone: +852-2862-2888
Germany
Singapore
RICOH DEUTSCHLAND
GmbH
Mergenthalerallee 38-40,
65760 Eschborn
Phone: +49-(0)6196-9060
RICOH ASIA PACIFIC
PTE.LTD.
260 Orchard Road,
#15-01/02 The Heeren,
Singapore 238855
Phone: +65-830-5888
France
RICOH FRANCE S.A.
383, Avenue du Général
de Gaulle
BP 307-92143 Clamart
Cedex
Phone: +33-(0)1-40-94-38-38
SUPPLIES MODEL NAME
The correct model name of supplies for
your Bizworks is:
RICOH TONER CASSETTE TYPE 1120D BLACK
RICOH CO., LTD.
Ohmori NM Building, 1-1 Ohmori-kita 2-chome
Ota-ku, Tokyo, 143-0016, Japan
Printed in the Netherlands
EE AE G026-8600
Operation Manual
Read this manual carefully before you use this product and keep
it handy for future reference. For safety, please follow the
instructions in this manual
Introduction
This manual contains detailed instructions on the operation and maintenance of this machine. To get
maximum versatility from this machine, all operators should carefully read and follow the instructions in
this manual. Please keep this manual in a handy place near the machine.
Please read the safety information on pages i - iii of this manual. It contains Important Information related
to user safety and preventing equipment problems.
Operator Safety:
This machine is considered a class 1 laser device, safe for office/ EDP use. The machine contains a 5milliwat, 765 - 805 nanometer wavelength, GaAIAs laser diodes. Direct (or indirect reflected) eye contact
with the laser beam might cause serious eye damage. Safety precautions and interlock mechanisms have
been designed to prevent any possible laser beam exposure to the operator.
The following label is attached on the machine.
This label can be found when opening the bypass tray.
CLASS 1 LASER PRODUCT
IN ACCORDANCE WITH IEC 825
LASER KLASSE 1 nach IEC 825
Laser Safety:
The optical housing unit can only be repaired in a factory or at a location with the requisite equipment. The
laser subsystem is replaceable in the field by a qualified Customer Engineer. The laser chassis is not
repairable in the field. Customer engineers are therefore directed to return all chassis and laser subsystems to the factory or service depot when replacement of the optical subsystem is required.
Notes:
•
•
•
Model names for the machines do not appear in the following pages. Check the type of your machine before reading this manual.
Type 1 Bizworks 406
Type 2 Bizworks 406DF
Some illustrations may be slightly different from your machine.
Certain types may not be available in some countries. For details, contact your local dealer.
Two kinds of size notation are employed in this manual. With this machine refer to the metric version.
For good print quality, Ricoh recommends that you use genuine Ricoh toner.
Ricoh shall not be responsible for any damage or expense that may result from the use of parts other than
genuine Ricoh parts in your Ricoh office product.
Power Source: 220 ~ 240 V, 50/60 Hz, 2.2 A
Please make sure to connect the power cord to a power source as above. For details about power connection, refer to page 8.
Trademarks
Microsoft„, Windows„, and MS-DOS„ are registered trademarks of Microsoft Corporation in the United
States and/or other countries.
Other product names used herein are for identification purposes only and might be trademarks of their
respective companies. We disclaim any and all rights in those marks.
© Copyright 1998, RICOH CO., LTD.
Declaration of Conformity
“The Product complies with the requirements of the EMC Directive 89/336/EEC and the Low Voltage
Directive 73/23/EEC.”
In accordance with ISO Standard 7001, this machine uses the following symbols for the main switch:
a means POWER ON.
b means POWER OFF.
Safety Information
When using your machine, the following safety precautions should always
be followed.
Types of warnings used in this manual
WARNING
Ignoring this warning could cause serious injury or even
death.
CAUTION
Ignoring this caution could cause injury or damage to property.
Symbol examples
The d symbol means a situation that requires you take care.
The m symbol means you MUST NOT carry out this operation.
This example means “Do not take apart.”
The ● symbol means you MUST perform this operation.
This example means “You must remove the wall plug.”
i
WARNING:
• Use of controls or adjustment or performance of procedures other than those
specified in this manual may result in hazardous radiation exposure.
• Only connect the machine to the power source described on the inside of the
front cover.
• Avoid multi-wiring.
• Do not damage, break or make any modifications to the power cord. Do not
place heavy objects on it, pull it hard or bend it more than necessary. These
actions could cause an electric shock or fire.
• Do not plug or unplug the power cord with your hands wet. Otherwise, an
electric shock might occur.
• Make sure the wall outlet is near the machine and freely accessible so that in
event of an emergency it can be unplugged easily.
• Do not remove any covers or screws other than those specified in this manual.
Some parts of the machine are at a high voltage and could give you an electric shock. Also, reflected eye contact with the leaser beam may cause serious eye damage. When the machine needs to be checked, adjusted, or repaired, contact your service representative.
• Do not take apart or attempt any modifications to this machine. There is a
risk of fire, electric shock, explosion or loss of sight.
• If the machine looks damaged or breaks down, smoke is coming out, there
is a strange smell or anything looks unusual, immediately turn off the power
switch then unplug the power cord from the wall. Do not continue using the
machine in this condition. Contact your service representative.
• If metal, liquid or foreign matter falls into the machine, turn off the power
switch, and unplug the power cord.
Contact your service representative. Do not keep using the machine with a
fault or defect.
• Do not put any metal objects or containers holding water (e.g. vases, flowerpots, glasses) on the machine. If the contents fall inside the machine, a fire
or electric shock could occur.
• Do not incinerate used toner or toner cassettes. Toner dust might ignite when
exposed to an open flame. Dispose of the used toner cassettes according to
local regulations for plastics.
ii
CAUTION:
• Keep the machine away from humidity and dust. A fire or an electric shock
might occur.
• Do not place the machine on an unstable or tilted surface. If it topples over,
it could cause injury.
• When you move the machine, unplug the power cord from the wall outlet to
avoid fire or electric shock.
• When the machine is not be used for a long time, unplug the power cord.
• When you pull out the plug from the socket, grip the plug to avoid damaging
the cord and causing fire or electric shock.
• If you use the machine in a confined space, make sure there is a continuous
air turnover.
• Do not reuse stapled paper. Do not use aluminium foil, paper containing
carbon or any other conductive paper. Otherwise, a fire might occur.
• When removing misfed paper, or replacing the toner cassette and the cleaning pad, do not touch the fusing section because it could be very hot.
• This machine has been tested for safety using this supplier’s parts and
consumables. We recommend you only use these specified supplies.
iii
Energy Star program
Energy Star®
As an Energy Star partner, we have determined that
this machine model meets the Energy Star Guidelines for energy efficiency.
The Energy Star Guidelines intend to establish an international energy- saving system for
developing and introducing energy-efficient office equipment to deal with environmental issues, such as global warning.
This product was designed to reduce the environmental impact associated with printing
equipment by means of energy-saving features such as Low Power mode.
• Low Power Mode
This machine automatically lowers its power consumption 15 minutes after the last
printing job has been completed. To exit Low Power mode, press any key on the
operation panel.
The machine returns to the ready condition in about 22 seconds. To change the low
Power delay, see page 58.
Specification
Low Power Mode
(Economy Mode)
Type 1, 2
Power consumption 15 W
Default delay
15 min.
Recovery time
22 sec.
Recycled paper
Please contact your sales or service representative for recommended recycled paper types
that may be used in this machine.
iv
Contents
Safety Information .............................................................................. i
Energy Star program .......................................................................... iv
General Description ............................................................................ viii
Operation Panel .................................................................................. x
1. SETTING UP
Package Contents ...............................................................................
Location ..............................................................................................
Installing the Starter Toner Cassette ...................................................
Unlocking the Scanner Lock ..............................................................
Installing the Upper Paper Tray ..........................................................
Other Settings for Type 2 ...................................................................
To remove the protective sheet .......................................................
To install the document output tray ................................................
Connecting to a computer...................................................................
Turning On the Machine ....................................................................
1
1
2
3
4
5
5
6
7
8
2. GETTING ACQUAINTED
Paper and Other Media .......................................................................
Loading Paper .....................................................................................
To load plain paper into the upper paper tray .................................
To load small size paper .................................................................
Loading Other Media .........................................................................
To load envelopes ...........................................................................
To load transparencies ....................................................................
To load label paper .........................................................................
Connecting a Second Printer (Additional Printer) .............................
To connect to a second printer ........................................................
Installing the Paper Feed Unit (Option) .............................................
Paper Feed Unit Part Names ..........................................................
To install the Paper Feed Unit ........................................................
To load paper into the paper feed unit ............................................
To change the paper size ................................................................
To specify the paper size ................................................................
To install the paper size indicator ...................................................
To select the paper source ..............................................................
Upgrading Memory ............................................................................
9
10
10
12
14
14
14
14
15
15
16
16
16
18
19
19
20
20
21
v
3. PRINTING
Setting Up For Printing ......................................................................
To install the printer driver under Windows® 95 ............................
To install the printer driver under Windows® 3.1x .........................
New Hardware Found Window ......................................................
Features You Can Access From the Printer Driver .............................
Using the Second Printer (Additional Printer) ...................................
To print to the second printer .........................................................
23
23
24
24
25
26
26
4. COPYING
Making a Copy ...................................................................................
Making Multiple Copies .....................................................................
Making a Book Copy .........................................................................
Reduction and Enlargement ...............................................................
To set the reduction factor ..............................................................
To set the enlargement factor .........................................................
Zoom (In 1% Increments) ..................................................................
To use zoom....................................................................................
Adjusting Copy Image ........................................................................
To select the resolution/photo setting .............................................
To adjust the image density ............................................................
Setting an Original onto the ADF (Type 2 only) ................................
Sorting Output (Type 2 only) .............................................................
To turn sorting on and off ...............................................................
27
28
29
30
30
31
32
32
33
33
34
35
37
37
5. TROUBLESHOOTING
General problems (printing and copying) .......................................... 39
Clearing a Paper Misfeed ................................................................... 43
Paper feed unit ................................................................................ 47
6. USER MAINTENANCE
Daily Maintenance .............................................................................
Replacing the Toner Cassette And the Cleaning Pad .........................
Storage ................................................................................................
Paper ...............................................................................................
Toner Cassette ................................................................................
vi
49
50
53
53
53
7. TECHNICAL REFERENCE
Printing the Help List .........................................................................
Selecting the Language ......................................................................
Selecting 300 dpi or 600 dpi...............................................................
Economy Mode ..................................................................................
Changing the Economy Mode ........................................................
Selecting Toner Save Mode ................................................................
54
55
56
58
58
59
8. SPECIFICATIONS ......................................................................... 60
Index ................................................................................................ 63
vii
General Description
Type 1
The following describes the Type 1 machine. This information also applies
to the Type 2 machine, except where specifically noted in the next page.
Platen cover
Lift this cover to access the
exposure glass when you want to
place an original on it for
copying.
Upper paper tray
Holds up to 100 sheets
of plain paper for
copying and printing.
Exposure glass
Place originals on this
glass face down for
copying.
Top unit
Operation panel
Key panel for controlling
the machine.
Extend tray
Pull out to support paper
output from the machine.
Output tray
Power switch
Turns the machine on and
off.
Top release lever
Pull to release the top unit
and open it.
Copy and printer output is
automatically stacked up to 50
sheets of plain paper on this tray.
Scanner lock
Locks the scanner to prevent
damage during transport.
Be sure to release this lock
before using the machine.
Small size paper
feed access panel
This panel can be
lowered to provide
easier handling when
printing on or
copying to small size
paper.
SIMM cover
Open this cover
when you want to
install a SIMM and
expand memory.
Power socket
Second Printer
(Additional Printer) port
You can connect a second printer
to this port.
Computer port
Connect your computer here.
viii
The following describes the Type 2 machine.
Original Guide
Automatic Document Feeder
(ADF)
Upper
paper tray
Holds up to 10 sheets of paper for automatic
feeding. Place originals face down.
Guides the original
correctly into the
machine. Set the original
so it is under this guide.
Document guides
Slide the left guide to fit
the size of the paper you are feeding.
Exposure glass
Top unit
Operation Panel
Power switch
Extend tray
Platen cover
Top release lever
Output tray
Lift this cover to access the exposure
glass when you want to scan a page
from a book, magazine, or any other
original that cannot be fed using the
ADF.
Document output tray
Scanner lock
Originals that pass through the machine’s
scanner mechanism during copying operations
are automatically stacked on this tray.
Extend tray
Extend to support
originals.
Small size
paper feed
access panel
SIMM cover
Power socket
Second Printer
(Additional Printer) port
Computer port
ix
GENERAL
DESCRIPTION
Type 2
Operation Panel
1
F
E
2
3
G
4
5
6
H
1 Check Display
This indicator lights up to alert you
to read the message on the display.
2 PC Interface
This indicator lights while the
machine is receiving data from a
connected computer.
3 Second Printer
Pressing this key switches between
printing on the machine (Second
Printer indicator off) and printing on
a second printer connected to the
machine (Second Printer indicator
on).
4 Reduce
Press this key to reduce an image
during copying. Available reduction
ratios are: 50%, 71%, 82%, 87% and
93%.
x
5 Enlarge
Press this key to enlarge an image
during copying. Available
enlargement ratios are: 115%,
122%, 141% and 200%.
6 Paper Select
Press this key to specify the paper
size. When the paper feed unit
(option) is installed, press this key to
switch between paper sources.
7 Density key
Press this key to select the image
density settings: Darker, Auto, Lighter.
8 Quantity keys
Press these keys to specify the
number of copies or to change
numeric values on the display.
9 Start
Press this key to start an operation.
C
GENERAL
DESCRIPTION
D
B
A
0
9
7
Note
8
Be sure to peel the protective sheet from the
operation panel.
0 Stop
Press this key to interrupt the current
ongoing procedure and return to the
stand by state. This key operates as a
kind of escape key.
Holding down this key for 3 seconds
resets the printer mode.
A Economy Mode/
Clear Modes key
Pressing this key cancels the
ongoing operation and clears the
settings of the current mode to their
initial defaults.
Holding down this key for about one
second switches the Economy Mode
on and off.
Refer to “Economy Mode” on page 58.
B OK
Press this key to execute an
operation that is prompted by a
message on the display.
C Zoom
Press these keys to tune the preset
reduction and enlargement factors to
the exact value you want.
D Help/Function
Press this key and then input a
function number to perform
various settings and list printing
functions.
E Copy Mode key
Press this key to specify the Copy
Mode. A pointer (T) appears on the
display to indicate the current
Text Fine/Photo1/Photo2 setting.
F Display
Displays messages and prompts
during operation.
G Memory Copy (Type 1 only)
Press this key to select Memory
Copy. (Your original will be scanned
only once when making multiple
copies.)
H Sort/Memory Copy
(Type 2 only)
Press this key to turn Sorting and
Memory Copy on and off.
Sorting is activated when the pointer
is visible on the display above Sort/
Memory Copy.
xi
1. SETTING UP
Package Contents
WARNING
Make sure the wall outlet is near the machine and freely accessible so that in event of an
emergency it can be unplugged easily.
Do not put any metal objects or containers holding water (e.g. vases, flowerpots, glasses)
on the machine. If the contents fall inside the machine, a fire or electric shock could occur.
CAUTION
Keep the machine away from humidity and dust. A fire or an electric shock might occur.
Do not place the machine on an unstable or tilted surface. If it topples over, it could cause injury.
If you use the machine in a confined space, make sure there is a continuous air turnover.
Location
Conditions
Temperature
Humidity
Optimum
Recommended
10 to 35°C (50 to 95°F)
15 to 25°C (59 to 77°F)
15 to 80%
30 to 70%
• The machine must be level within 3mm (0.11") both front to rear and left to right.
Locations to Avoid
• Avoid exposed to direct sunlight or strong light (more than 2,000 lux.).
• Avoid directly exposed to cool air from air conditioner’s or heated air from heater’s.
Sudden temperature changes can cause condensation to form inside the machine.
• Avoid where the machine mi,ght be subjected to frequent strong vibration.
• Places higher than 2,500m (8,221ft.) above sea level.
Machine Location
Min. 180mm (7.09")
Place the machine near the wall outlet, providing minimum
(Back)
clearance as shown.
Min. 50mm
(1.97")
Machine
Min. 30mm
(1.18")
(Front)
1
1. SETTING UP
Make sure that all of the items shown in the Package Contents sheet that
comes with the machine are included.
SETTING UP
Installing the Starter Toner Cassette
Pull the top release lever (1) and open
1 the
2
top unit (2).
1
2
Hold the starter toner cassette by its
handle, and remove it from its vinyl bag.
CAUTION
Keep all plastic bags out of the reach of children.
Important!
Be sure to hold the starter toner cassette by
its handle.
Note
Keep the vinyl bag for later repackaging when
necessary.
3
Holding the starter toner cassette by its
handle, gently shake it side to side 5 or
6 times to evenly distribute the toner
inside.
Important!
Be sure to hold the starter toner cassette by its
handle.
4
2
Look inside the machine and note the
locations of the arrows that indicate the
toner cassette guides on either side.
Handle
SETTING UP
5
Make sure the plastic pins (marked with
“*” in the illustration next to step 3 )
on either side of the starter toner cassette slide along the guides inside the
machine.
Note
6
1. SETTING UP
Be sure to hold the starter toner cassette by its
handle.
To close the top unit, press down firmly
but gently on both sides of it until the
top unit closes and clicks securely into
place.
Note
Background gray cast is sometimes evident
just after installing a new toner cassette.
Unlocking the Scanner Lock
Important
Be sure to unlock the scanner lock before using the machine.
The machine will not operate correctly if the scanner lock is not unlocked.
1
Unlock the scanner lock which is located
at the back of the machine.
3
SETTING UP
Installing the Upper Paper Tray
1
Look at the rear of the machine and
note the locations of the holes for insertion of the upper paper tray on both
sides.
2
To install the upper paper tray, press
down on both sides of the tray, making
sure that it is inserted as far as it will go.
Note
Paper will not be fed correctly into the machine if the upper paper tray is not inserted
all the way in.
4
SETTING UP
Other Settings for Type 2
To remove the protective sheet
Open the ADF cover (1) and then remove the protective sheet (2).
1
1. SETTING UP
1
2
2
Close the ADF cover and make sure it
locks securely into place.
5
SETTING UP
To install the document output tray
1
Look at the rear of the machine to confirm where the document output tray
should fit.
2
Insert the pin at one side of the tray by
gently bending the document tray until
it fits in the insert hole.
3
Make sure the small pieces of plastic
film curl upwards as shown.
Important!
The original will not be delivered properly, if
the films are not set as shown.
6
SETTING UP
Connecting to a computer
Important!
Make sure that the power of both the machine and your computer is turned off
before making the connection.
Plug one end of the your printer cable
into the lower port on the side of the
machine, and secure it in place as shown
in the illustration.
1. SETTING UP
1
Note
• The machine must be connected to a computer for printing.
• Use the cable that comes with the machine to connect to your computer.
7
SETTING UP
Turning On the Machine
WARNING
• Only connect the machine to the power source described on the inside of the front cover.
• Avoid multi-wiring.
• Do not damage, break or make any modifications to the power cord. Do not place heavy
objects on it, pull it hard or bend it more than necessary. These actions could cause an
electric shock or fire.
• Do not plug or unplug the power cord with your hands wet. Otherwise, an electric shock
might occur.
Important!
When you turn on the machine for the first time after the installation, make sure
that no paper is loaded beforehand.
8
1
Attach the power cord to the machine
and plug the other end into a outlet.
2
Turn on the machine.
2. GETTING ACQUAINTED
Paper and Other Media
The machine supports printing on the following types of paper/media from
the upper paper tray.
Refer to the following pages for details on loading each type of paper/media
into the upper paper tray.
Envelopes
Display
A4 (210mm × 297mm)
A4
A5 (148mm × 210mm)
A5
81/4" × 13"
81/4 × 13
Letter
(81/2"
81/2"
×
51/2"
81/2"
× 13"
× 11")
Page
p.10
;
Letter
p.10
(81/2
p.10
× 11)
p.10
81/2
×
81/2
× 13
p.10
8" × 101/2"
8 × 101/2
p.10
Legal (81/2" × 14")
Legal (81/2 × 14)
p.10
A5 (210mm × 148mm)
A5
:
p.12
C5 Envelope (162mm × 229mm)
C5 Env
p.12, 14
C6 Envelope (114mm × 162mm)
C6 Env
p.12, 14
DL Envelope (110mm × 162mm)
DL Env
p.12, 14
51/2
2. GETTING
ACQUAINTED
Plain paper
Paper/Media type (Paper size)
p.10
Transparencies
p.14
Label paper
p.14
Note
Do not attempt to use the following types of paper: wrinkled or creased paper,
curled or rolled paper, paper containing carbon, carbon-backed paper, coated
paper, onion skin or other very thin paper.
CAUTION
Do not reuse stapled paper. Do not use aluminium foil, paper containing carbon or other
conductive paper. Otherwise, a fire might occur.
9
GETTING ACQUAINTED
Loading Paper
After you set up the machine and specify the paper size, you are ready to
actually load paper.
Important!
When loading paper into the upper paper tray, make sure that you load maximum
100 sheets of plain paper (80 g/m2 or 20 lb). Overloading the upper paper tray can
cause misfeeds.
To load plain paper into the upper paper tray
1
Fan the stack of paper to make sure that
all pages are free and are not sticking
together. The upper paper tray holds up
to 100 sheets of plain paper (80 g/m2
or 20 lb).
2
Straighten up all four sides of the stack,
by tapping them on a desk or table top.
3
Set paper into the upper paper tray.
Make sure that the top of the stack is
not higher than the limit mark on the
tray guide.
4
Squeeze the tray guide and slide it
against the edge of the stack.
10
GETTING ACQUAINTED
5
Press
. “Prt Help List” appears.
6
Press
or
“1 Tray Pap. Size” appears.
until
Prt Help List
1 Tray Pap. Size
1 Tray Pap. Size
3 User Param.
2 Language
Note
7
Press
8
After pressing
, press
or
until the desired size appears. The sizes change in the following order.
A4 ?
.“Tray guide OK?” appears.
A5 ; ?
Legal (81/2 × 14) ?
8 × 101/2 ?
9
Tray guide OK?
OK
A4 ?
81/4 × 13 ?
Letter (81/2 × 11)?
81/2 × 13?
81/2 × 51/2?
When the correct paper size is on the
display, press
. “Registered” appears. If the paper feed unit (option)
(page 17) is installed, you can also select its paper size at this time.
Registered
Tip
If the paper feed unit (option) is not
installed, you can press
place of
skip step 6 and
to step 8 .
in step
7
in
5
. Next,
, and jump directly
11
2. GETTING
ACQUAINTED
If the paper feed unit (option) is installed, refer to page 19 for details on how to
specify the paper size.
GETTING ACQUAINTED
To load small size paper
Note
We recommend that you always feed small size paper vertically, with one of its
shorter edges feeding into the machine.
1
Remove all paper before loading small
size paper in the upper paper tray.
2
Open the small panel on the back of
the machine by unlatching it as shown
in the illustration. Opening the small
panel makes it easy to handle small size
paper.
3
Set paper into the upper paper tray.
Make sure that the top of the stack is
not higher than the limit mark on the
tray guide.
4
After setting the paper into the tray, raise
the small panel until it snaps securely
into place.
12
Unlatch Here
GETTING ACQUAINTED
5
Press
. “Prt Help List” appears.
6
Press
or
“1 Tray Pap.Size” appears.
until
Prt Help List
1 Tray Pap. Size
1 Tray Pap. Size
3 User Param.
2 Language
Note
7
Press
. “Tray guide OK?” appears.
8
After pressing
, press
or
until the desired size appears. The sizes change in the following order.
A5 : ?
A5 :
OK
?
C5 Env?
DL Env ?
9
Tray guide OK?
C6 Env ?
When the correct paper size is on the
. “Registered” apdisplay, press
pears.
Registered
Tip
If the paper feed unit (option) is not
installed, you can press
place of
skip step 6 and
to step 8 .
in step
7
in
5
. Next,
, and jump directly
Note
• Be sure to specify the paper size before printing on A4 or Letter paper again.
13
2. GETTING
ACQUAINTED
If the paper feed unit (option) is installed, refer to page 19 for details on how to
specify the paper size.
GETTING ACQUAINTED
Loading Other Media
Use the following procedures to load envelopes, transparencies, and label paper.
To load envelopes
Load up to 5 envelopes at a time, using the same procedure for loading
small size paper on page 12.
• Insert envelopes print side up with the stamp
position as shown.
Flap
• Envelope flaps should be securely folded down, so the envelope is “closed”.
This is especially important when printing on envelopes with adhesive on the
flaps, because heat generated during the printing process can cause the adhesive to melt and get on rollers.
Note
Refer to the paper select operation on page 13.
To load transparencies
Load only one transparency at a time, using the plain paper loading procedure on page 10 for large transparencies, and the small paper loading procedure on page 12 for small transparencies.
Note
Refer to the paper select operation on page 11 for large transparencies or page
13 for small ones.
To load label paper
Load only 10 sheets of label paper at a time, using the plain paper loading
procedure on page 10.
Note
Refer to the paper select operation on page 11.
14
GETTING ACQUAINTED
Connecting a Second Printer (Additional
Printer)
The machine features a port that you can use to connect your current printer
as a second printer (additional printer). Once you do, you have a selection
of this machine or the second printer at the touch of
key.
Note
Make sure that the power of your computer is turned off before making the connection.
1
Turn off both the machine and your second printer.
2
Connect one end of a parallel interface
cable to your second printer.
3
Connect the other end of the cable to
the second printer port, securing it in
place with the screws.
2. GETTING
ACQUAINTED
To connect to a second printer
Note
• It requires a standard 36-pin parallel cable
compliant with IEEE 1284.
• Refer to page 26 for details on using the second printer.
15
GETTING ACQUAINTED
Installing the Paper Feed Unit (Option)
This section describes how to install the paper feed unit (option) and how
to load paper in it. Addition of a paper feed unit provides you with a second
paper source that holds up to 250 sheets of A4 or Letter size paper.
Important!
Make sure that machine power is turned off and that the power cord is unplugged
from the power socket before installing the paper feed unit.
Paper Feed Unit Part Names
1 Front guide
2 Side guide
3 Limit mark
4 Paper size indicator
5 Connector
6 Corner guides
7 Metal plate
3
2
6
4
1
To install the Paper Feed Unit
1
Remove all the packing tapes from the
paper feed unit and pull the paper tray
out of the unit.
2
After removing all tapes and cardboard
from inside of the paper tray, insert the
tray back into the machine until it locks
into place. Locate the paper feed unit
where you plan to use the machine.
Note
Be sure to place the paper feed unit on a level
surface.
16
5
7
GETTING ACQUAINTED
3
The machine has handhold at the locations shown in the illustration. Note that
the illustration shows the machine as
viewed from above.
2. GETTING
ACQUAINTED
• This illustration shows the handhold location on the right side of the machine.
• This is the handhold location on the left
side of the machine.
4
Carefully lower the machine onto the
paper feed unit, making sure that the
dowels on the paper feed unit fit into
holes in the bottom of the machine
properly.
CAUTION
When lifting the machine, make sure your
hands are at the locations indicated by “ ” in
*
the illustration. This protects against pinching
your fingers between the machine and paper
feed unit.
Note
After the above installation, attach the power cord to the machine, and plug the
other end into an outlet. Refer to page 8 for details.
17
GETTING ACQUAINTED
To load paper into the paper feed unit
You can load either A4 or Letter size paper into the paper feed unit.
Refer to page 19 for details on how to change the positions of the paper
guides inside of the tray to match the type of paper you are using.
1
Pull out the paper tray and remove it
from the paper feed unit.
2
Press down on the metal plate in the
bottom of the paper tray until the plate
locks into place with a “click”.
3
Up to 250 sheets of plain paper (80 g/m2
or 20 lb) can be inserted into the paper tray as shown in the illustration.
Make sure that the top of the stack is
not higher than the limit mark on the
side fence.
Note
Make sure the leading corners of the paper
fit under the corner guides.
4
18
Slide the paper tray back into the paper feed unit until it locks into place.
GETTING ACQUAINTED
To change the paper size
1
Squeezing in on both sides of the front
guide, slide it to the correct position
for the desired paper size.
2
Squeezing in on both sides of the side
guide, slide it to the correct position
for the desired paper size.
2. GETTING
ACQUAINTED
Use the following procedure to set the positions of the paper guides inside
the paper tray for either A4 or Letter paper.
Important!
Whenever you change the paper size, be sure to also specify the paper size using
the operation panel.
To specify the paper size
After you install the paper feed unit (option), you can select between the
upper paper tray and the paper feed unit as the paper source, and specify
the size of paper in the paper feed unit.
1
Press the
pears.
. “Prt Help List” ap-
2
Press
or
Tray Pap. Size” appears.
until “1
Prt Help List
1 Tray Pap. Size
1 Tray Pap. Size
3 User Param
2 Language
19
GETTING ACQUAINTED
Press
3
.
OK
Lower Tray?
Note
The actual message that appears on the machine's display depends on the paper
source you last used. If "Upper Tray?" appears, press
or
to display the "Lower Tray?" message before proceeding with step 4 .
After pressing
, press
or
until the desired size appears.
4
Letter(81/2 × 11)?
Letter (81/2 × 11) ? ↔ A4 ?
When the correct size is on the display,
. “Registered” appears.
press
5
Registered
To install the paper size indicator
1
Break off the paper size indicator (1).
Positioning the indicator so the side that
shows the paper size you are using (A4
or Letter) is facing outwards, insert it
into the front of the paper tray (2).
1
2
To select the paper source
1
Press
until the desired paper source appears.
The upper paper tray is selected when
"U" is on the display, and the paper feed
unit is selected when "L" is on the display.
100%
U 01
100%
L 01
Note
Refer to page 10 for details on using the upper paper tray.
20
GETTING ACQUAINTED
Upgrading Memory
You can install Single Inline Memory Module (SIMM) to upgrade the onboard memory of the machine.
The machine is shipped from the factory with a 4MB SIMM, which can be
replaced with an 8MB, 16MB or 32MB SIMM.
Use the following procedure to install 8MB, 16MB or 32MB SIMM.
Note
The following are the required specifications for a SIMM used with this machine:
72-pin, 60ns, Extend Date Out (EDO), parity/non-parity.
1
Turn off the machine.
2
Remove the SIMM cover located on the
left side of the machine.
3
Pull apart the hooks on the both sides
of the SIMM board that hold it in place.
SIMM
21
2. GETTING
ACQUAINTED
Important!
Make sure you touch some grounded metal object with your hand to discharge any
electrostatic charge from your body before handling the SIMM.
GETTING ACQUAINTED
4
Carefully lift out the SIMM board currently installed on your printer.
5
Angle the new SIMM board as shown in
the illustration, and insert it down into
the slot. Gently rock it back and forth
until you hear it snap into place.
Important!
Make sure the SIMM board is oriented correctly when you insert it into the slot.
6
Make sure the hooks on the sides of the
SIMM board snap securely into place.
SIMM
7
22
Replace the cover by inserting its tabs
into the holes provided, as shown in
the illustration.
3. PRINTING
Setting Up For Printing
In order to use the machine as a printer, you must install its printer driver
on your computer. The printer driver can be found on the diskette that
comes with the machine. Use the following procedure to install the printer
driver.
Note
•
•
•
The following procedure assumes that you are already familiar with basic
computer operations. If you aren’t, consult the documentation that comes with
your computer and its operating system.
Refer to online help and Read me file of the printer driver.
Perform the procedures under “Connecting to a computer (p. 7)” and “Loading Paper (p. 10)” before trying to perform the following procedures.
1
If the “New Hardware Found” window is open, click [Cancel] to close it.
2
Quit all applications.
3
The next step you should perform depends on whether you are installing
from diskette.
< To install from diskette, follow these steps >
• Insert the diskette into your computer’s floppy disk drive (usually named A: or
B:).
• Click [Start] and then [Run].
• Type A: INSTALL (replace “A” with the name of your disk drive if it is different)
and then click [OK].
• Follow the instructions that appear on your computer screen. Note that installation takes a few minutes. After it is complete, remove the diskette from your
computer’s drive.
23
3. PRINTING
To install the printer driver under Windows®95
PRINTING
To install the printer driver under Windows®3.1x
1
Quit all applications except Program Manager.
•
•
•
•
2
Press [Alt] + [Tab] to display the Task List window.
Select the application you want to quit.
Click [End Task] and then press [Enter] to quit the program.
Repeat the above steps as many times as necessary to quit all applications that
are running.
The next step you should perform depends on whether you are installing from diskette.
< To install from diskette, follow these steps >
• Insert the diskette into your computer’s floppy disk drive (usually named A: or B:).
• On the Program Manager [File] menu, click [Run].
• Type X:INSTALL, replacing “X” with the name of the drive from which
you are installing, and then click [OK].
• Follow the instructions that appear on your computer screen. Note that
installation takes a few minutes. After it is complete, remove the diskette from
your computer’s drive.
New Hardware Found Window
Perform the following steps when the New Hardware Found window appears
after you first install the driver.
1
Click [Do not install a driver (Windows will not prompt you again).]
2
Click [OK].
Note
If the above window does not appear after you first install the driver, check to
make sure that the printer driver was installed properly and that you are using a
suitable cable to connect the machine to your computer.
The above dialog box will not appear if you partially or completely installed this
printer driver before.
24
PRINTING
Features You Can Access From the Printer
Driver
Printer Driver Contents
■ Paper Defaults
Paper size
Page orientation
Output
Paper source
About
■ N-Up Printing
Select a Layout Option
:
:
:
:
Size, Measurement Unit
Portrait, Landscape
Copies, Print in reverse order
Source
: Normal, Reduce for N-up printing
(Print page borders ; 2 pages up/sheet ; 4 pages up/sheet)
■ Document
Automatic
Graphics Mode
Font Resolution(dpi)
Graphics Resolution
Halftone
Job Settings
Raster
600
High
Screening
Photo
Desktop
(Grayscale) Publishing
Raster
GL/2
600
600
High
High
Screening Screening
High Speed
Draft
Raster
300
High
Screening
Business
Graphics
Raster
600
High
Dithering
: True Type Mode, Name
■ Configuration
Device Configuration
: Feeder ; Toner Save Mode ; Time-out
■ Fonts
Font Manager (To add printer fonts)
■ Overlays
Overlay Assignments : None, All pages, Odd/Even pages, First/Other pages
Cover/Divider page Overlays
Create New Overlay
Manage Overlays
: Get files from other sources to use as overlays, Send created overlays
to other sources, Rename overlays, Remove overlays
Important!
After printing a large number of pages, be sure not to turn off the machine in
several minutes.
Note
Be sure to use online help and Read me file of the printer driver to get the most
out of all the printer features and functions.
25
3. PRINTING
Document Type Settings
PRINTING
Using the Second Printer (Additional Printer)
Use the following procedure to switch between this machine and a second
printer when a second printer is connected.
Important!
If the second printer has a Bi-Direction mode, make sure to set the Bi-Direction
mode to Off.
Note
Refer to page 15 for details on connecting a second printer.
To print to the second printer
1
Press
indicator lights.
. The Second Printer
Important!
Whenever you change printers, be sure to also
change to the appropriate printer driver on
your computer.
Note
While the Second Printer Indicator is lit, print
data from your computer passes through the
machine to the second printer.
2
26
Perform the required print operation
with the application you are using.
4. COPYING
Making a Copy
1
Lift the platen cover (1). Place the
original face down at the arrow mark
on the scale (2). Close the platen
cover (3).
1
3
2
2
Press
tion.
to perform the copy opera-
Important!
After copying a large number of pages, be sure not to turn off the machine in several
minutes.
Note
When printing to label paper, envelopes, transparencies, or thin paper (60 g/m2
or 16 lb), remove each printout as it comes out of the machine. If you don't, printed
output can fall out of the output tray, which can cause it to become curled.
4. COPYING
Alignment of Originals
Align the original with the scale of the exposure glass.
• When the original is a standard size such as
A4 or Letter, align it to the indexes on the scale.
• When your original is not standard size, align
the upper left edge of the original to the arrow mark on the scale.
For Type 2 Users
• When the original is smaller than the paper
you are copying to, place a second sheet of paper that is larger than the paper
you are copying to on top of the original when you place the original onto the
exposure glass.
27
COPYING
Making Multiple Copies
You can specify the number of copies to be printed by pressing
(to reduce the number).
increase the number) or
Lift the platen cover (1). Place the
original face down at the arrow mark
on the scale (2). Close the platen
cover (3).
1
1
(to
3
2
Press
or
until the desired number of copies appears.
2
100%
10
Note
You can specify the number of copies in the
range of 01 to 99.
Press
tion.
3
to perform the copy opera-
Note
During the copy operation, the display shows
the number of copies printed so far and that
to be printed. For example, 02/10 appears
while the second copy of a run of 10 copies is
being printed.
Page number
P.01
Number of
copies printed
so far
02/10
Number of copies
to be printed
Tips
• Press
•
to clear the setting after the copying has been finished.
(Type 1) or
(Type 2) produces copies at a faster speed,
but it can also result in a loss of printout quality.
• With a Type 2 machine, using
automatically.
28
also activates the Sort feature
COPYING
Making a Book Copy
When copying from a book, the thickness of the book should be no more
than 30mm (1.18").
1
Lift the platen cover.
2
Open to the page you want to copy and
lay the page face down on the exposure
glass. Be sure to align one of the corners of the page with the arrow mark
on the scale.
3
Lower the platen cover.
4
Press
eration.
4. COPYING
to perform the copy op-
29
COPYING
Reduction and Enlargement
Press
or
the copy operation.
to select preset reduction or enlargement factors for
To set the reduction factor
1
Lift the platen cover (1). Place the
original face down at the arrow mark
on the scale (2). Close the platen
cover (3).
1
3
2
2
Press
until the desired size ratio appears. The sizes change in the following order.
100% → 93% → 87% → 82%
50% ← “71% A4
3
Press
eration.
A5”
to perform the copy op-
Note
Press
copying.
30
to clear the setting after
100%
Ratio (%)
93
87
82
71
50
01
Original ➝ Paper size
A little reduced.
A4 ➝ B5
B5 ➝ A5
A4 ➝ A5
Reduced by 1/4.
COPYING
To set the enlargement factor
1
Lift the platen cover (1). Place the
original face down at the arrow mark
on the scale (2). Close the platen
cover (3).
1
3
2
Press
until the desired size ratio appears. The sizes change in the following order.
→
100%
115%
200% ← “141% A5
3
Press
eration.
→
122%
A4”
100%
Ratio (%)
115
122
141
200
01
Original ➝ Paper size
B5 ➝ A4, B6 ➝ A5
A5 ➝ B5
A5 ➝ A4
A6 ➝ A4
to perform the copy op-
Note
Press
to clear the setting after
copying.
4. COPYING
2
31
COPYING
Zoom (In 1% Increments)
Zoom allows you to tune the preset reduction and enlargement factors to exactly the value you want. You can change the zoom factor in increments of 1%.
To use zoom
Setting Range
200 to 50%
1
Lift the platen cover (1). Place the
original face down at the arrow mark
on the scale (2). Close the platen
cover (3).
50 to 200%
1
3
2
2
Press
(decrease) or
(increase) until the desired
size ratio appears.
100%
99%
3
Press
eration.
to perform the copy op-
Note
Press
copying.
32
to clear the setting after
01
01
COPYING
Adjusting Copy Image
To select the resolution/photo setting
1
Lift the platen cover (1). Place the
original face down at the arrow mark
on the scale (2). Close the platen
cover (3).
1
3
2
2
3
Press the Copy Mode key to specify the
resolution or halftoning method for the
copy operation.
A pointer (T) moves on the display to
indicate the current setting.
The following describes when you should use
each setting.
Use for:
Copying text
Copying photographs
Copying mixed text and photographs
Note
If the memory size of your machine is 4MB, the machine automatically switches
from Photo2 to Photo1 in the following cases.
4
♦ when
the
♦ when
you make multiple copies using the ADF (Type 2 only)
Press
eration.
(Type 1) or
(Type 2) key is on
to perform the copy op-
Note
Press
copying.
to clear the setting after
33
4. COPYING
Setting
[Text Fine]
[Photo1]
[Photo2]
COPYING
To adjust the image density
1
Lift the platen cover (1). Place the
original face down at the arrow mark
on the scale (2). Close the platen
cover (3).
1
3
2
2
Press the Density key to select the image density settings.
• Select [Lighter] to make the image lighter.
• Select [Darker] to make the image darker.
3
Press
eration.
to perform the copy op-
Note
Press
copying.
34
to clear the setting after
COPYING
Setting an Original on the ADF (Type 2 only)
You can load up to 10 sheets of plain paper (80 g/m2 or 20 lb) at a time into
the Automatic Document Feeder (ADF).
Important!
1
Fan the stack of originals. Never try to
place more than 10 sheets of plain paper onto the ADF.
2
Straighten up all four sides of the stack,
by tapping them on a desk or table top.
3
Place the stack of originals face down
on the ADF and slide the document
guide against the side of the stack.
4. COPYING
Check to make sure that the ADF cover is
securely closed before using it.
Note
The side of the original to be copied should
be face down.
4
Insert the stack of originals along the
document guide into the ADF.
Note
Insert your stack of originals into the ADF
until it stops. If you do not push it right in,
the machine will not detect the stack.
35
COPYING
5
Stretch the extend tray that supports the
originals.
6
Press
to perform the copy op-
eration.
Note
• If an original becomes misfed during feeding by the ADF, press
to stop the op-
eration. Refer to“Clearing a Paper
Misfeed” on page 43.
• We recommend to use the TEXT mode when
copying with the ADF.
Originals that do not meet the following requirements can cause paper misfeeds,
and even damage the machine.
■ Requirements
• Thickness
• Weight
• Clear markings
• Uniform page size
• Page condition
36
0.05mm to 0.2mm (0.002" to 0.08")
60 to 90 g/m2 (16lb to 24lb)
Markings on the originals must be clear to be read
correctly.
All pages should be the same size.
Avoid using originals that are bent, curled, damaged,
or stapled, and originals printed on coated paper,
carbon paper, or photographic paper.
COPYING
Sorting Output (Type 2 only)
The following example shows how output is affected by turning sorting on
and off.
Important!
The sort operation requires scanning of all your originals into memory before
starting the copy operation. The number of originals that can be scanned at one
time depends on how much memory you have installed. Refer to page 21 for details on increasing memory capacity.
To turn sorting on and off
1
Set the originals on the ADF.
Note
2
4. COPYING
Refer to page 35 for how to set originals.
Sorting is activated when the T pointer is
visible on the display above Sort/Memory
Copy. Press
to select sorting on and off (no pointer).
37
COPYING
3
When you press
to start the copy
operation, all of the originals on the
ADF are scanned into memory before
they are printed.
Note
Press
copying.
38
to clear the setting after
5. TROUBLESHOOTING
General
Status
Nothing happens
when the machine is
turned on.
Paper misfeeds when
the machine is turned
on for the first time
after the installation.
After installing a SIMM
board, the memory
value that appears on
the machine's display
does not match the
amount of memory installed.
Cause
Remedy
Power cord is not con- Correctly connect the power
nected.
cord to the machine and plug it
into a outlet.
SIMM is not installed correctly. Install the SIMM correctly.
SIMM does not meet the Use a SIMM with the required
required specifications.
specifications.
Paper was loaded in the Remove the paper, turn the mamachine before the ma- chine off and then back on. Afchine was turned on.
ter machine initialization is
complete, load the paper back
into the machine.
SIMM does not meet the Use a SIMM with the required
required specifications.
specifications.
Page
p.8
p.21
p.21
p.8
P.21
Printing and Copying (1/2)
Cause
Remedy
Frequent paper mis- The upper paper tray is not Set the upper paper tray corset correctly
feeds.
rectly.
Improper paper.
Use paper of the correct size and
thickness.
Paper is not fed correctly Realign the paper with the pafrom the upper paper tray. per guide, and if necessary, take
care for the paper to be fed correctly.
Paper is curled or damp. Uncurl the paper.
Insert paper into the upper paper
tray from the least-curled side.
Set paper face down if necessary.
Avoid using damp paper.
Too much paper is loaded Remove some of the paper.
in the machine.
Paper is loaded incorrectly. Check the paper and realign it
if necessary.
Page
p.4
p.9
p.10
p.10,12,18
p.10,12
p.10,12,18
—
p.10,14
p.10,18
39
5. TROUBLESHOOTING
Status
TROUBLESHOOTING
Printing and Copying (2/2)
Status
Cause
Remedy
Page
Frequent paper mis- Attempting to print on both Print on only one side. Two-side p.10,18
feeds.
sides of the paper.
printing is not supported by this
machine.
Printing on an envelope Make sure that envelopes are
p.14
that is too thick.
folded flat.
p.14
Misfeeding of the envelope Make sure that envelope flaps
flap.
are closed (folded down).
Part of the image is Toner is distributed un- Remove the toner cassette, genp.50
unclear.
evenly in the toner cassette. tly rock it left and right a few
times, and replace it into the
machine.
Black lines on the Heat damage to the toner Replace the toner cassette.
p.50
printout.
cassette caused by turning
off the machine too soon
after copying a large
number of pages.
Dark areas along the Turning off the machine too Replace the toner cassette.
p.50
sides of the printout. soon after printing or copying a large number of
pages.
Printing
Remedy
Page
Abnormal or unex- Use of wrong cable.
pected printing results.
Wrong printer driver settings.
Attempting to print from a
DOS application at 600 dpi.
Parts of the image are The correct paper size is
not printed out.
not specified
Cannot print from a Second printer is not consecond printer.
nected correctly.
Status
Use the cable that comes with
this machine.
Change to the correct printer
driver settings.
Change to 300 dpi.
p.7
Specify the paper size using the
operation panel.
Check connections and make
corrections, if necessary.
p.19
Second printer is not selected.
Incorrect settings of the
second printer driver.
so the indiPress
cator above it is lit.
Use the printer driver of the second printer to turn off bi-directional printing.
p.26
40
Cause
p.23
p.56
p.15
p.26
TROUBLESHOOTING
Copying
Cause
Remedy
Page
Unlock the scanner lock, turn
the machine off and then back
on.
p.3
Set the original correctly.
Straighten out the original(s).
Insert the original(s) from the
least-curled side.
Incorrect original specifi- Use originals of the correct size,
cations.
thickness, and quantity.
Original is not fed ADF cover is open.
Close the ADF cover.
from the ADF.
Original is not fed out The document output tray Set the document output tray
properly.
is not set correctly.
and the small pieces of plastic
film correctly.
Periodic black marks Cleaning pad is not in- Correctly install the cleaning
on printed output.
stalled.
pad.
Black lines and marks Copying to small-size paper Place a sheet of the same size as
on printed output with the Type 2 machine. the paper you are printing onto
when copying from the Different size original and behind the original.
exposure glass.
copy paper.
Non-white original back- Adjust the print density.
ground.
Dirty platen cover or expo- Clean the platen cover and exposure glass.
sure glass.
Black and white lines Dirty ADF transport path. Clean the ADF transport path.
on printed output
when using the ADF .
Output too light.
Adjust the print density.
Low contrast original.
Unclear photographic Copying in Text Fine Mode. Use the Copy Mode key to select
images.
the Photo1 or Photo2 Mode.
Parts of the original The correct paper size is Specify the paper size using the
image are not copied. not specified
operation panel.
p.35
p.35
p.35
"Error 90" appears on Locked scanner.
the display, and the copy
operation is aborted
when copying from the
exposure glass.
Frequent original mis- Original is not set correctly.
feeds with ADF.
Curled original(s).
p.36
p.35
p.6
p.50
p.27
p.34
p.49
p.49
p.34
p.33
p.19
5. TROUBLESHOOTING
Status
41
TROUBLESHOOTING
Error Messages
Message
Cause
Close cover
Add paper
Top unit is open.
Machine is out of paper.
Toner near end
Add Toner
Machine is almost out of
toner.
Toner cassette is not loaded
correctly.
Machine is out of toner.
Clear paper
Paper misfeed.
Memory overflow
Not enough memory capacity.
Remove original (when Original misfeed.
original is set in ADF)
“Remove original” An original is under the
platen cover.
and “from glass”
“Memory full” and Too much sort copy data.
“Press Stop”
Remedy
Page
Close the top unit.
p.3
Load paper, and set the copy p.10,18
quantity again during a copy job.
Prepare a toner cassette for re—
placement.
Correctly load the toner cassette
p.2
into the machine.
Replace the toner cassette, and p.50
set the copy quantity again during a copy job.
Remove the misfed paper, and p.43
set the copy quantity again during a copy job.
Either lower the printer driver's p.21,25
"Resolution" setting or increase
memory capacity by installing a
larger SIMM. Press any operation panel key to clear the error
message from the display.
Remove the original from the ADF, p.47
and set the copy quantity again.
Remove the original. If there is
no original, open the platen
—
cover and close it again.
to cancel sort copy, p.21,37
Press
and perform the copy operation
without sorting. If you need to
print big sort copy jobs, increase
memory capacity.
to print pages already p.21, 37
“Memory full” and Too many sort copy pages. Press
stored in memory. If you need
“Press Start”
to print big sort copy jobs, increase memory capacity.
Unlock the scanner lock, turn the
p.3
Locked scanner.
Error 90
machine off and then back on.
p.8
Possible machine defect. Turn power off and then back
Error XX
on again.
If you have a problem with the machine and you can not resolve it by referring to the
information in this chapter, contact your service representative.
In case of “Error XX” messages, be sure to turn off the machine before calling.
42
TROUBLESHOOTING
Clearing a Paper Misfeed
This section describes how to clear a paper misfeed when one occurs.
CAUTION
When removing misfed paper, do not touch the fusing
section because it could be very not.
Important!
Hold a misfed sheet with both hands and slowly pull it out. Do not use a tool such
as a screwdriver or tweezers as this may damage the unit.
Type 1
1
Pull the top release lever (1) and open
the top unit (2).
2
2
5. TROUBLESHOOTING
1
Pull out the toner cassette.
Note
• Be sure to hold the toner cassette by its handle.
• Keep the toner cassette horizontal to avoid
spilling the toner.
43
TROUBLESHOOTING
3
Pressing down on the paper release lever (blue) on the right side, pull out
the misfed paper.
4
Pull out the misfed paper in the directions indicated by the arrows in the illustrations.
Note
• If you are using the paper feed unit (option) and cannot clear the misfeed using this
procedure, use the procedure on page 47
instead.
• Sometimes toner may get on your hands.
5
Install the toner cassette into the machine.
Note
• Be sure to hold the toner cassette by its handle.
• Keep the toner cassette horizontal to avoid
spilling the toner.
• Refer to page 2 for details on how to install
the toner cassette.
6
Close the top unit.
Important!
If a paper misfeed occurs during a copy job, make sure to specify the desired copy
quantity again.
44
TROUBLESHOOTING
Type 2
Area 4
Area 3
Area 1
Area 2
Area 1 or 2
1
Pull the top release lever (1) and open
the top unit (2).
2
1
2
Pull out the toner cassette.
Note
5. TROUBLESHOOTING
• Be sure to hold the toner cassette by its handle.
• Keep the toner cassette horizontal to avoid
spilling the toner.
45
TROUBLESHOOTING
3
Pressing down on the paper release lever (blue) on the right side, pull out
the misfed paper.
4
Pull out the misfed paper in the directions indicated by the arrows in the illustrations.
Note
• If you are using the paper feed unit (option) and cannot clear the misfeed using this
procedure, use the procedure on page 47
instead.
• Sometimes toner may get on your hands.
5
Install the toner cassette into the machine.
Note
• Be sure to hold the toner cassette by its handle.
• Keep the toner cassette horizontal to avoid
spilling the toner.
• Refer to page 2 for details on how to install
the toner cassette.
6
Close the top unit.
Important!
If a paper misfeed occurs during a copy job, make sure to specify the desired copy
quantity again.
46
TROUBLESHOOTING
Area 3 or 4
1
Open the ADF cover.
Note
Be sure to open the ADF cover before pulling
out the misfed original. Failure to do so can
result in damage to the original.
2
Pull out the misfed original.
3
Close the ADF cover, and make sure it
locks securely into place.
Important!
Make sure to specify the desired copy quantity again.
Paper feed unit
Use the following procedure when the misfed paper cannot be removed
using the procedure on page 43 (for Type 1) or page 45 (for Type 2).
Pull out the paper tray.
5. TROUBLESHOOTING
1
47
TROUBLESHOOTING
2
Pull out the misfed paper.
3
Slide the paper tray back into the paper
feed unit until it locks into place.
Tip
If you cannot find a remedy for unexpected printout results here,
check the printer driver's online help for other useful information.
48
6. USER MAINTENANCE
6. USER MAINTENANCE
Daily Maintenance
Clean with a damp cloth and wipe dry.
Note
Turn off the machine before cleaning
Exposure glass
Platen cover
(Type 1)
ADF
(Type 2)
Exposure glass
Platen cover
Platen
49
USER MAINTENANCE
Replacing the Toner Cassette And the
Cleaning Pad
Printing on A4 size paper under the recommended temperature and humidity conditions noted in the table under “Conditions” on page 1, you can
expect a toner cassette to print approximately 3,000 pages when you are
printing typical business letters that have text covering 5% of the total surface. The starter cassette that comes with the machine can print approximately 1,000 pages. Pages that contain graphics use more toner and shortens the life of a toner cassette.
WARNING
Do not incinerate used toner or toner containers. Toner dust might ignite when exposed to an
open flame. Dispose of the used toner cassettes according to local regulations for plastics.
This machine has been tested for safety using this supplier’s parts and consumables.
We recommend you only use these specified supplies.
CAUTION
When replacing the toner cassette and cleaning pad,
do not touch the fusing section because it could be
very not.
1
Open the box of the new toner cassette
and check to make sure it contains a
toner cassette and cleaning pad.
Note
Be sure to hold the toner cassette by its handle.
2
Pull the top release lever (1) and open
the top unit (2).
2
1
50
3
6. USER MAINTENANCE
USER MAINTENANCE
Holding the toner cassette by its handle and pull it out.
Note
Keep the toner cassette horizontal to avoid
spilling the toner.
4
Remove the old cleaning pad.
Note
Be sure to grasp the green handle when removing the cleaning pad.
5
Insert the new cleaning pad into place
by grasping the green handle.
6
Press down gently but firmly on both
sides of the pad to make sure that it is
inserted as far as it can go.
Do not forget to install the cleaning
pad whenever you install a new toner
cassette.
7
Prepare the new toner cassette. Holding the toner cassette by its handle, gently shake it side to side 5 or 6 times to
evenly distribute the toner inside.
Note
Be sure to hold the toner cassette by its handle.
51
USER MAINTENANCE
8
Look inside the machine and note the
locations of the arrows that indicate the
toner cassette guides on either side.
9
Make sure the plastic pins (marked with
“ * ” in the illustration next to step
above) on either side of the toner cassette slide along the guides inside the
machine.
Note
Be sure to hold the toner cassette by its handle.
10
To close the top unit, press down firmly
but gently on both sides of it until the
top unit closes and clicks securely into
place.
Note
Background gray cast is sometimes evident
just after installing a new toner cassette.
52
Storage
Paper
Paper should always be stored properly. Improperly stored paper might
result in poor image reproduction, creased copies, or paper misfeeds. Generally, avoid paper curling and absorption of moisture.
• Avoid storing paper in humid areas. In high-temperature and high-humidity, or lowtemperature and low-humidity conditions, store paper in a vinyl bag.
• Do not store paper where it will be exposed to heat.
• Store on a flat surface.
• Use older stock first.
• Do not lay heavy objects on paper.
• Keep open reams of paper in the package, and store as you would unopened paper.
Toner Cassette
• Keep the toner cassette inside the packaging that it comes packed in whenever it is
removed from the machine.
• Store horizontally in a cool, dark place.
• Never store a toner cassette where it will be exposed to heat.
• Do not lay heavy objects on the toner cassette.
CAUTION
Keep toner cassettes out of children’s reach.
53
6. USER MAINTENANCE
USER MAINTENANCE
7. TECHNICAL REFERENCE
Printing the Help List
You can print out the help list.
1
While the machine is not performing any
other operation, press
. The
message “Prt Help List” appears.
2
Press
3
Press
. “Press Start” appears.
Press Start
to print the Help List.
Note
Print on A4, Letter, or Legal paper.
54
Prt Help List
OK
TECHNICAL REFERENCE
Selecting the Language
The language for the display can be selected from the following:
English, French, Spanish, Italian, German, Swedish
Press
. “Prt Help List” appears.
2
Press
or
until "2
Language" appears. The messages
change in the following order.
Prt Help List
OK
7. TECHNICAL
REFERENCE
1
2 Language
1 Tray Pap. Size
3 User Param.
3
Press
and press
or
until the desired language
appears. The languages change in the
following order.
Language: English
Sprak: svenska
Spr.: Deutsch
4
2 Language
Langue: francais
Idioma: Espanol
Lingua: Italiano
Press
. “Please wait”, then “Registered” appears.
Please wait
Note
• Do not turn off the machine while “Please
wait” or “Registered” is displayed.
• The setting is not registered, if
not pressed.
Registered
is
55
TECHNICAL REFERENCE
Selecting 300 dpi or 600 dpi
Set the printer to 300 dpi if the designated output is not obtained when
printing using a DOS application compatible with the 300 dpi PCL printer.
1
Press
pears.
. “Prt Help List” ap-
2
until “3
Press
or
User Param.” appears. The messages
change in the following order.
Prt Help List
3 User param.
1 Tray Pap. Size
3 User Param.
3
2 Language
Press
and press
to
move the flashing block cursor until it
appears in the position shown in the
illustration to the right.
Note
The bits other than the one highlighted in the
illustration are unrelated to this setting.
4
Press
to change the setting to 1 or
0, as desired.
Display
02:0010 0000
02:0010 1000
56
Heater status
600 dpi (default setting)
300 dpi
02:0010
000
OK
TECHNICAL REFERENCE
Press
. “Please wait”, then “Registered” appears.
Please wait
Note
• To cancel this change, press
or
Registered
instead of
. “Please wait”
and “Not Registered” appear on the display.
• Do not turn off the machine while “Please
wait”, “Registered” or “Not Registered”
is displayed.
7. TECHNICAL
REFERENCE
5
57
TECHNICAL REFERENCE
Economy Mode
The Economy mode can be selected to save power. If no operation is performed for 5 minutes, the display becomes blank and all the indicators go
out. If no operation is performed in the next 10 minutes or 235 minutes
(according to the setting), the heater turns off.
The economy mode is on as the default setting.
ON (default setting)
Operation
Heater off
panel off
5 minutes 15 minutes (including time when operation panel is off)
OFF
5 minutes 240 minutes (including time when operation panel is off)
Economy mode
Note
• During the Economy Mode, the heater turns back on in the following cases.
♦ when any key on the operation panel is pressed
♦ when the platen cover is opened
♦ when paper is set in or removed from the upper paper tray (Type 2)
♦ when the tray of the paper feed unit (option) is pulled out or pushed back
into the machine
• When a key on the operation panel is pressed to turn the heater on, the key does
not perform its normal function.
• After the heater is turned back on, the previous %, quantity, and Sort On settings are cleared.
Changing the Economy Mode
Hold down the Clear modes key for approximately 1 second until the
Economy mode indicator lights or goes out, as required.
Economy Mode ON
58
Economy Mode OFF
TECHNICAL REFERENCE
Selecting Toner Saving Mode
The toner saving mode status has two settings.
Press
. “Prt Help List” appears.
2
Press
or
until “3
User Param.” appears. The messages
change in the following order.
Prt Help List
OK
7. TECHNICAL
REFERENCE
1
3 User param.
1 Tray Pap. Size
3 User Param.
3
2 Language
Press
and press
to
move the flashing block cursor until it
appears in one of the positions shown
in the illustration to the right.
02:0000 0 00
Note
The bits other than the one highlighted in the
illustration are unrelated to this setting.
4
Press
to change the bit setting to
1 or 0, as desired.
Display
02:0000 0000
02:0000 0100
5
Heater status
Off (Default)
On (Density will be lighter)
Press
. “Please wait”, then “Registered” appears.
Please wait
Note
• To cancel this change, press
or
Registered
instead of
. “Please wait”
and “Not Registered” appear on the display.
• Do not turn off the machine while “Please
wait”, “Registered” or “Not Registered”
is displayed.
59
8. SPECIFICATIONS
General Specifications
Type 1
Type 1, Type 2
Paper Capacity
Power Supply
Upper tray
plain paper (80 g/m2: 20 lb.) 100 sheets
Option paper unit
plain paper (80 g/m2: 20 lb.) 250 sheets
Output tray Capacity
plain paper (80 g/m2: 20 lb.) 50 sheets
Memory
4 MB (Expandable to 8 MB, 16 MB or
32 MB)
EDO SIMM, 60 ns, 72 pin
Dimensions
249mm × 352mm × 576mm (H × W × D)
9.81" × 13.87" × 22.69" (H × W × D)
Power Consumption
Max
Printing (Average)
Copying (Average)
Stand-by (Average)
Economy Mode
480 W
215 W
240 W
75 W
15 W
Operating Environment
Temperature /Humidity
10°C (50°F) to 35°C (95°F)
15% to 80%
Machine Life
Weight
15.0 kg (33.08 lb)
30,000 sheets/5 years
Printer Duty
Type 2
6,000 sheets/1 month
Paper Capacity
Upper tray
plain paper (80 g/m2: 20 lb.) 100 sheets
Option paper unit
plain paper (80 g/m2: 20 lb.) 250 sheets
ADF (Auto Document Feeder) Capacity
plain paper:
A4, LT · LG (80 g/m2: 20 lb) 10 sheets
Output tray Capacity
plain paper (80 g/m2: 20 lb.) 50 sheets
Memory
4 MB (Expandable to 8 MB, 16MB or 32MB)
EDO SIMM, 60 ns, 72 pin
Dimensions
297mm × 352mm × 576mm (H× W× D)
11.70" ×13.87"× 22.69" (H× W× D)
Weight
15.5 kg (34.18 lb)
60
AC 220 to 240 V
50/60 Hz
Scanner Duty
2,000 sheets/1 month
Paper Sizes
Plain paper
A4 = 210 mm × 297 mm
A5 = 148 mm × 210 mm
Letter (LT) = 8 1/2" × 11"
Legal (LG) = 8 1/2" × 14"
Half Letter = 8 1/2" × 51/2"
F4 = 81/4" × 13"
Government Letter = 8" × 13"
Government Legal = 8" × 101/2"
Envelopes
C5 = 162 mm × 229 mm
C6 = 114 mm × 162 mm
DL = 110 mm × 220 mm
Other
Transparencies
Label Paper
SPECIFICATIONS
Printer Language
Resident Font
PCL 5e emulation
• Dutch 801 SWC
• Dutch 801 Italic SWC
• Dutch 801 Bold SWC
• Dutch 801 Bold Italic SWC
• Swiss 742 SWC
• Swiss 742 Italic SWC
• Swiss 742 Bold SWC
• Swiss 742 Bold Italic SWC
• Swiss 742 Condensed SWC
• Swiss 742 Condensed Italic SWC
• Swiss 742 Condensed Bold SWC
• Swiss 742 Condensed Bold Italic SWC
• Incised 901 SWC
• Incised 901 Italic SWC
• Incised 901 Bold SWC
• Fixed Pitch 810 Courier Roman SWC
• Fixed Pitch 810 Courier Bold SWC
• Fixed Pitch 810 Courier Italic SWC
• Fixed Pitch 810 Courier Bold Italic SWC
• Fixed Pitch 850 Letter Gothic 12 pitch/text SWC
• Fixed Pitch 850 Letter Gothic Bold 12 pitch/text SWC
• Fixed Pitch 850 Letter Gothic Italic 12 pitch/text SWC
• Flareserif 821 SWC
• Flareserif 821 Extra Bold SWC
• Ribbon 131 SWC
• Wingbats SWM
Print Resolution
600 dpi × 600 dpi
1200 dpi × 600 dpi (enhanced)
Print Speed
6 ppm (page per minute)
Paper/Media Types
Plain paper
Envelopes
Transparencies
Label paper
Paper Weight
60 to 90 g/m2 (16 to 24 lb)
Interface
IEEE 1284 compartible
61
8. SPECIFICATIONS
Printing Specifications
SPECIFICATIONS
Copying Specifications
Copy Speed
Paper Weight
6 cpm (copy per minute)
60 to 90 g/m2 (16 to 24 lb)
Warm-up Time
Original Types
30 seconds or less
Exposure glass (Type 1/Type 2)
Sheet/Book
ADF (Type 2)
Plain paper (80 g/m2: 20 lb)
First copy
17 seconds or less
Mulitiple Copies
Up to 99 copies
Copy Reduction and Enlargement
50%, 71%, 82%, 87%, 93%,
115%, 122%, 141%, 200%
Paper/Media Types
Plain paper
Envelopes
Transparencies
Label paper
62
Maximum Original Size
A4, 8 1/2 " × 14"
Copy Resolution
600 dpi × 600 dpi
INDEX
INDEX
1
F
1 to 1 Copy ........................................................... 27
Front guide .................................................... 16, 19
Front paper support ............................................. 16
B
Book Copy ............................................................ 29
C
Check Display ........................................................ x
Clearing a Paper Misfeed .................................... 43
cleaning pad ........................................................ 50
Computer port .............................................. viii, ix
Connecting a Second Printer
(Additional Printer) ............................................ 15
Connecting to a computer .................................... 7
Connector ............................................................ 16
Copy Mode key ..................................................... xi
Corner guides ................................................ 16, 18
D
Daily Maintenance .............................................. 49
Density key ............................................................. x
Display ................................................................. xi
Document guides ................................................ ix
Document output tray ......................................... ix
Installing .......................................................... 6
E
Economy Mode .................................................... 58
Economy Mode/Clear Modes key ........................ xi
Enlarge .................................................................. x
Enlargement ....................................................... 30
envelopes ............................................................. 14
Exposure glass .............................................. viii, ix
Extend tray ................................................... viii, ix
H
Help List ............................................................... 54
Help/Function ..................................................... xi
I
image density ...................................................... 34
Installing
Document output tray...................................... 6
Toner cassette ................................................... 2
Upper paper Tray .............................................. 4
L
label paper ........................................................... 14
Language ............................................................. 55
Limit mark .............................................. 10, 16, 18
Loading Paper ..................................................... 10
Loading
plain paper ..................................................... 10
small size paper .............................................. 12
other media .................................................... 14
Location ................................................................. 1
M
Memory Copy (Type 1 only) ......................... xi, 28
Metal plate ...............................................10, 16, 18
Multiple Copies .................................................... 28
O
OK ........................................................................ xi
Operation Panel ....................................... viii, ix, x
Original
Setting (Exposure glass) ................................ 27
Setting (ADF) ................................................. 35
Requirements (ADF) ...................................... 36
Original Guide..................................................... ix
Output tray ................................................... viii, ix
63
INDEX
A
Additional Printer ................................................ 15
Auto image density .............................................. 34
Automatic Document Feeder (ADF) ................... ix
Setting an original ......................................... 35
INDEX
P
Paper and Other Media ......................................... 9
Paper Select ........................................................... x
paper size
Changing ........................................................ 19
Specifying (upper) ................................... 11, 13
Specifying (lower) .......................................... 19
Paper size indicator ....................................... 16, 19
Paper Feed Unit ................................................... 16
PC Interface ........................................................... x
Photo1 ................................................................. 33
Photo2 ................................................................. 33
Platen cover .................................................. viii, ix
Power socket ................................................. viii, ix
Power switch ................................................. viii, ix
printer driver
Windows 95 .................................................... 23
Windows 3.1 ................................................... 24
Q
Quantity keys ......................................................... x
R
Reduce ................................................................... x
Reduction ............................................................ 30
Replacing
Toner cassette ................................................. 50
cleaning pad ................................................... 50
resolution/photo setting ...................................... 33
S
Safety Information ................................................ i
Scanner lock ................................................. viii, ix
Unlocking ......................................................... 3
Second Printer (Additional Printer) port .... viii, ix
EE AE G026
64
Second Printer (Additional Printer) ..................... x
Connecting ..................................................... 15
Using .............................................................. 26
Side guide ...................................................... 16, 19
SIMM cover ................................................... viii, ix
SIMM ................................................................... 21
Small size paper feed access panel .............. viii, ix
small size paper ................................................... 12
sort ....................................................................... 37
Sort/Memory Copy (Type 2 only) ........... xi, 28, 33
SPECIFICATIONS ................................................ 61
Start ....................................................................... x
Stop ...................................................................... xi
Storage ................................................................. 53
T
Text Fine .............................................................. 33
Toner cassette
Installing .......................................................... 2
Replacing ....................................................... 50
Top release lever ........................................... viii, ix
Top unit ........................................................ viii, ix
transparencies ..................................................... 14
TROUBLESHOOTING .......................................... 39
Type 1 ................................................................. viii
Type 2 ................................................................... ix
U
Upgrading Memory ............................................. 21
Upper paper tray ................................. viii, ix, 4, 10
User Parameter .............................................. 56, 59
Using the Second Printer (Additional Printer) .. 26
Z
Zoom .............................................................. xi, 32
Overseas Affiliates
U.S.A.
Spain
RICOH CORPORATION
5 Dedrick Place
West Caldwell, New Jersey
07006
Phone: +1-973-882-2000
RICOH ESPAÑA S.A.
Avda. Litoral Mar, 12-14,
08005 Barcelona
Phone: +34-(0)93-295-7600
The Netherlands
Italy
RICOH EUROPE B.V.
Groenelaan 3, 1186 AA,
Amstelveen
Phone: +31-(0)20-5474111
RICOH ITALIA SpA
Via della Metallurgia 12,
37139 Verona
Phone: +39-(0)45-8181500
United Kingdom
Hong Kong
RICOH UK LTD.
Ricoh House,
1 Plane Tree Crescent,
Feltham,
Middlesex, TW13 7HG
Phone: +44-(0)181-261-4000
RICOH HONG KONG LTD.
23/F., China Overseas
Building,
139, Hennessy Road,
Wan Chai, Hong Kong
Phone: +852-2862-2888
Germany
Singapore
RICOH DEUTSCHLAND
GmbH
Mergenthalerallee 38-40,
65760 Eschborn
Phone: +49-(0)6196-9060
RICOH ASIA PACIFIC
PTE.LTD.
260 Orchard Road,
#15-01/02 The Heeren,
Singapore 238855
Phone: +65-830-5888
France
RICOH FRANCE S.A.
383, Avenue du Général
de Gaulle
BP 307-92143 Clamart
Cedex
Phone: +33-(0)1-40-94-38-38
SUPPLIES MODEL NAME
The correct model name of supplies for
your Bizworks is:
RICOH TONER CASSETTE TYPE 1120D BLACK
RICOH CO., LTD.
Ohmori NM Building, 1-1 Ohmori-kita 2-chome
Ota-ku, Tokyo, 143-0016, Japan
Printed in the Netherlands
EE AE G026-8600
Operation Manual
Read this manual carefully before you use this product and keep
it handy for future reference. For safety, please follow the
instructions in this manual
Overseas Affiliates
U.S.A.
Spain
RICOH CORPORATION
5 Dedrick Place
West Caldwell, New Jersey
07006
Phone: +1-973-882-2000
RICOH ESPAÑA S.A.
Avda. Litoral Mar, 12-14,
08005 Barcelona
Phone: +34-(0)93-295-7600
The Netherlands
Italy
RICOH EUROPE B.V.
Groenelaan 3, 1186 AA,
Amstelveen
Phone: +31-(0)20-5474111
RICOH ITALIA SpA
Via della Metallurgia 12,
37139 Verona
Phone: +39-(0)45-8181500
United Kingdom
Hong Kong
RICOH UK LTD.
Ricoh House,
1 Plane Tree Crescent,
Feltham,
Middlesex, TW13 7HG
Phone: +44-(0)181-261-4000
RICOH HONG KONG LTD.
23/F., China Overseas
Building,
139, Hennessy Road,
Wan Chai, Hong Kong
Phone: +852-2862-2888
Germany
Singapore
RICOH DEUTSCHLAND
GmbH
Mergenthalerallee 38-40,
65760 Eschborn
Phone: +49-(0)6196-9060
RICOH ASIA PACIFIC
PTE.LTD.
260 Orchard Road,
#15-01/02 The Heeren,
Singapore 238855
Phone: +65-830-5888
France
Operation Manual
Read this manual carefully before you use this product and keep
it handy for future reference. For safety, please follow the
instructions in this manual.
RICOH FRANCE S.A.
383, Avenue du Général
de Gaulle
BP 307-92143 Clamart
Cedex
Phone: +33-(0)1-40-94-38-38
SUPPLIES MODEL NAME
The correct model name of supplies for
your Bizworks is:
RICOH TONER CASSETTE TYPE 1120D BLACK
RICOH CO., LTD.
15-5, 1 chome, Minami-Aoyama, Minato-ku, Tokyo,
Phone: Tokyo 3479-3111
Printed in China
UE G026-8547
RICOH CORPORATION
CALLING FOR SERVICE
For service in the United States, call:
1-800-RICOH38 (1-800-742-6438)
Introduction
This manual contains detailed instructions on the operation and maintenance of this machine. To get
maximum versatility from this machine, all operators should carefully read and follow the instructions in
this manual. Please keep this manual in a handy place near the machine.
Please read the safety information on pages i - iii of this manual. It contains Important Information related
to user safety and preventing equipment problems.
Laser Safety:
The optical housing unit can only be repaired in a factory or at a location with the requisite equipment. The
laser subsystem is replaceable in the field by a qualified Customer Engineer. The laser chassis is not
repairable in the field. Customer engineers are therefore directed to return all chassis and laser subsystems to the factory or service depot when replacement of the optical subsystem is required.
Notes:
•
•
•
Model names for the machines do not appear in the following pages. Check the type of your machine before reading this manual.
Type 1 Bizworks 406e
Type 2 Bizworks 406eDF
Some illustrations may be slightly different from your machine.
Certain types may not be available in some countries. For details, contact your local dealer.
Two kinds of size notation are employed in this manual. With this machine refer to the metric version.
For good print quality, Ricoh recommends that you use genuine Ricoh toner.
Ricoh shall not be responsible for any damage or expense that may result from the use of parts other than
genuine Ricoh parts in your Ricoh office product.
Power Source: 120 V, 60 Hz, 4.2 A
Please make sure to connect the power cord to a power source as above. For details about power connection, refer to page 8.
Trademarks
Microsoft„, Windows„, and MS-DOS„ are registered trademarks of Microsoft Corporation in the United
States and/or other countries.
Other product names used herein are for identification purposes only and might be trademarks of their
respective companies. We disclaim any and all rights in those marks.
INFORMATION TO THE USER
USA FCC Part 15 Class B
NOTE
This equipment has been tested and found to comply with the limits for a Crass B digital device, pursuant
to Part 15 of the FCC Rules. These limits are designed to provide reasonable protection against harmful
interference in a residential installation. This equipment generates, uses and can radiate radio frequency
energy and, if not installed and used in accordance with the instructions, may cause harmful interference
to radio communications.
However, there is no guarantee that interference will not occur in a particular installation.
If this equipment does cause harmful interference to radio or television reception, which can be determined by turning the equipment off and on, the user is encouraged to try to correct the interference by one
more of the following measures:
-
Reorient or relocate the receiving antenna.
Increase the separation between the equipment and receiver.
Connect the equipment into an outlet on a circuit different from that to which the receiver is connected.
Consult the dealer or an experienced radio/TV technician for help.
Properly shielded and grounded cables and connectors must be used for connections to host computer in
order to meet FCC emission limits.
WARNING
Changes or modifications not expressly approved by the party responsible for compliance could void the
user’s authority to operate the equipment.
COMPLIANCE INFORMATION STATEMENT
Declaration of Conformity
RICOH Bizworks
406/406DF
RICOH CORPORATION
5 Dedrick Place West Caldwell, New Jersey 07006
973-882-2000
This device complies with Part 15 of the FCC Rules. Operation is subject to the following two conditions:
(1) This device may not cause harmful interference, and (2) this device must accept any interference
received, including interference that may cause undesired operation.
CANADA Class B
In accordance with ISO Standard 7001, this machine uses the following symbols for the main switch:
a means POWER ON.
b means POWER OFF.
© Copyright 1999, RICOH CO., LTD.
This Class B digital apparatus complies with Canadian ICES-003.
Cet appareil numérique de la classe B est conforme à la norme NMB-003 du Canada.
Safety Information
When using your machine, the following safety precautions should always
be followed.
Types of warnings used in this manual
WARNING
Ignoring this warning could cause serious injury or even
death.
CAUTION
Ignoring this caution could cause injury or damage to property.
Symbol examples
The d symbol means a situation that requires you take care.
The symbol means you MUST NOT carry out this operation.
This example means “Do not take apart.”
The ● symbol means you MUST perform this operation.
This example means “You must remove the wall plug.”
Microsoft®, Windows®, and MS-DOS® are registered trademarks of Microsoft Corporation in the
United States and/or other countries.
Other product names used here in are for identification purposes only and might be trademarks of
their respective companies. We disclaim any and all rights in those marks.
i
WARNING:
• Use of controls or adjustment or performance of procedures other than those
specified in this manual may result in hazardous radiation exposure.
• Only connect the machine to the power source described on the inside of the
front cover.
• Avoid multi-wiring.
• Do not damage, break or make any modifications to the power cord. Do not
place heavy objects on it, pull it hard or bend it more than necessary. These
actions could cause an electric shock or fire.
• Do not plug or unplug the power cord with your hands wet. Otherwise, an
electric shock might occur.
• Make sure the wall outlet is near the machine and freely accessible so that in
event of an emergency it can be unplugged easily.
• Do not remove any covers or screws other than those specified in this manual.
Some parts of the machine are at a high voltage and could give you an electric shock. Also, reflected eye contact with the leser beam may cause serious
eye damage. When the machine needs to be checked, adjusted, or repaired,
contact your service representative.
• Do not take apart or attempt any modifications to this machine. There is a
risk of fire, electric shock, explosion or loss of sight.
• If the machine looks damaged or breaks down, smoke is coming out, there
is a strange smell or anything looks unusual, immediately turn off the power
switch then unplug the power cord from the wall. Do not continue using the
machine in this condition. Contact your service representative.
• If metal, liquid or foreign matter falls into the machine, turn off the power
switch, and unplug the power cord.
Contact your service representative. Do not keep using the machine with a
fault or defect.
• Do not put any metal objects or containers holding water (e.g. vases, flowerpots, glasses) on the machine. If the contents fall inside the machine, a fire
or electric shock could occur.
• Do not incinerate used toner or toner cassettes. Toner dust might ignite when
exposed to an open flame. Dispose of the used toner cassettes according to
local regulations for plastics.
ii
CAUTION:
• Keep the machine away from humidity and dust. A fire or an electric shock
might occur.
• Do not place the machine on an unstable or tilted surface. If it topples over,
it could cause injury.
• When you move the machine, unplug the power cord from the wall outlet to
avoid fire or electric shock.
• When the machine is not be used for a long time, unplug the power cord.
• When you pull out the plug from the socket, grip the plug to avoid damaging
the cord and causing fire or electric shock.
• If you use the machine in a confined space, make sure there is a continuous
air turnover.
• Do not reuse stapled paper. Do not use aluminium foil, paper containing
carbon or any other conductive paper. Otherwise, a fire might occur.
• When removing misfed paper, or replacing the toner cassette and the cleaning pad, do not touch the fusing section because it could be very hot.
• This machine has been tested for safety using this supplier’s parts and
consumables. We recommend you only use these specified supplies.
iii
Energy Star program
Energy Star®
As an Energy Star partner, we have determined that
this machine model meets the Energy Star Guidelines for energy efficiency.
The Energy Star Guidelines intend to establish an international energy- saving system for
developing and introducing energy-efficient office equipment to deal with environmental issues, such as global warning.
When a product meets the Energy Star Guidelines for energy efficiency, the Partner shall
place the Energy Star logo onto the machine model.
This product was designed to reduce the environmental impact associated with printing
equipment by means of energy-saving features such as Low Power mode.
• Low Power Mode
This machine automatically lowers its power consumption 15 minutes after the last
printing job has been completed. To exit Low Power mode, press any key on the
operation panel.
The machine returns to the ready condition in about 22 seconds. To change the low
Power delay, see page 60.
Specification
Low Power Mode
(Economy Mode)
Type 1, 2
Power consumption 15 W
Default delay
15 min.
Recovery time
22 sec.
Recycled paper
Please contact your sales or service representative for recommended recycled paper types
that may be used in this machine.
iv
Contents
Safety Information .............................................................................. i
Energy Star program .......................................................................... iv
Part Names ......................................................................................... viii
Operation Panel .................................................................................. x
1. SETTING UP
Package Contents ...............................................................................
Location ..............................................................................................
Installing the Starter Toner Cassette ...................................................
Unlocking the Scanner Lock ..............................................................
Installing the Upper Paper Tray..........................................................
Other Settings for Type 2 ...................................................................
To remove the protective sheet .......................................................
To install the document output tray ................................................
To pull out the output tray extension ..............................................
Connecting to a computer...................................................................
Turning On the Machine ....................................................................
1
1
2
3
4
5
5
5
6
7
8
2. GETTING ACQUAINTED
Paper and Other Media .......................................................................
Loading Paper.....................................................................................
To load plain paper into the upper paper tray .................................
To load small size paper .................................................................
Loading Other Media .........................................................................
To load envelopes ...........................................................................
To load transparencies ....................................................................
To load label paper .........................................................................
Connecting a Second Printer (Additional Printer) .............................
To connect to a second printer ........................................................
Installing the Paper Feed Unit (Option) .............................................
Paper Feed Unit Part Names ..........................................................
To install the Paper Feed Unit ........................................................
To load paper into the paper feed unit ............................................
To change the paper size ................................................................
To specify the paper size ................................................................
To install the paper size indicator ...................................................
9
10
10
12
14
14
14
14
15
15
16
16
16
18
19
19
20
v
To select the paper source .............................................................. 20
Upgrading Memory ............................................................................ 21
3. PRINTING AND SCANNING
Setting up ............................................................................................
Installing the Software Drivers...........................................................
Features You Can Access From the Printer Driver .............................
Using the Second Printer (Additional Printer) ...................................
To print to the second printer .........................................................
23
23
25
26
26
4. COPYING
Making a Copy ...................................................................................
Making Multiple Copies .....................................................................
Making a Book Copy .........................................................................
Reduction and Enlargement ...............................................................
To set the reduction factor ..............................................................
To set the enlargement factor .........................................................
Zoom (In 1% Increments) ..................................................................
To use zoom ...................................................................................
Adjusting the Copy Image ..................................................................
To select the resolution/photo setting .............................................
To adjust the image density ............................................................
Setting an Original on the ADF (Type 2 only) ...................................
Sorting Output (Type 2 only) .............................................................
To turn sorting on and off ...............................................................
27
28
29
30
30
31
32
32
33
33
33
35
37
37
5. TROUBLESHOOTING
General problems (printing, copying, scanning and Error massages)
Clearing a Paper Misfeed ...................................................................
Paper feed unit ................................................................................
When paper will not feed ...............................................................
39
44
48
49
6. USER MAINTENANCE
Daily Maintenance .............................................................................
Replacing the Toner Cassette And the Cleaning Pad .........................
Storage ................................................................................................
Paper ...............................................................................................
Toner Cassette ................................................................................
vi
51
52
55
55
55
7. TECHNICAL REFERENCE
Printing the Help List .........................................................................
Selecting the Language ......................................................................
Selecting 300 dpi or 600 dpi...............................................................
Economy Mode ..................................................................................
Changing the Economy Mode ........................................................
Selecting Toner Save Mode ................................................................
56
57
58
60
60
61
8. SPECIFICATIONS ......................................................................... 62
Index ................................................................................................ 65
vii
Part Names
Type 1
The following describes the Type 1 machine. This information also applies
to the Type 2 machine, except where specifically noted in the next page.
Platen cover
Lift this cover to access the
exposure glass when you want to
place an original on it for
copying and scanning.
Upper paper tray
Holds up to 100 sheets
of plain paper.
Exposure glass
Place originals on this
glass face down.
Top unit
Operation panel
Key panel for controlling
the machine.
Power switch
Output tray extension
Turns the machine on and
off.
Pull out to support paper output
from the machine.
Output tray
Top release lever
Pull to release the top unit
and open it.
Prints are delivered here. This tray
can hold up to 50 sheets.
Scanner lock
Locks the scanner to prevent
damage during transport.
Be sure to release this lock
before using the machine.
Small size paper
feed access panel
This panel can be
lowered to provide
easier handling when
printing on or
copying to small size
paper.
SIMM cover
Open this cover
when you want to
install a SIMM and
expand memory.
Power socket
Second printer
(Additional Printer) port
You can connect a second printer
to this port.
Computer port
Connect your computer here.
viii
The following describes the Type 2 machine.
Original guide
Automatic document feeder
(ADF)
Upper
paper tray
Holds up to 10 sheets of paper for automatic
feeding. Place originals face down.
Guides the original
correctly into the machine.
Make sure your original
fits under this guide.
Document guides
Slide the left guide to fit
the size of the paper you are feeding.
Exposure glass
Top unit
Operation panel
Power switch
Output tray
extension
Platen cover
Top release lever
Output tray
Lift this cover to access the exposure
glass when you want to scan a page
from a book, magazine, or any other
original that cannot be fed using the
ADF.
Document output tray
Scanned documents are delivered here.
Scanner lock
Upper tray
extension
Extend to support
originals.
Small size
paper feed
access panel
SIMM cover
Power socket
Second printer
(Additional Printer) port
Computer port
ix
GENERAL
DESCRIPTION
Type 2
Operation Panel
1
F
E
2
3
G
Note
Be sure to panel the
protective seet from the
operation panel
4
5
6
H
1 Check Display
This indicator lights up to alert you
to read the message on the display.
2 PC Interface
This indicator lights while the
machine is receiving data from a
connected computer.
3 Second Printer
Pressing this key switches between
printing on the machine (Second
Printer indicator off) and printing on
a second printer connected to the
machine (Second Printer indicator
on).
4 Reduce
Press this key to reduce an image
during copying. Available reduction
ratios are: 50%, 65%, 77%, 93% and
LGL LTR.
x
5 Enlarge
Press this key to enlarge an image
during copying. Available
enlargement ratios are: 121%,129%,
155%, 200% and LTR LGL.
6 Paper Select
Press this key to specify the paper
size. When the paper feed unit
(option) is installed, press this key to
switch between paper sources.
7 Density key
Press this key to select the image
density settings: Darker, Auto, Lighter.
8 Quantity keys
Press these keys to specify the
number of copies or to change
numeric values on the display.
9 Start
Press this key to start an operation.
C
GENERAL
DESCRIPTION
D
B
A
0
9
7
8
0 Stop
Press this key to interrupt the
current ongoing procedure and
return to the stand by state. This key
operates as a kind of escape key.
Holding down this
key for 3 seconds resets the printer
mode.
A Economy Mode/
Clear Modes key
Pressing this key cancels the
ongoing operation and clears the
settings of the current mode to their
initial defaults.
Holding down this key for about one
second switches the Economy Mode
on and off.
Refer to “Economy Mode” on page 58.
B OK
Press this key to execute an
operation that is prompted by a
message on the display.
C Zoom
In copy mode, press these keys to
fine-tune the preset reduction and
enlargement ratios. Also use to
select function settings and navigate
the function menus.
D Help/Function
Press this key and then input a
function number to perform
various settings and help list
printing functions.
E Copy Mode key
Press this key to specify the Copy
Mode. A pointer (T) appears on the
display to indicate the current
Text Fine/Photo1/Photo2 setting.
F Display
Displays messages and prompts
during operation.
G Memory Copy (Type 1 only)
Press this key to select Memory
Copy. (Your original will be scanned
only once when making multiple
copies.)
H Sort/Memory Copy
(Type 2 only)
Press this key to turn Sorting and
Memory Copy on and off.
Sorting is activated when the pointer
is visible on the display above Sort/
Memory Copy.
xi
xii
1. SETTING UP
Package Contents
WARNING
Make sure the wall outlet is near the machine and freely accessible so that in event of an
emergency it can be unplugged easily.
Do not put any metal objects or containers holding water (e.g. vases, flowerpots, glasses)
on the machine. If the contents fall inside the machine, a fire or electric shock could occur.
CAUTION
Keep the machine away from humidity and dust. A fire or an electric shock might occur.
Do not place the machine on an unstable or tilted surface. If it topples over, it could cause injury.
If you use the machine in a confined space, make sure there is a continuous air turnover.
Location
Environment
Temperature
Humidity
Acceptable
Recommended
10 to 35°C (50 to 95°F)
15 to 25°C (59 to 77°F)
15 to 80%
30 to 70%
• The machine must be level within 3mm (0.11") both front to rear and left to right.
Locations to Avoid
• Avoid exposed to direct sunlight or strong light (more than 2,000 lux.).
• Avoid directly exposed to cool air from air conditioner’s or heated air from heater’s.
Sudden temperature changes can cause condensation to form inside the machine.
• Avoid where the machine mi,ght be subjected to frequent strong vibration.
• Places higher than 2,500m (8,221ft.) above sea level.
Machine Clearance
Min. 180mm (7.09")
Place the machine near the wall outlet, providing minimum
(Back)
clearance as shown.
Min. 50mm
(1.97")
Machine
Min. 30mm
(1.18")
(Front)
1
1. SETTING UP
Make sure that all of the items shown in the Package Contents sheet that
comes with the machine are included.
SETTING UP
Installing the Starter Toner Cassette
Pull the top release lever (1) and open
1 the
2
top unit (2).
1
2
Hold the starter toner cassette by its
handle, and remove it from its vinyl bag.
CAUTION
Keep all plastic bags out of the reach of children.
Important!
Be sure to hold the starter toner cassette by
its handle.
Note
Keep the vinyl bag for later repackaging when
necessary.
3
Holding the starter toner cassette by its
handle, gently shake it side to side 5 or
6 times to evenly distribute the toner
inside.
Important!
Be sure to hold the starter toner cassette by its
handle.
4
2
Look inside the machine and note the
locations of the arrows that indicate the
toner cassette guides on either side.
Handle
SETTING UP
5
Make sure the plastic pins (marked with
“*” in the illustration next to step 3 )
on either side of the starter toner cassette slide along the guides inside the
machine.
Note
6
1. SETTING UP
Be sure to hold the starter toner cassette by its
handle.
To close the top unit, press down firmly
but gently on both sides of it until the
top unit closes and clicks securely into
place.
Note
Background gray cast is sometimes evident
just after installing a new toner cassette.
Unlocking the Scanner Lock
Important
Be sure to unlock the scanner lock before using the machine.
The machine will not operate correctly if the scanner lock is not unlocked.
1
Unlock the scanner lock which is located
at the back of the machine.
3
SETTING UP
Installing the Upper Paper Tray
1
Look at the rear of the machine and
note the locations of the slots for insertion of the upper paper tray on both
sides.
2
To install the upper paper tray, press
down on both sides of the tray, making
sure that it is inserted as far as it will go.
Note
Paper will not be fed correctly into the machine if the upper paper tray is not inserted
all the way in.
4
SETTING UP
Other Settings for Type 2
To remove the protective sheet
Open the ADF cover (1) and then remove the protective sheet (2).
1
1. SETTING UP
1
2
2
Close the ADF cover and make sure it
locks securely into place.
To install the document output tray
1
Look at the rear of the machine to confirm where the document output tray
should fit.
2
Insert the pin at one side of the tray by
gently bending the document tray until
it fits in the insert hole.
5
SETTING UP
3
Make sure the small pieces of plastic
film curl upwards as shown.
Important!
The original will not be delivered properly, if
the films are not set as shown.
To pull out the output tray extension
1
6
To pull out the output tray extension as
shown.
SETTING UP
Connecting to a computer
Important!
Make sure that the power of both the machine and your computer is turned off
before making the connection.
Plug one end of the your parallel cable
into the lower port on the side of the
machine, and secure it in place as shown
in the illustration.
1. SETTING UP
1
Note
• The machine must be connected to a computer for printing.
• Use the cable that comes with the machine
to connect to your computer.
2
Connect the other end of the parallel
cable to your computer’s parallel
printer port.
7
SETTING UP
Turning On the Machine
WARNING
• Only connect the machine to the power source described on the inside of the front cover.
• Avoid multi-wiring.
• Do not damage, break or make any modifications to the power cable. Do not place heavy
objects on it, pull it hard or bend it more than necessary. These actions could cause an
electric shock or fire.
• Do not plug or unplug the power cord with your hands wet. Otherwise, an electric shock
might occur.
Important!
When you turn on the machine for the first time after the installation, make sure
that no paper is loaded beforehand.
8
1
Attach the power cable to the machine
and plug the other end into a outlet.
2
Turn on the machine.
2. GETTING ACQUAINTED
Important!
☛ The default display language is English. For how to change to your preferred
language, see page 57.
Paper and Other Media
The machine supports printing on the following types of paper/media from
the upper paper tray.
Refer to the following pages for details.
Envelopes
Display
Page
Letter (81/2" × 11")
Letter (81/2 × 11)
p.11
Half Letter
51/2 × 81/2
p.11
Legal (81/2" × 14")
Legal (81/2 × 14)
p.11
A4 (210mm × 297mm)
A4
p.11
A5 (148mm × 210mm)
A5
F4 (81/4" × 13")
81/4 × 13
Executive
COM 10
Monarch
:
2. GETTING
ACQUAINTED
Plain paper
Paper/Media type (Paper size)
p.11
p.11
1
1
Exec (7 /4 x 10 /2)
1
1
Com 10 (4 /8 x 9 /2)
7
1
Mon. (3 /8 x 7 /2)
p.13, 15
p.13, 15
p.13, 15
Transparencies
p.15
Label paper
p.15
Note
Do not attempt to use the following types of paper: wrinkled or creased paper,
curled or rolled paper, paper containing carbon, carbon-backed paper, coated
paper, onion skin or other very thin paper.
CAUTION
Do not reuse stapled paper. Do not use aluminium foil, paper containing carbon or other
conductive paper. Otherwise, a fire might occur.
9
GETTING ACQUAINTED
Loading Paper
After you have set up the machine you nee to load paper then specify the
paper size using the procedure below.
Important!
When loading paper into the upper paper tray, do not load more than 100 sheets of
plain paper (80 g/m2 or 20 lb). Overloading the upper paper tray can cause misfeeds.
To load plain paper into the upper paper tray
1
Fan the stack of paper to make sure that
all pages are free and are not sticking
together. The upper paper tray holds up
to 100 sheets of plain paper (80 g/m2
or 20 lb).
2
Straighten up all four sides of the stack,
by tapping them on a desk or table top.
3
Set paper into the upper paper tray.
Make sure that the top of the stack is
not higher than the limit mark on the
tray guide.
4
Squeeze the tray guide and slide it
against the edge of the stack.
10
GETTING ACQUAINTED
5
Press
6
Press
.
Prt Help List
.
1 Tray Pap. Size
Note
If the paper feed unit (option) is installed,
refer to page 19 for details on how to specify
the paper size.
Press
.
8
After pressing
, press
or
until the desired size appears.
9
When the correct paper size is on the
. If the paper feed
display, press
unit (option) (page 17) is installed, you
can also select its paper size at this
time.
Tray guide OK?
OK
2. GETTING
ACQUAINTED
7
Letter(81/2 × 11)?
Registered
Note
Do not carry out any operations while
“Registered” appears on the display.
Tip
If the paper feed unit (option) is not
in
installed, you can press
in step
place of
skip step 6 and
to step 8 .
7
5
. Next,
, and jump directly
11
GETTING ACQUAINTED
To load small size paper
Note
We recommend that you always feed small size paper vertically, with one of its
shorter edges feeding into the machine.
1
Remove all paper before loading small
size paper in the upper paper tray.
2
Open the small panel on the back of
the machine by unlatching it as shown
in the illustration. Opening the small
panel makes it easy to handle small size
paper.
3
Set paper into the upper paper tray.
Make sure that the top of the stack is
not higher than the limit mark on the
tray guide.
4
After setting the paper into the tray, raise
the small panel until it snaps securely
into place.
12
Unlatch Here
GETTING ACQUAINTED
5
Press
6
Press
.
Prt Help List
.
1 Tray Pap. Size
Note
If the paper feed unit (option) is installed,
refer to page 19 for details on how to specify
the paper size.
Press
.
Tray guide OK?
8
9
After pressing
, press
or
until the desired size
appears.
When the correct paper size is on the
.
display, press
Note
OK
2. GETTING
ACQUAINTED
7
51/2 × 81/2?
Registered
Do not carry out any operations while “Registered” appears on the display.
Tip
If the paper feed unit (option) is not
installed, you can press
in step
place of
skip step 6 and
to step 8 .
7
in
5
. Next,
, and jump directly
Note
• Be sure to specify the paper size before printing on A4 or Letter paper again.
13
GETTING ACQUAINTED
Loading Other Media
Use the following procedures to load envelopes, transparencies, and label paper.
To load envelopes
Load up to 5 envelopes at a time, using the same procedure for loading
small size paper on page 12.
• Insert envelopes print side up with the stamp
position as shown.
Flap
• Envelope flaps should be securely folded down, so the envelope is “closed”.
This is especially important when printing on envelopes with adhesive on the
flaps, because heat generated during the printing process can cause the adhesive to melt and get on rollers.
Note
Refer to the paper select operation on page 14.
To load transparencies
Load only one transparency at a time, using the plain paper loading procedure on page 10 for large transparencies, and the small paper loading procedure on page 12 for small transparencies.
Note
Refer to the paper select operation on page 11 for large transparencies or page
13 for small ones.
To load label paper
Load only 10 sheets of label paper at a time, using the plain paper loading
procedure on page 10.
Note
Refer to the paper select operation on page 11.
14
GETTING ACQUAINTED
Connecting a Second Printer (Additional
Printer)
The machine features a port that you can use to connect your current printer
as a second printer (additional printer). Once you do, you have a selection
of this machine or the second printer at the touch of
key.
Note
Make sure that the power of your computer is turned off before making the connection.
1
Turn off both the machine and your second printer.
2
Connect one end of a parallel interface
cable to your second printer.
3
Connect the other end of the cable to
the second printer port, securing it in
place with the screws.
2. GETTING
ACQUAINTED
To connect to a second printer
Note
• It requires a standard 36-pin parallel cable
compliant with IEEE 1284.
• Refer to page 26 for details on using the second printer.
15
GETTING ACQUAINTED
Installing the Paper Feed Unit (Option)
This section describes how to install the paper feed unit (option) and how
to load paper in it. Addition of a paper feed unit provides you with a second
paper source that holds up to 250 sheets of A4 or Letter size paper.
Important!
Make sure that machine power is turned off and that the power cord is unplugged
from the power socket before installing the paper feed unit.
Paper Feed Unit Part Names
1 Front guide
2 Side guide
3 Limit mark
4 Paper size indicator
5 Connector
6 Corner guides
7 Metal plate
3
2
6
4
1
To install the Paper Feed Unit
1
Remove all the packing tapes from the
paper feed unit and pull the paper tray
out of the unit.
2
After removing all tapes and cardboard
from inside of the paper tray, insert the
tray back into the machine until it locks
into place. Locate the paper feed unit
where you plan to use the machine.
Note
Be sure to place the paper feed unit on a level
surface.
16
5
7
GETTING ACQUAINTED
3
The machine has handhold at the locations shown in the illustration. Note that
the illustration shows the machine as
viewed from above.
2. GETTING
ACQUAINTED
• This illustration shows the handhold location on the right side of the machine.
• This is the handhold location on the left
side of the machine.
4
Carefully lower the machine onto the
paper feed unit, making sure that the
dowels on the paper feed unit fit into
holes in the bottom of the machine
properly.
CAUTION
When lifting the machine, make sure your
hands are at the locations indicated by “ ” in
*
the illustration. This protects against pinching
your fingers between the machine and paper
feed unit.
Note
After the above installation, attach the power cord to the machine, and plug the
other end into an outlet. Refer to page 8 for details.
17
GETTING ACQUAINTED
To load paper into the paper feed unit
You can load either A4 or Letter size paper into the paper feed unit.
Refer to page 19 for details on how to change the positions of the paper
guides inside of the tray to match the type of paper you are using.
1
Pull out the paper tray and remove it
from the paper feed unit.
2
Press down on the metal plate in the
bottom of the paper tray until the plate
locks into place with a “click”.
3
Up to 250 sheets of plain paper (80 g/m2
or 20 lb) can be inserted into the paper tray as shown in the illustration.
Make sure that the top of the stack is
not higher than the limit mark on the
side fence.
Note
Make sure the leading corners of the paper
fit under the corner guides.
4
18
Slide the paper tray back into the paper feed unit until it locks into place.
GETTING ACQUAINTED
To change the paper size
1
Squeezing in on both sides of the front
guide, slide it to the correct position
for the desired paper size.
2
Squeezing in on both sides of the side
guide, slide it to the correct position
for the desired paper size.
2. GETTING
ACQUAINTED
Use the following procedure to set the positions of the paper guides inside
the paper tray for either A4 or Letter paper.
Important!
Whenever you change the paper size, be sure to also specify the paper size using
the operation panel.
To specify the paper size
After you install the paper feed unit (option), you can select between the
upper paper tray and the paper feed unit as the paper source, and specify
the size of paper in the paper feed unit.
1
Press the
2
Press
.
.
Prt Help List
1 Tray Pap. Size
19
GETTING ACQUAINTED
Press
3
.
OK
Lower Tray?
Note
The actual message that appears on the machine's display depends on the paper
source you last used. If "Upper Tray?" appears, press
or
to display the "Lower Tray?" message before proceeding with step 4 .
4
After pressing
, press
or
until the desired size appears.
5
When the correct size is on the display,
press
.
Letter(81/2 × 11)?
Registered
Note
Do not carry out any operations while “Registered” appears on the display.
100%
L 01
To install the paper size indicator
1
Break off the paper size indicator (1).
Positioning the indicator so the side that
shows the paper size you are using (A4
or Letter) is facing outwards, insert it
into the front of the paper tray (2).
1
2
To select the paper source
1
Press
until the desired paper source appears.
The upper paper tray is selected when
"U" is on the display, and the paper feed
unit is selected when "L" is on the display.
100%
U 01
100%
L 01
Note
Refer to page 10 for details on using the upper paper tray.
20
GETTING ACQUAINTED
Upgrading Memory
You can install Single Inline Memory Module (SIMM) to upgrade the onboard memory of the machine.
The machine is shipped from the factory with a 4MB SIMM, which can be
replaced with an 8MB, 16MB or 32MB SIMM.
Use the following procedure to install 8MB, 16MB or 32MB SIMM.
Note
The following are the required specifications for a SIMM used with this machine:
72-pin, 60ns, Extend Date Out (EDO), parity/non-parity.
1
Turn off the machine.
2
Remove the SIMM cover located on the
left side of the machine.
3
Pull apart the hooks on the both sides
of the SIMM board that hold it in place.
SIMM
21
2. GETTING
ACQUAINTED
Important!
Make sure you touch some grounded metal object with your hand to discharge any
electrostatic charge from your body before handling the SIMM.
GETTING ACQUAINTED
4
Carefully lift out the SIMM board currently installed on your printer.
5
Angle the new SIMM board as shown in
the illustration, and insert it down into
the slot. Gently rock it back and forth
until you hear it snap into place.
Important!
Make sure the SIMM board is oriented correctly when you insert it into the slot.
6
Make sure the hooks on the sides of the
SIMM board snap securely into place.
SIMM
7
22
Replace the cover by inserting its tabs
into the holes provided, as shown in
the illustration.
3. PRINTING AND SCANNING
When connected to a compatible PC, you can use this machine as a high
performance laser printer and black and white scanner.
Important!
• Make sure that your PC parallel port is set to ECP. If it is not, please consult your
PC manual on how to change it.
Note
•
•
For information on PC hardware and software requirements, please read the
README file on the CD.
Printer drivers are provided for both Windows© 95/98 and Windows© 3.1, but
the scanning feature requires Windows© 95/98.
Setting up
Before you can start printing and scanning you need to the following if you
have not done so already:
• Connect the machine to your PC
Installing the Software Drivers
Follow the steps below to install the printer/scanner drivers on your PC.
1
Make sure the machine is connected to your PC and paper is loaded in
the upper paper tray.
☛ Connecting to a computer, See page 7
☛ Loading Paper, See page 10
2
Switch the machine on.
3
Insert the provided software CD into your CD-ROM drive.
23
3. PRINTING
AND SCANNING
• Install the software drivers on your PC
PRINTINGAND SCANNING
Do one of the following according to your operating system:
4
• Windows® 95/98
Run the setup application. For example, if your CD-ROM is assigned to D, run “D:\Scanin\Setup.exe”.
• Windows® 3.1
First copy the disk images under the directory named “3.1” on the CD-ROM to floppy disks.
Then insert the first floppy disk into your floppy disk drive and run “install.exe”.
Note
•
•
5
You cannot install from CD-ROM under Windows 3.1.
Only the printer driver will be installed under Windows3.1.
Follow the instructions that appear on the display.
For detailed information on how to print and scan from your PC, please
refer to the online help provided.
24
PRINTINGAND SCANNING
Features You Can Access From the Printer
Driver
Printer Driver Contents
■ Paper Defaults
Paper size
Page orientation
Output
Paper source
About
■ N-Up Printing
Select a Layout Option
:
:
:
:
Size, Measurement Unit
Portrait, Landscape
Copies, Print in reverse order
Source
: Normal, Reduce for N-up printing
(Print page borders ; 2 pages up/sheet ; 4 pages up/sheet)
■ Document
Automatic
Graphics Mode
Font Resolution(dpi)
Graphics Resolution
Halftone
Job Settings
Raster
600
High
Screening
Photo
Desktop
(Grayscale) Publishing
Raster
GL/2
600
600
High
High
Screening Screening
High Speed
Draft
Raster
300
High
Screening
Business
Graphics
Raster
600
High
Dithering
: True Type Mode, Name
■ Configuration
Device Configuration
: Feeder ; Toner Save Mode ; Time-out
■ Fonts
Font Manager (To add printer fonts)
■ Overlays
Overlay Assignments : None, All pages, Odd/Even pages, First/Other pages
Cover/Divider page Overlays
Create New Overlay
Manage Overlays
: Get files from other sources to use as overlays, Send created overlays
to other sources, Rename overlays, Remove overlays
Important!
After printing a large number of pages, wait a few minutes befor turning off the
machine.
Note
Be sure to use online help and Read me file of the printer driver to get the most
out of all the printer features and functions.
25
3. PRINTING
AND SCANNING
Document Type Settings
PRINTINGAND SCANNING
Using the Second Printer (Additional Printer)
Use the following procedure to switch between this machine and a second
printer when a second printer is connected.
Important!
If the second printer has a bi-directional mode, make sure you turn it off.
Note
☛ Connecting a second printer, see page 15.
To print to the second printer
1
Press
indicator lights.
. The Second Printer
Important!
Whenever you change printers, be sure to also
change to the appropriate printer driver on
your computer.
Note
While the Second Printer Indicator is lit, print
data from your computer passes through the
machine to the second printer.
2
26
Perform the required print operation
with the application you are using.
4. COPYING
Making a Copy
1
Lift the platen cover (1). Place the
original face down at the arrow mark
on the scale (2). Close the platen cover
(3).
1
3
2
2
Press
tion.
to perform the copy opera-
Important!
After copying a large number of pages, wait a couple of minutes before attempting
to turn off the machine.
Note
When printing to label paper, envelopes, transparencies, or thin paper (60 g/m2
or 16 lb), remove each printout as it comes out of the machine. If you don't,
printed output can fall out of the output tray, and become curled.
4. COPYING
Alignment of Originals
Align the original with the scale of the exposure glass.
• When the original is a standard size such as
A4 or Letter, align it to the indexes on the scale.
• When your original is not standard size, align
the upper left edge of the original to the arrow mark on the scale.
For Type 2 Users
• When the original is smaller than the paper
you are copying to, place a second sheet of paper that is larger than the paper
you are copying to on top of the original when you place the original onto the
exposure glass.
27
COPYING
Making Multiple Copies
You can specify the number of copies to be printed by pressing
(to reduce the number).
increase the number) or
Lift the platen cover (1). Place the
original face down at the arrow mark
on the scale (2). Close the platen cover
(3).
1
1
(to
3
2
Press
or
until the desired number of copies appears.
2
100%
10
Note
You can specify the number of copies in the
range of 01 to 99.
Press
tion.
3
to perform the copy opera-
Note
During the copy operation, the display shows
the number of copies printed so far and that
to be printed. For example, 02/10 appears
while the second copy of a run of 10 copies is
being printed.
Page number
P.01
Number of
copies printed
so far
02/10
Number of copies
to be printed
Tips
• Press
•
to clear the setting after the copying has been finished.
(Type 1) or
(Type 2) produces copies at a faster speed,
but it can also result in a loss of printout quality.
•
28
With a Type 2 machine, using
automatically.
also activates the Sort feature
COPYING
Making a Book Copy
When copying from a book, the thickness of the book should be no more
than 30mm (1.18").
1
Lift the platen cover.
2
Open to the page you want to copy and
lay the page face down on the exposure
glass. Be sure to align one of the corners of the page with the arrow mark
on the scale.
3
Lower the platen cover.
4
Press
eration.
4. COPYING
to perform the copy op-
29
COPYING
Reduction and Enlargement
Reduce
Press
Or En8
0
the copy operation.
0
to select preset reduction
or enlargement
factors for
Lift the platen cover (0). Place the
original face down at the arrow mark
on the scale (a). Close the platen
cover (@I).
Reduce
Press 0
until the desired size ratio appears. The sizes change in the following order.
100%
+
L
93% +
LGL.
m PmisJ
LTR
77% +
t
to perform
65%
50% -I
the copy op-
.
@ Note
Press
copying.
30
C/ear
Modes
0
to clear
the setting
after
I100%
01
I
Lift the platen cover (0). Place the
original face down at the arrow mark
on the scale (0). Close the platen
cover (0).
Q
Enlarge
Press
until the desired size ra0
tio appears. The sizeschange in the following order.
I
100%
01
+ 121% 4 129% + 155%
LTR. LGL c
200%
J
@Start
Press
..Oto perform the copy opQ eration.
& Note
Press
Clear
copying.
Modes
0
to clear the setting after
31
I
COPYING
Zoom (In 1% Increments)
Zoom allows you to tune the preset reduction and enlargement factors to exactly the value you want. You can change the zoom factor in increments of 1%.
To use zoom
Setting Range
200 to 50%
1
Lift the platen cover (1). Place the
original face down at the arrow mark
on the scale (2). Close the platen cover
(3).
50 to 200%
1
3
2
2
3
Press
(decrease) or
(increase) until the desired
size ratio appears.
Press
eration.
to perform the copy op-
Note
Press
copying.
32
to clear the setting after
100%
01
99%
01
COPYING
Adjusting the Copy Image
To select the resolution/photo setting
1
Lift the platen cover (1). Place the
original face down at the arrow mark
on the scale (2). Close the platen cover
(3).
1
3
2
2
3
Press the Copy Mode key to specify the
resolution or halftoning method for the
copy operation.
A pointer (T) moves on the display to
indicate the current setting.
The following describes when you should use
each setting.
Use for:
Copying text
Copying photographs
Copying mixed text and photographs
Note
If the memory size of your machine is 4MB, the machine automatically switches
from Photo2 to Photo1 in the following cases.
4
♦ when
the
♦ when
you make multiple copies using the ADF (Type 2 only)
Press
eration.
(Type 1) or
(Type 2) key is on
to perform the copy op-
Note
Press
copying.
to clear the setting after
33
4. COPYING
Setting
[Text Fine]
[Photo1]
[Photo2]
COPYING
To adjust the image density
1
Lift the platen cover (1). Place the
original face down at the arrow mark
on the scale (2). Close the platen cover
(3).
1
3
2
2
Press the Density key to select the image density.
• Select [Lighter] to make the image lighter.
• Select [Darker] to make the image darker.
3
Press
eration.
to perform the copy op-
Note
Press
copying.
34
to clear the setting after
COPYING
Setting an Original on the ADF (Type 2 only)
You can load up to 10 sheets of plain paper (80 g/m2 or 20 lb) at a time into
the Automatic Document Feeder (ADF).
Important!
1
Fan the stack of originals. Never try to
place more than 10 sheets of plain paper onto the ADF.
2
Straighten up all four sides of the stack,
by tapping them on a desk or table top.
3
Place the stack of originals face down
on the ADF and slide the document
guide against the side of the stack.
4. COPYING
Check to make sure that the ADF cover is
securely closed before using it.
Note
The side of the original to be copied should
be face down.
4
Insert the stack of originals along the
document guide into the ADF.
Note
Insert your stack of originals into the ADF
until it stops. If you do not push it right in,
the machine will not detect the stack.
35
COPYING
5
Stretch the extend tray that supports the
originals.
6
Press
to perform the copy op-
eration.
Note
• If an original becomes misfed during feeding by the ADF, press
to stop the op-
eration. Refer to“Clearing a Paper
Misfeed” on page 47.
• We recommend you use text mode when
copying with the ADF.
• We recommend you copy photo originals
from the exposure glass for best results.
Originals that do not meet the following requirements can cause paper misfeeds,
and even damage the machine.
■ Requirements
• Thickness
• Weight
• Clear markings
• Uniform page size
• Page condition
36
0.05mm to 0.2mm (0.002" to 0.08")
60 to 90 g/m2 (16lb to 24lb)
Markings on the originals must be clear to be read
correctly.
All pages should be the same size.
Avoid using originals that are bent, curled, damaged,
or stapled, and originals printed on coated paper,
carbon paper, or photographic paper.
COPYING
Sorting Output (Type 2 only)
The following example shows how output is affected by turning sorting on
and off.
Important!
The sort operation requires scanning of all your originals into memory before
starting the copy operation. The number of originals that can be scanned at one
time depends on how much memory you have installed.
☛ Upgrading Memory, see page 21
To turn sorting on and off
1
Set the originals on the ADF.
Note
☛ Setting an originals on the ADF, see
2
4. COPYING
page 35.
Sorting is activated when the T pointer is
visible on the display above Sort/Memory
to select sortCopy. Press
ing on and off (no pointer).
37
COPYING
3
When you press
to start the copy
operation, all of the originals on the
ADF are scanned into memory before
they are printed.
Note
Press
copying.
38
to clear the setting after
5. TROUBLESHOOTING
General
Status
Nothing happens
when the machine is
turned on.
Paper misfeeds when
the machine is turned
on for the first time
after the installation.
After installing a SIMM
board, the memory
value that appears on
the machine's display
does not match the
amount of memory installed.
Cause
Remedy
Power cord is not con- Correctly connect the power
nected.
cord to the machine and plug it
into a outlet.
SIMM is not installed correctly. Install the SIMM correctly.
SIMM does not meet the Use a SIMM with the required
required specifications.
specifications.
Paper was loaded in the Remove the paper, turn the mamachine before the ma- chine off and then back on. Afchine was turned on.
ter machine initialization is
complete, load the paper back
into the machine.
SIMM does not meet the Use a SIMM with the required
specifications.
required specifications.
Page
p.8
p.21
p.21
p.8
P.21
Printing and Copying (1/2)
Cause
Remedy
Frequent paper mis- The upper paper tray is not Set the upper paper tray corset correctly
feeds.
rectly.
Improper paper.
Use paper of the correct size and
thickness.
Paper is not set correctly in Realign the paper with the pathe upper paper tray.
per guide, and if necessary, fan
the paper stack.
Paper is curled or damp. Uncurl the paper.
Insert paper into the upper paper
tray from the least-curled side.
Set paper face down if necessary.
Avoid using damp paper.
Too much paper is loaded Remove some of the paper.
in the machine.
Paper is loaded incorrectly. Check the paper and realign it
if necessary.
Page
p.4
p.9
p.10
p.10,12,18
p.10,12
p.10,12,18
—
p.10,14
p.10,18
39
5. TROUBLESHOOTING
Status
TROUBLESHOOTING
Printing and Copying (2/2)
Status
Cause
Remedy
Page
Frequent paper mis- Attempting to print on both Print on only one side. Two-side p.10,18
feeds.
sides of the paper.
printing is not supported by this
machine.
Printing onto loosely Flatten the envelopes to expel all p.14
stacked envelopes
air.
Misfeeding of the envelope Make sure that envelope flaps
p.14
flap.
are closed (folded down).
Part of the image is Toner is distributed un- Remove the toner cassette, gen- p.52
unclear.
evenly in the toner cassette. tly rock it left and right a few
times, and replace it into the
machine.
Black lines on the Heat damage to the toner Replace the toner cassette.
p.52
printout.
cassette caused by turning
off the machine too soon
after copying a large
number of pages.
Dark areas along the Turning off the machine too Replace the toner cassette.
p.52
sides of the printout. soon after printing or copying a large number of
pages.
Printing
Status
Remedy
Page
Abnormal or unex- Use of wrong cable.
pected printing results.
Wrong printer driver settings.
Attempting to print from a
DOS application at 600 dpi.
Parts of the image are The correct paper size is
not printed out.
not specified.
Cannot print from a Second printer is not consecond printer.
nected correctly.
Use the cable that comes with
this machine.
Change to the correct printer
driver settings.
Change to 300 dpi.
p.7
Specify the paper size using the
operation panel.
Check connections and make
corrections, if necessary.
p.19
Second printer is not selected.
Incorrect settings of the
second printer driver.
Press
so the indicator above it is lit.
Use the printer driver of the second printer to turn off bi-directional printing.
p.26
40
Cause
p.23
p.58
p.15
p.26
TROUBLESHOOTING
Copying
Cause
Remedy
Page
Unlock the scanner lock, turn
the machine off and then back
on.
p.3
Set the original correctly.
Straighten out the original(s).
Insert the original(s) from the
least-curled side.
Incorrect original specifi- Use originals of the correct size,
cations.
thickness, and quantity.
Close the ADF cover.
Original is not fed ADF cover is open.
from the ADF.
Original is not fed out The document output tray Set the document output tray
is not set correctly.
and the small pieces of plastic
properly.
film correctly.
Periodic black marks Cleaning pad is not in- Correctly install the cleaning
stalled.
pad.
on printed output.
Black lines and marks Copying to small-size paper Place a sheet of the same size as
on printed output with the Type 2 machine. the paper you are printing onto
when copying from the Different size original and behind the original.
exposure glass.
copy paper.
Non-white original back- Adjust the print density.
ground.
Dirty platen cover or expo- Clean the platen cover and exsure glass.
posure glass.
Black and white lines Dirty ADF transport path. Clean the ADF transport path.
on printed output
when using the ADF .
Output too light.
Low contrast original.
Adjust the print density.
Unclear photographic Copying in Text Fine Mode. Use the Copy Mode key to select
images.
the Photo1 or Photo2 Mode.
Parts of the original The correct paper size is Specify the paper size using the
image are not copied. not specified
operation panel.
p.35
p.35
p.35
"Error 90" appears on Locked scanner.
the display, and the copy
operation is aborted
when copying from the
exposure glass.
Frequent original mis- Original is not set correctly.
feeds with ADF.
Curled original(s).
p.36
p.35
p.6
p.51
p.27
p.34
p.51
p.51
p.34
p.33
p.19
Scanning
Status
Cause
Remedy
PC scanning does not The PC parallel port is not Consult your PC manual on how
function properly.
set to ECP.
to set your parallel port to ECP.
Page
p.23
41
5. TROUBLESHOOTING
Status
TROUBLESHOOTING
Error Messages (1/2)
The table below explains the error messages that may appear on the display and the appropriate
action to take.
Message
Cause
“Close cover”
Top unit is open.
“Add paper”
Machine is out of paper.
“Toner near end”
Machine is almost out of
toner.
Toner cassette is not loaded
correctly.
Machine is out of toner.
“Add Toner”
“Clear paper”
Paper misfeed, or paper
will not feed at all.
“Memory overflow”
Not enough memory capacity (PC printing only).
“Remove original”
(when original is set in
ADF)
“Original left” and
“on glass”
Original misfeed, or paper
will not feed at all.
Page
Close the top unit. If a copy job
p.3
is in progress, set the copy quantity again.
Load paper. If a copy job is in p.10,18
progress, set the copy quantity
again.
Prepare a toner cassette for re—
placement.
Correctly load the toner cassette
p.2
into the machine.
Replace the toner cassette, and p.52
set the copy quantity again during a copy job.
Remove the misfed paper. If a p.44,49
copy job is in progress, set the
copy quantity again.
If paper persistently msifeeds,
carry out the procedure on page
49.
Either lower the printer driver's p.21,25
"Resolution" setting or increase
memory capacity by installing a
larger SIMM. Press any operation panel key to clear the error
message from the display.
Remove the original from the ADF, p.48
and set the copy quantity again.
An original may be under Remove the original. If there is
no original, open the platen
the platen cover.
cover and close it again.
“Memoly full” and Too much sort copy data.
“Press Stop”
42
Remedy
—
Press
to cancel sort copy, p.21,37
and perform the copy operation
without sorting. If you need to
print big sort copy jobs, increase
memory capacity.
TROUBLESHOOTING
2
Error Messages ( /2)
Message
Cause
Remedy
Page
“Memory full” and Too many sort copy pages. Press
to print pages already p.21, 37
“Press Start”
stored in memory to cancel the
job, press
. If you need to
print big sort copy jobs, increase
memory capacity.
“Error 90”
Locked scanner.
Unlock the scanner lock, turn the
p.3
machine off and then back on.
“Error XX”
Possible machine defect. Turn power off and then back
p.8
on again.
5. TROUBLESHOOTING
If you have a problem with the machine and you can not resolve it by referring to the
information in this chapter, contact your service representative.
In case of “Error XX” messages, be sure to turn off the machine before calling.
43
TROUBLESHOOTING
Clearing a Paper Misfeed
This section describes how to clear a paper misfeed when one occurs.
CAUTION
When removing misfed paper, do not touch the fusing
section because it could be very hot.
Important!
Hold a misfed sheet with both hands and slowly pull it out. Do not use a tool, such
as a screwdriver or tweezers. as this may damage the unit.
Type 1
1
Pull the top release lever (1) and open
the top unit (2).
2
1
2
Pull out the toner cassette.
Note
• Be sure to hold the toner cassette by its handle.
• Keep the toner cassette horizontal to avoid
spilling the toner.
44
TROUBLESHOOTING
3
Pressing down on the paper release lever (blue) on the right side, pull out
the misfed paper.
4
Pull out the misfed paper in the directions indicated by the arrows in the illustrations.
Note
• If you are using the paper feed unit (option) and cannot clear the misfeed using this
procedure, use the procedure on page 47
instead.
• Sometimes toner may get on your hands.
5
Install the toner cassette into the machine.
Note
• Be sure to hold the toner cassette by its handle.
• Keep the toner cassette horizontal to avoid
spilling the toner.
☛ Install the starter toner cassette, see page 2.
6
Close the top unit.
Note
5. TROUBLESHOOTING
• If “Clear Paper” is still displayed after you clear
the jam, there may be paper jammed in another
part of the machine. Check all areas described
in this section.
Important!
If a paper misfeed occurs during a copy job, be sure to specify the desired copy
quantity again.
45
TROUBLESHOOTING
Type 2
Area 4
Area 3
Area 1
Area 2
Area 1 or 2
1
Pull the top release lever (1) and open
the top unit (2).
2
1
2
Pull out the toner cassette.
Note
• Be sure to hold the toner cassette by its handle.
• Keep the toner cassette horizontal to avoid
spilling the toner.
46
TROUBLESHOOTING
3
Push back the blue paper release lever
located on the right.
Note
The lever releases pressure on the paper. If
you do not push it back, you could damage
the machine when removing paper.
4
Pull out the misfed paper in the directions indicated by the arrows in the illustrations.
Note
• If you are using the paper feed unit (option) and cannot clear the misfeed using this
procedure, use the procedure on page 47
instead.
• Sometimes toner may get on your hands.
5
Install the toner cassette into the machine.
Note
• Be sure to hold the toner cassette by its handle.
• Keep the toner cassette horizontal to avoid
spilling the toner.
☛ Install the starter toner cassette, see page 2.
6
Close the top unit.
Note
5. TROUBLESHOOTING
• If “Clear Paper” is still displayed after you clear
the jam, there may be paper jammed in another
part of the machine. Check all areas described
in this section.
Important!
If a paper misfeed occurs during a copy job, make sure to specify the desired copy
quantity again.
47
TROUBLESHOOTING
Area 3 or 4
1
Open the ADF cover.
Note
Be sure to open the ADF cover before pulling
out the misfed original. Failure to do so can
result in damage to the original.
2
Pull out the misfed original.
3
Close the ADF cover, and make sure it
locks securely into place.
Important!
If copying was in progress, be sure to specify the desired copy quantity again.
Paper feed unit
Use the following procedure when the misfed paper cannot be removed
using the procedure on page 43 (for Type 1) or page 45 (for Type 2).
1
48
Pull out the paper tray.
TROUBLESHOOTING
2
Pull out the misfed paper.
3
Slide the paper tray back into the paper
feed unit until it locks into place.
Note
For how to set paper in the optional paper
feed unit, see page 16.
Tip
If you cannot find a remedy for unexpected printout results here,
check the printer driver's online help for other useful information.
When paper will not feed
1
Remove all paper.
2
Pull the top release lever 1 and open
the top unit 2.
5. TROUBLESHOOTING
If paper has completely stopped feeding, check using the following procedure. Please keep this sheet in a secure place together with the Operation
Manual.
2
1
49
TROUBLESHOOTING
3
Pull out the toner cassette.
4
Pull the blue key-shaped pawl located
deep inside on the right where the toner
cassette was set forward.
5
Install the toner cassette into the machine.
6
Close the top unit.
When the top unit is closed, the motor
will start running. When the sound of
the motor stops, set paper in the original position and continue with normal
operation.
50
6 USER MAINTENANCE
6. USER MAINTENANCE
Daily Maintenance
Clean with a damp cloth and wipe dry.
Note
Turn off the machine before cleaning
Exposure glass
Platen cover
(Type 1)
ADF
(Type 2)
Exposure glass
Platen cover
Platen
51
USER MAINTENANCE
Replacing the Toner Cassette And the
Cleaning Pad
Printing on A4 size paper under the recommended temperature and humidity conditions noted in the table under “Environment” on page 1, you
can expect a toner cassette to print approximately 3,000 pages when you are
printing typical business letters that have text covering 5% of the total surface. The starter cassette that comes with the machine can print approximately 1,000 pages. Pages that contain graphics use more toner and shorten
the life of a toner cassette.
WARNING
Do not incinerate used toner or toner containers. Toner dust might ignite when exposed to an
open flame. Dispose of the used toner cassettes according to local regulations for plastics.
This machine has been tested for safety using this supplier’s parts and consumables.
We recommend you only use these specified supplies.
CAUTION
When replacing the toner cassette and cleaning pad,
do not touch the fusing section because it could be
very hot.
1
Open the box of the new toner cassette
and check to make sure it contains a
toner cassette and cleaning pad.
Note
Be sure to hold the toner cassette by its handle.
2
Pull the top release lever (1) and open
the top unit (2).
2
1
52
3
6. USER MAINTENANCE
USER MAINTENANCE
Hold the toner cassette by its handle and
pull it out.
Note
Keep the toner cassette horizontal to avoid
spilling the toner.
4
Remove the old cleaning pad.
Note
Be sure to grasp the green handle when removing the cleaning pad.
5
Insert the new cleaning pad into place
by grasping the green handle.
6
Press down gently but firmly on both
sides of the pad to make sure that it is
inserted as far as it can go.
Do not forget to install the cleaning
pad whenever you install a new toner
cassette.
7
Prepare the new toner cassette. Holding the toner cassette by its handle, gently shake it side to side 5 or 6 times to
evenly distribute the toner inside.
Note
Be sure to hold the toner cassette by its handle.
53
USER MAINTENANCE
8
Look inside the machine and note the
locations of the arrows that indicate the
toner cassette guides on either side.
9
Make sure the plastic pins (marked with
“ * ” in the illustration next to step
above) on either side of the toner cassette slide along the guides inside the
machine.
Note
Be sure to hold the toner cassette by its handle.
10
To close the top unit, press down firmly
but gently on both sides of it until the
top unit closes and clicks securely into
place.
Note
Background gray cast is sometimes evident
just after installing a new toner cassette.
54
Storage
Paper
Paper should always be stored properly. Improperly stored paper might
result in poor image reproduction, creased copies, or paper misfeeds. Generally, avoid paper curling and absorption of moisture.
• Avoid storing paper in humid areas. In high-temperature and high-humidity, or lowtemperature and low-humidity conditions, store paper in a vinyl bag.
• Do not store paper where it will be exposed to heat.
• Store on a flat surface.
• Use older stock first.
• Do not lay heavy objects on paper.
• Keep open reams of paper in the package, and store as you would unopened paper.
Toner Cassette
• Keep the toner cassette inside the packaging that it comes packed in whenever it is
removed from the machine.
• Store horizontally in a cool, dark place.
• Never store a toner cassette where it will be exposed to heat.
• Do not lay heavy objects on the toner cassette.
CAUTION
Keep toner cassettes out of children’s reach.
55
6. USER MAINTENANCE
USER MAINTENANCE
7. TECHNICAL REFERENCE
Printing the Help List
You can print out the help list.
1
While the machine is not performing any
other operation, press
. The
message “Prt Help List” appears.
2
Press
3
Press
.
Press Start
to print the Help List.
Note
Print on A4, Letter, or Legal paper.
56
Prt Help List
OK
TECHNICAL REFERENCE
Selecting the Language
The language for the display can be selected from the following:
Press
.
2
Press
or
Language" appears.
3
Press
Prt Help List
until "2
OK
7. TECHNICAL
REFERENCE
1
2 Language
and press
or
until the desired language
appears.
4
Press
.
Registered
Note
• Do not carry out any operations while
“Registered” appears on the display.
• The setting is not registered, if
not pressed.
100%
01
is
57
TECHNICAL REFERENCE
Selecting 300 dpi or 600 dpi
Set the printer to 300 dpi if the designated output is not obtained when
printing using a DOS application compatible with the 300 dpi PCL printer.
1
Press
.
2
until “3
Press
or
User Param.” appears. The messages
change in the following order.
3
Press
and press
to
move the flashing block cursor until it
appears in the position shown in the
illustration to the right.
4
Press
Prt Help List
OK
3 User Param.
02:0010
Ç000
to change the setting to 1 or
0, as desired.
Display
02:0010 0000
02:0010 1000
Heater status
600 dpi (default setting)
300 dpi
Note
The bits other than the one highlighted in the illustration are unrelated to this
setting.
58
TECHNICAL REFERENCE
Press
.
Please wait
Note
• To cancel this change, press
or
instead of
. “Please wait”
and “Not Registered” appear on the display.
• Do not carry out any operations while
“Registered” appears on the display.
Registered
100%
01
59
7. TECHNICAL
REFERENCE
5
TECHNICAL REFERENCE
Economy Mode
The Economy mode can be selected to save power. If no operation is performed for 5 minutes, the display becomes blank and all the indicators go
out. If no operation is performed in the next 10 minutes or 235 minutes
(according to the setting), the heater turns off.
The economy mode is on as the default setting.
ON (default setting)
Operation
Heater off
panel off
5 minutes 15 minutes (including time when operation panel is off)
OFF
5 minutes 240 minutes (including time when operation panel is off)
Economy mode
Note
• During the Economy Mode, the heater turns back on in the following cases.
♦ when any key on the operation panel is pressed
♦ when the platen cover is opened
♦ when paper is set in or removed from the upper paper tray (Type 2)
♦ when the tray of the paper feed unit (option) is pulled out or pushed back
into the machine
♦ When the top unit is opened.
♦ When an original is set in or removed from the ADF.
♦ On initiation of PC printing.
• When a key on the operation panel is pressed to turn the heater on, the key does
not perform its normal function.
• After the heater is turned back on, the previous %, quantity, and Sort On settings are cleared.
Changing the Economy Mode
Hold down the Clear modes key for approximately 1 second until the
Economy mode indicator lights or goes out, as required.
Economy Mode ON
60
Economy Mode OFF
TECHNICAL REFERENCE
Selecting Toner Saving Mode
The toner saving mode status has two settings.
Press
. “Prt Help List” appears.
2
Press
or
until “3
User Param.” appears. The messages
change in the following order.
3
Press
and press
to
move the flashing block cursor until it
appears in one of the positions shown
in the illustration to the right.
Prt Help List
OK
7. TECHNICAL
REFERENCE
1
3 User param.
02:0010 0Ç00
Note
The bits other than the one highlighted in the
illustration are unrelated to this setting.
4
Press
to change the bit setting to
1 or 0, as desired.
Display
02:0010 0000
02:0010 0100
5
Press
Heater status
Off (Default)
On (Density will be lighter)
.
Please wait
Note
• To cancel this change, press
or
instead of
. “Please wait”
and “Not Registered” appear on the display.
• Do not carry out any operations while
“Registered” appears on the display.
Registered
100%
01
61
8. SPECIFICATIONS
General Specifications
Type 1
Type 1, Type 2
Paper Capacity
Power Supply
Upper tray
plain paper (80 g/m2: 20 lb.) 100 sheets
Option paper unit
plain paper (80 g/m2: 20 lb.) 250 sheets
Output tray Capacity
plain paper (80 g/m2: 20 lb.) 50 sheets
Memory
4 MB (Expandable to 8 MB, 16 MB or
32 MB)
EDO SIMM, 60 ns, 72 pin
Dimensions
249mm × 352mm × 576mm (H × W × D)
9.81" × 13.87" × 22.69" (H × W × D)
Weight
15.0 kg (33.08 lb)
Type 2
Power Consumption
Max
Printing (Average)
Copying (Average)
Stand-by (Average)
PC-Scan (Average)
Economy Mode
480 W
215 W
240 W
75 W
75W
15 W
Operating Environment
Temperature /Humidity
10°C (50°F) to 35°C (95°F)
15% to 80%
Machine Life
30,000 sheets/5 years
Printer Duty
Paper Capacity
Upper tray
plain paper (80 g/m2: 20 lb.) 100 sheets
Option paper unit
plain paper (80 g/m2: 20 lb.) 250 sheets
ADF (Auto Document Feeder) Capacity
plain paper:
A4, LT · LG (80 g/m2: 20 lb) 10 sheets
Output tray Capacity
plain paper (80 g/m2: 20 lb.) 50 sheets
Memory
4 MB (Expandable to 8 MB, 16MB or 32MB)
EDO SIMM, 60 ns, 72 pin
Dimensions
297mm × 352mm × 576mm (H× W× D)
11.70" ×13.87"× 22.69" (H× W× D)
Weight
15.5 kg (34.18 lb)
62
AC 120 V
60 Hz
6,000 sheets/1 month
Scanner Duty
2,000 sheets/1 month
Paper Sizes
Plain paper
Letter (LT) = 8 1/2" × 11"
Legal (LG) = 8 1/2" × 14"
Half Letter = 51/2" × 81/2"
A4 = 210 mm × 297 mm
A5 = 148 mm × 210 mm
F4 = 81/4" × 13"
Envelopes
Executive = 71/4" × 101/2"
Com 10 = 41/8" × 91/2"
Monarch = 38/7" × 71/2"
Other
Transparencies
Label Paper
SPECIFICATIONS
Printer Language
Resident Font
PCL 5e compatible
• Dutch 801 SWC
• Dutch 801 Italic SWC
• Dutch 801 Bold SWC
• Dutch 801 Bold Italic SWC
• Swiss 742 SWC
• Swiss 742 Italic SWC
• Swiss 742 Bold SWC
• Swiss 742 Bold Italic SWC
• Swiss 742 Condensed SWC
• Swiss 742 Condensed Italic SWC
• Swiss 742 Condensed Bold SWC
• Swiss 742 Condensed Bold Italic SWC
• Incised 901 SWC
• Incised 901 Italic SWC
• Incised 901 Bold SWC
• Fixed Pitch 810 Courier Roman SWC
• Fixed Pitch 810 Courier Bold SWC
• Fixed Pitch 810 Courier Italic SWC
• Fixed Pitch 810 Courier Bold Italic SWC
• Fixed Pitch 850 Letter Gothic 12 pitch/text SWC
• Fixed Pitch 850 Letter Gothic Bold 12 pitch/text SWC
• Fixed Pitch 850 Letter Gothic Italic 12 pitch/text SWC
• Flareserif 821 SWC
• Flareserif 821 Extra Bold SWC
• Ribbon 131 SWC
• Wingbats SWM
Print Resolution
600 dpi × 600 dpi
1200 dpi × 600 dpi (enhanced)
Print Speed
6 ppm (pages per minute)
Paper/Media Types
Plain paper
Envelopes
Transparencies
Label paper
Paper Weight
60 to 90 g/m2 (16 to 24 lb)
Interface
IEEE 1284
Scanner Specifications
Configuration
Grey scale
Flatbed / ADF
256 levels (8-bit)
Document Size
Interface
LG, LT, HLT,A4, A5, B5
IEEE 1284
Optical Resolution
Compatibility
300dpi
TWAIN
Scanning Resolution
ADF
1bit
8bit
100 × 100, 150 × 150,
200 × 200, 300 × 300,
400 × 400, 600 × 600 dpi
300 × 300 dpi
ECP mode
Up to 10 pages of 80g /m2(20lb), Plain paper
Maximum scanning size
212 × 351.6 mm
OS
Windws 95/98 only
63
8. SPECIFICATIONS
Printing Specifications
SPECIFICATIONS
Copying Specifications
Copy Speed
Paper Weight
6 cpm (copy per minute)
60 to 90 g/m2 (16 to 24 lb)
Warm-up Time
Original Types
30 seconds or less
Mulitiple Copies
Exposure glass (Type 1/Type 2)
Sheet/Book
ADF (Type 2)
Up to 10 pages of 80 g/m2 (20 lb),
Plain paper
Up to 99 copies
Maximum Original Size
Copy Reduction and Enlargement
Legal (LG) = 8 1/2 " × 14"
50%, 65%, 77%, 93%, LGL LTR
121%, 129%, 155%, 200%, LTR LGL
Copy Resolution
First copy
17 seconds or less
Paper/Media Types
Plain paper
Envelopes
Transparencies
Label paper
64
600 dpi × 600 dpi
INDEX
INDEX
1
F
1 to 1 Copy ........................................................... 27
Front guide .................................................... 16, 19
Front paper support ............................................. 16
B
Book Copy ............................................................ 29
C
Check Display ........................................................ x
Clearing a Paper Misfeed .................................... 43
cleaning pad ........................................................ 52
Computer port .............................................. viii, ix
Connecting a Second Printer
(Additional Printer) ............................................ 15
Connecting to a computer .................................... 7
Connector ............................................................ 16
Copy Mode key ..................................................... xi
Corner guides ................................................ 16, 18
D
Daily Maintenance .............................................. 51
Density key ............................................................. x
Display ................................................................. xi
Document guides ................................................ ix
Document output tray ......................................... ix
Installing .......................................................... 6
E
Economy Mode .................................................... 60
Economy Mode/Clear Modes key ........................ xi
Enlarge .................................................................. x
Enlargement ....................................................... 30
envelopes ............................................................. 14
Exposure glass .............................................. viii, ix
Extend tray ................................................... viii, ix
H
Help List ............................................................... 56
Help/Function ..................................................... xi
I
image density ...................................................... 34
Installing
Document output tray...................................... 6
Toner cassette ................................................... 2
Upper paper Tray .............................................. 4
L
label paper ........................................................... 14
Language ............................................................. 57
Limit mark .............................................. 10, 16, 18
Loading Paper ..................................................... 10
Loading
plain paper ..................................................... 10
small size paper.............................................. 12
other media .................................................... 14
Location .................................................................1
M
Memory Copy (Type 1 only) ......................... xi, 28
Metal plate ...............................................10, 16, 18
Multiple Copies .................................................... 28
O
OK ........................................................................ xi
Operation Panel ....................................... viii, ix, x
Original
Setting (Exposure glass) ................................ 27
Setting (ADF) ................................................. 35
Requirements (ADF) ...................................... 36
Original Guide ..................................................... ix
Output tray ................................................... viii, ix
65
INDEX
A
Additional Printer ................................................ 15
Auto image density .............................................. 34
Automatic Document Feeder (ADF) ................... ix
Setting an original ......................................... 35
INDEX
P
Paper and Other Media ......................................... 9
Paper Select ........................................................... x
paper size
Changing ........................................................ 19
Specifying (upper) ................................... 11, 13
Specifying (lower) .......................................... 19
Paper size indicator ....................................... 16, 19
Paper Feed Unit ................................................... 16
PC Interface ........................................................... x
Photo1 ................................................................. 33
Photo2 ................................................................. 33
Platen cover .................................................. viii, ix
Power socket ................................................. viii, ix
Power switch ................................................. viii, ix
printer driver
Windows 95 .................................................... 23
Windows 3.1 ................................................... 24
Q
Quantity keys ......................................................... x
R
Reduce ................................................................... x
Reduction ............................................................ 30
Replacing
Toner cassette ................................................. 52
cleaning pad ................................................... 52
resolution/photo setting ...................................... 33
S
Safety Information ................................................ i
Scanner lock ................................................. viii, ix
Unlocking ......................................................... 3
Second Printer (Additional Printer) port .... viii, ix
UE G026
66
Second Printer (Additional Printer) ..................... x
Connecting .....................................................15
Using .............................................................. 26
Side guide ......................................................16, 19
SIMM cover ................................................... viii, ix
SIMM ................................................................... 21
Small size paper feed access panel .............. viii, ix
small size paper ................................................... 12
sort .......................................................................37
Sort/Memory Copy (Type 2 only) ........... xi, 28, 33
SPECIFICATIONS ................................................ 62
Start ....................................................................... x
Stop ...................................................................... xi
Storage .................................................................55
T
Text Fine .............................................................. 33
Toner cassette
Installing .......................................................... 2
Replacing .......................................................52
Top release lever ........................................... viii, ix
Top unit ........................................................ viii, ix
transparencies .....................................................14
TROUBLESHOOTING ..........................................39
Type 1 ................................................................. viii
Type 2 ................................................................... ix
U
Upgrading Memory ............................................. 21
Upper paper tray ................................. viii, ix, 4, 10
User Parameter .............................................. 58, 61
Using the Second Printer (Additional Printer) .. 26
Z
Zoom .............................................................. xi, 32
Overseas Affiliates
Spain
RICOH CORPORATION
5 Dedrick Place
West Caldwell, New Jersey
07006
Phone: +1-973-882-2000
RICOH ESPAÑA S.A.
Avda. Litoral Mar, 12-14,
08005 Barcelona
Phone: +34-(0)93-295-7600
The Netherlands
Italy
RICOH EUROPE B.V.
Groenelaan 3, 1186 AA,
Amstelveen
Phone: +31-(0)20-5474111
RICOH ITALIA SpA
Via della Metallurgia 12,
37139 Verona
Phone: +39-(0)45-8181500
United Kingdom
Hong Kong
RICOH UK LTD.
Ricoh House,
1 Plane Tree Crescent,
Feltham,
Middlesex, TW13 7HG
Phone: +44-(0)181-261-4000
RICOH HONG KONG LTD.
23/F., China Overseas
Building,
139, Hennessy Road,
Wan Chai, Hong Kong
Phone: +852-2862-2888
Germany
Singapore
RICOH DEUTSCHLAND
GmbH
Mergenthalerallee 38-40,
65760 Eschborn
Phone: +49-(0)6196-9060
RICOH ASIA PACIFIC
PTE.LTD.
260 Orchard Road,
#15-01/02 The Heeren,
Singapore 238855
Phone: +65-830-5888
France
Operation Manual
U.S.A.
Operation Manual
Read this manual carefully before you use this product and keep
it handy for future reference. For safety, please follow the
instructions in this manual.
RICOH FRANCE S.A.
383, Avenue du Général
de Gaulle
BP 307-92143 Clamart
Cedex
Phone: +33-(0)1-40-94-38-38
SUPPLIES MODEL NAME
The correct model name of supplies for
your Bizworks is:
RICOH TONER CASSETTE TYPE 1120D BLACK
RICOH CO., LTD.
15-5, 1 chome, Minami-Aoyama, Minato-ku, Tokyo
Phone: Tokyo 3479-3111
Printed in The Netherlands
EE G027-8600
706_GB_1~4
1
99.8.3, 6:11 PM
Introduction
This manual contains detailed instructions on the operation and maintenance of this machine. To get
maximum versatility from this machine, all operators should carefully read and follow the instructions in
this manual. Please keep this manual in a handy place near the machine.
Please read the safety information on pages i - iii of this manual. It contains Important Information related
to user safety and preventing equipment problems.
Operator Safety:
This machine is considered a class 1 laser device, safe for office/ EDP use. The machine contains a 5milliwat, 765 - 805 nanometer wavelength, GaAIAs laser diodes. Direct (or indirect reflected) eye contact
with the laser beam might cause serious eye damage. Safety precautions and interlock mechanisms have
been designed to prevent any possible laser beam exposure to the operator.
Declaration of Conformity
“The Product complies with the requirements of the EMC Directive 89/336/EEC and the Low Voltage
Directive 73/23/EEC.”
In accordance IEC 60417 this machine uses the following symbols for the main switch:
a means POWER ON.
b means POWER OFF.
The following label is attached on the machine.
This label can be found when opening the bypass tray.
CLASS 1 LASER PRODUCT
IN ACCORDANCE WITH IEC 825
LASER KLASSE 1 nach IEC 825
Laser Safety:
The optical housing unit can only be repaired in a factory or at a location with the requisite equipment. The
laser subsystem is replaceable in the field by a qualified Customer Engineer. The laser chassis is not
repairable in the field. Customer engineers are therefore directed to return all chassis and laser subsystems to the factory or service depot when replacement of the optical subsystem is required.
Notes:
•
•
•
Model names for the machines do not appear in the following pages. Check the type of your machine before reading this manual.
Bizworks 706
Some illustrations may be slightly different from your machine.
Certain types may not be available in some countries. For details, contact your local dealer.
Two kinds of size notation are employed in this manual. With this machine refer to the metric version.
For good print quality, Ricoh recommends that you use genuine Ricoh toner.
Ricoh shall not be responsible for any damage or expense that may result from the use of parts other than
genuine Ricoh parts in your Ricoh office product.
Power Source: 220 ~ 240 V, 50/60 Hz, 2.2 A
Please make sure to connect the power cord to a power source as above. For details about power connection, refer to page 8.
Trademarks
Microsoft®, Windows®, and MS-DOS® are registered trademarks of Microsoft Corporation in the United
States and/or other countries.
Other product names used herein are for identification purposes only and might be trademarks of their
respective companies. We disclaim any and all rights in those marks.
© Copyright 1999, RICOH CO., LTD.
706_GB_2~3
1
99.8.3, 1:07 PM
Safety Information
When using your machine, the following safety precautions should always
be followed.
Types of warnings used in this manual
WARNING
Ignoring this warning could cause serious injury or even
death.
CAUTION
Ignoring this caution could cause injury or damage to property.
Symbol examples
The d symbol means a situation that requires you take care.
The
symbol means you MUST NOT carry out this operation.
This example means “Do not take apart.”
The ● symbol means you MUST perform this operation.
This example means “You must remove the wall plug.”
Microsoft®, Windows®, and MS-DOS® are registered trademarks of Microsoft Corporation in the
United States and/or other countries.
Other product names used here in are for identification purposes only and might be trademarks of
their respective companies. We disclaim any and all rights in those marks.
i
b(GB)6.5_00_i-iii
1
99.8.3, 1:12 PM
WARNING:
• Use of controls or adjustment or performance of procedures other than those
specified in this manual may result in hazardous radiation exposure.
• Only connect the machine to the power source described on the inside of the
front cover.
• Avoid multi-wiring.
• Do not damage, break or make any modifications to the power cord. Do not
place heavy objects on it, pull it hard or bend it more than necessary. These
actions could cause an electric shock or fire.
• Do not plug or unplug the power cord with your hands wet. Otherwise, an
electric shock might occur.
• Make sure the wall outlet is near the machine and freely accessible so that in
event of an emergency it can be unplugged easily.
• Do not remove any covers or screws other than those specified in this manual.
Some parts of the machine are at a high voltage and could give you an electric shock. Also, reflected eye contact with the laser beam may cause serious
eye damage. When the machine needs to be checked, adjusted, or repaired,
contact your service representative.
• Do not take apart or attempt any modifications to this machine. There is a
risk of fire, electric shock, explosion or loss of sight.
• If the machine looks damaged or breaks down, smoke is coming out, there
is a strange smell or anything looks unusual, immediately turn off the power
switch then unplug the power cord from the wall. Do not continue using the
machine in this condition. Contact your service representative.
• If metal, liquid or foreign matter falls into the machine, turn off the power
switch, and unplug the power cord.
Contact your service representative. Do not keep using the machine with a
fault or defect.
• Do not put any metal objects or containers holding water (e.g. vases, flowerpots, glasses) on the machine. If the contents fall inside the machine, a fire
or electric shock could occur.
• Do not incinerate used toner or toner cassettes. Toner dust might ignite when
exposed to an open flame. Dispose of the used toner cassettes according to
local regulations for plastics.
ii
b(GB)6.5_00_i-iii
2
99.8.3, 1:12 PM
CAUTION:
• Keep the machine away from humidity and dust. A fire or an electric shock
might occur.
• Do not place the machine on an unstable or tilted surface. If it topples over,
it could cause injury.
• When you move the machine, unplug the power cord from the wall outlet to
avoid fire or electric shock.
• When the machine is not be used for a long time, unplug the power cord.
• When you pull out the plug from the socket, grip the plug to avoid damaging
the cord and causing fire or electric shock.
• If you use the machine in a confined space, make sure there is a continuous
air turnover.
• Do not reuse stapled paper. Do not use aluminium foil, paper containing
carbon or any other conductive paper. Otherwise, a fire might occur.
• When removing misfed paper, or replacing the toner cassette and the cleaning pad, do not touch the fusing section because it could be very hot.
• This machine has been tested for safety using this supplier’s parts and
consumables. We recommend you only use these specified supplies.
iii
b(GB)6.5_00_i-iii
3
99.8.3, 1:12 PM
Energy Star program
Energy Star®
As an Energy Star partner, we have determined that
this machine model meets the Energy Star Guidelines for energy efficiency.
The Energy Star Guidelines intend to establish an international energy- saving system for
developing and introducing energy-efficient office equipment to deal with environmental issues, such as global warning.
When a product meets the Energy Star Guidelines for energy efficiency, the Partner shall
place the Energy Star logo onto the machine model.
This product was designed to reduce the environmental impact associated with printing
equipment by means of energy-saving features such as Low Power mode.
• Low Power Mode
This machine automatically lowers its power consumption 15 minutes after the last
printing job has been completed. To exit Low Power mode, press any key on the
operation panel.
The machine returns to the ready condition in about 22 seconds. To change the low
Power delay, see page 108.
Specification
Low Power Mode
(Economy Mode)
Power consumption 15 W
Default delay
15 min.
Recovery time
22 sec.
Recycled paper
Please contact your sales or service representative for recommended recycled paper types
that may be used in this machine.
iv
b(GB)6.5_00_iv-ix(Contents)
4
99.8.3, 1:12 PM
Contents
Safety Information .............................................................................. i
Energy Star program .......................................................................... iv
Part Names ......................................................................................... x
Operation Panel .................................................................................. xii
1. SETTING UP
Package Contents ...............................................................................
Location ..............................................................................................
Installing the Starter Toner Cassette ...................................................
Installing Other Hardware ..................................................................
Unlocking the Scanner ...................................................................
Removing the Protective Sheet ......................................................
Installing the Document Output Tray .............................................
Installing the Upper Paper Tray .....................................................
Preparing the Output Tray ..............................................................
Connecting to a Computer ..................................................................
Connecting the Telephone Line and Optional Telephone Handset ....
Turning On the Machine ....................................................................
1
1
2
4
4
4
5
6
6
7
8
9
2. GETTING ACQUAINTED
Paper and Other Media .......................................................................
Loading Paper.....................................................................................
Loading Plain Paper into the Upper Paper Tray .............................
Loading Small Size Paper ..............................................................
Loading Other Media .........................................................................
Loading Envelopes .........................................................................
Loading Transparencies..................................................................
Loading Label Paper ......................................................................
Second (Additional) Printer................................................................
Connecting to a Second Printer ......................................................
Paper Feed Unit (Option) ...................................................................
Paper Feed Unit Part Names ..........................................................
Installing the Paper Feed Unit ........................................................
Loading Paper into the Paper Feed Unit ........................................
Changing the Paper Size ................................................................
10
11
11
13
15
15
15
15
16
16
17
17
17
19
20
v
b(GB)6.5_00_iv-ix(Contents)
5
99.8.3, 1:12 PM
Specifying the Paper Size ...............................................................
Installing the Paper Size Indicator .................................................
Selecting the Paper Source .............................................................
Upgrading Memory ............................................................................
20
21
22
23
3. PRINTING AND SCANNING
Setting up ............................................................................................
Installing the Software Drivers...........................................................
Features You Can Access From the Printer Driver .............................
Using the Second Printer (Additional Printer) ...................................
Printing to the Second Printer ........................................................
25
25
27
28
28
4. FAXING
Switching between Fax Operation and Copy Operation Mode ..........
Entering Characters on the Operation Panel ......................................
Entering Numbers ..........................................................................
Entering Letters, Symbols and Spaces ...........................................
Deleting Characters and Moving the Cursor ..................................
Setting up ............................................................................................
Please Read This First ....................................................................
Connecting to the Telephone Line ..................................................
Storing your Own Name/TTI .........................................................
Setting the Dial Mode ....................................................................
Storing your Own Fax Number ......................................................
Setting the Date and Time ..............................................................
Turning Summer Time (Daylight Saving Time) on/off ..................
Sending Faxes.....................................................................................
How to Send a Fax .........................................................................
Entering Pauses and Tones in Fax Numbers ..................................
Entering Pauses ....................................................................
Entering Tones .....................................................................
Redialling a Number ......................................................................
Automatic Redial............................................................................
Cancelling Automatic Redial ...............................................
Cancelling Transmission of a Fax ..................................................
Receiving Faxes .................................................................................
vi
b(GB)6.5_00_iv-ix(Contents)
6
99.8.3, 1:12 PM
29
30
30
30
31
32
32
32
33
34
36
38
39
40
40
43
43
44
44
45
45
45
46
Choosing a Reception Mode ..........................................................
FAX Model ..........................................................................
TEL Model ...........................................................................
Switcing between FAX Mode and TEL Mode .....................
Receving calls in TEL Mode ................................................
Screening out Unwanted Faxes with Authorized Reception ..........
Turning Authorized Reception on/off ..................................
Cancelling Reception of a Fax .......................................................
Making Telephone Calls .....................................................................
Faxing During a Telephone Call ....................................................
Sending a Fax During a Telephone call ...............................
Receving a Fax During a Telephone call .............................
Monitoring the Line while Dialling with On Hook........................
Remote Change ..............................................................................
Storing Fax and Telephone Numbers .................................................
Quick Dials .....................................................................................
Storing Quick Dials..............................................................
Editing Quick Dials..............................................................
Clearing Quick Dials............................................................
Name Dials .....................................................................................
Storing Name Dials ..............................................................
Deleting Name Dials ............................................................
Dialling with Name Dials ....................................................
Reports and Lists ................................................................................
Printing the Journal ........................................................................
Printing the Dial List ......................................................................
Transmission Result Report ...........................................................
Error Report....................................................................................
Power Failure Report .....................................................................
Unauthorized Call Report...............................................................
Advanced Features .............................................................................
Making Machine Sounds Louder or Quieter ..................................
Sending Faxes Over Unreliable Lines-Slow (4800bps) .................
RDS ................................................................................................
Page Header....................................................................................
Changing On/Off Settings ..............................................................
46
46
46
47
47
48
49
49
50
50
51
51
52
52
54
54
55
56
58
59
59
61
62
63
63
64
64
65
65
65
66
66
67
68
68
68
vii
b(GB)6.5_00_iv-ix(Contents)
7
99.8.3, 1:12 PM
5. COPYING
Making a Copy ...................................................................................
Making Multiple Copies .....................................................................
Making a Book Copy .........................................................................
Reduction and Enlargement ...............................................................
To Set the Reduction Factor ...........................................................
To Set the Enlargement Factor .......................................................
Zoom (In 1% Increments) ..................................................................
To Use Zoom ..................................................................................
Adjusting the Copy Image ..................................................................
To Select the Resolution/Photo Setting ..........................................
To Adjust the Image Density ..........................................................
Setting an Original on the ADF ..........................................................
Sorting Output ....................................................................................
Sorting Copying .............................................................................
70
71
72
73
73
74
75
75
76
76
77
78
80
80
6. TROUBLESHOOTING
General ...............................................................................................
Printing and Copying..........................................................................
Printing ...............................................................................................
Copying and Faxing ...........................................................................
Scanning .............................................................................................
Error Messages ...................................................................................
When the Receive File Indicator is Lit ...............................................
Clearing a Paper Misfeed ...................................................................
Clearing a Feed in the Main Unit ...................................................
Clearing a Misfeed in the ADF ......................................................
Clearing a Misfeed in the Optional Paper Feed Unit .....................
When Paper Will Not Feed.............................................................
82
82
83
84
86
86
90
91
91
93
93
94
7. USER MAINTENANCE
Daily Maintenance ............................................................................. 96
Replacing the Toner Cassette and the Cleaning Pad .......................... 97
Storage ................................................................................................ 100
Paper ............................................................................................... 100
Toner Cassette ................................................................................ 100
viii
b(GB)6.5_00_iv-ix(Contents)
8
99.8.3, 1:12 PM
8. TECHNICAL REFERENCE
Printing the Help List ......................................................................... 101
Customising Default Settings with the User Parameters.................... 102
Changing the User Parameters ....................................................... 102
User Parameter Switch Summary .................................................. 103
Function List....................................................................................... 106
Selecting the Language ...................................................................... 107
Economy Mode .................................................................................. 108
Changing the Economy Mode ........................................................ 108
9. SPECIFICATIONS ........................................................................ 109
Index .............................................................................................. 112
ix
b(GB)6.5_00_iv-ix(Contents)
9
99.8.3, 1:12 PM
Part Names
Automatic Document Feeder
(ADF)
Upper paper tray
Holds up to 10 sheets of paper for
automatic feeding. Place originals face
down.
Holds up to 100 sheets
of plain paper.
Document guides
Slide the left guide to fit
the size of the paper you
are feeding.
Original guide
Guides the original
correctly into the
machine. Make sure
your original fits under
this guide.
Exposure glass
Place originals on
this glass face
down.
Top unit
Operation panel
Key panel for
controlling the
machine.
Power switch
Turns the machine
on and off.
Platen cover
Output tray
extension
Lift this cover to access the exposure
glass when you want to scan a page
from a book, magazine, or any other
original that cannot be fed using the
ADF.
Pull out to support paper
output from the machine.
Top release lever
Pull to release the top unit
and open it.
Output tray
Prints are delivered here. This tray
can hold up to 50 sheets.
x
b(GB)6.5_00_x-xvi
10
99.8.3, 1:12 PM
Document output tray
Scanned documents are delivered here.
GENERAL
DESCRIPTION
Scanner lock
Locks the scanner to
prevent damage
during transport.
Be sure to release this
lock before using the
machine.
Upper tray
extension
Extend to support
originals.
Small size paper
feed access panel
This panel can be
lowered to provide
easier handling
when printing on
or copying to
small size paper.
SIMM cover
Power socket
Open this cover when you want
to install a SIMM and expand
memory.
Second Printer
(Additional Printer) port
You can connect a second
printer to this port.
Computer port
Connect your computer here.
TEL/LINE
Connect your telephone line
and optional handset here.
xi
b(GB)6.5_00_x-xvi
11
99.8.3, 1:12 PM
Operation Panel
1
D
E
F
Note
Be sure to panel the
protective seet from
the operation panel
G
<General>
1 Display
H
I
B
6 Stop key
Messages and prompts appear here.
2 Fax/Copy key
Press to switch between fax
operation mode and copy operation
mode. The indicators to the left of
this key show which mode the
machine is currently in.
3 Numeric keypad
Use these keys to enter the number
of copies, dial a fax number or
specify values.
4 Clear key
Press to delete the character to the
left of the display cursor. When the
cursor is located at the far left
position, pressing this key deletes all
of the input characters (when
programming functions only).
5 Start key
Press to start copying or begin
sending or receiving a fax.
Press this key to interrupt the current
operation and return the machine to
the standby state. To reset printer
mode, hold down this key for at
least 3 seconds.
7 Economy Mode/Clear
Modes key
Pressing this key clears any selected
settings to their defaults and cancels
the ongoing operation. Hold down
this key for more than about 3
seconds to turn Economy mode on
or off.
☛ Economy Mode, see page 108.
8 Economy Mode indicator
Lights when Economy mode is
turned on.
9 Help/Function key
Use to print the Help List. Press
once and enter a number for access
to various function settings.
☛ Printing the Help List, see page 101.
xii
b(GB)6.5_00_x-xvi
2
12
99.8.3, 1:12 PM
GENERAL
DESCRIPTION
0 9
8
A
7
6
5
C
4
3
0 Zoom keys
E Busy indicator
In copy mode, press these keys to
fine-tune the preset reduction and
enlargement ratios. Also use to
select function settings and navigate
the function menus.
A OK key
Press to enter values or execute an
operation when prompted by a
message on the display.
B Original Type Select key
Press to select a setting that best
matches your copy original or fax
document.
☛ Image Type, see page 76.
C Density key
Press to make copies/faxes lighter or
darker. Select Auto Image Density
to let the machine choose a suitable
setting.
D Check Display indicator
Blinks to alert you to read a message
on the display.
Lights during a fax operation and
when making telephone calls.
F PC Interface indicator
Lights while the machine is
receiving data from a connected
computer.
<Copying>
G Sort/Memory Copy key
Press to change order in which your
copy sets are delivered.
☛ Sorting Output, see page 80.
H Reduce key
Press to reduce the size of an image
when copying.
☛ To Set the Enlargement Foctor,
see page 73.
I Enlarge key
Press to enlarge the size of an image
when copying.
☛ To Set the Reduction Foctor,
see page 74.
xiii
b(GB)6.5_00_x-xvi
13
99.8.3, 1:12 PM
M
K
Q
L
J Paper Select key
Press to select the copy paper size.
When the optional paper feed unit is
installed, press to switch between
paper sources.
<Faxing>
K Receive File indicator
Lights to let you know there is
received fax data in memory that
could not be printed for some
reason.
☛ Substitute Reception, page 46.
L Quick Dial keys
In fax operation mode, press one of
these keys once to recall a fax or
telephone number you have stored
beforehand. In copy operation
mode, these keys have different
uses.
☛ Quick Dials, see page 54.
J
M Reception Mode key
Press to choose whether the machine
should answer all calls
automatically.
☛ Choosing the Reception Mode,
see page 46.
N Name key
Press to recall a fax or telephone
number stored in a Name Dial.
☛ Name Dials, see page 59.
O Pause/Redial key
Press this key in fax standby mode
to recall the last number dialled.
While entering a fax number, press
this key to enter a pause (shown on
the display as a hyphen).
P On Hook Dial key
Press this key to establish a
connection with the telephone line
connected to the machine for
dialing.
☛ On Hook, see page 52.
xiv
b(GB)6.5_00_x-xvi
14
99.8.3, 1:12 PM
GENERAL
DESCRIPTION
O
N
P
<Printing>
Q Second Printer key
Press this key to select between
printing to this machine (indicator
off), and printing to a second printer
connected to the machine (indicator
on).
xv
b(GB)6.5_00_x-xvi
15
99.8.3, 1:12 PM
This page is intentionally blank
xvi
b(GB)6.5_00_x-xvi
16
99.8.3, 1:12 PM
1. SETTING UP
Package Contents
WARNING
Make sure the wall outlet is near the machine and freely accessible so that in event of an
emergency it can be unplugged easily.
Do not put any metal objects or containers holding water (e.g. vases, flowerpots, glasses)
on the machine. If the contents fall inside the machine, a fire or electric shock could occur.
CAUTION
Keep the machine away from humidity and dust. A fire or an electric shock might occur.
Do not place the machine on an unstable or tilted surface. If it topples over, it could cause injury.
If you use the machine in a confined space, make sure there is a continuous air turnover.
Location
Environment
Temperature
Humidity
Acceptable
Recommended
10 to 35°C (50 to 95°F)
15 to 25°C (59 to 77°F)
15 to 80%
30 to 70%
• The machine must be level within 3mm (0.11") both front to rear and left to right.
Locations to Avoid
• Areas exposed to direct sunlight or strong light (more than 2000 lux).
• Areas exposed to cool or heated air (from air conditioners, heaters etc.). Sudden temperature changes can cause condensation to form inside the machine.
• Areas where the machine might be subjected to frequent strong vibration.
• Areas higher than 2500m (8,221 feet) above sea level.
Machine Clearance
Min. 180mm (7.09")
Place the machine near the wall outlet, providing minimum
(Back)
clearance as shown.
Min. 50mm
(1.97")
Machine
Min. 30mm
(1.18")
(Front)
1
b(GB)6.5_Chapter 01_p01-09
1
99.8.3, 1:12 PM
1. SETTING UP
Make sure that all of the items shown in the Package Contents sheet that
comes with the machine are included.
SETTING UP
Installing the Starter Toner Cassette
Pull the top release lever (1) and open
1 the
2
top unit (2).
1
2
Hold the starter toner cassette by its
handle, and remove it from its vinyl bag.
CAUTION
Keep all plastic bags out of the reach of children.
Handle
Important!
Be sure to hold the starter toner cassette by
its handle.
Note
Keep the vinyl bag for later repackaging when
necessary.
3
Holding the starter toner cassette by its
handle, gently shake it side to side 5 or
6 times to evenly distribute the toner
inside.
Important!
Be sure to hold the starter toner cassette by its
handle.
4
Look inside the machine and note the
locations of the arrows that indicate the
toner cassette guides on either side.
2
b(GB)6.5_Chapter 01_p01-09
2
99.8.3, 1:12 PM
SETTING UP
5
Make sure the plastic pins (marked with
“*” in the illustration next to step 3 )
on either side of the starter toner cassette slide along the guides inside the
machine.
Note
6
1. SETTING UP
Be sure to hold the starter toner cassette by its
handle.
To close the top unit, press down firmly
but gently on both sides of it until the
top unit closes and clicks securely into
place.
Note
Background gray cast is sometimes evident
just after installing a new toner cassette.
3
b(GB)6.5_Chapter 01_p01-09
3
99.8.3, 1:12 PM
SETTING UP
Installing Other Hardware
Unlocking the Scanner
Important
Be sure to unlock the scanner before using the machine.
The machine will not operate correctly if the scanner is locked.
1
Unlock the scanner by pulling the lever
located at the back of the machine.
Removing the Protective Sheet
1
Open the ADF cover (1) and then remove the protective sheet (2).
1
2
2
Close the ADF cover and make sure it
locks securely into place.
4
b(GB)6.5_Chapter 01_p01-09
4
99.8.3, 1:12 PM
SETTING UP
1
Look at the rear of the machine to confirm where the document output tray
should fit.
2
Insert one end of the document output
tray into the slot provided. Then gently
bend the tray so the other end fits into
the second slot.
3
Make sure the small pieces of plastic
film curl upwards as shown.
1. SETTING UP
Installing the Document Output Tray
Important!
Documents will not be delivered properly unless the pieces of film are set as shown.
5
b(GB)6.5_Chapter 01_p01-09
5
99.8.3, 1:12 PM
SETTING UP
Installing the Upper Paper Tray
1
Look at the rear of the machine and
note the locations of the slots for insertion of the upper paper tray on both
sides.
2
To install the upper paper tray, press
down on both sides of the tray, making
sure that it is inserted as far as it will go.
Note
Paper will not be fed correctly into the machine if the upper paper tray is not inserted
all the way in.
Preparing the Output Tray
1
Pull out the output tray extension as
shown.
6
b(GB)6.5_Chapter 01_p01-09
6
99.8.3, 1:12 PM
SETTING UP
Connecting to a Computer
Important!
Make sure that the power of both the machine and your computer is turned off
before making the connection.
Plug one end of the provided parallel
cable into the lower port on the side of
the machine, and secure it in place as
shown in the illustration.
1. SETTING UP
1
Note
• The machine must be connected to a computer for printing.
• Use the cable that comes with the machine
to connect to your computer.
2
Connect the other end of the parallel
cable to your computer’s parallel
printer port.
7
b(GB)6.5_Chapter 01_p01-09
7
99.8.3, 1:12 PM
SETTING UP
Connecting the Telephone Line and Optional Telephone Handset
There are two similar sockets located at the rear of the machine.
• LINE – the telephone line connection
• TEL – for an optional handset when sharing the line
with a telephone
1
Plug the line cable into the LINE socket
at the rear of the machine.
2
Connect the other end of the line cable
to your telephone line wall socket.
If you have the optional telephone handset, now do the following:
3
Plug the telephone handset cable into
the TEL socket at the rear of the machine.
4
Connect the other end of the telephone
handset cable to your telephone.
Note
If you wish to also be able to receive incoming telephone calls, you must set the Reception mode to Telephone.
☛ Choosing a Reception Mode, see page 46
8
b(GB)6.5_Chapter 01_p01-09
8
99.8.3, 1:12 PM
SETTING UP
Turning On the Machine
• Only connect the machine to the power source described on the inside of the front cover.
• Avoid multi-wiring.
• Do not damage, break or make any modifications to the power cable. Do not place heavy
objects on it, pull it hard or bend it more than necessary. These actions could cause an
electric shock or fire.
• Do not plug or unplug the power cord with your hands wet. Otherwise, an electric shock
might occur.
Important!
Whenever you turn on the machine, make sure that no paper is loaded beforehand.
1
Attach the power cable to the machine
and plug the other end into an outlet.
2
Turn on the machine.
Note
You can select your preferred language used
on the operation panel and on reports.
☛ Selecting the Language, see page 107.
9
b(GB)6.5_Chapter 01_p01-09
9
99.8.3, 1:12 PM
1. SETTING UP
WARNING
2. GETTING ACQUAINTED
Important!
☛ The default display language is English. For how to change to your preferred
language, see page 107
Paper and Other Media
The machine supports printing on the following types of paper/media from
the upper paper tray.
Refer to the following pages for details.
Envelopes
Plain paper
Paper/Media type (Paper size)
Display
Page
A4 (210mm × 297mm)
A4
p.11
A5 (148mm × 210mm)
A5
p.11
F4 (81/4" × 13")
81/4 × 13
p.11
Letter (81/2" × 11")
Letter (81/2 × 11)
p.11
Legal (81/2" × 14")
Legal (81/2 × 14)
p.11
C5 Envelope (162mm × 229mm)
C5 Env
p.13, 15
C6 Envelope (114mm × 162mm)
C6 Env
p.13, 15
DL Envelope (110mm × 162mm)
DL Env
p.13, 15
Transparencies
p.15
Label paper
p.15
Note
Do not attempt to use the following types of paper: wrinkled or creased paper,
curled or rolled paper, paper containing carbon, carbon-backed paper, coated
paper, onion skin or other very thin paper.
CAUTION
Do not reuse stapled paper. Do not use aluminium foil, paper containing carbon or other
conductive paper. Otherwise, a fire might occur.
10
b(GB)6.5_Chapter 02_p10-24
10
99.8.3, 1:13 PM
GETTING ACQUAINTED
Loading Paper
After you have set up the machine you need to load paper then specify the
paper size using the procedure below.
Important!
When loading paper into the upper paper tray, do not load more than 100 sheets of
plain paper (80 g/m2 or 20 lb). Overloading the upper paper tray can cause misfeeds.
1
Fan the stack of paper to make sure that
all pages are free and are not sticking
together. The upper paper tray holds up
to 100 sheets of plain paper (80 g/m2
or 20 lb).
2
Straighten up all four sides of the stack
by tapping them on a desk or tabletop.
3
Set paper into the upper paper tray.
Make sure that the top of the stack is
not higher than the limit mark on the
tray guide.
4
Squeeze the tray guide and slide it
against the edge of the stack.
2. GETTING
ACQUAINTED
Loading Plain Paper into the Upper Paper Tray
11
b(GB)6.5_Chapter 02_p10-24
11
99.8.3, 1:13 PM
GETTING ACQUAINTED
5
Press
6
Press
7
Press
.
Prt Help List
.
Function no.: _ _
.
61 Tray Pap.Size
Note
If the paper feed unit (option) is installed,
refer to page 19 for details on how to specify
the paper size.
8
Press
.
9
Press
. Then press
Tray guide OK?
OK
or
until the correct paper size
A4 ?
appears.
10
When the correct paper size is on the dis. If the paper feed unit
play, press
(option) (page 17) is installed, you can
also select its paper size at this time.
Registered
6 Others
Note
Do not carry out any operations while “Registered” appears on the display.
11
Press
display.
to return to the standby
Tip
If the paper feed unit (option) is not
installed and the machine is in copy
operation mode, you can press
in place of
. Next, skip step 6 and
directly to step 8 .
5
in step
7
, and jump
12
b(GB)6.5_Chapter 02_p10-24
12
99.8.3, 1:13 PM
OK
GETTING ACQUAINTED
Loading Small Size Paper
Note
1
Remove all paper before loading small
size paper in the upper paper tray.
2
Open the small size paper feed access
panel on the back of the machine by
unlatching it as shown in the illustration. Opening the small panel makes it
easy to handle small size paper.
3
Set paper into the upper paper tray.
Make sure that the top of the stack is
not higher than the limit mark on the
tray guide.
4
After setting the paper into the tray, raise
the small panel until it snaps securely
into place.
Unlatch Here
13
b(GB)6.5_Chapter 02_p10-24
13
99.8.3, 1:13 PM
2. GETTING
ACQUAINTED
We recommend that you always feed small size paper vertically with the shorter
edge feeding into the machine first.
GETTING ACQUAINTED
5
Press
6
Press
.
.
Press
7
Prt Help List
Function no.: _ _
.
61 Tray Pap.Size
Note
If the paper feed unit (option) is installed,
refer to page 19 for details on how to specify
the paper size.
8
Press
.
9
Press
. Then press
Tray guide OK?
or
OK
A5 : ?
until the correct paper size
appears.
10
When the correct paper size is on the
.
display, press
Note
Do not carry out any operations while “Registered” appears on the display.
11
Press
display.
Registered
6 Others
OK
to return to the standby
Tip
If the paper feed unit (option) is not
installed and the machine is in copy
operation mode, you can press
in place of
in
step 5 . Next, skip step 6 and 7 ,
and jump directly to step 8 .
Important!
Be sure to specify the paper size again before copying, printing or receiving faxes
onto A4 or Letter size paper. If you do not, you will not be able to receive faxes.
14
b(GB)6.5_Chapter 02_p10-24
14
99.8.3, 1:13 PM
GETTING ACQUAINTED
Loading Other Media
Use the following procedures to load envelopes, transparencies, and label paper.
Loading Envelopes
Load up to 5 envelopes at a time using the same procedure for loading small
size paper on page 13.
Flap
• Envelope flaps should be securely folded down, so the envelope is “closed”.
This is especially important when printing on envelopes with adhesive on the
flaps because heat generated during the printing process can cause the adhesive to melt and get on rollers.
Note
☛ Paper select operation, see page 14.
Loading Transparencies
Load only one transparency at a time using the plain paper loading procedure on page 10 for large transparencies, and the small paper loading procedure on page 13 for small transparencies.
Note
☛ Refer to the paper select operation on page 12 for large transparencies or
page 14 for small ones.
Loading Label Paper
Load only 10 sheets of label paper at a time using the plain paper loading
procedure on page 11.
Note
☛ Paper select operation, see page 12.
15
b(GB)6.5_Chapter 02_p10-24
15
99.8.3, 1:13 PM
2. GETTING
ACQUAINTED
• Insert envelopes print side up with the stamp
position as shown.
GETTING ACQUAINTED
Second (Additional) Printer
This machine features a port for connecting a second printer. When connected, press the
key to switch between the two printers.
Note
Make sure that the power of your computer is turned off before making the connection.
Connecting to a Second Printer
1
Turn off both the machine and your second printer.
2
Connect one end of a parallel interface
cable to your second printer.
3
Connect the other end of the cable to
the second printer port, securing it in
place with the screws.
Note
• Only use a standard IEEE 1284 compliant
36-pin parallel cable.
☛ Using the second printer, see page 28.
16
b(GB)6.5_Chapter 02_p10-24
16
99.8.3, 1:13 PM
GETTING ACQUAINTED
Paper Feed Unit (Option)
This section describes how to install the paper feed unit (option) and how
to load paper in it. Addition of a paper feed unit provides you with a second
paper source that holds up to 250 sheets of A4 or Letter size paper.
Important!
Make sure that machine power is turned off and that the power cord is unplugged
from the power socket before installing the paper feed unit.
Paper Feed Unit Part Names
3
2
6
4
7
1
Installing the Paper Feed Unit
1
Remove all the packing tapes from the
paper feed unit and pull the paper tray
out of the unit.
2
After removing all tapes and cardboard
from inside of the paper tray, insert the
tray back into the machine until it locks
into place. Locate the paper feed unit
where you plan to use the machine.
Note
Be sure to place the paper feed unit on a level
surface.
17
b(GB)6.5_Chapter 02_p10-24
17
99.8.3, 1:13 PM
2. GETTING
ACQUAINTED
1 Front guide
2 Side guide
3 Limit mark
4 Paper size indicator
5 Connector
6 Corner guides
7 Metal plate
5
GETTING ACQUAINTED
3
The machine has handholds at the locations shown in the illustration. Note
that the illustration shows the machine
as viewed from above.
• This illustration shows the handhold location on the right side of the machine.
• This is the handhold location on the left
side of the machine.
4
Carefully lower the machine onto the
paper feed unit, making sure that the
dowels on the paper feed unit fit into
holes in the bottom of the machine
properly.
CAUTION
When lifting the machine, make sure your
hands are at the locations indicated by “ ” in
*
the illustration. This protects against pinching
your fingers between the machine and paper
feed unit.
Note
After the above installation, attach the power cord to the machine and plug the
other end into an outlet. Refer to page 8 for details.
18
b(GB)6.5_Chapter 02_p10-24
18
99.8.3, 1:13 PM
GETTING ACQUAINTED
Loading Paper into the Paper Feed Unit
1
Pull out the paper tray and remove it
from the paper feed unit.
2
Press down on the metal plate in the
bottom of the paper tray until the plate
locks into place with a “click”.
3
Up to 250 sheets of plain paper (80 g/m2
or 20 lb) can be inserted into the paper tray as shown in the illustration.
Make sure that the top of the stack is
not higher than the limit mark on the
side fence.
2. GETTING
ACQUAINTED
You can load either A4 or Letter size paper into the paper feed unit.
Refer to page 20 for details on how to change the positions of the paper
guides inside of the tray to match the type of paper you are using.
Note
Make sure the leading corners of the paper
fit under the corner guides.
4
Slide the paper tray back into the paper feed unit until it locks into place.
19
b(GB)6.5_Chapter 02_p10-24
19
99.8.3, 1:13 PM
GETTING ACQUAINTED
Changing the Paper Size
Use the following procedure to set the positions of the paper guides inside
the paper tray for either A4 or Letter paper.
1
Squeezing in on both sides of the front
guide, slide it to the correct position
for the desired paper size.
2
Squeezing in on both sides of the side
guide, slide it to the correct position
for the desired paper size.
Important!
Whenever you change the paper size, be sure to also specify the paper size using
the procedure below.
Specifying the Paper Size
After you install the paper feed unit (option), you can select between the
upper paper tray and the paper feed unit as the paper source, and specify
the size of paper in the paper feed unit.
1
Press
2
Press
3
Press
.
Prt Help List
.
Function no.: _ _
.
61 Tray Pap.Size
20
b(GB)6.5_Chapter 02_p10-24
20
99.8.3, 1:13 PM
GETTING ACQUAINTED
4
Press
.
OK
Lower Tray?
Note
The actual message that appears on the machine's display depends on the paper source
you last used. If "Upper Tray?" appears, press
or
to display the
"Lower Tray?" message before proceeding
with step 4 .
Press
. Then press
or
A4 ?
until the correct paper size
appears.
6
When the correct size is on the display,
press
.
Note
Do not carry out any operations while “Registered” appears on the display.
7
Press
display.
Registered
OK
6 Others
to return to the standby
Installing the Paper Size Indicator
1
Remove the paper size indicator (1).
Positioning the indicator so the side that
shows the paper size you are using (A4
or Letter) is facing outwards, insert it
into the front of the paper tray (2).
1
2
21
b(GB)6.5_Chapter 02_p10-24
21
99.8.3, 1:13 PM
2. GETTING
ACQUAINTED
5
GETTING ACQUAINTED
Selecting the Paper Source
1
Press
until the desired paper source appears.
100%
U 01
The upper paper tray is selected when "U"
is on the display, and the paper feed unit
is selected when "L" is on the display.
100%
L 01
22
b(GB)6.5_Chapter 02_p10-24
22
99.8.3, 1:13 PM
GETTING ACQUAINTED
Upgrading Memory
You can install a Single Inline Memory Module (SIMM) to upgrade the onboard memory of the machine.
The machine is shipped from the factory with a 4MB SIMM which can be
replaced with an 8MB, 16MB or 32MB SIMM.
Use the following procedure to install an 8MB, 16MB or 32MB SIMM.
Note
The following are the required specifications for a SIMM used with this machine:
72-pin, 60ns, Extend Date Out (EDO), parity/non-parity.
1
Turn off the machine.
2
Remove the SIMM cover located on the
left side of the machine.
3
Pull apart the hooks on the both sides
of the SIMM board that hold it in place.
SIMM
23
b(GB)6.5_Chapter 02_p10-24
23
99.8.3, 1:13 PM
2. GETTING
ACQUAINTED
Important!
Make sure you touch some grounded metal object with your hand to discharge any
electrostatic charge from your body before handling the SIMM.
GETTING ACQUAINTED
4
Carefully lift out the currently installed
SIMM board.
5
Angle the new SIMM board as shown in
the illustration, and insert it down into
the slot. Gently rock it back and forth
until you hear it snap into place.
Important!
Make sure the SIMM board is oriented correctly when you insert it into the slot.
6
Make sure the hooks on the sides of the
SIMM board snap securely into place.
SIMM
7
Replace the cover by inserting its tabs
into the holes provided, as shown in
the illustration.
24
b(GB)6.5_Chapter 02_p10-24
24
99.8.3, 1:13 PM
3. PRINTING AND SCANNING
When connected to a compatible PC, you can use this machine as a high
performance laser printer and black and white scanner.
Important!
• Make sure that your PC parallel port is set to ECP. If it is not, please consult your
PC manual on how to change it.
Note
• For information on PC hardware and software requirements, please read the
README file on the CD.
• Printer drivers are provided for both Windows® 95/98 and Windows® 3.1, but
the scanning feature requires Windows® 95/98.
Setting up
Before you can start printing and scanning you need to the following if you
have not done so already:
• Connect the machine to your PC
Installing the Software Drivers
Follow the steps below to install the printer/scanner drivers on your PC.
1
Switch the machine on.
2
Make sure the machine is connected to your PC and paper is loaded in
the upper paper tray.
☛ Connecting to a computer, see page 7
☛ Loading Paper, see page 11
3
Insert the provided software CD into your CD-ROM drive.
25
b(GB)6.5_Chapter 03_p25-28
25
99.8.3, 1:14 PM
3. PRINTING
AND SCANNING
• Install the software drivers on your PC
PRINTINGAND SCANNING
4
Do one of the following according to your operating system:
• Windows® 95/98
Run the setup application. For example, if your CD-ROM is assigned to D, run “D:\Scanin\Setup.exe”.
• Windows® 3.1
First copy the disk images under the directory named “3.1” on the CD-ROM to floppy disks.
Then insert the first floppy disk into your floppy disk drive and run “install.exe”.
Note
You cannnot install from CD-ROM under Windows 3.1.
Only the printer driver will be installed under Windows 3.1.
5
Follow the instructions that appear on the display.
For detailed information on how to print and scan from your PC, please
refer to the online help provided.
26
b(GB)6.5_Chapter 03_p25-28
26
99.8.3, 1:14 PM
PRINTINGAND SCANNING
Features You Can Access From the Printer
Driver
Printer Driver Contents
■ Paper Defaults
Paper size
Page orientation
Output
Paper source
About
■ N-Up Printing
Select a Layout Option
:
:
:
:
Size, Measurement Unit
Portrait, Landscape
Copies, Print in reverse order
Source
: Normal, Reduce for N-up printing
(Print page borders ; 2 pages up/sheet ; 4 pages up/sheet)
■ Document
Automatic
Graphics Mode
Font Resolution(dpi)
Graphics Resolution
Halftone
Job Settings
Raster
600
High
Screening
Photo
Desktop
(Grayscale) Publishing
Raster
GL/2
600
600
High
High
Screening Screening
High Speed
Draft
Raster
300
High
Screening
Business
Graphics
Raster
600
High
Dithering
: True Type Mode, Name
■ Configuration
Device Configuration
: Feeder ; Toner Save Mode ; Time-out
■ Fonts
Font Manager (To add printer fonts)
■ Overlays
Overlay Assignments : None, All pages, Odd/Even pages, First/Other pages
Cover/Divider page Overlays
Create New Overlay
Manage Overlays
: Get files from other sources to use as overlays, Send created overlays
to other sources, Rename overlays, Remove overlays
Important!
After printing a large number of pages, wait a few minutes before turning off the
machine.
Note
Be sure to use online help and Read me file of the printer driver to get the most
out of all the printer features and functions.
27
b(GB)6.5_Chapter 03_p25-28
27
99.8.3, 1:14 PM
3. PRINTING
AND SCANNING
Document Type Settings
PRINTINGAND SCANNING
Using the Second Printer (Additional Printer)
Use the following procedure to switch between this machine and a second
printer when a second printer is connected.
Important!
If the second printer has a bi-directional mode, make sure you turn it off.
Note
Refer to page 16 for details on connecting a second printer.
Printing to the Second Printer
1
Press
indicator lights.
. The Second Printer
Important!
Whenever you change printers, be sure to also
change to the appropriate printer driver on
your computer.
Note
While the Second Printer Indicator is lit, print
data from your computer passes through the
machine to the second printer.
2
Perform the required print operation
with the application you are using.
28
b(GB)6.5_Chapter 03_p25-28
28
99.8.3, 1:14 PM
4. FAXING
Your machine is furnished with superior faxing capabilities and wide a range
of powerful fax features. Here are some of the things you can do:
• Send and receive fax messages
• Store fax numbers you often use and recall them with a single key press
• Redial the previous fax number
• Share your fax line with a telephone
• Keep track of machine usage through printed reports
• Customise default settings to suit your requirements
Note
Please read the Setup section before you start. It explains how to set up the fax
feature to suit your needs.
Switching between Fax Operation and Copy
Operation Mode
4. FAXING
This machine has two modes: fax operation mode and copy operation mode.
You can still receive fax messages when the machine is in copy operation
mode, but if you wish to send a fax you must make sure the machine is in
fax operation mode.
To switch back and forth between copy operation mode and fax operation
.
mode, press
The Fax and Copy indicators indicate which mode the machine is currently
in.
Note
When the machine automatically switches to Economy Mode, all indicators turn
off. Press any key to exit Economy mode.
☛ Economy Mode, see page 108.
☛ You can select the default mode the machine starts in. See User Parameters on
page 102.
29
b(GB)6.5_Chapter 04_p29-39
29
99.8.3, 1:14 PM
FAXING
Entering Characters on the Operation Panel
Entering Numbers
Enter digits when dialling inputting or fax numbers, specifying function
codes, or registering various information, such as your own fax number.
To enter digits - , press the appropriate key on the numeric keypad.
E.g. to enter the number 12345678, press
12345678
☛ Entering Pauses and Tones in Fax Numbers, see page 43.
Entering Letters, Symbols and Spaces
When the display asks you enter a name, you can use the numeric keypad to
enter characters and symbols.
To enter a character, press the appropriate key on the numeric keypad until
the character appears. Then press the
key to move the cursor
forward.
Press this key repeatedly
To enter these characters:
1
ABC2abcÄä
DEF3def
GHI4ghi
JKL5jkl
MNO6mnoÑÖñö
PQRS7pqrs
TUV8tuvÜü
WXYZ9wxyz
*
[Space] . - 0 + ? / : * % & ! ( ) [ ] ”
#
30
b(GB)6.5_Chapter 04_p29-39
30
99.8.3, 1:14 PM
FAXING
Note
Some special characters in lower case appear identical in upper case on the
display due to space limitations. These characters are printed correctly on lists
and reports.
Deleting Characters and Moving the Cursor
When entering names and storing numbers:
•
To delete the character to the left of the cursor, press
.
Note
If the cursor is at the far left of the display, pressing
and number.
To move the cursor left, press the
•
To move the cursor right, press the
key.
key.
4. FAXING
•
deletes the whole name
31
b(GB)6.5_Chapter 04_p29-39
31
99.8.3, 1:14 PM
FAXING
Setting up
Please Read This First
Before you can send or receive faxes you must connect the machine to a
telephone line and store the following settings:
☛
☛
☛
☛
☛
☛
☛
☛
Own Name/TTI, see page 33.
Dial Mode, see page 34.
Own Fax Number, see page 36.
Date and Time, see page 38.
In addition, you may wish to adjust the following:
Selecting the Language, see page 107.
Summer Time (Daylight Saving Time), see page 39.
The volume of sounds the machine makes, see page 66.
If you wish to share the line with a telephone handset, you may need to change the reception
mode.
Choosing a Reception Mode, see page 46.
Connecting to the Telephone Line
There are two similar sockets located at the
rear of the machine.
• LINE—the telephone line connection
• TEL—for an optional handset when sharing the line with a telephone
1
Insert the line cable into the LINE socket at the rear of the machine.
2
Connect the other end of the line cable to your telephone line.
32
b(GB)6.5_Chapter 04_p29-39
32
99.8.3, 1:14 PM
FAXING
Storing your Own Name/TTI
Store your name or name of your organisation. When you send a fax, this
identification appears at the top of the page when printed at the other end.
It is also shown on the other party’s display during communication. It can
be up to 32 characters long.
☛ Entering Characters on the Operation Panel, see page xii, 30.
☛ If you do not want this identification printed on faxes you send, see Page Header
on page 68.
1
Press
.
2
Press
.
3
Press
4
Press
5
Enter your name or name of your
organisation.
Prt Help List
Function no.: _ _
.
16 Own name/TTIO K
.
4. FAXING
XYZ CO.
E.g. press
Note
To clear the entire setting, make sure the
cursor is at the far left position then press
.
Press
to clear the setting, or press
to cancel this operation
XYZ CO.
Delete?
O
K
33
b(GB)6.5_Chapter 04_p29-39
33
99.8.3, 1:14 PM
FAXING
Press
. The display opposite will
flash briefly on the display and then the
function menu will reappear.
Note
6
Do not carry out any operations while “Registered” appears on the display.
Registered
1 Set up
O
K
Do one of the following:
7
• Enter another function number.
• Press
to return to standby mode.
Setting the Dial Mode
Specify the type of telephone line you are using (tone or pulse dial). If you
are unsure of what this should be, please consult your line provider.
If your machine is behind a PABX, you should also provide the following
details:
• The PABX number that gives you an outside dial tone—You can enter 0, or a value between 01 and
99 (00 is not possible).
• The PSTN access method. This will depend on your locale and the PABX system you are using.
The machine will not function correctly if these settings are not correct.
Consult your systems administrator if you are unsure.
1
Press
.
2
Press
.
3
Press
4
Press
Prt Help List
Function no.: _ _
.
.
12 Dial Mode
O
Mode: Tone?
O
34
b(GB)6.5_Chapter 04_p29-39
34
99.8.3, 1:14 PM
K
K
FAXING
5
Press
or
Pulse or Tone.
6
Press
to select
O
K
.
• If the display opposite does not appear, press to
finish.
7
Press
or
to select
whether your fax machine is behind a
PABX.
8
Press
.
Mode: PABX? No?
Mode: PABX? YesO K
1 Set up
• If you chose “No” in step 7 , proceed to step
12 .
• If you chose “Yes”, proceed to step 9 .
Enter the digit or digits that give you an
outside dial tone on the numeric
keypad, e.g. enter 0.
9
Mode: Pulse?
O
K
Postline by:_
Postline by:0_
O
Method:0?
O
Method: Flash?
O
K
You can enter 0, or a value between 01 and 99 (00
is not possible).
10
Press
.
11
Press
or
lect the PSTN access method.
to se-
K
K
Three methods are available.
<number>:Access the outside line by dialling the
number you entered in step 9
Ground: Ground Start
Flash:
Flash Start
35
b(GB)6.5_Chapter 04_p29-39
35
99.8.3, 1:14 PM
4. FAXING
Note
When changing an existing setting, press
to clear it, then enter the new number.
FAXING
12
Press
. The display opposite will
flash briefly on the display and then the
function menu will reappear.
Registered
Note
1 Set up
Do not carry out any operations while “Registered” appears on the display.
13
O
K
Do one of the following:
• Enter another function number.
• Press Help/Function to return to standby mode.
Storing your Own Fax Number
Store the telephone number of the line your machine is connected to.
This will appear on the other party’s display during communication and be
printed on their and your own reports.
Note
In some locales you cannot store your own fax number.
If the other party is using Authorized Reception or a similar feature to handle messages from certain senders differently, they should specify this information when registering Specified Senders on their machine.
To increase the legibility of your number, you can insert a “+” character and
spaces. To enter a “+”, press . To enter a space, press .
Note
The fax number can be up to 20 digits long.
☛ Entering Numbers, see page 30.
1
Press
.
2
Press
.
Prt Help List
Function no.: _ _
36
b(GB)6.5_Chapter 04_p29-39
36
99.8.3, 1:14 PM
FAXING
3
Press
.
4
Press
5
DEnter your own fax number on the
numeric keypad.
17 Own Fax No.
O
K
.
+12 3 456
E.g. press
Note
To clear the entire setting, make sure the
cursor is at the far left position then press
Delete?
O
K
. The display opposite will appear.
Press
6
Press
to clear the setting, or press
to cancel this operation.
.
Registered
Note
7
Do one of the following:
1 Set up
O
K
37
b(GB)6.5_Chapter 04_p29-39
37
99.8.3, 1:14 PM
4. FAXING
Do not carry out any operations while “Registered” appears on the display.
FAXING
Setting the Date and Time
This is printed on reports to help you keep track of machine usage.
• If you make a mistake when entering a value, press the
and
keys to position
the cursor and enter the value again.
1
Press
.
2
Press
.
3
Press
Prt Help List
Function no.: _ _
.
11 Date/Time
• Enter another function number.
• Press Help/Function to return to standby mode.
Time:
4
Press
5
Press
6
Enter the year on the numeric keypad.
8
Press
O
K
.
Year:
99O K
Year:
00O K
Month:
02O K
Month:
05O K
Day:
01O K
.
E.g. to enter the year 2000, press
7
01:13
.
.
Enter the month on the numeric keypad.
E.g. press
.
38
b(GB)6.5_Chapter 04_p29-39
38
99.8.3, 1:14 PM
FAXING
Press
9
10
Day:
23O K
Enter the date on the numeric keypad.
E.g. press
11
.
Registered
.
Press
. The display opposite will
flash briefly on the display and then the
function menu will reappear.
1 Set up
O
K
Note
Do not carry out any operations while “Registered” appears on the display.
12
Do one of the following:
• Enter another function number.
• Press
to return to standby mode.
This feature is useful if local custom requires advancing or setting the clock
back.
One minute after you turn Summer Time on, the clock advances by an
hour. Similarly, one minute after you turn Summer Time off, the clock is
put back an hour.
☛ For how to switch this feature on or off, see Changing On/Off Settings on page 68.
39
b(GB)6.5_Chapter 04_p29-39
39
99.8.3, 1:15 PM
4. FAXING
Turning Summer Time (Daylight Saving Time) on/off
FAXING
Sending Faxes
How to Send a Fax
This is the basic procedure for sending a fax message. For detailed information and explanations of the advanced features available, see the following
pages:
☛ Economy Mode, see page 108.
☛ Setting Documents For Faxing, see page 40.
☛ Adjusting Scan Settings, see page 41.
☛ Quick Dials, see page 54.
☛ Name Dials, see page 59.
☛ Redialling a Number, see page 44.
☛ Entering Pauses and Tones in Fax Numbers, see page 43.
Set documents you wish to fax in the same way as when setting originals for
copying. There are two methods:
• On the exposure glass—set documents face-down one page at a time
• In the ADF—insert a stack of up to 10 pages face-down
☛ For how to set a document on the exposure glass, see Making a Copy, see page 27
☛ For the ADF, see Setting an Original on the ADF, see pages 35-36
1
Check that the standby display is shown.
100%
• If the display is blank, press any key to exit
Economy mode.
2
If necessary, press
to switch to
Dial/Set orig.
fax operation mode.
40
b(GB)6.5_Chapter 04_p40-46
40
99.8.3, 1:15 PM
01
FAXING
3
Set your document in one of the following ways:
• In the ADF
Carefully insert the document stack face-down
into the ADF until the display changes to “Dial
number”.
• Make sure this message appears. If it does not,
your document will not be scanned from the ADF.
• Lift the platen cover 1 then place the first page
of your document face-down on the exposure
glass aligning it with the arrow mark on the scale
2. Then close the platen cover 3.
Dial number
1
3
2
Dial/Set orig.
4
Adjust the scan settings if necessary.
• E.g. if your document is a photograph, press the
Original Type Select key twice to select Photo 1.
Use for:
Standard text
Detail text
Photographs
Mixed text and photographs
4. FAXING
Setting
[Text]
[Text Fine]
[Photo1]
[Photo2]
☛ To select the Resolution/Photo setting, see
page 76.
41
b(GB)6.5_Chapter 04_p40-46
41
99.8.3, 1:15 PM
FAXING
5
Dial the fax number in one of the following ways:
12345678_
• On the numeric keypad.
E.g. press
.
• Press a Quick Dial key with a number stored in it.
( ).
E.g. press
• Press
B: XYZ CO.
then enter the first letter of a previABC CO.
ously stored Name Dial.
E.g. press
then press
until the Name
Dial you require appears.
6
Press
.
Dialing...
If you set your document in the ADF, the machine
dials the fax number and sends your fax message.
If you set your document on the exposure glass in
step 7 , you now need to do the following steps:
7
To select the length of your document,
or
until a
press
suitable length appears.
8
Press
or
.
: Vert.: A4?
Dialing...
The machine dials the fax number.
When the connection is established, if the other party
has registered it, their CSI will be displayed. If no CSI is
registered, "Transmitting" will appear instead.
After the machine has scanned your document, the
displays opposite will appear:
42
b(GB)6.5_Chapter 04_p40-46
42
99.8.3, 1:15 PM
FAXING
Do one of the following:
9
• If all pages of your document have been scanned
in, go to step 10 .
Set next OK?O K08
• If your document contains more than one page,
remove the page from the exposure glass and
set the next page before the counter on the dis-
To finish = # 06
play reaches zero. Then press
or
.
Wait until the displays opposite appear and repeat this step for all pages in your document.
Note
You have 16 seconds to set the next page. If
you do not set another page, the machine automatically finishes the transmission.
Set next OK?O K16
Blink
To finish = # 14
10
Press # on the numeric keypad to finish sending your fax message.
Entering Pauses and Tones in Fax Numbers
☛ Quick Dials, see page 54.
☛ Name Dials, see page 59.
●Entering Pauses
In some situations, you may need to insert a pause in fax numbers. For
example:
• If your telephone line is behind a PABX (you have to dial an access code to access outside numbers),
insert a pause between the access code and the telephone number.
• For international numbers, enter a pause after the country code.
To enter a pause in a fax number, press
.
001-
The pause is shown on the display as a “-”
character.
43
b(GB)6.5_Chapter 04_p40-46
43
99.8.3, 1:15 PM
4. FAXING
You can enter pauses and tones when dialling, or store them in Quick Dial
and Name Dial numbers.
FAXING
●Entering Tones
Some organisations offer you special services by telephone which you can
access using Touch Tone or DTMF tones.
To enter a tone, press the
or
keys.
☛ Setting the Dial Mode, see page 34.
Redialling a Number
The machine remembers the last fax or telephone number dialled with the
numeric keys, a Quick Dial or a Name Dial. To redial a fax number, follow
the procedure below.
Note
• If you dialled the last number with a Quick
Dial or Name Dial, the number will be displayed instead of the stored label.
• You cannot redial a number dialled with the
handset keypad.
1
Make sure the machine is in fax operation mode.
2
Set your document.
3
Press
.
4
Press
.
5
Continue the standard procedure for
sending a fax.
44
b(GB)6.5_Chapter 04_p40-46
44
99.8.3, 1:15 PM
FAXING
Automatic Redial
If the machine cannot connect to the other
party for some reason (e.g. the line is busy)
when sending a document from the ADF, it
will wait a while and then attempt to dial
again. This will be repeated until the connection is made, or the redial count maximum is reached.
Redial in:1'29"
Note
The redial interval and count maximum vary
according to your locale.
●Cancelling Automatic Redial
To cancel redialling, remove your document from the ADF.
Cancelling Transmission of a Fax
To cancel a fax transmission while dialling
or during transmission, press the Stop key
and remove your document.
Trans. canceled
Note
4. FAXING
Once a connection has been established and
transmission has begun, you cannot cancel
transmission of data already sent.
45
b(GB)6.5_Chapter 04_p40-46
45
99.8.3, 1:15 PM
FAXING
Receiving Faxes
Choosing a Reception Mode
This machine has two reception modes:
• FAX mode
• TEL mode
●FAX Mode
In this mode the machine automatically answers incoming calls. When a
call is received, the machine rings a few times to alert you that a message is
being sent, then starts receiving and printing the message.
FAX mode is ideal for a dedicated fax line.
Note
• The machine cannot switch between FAX mode and TEL mode automatically.
●TEL Mode
In this mode, the machine does not answer incoming calls automatically.
The machine will continue ringing until you pick up the handset (option),
or start fax reception manually.
This mode is useful if you are sharing the line with a telephone. If the caller
is a person, you can answer the telephone normally, but if it is a fax machine
you can still receive the message.
Note
• On Hook dialling is not available in some locales.
• This mode requires someone to be near the machine to receive fax messages. If
nobody answers the call, fax messages will not be received.
☛ Receiving Calls in TEL Mode, see page 47.
46
b(GB)6.5_Chapter 04_p40-46
46
99.8.3, 1:15 PM
FAXING
●Switching between FAX Mode and TEL Mode
Press the Reception Mode key to switch
between FAX mode and TEL mode.
●Receiving calls in TEL Mode
When the machine is switched to TEL mode, follow these steps to answer
incoming calls.
1
When the machine rings remove all
documents from the ADF then, press
Telephone call
or lift the handset and listen.
2
Press
then press
or
until the display opposite
Mode: Recep.?
OK
appears .
3
Press
and replace the handset.
Connecting ...
The machine will start receiving the message.
47
b(GB)6.5_Chapter 04_p47-53
47
99.8.3, 1:15 PM
4. FAXING
• If you hear a voice and you lifted the habdset,
continue the conversation as normal and replace
the handset when finished.
• If you hear another fax machine, make sure the
machine is in fax operation mode (press Fax/
Copy if necessary), then go to step 2.
FAXING
Screening out Unwanted Faxes with Authorized Reception
This feature lets you screen out unwanted incoming fax messages.
In this manual, the CSI of another machine which you wish to allow to
send you fax messages is referred to as a Specified Sender.
When Authorized Reception is turned on, your machine will only receive
fax messages from Specified Senders—all other incoming messages will be
rejected and not printed.
Note
If the other party has not registered their CSI or clears/changes it on their machine,
you will not be able to receive any messages from them when Authorized Reception
is turned on.
When a fax message comes in, the machine checks to see if the sender’s CSI
is stored in any of the Quick Dials or Name Dials. If it is found and you
have used that Quick Dial or Name Dial to send at least one message to that
destination, the message is accepted.
Note
You can store up to 30 Specified Senders (25 Name Dials and 5 Quick Dials).
To set up your machine for Authorized Reception, you need to:
1
Turn Authorized Reception on.
2
Make sure all the Specified Sender CSIs are stored in Quick Dials or
Name Dials.
3
Make sure that you have sent at least one message to all the Specified
Senders using their Name Dials or Quick Dials. After one message has
been sent, the Specified Sender is enabled and you can receive fax messages from them.
Note
If you turn Authorized Reception on and omit steps 2 and 3 above, the machine
will not be able to receive any fax messages.
☛ Storing, Editing and Deleting Quick Dials, see page 56.
☛ Storing and Deleting Name Dials, see page 61.
☛ Unauthorized Call Report, see page 65.
48
b(GB)6.5_Chapter 04_p47-53
48
99.8.3, 1:15 PM
FAXING
●Turning Authorized Reception on/off
1
Press
.
2
Press
.
3
Press
4
Press
5
Press
the setting.
6
Press
. The display opposite will
flash briefly on the display and then the
function menu will reappear.
Prt Help List
Function no.: _ _
.
21 Author. RX
.
or
to adjust
Note
OK
Mode:
Off?O K
Mode:
On?O K
Registered
2 CommunicationO K
Do not carry out any operations while “Registered” appears on the display.
7
Do one of the following.
• Enter another function number.
to return to standby mode.
Cancelling Reception of a Fax
If for some reason you want to cancel reception of fax while it is being
received, do the following.
1
Make sure the machine is in fax operation mode.
2
Press
Recep. canceled
.
Note
A portion of the fax message may still be
printed.
49
b(GB)6.5_Chapter 04_p47-53
49
99.8.3, 1:15 PM
4. FAXING
• Press
FAXING
Making Telephone Calls
If you connect an optional telephone handset, you can use the same line for
both telephone calls and fax messages.
Note
If you wish to be able to receive telephone calls, be sure to select TEL mode.
☛ Choosing a Reception Mode, see page 46.
1
Do one of the following:
• Pick up the telephone handset and dial with the handset keypad
• Make sure the machine is in fax operation mode, pick up the telephone handset and dial using
the operation panel numeric keypad, a Quick Dial, a Name Dial or the Pause/Redial key.
• Make sure the machine is in fax operation mode, press the On Hook key and dial using a
Quick Dial, a Name Dial or the Pause/Redial key. When the other party answers, pick up
the telephone handset.
Note
• In some locales, On Hook dialling is not available and/or you cannot dial using a Quick
Dial , Name Dial , the number keys or Redial key when the handset is lifted.
2
Continue your conversation as usual.
Faxing During a Telephone Call
You can also have the machine take over the line and send or receive a fax
message at the end of your telephone call. This is useful when:
• The other party shares their line with a similar fax machine and you wish to send or receive a message after your conversation.
• You wish to check that the number is indeed a fax number before attempting to send your message.
Note
The other party’s machine must support this feature.
1
Do one of the following:
• Pick up the telephone handset and dial with the handset keypad
• Make sure the machine is in fax operation mode, pick up the telephone handset and dial using
the operation panel numeric keypad, a Quick Dial, a Name Dial or the Pause/Redial key.
• Make sure the machine is in fax operation mode, press the On Hook key and dial using a
Quick Dial, a Name Dial or the Pause/Redial key. When the other party answers, pick up
the telephone handset.
Note
• In some locales, On Hook dialling is not available and/or you cannot dial using a Quick
Dial , Name Dial , the number keys or Redial key when the handset is lifted.
50
b(GB)6.5_Chapter 04_p47-53
50
99.8.3, 1:15 PM
FAXING
2
Listen to the line.
• If a voice answers, continue your conversation as normal.
• When you wish to send a fax, listen for the fax tone of the other party, then continue from
step 3 below.
• When you wish to receive a fax, listen for the fax tone of the other party, then continue
from step 8 below.
●Sending a Fax during a Telephone Call
3
Make sure the machine is in fax operation mode, set your document and adjust any scan settings as required.
4
Press
5
If the display opposite is not shown,
or
until it is.
press
6
Press
7
Press
then wait until the following display appears.
Mode: Trans. ?
OK
.
then replace the handset.
Connecting...
Replace the handset.
8
Make sure the machine is in fax operation mode and remove all documents
from the ADF.
Mode: Trans. ?
OK
9
Press
Mode: Recep. ?
OK
.
10
If the display opposite is not shown,
or
until it is.
press
11
Press
.
Replace the handset.
Connecting...
51
b(GB)6.5_Chapter 04_p47-53
51
99.8.3, 1:15 PM
4. FAXING
●Receiving a Fax during a Telephone Call
FAXING
Monitoring the Line while Dialling with On Hook
This feature lets you dial a telephone number without lifting the optional
external handset. You can listen to what is happening on the line through
the machine’s internal speaker.
1
If necessary, press
to switch to
Dial/Set orig.
fax operation mode.
2
Press
.
3
Dial the telephone number using the
numeric keypad, a Quick Dial, a Name
Dial or the Pause/Redial key.
4
If you hear a voice answer, pick up the
Dial number
12345
again
external handset, press
and continue your conversation.
• To cancel the call, press
5
.
Replace the handset when you have finished the call.
Dial/Set orig.
Remote Change
If you have set the reception mode to TEL mode and turn this feature on,
you can use the telephone handset numeric keypad to start fax reception
when you hear another fax machine on the line.
When you hear a fax machine through the handset, press the Remote Change
digit on the telephone handset twice to initiate fax reception, then replace
the handset.
You need to specify the Remote Change digit using when you turn this
feature on with the following procedure.
52
b(GB)6.5_Chapter 04_p47-53
52
99.8.3, 1:15 PM
FAXING
1
Press
.
2
Press
.
3
Press
4
Press
5
Press
or
Remote Change on or off.
6
Press
ing:
Prt Help List
Function no.: __
.
32 Remote Change
.
Change with 2
OK
Change with 7
OK
.
8 .
7
.
Press
. The display opposite will
flash briefly on the display and then the
function menu will reappear.
Note
Do not turn off the machine while “Please
wait” or “Registered” is shown on the operation panel display.
9
On?O K
4. FAXING
8
Mode:
and do one of the follow-
Press a digit on the numeric keypad to
select the Remote Change digit.
E.g. press
Off?O K
to turn
• If you turned Remote Change on, go to step
• If you turned Remote Change off, go to step
7
Mode:
Registered
3 Fax Switch
OK
Do one of the following.
• Enter another function number.
• Press
to return to standby mode.
53
b(GB)6.5_Chapter 04_p47-53
53
99.8.3, 1:15 PM
FAXING
Storing Fax and Telephone Numbers
This machine provides two useful methods for storing fax and telephone
numbers:
• Quick Dials
• Name Dials
Note
The maximum length of a fax number you can dial, or store in Quick Dials/Name
Dials, is 40 digits.
Quick Dials
If you often dial certain numbers, you can save time and effort by storing
them in Quick Dial keys. Once stored, instead of entering a fax number
directly on the numeric keypad, just press the Quick Dial key the number is
stored in.
If you store a number in a Quick Dial, you can also give it a name up to 10
characters long.
If you press a Quick Dial key when the display opposite is shown, the stored
name will come up on the display so you can check it.
Dial/set orig.
B:XYZ CO.
You can store one fax number in each of the five Quick Dial keys labeled A-E.
To check the fax numbers stored in Quick Dials, print out the Dial List.
☛ Printing the Dial List, see page 64.
☛ Name Dials, see page 59.
☛ For how to dial with a Quick Dial, see page 55 step 5.
54
b(GB)6.5_Chapter 04_p54-58
54
99.8.3, 1:15 PM
FAXING
●Storing Quick Dials
☛ Entering Characters on the Operation Panel, see page xiv.
☛ Entering Pauses and Tones in Fax Numbers, see page 43.
1
Press
2
Press
3
Press
4
Press
.
Prt Help List
.
Function no.: _ _
.
13 Quick Dial
.
O
K
Press Quick or
Blink
Print List
5
To select a Quick Dial, press a Quick
Dial key.
B:
E.g. press
to select Quick dial ( ).
Note
Dial List
4. FAXING
To print a list of currently stored Quick Dials,
press
.
Blink
Press Start
Then press
.
Printing...
6
Enter or edit the fax number you wish
to store with the numeric keypad.
E.g. press
123456789
.
55
b(GB)6.5_Chapter 04_p54-58
55
99.8.3, 1:16 PM
FAXING
7
Press
.
8
Enter or edit the name for this Quick
Dial.
B:
B:XYZ CO._
E.g. press
Press
9
.
Registered
Note
Do not turn off the machine while “Please
wait” or “Registered” is shown on the operation panel display.
Print List
Blink
Press Quick or
10
Do one of the following:
• To store another Quick Dial, go back to step 5 .
• To return to standby mode, press
twice.
• To access another function, press
then
enter a function number.
●Editing Quick Dials
1
Press
.
2
Press
.
3
Press
Prt Help List
Function no.: _ _
.
13 Quick Dial
56
b(GB)6.5_Chapter 04_p54-58
56
99.8.3, 1:16 PM
O
K
FAXING
Press
4
.
Print List
Blink
Press Quick or
5
Press the Quick Dial key you wish to
edit.
6
Press
twice then press
.
111234567989
123456789
1203456789
Note
To clear the Lefrmost digit, press
Then press
.
123456789
.
23456789
7
Press
.
8
Edit the name stored in this Quick Dial.
B:XYZ
B:AXYZ
.
• To move the cursor, press
or
4. FAXING
E.g. Press
.
Press
9
.
Registered
Note
Do not turn off the machine while “Please
wait” or “Registered” is shown on the operation panel display.
Print List
Blink
Press Quick or
10
Do one of the following:
• To edit another Quick Dial, go to step
• To return to standby mode, press
twice.
b(GB)6.5_Chapter 04_p54-58
57
5
.
57
99.8.3, 1:16 PM
FAXING
●Clearing Quick Dials
1
Press
.
2
Press
.
3
Press
4
Press
Prt Help List
Function no.: _ _
.
13 Quick Dial
.
Print List
Blink
Press Quick or
5
Press the Quick Dial key you wish to
delet
E.g. press
6
Press
1112345
to select Quick dial ( ).
.
Delete?
Note
If you do not wish to clear this Quick Dial,
press
mode.
7
Press
twice to return to standby
.
Deleted
B:■
8
Press
standby mode.
twice to return to
58
b(GB)6.5_Chapter 04_p54-58
58
99.8.3, 1:16 PM
O
K
FAXING
Name Dials
Name Dials are a handy way of storing fax numbers that you dial regularly
in machine memory. When you store a number in a Name Dial, you must
also give it a name up to 10 characters long. When dialling, you enter the
first letter of this name to quickly find the Name Dial you require.
Office B
You can store multiple Name Dials with identical first letters and step through
them to find the one you want when dialling.
You can store up to 25 Name Dials.
Note
You cannot store two Name Dials with the same name.
To check which Name Dials are currently stored, print out the Dial List.
☛ Printing the Dial List, see page 64.
☛ Quick Dials, see page 54.
●Storing Name Dials
☛ Entering Characters on the Operation Panel, see page xiv,30.
☛ Entering Pauses and Tones in Fax Numbers, see page 43.
1
Press
.
2
Press
3
Press
4
Press
.
5
Press
.
.
Function no.: _ _
.
14 Name Dial
Register?
OK
OK
■
59
b(GB)6.5_Chapter 04_p59-61
59
99.8.3, 1:16 PM
4. FAXING
Prt Help List
FAXING
Enter the fax number you wish to store
with the numeric keypad.
6
123456789■
E.g. press
7
Press
.
8
Enter or edit the name for this Name
Dial.
Name: ■
Name:XYZ CO. ■
E.g. press
Press
9
.
Registered
Register?
Note
• Do not turn off the machine while
“Registered” is shown on the operation
panel display.
• If a Name Dial with the same name is already stored, “Name exists” will flash on
the display. Enter a different name.
10
Do one of the following.
• To store another Name Dial, go back to step
• To return to standby mode, press
twice.
• To access another function, press
once and enter another function number.
4
.
60
b(GB)6.5_Chapter 04_p59-61
60
99.8.3, 1:16 PM
OK
FAXING
●Deleting Name Dials
1
Press
.
2
Press
3
Press
4
Press
5
Press
6
Enter the first letter of the Name Dial
label.
Prt Help List
.
Function no.: _ _
.
14 Name Dial
OK
Delete?
OK
.
.
Select letter
E.g. press
Marty
.
• If Name Dial you are looking for does not appear, keep pressing the key until it does.
E.g. press
again
Note
7
Press
.
8
Do one of the following.
4. FAXING
You can also search through Name Dials that
begin the same initial letter with the
and
keys.
Delete?
• To delete the Name Dial, press
to step 9 .
and go
Deleted
Delete?
• To cancel this operation, press
OK
ei-
ther enter another function number, or press
to return to standby mode.
61
b(GB)6.5_Chapter 04_p59-61
61
99.8.3, 1:16 PM
FAXING
9
Do one of the following.
• To delete another Name Dial, go to step
5
.
• To return to standby mode, press
twice.
• To access another function, press
once and enter another function number.
●Dialling with Name Dials
Instead of dialling the number on the numeric keypad, do the following in
fax operation mode.
☛ How to Send a Fax, see page 40
1
Make sure the machine is in fax
operation mode.
2
Press
2
Enter the first letter of the Name Dial
label.
E.g. press
.
Select letter
Marty
.
• If the Name Dial you are looking for does not
appear, keep pressing the key until it does.
E.g. press
Dial/Set orig.
Main Off
again.
Note
You can also search through Name Dials that
begin the same initial letter with the
and
keys.
62
b(GB)6.5_Chapter 04_p62-65
62
99.8.3, 1:16 PM
FAXING
Reports and Lists
Printing the Journal
The Journal is a record of fax messages that were recently sent or received by
your machine. By default, it is printed automatically after every 35 communications.
You can print it out whenever you wish to check on machine usage, or to
find out if a communication was successful or not.
The following items are included on the Journal:
• Own name—this machine’s Own name/TTI identification
• Transmission—list of recent fax transmissions from this machine
• Reception—list of recent fax messages received by this machine
• Date and Time—when the communication took place
• Address—the fax number/identification of the other party
• Duration—how long the communication took
• Page—how many pages the message contained
• Result—whether the communication completed successfully
☛ For how to turn automatic printing of the Journal on/off, see User Parameters,
see page 102.
Press
.
2
Press
.
3
Press
4
Press
5
Press
Prt Help List
Function no.: _ _
.
41 Journal
.
Press Start
.
Printing...
63
b(GB)6.5_Chapter 04_p62-65
63
99.8.3, 1:16 PM
4. FAXING
1
FAXING
Printing the Dial List
Print this list to check on the names and numbers of Quick Dials and Name
Dials stored in the machine.
You can print the Dial list using the procedure below, or when storing Quick
Dials.
The following items are included on the Dial List:
• Own name—this machine’s Own name/TTI identification
• Own fax number—this machine’s fax number
• Quick Dial—list of Quick Dial labels and numbers
• Name Dial—list of Name Dial labels and numbers
1
Press
2
Press
.
Prt Help List
.
Function no.: _ _
3
Press
4
Press
5
Press
.
42 Dial List
.
O
K
Press Start
.
Printing...
Transmission Result Report
By default, this report is turned off. If you turn it on, this report will be
printed after every fax you send.
The following information is listed:
• From (Owner)—this machine’s fax number/identification
• To—the destination fax number/identification
• Page(s)—number of pages in document
• Date, Time—when the communication took place
64
b(GB)6.5_Chapter 04_p62-65
64
99.8.3, 1:16 PM
FAXING
• Duration—how long the communication lasted
• Result—whether the transmission was successful
☛ To turn automatic printing of this report on or off, see Customising Default Settings with the User Parameters, see page 102.
Error Report
By default, this report is printed automatically if a reception or transmission fails.
The following information is given:
• From (Owner)—the sender’s fax number/identification
• To—the receiver’s fax number/identification
• Date, Time—when the communication failure happened
• Duration—how long the communication lasted
• Reason for error
Power Failure Report
If power is lost while sending a message, receiving a message, or while a
message has been stored in memory when the Receive File indicator is lit,
this report will be printed out when power is restored.
Unauthorized Call Report
If you have set up Authorized Reception, and turned this report on, a report
is printed if an unauthorized sender tries to send you a message.
By default this report is turned off. Turn it on with the User Parameters.
☛ Authorized Reception, see page 47.
☛ User Parameters, see page 102.
The following items are recorded:
• From—the fax number/id of the sender
• Date, Time—when they tried to send the message
65
b(GB)6.5_Chapter 04_p62-65
65
99.8.3, 1:16 PM
4. FAXING
☛ When the Receive File Indicator is lit, see page 47.
FAXING
Advanced Features
Making Machine Sounds Louder or Quieter
This machine makes various sounds during operation. You can adjust the volume of these sounds, or turn them off completely according to your taste.
You can change the following:
• TX—the sound of a fax being sent
• RX—the sound of a fax being received
• On Hook—sounds made when using the On Hook feature
• Dialling—tones you hear after pressing Start
• Buzzer—warning beep (e.g. when cover is opened) and the sound made every time you press a key
on the operation panel
• Ring—ringing sound when a call comes in
Note
On Hook is not available in some locales.
1
Press
.
2
Press
3
Press
4
Press
5
Press
or
to make
the volume louder or quieter.
6
Press
Prt Help List
.
Function no.: __
.
31 Adjust Volume
.
TX: ■
TX: ■■
.
66
b(GB)6.5_Chapter 04_p66-69
66
99.8.3, 1:17 PM
OK
OK
FAXING
7
Repeat steps 5 and
able volumes.
6
for all adjust-
After adjusting the Ring volume and pressing
, the display opposite will appear. Now go
to step 8 .
Registered
Note
Do not carry out any operations while “Registered” appears on the display.
8
Do one of the following:
• Enter another function number.
• Press
3 FaxSwitch
OK
to return to standby mode.
Sending Faxes Over Unreliable Lines-Slow (4800bps)
4. FAXING
If you experience problems sending faxes due to bad telephone lines, you
can reduce the speed at which your machine sends fax messages to 4800 bits
per second.
Note
This setting does not affect the speed at which your machine receives faxes.
Use the following procedure to turn this feature on/off.
1
Press
2
Press
3
Press
4
Press
.
Prt Help List
.
Function no.: _ _
.
22 Slow(4800bps)
.
4800bps:
No?
67
b(GB)6.5_Chapter 04_p66-69
67
99.8.3, 1:17 PM
FAXING
5
Press
the setting.
or
to adjust
6
Press
. The display opposite will
flash briefly on the display and then the
function menu will reappear.
Note
Do not carry out any operations while “Registered” appears on the display.
7
4800bps:
Yes?
OK
Registered
2 CommunicationO K
Do one of the following:
• Enter another function number.
• Press
to return to standby mode.
RDS
RDS stands for Remote Diagnostic System.
If your machine has a problem, a service technician can perform various
diagnostic tasks over the telephone line from the service station to try and
find out what is wrong. The service technician can also use this feature to
change some of your machine’s settings if you request it.
For this feature to work, you must turn it on before the service technician
starts the RDS operation on your machine.
☛ For how to switch this feature on or off, see Changing On/Off Settings, see page 69.
Page Header
By default, your TTI/Own Number appears on top of faxes you send when
printed at the other end. If you wish, you can turn this feature off.
☛ For how to switch this feature on or off, see Changing On/Off Settings, see above.
☛ Storing your Own Name/TTI, see page 33.
Changing On/Off Settings
Use this procedure to turn the following features on or off:
☛ Page Header, see above.
☛ Turning Summer Time (Daylight Saving Time) on/off, see page 39.
☛ RDS, see above.
68
b(GB)6.5_Chapter 04_p66-69
68
99.8.3, 1:17 PM
FAXING
1
Press
.
2
Press
.
3
Press
4
Press
5
Press
or
until the
setting you wish to change appears on
the display.
Prt Help List
Function no.: _ _
.
51 Select
.
Page Header
OK
Summer Time
OK
Mode: Off?
OK
Mode: On?
OK
once.
6
Press
.
7
Press
the change.
8
Press
. The display opposite will
flash briefly on the display and then the
function menu will reappear.
or
to adjust
Note
Do not carry out any operations while “Registered” appears on the display.
Registered
5 Select
OK
Do one of the following:
• Enter another function number.
• Press
to return to standby mode.
69
b(GB)6.5_Chapter 04_p66-69
69
99.8.3, 1:17 PM
4. FAXING
E.g. press
9
OK
5. COPYING
Making a Copy
1
Lift the platen cover (1). Place the
original face down at the arrow mark
on the scale (2). Close the platen cover
(3).
1
3
2
2
Press
tion.
to perform the copy opera-
Important!
After copying a large number of pages, wait a couple of minutes before attempting
to turn off the machine.
Note
When printing to label paper, envelopes, transparencies, or thin paper (60 g/m2
or 16 lb), remove each printout as it comes out of the machine. If you don't,
printed output can fall out of the output tray, and become curled.
Alignment of Originals
Align the original with the scale of the exposure glass.
• When the original is a standard size such as
A4 or Letter, align it to the indexes on the scale.
• When your original is not standard size, align
the upper left edge of the original to the arrow mark on the scale.
70
b(GB)6.5_Chapter 05_p70-75
70
99.8.3, 1:17 PM
COPYING
Making Multiple Copies
1
Lift the platen cover (1). Place the
original face down at the arrow mark
on the scale (2). Close the platen cover
(3).
1
3
2
2
Enter the number of copies you wish to
make using the numeric keypad.
E.g. to make ten copies, press
100%
10
.
Note
If your document is not scanned in even when
you press
, there is a chance it is not set
correctly in the ADF. Reset your document
and try again. For how to set documents in
the ADF, see page 78.
Press
tion.
to perform the copy operaPage number
Note
During the copy operation, the display shows
the number of copies printed so far and that
to be printed. For example, 02/10 appears
while the second copy of a run of 10 copies is
being printed.
Number of
copies printed
so far
P.01
02/10
Number of copies
to be printed
5. COPYING
3
Tips
• After copying finishes, press
to clear any settings.
71
b(GB)6.5_Chapter 05_p70-75
71
99.8.3, 1:17 PM
COPYING
Making a Book Copy
When copying from a book, the thickness of the book should be no more
than 30mm (1.18").
1
Lift the platen cover.
2
Open to the page you want to copy and
lay the page face down on the exposure
glass. Be sure to align one of the corners of the page with the arrow mark
on the scale.
3
Lower the platen cover.
4
Press
tion.
to perform the copy opera-
72
b(GB)6.5_Chapter 05_p70-75
72
99.8.3, 1:17 PM
COPYING
Reduction and Enlargement
Press
or
the copy operation.
to select preset reduction or enlargement factors for
To Set the Reduction Factor
1
Lift the platen cover (1). Place the
original face down at the arrow mark
on the scale (2). Close the platen cover
(3).
1
3
2
2
Press
until the desired size ratio appears. The sizes change in the following order.
100% → 93% → 87% → 82%
50% ← “71% A4
3
Press
tion.
A5”
100%
01
Ratio (%)
93
87
82
71
50
Original ➝ Paper size
A little reduced.
A4 ➝ B5
B5 ➝ A5
A4 ➝ A5
Reduced by 1/4.
to perform the copy opera-
Note
to
5. COPYING
After copying finishes, press
clear any settings.
73
b(GB)6.5_Chapter 05_p70-75
73
99.8.3, 1:17 PM
COPYING
To Set the Enlargement Factor
1
Lift the platen cover (1). Place the
original face down at the arrow mark
on the scale (2). Close the platen cover
(3).
1
3
2
2
Press
until the desired size ratio
appears. The sizes change in the following order.
→
100%
115%
200% ← “141% A5
3
Press
→
122%
A4”
100%
01
Ratio (%)
115
122
141
200
Original → Paper size
B5 → A4, B6 → A5
A5 → B5
A5 → A4
A6 → A4
to perform the copy opera-
tion.
Note
After copying finishes, press
clear any settings.
to
74
b(GB)6.5_Chapter 05_p70-75
74
99.8.3, 1:17 PM
COPYING
Zoom (In 1% Increments)
Zoom allows you to tune the preset reduction and enlargement factors to exactly the value you want. You can change the zoom factor in increments of 1%.
To Use Zoom
Setting Range
200 to 50%
1
50 to 200%
Lift the platen cover (1). Place the
original face down at the arrow mark
on the scale (2). Close the platen cover
(3).
1
3
2
2
3
Press
(decrease) or
(increase) until the desired
size ratio appears.
Press
100%
01
99%
01
to perform the copy opera-
tion.
Note
to
5. COPYING
After copying finishes, press
clear any settings.
75
b(GB)6.5_Chapter 05_p70-75
75
99.8.3, 1:17 PM
COPYING
Adjusting the Copy Image
To Select the Resolution/Photo Setting
1
Lift the platen cover (1). Place the
original face down at the arrow mark
on the scale (2). Close the platen cover
(3).
1
3
2
2
3
Press the Original Type Select key to
specify the resolution or halftoning
method for the copy operation.
A pointer (T) moves on the display to
indicate the current setting.
Choose a setting that matches your original:
Setting
[Text Fine]
[Photo1]
[Photo2]
Use for:
Copying text
Copying photographs
Copying mixed text and photographs
Note
If the memory size of your machine is 4MB, the machine automatically switches
from Photo2 to Photo1 when you make multiple copies using the ADF.
4
Press
tion.
to perform the copy opera-
Note
After copying finishes, press
clear any settings.
to
76
b(GB)6.5_Chapter 05_p76-81
76
99.8.3, 1:17 PM
COPYING
To Adjust the Image Density
1
Lift the platen cover (1). Place the
original face down at the arrow mark
on the scale (2). Close the platen cover
(3).
1
3
2
2
Press the Density key to select the image density.
• Select [Lighter] to make the image lighter.
• Select [Darker] to make the image darker.
Press
tion.
to perform the copy opera5. COPYING
3
Note
After copying finishes, press
clear any settings.
to
77
b(GB)6.5_Chapter 05_p76-81
77
99.8.3, 1:17 PM
COPYING
Setting an Original on the ADF
You can load up to 10 sheets of plain paper (80 g/m2 or 20 lb) at a time into
the Automatic Document Feeder (ADF).
Important!
Check to make sure that the ADF cover is
securely closed before using it.
1
Fan the stack of originals. Never try to
place more than 10 sheets of plain paper onto the ADF.
2
Straighten up all four sides of the stack,
by tapping them on a desk or table top.
3
Place the stack of originals face down
on the ADF and slide the document
guide against the side of the stack.
Note
The side of the original to be copied should
be face down.
4
Insert the stack of originals along the
document guide into the ADF.
Note
Insert your stack of originals into the ADF
until it stops. If you do not push it right in,
the machine will not detect the stack.
78
b(GB)6.5_Chapter 05_p76-81
78
99.8.3, 1:17 PM
COPYING
5
Make sure the upper tray extension is
pulled out.
6
Press
tion.
to perform the copy opera-
Note
• If your original jams while being fed into
the ADF, press
to cancel the operation. See page 93 for how to clear the jam.
• We recommend you use Text mode when
copying with the ADF.
Note
We recommend you copy photo originals from
the exposure glass for best results.
■ Requirements
• Thickness
• Weight
• Clear markings
0.05mm to 0.2mm (0.002" to 0.08")
60 to 90 g/m2 (16lb to 24lb)
Markings on the originals must be clear to be read
correctly.
All pages should be the same size.
Avoid using originals that are bent, curled, damaged,
or stapled, and originals printed on coated paper,
carbon paper, or photographic paper.
• Uniform page size
• Page condition
79
b(GB)6.5_Chapter 05_p76-81
79
99.8.3, 1:17 PM
5. COPYING
Originals that do not meet the following requirements can cause paper misfeeds,
and even damage the machine.
COPYING
Sorting Output
The following example shows how output is affected by turning sorting on
and off.
Important!
The sort operation requires scanning of all your originals into memory before
starting the copy operation. The number of originals that can be scanned at one
time depends on how much memory you have installed. Refer to page 23 for details on increasing memory capacity.
Sort Copying
1
Set the originals on the ADF.
Note
Refer to page 78 for how to set originals.
2
Sorting is activated when the T pointer
is visible on the display above Sort/
Memory Copy. Press
to turn
sorting on.
80
b(GB)6.5_Chapter 05_p76-81
80
99.8.3, 1:17 PM
COPYING
3
When you press
to start the copy
operation, all of the originals on the
ADF are scanned into memory before
they are printed.
Note
to
5. COPYING
After copying finishes, press
clear any settings.
81
b(GB)6.5_Chapter 05_p76-81
81
99.8.3, 1:17 PM
6. TROUBLESHOOTING
General
Cause
Status
Nothing happens
when the machine is
turned on.
Paper misfeeds when
the machine is turned
on for the first time
after the installation.
After installing a SIMM
board, the memory
value that appears on
the machine's display
does not match the
amount of memory installed.
Remedy
Power cord is not con- Correctly connect the power
nected.
cord to the machine and plug it
into a outlet.
SIMM is not installed correctly. Install the SIMM correctly.
SIMM does not meet the Use a SIMM with the required
required specifications.
specifications.
Paper was loaded in the Remove the paper, turn the mamachine before the ma- chine off and then back on. Afchine was turned on.
ter machine initialization is
complete, load the paper back
into the machine.
SIMM does not meet the Use a SIMM with the required
specifications.
required specifications.
Page
p.9
p.23
p.23
p.9
P.23
Printing and Copying (1/2)
Cause
Status
Remedy
Frequent paper mis- The upper paper tray is not Set the upper paper tray corset correctly
feeds.
rectly.
Improper paper.
Use paper of the correct size and
thickness.
Paper is not set correctly in Realign the paper with the pathe upper paper tray.
per guide, and if necessary, fan
the paper stack.
Paper is curled or damp. Uncurl the paper.
Insert paper into the upper paper
tray from the least-curled side.
Set paper face down if necessary.
Avoid using damp paper.
Too much paper is loaded Remove some of the paper.
in the machine.
Paper is loaded incorrectly. Check the paper and realign it
if necessary.
82
b(GB)6.5_Chapter 06_p82-95
82
99.8.3, 1:17 PM
Page
p.6
p.10
p.11
p.11,13,19
p.11,13
p.11,13,19
—
p.11,15
p.11,19
Printing and Copying
Status
Cause
Remedy
Page
Frequent paper mis- Attempting to print on both Print on only one side. Two-side p.11,19
feeds.
sides of the paper.
printing is not supported by this
machine.
Printing onto loosely Flatten the envelopes to expel all p.15
stacked envelopes.
air.
Misfeeding of the envelope Make sure that envelope flaps
p.15
flap.
are closed (folded down).
Part of the image is Toner is distributed un- Remove the toner cassette, gen- p.97
unclear.
evenly in the toner cassette. tly rock it left and right a few
times, and replace it into the
machine.
Black lines on the Heat damage to the toner Replace the toner cassette.
p.97
printout.
cassette caused by turning
off the machine too soon
after copying a large
number of pages.
Dark areas along the Turning off the machine too Replace the toner cassette.
p.97
sides of the printout. soon after printing or copying a large number of
pages.
Printing
Status
Cause
Remedy
Page
Abnormal or unex- Use of wrong cable.
pected printing results.
Wrong printer driver settings.
Attempting to print from a
DOS application at 600 dpi.
Parts of the image are The correct paper size is
not printed out.
not specified .
Cannot print from a Second printer is not consecond printer.
nected correctly.
Use the cable that comes with
this machine.
Change to the correct printer
driver settings.
Change to 300 dpi.
p.7
Specify the paper size using the
operation panel.
Check connections and make
corrections, if necessary.
p.20
Second printer is not selected.
Incorrect settings of the
second printer driver.
Press
so the indicator above it is lit.
Use the printer driver of the second printer to turn off bi-directional printing.
p.28
p.25
p.105
p.16
p.28
83
b(GB)6.5_Chapter 06_p82-95
83
99.8.3, 1:17 PM
6. TROUBLESHOOTING
TROUBLESHOOTING
(2/2)
TROUBLESHOOTING
Copying and Faxing (1/2)
Status
Cause
"Error 90" appears on Locked scanner.
the display, and the copy
operation is aborted
when copying from the
exposure glass.
Frequent original mis- Original is not set correctly.
feeds with ADF.
Curled original(s).
Remedy
Page
Unlock the scanner lock, turn
the machine off and then back
on.
p.3
Set the original correctly.
p.41,78
Straighten out the original(s). p.41,78
Insert the original(s) from the p.41,78
least-curled side.
Incorrect original specifi- Use originals of the correct size, p.79
cations.
thickness, and quantity.
Close the ADF cover.
Original is not fed ADF cover is open.
p.78
from the ADF.
Document is not set cor- Set the document properly. p.41,78
rectly in ADF.
Original is not fed out The document output tray Set the document output tray
p.5
is not set correctly.
and the small pieces of plastic
properly.
film correctly.
Periodic black marks Cleaning pad is not in- Correctly install the cleaning p.97
stalled.
pad.
on printed output.
Black lines and marks Copying to small-size paper. Place a sheet of the same size as p.70
the paper you are printing onto
on printed output
when copying from the Different size original and behind the original.
copy paper.
exposure glass.
Non-white original back- Adjust the print density.
p.77
ground.
Dirty platen cover or expo- Clean the platen cover and ex- p.96
sure glass.
posure glass.
p.96
Black and white lines Dirty ADF transport path. Clean the ADF transport path.
on printed output
when using the ADF .
Adjust the print density.
p.77
Output too light.
Low contrast original.
Unclear photographic Copying in Text Fine Mode. Use the Original Type Select key p.76
to select the Photo1 or Photo2
images.
Mode.
Parts of the original The correct paper size is Specify the paper size using the p.20
operation panel.
image are not copied. not specified
84
b(GB)6.5_Chapter 06_p82-95
84
99.8.3, 1:17 PM
Copying and Faxing (2/2)
Cause
Status
Cannot send or receive The power is off.
faxes.
The machine is not
connected to the
telephone line.
Remedy
Turn on the power.
Check the line connection. Make
sure that one end of the line
cable is connected to the LINE
socket at the rear of the machine
and the other to your telephone
line socket.
Page
p.9
p.32
The Dial Mode settings are Make sure you have selected the
correct line type (pulse or tone).
not correct.
If behind a PABX, make sure the
PABX settings are correct.
p.34
Cannot send faxes.
The machine is in copy op- Press the Fax/Copy key to switch
to fax operation mode.
eration mode.
p.29
Cannot receive faxes
The machine is busy Fax reception is not possible
processing or printing a PC while the machine is processing
or printing PC print data.
print job.
The machine is busy mak- Fax reception is not possible
while making copies.
ing copies.
The machine has run out of Load more paper. If small size
paper, or small size paper paper is loaded, load A4 size
is loaded in the upper tray. paper so you can receive faxes.
Toner has run out.
Install a new toner cassette.
The machine is in TEL Press the Reception Mode key
to switch to FAX mode, or read
mode.
about how to receive faxes
manually in TEL mode.
p.11
p.97
p.46
Paper is jammed.
Clear all jammed paper.
p.91
Top unit cover open.
Close all top unit.
p.3
The machine has been set Turn Authorized Reception off
up to only receive faxes with function 21, or read how
from certain senders with to configure this feature.
the Authorized Reception
feature.
Even when you press Remote Change is not
the Remote Change turned on.
digit, Remote Change
You are pressing the wrong
will not function.
Remote Change digit, have
pressed a key on the
operation panel or the
machine is busy dialling.
p.47
Turn it on with function 32.
p.52
The default Remote Change digit
is 2. If pressing this digit on the
handset keypad still does not
work, try changing the Remote
Change digit to another number.
Do not press any key on the
operation panel before pressing
the Remote Change digit. If the
machine is busy dialling,
Remote Change is not available.
p.52
85
b(GB)6.5_Chapter 06_p82-95
85
99.8.3, 1:17 PM
6. TROUBLESHOOTING
TROUBLESHOOTING
TROUBLESHOOTING
Scanning
Status
Cause
Remedy
Page
PC scanning does not The PC parallel port is not Consult your PC manual on how p.25
function properly.
set to ECP.
to set your parallel port to ECP.
Error Messages (1/4)
The table below explains the error messages that may appear on the display and the appropriate
action to take.
Cause
Message
“Close cover”
Top unit is open.
“Add paper”
Machine is out of paper.
“Toner near end”
Machine is almost out of
toner.
Toner cassette is not loaded
correctly.
“Add Toner”
“Clear paper”
Machine is out of toner.
Paper misfeed or paper
will not feed at all.
“Memory overflow”
Not enough memory
capacity. (PC printing
only)
“Remove original”
(when original is set
in ADF)
“Original left” and
“on glass”
Original misfeed or paper
will not feed at all.
An original may be left under the platen cover.
Remedy
Close the top unit.
P.3
If a copy job is in progress, set
the copy quantity again.
Load paper.
P.11,19
If a copy job is in progress, set
the copy quantity again.
Prepare a toner cassette for re—
placement.
Correctly load the toner cassette
P.2
into the machine.
If a copy job is in progress, set
the copy quantity again.
P.97
Replace the toner cassette.
Remove the misfed paper. If a P.91
copy job is in progress, set the
copy quantity again.
If paper persistently misfeeds, carry
out the procedure on page 89.
Either lower the printer driver P.23
Resolution setting, or increase
memory capacity by installing a
larger SIMM. Press any operation panel key to clear the error
message from the display.
Remove the original from the P.78
ADF. If a copy job is in progress,
set the copy quantity again.
—
Open the platen cover, remove
any original that remains, then
lower the platen cover again.
86
b(GB)6.5_Chapter 06_p82-95
86
Page
99.8.3, 1:18 PM
Error Messages
Message
“Memory full” and
“Press Stop”
Cause
Too much sort copy data.
Remedy
Press
to cancel sort copying.
If you need to print big copy jobs,
increase the memory capacity.
Too many sort copy pages. Press
Page
P.23, 80
to print pages al- P. 23,80
ready stored in memory. To can. If you
cel the job, press
need to print big copy jobs, increase the memory capacity.
“Transm.error” and
“Press Stop”
An error occurred during
transmission, or the other
line was busy.
If power was lost during the
dialing or connecting
phases of transmission, or
in fax transmission standby
mode, this message will
appear when you next turn
the machine on.
“Too many numbers” Either the maximum
number of Name Dials have
been stored (25), or you
tried to enter more than 40
digits for a destination fax
number.
“No connection”
The line is busy while dialling , connection failed, you
dialled the wrong number,
or there is no answer.
“No loop current”
“Printer in use”
“Machine busy”
Press
message.
to clear the error
Delete some Name Dials or
enter a shorter number.
When scanning from the ADF,
the machine will automatically
enter redial mode. To cancel
redialling, remove your
document from the ADF.
The line current was not Check the line connection.
detected-the line may not
be connected.
The machine is busy print- Wait until it has finished and try
again.
ing.
The machine is busy com- Wait until the current operation
has finished and try again.
municating.
—
P.59
P.52
P.8
—
—
87
b(GB)6.5_Chapter 06_p82-95
87
99.8.3, 1:18 PM
6. TROUBLESHOOTING
TROUBLESHOOTING
(2/4)
TROUBLESHOOTING
Error Messages (3/4)
Message
Cause
Remedy
“Name exists”
The name you input for Either use a different name, or
this Name Dial already ex- delete the other Name Dial and
try again.
ists.
“Unable”
The machine is unable to
to exit funcprint the report or list be- Press
cause there is a problem tion mode and rectify the probwith the printer.
lem indicated on the display.
“Check fax no.” and Multiple attempts at
to cancel the trans“Press Stop”
communication with this Press
mission.
number failed.
In some locales, if this number
was stored in a Name Dial,
Quick Dial, or the redial
memory, the number will be
erased completely from the machine memory to comply with
regulations.
Check the number is correct and
store it again if necessary.
No dial tone was detected. Check the line connection and
“No dial tone”
if behind a PABX, the PABX
settings.
Small size paper is loaded Load A4 size paper in the upper
“Set A4 paper”
in the upper tray (A4 size tray and register the correct papaper is required for re- per size setting.
ceiving faxes)
“Set paper size”
The actual length of the Make sure the registered paper
paper is less than the reg- size matches the paper loaded
and register the correct paper
istered paper length.
size setting.
Page
P.59
—
—
P.34
p.11
p.20
—
“Error” and “Press An error occurred during
Press
to clear the error
Stop”
reception.
message and inform the other
party to send their fax again.
“Not registered”
The Redial memory or Print the Dial List to check on p.54, 64
pressed Quick Dial key is which Quick Dials have numbers stored in them.
empty.
“Name: No entry”
No name Dial exists with Make sure you selected the cor- p.54, 64
the initial letter you rect search letter for this Name
Dial. You also can print the Dial
selected.
List to see currently stored Name
Dials.
88
b(GB)6.5_Chapter 06_p82-95
88
99.8.3, 1:18 PM
Error Messages
4)
Message
Cause
“Error 90”
Locked scanner.
“Error XX”
Possible machine defect.
There is a problem with
your machine.
Remedy
Page
Unlock the scanner lock, turn the
machine off and then back on.
Turn power off and then back
on again.
P.4
P.9
If you have a problem with the machine and you cannot resolve it by referring to the
information in this chapter, please contact your service representative.
If an “Error XX” message is displayed, be sure to turn off the machine before calling.
89
b(GB)6.5_Chapter 06_p82-95
89
99.8.3, 1:18 PM
6. TROUBLESHOOTING
TROUBLESHOOTING
(4/
TROUBLESHOOTING
When the Receive File Indicator is Lit
This indicator lights to inform you that a page of an incoming fax message
could not be printed for some reason (e.g. paper has run out) and that page
has been stored in memory.
Important!
The machine cannot receive any more messages until you solve the problem.
Turning off the power will erase any message stored in memory.
To print the page out, check the display and rectify the problem (e.g. paper has run out). When the
problem is resolved, the page will automatically be printed out.
Note
If there is not enough memory, all or some parts of the message will not be stored
or printed.
The machine will only store a page in memory if a problem occurs while reception is in process.
The line will be disconnected immediately and following pages of the same message will not be
received.
90
b(GB)6.5_Chapter 06_p82-95
90
99.8.3, 1:18 PM
TROUBLESHOOTING
6. TROUBLESHOOTING
Clearing a Paper Misfeed
This section describes how to clear a paper misfeed when one occurs.
CAUTION
When removing misfed paper, do not touch the fusing
section because it could be very hot.
Important!
Hold a misfed sheet with both hands and slowly pull it out. Do not use a tool, such
as a screwdriver or tweezers as this may damage the unit.
Note
If “Clear Paper” is still displayed after you clear the jam, there may be paper
jammed in another part of the machine. Check all areas described in this section
Clearing a Feed in the Main Unit
1
Pull the top release lever (1) and open
the top unit (2).
2
1
2
Pull out the toner cassette.
Note
• Be sure to hold the toner cassette by its handle.
• Keep the toner cassette horizontal to avoid
spilling the toner.
91
b(GB)6.5_Chapter 06_p82-95
91
99.8.3, 1:18 PM
TROUBLESHOOTING
3
Push back the blue paper release lever
located on the right.
Note
The lever releases pressure on the paper. If
you do not push it back, you could damage
the machine when removing paper.
4
Pull out the misfed paper in the directions indicated by the arrows in the illustrations.
Note
• If you are using the paper feed unit (option) and cannot clear the misfeed using
this procedure, use the procedure on page
93 instead.
• If toner gets on your hands, wash them immediately.
5
Install the toner cassette into the machine.
Note
• Be sure to hold the toner cassette by its handle.
• Keep the toner cassette horizontal to avoid
spilling the toner.
• Refer to page 2 for details on how to install the toner cassette.
6
Close the top unit.
Note
If “Clear Paper” is still displayed after you
clear the jam, there may be paper jammed in
another part of the machine. Check all areas
described in this section
Important!
If a paper misfeed occurs during a copy job, be sure to specify the desired copy
quantity again.
92
b(GB)6.5_Chapter 06_p82-95
92
99.8.3, 1:18 PM
6. TROUBLESHOOTING
TROUBLESHOOTING
Clearing a Misfeed in the ADF
1
Open the ADF cover.
Note
Be sure to open the ADF cover before pulling
out the misfed original. Failure to do so can
result in damage to the original.
2
Pull out the misfed original.
3
Close the ADF cover, and make sure it
locks securely into place.
Important!
If copying was in progress, be sure to specify
the desired copy quantity again.
Clearing a Misfeed in the Optional Paper Feed Unit
1
Pull out the paper tray.
2
Pull out the misfed paper.
93
b(GB)6.5_Chapter 06_p82-95
93
99.8.3, 1:18 PM
TROUBLESHOOTING
3
Slide the paper tray back into the paper feed unit until it locks into place.
Note
☛ For how to set paper in the optional paper
feed unit, see page 19.
Tip
If you cannot find a remedy for unexpected printout results here,
check the printer driver's online help for other useful information.
When Paper Will Not Feed
If paper has completely stopped feeding, check using the following procedure.
1
Remove all paper.
2
Pull the top release lever 1 and open
the top unit 2.
2
1
3
Pull out the toner cassette.
94
b(GB)6.5_Chapter 06_p82-95
94
99.8.3, 1:18 PM
4
Pull the blue key-shaped pawl located
deep inside on the right where the toner
cassette was set forward.
5
Install the toner cassette into the machine.
6
Close the top unit.
When the top unit is closed, the motor
will start running. When the sound of
the motor stops, set paper in the original position and continue with normal
operation.
6. TROUBLESHOOTING
TROUBLESHOOTING
95
b(GB)6.5_Chapter 06_p82-95
95
99.8.3, 1:18 PM
7. USER MAINTENANCE
Daily Maintenance
Clean with a damp cloth and wipe dry.
Note
Turn off the machine before cleaning
ADF
Exposure glass
Platen cover
Platen
96
b(GB)6.5_Chapter 07_p96-100
96
99.8.3, 1:18 PM
USER MAINTENANCE
Printing on A4 size paper under the recommended temperature and humidity conditions noted in the table under “Environment” on page 1, you
can expect a toner cassette to print approximately 3,000 pages when you are
printing typical business letters that have text covering 5% of the total surface. The starter cassette that comes with the machine can print approximately 1,000 pages. Pages that contain graphics use more toner and shorten
the life of a toner cassette.
WARNING
Do not incinerate used toner or toner containers. Toner dust might ignite when exposed to an
open flame. Dispose of the used toner cassettes according to local regulations for plastics.
This machine has been tested for safety using this supplier’s parts and consumables.
We recommend you only use these specified supplies.
CAUTION
When replacing the toner cassette and cleaning pad,
do not touch the fusing section because it could be
very hot.
1
Open the box of the new toner cassette
and check to make sure it contains a
toner cassette and cleaning pad.
Note
Be sure to hold the toner cassette by its handle.
2
Pull the top release lever (1) and open
the top unit (2).
2
1
97
b(GB)6.5_Chapter 07_p96-100
97
99.8.3, 1:18 PM
7. USER MAINTENANCE
Replacing the Toner Cassette And the
Cleaning Pad
USER MAINTENANCE
3
Hold the toner cassette by its handle and
pull it out.
Note
Keep the toner cassette horizontal to avoid
spilling the toner.
4
Remove the old cleaning pad.
Note
Be sure to grasp the green handle when removing the cleaning pad.
5
Grasp the new cleaning pad by the green
handle and insert it into place.
6
Press down gently but firmly on both
sides of the pad to make sure that it is
inserted as far as it can go.
Do not forget to install the cleaning
pad whenever you install a new toner
cassette.
7
Prepare the new toner cassette. Holding the toner cassette by its handle, gently shake it side to side 5 or 6 times to
evenly distribute the toner inside.
Note
Be sure to hold the toner cassette by its handle.
98
b(GB)6.5_Chapter 07_p96-100
98
99.8.3, 1:18 PM
USER MAINTENANCE
7. USER MAINTENANCE
Look inside the machine and note the
locations of the arrows that indicate the
toner cassette guides on either side.
8
Make sure the plastic pins (marked with
“*” in the illustration next to step
above) on either side of the toner cassette slide along the guides inside the
machine.
9
Note
Be sure to hold the toner cassette by its handle.
10
To close the top unit, press down firmly
but gently on both sides of it until the
top unit closes and clicks securely into
place.
Note
Background gray cast is sometimes evident
just after installing a new toner cassette.
99
b(GB)6.5_Chapter 07_p96-100
99
99.8.3, 1:18 PM
USER MAINTENANCE
Storage
Paper
Paper should always be stored properly. Improperly stored paper might
result in poor image reproduction, creased copies, or paper misfeeds. Generally, avoid paper curling and absorption of moisture.
• Avoid storing paper in humid areas. In high-temperature and high-humidity, or lowtemperature and low-humidity conditions, store paper in a vinyl bag.
• Do not store paper where it will be exposed to heat.
• Store on a flat surface.
• Use older stock first.
• Do not lay heavy objects on paper.
• Keep open reams of paper in the package, and store as you would unopened paper.
Toner Cassette
• Keep the toner cassette inside the packaging that it comes packed in whenever it is
removed from the machine.
• Store horizontally in a cool, dark place.
• Never store a toner cassette where it will be exposed to heat.
• Do not lay heavy objects on the toner cassette.
CAUTION
Keep toner cassettes out of children’s reach.
100
b(GB)6.5_Chapter 07_p96-100
100
99.8.3, 1:18 PM
8. TECHNICAL REFERENCE
Printing the Help List
Print this list to get a quick guide to frequently used fax features.
1
While the machine is not performing any
other operation, press
.
2
Press
3
Press
.
Prt Help List
OK
8. TECHNICAL
REFERENCE
Press Start
to print the Help List.
Note
Print on A4, Letter, or Legal paper.
101
b(GB)6.5_Chapter 08_p101-108
101
99.8.3, 1:18 PM
TECHNICAL REFERENCE
Customising Default Settings with the User
Parameters
Changing the User Parameters
The User Parameters allow you to customise various machine settings and
features to suit your requirements.
They are four User Parameter Switches numbered 00 to 03. Each switch has
8 adjustable “bits” which can set to either 0 or 1.
→
7654 3210 ← bit number
Switch number → 00: 0000 1011 ← bit values
☛ For the meaning of each bit and how changing them affects the machine, see
page 103.
Note
Take care when changing the switch values. Only change the bits whose meanings are described in this manual.
Note
Do not turn off the power while adjusting the User Parameter bit switches.
The following procedure describes how to change the User Parameters.
1
Press
.
2
Press
.
3
Press
4
Press
5
Press
or
until the
switch you wish to edit appears.
E.g. press
Prt Help List
Function No.:__
.
52 User Param.
K
.
00 :1000 1011
O
02 :1110 0000
O
twice to show switch 02.
102
b(GB)6.5_Chapter 08_p101-108
O
102
99.8.3, 1:18 PM
K
K
TECHNICAL REFERENCE
02 :1110 1000
To toggle the value of a single bit, press
the number on the numeric keypad that
corresponds to the number of the bit
you wish to change.
6
E.g. press
K
to change bit 3.
Please wait
Press
. The display opposite will
flash briefly on the display and then the
function menu will reappear.
7
O
Registered
Do not carry out any operations while “Registered” appears on the display.
8
Do one of the following:
5 Select
O
K
• Enter another function number.
• Press Help/Function to return to standby mode.
User Parameter Switch Summary
The following tables summarize the User Parameter bit switches and their
meanings.
SWITCH 00 (1/2)
Bit
Explanation
7
Width scanned when faxing
a document
Display “Original left on
glass.” Warning when scanning from the ADF and an
original is left on the exposure glass
Maximum length of document when scanning from
the ADF
Automatically print the
Transmission Result Report
after every successful transmission
6
5
4
Available
Settings
Default
Notes
0: 210 mm (A4) 210mm (A4)
1: 216mm (LT/LG)
0: Yes
Yes
1: No
0: 400mm
1: 1200mm
400mm
0: No
1: Yes
No
This setting takes effect
from the next power on.
This setting takes effect
from the next power on.
103
b(GB)6.5_Chapter 08_p101-108
103
99.8.3, 1:18 PM
8. TECHNICAL
REFERENCE
Note
TECHNICAL REFERENCE
SWITCH 00 (2/2)
Bit
Explanation
3
Automatically print the
Journal after every 35 communications
Print the Unauthorized Call
Report when an unregistered caller tries to send
you a fax ( when Authorized Reception is switched
on)
Do not change this setting
2
1
0
Available
Settings
Default
0: No
1: Yes
Yes
0: No
1: Yes
No
Automatically reduce re- 0: No
ceived images to fit page
1: Yes
Yes*
Notes
* This function turned
off by default in some
locales.
If you turn this function off, some parts of
the printed image
may be lost.
SWITCH 01
Bit
7
6
5
4
Explanation
Available
Settings
Copy/Fax Operation mode 0: Fax
home position.
1: Copy
Do not change these settings
Reset the image density and
resolution to the values below after sending a fax,
switching to fax operation
mode or on power up.
3 & 2 Image density home
position when bit 4 above
is 1.
1 & 0 Resolution home position
when bit 4 above is 1.
0: No
1: Yes
Default
Notes
Copy
Yes
These settings have no
affect on the copy feature.
b3 b2
Auto
0 0: Auto
0 1: Darker
1 0: Lighter
b1 b0
Text (STD)
0 0: Text (STD)
0 1: Text (Fine)
1 0: Photo 1
1 1: Photo 2
104
b(GB)6.5_Chapter 08_p101-108
104
99.8.3, 1:18 PM
TECHNICAL REFERENCE
SWITCH 02
Bit
2
1
0
Available
Settings
Default
Notes
Do not change these settings
PCL Resolution
0: 600dpi
Set the printer to 300 dpi 1: 300dpi
if the designated output is
not obtained when printing
using a DOS application
compatible with the 300
dpi PCL printer.
Toner Saving mode
0: Off
When Toner Saving is 1: On
turned on, the machine
prints using less toner. Use
this mode if you wish to
save on toner and do not
mind lighter prints.
Do not change these settings
600dpi
8. TECHNICAL
REFERENCE
7
6
5
4
3
Explanation
Off
SWITCH 03
Bit
7
6
5
4
3
2
1
0
Explanation
Available
Settings
Notes
Default
Do not change these settings
105
b(GB)6.5_Chapter 08_p101-108
105
99.8.3, 1:18 PM
TECHNICAL REFERENCE
Function List
Function Number
11
12
13
14
15
16
17
21
22
31
32
41
42
51
52
61
Function Name
Date/Time
Dial Mode
Quick Dial/Print Dial List
Name Dial
Language
Own name/TTI
Own Fax No.
Authorized Reception
Slow (4800bps)
Adjust Volume
Remote Change
Journal
Dial List
Page Header
Summer Time
RDS Mode
User Parameters
Tray Paper Size
Page Reference
38
34
54
59
107
33
36
49
67
66
52
63
64
68
39
68
102
11
106
b(GB)6.5_Chapter 08_p101-108
106
99.8.3, 1:18 PM
TECHNICAL REFERENCE
Selecting the Language
1
Press
.
2
Press
.
3
Press
and press
or
until the desired language
Prt Help List
15 Language
4
Press
.
Registered
Note
• Do not carry out any operations while
“Registered” appears on the display.
, the setting is
• If you do not press
not changed.
5
Press
display.
1 Set up
O
K
to return to the standby
107
b(GB)6.5_Chapter 08_p101-108
107
99.8.3, 1:18 PM
8. TECHNICAL
REFERENCE
appears.
TECHNICAL REFERENCE
Economy Mode
Economy mode is a power saving feature and is turned on by default. If no
operation is performed for 5 minutes, the display becomes blank and all the
indicators go out. If no operation is performed in the next 10 minutes or
235 minutes (according to the setting), the heater turns off.
Operation panel
Heater turns off after
turns off after
ON (default setting) 5 minutes 15 minutes (including time when operation panel is off)
Economy mode
OFF
5 minutes 240 minutes (including time when operation panel is off)
Note
• In Economy Mode, the heater turns back on in the following cases.
♦ When any key on the operation panel is pressed
♦ When the platen cover is opened
♦ When paper is set in or removed from the upper paper tray
♦ When the tray of the paper feed unit (option) is pulled out or pushed back
into the machine
♦ When the top unit is opened.
♦ When an original is set in or removed from the ADF.
♦ On initiation of fax operations, such as fax reception, lifting the headset etc.
♦ On initiation of PC printing.
• When a key on the operation panel is pressed to turn the heater on, the key does
not perform its normal function.
• After the heater is turned back on, the previous %, quantity, Sort settings, entered fax number, original type and various other settings are cleared.
Changing the Economy Mode
Hold down the Clear modes key for approximately 1 second until the
Economy mode indicator lights or goes out, as required.
Economy Mode ON
Economy Mode OFF
108
b(GB)6.5_Chapter 08_p101-108
108
99.8.3, 1:18 PM
9. SPECIFICATIONS
General Specifications
Machine Life
Upper tray
plain paper (80 g/m2: 20 lb.) 100 sheets
Optional paper unit
plain paper (80 g/m2: 20 lb.) 250 sheets
ADF (Auto Document Feeder) Capacity
plain paper:
A4, LT · LG (80 g/m2: 20 lb) 10 sheets
Output tray
plain paper (80 g/m2: 20 lb.) 50 sheets
Memory
4 MB (Expandable to 8 MB, 16MB or 32MB)
EDO SIMM, 60 ns, 72 pin
Dimensions
297mm × 352mm × 576mm (H× W× D)
11.70" ×13.87"× 22.69" (H× W× D)
Weight
15.5 kg (34.18 lb)
Power Supply
AC 220 to 240 V
50/60 Hz
30,000 sheets/5 years
Printer Duty
6,000 sheets/1 month
Scanner Duty
2,000 sheets/1 month
Paper Sizes
Plain paper
A4 = 210 mm × 297 mm
A5 = 148 mm × 210 mm
Letter (LT) = 8 1/2" × 11"
Legal (LG) = 8 1/2" × 14"
Half Letter = 51/2" × 81/2"
F4 = 81/4" × 13"
Envelopes
C5 = 162 mm × 229 mm
C6 = 114 mm × 162 mm
DL = 110 mm × 220 mm
Other
Transparencies
Label paper
9. SPECIFICATIONS
Paper Capacity
Power Consumption
Max
Printing (Average)
Copying (Average)
Stand-by (Average)
PC-Scan (Average)
Sending Faxes (Average)
Receving Faxes (Average)
Economy Mode
640 W
230 W
250 W
75 W
75W
75W
230 W
15 W
Operating Environment
Temperature /Humidity
10°C (50°F) to 35°C (95°F)
15% to 80%
109
b(GB)6.5_Chapter 09_p109-111
109
99.8.3, 1:19 PM
SPECIFICATIONS
Printing Specifications
Printer Language
Resident Font
PCL 5e compatible
• Dutch 801 SWC
• Dutch 801 Italic SWC
• Dutch 801 Bold SWC
• Dutch 801 Bold Italic SWC
• Swiss 742 SWC
• Swiss 742 Italic SWC
• Swiss 742 Bold SWC
• Swiss 742 Bold Italic SWC
• Swiss 742 Condensed SWC
• Swiss 742 Condensed Italic SWC
• Swiss 742 Condensed Bold SWC
• Swiss 742 Condensed Bold Italic SWC
• Incised 901 SWC
• Incised 901 Italic SWC
• Incised 901 Bold SWC
• Fixed Pitch 810 Courier Roman SWC
• Fixed Pitch 810 Courier Bold SWC
• Fixed Pitch 810 Courier Italic SWC
• Fixed Pitch 810 Courier Bold Italic SWC
• Fixed Pitch 850 Letter Gothic 12 pitch/text SWC
• Fixed Pitch 850 Letter Gothic Bold 12 pitch/text SWC
• Fixed Pitch 850 Letter Gothic Italic 12 pitch/text SWC
• Flareserif 821 SWC
• Flareserif 821 Extra Bold SWC
• Ribbon 131 SWC
• Wingbats SWM
Print Resolution
600 dpi × 600 dpi
1200 dpi × 600 dpi (enhanced)
Print Speed
6 ppm (pages per minute)
Paper/Media Types
Plain paper
Envelopes
Transparencies
Label paper
Paper Weight
60 to 90 g/m2 (16 to 24 lb)
Interface
IEEE 1284
Scanner Specifications
Configuration
Grey scale
Flatbed / ADF
256 levels (8-bit)
Document Size
Interface
LG, LT, HLT,A4, A5, B5
IEEE 1284
Optical Resolution
Compatibility
300dpi
TWAIN
Scanning Resolution
ADF
ECP mode
Up to 10 pages of 80g /m2(20lb), Plain paper
1bit
100 × 100, 150 × 150,
200 × 200, 300 × 300,
400 × 400, 600 × 600 dpi
8bit
300 × 300 dpi
Maximum scanning size
212 × 351.6 mm
OS
Windws 95/98 only
110
b(GB)6.5_Chapter 09_p109-111
110
99.8.3, 1:19 PM
SPECIFICATIONS
Copying Specifications
Copy Speed
Paper Weight
6 cpm (copies per minute)
60 to 90 g/m2 (16 to 24 lb)
Warm-up Time
Original Types
30 seconds or less
Exposure glass
Sheet/Book
ADF
Up to 10 pages of 80g /m2(20lb), Plain paper
First copy
17 seconds or less
Mulitiple Copies
Maximum Original Size
Up to 99 copies
Legal (LG) = 8 1/2 " × 14"
Copy Reduction and Enlargement
50%, 71%, 82%, 87%, 93%,
115%, 122%, 141%, 200%
Copy Resolution
600 dpi × 600 dpi
Paper/Media Types
9. SPECIFICATIONS
Plain paper
Envelopes
Transparencies
Label paper
Fax Specifications
Modem Speed
Fax Resolution
14400 bps
Text (Standard) :203 × 98dpi
Text Fine (Detail) :203 × 196dpi
Protocol
Quick Dials
ITU Group 3
5
Compression Method
Name Dials
MH/MR/MMR
25
111
b(GB)6.5_Chapter 09_p109-111
111
99.8.3, 1:19 PM
INDEX
INDEX
1
E
1 to 1 Copy ........................................................... 70
Economy mode ................................................. 108
Economy mode/Clear modes key ...................... xii
Economy mode indicator .................................. xii
Enlarge key ........................................................ xiii
Enlargement .......................................................33
Entering numbers ...............................................30
Entering pauses ................................................... 43
Entering tones .....................................................43
Envelopes ............................................................. 14
Error messages .................................................... 86
Error report .......................................................... 65
Exposure glass ....................................................... x
A
Additional printer ................................................ 16
Auto image density .............................................. 77
Automatic Document Feeder (ADF) ..................... x
Setting an original ......................................... 78
Authorized reception ........................................... 47
Automatic redial .................................................. 45
B
Book Copy ............................................................ 72
Busy indicator ................................................... xiii
F
C
Cancelling automatic redial ............................... 45
Cancelling taransmission of a fax ...................... 45
Changing On/Off settings ................................... 68
Check display indicator ..................................... xiii
Clearing a paper misfeed .................................... 93
Clear key ............................................................. xii
Cleaning pad ....................................................... 97
Computer port ..................................................... xi
Connecting a second printer
(Additional Printer) ............................................ 16
Connecting to a computer .................................... 7
Connector ............................................................ 16
Copy operation .................................................... 29
Corner guides ................................................ 17, 19
D
Daily maintenance .............................................. 96
Date and time ...................................................... 38
Density key ......................................................... xiii
Dial mode ............................................................ 34
Display ................................................................ xii
Document guides .................................................. x
Document output tray ......................................... xi
Installing .......................................................... 5
Fax/Copy key ...................................................... xii
Fax mode ............................................................. 46
Fax operation ...................................................... 29
Front guide .................................................... 17, 20
H
Help list .............................................................. 101
Help/Function .................................................... xii
I
Image density ...................................................... 77
Installing
Document output tray...................................... 5
Software drivers .............................................. 25
Toner cassette ................................................... 2
Upper paper tray ............................................... 6
L
Label paper .......................................................... 15
Language ........................................................... 107
Limit mark .............................................. 11, 17, 19
Lines-slow (4800 bps) ......................................... 67
Loading Paper .....................................................11
112
b(GB)6.5_index p112-114
112
99.8.3, 1:19 PM
INDEX
M
Metal plate ..................................................... 17, 19
Multiple copies .................................................... 71
N
Name key ............................................................ xiv
Name Dials
Deleting Name Dial........................................ 61
Dialling Name Dial ........................................ 62
Storing Name Dial ......................................... 59
Numeri keypad ................................................... xii
O
OK key ............................................................... xiii
On hook ............................................................... 52
On hook dial key ................................................ xiv
Operation Panel ...................................... x, xii, xiv
Original
Setting (Exposure glass) ........................... 41,70
Setting (ADF) ............................................ 40,78
Requirements (ADF) ...................................... 79
Original guide ....................................................... x
Original type select key ..................................... xiii
Output tray ............................................................ x
Output tray extension ........................................ x,6
P
Page header ......................................................... 68
Paper and other media ....................................... 10
Paper select key ................................................. xiii
paper size
Changing ........................................................ 20
Specifying (upper) ................................... 13, 15
Specifying (lower) .......................................... 19
Paper size indicator ....................................... 17, 19
Paper feed unit .................................................... 17
Pause/Redial key ................................................ xiv
Pauses .................................................................. 43
PC Interface indicator ....................................... xiii
Photo1 ................................................................. 76
Photo2 ................................................................. 76
Platen cover ........................................................... x
Power socket .......................................................... x
Power switch .......................................................... x
Printer driver
Windows 95/98 ............................................... 26
Windows 3.1 ................................................... 26
Printer driver contents ........................................ 27
Printing the dial list ............................................ 64
Printing the journal ............................................ 63
Power failure report ............................................ 65
Q
Quick Dials
Clearing Quick Dial ....................................... 58
Editing Quick Dial ......................................... 56
Storing Quick Dial ......................................... 55
Quick Dial key .................................................... xiv
R
Receive file indicator .......................................... xiv
Receiving faxes .................................................... 46
Reception mode key ........................................... xiv
Redialling a number ........................................... 44
Reduce key ......................................................... xiii
Reduction ............................................................ 73
Remote change ................................................... 52
Replacing
Toner cassette ................................................. 91
Cleaning pad .................................................. 91
Resolution/Photo setting .................................... 76
RDS ...................................................................... 68
113
b(GB)6.5_index p112-114
113
99.8.3, 1:19 PM
INDEX
Loading
Plain paper ..................................................... 11
Small size paper ............................................. 13
Other media ................................................... 15
Location .................................................................1
INDEX
S
Safety information ................................................ i
Scanner lock .......................................................... x
Unlocking ......................................................... 4
Second (Additional) printer ................................ xi
Connecting ..................................................... 16
Using .............................................................. 28
Second printer key ............................................... xv
Sending faxes ...................................................... 40
Setting up
Connecting to the telephone line .................. 32
Software drivers .............................................. 25
Side guide ......................................................17, 20
SIMM cover ............................................................ x
SIMM ................................................................... 23
Small size paper feed access panel ....................... x
Small size paper .................................................. 13
Sort ...................................................................... 80
Sort/Memory key ............................................... xiii
Sounds ................................................................. 66
Specifications .................................................... 109
Start key .............................................................. xii
Stop key .............................................................. xii
Storing your own fax number ............................ 36
Storage ............................................................... 100
Summer time ...................................................... 39
Transmission result report .................................. 64
Transparencies .................................................... 15
Troubleshooting .................................................. 82
TTI ....................................................................... 33
U
Unauthorized call report ..................................... 65
Upgrading memory ............................................. 23
Upper paper tray .......................................... x, 6, 11
Upper try extension ............................................. xi
User parameter .................................................. 103
Using the second (Additional) printer ................ 28
Z
Zoom key ........................................................... xiii
Zoom (In 1% increments) .................................. 75
T
TEL/LINE ........................................................ xi,32
Tel mode .............................................................. 46
Telephone call ..................................................... 50
Text fine ............................................................... 76
Toner cassette
Installing .......................................................... 2
Replacing ....................................................... 91
Tones .................................................................... 44
Top release lever .................................................... x
Top unit ................................................................. x
EE G027
114
b(GB)6.5_index p112-114
114
99.8.3, 1:19 PM