1
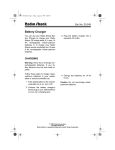
21-1672.fm Page 1 Thursday, August 5, 1999 12:04 PM
Cat. No. 21-1672
OWNER’S MANUAL
Please read before using this equipment.
TRC-232
4-Watt 40-Channel
CB Walkie-Talkie
21-1672.fm Page 2 Thursday, August 5, 1999 12:04 PM
FEATURES
Your Radio Shack TRC-232 4-Watt 40-Channel CB WalkieTalkie is a portable, two-way citizen’s band radio that you can
carry almost anywhere. Use it around the house, in your office,
or in your car or boat. You can put your walkie-talkie to good use
on fishing and camping trips, or you can use it in your business
for security patrols, supervisors, or warehouse personnel.
Your walkie-talkie has these advanced features:
Digital Phase-Locked Loop (PLL) Frequency Synthesizer —
provides the highest degree of accurate and stable tuning.
Auto-Scan — searches for active channels.
Dual Watch — lets you monitor one channel while listening to
another.
Two Power Levels — let you save battery power on short-range
transmissions.
Power Saver — reduces power consumption by 30% when the
walkie-talkie is not receiving a transmission.
Large, Illuminated, Digital Display — shows the channel number, battery condition, RF power, and incoming signal strength.
Base-Loaded, Helical Antenna with BNC Connector — provides excellent reception and transmission.
© 1997 Tandy Corporation.
All Rights Reserved.
Radio Shack is a registered trademark used by Tandy Corporation.
2
21-1672.fm Page 3 Thursday, August 5, 1999 12:04 PM
Built-In, Ceramic Filters — ensure superior selectivity and freedom from adjacent-channel interference.
Automatic Modulation Control — ensures a constant RF modulation level.
Automatic Gain Control — maintains a constant volume level,
regardless of the signal strength.
Automatic Noise Limiter — helps reduce noise caused by
nearby electrical equipment, such as motors or automotive ignition systems.
DC Adapter Cord — lets you operate the walkie-talkie from your
vehicle’s cigarette lighter socket or AC power, and connect the
walkie-talkie to an external, mounted antenna.
Optional Power Sources — let you operate the walkie-talkie
from alkaline batteries, rechargeable nickel-cadmium batteries,
your vehicle’s cigarette lighter socket, or AC power.
Note: You can operate a walkie-talkie without an FCC license.
For your records, we recommend you record your walkie-talkie’s
serial number in the space provided. The serial number is on the
walkie-talkie’s back panel.
Serial Number ________________
3
21-1672.fm Page 4 Thursday, August 5, 1999 12:04 PM
CONTENTS
Preparation ............................................................................ 6
Connecting an Antenna ................................................... 6
Power Sources ................................................................. 8
Using Alkaline Batteries ............................................ 8
Using Rechargeable Batteries ................................ 10
Charging Nickel-Cadmium Batteries ....................... 12
Using Vehicle Battery Power.................................... 14
Using AC Power....................................................... 16
Using an External Speaker ............................................. 18
Connecting an External Speaker/Microphone................. 19
Using the Wrist Strap ...................................................... 19
Using the Belt Clip............................................................19
Operation .............................................................................. 20
Receiving Transmissions and Adjusting Squelch ........... 20
Transmitting .................................................................... 22
Using Special Controls and Functions ............................ 23
Turning On/Off the Light .......................................... 24
Using Last Channel Recall....................................... 24
Scanning Incoming Signals...................................... 25
Alternating Between Two Channels ......................... 25
Monitoring Channel 9............................................... 26
Locking the Functions ...............................................27
Power Saver.................................................................... 27
Operational Hints ................................................................. 28
Common Uses for a CB Radio........................................ 28
Business Uses ......................................................... 28
Personal Uses ......................................................... 28
Transmission Courtesy ................................................... 29
Maximum Range ........................................................... 30
Using Common 10-Codes ............................................. 30
Care ..................................................................................... 33
FCC Information ............................................................ 34
4
21-1672.fm Page 5 Thursday, August 5, 1999 12:04 PM
Replacing the DC Car Adapter Fuse .............................. 35
Specifications ..................................................................... 36
PREPARATION
CONNECTING AN ANTENNA
Caution: To prevent damage to your walkie-talkie, you must
connect an antenna before you operate the walkie-talkie.
Your walkie-talkie comes with a helical antenna that is ideal for
most applications. However, the walkie-talkie’s BNC antenna
connector makes it easy to connect other types of antennas.
Your local Radio Shack store sells a wide variety of antennas.
Choose the one that best meets your needs.
Follow these steps to connect an antenna.
1. Position the BNC antenna connector over the antenna jack
on the walkie-talkie.
2. Slip the slot in the antenna connector over the antenna
jack’s tab on top of the walkie-talkie.
5
21-1672.fm Page 6 Thursday, August 5, 1999 12:04 PM
3. Press down and turn the antenna’s base clockwise until it
locks into place.
Note: If you are powering your walkie-talkie from your vehicle’s
cigarette lighter socket or from AC power, you can connect the
supplied DC adapter cord’s antenna connector to an external
antenna (see “Using Vehicle Battery Power” on Page 13 or “Using AC Power” on Page 15).
To use a base-station or mobile antenna, attach an appropriate
connector adapter (not supplied) to the end of the antenna’s cable. Then insert it onto the walkie-talkie’s antenna connector.
6
21-1672.fm Page 7 Thursday, August 5, 1999 12:04 PM
Warning: Use extreme caution when installing or removing an
outdoor antenna. If the antenna starts to fall, let it go! It could
contact overhead power lines. If the antenna touches a power
line, contact with the antenna, mast, cable, or guy wires can
cause electrocution and death. Call the power company to remove the antenna. DO NOT attempt to do so yourself.
POWER SOURCES
You can power the walkie-talkie from any of four sources:
• Alkaline batteries (using the supplied alkaline battery case)
• Rechargeable nickel-cadmium batteries (using the supplied nickel-cadmium battery case)
• Your vehicle’s battery (using the supplied DC adapter)
• Standard AC power (using the supplied DC adapter and an
optional 12-volt DC power supply)
Using Alkaline Batteries
You can operate the walkie-talkie with six AA batteries, using the
supplied alkaline battery case. For the longest operation and
best performance, we recommend Radio Shack Cat. No. 23552.
7
21-1672.fm Page 8 Thursday, August 5, 1999 12:04 PM
Follow these steps to install batteries in the alkaline battery
case.
1. If the alkaline battery case is connected to the walkietalkie, push the battery latch up and slide the battery case
off the walkie-talkie.
2. Using your thumb, press down on one of the arrow marks
on top of the battery case and pull it open.
3. Remove old batteries, if necessary, and install six fresh AA
alkaline batteries, according to the polarity marks (+ and –)
inside the battery case.
8
21-1672.fm Page 9 Thursday, August 5, 1999 12:04 PM
4. Press the battery case back together and slide it onto the
walkie-talkie.
Cautions:
• Never mix different types of batteries, and never mix old
and new batteries.
• Do not put alkaline batteries in the rechargeable battery
case.
• Use only replacement batteries of the required type.
• Do not dispose of the batteries in a fire because they can
explode.
• Do not open or mutilate a battery. Swallowing a battery can
be fatal.
• Be careful not to short the batteries with conducting materials, such as rings, bracelets, and keys. The batteries or
conductor might overheat and burn.
If BATT LOW appears on the display, replace the batteries.
Using Rechargeable Batteries
You can operate the walkie-talkie with nine rechargeable nickelcadmium AA batteries (Cat. No. 23-125) using the supplied
rechargeable battery case. You need a charger to recharge
batteries in the rechargeable battery case (see “Charging NickelCadmium Batteries” on Page 11).
9
21-1672.fm Page 10 Thursday, August 5, 1999 12:04 PM
Follow these steps to install batteries in the rechargeable battery
case.
1. If the rechargeable battery case is connected to the walkietalkie, push the battery latch up and slide the battery case
off the walkie-talkie.
2. Using your thumb, press down on one of the arrow marks
on top of the battery case and pull it open.
3. Remove old batteries, if necessary, and install nine AA
rechargeable batteries, according to the polarity marks (+
and –) inside the battery case.
4. Press the battery case back together.
5. Charge the batteries. See “Charging Nickel-Cadmium Batteries” on Page 11.
6. Slide the battery case onto the walkie-talkie.
If BATT LOW appears on the display, you need to recharge the
batteries.
Cautions:
• Use only replacement batteries of the required type.
10
21-1672.fm Page 11 Thursday, August 5, 1999 12:04 PM
• Do not dispose of the batteries in a fire because they can
explode.
• Do not open or mutilate a battery. Swallowing a battery can
be fatal.
• Be careful not to short the batteries with conducting materials, such as rings, bracelets, and keys. The batteries or
conductor might overheat and burn.
• At the end of a rechargeable battery’s useful life, it must be
recycled or disposed of properly. Contact your local,
county, or state hazardous waste management authorities
for information on recycling or disposal programs in your
area. Some options that might be available are municipal
curbside collection, drop-off boxes at retailers such as your
local Radio Shack store, recycling collection centers, and
mail-back programs.
Charging Nickel-Cadmium Batteries
You need a battery charger (Cat. No. 273-1652) and the supplied adapter plug to charge batteries in the supplied rechargeable battery case.
Caution: Never use any charger other than Cat. No. 273-1652
to recharge the batteries in the rechargeable battery case. Even
battery chargers with the same voltage and current ratings could
permanently damage your walkie-talkie or the batteries.
11
21-1672.fm Page 12 Thursday, August 5, 1999 12:04 PM
Uncap the power jack cover on the battery case, attach the
adapter plug to the adapter, insert the adapter plug into the power jack, then plug the charger into a standard AC outlet.
Warning: Never try to recharge alkaline or other nonrechargeable batteries. Charging non-rechargeable batteries
can cause them to become very hot and possibly explode.
Notes:
• You can recharge the batteries with the battery case attached to the walkie-talkie, but be sure to turn off the
walkie-talkie before you charge them.
• Charging time is 14 to 16 hours the first time. Subsequent
recharging takes about 8 to 10 hours.
• Occasionally, let the nickel-cadmium batteries totally discharge by using the walkie-talkie until BATT LOW appears
on the display. Then fully charge the batteries. This conditions the batteries so they use their full charging capacity.
Caution: To prevent permanent nickel-cadmium power loss,
never charge the batteries in an area where the temperature is
above about 90°F.
12
21-1672.fm Page 13 Thursday, August 5, 1999 12:04 PM
Using Vehicle Battery Power
Your walkie-talkie comes with a DC car adapter that is ideal for
use in your vehicle. It lets you power your walkie-talkie from your
vehicle’s cigarette lighter socket (if your vehicle has a 12-volt
negative-ground electrical system), and its antenna adapter connector makes it easy to connect to an external antenna mounted
on your vehicle. Your local Radio Shack store sells a wide variety of mobile walkie-talkie antennas. Choose the one that best
meets your needs.
Follow these steps to use DC power.
1. If either battery case is connected to the walkie-talkie, push
the battery latch up and slide the battery case off the
walkie-talkie.
2. Slide the DC car adapter onto the walkie-talkie.
Caution: Before plugging the DC adapter’s cigarette lighter
plug into your vehicle’s cigarette lighter socket, make sure
the cap is screwed firmly onto the plug. See “Replacing the
DC Car Adapter Fuse” on Page 34 for more information
about the cigarette lighter plug.
13
21-1672.fm Page 14 Thursday, August 5, 1999 12:04 PM
3. Insert the cigarette lighter plug into your vehicle’s cigarette
lighter socket.
Note: If the walkie-talkie does not operate properly when
you use the DC car adapter, unplug the cord from the
lighter socket and clean any ashes or other debris from the
socket. If it still does not operate properly, check the fuse in
the DC car adapter plug (see “Replacing the DC Car
Adapter Fuse” on Page 34).
4. To connect an external, mounted antenna using the DC car
adapter, attach the female antenna connector on the DC
car adapter to a male antenna connector on the external,
mounted antenna cable.
Then disconnect the antenna connected to the antenna
jack on the walkie-talkie.
5. When you finish using the DC car adapter, disconnect it
from the cigarette lighter socket. Then disconnect the
adapter cord from your walkie-talkie. Reconnect the supplied antenna to the antenna jack on the walkie-talkie.
14
21-1672.fm Page 15 Thursday, August 5, 1999 12:04 PM
Using AC Power
You can operate the walkie-talkie from AC power using the supplied DC car adapter, a 12-volt DC power supply (such as Cat.
No. 22-120), and a cigarette lighter accessory outlet (such as
Cat. No. 270-1539). The supplied DC car adapter also lets you
connect an external, mounted walkie-talkie antenna.
Note: Most 12-volt DC power supplies plug into a standard AC
outlet to produce DC power. Before connecting your walkietalkie to a 12-volt DC power supply, read and follow the instructions included with the power supply.
Follow these steps to power the walkie-talkie from AC power.
1. Slide the DC car adapter onto the walkie-talkie.
2. Using the double-sided foam tape supplied with the cigarette lighter accessory outlet, mount the cigarette lighter
accessory outlet to the DC power supply.
15
21-1672.fm Page 16 Thursday, August 5, 1999 12:04 PM
Caution: Before plugging the plug into your cigarette
lighter accessory outlet, make sure the cap is screwed
firmly onto the plug. See “Replacing the DC Car Adapter
Fuse” on Page 34 for more information about the cigarette
lighter plug.
3. Insert the cigarette lighter plug on the DC car adapter into
the cigarette lighter accessory outlet.
4. Connect the DC power supply to a standard AC outlet.
5. To connect an external, mounted antenna using the DC car
adapter, attach the female antenna connector on the DC
car adapter to a male antenna connector on the external,
mounted antenna cable.
Then disconnect the antenna connected to the antenna
jack on the walkie-talkie.
16
21-1672.fm Page 17 Thursday, August 5, 1999 12:04 PM
6. When you finish using the DC adapter cord, disconnect it
from the cigarette lighter accessory outlet. Then disconnect
the adapter cord from your walkie-talkie. Reconnect the
supplied antenna to the antenna jack on the walkie-talkie.
USING AN EXTERNAL SPEAKER
In a noisy area, an external speaker positioned in the right place
might provide more comfortable listening. Remove the cap and
plug the speaker cable’s 1/8-inch (3.5 mm) mini plug into the
walkie-talkie’s SPK jack. This disconnects the internal speaker.
17
21-1672.fm Page 18 Thursday, August 5, 1999 12:04 PM
CONNECTING AN EXTERNAL
SPEAKER/MICROPHONE
You can use an external speaker/microphone (such as Cat. No.
19-310) for hands-free operation. Remove the cap and plug the
speaker/microphone’s connector into the walkie-talkie’s MIC and
SPK jacks.
USING THE WRIST STRAP
You can use the attached wrist strap to keep the walkie-talkie
accessible. Simply slip the strap over your hand.
USING THE BELT CLIP
You can use the attached belt clip to make the walkie-talkie easier to use when you are on the go. Simply slide the belt clip over
your belt or waistband.
18
21-1672.fm Page 19 Thursday, August 5, 1999 12:04 PM
OPERATION
Before you use your walkie-talkie, you should know how to use
it effectively and courteously. “Operational Hints” contains information that will help you get more enjoyment from your walkietalkie.
RECEIVING TRANSMISSIONS AND
ADJUSTING SQUELCH
1. Turn SQUELCH fully counterclockwise.
2. Turn on the power by turning VOLUME clockwise.
19
21-1672.fm Page 20 Thursday, August 5, 1999 12:04 PM
3. Press UP or DWN until the desired channel appears on the
display. As you receive signals, the signal meter on the display shows the incoming signal strength.
Important! Channel 9 is reserved for motorist assistance
and for reporting emergency information about accidents,
hazardous road conditions, and so on. Always give emergency messages priority on Channel 9.
4. Adjust SQUELCH to cut out background noise between
transmissions. To do this, wait until there is no signal on the
channel. Then slowly turn SQUELCH clockwise until the
background noise stops.
Note: Do not turn SQUELCH too far clockwise because you
might cut out weak signals, too.
5. Adjust VOLUME to a comfortable listening level.
6. To turn off the walkie-talkie, turn VOLUME counterclockwise
until you hear it click.
20
21-1672.fm Page 21 Thursday, August 5, 1999 12:04 PM
TRANSMITTING
1. Follow the steps described in “Receiving Transmissions
and Adjusting Squelch.”
2. To transmit, press PTT. TX appears on the display. The RF
Out meter on the display shows the output level. Hold the
walkie-talkie about 2–3 inches from your mouth and speak
slowly and clearly in a normal tone of voice.
Note: A built-in automatic modulation circuit adjusts the
microphone’s sensitivity to allow for a wide variety of voice
levels.
3. When you finish transmitting, release PTT.
21
21-1672.fm Page 22 Thursday, August 5, 1999 12:04 PM
4. Press H/L to set the output power to low power, if necessary. LOW appears on the display. Use this mode to transmit to nearby units.
If the other walkie-talkie is farther away or the receiving
person complains of noise, press H/L again to set it to high
output power. LOW disappears from the display.
5. To turn off the walkie-talkie, turn VOLUME counterclockwise
until you hear it click.
USING SPECIAL CONTROLS
AND FUNCTIONS
Your walkie-talkie has several unique controls and functions. We
recommend you read the following sections about the controls
and functions so you can fully enjoy your walkie-talkie.
22
21-1672.fm Page 23 Thursday, August 5, 1999 12:04 PM
Turning On/Off the Light
Press LGT to turn on and off the display’s light.
Using Last Channel Recall
Press LCR to return to the last channel that was used for longer
than 3 seconds or was transmitted on.
23
21-1672.fm Page 24 Thursday, August 5, 1999 12:04 PM
Scanning Incoming Signals
To scan incoming signals, press SCAN. SCAN appears on the
display, and the walkie-talkie stops for 5 seconds on each channel where there is a transmission. Press SCAN again to stop automatic scanning. SCAN disappears from the display.
Alternating Between Two Channels
To alternate between two channels, select one channel and
press DW (dual watch). DW appears on the display. Using the UP
or DWN channel buttons, select another channel.
24
21-1672.fm Page 25 Thursday, August 5, 1999 12:04 PM
The walkie-talkie alternates between the first selected channel
(the dual watch channel) and the currently selected channel.
Whenever the walkie-talkie detects a transmission on the first
channel, it switches back to that channel. After 5 seconds, the
walkie-talkie returns to the second channel (even if the
transmission is not complete).
To turn off dual watch, press DW. DW disappears from the display.
Monitoring Channel 9
For emergency call monitoring on channel 9, just press CH9. 09
flashes on the display, and the walkie-talkie stays on channel 9.
Press CH9 to release emergency call monitoring. The previously
selected channel number appears on the display.
25
21-1672.fm Page 26 Thursday, August 5, 1999 12:04 PM
Locking the Functions
Use the LOCK switch to lock the walkie-talkie’s functions (except
PTT, LGT, and H/L) to prevent accidental program changes.
Press LOCK so LOCK appears on the display. To release the
lock, press LOCK again. LOCK disappears from the display.
POWER SAVER
Your walkie-talkie features a special power saver circuit. If the
walkie-talkie does not receive a transmission for more than 10
seconds, the circuit sets the walkie-talkie to standby and PS
flashes on the display.
During standby, the walkie-talkie uses only 70% of the power
consumed during regular operation. The walkie-talkie returns to
normal power when it receives a transmission, when you turn
SQUELCH counterclockwise until you hear noise, or when you
press any control or function switch.
26
21-1672.fm Page 27 Thursday, August 5, 1999 12:04 PM
OPERATIONAL HINTS
Like most activities, CB radio has its customs and courtesies.
The following tips will help you get the most enjoyment from your
walkie-talkie.
COMMON USES FOR A CB RADIO
Business Uses
• Truck drivers and delivery personnel can learn road and
traffic conditions and get assistance in locating destinations. A CB radio is also good company on those “long
hauls.”
• On construction crews, a CB radio quickly pays for itself
when you are calling for additional materials or coordinating the activities of different work crews.
• For security officers, a CB radio is more than a convenience — it is a must for both safety and efficiency.
Personal Uses
• Keep in touch with home while driving to work, to the store,
or to a social activity. Let your family know you are tied up
in traffic or that you will stop by the store on the way home.
27
21-1672.fm Page 28 Thursday, August 5, 1999 12:04 PM
• If you are a two-car (or more) family, CB radios are great
for communicating with family members while they are in
their cars.
• Contact friends or neighbors — find out “what’s happening”
or plan a get-together.
• Ever have car trouble or run out of gas on the highway?
What an assurance it is to be able to radio for assistance!
• Camping, fishing, and other sports are more fun with a CB
radio. Locate a buddy or find out “what’s cooking” back at
camp.
TRANSMISSION COURTESY
• Wait for a pause in someone else’s transmission before
you ask for a break.
• If you do not receive an answer to your call after a second
attempt, sign off and wait several minutes before trying
again.
• Do not hold down the PTT button when you are not talking.
(This is called dead keying.)
• Assist callers with directions, information about road conditions, and any other reasonable requests.
28
21-1672.fm Page 29 Thursday, August 5, 1999 12:04 PM
MAXIMUM RANGE
The maximum range and quality of CB radio transmissions vary
depending on the following conditions:
• The type and quality of antenna used
• The height of the antenna’s mounting location — the higher
the antenna, the better the signal’s range
• The surrounding terrain — mountains and tall buildings
limit range
• Weather conditions
• The number of nearby radios operating on the same channel
Note: Your CB radio’s transmission range is generally line-ofsight. To ensure maximum range, always keep fresh or fullycharged batteries in your CB radio.
USING COMMON 10-CODES
Citizen’s band operators and CB radio users have largely adopted the 10-codes for standard questions and answers. These
codes permit faster communication and better intelligibility in
noisy areas.
29
21-1672.fm Page 30 Thursday, August 5, 1999 12:04 PM
This table lists codes adopted by the Associated Public Safety
Communications Officers (APCO).
Code
30
Meaning
10-1
Your signal is bad.
10-2
Your signal is good.
10-3
Stop transmitting.
10-4
Message received and understood.
10-5
Relay information to _____.
10-6
I am busy or are you busy?
10-7
Out of service.
10-8
In service.
10-9
Repeat last message.
10-10
Negative (NO).
10-11
_____ in service.
10-12
Stand by.
10-13
Report road/weather conditions.
10-14
Information.
10-15
Message delivered.
10-16
Reply to message.
21-1672.fm Page 31 Thursday, August 5, 1999 12:04 PM
Code
Meaning
10-17
En route.
10-18
Urgent.
10-19
Contact _____.
10-20
What is your location?
10-21
Call _____ by telephone.
10-22
Cancel last message.
10-23
Arrived at the scene.
10-24
Assignment complete.
10-25
Meet _____.
10-26
Estimated time of arrival is _____.
10-30
Use caution.
10-31
Pick up.
10-33
Emergency traffic. Clear the channel.
10-34
What time is it?
10-41
Switch to Channel xx.
10-62
Cannot understand.
31
21-1672.fm Page 32 Thursday, August 5, 1999 12:04 PM
CARE
Your Radio Shack TRC-232 4-Watt 40-Channel CB WalkieTalkie is an example of superior design and craftsmanship. The
following suggestions will help you care for the CB radio so you
can enjoy it for years.
• Keep the walkie-talkie dry. If it gets wet, wipe it dry immediately. Liquids can contain minerals that can corrode the
electronic circuits.
• Handle the walkie-talkie gently and carefully. Dropping it
can damage circuit boards and cases and can cause the
walkie-talkie to work improperly.
• Use and store the walkie-talkie in normal temperature environments. Temperature extremes can shorten the life of
electronic devices, damage batteries, and distort or melt
plastic parts.
• Keep the walkie-talkie away from dust and dirt, which can
cause premature wear of parts.
• Wipe the walkie-talkie with a damp cloth occasionally to
keep it looking new. Do not use harsh chemicals, cleaning
solvents, or strong detergents to clean the walkie-talkie.
Modifying or tampering with the CB radio’s internal components
can cause a malfunction and might invalidate the CB radio’s
warranty and void your FCC authorization to operate it. If your
CB radio is not performing as it should, take it to your local Radio
Shack store for assistance.
32
21-1672.fm Page 33 Thursday, August 5, 1999 12:04 PM
FCC INFORMATION
The Federal Communications Commission (FCC) does not require you to have a license to operate this CB radio. However,
you must know Part 95 of FCC Rules. It explains the proper operation of a Class D citizens band transceiver. We enclosed a
copy of Part 95 with your CB radio.
Warning: Do not open the CB radio to make any internal adjustments. A CB radio is set up to transmit a regulated signal on an
assigned frequency. It is against the law to alter or adjust the settings inside the unit to exceed these limitations. Any adjustments
to a CB radio must be made by a qualified technician using the
proper test equipment.
To be safe and sure:
1. Never open your CB radio’s case.
2. Never change or replace anything in your CB radio.
Your CB radio might cause TV or radio interference even when
it is operating properly. To determine whether your CB radio is
causing the interference, turn off your CB radio. If the interference goes away, your CB radio is causing the interference. Try
to eliminate the interference by:
• Moving your CB radio away from the receiver
• Contacting your local Radio Shack store for help
33
21-1672.fm Page 34 Thursday, August 5, 1999 12:04 PM
This device complies with Part 15 of FCC Rules. Operation is
subject to the following two conditions:
1. This device may not cause harmful interference.
2. This device must accept any interference received, including interference that may cause undesired operation.
REPLACING THE DC
CAR ADAPTER FUSE
The DC car adapter has a 32V 2-amp fuse in the cigarette lighter
plug. When replacement is required, use a slow-blow glass fuse,
such as Cat. No. 270-1023.
1. Turn the cap on the adapter plug counterclockwise to unscrew it from the plug body.
2. Remove the old fuse and inspect its condition. If it is
“blown” and requires replacement, insert a new 2-amp
fuse. If it is not “blown,” reinsert it.
3. Replace the spring, the terminal, and the cap and screw
the cap in tightly.
34
21-1672.fm Page 35 Thursday, August 5, 1999 12:04 PM
SPECIFICATIONS
RECEIVER
Frequency Coverage ................................ 26.965–27.405 MHz
Sensitivity ......................................... 0.7 mV for 10dB (S+N)/N
Adjacent Channel Rejection ............................................ 65 dB
Audio Distortion at 1 kHz .................................. Less than 10%
at 0.6 watts output (8 ohm)
Intermediate Frequency:
1st ................................................................... 10.695 MHz
2nd ...................................................................... 455 KHz
Current Drain:
At Standby ............................................................... 25 mA
At Maximum .......................................................... 400 mA
TRANSMITTER
Frequency Coverage ................................ 26.965–27.405 MHz
Power Input:
HI Position .............................................................. 4 watts
LOW Position ...................................................... 1.3 watts
Power Output:
HI Position ........................................................... 3.4 watts
LOW Position ......................................................... 1 watts
Modulation ................................................................... 80–95%
Spurious Output .............................................. –60 dB or better
Type of Emission ............................................................... A3E
35
21-1672.fm Page 36 Thursday, August 5, 1999 12:04 PM
Frequency Tolerance ................................................. 0.002%
Current Drain (with modulation):
HI Position ........................................................ 1000 mA
LOW Position ..................................................... 800 mA
GENERAL
Power Requirements ........................................... 12 volts DC
Speaker ...................................................... 11/4 Inch (3.2 cm)
Permanent Magnet Dynamic Type
Microphone ........................ Built-In Electret-Condenser Type
with FET Amplifier
External Microphone Jack .............................. Sub Mini Type
External Speaker Jack ................................... Miniature Type
Operating Temperature ..................... 0°–140°F (–18°–60°C)
Size (HWD)
With Nickel-Cadmium
Battery Case .............................. 6 3/8 × 21/2 × 11/2 Inches
(169 × 63 × 39 mm)
With Alkaline Battery Case ......... 5 1/4 × 21/2 × 11/2 Inches
(146 × 63 × 39 mm)
With DC Adapter Cord .................. 5 × 21/2 × 11/2 Inches
(127 × 63 × 39 mm)
Weight
With Nickel-Cadmium Battery Case ....... 10.7 oz (300 g)
With Alkaline Battery Case ..................... 10.3 oz (290 g)
With DC Adapter Cord ........................... 14.6 oz (410 g)
Specifications are typical; individual units might vary. Specifications are subject to change and improvement without notice.
36
21-1672.fm Page 37 Thursday, August 5, 1999 12:04 PM
NOTES
37
21-1672.fm Page 38 Thursday, August 5, 1999 12:04 PM
38
21-1672.fm Page 39 Thursday, August 5, 1999 12:04 PM
39
21-1672.fm Page 40 Thursday, August 5, 1999 12:04 PM
RADIO SHACK LIMITED WARRANTY
This product is warranted against defects for 90 days from date of
purchase from Radio Shack company-owned stores and authorized Radio Shack franchisees and dealers. Within this period, we
will repair it without charge for parts and labor. Simply bring your
Radio Shack sales slip as proof of purchase date to any Radio
Shack store. Warranty does not cover transportation costs. Nor
does it cover a product subjected to misuse or accidental damage.
EXCEPT AS PROVIDED HEREIN, RADIO SHACK MAKES NO
EXPRESS WARRANTIES AND ANY IMPLIED WARRANTIES
ARE LIMITED IN DURATION TO THE DURATION OF THE
WRITTEN LIMITED WARRANTIES CONTAINED HEREIN. Some
states do not permit limitation or exclusion of implied warranties;
therefore, the aforesaid limitation(s) or exclusion(s) may not apply
to the purchaser.
This warranty gives you specific legal rights and you may also have other
rights which vary from state to state.
We Service What We Sell
9/94
RADIO SHACK
A Division of Tandy Corporation
Fort Worth, Texas 76102
1A7
Printed in Korea