1
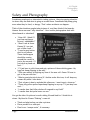
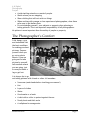
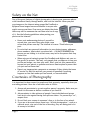
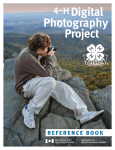
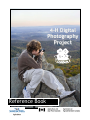
4-H Digital Photography Project Reference Book The 4‐H Motto “Learn to Do by Doing” The 4‐H Pledge I pledge My Head to clearer thinking, My Heart to greater loyalty, My Hands to larger service, My Health to better living, For my club, my community, and my country. The 4‐H Grace (Tune of Auld Lang Syne) We thank thee, Lord, for blessings great on this, our own fair land. Teach us to serve thee joyfully, with head, heart, health and hand. Published by Canadian 4-H Council No portion of this manual may be reproduced without written permission from the Canadian 4-H Council Resource Network, Ottawa Ontario. For more information on Nova Scotia 4‐H contact: 4-H and Rural Organizations, Nova Scotia Department of Agriculture, Box 550, Truro, Nova Scotia B2N 5E3 Phone: 902-893-6585/ Fax: 902-893-2757 www.gov.ns.ca/agri/4h Written by Elizabeth Webster Goddard M. Agr. First edition 2003 Jode Jorgensen, Picture Us There Photography, Second Edition 2009 Photo Credit Jennifer Jorgensen, Picture Us There Photography The photos in this document are copyright of Picture Us There Photography and are not to be used for other purposes. Contents 4-H Digital Photography Project Objectives ............................................. 4 Getting the Most from this Project ........................................................ 5 Achievement Requirements for this Project ............................................. 5 Safety and Photography ..................................................................... 7 The Photographer’s Comfort ............................................................... 8 Safety on the Net............................................................................. 9 Courtesies of Photography .................................................................. 9 Resources for Learning ..................................................................... 10 Digital Photography: A Brief History ..................................................... 12 How Does a Digital Camera Work? ........................................................ 13 Getting to Know Your Camera............................................................. 15 Parts of a Camera ........................................................................... 15 Caring for Your Camera .................................................................... 19 Equipment .................................................................................... 20 Tripods ........................................................................................ 22 Hints and Tricks ............................................................................. 26 Common Mistakes ........................................................................... 26 Portraits ...................................................................................... 28 Animal Photography......................................................................... 30 Black and White Photography ............................................................. 33 Exposure Settings............................................................................ 34 Controlling Light Inside the Camera...................................................... 35 Lighting ....................................................................................... 38 Composition .................................................................................. 41 Suggesting Movement in Photography.................................................... 43 Panning: ...................................................................................... 43 Suggesting Movement:...................................................................... 43 Storing and Sharing your Digital Images ................................................. 44 Post Processing Your Images............................................................... 47 Members “I Can” Checklist ................................................................ 51 Glossary ....................................................................................... 52 Resources ..................................................................................... 55 4-H Digital Photography Project 4‐H Digital Photography Project Objectives Upon successfully completing this project, the members will be able to: Think and plan before making a photograph. Create great photographs of people, places and things using a “point-andshoot” and “DSLR” camera. Try new things to improve their photography. Develop skill in observing, making decisions, being part of a group, solving problems, handling money, and communicating with others. Identify opportunities for photography. Compose and make clear pictures. Use photography to communicate. Use a flash and tripod to enhance their photographic skills. Develop skill in observation, decision making, leadership, problem-solving, finances and communication. Create photographs to record situations and events, honour achievement and inspire action. Identify, use and store photography equipment and supplies in a safe manner. Challenge themselves with variety and varying levels of complexity of tasks in photography. Work cooperatively with others. Apply their photographic skills in day to day living. Have fun while taking great photos! Reference Book Page 4 4-H Digital Photography Project Getting the Most from this Project Attend club activities regularly. Listen, and ask questions. You will learn from other members as well as your leaders. Carry your camera with you, and take as many pictures as you can, you never know when a great photo opportunity will happen! Look at pictures other people have taken, in books, magazines and newspapers. What do you admire about the pictures? What can you try? What would you change? Look at your surroundings. Look for interesting lines, textures, patterns, events and people. Practice taking pictures!!!! With digital photography the results are instant, and free! So take as many shots as you can! “Learn to do, by doing”. Keep organized notes about techniques you use, and shots you take, in a journal or log. Include subject matter, camera settings, conditions, flash/lighting changes and refer to them when you review your images on a computer. Look at pictures other people have taken, in books, magazines and newspapers. What do you admire about the pictures? How do you think they got the shot? What can you try? What would you change? Pay attention to other communication forms such as paintings, sculpture, music or writing, which might spark some ideas for you! Refer to the “I Can” Checklist at the end of the book to see how you are doing! Achievement Requirements for this Project A completed record book. Exhibit a collection of 10 to 15 photographs taken during the club project. One picture each of a pet animal, a home (for people or others), a plant (wild or domestic) shot from the viewpoint of a very young child (two to four years of age). Three examples of textures, leading lines, and framing. Exhibit at least three photographs of another 4-H project or topic that would spark interest in that project. Exhibit of at least three pictures that intend to trigger a specific reaction in the viewer (labelled). Page 5 Reference Book 4-H Digital Photography Project One special project from the list of special projects from the Activity Guide. Reference Book Page 6 4-H Digital Photography Project Safety and Photography Sometimes people get so interested in taking pictures, they stop paying attention to where they are and what is going on around them. Sometimes they keep going even when they’re tired, or hungry. That’s when accidents can happen. Think of the situations people take pictures of, and then think of the hazards. Hmmm. Here are some “silly situations”. How could a photographer deal with those hazards or situations? “Nice cliff. I think I’ll just lean out here a bit and...ahhhhhhhh!” “Wow! Look at those flames! If I can just get a little closer...” “I need a good action shot for my album. Those chuckwagons should be coming around the corner in just a few seconds. I’ll just stick my head out and...” “I’ll just lean in a bit closer and get a picture of those whirling gears. My long hair keeps flipping in the way.” “That new mother is blocking my view of the new calf. Guess I’ll have to get in the pen with her.” “What a great electrical storm! If I shelter under this tree, it will keep my camera dry while I take shots.” “That volcano is due to explode this afternoon. I want to get a close-up.” “These silly yellow police tapes keep flapping in my way. I’ll just step over and...” “I wonder how that killer whale will respond to my flash?” “I wonder how fast polar bears can run.” You get the idea. No picture is worth risking life and limb for! I think this is where “My Head to Clearer Thinking” comes in! Think and plan before you take a picture. Place yourself in a safe spot. Plan for an “escape route”, if necessary. Page 7 Reference Book 4-H Digital Photography Project Avoid startling animals or crowds of people. Watch where you are stepping. Wear clothing that will not catch on things. When working with younger or less experienced photographers, show them safe ways to get better shots. Do not endanger yourself, your subjects or property when planning or taking pictures. This is an important responsibility of all photographers. No picture is more important than the safety of people or property. The Photographer’s Comfort Cold, hungry, sore and sunburned? Not the best conditions for making your best pictures. Prepare yourself when you go out on photo shoots. If you are going out to take picture by yourself, tell someone where you are going, just in case you break a leg or get lost. It is always fun to go out taking pictures with friends or other 4-H members. Sunscreen (wash hands before touching your camera!) Hat Layers of clothes Water Good snacks or a lunch A shirt with a collar to protect against the sun Sturdy boots and thick socks A cellphone for emergencies Reference Book Page 8 4-H Digital Photography Project Safety on the Net One of the great features of digital photography is sharing your awesome photos with friends and family through emails, and over the Internet. When you post your images on the Internet using groups like FaceBook or MySpace those images become accessible to anyone who might come across them. Even once you delete the photo there may still be someone else out there who has a copy of it. Use the following guidelines when posting your photos on the Internet: Never post embarrassing photos of yourself or anyone else, you never know who might come across that picture one day! The Internet is forever. Think before you post. Do not attach any personal information to your photos (names, addresses, phone numbers, what school you attend etc...) ALWAYS REMEMBER the person you are talking to in a chat room, may not be the person that they claim to be. When using social network groups like FaceBook and MySpace set your online profile to private. That way, only people that you approve to see your profile and images, can view your work. Don’t give out your passwords to anyone but your parent or guardian and never meet anyone in person that you just met on these sites. Report any inappropriate comments or messages if they violate the terms of service for that site and tell your parents or guardian if anything happens on-line that makes you feel scared, or uncomfortable. Courtesies of Photography It is important to show respect to people and their property, especially when you are taking pictures. Here are a few basic rules to follow: 1. Always ask permission to go onto another person’s property. Make sure you leave it in the same or better condition as you found it. 2. Ask permission to take pictures of people. Some individuals and groups have strict rules against having their pictures taken. If a person says “no”, respect that. 3. Do not flash your camera in someone’s face or in the face of an animal. 4. If you are at an event where there is an “official photographer”, such as a national event, stay out of the line of shooting, they are being paid a lot of money to be there! Page 9 Reference Book 4-H Digital Photography Project 5. Sometimes you might take a picture of someone that makes them look terrible. It would not be kind to display that picture. Think of how you would like to be treated. 6. If an area is posted “NO PHOTOS”, obey the sign. Otherwise, you might lose your memory stick or camera. If you are in a military zone, you also might have some explaining to do! 7. Do not handle another person’s camera equipment without their permission. 8. Never publish a person’s picture without their permission. Be sure to take your best manners with you when you go out to create photographs, remember, you represent your Club, Community and Yourself while you are out there. Always respect people, their space and property. Be aware of individual, local and cultural viewpoints about photography, in some cultures it is highly offensive to take a person’s picture. Some parents are particularly leery of strangers taking pictures of their children. When in doubt, ask first!! And make sure you thank people who allow you to photograph them too! Resources for Learning People: Local media photographers. Commercial photographers. Teachers. Other 4-H members or leaders. Resources: Your camera’s user manual. Books or magazines (any book by Freeman Patterson, world class photographer and a former 4-H member!). Comics and cartoons, advertisements, posters. Sales displays. Video tutorials on YouTube and other sites. Reference Book Places, Events and Organizations: Photography clubs or clubs which use photography. Exhibitions and fairs that have a photography class. Colleges and universities that offer photography, design, or similar courses. Web Sites: Search for “photography tutorials” for a list of websites, and you can learn about lighting, tips and tricks, posing your subjects, post processing your images and pretty much everything else that is related to photography. Most of these tutorials are free! Page 10 4-H Digital Photography Project Page 11 Reference Book Digital Photography: A Brief History Charles and Vincent Chevalier created the first camera that could actually produce a picture while Joseph Niepce developed the first photograph using this camera in 1826. The prototype of the film camera as we know it today was invented by George Eastman in 1884. George is also credited with inventing film on a roll. In 1888 George trademarked the name Kodak, and the Eastman Kodak Company was created, making photography available to the mainstream. When it was time to have the film developed, the camera was sent in to Kodak with a processing fee of $10. The film would be developed, printed, and returned to the customer along with a new roll of 100exposure film. In 1986, Kodak inventors created the world’s first megapixel sensor, capable of recording 1.4 million pixels that could produce a 5x7-inch digital photo-quality print. In 1991, Kodak released the first professional digital camera system, the Nikon F-3 camera equipped by Kodak with a 1.3 mega pixel sensor, and the “Digital Age” was born! In the past with film cameras, the photographer had to be selective with the shots that they wanted to capture, as the cost of the film and processing were quite high. Digital photography allows the user to take images, get instant feedback and delete any unwanted photos that have been taken. 4-H Digital Photography Project How Does a Digital Camera Work? Just like a conventional camera, digital cameras have a series of lenses and mirrors that reflect light to create an image of a scene. As seen in the diagram, light travels into the camera and bounces off a mirror into the pentaprism and through the viewfinder. When you push the shutter release button, the mirror pops up. Light goes through the lens, through the aperture, and through the open shutter to create the image. Instead of focusing this light onto a piece of film to record the image, it focuses it onto a digital sensor. A computer then breaks this electronic information down into digital data and saves this data onto your memory card. All the fun and interesting features of digital cameras come as a direct result of this process. There are 3 different categories that digital cameras fall into: basic “Point and Shoot”, DSLR (Digital Single Lens Reflex) and Medium Format cameras. The camera you end up buying will most likely depend on the function it will serve, and the budget you must follow. For this project, we will cover “Point and Shoot” cameras and touch on DSLR cameras throughout the book. One of the main differences between a point and shoot camera and a DSLR digital camera is that an DSLR has a detachable lens. DSLR cameras also give you full control over manual settings such as exposure and shutter speed. Page 13 Reference Book Advantages of point and shoot cameras are that they are lightweight and portable which make them perfect for the beginner photographer who wishes to capture everyday moments. They fit easily into backpacks, purses or even front shirt pockets! Everyone should own a good point and shoot camera, even the pros because the worst camera to have is the one you left at home! Most compact cameras offer a large LCD screen which helps in composing images, navigating menus, and viewing your wonderful captures. Many point and shoot cameras also have a video function which can be perfect for capturing a story that cannot be told with a still image, this feature is becoming more common with DSLR cameras. 4-H Digital Photography Project Getting to Know Your Camera Parts of a Camera Viewfinder: This is the window that you look through to see your subject. Most point and shoot cameras available have a “live” LCD monitor built in on the back of the camera. It is as easy as capturing the moment as you see it. DSLR cameras come with an LCD screen for reviewing images and are starting to offer the “live” LCD feature, although most photos are composed through the viewfinder. Lens: Do not touch the lens! The lens focuses the light from your subject on to the cameras digital sensor. When taking a picture, make sure that nothing is in front of the lens, like your finger, hair or camera strap, digital cameras today are very compact and it is easy to ruin a shot by having your finger over the lens or flash during a shot. Many point and shoot cameras have a door that covers the lens when the camera is not in use to protect the lens from dust, rain and curious fingers. DSLR cameras have lenses that can be removed and switched out. This allows the photographer to use the proper lens for the job. Examples are a wide angle lens for landscape shots, a zoom lens for taking pictures of wildlife, or a macro lens to do fine detail shots. Aperture: The sensor needs the correct amount of light to fall on it in order to get a properly exposed image. The aperture determines the amount of light that hits the sensor. Think of the aperture as the pupil in your eye. It controls the amount of light that gets let in. If the opening is smaller, less light gets in (for when there is lots of light available). If the topening is larger, then more light gets in (for low light situations). The aperture determines the “f-stop” that you will be shooting at. The lower the number the MORE light you will let in. The higher the number, the LESS light you will let in. Low f-stop = larger opening = more light entering camera = softer images. High f-stop = smaller opening = less light entering camera = sharper images. Page 15 Reference Book 4-H Digital Photography Project Shutter: The shutter is between the lens and the camera’s sensor. The shutter opens and shuts quickly when the shutter button is pushed. This lets a controlled amount of light (determined by the aperture!) to focus through the lens and onto the digital sensor. Think of this shutter as your eyelid, and blinking as the shutter snapping the image. Memory Card Slot & USB Port: The USB port lets you to connect your camera to your computer allowing you to update the camera’s software, and transfer images onto your computer. The memory card records the image as a JPG, TIFF or RAW file. These file types will be discussed later in the Glossary. Options Menu: The options menu allows you to manually change the settings of your camera. Access your options menu to use effect settings (black and white, sepia, negative effect etc.) and to adjust things like white balance or ISO, to select a focus mode, set the “red eye” reduction, adjust the image resolution (how big your file will be after you take the picture), set the self timer, or to select multiple sequential shots. Play around with the options menu, and try out different settings. If you can’t figure out what you did and messed something up, select the “reset settings” option to reset the all of the options of your camera, and start again! Page 17 Reference Book Exposure Modes: Point and shoot cameras have built in features that allow a photographer to automatically choose the correct camera settings to create images in many different lighting conditions. Here are some of the most common icons and what they do. What is a Mega Pixel? Most digital cameras are at least 6 mega pixels or higher. A pixel is a tiny square that is so small that it appears as a dot. The more dots you have, the higher the resolution of your photo. One mega pixel is equal to one million “dots”. If your camera is 8 mega pixels, then the image is made up of 8 million pixels, allowing you to print images larger than 20 x 24 without losing image quality. So, a 12 mega pixel camera should be better than a 6 mega pixel camera right? Wrong! Having a camera that captures more mega pixels just means that you can print larger images without compromising quality. If you are only printing images that are 8x10 or 11x14, both cameras will work well. 4-H Digital Photography Project Caring for Your Camera Protect Your Camera: Avoid lending your camera to others. Carry your camera in a camera case or bag. Always use your camera strap. Label it with your name and phone number in case it goes missing. Keep it from extreme temperatures (not in the glove box or trunk). Do not open your camera to switch memory cards or change lenses in dusty conditions. This could damage the inside of your camera, which can be expensive or impossible to repair. If in a dusty environment, put it in a ziplock bag. When passing your camera to someone, use two hands. Do not let go until you are sure the other person has a good grip, also with two hands! Do not touch the lens for any reason, ever! Write down the details about your camera (make, model and serial number). Have someone take a picture of it for you to store somewhere safe in case you lose it. Cleaning your Camera: Digital cameras require periodic cleaning to keep the camera operational, and allow you to take the best possible pictures. Most point and shoot cameras have very little to clean and are sealed to keep out dust and other things that may damage the camera. It is always a good idea to keep the exterior of the camera clean by using a lint free cloth. To clean the lens, use a lens pen or a can of compressed air. For fingerprints, use lens cleaner and lens paper and wipe gently as to not damage the lens. Digital single lens reflex (DSLR) cameras have more parts and are more complicated to clean. Consult your user’s manual for directions. Most camera manufacturers will clean and service your camera for you. It is a good idea to have this done every couple of years to make sure your camera is in top working condition. Inspect the batteries and battery compartment for any signs of corrosion. Rub the contacts on the batteries and camera with a clean cloth If you see any marks Page 19 Reference Book on the contact points, use a pencil eraser to rub them off. Brush out any dust, and discard any corroded batteries. Equipment Batteries: What kind of batteries does your camera use? Some cameras use AA batteries while others use special rechargeable batteries that can only be used for that type of camera. If your camera uses AA batteries, choose a NiHM or lithium battery over an alkaline battery, as they will give you a much longer shooting time. Your camera will drain batteries faster if you are using the LCD display and onboard flash. If you find you use up batteries quickly, invest in some rechargeable ones. Make sure you carry spare batteries when you are going on a trip or taking pictures of a special event. Missing the perfect shot because you did not have your camera is one thing. Having your camera and no batteries is another! If you will not be using your camera for a while, take the batteries out. This will prevent damage to your camera if the batteries leak. Memory: The most common types of memory cards are SD (Secure Data) or (CF) Compact Flash cards. Secure Data Cards: Are some of the smallest cards available, and are used in both point and shoot and DSLR cameras. They can also be used as memory for cell phones, video game systems, MP3 players, and PDA’s. Mini SD cards are also available. Compact Flash Cards: Are mostly used in DSLR cameras and have the benefit of a built in controller chip, allowing for faster transfer rates. Both types of memory cards are available in sizes from 512MB to over 32 Gigabytes. Always have more memory than you need. For an amateur photographer 3-10 Gigabytes should cover all of your needs. It is not a good idea to have one 16 or 32 GB card. If you need that much space, get a few 4 or 8 GB cards. That way if you lose a card or it becomes corrupted, at least you don’t lose all of your photos. Label all of your memory cards with your address, phone number and “reward” in case you lose one! 4-H Digital Photography Project A general guide to how many images you can fit on each size of memory card, based on 6-10 Mega pixel cameras: Camera: 1 GB 4 GB 16 GB 32 GB 6 MP 300 1,200 4,800 9,600 8 MP 230 920 3,680 7,360 10 MP 165 660 2,640 5,280 Flash: Sometimes it is just too dark, or there is not enough light in the area to take a picture. Other times, the light is so bright that there are dark shadows on someone’s face - like taking a picture of a cowboy with his back to the sun wearing a cowboy hat. If you do not use a “fill flash” to get rid of the shadows on his face cast by his hat, then his face will be too dark to make out any of his features. Most point and shoot cameras have a flash built right in that work automatically, when the camera sensor notices that you need more light. Some cameras have a flash that you have to switch on anytime you need it. Make sure you switch it off when you do not want it. Your camera can easily be fooled into thinking that flash is needed to properly expose your image. Using the onboard flash will drain your batteries at a quicker rate. Page 21 Reference Book Tripods Tripods are a great invention. Not only will you take better pictures, but people may clear a path through crowds for you when you carry one! Ah – power! Tripods eliminate the problem of camera shake. They also act as a second set of hands if you are arranging the subjects of a picture. They allow you to shoot at slower shutter speeds that then allow you greater depth of field. Tripods are our friends! Tripods vary in size, features and, of course, price. But if you are going to do much photography, they are an essential tool. Having a tripod will expand the type of photography you are able to do and help you improve what you already do. Using a Tripod: Practice adjusting a tripod without the camera attached first. You will save your camera and look like a pro when you set up in front of people! Open the legs of the tripod and practice setting it up for different heights and ground surfaces. Practice locking the legs securely after setting the height you want. Use the heavier legs of the tripod before extending the thinner legs. The heavier legs are stronger and will be more stable. Extend the tripod legs before spreading them out. This makes it easier to set them at the same height. The centre column can be moved up and down either by a push-pull mechanism or a gear system. A gear system gives you more precise control. Be sure to lock the centre column securely. Use the centre column (the part that your camera is attached to) for fine adjustments only. If you extend the centre column too high, your tripod may become dangerously top heavy and fall over. In windy or crowded situations, stabilize your tripod by hanging something heavy from the bottom of the centre column. I use my camera bag for this. I have seen some people use a rock in a bag. Some photographers install a hook on the bottom of the column for this purpose. Point one of the tripod legs the same direction as the camera lens. There is less chance that you will trip over a leg that way! 4-H Digital Photography Project Your camera has a socket in the bottom, which you will screw onto the post on top of the tripod. After you screw the camera on, secure it completely by tightening the knob just under the camera. You can carry the camera and tripod together, with the tripod legs collapsed, if you need to. For the safety of your camera, take the camera off the tripod and carry them separately. The head of the tripod should allow you to shoot both vertical as well as horizontal shots, shoot 360 degrees, and be able to adjust and operate all the locks smoothly and set them firmly. Some tripod heads have a “quick release” feature. This allows for the quick removal of the camera to do hand held shots, when you need to be able to move freely. Caring for Your Tripod After you have bought your tripod, label it clearly with • your name and phone number. It is less likely to be stolen if labelled in an obvious way, and more likely to be returned if found. Keep your tripod folded up and out of the way when not in use. Grit is an enemy of moving parts. Keep your tripod clean. Do not let anyone lean on your tripod. I don’t know why people do this, but it is hard on the tripod. Choosing a Tripod: Make sure the tripod is sturdy enough to support your equipment. How heavy are your camera and flash? You do not want your tripod to crash over with your camera and flash falling into a ravine. With tripod legs fully extended, your camera should be at least at eye level, Page 23 Reference Book without raising the centre column. Even better is a tripod that will let you get right down to ground level. How is the tripod adjusted? Are there squeeze or screw mechanisms for adjusting the leg lengths? If these break or fall off, can I buy parts or do I have to buy a whole new tripod? In how many directions does the head move? Test it. Is it still stable at all angles? Is there a quick release on the platform so you can remove the camera with the base, then reattach it? How much does it weigh? If it is too heavy, you will avoid carrying it and using it. What are its dimensions? If it is too big, you may find it awkward to carry. How low and how high will it reach? Can you test someone’s tripod, before you buy one? Talk to other photographers about their tripods and what they like or dislike about them. Need More Light, But No Flash Available? “Fill” dark areas on your photos by reflecting light to your subject with an inexpensive collapsible reflector. A 48” reflector costs less than $30, and folds up to about the size of a frisbee. If you don’t have a reflector, a light coloured piece of fabric, mirror, or white cardstock will work just as well! 4-H Digital Photography Project What Causes Blurred Pictures? Most of the time blurry images can be blamed on camera shake. When you take a picture tuck your elbows close to your body, hold the camera steady with your left hand, and press the shutter button gently. Using a tripod will reduce camera shake as well. If you don’t have a tripod handy, leaning against a tree or other large object will help steady your shot. Movement by the subject can also make a blurred image. Try: Panning the moving object. Follow the subject with your camera while you snap the picture. This will create “motion blur” an effect where the subject is frozen, but the background appears to be moving Using a faster shutter speed Using a flash to add more light to the subject. The other cause of blurry images is having the wrong settings chosen for the lighting conditions available. Open “scene” from your cameras menu and choose an appropriate setting. Page 25 Reference Book Hints and Tricks Look, Plan, & Shoot, Shoot, Shoot! Make sure you select the appropriate camera settings and white balance for the shooting conditions. Get up close and fill the frame with your subject. The best zoom lens is your own two feet! Avoid putting your subject in the dead centre of the picture. Use a simple background that does not distract the viewer from the subject. Common Mistakes Some common mistakes made by new photographers can be easily corrected, as long as you know how to fix the problem. Here are ten problems and solutions that will improve your photos in no time! Mistake Correction Don’t know how to use their camera. When people get a digital camera they rip open the box, pop in the memory card and batteries and start snapping away. The user’s manual is placed on a shelf to collect dust and is never seen again! The camera’s user’s manual is the BEST tool you have to learn all of the features and settings for a camera. Read the manual while you have your camera there to practice. You’ll be amazed with what your camera can do! The pictures are too dark. Use on-board flash when in low light conditions, if your pictures are blurry, or as a fill light on a sunny day to get rid of shadows. Shooting at a slower shutter speed will allow you to take pictures in lower light situations. The focal point is behind the subject. There is nothing more frustrating than snapping a great picture and having a large tree ten feet behind your subject in perfect focus and your subject out of focus. This is an easy fix: press the shutter release button halfway, the camera will automatically select the focus area containing the subject closest to the camera, recompose your shot (while holding the button halfway) press the shutter button the rest of the way to take the photo. The colour is “off ”. White balance needs to be adjusted for the type of lighting conditions. Mistake Correction 4-H Digital Photography Project Too many things going on in the picture. If there are too many things going on in a picture it is distracting to the eye. Instead of trying to fit everything into one shot, take 4 or 5 different shots. Pictures are cluttered. Get rid of clutter in the background of your pictures as it draws the eye away from the subject. If you can’t remove the clutter, try shooting at a different angle to eliminate as many of the distracting elements as you can. Always shooting Adding different levels and angles to your photography will from eye level. make your images stand out, and give you dramatically different results. Get on the floor when you are taking a picture of a small child or dog to get a shot from their perspective. Experiment with as many angles and levels as you can to compose interesting shots. Only taking one shot. Digital = FREE!! Shoot as many shots as you need to get the perfect shot. You can go through them on the computer later and keep the best ones. If you are running low on memory, delete some of the unwanted photos to free up space but don’t always rely on the LCD screen (see next point). Relying only on the LCD to provide accurate results. The LCD screen on your camera is a great feature, but the best way to review your photos is on the computer. Because of the size of the LCD screen it is tough to see some of focal points and fine details in your shots. Forgetting to adjust camera settings for the lighting conditions (and setting them back!). White balance, ISO, aperture and shutter speed should be adjusted for the conditions. If you shoot in full automatic mode your camera will take care of most of these settings. Double check to make sure you have auto ISO and auto white balance selected in the options menu. Page 27 If you find that you need more memory space, invest in additional memory cards (or larger ones). Reference Book Portraits When taking portraits of people, try to make them as comfortable and relaxed as possible. When people are relaxed and having a good time, it makes for much better pictures. Use the portrait setting on your camera or a 50mm portrait lens at a low f-stop (if you have the ability to change lenses). This will give you a shallow depth of field and make the subject “pop” while the background is in soft focus. Fill the frame with your subject as much as you can. Fix your focus on the eyes, recompose and snap the image. Try shooting close up images of faces and eyes. You can get some very dramatic shots that really capture that person. They say that a picture is worth a thousand words. A successful portrait photograph captures a person’s character and personality and is able to tell a story about them. Children’s Portraits: Taking pictures of kids can be fun, entertaining and exhausting! Photograph kids playing in their own environment where they are most comfortable, and get down on their level. Take as many shots as you can and you will be sure to capture some great images of the kids making silly faces, playing, and doing typical cute kid stuff. Sometimes getting kids to smile can be quite a challenge. You can get them smiling by telling a joke or by asking them to say silly words that have a long “e” sound like doggy, kitty, or chimpanzee. Asking them questions that have a yes answer always works well too! Long “e” words naturally form your mouth into a smile! If your camera has a good zoom lens you can zoom in on the child from far away and capture some really great non-posed natural looking shots. 4-H Digital Photography Project Group Photos: The first and most important rule of taking group photos is to take your lens cap off before you start taking your first picture. It is really embarrassing if you don’t – trust me! If possible, go to the spot where you would like to take the picture, before everyone gets there, so you can plan where you’d like people to stand. This will save everyone’s time and help keep people in a good mood. It is always a good idea to know how many people will be in the picture too! Pose the group so their heads form triangles. Triangles make the image more visually pleasing and naturally lead your eye from one person to the next. Stagger the group so their heads are at different levels. Make sure you can see everybody, and everybody can see you. As a general rule of thumb, you will need to take a minimum of one shot for every person in the group. For example if you are taking a shot of 12 people you will need take at least 12 pictures of the group in order to get ONE shot of everybody smiling, looking at the camera and not blinking. If you are taking the picture on a sunny day, place the group with their backs at an angle towards the sun so you are not shooting directly into the sun. This is one way to help avoid squinting. Another good trick is to get everyone to close their eyes and open them on the count of three, snap the shutter when they open them. Use a fill flash or reflector to get rid of any shadows. Page 29 Reference Book Animal Photography Much like children, animals tend to do their own thing when it comes to posing for pictures. It is best to go with the flow, work with the animal, and try to anticipate what it will do next so you can be one step ahead and get that awesome shot. You may have to be very patient in order to get the exact animal shot that you are trying for. Waiting with your camera in hand is the key to getting that shot when it happens. Use natural light if at all possible and avoid using your on-board flash as it will cause red eye and may frighten the animal. Always remember, safety first!! No shot is worth risking your own safety. Getting a close up shot of a bear might make for a great picture, but is worthless if the bear eats you! If you enjoy taking pictures of wildlife invest in a good zoom lens so you can stay a safe distance away. 4-H Digital Photography Project Landscape Photography A classic landscape shot includes four elements: the foreground, the focal point, the background, and the horizon. Because you cannot move your subject, you need to time your photography to take best advantage of natural light. On sunny days, landscape shots are best made early in the morning or late in the day. The shadows produced at those times are strong, dramatic and show off landscape features well. Overcast days offer great opportunities for landscape photography. You can shoot all day when it is overcast! Some shots are also better at different times of the year. Certain lakes in the mountains are frozen for many months of the year. Certain rivers or lakes may become very low during the summer. Some features may only appear after the leaves have dropped in the fall. Some scenes that seem “boring” in the fall become works of art when draped with snow. Take these changes into consideration when planning landscape shots. Occasionally include a human or identifiable animal in your landscape shots, to add interest. This also helps give a sense of scale. You can tell that these rocks are huge when the little girl stands in front of them. You can use any lens to shoot landscapes. A wide angle lens allows you to capture more of the landscape. A telephoto lens can save you leg work and allows you to zoom in on features you find attractive. If you want to emphasize the sky in a shot, put the horizon line of the photo low in the frame. If you want the emphasis put on the landscape, put the horizon Page 31 Reference Book high in the frame. If you cannot get the entire scene into one shot, take several, overlapping a bit at the edges of each shot. Keep your camera the same height as you rotate your body at the hips. Take several shots. When you get the pictures back home, try stitching them together using photo processing software to create a cool panoramic shot! If your shot does not line up seamlessly you can add a border where your images meet up to merge the two images together. Night Photography Night photos can be extremely beautiful, but very challenging to take. Just like most other things in life, the more you practice the better at it you will become! The most important aspect, aside from weather, is the exposure. You will need to use a longer exposure time for night pictures in order to allow as much natural light to enter the camera as possible (you will also need a tripod!). If you want to capture incredible details in your night photography, using a longer exposure is the only way to do it! You can also use a long exposure to capture lightning at night. Make sure you are set up somewhere out of the rain and will provide protection against the lightning bolts! You will need to have lots of “trial and error” to get the correct camera settings, but once you do, your photos will be awesome! If you don’t like a shot, erase it and start over again, don’t ‘ya just love digital! 4-H Digital Photography Project Black and White Photography By using your camera’s black and white settings you force yourself to think about the content of your picture. If you have not planned your shot, a poor black and white picture can be boring because it does not have colour to draw your eye into the picture. A well planned black and white shot will draw your eye directly to the subject and get rid of some distracting background elements. Sometimes you will take an image that looks okay in colour. But once you turn it into a black and white it really adds character to the shot and makes the image “pop”. The image of the blacksmith speaking with the other gentleman is a good example of this. Adding sepia tone (see-pee-uh), to the image of the blacksmith, would add a faded brownish colour, giving it an older feel. So, if you want to force yourself to improve, shoot occasionally in black and white! Page 33 Reference Book Exposure Settings It is very important that the correct amount of light enters the camera for the right amount of time, creating the correct exposure. Point and shoot cameras adjust automatically by taking a light reading to determine how much light to let in to get the proper exposure. There are also several settings to choose from for different lighting conditions. DSLR cameras allow you to adjust all of your settings manually as well as shoot in full automatic mode. ISO: In the days of film, ISO related to the “speed” of the film, the higher the ISO the more sensitive the film was to being exposed to light, allowing for faster or slower shutter speeds. The lower the ISO the longer it took to take to get a properly exposed image. Therefore a slower shutter speed was required. The same principles apply with digital photography, but instead of changing film you can make all of the adjustments in your camera! If you were taking pictures of daisies in a meadow, you would probably use an ISO of 200. If you were at a hockey arena taking action shots, because of the low lighting and speed of the game, you would need to use an ISO of at least 800 in order to get a fast enough shutter speed to freeze the action of the game. If you were to use an ISO of 200 at the hockey game the shutter would have to be open for too long and all of your action shots would turn out as a blurry mess! Underexposed But beware: if you are using a high ISO you will be sacrificing image quality and your shots may be grainy or produce “noise”. Overexposed Correctly exposed 4-H Digital Photography Project Controlling Light Inside the Camera There are two ways to control the amount of light that reaches your camera’s digital sensor, by adjusting the shutter speed and by changing the size of the aperture. If you have a point-and-shoot digital camera that has no manual or semiautomatic controls, you may not be able to manually adjust the aperture and shutter speed. Some cameras adjust automatically, depending on the lighting conditions and the mode that you have selected. The camera will take an average reading of the light, using a built in light meter, and set the aperture and shutter speed accordingly. Sometimes this will be acceptable, sometimes it will not. It is important to know how to do this manually just in case. Check your camera’s LCD screen to see if you need to make any changes to the settings – reviewing your photos is called “Chimping” by photographers, but I am not too sure why. When taking a shot in tricky lighting, get close to the subject and take a reading where you want the exposure to be correct, step back, and snap your shot. This way you will get the proper exposure reading for you subject, not everything else around it. Setting the Aperture: DSLR cameras use a ring on the lens barrel to adjust the aperture. This controls HOW MUCH light enters the camera. The settings are marked on the barrel of the lens in numbers called “f-stops”, such as f/2.8 f/5.6, f/8, f/16. The smaller the number, the larger the opening or aperture is, and the more light it will let in. Adjust the aperture by dialing up or down to the f-stop you would like to use, each increase in f-stop cuts the amount of light in half! So, an aperture of f/2.8 will let in twice as much light as an aperture of f/5.6. Page 35 Reference Book Setting Length of Exposure (shutter speed): By adjusting the shutter speed you can change HOW LONG the digital sensor is exposed to light. Shutter speeds are expressed in amount of time. For example you can set your shutter speed to, 1/1000 (really fast), 1/125, 1/60, 1/15 of a second (slow). Every time you blink your eye it takes about 1/100 of a second. For hand held shots, use speeds of 1/60 of a second and up. For anything slower than 1/60, use a tripod. Otherwise your shots will not be sharply focused. A shutter speed setting lets in twice as much light as the next higher setting (because it is open for twice as long, right?). For example, a 1/30 of a second setting will let in twice as much light as the 1/60 of a second setting. Each change of shutter speed has the same effect as one f/stop change in aperture. If you want to change the exposure of a shot, you can either change the aperture or the shutter speed. Or, you can do a combination of both. For example: If you are shooting in a dark situation, you can either open up the aperture (let in more light), or you can use a slower shutter speed (let light in for a longer time). If you still cannot get a correct exposure you can increase the ISO, to change how sensitive the sensor is to light. Adjusting the ISO may cause “noise” in your photo, making your image grainy and pixelated. If you are shooting in bright light, you can close the aperture (let in less light through a tinier hole) or use a faster shutter speed (open the hole for a shorter time). If you are shopping for a camera, it is important to compare the range of f/stops on the lens that come with the camera. If you are going to get serious about photography, you will need to have a couple of lenses that can be switched out depending on what you are shooting. Some lenses can cost 2-3 times what you paid for the camera itself! A lens that will open up to f/1.4 is more versatile than a lens that only opens to f/2.8. The lens and the purpose you want it to serve are the most important features to consider when buying a camera or lens. Your budget will factor in somewhere as well! 4-H Digital Photography Project White Balance: Have you ever seen or taken a picture where everyone’s skin is a blue or red tone, and none of the colours seem vibrant? That is the result of not having the correct white balance settings for the type of lighting the image was taken in. This is one of the easiest things to fix and will make your photos look much better instantly!! All digital cameras have white balance settings for all sorts of conditions that may arise. Adjust your settings as the lighting conditions change. If you are taking pictures indoors and there is fluorescent lighting, go into the menu on your camera and change the white balance setting to the icon that looks like a fluorescent light bulb. If you go outside and have a lot of natural light, choose the icon that looks like the sun. If it’s cloudy outside choose the cloud icon. If you have incandescent lighting choose the light bulb icon. You can also select auto white balance to have the camera make the adjustments for you. Sometimes the camera can be tricked into choosing incorrect settings depending on what part of the image the camera meters for light. Page 37 Reference Book Lighting The quality of your photos will depend on the quality of light available. In a perfect photographic world, the light would be soft and plentiful! In the real world you will come across all sorts of different lighting conditions. Quality of light is broken down into two categories: Hard light and Soft light. Hard light throws distinct shadows and will usually come from one point of light (your flash, the sun) and gives a dramatic effect. Soft light does the opposite and usually comes from a reflected, ambient or large light source. Soft light has no defined shadows, and is perfect to use for portraits. Directional lighting is the angle that light hits your subject. Here are some examples of directional lighting. Thanks to our friend Cleaver for modeling for us! Front Lighting: Beginning photographers rely on front lighting (light falling in front of the subject). This is relatively safe and easy to work with. However, it is not very exciting, and often fails to show the texture of the subject. Sometimes pictures taken with front lighting look “flat”. Frontal flash lighting also causes “red eye” when light is reflected off the retinas of the subjects. Reduce this problem by moving, asking the people to avoid looking directly at the camera, or by using the red eye reduction feature (if your camera has this capability). Side Lighting: Side lighting helps emphasize texture and shape because it produces good shadows. The best time of day for natural side lighting is early morning or late in the day. If you examine professional photographs, you will notice by the shadows, that many of them were taken using side lighting. Side lighting is not recommended for portraits because it rarely enhances skin texture and is not very flattering. Use a combination of frontal and side lighting for portraits. 4-H Digital Photography Project Back Lighting: Back lighting is challenging but can contribute to great photographs, if you learn to manage it properly! It produces a ring of light around the subject and casts shadows on the subject. To get the correct exposure with back lighting, use a fill flash to add in some light to the front, change angles to reduce the back light or reflect light onto the front of the subject with a reflector, mirror or piece of white card stock. Top and Bottom Lighting: We are used to light coming from above, so some lighting from slightly above looks normal in pictures. Light from directly above a person produces unattractive shadows on the face (black hollows under the eyes and nose). Sometimes, lighting comes from below the subject, such as at campfires. This kind of lighting will produce dark shadows in the eyes and cast some strange shadows on the rest of the face. This is also known as “horror lighting”. Use this type of lighting if that is the effect that you want to go for! If light would not naturally come from below the subject, avoid lighting a shot this way. Light Meters: Many cameras have built-in light meters that measure available light and direct or change the camera settings. Built-in meters average the light in the scene, but may not give the precise reading needed for your subject. A hand-held meter allows you to measure precisely the light being reflected off your intended subject. Using a flash: A flash adds light to a subject, freezes action and extends our opportunity for taking pictures. Most cameras are set for exposure control Page 39 Reference Book with a flash. A flash can throw harsh shadows, create red eye and make pictures look “flat”. How fast your flash recycles will depend, in part, on the freshness of your batteries and the size and make of your flash. Always carry spare batteries and replace them before an important photographic event. Fill flash: Fill flash adds to existing light. Often fill flash is bounced off the ceiling or other surfaces and is not directed at the subject, filling the environment with more light. Fill flash can add light to reduce shadows such as those caused by wrinkles, noses, hair, hats, and eye sockets (don’t laugh – you’ll have wrinkles someday!) It can also reduce the problems of back lighting. Fill flash is much less harsh than direct flash and looks much more natural. 4-H Digital Photography Project Composition The compositional goal of photography is to NOT place the subject dead center in the frame. However, as with most rules there are always exceptions. If you are trying to emphasize symmetry for example, you might take a picture of someone’s face and have the center point of the image even with the center of their face, making for a very well composed photo that is balanced on both sides. The Rule of Thirds: One of the most valuable rules you will learn is the “Rule of Thirds”. Imagine the frame has lines that form a tic-tac-toe board, dividing the frame into thirds from top to bottom and from left to right. There will be four spots on the frame where the lines intersect. These are the “sweet spots”. When the focal point is placed on or near one these spots your photo will have more Page 41 Reference Book impact and be more visually appealing to the eye. Once you learn, practice, and understand the rule of thirds, go ahead and break the rules! Experiment! Framing Your Subject: A great way to add depth and impact to your photos is framing your subject with an object in the photo. Taking a photo through an archway, or using an open window to frame your subject is a great way to enhance your images. This will take practice and a creative eye, but the results are well worth the effort. Leading Lines: By using leading lines you bring the viewer into the photograph. Strong lines like roads, bridges, rows of trees, buildings, walking trails, and fences will add depth to your images. Placing the leading lines using the rule of thirds will draw the eye into the picture. Portrait and Landscape: 4-H Digital Photography Project Portrait shots emphasize height and relative size. Landscape suggests wideness. Consider both views when planning a shot. You will challenge your thinking, and lead to some great pictures. Suggesting Movement in Photography Panning: Using the “Sports/Action” mode, follow the moving subject with your camera keeping the subject in the center of the frame. Press the shutter release halfway down to keep the subject in focus while you pan. This will create a background that is moving but the subject appears to be standing still. If you have the ability to take multiple frames per second use it! You will probably have to do this several times to get it down pat, but when you do, you will be very pleased with the results! Suggesting Movement: Using a slow shutter speed when taking pictures of flowing water will make the water appear to be flowing, while everything else in the photo is in focus. Using a fast shutter speed will freeze the water, giving you fine drops frozen in mid air! You will need to use a tripod, or hold your camera very steady, for a long exposure shot to turn out. Don’t give up! Intentionally Blurring the Action: Page 43 Reference Book When you can anticipate a moving subject in a particular spot, set up with your camera on a tripod and focus on the background. As the subject passes in front of the camera, squeeze the shutter button, this will keep the focus on the background and make the subject appear to be moving. Examples include, a runner crossing the finish line or a bull and rider exploding out of the stall at a rodeo. Storing and Sharing your Digital Images With digital photography, you can take hundreds of photographs (depending on the size of your memory card) but what do you do with all of the great images once you have captured them? There are 4 main ways to store your images so that you can keep them for years to come. 1. Store your photos on a CD: Backing up your images on a CD or DVD is a great way to store and share your photos. You will need a writable CD or DVD drive in your computer, and appropriate software in order to burn your files onto disc. One CD-R has the capacity to store 700MB of data. On average you can store 50100 images per disc, depending on how large your files are. If you have a whole bunch of photos to store, a DVD has 4500MB of available storage space - that’s a lot of photos!! Keep the copies of the discs in a CD binder with soft sleeves, or mail them out to friends and family to share your work. 2. E-mail your photos: Send your photos to friends and family all over the world with e-mail. It seems that everyone today has access to the Internet and e-mail. This is a great and inexpensive way to share your images instantly. Make sure that you RESIZE the images to make them smaller before you send them, otherwise the e-mail attachment will be really big and take the person on the other end very long time to download it! We will go over how to resize an image so that it is “e-mail friendly” a little later. 3. Upload your photos to a website: There are several photo storage websites that you can access over the web for free. Photobucket, Flickr, and Mozy are a few great FREE online photo storage sites which allow you to upload, store, manage and share your photos with others. Be sure to check out the privacy settings and set them to “private” so 4-H Digital Photography Project your work can only be viewed by people that you approve. Google “free online photo storage” to find a site you like. DON’T store all of your photos on the hard drive of your computer!!!!! If you computer crashes and loses all of its files, your pictures will be gone too!!! Be sure to back up your images on CD and keep them in a safe place. 4. Printing photos: Just like with film-based photography, you can share your pictures by having a printed version. As long as you use quality photo paper, most home computer printers can produce high quality photographs. But beware, if you are printing lots of photos this could cost you a small fortune in ink! If you do not have a printer for your home computer or want to print lots of photos, many department stores have self-serve kiosks that you can use to print your images in several different sizes, quite inexpensively. There are on-line photo printing services that allow you to upload all of your images from your home computer to their website. You select the sizes and quantities you need. Once they have been printed, the photos can be shipped right to your front door! Caring for Prints: Protect your pictures from fingerprints, spills and scratches by putting them into albums as soon as you can (you can always put an album on your “wish list”!). Some print labs offer the option of having your picture dry mounted on a board which will preserve the image and keep it from curling over time. You can also have you photos laminated so the colours will not yellow or fade over time, even in direct sunlight! When you choose an album, buy one with “archival” quality materials. This quality of album will not accelerate the breakdown of your precious photographs. The best albums for your pictures use materials that are acid free, and buffered. Store pictures out of extremes of temperature and humidity. This means no basements or attics, no glove boxes or car trunks! Avoid writing on the back of your photographs. If you must do so, use a felt tipped marker or photo labeling pencil to avoid damaging the photo. When you mail a picture to someone, inset a piece of cardboard in the envelope, to protect the corners of the photo and avoid damage during shipment. Page 45 Reference Book When you frame a photograph, use matting so that the photograph does not touch the glass. Keep photographs out of direct sunlight, or they will fade. If your photos are laminated and dry mounted you do not need to frame them behind glass. If gluing photographs onto something, use glue that is designed for photographic use. Other kinds of glue will ruin the picture. 4-H Digital Photography Project Post Processing Your Images Image Processing: There are two important factors to remember when processing your images. Are to ensure your photo is of a higher quality. If you are processing for web (to email, or to post on FaceBook/MySpace, etc.) then you will want your photo to be saved at a smaller resolution. A good idea when processing for both print and web is to create two versions. ALWAYS keep a copy of your original photos as well. You never know when you might want to re-process an image at a later time, when you have learned a new processing technique. Processing for Print: When processing your photos for print, you will want to ensure that you are taking your time to edit. Your image resolution will need to be at least 150dpi (which refers to how many dots per inch a printer is capable of printing). When working with photos that are larger than an 8x10, you will want your photo resolution to be as close to 300dpi as possible to achieve the best quality. Processing for Web/E‐mail: When saving your photos for the web, resolution size should be no more than 72dpi. Most photo editing programs have a “Save for Web” feature. If you do not have any post processing software available, search online for “resizing photos” and download some free photo resizing software. Photos saved at 72dpi resolution can still produce a print of about a 4x6” in size without losing sharpness. Page 47 Reference Book Enhancing your Photos There are several different ways to enhance your photos by using such programs as Photoshop, PaintShopPro & Painter. You can find several free programs on-line such as Gimp & Picasa, which can offer many of the same features as professional photo editing software. The types of photos you prefer to capture will determine how you manipulate your photos. The most commonly used tools will be explained here. Please note, Photoshop terms will be used as examples. You can find tutorials on the Internet that will explain how use the program you have available. Learning the shortcuts for whichever program you prefer will save you a lot of time. Saving time during processing might not seem important, but once you take on photography as a serious hobby, or get into events, sports, or equine photography, you are going to start processing a lot of images! You can find printouts for default keyboard shortcuts for your program, by searching on-line, or checking the help menu within the program itself. These shortcuts will save you a lot of time by using the keyboard instead of navigating the windows and menus with the mouse. For example, hitting “Ctrl+Z” in Photoshop will undo your last action. “Ctrl+Alt+Z” will allow you to undo and take as many as 20 steps back. If you were to use your mouse to undo your last action, you would have to move the cursor to “file” and click “undo”. With this keyboard shortcut, you can save 3 seconds every time you need to undo your last action. When you are just learning to use post processing software, this shortcut will be your best friend! Commonly Used Photoshop Tools: Move: Usually displayed as an arrow, with this tool selected, you are able to move elements that you are working on within your document. Erase: Obviously, does as stated. Paint: Allows you to paint colours into your image. Blur: The Blur tool, which is displayed as a drop, is great when wanting to take the eye away from certain areas of your photo, or to enhance the depth of field. 4-H Digital Photography Project Crop: Displayed as either a “cross hair” or a crop, is best used to enhance your composition or to crop out distracting elements from your photos. Move Patch: Used when a more seamless look is required when copying from one area to another. Great for wrinkles & blemishes. Marquee Clone: Displayed as a stamp, the clone tool is a fantastic way to rid your image of unwanted elements by cloning and copying from a different area of the image. Crop Dodge: Dodge is best used when working on portraits. The dodge tool takes darkness out of images. This is perfect to use on areas that are darker than what you would like them to be (in and around the eyes, dark circles, wrinkles, etc). Be careful. You can also take the colour out of the images when this tool is overused. Heal/Patch Burn: Burn is the opposite of dodge. Burning adds dark to your images, which is perfect when trying to draw the attention of your viewer to a certain element in your photos. Gradient Text: The text tool allows you to add text to your images, create slogans, add names, dates, whatever you like! Shape/Brushes: The shape tool has a submenu or options palette where you can select from a number of the shapes and add them to your image. Lasso Magic Wand Slice Brush Clone Stamp History Brush Erase Blur Dodge/Burn Pen Text Path Selection Shape Notes Eye Dropper Hand Zoom Page 49 Reference Book Eye Dropper: The eye dropper allows you to sample colour from anywhere on your document. This is fantastic when trying to match colours from your photo or document. Patch, Clone, and Crop to remove unwanted elements. Layers & Masking: Do make a point, as you become more advanced with your “Photoshopping Skills” to familiarize yourself with layers and masking. These two tools enhance your ability to manipulate your images in many ways. There are so many more features that your post processing software can offer. Familiarize yourself with your program as much as possible and experiment! Burn edges of the image to create a vignette and draw the eye to the subject. 4-H Digital Photography Project Members “I Can” Checklist Refuse to put myself in danger for the sake of a better picture. Identify and avoid dangerous situations when taking pictures. Identify and manage any hazards related to photography. Demonstrate photographic courtesies. Explain, how different people and groups feel about having their picture taken. Explain how taking a picture of someone might offend them. Identify situations in which photography would not be appropriate. Explain, in simple terms, how my camera works. Clean my camera/Explain and demonstrate camera care. Demonstrate how to hold camera for portrait and landscape shots. Navigate the options menus of my camera. Remember tips for taking better photographs of people, animals and scenery. Find and use resources for photography tips. Listen to and consider feedback about my photography. Evaluate work by other photographers to learn their techniques. Prevent damage to my printed images in storage, and on display. Use my photographs as gifts, to complement my school projects, to serve my community. Explain and name the main parts of my camera and their functions. Determine equipment I need. Decide a specific result that I want to achieve with a photograph. Plan a picture while considering the subject, background. Make pictures that focus attention on my intended subject. Limit visual distraction from my subject in the picture. Explain how changing the angle will affect a photograph. Challenge myself to look at things from different angles and points of view. To change the impact of a shot. Experiment with different angles, arrangements and lighting, backgrounds. View and photograph a subject from several points of view. Use panning, flash, and shooting at “peak of action” to suggest action. Use a flash, composition, and timing of a shot to suggest movement. Evaluate my own work and think of new ways to shoot the same subject. Page 51 Reference Book Can create photographs that suggest movement of feelings as well as physical movement. Place the horizon line in the photo at different spots in the frame, to put the focal point either on the landscape or sky. Explain ISO. Set the white balance options on my camera for different types of lighting. Select camera settings appropriate for different lighting conditions. Tell the difference between side lighting, back lighting and direct lighting. Use a flash to provide or complement light. Use available resources to reflect or diffuse light. Experiment with side lighting, back lighting direct lighting and reflected light. Explain the relationship between the shutter and aperture. Adjust the shutter speed and aperture. Use extended exposure to compensate for difficult light. Use a tripod to reduce blur at longer exposure. Use tripod and long exposure for night time effects shots. Adjust exposure settings to compensate for light levels. Can demonstrate “painting with light” to create photographs. Leaders Comments: Glossary 4-H Digital Photography Project Aperture: The aperture controls how much light enters the camera, and is measured in “f-stops”. Autofocus: Automatically adjusts the lens position to bring your scene into focus. Depth of Field: The area which is in focus in your scene. Digital Camera: A camera that captures images electronically. Exposure Time: The amount of time it takes for the camera to take an image. The length of the exposure is how long the shutter will remain open, allowing light to hit the lens. F-Stop: Determines how much light enters the camera. Fill Flash: Using flash or reflected light to “light up” your subject. Fish Eye Lens: A lens that has a view of 360 degrees. The center of the image often looks larger, with rounded edges. Flash: On board flash provides a blast of light which allows you to take pictures in low light situations. Focal Point: Where your eye is first drawn to in an image. Usually the subject will be in sharp focus. Frame: The area that you see when looking through the viewfinder. ISO (International Standards Organization): The rating system used to determine film speed. When using a digital camera, it is basically translated as, the sensor’s sensitivity to light. LCD Screen: The LCD (liquid crystal display) allows you to navigate the options menu and review your images. Lens: A piece of glass that is convex in shape, to bend rays of light onto the digital sensor. Lithium Battery: Lithium cells can produce twice the voltage of an ordinary alkaline cell, which increases shooting time. Macro Lens: A lens with a short focal length, these are used for taking photos of subjects that are close to the camera, and fine detail shots. Mega Pixel: One mega pixel is equal to one million pixels, which determines the resolution of the image. Mono-pod: A camera stand with one leg, used to help steady the camera while shooting. Page 53 Reference Book NiMH Batteries: A nickel-metal hydrate cell. A NiMH cell can have two to three times the capacity of an equivalent cell, and are rechargeable. Overexposure: When an image looks washed out. This happens when too much light has entered the lens. Panning: A term to describe moving the camera while taking a photo to follow a moving subject. Panoramic Picture: An extra wide view of a scene, best used in landscape photography. Pixels: Tiny dots that make up a digital image. Reflector: A material used to reflect light onto your subject. Sepia: A filter which adds a faded brownish tone to your image, giving them an aged feel. Shutter: The part of the camera which “opens & closes” to allow light to enter, and hit the sensor. SLR (Single Lens Reflex): A camera that allows you to capture exactly what the camera “sees”. Telephoto Lens: A lens that is mainly used to photograph objects that are far away. Tripod: A camera stand with three legs, which holds your camera steady for long exposure shots and eliminates camera shake. Underexposure: When your subject is dark, not enough light is entering the lens, This often happens when your scene is brighter than your subject. Viewfinder: The window you look through when framing/focusing on your subject. White Balance: The process of removing improper color casts, so that objects which appear white in person, appear white in your photo. Wide Angle Lens: A lens with a wider degree of view than the human eye. Zoom Lens: A lens which allows you to zoom in close or back out to capture a wider scene. 4-H Digital Photography Project Resources www.digitalphotography.tipcentral.net www.cambridgeincolour.com www.malektips.com www.eastmanhouse.org www.digitalphotographysecrets.com www.digitalphotographybusiness.com www.wikipedia.com www.youtube.com www.pictureusthere.ca All images © Picture Us There Photography unless otherwise stated. Page 55 Reference Book