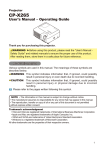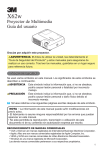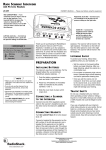
1
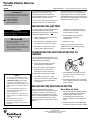
2QTVCDNG"/QVKQP"&GVGEVQT
YKVJ"#NCTO
49-426
OWNER’S MANUAL — Please read before using this equipment.
#"+/2146#06"#
If an icon appears at the end of a paragraph, go
to the box on that page with the corresponding
icon for pertinent information.
Rý— Signifies a Warning
. — Signifies a Caution
# — Signifies Important text
Your RadioShack Portable Motion Detector
with Alarm is a pocket-sized, dualpyroelectric infrared sensor alarm that
provides reliable protection. It is perfect for
home, business, and travel security.
You can use the motion detector to alert you
to possible intruders or sound a pleasant
chime when someone enters the area. You
can also connect one or two external hardwired magnetic sensors or passive infrared
(PIR) detectors to the motion sensor to serve
as a small security alarm system. This motion
detector is for indoor use only.
+056#..+0)"6*'"$#66'4;
ý
R
"9#40+0)ý
R
"
Dispose of old batteries promptly and properly.
Do not burn or bury them.
."%#76+10".
Your motion detector requires one 9V battery
(not supplied) for power. For the best
performance and longest life, we recommend
.
a RadioShack alkaline battery.
R
1. Lift the mounting bracket to access the
battery compartment.
• Use only a fresh battery of the required size
and recommended type.
2. Slide the battery compartment cover in
the direction of the arrow to remove it.
• If you do not plan to use the motion
detector for a month or more, remove the
battery. Batteries can leak chemicals that
can destroy electronic parts.
3. Remove the mounting screws and
anchors stored inside the battery
compartment. Keep the screws and
anchors in case you want to mount the
motion detector on a wall.
4. Snap the battery onto the battery
terminals inside the battery
compartment.
5. Replace the cover.
When the alarm sound weakens or the
motion detector stops operating properly,
replace the battery. .
%100'%6+0)"6*'"/16+10"&'6'%614"61"
5'05145
You can connect the motion detector to one
or two external hard-wired magnetic sensors
or PIR detectors (not supplied).
1. Loosen the screw terminal’s screws
inside the battery compartment.
2. Insert the sensor’s or PIR detector’s
wires into the wire hole under the
terminals, then tighten the screws.
±"016'"±"
• To prevent the motion detector’s chime
from sounding after you install the battery,
CHIME/OFF/ALARM is preset to OFF.
• If the alarm sound weakens or the red
indicator flashes, replace the battery. If the
battery is dead, the red indicator does not
light.
• Do not install the motion detector in an
area where sun shines directly on it or
where it might get wet.
• Do not install the motion detector near a
heat source such as a radiator, stove top,
or light.
• Avoid locations where extreme
temperature changes might occur.
• Avoid places with high humidity (such as a
bathroom).
To install detector(s) with the mini alarm:
1. Use needle nose pliers or a sharp
instrument to punch through the knockout hole on the bottom of the battery
compartment.
2. Use a flat-blade screwdriver to secure
the detector wires to the nodes, then
guide the wire out.
3. Place the wires so they are not stepped
on or in a place where they interfere with
normal activities.
+056#..+0)"6*'"/16+10"&'6'%614
Before you install the motion detector,
choose a location where the entry point (door
or window) is within the motion detector's
detection angle (100 degrees). The motion
detector detects motion best when the object
moves across the detection angle, rather
than directly toward or away from the motion
detector.
10"#"&'5-"14"6#$.'
1. With the flat side of the bracket pointing
toward the top of the sensor, slide the
bracket’s grooved slots onto the
mounting tabs on both sides of the
battery compartment until it snaps into
place.
2. Rotate the bracket to the desired angle,
then place the sensor on a desk or table.
© 2002 RadioShack Corporation.
All Rights Reserved.
RadioShack and RadioShack.com are trademarks
used by RadioShack Corporation.
10"#"9#..
1. Using the mounting bracket as a
template, mark the location for the two
screw holes on the wall.
2. Drill two 3/16-inch (4.7 mm) holes for the
supplied anchors and hammer them into
the wall.
3. Use the two
supplied screws
to attach the
mounting bracket
to the anchors.
4. Insert the motion
detector into the
bracket with the
sensing lens facing out.
5. Slide the motion detector's mounting
tabs into the bracket's grooved slots until
it clicks into place, then rotate the motion
detector to the desired angle.
75+0)"6*'"/16+10"&'6'%614
±"016'"±"
When you set CHIME/OFF/ALARM to ALARM,
the motion detector does not detect any motion
for about 15 seconds to allow you to leave the
area. Then, when the sensor detects movement
it sounds the siren for about 30 seconds.
1. To use the motion detector to announce
someone's presence, set CHIME/OFF/
ALARM to CHIME. When the sensor
detects movement, it sounds a pleasant
tone and the red indicator lights.
To use the motion detector to detect
movement, set CHIME/OFF/ALARM to
ALARM. When the sensor detects
movement within the detection angle,
the red indicator lights. Then, it sounds a
loud siren after about 15 seconds. The
indicator stays lit until you set CHIME/
OFF/ALARM to OFF.
2. To turn off the motion detector, set
CHIME/OFF/ALARM to OFF. The red
indicator turns off.
6417$.'5*116+0)
If you have problems with your motion detector, the following chart might help. If you still have
problems, take the motion detector to your local RadioShack store for assistance.
Limited Ninety-Day Warranty
This product is warranted by RadioShack against manufacturing
defects in material and workmanship under normal use for ninety
(90) days from the date of purchase from RadioShack companyowned stores and authorized RadioShack franchisees and dealers. EXCEPT AS PROVIDED HEREIN, RadioShack MAKES NO
EXPRESS WARRANTIES AND ANY IMPLIED WARRANTIES,
INCLUDING THOSE OF MERCHANTABILITY AND FITNESS
FOR A PARTICULAR PURPOSE, ARE LIMITED IN DURATION
TO THE DURATION OF THE WRITTEN LIMITED WARRANTIES CONTAINED HEREIN. EXCEPT AS PROVIDED HEREIN,
RadioShack SHALL HAVE NO LIABILITY OR RESPONSIBILITY TO CUSTOMER OR ANY OTHER PERSON OR ENTITY
WITH RESPECT TO ANY LIABILITY, LOSS OR DAMAGE
CAUSED DIRECTLY OR INDIRECTLY BY USE OR PERFORMANCE OF THE PRODUCT OR ARISING OUT OF ANY
BREACH OF THIS WARRANTY, INCLUDING, BUT NOT LIMITED TO, ANY DAMAGES RESULTING FROM INCONVENIENCE, LOSS OF TIME, DATA, PROPERTY, REVENUE, OR
PROFIT OR ANY INDIRECT, SPECIAL, INCIDENTAL, OR
CONSEQUENTIAL DAMAGES, EVEN IF RadioShack HAS
BEEN ADVISED OF THE POSSIBILITY OF SUCH DAMAGES.
Some states do not allow limitations on how long an implied warranty lasts or the exclusion or limitation of incidental or consequential damages, so the above limitations or exclusions may
not apply to you.
In the event of a product defect during the warranty period, take
the product and the RadioShack sales receipt as proof of purchase date to any RadioShack store. RadioShack will, at its option, unless otherwise provided by law: (a) correct the defect by
product repair without charge for parts and labor; (b) replace the
product with one of the same or similar design; or (c) refund the
purchase price. All replaced parts and products, and products on
which a refund is made, become the property of RadioShack.
New or reconditioned parts and products may be used in the
performance of warranty service. Repaired or replaced parts and
products are warranted for the remainder of the original warranty
period. You will be charged for repair or replacement of the product made after the expiration of the warranty period.
This warranty does not cover: (a) damage or failure caused by or
attributable to acts of God, abuse, accident, misuse, improper or
abnormal usage, failure to follow instructions, improper installation or maintenance, alteration, lightning or other incidence of
excess voltage or current; (b) any repairs other than those provided by a RadioShack Authorized Service Facility; (c) consumables such as fuses or batteries; (d) cosmetic damage; (e)
transportation, shipping or insurance costs; or (f) costs of product removal, installation, set-up service adjustment or reinstallation.
This warranty gives you specific legal rights, and you may also
have other rights which vary from state to state.
RadioShack Customer Relations, 200 Taylor Street, 6th Floor,
Fort Worth, TX 76102
12/99
RadioShack Corporation
Fort Worth, Texas 76102
2TQDNGO
2TQDCDNG"%CWUG
CHIME/OFF/ALARM set to OFF.
Detector does
Battery low or dead.
not sound
when an object Battery not installed.
should be
Detection angle incorrect.
detected.
Lens window blocked.
Detection
range is too
short.
4GOGF[
Set CHIME/OFF/ALARM to CHIME or ALARM.
Replace the battery.
Install a new battery.
Adjust the motion detector’s angle.
Clear the lens window of obstructions.
Lens window is dusty or dirty.
Clean the lens window.
Detection angle incorrect.
Adjust the motion detector’s angle.
Detection area too hot, moist, or windy. Change the motion detector’s location.
Alarm or chime Battery low or dead.
is weak.
Siren blocked.
Replace the battery.
Clear the siren opening of obstructions.
%#4'
5'48+%'"#0&"4'2#+4
Keep the motion detector dry; if it gets wet,
wipe it dry immediately. Use and store the
motion detector only in normal temperature
environments. Handle the motion detector
carefully. Keep the motion detector away
from dust and dirt, and wipe it with a damp
cloth occasionally to keep it looking new.
If your motion detector is not performing as it
should, take it to your local RadioShack store
for assistance. Modifying or tampering with
the motion detector’s internal components
can cause a malfunction and might invalidate
its warranty.
52'%+(+%#6+105
Detection Coverage ................................ 30 feet (at 20°C)
Detection Angle ..............................................100 degrees
Power ............................................DC 9V/500mAh battery
Standby Current .........................................180µA (typical)
Operating Current .......................................60mA (typical)
Alarm Exit Delay Time ................................ 15 sec ± 4 sec
Alarm Entry Delay Time ............................. 15 sec ± 4 sec
Alarm Auto Reset Time .............................. 30 sec ± 5 sec
Warm-up Time ......................................... 30 sec – 50 sec
Siren Sound .......................................... 90 dB/ft. (typical)
Operating Temperature ................ 32°F – +104°F (Indoor)
External Trigger Input............... Two Inputs (Normal Close)
Battery Life (standby) .......... 3.4 months at 180µA (typical)
Specifications are typical; individual units might vary.
Specifications are subject to change and improvement
without notice.
49-426
01A02
Printed in China