1
BDP-121
Should this product require service in the U.S.A. and you wish to locate the nearest Pioneer
Authorized Independent Service Company, or if you wish to purchase replacement parts,
operating instructions, service manuals, or accessories, please call the number shown
below.
1–800–421–1404
Please do not ship your product to Pioneer without first calling the Customer Support at the
above listed number for assistance.
Pioneer Electronics Service, Inc.
P.O. BOX 1760, Long Beach,
CA 90801-1760, U.S.A.
Blu-ray Disc PLAYER
REPRODUCTOR de Blu-ray Disc
BDP-121
For warranty information please see the Limited Warranty sheet included with your product.
Should this product require service in Canada, please contact a Pioneer Canadian
Authorized Dealer to locate the nearest Pioneer Authorized Service Company in Canada.
Alternatively, please contact the Customer Satisfaction Department at the following address:
Pioneer Electronics of Canada, Inc.
Customer Satisfaction Department
300 Allstate Parkway, Markham, Ontario L3R 0P2
1-877-283-5901
905-479-4411
For warranty information please see the Limited Warranty sheet included with your product.
Si ce produit doit être réparé au Canada, veuillez vous adresser à un distributeur autorisé
Pioneer du Canada pour obtenir le nom du Centre de Service Autorisé Pioneer le plus près
de chez-vous. Vous pouvez aussi contacter le Service à la clientèle de Pioneer:
Pioneer Électroniques du Canada, Inc.
Service Clientèle
300, Allstate Parkway, Markham, Ontario L3R 0P2
1-877-283-5901
905-479-4411
Pour obtenir des renseignements sur la garantie, veuillez vous reporter au feuillet sur la
garantie restreinte qui accompagne le produit.
S018_C_EF
Published by Pioneer Corporation.
Copyright © 2009 Pioneer Corporation.
All rights reserved.
PIONEER CORPORATION
Register Your Product on
http://www.pioneerelectronics.com (US)
http://www.pioneerelectronics.ca (Canada)
4-1, Meguro 1-Chome, Meguro-ku, Tokyo 153-8654, Japan
Registre su producto en
PIONEER ELECTRONICS (USA) INC.
http://www.pioneerelectronics.com (EE.UU.)
http://www.pioneerelectronics.ca (Canadá)
P.O. BOX 1540, Long Beach, California 90801-1540, U.S.A. TEL: (800) 421-1404
PIONEER ELECTRONICS OF CANADA, INC.
300 Allstate Parkway, Markham, Ontario L3R 0P2, Canada TEL: 1-877-283-5901, 905-479-4411
PIONEER EUROPE NV
Haven 1087, Keetberglaan 1, B-9120 Melsele, Belgium TEL: 03/570.05.11
PIONEER ELECTRONICS ASIACENTRE PTE. LTD.
253 Alexandra Road, #04-01, Singapore 159936 TEL: 65-6472-7555
Operating Instructions
Manual de instrucciones
PIONEER ELECTRONICS AUSTRALIA PTY. LTD.
178-184 Boundary Road, Braeside, Victoria 3195, Australia, TEL: (03) 9586-6300
PIONEER ELECTRONICS DE MEXICO S.A. DE C.V.
Blvd.Manuel Avila Camacho 138 10 piso Col.Lomas de Chapultepec, Mexico,D.F. 11000 TEL: 55-9178-4270
Printed in China Impreso en China
K002_B_En
<VRD1238-A>
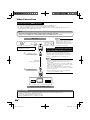
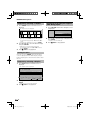
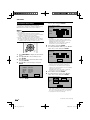
OPERATING INSTRUCTIONS
ENGLISH
ENGLISH
BDP-121
sç4HISç0LAYERçISçCLASSIFIEDçASçAç#,!33çç,!3%2çPRODUCT
sç4HEç#,!33çç,!3%2ç02/$5#4çLABELçISçLOCATEDçONç
THEçREARçCOVER
sç4HISçPRODUCTçCONTAINSçAçLOWçPOWERçLASERçDEVICEç4Oç
ENSUREçCONTINUEDçSAFETYçDOçNOTçREMOVEçANYçCOVERçORç
ATTEMPTçTOçGAINçACCESSçTOçTHEçINSIDEçOFçTHEçPRODUCTç
2EFERçALLçSERVICINGçTOçQUALIFIEDçPERSONNEL
sç4HEçFOLLOWINGçCAUTIONçLABELçAPPEARSçONçYOURçUNIT
,OCATIONçINSIDEçOFçTHEçUNIT
SA172WJ
CAUTION: CLASS 2 VISIBLE AND INVISIBLE LASER
RADIATION WHEN OPEN. DO NOT STARE INTO THE BEAM.
ACHTUNG: BEI GEÖFFNETER ABDECKUNG IST SICHTBARE UND
UNSICHTBARE LASERSTRAHLUNG DER KLASSE 2 IM
GERÄTEINNEREN VORHANDEN. NICHT IN DEN STRAHL SEHEN.
ATTENTION : RADIATIONS LASER VISIBLES ET INVISIBLES
DE CLASSE 2 OUAND OUVERT. NE PAS REGARDER
FIXEMENT LE FAISCEAU.
VARNING: KLASS 2 SYNLIG OCH OSYNLIG LASERSTRÅLNING NÄR DENNA
DEL ÄR ÖPPNAD. TITTA INTE IN I STRÅLEN.
HUOMIO: AVATTAESSA OLET ALTTIINA NÄKYVÄLLE JA NÄKYMÄTTÖMÄLLE
LUOKAN 2 LASERSÄTEILYLLE. ÄLÄ KATSO SÄTEESEEN.
ADVARSEL: KLASSE 2 SYNLIG OG USYNLIG LASERSTRÅLING HVIS DENNE
DELEN ÅPNES. STIRR IKKE INN I STRÅLEN.
ADVARSEL: KLASSE 2 SYNLIG OG USYNLIG LASERSTRÅLING VED ÅBNING.
KIG IKKE IND I STRÅLEN.
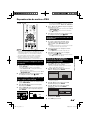
1
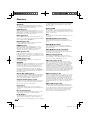
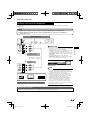
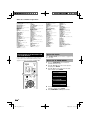
Introduction
Contents
Introduction
Contents ............................................................................. 2
What would you like to do with this Player? ................... 3
DEAR Pioneer CUSTOMER .............................................. 4
IMPORTANT SAFETY INSTRUCTIONS ........................ 4–5
About Discs .................................................................... 6–7
Blu-ray Disc .................................................................. 6
Types of Discs that Can Be Used with This Player ......... 6
Discs that Cannot Be Used with This Player .............. 6–7
About Disc Contents ......................................................... 8
BD Video ...................................................................... 8
Title, Chapter and Track ................................................ 8
Icons Used on DVD Video Disc Cases .......................... 8
The Icons Used in This Operating Instructions............... 8
Important Information ....................................................... 9
Disc Precautions ........................................................... 9
Copyright ...................................................................... 9
Getting Started ................................................................ 10
Major Components.................................................... 11–12
Main Unit (Front).......................................................... 11
Main Unit (Rear) .......................................................... 11
HDMI cable holder on the rear of the main unit............ 11
Remote Control Unit ................................................... 12
Connection
Introduction to Connections .......................................... 13
Video Connections .................................................... 14–16
Connecting to the HDMI Terminal ................................ 14
Selecting the priority video output when connecting
HDMI and Component video .................................... 14
Connecting to the Component Jacks .......................... 15
Connecting to the Video Jack ..................................... 16
Audio Connections .......................................................... 17
Connecting to the Digital Audio Terminal or Audio Jacks ... 17
Broadband Internet Connection .................................... 18
Connecting to the LAN terminal .................................. 18
Disc Playback
Before Starting Playback .......................................... 19–23
Loading the Batteries in the Remote Control ............... 19
Approximate operating range of remote control ..... 19
Connecting the Power Cord........................................ 19
Turning the Power On ................................................. 20
Turning the power on ............................................. 20
Entering standby .................................................... 20
Indicators on the Player ......................................... 20
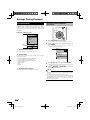
Language Setting........................................................ 21
Changing the on-screen display language.............. 21
Operating the TV with the player’s remote control ....... 21
TV Preset code list ............................................21-22
Turning Off the LCD Backlight and Indications............. 23
Quick operation ..................................................... 23
HOME MENU operation ......................................... 23
About KURO LINK function ......................................... 23
To use the KURO LINK function ............................. 23
What the KURO LINK function can do ................... 23
BD/DVD/CD Playback ............................................... 24–29
Loading a Disc ............................................................ 24
BD/DVD Video Playback ............................................. 24
Displaying the disc information ............................... 24
BD/DVD Menus .......................................................... 25
Start playback by selecting a title from the top menu ... 25
Using the disc menu .............................................. 25
Using the pop-up menu ......................................... 25
2
Enjoying BONUSVIEW or BD-LIVE .............................. 26
Use of Picture in Picture function (secondary audio/
video playback) ................................................... 26
Virtual Package ...................................................... 26
BD-LIVE................................................................. 26
DVD-R/-RW/BD-RE/-R Playback .......................... 27–28
Playback by selecting a title ................................... 27
Playback by selecting a chapter ............................. 28
Sorting the titles ..................................................... 28
Playback by selecting a Playlist .............................. 28
Playing back the title you stopped while being played... 28
Audio CD Playback ..................................................... 29
Playback from the beginning .................................. 29
Playback by selecting a track ................................. 29
Operation procedure for the “Functions” menu ...... 29
Playback Functions ................................................... 30–32
Fast Forward/Reverse (Search) ................................... 30
Skipping to the Next or the Start of the Current
Chapter (Track) ......................................................... 30
Pause/Frame Advance Playback ................................. 30
Slow Playback ............................................................ 30
Skip Search ................................................................ 30
Replay ........................................................................ 30
Repeat Playback of a Title or Chapter
(Repeat Playback) .................................................... 30
Partial Repeat Playback
(Repeat Playback of a Specified Part) ....................... 31
Displaying the Audio Information ................................. 31
Switching Subtitles...................................................... 31
Switching the Angle .................................................... 32
Displaying the Angle Mark ........................................... 32
JPEG File Playback ......................................................... 33
Playing back still images in sequence.......................... 33
Playing back still images in a selected folder ............... 33
Playing back Slide Show ............................................. 33
Setting slide show speed/repeat playback .................. 33
Settings During Playback ......................................... 34–35
Function Control ......................................................... 34
Function control operation procedure .................... 34
Functions which can be set ................................... 35
Settings
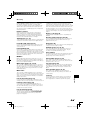
SETTINGS ................................................................... 36–45
Common operations ................................................... 36
Basic Operation for Playback Setting .......................... 36
Audio Video Settings............................................. 37–38
Quick Start.................................................................. 38
Auto Power Off ........................................................... 38
KURO LINK ................................................................ 38
Playback Setting ......................................................... 39
Front Display/LED ....................................................... 39
Version........................................................................ 39
System Reset ............................................................. 39
Communication Setup .......................................... 40–42
The operation procedure for inputting characters
manually .............................................................. 42
USB Memory Management ......................................... 43
Software Update ......................................................... 44
Appendix
Troubleshooting ......................................................... 46–48
To Reset this Player..................................................... 48
On-screen Error Messages ............................................ 49
Glossary ..................................................................... 50–51
Specifications .................................................................. 52
* The illustrations and on-screen displays in this operating
instructions are for explanation purposes and may vary
slightly from the actual operations.
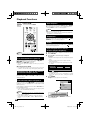
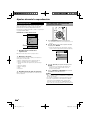
What would you like to do with this Player?
Watching high quality movies on Bluray discs
This Player offers full high-definition Blu-ray disc
playback.
BD/DVD/CD Playback (p. 24)
Enjoying different kinds of discs and
contents
What to do first:
Refer to “Getting Started” (p. 10) to prepare
for watching your discs.
Introduction (pp. 1–12)
Explains the important operation information.
Use this Player to enjoy various types of optical
discs such as DVDs and CDs that contain various
multimedia content.
About Discs (pp. 6–7)
BD/DVD/CD Playback (p. 24)
Connection (pp. 13–18)
Shows the connecting options provided by
this Player.
Simple connection and operation
through HDMI
This Player is equipped with an HDMI terminal. You
can connect it to the TV using HDMI and no other
cable will be needed to enjoy movies. If your TV is
compatible with KURO LINK, you can control both
the TV and this Player with simple operations.
Disc Playback (pp. 19–35)
Shows simple playback and useful functions.
Introduction to Connections (p. 13)
Video Connections (p. 14)
Settings (pp. 36–45)
Gives you more options to suit your
circumstances.
Enjoying BD-LIVE functions through
the internet
This Player is compatible with BD-LIVE. You can
enjoy bonus content such as movie trailers through
the internet when playing back BD-Video discs
compatible with BD-LIVE.
Enjoying BONUSVIEW or BD-LIVE
(p. 26)
Appendix (pp. 46–52)
Provides troubleshooting tips and more
information.
3
DEAR Pioneer CUSTOMER
Thank you for buying this Pioneer product.
Please read through these operating instructions so you will know how to operate your model properly.
After you have finished reading the instructions, put them away in a safe place for future reference.
IMPORTANT SAFETY INSTRUCTIONS
Electricity is used to perform many useful functions, but it can also cause personal injuries and property damage if
improperly handled. This product has been engineered and manufactured with the highest priority on safety. However,
improper use can result in electric shock and/or fire. In order to prevent potential danger, please observe the following
instructions when installing, operating and cleaning the product. To ensure your safety and prolong the service life of your
Blu-ray Disc Player, please read the following precautions carefully before using the product.
1)
2)
3)
4)
5)
6)
7)
8)
9)
10)
11)
12)
13)
14)
Read these instructions.
Keep these instructions.
Heed all warnings.
Follow all instructions.
Do not use this apparatus near water.
Clean only with dry cloth.
Do not block any ventilation openings. Install in accordance with the manufacturer’s instructions.
Do not install near any heat sources such as radiators, heat registers, stoves, or other apparatus (including amplifiers)
that produce heat.
Do not defeat the safety purpose of the polarized or grounding-type plug. A polarized plug has two blades with one
wider than the other. A grounding type plug has two blades and a third grounding prong. The wide blade or the
third prong are provided for your safety. If the provided plug does not fit into your outlet, consult an electrician for
replacement of the obsolete outlet.
Protect the power cord from being walked on or pinched particularly at plugs, convenience receptacles, and the point
where they exit from the apparatus.
Only use attachments/accessories specified by the manufacturer.
Use only with the cart, stand, tripod, bracket, or table specified by the manufacturer, or sold with the apparatus.
When a cart is used, use caution when moving the cart/apparatus combination to avoid injury from tip-over.
Unplug this apparatus during lightning storms or when unused for long periods of time.
Refer all servicing to qualified service personnel. Servicing is required when the apparatus has been
damaged in any way, such as power-supply cord or plug is damaged, liquid has been spilled or objects
have fallen into the apparatus, the apparatus has been exposed to rain or moisture, does not operate
normally, or has been dropped.
Additional Safety Information
15) Power Sources—This product should be operated only from the type of power source indicated on the marking label.
If you are not sure of the type of power supply to your home, consult your product dealer or local power company.
For products intended to operate from battery power, or other sources, refer to the operating instructions.
16) Overloading—Do not overload wall outlets, extension cords, or integral convenience receptacles as this can result in
a risk of fire or electric shock.
17) Object and Liquid Entry—Never push objects of any kind into this product through openings as they may touch
dangerous voltage points or short-out parts that could result in a fire or electric shock. Never spill liquid of any kind on
the product.
18) Damage Requiring Service—Unplug this product from the wall outlet and refer servicing to qualified service personnel
under the following conditions:
a) When the AC cord or plug is damaged,
b) If liquid has been spilled, or objects have fallen into the product,
c) If the product has been exposed to rain or water,
d) If the product does not operate normally by following the operating instructions.
Adjust only those controls that are covered by the operating instructions as an improper adjustment of other
controls may result in damage and will often require extensive work by a qualified technician to restore the
product to its normal operation,
e) If the product has been dropped or damaged in any way, and
f) When the product exhibits a distinct change in performance - this indicates a need for service.
19) Replacement Parts—When replacement parts are required, be sure the service technician has used replacement
parts specified by the manufacturer or have the same characteristics as the original part. Unauthorized substitutions
may result in fire, electric shock, or other hazards.
20) Safety Check—Upon completion of any service or repairs to this product, ask the service technician to perform safety
checks to determine that the product is in proper operating condition.
21) Wall or ceiling mounting—When mounting the product on a wall or ceiling, be sure to install the product according to
the method recommended by the manufacturer.
22) The main AC plug is used as disconnect device and shall always remain readily operable.
4
IMPORTANT SAFETY INSTRUCTIONS
CAUTION
The STANDBY/ON switch on this unit will not
completely shut off all power from the AC outlet.
Since the power cord serves as the main disconnect
device for the unit, you will need to unplug it from
the AC outlet to shut down all power. Therefore,
make sure the unit has been installed so that the
power cord can be easily unplugged from the AC
outlet in case of an accident. To avoid fire hazard,
the power cord should also be unplugged from the
AC outlet when left unused for a long period of time
(for example, when on vacation).
D3-4-2-2-2a_A_En
Introduction
• Water and Moisture — Do not use this product near water - for example, near a bath tub, wash bowl, kitchen sink, or
laundry tub; in a wet basement; or near a swimming pool; and the like.
• Stand — Do not place the product on an unstable cart, stand, tripod or table. Placing the product on an unstable base
can cause the product to fall, resulting in serious personal injuries as well as damage to the product. Use only a cart,
stand, tripod, bracket or table recommended by the manufacturer or sold with the product. When mounting the product
on a wall, be sure to follow the manufacturer's instructions. Use only the mounting hardware recommended by the
manufacturer.
• Selecting the location — Select a place with no direct sunlight and good ventilation.
• Ventilation — The vents and other openings in the cabinet are designed for ventilation. Do not cover or block these
vents and openings since insufficient ventilation can cause overheating and/or shorten the life of the product. Do not
place the product on a bed, sofa, rug or other similar surface, since they can block ventilation openings. This product is
not designed for built-in installation; do not place the product in an enclosed place such as a bookcase or rack, unless
proper ventilation is provided or the manufacturer's instructions are followed.
• Heat — The product should be situated away from heat sources such as radiators, heat registers, stoves, or other
products (including amplifiers) that produce heat.
• Lightning — For added protection for this product during a lightning storm, or when it is left unattended and unused for
long periods of time, unplug it from the wall outlet. This will prevent damage to the product due to lightning and powerline surges.
• To prevent fire, never place any type of candle or flames on the top or near the product.
• To prevent fire or shock hazard, do not expose this product to dripping or splashing.
No objects filled with liquids, such as vases, should be placed on the product.
• To prevent fire or shock hazard, do not place the AC cord under the product or other heavy items.
• Turn off the main power and unplug the AC cord from the wall outlet before handling.
• To clean the outer cabinet, periodically wipe it with a soft cloth.
• Do not use chemicals for cleaning. It may damage the cabinet finish.
When disposing of used batteries, please comply
with governmental regulations or
environmental public institution’s rules that
apply in your country/area.
D3-4-2-3-1_En
WARNING: Handling the cord on this product or
cords associated with accessories sold with the
product will expose you to chemicals listed on
proposition 65 known to the State of California and
other governmental entities to cause cancer and
birth defect or other reproductive harm.
Wash hands after handling
D36-P4_A_En
5
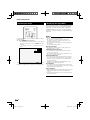
About Discs
Blu-ray Disc
Blu-ray Disc is the ultimate next generation optical
media format, offering the following key features:
• Largest capacity (25 GB single layer – 50 GB dual layer)
– with over 5 times the amount of content possible with
current DVDs, particularly well suited for high definition
feature films with extended levels of interactive features
• Pristine picture quality with the capability for full high
definition 1920 x 1080p resolution
• Best audio possible with uncompressed surround sound
(higher quality than even theatre audio)
• Broadest industry support – ensuring more choice for
consumers in the marketplace
• Hardware products will be backward compatible with
DVDs, allowing continued enjoyment of existing DVD
libraries.
• Disc Durability – new breakthroughs in hard coating
technologies gives Blu-ray Discs the strongest resistance
to scratches and finger prints.
Types of Discs that Can Be Used
with This Player
• The following discs can be played back in this Player. Do
not use an 8 cm (3”) to 12 cm (5”) adapter.
• Use discs that conform to compatible standards as
indicated by the presence of official logos on the disc label.
Playback of discs not complying with these standards is
not guaranteed. In addition, the image quality or sound
quality is not guaranteed even if the discs can be played
back.
Recording
Format
Disc Type
BD
video
Region
code
A/ALL
—
Contents
Audio
+ Video
(Movie)
Disc Size
• BD/DVD video players and discs have region codes, which
dictate the regions in which a disc can be played. This
Player's region code is A for BD and 1 for DVD. (Discs
marked ALL will play in any player.)
• BD/DVD Video operations and functions may be different
from the explanations in this manual and some operations
may be prohibited due to disc manufacturer's settings.
• If a menu screen or operating instructions are displayed
during playback of a disc, follow the operating procedure
displayed.
• The audio component of a DVD video recorded at 96
kHz (Linear PCM) will be output as 48 kHz audio during
playback.
NOTE
• Playback for some of the discs in the left side column
tables may not be possible depending on the disc.
• “Finalize” refers to a recorder processing a recorded disc
so that it will play in other DVD players/recorders as well
as this player. Only finalized DVD discs will play back in
this player. (This player does not have a function to finalize
discs.)
Discs that Cannot Be Used with
This Player
The following discs cannot be played back or will
not play back properly on this Player. If such a
disc is mistakenly played back, speaker damage
may occur. Never attempt to play back these
discs.
CDG, Video CD, Photo CD, CD-ROM, CD-TEXT, SVCD,
SACD, PD, CDV, CVD, DVD-RAM, DVD-Audio, BD-RE
with the cartridge, CD-MP3, CD-WMA
12 cm (5”)
Discs with unusual shapes cannot be played.
• Discs with unusual shapes (heart-shaped or hexagonal
discs, etc.) cannot be used. The use of such discs will
cause malfunction.
The following BD video discs cannot be played.
BD-RE DL
BD-R DL
DVD
Video
BDMV/BDAV
format
Region
code
1/ALL
1
Video format
Audio
+ Video
(Movie)
12 cm (5”)
8 cm (3”)
The following DVD video discs cannot be played.
ALL
DVD+RW/DVD+R
DVD-R DL
DVD-RW/DVD-R
Video/VR/
AVCHD
format
(finalized disc
only)
Audio
+ Video
(Movie)
Audio CD*1
Audio CD
(CD-DA)
Audio
CD-RW/CD-R
Audio CD
(CD-DA)
Audio
JPEG*2
Still image
(JPEG file)
12 cm (5”)
8 cm (3”)
• Discs not displaying “1” or “ALL” for the region code (discs
sold outside the authorized marketing area).*
• Discs produced illegally.
• Discs recorded for commercial use.
* The region code for this product is 1.
The following BD-RE/R, DVD-RW/R and
DVD+RW/R discs cannot be played.
12 cm (5”)
8 cm (3”)
This Player has been designed on the premise of playing
*1 back Audio CDs that comply with CD (Compact Disc)
standards. CDs containing a signal for the purpose of
protecting copyrights (copy control signal) may not be able
to be played back with this Player.
6
• Discs not displaying “A” or “ALL” for the region code (discs
sold outside the authorized marketing area).*
• Discs produced illegally.
• Discs recorded for commercial use.
* The region code for this product is A.
• Discs on which data has not been recorded cannot be
played back.
The following Audio CD discs cannot be played.
• Discs containing a signal for the purpose of protecting
copyrights (copy control signal) may not be played back
with this Player.
• This Player has been designed on the premise of playing
back Audio CDs that comply with CD (Compact Disc)
standards.
About Discs
The following CD-RW/R discs cannot be played.
• Discs on which data has not been recorded cannot be
played back.
• Discs recorded in a format other than an Audio CD and
JPEG file format*2 cannot be played back.
• Discs may not be played back depending on their
recording status or the status of the disc itself.
• Discs may not be played back depending on their
compatibility with this Player.
Structure of still images (JPEG) folders
You can play still images (JPEG) with this unit by making
folder on disc as shown below.
Root
01 Folder
001.jpg
*2
About the JPEG file format
JPEG is a type of file format for storing still-image files
(photos, illustrations, etc.). The Player lets you play JPEG
format still-image files.
001.jpg
256.jpg
Introduction
File formats that are not compatible.
• Still images in formats other than JPEG (such as TIFF)
cannot be played.
• There may be some files that cannot be played even if they
are in JPEG format.
• Progressive JPEG files cannot be played.
• Moving image files and audio files as well as Motion JPEG
format files cannot be played, even though they are JPEG
files.
256.jpg
02 Folder
256 Folder
Other files that cannot be played back.
• You may not be able to play some still images which you
have created, touched up, copied or otherwise edited on
your computer.
You may experience one or more of the following
symptoms when playing files.
001.jpg
256.jpg
• It may take some time to play files depending on the
number of folders, number of files and volume of data
involved.
• EXIF information will not be displayed. EXIF stands for
Exchangeable Image File Format, and is a standard for
storing interchange information in image files, especially
those using JPEG compression. (Refer to http://exif.org for
more information.)
When using the unit to play a CD-RW/R disc with
still images stored (recorded).
• With CD-RW/R discs on which still images are mixed in
with music or movies, you will be able to play only the still
images. You may not be able to play some of these discs
at all.
• Multi-session discs cannot be played.
• You may not be able to play some still images you have
processed (rotated or saved by overwriting other images)
using image processing software or some still images you
have imported from the Internet or e-mail.
• The discs which this Player can play back (recognize) are
limited to the following properties:
Contains EXIF format files
Picture resolution: Between 3232 and 76804320
pixels
Maximum number of folders: 256
Maximum number of files: 256
File size: 20 MB or less
7
About Disc Contents
DTS
BD Video
DTS is a digital sound system developed by DTS, Inc. for
use in cinemas.
Enjoy BD-specific functions including BONUSVIEW (BD-ROM
Profile 1 Version 1.1), such as picture-in-picture, and BD-LIVE
(page 26).
For the BD video discs compatible with BONUSVIEW/BDLIVE, you can enjoy additional contents by copying the data
from the discs or downloading it via the internet. For instance,
this function is capable of playing the original movie as the
primary video while playing video commentary from the film
director on a small screen as a secondary video.
NOTE
Linear PCM
Linear PCM is a signal recording format used for Audio
CDs and on some DVD and Blu-ray discs. The sound
on Audio CDs is recorded at 44.1 kHz with 16 bits.
(Sound is recorded between 48 kHz with 16 bits and 96
kHz with 24 bits on DVD video discs and between 48
kHz with 16 bits and 192 kHz with 24 bits on BD video
discs.)
2
Subtitle languages
3
Screen aspect ratio
4
Camera angle
This indicates the kind of subtitles.
• The available functions differ depending on the disc.
Movies are shot in a variety of screen modes.
Title, Chapter and Track
• Blu-ray discs and DVDs are divided into “Titles” and
“Chapters”. If the disc has more than one movie on it, each
movie would be a separate “Title”. “Chapters”, on the other
hand, are subdivisions of titles. (See Example 1.)
• Audio CDs are divided into “Tracks”. You can think of a
“Track” as one tune on an Audio CD. (See Example 2.)
Example 1: Blu-ray disc or DVD
Recorded onto some BD/DVD discs are scenes which
have been simultaneously shot from a number of
different angles (the same scene is shot from the front,
from the left side, from the right side, etc.).
5
Region code
This indicates the region code (playable region code).
The Icons Used in This Operating
Instructions
Title 1
Title 2
BD VIDEO ........... Indicates the functions that can be
performed for BD Video discs.
........... Indicates the functions that can be
performed for BD-RE discs.
BD-R ........... Indicates the functions that can be
performed for BD-R discs.
DVD VIDEO ....... Indicates the functions that can be
performed for DVD Video discs.
DVD-RW ......... Indicates the functions that can be
performed for DVD-RW discs.
DVD-R
.......... Indicates the functions that can be
performed for DVD-R discs.
AUDIO CD ........... Indicates the functions that can be
performed for Audio CDs.
CD-R
........ Indicates the functions that can be
JPEG
performed for CD-R discs in JPEG format.
CD-RW
......... Indicates the functions that can be
JPEG
performed for CD-RW discs in JPEG format.
AVCHD
......... Indicates the functions that can be
performed for DVD discs in AVCHD format.
BD-RE
Chapter 1 Chapter 2
Chapter 3
Chapter 1
Example 2: Audio CD
Track 1
Track 2
Track 3
Track 4
Icons Used on DVD Video Disc Cases
The back of the case of a DVD that is commercially
available usually contains various information about the
contents of the disc.
1
2
2
1. English
2. Chinese
3
4
16:9 LB
1
2
1. English
2. Chinese
5
2
123
456
Audio tracks and audio formats
DVD discs can contain up to 8 separate tracks with
a different language on each. The first in the list is the
original track.
This section also details the audio format of each
soundtrack — Dolby Digital, DTS, MPEG etc.
Dolby Digital
A sound system developed by Dolby Laboratories Inc.
that gives movie theater ambience to audio output when
the Player is connected to a Dolby Digital processor or
amplifier.
8
Important Information
Disc Precautions
Be Careful of Scratches and Dust
• BD, DVD and CD discs are sensitive to dust, fingerprints
and especially scratches. A scratched disc may not be able
to be played back. Handle discs with care and store them
in a safe place.
Proper Disc Storage
Place the disc in the center of the
disc case and store the case and
disc upright.
Avoid storing discs in locations
where there are large amounts of
dust or moisture.
Handling Precautions
• If the surface is soiled, wipe gently with a soft, damp (water
only) cloth. When wiping discs, always move the cloth from
the center hole toward the outer edge.
• Do not use record cleaning sprays, benzene, thinner, static
electricity prevention liquids or any other solvent.
• Do not touch the surface.
• Do not stick paper or adhesive labels to the disc.
• If the playing surface of a disc is soiled or scratched, the
Player may decide that the disc is incompatible and eject
the disc tray, or it may fail to play the disc correctly. Wipe
any dirt off the playing surface with a soft cloth.
U.S. Patent Nos. 6,836,549; 6,381,747; 7,050,698;
6,516,132; and 5,583,936
• Manufactured under license from Dolby Laboratories.
Dolby and the double-D symbol are trademarks of Dolby
Laboratories.
• Manufactured under license under U.S. Patent #’s:
5,451,942; 5,956,674; 5,974,380; 5,978,762; 6,226,616;
6,487,535; 7,392,195; 7,272,567; 7,333,929; 7,212,872 &
other U.S. and worldwide patents issued & pending. DTS is
a registered trademark and the DTS logos, Symbol, DTSHD and DTS-HD Master Audio | Essential are trademarks
of DTS, Inc. © 1996-2008 DTS, Inc. All Rights Reserved.
are trademarks.
• “Blu-ray Disc” and
• “BD-LIVE” logo is trademark of Blu-ray Disc Association.
•
Introduction
Avoid storing discs in locations
subject to direct sunlight, close to
heating appliances or in locations of
high humidity.
Do not drop discs or subject them to
strong vibrations or impacts.
• This product incorporates copyright protection technology
that is protected by method claims of certain U.S.
patents and other intellectual property rights owned by
Macrovision Corporation and other rights owners. Use of
this copyright protection technology must be authorized
by Macrovision Corporation, and is intended for home and
other limited viewing uses only unless otherwise authorized
by Macrovision Corporation. Reverse engineering or
disassembly is prohibited.
is a trademark of DVD Format/Logo Licensing
Corporation.
• HDMI, the HDMI Logo and High-Definition Multimedia
Interface are trademarks or registered trademarks of HDMI
Licensing, LLC.
• “x.v.Color” and
are trademarks of Sony
Corporation.
Cleaning the Pick Up Lens
• Never use commercially available cleaning discs. The use
of these discs can damage the lens.
• Request the nearest service center approved by Pioneer to
clean the lens.
Warnings about dew formation
• Condensation may form on pick up lens or disc in the
following conditions:
− Immediately after a heater has been turned on.
− In a steamy or very humid room.
− When the Player is suddenly moved from a cold
environment to a warm one.
• Java and all Java-based trademarks and logos are
trademarks or registered trademarks of Sun Microsystems,
Inc. in the U.S. and other countries.
When condensation forms:
• It becomes difficult for the Player to read the signals
on the disc and prevents the Player from operating
properly.
• “BONUSVIEW” is trademark of Blu-ray Disc Association.
To remove condensation:
• Take out the disc and leave the Player with the power
off until the condensation disappears. Using the Player
when there is condensation may cause malfunction.
• This label indicates playback compatibility with DVD-RW
discs recorded in VR format (Video Recording format).
However, for discs recorded with a record-only-once
encrypted program, playback can only be achieved using a
CPRM compatible device.
Copyright
• Audio-visual material may consist of copyrighted works
which must not be recorded without the authority of the
owner of the copyright. Refer to relevant laws in your
country.
• “AVCHD” and the “AVCHD” logo are trademarks of
Panasonic Corporation and Sony Corporation.
9
Getting Started
Step 1: Unpacking
Make sure the following accessories are provided with the product.
Remote control unit
“AA/R6” size battery (2)
AV cable
Step 2: Selecting equipment to connect
Connection varies with the equipment used. Refer to Connection. (Pages 13–18)
Turn off the devices before connecting.
Step 3: Playing back discs
Play back a Blu-ray disc after connecting the Player to your favorite equipment.
Refer to Disc Playback. (Pages 19–35)
Step 4: Adjust settings
Adjust settings to enjoy various features and other functions for playing discs.
Refer to Settings. (Pages 36–45)
10
AC cord
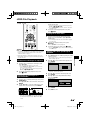
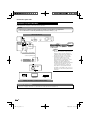
Major Components
Main Unit (Front)
1
3
4
5
6
7
8
9
10
STANDBY/ON (p. 20)
STANDBY/ON indicator (p. 20)
PLAY (p. 24)
STOP (p. 24)
PAUSE (p. 30)
KURO LINK indicator (pp. 20, 23)
7
8
9
10
11
12
11
12
Remote control sensor (p. 19)
BD/DVD/CD disc indicator (p. 20)
Playback indicator (p. 20)
Front panel display (p. 20)
Disc tray (p. 24)
OPEN/CLOSE (p. 24)
Introduction
1
2
3
4
5
6
2
Main Unit (Rear)
1
1
2
3
4
5
6
2
3
4
COMPONENT VIDEO output jacks
(p. 15)
VIDEO output jack (p. 16)
AUDIO OUT jacks (p. 17)
DIGITAL OUT OPTICAL terminal (p. 17)
LAN terminal (p. 18)
HDMI cable holder (See below.)
5
6
7
8
9
10
7
BD STORAGE/SERVICE terminal
BD STORAGE (pp. 26, 43)
SERVICE for software (p. 44)
8 HDMI OUT terminal (p. 14)
9 Cooling fan
The cooling fan operates while the power
to the Player is on.
10 AC IN terminal (p. 19)
HDMI cable holder on the rear of the main unit
This Player comes with a dedicated cable holder so that the
HDMI cable does not place direct weight and stress on the
terminal. When connecting the HDMI cable, be sure to pass the
cable through the cable holder and secure it.
Connect the HDMI cable to
the rear of the main unit while
providing some slack.
CAUTION
• Do not pull on the HDMI cable when it is connected to the terminal, as
this can damage the terminal or cause a poor connection.
Press down on the tab and pull it towards you.
Pass the HDMI cable (commercially available) through the
cable holder.
Press in on the tab until it clicks into position.
HDMI cable
11
Major Components
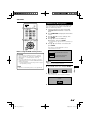
Remote Control Unit
1
17
2
18
3
19
4
5
6
20
21
7
22
8
9
10
23
24
11
12
25
13
14
15
16
26
27
28
29
30
31
1
2
3
4
5
6
7
8
9
10
11
12
13
14
15
16
17
18
19
20
21
22
23
24
25
26
27
28
29
30
31
STANDBY/ON (p. 20)
TV CONTROL buttons (p. 21)
AUDIO (p. 31), SUBTITLE (p. 31), ANGLE (p. 32)
Number buttons (p. 35)
CLEAR (p. 35)
SECONDARY VIDEO (p. 26)
REPEAT (pp. 30, 31), REPEAT OFF (pp. 30, 31)
EXIT (pp. 20, 36)
DISPLAY (pp. 24, 31)
TOP MENU/DISC NAVIGATOR (pp. 25, 27)
Cursor buttons (), ENTER (pp. 21, 36)
HOME MENU (pp. 21, 36)
REV (p. 30)
PLAY (p. 24)
//k (pp. 27, 30)
PAUSE (p. 30)
OPEN/CLOSE (p. 24)
VIDEO OUTPUT RESET (p. 37)
FRONT LIGHT (p. 23)
ENTER (pp. 21, 36)
KEY LOCK (See below.)
PAGE +/- (p. 27)
FUNCTION (p. 34)
POPUP MENU/MENU (p. 25)
RETURN (p. 30)
FWD (p. 30)
//l (pp. 27, 30)
STOP (p. 24)
RED, GREEN, BLUE, YELLOW (pp. 27, 33)
SKIP SEARCH (p. 30)
REPLAY (p. 30)
Keylock function
You can set the keylock to prevent accidental operations.
This function allows TVs compatible with KURO LINK to
also perform a Key Lock on the player.
Press and hold KEY LOCK for more than 5 seconds.
• Each time you perform this operation, the function is
activated or deactivated.
• If you try to operate the Player while the keylock function
is set, “Hold” blinks on the front display panel to indicate
that the keylock function is set.
NOTE
• This remote control unit is equipped with two ENTER
buttons (11 and 20 listed above). The ENTER button is
useful when using with the number buttons.
12
Connection
Introduction to Connections
Before making or changing the connections, switch off the power and disconnect the power cord from the AC outlet.
This Player is equipped with the terminals/jacks listed below. Find the corresponding terminal/jack on your video
equipment. Using the supplied cable or commercially available cables, connect the video first. Then connect the
audio.
Video terminals/jacks on this Player
Higher Quality
HDMI OUT terminal
Page 14
COMPONENT VIDEO
output jacks
Page 15
VIDEO output jack
Page 16
Connection
Standard Quality
Audio terminals/jacks on this Player
Digital audio connection
Higher Quality
HDMI OUT terminal
Page 14
DIGITAL OUT OPTICAL
terminal
Page 17
Standard Quality
Analog audio connection
Standard Quality
AUDIO OUT jacks
Page 17
Broadband Internet connection
LAN terminal
Page 18
13
Video Connections
Connecting to the HDMI Terminal
• You can enjoy high quality digital picture and sound through the HDMI terminal.
• See page 45 for information on the output of next generation audio formats.
• Use High Speed HDMI™ cables when using the KURO LINK function. The KURO LINK function may not
operate properly if other HDMI cables are used.
STEPS
1 Be sure to turn off this Player and the equipment before making any connections.
2 Firmly connect an HDMI cable (commercially available) to the HDMI terminals ( and ).
NOTE
This Player
• Audio transmitted in DTS-HD High
Resolution Audio and DTS-HD Master
Audio formats is output from the
HDMI terminal as Bitstream. Connect
an amplifier with a built-in decoder to
enjoy the fine sound quality.
• When using an HDMI output, 7.1 ch
Digital Output is available.
Selecting the priority video output when
connecting HDMI and Component video
When you connect both an HDMI cable and a
component cable to this player, you need to select
the priority video output in “Settings” – “Audio Video
Settings” – “Video Out Select”. (See page 37.)
To HDMI OUT terminal
NOTE
HDMI cable
(commercially available)
To HDMI IN terminal
Projector
TV
• When you connect the player to a Pioneer TV with an
HDMI cable only and the TV is turned on, the video output
switches to HDMI automatically. (The above setting is
unnecessary.)
• When you connect the player to a TV with an HDMI cable,
“HDMI Video Out” is set to “Auto”. If you don’t get a stable
image, select the desired resolution*.
When you set “HDMI Video Out” to a setting other than
“Auto”, you can only select resolutions* that are compatible
with the connected TV.
* Refer to “HDMI Video Out” on page 37 regarding the
resolutions of the HDMI video output.
AV receiver
Equipment with an HDMI terminal
After connecting
•
•
•
•
Secure the HDMI cable to the HDMI cable holder, passing it through the holder. (Page 11)
If desired, connect audio equipment. (Page 17)
Load a disc and start playback. (Pages 24–29)
Refer to KURO LINK function. (Pages 23 and 38)
14
Video Connections
Connecting to the Component Jacks
You can enjoy accurate color reproduction and high quality images through the component jacks.
STEPS
1 Be sure to turn off this Player and the equipment before making any connections.
2 Firmly connect a component video cable (commercially available) to the component jacks ( and ).
This Player
(Red)
CAUTION
Red
Blue
(Green)
Green
To COMPONENT
VIDEO output jacks
Component video cable
(commercially available)
To COMPONENT
IN jacks
(Red)
Red
(CR)
Blue
(CB)
Connection
• You need to select the priority video output in
“Settings” – “Audio Video Settings” – “Video Out
Select”. (See page 37.)
• When the priority video output is set to “HDMI” in
“Video Out Select”, the video resolution which is output
from the COMPONENT VIDEO output jacks is the one
set in “HDMI Video Out”.
• When the output from the COMPONENT VIDEO output
jacks is prioritized, set the priority video output to
“Component”.
(Blue)
Blu-ray Disc
Player
VCR
TV
(Blue)
NOTE
(Green)
Green
COMPONENT
IN
Projector
TV
AV receiver
• Connect the Blu-ray disc player to TV directly. If
you playback the image via VCR, the image may
deteriorate due to the copy guard function.
• When you record the program where copyright
is protected, the copy guard function is activated
automatically; the program can not be recorded
correctly. Also, the playback image via VCR may
deteriorate due to this function. However, this is not
a malfunction. When you watch the program where
copyright is protected, we recommend that the Blu-ray
disc player be connected to TV directly.
Video equipment with component jacks
After connecting
• Connect audio equipment or the audio terminals of the TV. (Page 17)
15
Video Connections
Connecting to the Video Jack
You can enjoy the images through the video jack.
STEPS
1 Be sure to turn off this Player and the equipment before making any connections.
2 Firmly connect an AV cable (supplied) to the video jacks ( and ).
This Player
(Yellow)
Yellow
Blu-ray Disc
Player
VCR
TV
NOTE
• Connect the Blu-ray disc player to TV
directly. If you playback the image via VCR,
the image may deteriorate due to the copy
guard function.
• When you record the program where
copyright is protected, the copy guard
function is activated automatically; the
program can not be recorded correctly.
Also, the playback image via VCR may
deteriorate due to this function. However,
this is not a malfunction. When you watch
the program where copyright is protected,
we recommend that the Blu-ray disc player
be connected to TV directly.
To VIDEO output jack
AV cable (supplied)
VIDEO
To
input jack
(Yellow)
VIDEO
L - AUDIO -R
Yellow
AV INPUT
Projector
TV
AV receiver
Video equipment with a video jack
After connecting
• Connect audio equipment or the audio terminals of the TV. (Page 17)
16
Audio Connections
Connecting to the Digital Audio Terminal or Audio Jacks
• You can connect audio equipment or the TV to the DIGITAL OUT OPTICAL terminal or AUDIO OUT jacks.
• See page 45 for information on the output of next generation audio formats.
STEPS
1 Be sure to turn off this Player and the equipment before making any connections.
2 Firmly connect an optical digital cable (commercially available) or AV cable (supplied) to the optical digital audio
terminals or audio jacks ( and , or and ).
This Player
• When using OPTICAL output,
5.1 ch Digital Output is available.
7.1 ch Digital Output is not available.
(Red)
NOTE:
7.1 ch Audio is available via the HDMI terminal.
White
To OPTICAL
output terminal
To AUDIO OUT
jacks
AV cable (supplied)
Connection
Red
(White)
Optical digital cable
(commercially available)
To AUDIO input
jacks
(White) (Red)
To OPTICAL
input terminal
VIDEO
L - AUDIO -R
White
Red
AV INPUT
TV
OPTICAL
DIGITAL AUDIO IN
Amplifier
Audio equipment with a digital audio input terminal
After connecting
• Load a disc and start playback. (Pages 24–29)
17
Broadband Internet Connection
Connecting to the LAN terminal
• You can enjoy a variety of contents with interactive functions by connecting to the internet when playing BDLIVE compatible discs. Refer to pages 26 and 39 regarding further information on BD-LIVE functions.
• When using the internet, a broadband internet connection as shown below is required.
STEPS
1 Be sure to turn off this Player and the equipment before making any connections.
2 Firmly connect a LAN cable (commercially available) to the LAN terminal ( and ).
This Player
To LAN terminal
CAUTION
• When using a broadband internet connection, a contract
with an internet service provider is required. For more
details, contact your nearest internet service provider.
• Refer to the operation manual of the equipment you have
as the connected equipment and connection method may
differ depending on your internet environment.
LAN cable
(commercially available)
NOTE
• Use a LAN cable/router supporting 10BASE-T/100BASETX.
To LAN terminal
LAN
Internet
Modem
Hub or broadband router
Example of a Broadband Internet Connection
After connecting
• Perform the communication setting. (Pages 40–42)
• Load a BD-LIVE compatible disc and play back the contents. (Pages 24 and 26)
18
PC
Disc Playback
Before Starting Playback
Loading the Batteries in the
Remonte Contorol
1
Approximate operating range of
remote control
Open the rear cover.
Remote control sensor
Press lightly on this
part and slide into the
direction of the arrow.
2
30º
30º
7m
Insert the batteries (AA/R6 x 2).
Insert as indicated by the / marks into the
battery compartment.
Remote control unit
Insert the negative ()
side first.
3
Close the rear cover.
Close securely (a click should be heard).
Plug the supplied AC cord into the AC IN terminal on
the rear of the Player. Then plug into AC outlet.
Disc Playback
Connecting the Power Cord
CAUTION
• Do not use any batteries other than the ones specified.
Also, do not use a new battery together with an old one.
• When loading the batteries into the remote control, set
them in the proper direction, as indicated by the polarity
marks ( and ).
• Do not heat batteries, disassemble them, or throw them
into flames or water.
• Batteries may have different voltages, even if they look
similar. Do not use different kinds of batteries together.
• To prevent leakage of battery fluid, remove the batteries
if you do not plan to use the remote control for a long
period of time (1 month or more). If the fluid should leak,
wipe it carefully off the inside of the case, then insert new
batteries. If a battery should leak and the fluid should get
on your skin, flush it off with large quantities of water.
• When disposing of used batteries, please comply
with governmental regulations or environmental public
institution’s rules that apply in your country/area.
• WARNING
Do not use or store batteries in direct sunlight or other
excessively hot place, such as inside a car or near a heater.
This can cause batteries to leak, overheat, explode or
catch fire. It can also reduce the life or performance of
batteries.
To AC IN terminal
To AC outlet
NOTE
• Place the Player close to the AC outlet, and keep the
power plug within reach.
• TO PREVENT RISK OF ELECTRIC SHOCK, DO NOT
TOUCH THE UN-INSULATED PARTS OF ANY CABLES
WHILE THE AC CORD IS CONNECTED.
• The STANDBY/ON indicator blinks while the Player is
preparing for starting up. You cannot turn the Player on
until the STANDBY/ON indicator stops blinking.
• If you are not going to use this Player for a long period of
time, be sure to remove the AC cord from the AC outlet.
19
Before Starting Playback
Turning the Power On
Indicators on the Player
STANDBY/ON indicator
Blue on
Power on
Red blinks
Preparing for standby
Red on
Standby
KURO LINK indicator
Red on
Output the optimum picture
quality for “KURO”
(See page 23.)
BD/DVD/CD disc indicator
STANDBY/ON
Off
No disc
White on
Disc stopped
White blinks
Loading a disc
Playback indicator
Blue on
BD/DVD/CD disc indicator
KURO LINK indicator
STANDBY/ON indicator
Playback indicator
Turning the power on
Press STANDBY/ON on the remote control or on
the Player to turn on the power of the Player.
Entering standby
Press STANDBY/ON on the remote control or on
the Player to enter standby.
• If you press STANDBY/ON again immediately after
entering standby, the Player may not turn on. If this
happens, wait for 10 seconds or more and then turn on the
power again.
NOTE
• When the STANDBY/ON indicator is blinking (may take
some time), the Player cannot be turned on.
20
Playing back
• When you turn on the power, the Menu screen
automatically displays for a while.
Press EXIT to erase the display.
Before Starting Playback
Operating the TV with the player’s
remote control
Language Setting
When the manufacturer code for your brand of TV
is set on the player’s remote control, the TV can be
operated using the player’s remote control.
CAUTION
• For some models it may not be possible to operate the TV
with the player’s remote control, even for TVs of brands
listed on the manufacturer code list.
• The setting may be restored to the default after the
batteries are replaced. If this happens, reset it.
Changing the on-screen display
language
1 Press HOME MENU to display the Home Menu
screen.
2
Press to select “On Screen
Language”, then press ENTER.
1
Input the 2-digit manufacturer code.
3
Disc Navigator
Settings
On Screen Language
Picture
Press to select the language you want to
display on the screen, then press ENTER.
English
Español
Français
NOTE
• To select the DVD disc language, such as subtitle
language, etc., see page 25.
NOTE
• The factory setting is 00 (PIONEER).
• If you make a mistake when inputting the code, release TV
CONTROL then start over from the beginning.
• When there are multiple codes for a manufacturer, try
inputting them in the indicated order until the TV can be
operated.
2
Disc Playback
• Press the number buttons (0 to 9) to input the code
while pressing TV CONTROL .
Check that the TV can be operated.
• Operate the TV using TV CONTROL.
– Press to turn the TV’s power on and off.
INPUT SELECT – Press to switch the TV’s input.
CH +/– – Press to select the TV channel.
VOL +/– – Press to adjust the volume.
TV Preset code list
Manufacturer Code(s)
PIONEER 00, 31, 32, 07, 36, 42,
51, 22
ACURA 44
ADMIRAL 31
AIWA 60
AKAI 32, 35, 42
AKURA 41
ALBA 07, 39, 41, 44
AMSTRAD 42, 44, 47
ANITECH 44
ASA 45
ASUKA 41
AUDIOGONIC 07, 36
BASIC LINE 41, 44
BAUR 31, 07, 42
BEKO 38
BEON 07
BLAUPUNKT 31
BLUE SKY 41
BLUE STAR 18
BPL 18
BRANDT 36
BTC 41
BUSH 07, 41, 42, 44, 47, 56
CASCADE 44
CATHAY 07
CENTURION 07
CGB 42
CIMLINE 44
CLARIVOX 07
CLATRONIC 38
CONDOR 38
(Continued on the next page)
21
Before Starting Playback
CONTEC 44
CROSLEY 32
CROWN 38, 44
CRYSTAL 42
CYBERTRON 41
DAEWOO 07, 44, 56
DAINICHI 41
DANSAI 07
DAYTON 44
DECCA 07, 48
DIXI 07, 44
DUMONT 53
ELIN 07
ELITE 41
ELTA 44
EMERSON 42
ERRES 07
FERGUSON 07, 36, 51
FINLANDIA 35, 43, 54
FINLUX 32, 07, 45, 48, 53, 54
FIRSTLINE 40, 44
FISHER 32, 35, 38, 45
FORMENTI 32, 07, 42
FRONTECH 31, 42, 46
FRONTECH/PROTECH 32
FUJITSU 48
FUNAI 40, 46, 58
GBC 32, 42
GE 00, 01, 08, 07, 10, 11, 17,
02, 28, 18
GEC 07, 34, 48
GELOSO 32, 44
GENERAL 29
GENEXXA 31, 41
GOLDSTAR 10, 23, 21, 02, 07, 50
GOODMANS 07, 39, 47, 48, 56
GORENJE 38
GPM 41
GRAETZ 31, 42
GRANADA 07, 35, 42, 43, 48
GRADIENTE 30, 57
GRANDIN 18
GRUNDIG 31, 53
HANSEATIC 07, 42
HCM 18, 44
HINARI 07, 41, 44
HISAWA 18
HITACHI 31, 33, 34, 36, 42, 43,
54, 06, 10, 24, 25, 18
HUANYU 56
HYPSON 07, 18, 46
ICE 46, 47
IMPERIAL 38, 42
INDIANA 07
INGELEN 31
INTERFUNK 31, 32, 07, 42
INTERVISION 46, 49
ISUKAI 41
ITC 42
ITT 31, 32, 42
JEC 05
JVC 13, 23
KAISUI 18, 41, 44
KAPSCH 31
KENDO 42
KENNEDY 32, 42
KORPEL 07
KOYODA 44
LEYCO 07, 40, 46, 48
LIESENK&TTER 07
LOEWE 07
LUXOR 32, 42, 43
M-ELECTRONIC 31, 44, 45, 54,
56, 07, 36, 51
MAGNADYNE 32, 49
MAGNAFON 49
MAGNAVOX 07, 10, 03, 12, 29
MANESTH 39, 46
MARANTZ 07
22
MARK 07
MATSUI 07, 39, 40, 42, 44, 47, 48
MCMICHAEL 34
MEDIATOR 07
MEMOREX 44
METZ 31
MINERVA 31, 53
MITSUBISHI 09, 10, 02, 21, 31
MULTITECH 44, 49
NEC 59
NECKERMANN 31, 07
NEI 07, 42
NIKKAI 05, 07, 41, 46, 48
NOBLIKO 49
NOKIA 32, 42, 52
NORDMENDE 32, 36, 51, 52
OCEANIC 31, 32, 42
ORION 32, 07, 39, 40
OSAKI 41, 46, 48
OSO 41
OSUME 48
OTTO VERSAND 31, 32, 07, 42
PALLADIUM 38
PANAMA 46
PANASONIC 31, 07, 08, 42, 22
PATHO CINEMA 42
PAUSA 44
PHILCO 32, 42
PHILIPS 31, 07, 34, 56, 68
PHOENIX 32
PHONOLA 07
PROFEX 42, 44
PROTECH 07, 42, 44, 46, 49
QUELLE 31, 32, 07, 42, 45, 53
R-LINE 07
RADIOLA 07
RADIOSHACK 10, 23, 21, 02
RBM 53
RCA 01, 10, 15, 16, 17, 18, 61,
62, 09
REDIFFUSION 32, 42
REX 31, 46
ROADSTAR 41, 44, 46
SABA 31, 36, 42, 51
SAISHO 39, 44, 46
SALORA 31, 32, 42, 43
SAMBERS 49
SAMSUNG 07, 38, 44, 46, 69, 70
SANYO 35, 45, 48, 21, 14, 91
SBR 07, 34
SCHAUB LORENZ 42
SCHNEIDER 07, 41, 47
SEG 42, 46
SEI 32, 40, 49
SELECO 31, 42
SHARP 02, 19, 27, 67, 90
SIAREM 32, 49
SIEMENS 31
SINUDYNE 32, 39, 40, 49
SKANTIC 43
SOLAVOX 31
SONOKO 07, 44
SONOLOR 31, 35
SONTEC 07
SONY 04
SOUNDWAVE 07
STANDARD 41, 44
STERN 31
SUSUMU 41
SYSLINE 07
TANDY 31, 41, 48
TASHIKO 34
TATUNG 07, 48
TEC 42
TELEAVIA 36
TELEFUNKEN 36, 37, 52
TELETECH 44
TENSAI 40, 41
THOMSON 36, 51, 52, 63
THORN 31, 07, 42, 45, 48
TOMASHI 18
TOSHIBA 05, 02, 26, 21, 53
TOWADA 42
ULTRAVOX 32, 42, 49
UNIDEN 92
UNIVERSUM 31, 07, 38, 42, 45,
46, 54
VESTEL 07
VICTOR 13
VOXSON 31
WALTHAM 43
WATSON 07
WATT RADIO 32, 42, 49
WHITE WESTINGHOUSE 07
YOKO 07, 42, 46
ZENITH 03, 20
Before Starting Playback
Turning Off the LCD Backlight and
Indications
If you feel that the indicators on the Player are too
bright when watching movies, you can turn them off
except for the STANDBY/ON indicator.
About KURO LINK function
The functions work when a Pioneer KURO LINK-compatible
Flat Panel TV or AV system (AV receiver or amplifier, etc.) is
connected to the player using an HDMI cable.
Also refer to the operating instructions of the Flat Panel TV
and AV system (AV receiver or amplifier, etc.)
To use the KURO LINK function
• The KURO LINK function operates when KURO LINK is set
to On for all devices connected with HDMI cables.
• Once connections and the settings of all the devices
are finished, be sure to check that the player’s picture is
output to the Flat Panel TV. (Also check after changing
the connected devices and reconnecting HDMI cables.)
The KURO LINK function may not operate properly if the
player’s picture is not properly output to the Flat Panel TV.
• Use High Speed HDMI™ cables when using the KURO
LINK function. The KURO LINK function may not operate
properly if other HDMI cables are used.
• For some models, the KURO LINK function may be
referred to as “HDMI Control”.
• The KURO LINK function does not work with devices of
other brands, even if connected with an HDMI cable.
What the KURO LINK function can do
Press FRONT LIGHT to turn the LCD backlight
on or off.
HOME MENU operation
1
2
3
Press HOME MENU to display the Home Menu
screen.
Press to select “Settings”, then
press ENTER.
Press to select “Front Display/LED”, then
press ENTER.
Audio Video Settings
Quick Start
Auto Power Off
KURO LINK
Playback Setting
Communication Setup
Front Display/LED
Version
USB Memory Management
Software Update
System Reset
4
Press to select “On” or “Off”, then press
ENTER.
5
Press HOME MENU or EXIT to exit.
Disc Playback
Quick operation
• Outputting the optimum picture quality for “KURO”
from the player.
When the KURO LINK function is enabled, video signals
with the optimum picture quality for “KURO” are output
from the player’s HDMI terminal.
The KURO LINK indicator on the player lights red.
KURO LINK indicator
• Operating the player with the Flat Panel TV’s remote
control.
Such player operations as starting and stopping playback
and displaying the menus can be performed from the Flat
Panel TV.
• The player’s playback picture is displayed on the Flat
Panel TV’s screen. (Auto-select function)
The input switches automatically on the Flat Panel TV and
AV system (AV receiver or amplifier, etc.) when playback is
started on the player or the Home Menu or Disc Navigator
is displayed. When the input is switched, the playback
picture, the Home Menu or Disc Navigator appears on the
Flat Panel TV.
• The power of the Flat Panel TV and the player turns
on and off automatically.
(Simultaneous power function)
When playback on the player is started or the Home
Menu or Disc Navigator is displayed, if the Flat Panel TV’s
power was off, its power turns on automatically. When
the Flat Panel TV’s power is turned off, the player’s power
automatically turns off.
• The player’s on-screen display language switches
automatically. (Unified language function)
When the language information from a connected Flat
Panel TV is received, you can have the player’s on-screen
display language change automatically to that of the Flat
Panel TV. This function is available only when playback is
stopped and the menu screen is not displayed.
23
BD/DVD/CD Playback
This section explains playback of commercially
available BD Video and DVD Video discs (like movies),
CDs, and recorded DVD-RW/R discs.
To stop playback
Press STOP.
Resume playback function
• If you press PLAY next, playback will resume from
the point where the Player was previously stopped. To
playback from the beginning, cancel resume mode by
pressing STOP, then press PLAY. (This may not
work depending on the type of disc. In this case, open the
disc tray or enter standby.)
Loading a Disc
NOTE
• Resume playback may not function depending on the disc.
OPEN/CLOSE
STANDBY/ON
Displaying the disc information
1
2
3
Press STANDBY/ON to turn on the power.
Press OPEN/CLOSE to open the disc tray.
Load a disc on the disc tray.
• Insert the disc with the label face up.
• In case of disc recorded on both sides, face down the
side to play back.
Press DISPLAY during playback.
• Each time you press DISPLAY, the display switches
as follows.
Disc Information Screen A
4
Press OPEN/CLOSE to close the disc tray.
BD-VIDEO
1/1
1 / 101
00 : 00 : 12
/ 03 : 12 : 28
BD/DVD Video Playback
BD VIDEO
DVD VIDEO
BD-RE
DVD-R
BD-R
DVD-RW
Disc Information Screen B
AVCHD
This player supports DVD upscaling during DVD
playback.
00 : 00 : 12
/ 03 : 12 : 28
No Display
1
Load a disc.
• Playback may begin automatically, depending on the
disc.
• Playback begins from the first title.
• The menu may be displayed first, depending on the
disc. Perform playback operation by following the
directions on the screen.
2
Press PLAY if playback does not begin
automatically or playback is stopped.
NOTE
• The disc load time may vary depending on the disc.
24
Type of disc
Title number being played/Total number of Titles
Chapter number being played/Total number of
Chapters
Elapsed playback time/Total playback time for the
Title
NOTE
• Disc Information Screen A disappears after about 1 minute
elapses without performing any operations.
• For some commercially-released BD VIDEO discs, the total
playback time display for the Chapter/Title may not appear.
BD/DVD/CD Playback
BD/DVD Menus
Using the disc menu
• This section explains how to play back a BD/DVD
video disc with a top menu, disc menu or pop-up
menu.
• The titles listed in the top menu and a disc guide (for
options like subtitles and audio languages) are given
in the disc menu.
DVD VIDEO
Example: Select “SUBTITLE LANGUAGE”.
1
Press TOP MENU/DISC NAVIGATOR.
• The disc menu screen is displayed if present on the
DVD video disc.
2
Press to select “SUBTITLE LANGUAGE”,
then press ENTER.
• The screen for selecting the subtitle language is
displayed.
MENU
1 AUDIO LANGUAGE
2 SUBTITLE LANGUAGE
3 AUDIO
Start playback by selecting a title
from the top menu
BD VIDEO
1
DVD VIDEO
3
Press TOP MENU/DISC NAVIGATOR.
• The top menu screen is displayed if present on the
BD/DVD video disc.
TOP MENU
Jazz
2
Latin
3
Classic
4
Rock
Using the pop-up menu
BD VIDEO
1
Press POPUP MENU/MENU during playback.
• The pop up menu screen is displayed.
• The menu contents displayed vary depending on the
disc. For details on how to see and operate the popup menu, refer to the manual for the disc.
Press to select the title, then press
ENTER.
• The selected title is played back.
Pop-up menu
Disc Playback
2
1
4
Press to select the subtitle language, then
press ENTER.
Press TOP MENU/DISC NAVIGATOR to exit.
NOTE
• The procedure explained on this page is the basic
operation procedure. Procedures vary depending on
the BD/DVD video disc, so you may need to follow the
instructions in the BD/DVD video disc manual or the
instructions displayed on the screen.
Top menu
• With some BD/DVD discs, the top menu may be referred to
as the “Title Menu”. Use TOP MENU/DISC NAVIGATOR
on the remote control when the instructions refer to “Title
Menu”.
• If no top menu is available, the TOP MENU/DISC
NAVIGATOR button will have no effect.
Previous page
Next page
2
Press to select the desired item,
then press ENTER.
3
Press POPUP MENU/MENU to exit.
• The pop-up menu will automatically disappear for
some discs.
25
BD/DVD/CD Playback
Enjoying BONUSVIEW or BD-LIVE
BD VIDEO
This Player is compatible with additional functions of
BD-Video, BONUSVIEW (BD-ROM Profile 1 Version
1.1) and BD-LIVE.
For BD-Video discs compatible with BONUSVIEW, the
functions of Picture in Picture and Virtual Package are
available. For BD-LIVE compatible discs, you can enjoy
a variety of functions via the internet in addition to the
BONUSVIEW functions.
Use of Picture in Picture function
(secondary audio/video playback)
BD-Video that includes secondary audio and video
compatible with Picture in Picture can be played back
with secondary audio and video simultaneously as a
small video in the corner.
1 Press SECONDARY VIDEO during playback to
show the 2-picture screen.
Virtual Package/BD-LIVE data is saved in Local
Storage (USB memory device connected to this
Player). To enjoy these functions, connect a USB
memory device (minimum 1 GB capacity (2 GB or
more recommended)) supporting USB 2.0 High Speed
(480 Mbit/s) to the BD STORAGE/SERVICE terminal
(page 11) on the back of this player.
• If there is insufficient storage space, the data will not be
copied/downloaded. Delete unneeded data or use a new
USB memory device.
• If a USB memory device containing other data (previously
recorded) is used, the video and audio may not play back
properly.
• If the USB memory device is disconnected from this player
during playback of Virtual Package/BD-LIVE data, playback
of the disc will stop.
• Some time may be required for the data to load (read/
write).
• Refer to “USB Memory Management” on page 43 for
erasing the Virtual Package data and the BD-LIVE data in
the USB memory device.
CAUTION
• It may not be possible to use the BD-LIVE functions if
there is insufficient space on the USB memory device.
In this case, refer to “USB Memory Management” on
page 43 for erasing the Virtual Package data and the
BD-LIVE data in the USB memory device.
NOTE
• Operation of USB memory devices is not guaranteed.
• Do not use a USB extension cable when connecting
a USB memory device to the BD STORAGE/SERVICE
terminal of the player.
− Using a USB extension cable may prevent the player
from performing correctly.
Primary
audio/video
2
Secondary
audio/video
To remove the secondary video, press
SECONDARY VIDEO again.
NOTE
• To listen to secondary audio, make sure that “Secondary
Audio” is set to “On”. (See page 37.)
• The secondary audio and video for Picture In Picture may
automatically play back and be removed depending on the
content. Also, playable areas may be restricted.
Virtual Package
For BD-Video discs compatible with Virtual Package,
data is copied from the discs or internet to local
storage. It is automatically copied to the local storage
prior to playback. You can enjoy a variety of additional
functions including secondary video, secondary audio,
subtitles, movie trailers, etc.
• The playback methods vary depending on the disc. For
details, refer to the disc manual.
BD-LIVE
In this Player, a variety of contents with interactive
functions are available through BD-LIVE compatible
Blu-ray discs by connecting to the internet. You
can enjoy the download of bonus features such
as latest movie trailers to the USB memory device,
communication compatible BD-J interactive games,
etc.
• The available functions differ depending on the disc.
NOTE
• Regarding playback method of BD-LIVE contents, etc.,
perform the operations in accordance with the instructions
in the BD disc manual.
• To enjoy BD-LIVE functions, perform the broadband
internet connection (page 18) and communication settings
(pages 40–42).
• Refer to page 39 regarding the setup to restrict access to
BD-LIVE contents.
26
BD/DVD/CD Playback
DVD-R/-RW/BD-RE/-R Playback
DVD-R
DVD-RW
BD-RE
BD-R
You can play back a recorded disc (DVD: VR format
finalized disc only / BD: BDAV format disc only).
NOTE
• The Disc Navigator screen also can be displayed by
pressing TOP MENU/DISC NAVIGATOR when playback
is stopped or by pressing ENTER after choosing “Disc
Navigator” in Home Menu when playback is stopped.
About Disc Navigator
• The Disc Navigator can be displayed in two types,
Thumbnail and Title Name.
• Each time you press RED, the screen changes between
Thumbnail and Title Name.
Thumbnail
Program 1
5/21 Fri 9:30 AM 110 Min.
Program
1
Program
2
Program
4
NOTE
A
• “Finalize” refers to a recorder processing a recorded disc
so that it will play in other DVD players/recorders as well
as this player. Only finalized DVD discs will play back in
this player. (This player does not have a function to finalize
discs.)
1
Load a recorded disc.
• The Disc Navigator screen is displayed.
Program
1
Program
2
By Chapter
C
Program
6
Playlist
D
Functions
Program 1
5/21 Fri 9:30 AM 110 Min.
[From Old]
1 Program 1
5/21
2 Program 2
6/15
3 Program 3
7/3
4 Program 4
9/18
Fri
Fri
Mon
Thu
110 Min.
110 Min.
56 Min.
40 Min.
Program
3
Program
5
Program
6
• When loading a BD disc with usage restrictions placed
by a BD recorder, the password input screen appears.
Then, input your password.
If you input a wrong password three times, the disc
tray will open. Close the disc tray, and then input a
correct password.
• If the Disc Navigator screen is not displayed, press
TOP MENU/DISC NAVIGATOR.
2
Program
5
Title Name
A
Program
4
B
Program
3
Thumbnail
B
Sorting
C
Playlist
D
Functions
Disc Playback
Playback by selecting a title
Title Name
Information of selected title
Title Name
Recording Date
Recording Duration
Caption for Color Button
• When seven or more titles are displayed, switch pages
by pressing PAGE +/-.The same operation can be
performed by pressing k orl.
Press to select the desired title, then
press ENTER.
• When seven or more titles are displayed, switch pages
by pressing PAGE +/-.The same operation can be
performed by pressing k orl.
• Playback of the selected title will begin.
You can playback by pressing PLAY instead of
pressing ENTER.
3
Press STOP to stop playback.
27
BD/DVD/CD Playback
Playback by selecting a chapter
1
Press GREEN while the Thumbnail screen is
displayed.
Playing back the title you stopped
while being played
1
• The chapter screen is displayed.
Press YELLOW while the Disc Navigator screen
is displayed.
Playback
Chapter
1
Chapter
2
Chapter
3
From Beginning
Chapter
4
Chapter
5
• When seven or more chapters are displayed, switch
pages by pressing PAGE +/-.The same operation
can be performed by pressing k or
l.
• To return to the Thumbnail screen, press GREEN.
2
Press to select the desired chapter,
then press ENTER.
• Playback of the selected chapter will begin.
You can playback by pressing PLAY instead of
pressing ENTER.
3
Press STOP to stop playback.
Sorting the titles
Each time you press GREEN, while the Title Name
screen is displayed, the Title Name display changes
between displaying the newest title first and the oldest
title first.
Playback by selecting a Playlist
1
Press BLUE while the Thumbnail screen is
displayed.
• The Playlist screen is displayed.
Program 1
5/21 Fri 9:30 AM 110 Min.
1 Program 1
2 Program 2
5/21
6/15
C
2
Fri
Fri
Original
110 Min.
110 Min.
D
Functions
Press to select the title, then press
ENTER.
• Playback of the selected title will begin.
3
Press STOP to stop playback.
28
From Continued
Chapter
6
2
Press to select the type of Playback, then
press ENTER.
• Playback of the title will begin.
3
Press STOP to stop playback.
BD/DVD/CD Playback
Audio CD Playback
Playback by selecting a track
1
AUDIO CD
Press to select the track, then press
ENTER during playback or when playback is
stopped.
• Playback of the selected track will begin.
• When seven or more tracks are displayed, switch
pages by pressing PAGE +/-.
Track 03
5:23
0:00
1
2
3
4
5
6
Track 01
Track 02
Track 03
Track 04
Track 05
Track 06
Functions
3 / 12
00 : 00 : 11
L+R
3
Off
5:16
5:10
5:23
5:03
4:44
5:08
3 / 12
Select
Enter
Playback from the beginning
1
D
2
Load an audio CD.
• The CD screen is displayed.
(The CD screen is displayed only when a compact
disc recorded in the CD-DA format is inserted.)
• Playback may begin automatically, depending on the
disc.
Track 01
1
2
3
4
5
6
Track 01
Track 02
Track 03
Track 04
Track 05
Track 06
Press STOP to stop playback.
Operation procedure for the
“Functions” menu
1
Functions
1 / 12
00 : 00 : 11
L+R
3
Off
Press YELLOW (Functions) when the CD screen
is displayed.
• The “Functions” menu is activated.
Track 03
5:16
5:10
5:23
5:03
4:44
5:08
1 / 12
Select
5:23
0:00
1
2
3
4
5
6
Enter
D
Functions
Track 01
Track 02
Track 03
Track 04
Track 05
Track 06
Functions
3 / 12
00 : 00 : 11
L+R
3
Off
Disc Playback
5:16
0:00
Functions
5:16
5:10
5:23
5:03
4:44
5:08
3 / 12
2
3
Press PLAY if playback does not begin
automatically or playback is stopped.
Press STOP to stop playback.
Select
NOTE
• Resume playback may not function depending on the disc.
Return
D
2
Track select
Press to select the desired setting, then
press ENTER.
• When playback is stopped, only “Track” can be
selected.
• For a description of each setting, see “Functions
which can be set” (Page 35).
Resume playback function
• If you press PLAY next, playback will resume from
the point where the Player was previously stopped. To
playback from the beginning, cancel resume mode by
pressing STOP, then press PLAY. (This may not
work depending on the type of disc. In this case, open the
disc tray or enter standby.)
Enter
3
Press to set, then press ENTER.
• Operations vary depending on the setting. Follow the
operation instructions on the screen.
4
Press
RETURN or YELLOW to exit the
“Functions” menu.
NOTE
• The displayed items vary depending on the disc.
29
Playback Functions
BD VIDEO
DVD VIDEO
BD-R
DVD-R
BD-RE
DVD-RW
AVCHD
AUDIO CD
Slow Playback
Slow Playback functions when l or
k is pressed for more than 2 seconds during pause.
• Press PLAY to return to normal playback.
NOTE
• This doesn't work for audio CDs.
• Reverse Slow Playback cannot be performed for BD video
and DVD discs in AVCHD format.
Skip Search
SKIP
Playback skips 30 seconds ahead when
SEARCH is pressed during playback.
Replay
Playback jumps back 10 seconds when
is pressed during playback.
REPLAY
Repeat Playback of a Title or
Chapter (Repeat Playback)
NOTE
• Some operations in the following playback functions cannot
be performed depending on the specifications of the disc.
1
2
3
Play back the title or chapter you want to repeat.
Press REPEAT.
Press to select the type of Repeat
Playback.
• Playback Title: Repeats the title currently being played
back.
• Playback Chapter: Repeats the chapter currently
being played back.
• Scene Selection: Repeats the specified scene of title
or chapter.
Fast Forward/Reverse (Search)
Fast Forward/Reverse functions when REV or
FWD is pressed during playback.
Example: When FWD is pressed
• The search speed will change each time you press the
button.
When playing back a DVD
Playback Title
Playback Chapter
Scene Selection
• You cannot fast forward or fast reverse from one title and
continue to another title (except when playing audio CDs).
• Press
RETURN to cancel without setting the type
of Repeat Playback.
• For Audio CD, you can select “Playing Disc”, “Playing
Track” and “Specify The Part” as Repeat Playback
options.
Skipping to the Next or the Start of
the Current Chapter (Track)
Skipping (to the beginning of a chapter or track)
functions when k or l is pressed
during playback.
4
Pause/Frame Advance Playback
Press ENTER.
Example: Repeat playback of a title (TITLE)
BD-VIDEO
Pause functions when PAUSE is pressed during
playback. (If you are playing back an audio CD, the CD
will also pause.)
1/3
5 / 25
00 : 20 : 30
2 English
1
1
5 . 1ch
On Title Repeat
Frame Advance Playback functions when l is
pressed during Pause.
• Frame Advance Playback may not function properly with
discs other than DVD-RW (VR format).
NOTE
• Some BD/DVD Video discs are not compatible with Pause/
Frame Advance Playback.
• Frame Advance/Reverse Playback can be performed for
DVD discs by pressing l or k during
pause.
30
On Title Repeat
5
Press REPEAT OFF or REPEAT to return to
normal playback.
Playback Functions
NOTE
• Press l, the Repeat Playback is cancelled and
the next chapter being play back.
• Press k once, the Repeat Playback is cancelled
and the player returns to the start of current chapter (track).
• If you press k again (within about 5 seconds) the
player will skip to the beginning of the previous chapter
(track).
• For Partial Repeat Playback, set the start and end points
within the same title.
• Repeat Playback may be forbidden depending on the disc.
• Partial Repeat Playback may not work in multi-angle
scenes.
• If you press DISPLAY, you can confirm the Repeat
Playback status.
Displaying the Audio Information
You can display the audio information on the disc
currently being played back by pressing AUDIO.
• The displayed contents vary depending on the disc.
BD VIDEO
DVD VIDEO
The audio track currently being played back will be
displayed.
If multiple audio channels are recorded, you can switch
the audio channel by pressing AUDIO.
DVD-RW
DVD VIDEO
DVD-R
DVD-RW
NOTE
AUDIO CD
NOTE
• Some operations in the following playback function cannot
be performed depending on the specifications of the disc.
1
2
Press REPEAT during playback.
Press to select “Scene Selection”, then
press ENTER.
• “Set Start Point” displays.
Playback Title
Playback Chapter
• When you play a program recorded in stereo or monaural,
and if you are listening to the Bitstream sound via the digital
output jack, you cannot select the audio channel. Set
“Audio Out” to “PCM” (Page 38), or if you want to change
the audio channel, listen via the analog output jacks.
Switching Subtitles
If subtitles are provided in multiple languages, you can
switch between them.
Scene Selection
Set Start Point
3
When a recorded broadcast with stereo or
monaural audio is played back:
“Stereo” is displayed. (Audio cannot be switched.)
Disc Playback
Partial Repeat Playback (Repeat
Playback of a Specified Part)
DVD-R
Press ENTER at the scene where you want to
set the start point.
Press SUBTITLE during playback.
• The display indicates the subtitle number currently being
played back, and the subtitles appear.
• Each time SUBTITLE is pressed, the subtitles change.
• “–” is displayed if a disc has no subtitles.
• You can also select “Off”.
• “Set End Point” displays.
4
Press ENTER at the scene where you want to
set the end point.
• You can press FWD to fast forward to the scene
where you want to set the end point. When you
reach the desired scene, simply press PLAY and
then ENTER to set the end point. To cancel Repeat
Playback, press REPEAT OFF or REPEAT.
31
Playback Functions
Switching the Angle
Displaying the Angle Mark
You can change settings so that Angle Mark appears
in the right bottom part of the screen when multiple
angles are recorded. (The Angle Mark is displayed
for BD/DVD video.) The settings can be changed in
“Settings” - “Playback Setting” - “Angle Mark Display”
(Page 39).
NOTE
If multiple angles are recorded, you can switch
between them.
1 Press ANGLE during playback.
• The display indicates the angle number currently being
played back. Each time you press ANGLE, the angle
switches.
• “–” is displayed if a disc is recorded with only one
angle.
• Settings for audio and subtitles can be changed also in
Function Control Screen (Page 34).
• The operations of subtitles, angle and audio differ
according to each disc. You may need to refer to the
operation manual of the disc.
• The following operations will not work when playing back
an audio CD:
Slow Playback, Frame Advance
Display of functions
• The display for subtitles, angle or audio automatically
disappears after 5 seconds.
1
Switching between functions
• You can switch the subtitles and audio at the Function
Control screen (Page 34).
• The operation for each function varies depending on the
disc. See the manual for the disc.
Fast Forward/Reverse
To return to the previous angle, press ANGLE to cycle
through the angles until you return to the original angle.
• You cannot perform Fast Forward/Fast Reverse between
titles. At the end or beginning of the title, Fast Forward/
Fast Reverse will be cancelled and normal playback will
automatically resume.
• Subtitles are not played back with BD/DVD video discs
during Fast Forward and Fast Reverse.
Slow Playback
• You cannot perform Slow Playback between titles. At the
end of the title, Slow Playback will be cancelled and normal
playback will automatically resume.
Repeat Playback
• Repeat Playback may be forbidden depending on the disc.
• Partial Repeat Playback may not work in multi-angle
scenes.
• For Partial Repeat Playback, set the start and end points
within the same title.
32
JPEG File Playback
CD-R
JPEG
CD-RW
JPEG
4
Pressk orl to replace one
image with another.
• The same operation can be performed by pressing
or REV/ FWD.
• Press
RETURN if you wish to return to the folder
selection screen.
5
To stop the still image playback at any time,
press STOP.
Playing back Slide Show
1
In Step 2 of the left side “Playing back still
images in a selected folder”, press PLAY
(Slide Show).
• The still images inside the selected folder are played
as a slide show.
2
To pause the playback at any time, press
PAUSE.
• Press PLAY to resume playback.
3
To stop the play at any time, press STOP.
• Press
RETURN to play a slide show of still images
in another folder.
NOTE
• This Player can play still images (JPEG files) that have been
recorded on CD-RW/R discs. For details on the still images
that you can play using this player, refer to “About the
JPEG file format” on page 7.
• During “Normal play”, still images are played one by one
while during “Slide show”, they are automatically replaced
one after another.
1
1
• The setting screen for “Slide Show Speed”/“Repeat
Mode Setting” appears.
2
To stop the still image playback at any time,
press STOP.
Playing back still images in a
selected folder
1
2
3
Normal
• The slide show speed may be selected from “Fast”,
“Normal”, “Slow1” and “Slow2”.
3
4
Press to select the desired speed, then
press ENTER.
Press to select “Repeat Mode Setting”,
then press ENTER.
Slide Show Speed
Repeat Mode Setting
Load the disc containing still images, then press
HOME MENU.
Press to select “Picture”, then press
ENTER.
Use to select the folder whose still
images are to be played, then press ENTER.
Press to select “Slide Show Speed”, then
press ENTER.
Slide Show Speed
Repeat Mode Setting
Load the disc containing the still images, and
press PLAY.
• The first still image appears on the screen.
• Pressk orl to proceed to the
next or previous still image.
The same operation can be performed by pressing
or REV/ FWD.
2
Press BLUE (Slide Show Menu) during the folder
selection screen.
Disc Playback
Playing back still images in sequence
Setting slide show speed/repeat
playback
Yes
5
8/15
6
No
Press to select the desired item, then
press ENTER.
Press EXIT to exit.
• When seven or more folders are displayed, switch
pages by pressing PAGE +/-.The same operation
can be performed by pressing k or
l.
33
Settings During Playback
Function Control
This allows you to adjust various settings at once, like
subtitles, angle settings and the title selection for Direct
Playback. You can adjust the video and audio to suit
your preferences. The operations are the same for BD
and DVD.
Function control operation
procedure
Function control screen
BD-VIDEO
1/3
5 / 25
00 : 20 : 30
2 English
1
1
5 . 1ch
Off
Select
ENTER
1
Press FUNCTION during playback.
2
Press to select the desired setting, then
press ENTER.
• The Function Control screen is displayed on the TV.
• For a description of each setting, see “Functions
which can be set” (Page 35).
Enter
Return
BD-VIDEO
Playback status display
Shows the operation status and the disc type.
1/3
5 / 25
00 : 20 : 30
2 English
1
1
5 . 1ch
Off
Setting items
Selects a title (or track) or chapter for playback, or performs
video/audio settings.
•
•
•
•
•
•
•
Title/Track Number (Direct Title/Track Skip)
Chapter Number (Direct Chapter Skip)
Playback Elapsed Time (Direct Time Skip)
Subtitle Language
Angle Number
Audio
Repeat
Operation guide display
Provides help on remote control button operations.
3
Press to set, then press ENTER.
4
Press
RETURN or FUNCTION to close the
Function Control screen.
• Operations vary depending on the setting. Follow the
operation instructions on the screen.
NOTE
• If “– –” is displayed for an option like title number or
subtitles, the disc has no titles or subtitles which can be
selected.
• The displayed items vary depending on the disc.
• If you access the Function Control screen during playback
of a BD/DVD video, it may be impossible to operate the
BD/DVD video playback. In cases like this, close the
Function Control screen.
34
Settings During Playback
Functions which can be set
Title/Track Number (Direct Title/Track Skip)
• Shows the title number being played back (or track number when playing back an audio
CD). You can skip to the start of the title (or track).
• To skip to the start of a selected title (or track), press the Number buttons to enter the
title (or track) number when this option is highlighted.
Chapter Number (Direct Chapter Skip)
• Shows the chapter number being played back. You can skip to the start of the chapter.
• To skip to the start of a selected chapter, press the Number buttons to enter the
chapter number when this option is highlighted.
Playback Elapsed Time (Direct Time Skip)
• Shows the time elapsed from the beginning of the current disc title (or track). This lets
you skip to a specific time.
• Press to select the Hour, Minute or Second, then press or the Number
buttons to set the time. Press ENTER to start playback at the set time.
NOTE
• ENTER button: Enters the input number.
• CLEAR button: Clears the input number.
Subtitle Language
• Shows the currently selected subtitle language. If subtitles are provided in other
languages, you can switch to your preferred language.
Audio
Disc Playback
Angle Number
• Shows the currently selected angle number. If the video is recorded with multiple angles,
you can switch the angle.
• Shows the currently selected type of audio. You can select the desired type of audio.
Repeat
• The current Title (or Chapter) or partial segments can be repeatedly played back. Repeat
Playback is also possible with the REPEAT button on the remote control.
NOTE
• These functions may not work with all discs.
35
Settings
SETTINGS
Common operations
The “Menu” enables various audio/visual settings and adjustments on the functions using the remote control
unit. You need to call up the OSD to perform settings for this player. The following is the explanation for the basic
operations of the “Menu”.
Example: Setting “Front Display/LED”
1
3
2
Display the Menu screen
Disc Navigator
Settings
On Screen Language
Picture
Select a menu item
Press to select “Front Display/
LED”, then press ENTER.
Press HOME MENU to
display the Home Menu
screen.
Press to
select “Settings”, then
press ENTER.
Audio Video Settings
Quick Start
Auto Power Off
KURO LINK
Playback Setting
Communication Setup
Front Display/LED
Version
USB Memory Management
Software Update
System Reset
Select the next item
Press to select the desired item,
then press ENTER.
On
4
Off
RETURN to return to the
Press
previous “Menu” page.
Basic Operation for Playback
Setting
Example: Setting “Parental Control” under “Playback Setting”
1
2
3
4
Press HOME MENU to display the Home Menu
screen.
Press to select “Settings”, then
press ENTER.
Press to select “Playback Setting”, then
press ENTER.
Press to select “Parental Control”, then
press ENTER.
Press HOME MENU or EXIT to exit.
Enter a 4-digit number for the password, then
the same 4-digit number for confirmation.
Press ENTER to complete the password setting
procedure and move to the next setting screen.
6 Press to select the parental control level
for DVD VIDEO, BD-ROM, and then select the
country code. Press ENTER after making each
selection.
Parental Control
Disc Language
Angle Mark Display
Password Setting
BD Internet Access
• When you operate this Player for the first time, the
password setting screen will be displayed. See “When
setting the password for the first time” below.
5
Exit the Menu screen
Level 3
0
USA
Enter your 4-digit password.
• You cannot move to the next setting screen until you
can input the correct password.
When setting the password for the first time
To set the password for the first time, press
to select “Yes” to enter the password setting
menu, then press ENTER.
36
7
Press HOME MENU or EXIT to exit.
SETTINGS
Audio Video Settings
TV Aspect Ratio
You can set the screen aspect ratio of the connected
TV, and adjust the video output.
If you switch your TV (i.e. because you have bought a
new one) and the screen aspect ratio of the connected
TV changes, you will have to change the “TV Aspect
Ratio” setting.
Item
Wide 16:9: Select this when connecting to a TV with a
16:9 screen aspect ratio.
Normal 4:3: Select this when connecting to a TV with a
4:3 screen aspect ratio.
Video Out Select
This function allows you to select the priority video
output when you connect video equipment such
as a TV to both the HDMI OUT terminal and the
COMPONENT VIDEO output jacks.
Item
HDMI, Component
• When the priority video output is selected, video is output
from the other video terminal with the resolution of the
selected video output.
• There is no output from the COMPONENT VIDEO output
jacks and VIDEO output jack when video is output at
1080p resolution and the priority video output is selected
to “HDMI”.
• If the video equipment connected to each of the terminals
is not compatible with the resolution of the priority video
output, abnormalities in images on the screen may appear.
<When selecting Normal 4:3>
Item
Letter Box: If you connect to a TV with a screen aspect
ratio of 4:3 and playback a DVD with 16:9 video, the
video will be played back with black bands at the top
and bottom while maintaining the 16:9 ratio.
Pan Scan: If you connect to a TV with a screen aspect
ratio of 4:3 and playback a DVD with 16:9 video, the
video will be played back with the left and right sides of
the image cut off to display in 4:3 screen aspect ratio.
(This function works if the disc is labelled for 4:3PS.)
Secondary Audio
This toggles the clicking sound on the menu and audio
with secondary video in picture in picture mode for
BD-Video.
• Select “Off” when enjoying the high quality sounds of BDVideo.
Item
On, Off
Component Video Out
Item
1080i, 720p, 480p, 480i
Settings
This sets the resolution of the component video
output.
Some TV are not fully compatible with the Blu-ray disc
player, which may cause the image distortion. In this
case, press VIDEO OUTPUT RESET on the remote
control for five seconds. “Component Video Out” will
be reset to “480i” (factory preset value).
HDMI Video Out
This sets the resolution of the HDMI video output.
Some TV are not fully compatible with the Blu-ray disc
player, which may cause the image distortion. In this
case, press VIDEO OUTPUT RESET on the remote
control for five seconds. “HDMI Video Out” will be reset
to “Auto” (factory preset value).
Item
Auto, 1080p, 1080i, 720p, 480p
NOTE
• When the BD player is connected to a 1080p 24 Hz
compatible TV and the “HDMI Video Out” is set to “Auto”,
1080p 24 Hz will automatically be displayed when
compatible discs are played back.
At 1080p 24 Hz/1080p 60 Hz, there is no output from the
COMPONENT VIDEO output jacks and VIDEO output jack.
37
SETTINGS
Audio Out
Dynamic Range Control
You can set the audio output when connecting to
SURROUND equipment.
1 This sets the audio output connected to
SURROUND equipment.
Item
Item
HDMI Output: Select this when you connect using HDMI
OUT terminal.
Digital Output: Select this when you connect using
DIGITAL OUT OPTICAL terminal.
2ch Audio Output: Select this when you do not use
SURROUND sound equipment.
2
You can set the audio output mode for each
output terminal.
This sets the audio output mode for HDMI OUT
terminal when selecting “HDMI Output”.
Item
PCM (Surround):
• Select this when connecting to
HDMI equipment with a built-in
decoder for DOLBY DIGITAL, etc.
• Setting to Bitstream will output
each audio signal by Bitstream.
• Select this when connecting to
multi-channel HDMI equipment.
• Setting to PCM (Surround) will
output by LINEAR PCM by
decoding audio signals recorded in
each audio output mode such as
DOLBY DIGITAL, DTS.
This sets the audio output mode for DIGITAL
OUT OPTICAL terminal when selecting “Digital
Output”.
Item
Bitstream:
PCM:
• Select this when connecting to
SURROUND equipment with
a built-in decoder for DOLBY
DIGITAL, etc.
• Setting to Bitstream will output
each audio signal by Bitstream.
• Select this when connecting to 2
channel stereo audio equipment.
• Setting to PCM will output by
converting each audio signal into
PCM 2 channel audio signal.
NOTE
• See page 45 for information on output of next generation
audio formats.
38
Normal: The same audio output range is played as the
original recorded audio output range.
Shift*: When Dolby Digital audio is played back, the
dynamic range of the audio is adjusted so that the
dialog portion can be heard easily. (If the audio sounds
abnormal, set to “Normal”.)
Auto: When you play back audio in the Dolby TrueHD
format, the dynamic range is automatically adjusted.
* Lower the audio volume before setting. If you do not do so,
the speakers may emit a loud sound or excessive output
may be applied to the speakers.
Quick Start
NOTE
• When the secondary audio is set to “On”, PCM is
automatically selected as the audio output mode.
Bitstream:
This lets you adjust the range between the loudest
and softest sounds (dynamic range) for playback
at average volume. Use this when it is hard to hear
dialog.
This turns the Quick Start function on and off.
When the Quick Start function is on:
• The startup time of the Player is reduced.
• However, power consumption will increase (about 8W).
When the Quick Start function is off:
• The player will enter the low power consumption mode
when in standby condition.
Item
Yes, No
NOTE
• When “Quick Start” is set to “Yes”, the Player requires
some time to turn off.
Auto Power Off
This sets the Player so that power is automatically shut
off if playback is stopped for about 10 minutes.
Item
Yes, No
KURO LINK
This sets the Player to be controlled from the Flat
Panel TV via the HDMI cable.
Item
Yes, No
NOTE
• For details, refer to the operation manual of TV.
SETTINGS
Playback Setting
Parental Control
This lets you set the Parental Control depending on the
disc content. The available Parental Control Levels are
shown below.
The 4-digit password number needs to be entered
before the Parental Control Levels and the Country
Code are set. The Parental Control Levels and the
Country Code cannot be set if a password has not
been created or the password is not entered.
Password Setting
This sets the password for setting or changing the
Parental Control Level.
Item
Yes: Enter the 4-digit number.
No
NOTE
• When you forget the password, you can reset the current
password using “System Reset” under “Settings”. (See this
page.)
• You can also set the new password if desired.
Item (For DVD-VIDEO)
8 and Off: All DVD-video can be played.
1-7: Prohibits play of DVD-video with corresponding
ratings recorded on them.
Item (For BD-ROM)
No Limit: All BD-video can be played.
0-99 year(s): Prohibits play of BD-video with corresponding
ratings recorded on them.
BD Internet Access
This allows you to set access restriction to BD-LIVE
contents.
Item
Permit: Allow all BD-LIVE discs.
Limit: Allow only discs with owner certification.
Prohibit: Prohibit all BD-LIVE discs.
Item (Country code)
Sets the country code. Refer to the Country Code List
(page 45) because the ratings differ according to the
country.
NOTE
• Refer to “Basic Operation for Playback Setting” on page 36
for details.
NOTE
• The available functions differ depending on the disc.
• Regarding playback method of BD-LIVE contents, etc.,
perform the operations in accordance with the instructions
in the BD disc manual.
• To enjoy BD-LIVE functions, perform the broadband internet
connection (page 18) and communication settings (pages
40–42).
Disc Language (Disc Priority Language)
This lets you select the language for subtitles, audio
and menus displayed on the screen.
Item (Subtitle)
If you feel that the indicators on the Player are too
bright when watching movies, you can turn them off
except for the STANDBY/ON indicator.
Item
Item (Audio)
On, Off
Refer to the Language List. (Page 45)
Item (Menu)
Refer to the Language List and Language Code List.
(Page 45)
Angle Mark Display
This lets you turn the Angle Mark Display on or off
when DVD video recorded with multiple angles is
played back. (The Angle Mark is displayed in the lower
right screen.)
Item
Yes, No
Settings
Refer to the Language List. (Page 45)
Front Display/LED
Version
When you select “Version”, the system software
version is displayed.
Please refer to our website for information regarding
software updates.
IN THE U.S.A.: http://www.pioneerblu-ray.com
IN CANADA: http://www.pioneerblu-ray.ca
System Reset
You can reset all settings to the factory presets.
Item
Reset, Not Reset
39
SETTINGS
5
Communication Setup
This allows you to perform and/or change the
communication setting. This setting is required to use
BD-LIVE functions that connect to the internet.
For setting the IP address, press to select
“Yes” or “No”, then press ENTER.
Do you obtain the IP address
automatically?
Yes
NOTE
No
IP Address
Netmask
Gateway
• Make sure that the LAN cable is connected to this Player.
(See page 18.)
• For manually performing the setting, the following
information of the connected router or modem is required.
Confirm the information prior to the setting.
− IP address, netmask, gateway, DNS IP address
• Besides, if specifying a proxy server, the following
information specified from your internet service provider is
also required. Confirm the information prior to the setting.
− IP address and port number of the proxy server
Next
• If selecting “Yes”: The IP address is automatically
obtained.
• If selecting “No”: The IP address, netmask and
gateway are manually entered using the screen for
inputting characters. (See page 42.)
Regarding each of the setup values, confirm the
specifications of your broadband router.
6
7
Select “Next”, then press ENTER.
For setting the DNS IP address, press to
select “Yes” or “No”, then press ENTER.
Do you obtain the DNS IP address
automatically?
1
2
3
4
Yes
Press HOME MENU to display the Home Menu
screen.
Press to select “Settings”, then
press ENTER.
Press to select “Communication Setup”,
then press ENTER.
Press to select “Change”, then press
ENTER.
Next
• If selecting “Yes”: The DNS IP address is automatically
obtained. (The DHCP server function of the router or
modem is used for the automatic acquisition.)
• If selecting “No”: The primary and secondary IP
addresses are entered using the screen for inputting
characters. (See page 42.)
Regarding each of the setup values, confirm the
specifications of your broadband router.
Current Ethernet setup info.
IP Address
Netmask
Gateway
DNS
Proxy
Change
: Auto Setup
: Auto Setup
: Auto Setup
: Auto Setup
: Not Use
8
9
Initialize
• For initializing the current setting, select “Initialize”,
then press ENTER.
No
Primary
Secondary
Select “Next”, then press ENTER.
For setting the proxy server, press to
select “Yes” or “No”, then press ENTER.
Do you use the proxy server?
Yes
No
Address
Port
Next
• If selecting “Yes”: The IP address or proxy server
name and port number for the proxy server specified
from your internet service provider are entered using
the screen for inputting characters. (See page 42.)
• If selecting “No”: Go to the next step.
(Continued on the next page)
40
SETTINGS
10
11
Select “Next”, then press ENTER.
For the advanced setting (the setting of the
Ethernet connection speeds), press to
select “Yes” or “No”, then press ENTER.
• Normally select “No”, then press ENTER.
• The Ethernet connection speeds can be set when you
select “Yes”, then press ENTER.
• As automatic detection is made (factory preset
mode), this setting is not normally necessary. If a
situation occurs in which the Ethernet connection fails,
etc., change the setting and confirm if the Ethernet
connection successfully works.
When the connection speed is set, select “Next”, then
press ENTER.
Option
Ethernet Connection Speeds
Yes
No
Auto-Detection
10M Half Duplex
10M Full Duplex
100M Half Duplex
100M Full Duplex
Next
12
For testing the connection to the internet, after
confirming the settings, press to select
“Test”, then press ENTER.
• “Test” is available only when setting to obtain the IP
address automatically. “Test” cannot be selected if the
IP address has not been obtained automatically.
Confirm the current setting.
IP Address : xxx xxx xxx xxx
: xxx xxx xxx xxx
Netmask
: xxx xxx xxx xxx
Gateway
DNS Address : xxx xxx xxx xxx
MAC Address : xx:xx:xx:xx:xx:xx
Complete
• As a result of the test, if the internet connection fails,
enter the setup values manually.
13
Settings
Test
Press to select “Complete”, then press
ENTER.
41
SETTINGS
Press to select a number/character, then
press ENTER.
Repeat the step 3 to display all of the desired
characters/numbers in the input field.
3
The operation procedure for
inputting characters manually
4
NOTE
• Numeric characters such as IP address can be entered on
the input screen either by selecting each of the characters
in the “Numeric” mode or using the Number buttons on
the remote control.
IP Address
Netmask
Gateway
1
123
Numeric
Edit
123
1 2 3 4 5 6 7 8 9 0
NOTE
RETURN (Del.Char.) to delete a number/
• Press
character you have input.
• To change a number/character you have input, press
GREEN (Left) or BLUE (Right) to select the number/
character you want to change, and press
RETURN
(Del.Char.). Then, press to select a new number/
character you want to input, and press ENTER.
Press ENTER at the boxes in which characters
are to be entered, and the input screen will
appear.
Numeric
Edit
5
1 2 3 4 5 6 7 8 9 0
Selected by
pressing
2
Example: The screen for inputting numeric characters
Press YELLOW (Complete) to fix the numbers
which have been input.
IP Address
Netmask
Gateway
Selected by
pressing
Press to select the desired input mode.
• When inputting the address of the proxy server;
“1ABC” (Alphabet/numeric character) / “Sign” / “Edit”
• When inputting other values (IP address, etc.);
“Numeric” / “Edit”
6
123
Repeat step 1 to 5 to finish inputting all the
required characters.
Input character list
1ABC (Alphabet/
numeric character)
Num.
ABC
Num.
1234567890
ABC
ABCabc
DEF
DEFdef
GHI
GHIghi
JKL
JKLjkl
MNO
MNOmno
PQRS
PQRSpqrs
TUV
TUVtuv
WXYZ
WXYZwxyz
Spc.
(space)
Numeric
Sign
Edit
DEF
GHI
JKL
MNO
TUV
WXYZ
Spc.
1234567890
@.,:
;_-\
$%!?
&#+*
=/|˜
“‘ˆ`
()<>
[ ]{ }
Spc.
@.,:
@ . , :
;_-\
; _ - \
$%!?
&#+*
& # + *
=/|˜
= / | ˜
“‘ˆ`
“ ‘ ˆ `
( )< >
(
Spc.
(space)
Cancel
) <
>
Left
[ ]{ }
Right
[
]
Complete
* The same operation as the colored buttons and
of the items and pressing ENTER.
“Del.Char.” stands for deleting characters.
42
PQRS
{
}
$ % ! ?
Del.Char.
RETURN can be performed by selecting each
SETTINGS
USB Memory Management
The following instructions explain how to delete data
such as the Virtual Package data and the BD-LIVE
data in a USB memory device.
1 Insert the USB memory device into the BD
STORAGE/SERVICE terminal on rear of this
player.
2 Press HOME MENU to display the Home Menu
screen.
3 Press to select “Settings”, then
press ENTER.
4 Press to select “USB Memory
Management”, then press ENTER.
• “No USB Memory” appears when no USB memory is
inserted.
5
Press , select “Erase” or “Format”, then
press ENTER.
Erase: Deletes only BD-VIDEO data contents.
Format: Deletes all contents.
Before using the USB memory device
Erase
Erases BD-VIDEO data on USB memory.
Format
Erase all contents on USB memory
including protected contents.
CAUTION:
• Do not remove the USB memory device or unplug
the AC cord while the operations for “USB Memory
Management ” or “Software Update” are being
performed.
• Do not use a USB extension cable when connecting
a USB memory device to the BD STORAGE/SERVICE
terminal of the player.
− Using a USB extension cable may prevent the player
from performing correctly.
NOTE:
• Operation of USB memory devices is not guaranteed.
NOTE
• Data which has been saved to the player’s internal memory
(game score, etc.) will also be deleted.
6
Press , select “Yes”, and press ENTER.
7
No
Settings
Yes
Start the process.
• The screen for the current operation will display.
Complete
OK
8
Press ENTER.
43
SETTINGS
• If the USB memory device is not properly installed or
the correct update file cannot be found on the USB
memory device, an error message is displayed.
Check the file on the USB memory device, and then
reinsert the USB memory device correctly.
Software Update
This function allows software updates by inserting a
USB memory device with the update file into the BD
STORAGE/SERVICE terminal on this player.
To check for the availabitity of a software update,
visit www.pioneerelectronics.com/PUSA/.
1 Insert the USB memory device with the update
file into the BD STORAGE/SERVICE terminal on
rear of this player.
2 Press HOME MENU to display the Home Menu
screen.
3 Press to select “Settings”, then
press ENTER.
4 Press to select “Software Update”, then
ENTER.
Software update file is not detected in the USB memory device.
Confirm that you have transferred the file
to the USB memory device and retry software update.
Confirm that you have inserted the USB memory device
into the correct device.
OK
There is more than one software file
in the USB memory device.
Confirm that only the software update file is
in the USB memory device.
• If you have not yet set the password, go to step 6.
5
Enter 4-digit password
6
OK
Enter the 4-digit number using 0-9.
8
Press ENTER to start updating.
• The screen becomes dark for a while until the update
screen can be displayed. Please wait for the update
screen to appear. Do not unplug the AC cord.
Press ENTER to start checking data in the USB
memory device.
The picture will temporarily go dark until
the software update display appears.
Wait several minutes and do not unplug the AC cord.
Insert USB memory device containing
the software update file.
OK
OK
7
During the data checking, “Checking” blinks.
Now updating
* Do not unplug AC cord.
Now checking the data in USB memory device.
Update Version
**2345678
30%
Checking
• The current version of this unit software and the
version of the update file on the USB memory device
are displayed. To update this player software with
update file, select “Yes”, and press ENTER.
Software update file is detected in the USB memory device.
Start update?
Current Ver. :
Update Ver. :
**1234567
**2345678
Yes
44
No
9
When the software is successfully updated, a
screen is displayed indicating that the update
process is completed.
• If the update has failed, check the file in the USB
device and try Software Update again.
10
11
Press STANDBY/ON to turn off the player.
Remove the USB memory device.
SETTINGS
Country Code List
USA / CANADA / JAPAN / GERMANY / FRANCE / UK / ITALY / SPAIN / SWISS / SWEDEN / HOLLAND / NORWAY /
DENMARK / FINLAND / BELGIUM / HONG KONG / SINGAPORE / THAILAND / MALAYSIA / INDONESIA / TAIWAN /
PHILIPPINE / AUSTRALIA / RUSSIA / CHINA
Language List
English / Français / Deutsch / Italiano / Español / Japanese / Svenska / Nederlands
Language Code List
AA Afar / AB Abkhazian / AF Afrikaans / AM Ameharic / AR Arabic / AS Assamese / AY Aymara / AZ Azerbaijani / BA Bashkir /
BE Byelorussian / BG Bulgarian / BH Bihari / BI Bislama / BN Bengali, Bangla / BO Tibetan / BR Breton / CA Catalan /
CO Corsican / CS Czech / CY Welsh / DA Danish / DE German / DZ Bhutani / EL Greek / EN English / EO Esperanto /
ES Spanish / ET Estonian / EU Basque / FA Persian / FI Finnish / FJ Fiji / FO Faroese / FR French / FY Frisian / GA Irish /
GD Scots Gaelic / GL Galician / GN Guarani / GU Gujarati / HA Hausa / HI Hindi / HR Croatian / HU Hungarian / HY Armenian /
IA Interlingua / IE Interlingue / IK Inupiak / IN Indonesian / IS Icelandic/ IT Italian / IW Hebrew / JA Japanese / JI Yiddish /
JW Javanese / KA Georgian / KK Kazakh / KL Greenlandic / KM Cambodian / KN Kannada / KO Korean / KS Kashmiri /
KU Kurdish / KY Kirghiz / LA Latin / LN Lingala / LO Laothian / LT Lithuanian / LV Latvian, Lettish / MG Malagasy / MI Maori /
MK Macedonian / ML Malayalam / MN Mongolian / MO Moldavian / MR Marathi / MS Malay / MT Maltese / MY Burmese /
NA Nauru / NE Nepali / NL Dutch / NO Norwegian / OC Occitan / OM Afan (Oromo) / OR Oriya / PA Panjabi / PL Polish /
PS Pashto, Pushto / PT Portuguese/ QU Quechua / RM Rhaeto-Romance / RN Kirundi / RO Romanian / RU Russian /
RW Kinyarwanda / SA Sanskrit / SD Sindhi / SG Sangho / SH Serbo-Croatian / SI Singhalese / SK Slovak / SL Slovenian /
SM Samoan / SN Shona / SO Somali / SQ Albanian / SR Serbian / SS Siswat / ST Sesotho / SU Sundanese / SV Swedish /
SW Swahili / TA Tamil / TE Telugu / TG Tajik / TH Thai / TI Tigrinya / TK Turkmen / TL Tagalog / TN Setswana / TO Tonga /
TR Turkish / TS Tsonga / TT Tatar / TW Twi / UK Ukrainian / UR Urdu / UZ Uzbek / VI Vietnamese / VO Volapük / WO Wolof /
XH Xhosa / YO Yoruba / ZH Chinese / ZU Zulu
About Output of Next Generation Audio Formats
Next generation
audio formats
Dolby TrueHD
Maximum number of
channels
7.1ch (48 kHz/96 kHz)
HDMI
PCM
DIGITAL OUT
Bitstream
PCM
Bitstream
7.1ch *3
7.1ch *4
2ch *2
5.1ch *1/*3
3
4
2
5.1ch *1/*3
5.1ch *
5.1ch *
7.1ch (48 kHz)
7.1ch *3
7.1ch *4
2ch *
2ch *2
5.1ch *1/*3
DTS-HD Master Audio
7.1ch (48 kHz/96 kHz)
7.1ch *3
7.1ch *4
2ch *2
5.1ch *1/*3
5.1ch (192 kHz)
5.1ch *3/*5
5.1ch *4
2ch *2
5.1ch *1/*3
DTS-HD High Resolution Audio
7.1ch (48 kHz/96 kHz)
7.1ch *3
7.1ch *4
2ch *2
5.1ch *1/*3
LPCM
7.1ch (48 kHz/96 kHz)
7.1ch *3
—
2ch *2
—
5.1ch (192 kHz)
5.1ch *3
—
2ch *2
—
Settings
5.1ch (192 kHz)
Dolby Digital PLUS
*1 Core only
*2 Down mixed
*3 When “Secondary Audio” is set to “On”, the audio is output as 48 kHz.
*4 When “Secondary Audio” is set to “On”, the audio is output as PCM.
*5 When 5.1ch (192 kHz), the audio output is downsampled to 96 kHz.
*5 When 2ch, the audio is output as 192 kHz.
45
Appendix
Troubleshooting
The following problems do not always suggest a defect or malfunction of this Player.
Refer to the problems and lists of possible solutions below before calling for service.
Power
Problem
Possible causes and solutions
The Player power cannot be turned
on.
• Is the power cord firmly plugged into the AC outlet? (Page 19)
• When the power cord is plugged into an AC outlet, press and hold STANDBY/
” appears on the front panel display. Then, after
ON on the Player until “
the STANDBY/ON indicator is lit, turn on the power. (Page 48)
• Press STANDBY/ON after the STANDBY/ON indicator turns on. (Page 20)
The Player power is turned on
automatically.
• When “Settings” – “KURO LINK” is set to “Yes” on the player, the player’s power
may turn on when the connected TV is operated. (Page 38)
The Player power is turned off
automatically.
• Is “Auto Power Off” set to “Yes”? When “Auto Power Off” is set to “Yes”, the
power will be automatically turned off after 10 continuous minutes of inactivity (no
playback). (Page 38)
• When “Settings” – “KURO LINK” is set to “Yes” on the player, the player’s power
may turn off when the power of the connected TV is turned off. (Page 38)
Basic Operation
Problem
Possible causes and solutions
The remote control does not work.
• Use the remote control within its operating range. (Page 19)
• Replace the batteries. (Page 19)
Cannot operate the Player.
• Are you operating the Player within the specified operating temperature range?
(Page 52)
Disc Playback
Problem
Possible causes and solutions
The Player cannot play a disc.
• Take out the disc and clean it. (Page 9)
• Make sure that the disc is loaded properly (aligned in disc tray and label-side up).
(Page 24)
• Make sure that region code on the disc matches that of this Player. (Page 6)
• Allow any condensation in or near the Player to dry. (Page 9)
• Check that the disc is recorded in the compatible TV system (PAL or NTSC).
• The Player cannot play back video which was not recorded normally. (Page 6)
• Proper playback may be impossible due to the state of the disc recording, a
scratched, warped or dirty disc, the state of the pick-up, or compatibility issues
between this Player and the disc being used. (Pages 6, 9)
• When the recorded time of a disc is unusually short, playback may not be possible.
• BD-RE/R discs recorded in a format other than BDMV/BDAV cannot be played
back. (Page 6)
The disc is automatically ejected
after closing the disc tray.
• Make sure that the disc is loaded properly (aligned in disc tray and label-side up).
(Page 24)
• Take out the disc and clean it. (Page 9)
• Make sure that region code on the disc matches that of this Player. (Page 6)
• Make sure that the disc is playable. (Page 6)
Video stops.
• Has the Player been subjected to shock or impact? Are you using it in an unstable
location? The Player will stop if it senses shock or vibration.
The Player makes a snapping sound
when starting playback or loading
a disc.
• The player may sometimes make a snapping sound when starting playback if it has
not been operated in a while. These sounds are not malfunctions of the player but
are normal operating conditions.
(Continued on the next page)
46
Troubleshooting
Picture
Problem
Possible causes and solutions
No picture.
• Make sure that the cables are connected correctly. (Pages 14–16)
• Make sure that the connected TV or the AV receiver is set to the correct input.
(Pages 14–16)
• Take out the disc and clean it. (Page 9)
• Make sure that region code on the disc matches that of this Player. (Page 6)
• There is no picture from the HDMI output.
− Are the settings performed correctly? Please check the settings. (Page 37)
• There is no picture from the component video output.
− Are the settings performed correctly? Please check the settings. (Page 37)
Screen freezes and operation
buttons do not work.
•
•
•
•
There is just audio with no video.
• Is the connection cable for video output connected properly? (Pages 14–16)
Widescreen video appears vertically
stretched, or black bands appear at
the top and bottom of the screen.
• Is “TV Aspect Ratio” set to match the connected TV? (Page 37)
• If you are using a widescreen TV, is the “TV Aspect Ratio” set to “Wide”? (Page 37)
Square noise (mosaic) appears on
the screen.
• Blocks in images may be visible in scenes with rapid movement due to the
characteristics of digital image compression technology.
The playback screen will be
disturbed if DVD video is recorded
to a VCR, or played back through a
VCR.
• This Player complies with analog copy protection. Some discs contain a copy
prohibiting signal. If you try to play back such discs through a VCR, or record to a
VCR and play back the signal, the copy protection will prevent normal playback.
(Pages 15–16)
Audio is not output, or images are
not played back properly.
• The audio may not be output or the images may not be played back properly for
some discs in which copyright-protected contents are recorded.
Press STOP, then restart playback.
Turn off the power and turn on the power again.
If the power is not turned off, perform a reset. (Page 48)
Is the disc damaged or dirty? Check the condition of the disc. (Page 9)
Sound
Problem
Possible causes and solutions
• If the volume of the TV or amplifier is set to minimum, turn the volume up.
• There is no sound during still mode, slow motion playback, fast forward and fast
reverse. (Page 30)
• DVD audio recorded in DTS is only output from the DIGITAL OUT OPTICAL
terminal. Connect a DTS compatible digital amplifier or decoder to the DIGITAL OUT
OPTICAL terminal on this Player. (Page 17)
• Check that the audio cable is connected correctly. (Page 17)
• Check that the cable plugs are clean.
• Take out the disc and clean it. (Page 9)
• Audio may not be output depending on the audio recording status, such as when
audio other than an audio signal or non-standard audio is recorded for the audio
content of the disc. (Page 6)
Left and right channels of audio are
reversed, or sound comes out of
only one side.
• Are left and right audio cables connected to the opposite terminal, or is one side
disconnected? (Page 17)
Audio is not output, or images are
not played back properly.
• The audio may not be output or the images may not be played back properly for
some discs in which copyright-protected contents are recorded.
Appendix
No sound, or sound is distorted.
Network
Problem
Cannot connect to the Internet.
Possible causes and solutions
• Is the LAN cable connected properly?
• Is the wrong cable such as a modular cable used? Connect a LAN cable to the LAN
terminal. (Page 18)
• Is the power for the connected equipment, such as broadband router or modem turned on?
• Is the broadband router and/or modem properly connected?
• Is the proper value(s) set in the network setting? Check “Communication Setup”.
(Pages 40–42)
47
Troubleshooting
Network (Continued)
Problem
Cannot download BD-LIVE contents.
Possible causes and solutions
• Is the LAN cable connected properly?
• Is the USB memory device properly connected? Check that the USB memory
device is connected to the BD STORAGE/SERVICE terminal of this Player.
• Check if the BD disc supports BD-LIVE.
• Check the setting for “BD Internet Access”. (Page 39)
KURO LINK
Problem
Possible causes and solutions
KURO LINK function does not work.
• Connect the HDMI cable properly.
• Use High Speed HDMI™ cables when using the KURO LINK function. The KURO
LINK function may not operate properly if other HDMI cables are used.
• Set “Settings” – “KURO LINK” on the player to “Yes”. (Page 38)
• The KURO LINK function does not work with devices of other brands, even if
connected using an HDMI cable.
The KURO LINK function will not work if devices that do not support the KURO
LINK function or devices of other brands are connected between the KURO LINKcompatible device and the player.
It may also not work with certain Flat Panel TVs.
• Set KURO LINK to On on the connected device.
The KURO LINK function works when KURO LINK is set to On for all devices
connected by HDMI cable. Once connections and the settings of all the devices
are finished, be sure to check that the player’s picture is output to the Flat Panel TV.
(Also check after changing the connected devices and reconnecting HDMI cables.)
The KURO LINK function may not operate properly if the player’s picture is not
properly output to the Flat Panel TV.
• The KURO LINK function may not work if three or more players, including this player,
are connected.
• Also refer to the operating instructions of the connected device.
KURO LINK indicator does not light.
•
•
•
•
Connect to a KURO LINK-compatible Pioneer Flat Panel TV using an HDMI cable.
Set KURO LINK to On on the Flat Panel TV.
Set “Settings” – “KURO LINK” on the player to “Yes”. (Page 38)
Check that the player’s picture is being output to the Flat Panel TV.
Other
Problem
Possible causes and solutions
The TV operates incorrectly.
• Some TVs with wireless remote control capability may operate incorrectly when
using the remote control of this Player. Use such TVs away from this Player.
The Player heats up during use.
• When using this Player, the console cabinet may heat up depending on the usage
environment. This is not a malfunction.
Input of connected TV and AV
system switches automatically.
• When “Settings” – “KURO LINK” is set to “Yes” on the player, the input on the
connected TV or AV system (AV receiver or amplifier, etc.) may switch automatically.
(Page 38)
STANDBY/ON indicator will remain
lit.
• When the AC cord is removed from the outlet, the STANDBY/ON indicator will
remain lit for a short period. This is normal and is not a malfunction.
To Reset this Player
• If this Player receives strong interference from a source such as excessive static electricity, strong external noise, malfunction
of power supply, or voltage caused by lightning during use or a wrong operation is sent to the Player, errors like the Player not
” appears on the front panel
accepting an operation may occur. Press and hold STANDBY/ON on the Player until “
display when the Player does not operate properly even after the power has been turned off. Then, after the STANDBY/ON
indicator is lit, turn on the power.
• When a reset is performed while the power is on, the Player will turn off. Turn the power on again. At this point, it may take
a few moments for the system processing to finish before the Player is ready for use. During the system processing, the
BD/DVD/CD disc indicator on the front panel display of the Player will blink. Once the system processing has finished, the
indicators will finish blinking and then light up normally. You can operate the Player when the BD/DVD/CD disc indicator is lit.
• Since all settings including the language setting stored in memory are also reset when a reset has been performed, they must
be set again.
• When the problem persists even after performing a reset, unplug the AC cord and plug it in again. If this does not solve the
problem, contact the nearest service center approved by Pioneer.
48
On-screen Error Messages
Messages Relating to BD disc and DVD disc
• The following messages appear on the TV screen in case the disc you tried to playback is not appropriate or the
operation is not correct.
Error message
Possible Error
Cannot play.
• The disc cannot be played back with
this Player.
Incompatible disc.
• If you load a disc which cannot be
played with this Player (i.e. a scratched
disc), or if you load a disc upside down,
this message will appear, and the disc
tray will automatically pop out.
• Occurs if the loaded disc cannot be
played because it is a non-standard disc
or scratched, etc.
Suggested Solution
• Check the disc, and load it correctly.
• Remove the disc.
—
Cannot operate.
• Occurs if an operation is incorrect.
This USB memory is not formatted
properly. Please format the memory in
USB memory management.
• Occurs if there is a formatting error.
• Format the USB memory again.
The Connected USB Memory cannot
be used. It should be compliant with
USB 2.0.
• Occurs if USB memory not compliant
with USB 2.0 High Speed (480Mbit/s) is
used (i.e. USB 1.0/USB 1.1).
• Connect USB 2.0 High Speed
(480Mbit/s) compliant USB memory.
Appendix
49
Glossary
AVCHD (Advanced Video Codec High
Definition)
The AVCHD is a high definition (HD) digital video camera
recorder format recording high-definition onto certain media
by using highly efficient codec technologies.
BDAV (Page 6)
BDAV (Blu-ray Disc Audio/Visual, BD-AV) refers to one of the
application formats used for writable Blu-ray discs such as
BD-R, BD-RE, etc. BDAV is a recording format equivalent to
DVD-VR (VR mode) of the DVD specifications.
BD-J application
The BD-ROM format supports Java for interactive functions.
“BD-J” offers content providers almost unlimited functionality
when creating interactive BD-ROM titles.
BD-LIVE (page 26)
A variety of interactive content is available from BD-LIVE
compatible Blu-ray discs via the internet.
BDMV (page 6)
BDMV (Blu-ray Disc Movie, BD-MV) refers to one of the
application formats used for BD-ROM which is one of the
Blu-ray Disc specifications. BDMV is a recording format
equivalent to DVD-video of the DVD specification.
BD-R (pages 6, 24)
A BD-R (Blu-ray Disc Recordable) is a recordable, write-once
Blu-ray Disc. Since contents can be recorded and cannot be
overwritten, a BD-R can be used to archive data or for storing
and distributing video material.
Dolby Digital Plus
A sound system developed as an extension to Dolby Digital.
This audio coding technology supports 7.1 multi-channel
surround sound.
Dolby TrueHD
Dolby TrueHD is a lossless coding technology that supports
up to 8 channels of multi-channel surround sound for the next
generation optical discs. The reproduced sound is true to the
original source bit-for-bit.
DTS
This is a digital sound system developed by DTS, Inc. for use
in cinemas.
DTS-HD High Resolution Audio
DTS-HD High Resolution Audio is a new technology
developed for the next generation high definition optical disc
format.
DTS-HD Master Audio
DTS-HD Master Audio is a lossless audio compression
technology developed for the next generation high definition
optical disc format.
DTS-HD Master Audio | Essential
DTS-HD Master Audio | Essential is a lossless audio
compression technology developed for the next generation
high definition optical disc format.
DVD upscaling (page 24)
BD-RE (pages 6, 24)
Upscaling (upconverting) refers to a function of various
players and devices that enlarge the image size to fit the size
of the screen of video equipments such as a TV.
A BD-RE (Blu-ray Disc Rewritable) is a recordable and
rewritable Blu-ray Disc.
DVD video (pages 6, 24)
BD-ROMs (Blu-ray Disc Read-Only Memory) are commercially
produced discs. Other than conventional movie and video
contents, these discs have enhanced features such as
interactive content, menu operations using pop-up menus,
selection of subtitle display, and slide shows. Although a
BD-ROM may contain any form of data, most BD-ROM discs
will contain movies in High Definition format for playback on
Blu-ray Disc players.
A disc format that contains up to eight hours of moving
pictures on a disc the same diameter as a CD. A single-layer
single sided DVD holds up to 4.7 GB; a double layer singlesided DVD, 8.5 GB; a single layer double-sided DVD, 9.4
GB; double-layer double-sided DVD, 17 GB. The MPEG 2
format was adopted for efficient video data compression. It is
a variable rate technology that encodes the data to according
to the status of the video for reproducing high-quality images.
Audio information is recorded in a multi-channel format such
as Dolby Digital, allowing for a realistic audio presence.
Blu-ray Disc (BD) (page 6)
DVD+/-R (pages 6, 24)
BD-ROM
A disc format developed for recording/playing high-definition
(HD) video (for HDTV, etc.), and for storing large amounts of
data. A single layer Blu-ray Disc holds up to 25 GB, and a
dual-layer Blu-ray Disc holds up to 50 GB of data.
Chapter number (pages 34, 35)
Sections of a movie or a music feature that are smaller than
titles. A title is composed of several chapters. Some discs
may only be comprised of a single chapter.
Copy guard
This function prevents copying. You cannot copy discs
marked by the copyright holder with a signal which prevents
copying.
Disc menu (page 25)
This lets you select things like the subtitle language or audio
format using a menu stored on the DVD video disc.
Dolby Digital
A sound system developed by Dolby Laboratories Inc. that
gives movie theater ambience to audio output when the
product is connected to a Dolby Digital processor or amplifier.
50
A DVD+/-R is a recordable, write-once DVD. Since contents
can be recorded and cannot be overwritten, a DVD+/-R can
be used to archive data or for storing and distributing video
material. The DVD+/-R has two different formats: VR format
and Video format. DVDs created in Video format have the
same format as a DVD video, while discs created in VR (Video
Recording) format allow the contents to be programed or
edited.
DVD+/-RW (pages 6, 24)
A DVD+/-RW is a recordable and rewritable DVD. The rerecordable feature makes editing possible. The DVD+/-RW
has two different formats: VR format and Video format. DVDs
created in Video format have the same format as a DVD
video, while discs created in VR (Video Recording) format
allow the contents to be programed or edited.
Glossary
HDMI (page 14)
Progressive format
HDMI (High-Definition Multimedia Interface) is an interface
that supports both video and audio on a single digital
connection. The HDMI connection carries standard to high
definition video signals and multi-channel audio signals to
AV components such as HDMI equipped TVs, in digital form
without degradation.
Compared to the Interlace format that alternately shows
every other line of an image (field) to create one frame, the
Progressive format shows the entire image at once as a single
frame. This means that while the Interlace format can show
30 frames/60 fields in one second, the Progressive format
can show 60 frames in one second. The overall picture quality
increases and still images, text, and horizontal lines appear
sharper.
Interlace format
Interlace format shows every other line of an image as a
single “field” and is the standard method for displaying
images on television. The even numbered field shows the
even numbered lines of an image, and the odd numbered
field shows the odd numbered lines of an image.
JPEG (pages 6, 7, 33)
Region code (page 6)
Code identifying a geographic region of compatibility for a
BD/DVD.
Resume playback (pages 24, 29)
JPEG (Joint Photographic Experts Group) is a still image data
compression format and is used in most of digital cameras.
If you stop playback while it is in progress, the Player stores
the stop position in memory, and this function lets you
playback from that point.
Letter Box (LB 4:3) (page 37)
Skip (page 30)
A screen size with black bars on the top and bottom of the
image to allow viewing of wide-screen (16:9) material on a
connected 4:3 TV.
This returns to the start of the chapter (or track) being played,
or skips to the next chapter (or track).
Linear PCM Sound
These are the lines of text appearing at the bottom of the
screen which translate or transcribe the dialog. They are
recorded on many DVD and BD video discs.
Linear PCM is a signal recording format used for Audio CDs
and on some DVD and Blu-ray discs. The sound on Audio
CDs is recorded at 44.1 kHz with 16 bits. (Sound is recorded
between 48 kHz with 16 bits and 96 kHz with 24 bits on DVD
video discs and between 48 kHz with 16 bits and 192 kHz
with 24 bits on BD video discs.)
MPEG-2
Subtitles (pages 31, 34, 35)
Time number
This indicates the play time which has elapsed from the start
of a disc or a title. It can be used to find a specific scene
quickly. (It may not work with some discs.)
MPEG-2 (Moving Picture Experts Group phase 2) is one of
the video data compression schemes, which is adopted for
DVD videos and digital broadcasts worldwide. Some Blu-ray
Discs also use high bitrate MPEG-2.
Title number (pages 34, 35)
Multi Angle (pages 32, 34, 35)
Top menu (page 25)
This is a feature of DVD and BD video discs. In some discs,
the same scene is shot from different angles, and these are
stored in a single disc so you can enjoy playback from each
angle. (This function can be enjoyed if the disc is recorded
with multiple angles.)
In a BD/DVD video, this is the menu for selecting things like
the chapter to be played back and the subtitle language. In
some DVD videos, the top menu may be called the “Title
Menu”.
Multi Audio
These numbers are assigned to the tracks which are
recorded on audio CDs. They enable specific tracks to be
located quickly.
This is a feature of DVD and BD video discs. This function
makes it possible to record different audio tracks for the same
video, so you can enhance your enjoyment by switching the
audio. (You can enjoy this function with discs recorded with
multiple audio tracks.)
A screen size that cuts off the sides of the image to allow
viewing of wide-screen (16:9) material on a connected 4:3 TV.
Parental control (page 39)
Track number (pages 34, 35)
x.v.Color
x.v.Color reproduces a greater range of color than before,
showing almost all of the colors that the human eye can
detect. (Applicable for JPEG files only with this system)
Appendix
Pan Scan (PS 4:3) (page 37)
These numbers are recorded on DVD and Blu-ray discs.
When a disc contains two or more movies, these movies are
numbered as title 1, title 2, etc.
In some digital broadcasts and BD/DVD video discs, a
control level for disc viewing is set depending on the age of
the viewer. With this Player, you can set the control level for
viewing such broadcasts and discs.
Pop-up menu (page 25)
An enhanced menu operation available on BD video discs.
The pop-up menu appears when POPUP MENU/MENU
is pressed during playback, and can be operated while
playback is in progress.
51
Specifications
General
Power supply
AC 120 V, 60 Hz
Power consumption (Normal)
19 W
Power consumption (Standby)
0.5 W (When “Quick Start” is set to “No”)
Dimensions
Approx. 16 9/16 2 5/16 10 9/16 inch (W H D)
Approx. 420 mm 58 mm 268 mm (W H D)
Weight
Approx. 6 lbs. (2.7 kg)
Operating temperature
41 °F to 95 °F (5 °C to 35 °C)
Storage temperature
–4 °F to 131 °F (–20 °C to 55 °C)
Operating humidity
10 % to 80 % (no condensation)
TV systems
NTSC system
Playback
Playable discs
BD-ROM, BD-RE Dual Layer, BD-R Dual Layer,
DVD Video, DVD+RW/+R/-RW/-R Dual Layer (Video/VR/AVCHD format),
Audio CD (CD-DA), CD-RW/R (CD-DA, JPEG file format)
Input/Output
HDMI OUT
HDMI 19-pin standard connector (1080p 24 Hz output)
HDMI™ (V.1.3 with Deep Color, x.v.Color™, Dolby TrueHD,
DTS-HD Master Audio | Essential)
COMPONENT VIDEO
Output level:
Y: 1 Vp-p (75 ohms)
PB, PR: 0.7 Vp-p (75 ohms)
Jacks: RCA jack
VIDEO
Output level: 1 Vp-p (75 ohms)
Jack: RCA-pin jack
DIGITAL OUT OPTICAL
Terminal: Square Optical terminal
AUDIO OUT
Output level: 2 V rms (Output impedance: 1k ohms)
Jacks: RCA jack
BD STORAGE/SERVICE
USB 2.0 High Speed (480 Mbit/s) correspondence (for Local storage/Software
update)
LAN
10BASE-T/100BASE-TX
Specifications are subject to change without notice.
52
MANUAL DE INSTRUCCIONES
Para referencia futura, anote los números de modelo y de
serie (indicados en la parte posterior de este producto) en
el espacio provisto.
ESPAÑOL
N°. de modelo: BDP-121
N°. de serie:
AVISO: PARA REDUCIR EL RIESGO DE INCENDÍO O ELECTROCHOQUE NO
EXPONGA ESTE APARATO A LA HUMEDAD.
PELIGRO DE DESCARGA
ELECTRICA NO ABRIRP
ESPAÑOL
Este símbolo previene al usuario
del voltaje aislado dentro de la
unidad que puede provocar
descargas eléctricas peligrosas.
PRECAUCIÓN
PRECAUCIÓN:
PARA REDUCIR EL RIESGO DE DESCARGA ELECTRICA,
NO QUITE LA CUBIERTA. EL USUARIO NO DEBERA DAR
NINGUN TIPO DE SERVICIO A NINGUNA PARTE
INTERNA. DEBERA SER REALIZADO SOLO POR
PERSONAL DE SERVICIO CALIFICADO.
Este símbolo advierte al usuario
que existen instrucciones de
operación y de mantenimiento en la
literatura incluida en esta unidad.
“ADVERTENCIA—Las reglas de la FCC (Comisión Federal de Comunicaciones) estipulan
que cualquier modificación o cambio a este equipo no aprobado expresamente por el
fabricante podrá anular la autorización del usuario para operar este equipo”.
INFORMACIÓN
Este equipo se ha sometido a todo tipo de pruebas y cumple con las normas establecidas para dispositivo
digital de Clase B, de conformidad con la Parte 15 de las reglas de la FCC (Comisión Federal de
Comunicaciones). Estas reglas están diseñadas para asegurar una protección razonable contra interferencias
perjudiciales en las instalaciones residenciales. Este equipo genera, utiliza y puede emitir energía de
radiofrecuencia y, si no se instala y utiliza debidamente, es decir, conforme a las instrucciones, podrían
producirse interferencias perjudiciales en las radiocomunicaciones. Sin embargo, no se garantiza que estas
interferencias no se produzcan en una instalación determinada. Si este equipo ocasiona interferencias en la
recepción de radio o televisión, lo cual puede comprobarse con sólo apagar y encender el equipo, intente
corregir el problema mediante una o una combinación de las siguientes medidas:
—Reoriente la antena receptora o cámbiela de lugar.
—Aumente la separación entre el equipo y el receptor.
—Enchufe el equipo a una toma de corriente situada en un circuito distinto del receptor.
—Consulte a su distribuidor o a un técnico experto en radio/televisión.
PRECAUCIÓN:
EL USO DE MANDOS O AJUSTES O LA
REALIZACION DE PROCEDIMIENTOS DISTINTOS
DE LOS INDICADOS EN LA PRESENTE IMPLICA
EL RIESGO DE EXPOSICION A UNA RADIACION
PELIGROSA.
COMO LOS RAYOS LASER UTILIZADOS EN ESTA
UNIDAD PUEDEN RESULTAR PERJUDICIALES
PARA SUS OJOS, NO INTENTE DESARMAR EL
GABINETE.
SOLICITE EL SERVICIO UNICAMENTE A
PERSONAL CALIFICADO.
• Este reproductor está clasificado como un producto
CLASS 1 LASER.
• La etiqueta CLASS 1 LASER PRODUCT se encuentra en
la tapa posterior.
• Este producto contiene un dispositivo láser de baja potencia.
Para garantizar su seguridad, no retire ninguna cubierta ni
trate de tener acceso al interior del producto. Solicite todas
las reparaciones sólo a personal cualificado.
PRODUCTO
LASER CLASE 1
• En su unidad encontrará la siguiente etiqueta de
precaución.
Ubicación: dentro de la unidad
SA172WJ
CAUTION: CLASS 2 VISIBLE AND INVISIBLE LASER
RADIATION WHEN OPEN. DO NOT STARE INTO THE BEAM.
ACHTUNG: BEI GEÖFFNETER ABDECKUNG IST SICHTBARE UND
UNSICHTBARE LASERSTRAHLUNG DER KLASSE 2 IM
GERÄTEINNEREN VORHANDEN. NICHT IN DEN STRAHL SEHEN.
ATTENTION : RADIATIONS LASER VISIBLES ET INVISIBLES
DE CLASSE 2 OUAND OUVERT. NE PAS REGARDER
FIXEMENT LE FAISCEAU.
VARNING: KLASS 2 SYNLIG OCH OSYNLIG LASERSTRÅLNING NÄR DENNA
DEL ÄR ÖPPNAD. TITTA INTE IN I STRÅLEN.
HUOMIO: AVATTAESSA OLET ALTTIINA NÄKYVÄLLE JA NÄKYMÄTTÖMÄLLE
LUOKAN 2 LASERSÄTEILYLLE. ÄLÄ KATSO SÄTEESEEN.
ADVARSEL: KLASSE 2 SYNLIG OG USYNLIG LASERSTRÅLING HVIS DENNE
DELEN ÅPNES. STIRR IKKE INN I STRÅLEN.
ADVARSEL: KLASSE 2 SYNLIG OG USYNLIG LASERSTRÅLING VED ÅBNING.
KIG IKKE IND I STRÅLEN.
1
Introducción
Contenido
Introducción
Contenido ........................................................................... 2
¿Qué le gustaría hacer con este reproductor? ............... 3
ESTIMADO CLIENTE DE Pioneer ..................................... 4
PRECAUCIONES DE SEGURIDAD IMPORTANTES .... 4–5
Acerca de los discos ..................................................... 6–7
Disco Blu-ray ................................................................ 6
Tipos de discos que pueden utilizarse con este reproductor ... 6
Discos que no pueden ser utilizados con este reproductor ... 6–7
Acerca del contenido del disco........................................ 8
BD-Vídeo ...................................................................... 8
Título, capítulo y pista ................................................... 8
Iconos utilizados en las cajas de discos de DVD-Vídeo ... 8
Los iconos utilizados en este manual de instrucciones ... 8
Información importante .................................................... 9
Precauciones con los discos ......................................... 9
Propiedad intelectual..................................................... 9
Comenzando .................................................................... 10
Componentes principales......................................... 11–12
Unidad principal (Parte delantera) ................................ 11
Unidad principal (Parte trasera) ................................... 11
Soporte para cable HDMI en la parte posterior de la
unidad principal ................................................... 11
Unidad de mando a distancia ..................................... 12
Conexión
Introducción a las conexiones ....................................... 13
Conexiones para vídeo ............................................. 14–16
Conexión al terminal HDMI .......................................... 14
Selección de la salida de vídeo con prioridad cuando se
conecta HDMI y vídeo componente.......................... 14
Conexión a las tomas de componente ........................ 15
Conexión a la toma de vídeo ....................................... 16
Conexiones de audio....................................................... 17
Conexión al terminal de audio digital o a las tomas de
audio ........................................................................ 17
Conexión a Internet de banda ancha ............................ 18
Conexión al terminal LAN ............................................ 18
Reproducción de disco
Antes de comenzar a reproducir ............................. 19–23
Instalación de las pilas en el mando a distancia........... 19
Alcance aproximado de funcionamiento del
mando a distancia ............................................... 19
Conexión del cable de alimentación ............................ 19
Conexión de la alimentación ....................................... 20
Conexión de la alimentación .................................. 20
Entrando en espera ............................................... 20
Indicadores en el reproductor ................................ 20
Ajuste del idioma......................................................... 20
Cambio del idioma visualizado en la pantalla .......... 20
Control del TV con el mando a distancia del
reproductor .............................................................. 21
Lista de códigos de preajuste del televisor ........21-22
Cómo apagar la luz de fondo LCD y las indicaciones ... 22
Operación rápida ................................................... 22
Operación de HOME MENU .................................. 22
Acerca de la función KURO LINK ................................ 23
Para emplear la función KURO LINK ...................... 23
¿Qué puede hacerse con la función KURO LINK? .... 23
Reproducción de BD/DVD/CD ................................. 24–29
Para cargar un disco ................................................... 24
Reproducción de BD/DVD-Vídeo ................................ 24
Visualización de la información del disco ................ 24
Menús BD/DVD .......................................................... 25
Comienzo de la reproducción seleccionando un título
del menú principal ............................................... 25
Utilización del menú del disco ................................ 25
Utilización
del menú emergente ............................. 25
2
Disfrutar de BONUSVIEW o BD-LIVE .......................... 26
Utilización de la función Imagen en Imagen
(reproducción de audio/vídeo secundario) ........... 26
Paquete Virtual ...................................................... 26
BD-LIVE................................................................. 26
Reproducción de DVD-R/-RW/BD-RE/-R ............. 27–28
Reproducción seleccionando un título ................... 27
Reproducción seleccionando un capítulo ............... 28
Ordenando los títulos ............................................. 28
Reproducción seleccionando una Lista de
Reproducción...................................................... 28
Reproducción del título que paró mientras se
reproducía. .......................................................... 28
Reproducción de Audio CD ........................................ 29
Reproducción desde el principio ............................ 29
Reproducción seleccionando una pista.................. 29
Procedimiento de operación para el menú “Funciones” ... 29
Funciones de reproducción ...................................... 30–32
Avance/retroceso rápido (Búsqueda) .......................... 30
Saltando al siguiente capítulo (pista) o al principio del actual ... 30
Pausa/Reproducción de avance de fotograma............ 30
Reproducción lenta ..................................................... 30
Búsqueda con salto .................................................... 30
Repetición................................................................... 30
Reproducción repetida de un título o capítulo
(Reproducción repetida) ........................................... 30
Reproducción repetida parcial (Reproducción repetida
de una parte específica) ........................................... 31
Visualización de la información del audio..................... 31
Cambio de subtítulos .................................................. 31
Cambio de ángulo ...................................................... 32
Cómo visualizar la marca de ángulo ............................ 32
Reproducción de archivo JPEG ..................................... 33
Cómo reproducir imágenes fijas en secuencia ............ 33
Cómo reproducir imágenes fijas en una carpeta seleccionada ... 33
Reproducción de Presentación de Diapositivas ........... 33
Ajuste de la velocidad de la presentación de
diapositivas/reproducción repetida ........................... 33
Ajustes durante la reproducción .............................. 34–35
Control de función ...................................................... 34
Procedimiento operacional del control de funciones... 34
Funciones que pueden ajustarse ........................... 35
Ajustes
AJUSTES .................................................................... 36–45
Operaciones comunes ................................................ 36
Operación básica para Ajustes de la Reproducción .... 36
Ajustes De Audio Vídeo ......................................... 37–38
Inicio Rápido ............................................................... 38
Apagado Automático .................................................. 38
KURO LINK ................................................................ 38
Ajustes De La Reproducción ....................................... 39
Visor Frontal/LED ........................................................ 39
Versión........................................................................ 39
Reinicio Sistema ......................................................... 39
Configuración De Comunicaciones ....................... 40–42
El procedimiento de operación para introducir
caracteres manualmente ..................................... 42
Manejo De Memoria USB............................................ 43
Actualiz. Software ....................................................... 44
Apéndice
Solución de problemas ............................................. 46–49
Para reiniciar este reproductor .................................... 49
Mensajes de error en pantalla........................................ 49
Glosario ...................................................................... 50–51
Especificaciones ............................................................. 52
* Las figuras y las presentaciones en pantalla en este manual
de instrucciones tienen una función meramente explicativa
y pueden tener pequeñas diferencias con las operaciones
reales.
¿Qué le gustaría hacer con este reproductor?
Ver películas de alta calidad en discos
Blu-ray
Este reproductor ofrece reproducción de discos
Blu-ray de alta definición total.
Reproducción de BD/DVD/CD (Pág. 24)
Disfrutar de diferentes tipos de discos
y contenidos
Utilice este reproductor para disfrutar de varios
tipos de discos ópticos como DVDs y CDs con
contenido multimedia diverso.
Acerca de los discos (Págs. 6–7)
Reproducción de BD/DVD/CD (Pág. 24)
Qué hacer primero:
Consulte “Comenzando” (Pág. 10) para
prepararse a ver sus discos.
Introducción (Págs. 1–12)
Explica información sobre funciones
importantes.
Conexión (Págs. 13–18)
Muestra las opciones de conexión ofrecidas
por este reproductor.
Conexión y operación sencillas
mediante HDMI
Este reproductor cuenta con un terminal HDMI.
Usted puede conectarlo al televisor utilizando
HDMI y no necesitará otro cable para disfrutar
películas. Si su televisor es compatible con KURO
LINK, puede controlar tanto el televisor como este
reproductor con operaciones sencillas.
Reproducción de disco (Págs. 19–35)
Explica de forma simple la reproducción y
funciones útiles.
Introducción a las conexiones (Pág. 13)
Conexiones para vídeo (Pág. 14)
Ajustes (Págs. 36–45)
Le ofrece más opciones para ajustarse a sus
condiciones.
Disfrutar de funciones BD-LIVE a
través de Internet
Este reproductor es compatible con BD-LIVE.
Puede disfrutar de contenido adicional como
tráilers de películas a través de Internet al
reproducir discos BD-Vídeo compatibles con BDLIVE.
Apéndice (Págs. 46–52)
Brinda consejos para la solución de
problemas e información adicional.
Disfrutar de BONUSVIEW o BD-LIVE
(Pág. 26)
3
ESTIMADO CLIENTE DE Pioneer
Enhorabuena por la adquisición de este producto Pioneer.
Lea completamente este manual de instrucciones para aprender a operar correctamente el aparato.
Después de haber terminado la lectura de las instrucciones, guarde el manual en un lugar seguro para
poderlo consultar en el futuro.
PRECAUCIONES DE SEGURIDAD IMPORTANTES
La electricidad se usa para realizar muchas funciones útiles, pero también puede causar lesiones en personas y daños en la
propiedad si se utiliza incorrectamente. Este producto ha sido diseñado y fabricado con la más alta prioridad en la seguridad.
Sin embargo, su uso incorrecto puede provocar descargas eléctricas y/o incendios. Para evitar peligros potenciales, por
favor tenga muy en cuenta las instrucciones siguientes al instalar, operar y limpiar el producto. Para garantizar su seguridad y
prolongar la duración de su reproductor de disco Blu-ray, lea cuidadosamente las precauciones siguientes antes de utilizarlo.
1)
2)
3)
4)
5)
6)
7)
8)
9)
10)
11)
12)
13)
14)
Lea estas instrucciones.
Guarde estas instrucciones.
Preste atención a todas las advertencias.
Siga todas las instrucciones.
No utilice este aparato cerca del agua.
Límpielo solamente con un paño seco.
No tape las aberturas de ventilación. Instale el aparato de acuerdo con las instrucciones del fabricante.
No instale el aparato cerca de ninguna fuente de calor como, por ejemplo, radiadores, salidas de aire caliente, estufas
o otros aparatos (incluyendo amplificadores) que produzcan calor.
No anule la seguridad de la clavija polarizada ni la de la clavija con conexión a tierra. Una clavija polarizada tiene dos
patillas, una más ancha que la otra. Una clavija con conexión a tierra tiene dos patillas y una espiga de conexión a
tierra. La patilla ancha y la espiga se proporcionan para su seguridad. Si la clavija proporcionada no entra en su toma
de corriente, consulte a un electricista para reemplazar la toma de corriente obsoleta.
Proteja el cable de alimentación para que nadie lo pise ni quede aplastado, especialmente en las clavijas, tomas de
corriente y puntos por donde sale del aparato.
Utilice solamente los accesorios suministrados por el fabricante.
Utilice el aparato solamente con el carrito, soporte, trípode, ménsula o mesa especificado por el fabricante,
o vendido con el propio aparato. Cuando utilice un carrito, tenga cuidado cuando mueva la combinación del
carrito y el aparato para evitar que se caiga y se estropee.
Desenchufe este aparato durante las tormentas eléctricas o cuando no lo utilice durante largos periodos de tiempo.
Solicite todos los trabajos de reparación al personal calificado solamente. Las reparaciones serán
necesarias cuando se haya dañado el aparato de cualquier forma: cuando se haya estropeado el cable o la clavija de
alimentación, se hayan derramado líquidos o hayan caído objetos en el interior del aparato, cuando éste haya estado
expuesto a la lluvia o a la humedad, cuando no funcione normalmente o cuando se haya caído.
Información de seguridad adicional
15) Fuentes de energía — Este producto deberá utilizarse solamente con el tipo de fuente de energía indicado en la
etiqueta de especificaciones. Si no está seguro del tipo de suministro de energía de su casa, consulte a su distribuidor
o a la compañía de electricidad de su localidad. Para los productos diseñados para funcionar con pilas o otra fuente
de energía, consulte las instrucciones de operación.
16) Sobrecarga — No sobrecargue las tomas de corriente, los cables de prolongación o los receptáculos de conveniencia
integrales porque se puede correr el riesgo de causar un incendio o recibir una descarga eléctrica.
17) Entrada de objetos y líquidos — No meta nunca objetos de ninguna clase en este producto a través de las aberturas
porque pueden tocar puntos de alto voltaje peligrosos o cortocircuitar partes que podrían causar un incendio o una
descarga eléctrica. No derrame nunca líquidos de ningún tipo sobre el producto.
18) Daños que necesitan ser reparados — Desenchufe este producto de la toma de corriente y solicite las reparaciones al
personal de servicio calificado cuando se den las condiciones siguientes:
a) Cuando el cable o la clavija de CA está dañado.
b) Si se ha derramado algún líquido o han caído objetos en el interior del producto.
c) Si el producto ha sido expuesto a la lluvia o al agua.
d) Si el producto no funciona normalmente siguiendo las instrucciones de operación.
Ajuste solamente aquellos controles descritos en las instrucciones de operación, ya que un ajuste incorrecto de
otros controles podrá causar daños que a menudo requieren un arduo trabajo de ajuste por parte de un técnico
calificado para que el producto pueda volver a funcionar normalmente.
e) Si el producto se ha caído o dañado de cualquier forma.
f) Cuando el producto muestra un cambio notable en su rendimiento, lo que indica que necesita ser reparado.
19) Piezas de repuesto — Cuando se necesiten piezas de repuesto, asegúrese de que el técnico de servicio utilice las
piezas de repuesto especificadas por el fabricante o otras cuyas características sean similares a las de las piezas
originales. El uso de piezas no autorizadas puede causar incendios, descargas eléctricas o otros peligros.
20) Verificación de seguridad — Una vez completado cualquier trabajo de mantenimiento o reparación en este producto,
pida al técnico de servicio que realice verificaciones de seguridad para determinar si el producto está en condiciones
de funcionamiento apropiadas.
21) Montaje en la pared o en el techo — Cuando monte el producto en la pared o en el techo, asegúrese de instalarlo de
acuerdo con el método recomendado por el fabricante.
22) El enchufe de alimentación de red de CA se utiliza como un dispositivo de desconexión y siempre debe permanecer
disponible para operación.
4
PRECAUCIONES DE SEGURIDAD IMPORTANTES
PRECAUCIÓN
El interruptor de la alimentación STANDBY/ON de
este aparato no corta por completo toda la
alimentación de la toma de corriente de CA. Puesto
que el cable de alimentación hace las funciones de
dispositivo de desconexión de la corriente para el
aparato, para desconectar toda la alimentación del
aparato deberá desenchufar el cable de la toma de
corriente de CA. Por lo tanto, asegúrese de instalar
el aparato de modo que el cable de alimentación
pueda desenchufarse con facilidad de la toma de
corriente de CA en caso de un accidente. Para evitar
correr el peligro de incendio, el cable de
alimentación también deberá desenchufarse de la
toma de corriente de CA cuando no se tenga la
intención de utilizarlo durante mucho tiempo
seguido (por ejemplo, antes de irse de vacaciones).
D3-4-2-2-2a_A_Sp
Introducción
• Agua y humedad — No utilice este producto cerca del agua como, por ejemplo, una bañera, palangana, fregadero de
cocina o lavadora; en un sótano húmedo; cerca de una piscina o un lugar similar.
• Soporte — No coloque el producto en un carrito, soporte, trípode o mesa inestable. La colocación del producto en
una base inestable puede ser la causa de que el producto se caiga, lo que podrá causar lesiones graves a personas
y también daños al producto. Utilice solamente un carrito, soporte, trípode, ménsula o mesa recomendado por el
fabricante o vendido junto con el producto. Cuando coloque el producto en una pared, asegúrese de seguir las
instrucciones del fabricante. Utilice solamente el hardware de montaje recomendado por el fabricante.
• Selección de la ubicación — Seleccione un lugar donde no dé directamente la luz del sol y haya buena ventilación.
• Ventilación — Los orificios de ventilación y otras aberturas de la caja han sido diseñados para ventilar el producto. No
cubra ni bloquee estos orificios de ventilación y aberturas porque la falta de ventilación puede causar recalentamiento y/o
reducir la duración del producto. No coloque el producto en una cama, sofá, alfombra o otra superficie similar porque
las aberturas de ventilación podrán quedar bloqueadas. Este producto no ha sido diseñado para ser empotrado; no lo
coloque en un lugar cerrado como, por ejemplo, un mueble librería o estantería a menos que disponga de la ventilación
apropiada o se sigan las instrucciones del fabricante.
• Calor — El producto deberá colocarse alejado de las fuentes de calor como, por ejemplo, radiadores, salidas de aire
caliente, estufas o otros productos (incluyendo amplificadores) que produzcan calor.
• Tormentas eléctricas — Para una mayor protección de este producto durante una tormenta de rayos, y cuando se deja
descuidado y sin usar durante largos periodos de tiempo, desenchúfelo del toma de corriente de la pared. Esto evitará
daños al producto debido a rayos y subidas de tensión.
• Para impedir un incendio, no ponga nunca ningún tipo de vela o llama al descubierto encima o cerca del producto.
• Para impedir un incendio o una descarga eléctrica, no exponga este producto al goteo ni a las salpicaduras.
Tampoco deberán ponerse encima del producto, objetos llenos de líquidos como, por ejemplo, floreros.
• Para impedir un incendio o una descarga eléctrica, no ponga el cable de CA debajo del producto u otros objetos
pesados.
• Apague el aparato y desconecte el cable de CA de la toma de corriente antes de manipularlo.
• Para limpiar la caja exterior, pásele periódicamente un paño suave.
• No utilice productos químicos para la limpieza. Se puede dañar el acabado de la caja.
Cuando tenga que desembarazarse de las baterías
usadas, por favor respete los reglamentos
gubernamentales o las disposiciones de las
instituciones públicas de protección del medio
ambiente en vigor en su país o región. D3-4-2-3-1_Sp
ADVERTENCIA: La manipulación del cable de este
producto o de los cables relacionados con los
accesorios vendidos con el producto le dejará
expuesto a los productos químicos enumerados en
la proposición 65 que el Estado de California y otras
agencias gubernamentales han comprobado que
causan cáncer y defectos de nacimiento u otros
efectos reproductivos perjudiciales.
Lávese las manos después de la manipulación
D36-P4_A_Es
5
Acerca de los discos
*1 Este reproductor ha sido diseñado con la premisa de
Disco Blu-ray
El disco Blu-ray es lo más avanzado en formato de
medio óptico de próxima generación, ofreciendo las
siguientes prestaciones principales:
• La mayor capacidad (25 GB cara única – 50 GB cara
doble) – con más de 5 veces la cantidad de contenido
posible con los DVDs actuales, especialmente muy
apropiado para películas en alta definición con niveles
ampliados de funciones interactivas
• Calidad de imagen prístina con capacidad para resolución
1920 x 1080p de alta definición total
• El mejor audio posible con sonido envolvente sin comprimir
(una calidad más alta que incluso el audio del cine más
calidad)
• El soporte más extendido en la industria – garantizando
más opciones para los consumidores en el mercado
• Los equipos seguirán siendo compatibles con DVDs,
permitiendo continuar disfrutando de las videotecas en
DVD existentes.
• Durabilidad del disco – los nuevos avances en tecnologías
de recubrimiento duro otorgan a los discos Blu-ray la
mayor resistencia contra raspaduras y huellas dactilares.
Tipos de discos que pueden
utilizarse con este reproductor
• Con este reproductor se pueden reproducir los siguientes
discos. No utilice adaptador de 8 cm (3”) a 12 cm (5”).
• Utilice discos que sean compatibles con los estándares
indicados mediante la presencia de los siguientes
logotipos oficiales marcados en la etiqueta del disco.
La reproducción de discos que no cumplan con estos
estándares no está garantizada. Además, la calidad de
imagen o calidad de sonido no está garantizada incluso si
tales discos se pueden reproducir.
Tipo de disco
BD-Vídeo
Código
de región
A/ALL
BD-RE DL
BD-R DL
DVD-Vídeo
Formato
de
grabación
—
Contenido
Audio
+ Vídeo
(Película)
12 cm (5”)
Código de
región
1/ALL
Formato
Vídeo
•
•
•
NOTA
• Según cada disco, puede que no sea posible la
reproducción de algunos de los discos en las tablas de la
columna izquierda.
• “Finalizar” en este manual se refiere a asegurarse de que
un dispositivo de grabación procese el disco de forma que
pueda reproducirse en otros reproductores/grabadoras de
DVD y en este reproductor. En este reproductor sólo se
reproducirán discos DVD finalizados. (Este reproductor no
tiene una función para finalizar discos.)
Discos que no pueden ser
utilizados con este reproductor
Los siguientes discos no podrán ser reproducidos o
no se reproducirán debidamente en este reproductor.
Si se reproduce por error tal disco, podrá dañarse el
altavoz. No intente nunca reproducir tales discos.
CDG, Video CD, Photo CD, CD-ROM, CD-TEXT, SVCD,
SACD, PD, CDV, CVD, DVD-RAM, DVD-Audio, BD-RE
con el cartucho, CD-MP3, CD-WMA
Los discos con formas raras no se pueden
reproducir.
Formato
BDMV/
BDAV
1
Audio
+ Vídeo
(Película)
12 cm (5”)
8 cm (3”)
12 cm (5”)
8 cm (3”)
Formato
Vídeo/VR/
AVCHD
(solamente
disco
finalizado)
Audio
+ Vídeo
(Película)
Audio CD*1
Audio CD
(CD-DA)
Audio
CD-RW/CD-R
Audio CD
(CD-DA)
Audio
JPEG*2
Imagen fija
(Archivo
JPEG)
• Los discos con formas raras (discos con forma de corazón
o hexagonales, etc.) no se pueden utilizar. La utilización de
tales discos ocasionará un fallo.
Los siguientes discos BD-Vídeo no se pueden
reproducir.
ALL
DVD+RW/DVD+R
DVD-R DL
DVD-RW/DVD-R
6
Tamaño
del disco
•
reproducir Audio CDs que cumplan con los estándares
de CD (Disco compacto). Los CDs que contengan una
señal con el fin de proteger los derechos de autor (señal de
control de copia) quizás no se puedan reproducir en este
reproductor.
Los reproductores de BD/DVD-Vídeo y los discos tienen
códigos de región, que dictan las regiones en las que
un disco puede ser reproducido. El código de región
para este reproductor es A para BD y 1 para DVD. (Los
discos marcados con ALL se reproducirán en cualquier
reproductor.)
Las operaciones y funciones de BD/DVD-Vídeo podrán ser
diferentes de las explicaciones en este manual y algunas
operaciones quizás estén prohibidas debido al ajuste del
fabricante del disco.
Si se visualiza una pantalla de menú o instrucciones de
funcionamiento durante la reproducción de un disco, siga
el procedimiento de funcionamiento visualizado.
El componente de audio de un DVD-Vídeo grabado a 96
kHz (PCM Lineal) tendrá una salida de audio de 48 kHz
durante la reproducción.
• Los discos que no contengan “A” o “ALL” para el
código de región (discos vendidos fuera del área de
comercialización autorizada).*
• Discos producidos ilegalmente.
• Discos grabados para uso comercial.
* El código de región para este producto es A.
Los siguientes discos DVD-Vídeo no se pueden
reproducir.
12 cm (5”)
8 cm (3”)
• Los discos que no contengan “1” o “ALL” para el
código de región (discos vendidos fuera del área de
comercialización autorizada).*
• Discos producidos ilegalmente.
• Discos grabados para uso comercial.
* El código de región para este producto es 1.
Acerca de los discos
No se pueden reproducir los siguientes discos de
tipo BD-RE/R, DVD-RW/R y DVD+RW/R.
• Aquellos discos en los que no se hayan grabado datos no
se pueden reproducir.
Los siguientes discos Audio CD no se pueden
reproducir.
• Los discos que contengan una señal con el fin de proteger
los derechos de autor (señal de control de copia) quizás no
se puedan reproducir en este reproductor.
• Este reproductor ha sido diseñado con la premisa de
reproducir Audio CDs que cumplan con los estándares de
CD (Disco compacto).
Los siguientes discos CD-RW/R no se pueden
reproducir.
Estructura de las carpetas de imágenes fijas
(JPEG)
Puede reproducir imágenes fijas (JPEG) con esta unidad
creando una carpeta en un disco como se muestra a
continuación.
Raíz
Carpeta 01
001.jpg
Introducción
• Aquellos discos en los que no se hayan grabado datos no
se pueden reproducir.
• No se pueden reproducir discos grabados en un formato
que no sea Audio CD y archivos de formato JPEG*2.
• Los discos no podrán reproducirse dependiendo de su
estado de grabación o el estado del propio disco.
• Los discos no podrán reproducirse dependiendo de su
compatibilidad con este reproductor.
• Los discos que este reproductor puede reproducir
(reconocer) están limitados a las siguientes propiedades:
Contiene archivos en formato EXIF
Resolución de la imagen: Entre 3232 y 76804320
píxeles
Número máximo de carpetas: 256
Número máximo de archivos: 256
Tamaño de archivo: 20 MB o menos
256.jpg
*2
Acerca del formato de archivo JPEG
JPEG es un tipo de formato de archivo para guardar
archivos de imágenes fijas (fotografías, ilustraciones, etc.). El
reproductor le permite reproducir archivos de imágenes fijas
en formato JPEG.
Formatos de archivo que no son compatibles.
• No se pueden reproducir imágenes fijas en formatos que
no sean JPEG (como TIFF).
• Puede haber algunos archivos que no se puedan
reproducir incluso si están en formato JPEG.
• No se pueden reproducir archivos JPEG progresivos.
• No se pueden reproducir archivos de imagen animada ni
archivos de audio ni tampoco archivos de formato JPEG
animado, incluso si están en formato JPEG.
Otros archivos que no pueden reproducirse.
• Es posible que no pueda reproducir algunas imágenes fijas
que haya creado, retocado, copiado o editado en alguna
forma en su PC.
Carpeta 02
001.jpg
256.jpg
Carpeta 256
001.jpg
256.jpg
Al reproducir archivos, puede experimentar uno o
más de los siguientes síntomas.
• Puede tomar un tiempo el reproducir archivos
dependiendo del número de carpetas, el número de
archivos y el volumen de datos de que se trate.
• No se visualiza información EXIF. EXIF son las siglas en
inglés de Formato de Archivo de Imagen Intercambiable,
y es una norma para almacenar información en archivos
de imágenes, especialmente en aquellos que utilizan
compresión JPEG. (Para información adicional, visite
http://exif.org.)
Al utilizar la unidad para reproducir un disco CDRW/R con imágenes fijas guardadas (grabadas).
• Con discos CD-RW/R en los que las imágenes fijas
están mezcladas con música o películas, sólo se podrán
reproducir las imágenes fijas. Puede darse el caso de que
no se puedan reproducir estos discos en absoluto.
• No se puede reproducir discos multi-sesión.
• Quizá no pueda reproducir algunas imágenes fijas que
haya procesado (rotadas o guardadas sobrescribiendo
otras imágenes) utilizando software de procesamiento de
imágenes o algunas imágenes fijas que haya importado
desde Internet o correo electrónico.
7
Acerca del contenido del disco
Dolby Digital
BD-Vídeo
Un sistema de sonido desarrollado por Dolby
Laboratories Inc. que proporciona ambiente de sala de
cine a la salida de audio cuando el reproductor está
conectado a un procesador o amplificador Dolby Digital.
Disfrute de funciones específicas para BD, incluyendo
BONUSVIEW (BD-ROM Perfil 1 Versión 1.1), como imagenen-imagen, y BD-LIVE (página 26).
Para los discos BD-Vídeo compatibles con BONUSVIEW/
BD-LIVE, puede disfrutar de contenido adicional copiando
los datos desde discos o descargándolos desde Internet.
Por ejemplo, esta función es capaz de reproducir la película
original como el vídeo primario a la vez que en una pantalla
pequeña reproduce comentarios en vídeo del director de la
película, como un vídeo secundario.
DTS
DTS es un sistema de sonido digital desarrollado por
DTS, Inc. para uso en salas de cine.
PCM Lineal
PCM Lineal es un formato de grabación de señal
utilizado para Audio CDs y en algunos discos DVD y Bluray. El sonido de Audio CDs se graba a 44,1 kHz con 16
bits. (En discos DVD-Vídeo el sonido se graba entre 48
kHz con 16 bits y 96 kHz con 24 bits y en discos BDVídeo entre 48 kHz con 16 bits y 192 kHz con 24 bits.)
NOTA
• Las funciones disponibles difieren dependiendo del disco.
2
Idiomas de los subtítulos
3
Proporciones dimensionales de pantalla
Título, capítulo y pista
Esto indica el tipo de los subtítulos.
• Los discos Blu-ray y los DVDs están divididos en “Títulos”
y “Capítulos”. Si el disco tiene más de una película en él,
cada película será un “Título” separado. Los “Capítulos”,
por el contrario, son subdivisiones de títulos. (Consulte el
Ejemplo 1.)
• Los Audio CDs están divididos en “Pistas”. Podrá pensar
de una “Pista” como una melodía en un Audio CD.
(Consulte el Ejemplo 2.)
Ejemplo 1: Disco Blu-ray o DVD
Las películas son rodadas en una variedad de modos de
pantalla.
4
Ángulo de la cámara
En algunos discos BD/DVD hay grabadas escenas que
han sido rodadas simultáneamente desde un número de
ángulos diferentes (la misma escena es rodada desde el
frente, desde el lado izquierdo, desde el lado derecho,
etc.).
5
Código de región
Esto indica el código de región (código de región
reproducible).
Título 1
Título 2
Capítulo 1 Capítulo 2 Capítulo 3
Capítulo 1
Los iconos utilizados en este
manual de Instrucciones
BD VIDEO ........... Indica las funciones que pueden realizarse
Ejemplo 2: Audio CD
para discos BD-Vídeo.
........... Indica las funciones que pueden realizarse
para discos BD-RE.
BD-R ........... Indica las funciones que pueden realizarse
para discos BD-R.
DVD VIDEO ....... Indica las funciones que pueden realizarse
para discos DVD-Vídeo.
DVD-RW ......... Indica las funciones que pueden realizarse
para discos DVD-RW.
DVD-R .......... Indica las funciones que pueden realizarse
para discos DVD-R.
AUDIO CD ........... Indica las funciones que pueden realizarse
para Audio CDs.
CD-R
........ Indica las funciones que pueden realizarse
JPEG
para discos CD-R en el formato JPEG.
CD-RW
......... Indica las funciones que pueden realizarse
JPEG
para discos CD-RW en el formato JPEG.
AVCHD
......... Indica las funciones que pueden realizarse
para discos DVD en el formato AVCHD.
BD-RE
Pista 1
Pista 2
Pista 3
Pista 4
Iconos utilizados en las cajas de
discos de DVD-Vídeo
El reverso de la caja de un DVD disponible a la venta
por lo general contiene información acerca de los
contenidos del disco.
1
2
2
1. English
2. Chinese
3
4
16:9 LB
1
2
1. English
2. Chinese
5
2
123
456
Pistas de audio y formatos de audio
Los discos DVD pueden contener hasta 8 pistas
distintas con un idioma diferente cada una. La primera
de la lista es la pista original.
Esta sección también indica el formato de audio de cada
pista sonora — Dolby Digital, DTS, MPEG, etc.
8
Información importante
Precauciones con los discos
Tenga cuidado con las raspaduras y polvo
• Los discos BD, DVD y CD son sensibles al polvo, huellas
dactilares y especialmente raspaduras. Un disco raspado
quizás no pueda ser reproducido. Maneje los discos con
cuidado y almacénelos en un lugar seguro.
Almacenamiento apropiado de los discos
Ponga el disco en el centro de la
caja y almacene la caja y el disco
en posición vertical.
No deje caer los discos ni los
someta a vibraciones o impactos
fuertes.
Evite almacenar los discos en
lugares donde haya mucha
cantidad de polvo o humedad.
Precauciones para el manejo
• Si la superficie está manchada, limpie suavemente con un
paño suave humedecido (con agua solamente). Cuando
limpie los discos, mueva siempre el paño desde el orificio
central hacia el borde exterior.
Patentes de los EE.UU. Nos. 6.836.549; 6.381.747;
7.050.698; 6.516.132; y 5.583.936
• Fabricado bajo licencia de Dolby Laboratories. Dolby y el
símbolo de la doble D son marcas comerciales de Dolby
Laboratories.
• Fabricado bajo licencia con patentes de los EE.UU.
números: 5,451,942; 5,956,674; 5,974,380; 5,978,762;
6,226,616; 6,487,535; 7,392,195; 7,272,567; 7,333,929;
7,212,872 y otras patentes de los EE.UU. y el resto
del mundo emitidas y pendientes. DTS es una marca
registrada, y los logotipos y símbolos de DTS, DTS-HD y
DTS-HD Master Audio | Essential son marcas de fábrica
de DTS, Inc. © 1996-2008 DTS, Inc. Todos los derechos
reservados.
• “Blu-ray Disc” y
son marcas de fábrica.
• El logotipo “BD-LIVE” es una marca comercial de Blu-ray
Disc Association.
•
• No utilice pulverizadores de limpieza de discos de vinilo,
bencina, diluyente, líquidos para prevención de electricidad
estática u otros disolventes.
• No toque la superficie.
• No adhiera papel ni etiquetas adhesivas en el disco.
• Si la superficie de reproducción de un disco está manchada
o raspada, el reproductor podrá decidir que el disco es
incompatible y expulsar la bandeja de disco, o podrá no
reproducir el disco correctamente. Limpie cualquier mancha
de la superficie de reproducción con un paño suave.
Limpieza del lente lector
Introducción
Evite guardar discos en lugares
con luz de sol directa, cerca
dispositivos de calefacción o en
lugares con humedad alta.
Propiedad intelectual
• El material audio-visual puede consistir en productos de
propiedad intelectual que no deben ser grabados sin la
autorización del poseedor de dicha propiedad intelectual.
Sírvase remitirse a las leyes aplicables de su país.
• Este producto incorpora tecnología de protección del
copyright que a su vez está protegida por reclamaciones
de métodos de ciertas patentes de los EE.UU. y otros
derechos de la propiedad intelectual propiedad de
Macrovision Corporation y otros propietarios de derechos.
El uso de la tecnología de protección del copyright deberá
contar con la autorización de Macrovision Corporation,
y deberá usarse en casa o con fines de visión limitada, a
menos que Macrovision Corporation autorice lo contrario.
La inversión de ingeniería o el desmontaje están prohibidos.
es una marca registrada de DVD Format/Logo
Licensing Corporation.
• HDMI, el logotipo HDMI y High-Definition Multimedia
Interface son marcas comerciales o marcas registradas de
HDMI Licensing, LLC.
• “x.v.Color” y
Sony Corporation.
son marcas de fábrica de
• No utilice nunca discos de limpieza disponibles en el
comercio. La utilización de esos discos podrá dañar la lente.
• Solicite la limpieza del lente al centro de servicio aprobado
por Pioneer más cercano.
Advertencias sobre la formación de
condensación
• Podrá formarse condensación en el lente lectora o disco
en las siguientes condiciones:
− Inmediatamente después de haber encendido una estufa.
− En una habitación con vapor o muy húmeda.
− Cuando el reproductor sea movido repentinamente de
un ambiente frío a uno cálido.
Cuando se forme condensación:
• Java y todas las marcas de fábrica y logotipos basados en
Java son marcas de fábrica o marcas registradas de Sun
Microsystems, Inc. en los EE.UU. y en otros países.
• Resultará difícil al reproductor leer las señales de los
discos y impedirá al reproductor funcionar debidamente.
Para quitar la condensación:
• Extraiga el disco y deje el reproductor con la
alimentación desactivada hasta que desaparezca la
condensación. Si utiliza el reproductor con formación de
condensación podrá ocasionar un mal funcionamiento.
• “BONUSVIEW” es una marca de fábrica de Blu-ray Disc
Association.
9
Información importante
• Esta etiqueta indica la compatibilidad de reproducción
con los discos DVD-RW grabados en el formato VR
(formato de grabación de vídeo). Sin embargo, para los
discos grabados con un programa encriptado de una sola
grabación, la reproducción sólo se podrá hacer usando un
aparato compatible con CPRM.
• “AVCHD” y el logotipo “AVCHD” son marcas de fábrica de
Panasonic Corporation y Sony Corporation.
Comenzando
Paso 1: Desempacar
Asegúrese de que los siguientes accesorios han sido suministrados con el producto.
Unidad de mando a distancia
Pila tamaño “AA/R6” (2)
Cable de CA
Cable AV
Paso 2: Selección del equipo a conectar
Paso 4: Ajuste de configuraciones
La conexión varía según el equipo utilizado.
Consulte Conexión. (Páginas 13–18)
Apague los equipos antes de conectarlos.
Ajuste las configuraciones para disfrutar de
diversas opciones y otras funciones para
reproducir discos.
Consulte Ajustes. (Páginas 36–45)
Paso 3: Reproducción de discos
Reproduzca un disco Blu-ray después de conectar
el reproductor a su equipo preferido.
Consulte Reproducción de disco. (Páginas 19–35)
10
Componentes principales
Unidad principal (Parte delantera)
1
3
4
5
6
7
8
9
10
STANDBY/ON (Pág. 20)
Indicador STANDBY/ON (Pág. 20)
PLAY (Pág. 24)
STOP (Pág. 24)
PAUSE (Pág. 30)
Indicador KURO LINK (Págs. 20, 23)
11
12
Sensor del mando a distancia (Pág. 19)
Indicador de disco BD/DVD/CD (Pág. 20)
Indicador de reproducción (Pág. 20)
Visor del panel delantero (Pág. 20)
Bandeja de disco (Pág. 24)
OPEN/CLOSE (Pág. 24)
7
8
9
10
11
12
Introducción
1
2
3
4
5
6
2
Unidad principal (Parte trasera)
1
1
2
3
4
5
6
2
3
4
5
Tomas de salida COMPONENT VIDEO
(Pág. 15)
Toma de salida VIDEO (Pág. 16)
Tomas AUDIO OUT (Pág. 17)
Terminal DIGITAL OUT OPTICAL (Pág. 17)
Terminal LAN (Pág. 18)
Soporte para cable HDMI (Ver debajo.)
6
7
8
9
10
7
Terminal BD STORAGE/SERVICE
BD STORAGE (Págs. 26, 43)
SERVICE para software (Pág. 44)
8 Terminal HDMI OUT (Pág. 14)
9 Ventilador de enfriamiento
El ventilador de enfriamiento funciona
mientras el reproductor está encendido.
10 Terminal AC IN (Pág. 19)
Soporte para cable HDMI en la parte
posterior de la unidad principal
Este reproductor posee un soporte para cable exclusivo para
que el cable HDMI no ejerza peso y esfuerzo directo sobre el
terminal. Al conectar el cable HDMI, asegúrese de pasar el cable
a través del soporte para cable y de asegurarlo al mismo.
Conecte el cable HDMI a la
parte posterior de la unidad
principal, permitiendo cierta
holgura.
PRECAUCIÓN
• No tire del cable HDMI mientras esté conectado al terminal, ya que
esto puede dañar el terminal o causar una conexión deficiente.
Presione la pestaña hacia abajo y tire hacia usted.
Pase el cable HDMI (disponible en el comercio) por el
soporte para cable.
Presione la pestaña hasta que quede en su lugar con un
chasquido.
Cable HDMI
11
Componentes principales
Unidad de mando a distancia
1
17
2
18
3
19
4
5
6
20
21
7
22
8
9
10
23
24
11
12
25
13
14
15
16
26
27
28
29
30
31
1
2
3
4
5
6
7
8
9
10
11
12
13
14
15
16
17
18
19
20
21
22
23
24
25
26
27
28
29
30
31
STANDBY/ON (Pág. 20)
Botones TV CONTROL (Pág. 21)
AUDIO (Pág. 31), SUBTITLE (Pág. 31), ANGLE (Pág. 32)
Botones numéricos (Pág. 35)
CLEAR (Pág. 35)
SECONDARY VIDEO (Pág. 26)
REPEAT (Págs. 30, 31), REPEAT OFF (Págs. 30, 31)
EXIT (Págs. 20, 36)
DISPLAY (Págs. 24, 31)
TOP MENU/DISC NAVIGATOR (Págs. 25, 27)
Botones del cursor (), ENTER (Págs. 21, 36)
HOME MENU (Págs. 21, 36)
REV (Pág. 30)
PLAY (Pág. 24)
//k (Págs. 27, 30)
PAUSE (Pág. 30)
OPEN/CLOSE (Pág. 24)
VIDEO OUTPUT RESET (Pág. 37)
FRONT LIGHT (Pág. 23)
ENTER (Págs. 21, 36)
KEY LOCK (Ver debajo.)
PAGE +/- (Pág. 27)
FUNCTION (Pág. 34)
POPUP MENU/MENU (Pág. 25)
RETURN (Pág. 30)
FWD (Pág. 30)
//l (Págs. 27, 30)
STOP (Pág. 24)
ROJO, VERDE, AZUL, AMARILLO (Págs. 27, 33)
SKIP SEARCH (Pág. 30)
REPLAY (Pág. 30)
Función bloqueo de botón
Puede ajustar el bloqueo de botón para impedir
operaciones por accidente.
Esta función permite a televisores compatibles con
KURO LINK ejecutar también un bloqueo de botón en el
reproductor.
Pulse y mantenga pulsado KEY LOCK durante más de 5
segundos.
• Cada vez que realice esta operación, la función se
activará o desactivará.
• Si intenta operar el reproductor mientras esté ajustada
la función de bloqueo, parpadeará “Hold” en el panel de
visualización delantero y le indicará que está ajustada la
función de bloqueo.
NOTA
• Esta unidad de mando a distancia cuenta con dos
botones ENTER (11 y 20 listados anteriormente). El botón
ENTER bajo la tapa es útil cuando se utilizan los botones
numéricos.
12
Conexión
Introducción a las conexiones
Asegúrese de desconectar la alimentación y desenchufar el cable de alimentación de la toma de corriente siempre
que haga o cambie conexiones.
Este reproductor está equipado con los terminales/tomas que se listan debajo. Encuentre el terminal/toma
correspondiente en su equipo de vídeo. Conecte el vídeo primero, utilizando el cable suministrado o cables
disponibles en el comercio. Luego conecte el audio.
Terminales/tomas de vídeo en este reproductor
Calidad más alta
Terminal HDMI OUT
Página 14
Tomas de salida
COMPONENT VIDEO
Página 15
Toma de salida VIDEO
Calidad normal
Conexión
Página 16
Terminales/tomas de audio en este reproductor
Conexión para audio digital
Calidad más alta
Terminal HDMI OUT
Página 14
Terminal DIGITAL OUT
OPTICAL
Página 17
Calidad normal
Conexión para audio analógico
Calidad normal
Tomas AUDIO OUT
Página 17
Conexión a Internet de banda ancha
Terminal LAN
Página 18
13
Conexiones para vídeo
Conexión al terminal HDMI
• Puede disfrutar de imagen y sonido digital de alta calidad a través del terminal HDMI.
• Para información sobre salida de formatos de audio de próxima generación, consulte la página 45.
• Use cables High Speed HDMI™ cuando use la función KURO LINK. La función KURO LINK puede no funcionar
correctamente si se usan otros cables HDMI.
PASOS
1 Antes de hacer cualquier conexión asegúrese de apagar este reproductor y el equipamiento.
2 Conecte firmemente un cable HDMI (disponible en el comercio) a los terminales HDMI ( y ).
NOTA
Este reproductor
• Cuando utilice una salida HDMI, la
salida digital 7.1 ch estará disponible.
Selección de la salida de vídeo con
prioridad cuando se conecta HDMI
y vídeo componente
Al terminal HDMI OUT
Cuando conecta un cable HDMI y un cable de
componente a este reproductor, necesita seleccionar
la salida de vídeo con prioridad en “Ajustes” – “Ajustes
De Audio Vídeo” – “Selección Salida De Vídeo”.
(Consulte la página 37.)
Cable HDMI
(disponible en el comercio)
NOTA
• Cuando conecta el reproductor a un televisor de Pioneer
utilizando solamente un cable HDMI y el televisor está
encendido, la salida de vídeo cambia automáticamente a
HDMI. (El ajuste anterior no es necesario.)
• Cuando conecta el reproductor a un televisor utilizando un
cable HDMI, “Salida De Vídeo HDMI” se ajusta a “Auto”.
Si no obtiene una imagen estable, seleccione la resolución
deseada*.
Cuando ajusta “Salida De Vídeo HDMI” a un ajuste que no
sea “Auto”, solamente puede seleccionar resoluciones*
compatibles con el televisor conectado.
* Para los detalles sobre las resoluciones en la salida de vídeo
HDMI consulte “Salida De Vídeo HDMI” en la página 37.
Al terminal HDMI IN
Proyector
• Al audio emitido en los formatos DTSHD High Resolution Audio y DTS-HD
Master Audio se le da salida desde el
terminal HDMI como Bitstream. Para
disfrutar de esta magnífica calidad de
sonido conecte un amplificador con
un decodificador incorporado.
Televisor
Receptor de AV
Equipo con un terminal HDMI
Después de la conexión
•
•
•
•
Fije el cable HDMI al soporte para cable HDMI, pasándolo a través del soporte. (Página 11)
Si lo desea, conecte equipo de audio. (Página 17)
Cargue un disco y comience la reproducción. (Páginas 24–29)
Consulte la función KURO LINK. (Páginas 23 y 38)
14
Conexiones para vídeo
Conexión a las tomas de componente
Puede disfrutar de reproducción de color precisa y de imágenes de alta calidad a través de las tomas de
componente.
PASOS
1 Antes de hacer cualquier conexión asegúrese de apagar este reproductor y el equipamiento.
2 Conecte firmemente un cable de vídeo componente (disponible en el comercio) a los terminales de
componente ( y ).
Este reproductor
(Rojo)
Rojo
PRECAUCIÓN
(Azul)
Azul
A las tomas de salida
COMPONENT VIDEO
Cable de vídeo componente
(disponible en el comercio)
Conexión
(Verde)
Verde
• Necesita seleccionar la salida de vídeo con prioridad
en “Ajustes” – “Ajustes De Audio Vídeo” – “Selección
Salida De Vídeo”. (Consulte la página 37.)
• Cuando la salida de vídeo con prioridad está ajustada
en “HDMI” en “Selección Salida De Vídeo”, la
resolución del vídeo que sale por las tomas de salida
COMPONENT VIDEO es la que se ajustó en “Salida De
Vídeo HDMI”.
• Cuando la salida desde las tomas de salida
COMPONENT VIDEO tiene prioridad, ajuste la salida
de vídeo con prioridad a “Componente”.
A las tomas
COMPONENT IN
(Rojo)
Rojo
(CR)
REPRODUCTOR
de Blu-ray Disc
(Azul)
Azul
Videograbadora
Televisor
(CB)
NOTA
(Verde)
Verde
COMPONENT
IN
Proyector
Televisor
Receptor de AV
Equipo de vídeo con tomas de componente
• Conecte el reproductor de disco Blu-ray directamente
al televisor. Si reproduce la imagen mediante una
videograbadora, la imagen puede deteriorarse debido
a la función de protección contra la copia.
• Al grabar un programa con propiedad intelectual
protegida, la función de protección contra la copia
se activa automáticamente; el programa no podrá
grabarse correctamente. Además, la imagen
reproducida mediante una videograbadora puede
deteriorarse debido a esta función. Sin embargo,
esto no es un mal funcionamiento. Cuando vea
un programa con propiedad intelectual protegida,
recomendamos que conecte el reproductor de disco
Blu-ray directamente al televisor.
Después de la conexión
• Conecte un equipo de audio o los terminales de audio del televisor. (Página 17)
15
Conexiones para vídeo
Conexión a la toma de vídeo
Podrá disfrutar de imágenes a través de la toma de vídeo.
PASOS
1 Antes de hacer cualquier conexión asegúrese de apagar este reproductor y el equipamiento.
2 Conecte firmemente un cable AV (suministrado) a las tomas de vídeo ( y ).
Este reproductor
(Amarillo)
Amarillo
REPRODUCTOR
de Blu-ray Disc
Videograbadora Televisor
NOTA
• Conecte el reproductor de disco Blu-ray
directamente al televisor. Si reproduce la
imagen mediante una videograbadora,
la imagen puede deteriorarse debido a la
función de protección contra la copia.
• Al grabar un programa con propiedad
intelectual protegida, la función de
protección contra la copia se activa
automáticamente; el programa no podrá
grabarse correctamente. Además,
la imagen reproducida mediante una
videograbadora puede deteriorarse debido
a esta función. Sin embargo, esto no
es un mal funcionamiento. Cuando vea
un programa con propiedad intelectual
protegida, recomendamos que conecte el
reproductor de disco Blu-ray directamente
al televisor.
A la toma de salida VIDEO
Cable AV (suministrado)
A la toma de
entrada VIDEO
(Amarillo)
VIDEO
L - AUDIO -R
Amarillo
AV INPUT
Proyector
Televisor
Receptor de
AV
Equipo de vídeo con una toma de vídeo
Después de la conexión
• Conecte un equipo de audio o los terminales de audio del televisor. (Página 17)
16
Conexiones de audio
Conexión al terminal de audio digital o a las tomas de audio
• Puede conectar un equipo de audio o el televisor al terminal DIGITAL OUT OPTICAL o a las tomas AUDIO OUT.
• Para información sobre salida de formatos de audio de próxima generación, consulte la página 45.
PASOS
1 Antes de hacer cualquier conexión asegúrese de apagar este reproductor y el equipamiento.
2 Conecte firmemente un cable digital óptico (disponible en el comercio) o un cable AV (suministrado) a los
terminales de audio digital óptico o a las tomas de audio ( y , o y ).
Este reproductor
• Al utilizar la salida OPTICAL,
salida digital 5.1 ch está disponible.
Salida digital 7.1 ch no está disponible.
(Rojo)
NOTA:
Audio 7.1 ch está disponible a través del
terminal HDMI.
Blanco
Al terminal de
salida OPTICAL
A las tomas AUDIO
OUT
Conexión
Rojo
(Blanco)
Cable AV (suministrado)
Cable digital óptico
(disponible en el comercio)
A las tomas de
entrada AUDIO
(Blanco) (Rojo)
VIDEO
Al terminal de
entrada OPTICAL
L - AUDIO -R
Blanco
Rojo
AV INPUT
Televisor
OPTICAL
DIGITAL AUDIO IN
Amplificador
Equipo de audio con un terminal de entrada de audio digital o tomas de audio
Después de la conexión
• Cargue un disco y comience la reproducción. (Páginas 24–29)
17
Conexión a Internet de banda ancha
Conexión al terminal LAN
• Cuando reproduce discos compatibles con BD-LIVE puede disfrutar de contenido variado con funciones
interactivas a través de la conexión a Internet. Para información adicional sobre las funciones BD-LIVE consulte
las páginas 26 y 39.
• Al usar Internet, se requiere una conexión a Internet de banda ancha como se muestra debajo.
PASOS
1 Antes de hacer cualquier conexión asegúrese de apagar este reproductor y el equipamiento.
2 Conecte firmemente un cable LAN (disponible en el comercio) al terminal LAN ( y ).
Este reproductor
Al terminal LAN
PRECAUCIÓN
• Al usar una conexión a Internet de banda ancha, se
requiere un contrato con un proveedor de servicios de
Internet. Para más detalles, contacte con su proveedor
local de servicio de Internet.
• Consulte el manual de manejo de su equipo ya que el
equipo conectado y el método de conexión pueden variar
dependiendo de su entorno de Internet.
Cable LAN
(disponible en el comercio)
NOTA
• Use un cable LAN/enrutador compatible con 10BASE-T/
100BASE-TX.
Al terminal LAN
LAN
Internet
Módem
Concentrador o enrutador de
banda ancha
Ejemplo de una conexión a Internet de banda ancha
Después de la conexión
• Realice el ajuste de la comunicación. (Páginas 40–42)
• Cargue un disco compatible con BD-LIVE y reproduzca el contenido. (Páginas 24 y 26)
18
PC
Reproducción de disco
Antes de comenzar a reproducir
Instalación de las pilas en el
mando a distancia
1
Alcance aproximado de
funcionamiento del mando a distancia
Sensor del mando a distancia
Abra la cubierta trasera.
Presione ligeramente
esta parte y deslícela en
el sentido de la flecha.
2
30º
Introduzca las pilas (AA/R6 x 2).
Introdúzcalas en su compartimento como
indican las marcas /.
30º
7m
Unidad de mando a
distancia
Introduzca primero el
lado negativo ().
3
Cierre la cubierta trasera.
Cierre firmemente (deberá oírse un clic).
Conexión del cable de alimentación
PRECAUCIÓN
• No utilice ninguna pila que no sea del tipo especificado. No
emplee tampoco al mismo tiempo una pila nueva y una pila
usada.
• Cuando instale las pilas en el mando a distancia,
colóquelas en el sentido correcto, según indican las
marcas de las polaridades ( y ).
• No caliente, desmonte, ni tire al fuego o al agua las pilas.
• Las pilas pueden tener tensiones distintas, aunque por
fuera parezcan similares. No utilice conjuntamente tipos de
pilas diferentes.
• Para evitar fugas de líquido de las pilas, quite las pilas si no
tiene la intención de utilizar el mando a distancia durante
períodos prolongados de tiempo (1 mes o más tiempo).
Si se producen fugas del líquido, frótelo con cuidado en
el interior del alojamiento, y luego inserte pilas nuevas. Si
se producen fugas en una pila y el líquido se le pone en
contacto con la piel, lávese con mucha cantidad de agua.
• Cuando tenga que desembarazarse de las
baterías usadas, por favor respete los reglamentos
gubernamentales o las disposiciones de las instituciones
públicas de protección del medio ambiente en vigor en su
país o región.
• ADVERTENCIA
No utilice ni guarde pilas expuestas directamente a la
luz del sol o en ubicaciones con demasiado calor como
el interior de un coche o cerca de un calentador. Esto
podría provocar que las pilas tuvieran pérdidas, se
sobrecalentaran, explotaran o se prendieran. También
puede reducir la vida o rendimiento de las mismas.
Reproducción de disco
Enchufe el cable de CA suministrado en el terminal AC
IN en la parte trasera del reproductor. Luego enchúfelo
en la toma de CA.
Al terminal AC IN
A la toma de CA
NOTA
• Coloque el reproductor cerca de la toma de CA, y
mantenga el enchufe de alimentación cerca.
• PARA PREVENIR EL RIESGO DE DESCARGA ELÉCTRICA,
NO TOQUE LAS PARTES SIN AISLAMIENTO DE LOS
CABLES MIENTRAS EL CABLE DE CA ESTÉ CONECTADO.
• El indicador STANDBY/ON parpadea mientras el
reproductor está preparándose para comenzar. No puede
encender el reproductor hasta que el indicador STANDBY/
ON no termine de parpadear.
• Si no va a utilizar este reproductor durante un largo periodo
de tiempo, asegúrese de desconectar el cable de CA de la
toma de CA.
19
Antes de comenzar a reproducir
Conexión de la alimentación
Indicadores en el reproductor
Indicador STANDBY/ON (encendido/en espera)
Azul encendido
Alimentación conectada
Rojo parpadeando
Preparando para espera
Rojo encendido
Espera
Indicador KURO LINK
Rojo encendido
Salida de la óptima calidad
de imagen para “KURO”
(Consulte la página 23.)
Indicador de disco BD/DVD/CD
STANDBY/ON
Apagado
No hay disco
Blanco encendido
Disco parado
Blanco parpadeando
Cargando un disco
Indicador de reproducción
Azul encendido
Indicador de disco BD/DVD/CD
Reproduciendo
• Cuando encienda la alimentación, la pantalla Menú se
visualizará automáticamente durante algún tiempo.
Pulse EXIT para borrar la visualización.
Ajuste del idioma
Indicador KURO LINK
Indicador STANDBY/ON
Indicador de reproducción
Conexión de la alimentación
Pulse STANDBY/ON en el mando a distancia o en el
reproductor para conectar la alimentación del reproductor.
Entrando en espera
Pulse STANDBY/ON en el mando a distancia o en
el reproductor para entrar en espera.
• Si pulsa STANDBY/ON otra vez inmediatamente
después de haber entrado en espera, quizá no se
encienda el reproductor. Si ocurriera esto, espere
10 segundos o más y entonces conecte otra vez la
alimentación.
NOTA
• Cuando el indicador STANDBY/ON está parpadeando (puede
tomar algún tiempo), no se puede encender el reproductor.
20
Cambio del idioma visualizado en
la pantalla
1 Presione HOME MENU para visualizar la
pantalla del Menú Inicial.
Antes de comenzar a reproducir
2
Pulse para seleccionar “Idioma En
La Pantalla”, después pulse ENTER.
Navegador del disco
Ajustes
NOTA
• El ajuste de fábrica es 00 (PIONEER).
• Si se equivoca al introducir el código, suelte TV CONTROL
y luego empiece de nuevo desde el principio.
• Cuando haya múltiples códigos para un fabricante, intente
introducirlos en el orden indicado hasta poder controlar el TV.
2
Verifique que el TV pueda ser controlado.
• Opere el televisor empleando el TV CONTROL.
Idioma En La Pantalla
3
Imagen
Pulse para seleccionar el idioma que
desea ver en la pantalla, después pulse ENTER.
English
Español
Français
NOTA
• Para seleccionar el idioma del disco DVD, como el idioma
de los subtítulos, etc., consulte la página 25.
Control del TV con el mando a
distancia del reproductor
PRECAUCIÓN
• Para algunos modelos puede que no sea posible controlar
el TV con el mando a distancia del reproductor, incluso
con TV cuya marca aparezca en la lista de códigos del
fabricante.
• El ajuste puede cambiar al ajuste predeterminado después
de sustituir las pilas. Si pasa esto, repóngalo.
1
Introduzca el código de 2 dígitos del fabricante.
• Pulse los botones de números (0 a 9) para introducir
el código mientras se pulsa TV CONTROL .
Lista de códigos de preajuste del
televisor
Fabricante Código(s)
PIONEER 00, 31, 32, 07, 36, 42,
51, 22
ACURA 44
ADMIRAL 31
AIWA 60
AKAI 32, 35, 42
AKURA 41
ALBA 07, 39, 41, 44
AMSTRAD 42, 44, 47
ANITECH 44
ASA 45
ASUKA 41
AUDIOGONIC 07, 36
BASIC LINE 41, 44
BAUR 31, 07, 42
BEKO 38
BEON 07
BLAUPUNKT 31
BLUE SKY 41
BLUE STAR 18
BPL 18
BRANDT 36
BTC 41
BUSH 07, 41, 42, 44, 47, 56
CASCADE 44
CATHAY 07
CENTURION 07
CGB 42
CIMLINE 44
CLARIVOX 07
CLATRONIC 38
CONDOR 38
CONTEC 44
CROSLEY 32
CROWN 38, 44
CRYSTAL 42
CYBERTRON 41
DAEWOO 07, 44, 56
DAINICHI 41
DANSAI 07
DAYTON 44
DECCA 07, 48
DIXI 07, 44
DUMONT 53
ELIN 07
ELITE 41
ELTA 44
EMERSON 42
ERRES 07
FERGUSON 07, 36, 51
FINLANDIA 35, 43, 54
FINLUX 32, 07, 45, 48, 53, 54
FIRSTLINE 40, 44
FISHER 32, 35, 38, 45
FORMENTI 32, 07, 42
FRONTECH 31, 42, 46
FRONTECH/PROTECH 32
FUJITSU 48
FUNAI 40, 46, 58
GBC 32, 42
GE 00, 01, 08, 07, 10, 11, 17, 02,
28, 18
GEC 07, 34, 48
GELOSO 32, 44
GENERAL 29
GENEXXA 31, 41
GOLDSTAR 10, 23, 21, 02, 07,
50
GOODMANS 07, 39, 47, 48, 56
GORENJE 38
GPM 41
GRAETZ 31, 42
GRANADA 07, 35, 42, 43, 48
GRADIENTE 30, 57
GRANDIN 18
GRUNDIG 31, 53
HANSEATIC 07, 42
HCM 18, 44
HINARI 07, 41, 44
HISAWA 18
HITACHI 31, 33, 34, 36, 42, 43,
54, 06, 10, 24, 25, 18
HUANYU 56
HYPSON 07, 18, 46
ICE 46, 47
IMPERIAL 38, 42
INDIANA 07
INGELEN 31
INTERFUNK 31, 32, 07, 42
INTERVISION 46, 49
ISUKAI 41
ITC 42
ITT 31, 32, 42
JEC 05
JVC 13, 23
KAISUI 18, 41, 44
KAPSCH 31
KENDO 42
KENNEDY 32, 42
KORPEL 07
KOYODA 44
LEYCO 07, 40, 46, 48
LIESENK&TTER 07
LOEWE 07
Reproducción de disco
Cuando el código del fabricante para su marca de TV
se establezca en el mando a distancia del reproductor,
el TV podrá controlarse con el mando a distancia del
reproductor.
– Púlselo para conectar y desconectar la alimentación
del televisor.
INPUT SELECT – Púlselo para cambiar la entrada del
televisor.
CH +/– – Púlselos para seleccionar el canal de TV.
VOL +/– – Púlselos para ajustar el volumen.
(Continúa en la página siguiente)
21
Antes de comenzar a reproducir
LUXOR 32, 42, 43
M-ELECTRONIC 31, 44, 45, 54,
56, 07, 36, 51
MAGNADYNE 32, 49
MAGNAFON 49
MAGNAVOX 07, 10, 03, 12, 29
MANESTH 39, 46
MARANTZ 07
MARK 07
MATSUI 07, 39, 40, 42, 44, 47,
48
MCMICHAEL 34
MEDIATOR 07
MEMOREX 44
METZ 31
MINERVA 31, 53
MITSUBISHI 09, 10, 02, 21, 31
MULTITECH 44, 49
NEC 59
NECKERMANN 31, 07
NEI 07, 42
NIKKAI 05, 07, 41, 46, 48
NOBLIKO 49
NOKIA 32, 42, 52
NORDMENDE 32, 36, 51, 52
OCEANIC 31, 32, 42
ORION 32, 07, 39, 40
OSAKI 41, 46, 48
OSO 41
OSUME 48
OTTO VERSAND 31, 32, 07, 42
PALLADIUM 38
PANAMA 46
PANASONIC 31, 07, 08, 42, 22
PATHO CINEMA 42
PAUSA 44
PHILCO 32, 42
PHILIPS 31, 07, 34, 56, 68
PHOENIX 32
PHONOLA 07
PROFEX 42, 44
PROTECH 07, 42, 44, 46, 49
QUELLE 31, 32, 07, 42, 45, 53
R-LINE 07
RADIOLA 07
RADIOSHACK 10, 23, 21, 02
RBM 53
RCA 01, 10, 15, 16, 17, 18, 61,
62, 09
REDIFFUSION 32, 42
REX 31, 46
ROADSTAR 41, 44, 46
SABA 31, 36, 42, 51
Cómo apagar la luz de fondo LCD
y las indicaciones
Si al ver películas considera que los indicadores en
el reproductor están demasiado brillantes, puede
apagarlos, excepto el indicador STANDBY/ON.
SAISHO 39, 44, 46
SALORA 31, 32, 42, 43
SAMBERS 49
SAMSUNG 07, 38, 44, 46, 69, 70
SANYO 35, 45, 48, 21, 14, 91
SBR 07, 34
SCHAUB LORENZ 42
SCHNEIDER 07, 41, 47
SEG 42, 46
SEI 32, 40, 49
SELECO 31, 42
SHARP 02, 19, 27, 67, 90
SIAREM 32, 49
SIEMENS 31
SINUDYNE 32, 39, 40, 49
SKANTIC 43
SOLAVOX 31
SONOKO 07, 44
SONOLOR 31, 35
SONTEC 07
SONY 04
SOUNDWAVE 07
STANDARD 41, 44
STERN 31
SUSUMU 41
SYSLINE 07
TANDY 31, 41, 48
TASHIKO 34
TATUNG 07, 48
TEC 42
TELEAVIA 36
TELEFUNKEN 36, 37, 52
TELETECH 44
TENSAI 40, 41
THOMSON 36, 51, 52, 63
THORN 31, 07, 42, 45, 48
TOMASHI 18
TOSHIBA 05, 02, 26, 21, 53
TOWADA 42
ULTRAVOX 32, 42, 49
UNIDEN 92
UNIVERSUM 31, 07, 38, 42, 45,
46, 54
VESTEL 07
VICTOR 13
VOXSON 31
WALTHAM 43
WATSON 07
WATT RADIO 32, 42, 49
WHITE WESTINGHOUSE 07
YOKO 07, 42, 46
ZENITH 03, 20
Operación rápida
Pulse FRONT LIGHT para encender o apagar la luz
de fondo LCD.
Operación de HOME MENU
1
2
3
Presione HOME MENU para visualizar la
pantalla del Menú Inicial.
Pulse para seleccionar “Ajustes”,
después pulse ENTER.
Pulse para seleccionar “Visor Frontal/
LED”, después pulse ENTER.
Ajustes De Audio Vídeo
Inicio Rápido
Apagado Automático
KURO LINK
Ajustes De La Reproducción
Configuración De Comunicaciones
Visor Frontal/LED
Versión
Manejo De Memoria USB
Actualiz. Software
Reinicio Sistema
4
5
22
Pulse para seleccionar “Encender” o
“Apagar”, después pulse ENTER.
Pulse HOME MENU o EXIT para terminar.
Antes de comenzar a reproducir
Acerca de la función KURO LINK
Las funciones pueden utilizarse cuando haya conectado un
televisor de pantalla plana o sistema audiovisual (receptor
o amplificador audiovisual, etc.) Pioneer compatibles con
KURO LINK mediante un cable HDMI. Consulte también el
manual de instrucciones del televisor de pantalla plana o
sistema audiovisual (receptor o amplificador audiovisual, etc.).
Para emplear la función KURO LINK
• La función KURO LINK podrá operarse cuando se ha
activado KURO LINK en todos los dispositivos conectados
con cables HDMI.
• Una vez haya terminado todas las conexiones y ajustes
de todos los dispositivos, no se olvide de comprobar que
la imagen del reproductor se emite al televisor de pantalla
plana. (Compruébelo también después de haber cambiado
los dispositivos conectados y después de haber vuelto a
conectar los cables HDMI.)
Es posible que no opere la función KURO LINK si la
imagen del reproductor no se emite correctamente al
televisor de pantalla plana.
• Para emplear la función KURO LINK emplee cables High
Speed HDMI™ de alta velocidad. Si emplea otros cables
HDMI es posible que la función KURO LINK no opere
correctamente.
• Es posible que en algunos modelos, la función KURO LINK
se denomine “HDMI Control”.
• La función KURO LINK no opera con dispositivos de otras
marcas, aunque se hayan conectado con un cable HDMI.
• Salida de la óptima calidad de imagen para “KURO”
desde el reproductor.
Cuando se ha habilitado la función KURO LINK, se emiten
las señales de vídeo con la óptima calidad de imagen para
“KURO” desde el terminal HDMI del reproductor.
El indicador KURO LINK del reproductor se encenderá en
rojo.
Indicador KURO LINK
Reproducción de disco
¿Qué puede hacerse con la función
KURO LINK?
• La alimentación del televisor de pantalla plana
y del reproductor se conecta y desconecta
automáticamente. (Función de alimentación
simultánea)
Cuando se inicia la reproducción en el reproductor o se
visualiza el Menú Inicial o el Navegador del disco, si el
televisor de pantalla plana estaba apagado, se encenderá
automáticamente. Cuando se apague el televisor de
pantalla plana, el reproductor también se apagará
automáticamente.
• El idioma de visualización en pantalla del reproductor
cambia automáticamente. (Función de idioma
unificado)
Cuando se recibe la información sobre el idioma
procedente de un televisor de pantalla plana conectado,
podrá hacer que el idioma de visualización en pantalla del
reproductor cambie automáticamente al mismo que el
idioma del televisor de pantalla plana. Está función sólo
podrá aplicarse cuando la reproducción esté detenida y no
se esté visualizando la pantalla del menú.
• Operación del reproductor con el mando a distancia
del televisor de pantalla plana.
Las operaciones del reproductor tales como el inicio y la
parada de la reproducción y la visualización de menús
pueden llevarse a cabo desde el televisor de pantalla plana.
• La imagen de reproducción del reproductor se
visualiza en la pantalla del televisor de pantalla plana.
(Función de selección automática)
Cuando se inicia la reproducción en el reproductor o
se visualiza el Menú Inicial o el Navegador del disco, la
entrada cambia automáticamente en el televisor de pantalla
plana y en el sistema audiovisual (receptor o amplificador
audiovisual, etc.). Cuando se cambie la entrada, aparecerá
la imagen de reproducción, el Menú Inicial o el Navegador
del disco en el televisor de pantalla plana.
23
Reproducción de BD/DVD/CD
Esta sección explica la reproducción de discos BDVídeo y DVD-Vídeo (como películas), CDs y discos
DVD-RW/R grabados disponibles en el comercio.
Para parar la reproducción
Pulse STOP.
Función de reproducción con reanudación
• Si pulsa PLAY a continuación, la reproducción se
reanudará desde el punto donde se paró el reproductor la
vez anterior. Para reproducir desde el principio, cancele el
modo de reanudación pulsando STOP, después pulse
PLAY. (Esto podrá no funcionar dependiendo del tipo
de disco. En tal caso, abra la bandeja de discos o entre en
espera.)
Para cargar un disco
NOTA
OPEN/CLOSE
STANDBY/ON
1
2
3
• La reproducción con reanudación podrá no funcionar
dependiendo del disco.
Visualización de la información del
disco
Pulse STANDBY/ON para encender la
alimentación.
Pulse OPEN/CLOSE para abrir la bandeja de
disco.
Cargue un disco en la bandeja de disco.
• Inserte el disco con la etiqueta hacia arriba.
• En el caso de un disco grabado de ambos lados,
ponga boca abajo el lado que va a reproducir.
Press DISPLAY during playback.
Pulse DISPLAY durante la reproducción.
• Cada vez que pulse DISPLAY, la visualización
cambiará de la forma siguiente.
Pantalla de información de disco A
1
4
2
Pulse OPEN/CLOSE para cerrar la bandeja
de disco.
3
4
Reproducción de BD/DVD-Vídeo
BD VIDEO
DVD VIDEO
BD-RE
DVD-R
DVD-RW
Pantalla de información de disco B
AVCHD
4
00 : 00 : 12
/ 03 : 12 : 28
No hay visualización
Cargue un disco.
• La reproducción comenzará automáticamente,
dependiendo del disco.
• La reproducción comenzará desde el primer título.
• El menú podrá visualizarse primero, dependiendo del
disco. Realice la operación de reproducción siguiendo
las indicaciones en pantalla.
2
1/1
1 / 101
00 : 00 : 12
/ 03 : 12 : 28
BD-R
Este reproductor permite el escalado del DVD durante
la reproducción del mismo.
1
BD-VÍDEO
Pulse PLAY si la reproducción no comienza
automáticamente o si la misma se detiene.
NOTA
• El tiempo para cargar el disco puede variar dependiendo
del disco.
24
Tipo de disco
Número del título reproduciéndose/Número total de
títulos
Número del capítulo reproduciéndose/Número total
de capítulos
Tiempo transcurrido de reproducción/Tiempo de
reproducción total para el título
NOTA
• La pantalla de información de disco A desaparece después
que transcurra aproximadamente 1 minuto sin realizarse
ninguna operación.
• Para algunos discos BD-VÍDEO lanzados comercialmente,
puede que no aparezca la visualización del tiempo de
reproducción total para el capítulo/título.
Reproducción de BD/DVD/CD
Menús BD/DVD
Utilización del menú del disco
• Esta sección explica cómo reproducir un disco BD/
DVD-Vídeo con un menú principal, menú del disco o
menú emergente.
• En el menú del disco se ofrecen los títulos listados
en el menú de títulos, y una guía del disco (para
opciones como subtítulos y idiomas de audio).
DVD VIDEO
Ejemplo: Seleccione “IDIOMA DEL SUBTÍTULO”.
1
Pulse TOP MENU/DISC NAVIGATOR.
• Si el disco DVD-Vídeo tiene una pantalla de menú de
disco, se visualiza la misma.
2
Pulse para seleccionar “IDIOMA DEL
SUBTÍTULO”, después pulse ENTER.
• Se visualizará la pantalla para seleccionar el idioma
del subtítulo.
MENÚ
1 IDIOMA DEL AUDIO
2 IDIOMA DEL SUBTÍTULO
3 AUDIO
Comienzo de la reproducción
seleccionando un título del menú
principal
BD VIDEO
1
3
DVD VIDEO
4
Pulse TOP MENU/DISC NAVIGATOR.
• Si el disco BD/DVD-Vídeo tiene una pantalla de menú
principal, se visualiza la misma.
Pulse para seleccionar el idioma del
subtítulo, después pulse ENTER.
Pulse TOP MENU/DISC NAVIGATOR para
terminar.
Utilización del menú emergente
MENÚ PRINCIPAL
BD VIDEO
Jazz
2
Latina
3
Clásica
4
Rock
1
• Se visualizará la pantalla del menú emergente.
• El contenido de menú visualizado variará dependiendo
del disco. Para los detalles sobre cómo ver y operar el
menú emergente, consulte el manual del disco.
Pulse para seleccionar el título,
después pulse ENTER.
• Se reproducirá el título seleccionado.
NOTA
• El procedimiento explicado en esta página es el
procedimiento de operación básico. Los procedimientos
variarán dependiendo del disco BD/DVD-Vídeo, por lo que
deberá realizar las operaciones siguiendo las instrucciones
del manual del disco BD/DVD-Vídeo, o las instrucciones
visualizadas en la pantalla.
Menú emergente
Página anterior
Página siguiente
2
Menú principal
• Con algunos discos BD/DVD, el menú principal puede
ser mencionado como el “Menú Títulos”. Cuando las
instrucciones se refieran a “Menú Títulos” utilice TOP
MENU/DISC NAVIGATOR en el mando a distancia.
• Si no hay menú principal disponible, el botón TOP MENU/
DISC NAVIGATOR no tendrá ningún efecto.
Pulse POPUP MENU/MENU durante la
reproducción.
Reproducción de disco
2
1
3
Pulse para seleccionar el elemento
deseado, después pulse ENTER.
Pulse POPUP MENU/MENU para terminar.
• Para algunos discos, el menú emergente
desaparecerá automáticamente.
25
Reproducción de BD/DVD/CD
Disfrutar de BONUSVIEW o BD-LIVE
1
BD VIDEO
Pulse SECONDARY VIDEO durante la
reproducción para visualizar la pantalla con 2
imágenes.
Este reproductor es compatible con funciones
adicionales de BD-Vídeo, BONUSVIEW (BD-ROM
Perfil 1 Versión 1.1) y BD-LIVE.
Para discos BD-Vídeo compatibles con BONUSVIEW,
están disponibles las funciones Imagen en Imagen y
Paquete Virtual. Para discos compatibles con BDLIVE, además de las funciones BONUSVIEW puede
disfrutar de varias funciones a través de Internet.
Los datos de Paquete Virtual/BD-LIVE se guardan en
almacenamiento local (dispositivo de memoria USB
conectado a este reproductor). Para poder utilizar
estas funciones, conecte un dispositivo de memoria
USB (capacidad mínima de 1 GB (se recomiendan 2
GB o más)) compatible con USB 2.0 de alta velocidad
(480 MB/s) en el terminal BD STORAGE/SERVICE
(página 11) de la parte trasera de este reproductor.
• Si el espacio para almacenamiento es insuficiente, los datos
no se copiarán/descargarán. Borre datos innecesarios o
utilice un dispositivo de memoria USB nuevo.
• Si se utiliza un dispositivo de memoria USB que contiene
otros datos (grabados previamente), puede ser que el
vídeo y el audio no se reproduzcan correctamente.
• Si el dispositivo de memoria USB se desconecta del
reproductor durante la reproducción de datos de Paquete
Virtual/BD-LIVE, se parará la reproducción del disco.
• Puede requerirse algún tiempo para que se carguen
(lectura/escritura) los datos.
• Consulte “Manejo De Memoria USB” en la página 43 para
borrar los datos de Paquete Virtual y los datos de BD-LIVE
en el dispositivo de memoria USB.
PRECAUCIÓN
• Si no hay espacio suficiente en el dispositivo de memoria
USB, puede resultar imposible emplear las funciones BDLIVE. En este caso, consulte el apartado “Manejo De
Memoria USB”, en la página 43, para ver el modo de borrar
los datos del Paquete virtual y los datos de BD-LIVE del
dispositivo de memoria USB.
NOTA
• No se garantiza la operación de dispositivos de memoria
USB.
• No utilice un cable alargador USB cuando conecte un
dispositivo de memoria USB al terminal BD STORAGE/
SERVICE del reproductor.
− El uso de un cable alargador USB puede prevenir que el
reproductor funcione correctamente.
Utilización de la función Imagen en
Imagen (reproducción de audio/
vídeo secundario)
El BD-Vídeo que incluye audio y vídeo secundario
compatible con Imagen en Imagen puede reproducirse
con audio y vídeo secundario simultáneamente como
un vídeo pequeño en la esquina.
26
Audio/vídeo
primario
2
Audio/vídeo
secundario
Para quitar el vídeo secundario, pulse
SECONDARY VIDEO nuevamente.
NOTA
• Para escuchar audio secundario, asegúrese de que “Audio
Secundario” esté ajustado en “Encender”. (Consulte la
página 37.)
• Dependiendo del contenido, el audio y el vídeo
secundario para Imagen en Imagen pudiera reproducirse
y desaparecer automáticamente. Además, pudiera haber
restricción respecto a las áreas que pueden visualizarse.
Paquete Virtual
Para discos BD-Vídeo compatibles con Paquete
Virtual, los datos se copian desde discos o Internet al
almacenamiento local. Se copian automáticamente al
almacenamiento local antes de la reproducción. Puede
disfrutar de variadas funciones adicionales incluyendo
vídeo secundario, audio secundario, subtítulos, tráilers
de películas, etc.
• Los métodos de reproducción varían dependiendo del
disco. Para los detalles, consulte el manual del disco.
BD-LIVE
En este reproductor, se puede disfrutar de contenido
variado con funciones interactivas mediante discos
Blu-ray compatibles con BD-LIVE y una conexión a
Internet. Puede disfrutar de la descarga de contenido
adicional, como tráilers de películas más recientes, al
dispositivo de memoria USB, juegos interactivos BD-J
compatibles con comunicación, etc.
• Las funciones disponibles difieren dependiendo del disco.
NOTA
• Con respecto al método de reproducción de contenido
BD-LIVE, etc., ejecute las operaciones de acuerdo con las
instrucciones en el manual del disco BD.
• Para disfrutar de funciones BD-LIVE, ejecute la conexión
a Internet de banda ancha (página 18) y los ajustes de
comunicación (páginas 40–42).
• Consulte la página 39 para el ajuste para restringir el
acceso a contenido BD-LIVE.
Reproducción de BD/DVD/CD
Reproducción de DVD-R/-RW/
BD-RE/-R
DVD-R
DVD-RW
BD-RE
BD-R
Puede reproducir un disco grabado (DVD: solamente
disco finalizado en formato VR / BD: solamente disco
en formato BDAV).
NOTA
• La pantalla del Navegador del disco también puede
visualizarse presionando TOP MENU/DISC NAVIGATOR
cuando la reproducción está detenida, o presionando
ENTER después de haber seleccionado “Navegador
del disco” en el Menú Inicial cuando la reproducción está
detenida.
Acerca del Navegador del disco
• El Navegador del disco puede visualizarse en dos
formatos, el de Imagen miniatura y Nombre de título.
• Cada vez que pulse ROJO, la pantalla cambia entre
Miniatura y Nombre Del Título.
Miniatura
Programa 1
5/21 Vie 9:30 AM 110 Min.
Programa
1
Programa
2
Programa
4
Programa
3
Programa
5
Programa
6
NOTA
Reproducción seleccionando un
título
1
Cargue un disco grabado.
• Se visualiza la pantalla del Navegador del disco.
Programa
1
Programa
2
A
Programa
5
Por Capítulo
C
Lista Repr
D
Funciones
Programa 1
5/21 Vie 9:30 AM 110 Min.
[ A Partir De Antiguo ]
1 Programa 1
5/21
2 Programa 2
6/15
3 Programa 3
7/3
4 Programa 4
9/18
Vie
Vie
Lun
Jue
110 Min.
110 Min.
56 Min.
40 Min.
Funciones
Programa
3
Programa
6
• Al cargar un disco BD con restricciones de uso
establecidas por un grabador de BD, aparecerá
la pantalla para introducción de la contraseña. A
continuación, introduzca su contraseña.
Si introduce una contraseña incorrecta tres veces, se
abrirá la bandeja de disco. Cierre la bandeja de disco
e introduzca la contraseña correcta.
• Si no se visualiza la pantalla del Navegador del disco,
presione TOP MENU/DISC NAVIGATOR.
2
B
Nombre Del Título
A
Programa
4
Nombre Del Título
Miniatura
B
Ordenando
C
Lista Repr
D
Reproducción de disco
• “Finalizar” en este manual se refiere a asegurarse de que
un dispositivo de grabación procese el disco de forma que
pueda reproducirse en otros reproductores/grabadoras de
DVD y en este reproductor. En este reproductor sólo se
reproducirán discos DVD finalizados. (Este reproductor no
tiene una función para finalizar discos.)
Información del título seleccionado
Nombre del título
Fecha de la grabación
Duración de la grabación
Subtítulo para botón de color
• Cuando se visualicen siete títulos o más, cambie de
página pulsando PAGE +/-. La misma operación
puede realizarse pulsando k o l.
Pulse para seleccionar el título
deseado, después pulse ENTER.
• Cuando se visualicen siete títulos o más, cambie de
página pulsando PAGE +/-. La misma operación
puede realizarse pulsando k o l.
• Comenzará la reproducción del título seleccionado.
Puede reproducir pulsando PLAY en lugar de
pulsar ENTER.
3
Pulse STOP para parar la reproducción.
27
Reproducción de BD/DVD/CD
Reproducción seleccionando un
capítulo
1
Pulse VERDE mientras se visualiza la pantalla
Miniatura.
Reproducción del título que paró
mientras se reproducía.
1
• Se visualizará la pantalla de capítulo.
Capítulo
1
Capítulo
4
Capítulo
2
Reproducción
Capítulo
3
Capítulo
5
Pulse para seleccionar el capítulo
deseado, después pulse ENTER.
• Comenzará la reproducción del capítulo seleccionado.
Puede reproducir pulsando PLAY en lugar de
pulsar ENTER.
3
Pulse STOP para parar la reproducción.
Ordenando los títulos
Cada vez que pulse VERDE mientras se visualiza
la pantalla Nombre Del Título, la visualización de la
pantalla Nombre Del Título cambia entre visualización
del título más reciente primero y del título más antiguo
primero.
Reproducción seleccionando una
Lista de Reproducción
1
Pulse AZUL mientras se visualiza la pantalla
Miniatura.
• Se visualizará la pantalla Lista Repr.
Programa 1
5/21 Vie 9:30 AM 110 Min.
1 Programa 1
2 Programa 2
5/21
6/15
C
2
Original
Fri
Fri
110 Min.
110 Min.
D
Funciones
Pulse para seleccionar el título, después
pulse ENTER.
• Comenzará la reproducción del título seleccionado.
3
Pulse STOP para parar la reproducción.
28
Desde Principio
Continuar
Capítulo
6
• Cuando se visualicen siete capítulos o más, cambie
de página pulsando PAGE +/-. La misma operación
puede realizarse pulsando k o
l.
• Para regresar a la pantalla Miniatura, pulse VERDE.
2
Pulse AMARILLO mientras se visualiza la
pantalla del Navegador del disco.
2
Pulse para seleccionar el tipo de
reproducción, después pulse ENTER.
• Comenzará la reproducción del título.
3
Pulse STOP para parar la reproducción.
Reproducción de BD/DVD/CD
Reproducción seleccionando una
pista
Reproducción de Audio CD
AUDIO CD
1
Pulse para seleccionar la pista, después
pulse ENTER durante la reproducción o cuando
se detenga la misma.
• Comenzará la reproducción de la pista seleccionada.
• Cuando se visualicen siete o más pistas, cambie de
página pulsando PAGE +/-.
Pista 03
5:23
0:00
1
2
3
4
5
6
Reproducción desde el principio
Pista 01
Pista 02
Pista 03
Pista 04
Pista 05
Pista 06
D
Pista 01
1
2
3
4
5
6
Pista 01
Pista 02
Pista 03
Pista 04
Pista 05
Pista 06
2
Procedimiento de operación para
el menú “Funciones”
1
Funciones
1 / 12
00 : 00 : 11
L+R
3
Desac.
Pulse AMARILLO (Funciones) mientras se
visualice la pantalla CD.
• Se activará el menú “Funciones”.
Pista 03
5:16
5:10
5:23
5:03
4:44
5:08
5:23
0:00
1
2
3
4
5
6
1 / 12
Selecc
Intro.
D
Funciones
Pulse STOP para parar la reproducción.
Reproducción de disco
5:16
0:00
3
Intro.
Cargue un audio CD.
• Se visualizará la pantalla CD.
(La pantalla CD se visualiza solamente cuando está
insertado un disco compacto grabado en el formato
CD-DA.)
• La reproducción puede comenzar automáticamente,
dependiendo del disco.
2
5:16
5:10
5:23
5:03
4:44
5:08
3 / 12
Selecc
1
Funciones
3 / 12
00 : 00 : 11
L+R
3
Desac.
Funciones
Pulse PLAY si la reproducción no comienza
automáticamente o si la misma se detiene.
Pulse STOP para parar la reproducción.
Intro.
D
2
Selecc Pista
Pulse para seleccionar el ajuste deseado,
después pulse ENTER.
• Cuando la reproducción está detenida, sólo puede
seleccionarse “Pista”.
• Para ver una descripción de cada elemento de ajuste,
consulte “Funciones que pueden ajustarse” (Página 35).
3
Pulse para ajustar, después pulse
ENTER.
• Las operaciones podrán variar dependiendo del
elemento de ajuste. Realice la operación siguiendo las
instrucciones de operación de la pantalla.
NOTA
• La reproducción con reanudación podrá no funcionar
dependiendo del disco.
5:16
5:10
5:23
5:03
4:44
5:08
3 / 12
Selecc
Función de reproducción con reanudación
• Si pulsa PLAY a continuación, la reproducción se
reanudará desde el punto donde se paró el reproductor la
vez anterior. Para reproducir desde el principio, cancele el
modo de reanudación pulsando STOP, después pulse
PLAY. (Esto podrá no funcionar dependiendo del tipo
de disco. En tal caso, abra la bandeja de discos o entre en
espera.)
Pista 01
Pista 02
Pista 03
Pista 04
Pista 05
Pista 06
Funciones
3 / 12
00 : 00 : 11
L+R
3
Desac.
4
Pulse
RETURN o AMARILLO para salir del
menú “Funciones”.
NOTA
• Los elementos visualizados varían dependiendo del disco.
29
Funciones de reproducción
BD VIDEO
DVD VIDEO
BD-R
DVD-R
BD-RE
DVD-RW
AVCHD
AUDIO CD
Reproducción lenta
Las funciones de reproducción lenta funcionan
cuando se pulsa l o k más de 2
segundos durante la pausa.
• Pulse PLAY para volver a la reproducción normal.
NOTA
• Esto no funciona para audio CDs.
• La reproducción lenta con retroceso no puede realizarse
para discos BD de vídeo ni discos DVD en el formato
AVCHD.
Búsqueda con salto
La reproducción salta 30 segundos hacia
adelante cuando se pulsa
SKIP SEARCH durante
la reproducción.
Repetición
La reproducción salta 10 segundos hacia atrás cuando
se pulsa
REPLAY durante la reproducción.
NOTA
• Algunas operaciones en las siguientes funciones de
reproducción no pueden ejecutarse dependiendo de las
especificaciones del disco.
Avance/retroceso rápido (Búsqueda)
Reproducción repetida de un título
o capítulo (Reproducción repetida)
1
2
3
Funciones de avance/retroceso rápido cuando se
pulsa REV o FWD durante la reproducción.
Reproduzca el título o capítulo que quiera repetir.
Pulse REPEAT.
Pulse para seleccionar el tipo de
Reproducción repetida.
• Reproducción Título: Repite el título reproduciéndose
actualmente.
• Reproducción Capít: Repite el capítulo
reproduciéndose actualmente.
• Selección De Escena: Repite la escena especificada
de título o capítulo.
Ejemplo: Cuando se pulsa FWD
• La velocidad de búsqueda cambiará cada vez que pulse
el botón.
Cuando reproduce un DVD
• No puede avanzar rápido o retroceder rápido desde un título
y continuar con otro título (excepto al reproducir audio CDs).
Reproducción Título
Reproducción Capít
Selección De Escena
Saltando al siguiente capítulo
(pista) o al principio del actual
El salto (al principio de un capítulo o una pista) funciona
cuando se pulsa k o l durante la
reproducción.
Pausa/Reproducción de avance de
fotograma
RETURN para cancelar sin ajustar el tipo de
• Pulse
reproducción repetida.
• Para Audio CD, puede seleccionar “Reproducción
Disco”, “Reproducción Pista” y “Especificar Parte”
como opciones de reproducción repetida.
4
Ejemplo: Reproducción repetida de un título (TÍTULO)
La pausa funciona cuando se pulsa PAUSE
durante la reproducción. (Si está reproduciendo un
audio CD, el CD también hará pausa.)
La reproducción de avance de fotograma funciona
cuando se pulsa l durante Pausa.
BD-VÍDEO
1/3
5 / 25
00 : 20 : 30
2 English
1
1
5 . 1ch
Activ. Repetir Título
• La reproducción de avance de fotograma puede no funcionar
correctamente con discos que no sean DVD-RW (formato VR).
NOTA
• Algunos discos BD/DVD-Vídeo no son compatibles con
Pausa/Reproducción de avance de fotograma.
• La reproducción con avance/retroceso de fotograma puede
realizarse para discos DVD pulsando l or
/k durante la pausa.
30
Pulse ENTER.
Activ. Repetir Título
5
Pulse REPEAT OFF o REPEAT para volver a la
reproducción normal.
Funciones de reproducción
NOTA
• Pulse l, se cancelará la reproducción repetida y
se reproducirá el siguiente capítulo.
• Pulse k una vez, se cancelará la reproducción
repetida y el reproductor regresará al inicio del capítulo
(pista) actual.
• Si pulsa k otra vez (antes de que transcurran 5
segundos) el reproductor saltará al inicio del capítulo (pista)
anterior.
• Para la reproducción repetida parcial, ajuste los puntos de
comienzo y fin dentro del mismo título.
• La reproducción repetida podrá estar prohibida
dependiendo del disco.
• La reproducción repetida parcial puede que no trabaje en
escenas con ángulos múltiples.
• Si pulsa DISPLAY, podrá confirmar la situación de la
reproducción repetida.
Visualización de la información del
audio
Puede visualizar la información del audio en el disco
reproduciéndose en ese momento pulsando AUDIO.
• El contenido visualizado varía dependiendo del disco.
BD VIDEO
DVD VIDEO
Se visualizará la pista de audio reproduciéndose en
ese momento.
Si hay grabados múltiples canales de audio, podrá
cambiar el canal de audio pulsando AUDIO.
DVD VIDEO
DVD-R
DVD-RW
AUDIO CD
DVD-R
Cuando se reproduce una emisión grabada con
audio estéreo o monofónico:
Se visualiza “Estéreo”. (No puede alternarse el audio.)
NOTA
NOTA
• Algunas operaciones en las siguiente función de
reproducción no pueden ejecutarse dependiendo de las
especificaciones del disco.
1
2
DVD-RW
Pulse REPEAT durante la reproducción.
Pulse para seleccionar “Selección De
Escena”, después pulse ENTER.
• Cuando reproduzca un programa grabado en estéreo o
monofónico, y si está escuchando el sonido Bitstream a
través de la toma de salida digital, no podrá seleccionar el
canal de audio. Ajuste “Salida De Audio” a “PCM” (Página
38), o si quiere cambiar el canal de audio, escuche a través
de las tomas de salida analógica.
Reproducción de disco
Reproducción repetida parcial
(Reproducción repetida de una
parte específica)
Cambio de subtítulos
• Se visualiza “Fijar Punto Inicio”.
Reproducción Título
3
Reprodccción Capít
Selección De Escena
Si se han provisto subtítulos en múltiples idiomas,
podrá cambiar entre ellos.
Fijar Punto Inicio
Pulse SUBTITLE durante la reproducción.
Pulse ENTER en la escena en la que desea
ajustar el punto de inicio.
• Se visualiza “Fije Punto Fin”.
4
• El visor indica el número de subtítulo que se está
reproduciendo y aparecen los subtítulos.
• Cada vez que se pulsa SUBTITLE cambia el subtítulo.
• Se visualiza “–” si el disco no tiene subtítulos.
• También puede seleccionar “Desac.”.
Pulse ENTER en la escena en la que desea
ajustar el punto final.
• Puede pulsar FWD para avanzar rápido hasta la
escena en la que desea ajustar punto final. Cuando
llegue a la escena deseada, simplemente pulse
PLAY y después ENTER para ajustar el punto final.
Para cancelar reproducción repetida, pulse REPEAT
OFF o REPEAT.
31
Funciones de reproducción
Cómo visualizar la marca de
ángulo
Cambio de ángulo
Puede cambiar los ajustes de manera que la marca
de ángulo aparezca en la parte inferior derecha de la
pantalla cuando estén grabados ángulos múltiples.
(La marca del ángulo se visualiza para discos BD/DVD
Vídeo.) Los ajustes pueden cambiarse en “Ajustes” “Ajustes De La Reproducción” - “Visul. Marca Ángulo”
(Página 39).
Si hay grabados múltiples ángulos, podrá cambiar
entre ellos.
1
Pulse ANGLE durante la reproducción.
• El visor indicará el número de ángulo reproduciéndose
actualmente. Cada vez que pulse ANGLE, cambiará
el ángulo.
• Si un disco está grabado con un sólo ángulo
solamente se visualizará “– ”.
NOTA
• Los ajustes para el audio y los subtítulos pueden
cambiarse también en la pantalla de control de funciones
(Página 34).
• Las operaciones de subtítulos, ángulo y audio difieren
según el disco. Consulte también el manual de manejo del
disco.
• Las siguientes operaciones no responderán cuando se
esté reproduciendo Audio CD:
Reproducción lenta, Avance de fotograma
Visualización de funciones
1
• La visualización para subtítulos, ángulo o audio
desaparecerá después de 5 segundos.
Cambio entre funciones
• Podrá cambiar subtítulos y audio en la pantalla de control
de funciones (Página 34).
• La operación para cada función variará dependiendo del
disco. Consulte el manual del disco.
Avance/retroceso rápido
Para volver al ángulo anterior, pulse ANGLE unas
cuantas veces para seleccionar el ángulo original.
• No podrá realizar avance/retroceso rápido entre títulos.
Al final o principio del título, el avance/retroceso rápido se
cancelará y se reanudará automáticamente la reproducción
normal.
• Los subtítulos no se reproducen con discos de vídeo
BD/DVD durante avance/retroceso rápido.
Reproducción lenta
• No podrá realizar reproducción lenta entre títulos. Al final
del título, la reproducción lenta se cancelará y se reanudará
automáticamente la reproducción normal.
Reproducción repetida
• La reproducción repetida podrá estar prohibida
dependiendo del disco.
• La reproducción repetida parcial puede que no trabaje en
escenas con ángulos múltiples.
• Para la reproducción repetida parcial, ajuste los puntos de
comienzo y fin dentro del mismo título.
32
Reproducción de archivo JPEG
CD-R
JPEG
• Cuando se visualicen siete carpetas o más, cambie
de página pulsando PAGE +/-. La misma operación
puede realizarse pulsando k o l.
CD-RW
JPEG
4
Pulse k o l para reemplazar
una imagen por otra.
• La misma operación puede realizarse pulsando
o REV/ FWD.
• Pulse
RETURN si desea volver a la pantalla de
selección de carpeta.
5
Para detener la reproducción de imágenes fijas
en cualquier momento, pulse STOP.
Reproducción de Presentación de
Diapositivas
1
En el paso 2 de la parte izquierda “Cómo
reproducir imágenes fijas en una carpeta
seleccionada”, pulse PLAY (Present.
Diapos.).
• Las imágenes fijas dentro de la carpeta seleccionada
se reproducen en modo de presentación.
2
NOTA
Cómo reproducir imágenes fijas en
secuencia
1
Ajuste de la velocidad de la
presentación de diapositivas/
reproducción repetida
1
2
3
Pulse AZUL (Menú Pres. Diap.) durante la
pantalla de selección de carpeta.
• Aparecerá la pantalla de ajuste para “Vel. Present.
Diapos.”/“Ajus. Modo Repetición”.
2
Pulse para seleccionar “Vel. Present.
Diapos.”, después pulse ENTER.
Vel. Present. Diapos.
Ajus. Modo Repetición
Para detener la reproducción de imágenes fijas
en cualquier momento, pulse STOP.
Normal
Cómo reproducir imágenes fijas en
una carpeta seleccionada
1
Para detener la reproducción en cualquier
momento, pulse STOP.
• Pulse
RETURN para reproducir una presentación
de imágenes fijas en otra carpeta.
Cargue el disco que contiene las imágenes fijas
y pulse PLAY.
• La primera imagen fija aparece en la pantalla.
• Pulse k o l para avanzar a la
imagen fija siguiente o anterior.
La misma operación puede realizarse pulsando
o REV/ FWD.
2
• Pulse PLAY para reanudar la reproducción.
3
Cargue el disco que contiene las imágenes fijas
y pulse HOME MENU.
Pulse para seleccionar “Imagen”,
después pulse ENTER.
Reproducción de disco
• Este reproductor puede reproducir imágenes fijas (archivos
JPEG) que han sido grabados en CD-RW/R discos. Para
obtener más información sobre las imágenes fijas que
se pueden reproducir con este reproductor, remítase a
“Acerca del formato de archivo JPEG” en la página 7.
• Durante la “Reproducción normal”, se producen las
imágenes fijas una por una, mientras que durante
“Presentación de Diapositivas” se suceden unas a otras.
Para poner la pausa en cualquier momento,
pulse PAUSE.
• La velocidad de la presentación de diapositivas
pueden seleccionarse entre “Rápido”, “Normal”,
“Lento1” y “Lento2”.
3
4
Utilice para seleccionar la carpeta
cuyas imágenes se van a reproducir, después
pulse ENTER.
Pulse para seleccionar la velocidad
deseada, después pulse ENTER.
Pulse para seleccionar “Ajus. Modo
Repetición”, después pulse ENTER.
Vel. Present. Diapos.
Ajus. Modo Repetición
Sí
8/15
5
6
No
Pulse seleccionar el elemento deseado,
después pulse ENTER.
Pulse EXIT para terminar.
33
Ajustes durante la reproducción
Control de función
Esto le permite hacer varios ajustes al instante, como
ajuste de subtítulos y ángulo, y selección de título
para reproducción directa. Dependiendo de sus
preferencias, podrá ajustar vídeo y audio. La operación
es igual para BD y DVD.
Procedimiento operacional del
control de funciones
Pantalla de control de funciones
BD-VÍDEO
1/3
5 / 25
00 : 20 : 30
2 English
1
1
5 . 1ch
Desac.
1
• Se visualizará la pantalla de control de funciones en el
televisor.
2
Selecc
ENTER
Pulse FUNCTION durante la reproducción.
Intro.
Volv.
Pulse para seleccionar el ajuste deseado,
después pulse ENTER.
• Para ver una descripción de cada elemento de ajuste,
consulte “Funciones que pueden ajustarse” (Página 35).
BD-VÍDEO
Visualización de estado de la
reproducción
1/3
5 / 25
00 : 20 : 30
2 English
1
1
5 . 1ch
Desac.
Muestra el estado de operación y el tipo de disco.
Elementos de ajuste
Selecciona un título (o pista) o capítulo para reproducir, o
realiza ajustes de vídeo/audio.
• Número de título/pista (Salto de título/pista directo)
• Número de capítulo (Salto de capítulo directo)
• Tiempo transcurrido de reproducción (Salto de tiempo
directo)
• Idioma de subtítulo
• Número de ángulo
• Audio
• Repetición
Visualización de la guía de operación
Ofrece ayuda sobre las operaciones con los botones del
mando a distancia.
3
Pulse para ajustar, después pulse
ENTER.
• Las operaciones podrán variar dependiendo del
elemento de ajuste. Siga las instrucciones de
operación de la pantalla.
4
Pulse
RETURN o FUNCTION para cerrar la
pantalla de control de funciones.
NOTA
• Si se visualiza “– –” para una opción, como número de
título o subtítulos, el disco no tendrá títulos o subtítulos que
puedan seleccionarse.
• Los elementos visualizados varían dependiendo del disco.
• Si accede a la pantalla de control de funciones durante
la reproducción de un BD/DVD-Vídeo, podrá resultar
imposible operar la reproducción de BD/DVD-Vídeo. En
casos como este, cierre la pantalla de control de funciones.
34
Ajustes durante la reproducción
Funciones que pueden ajustarse
Número de título/pista (Salto de título/pista directo)
• Muestra el número del título reproduciéndose (o el número de pista cuando se
reproduce un audio CD). Usted podrá saltar hasta el principio del título (o pista).
• Para saltar al comienzo de un título (o pista) seleccionado, pulse los botones
Numéricos para introducir el número del título (o pista) si esta opción está iluminada.
Número de capítulo (Salto de capítulo directo)
• Muestra el número de capítulo que está reproduciéndose. Usted podrá saltar hasta el
principio del capítulo.
• Para saltar al comienzo de un capítulo seleccionado, pulse los botones Numéricos
para introducir el número del capítulo si esta opción está iluminada.
Tiempo transcurrido de reproducción (Salto de tiempo directo)
• Muestra el tiempo transcurrido desde el principio del título de disco (o pista) actual. Esto
le permite saltar a un tiempo especificado.
• Pulse para seleccionar hora, minuto o segundo, después pulse o
los botones Numéricos para ajustar el tiempo. Pulse ENTER para comenzar la
reproducción en el tiempo ajustado.
NOTA
• Botone ENTER: Introduce el número.
• Botone CLEAR: Borra el número introducido.
Idioma de subtítulo
Número de ángulo
• Muestra el número de ángulo seleccionado actualmente. Si el vídeo está grabado con
múltiples ángulos, podrá cambiar el ángulo.
Audio
• Muestra el tipo de audio seleccionado actualmente. Usted podrá seleccionar el tipo de
audio deseado.
Reproducción de disco
• Muestra el idioma del subtítulo seleccionado actualmente. Si hay subtítulos provistos en
otros idiomas, podrá cambiar a su idioma preferido.
Repetición
• Puede reproducirse repetidamente el Título (o Capítulo) actual o segmentos parciales.
La reproducción repetida también es posible con el botón REPEAT en el mando a
distancia.
NOTA
• Puede que estas funciones no se ejecuten en todos los discos.
35
Ajustes
AJUSTES
Operaciones comunes
El “Menú” permite diversos ajustes y configuraciones audiovisuales en las funciones utilizando el mando a
distancia. Para ejecutar ajustes en este reproductor necesita hacer aparecer la OSD. A continuación se muestra la
explicación para las operaciones básicas del “Menú”.
Ejemplo: Ajuste de “Visor Frontal/LED”
1
3
2
Visualice la pantalla Menú
Navegador del disco
Ajustes
Idioma En La Pantalla
Imagen
4
Apagar
RETURN para regresar a la
Pulse
página de “Menú” anterior.
Operación básica para Ajustes de
la Reproducción
Ejemplo: Ajuste de “Control Paterno” en “Ajustes De La
Reproducción”
3
4
Presione HOME MENU para visualizar la
pantalla del Menú Inicial.
Pulse para seleccionar “Ajustes”,
después pulse ENTER.
Pulse para seleccionar “Ajustes De La
Reproducción”, después pulse ENTER.
Pulse para seleccionar “Control Paterno”,
después pulse ENTER.
Salga de la pantalla Menú
Pulse HOME MENU o EXIT para
terminar.
Introduzca un número de 4 dígitos para la
contraseña, y después el mismo número de 4
dígitos para confirmación.
Pulse ENTER para completar el procedimiento
de ajuste de la contraseña e ir a la siguiente
pantalla de ajuste.
6 Pulse para seleccionar el nivel de control
paterno para DVD VÍDEO, BD-ROM, y después
seleccione el código de país. Pulse ENTER
después de hacer cada selección.
Control Paterno
Idioma De Disco
Visul. Marca Ángulo
Ajuste De Contraseña
Acceso A BD Internet
• Cuando utilice este reproductor por primera vez,
se visualizará la pantalla de ajuste de contraseña.
Consulte debajo “Cuando se ajusta la contraseña por
primera vez”.
5
Ajustes De Audio Vídeo
Inicio Rápido
Apagado Automático
KURO LINK
Ajustes De La Reproducción
Configuración De Comunicaciones
Visor Frontal/LED
Versión
Manejo De Memoria USBent
Actualiz. Software
Reinicio Sistema
Seleccione el elemento
siguiente
Encender
2
Pulse para seleccionar “Visor
Frontal/LED”, después pulse ENTER.
Presione HOME MENU
para visualizar la pantalla
del Menú Inicial.
Pulse para
seleccionar “Ajustes”,
después pulse ENTER.
Pulse seleccionar el elemento
deseado, después pulse ENTER.
1
Seleccione un elemento
en el menú
Nivel 3
0
Introduzca su contraseña de 4 dígitos.
• No puede ir a la siguiente pantalla de ajuste hasta que
no haya introducido la contraseña correcta.
Cuando se ajusta la contraseña por primera vez
Para ajustar la contraseña por primera vez,
pulse para seleccionar “Sí” y entrar en el
menú de ajuste de contraseña, después pulse
ENTER.
36
7
Pulse HOME MENU o EXIT para terminar.
AJUSTES
Ajustes De Audio Vídeo
Relación Aspecto TV
Podrá ajustar las proporciones dimensionales de pantalla
del televisor conectado, y ajustar la salida de vídeo.
Si cambia de televisor (p.ej., porque ha comprado uno
nuevo) y las proporciones dimensionales de pantalla
del televisor conectado cambian, tendrá que cambiar
el ajuste “Relación Aspecto TV”.
Elemento
Panor. 16:9: Seleccione esto cuando conecte con un
televisor con proporciones dimensionales de pantalla 16:9.
Normal 4:3: Seleccione esto cuando conecte con un
televisor con proporciones dimensionales de pantalla 4:3.
NOTA
• Cuando el reproductor BD está conectado a un televisor
compatible con 1080p 24Hz TV y la “Salida De Vídeo HDMI”
está ajustada a “Auto”, cuando se reproduzcan discos
compatibles se visualizará automáticamente 1080p 24Hz.
En 1080p 24Hz / 1080p 60Hz, no hay salida desde las
tomas de salida COMPONENT VIDEO y la toma de salida
VIDEO.
Selección Salida De Vídeo
Esta función le permite seleccionar la salida de vídeo
con prioridad cuando conecta un equipo de vídeo
como un televisor al terminal HDMI OUT y a las tomas
de salida COMPONENT VIDEO.
Elemento
HDMI, Componente
<Cuando se selecciona Normal 4:3>
Elemento
Buzón: Si conecta con un televisor cuyas proporciones
dimensionales de pantalla sean 4:3 y reproduce un DVD
con vídeo 16:9, el vídeo se reproducirá con bandas negras
por encima y por debajo, mientras se mantienen las
proporciones 16:9.
Expl. Panor.: Si conecta con un televisor cuyas proporciones
dimensionales de pantalla sean 4:3 y reproduce un DVD
con vídeo 16:9, el vídeo se reproducirá con los lados
izquierdo y derecho de la imagen cortados para visualizar
las proporciones dimensionales de pantalla 4:3. (Esta
función responderá si el disco está etiquetado para 4:3PS.)
Salida De Vídeo Componente
Audio Secundario
Esto alterna el sonido de chasquido en el menú y
audio con vídeo secundario en el modo imagen en
imagen para BD-Vídeo.
• Seleccione “Apagar” cuando disfrute de los sonidos de alta
calidad de BD-Vídeo.
Elemento
Encender, Apagar
Ajustes
Esto ajusta la resolución de la salida de vídeo
componente.
Algunos televisores no son completamente
compatibles con el reproductor de disco Blu-ray, lo
cual puede causar distorsión de la imagen. En este
caso, pulse VIDEO OUTPUT RESET en el mando a
distancia durante cinco segundos. “Salida De Vídeo
Componente” se restablecerá a “480i” (valor ajustado
en la fábrica).
• Cuando está seleccionada la salida de vídeo con prioridad,
el vídeo sale desde el otro terminal de vídeo con la
resolución de la salida de vídeo seleccionada.
• No hay salida desde las tomas de salida COMPONENT
VIDEO y la toma de salida VIDEO cuando hay salida de
vídeo a resolución de 1080p y la salida de vídeo con
prioridad está seleccionada a “HDMI”.
• Si el equipo de vídeo conectado a cada uno de los
terminales no es compatible con la resolución de la salida
de vídeo con prioridad, pueden aparecer anomalías en las
imágenes en la pantalla.
Elemento
1080i, 720p, 480p, 480i
Salida De Vídeo HDMI
Esto ajusta la resolución de la salida de vídeo HDMI.
Algunos televisores no son completamente compatibles
con el reproductor de disco Blu-ray, lo cual puede causar
distorsión de la imagen. En este caso, pulse VIDEO
OUTPUT RESET en el mando a distancia durante cinco
segundos. “Salida De Vídeo HDMI” se restablecerá a
“Auto” (valor ajustado en la fábrica).
Elemento
Auto, 1080p, 1080i, 720p, 480p
37
AJUSTES
Salida De Audio
Puede ajustar la salida de audio cuando conecte a un
equipo ENVOLVENTE.
1 Esto ajusta la salida de audio conectada a un
equipo ENVOLVENTE.
Elemento
Elemento
Salida De HDMI: Seleccione esto cuando conecte
utilizando el terminal HDMI OUT.
Salida Digital: Seleccione esto cuando conecte utilizando
el terminal DIGITAL OUT OPTICAL.
Salida Audio 2ch: Seleccione esto cuando no utilice
equipo de sonido ENVOLVENTE.
2
Puede ajustar el modo de salida de audio para
cada terminal de salida.
Esto ajusta el modo de salida de audio para
el terminal HDMI OUT cuando se selecciona
“Salida De HDMI”.
NOTA
• Cuando el audio secundario está ajustado en “Encender”,
PCM se selecciona automáticamente como el modo de
salida de audio.
Elemento
Bitstream:
PCM (Envolvente):
PCM:
• Seleccione esto al conectar a
un equipo ENVOLVENTE con un
descodificador incorporado para
DOLBY DIGITAL, etc.
• El ajuste en Bitstream dará salida
a cada señal de audio mediante
Bitstream.
• Seleccione esto al conectar a un
equipo de audio estéreo con 2
canales.
• El ajuste en PCM dará salida
convirtiendo cada señal de audio
en señal de audio PCM de 2
canales.
NOTA
• Para información sobre salida de formatos de audio de
próxima generación, consulte la página 45.
38
Normal: La misma gama de salida de audio se reproduce
como la gama de salida de audio grabado original.
Cambiar*: Cuando se reproduce audio Dolby Digital, la
gama dinámica del audio se ajusta de forma que se
pueda oír fácilmente la parte del diálogo. (Si el audio
suena anormal, ajuste en “Normal”.)
Auto.: Cuando reproduce audio en el formato Dolby
TrueHD, la gama dinámica se ajusta automáticamente.
* Baje el volumen antes de ajustar. Si no lo hace, los
altavoces podrán emitir un sonido alto, o aplicarse una
salida excesiva a los altavoces.
Inicio Rápido
Eso activa y desactiva la función Inicio Rápido.
Cuando la función Inicio Rápido está activada:
• El tiempo de comienzo de funcionamiento del reproductor
se reduce.
• Sin embargo, el consumo de energía aumentará (unos 8 W).
Cuando la función Inicio Rápido está desactivada:
• Seleccione esto al conectar
a un equipo HDMI con un
descodificador incorporado para
DOLBY DIGITAL, etc.
• El ajuste en Bitstream dará salida
a cada señal de audio mediante
Bitstream.
• Seleccione esto al conectar a un
equipo HDMI multicanal.
• El ajuste en PCM (Envolvente)
dará salida mediante PCM LINEAL
descodificando señales de audio
grabadas en cada modo de salida
de audio como DOLBY DIGITAL,
DTS.
Esto ajusta el modo de salida de audio para
DIGITAL OUT OPTICAL cuando se selecciona
“Salida Digital”.
Elemento
Bitstream:
Control Gama Dinámica
Esto le permite ajustar la gama entre el sonido más
alto y más bajo (gama dinámica) para reproducir
al volumen promedio. Utilice esto cuando cueste
escuchar el diálogo.
• El reproductor entrará en el modo de bajo consumo de
energía cuando esté en la condición en espera.
Elemento
Sí, No
NOTA
• Cuando “Inicio Rápido” está ajustado en “Sí”, el
reproductor requiere algún tiempo para apagarse.
Apagado Automático
Esto ajusta el reproductor de forma que la
alimentación se apague automáticamente si se para la
reproducción durante aproximadamente 10 minutos.
Elemento
Sí, No
KURO LINK
De este modo el reproductor quedará establecido para
que sea controlado desde el televisor de pantalla plana
a través del cable HDMI.
Elemento
Sí, No
NOTA
• Para los detalles, consulte el manual de manejo del
televisor.
AJUSTES
Ajustes De La Reproducción
Control Paterno
Esto le permite ajustar el Control Paterno dependiendo
del contenido del disco. Los Niveles de Control
Paterno disponibles se muestran a continuación.
Antes de ajustar los Niveles de Control Paterno y el
Código de País es necesario introducir la contraseña
de 4 dígitos. Los Niveles de Control Paterno y el
Código de País no pueden ajustarse si no se ha
creado una contraseña o si no se ha introducido la
misma.
Elemento (Para DVD-VÍDEO)
8 y Apagado: Se puede reproducir todo el DVD-Vídeo.
1-7: Prohíbe la reproducción de DVD-Vídeo con las
clasificaciones correspondientes grabadas en ellos.
Elemento (Para BD-ROM)
Sin Límite: Se puede reproducir todo el BD-Vídeo.
0-99 años(s): Prohíbe la reproducción de BD-Vídeo con
las clasificaciones correspondientes grabadas en ellos.
Ajuste De Contraseña
Esto ajusta la contraseña para el ajuste o cambio del
Nivel de Control Paterno.
Elemento
Sí: Introduzca el número de 4 dígitos.
No
NOTA
• Si olvida la contraseña, puede reponer la contraseña actual
utilizando “Reinicio Sistema” en “Ajustes”. (Consulte esta
página.)
• Si lo desea, también puede ajustar la contraseña nueva.
Acceso A BD Internet
Esto permite ajustar la restricción del acceso a
contenido BD-LIVE.
Elemento
Permitir: Permite todos los discos BD-LIVE.
Límite: Permite sólo discos con certificación de
propietario.
Prohibir: Prohíbe todos los discos BD-LIVE.
Elemento (Código de país)
Ajusta el código de país. Consulte la Lista de Código
de Países (página 45) porque las clasificaciones varían
dependiendo del país.
NOTA
• Para los detalles, consulte “Operación Básica para Ajustes
de la Reproducción” en la página 36.
NOTA
• Las funciones disponibles difieren dependiendo del disco.
• Con respecto al método de reproducción de contenido
BD-LIVE, etc., ejecute las operaciones de acuerdo con las
instrucciones en el manual del disco BD.
• Para disfrutar de funciones BD-LIVE, ejecute la conexión
a Internet de banda ancha (página 18) y los ajustes de
comunicación (páginas 40–42).
Idioma De Disco (Idioma de Prioridad del Disco)
Esto le permite seleccionar el idioma para los
subtítulos, el audio y los menús visualizados en la
pantalla.
Si al ver películas considera que los indicadores en
el reproductor están demasiado brillantes, puede
apagarlos, excepto el indicador STANDBY/ON.
Elemento
Encender, Apagar
Ajustes
Elemento (Subtít.)
Consulte la Lista de Idiomas. (Página 45)
Visor Frontal/LED
Elemento (Audio)
Consulte la Lista de Idiomas. (Página 45)
Elemento (Menú)
Consulte la Lista de Idiomas y la Lista de códigos de
Idiomas. (Página 45)
Visul. Marca Ángulo
Esto le permite encender y apagar la visualización de
marca de ángulo cuando se reproduce un DVD-Vídeo
grabado con ángulos múltiples. (Se visualiza la marca
del ángulo en la parte inferior derecha de la pantalla.)
Elemento
Sí, No
Versión
Cuando selecciona “Versión”, se visualiza la versión del
software del sistema.
Consulte nuestro sitio Web para encontrar información
sobre las actualizaciones del software.
EN LOS EE.UU.: http://www.pioneerblu-ray.com
EN CANADÁ: http://www.pioneerblu-ray.ca
Reinicio Sistema
Puede reponer todos los ajustes a los ajustes de
fábrica.
Elemento
Reponer, No Reponer
39
AJUSTES
Configuración De Comunicaciones
5
Esto permite ejecutar y/o cambiar la configuración
de las comunicaciones. Este ajuste se requiere para
utilizar funciones BD-LIVE que se conectan con
Internet.
Para ajustar la dirección IP, pulse para
seleccionar “Sí” o “No”, después pulse ENTER.
¿Obtiene la dirección IP automáticamente?
Sí
No
Dirección IP
Máscara De Red
Puerta De Enlace
NOTA
• Asegúrese de que el cable LAN está conectado a este
reproductor. (Consulte la página 18.)
• Para ejecutar el ajuste manualmente, se requiere la
siguiente información sobre el enrutador o módem
conectado. Confirme la información antes del ajuste.
− Dirección IP, máscara de red, puerta de enlace,
Dirección IP de DNS
• Además, si se especifica un servidor proxy, también se
requiere la siguiente información especificada por su
proveedor de servicio de Internet. Confirme la información
antes del ajuste.
− Dirección IP y número de puerto del servidor proxy
Siguiente
• Si selecciona “Sí”: La dirección IP se obtiene
automáticamente.
• Si selecciona “No”: La dirección IP, máscara de
red y puerta de enlace se introducen manualmente
utilizando la pantalla para introducción de caracteres.
(Consulte la página 42.)
Con respecto a cada valor de configuración, confirme
las especificaciones de su enrutador de banda ancha.
6
7
Seleccione “Siguiente”, después pulse ENTER.
Para ajustar la dirección IP de DNS, pulse
para seleccionar “Sí” o “No”, después pulse
ENTER.
¿Obtiene la dirección IP de DNS automáticamente?
Sí
1
2
3
4
Presione HOME MENU para visualizar la
pantalla del Menú Inicial.
Pulse para seleccionar “Ajustes”,
después pulse ENTER.
Pulse para seleccionar “Configuración De
Comunicaciones”, después pulse ENTER.
Pulse para seleccionar “Cambiar”,
después pulse ENTER.
Siguiente
• Si selecciona “Sí”: La dirección IP de DNS se obtiene
automáticamente. (La función de servidor DHCP del
enrutador o módem se utiliza para la adquisición
automática.)
• Si selecciona “No”: Las direcciones IP primaria y
secundaria se introducen utilizando la pantalla para
introducción de caracteres. (Consulte la página 42.)
Con respecto a cada valor de configuración, confirme
las especificaciones de su enrutador de banda ancha.
Información actual de la configuración Ethernet.
Dirección IP
Máscara De Red
Puerta De Enlace
DNS
Proxy
Cambiar
: Auto-Configurar
: Auto-Configurar
: Auto-Configurar
: Auto-Configurar
: No Usar
Incializar
• Para inicializar el ajuste actual, seleccione “Incializar”,
después pulse ENTER.
No
Primaria
Secundario
8
9
Seleccione “Siguiente”, después pulse ENTER.
Para ajustar el servidor proxy, pulse para
seleccionar “Sí” o “No”, después pulse ENTER.
¿Usa un servidor proxy?
Sí
No
Dirección
Puerto
Siguiente
• Si selecciona “Sí”: La dirección IP o nombre del
servidor proxy y número de puerto para el servidor
proxy especificado por su proveedor de servicio
de Internet se introducen utilizando la pantalla para
introducción de caracteres. (Consulte la página 42.)
• Si selecciona “No”: Vaya al paso siguiente.
(Continúa en la página siguiente)
40
AJUSTES
10
11
Seleccione “Siguiente”, después pulse ENTER.
Para el ajuste avanzado (el ajuste de las
velocidades de conexión Ethernet), pulse
para seleccionar “Sí” o “No”, después pulse
ENTER.
• Usualmente seleccione “No”, después pulse ENTER.
• Las velocidades de conexión Ethernet pueden
ajustarse cuando selecciona “SÍ”, después pulse
ENTER.
• Como se realiza detección automática (modo
preajustado en la fábrica), este ajuste usualmente no
es necesario. Si ocurre una situación en la cual falla la
conexión Ethernet, etc., cambie el ajuste y confirme si
la conexión Ethernet funciona correctamente.
Cuando se ajusta la velocidad de conexión,
seleccione “Siguiente”, después pulse ENTER.
Opción
Velocidades de Conexión Ethernet
Sí
No
Auto-Detectar
10M Medio Duplex
10M Duplex Completo
100M Medio Duplex
100M Duplex Completo
Siguiente
12
Para probar la conexión a Internet, después
de confirmar los ajustes, pulse para
seleccionar “Prueba”, después pulse ENTER.
• “Prueba” sólo está disponible cuando el ajuste se
hace para obtener automáticamente la dirección IP.
“Prueba” no puede seleccionarse si la dirección IP no
se ha obtenido automáticamente.
Confirme la configuración actual.
Prueba
: xxx xxx xxx xxx
: xxx xxx xxx xxx
: xxx xxx xxx xxx
: xxx xxx xxx xxx
: xx:xx:xx:xx:xx:xx
Completo
Ajustes
Dirección IP
Máscara De Red
Puerta De Enlace
DNS
Proxy
• Como resultado de la prueba, si falla la conexión,
introduzca manualmente los valores de configuración.
13
Pulse para seleccionar “Completo”,
después pulse ENTER.
41
AJUSTES
Pulse para seleccionar un número/
carácter, después pulse ENTER.
Repita el paso 3 para visualizar todos los
caracteres/números en el campo de entrada.
3
El procedimiento de operación para
introducir caracteres manualmente
4
NOTA
• Los caracteres numéricos como la dirección IP
pueden introducirse en la pantalla de entrada lo mismo
seleccionando cada uno de los caracteres en el modo
“Numérico” que utilizando los botones Numéricos en el
mando a distancia.
Ejemplo: La pantalla para introducir caracteres numéricos
Dirección IP
123
Mascara De Red
Puerta De Enlace
1
2
NOTA
5
1 2 3 4 5 6 7 8 9 0
Seleccionado
pulsando
1 2 3 4 5 6 7 8 9 0
• Pulse
RETURN (Borr. Carác.) para borrar un número/
carácter que haya introducido.
• Para cambiar un número/carácter que haya introducido,
pulse VERDE (Izquierda) o AZUL (Dere.) para seleccionar
el número/carácter que desea cambiar, después pulse
RETURN (Borr. Carác.). Luego, pulse para
seleccionar un número/carácter que desea introducir, y
pulse ENTER.
Pulse ENTER en los cuadros en los cuales
se introducirán los caracteres, y aparecerá la
pantalla de entrada.
Numérico
Editar
123
Numérico
Editar
Pulse AMARILLO (Completo) para fijar los
números que ha introducido.
Dirección IP
123
Mascara De Red
Puerta De Enlace
Seleccionado
pulsando
Pulse para seleccionar el ajuste deseado.
• Cuando se introduce la dirección del servidor proxy;
“1ABC” (Carácter Alfabeto/Numérico) / “Carácter” /
“Editar”
• Cuando se introducen otros valores (Dirección IP, etc.);
“Numérico” / “Editar”
6
Repita los pasos 1 al 5 para terminar de
introducir todos los caracteres requeridos.
Lista de introducción de caracteres
1ABC (Carácter
Alfabeto/Numérico)
Num.
ABC
Num.
1234567890
ABC
ABCabc
DEF
DEFdef
GHI
GHIghi
JKL
JKLjkl
MNO
MNOmno
PQRS
PQRSpqrs
TUV
TUVtuv
WXYZ
WXYZwxyz
Esp.
(espacio)
Numérico
Carácter
Editar
DEF
GHI
JKL
MNO
PQRS
TUV
WXYZ
Esp.
1234567890
@.,:
;_-\
$%!?
&#+*
=/|˜
“‘ˆ`
()<>
[ ]{ }
Esp.
@.,:
@ . , :
;_-\
; _ - \
$%!?
&#+*
& # + *
=/|˜
= / | ˜
“‘ˆ`
“ ‘ ˆ `
( )< >
(
Esp.
(espacio)
Cancelar
) <
>
Izqui.
[ ]{ }
Dere.
[
]
Completo
{
}
$ % ! ?
Borr. Carác.
* La misma operación que con los botones de colores y
RETURN puede ejecutarse
seleccionando cada uno de los elementos y pulsando ENTER.
“Borr. Carác.” significa borrado de caracteres.
42
AJUSTES
Manejo De Memoria USB
Las siguientes instrucciones explican cómo borrar
datos como los datos del Paquete Virtual y los de BDLIVE en un dispositivo de memoria USB.
1 Inserte el dispositivo de memoria USB en el
terminal BD STORAGE/SERVICE en la parte
trasera de este reproductor.
2 Presione HOME MENU para visualizar la
pantalla del Menú Inicial.
3 Pulse para seleccionar “Ajustes”,
después pulse ENTER.
4 Pulse para seleccionar “Manejo De
Memoria USB”, después pulse ENTER.
• Cuando no hay memoria USB insertada, aparece “No
hay memoria USB.”.
5
Pulse para seleccionar “Borrar” o
“Formatear”, después pulse ENTER.
Borrar: Borra solamente contenido de datos BD-VÍDEO.
Formatear: Borra todo el contendido.
Antes de utilizar el dispositivo de
memoria USB
Borrar
Formatear
PRECAUCIÓN:
• No extraiga el dispositivo de memoria USB ni
desenchufe el cable de CA mientras se están
ejecutando operaciones para “Manejo De Memoria
USB” o “Actualiz. Software”.
• No utilice un cable alargador USB cuando conecte un
dispositivo de memoria USB al terminal BD STORAGE/
SERVICE del reproductor.
− El uso de un cable alargador USB puede prevenir
que el reproductor funcione correctamente.
Borra datos BD-Vídeo en la memoria USB.
Borra todo el contenido en la memoria USB
incluyendo contenido protegido.
NOTA
• También se borrarán los datos guardados en la memoria
interna del reproductor (puntuación de juegos, etc.).
6
• No se garantiza la operación de dispositivos de
memoria USB.
Pulse para seleccionar “Sí”, después
pulse ENTER.
Sí
7
No
Ajustes
NOTA:
Comience el proceso.
• Se visualizará la pantalla para la operación en curso.
Completo
OK
8
Pulse ENTER.
43
AJUSTES
• Si el dispositivo de memoria USB no está instalado
correctamente o si en el dispositivo de memoria USB
no se encontró el archivo de actualización correcto,
se visualiza un mensaje de error.
Verifique el archivo en el dispositivo de memoria USB,
y luego reinserte correctamente el dispositivo de
memoria USB.
Actualiz. Software
Esta función permite actualizaciones del software
insertando un dispositivo de memoria USB con el
archivo de actualización en el terminal BD STORAGE/
SERVICE en este reproductor.
Para verificar la disponibilidad de una actualización
del software, visite www.pioneerelectronics.com/
PUSA/.
1 Inserte el dispositivo de memoria USB con
el archivo de actualización en el terminal BD
STORAGE/SERVICE en la parte trasera de este
reproductor.
2 Presione HOME MENU para visualizar la
pantalla del Menú Inicial.
3 Pulse para seleccionar “Ajustes”,
después pulse ENTER.
4 Pulse para seleccionar “Actualiz.
Software”, después pulse ENTER.
No se detectó archivo de actualización del software en el
dispositivo de memoria USB.
Confirme que ha transferido el archivo a el dispositivo de memoria
USB y reintente la actualización del software.
Compruebe que ha insertado la memoria USB en el equipo correcto.
OK
Hay más de un archivo de software en
el dispositivo de memoria USB.
Confirme que en el dispositivo de memoria USB sólo
esté el archivo de actualización de software.
OK
• Si no ha ajustado la contraseña, vaya al paso 6.
5
Introduzca el número de 4 dígitos utilizando 0-9.
8
• La pantalla se oscurece durante un tiempo hasta
que se visualiza la pantalla de actualización. Espere
hasta que aparezca la pantalla de actualización. No
desenchufe el cable de CA.
Introducir 4 dígitos.
6
Pulse ENTER para comenzar la actualización.
La imagen se oscurecerá temporalmente hasta
que se visualice la pantalla actualización de software.
Espere algunos minutos y no desenchufe el cable de CA.
Pulse ENTER para comenzar a revisar datos en
el dispositivo de memoria USB.
Inserte el dispositivo de memoria USB con
el archivo de actualización del software.
OK
OK
7
Durante la comprobación de datos, parpadea
“Comprobando”.
Actualizando.
* No desenchufe el cable de CA.
Actualice la Versión:
Comprobando los datos en
el dispositivo de memoria USB.
30%
Comprobando
9
• Se visualizan la versión actual del software de esta
unidad y la versión del archivo de actualización
en el dispositivo de memoria USB. Para actualizar
el software de este reproductor con el archivo de
actualización, seleccione “Sí”, y pulse ENTER.
Se detectó archivo de actualización del software
el dispositivo de memoria USB. ¿Iniciar actualización?
Versión antual :
Actualice la Versión :
Sí
44
**2345678
**1234567
**2345678
No
Cuando el software se ha actualizado con éxito,
se visualiza una pantalla indicando que se ha
completado el proceso de actualización.
• Si ha fallado la actualización, revise el archivo en
el dispositivo de memoria USB y intente otra vez
Actualizar software.
10
11
Pulse STANDBY/ON para apagar el
reproductor.
Extraiga el dispositivo de memoria USB.
AJUSTES
Lísta de códigos de países
EE.UU. / CANADÁ / JAPÓN / ALEMANIA / FRANCIA / REINO UNIDO / ITALIA / ESPAÑA / SUIZA / SUECIA / HOLANDA /
NORUEGA / DINAMARCA / FINLANDIA / BÉLGICA / HONG KONG / SINGAPUR / TAILANDIA / MALASIA / INDONESIA /
TAIWÁN / FILIPINAS / AUSTRALIA / RUSIA / CHINA
Lista de idiomas
English / Français / Deutsch / Italiano / Español / Japanese / Svenska / Nederlands
Lista de códigos de idiomas
AA Afar / AB Abkhaziano / AF Afrikaans / AM Amárico / AR Árabe / AS Asamés / AY Aymara / AZ Azerí / BA Bashkir /
BE Bielorruso / BG Búlgaro / BH Bihari / BI Bislama / BN Bengalí / BO Tibetano / BR Bretón / CA Catalán /
CO Corso / CS Checo / CY Galés / DA Danés / DE Alemán / DZ Bhutaní / EL Griego / EN Inglés / EO Esperanto /
ES Español / ET Estonio / EU Vasco / FA Farsi / FI Finlandés / FJ Fidji / FO Feroés / FR Francés / FY Frisón / GA Irlandés /
GD Gaélico / GL Gallego / GN Guaraní / GU Gujarati / HA Hausa / HI Hindi / HR Croata / HU Húngaro / HY Armenio /
IA Interlingua / IE Interlingue / IK Inupiak / IN Indonesio / IS Islandés / IT Italiano / IW Hebreo / JA Japonés / JI Yidish /
JW Javanés / KA Georgiano / KK Kazaj / KL Groenlandés / KM Camboyano / KN Kannada / KO Coreano / KS Cachemir /
KU Kurdo / KY Kirghiz / LA Latín / LN Lingala / LO Laosiano / LT Lituano / LV Letón / MG Malgache / MI Maori /
MK Macedonio / ML Malayalam / MN Mongol / MO Moldavo / MR Marathi / MS Malayo / MT Maltés / MY Birmano /
NA Nauri / NE Nepalés / NL Holandés / NO Noruego / OC Occitán / OM Oromo / OR Oriya / PA Panjabi / PL Polaco /
PS Pastún / PT Portugués / QU Quechua / RM Pasto-romance / RN Kirundi / RO Rumano / RU Ruso /
RW Kinyarwanda / SA Sánscrito / SD Sindhi / SG Sangho / SH Serbocroata / SI Singalés / SK Eslovaco / SL Eslovenio /
SM Samoano / SN Shona / SO Somalí / SQ Albano / SR Serbio / SS Siswat / ST Sesotho / SU Sundanés / SV Sueco /
SW Swahili / TA Tamil / TE Telugu / TG Tayic / TH Thai / TI Tigrinya / TK Turcmeno / TL Tagalo / TN Setchwana / TO Tonga /
TR Turco / TS Tsonga / TT Tatar / TW Twi / UK Ucraniano / UR Urdu / UZ Uzbeko / VI Vietnamita / VO Volapük / WO Wolof /
XH Xhosa / YO Yoruba / ZH Chino / ZU Zulú
Acerca de la salida de formatos de audio de próxima generación
Formatos de audio de
próxima generación
Dolby TrueHD
Número máximo de
canales
7.1ch (48 kHz/96 kHz)
HDMI
PCM
SALIDA DIGITAL
Bitstream
PCM
Bitstream
7.1ch *3
7.1ch *4
2ch *2
5.1ch *1/*3
3
4
2
5.1ch *1/*3
5.1ch *
7.1ch (48 kHz)
7.1ch *3
5.1ch *
7.1ch *4
2ch *
2ch *2
5.1ch *1/*3
DTS-HD Master Audio
7.1ch (48 kHz/96 kHz)
7.1ch *3
7.1ch *4
2ch *2
5.1ch *1/*3
5.1ch (192 kHz)
5.1ch *3/*5
5.1ch *4
2ch *2
5.1ch *1/*3
DTS-HD High Resolution Audio
7.1ch (48 kHz/96 kHz)
7.1ch *3
7.1ch *4
2ch *2
5.1ch *1/*3
LPCM
7.1ch (48 kHz/96 kHz)
7.1ch *3
—
2ch *2
—
5.1ch (192 kHz)
5.1ch *3
—
2ch *2
—
Ajustes
5.1ch (192 kHz)
Dolby Digital PLUS
*1 Sólo núcleo
*2 Mezclado
*3 Cuando “Audio Secundario” está ajustado en “Encender”, el audio sale como 48 kHz.
*4 Cuando “Audio Secundario” está ajustado en “Encender”, el audio sale como PCM.
*5 Cuando es 5.1ch (192 kHz), la salida de audio es reducida a 96 kHz.
*5 Cuando es 2ch, el audio sale como 192 kHz.
45
Apéndice
Solución de problemas
Los siguientes problemas no siempre sugerirán un defecto o mal funcionamiento de este reproductor.
Consulte los problemas y listas de soluciones posibles listadas abajo antes de solicitar servicio.
Alimentación
Problema
Causas posibles y soluciones
No puede encenderse el
reproductor.
• ¿Está el cable de alimentación firmemente enchufado en la toma de CA? (Página 19)
• Cuando el cable esté enchufado en la toma de CA, pulse y mantenga pulsado
STANDBY/ON en el reproductor hasta que en el visor del panel delantero aparezca
“
”. A continuación, después de encenderse el indicador STANDBY/ON,
encienda la alimentación. (Página 48)
• Pulse STANDBY/ON después de que se encienda el indicador STANDBY/ON
(Página 20)
Se conectará automáticamente la
alimentación del reproductor.
• Cuando “Configuración” - “KURO LINK” se haya ajustado en “Sí” en el reproductor,
es posible que el reproductor se encienda cuando opere el televisor conectado al
mismo. (Página 38)
Se desconectará automáticamente
la alimentación del reproductor.
• ¿El ajuste “Apagado Automático” está ajustado en “Sí”? Cuando “Apagado
Automático” está ajustado en “Sí”, se apaga automáticamente la alimentación
después de 10 minutos continuos de inactividad (sin reproducción). (Página 38)
• Cuando “Configuración” - “KURO LINK” se haya ajustado en “Sí” en el reproductor,
es posible que el reproductor se apague cuando apague el televisor conectado al
mismo. (Página 38)
Operación básica
Problema
Causas posibles y soluciones
El mando a distancia no funciona.
• Utilice el mando a distancia dentro de su alcance operativo. (Página 19)
• Reemplace las pilas. (Página 19)
No puede hacer funcionar el
reproductor.
• ¿Está haciendo funcionar el reproductor dentro de la gama de temperaturas de
funcionamiento? (Página 52)
Reproducción de disco
Problema
Causas posibles y soluciones
El reproductor no puede reproducir
un disco.
• Extraiga el disco y límpielo. (Página 9)
• Asegúrese de que el disco ha sido cargado correctamente (alineado en la bandeja
de disco y con la cara de la etiqueta hacia arriba). (Página 24)
• Asegúrese de que el código de región del disco coincida con el de este reproductor.
(Página 6)
• Permita que desaparezca cualquier condensación en o cerca del reproductor.
(Página 9)
• Compruebe que el disco está grabado en el sistema de televisión compatible (PAL
o NTSC).
• El reproductor no puede reproducir vídeo que no haya sido grabado normalmente.
(Página 6)
• La reproducción correcta podrá resultar imposible debido al estado de la grabación
del disco, a un disco rayado, alabeado o sucio, al estado del lente captora, o
a temas de incompatibilidad entre este reproductor y el disco que esté siendo
utilizado. (Páginas 6, 9)
• Cuando la cantidad de tiempo grabado es inusualmente corta, puede gue no sea
posible la reproducción.
• Los discos BD-RE/R grabados en un formato que no sea BDMV/BDAV no pueden
reproducirse. (Página 6)
El disco es expulsado
automáticamente después de cerrar
la bandeja de disco.
• Asegúrese de que el disco ha sido cargado correctamente (alineado en la bandeja
de disco y con la cara de la etiqueta hacia arriba). (Página 24)
• Extraiga el disco y límpielo. (Página 9)
• Asegúrese de que el código de región del disco coincida con el de este reproductor.
(Página 6)
• Asegúrese de que el disco es reproducible. (Página 6)
El vídeo se para.
• ¿Ha sido sometido el reproductor a golpe o impacto? ¿Está utilizando una
ubicación inestable? El reproductor se parará si detecta golpe o vibración.
El reproductor hace un sonido de
chasquido cuando comienza la
reproducción o al cargar un disco.
• Si el reproductor no se ha utilizado durante algún tiempo, en ocasiones puede hacer
un sonido de chasquido al comenzar la reproducción. Estos sonidos del reproductor
son condiciones normales de funcionamiento y no constituyen mal funcionamiento.
(Continúa en la página siguiente)
46
Solución de problemas
Imagen
Problema
Causas posibles y soluciones
No hay imagen.
• Asegúrese de que los cables están conectados correctamente. (Páginas 14–16)
• Asegúrese de que el televisor o receptor de AV conectado está ajustado a la entrada correcta.
(Páginas 14–16)
• Extraiga el disco y límpielo. (Página 9)
• Asegúrese de que el código de región del disco coincida con el de este reproductor. (Página 6)
• No hay imagen desde la salida HDMI.
− ¿Se han ejecutado correctamente los ajustes? Revise los ajustes. (Página 37)
• No hay imagen desde la salida de vídeo componente.
− ¿Se han ejecutado correctamente los ajustes? Revise los ajustes. (Página 37)
La pantalla se congela y los botones
de operación no responden.
•
•
•
•
Solamente hay audio sin vídeo.
• ¿Está el cable de conexión para salida de vídeo conectado correctamente? (Páginas 14–16)
El vídeo ancho horizontalmente
aparece estirado verticalmente, o
aparecen bandas negras en las partes
superior e inferior de la pantalla.
• ¿Está “Relación Aspecto TV” ajustado de acuerdo con el televisor conectado?
(Página 37)
• Si está utilizando un televisor de pantalla ancha, ¿está “Relación Aspecto TV”
ajustado a “Panor.”? (Página 37)
Aparece ruido cuadrado (mosaicos)
en la pantalla.
• Las imágenes en bloques podrán estar visibles en escenas que contengan movimiento
rápido debido a las características de la tecnología de compresión de imagen digital.
La pantalla de reproducción se
perturbará si se graba DVD-Vídeo a
una videograbadora, o se reproduce
a través de una videograbadora.
• Este reproductor es compatible con la protección contra la copia. Algunos discos
contienen una señal de prohibición de copia. Si intenta reproducir tales discos a
través de una videograbadora, o grabar a una videograbadora y reproducir la señal,
la protección contra la copia impedirá la reproducción normal. (Páginas 15–16)
No hay salida de audio, o las
imágenes no se reproducen
debidamente.
• Para algunos discos en los cuales se ha grabado contenido protegido por derechos
de autor es posible que no haya salida de audio o que las imágenes no se
reproduzcan debidamente.
Pulse STOP, y después reinicie la reproducción.
Desconecte la alimentación y vuelva a conectarla.
Si la alimentación no está apagada, ejecute un reinicio. (Página 48)
¿Está dañado el disco o sucio? Compruebe la condición del disco. (Página 9)
Sonido
Causas posibles y soluciones
• Si el volumen del televisor o amplificador está ajustado al mínimo, suba el volumen.
• No hay sonido durante el modo de reproducción fija, cámara lenta, avance rápido y
retroceso rápido. (Página 30)
• El audio de DVD grabado en DTS solamente sale por el terminal DIGITAL OUT
OPTICAL. Conecte un amplificador o decodificador digital compatible con DTS al
terminal DIGITAL OUT OPTICAL de este reproductor. (Página 17)
• Compruebe que el cable de audio está conectado correctamente. (Página 17)
• Compruebe que las clavijas del cable están limpias.
• Extraiga el disco y límpielo. (Página 9)
• El audio podrá no salir dependiendo del estado de grabación del audio, tal como
cuando se haya grabado audio que no sea una señal de audio o audio no estándar
para el contenido de audio del disco. (Página 6)
Los canales de audio izquierdo y
derecho están inversos o el sonido
proviene de un solo lado.
• ¿Están conectados los cables de audio izquierdo y derecho al terminal opuesto, o
hay un lado desconectado? (Página 17)
No hay salida de audio, o las
imágenes no se reproducen
debidamente.
• Para algunos discos en los cuales se ha grabado contenido protegido por derechos
de autor es posible que no haya salida de audio o que las imágenes no se
reproduzcan debidamente.
Apéndice
Problema
No hay sonido o está distorsionado.
Red
Problema
No se puede conectar a Internet.
Causas posibles y soluciones
• ¿Está el cable LAN conectado correctamente?
• ¿Se está utilizando un cable incorrecto como un cable modular? Conecte un cable
LAN al terminal LAN. (Página 18)
• ¿Está encendida la alimentación del equipo conectado, como un módem o
enrutador de banda ancha?
• ¿Está conectado correctamente el módem y/o enrutador de banda ancha?
• ¿Está ajustado el valor (o valores) correcto en el ajuste de red? Verifique
“Configuración De Comunicaciones”. (Páginas 40–42)
47
Solución de problemas
Red (Continuación)
Problema
No se puede descargar contenido
BD-LIVE.
Causas posibles y soluciones
• ¿Está el cable LAN conectado correctamente?
• ¿Está el dispositivo de memoria USB conectado correctamente? Verifique que el dispositivo
de memoria USB esté conectado al terminal BD STORAGE/SERVICE de este reproductor.
• Verifique si el disco BD es compatible con BD-LIVE.
• Verifique el ajuste para “Acceso A BD Internet”. (Página 39)
KURO LINK
Problema
Causas posibles y soluciones
La función KURO LINK no funciona.
• Conecte correctamente el cable HDMI.
• Para emplear la función KURO LINK emplee cables High Speed HDMI™ de alta
velocidad. Si emplea otros cables HDMI es posible que la función KURO LINK no
opere correctamente.
• Ajuste “Configuración” - “KURO LINK” en “Sí” en el reproductor. (Página 38)
• La función KURO LINK no opera con dispositivos de otras marcas, aunque se
hayan conectado mediante un cable HDMI.
La función KURO LINK no podrá emplearse si se han conectado dispositivos
incompatibles con la función KURO LINK o dispositivos de otras marcas entre los
dispositivos compatibles con KURO LINK y el reproductor. Es posible que tampoco
funcione con ciertos televisores de pantalla plana.
• Active KURO LINK en el dispositivo conectado.
La función KURO LINK podrá operarse cuando se haya activado KURO LINK
en todos los dispositivos conectados mediante un cable HDMI. Una vez haya
terminado todas las conexiones y ajustes de todos los dispositivos, no se olvide de
comprobar que la imagen del reproductor se emite al televisor de pantalla plana.
(Compruébelo también después de haber cambiado los dispositivos conectados y
después de haber vuelto a conectar los cables HDMI.)
Es posible que no opere la función KURO LINK si la imagen del reproductor no se
emite correctamente al televisor de pantalla plana.
• Es posible que no opere la función KURO LINK si se conectan tres o más
reproductores, incluyendo este reproductor.
• Consulte el manual de instrucciones del dispositivo que se proponga conectar.
No se enciende el indicador KURO
LINK.
• Conéctelo a un televisor de pantalla plana Pioneer compatible con KURO LINK
empleando un cable HDMI.
• Active KURO LINK en el televisor de pantalla plana.
• Ajuste “Configuración” - “KURO LINK” en “Sí” en el reproductor. (Página 38)
• Compruebe que la imagen del reproductor se emita al televisor de pantalla plana.
Otro
Problema
Causas posibles y soluciones
El televisor funciona incorrectamente.
• Algunos televisores con capacidad para control remoto inalámbrico podrán
funcionar incorrectamente cuando se utilice el mando a distancia de este
reproductor. Utilice tales televisores alejados de este reproductor.
El reproductor se calienta durante la
utilización.
• Cuando utilice este reproductor, la caja de la consola podrá calentarse,
dependiendo del entorno de utilización. Esto no es un mal funcionamiento.
La entrada del televisor o del sistema
audiovisual conectado cambia
automáticamente.
• Cuando “Configuración” - “KURO LINK” se haya ajustado en “Sí” en el reproductor,
es posible que la entrada del televisor o del sistema audiovisual conectado (receptor
o amplificador audiovisual, etc.) cambie automáticamente. (Página 38)
El indicador STANDBY/ON
permanece iluminado.
• Cuando se extrae el cable de CA de la toma de corriente, el indicador
STANDBY/ON permanecerá iluminado durante un corto período de tiempo. Esto es
normal y no es un mal funcionamiento.
48
Solución de problemas
Para reiniciar este reproductor
• Si este reproductor recibe interferencia fuerte procedente de una fuente, tal como excesiva electricidad estática, ruido
externo intenso, mal funcionamiento de la tensión del suministro eléctrico, o tensión causada por relámpagos durante la
utilización o se envía una operación incorrecta al reproductor, podrán ocurrir errores como que el reproductor no acepte una
operación. Cuando el reproductor no funcione correctamente incluso después de que se haya apagado la alimentación, pulse
y mantenga pulsado STANDBY/ON en el reproductor hasta que en el visor del panel delantero aparezca “
”. A
continuación, después de encenderse el indicador STANDBY/ON, encienda la alimentación.
• Cuando se ejecuta un reinicio estando la alimentación encendida, el reproductor se apagará. Encienda la alimentación nuevamente.
En este momento, el proceso del sistema puede tardar un poco en terminar antes de que el reproductor esté listo para su uso.
Durante el proceso del sistema, parpadeará el indicador de disco BD/DVD/CD que se encuentra en el visor del panel delantero
del reproductor. Una vez que haya terminado el proceso del sistema, los indicador dejarán de parpadear y se encenderán
normalmente. Usted puede hacer funcionar el reproductor cuando el indicador de disco BD/DVD/CD esté encendido.
• Ya que todos los ajustes, incluyendo el ajuste del idioma guardado en la memoria, también se reinician cuando se ha
ejecutado un reinicio, deben ajustarse nuevamente.
• Cuando el problema persista incluso después de ejecutar un reinicio, desenchufe el cable de CA y enchúfelo otra vez. Si esto
no resuelve el problema, póngase en contacto con el centro de servicio aprobado por Pioneer más cercano.
Mensajes de error en pantalla
Mensajes relacionados con discos BD y DVD
• Los mensajes siguientes aparecerán en la pantalla del televisor en caso de que el disco que intenta reproducir
no sea apropiado o la operación no sea correcta.
Mensaje de error
Error posible
Imposible reproducir.
• El disco no se puede reproducir con
este reproductor.
Disco Incompatible.
• Si carga un disco que no pueda ser
reproducido con este reproductor (p.ej., un
disco rayado), o si carga un disco al revés,
aparecerá este mensaje, y la bandeja de
disco se abrirá automáticamente.
• Ocurrirá si el disco cargado no puede
ser reproducido porque es uno no
estándar o está rayado, etc.
Solución sugerida
• Compruebe el disco, y cárguelo
correctamente.
• Extraiga el disco.
—
Imposible operar.
• Ocurrirá si la operación es incorrecta.
Esta memoria USB no está formateada
correctamente. Formatee la memoria
en manejo de memoria USB.
• Ocurrirá si hay un error de formateo.
• Formatee nuevamente la memoria
USB.
No se puede usar la memoria USB
conectada. La misma debe ser
compatible con USB 2.0.
• Ocurrirá si se utiliza una memoria USB
que no sea compatible con USB 2.0
alta velocidad (480MB/s) (p.ej. USB
1.0/USB1.1).
• Conecte una memoria USB
compatible con USB 2.0 alta
velocidad (480MB/s).
Apéndice
49
Glosario
Aplicación BD-J
Disco Blu-ray (BD) (página 6)
El formato BD-ROM soporta Java para funciones interactivas.
“BD-J” ofrece a los proveedores de contenido funcionalidad
casi ilimitada durante la creación de títulos BD-ROM
interactivos.
Un formato de disco desarrollado para grabación/
reproducción de video de alta definición (HD) (para HDTV,
etc.), y para almacenar grandes cantidades de datos. Un
disco Blu-ray de capa única guarda hasta 25 GB, y un disco
Blu-ray de capa doble guarda hasta 50 GB de datos.
AVCHD (Advanced Video Codec High
Definition)
El AVCHD es un formato de videocámara digital de alta
definición (HD) que permite grabar con alta definición
en ciertos medios usando tecnologías de codificación y
decodificación de alta eficacia.
BDAV (página 6)
BDAV (Blu-ray Disc Audio/Visual, BD-AV = Disco Blu-ray
Audio/Visual, BD-AV) se refiere a uno de los formatos
de aplicación utilizados para discos Blu-ray que pueden
escribirse como BD-R, BD-RE, etc. BDAV es un formato
de grabación equivalente a DVD-VR (modo VR) de las
especificaciones DVD.
BD-LIVE (página 26)
Para discos Blu-ray compatibles con BD-LIVE está disponible
contenido interactivo variado a través de Internet.
BDMV (página 6)
Dolby Digital
Un sistema de sonido desarrollado por Dolby Laboratories
Inc. que da un ambiente de sala de cine a la salida de audio
cuando el producto está conectado a un procesador Dolby
Digital o amplificador.
Dolby Digital Plus
Un sistema de sonido desarrollado como una extensión
al Dolby Digital. Esta tecnología de codificación de audio
soporta sonido envolvente multi-canal de 7,1 canales.
Dolby TrueHD
Dolby TrueHD es una tecnología de codificación sin pérdidas
que soporta hasta 8 canales de sonido envolvente multi-canal
para los discos ópticos de próxima generación. El sonido
reproducido conserva fielmente, bit a bit, la fuente original.
DTS
Este es un sistema de sonido digital desarrollado por DTS,
Inc. para uso en salas de cine.
BDMV (Blu-ray Disc Movie, BD-MV = Películas en disco Blu-ray,
BD-MV) se refiere a uno de los formatos de aplicación utilizados
para BD-ROM que constituye una de las especificaciones
de los discos Blu-ray. BDMV es un formato de grabación
equivalente al DVD-Vídeo de la especificación DVD.
DTS-HD High Resolution Audio
BD-R (páginas 6, 24)
DTS-HD Master Audio es una tecnología de compresión
de audio sin pérdidas desarrollada para el formato de disco
óptico de alta definición de próxima generación.
Un BD-R (Blu-ray Disc Recordable = Disco Blu-ray grabable)
es un disco Blu-ray grabable, que puede escribirse una
vez. Ya que el contenido puede ser grabado y no puede ser
sobrescrito, un BD-R puede utilizarse para archivar datos o
para almacenar y distribuir material de vídeo.
BD-RE (páginas 6, 24)
Un BD-RE (Blu-ray Disc Rewritable = Disco Blu-ray rescribible)
es un disco Blu-ray grabable y que puede rescribirse.
BD-ROM
Los BD-ROMs (Blu-ray Disc Read-Only Memory = Disco
Blu-ray con memoria de sólo lectura) son discos producidos
comercialmente. Además de películas y contenido de vídeo
convencional, estos discos tienen funciones avanzadas
como contenido interactivo, operaciones de menú utilizando
menús emergentes, selección de visualización de subtítulos,
y presentaciones. Aunque un BD-ROM puede contener
cualquier tipo de datos, la mayoría de los discos BD-ROM
contendrán películas en formato de alta definición para
reproducción en reproductores de discos Blu-ray.
Buzón (LB 4:3) (página 37)
Un tamaño de pantalla con barras negras en la parte
superior e inferior de la imagen para permitir la visualización
de material en pantalla ancha (16:9) en un televisor 4:3
conectado.
Código de región (página 6)
Código que identifica una región geográfica de compatibilidad
para un BD/DVD.
Control paterno (página 39)
En algunas emisiones digitales y discos BD/DVD-Vídeo,
se ajusta un nivel de control para el visionado del disco
dependiendo de la edad del espectador. Con este
reproductor, usted podrá ajustar el nivel de control para ver
tales emisiones y discos.
50
DTS-HD High Resolution Audio es una tecnología novedosa
desarrollada para el formato de disco óptico de alta definición
de próxima generación.
DTS-HD Master Audio
DTS-HD Master Audio | Essential
DTS-HD Master Audio | Essential es una tecnología de
compresión de audio sin pérdidas desarrollada para el formato
de disco óptico de alta definición de próxima generación.
DVD-Vídeo (páginas 6, 24)
Un formato de disco que contiene hasta ocho horas de
película en un disco con el mismo diámetro que un CD. Un
DVD de una cara y capa única guarda hasta 4,7 GB; un DVD
de una cara y capa doble, 8,5 GB; un DVD de dos caras y
capa única, 9,4 GB; un DVD de dos caras y capa doble, 17
GB. El formato MPEG 2 fue adoptado para lograr compresión
eficiente de datos de vídeo. Es una tecnología de tasa
variable que codifica los datos de acuerdo al estado del vídeo
para reproducir imágenes de alta calidad. La información de
audio se graba en un formato multi-canal como Dolby Digital,
permitiendo una presencia de audio realista.
DVD+/-R (páginas 6, 24)
Un DVD+/-R es un DVD grabable, que puede escribirse una
vez. Ya que el contenido puede ser grabado y no puede ser
sobrescrito, un DVD+/-R puede utilizarse para archivar datos
o para almacenar y distribuir material de vídeo. El DVD+/-R
tiene dos formatos diferentes: formato VR y formato Video.
Los DVDs creados en formato Video tienen el mismo formato
que un DVD-Vídeo, mientras que los discos creados en
formato VR (grabación de vídeo) permiten que el contenido
sea programado o editado.
DVD+/-RW (páginas 6, 24)
Un DVD+/-RW es un DVD que puede grabarse y
sobrescribirse. Las funciones de reescritura permiten la
edición. El DVD+/-RW tiene dos formatos diferentes: formato
VR y formato Video. Los DVDs creados en formato Video
tienen el mismo formato que un DVD-Vídeo, mientras que los
discos creados en formato VR (grabación de vídeo) permiten
que el contenido sea programado o editado.
Glosario
Escalado del DVD (página 24)
Multiángulo (páginas 32, 34, 35)
El escalado (conversión ascendente) se refiere a una función
en varios reproductores y equipos que amplía el tamaño de
la imagen para ajustarla al tamaño de la pantalla de equipos
para vídeo como un televisor.
Esto es una característica de los discos DVD y BD-Vídeo. En
algunos discos, la misma imagen es rodada desde diferentes
ángulos, y éstos se almacenan en un solo disco para que
usted pueda disfrutar de la reproducción desde cada ángulo.
(Esta función podrá ser disfrutada si el disco está grabado
con múltiples ángulos.)
Expl. Panor. (PS 4:3) (página 37)
Tamaño de pantalla que recorta los costados de la imagen
para permitir la reproducción de material de pantalla ancha
(16:9) en un televisor 4:3 conectado.
Formato entrelazado
El formato entrelazado muestra cada otra línea de una
imagen como un “campo” sencillo y es el método estándar
para visualizar imágenes en televisión. El campo con número
par muestra las líneas con números pares de una imagen, y
el campo con número impar muestra las líneas con números
impares de una imagen.
Formato progresivo
En comparación con el formato entrelazado que muestra de
forma alterna una línea sí y una no de una imagen (campo)
para crear un cuadro, el formato progresivo muestra toda
la imagen de una vez como un cuadro único. Esto significa
que mientras que el formato entrelazado puede mostrar 30
cuadros/60 campos en un segundo, el formato progresivo
puede mostrar 60 cuadros en un segundo. La calidad general
de la imagen aumenta y las imágenes fijas, texto, y líneas
horizontales aparecen con mayor nitidez.
HDMI (página 14)
HDMI (High-Definition Multimedia Interface = Definición
Multimedia de Alta Definición) es una interfaz que soporta
vídeo y audio en una sola conexión digital. La conexión
HDMI lleva señales de vídeo, lo mismo estándar que de alta
definición, y señales de audio en multi-canal a componentes
AV como televisores equipados con HDMI, en forma digital
sin degradación.
JPEG (páginas 6, 7, 33)
JPEG (Joint Photographic Experts Group = Grupo Conjunto
de Expertos Fotográficos) es un formato de compresión de
datos de imagen fija y se utiliza en la mayoría de las cámaras
digitales.
Menú del disco (página 25)
Esto le permite seleccionar elementos como el idioma
del subtítulo o el formato del audio utilizando un menú
almacenado en el disco DVD-Vídeo.
Menú emergente (página 25)
Menú Principal (página 25)
En un BD/DVD-Vídeo, este es el menú para seleccionar
elementos como el capítulo que se reproducirá y el idioma del
subtítulo. En algunos DVD videos, el menú principal puede
llamarse “Menú Título”.
MPEG-2
MPEG-2 (Moving Picture Experts Group phase 2 = Grupo
de Expertos en Imágenes en Movimiento fase 2) es uno de
los esquemas de compresión de datos de vídeo, el cual es
adoptado por DVD videos y emisiones digitales en todo el
mundo. Algunos discos Blu-ray también utilizan MPEG-2 con
velocidad binaria alta.
Esto es una característica de los discos DVD y BD-Vídeo.
Esta función hace posible grabar diferentes pistas de audio
para el mismo vídeo, para que usted pueda realzar su disfrute
cambiando de audio. (Podrá disfrutar de esta función con
discos grabados con múltiples pistas de audio.)
Número de capítulo (páginas 34, 35)
Secciones de una película o una producción musical que son
menores que los títulos. Un título está compuesto por varios
capítulos. Algunos discos sólo pueden estar compuestos por
un solo capítulo.
Número de pista (páginas 34, 35)
Estos números se asignan a las pistas que están grabadas en
Audio CDs. Permiten localizar pistas específicas rápidamente.
Número de tiempo
Esto indica el tiempo de reproducción que ha transcurrido
desde el principio de un disco o título. Puede utilizarse para
encontrar una escena específica rápidamente. (Podrá no
funcionar con algunos discos.)
Número de título (páginas 34, 35)
Estos números se graban en discos DVD y Blu-ray. Cuando
un disco contenga dos o más películas, estas películas
estarán numeradas como título 1, título 2, etc.
Protección contra la copia
Esta función previene la copia. No puede copiar discos
marcados por el poseedor de la propiedad intelectual con
una señal que previene el copiado.
Reproducción con reanudación
(páginas 24, 29)
Si detiene la reproducción mientras se está realizando, el
reproductor almacenará la posición de parada en la memoria, y
esta función le permite reproducir desde ese punto de parada.
Salto (página 30)
Esto retrocede al principio del capítulo (o pista) que se esté
reproduciendo, o salta al siguiente capítulo (o pista).
Sonido PCM lineal
PCM Lineal es un formato de grabación de señal utilizado
para Audio CDs y en algunos discos DVD y Blu-ray. El sonido
de Audio CDs se graba a 44,1 kHz con 16 bits. (En discos
de DVD-Vídeo el sonido se graba a entre 48 kHz con 16 bits
y 96 kHz con 24 bits y en discos BD-Vídeo entre 48 kHz con
16 bits y 192 kHz con 24 bits.)
Apéndice
Un menú para operación mejorado disponible en discos BDVídeo. El menú emergente aparece cuando se pulsa POPUP
MENU/MENU durante la reproducción, y puede operarse
mientras se está reproduciendo.
Multiaudio
Subtítulos (páginas 31, 34, 35)
Son las líneas impresas que aparecen en la parte inferior de
la pantalla las cuales traducen o transcriben el diálogo. Se
graban en muchos discos DVD y BD-Vídeo.
x.v.Color
x.v.Color reproduce una gama de colores más amplia que
antes, mostrando casi todos los colores que puede detectar
el ojo humano. (Aplicable para archivos JPEG solamente con
este sistema)
51
Especificaciones
Generalidades
Alimentación
120 V CA, 60 Hz
Consumo (Normal)
19 W
Consumo (En espera)
0,5 W (Cuando “Inicio Rápido” está ajustado a “No”.)
Dimensiones
Aprox. 420 mm 58 mm 268 mm (An Al Pr)
Peso
Aprox. 2,7 kg
Temperatura de funcionamiento
5°C a 35°C
Temperatura de almacenamiento
–20°C a 55°C
Humedad de funcionamiento
10 % a 80 % (sin condensación)
Sistemas de TV
Sistema NTSC
Reproducción
Discos reproducibles
BD-ROM, BD-RE Dual Layer, BD-R Dual Layer,
DVD-Vídeo, DVD+RW/+R/-RW/-R Dual Layer (formato Video/VR/AVCHD),
Audio CD (CD-DA), CD-RW/R (CD-DA, formato de archivo JPEG)
Entrada/Salida
HDMI OUT
Conector estándar de 19 contactos HDMI (salida 1080p 24Hz)
HDMI™ (V.1.3 con Deep Color, x.v.Color™, Dolby TrueHD,
DTS-HD Master Audio | Essential)
COMPONENT VIDEO
Nivel de salida:
Y: 1 Vp-p (75 ohmios)
PB, PR: 0,7 Vp-p (75 ohmios)
Tomas: Toma RCA
VIDEO
Nivel de salida: 1 Vp-p (75 ohmios)
Toma: Toma con contacto RCA
DIGITAL OUT OPTICAL
Terminal: Terminal óptico cuadrado
AUDIO OUT
Nivel de salida: 2 V rms (Impedancia de salida: 1 kilohmio)
Tomas: Toma RCA
BD STORAGE/SERVICE
Correspondencia con USB 2.0 alta velocidad (480 MB/s) (para almacenamiento
local/actualización de software)
LAN
10BASE-T/100BASE-TX
Las especificaciones están sujetas a cambio sin previo aviso.
Publicado por Pioneer Corporation.
Copyright © 2009 Pioneer Corporation.
Todos los derechos reservados.
52
BDP-121
Should this product require service in the U.S.A. and you wish to locate the nearest Pioneer
Authorized Independent Service Company, or if you wish to purchase replacement parts,
operating instructions, service manuals, or accessories, please call the number shown
below.
1–800–421–1404
Please do not ship your product to Pioneer without first calling the Customer Support at the
above listed number for assistance.
Pioneer Electronics Service, Inc.
P.O. BOX 1760, Long Beach,
CA 90801-1760, U.S.A.
Blu-ray Disc PLAYER
REPRODUCTOR de Blu-ray Disc
BDP-121
For warranty information please see the Limited Warranty sheet included with your product.
Should this product require service in Canada, please contact a Pioneer Canadian
Authorized Dealer to locate the nearest Pioneer Authorized Service Company in Canada.
Alternatively, please contact the Customer Satisfaction Department at the following address:
Pioneer Electronics of Canada, Inc.
Customer Satisfaction Department
300 Allstate Parkway, Markham, Ontario L3R 0P2
1-877-283-5901
905-479-4411
For warranty information please see the Limited Warranty sheet included with your product.
Si ce produit doit être réparé au Canada, veuillez vous adresser à un distributeur autorisé
Pioneer du Canada pour obtenir le nom du Centre de Service Autorisé Pioneer le plus près
de chez-vous. Vous pouvez aussi contacter le Service à la clientèle de Pioneer:
Pioneer Électroniques du Canada, Inc.
Service Clientèle
300, Allstate Parkway, Markham, Ontario L3R 0P2
1-877-283-5901
905-479-4411
Pour obtenir des renseignements sur la garantie, veuillez vous reporter au feuillet sur la
garantie restreinte qui accompagne le produit.
S018_C_EF
Published by Pioneer Corporation.
Copyright © 2009 Pioneer Corporation.
All rights reserved.
PIONEER CORPORATION
Register Your Product on
http://www.pioneerelectronics.com (US)
http://www.pioneerelectronics.ca (Canada)
4-1, Meguro 1-Chome, Meguro-ku, Tokyo 153-8654, Japan
Registre su producto en
PIONEER ELECTRONICS (USA) INC.
http://www.pioneerelectronics.com (EE.UU.)
http://www.pioneerelectronics.ca (Canadá)
P.O. BOX 1540, Long Beach, California 90801-1540, U.S.A. TEL: (800) 421-1404
PIONEER ELECTRONICS OF CANADA, INC.
300 Allstate Parkway, Markham, Ontario L3R 0P2, Canada TEL: 1-877-283-5901, 905-479-4411
PIONEER EUROPE NV
Haven 1087, Keetberglaan 1, B-9120 Melsele, Belgium TEL: 03/570.05.11
PIONEER ELECTRONICS ASIACENTRE PTE. LTD.
253 Alexandra Road, #04-01, Singapore 159936 TEL: 65-6472-7555
Operating Instructions
Manual de instrucciones
PIONEER ELECTRONICS AUSTRALIA PTY. LTD.
178-184 Boundary Road, Braeside, Victoria 3195, Australia, TEL: (03) 9586-6300
PIONEER ELECTRONICS DE MEXICO S.A. DE C.V.
Blvd.Manuel Avila Camacho 138 10 piso Col.Lomas de Chapultepec, Mexico,D.F. 11000 TEL: 55-9178-4270
Printed in China Impreso en China
K002_B_En
<VRD1238-A>