Download Philips SA4VD404 User's Manual
Transcript
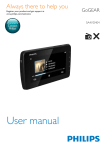
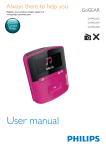
Always there to help you Register your product and get support at www.philips.com/welcome GoGEAR SA4VD404 Question? Contact Philips User manual SA4VD408 Contents 1 Important safety information General maintenance Recycling the product 2 Your new player What's in the box Software loaded on the player Files loaded on the player Overview Controls Screens Volume reminder Use the stand 3 Get started Charge power Charge through a USB AC/DC adapter Switch the player on or off Automatic standby and shut-down 3 3 5 7 7 7 7 7 7 8 9 9 10 10 10 10 10 4 Build a media library on VIDEO4.3 11 Transfer from your PC media library Use a Micro SD card Play from the Micro SD card 5 Music Browse the music library Browse by playlist Play music Select play options Select sound options Playlists Create a playlist-on-the-go Play a playlist 6 Videos Browse the video library Browse by title Play videos 11 11 11 12 12 12 12 12 12 13 13 13 14 14 14 14 Select play options Select sound options Select the brightness 14 14 14 7 Pictures 15 15 15 15 15 15 15 15 15 Browse the picture library Browse by album Play pictures Select play options Set a picture as wallpaper Favorite pictures Add pictures to Favorites Remove pictures from Favorites 8 FM radio 16 16 16 16 16 Tune in to radio stations Auto tune Manual tune Store preset stations 9 Recordings 17 17 17 17 17 Make recordings Record voices Record from the FM radio Play recordings 10 Text reader 18 11 Folder view 19 12 SD Card 20 13 Settings 21 21 21 21 21 21 21 22 5HDGWH[WÀOHV Set power-saving mode Sleep timer Display settings Language Information Format device Factory settings EN 1 14 Sync with PC media library through Philips Songbird Install Philips Songbird &ROOHFWPHGLDÀOHVIURPWKH3& Set the watch folder ,PSRUWPHGLDÀOHV Create playlists in Philips Songbird Create a playlist Generate LikeMusic playlists Save the play queue as a playlist 0DQDJHPHGLDÀOHVLQ3KLOLSV6RQJELUG Edit metadata Get album artwork 5HPRYHPHGLDÀOHVIURPWKHOLEUDU\ Sync the player with Philips Songbird Select auto or manual sync Auto sync Manual sync 23 23 23 25 25 25 26 27 27 28 28 28 29 8SGDWHWKHÀUPZDUHWKURXJK Philips Device Manager 30 16 Troubleshooting 32 17 Technical data 33 34 6XSSRUWHGPXVLFÀOHIRUPDWV 6XSSRUWHGYLGHRÀOHIRUPDWV 6XSSRUWHGSLFWXUHÀOHIRUPDWV System requirements Need help? Please visit www.philips.com/welcome where you can access a full set of supporting materials such as the user manual, the latest software updates, and answers to frequently asked questions. 2 EN 1 Important safety information General maintenance The translation of this document is for reference only. In the event of any inconsistency between the English version and the translated version, the English version shall prevail. About operating and storage temperatures Operate in a place where temperature is always between 0 and 45ºC (32 to 113ºF) Store in a place where temperature is always between -20 and 45ºC (-4 to 113ºF). Battery life may be shortened in low temperature conditions. Replacement parts/accessories: Visit www.philips.com/support to order replacement parts/accessories. Hearing Safety Caution To avoid damage or malfunction: Do not expose the product to excessive heat caused by heating equipment or direct sunlight. Do not drop the product or allow objects to fall on A pleine puissance, l’écoute prolongée du baladeur peut endommager l’oreille de l’utilisateur. your player. Do not allow the product to be submerged in water. Do not expose headphone socket or battery compartment to water, as water entering the set may cause major damage. Active mobile phones in the vicinity may cause interference. %DFNXS\RXUÀOHV(QVXUHWKDW\RXUHWDLQWKHRULJLQDO ÀOHV\RXKDYHGRZQORDGHGWR\RXUGHYLFH3KLOLSVLVQRW responsible for any loss of data if the product becomes damaged or not readable / legible. 0DQDJHWUDQVIHUGHOHWHHWF\RXUPXVLFÀOHVRQO\ZLWK the supplied music software to avoid problems. Do not use any cleaning agents containing alcohol, ammonia, benzene, or abrasives as these may harm the product. Batteries (battery pack or batteries installed) shall not EHH[SRVHGWRH[FHVVLYHKHDWVXFKDVVXQVKLQHÀUHRU the like. Danger of explosion if battery is incorrectly replaced. Replace only with the same or equivalent type. Note Batteries (battery pack or batteries installed) shall not EHH[SRVHGWRH[FHVVLYHKHDWVXFKDVVXQVKLQHÀUHRU the like. Danger of explosion if battery is incorrectly replaced. Replace only with the same or equivalent type. Warning To prevent possible hearing damage, do not listen at high volume levels for long periods. The maximum output voltage of the player is not greater than 150 mV. Wide band characteristic voltage WBCV:>= 75 mV 0RGLÀFDWLRQV 0RGLÀFDWLRQVQRWDXWKRUL]HGE\WKH manufacturer may void user's authority to operate the product. Copyright information All other brands and product names are trademarks of their respective companies or organizations. EN 3 Unauthorized duplication of any recordings whether downloaded from the Internet or made from audio CDs is a violation of copyright laws and international treaties. The making of unauthorized copies of copyprotected material, including computer SURJUDPVÀOHVEURDGFDVWVDQGVRXQG recordings, may be an infringement of copyrights and constitute a criminal offense. This equipment should not be used for such purposes. The Windows Media and the Windows logo are registered trademarks of Microsoft Corporation in the United States and/or other countries. Be responsible! Respect copyrights. Philips is committed to improving the quality of your product and enhancing the Philips user H[SHULHQFH7RXQGHUVWDQGWKHXVDJHSURÀOHRI this device, this device logs some info / data to the non-volatile memory region of the device. These data are used to identify and detect any failures or problems you as a user may experience while using the device. The data stored, for example, will be the duration of playback in music mode, duration of playback in turner mode, how many times battery low was encountered, etc. The data stored do not reveal the content or media used on the device or the source of downloads. The data stored on the device are retrieved and used ONLY if the user returns the device to the Philips service center and ONLY to simplify error detection and prevention. The data stored shall be made DYDLODEOHWRXVHURQXVHU·VÀUVWUHTXHVW Monkey's Audio decoder Philips respects the intellectual property of others, and we ask our users to do the same. Multimedia content on the internet may have been created and/or distributed without the original copyright owner's authorization. Copying or distributing unauthorized content may violate copyright laws in various countries including yours. Compliance with copyright laws remains your responsibility. The recording and transfer to the portable player of video streams downloaded to your computer is intended only for use with public domain or properly licensed content. You may only use such content for your private, non-commercial use and shall respect eventual copyright instructions provided by the copyright owner of the work. Such instruction may state that no further copies shall be made. Video streams may include copy protection technology that prohibits further copying. For such situations the recording function will not ZRUNDQG\RXZLOOEHQRWLÀHGZLWKDPHVVDJH Data logging 4 EN a The Monkey's Audio SDK and source code can be freely used to add APE format playback, encoding, or tagging support to any product, free or commercial. Use of the code for proprietary efforts that don't support WKHRIÀFLDO$3(IRUPDWUHTXLUHZULWWHQ consent of the author. b Monkey's Audio source can be included in GPL and open-source software, although Monkey's Audio itself will not be subjected to external licensing UHTXLUHPHQWVRURWKHUYLUDOVRXUFH restrictions. c Code changes and improvements must be contributed back to the Monkey's Audio project free from restrictions or royalties, unless exempted by express written consent of the author. d Any source code, ideas, or libraries used must be plainly acknowledged in the software using the code. e Although the software has been tested thoroughly, the author is in no way responsible for damages due to bugs or misuse. If you do not completely agree with all of the previous stipulations, you must cease using this source code and remove it from your storage device. FLAC decoder Copyright (C) 2000,2001,2002,2003,2004,2005, 2006,2007,2008,2009 Josh Coalson Redistribution and use in source and binary IRUPVZLWKRUZLWKRXWPRGLÀFDWLRQDUH permitted provided that the following conditions are met: Redistributions of source code must retain the above copyright notice, this list of conditions and the following disclaimer. Redistributions in binary form must reproduce the above copyright notice, this list of conditions and the following disclaimer in the documentation and/ or other materials provided with the distribution. Neither the name of the Xiph. org Foundation nor the names of its contributors may be used to endorse or promote products derived from this VRIWZDUHZLWKRXWVSHFLÀFSULRUZULWWHQ permission. THIS SOFTWARE IS PROVIDED BY THE COPYRIGHT HOLDERS AND CONTRIBUTORS "AS IS" AND ANY EXPRESS OR IMPLIED WARRANTIES, INCLUDING, BUT NOT LIMITED TO, THE IMPLIED WARRANTIES OF MERCHANTABILITY AND FITNESS FOR A PARTICULAR PURPOSE ARE DISCLAIMED. IN NO EVENT SHALL THE FOUNDATION OR CONTRIBUTORS BE LIABLE FOR ANY DIRECT, INDIRECT, INCIDENTAL, SPECIAL, EXEMPLARY, OR CONSEQUENTIAL DAMAGES (INCLUDING, BUT NOT LIMITED TO, PROCUREMENT OF SUBSTITUTE GOODS OR SERVICES; LOSS OF USE, DATA, OR PROFITS; OR BUSINESS INTERRUPTION) HOWEVER CAUSED AND ON ANY THEORY OF LIABILITY, WHETHER IN CONTRACT, STRICT LIABILITY, OR TORT (INCLUDING NEGLIGENCE OR OTHERWISE) ARISING IN ANY WAY OUT OF THE USE OF THIS SOFTWARE, EVEN IF ADVISED OF THE POSSIBILITY OF SUCH DAMAGE. Recycling the product Your product is designed and manufactured with high quality materials and components, which can be recycled and reused. When you see the crossed-out wheel bin symbol attached to a product, it means the product is covered by the European Directive 2002/96/EC: Never dispose of your product with other household waste. Please inform yourself about the local rules on the separate collection of electrical and electronic products. The correct disposal of your old product helps prevent potentially negative consequences on the environment and human health. Warning Removal of the built-in battery invalidates the warranty and can destroy the product. The following removal and disposal instructions are steps that are to be performed at the end of the product's life only. Your product contains a built-in rechargeable battery covered by the European Directive EN 5 2006/66/EC, which cannot be disposed of with normal household waste. To safeguard the functionality and safety of \RXUSURGXFWWDNH\RXUSURGXFWWRDQRIÀFLDO collection point or service center where a professional can remove the battery as shown: Please inform yourself about the local rules on separate collection of batteries. The correct disposal of batteries helps prevent potentially negative consequences on the environment and human health. Notice for the European Union This product complies with the radio interference requirements of the European Union. 6 EN 2 Your new player What's in the box Make sure that you have received the following items: Player Software loaded on the player VIDEO4.3 comes with the following software: Philips Songbird (helps you manage your media library on a PC and the player) Philips Device Manager (helps you get ÀUPZDUHXSGDWHVDQGUHFRYHUWKHSOD\HU To getPhilips SongbirdandPhilips Device Manageronline, On your PC, download from www. philips.com/Songbird or www.philips. com/support. Files loaded on the player Earphones 7KHIROORZLQJÀOHVDUHORDGHGRQVIDEO4.3: User manual Frequently asked questions Overview USB cable Controls c b a Quick start guide d e i f g h Philips GoGear audio player Quick start guide a Safety and Warranty sheet Safety and Warranty Before using your set: Check out details inside this booklet Note The images serve as reference only. Philips reserves the right to change color/design without notice. / Press and hold: Switch on/off the device Press: Lock/unlock the screen b Go back one level or exit , on the list of options: Press: Skip to the previous/next option on the play screen: 3UHVV6NLSWRWKHQH[WSUHYLRXVÀOH Press and hold: Fast forward or rewind ZLWKLQFXUUHQWÀOH EN 7 Press: Select options, or start/pause/ resume play Show options menu c Speaker Navigate on the screen From the Home screen, you can access functions or options by pressing the navigation buttons , and . To go back to previous screens, press repeatedly. d MICRO SD Slot for Micro SD card e RESET Press the hole by using the tip of a ball pen when the screen does not respond to the pressing of keys f 3.5 mm headphone connector g MIC Microphone h USB connector for power charging and data transfer i , Press: increase/decrease the volume Press and hold: increase/decrease fast Screens Home screen Menu Mode Music Video Pictures FM radio Text reader Settings To SOD\DXGLRÀOHV watch videos view pictures tune in to the FM radio UHDGWH[WW[WÀOHV customize the settings of VIDEO4.3 Micro SD YLHZRUSOD\PHGLDÀOHV card that you store on the Micro SD card Recordings create or listen to recordings Folder YLHZLQIROGHUVWKHÀOHV view that you store on the internal storage of the player 8 EN Lock and unlock the screen Lock the screen of VIDEO4.3. You can lock all the touch controls on the screen (the volume controls still function). Thus, undesired operations are prevented. Auto lock After a time duration, the screen dims and is locked automatically. To set the time duration, go to > [Display settings] > [Screen off timer]. To lock the screen manually Press / . To unlock the screen Press / . Select the wallpaper To select wallpaper for the Home screen, From the Home screen, go to > [Display settings] > [Wallpaper]. Select a theme. To set the custom wallpaper, Go to . Play a picture and set the wallpaper. To switch from a theme to the last custom wallpaper, In > [Display settings] > [Wallpaper], select [Custom]. Volume reminder VIDEO4.3 can have you reminded when the volume reaches a high level. To prevent possible hearing damage, do not listen at high volume levels for long periods. 1 2 To change the volume level, press the volume button , . » When you reach the high volume level, a beep sounds and a pop-up screen is displayed. Music play pauses. To continue to increase the volume, press and hold until music play resumes. To exit, release . » Wait until the pop-up screen disappears. Music play resumes.You return to the previous volume level. Use the stand Use the stand at the back of the player. You can position the player in a different way. 1 2 At the back of the player, lift the stand. Push the stand to its full width. EN 9 3 Get started To conserve battery power and increase the play time, do the following on VIDEO4.3: Set the backlight timer to a low value (go to > [Display settings] > [Screen off timer]). Charge power VIDEO4.3 has a built-in battery that can be charged through the USB connector of a computer. Connect VIDEO4.3 to a PC by using the USB cable. When you connect VIDEO4.3 to a computer, you are EULHÁ\SURPSWHGWRVHOHFW[Charge & transfer] or [Charge & play]. If no option is selected, [Charge & transfer] applies. To play the VIDEO4.3 when you charge power, select [Charge & play]. Battery level indication The display indicates the approximate levels of the battery status as follows: 100% 75% 50% 25% 0% » $ÁDVKLQJEDWWHU\VFUHHQLQGLFDWHVWKDW the battery is low. The player saves all settings and switches off within 60 seconds. Note Rechargeable batteries have a limited number of charge 10 cycles. Battery life and number of charge cycles vary by use and settings. The charging animation stops and the icon is displayed when the charging process is completed. EN To charge VIDEO4.3 through a USB AC/DC adapter, use Philips AY5800 (Input: 100 - 240 V, ~50/60 Hz, 0.15 A; Output: 5.0 V, 0.5A). Switch the player on or off Note Charge through a USB AC/DC adapter Press and hold or off. until the player is switched on Automatic standby and shut-down The player has an automatic standby and shutdown feature that can save battery power. If in idle mode (no play, no button is pressed) for a certain time duration, the player switches off automatically. 7RGHÀQHWKHWLPHGXUDWLRQ From the Home screen, go to > [Set power-saving mode…]. 4 Build a media library on VIDEO4.3 Use a Micro SD card Insert a Micro SD card (up to 32 GB) into the VIDEO4.3. You can expand the memory size of VIDEO4.3. Build a media library on VIDEO4.3 before you play from the player. To build such a media library, you can transfer your PC media library to the player; use a micro SD card (up to 32 GB) as media library. Transfer from your PC media library You can transfer your PC media library to VIDEO4.3 in the following ways: Sync through Philips Songbird (see 'Sync with PC media library through Philips Songbird' on page 23); With the media management software, you can create playlists, or edit your media collection by metadata or ID3 tag. 'UDJDQGGURSPHGLDÀOHVLQ:LQGRZV Explorer. By doing so, you can organize your PHGLDFROOHFWLRQE\ÀOHIROGHU 7RGUDJDQGGURSPHGLDÀOHVLQ:LQGRZV Explorer, 1 2 3 Connect VIDEO4.3 to a PC. 1 2 Open the cover of the Micro SD card slot. Insert the SD card into the slot until it is fully inserted. Play from the Micro SD card Under , , or on the player, you can ÀQGDQGSOD\VXSSRUWHGPHGLDÀOHVIURP the Micro SD card. Alternatively, From the Home screen, press . Select DQGSOD\PHGLDÀOHVWKDWDUHVWRUHGRQWKH Micro SD card. On the PC, under My Computer or Computer, select VIDEO4.3DQGFUHDWHÀOH folders. 2QWKH3&GUDJDQGGURSPHGLDÀOHVWR WKHÀOHIROGHUVRQVIDEO4.3. $OWHUQDWLYHO\GUDJDQGGURSÀOHIROGHUV from the PC to VIDEO4.3. EN 11 5 Music Select play options In PXVLFÀOHVDUHRUJDQL]HGE\PHWDGDWDÀOH information). You can browse the music library by song information. On the play screen, Press to pause/resume play. Press , to skip songs; Press and hold , to rewind or fast IRUZDUGZLWKLQFXUUHQWÀOH Press to select play options: [Repeat] [Repeat 1]: Repeat current song. [Repeat all]: Repeat all songs in current folder. >6KXIÁH@ [On]: Play all songs in current folder in random order. To switch between the play screen and library screen Press repeatedly to go to the Home screen; To return to the play screen, select on the Home screen. Then, select [Now playing]. 1 Select sound options Go to to play music from the media library on the player. Browse the music library 2 Press , and to select a library view: Select , , or to sort songs by song title, album, or artist. » The music library is sorted by the song information. Press or to browse through the list of options. Press WRFRQÀUP\RXURSWLRQ Browse by playlist On the play screen, press options: [FullSound] >(TXDOL]HU@ [Volume limit] Select the library view of <RXFDQÀQG playlists-on-the-go that you create on the player (see 'Create a playlist-onthe-go' on page 13). Play music 1 2 ,QWKHPXVLFOLEUDU\EURZVHWRÀQGPXVLF Select a song. » Play starts from current song. » The play screen is displayed. 12 EN to select Restore the sonic details that music compression loses (such as MP3, WMA). 'HÀQHVRXQGVHWWLQJVDVQHHGHG Set a maximum volume level for the device. In this way, you can always keep the volume within a level safe enough to your hearing. Press or to set the maximum level. Note Equalizer is deactivated when you select FullSound. Playlists With a playlist, you can access a list of songs from different artists or albums. Create a playlist-on-the-go On VIDEO4.3\RXFDQFUHDWHÀYHSOD\OLVWVRQ the-go. Create a playlist-on-the-go 1 2 Select the library view of . Press and select [Create new 'Playlist on the go']. » A playlist-on-the-go is created. Add songs to a playlist 1 2 3 Play a song. On the play screen, press and select [Add to playlist]. » A list of playlists is displayed. 6HOHFWDSOD\OLVW&RQÀUPDVSURPSWHG » Current song is added to the playlist. Play a playlist 1 2 Select the library view of . » A list of playlists is displayed. Select a playlist and song. » The playlist starts playing from current song. EN 13 6 Videos Select the brightness Go to to play videos from the media library on the player. Browse the video library ,QWKHYLGHROLEUDU\YLGHRÀOHVDUHRUJDQL]HGE\ PHWDGDWDÀOHLQIRUPDWLRQ Browse by title With columns for video artwork, title and total play time, the video library of VIDEO4.3 allows \RXWREURZVHLQIRUPDWLRQDERXWYLGHRÀOHV quickly. Press or to browse through the list of options. Press WRFRQÀUP your option. Play videos In the video library, select a video. » Play starts from current video. » The play screen is displayed. Select play options On the play screen, Press to pause/resume play. Press , to skip titles; Press and hold , to rewind or fast IRUZDUGZLWKLQFXUUHQWÀOH Select sound options On the play screen, press to select Surround for movies (surround sound for movie play). 14 EN On the play screen, press and select [Brightness]. Select an option. 7 Pictures [Repeat]: Play pictures in current folder repeatedly. >6KXIÁH@: Play pictures in current folder in random order. Go to to play pictures from the media library on the player. Set a picture as wallpaper Browse the picture library ,QWKHSLFWXUHOLEUDU\SLFWXUHÀOHVDUHRUJDQL]HG E\DOEXPRUÀOHIROGHU Browse by album 1 2 Select an album or folder. » Pictures in the folder are displayed as thumbnails. Press or to browse through the list of options. Press WRFRQÀUP\RXURSWLRQ To set a picture as the wallpaper of Home screen, 1 2 3 Select a picture to start play. On the play screen, press [Set as wallpaper]. and select Select [Set as wallpaper]. Tip You can also set the wallpaper in > [Display settings] > [Wallpaper]. Play pictures Favorite pictures 1 With the [Favorites pictures] folder, you can access your favorite pictures from different albums. In , select a picture to start play. » The play screen is displayed. 2 Press , to select a picture. To play pictures one by one Press . Alternatively, Press and select [Start slideshow]. Add pictures to Favorites 1 2 Select play options On the play screen, Press to pause/resume play. Press , to skip pictures. Select slideshow settings On the play screen, press and select [Slideshow settings]: [Slideshow effect]: Set the transition mode between two slides. [Set Time per slide]: Set the time interval before one slide switches to another. Play a picture. On the play screen, press and select [Add to 'Favorites']. » Current picture is added to [Favorites pictures]. Remove pictures from Favorites 1 2 Play a picture. On the play screen, press and select [Remove from 'Favorites' folder]. » Current picture is removed from the [Favorites pictures] folder. EN 15 8 FM radio Tip When you move to a new place (such as a new city or country), restart auto tune for better reception. Note Plug in the supplied earphones when you tune in to radio stations. The earphones double as antenna. For better reception, move the earphone cable in different directions. 3 From the Home screen, go to . » The last played station starts to play. To select a preset station, press and hold / and release. To mute/ unmute the sound, press » or is displayed. Press / repeatedly to search for a frequency. On VIDEO4.3, you can store up to 20 preset stations. Auto tune 2 Store preset stations Tune in to radio stations 1 Manual tune 1 2 3 . Tune in to a radio station. On the radio play screen, press and select [Save to preset]. » The list of preset stations is displayed. Press / to select a preset number. &RQÀUPDVSURPSWHG » Current station is saved to the selected location. To remove all preset stations, 1 2 To restart auto tune, On the play screen, press , and select [Auto tune]. » Up to 20 available stations are stored to replace the old presets. 16 EN On the radio play screen, press . Select [Clear all presets]&RQÀUPDV prompted. » All the stations are removed from the list of presets. 9 Recordings Note The feature of FM radio recording is available with some versions only. Refer to the onscreen menu of the SOD\HUWRÀQGRXWZKLFKIHDWXUHVDUHDYDLODEOHWR\RX Make recordings With VIDEO4.3, you can record: voices or audio through the built-in microphone; or radio programs when the radio plays on the player. Play recordings 1 Record voices 1 2 3 4 From the Home screen, go to . Select [Recordings]. » The recording screen is displayed. 2 From the Home screen, go to . Select [Voice library]. » In the recordings library, existing recordings are displayed. Select a recording to start play. » The play screen is displayed. Make sure that the microphone is close to the sound source. Press to start, pause, or resume recording. Press to stop recording. Select [Yes] to save the recording. » Recordings are saved to > [Voice library] > [Voice library]. (Filename format: REC-00000000-XXX.MP3, where XXX is the recording number that is generated automatically.) Record from the FM radio 1 2 3 4 Tune in to a radio station. On the play screen, press and select [Recordings] to start recording. » You start recording from the FM radio. Press to toggle between pause and record. To save the recording, press , and FRQÀUPDVSURPSWHG » Recordings are saved to > [Voice library] > [FM rec library]. (Filename format: FMRECXXX-00000000_ XXX.MP3, where XXX is the recording number that is generated automatically.) EN 17 10 Text reader Go to WRSOD\WH[WÀOHVW[WIURPWKHPHGLD library on the player. 5HDGWH[WÀOHV 1 2 From the Home screen, go to . » 7KHWH[WÀOHVDUHGLVSOD\HGDVDOLVW Press or to browse through the list of options. Press WRFRQÀUP\RXURSWLRQ » The play screen is displayed. 3 Press , to turn over pages. 7RLQFUHDVHRUGHFUHDVHWKHIRQWVL]H On the play screen, press to select >,QFUHDVHIRQWVL]H@ or [Decrease font VL]H@. To add a bookmark, On the play screen, press and select [Add bookmark]. » Current page is folded at the corner. To go to the bookmarked section, On the play screen, press and select [Go to bookmark]. Select an option. To remove a bookmark, 1 2 18 Go to the bookmarked section. Press EN and select [Delete bookmark]. 11 Folder view Go to WRYLHZDQGSOD\PHGLDÀOHVRQWKH internal storage of the player. EN 19 12 SD Card Go to WRYLHZDQGSOD\PHGLDÀOHVWKDW\RX store on the Micro SD card. 20 EN 13 Settings From the Home screen, go to to select your settings. Press or to browse through the list of options. Press WRFRQÀUP your option. Press to exit. Set power-saving mode If in idle mode (no play, no button is pressed) for a certain time duration, the player switches off automatically. In [Set power-saving mode…], select an option. » After the selected time duration, the device is switched off automatically. Sleep timer During play or in idle mode, the VIDEO4.3 can switch off automatically after a certain time duration. In [Sleep timer], select an option. » After the selected time duration, the device is switched off automatically. Display settings [Wallpaper] Select a theme. Or, select [Custom] to switch to the custom wallpaper that you set in . Language In [Language], select a language for the player. Information In [Information], learn the following information about the device: [Capacity:] [Free space:] [SD card capacity:] [SD card free space:] [Firmware version:] [Model:] [CTN] [Support site:] memory size space available memory size of the SD card that is inserted into the player space available on the SD card that is inserted into the player FXUUHQWÀUPZDUHYHUVLRQ&KHFN WKHÀUPZDUHYHUVLRQZKHQ XSGDWLQJÀUPZDUHIURPWKH support website. full product name. Check the full product name when updating ÀUPZDUHIURPWKHVXSSRUW website. model number web site that provides support for the device In [Display settings], select your display options: [Brightness] [Screen off timer] Select the display brightness. After the selected time duration, the screen turns off automatically. To save battery power, select a low value. Format device Format the VIDEO4.3. You remove all the data that are stored on the player. Select [Format device]. Then, select [Yes] as prompted. EN 21 Factory settings In [Factory settings], restore the player to factory settings. Files transferred to the player are retained. 22 EN 14 Sync with PC media library through Philips Songbird With Philips Songbird, you can do the following: Manage your music collection on a PC; Sync VIDEO4.3 with your PC music library; Register VIDEO4.3 on www.philips. com/welcome. Install Philips Songbird 1 2 3 4 Connect VIDEO4.3 to a PC. On the PC, select My Computer (Windows XP / Windows 2000) / Computer (Windows Vista / Windows 7). &ROOHFWPHGLDÀOHVIURPWKH PC Set the watch folder Create a central folder <RXFDQKDYHDOOPXVLFÀOHVDXWRPDWLFDOO\DGGHG to your library when you copy them to a folder. Creating a central folder is recommended. In Philips Songbird, set the central folder as the watch folder. Each time you launch Philips Songbird, songs are added to/ removed from Philips Songbird as they are on the central folder. On the PC, create a central folder to save all PXVLFÀOHVIRUH[DPSOH'?6RQJELUGPHGLD First-time launch 7KHÀUVWWLPH\RXODXQFKPhilips Songbird on a PC, do the following as prompted to import H[LVWLQJPHGLDÀOHVLQWRPhilips Songbird: Select the iTunes media folder to import an existing iTunes library; Select the central folder to search and LPSRUWWKHH[LVWLQJPXVLFÀOHV » The central folder is set as the watch folder of Philips Songbird. Set iTunes media folder Right click on the Philips GoGear VIDEO4.3 icon. Select Download Philips Songbird. Alternatively, click the Philips GoGear VIDEO4.3 icon. Double click the setup.exe. Follow the onscreen instructions to complete the installation. Note The installation requires you to agree to the license terms. EN 23 1 2 3 4 On Philips Songbird, go to Tools > Options... Select Media Importer, and then the iTunes Importer tab. Verify your library location and options. Click the Import Library button next to the library location. » The software imports the iTunes library into Philips Songbird. Set the watch folder In Philips Songbird, set the watch folder as follows: 1 2 3 4 Select Tools > Options. In Options, select Media Importer. Then, select the Watch Folders tab. In Watch Folders, tick the check box as shown. Click Browse, and select the central folder HJ'?6RQJELUGPHGLDDVWKHZDWFK folder. » In Philips SongbirdPHGLDÀOHVDUH added or removed as they are in the central music folder. ,PSRUWPHGLDÀOHV ,PSRUWPHGLDÀOHVIURPRWKHUIROGHUV In Philips Songbird, go to File > Import Media to select folders on the PC. » 0HGLDÀOHVDUHDGGHGXQGHU Library. 24 EN or, go to File > Import a playlist to select playlists on the PC. » 0HGLDÀOHVDUHDGGHGXQGHU Playlists. 1 2 In Library > Music, select songs. To select multiple songs, hold down the Ctrl button when you click songs. To add the songs to a playlist: Right click on the songs, and select Add to Playlist; Select a playlist; » The songs are added to the playlist. To create a playlist, select New Playlist. » A new playlist is created for the songs. Create playlists in Philips Songbird » Under Playlists, name the playlist as needed. Alternatively, Create a playlist. Add selected songs to the playlist. With a playlist, you can manage and sync your songs as needed. Create a playlist Select songs that you want to play. Add the songs to a playlist. 1 2 3 Under Playlists, click to create a playlist. » A new playlist is created. Name the new playlist as desired. 'UDJDQGGURSPHGLDÀOHVWRWKHSOD\OLVW Tip 7RGUDJDQGGURSPXOWLSOHÀOHVDWWKHVDPHWLPHKROG down the Ctrl button when you click on selections. Generate LikeMusic playlists Based on the LikeMusic analysis, a playlist can be generated from a seed song. EN 25 LikeMusic analyzes songs in your library and, based on their music characteristics, creates relationships between them. These relationships help LikeMusic to create playlists of songs that sound great together. When you import songs into the music library of Philips Songbird, the LikeMusicanalysis starts. For the song that completes the analysis, the LikeMusic icon lights up; For the song that cannot complete the analysis, the icon remains gray. Select a seed song Make sure that the seed song has completed the LikeMusic analysis. In Library > Music, double click the blue LikeMusic icon of the song; Alternatively, In Library > Music, right click on a song and select Run LikeMusic with. » A LikeMusic playlist is displayed in the LikeMusic page. 26 EN Set the maximum number of songs Select a number in the drop-down list. Save the LikeMusic playlist Click Save as playlist in the LikeMusic page. » The LikeMusic playlist is saved under Playlists. 6DYHWKHSOD\TXHXHDVDSOD\OLVW Create a play queue Drag and drop songs or playlists to the Play Queue pane. Save the play queue as a playlist 1 Click Save. » The play queue is saved as a playlist under Playlists. 2 Under Playlists, name the playlist as needed. $GGVRQJVWRWKHWRSRUHQGRIWKHSOD\TXHXH To add songs to the top, right click on the options and select Queue Next; To add songs to the end, right click on the options and select Queue Last. 2 5LJKWFOLFNRQWKHÀOHWRVHOHFWView Metadata. » A metadata table appears for you to edit the information. Get album artwork Artwork is sometimes available for music downloads. With Philips Songbird, you can insert artwork for songs. After you sync the songs to some players, you can browse the media library by artwork. 0DQDJHPHGLDÀOHVLQ3KLOLSV Songbird Edit metadata %\HGLWLQJÀOHLQIRUPDWLRQPHWDGDWDRU ,'WDJ\RXFDQKDYHPHGLDÀOHVVRUWHG automatically by song title, artist, album, and other information. $IWHU\RXV\QFWKHPHGLDÀOHVWRWKHSOD\HU\RX can browse the media library by metadata. 1 On Philips Songbird, select Tools > Get Artwork. » Artwork is fetched for all titles in the library. Right click on selected titles, and select Get Artwork. » Artwork is fetched for all selected titles. In Library > Music or Videos, select a PHGLDÀOH EN 27 5HPRYHPHGLDÀOHVIURPWKHOLEUDU\ 1 2 5LJKWFOLFNRQDPHGLDÀOH6HOHFWRemove. &RQÀUPDVSURPSWHG » 7KHVHOHFWHGÀOHLVUHPRYHGIURPWKH library and from all playlists. (By default, WKHÀOHLVRQO\UHPRYHGQRWGHOHWHG 7KHÀOHVWLOOH[LVWVLQLWVRULJLQDO location on the computer or computer network.) Select auto or manual sync 7KHÀUVWWLPH\RXFRQQHFWWKHSOD\HUWRPhilips Songbird, select auto sync as prompted. The player sync with Philips Songbird automatically. If you didn't select auto sync, you switch on the manual sync. To select auto or manual sync, Tip 7RVHOHFWPXOWLSOHÀOHVKROGGRZQWKH Ctrl button when you click on selections. 7RVHOHFWPXOWLSOHFRQVHFXWLYHÀOHVKROGGRZQWKHShift EXWWRQZKHQ\RXFOLFNRQWKHÀUVWDQGODVWVHOHFWLRQV Sync the player with Philips Songbird 1 2 On the PC, launch Philips Songbird. Connect the player to the PC by using a USB cable. » On Philips Songbird, the player is displayed when it is recognized by the PC. 1 2 3 Select the player under Devices. Select Manual or Auto. 7RFRQÀUPWKHRSWLRQFOLFNApply. Auto sync If you have selected auto sync, auto sync starts automatically when you connect the player to a PC; 28 EN Alternatively, select the player under Devices, and click Sync. To select auto sync settings, 1 2 Select playlists. Drag and drop the playlists to VIDEO4.3. 7RPDQXDOO\WUDQVIHUVHOHFWHGPHGLDÀOHV 1 2 On the Content pane, right click on a VHOHFWHGPHGLDÀOH Select Add to Device > VIDEO4.3. » 6HOHFWHGÀOHVDUHWUDQVIHUUHGWR VIDEO4.3. Tip 1 2 3 Select the player under Devices. 7RVHOHFWPXOWLSOHÀOHVDWWKHVDPHWLPHKROGGRZQWKH Ctrl button when you click on selections. On the pop-up window, click the Music or Videos tab. Click to select an option. Manual sync To manually transfer selected playlists, EN 29 15 Update the firmware through Philips Device Manager » <RXFDQÀQGFXUUHQWÀUPZDUHYHUVLRQ of the device. Install Philips Device Manager 1 2 3 4 Connect VIDEO4.3 to a PC. On the PC, select My Computer (Windows XP / Windows 2000) / Computer (Windows Vista / Windows 7). Right click on the Philips GoGear VIDEO4.3 icon. Select Install Philips Device Manager. Alternatively, click the Philips GoGear VIDEO4.3 icon. Double-click the installer.exe. 4 7RFKHFNIRUÀUPZDUHXSGDWHV a Close the dialog box of Philips Device Manager. b At the base of the PC screen, right click and select Check for updates. Follow the onscreen instructions to complete the installation of the software. Note The installation requires you to agree to the license terms. &KHFNIRUÀUPZDUHXSGDWHV 1 2 3 Make sure that you have connected your PC to the Internet. » Philips SA4VD4XX Device Manager checks for updates from the Internet. Launch Philips Device Manager. » A dialog box is displayed. Connect VIDEO4.3 to your PC. » When the device is connected, "SA4VD4XX" is displayed on the text box. 8SGDWHWKHÀUPZDUH 1 2 30 EN :KHQWKHÀUPZDUHXSGDWHLVDYDLODEOH follow the onscreen instructions to GRZQORDGDQGLQVWDOOWKHÀUPZDUH Disconnect VIDEO4.3 from the PC. » VIDEO4.3UHVWDUWVDIWHUWKHÀUPZDUH is updated and is ready for use again, EN 31 16 Troubleshooting If VIDEO4.3 is not working properly or the display freezes, you can reset it without losing data: How do I reset VIDEO4.3? Insert a pen tip or other object into the reset hole on VIDEO4.3. Hold until the player shuts down. If the reset option is unsuccessful, recover VIDEO4.3 through Philips Device Manager: 1 2 On your PC, launch Philips Device Manager. Enter the recovery mode: a Switch off VIDEO4.3. b Press and hold the volume button , and then, connect VIDEO4.3 to your PC. c Keep holding the button until Philips 'HYLFH0DQDJHUUHFRJQL]HV9,'(2 and enters the recovery mode. 3 Start the recovery process: a On Philips Device Manager, click the Repair button. Follow the onscreen instructions to complete the recovery process. b When the recovery is completed, disconnect VIDEO4.3 from your PC. 4 Restart VIDEO4.3. 32 EN 17 Technical data Power Power supply: 1050 mAh Li-ion polymer internal rechargeable battery Play time¹ Music: up to 20 hours Video: up to 4 hours Radio: up to 25 hours Software Philips Songbird: To transfer³ media Philips Device Manager: To update the ÀUPZDUHDQGUHFRYHUWKHSOD\HU Connectivity Headphone 3.5 mm USB 2.0 High speed Sound Headphone: Channel separation: >35 dB Frequency Response: 45 Hz - 16 kHz Output power (RMS): 2 x 2.4 mW Signal to noise ratio: > 80 dB Audio playback MP3 bit rates: 8 - 320 kps and VBR MP3 sample rates: 8, 11.025, 16, 22.050, 24, 32, 44.1, 48 kHz WMA bit rates: 5 - 192 kbps and VBR WMA sample rates: 8, 11.025, 16, 22.050, 32, 44.1, 48 kHz ID3-tag support Video playback MPEG4 SP: Up to 2 Mbps, 720 x 560 pixels, 25 fps MP4 (AVI)/ MPEG4 AVC/ H.264: up to 4 Mbps in .avi/.mp4, 720 x 576 pixels, 25 fps RMVB: up to 2 Mbps, 1280 x 720 pixels, 25 fps WMV9: Up to 1 Mbps, 640 x 480 pixels, 25 fps Storage media Built-in memory capacity²: SA4VD4 4 GB NAND Flash , SA4VD4 8GB NAND Flash Media transfer³ Display Songbird (sync) Windows Explorer (drag and drop) Touch-sensitive color LCD 480 x 272 pixels 262 k colors Note 6SHFLÀFDWLRQVDUHVXEMHFWWRFKDQJHZLWKRXWQRWLFH ¹ Rechargeable batteries have a limited number of charge cycles. Battery life and number of charge cycles vary by use and settings. ² 1GB = 1 billion bytes; available storage capacity is less. Full memory capacity may not be available as some memory is reserved for the player. Storage capacity is based on 4 minutes per song and 128 kbps MP3 encoding. ³ Transfer speed depends on operating system and VRIWZDUHFRQÀJXUDWLRQ 6XSSRUWHGPXVLFÀOHIRUPDWV VIDEO4.3 supports the following music formats: MP3 WMA WAV Flac Ape 6XSSRUWHGYLGHRÀOHIRUPDWV VIDEO4.3 supports the following video formats: MPEG4 SP MP4 (AVI)/ MPEG4 AVC/ H.264 RMVB 6XSSRUWHGSLFWXUHÀOH formats VIDEO4.3 supports the following picture formats: JPEG EN 33 BMP 6\VWHPUHTXLUHPHQWV Windows® XP (SP3 or above) / Vista / 7 Pentium III 800 MHz processor or higher 512 MB RAM 500 MB hard disk space Internet connection Windows® Internet Explorer 6.0 or later CD-ROM drive USB port 34 EN Specifications are subject to change without notice © 2012 Koninklijke Philips Electronics N.V. All rights reserved. SA4VD4_12_UM_V1.0 wk1244.3


