1
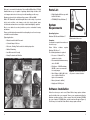
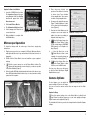
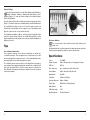
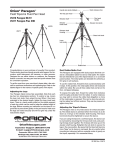
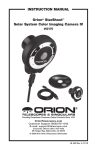
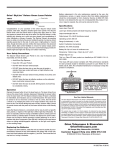
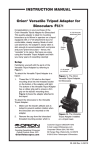
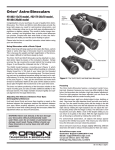
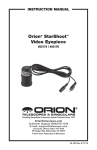
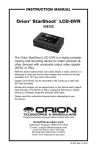
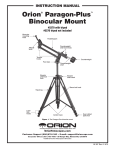
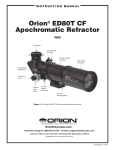
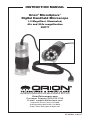
instruction Manual Orion® MicroXplore™ Digital Handheld Microscope 1.3 MegaPixel, Illuminated, 40x and 200x magnification #52177 Providing Exceptional Consumer Optical Products Since 1975 OrionTelescopes.com Customer Support (800) 676-1343 E-mail: [email protected] Corporate Offices (831) 763-7000 89 Hangar Way, Watsonville, CA 95076 © 2011 Orion Telescopes & Binoculars IN 409 Rev. A 01/11 Welcome to a new world of adventure. Your new Orion® MicroXplore™ Digital Handheld microscope is capable of capturing detailed, high resolution, fullcolor images and movies of microscopic worlds awaiting your discovery. Examine specimen objects at high and low powers of 40X and 200X. With 8 LED illumination and dual magnification a wide variety of specimen objects such as slides, coins, stamps, rocks, relics, insects, plants, gems, circuit boards and much more can easily be studied and digitally captured. Easy to use rubber focus wheel provides a precise one-handed focusing mechanism. Please read this instruction manual before attempting to use the microscope or install the needed software. Typical applications • Education and Scientific Research • Coin and Stamp Collectors • Electronic, Printing, Textiles and other industry inspection Parts List • Digital Handheld Microscope with built In USB cable • CD-ROM (XP, Vista, Windows 7) System Requirements Operating System Windows XP, Vista and Windows 7 Computer A computer is required for normal use of the microscope. • Medical Examining Future WinJoe software Windows XP, Vista or 7. • Law Enforcement & Security The following hardware is required: • Beauty Treatment and Skin Care Figure 1. The Orion MicroXplore Digital Handheld Microscope. requires • Processor – Pentium III™ or equivalent, or higher • Recommended minimum memory size is 256 MB. • Disk Space – 100 MB minimum, 500 MB or more recommended for saving images. • Video Display – 800 X 600, 16-bit color or higher. 1024x768 or higher is recommended. Figure 2. The launcher provides an easy menu for software installation. • Mouse (external or built-in) • High Speed USB 2.0 port Software Installation Before the microscope can be used, Future WinJoe image capture software must be installed onto your computer. Turn on your computer and allow the Windows operating system to load as normal. Insert the included CD-ROM into your computer’s CD-ROM drive, and the Launcher will appear (Figure 2). This allows you to install the Future WinJoe image capture software. 2 3 5. Place microscope directly over specimen. Turn rubber focus wheel to achieve focus. Turn clockwise for low magnification. Turn counterclockwise for high magnification. Capture Software Installation 1. Insert the CD-ROM into the drive. The Launcher will appear. If you are using Windows Vista, the AutoPlay window will appear first. Select Run autorun.exe. 6. You may need to adjust the exposure (Figure 7) and/or brightness control of the camera before attempting to focus. (Figure 6). 2. Click Install Future WinJoe. 3. The Software Installation will start. 4. Select language and follow the on screen instructions. Figure 3. The live video window. 5. When installation is complete click the Finish button. Microscope Operation 7. View the Live Video Window on the computer screen and adjust the rubber focus wheel accordingly to determine best image focus. 8. Select the Capture Image Icon on the Future WinJoe toolbar to take a single image in JPG/BMP/ PNG format as set in Capture settings (Figure 5). 9. Select the Burst Icon on the Future WinJoe toolbar to take a number of consecutive images as set in Capture Settings (Figure 5). To obtain first images with the microscope, follow these step-by-step instructions: 1. Plug the microscope into your computer’s USB port. Windows will automatically install the microscope camera driver the first time the device is plugged in. 2. Double click the Future WinJoe icon now installed on your computer’s desktop. 3. Click the connect camera icon on the Future WinJoe toolbar. The software will automatically connect directly to your microscope with a Live Video Window. (Figure 3) 4. Notice the white LED lights shining through the bottom of the microscope; these LED lights indicate that the microscope is connected and receiving power from the computer. 100 Dollar Bill 40X 100 Dollar Bill 200X 10. Figure 5. Changing resolution. Figure 6. Adjusting brightness. Select the Capture Video Icon on the Future WinJoe toolbar to take a movie in WMV format. You have now taken your first images with the Orion MicroXplore Digital Handheld microscope! Camera Options For best images, you can adjust the Figure 7. Adjusting exposure. camera settings to fine tune the image. You can see how the camera controls affect an image in the Live Video Window. Capture Settings Select the capture settings icon on the Future WinJoe toolbar. Record and Preview resolutions, frames per second, video quality and Image output formats can be adjusted. (Figure 5). The destination file directory can also be changed from the default in Capture settings. Figure 4. Dual 40X and 200 X magnifications. 4 5 Camera Settings Select the Camera Settings Icon on the Future WinJoe toolbar. Brightness, Contrast, Saturation, Sharpness, Gamma and White Balance can be adjusted. (Figure 6). To return the camera settings to their default settings, click the Default button. Select the Camera Control tab to modify exposure times using exposure slider. (Figure 7). To return the exposure to its default settings, click the Default button. Try several different settings to get a feel of how the camera controls work and affect the resultant image on the computer screen. The Brightness and Exposure controls are the ones you will use the most. The magnification, lighting conditions, and object being imaged will dictate how these camera controls should be set. Usually Exposure will be set first (higher magnification usually requires more exposure), and then Brightness is adjusted as needed. Tips Loss of Camera Connection If the computer connection to the camera is interrupted, you will need to re-establish connection. This can happen due to several reasons; if a cable becomes unplugged, the computer “freezes”, or the software/hardware otherwise temporarily loses the data coming from the camera. To re-establish camera connection, first close the Future WinJoe program on your computer. Then, unplug and re-plug the camera into the computer’s USB port. Now, open Future WinJoe, click the connect camera icon and the Live Video Window should appear indicating re-established connection between camera and computer. Figure 8. Measuring specimens using on screen reticule. On Screen Reticule The on screen reticule can be switched on and off by clicking on the reticule icon. By calibrating the units of reticule against a ruler, target specimens can then be visually measured against this reticule for precise measurement. Specifications Sensor 1/4" CMOS Number of pixels 1280 x 1024 pixel layout; 1.3 megapixel resolution USB Port USB 2.0 Video frame rate up to 16 frames/second @ 1280 x 1024 Preview Mode 1280 x 1024, 640 x 480, 320 x 240 Magnification 40x; 200x Sensitivity1.0V/lux-sec@550nm Spectrum Response 400nm – 1000nm 6 Shutter Type ERS (Electronic Rolling Shutter) White Balance Auto USB Cable length 1.5 M Operating System XP, Vista, Windows7 7 One-Year Limited Warranty This Orion MicroXplore Digital Handheld Microscope is warranted against defects in materials or workmanship for a period of one year from the date of purchase. This warranty is for the benefit of the original retail purchaser only. During this warranty period Orion Telescopes & Binoculars will repair or replace, at Orion’s option, any warranted instrument that proves to be defective, provided it is returned postage paid to: Orion Warranty Repair, 89 Hangar Way, Watsonville, CA 95076. If the product is not registered, proof of purchase (such as a copy of the original invoice) is required. This warranty does not apply if, in Orion’s judgment, the instrument has been abused, mishandled, or modified, nor does it apply to normal wear and tear. This warranty gives you specific legal rights, and you may also have other rights, which vary from state to state. For further warranty service information, contact: Customer Service Department, Orion Telescopes & Binoculars, 89 Hangar Way, Watsonville, CA 95076; (800) 676-1343. OrionTelescopes.com 89 Hangar Way, Watsonville, CA 95076 Customer Support Help Line (800) 676-1343 © 2011 Orion Telescopes & Binoculars