1
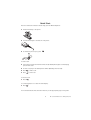
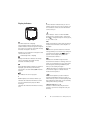
User’s Guide
Nokia is a registered trademark of Nokia Corporation, Finland.
© 1998 Nokia Mobile Phones. All rights reserved.
Nokia Mobile Phones operates a policy of continuous development.
Therefore we reserve the right to make changes and improvements to any of
the products described in this guide without prior notice.
Issue 4
9351391
For Your Safety
FOR YOUR SAFETY
QUALIFIED SERVICE
Read these simple guidelines.
Breaking the rules may be dangerous or
illegal. Further detailed information is
given in this manual.
Only qualified service personnel must
install or repair equipment. Use only
approved accessories and batteries.
ROAD SAFETY COMES FIRST
SWITCH OFF IN AIRCRAFT
Don’t use a hand-held phone while
driving; park the vehicle first.
Mobile phones can cause interference.
Using them on aircraft is illegal.
SWITCH OFF IN HOSPITALS
INTERFERENCE
Follow any regulations or rules.
Switch off near medical equipment.
All mobile phones may be subject to
interference which could affect
performance.
USE SENSIBLY
MAKING CALLS
Use only in normal position (to ear).
Don’t touch the antenna unnecessarily.
Ensure the phone is switched on and in
service. Enter the phone number,
including area code, then press
.
To end a call press
.
To answer a call press
.
SWITCH OFF WHEN REFUELLING
EMERGENCY CALLS
Don’t use phone at a refuelling point.
Don’t use near fuel or chemicals.
Ensure that the phone is switched on and
in service. Hold
for several seconds,
to clear the display. Enter the emergency
number, then press
. Give your
location. Do not end the call until told
to do so.
SWITCH OFF NEAR BLASTING
Don’t use phone where blasting is in
progress. Observe restrictions, and
follow any regulations or rules.
2
È1999 Nokia Mobile Phones. All Rights Reserved.
Quick Start
Here are a few basic instructions about using your new Nokia 550 phone:
Español
1 Attach the battery to the phone.
2 Connect the charger to the bottom of the phone.
3 To switch the phone on/ off, press
.
To make a call:
4 If your phone is within the network service area (if the O symbol appears on the display),
you can make a call.
5 To make a call, key in the desired phone number (including the area code).
6 Press to make a call.
7 Press to end a call.
To receive a call:
1 Press
.
To correct keypresses or to clear the entire display:
1 Press
.
For more details about these and other functions, see the appropriate pages of this guide.
3
È1999 Nokia Mobile Phones. All Rights Reserved.
Contents
For Your Safety...............................................2
Quick Start......................................................3
1. Basic Information.......................................5
Using This Guide ..................................................... 5
List Of Keys .............................................................. 5
Selection Keys ......................................................... 5
Display Indicators ................................................... 6
Charging A New Battery ...................................... 7
Battery Information ............................................... 7
Switching On/Off .................................................... 8
Signal Strength ....................................................... 8
Accessories ............................................................... 8
Call Forwarding ....................................................... 8
Register Recall Function ...................................... 8
2. Basic Functions ..........................................9
Making A Call .......................................................... 9
International Calls ................................................. 9
Receiving A Call ...................................................... 9
Adjusting The Earpiece Volume ........................10
Any Key Answering ..............................................10
1-Touch Dialling ...................................................10
Last Number Redial .............................................10
Keypad Locked .......................................................10
Muting The Microphone .....................................11
3. The Memory..............................................12
Keying In Names ...................................................12
Storing Information .............................................12
Clearing Information ...........................................13
Recalling Information By Memory Location
Number And By Name ........................................13
Scanning For A Number .....................................14
Scanning For A Name .........................................14
Number Of The Phone .........................................14
Scratchpad Memory ............................................14
4. The Menu Facility ....................................15
The Menu Method ................................................15
The Menu Shortcut ..............................................15
Menu Functions ....................................................17
Call Register (Menu 0) ....................................... 17
Recent Calls (Menu 0 0) .................................. 17
Call Duration (Menu 0 1)................................. 17
Messages (Menu 1) ............................................. 17
Read Messages (Menu 1 0)............................. 17
Write Messages (Menu 1 1)............................ 17
Listen To Voice Messages (Menu 1 2).......... 18
Retrieve Messages (Menu 1 3)....................... 18
Message Settings (Menu 1 4)......................... 18
Message Centre Number (Menu 1 4 0)...... 18
Voice Mailbox Number (Menu 1 4 1) ......... 18
Encryption Key (Menu 1 4 2) ........................ 19
Encryption (Menu 1 4 3) ................................ 19
Phone Settings (Menu 2) ................................... 19
Country (Menu 2 0).......................................... 19
Setting The Lights On/Off (Menu 2 1) ......... 19
Keypad Tones (Menu 2 2) ................................ 19
Language Select (Menu 2 3)........................... 19
Battery Care (Menu 2 4) .................................. 19
Clock (Menu 2 5)................................................ 20
Security Options (Menu 3) ................................ 20
Phone Lock (Menu 3 0) .................................... 20
Change Lock Code (Menu 3 1) ....................... 20
Call Barring (Menu 3 2) ................................... 20
Call Settings (Menu 4) ....................................... 21
Ringing Tone (Menu 4 0) ................................. 21
Ringing Volume (Menu 4 1)............................ 21
Call Alert (Menu 4 2) ........................................ 21
1-Touch Dialling (Menu 4 3) .......................... 21
Automatic Answer (Menu 4 4)....................... 21
Send DTMF Tones (Menu 5) .............................. 21
Alarm Options (Menu 6) .................................... 22
Countdown Timer (Menu 6 0) ........................ 22
Alarm Clock (Menu 6 1)................................... 22
Prefix Editor (Menu 7) ........................................ 23
Care and Maintenance ................................24
Important Safety Information ....................24
Emergency Calls ..........................................25
Troubleshooting ...........................................25
4
È1999 Nokia Mobile Phones. All Rights Reserved.
1. Basic Information
Using This Guide
The cellular phone described in this guide is
approved for use in a NMT 450 network. A
number of features included in this guide are
called Network Services provided by cellular
service providers. Before you can take
advantage of any of these Network Services, you
must subscribe to the service(s) you require
from your home
service provider. You can then activate these
functions as described in this guide. The manual
activation commands for various services are
not presented in this guide (e.g. using characters
for activating or deactivating services). The
phone, nevertheless, is capable of handling
commands given in that form. For these
commands, please consult with your cellular
service providers. The operation of the phone
requires successive key depressions; two keys
are never to be pressed simultaneously.
Press to switch to alpha mode and key
in or display letters; press again to switch
back to numeric mode.
Press to delete characters or to clear the
entire display.
Press to call a number. Press for Register
Recall (NMT system feature) during a
call.
Press to end a call.
Press these keys to scroll through the
memory locations and menu functions.
First press the Menu or the Memory
selection key and then use keys
and
to scroll through the menu or
the memory. (Press and hold down to
scroll continuously through the menu or
the memory.)
Number and character keys.
Selection Keys
Beneath the display, there are two selection
keys. Their functions depend entirely on the
guiding texts that appear on the display’s
bottom line. In standby mode, Menu allows
access to the menu functions and Memory to
the memory operations.
List Of Keys
(More detailed information on the use of each
key is given in the appropriate place in the
manual.)
5
È1999 Nokia Mobile Phones. All Rights Reserved.
Español
Press and hold to switch the phone on or
off.
Display Indicators
O
Service indicator. Indicates that you are in a
cellular service area. If it does not appear, you
are outside the service area and the network
cannot serve you.
Roam indicator. Comes on when the NMT
network cannot transmit calls to your phone.
Press
to reregister the phone on the system,
or try to make a call.
ABC
Alpha mode indicator. Shows that the phone is
in alpha mode and letters can be keyed in or
displayed.
and bar (left side of display)
Signal strength indicator. The bar above the
symbol indicates the current signal strength at
the location of your phone. The higher the bar,
the better the signal in the area.
Indicates that you have received a voicemail
message which you can listen to by calling the
voicemail centre number. The
indicator
appears on the display until you call the
voicemail centre number. *
No bar: You are outside the coverage area and
cannot make any calls.
and bar (right side of display)
Charge level indicator. Indicates the charge
level of the battery. The higher the bar,
the better the battery charge.
Indicates that an SMS message has been
received. If the indicator is flashing, there is no
space for new messages. For more space erase
old messages by selecting the Erase option
when you are reading messages. *
Call Forwarding indicator. When the symbol is
displayed, your incoming calls are being
transferred to another number (NMT network
service).
* Note: This function is operational only if the
local network supports it. Check with the
network service operator.
Call-indicator. A call is in progress.
Menu function/memory location indicator.
Indicates which Menu function is active, or
which memory location is currently being used.
Also indicates the place that you are currently
editing when writing a message.
D
Multifrequency tone indicator. When on, it
indicates that numerical information can be
sent for communication purposes. When
flashing, it
indicates that numerical information is being
sent.
COUNTRY CODE (e.g. FI , SV)
Indicates in which country the phone will
operate. If you wish to change the code, see
‘Country’.
6
È1999 Nokia Mobile Phones. All Rights Reserved.
Charging A New Battery
Before you can use your phone, you must fully
charge the battery. A new battery must be
charged for at least 16 hours before being used
for the first time. Attach the battery to the
phone and connect the charger to the bottom of
the phone as described on page 2.
NiMH battery performance will vary with the
condition of the battery. The following
conditions will reduce battery performance:
temperature extremes, poor charging or
discharging practices and improper storage.
Battery Information
When the battery charge is low, the warning
message BATTERY LOW flashes you at regular
intervals.
The NiMH battery’s performance is particularly
limited in temperatures below -10°C and Li-Ion
batteries performance is particularly limited in
temperatures below 0°C. Therefore, the battery
should be kept protected from the cold, e.g., in a
pocket, if it is to be exposed to low temperatures
for long periods.
Finally, the message RECHARGE BATTERY is
displayed. If you do not recharge your battery,
the phone switches off after a while. While
charging is in progress, the battery charge bar
on the display scrolls repeatedly from clear to
full. When the bar stops scrolling and remains at
a full bar, and a message BATTERY FULL appears
on the display, charging is completed. If the
display bar continues to scroll, charging may be
temporarily disrupted (for instance, if the
battery is too hot or too cold).
The approximate charging times, for charging
empty batteries to an 80% capacity, while using
the Fast Travel Charger are:
NiMH batteries:
550 mAh
60 min.
Li-Ion batteries:
Use only batteries approved by the phone
manufacturer, and recharge your battery only
with the chargers approved by the
manufacturer. When a charger is not in use,
disconnect it from the power source. Do not
leave the battery connected to a charger for
longer than a week, since overcharging may
shorten its life. If left unused, a fully charged
battery will discharge itself over time.
400 mAh
50 min.
1500 mAh 180 min.
A trickle charge to full 100% capacity would
require a couple of hours more, but it is not
necessary in normal use.
Temperature extremes will affect the ability of
your battery to charge: it may require cooling or
warming first.
Note that a new NiMH battery achieves full
performance only after two or three complete
charge and discharge cycles!
Note:
- Use the battery only for its intended purpose.
For good operation times when using a NiMH
battery, discharge the battery from time to time
by leaving your phone switched on until it turns
itself off (or by using the battery discharge
facility of any approved accessory for your
phone). Do not attempt to discharge the battery
by any other means.
- Never use any charger or battery which is
damaged or worn out.
- Do not short-circuit the battery. Accidental
short-circuiting can occur when a metallic
object (coin, clip or pen) causes direct
connection between the + and - terminals of
7
È1999 Nokia Mobile Phones. All Rights Reserved.
Español
The battery can be charged and discharged
hundreds of times, but it will eventually wear
out. When the operating time (talk-time and
standby time) is noticeably shorter than normal,
it is time to buy a new battery.
Accessories
the battery (metal strips on the back of the
battery), for example, when you carry a spare
battery in your pocket or purse. Short-circuiting
the terminals may damage the battery or the
connecting object.
An extensive range is available for your phone.
You can select these according to your special
communication needs. For availability of
accessories, check with your local dealer. When
you disconnect the power cord of any accessory,
grasp and pull the plug, not the cord.
- Leaving the battery in hot or cold places, such as
in a closed car in summer or winter conditions, will
reduce the capacity and lifetime of the battery.
Always try to keep the battery
between 15°C and 25°C (59°F and 77°F). A phone
with a hot or cold battery may temporarily not
work, even when the battery is fully charged.
IMPORTANT! Use only accessories approved by
the phone manufacturer. The use of any other
types will invalidate any approval or warranty
applying to the phone and may be dangerous.
- Dispose of used batteries in accordance with
local regulations. Recycle!
Call Forwarding
Call transfer is an NMT system feature. Contact
your system provider for further information.
This feature allows you to transfer incoming
calls to another telephone number.
- Do not dispose of batteries in a fire!
Switching On/Off
As with any other radio transmitting device,
avoid unnecessary contact with the antenna
when the phone is switched on.
Press
Register Recall Function
The NMT network may offer a service called
Register Recall (three-way calling or conference
call). This feature allows you to activate
a second call while you are already making a
call.
to switch the phone on /off.
When turning the phone on, it will carry out a
short self-test, briefly displaying its number, or
the name associated with the number (operator,
dealer or your own name).
This function is activated with the
key. For
further information, contact your local
system provider as the operating instructions
vary from country to country.
When the appropriate country code and O
indicator appear on the display, the phone is
ready for use.
A cellular phone can only make and receive calls
when it is switched on.
Signal Strength
The quality of your call depends on the strength
of the cellular signal in your area. The phone
displays current field strength as a series of bars
on the left-hand side of its display screen - the
more bars, the better the signal in your area.
If the signal is poor, you can try moving the
phone slightly to improve reception. If you are
using the phone in a building, you may find that
reception is better near a window.
8
È1999 Nokia Mobile Phones. All Rights Reserved.
2. Basic Functions
Making A Call
For example, when calling abroad from Finland,
instead of dialling
1 Key in the number (include the area code,
1 Press the
If you make a mistake you can delete the last
number by pressing
or clear the whole
display, by pressing and holding
for half a
second.
2 Press
If you also store all of your domestic phone
numbers with the prefix +, you need not insert
the phone number with the international access
codes when you wish to call these numbers from
abroad.
.
The
indicator and the dialled number will
appear on the display. When the number clears
from the display and a tone is heard, the phone
has transmitted the number.
If the network does not support this function,
a message PREFIX + CANNOT BE USED may
appear on the display. Then, the international
access code must be keyed in.
3 Lift the phone to your ear, and wait until
your call is answered, then speak.
4 When you have finished the call, press
.
Receiving A Call
If the message LOCKED appears on the display,
your phone has been locked. (see ‘Security
Options’). When the phone is locked, calls may
be possible to the emergency number
preprogrammed into your phone (e.g., 112 or
some other official emergency number).
When there is an incoming call, you will hear
the ringing tone and the text CALL appears on
the display. If the ringing tone has been
switched off - the SILENT SERVICE feature has
been selected for privacy or other reasons - the
lights will flash instead and only a short beep
will be heard (see ‘Call Alert’). An easy way to
select the SILENT SERVICE feature ON is
Also, calls to the numbers in memory locations
94, 95, 96, and 97 may be made and all calls
may be received.
(see ‘Memory’)
to press Menu and
To redial the last number called:
1 Press
key twice to insert
a + character.
.
If the caller can be identified (if the network
supports this function), the caller’s phone
number (or the name, if it is stored in the
memory) appears on the display together with
the text CALLING.
twice.
International Calls
Note: This function is operational only if the
local network supports it. Check with the
network service operator.
Note: This function, which enables the caller to
be identified, is operational only if the local
network supports it. Check with the network
service operator.
When calling abroad a + character can be
inserted in front of the country code instead of
the international access code.
If the call is diverted from another number, the
indicator appears on the right-hand side of
the third display row. If the caller cannot be
9
È1999 Nokia Mobile Phones. All Rights Reserved.
Español
990 010 81 123 456
+ 010 81 123 456 can be used.
even if you are making a local call).
1-Touch Dialling
identified and the call is diverted, the message
DIVERTED CALL appears on the display.
1
Press
Keys 1-9 dial predefined numbers stored in
memory locations 1-9. Note: before you can use
the 1-Touch Dialling function, you must first
store a number in one of the locations 1-9 and
make sure you have switched the 1-Touch
Dialling function On using the phone’s Menu
Facility (see Menu 4 3).
to take the call.
When you have finished speaking, press
.
If you don’t answer the call, the message
1MISSED CALL appears on the display. If the
network supports the clock function and
provides the right time for the phone, the time
when a call was missed or received can be seen
similarily like the number of that call. To check
the time:
1 Press
Note: store the voice mailbox number into
memory location 1 (see Menu 1 4 1), if you wish
to use 1-Touch Dialling function for listening
your voicemail messages. The memory location
1 can be used only for listening voicemail
messages when the 1-Touch Dialling function is
used.
to switch your phone into alpha
mode.
During the call, the
on.
indicator will remain
Last Number Redial
Adjusting The Earpiece Volume
The phone automatically stores the last 10
numbers (and associated names) that you have
called or tried to call. To scroll the 10 numbers
last called:
The volume of the earpiece can be
adjusted with the toggle key on
the side of the phone.
1 Press
2 Press
3 Press
. The last number called appears.
4 Press
to make a call to the number
to clear the display.
or
to scroll through the
other nine last numbers called.
Lowest volume
Highest volume
displayed.
Note: In Menu 0 0 3 you can select (ERASE ALL
RECENT CALLS) if you want the last numbers
called to be cleared from the memory.
Any Key Answering
The phone is equipped with an any key
answering option (press any key except
to
answer a call). If you receive an incoming call
at the same time as you are keying in a number,
the any key answering feature becomes active
after the first ringing tone. Any key answering is
not active when the keypad is locked.
Keypad Locked
The phone’s keypad can be locked to prevent
accidental keypresses, e.g. when the
phone is in your pocket.
Note: When the keypad is locked, calls may be
possible to the emergency number
preprogrammed into your phone (e.g., 112 or
some other official emergency number).
10
È1999 Nokia Mobile Phones. All Rights Reserved.
Muting The Microphone
To lock the keypad:
Press Menu and
.
The muting feature allows you to switch off the
phone’s microphone, so you can have a private
conversation with other people during a call.
1 Press Unlock and
.
Press the Menu selection key and hold it down
briefly to mute the microphone. The MUTED
message is shown. Press and hold the Menu key
again to unmute the microphone. MUTE OFF is
shown. The call can then be continued in the
usual way.
The KEYPAD LOCKED message appears on the
display. When any key is pressed the Press
Unlock and then * message is shown.
To answer a call when the keypad is locked,
press
.
During a call, the keypad is not locked, and you
can operate the phone as usual. When the
keypad is unlocked, the KEYPAD ACTIVE message
appears, and the phone starts to operate in the
usual way.
11
È1999 Nokia Mobile Phones. All Rights Reserved.
Español
1
To unlock the keypad:
3. The Memory
(before the ABC indicator flashes). If the
character displayed is not the character you
want, press the key again (before the ABC
indicator flashes) and if you still don’t have
the character you want, press the key a third
time (before the ABC indicator flashes).
If you miss the letter you want, press the key
repeatedly until the letter you require
reappears.
The phone has 97 standard memory locations
which allow you to store information as follows:
• Phone numbers of up to 30 digits each
• Names of up to 20 letters each
Numbers and letters cannot be displayed at the
same time. You can switch between numerical
and alpha modes by pressing
.
Memory location 99 stores the phone’s own
number and a welcoming message (max. 20
letters). You can change the number and edit
the welcoming message (see the section
‘Storing Information’) .
Note: rapid key presses may activate other
characters.
3 Select further letters in the same way.
You can select upper case or lower case letters
by pressing and holding the key for a few
seconds. Additional characters can be displayed
(by repeatedly pressing the key) as follows:
Memory location 98 holds the phone’s number
with a country code prefix. The location cannot
be edited.
Memory location 00 is the so-called scratchpad
memory (see ‘Scratchpad Memory’) where you
can store information temporarily during a call.
This 00 memory location is cleared when the
phone is switched off.
1-key - ? ! 1 , . : “ ‘ $ £ ( ) / % @
2-key A B C 2 Ä Å à AE Ç
3-key D E F 3 è É
Memory location 0 is for the last number called.
4-key G H I 4 ì ¡
When the phone is locked, calls may be possible
to the emergency number preprogrammed into
your phone (e.g., 112 or some other official
emergency number).
5-key J K L 5
Also, calls to the numbers in memory locations
94, 95, 96, and 97 may be made and all calls
may be received.
8-key T U V 8 Ü ù
6-key M N 6 Ñ
7-key P R S 7 ß
9-key W X Y 9
0-key O Q Z 0 Ö Ø ò
#-key a blank space
Keying In Names
1 Press
*-key * +
. The ABC indicator will appear on
the display indicating that the phone is in
the alpha mode and that when you press a
key, letters will appear instead of numbers.
4 Exit letter selection by pressing
again.
Storing Information
2 Select the key labelled with the letter you
1 Key in the area code and number and, (in the
want. Each key is labelled with three letters,
except for the MN 6 key, so press the key
labelled with the letter you want once
alpha mode) the name (or key in first the
name and then the number).
12
È1999 Nokia Mobile Phones. All Rights Reserved.
2 Press Memory, Save. The phone will ask you
Or:
1 Press and hold to clear the display.
2 Press Memory, Save, Save. The phone will
to specify a memory location number SAVE
IN LOCATION.
3 Press OK if you want the information stored
ask you to specify a memory location number
Location to be erased:
in the first available memory location.
Otherwise, key in a memory location number.
want to clear and press Erase. The message
ERASE ? and the name or number and the
memory location number will appear.
confirming that the information has been
stored in the memory location specified.
4 Press Erase. The message ERASED will be
If you try to store only a name or a number, the
phone asks for the missing name or number.
displayed briefly, confirming that the
memory location has been cleared.
Key the required name or number in, and
confirm it by pressing Save, OK. If you don’t
wish to have a name or number, just confirm
with Save, OK.
Recalling Information By Memory
Location Number And By Name
1 Press Memory.
2 Key in the name or its first letters.
3 Press Find. A list of names appears.
4 You can scroll through the list with the
If you try to store information in a memory
location that is already being used or with a
name that is already being used, the phone will
display the memory location number and the
REPLACE? message text.
If you want to replace the existing information,
press OK.
and
keys.
5 Press Options to get the following options:
If you do not want to replace the existing
information, either press
or Quit. The
information you tried to store will then reappear
on the display, and you can store it in a different
memory location or with a different name, as
described above.
Move, Show, Edit, Erase.
6 You can scroll through the list with the
and
keys.
7 Press Show to view the number stored with
the name.
Or:
1 Press Memory.
2 Key in the name or its first letters.
3 Press Find to get the name on the display.
4 Press Options, Erase. The message ERASE ?
1 Press Memory,
5 Press Erase. The message ERASED will be
3 Press ABC if you want to check the name
Clearing Information
, Find. The phone asks
you to specify the memory location with the
message Location number:
2 Key in the memory location number, (e.g. 2)
and press Find. The telephone number stored
in the memory location will appear on the
display.
and the name or number and the memory
location number will appear.
stored with the number.
displayed briefly, confirming that the
memory location has been cleared.
13
È1999 Nokia Mobile Phones. All Rights Reserved.
Español
3 Key in the number of the memory location you
4 The message SAVED will appear on the display,
Scratchpad Memory
(If no name was stored with the number, the
display will be blank). Press
again if you
want to return to the number display.
4 Call the number by pressing
In addition to its 97 permanent memory
locations, the phone has one short-term
memory location (00), where a telephone
number (and a name ) keyed in during a call is
temporarily stored. The number is cleared from
memory when the phone is switched off.
.
Scanning For A Number
1 To scan the entire memory, use the
1 Key in a number (or a name in alpha mode)
or
keys to display the contents of the
memory locations in use. If you have just
recalled a memory location by number, the
scanning will start from that memory
location.
during a call. The phone will automatically
store the number or name in the scratchpad
memory location when you end the call. Any
information previously stored in the
scratchpad memory will be lost.
2 When you find the number you want, press
To move a number from the scratchpad memory
location to a permanent memory location, recall
it: 00 Memory, Find. Store the information as
described in Storing Information.
to make the call.
Scanning For A Name
1 Press
2 Press
(When the location 00 is not in use, the phone’s
SIS security reference code can be checked
there. The reference code is used by the NMT
network to register your phone.)
.
to display the first and
to
display the last name in alphabetic order. To
display the other stored names, press the
arrow keys until you find the name you are
looking for.
Number Of The Phone
To check the number of your phone:
1 Key in 99 (memory location where the phone
number is stored).
2 Press Memory, Find.
14
È1999 Nokia Mobile Phones. All Rights Reserved.
4. The Menu Facility
The Menu Shortcut
The menu allows you to check and change the
settings for certain functions, e.g. whether they
are currently switched on or off. You can scroll
through the menu with the
or
keys to
enter a function or to use a shortcut by pressing
the Menu key and number of the desired menu
For example, to enter Menu 0, press Menu and
then 0. Similarily, to enter the submenu 0 1,
you can press Menu and then keys 0 and 1.
(see instructions below).
Note: in Menu functions 0, 1, 2, 3, 4 and 6 you
can enter the submenus by using the shortcut,
i.e. by pressing the number of the submenu
option.
The Menu Method
1 Press the Menu selection key.
2 Use either or keys to scroll forward
See the picture on the following page for a list
of menus and submenus.
or backward through the list of functions
until you find the one you want.
3 Press Select when you reach the function
you wish to activate.
4 Use
or
to check the current setting
of the function or to scroll through
submenus.
5 Select the setting you wish to change with
the Select key. Use
through the options.
or
to scroll
6 Press the OK selection key to store the new
setting in memory (the one which is shown
on the dark background).
You can press the Quit selection key, at any
time, to quit the menu function and go back to
the previous Menu level.
Note: if you choose not to change any setting,
you can exit the Menu function with the Quit
or
keys.
15
È1999 Nokia Mobile Phones. All Rights Reserved.
Español
1 Press the Menu selection key.
2 Press the number of the desired menu.
Menu 0
Menu 1
CALL REGISTER
MESSAGES
0 RECENT CALLS
0 DIALLED CALLS
1 RECEIVED CALLS
2 MISSED CALLS
3 ERASE ALL RECENT
CALLS
1 CALL DURATION
0 LAST CALL
1 OUTGOING CALLS
2 INCOMING CALLS
3 RESET COUNTERS
0 READ MESSAGES
1 WRITE MESSAGES
2 LISTEN TO VOICE
MESSAGES
3 RETRIEVE MESSAGES
4 MESSAGE SETTINGS
Menu 2
PHONE SETTINGS
0 COUNTRY
1 LIGHTS
2 KEYPAD TONES
3 LANGUAGE
4 BATTERY CARE
5 CLOCK
Menu 3
SECURITY OPTIONS
0 PHONE LOCK
1 CHANGE LOCK CODE
2 CALL BARRING
Menu 4
CALL SETTINGS
0 RINGING TONE
1 RINGING VOLUME
2 CALL ALERT
3 1-TOUCH DIALLING
4 AUTOMATIC ANSWER
Menu 5
SEND DTMF TONES
Menu 6
ALARM OPTIONS
Menu 7
PREFIX EDITOR
0 MESSAGE CENTRE
NUMBER
1 VOICE MAILBOX
NUMBER
2 ENCRYPTION KEY
3 ENCRYPTION
0 COUNTDOWN TIMER
1 ALARM CLOCK
16
È1999 Nokia Mobile Phones. All Rights Reserved.
Menu Functions
network features, rounding-off for billing, and
so forth.
You can enter all the Menu functions described
on the following pages in the same way as in
examples CALL REGISTER (Menu 0) or
MESSAGES (Menu 1).
Your phone can also be used for sending and
receiving SMS messages. This function is a
network service and operational only if the
network supports it.
Call Register (Menu 0)
With Menu function 0, you can get information
about your recent calls and their duration.
indicates that an SMS message has been
received.
1 Press Menu 0 to enter the Call Register Menu.
2 Scroll between submenus (Recent Calls and
Call Duration) with the
and
keys.
3 Press Select key to enter the desired
Read Messages (Menu 1 0)
To read a message:
1 Press Menu 1 0 to enter
the ‘Read messages’ submenu 1 0.
2 A new message or the last received message
submenu.
To leave the Menu function, press Quit.
is shown on the display. Use the
keys to read the message.
Recent Calls (Menu 0 0)
and
3 With Options selection key you get a list
With Menu function 0 0 you can view the
automatically stored numbers of all dialled,
received and missed calls and you may choose to
clear all these numbers from the phone’s memory.
(Send, Read next, Erase, Reply, Use number,
Edit). Use the
and
keys to scroll
through these options.
1 Scroll through the submenus (Dialled Calls,
4 To select an option, e.g. to Erase a message,
press OK selection key.
5 Press Quit to exit the function.
Received Calls, Missed Calls, Erase All Recent
Calls) with the
and
to accept the
desired setting.
2 Press Select to list or clear all recent calls.
If you want to reply to a message use the Reply
option, under Options selection key. You can
also use the ‘Use number’ option to store the
number in memory if you wish to reply later.
To leave the Menu function, press Quit.
Call Duration (Menu 0 1)
If the
indicator is flashing, there is no space
for new messages. For more space, erase old
messages as described above.
With Menu function 0 1 you can check the
duration of your calls and reset the call counters.
1 Scroll through the submenus (Last Call,
Write Messages (Menu 1 1)
Outgoing Calls, Incoming Calls, Reset
Counters) with the
and
keys.
To write and send a message:
1 Press Menu 1 1 to enter
the ‘Write messages’ submenu 1 1.
2 Write the message. It can be a maximum of
Note: To reset the counters you need the fourdigit security code, which is included in the sales
package.
160 characters.
Note: the actual time invoiced for calls by your
service provider may vary, depending upon
17
È1999 Nokia Mobile Phones. All Rights Reserved.
Español
Messages (Menu 1)
3 With Options selection key you get a list
(Save, Send, Erase). Use the
and
to scroll through these options.
If the voice mailbox number is not stored in the
phone’s memory, a message NO VOICE MAILBOX
NUMBER will appear on the display. Use
submenu 1 4 1 to store the voice mailbox
number.
keys
4 To select an option, e.g. to Send a message,
press the OK selection key.
5 The phone will ask for recipient’s number
(Number:).
6 Use the and keys if you wish to get
a number from the phone’s memory.
7 With the OK selection key the selection keys
Own and Other appear on the display.
8 Press Own key if you want the phone to use
Retrieve Messages (Menu 1 3)
This menu function is needed only when you are
in a country where the local network operator
does not support the SMS. It allows you to
retrieve your SMS messages from your own
operator’s service centre by placing a call to
your home systems centre.
1 Press Menu 1 3 to enter the ‘Retrieve
your own message centre number, which
was stored in menu 1 4 0.
messages’ submenu.
9 Press Other if you want to key in other
After successful retrieval of a message, the
indicator appears on the display.
message centre number. This number can
also be retrieved from the memory, if it was
stored there.
Note: if you use a message centre other than
yours, the encryption is automativally
deactivated and later activated again. (see
Menus 1 4 2 - 1 4 3).
If the message RETRIEVAL FAILED appears on the
display, you can try to retrieve messages later.
If there are no messages in the SMS service
centre, the NO MESSAGES text appears on the
display.
When writing the message you can use the
following:
Message Settings (Menu 1 4)
• the
-key to switch between numeric and
alpha modes
•
-key to delete characters
•
-key to insert a space and
•
and
keys to move the cursor to the
left or right.
The
indicator shows the place which you
are currently editing when you are writing a
message.
Message Centre Number (Menu 1 4 0)
To send or retrieve SMS messages you must key
in the message centre number by using this
submenu. Your network operator provides you
with the message centre number when you
subscribe to the SMS (Short Message Service).
1 Press Menu 1 4 0 to enter the ‘Message
centre number’ submenu.
2 Key in the phone number of the message
Listen To Voice Messages (Menu 1 2)
centre.
3 Press the OK selection key.
Note: This function is operational only if the
local network supports it. Check with the
network service operator.
Voice Mailbox Number (Menu 1 4 1)
If you wish to use Menu 1 2 (to listen to the
messages left in your voice mailbox or to clear
the
indicator from the display) you have to
With this menu function you can call your voice
mailbox and listen to your voice messages.
1 Press Menu 1 2 to enter the ‘Listen to
voicemessages’ submenu.
18
È1999 Nokia Mobile Phones. All Rights Reserved.
Phone Settings (Menu 2)
store the voice mailbox number in the phone’s
memory by using this submenu function.
1 Press Menu 1 4 1 to enter the ‘Voice
There are 18 selectable country codes in the
phone’s memory. If you go to another country
using the NMT network and wish to use your
phone there, you must select the correct
country code (FI, NO, SE, DK, etc.).
2 Key in the voice mailbox number provided by
the local network operator.
3 Press the OK selection key.
Encryption Key (Menu 1 4 2)
With this menu function you can enter the
encryption key which is used during SMS. To
ensure the proper functioning of the SMS, you
must enter the encryption key, if your network
operator provides you with one when you
subscribe to the SMS.
To change the country code:
1 Press 2 0 to enter the Country submenu.
The phone will display the code it is currently
using.
2 Use the and keys to select a new
code from the list.
3 Press OK to confirm a setting.
(Note: not all operators provide a key; some use
the key preprogrammed into your phone, in
which case you will not need a separate
encryption key).
If your operator provides you with a key:
Setting The Lights On/Off (Menu 2 1)
The phone’s keypad and display are fitted with
lights to make them easy to read.
1 Press Menu 1 4 2 to enter the ‘Encryption
key’ submenu.
Keypad Tones (Menu 2 2)
provided by the network operator.
You hear a key tone each time you press a key.
You can select a key tone you prefer or to turn
the key tones off.
2 Enter the ten-digit encryption key
3 Press the OK selection key.
Note that when the key tones are switched off,
DTMF tones can still be sent. Also note that
when you have switched off the ringing tone no
key tones will be heard either.
If your operator has not provided you with the
key and your phone uses a preprogrammed key,
enter * with Menu 1 4 2.
Encryption (Menu 1 4 3)
This menu function enables you to select
encryption On or Off by using Select and the
arrow keys.
Language Select (Menu 2 3)
You can select a language for the display texts.
Battery Care (Menu 2 4)
You can switch the phone’s battery care On or
Off. When it is switched On, the battery will be
prevented from charging continuously.
When the battery capacity has decreased to the
shutdown level, the setting changes
automatically to the BATTERY CARE OFF state
and charging can begin again once the phone is
connected to a charger.
19
È1999 Nokia Mobile Phones. All Rights Reserved.
Español
Country (Menu 2 0)
mailbox number’ submenu.
Clock (Menu 2 5)
Change Lock Code (Menu 3 1)
This menu function allows you to check the time
on your phone, but only if the network supports
the function. Time is shown on the third display
row when the phone is in idle mode, conversation
mode or when the phone’s keypad is locked.
To change the lock code of your phone:
Enter Menu 2 5 and use the
and
to switch the function On or Off.
2
1 Press Menu 3 1 to enter the Change Lock
keys
Code submenu. The phone asks you to key in
the five-digit security code supplied by your
dealer (Security code:).
Key in the security code and press OK.
If you keyed in an incorrect code, the message
CODE ERROR appears. After you have given the
correct security code, the phone asks you to key
in the new lock code (Enter new lock code:).
Security Options (Menu 3)
3 Key in the new four-digit lock code and press
Phone Lock (Menu 3 0)
The phone has an easy-to-use security system. It
can be locked by using a four-digit lock code to
prevent unauthorised use. If you forget your lock
code, you can change it by using the Menu 3 1
function.
OK.
The code must only consist of digits: other
characters (e.g. *, #) and letters are not allowed.
The message SAVED will appear to confirm that
the new lock code has been set.
Note: to change the lock code, you must know
the security code supplied by your dealer. When
the phone is locked, calls may be possible to the
emergency number preprogrammed into your
phone (e.g. 112 or some other official
emergency number).
Call Barring (Menu 3 2)
This menu function restricts calls to certain,
selected numbers, e.g. international calls.
You need to know the phone’s five-digit security
code to activate the function.
Also, calls to the numbers in memory locations
94, 95, 96, and 97 may be made and all calls
may be received. Access to memory is also
prevented.
1 Press 3 2 to enter the Call Barring submenu.
The options Activate, Cancel and Status will
appear on the display. The phone asks you to
key in the security code (Security code:).
To lock the phone:
1 Press Menu 3 0 to enter the PHONE LOCK
2 Key in the security code and press OK.
3 The phone asks you to enter the area code or
submenu. The options Activate, Cancel,
Status will be displayed. The phone will ask
you to key in the lock code (Enter lock code:)
if you choose options Activate or Cancel.
prefix of a phone number you want to be
barred (Number:).
4 Key in the number and press OK.
5 The options Activate, Cancel and Status
appear on the display.
6 Use the and keys to select the
2 Key in the four-digit code. It will appear on
the display as four stars.
3 Press OK.
If you keyed in an incorrect code, the message
CODE ERROR appears. To exit the function, press
or Quit. Unlocking the phone is carried out
as described above.
appropriate option and press OK to accept
the option.
The option Status shows the currently barred
numbers (BARRING ACTIVE ON NUMBERS:)
20
È1999 Nokia Mobile Phones. All Rights Reserved.
You can enter several, maximum of 30 numbers,
at the same time. Press
to separate the
different numbers.
a short beep. The message SILENT is displayed in
standby mode.
Note: The vibrating options operate only when a
vibra battery is used.
For example, 990*9700 restricts the calls to any
numbers beginning with 990 and 9700.
You can enable the 1-9 keys to make a call to a
number stored in one of those particular
memory locations. When the 1-Touch Dialling is
selected as On, you can call a number in memory
locations 1-9 simply by pressing the desired
number key.
Note: If you wish to use the 1-Touch Dialling
function for listening your voice mail, you have
to store the voice mailbox number into the
memory location 1 and select the 1-Touch
Dialling as On. Then you can call your voice
mailbox number by pressing and holding
number 1. You can use memory location 1
together with 1-Touch Dialling only for
checking voicemail messges.
Call Settings (Menu 4)
With submenus 4 0- 4 4 you can select
different call settings, such as ringing tone,
ringing volume, call alerting type and dialling
and answering modes.
Ringing Tone (Menu 4 0)
The phone is provided with 12 types of ringing
tones. To select the tone you like best, scroll
between different ringing tone types with keys
and
. Use OK selection key to select the
ringing type you prefer.
Automatic Answer (Menu 4 4)
This function is used in connection with a
headset and with the Handsfree-facility of the
carkit. You can select the automatic answer to
be either On/ Off with the Select key.
Ringing Volume (Menu 4 1)
You will hear the ringing tone when there is an
incoming call. There are 4 different levels of
tone volumes you can choose from.
Note: if the SILENT SERVICE function is On,
AUTOMATIC ANSWER function is not available.
Call Alert (Menu 4 2)
Send DTMF Tones (Menu 5)
This allows you to select the desired type of alert
from the following options:
You can transmit numeric data as a series of
tones, for example, to check your answering
machine.
Ring & Vibr.: Ringing tone normal and with the
vibrator.
You can either send DTMF (Dual Tone Multi
Frequency) tones through the phone’s DTMF
tone generator, or you can use the MFT service
of the NMT system. Sending DTMF tones by the
MFT service is more reliable in poor transmission
conditions.
Ringing: Only the ringing tone is active.
Vibrate: Only the vibrator is active, all ringing
tones are inactive.
Silent: All tones are turned off, only the lights
blink and a message indicating a call appears on
the display during an incoming call and there is
21
È1999 Nokia Mobile Phones. All Rights Reserved.
Español
1-Touch Dialling (Menu 4 3)
Note: when calls are barred, calls may be
possible to certain emergency numbers in some
networks (e.g., 112 or some other official
emergency numbers).
I Manual DTMF Dialling
1 Make the call in the usual way (see ‘Making
a Call’).
2 Key in the numbers onto the display. Each
When you store the DTMF numbers in the
memory, you can add pause characters in the
middle of the string of digits. It may be that your
answering machine requires a pause between
your password and the code for “play messages”.
II Manual DTMF Dialling through the MFT Service
To create a pause of 2.5 seconds in the string,
press the
key three times (shown as p on
the display).
number is sent directly as a DTMF tone. The
length of the tone depends on how long you
press the key.
1 Make the call in the usual way.
2 Press Menu 5 to select the MFT service. The
D indicator will appear on the display.
3 Key the numbers onto the display. Each
Alarm Options (Menu 6)
Countdown Timer (Menu 6 0)
This menu function is a personal reminder. After
a certain period of time, determined as
described in steps 1-4 , you will hear an alerting
tone and the message COUNTDOWN TIME UP!
appears on the display.
number is directly sent as a DTMF tone. The
D indicator flashes as each tone is sent.
4 Press the Stop selection key to switch off the
MFT service.
III Automatic DTMF Dialling through MFT
Service
To set the countdown timer:
1 Press Menu 6 0. Activate, Cancel and Status
This feature allows you to recall a number from
a memory location and send it as a complete
number. (Check that you have the number
stored in the memory).
will appear on the display.
2 Press OK to select an option. The message
’Set timer:’ appears.
1 Make the call in the usual way.
2 Press Memory, Find to recall the number
3 Use the number keys to set the desired
countdown time.
4 Press OK to accept the set countdown time.
from the memory location. Or use the
and
keys to scroll through the memory
locations until you find the right number.
To stop the phone alerting and to clear the
message from the display after the countdown
time is up:
3 Press Quit.
4 Press Menu 5 to activate the MFT service.
1 Press the OK key.
The number stored in the memory location is
automatically sent as DTMF tones (the D
indicator flashes during transmission.)
With the ‘Status’ option, you can check if the
timer alarm is set and how much countdown
time is left.
If the D indicator remains on after the
transmission, use the Stop selection key to
return to normal operation.
Alarm Clock (Menu 6 1)
You can set the alarm on your phone, if it gets
the right time from the local NMT 450. To set
the alarm:
You cannot speak into the phone when the MFT
service is on. Even if the keytones are turned off,
the DTMF tones can still be sent.
1 Press Menu 6 1. Activate, Cancel and Status
Placing a Pause between DTMF Tone Strings.
will appear on the display.
22
È1999 Nokia Mobile Phones. All Rights Reserved.
2 Press OK to select an option. The message
Prefix Editor (Menu 7)
’Set alarm time:’ appears.
3 Use the number keys to set the desired alarm
A number prefix can be added with the front
editor, which enables the user to add numbers
to the beginning of the phone number. Numbers
will be modified starting at the cursor location.
time.
4 Press OK to accept the set time.
1 Recall number from shortcode memory
To stop the phone alerting and to clear the
message ALARM! from the display after the
alarm time is up:
2 Press Quit.
3 Start the front editor by pressing Menu 7.
4 Use the key to delete the numbers from
1 Press the OK key.
With the ‘Status’ option, you can check if the
timer alarm is set and what time will the alarm
time be up.
the beginning of the displayed number.
5 Add the desired numbers by keying them
If the network does not provide the time to your
phone, a message TIME NOT AVAILABLE appears
on the display when you try to set the alarm
time.
onto the display.
If you leave the Menu function with the Quit
key, the display will be cleared. The OK key will
return to the normal editing mode.
Note: the alarm time will be stored into phone’s
memory and if the ALARM CLOCK function is
activated, the phone will alert again at the same
time next day.
23
È1999 Nokia Mobile Phones. All Rights Reserved.
Español
location: Press Memory, Find.
Care and Maintenance
Important Safety Information
Your phone is a product of superior design and
craftsmanship and should be treated with care.
The suggestions below will help you to fulfill any
warranty obligations and to enjoy this product
for many years.
Traffic Safety
Do not use a hand-held telephone while driving
a vehicle. If using a hand-held phone, park the
vehicle before conversing. Always secure the
phone in its holder; do not place the phone on
the passenger seat or where it can break loose
in a collision or sudden stop.
Keep the phone and all its parts and accessories
out of the reach of small children’s.
Keep the phone dry. Precipitation, humidity, and
liquids contain minerals that will corrode
electronic circuits.
The use of an alert device to operate a vehicle’s
lights or horn on public roads is not permitted.
Do not use or store the phone in dusty, dirty
areas; its moving parts can be damaged.
Remember, road safety always comes first!
Do not store the phone in hot areas. High
temperatures can shorten the life of electronic
devices, damage batteries, and warp or melt
certain plastics.
Operating Environment
Remember to follow any special regulations in
force in any area and always switch off your
phone whenever it is forbidden to use it, or
when it may cause interference or danger.
Do not store the phone in cold areas. When the
phone warms up (to its normal temperature),
moisture can form inside the phone, which may
damage electronic circuit boards.
Operation of any radio transmitting equipment,
including cellular phones, may interfere with
the functioning of inadequately protected
medical devices. Consult a physician or the
manufacturer of the medical device if you have
any questions. Other electronic equipment may
also be subject to interference.
Do not attempt to open the phone. Non-expert
handling of the phone may damage it.
Do not drop, knock or shake the phone. Rough
handling can break internal circuit boards.
As with other mobile radio transmitting
equipment, users are advised that for the
satisfactory operation of the equipment and for
the safety of personnel, it is recommended that
the equipment should only be used in the
normal operating position.
Do not use harsh chemicals, cleaning solvents,
or strong detergents to clean the phone. Wipe it
with a soft cloth slightly dampened in a mild
soap-and-water solution.
If the phone or any of its accessories are not
working properly, take them to your nearest
qualified service facility. The personnel there
will assist you, and if necessary, arrange for
service.
Users are advised to switch off the phone when
at a refuelling point (service station). Users are
reminded of the need to observe restrictions on
the use of radio equipment in fuel depots (fuel
storage and distribution areas), chemical plants
or where blasting operations are in progress.
Do not store or carry flammable liquids, gases or
explosive materials in the same compartment as
the phone, its parts or accessories.
24
È1999 Nokia Mobile Phones. All Rights Reserved.
Electronic fuel injection systems, electronic
anti-skid braking systems, electronic cruise
control systems and other electronic systems
can malfunction due to a lack of protection
from radio signals. Check regularly that all
cellular phone equipment in your vehicle is
mounted and operating properly.
When making an emergency call, remember to
give all the necessary information as accurately
as possible. Remember that your cellular phone
may be the only means of communication at the
scene of an accident - do not cut off the call
until given permission to do so.
Switch off your cellular phone when in an aircraft.
The use of cellular telephones in an aircraft may be
dangerous to the operation of the aircraft, disrupt
the cellular network and is illegal.
Troubleshooting
If the power does not come on or stay on: Make
sure the battery is properly installed in the
phone. Make sure the contacts are clean on the
battery and the charging stand. The battery
charge may be too low for operation. Listen for
the low battery warning tones. If the power
comes on but the phone does not work: check
the O and
indicators; you might be out of
the cellular service range.
Failure to observe these instructions may lead to
suspension or denial of cellular telephone
services for the offender, or legal action or both.
Emergency Calls
This phone, like any cellular phone, operates
using radio signals, cellular and landline
networks, as well as user-programmed
functions which cannot guarantee connection
in all conditions. Therefore, you should never
rely solely upon any cellular phone for essential
communications (e.g. medical emergencies).
Remember, to make or receive any calls the
phone must be switched on and in a service area
with adequate cellular signal strength.
Emergency calls may not be possible on all
cellular phone networks or when certain
network services and/or phone features are in
use. Check with local cellular service providers.
To make an emergency call:
1 If the phone is not on, switch it on.
2 Press and hold the key for several
seconds to ready the phone for calls.
3 Key in the emergency number for your
present location (e.g. 112 or some other
official emergency number).
Emergency numbers vary by location.
4 Press the
key.
25
È1999 Nokia Mobile Phones. All Rights Reserved.
Español
If certain features are in use (Keyguard, Locking,
Call Barring, etc.), you may first need to turn
those features off before you can make an
emergency call. Consult this document and your
local cellular service provider.
Only qualified personnel should install or service
the phone in a vehicle. Faulty installation or
service may be dangerous and may invalidate
any warranty which may apply to the unit.