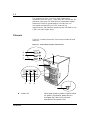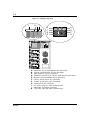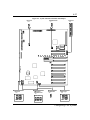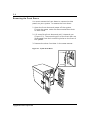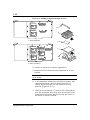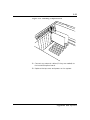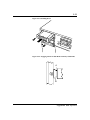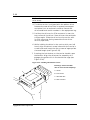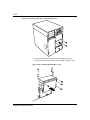
1
User’s Guide
``````````````()
Server HX4100/HX6100
■
■
■
■
■
■
■
■
■
■
■
■
■
■
■
■
■
■
■
■
■
■
■
■
■
■
■
■
■
■
■
■
■
■
■
■
■
■
■
■
■
■
■
■
■
■
■
■
■
■
■
■
■
■
■
■
■
■
■
■
■
■
■
■
■
■
■
■
■
■
■
■
■
■
■
■
■
■
■
■
■
■
■
■
■
■
■
■
■
■
■
■
■
■
■
■
■
■
U.S. Government restricted rights. Use, duplication, or disclosure by the Government is subject to
restrictions as set forth in subparagraph (c) (1) (ii) of the Rights in Technical Data and Computer Software
clause at DFARS 252.227-7013 (Oct. 1988); or if provided under a contract or subcontract with NASA or a
civilian agency of the Government, to the restrictions set forth in such contract or subcontract. PB NEC
Corporation, 1 Packard Bell Way, Sacramento, CA 95828 U.S.A.
.
REVIEW DRAFT
2/97
Copyright © 1998 Packard Bell NEC, Inc.
Trademarks
Adaptec is a registered trademark of Adaptec Corporation
INTEL is a registered trademark of Intel Corporation
Mylex is a trademark of Mylex Corporation
MS-DOS is a registered trademark of Microsoft, Inc.
Pentium is a registered trademark of Intel Corporation
Other product and company names are registered trademarks and trademarks of their respective holders.
Printed in the United States of America.
PN: 904468-01
4/98
Safety Notices
!
Caution: To reduce the risk of electric shock which could cause personal injury, follow all safety
notices. The symbols shown are used in your documentation and on your equipment to indicate safety
hazards.
Warning: Lithium batteries can be dangerous. Improper handling of lithium batteries may result in an
explosion. Dispose of lithium batteries as required by local ordinance or as normal waste if no local
ordinance exists.
Warning: The detachable power supply cord is intended to serve as the disconnect device.
Warning: This equipment has up to three 3-wire, grounded power cords. To prevent electrical hazards,
do not remove or defeat the ground prong on the power cords. Replace the power cord if it gets
damaged. Contact your dealer for an exact replacement.
In the U.S.A. and Canada, the power cord must be a UL-listed detachable power cord (in Canada,
CSA-certified), type ST or SJT, 16 AWG, 3-conductor, provided with a molded-on NEMA type
5-15 P plug cap at one end and a molded-on cord connector body at the other end. The cord length
must not exceed 9 feet (2.7 meters).
Outside the U.S.A. and Canada, the plug must be rated for 250 VAC, 10 amp minimum, and must
display an international agency approval marking. The cord must be suitable for use in the end-user
country. Consult your dealer or the local electrical authorities if you are unsure of the type of power
cord to use in your country. The voltage change is auto-sensed by the power supply.
Warning: Under no circumstances should the user attempt to disassemble the power supply. The
power supply has no user-replaceable parts. Inside the power supply are hazardous voltages that can
cause serious personal injury. A defective power supply must be returned to your dealer.
Safety Notices for Users Outside of the U.S.A. and Canada
PELV (Protected Extra-Low Voltage) Integrity: To ensure the extra-low voltage integrity of the
equipment, connect only equipment with mains-protected electrically-compatible circuits to the
external ports.
Remote Earths: To prevent electrical shock, connect all local (individual office) computers and
computer support equipment to the same electrical circuit of the building wiring. If you are unsure,
check the building wiring to avoid remote earth conditions.
Earth Bonding: For safe operation, only connect the equipment to a building supply that is in
accordance with current wiring regulations in your country. In the U.K., those regulations are the IEE.
xxx
Care and Handling
Use the following guidelines to properly handle and
care for your system.
Protect the system from extremely low or high temperatures. Let
the system warm (or cool) to room temperature before using it.
Keep the system away from magnetic forces.
Keep the system dry. Do not wash the system with a wet
cloth or pour fluid into it.
Protect the system from being bumped or dropped.
Check the system for condensation. If condensation
exists, allow it to evaporate before powering on the
system.
Keep the system away from dust, sand, and dirt.
Bill Graham
Contents
Chapter 1
Introduction
Chapter 2
Features
Chapter 3
Setup
Chapter 4
Configuring Your System
Chapter 5
Upgrades and Options
Chapter 6
Problem Solving
Appendix A
Cabling
Appendix B
Memory Configurations
Glossary
Equipment Log
Bill Graham
Chapter 1
Introduction
Contents
Organization ........................................................................... 1
Notational Conventions ............................................................ 3
Bill Graham
1-1
This guide tells you how to configure and upgrade your
server. Its goal is to familiarize you with your server
and the tasks necessary for system configuration and
upgrading.
Organization
Chapter 1
Introduction Introduces you to the purpose and
structure of this guide.
Chapter 2
Features Gives you an overview of the server and
describes major system components.
Chapter 3
Setup Tells you how to select a site, unpack the
system, get familiar with the system, make cable
connections, and power on the system.
Chapter 4
Configuring Your System
Tells you how to configure
the system and provides instructions for running the
Resource Configuration Utility (RCU), the BIOS Setup
Utility and the SCSISelect Utility. Chapter 4 also tells
you how to configure system board jumpers to set
specific operating parameters.
Chapter 5
Upgrades and Options Provides you with instructions
for upgrading your system with optional memory,
options cards, and peripheral devices.
Chapter 6
Problem Solving Contains helpful information for
solving problems that might occur with your system.
Introduction
1-2
Appendix A
System Cabling
system.
Includes cabling information for your
Appendix B
Memory Configurations Defines the allowable memory
configurations for your system.
Glossary Defines the standard acronyms and
technical terms used in this manual.
Equipment Log Provides you with a sample
equipment log for documenting the system configuration
and updates.
Introduction
1-3
Notational Conventions
The notational conventions listed below are used
throughout this manual.
F1
A letter, number, symbol, or word in CAPs represents a
key on your keyboard. For example, the instruction
press F1 means press the key labeled F1 on your
keyboard.
ENTER
The ENTER key is interchangeably used as RETURN
and CARRIAGE RETURN.
CTRL + ALT
Two or three key names, separated by plus sign (s),
indicate multiple-key entries. For example, CTRL +
ALT + DEL means hold down the CTRL and ALT keys
and press the DEL key.
The special notices listed below are used throughout
this manual to emphasize specific information:
!
Warning: Warning indicates a hazard that can cause
serious personal injury or death if the hazard is not
avoided
!
Caution: Caution indicates a hazard that might cause
personal injury
Introduction
1-4
Notice: Notice indicates the potential to damage
equipment or data is present if the user does not take
the necessary precautions recommended by the Notice.
Note: Notes are used to identify or amplify a point to
the reader. A Note may be used to emphasize a
recommended sequence of steps.
Introduction
Chapter 2
Features
Contents
Overview ................................................................................ 1
System Feature Summary ................................................... 2
Expanding the Server as Needs Grow .................................. 3
HX4100 ........................................................................ 3
HX6100 ........................................................................ 4
Configuration Constraints ................................................... 5
Chassis .................................................................................. 6
Status LED Indicator Descriptions ....................................... 7
Opening the Front Doors .................................................... 9
Chassis Front Features and Controls ................................. 10
Chassis Rear Features and Controls ................................. 11
System Board Features ......................................................... 13
Processor ........................................................................ 20
Memory ........................................................................... 20
Bus Master I/O Expansion Slots ........................................ 20
Real-Time Clock/Calendar ................................................ 21
BIOS ............................................................................... 21
Video .............................................................................. 21
SCSI Controller ................................................................ 22
Peripheral Controller ........................................................ 22
External Device Connectors .............................................. 22
Keyboard and Mouse ........................................................ 22
Fans ............................................................................... 23
Peripheral Devices ................................................................ 23
SCSI-2 Hard Drive Bays ................................................... 23
Removable Media Drive Bays ............................................ 25
Power System ....................................................................... 26
Software Locks via the BIOS Setup ........................................ 27
xxx
2-1
Overview
The server is a modular, multiprocessing server based
on the Intel Pentium® Pro chip set. The chip set
incorporates a modular scaleable architecture that
integrates a 64-bit bus interface with three Peripheral
Component Interconnect (PCI) buses and an Industry
Standard Architecture (ISA) bus. The architecture
supports Symmetrical Multiprocessing (SMP) and a
variety of operating systems. The chassis and system
boards are designed to meet the needs of the server
marketplace.
The combination of computing performance, memory
capacity, and integrated I/O provides a high
performance environment for many applications
including network servers and multi-user systems. The
server is designed for use in applications where
downtime must be minimized. To this end, the server
includes or has the option to include the following:
■
Power system redundancy; in a system configured
with redundant power supplies, the system will
continue to operate with a single power supply
failure.
■
Self-contained power supply units that can be easily
installed or removed from the back of the chassis.
■
Hot-swap SCSI hard drive bays accessible from the
front of the chassis; a failed drive can be removed
and a new drive installed without system power
being turned off, if a Redundant Array of
Independent Disks (RAID) controller module is
installed.
■
High degree of SCSI hard disk fault tolerance and
advanced disk array management features through
the use of RAID (Redundant Array of Independent
Disks) technology, if a Redundant Array of
Independent Disks (RAID) controller is installed.
■
Hardware monitors (temperature and voltage) and
software monitors to indicate failures.
■
Easy access to all parts for service.
Features
2-2
System Feature Summary
The following provides a summary of the system
features:
Feature
Description
Modular board set
System is intended for use with a modular board set based
on Pentium Pro processor technology; from one to six
processors and up to 4 GB of memory.
Add-in board support
Rail and back panel slots support up to 11 add-in boards
(two ISA and nine PCI).
3 1/2-inch diskette drive
3 1/2-inch diskette drive is externally accessible.
One location for a 3 1/2-inch
removable media device
One externally accessible 3 1/2-inch half-height bay is
available for server expansion.
5 1/4-inch SCSI CD-ROM
5 1/4-inch CD-ROM drive is externally accessible.
Three locations for 5 1/4-inch
removable media devices
Three externally accessible 5 1/4-inch half-height bays are
available for server expansion (diskette, CD-ROM, and/or
tape drives).
12 locations for 3 ½-inch
SCSI-2 hard drives
From one to three hard disk drive cages; each holding up
to four 3 ½-inch hot-swappable ultra wide SCSI-2 hard
drives. Each cage is secured behind a metal EMI door;
drives can be swapped in or out of the system without
powering it down, if a Redundant Array of Independent
Disks (RAID) controller module is installed. The array of
drives allows easy setup of optional RAID applications.
Hot swap-capable backplane
A hot swap-capable backplane is part of each drive cage
assembly for SCSI hard drives. The backplane is designed
for wide ultra SCSI-2 devices that use the industry
standard 80-pin Single Connector Attach (SCA) connector.
The backplane consists of a row of four drive connectors.
Power supply
From one to three 420 Watt autoranging power supplies
are easily removed/installed for service. In a three-supply
system, the third supply is redundant. In a two-supply
system, the second supply can be redundant, depending on
the system configuration.
Software: utilities, setup
BIOS Setup, Resource Configuration Utility, and
SCSISelect Utility. The EXPRESSBUILDER CD-ROM
contains the setup utilities and the ESMPRO CD-ROM
contains the server management software.
Features
2-3
Security
Mechanical: Key lock at the front door. One intrusion
sensor for front door to secure diskette, hard disk,
removable media device, power on/off switch, reset switch,
top cover, and left/right panel access. Three power interlock sensors one on each side of the chassis and one on top
of the chassis.
BIOS: Password enable.
Expanding the Server as Needs Grow
The following two subsections describe the typical
minimum system configuration and expanded system
capabilities of the HX4100 and HX6100 servers.
HX4100
The typical minimum system configuration of the
HX4100 server could include the following:
■
Board set consisting of system I/O board, CPU base
board with 128 MB memory, and two dual CPU
boards with one Pentium Pro microprocessor on the
first (primary) CPU board.
■
Diskette drive and SCSI CD-ROM drive
■
SCSI hard drive cage with one hard drive
■
Network add-in boards
■
A 420 Watt power supply
■
Onboard 1 MB video memory
■
System I/O board has two ISA slots and nine PCI
slots for add-in boards. The system I/O board also
has a riser board for external I/O (serial, parallel,
video) interfaces.
■
Chassis can hold six removable media drives: four 5
1/4-inch half-height bays with a CD-ROM reader
already installed in one bay; and two 3 1/2-inch halfheight bays with a diskette drive already installed
in one bay.
Features
2-4
As server/client needs grow, you can expand system
processor capacity, memory, drives, option cards, and
the number of power supplies.
■
CPU base board has two slots for dual CPU boards.
Each dual CPU board may contain up to two
processors, for a configurable range of one, two,
three, or four processors.
■
System I/O board has a video memory upgrade
socket for an additional 1 MB of video memory.
■
CPU base board supports 16 DIMM devices for a
minimum memory size of 128 MB; maximum is 4 GB.
■
System I/O board has eleven option board slots (two
ISA and nine PCI).
■
Chassis can hold six removable media drives.
■
Chassis supports up to three SCSI hard drive cages
for a total of 12 hot-swap bays for 3 1/2-inch ultra
wide SCSI-2 hard drives.
■
Chassis supports up to three power supplies. The
second or third power supply can be added to
provide redundant power. A second power supply
must be added if a second processor or SCSI hard
drive cage is added.
HX6100
The typical minimum system configuration of the
HX6100 server could include the following:
Features
■
Board set consisting of system I/O board, CPU base
board with 256 MB memory, and two triple CPU
boards with two Pentium Pro microprocessors on
the first (primary) CPU board.
■
Diskette drive and SCSI CD-ROM drive
■
Three SCSI hard drive cages with one hard drive
and a RAID controller is installed
■
Network add-in boards
■
Three 420 Watt power supplies. The third power
supply provides redundant power.
2-5
■
Onboard 2 MB video memory
■
System I/O board has two ISA slots and nine PCI
slots for add-in boards. The system I/O board also
has a riser board for external I/O (serial, parallel,
video) interfaces.
■
Chassis can hold six removable media drives: four 5
1/4-inch half-height bays with a CD-ROM reader
already installed in one bay; and two 3 1/2-inch halfheight bays with a diskette drive already installed
in one bay.
As server/client needs grow, you can expand system
processor capacity, memory, drives, option boards, and
the number of power supplies.
■
CPU base board has two slots for triple CPU boards.
Each triple CPU board may contain up to three
processors, for a configurable range of two, three,
four, five, or six processors.
■
CPU base board supports 16 DIMM devices for a
minimum memory size of 256 MB; maximum is 4 GB.
■
System I/O board has eleven option board slots (two
ISA and nine PCI).
■
Chassis can hold six removable media drives.
■
Three SCSI hard drive cages support up to 12 hotswap bays for 3 1/2-inch ultra wide SCSI-2 hard
drives.
Configuration Constraints
Power supplies are easily removed and installed. The
second or third power supply may provide redundant
power so that if one of the power supplies fail, the
system will continue to operate and the failed power
supply can be hot swapped. That is, the failed power
supply is removed and replaced without turning power
off. The second power supply is required with more than
one processor or SCSI hard drive cage is used. In this
case, a third power supply is required for redundancy.
Features
2-6
The system has four 5 1/4-inch half-height bays
accessible from the front. These bays are convenient for
diskette, tape, and CD-ROM drives (removable media).
Because of the EMI generated by hard drives, the
increased susceptibility to ESD, and cooling
requirements, hard drives should not be installed in the
5 1/4-inch half-height bays.
Chassis
Figure 2-1 shows the server front chassis features and
controls.
Figure 2-1. Front Chassis Features And Controls
POWER
A
STATUS
B
E
DISK
C
D
3
F
G
H
I
A
Features
Power LED
When green, power is present in system. When
off, power is turned off or power source is
disrupted. See Table 2-1 for a list and
description of the system LEDs.
2-7
B
Status LED
When green the system is OK. See Table 2-1
for a list and description of the system LEDs.
C
Disk LED
When green, internal disk drives are being
accessed. See Table 2-1 for a list and
description of the system LEDs.
D
Key lock
Secures both front external doors.
E
LCD panel
Displays information about BIOS and system
failures (error and diagnostic information).
F
G
H
Left to right: Drive
present/power on; drive active;
drive faulty.
Each drive has three LEDs visible above the
bay from the front. See Table 2-2 for a list of
SCSI disk drive status LED indicators.
I
Casters (4)
Used when moving the server. Fixed by the
caster holders.
Status LED Indicator Descriptions
Table 2-1 lists the system status LED indicators along
with a description of each LED indicator. Table 2-2 lists
the disk drive status LED panel indicators along with a
description of each LED indicator.
Table 2-1. System Status LED Indicators
LED
Status
Description
Response
Power
Off
Power OFF
None required (normal)
Green
Power ON
None required (normal)
Amber
System power supply failure
Replace failed power
supply module.
Off
Power OFF
None required (normal)
Green
No alarms
None required (normal)
Amber
Abnormal condition
(see Table 2-3).
Check condition.
Off
Not accessing disk drives
None required (normal)
Amber
Internal disk drive failure
Check disk drive status
LEDs
Green
Accessing disk drives
None required (normal)
Status
Disk
Features
2-8
Table 2-2. Disk Drive Status LED Panel Indicators
LED
Status
Description
Response
Disk Drive
Present
Off
Disk drive not present
None required (normal)
Green
Disk drive present
None required (normal)
Off
Not accessing disk drive
None required (normal)
On
Accessing disk drive
None required (normal
Off
No alarms
None required (normal)
Amber
Disk drive failure
Replace disk drive.
Disk Drive
Activity
Disk Drive
Status
Table 2-3. System Status Abnormal Conditions
LED (Amber)
Conditions
System Status
Chassis intrusion (front cover)
Unit fan alarm
Memory multi-bit error (SERR)
P6 bus error (SERR)
Thermal sensor
Temperature
Voltage
CPU thermal trip
PCI PERR# (OPB/ESC detect)
PCI SERR#
CPU internal error
WDT
IOCHK
Features
2-9
Opening the Front Doors
You must open the right front door to turn the server
power on or off, reset the server, mount or dismount a
floppy disk, or mount or dismount a hard disk drive.
Open the left front door to mount or dismount 5 1/4inch removable media devices.
To open the front doors:
1. To open the front doors, you need to use the security
key provided with the server. Insert the security key
into the key slot and turn the key to the right.
2. First open the right front door, then open the left
door.
Features
2-10
Chassis Front Features and Controls
Figure 2-2 shows the server front chassis features and
controls with front doors opened.
Figure 2-2. Front Chassis Features And Controls (with front doors
opened)
K J
H
I
E
F
G
D
C
B
A
Features
A
SCSI hard drive cages
Used to mount the hard disks. Each cage
contains four disks with their three status
LEDs mounted above.
B
Ejector button, 3 1/2-inch
diskette drive
Press to eject diskette.
C
Activity light, 3 1/2-inch
diskette drive
When lit, drive is in use.
D
LCD panel
Displays information about BIOS and
system failures (error and diagnostic
information).
2-11
E
Power LED
When green, power is present in system.
When off, power is turned off or power
source is disrupted. See Table 2-1 for a
list and description of the system LED
indicators.
F
Status LED
When green the system is OK. See Table
2-1 for a list and description of the system
LED indicators.
G
Disk LED
When green, internal disk drives are
being accessed. See Table 2-1 for a list
and description of the system LED
indicators.
H
DC power switch
Press to turn system DC power on or off.
I
Reset switch
Press to cause a hard reset to the system;
the power-on self test (POST) will run.
J
Load/eject button, CD-ROM
reader
Press to load CD and eject CD.
K
Activity light, CD-ROM reader
When lit, drive is in use.
Chassis Rear Features and Controls
Figure 2-3 shows the server rear chassis features and
controls.
Features
2-12
Figure 2-3. Rear Chassis Features and Controls
O
N M L
G
A
H
I
B
C
D
J
F
E
P
K
A
Keyboard
PS/2-compatible 6-pin mini-DIN connector.
B
Printer
LPT1 25-pin parallel port connector.
C
VGA
VGA monitor 15-pin connector.
D
External-SCSI
Narrow-SCSI 50-pin connector
E
Dump button
See Configuring Switch and Jumper Settings in Chapter 4
of this User’s Guide.
F
Function select switches
See Configuring Switch and Jumper Settings in Chapter 4
of this User’s Guide.
G
Mouse
PS/2-compatible 6-pin mini-DIN connector.
H
COM1
COM1 serial port 9-pin connector.
I
COM2
COM2 serial port 9-pin connector.
Features
2-13
J
—
Reserved.
K
Power status LEDs
Both indicators are green during normal operation. Either
or both indicators go off when power supply fails. See Table
2-4 for status descriptions.
L
PCI slots
Two PCI add-in board slot locations (PCI #11 and PCI #12).
M
Knockout
Available to route SCSI signals to peripheral boxes.
N
ISA slots
Two ISA add-in board slot locations (ISA #1 and ISA #2).
O
PCI slots
Seven PCI add-in board slot locations(PCI #21, PCI #22,
PCI #23, PCI #31, PCI #32, PCI #33, and PCI #34).
P
Power supplies (three
shown)
Possible configurations, installed from bottom most bay:
1 supply (nonredundant)
2 supplies (redundant if system has only one processor and
one SCSI hard drive cage; nonredundant if more
than one processor and one hard drive cage)
3 supplies (one redundant)
Each power supply has a separate AC input power
connector.
System Board Features
The board set includes the system I/O board, one CPU
base board, and two CPU boards (either dual or triple).
The system I/O board is mounted at the top of the
system Figure 2-4 shows the system with the top cover
removed.
Features
2-14
Figure 2-4. System I/O Board Location
F
A
E
B
C
D
A
System I/O Board
B
Option board Fan
C
Diskette drive
D
Four 5 1/4-inch half-height bays with a CD-ROM reader
already installed in bottom bay
E
I/O riser board
F
Expansion slot covers
The CPU base board plugs into the underside of the
system I/O board and the CPU boards plug into the CPU
base board. Figure 2-5 shows the system with the left
side cover removed.
Features
2-15
Figure 2-5. CPU Base Board and CPU Board Location
A
B
C
D
F
E
A
CPU base board
B
CPU board #1 (primary)
C
CPU board #2 (secondary)
D
Rear CPU fan
E
Memory DIMMs
F
Front CPU fan
Features
2-16
Figures 2-6, 2-7, and 2-8 show the major components on
the system I/O board, CPU base board, and CPU boards,
while the following summarizes the board set features.
Board set summary
Feature description
Multiple processor
support
Two CPU boards. Either two or three processor sockets, for a
total of either four or six processors.
Upgradable memory
Sixteen DIMM sockets on the CPU base board, supporting up to
4 GB memory using 256 MB DIMMs.
Add-in board support
Two dedicated ISA bus slots and nine dedicated 32-bit PCI slots
on the system I/O board.
SCSI controller
Dual onboard SCSI-2 controller (PCI-based).
BIOS
Flash memory-based BIOS (Basic Input/Output System ) and
Setup utilities.
Video
Integrated super VGA controller ships with either 1 MB or 2
MB of video memory. Upgrade socket (1 MB) is available for 1
MB system to increase total video memory size to 2 MB.
External device
connectors
Onboard connectors for two serial ports, parallel port, narrow
SCSI port, PS/2-compatible keyboard and mouse, and VGA
monitor.
Clock
Real-time clock/calendar (RTC).
System hardware
monitoring
Detects chassis intrusion and contains sensors for temperature,
voltage, and fan failure.
Configuration
utilities
Resource Configuration Utility (RCU) and SCSISelect Utility.
Features
2-17
Figure 2-6. System I/O Board Connector and Component Locations
I
H
J
T
G
K
F
L
M
E
D
N
C
O
P
B
Q
R
A
M
S
M
A
PCI expansion slots (#31, #32, #33, and #34)
B
PCI expansion slots (#21, #22, and #23)
C
ISA expansion slots (#1 and #2)
D
CPU base board connector (underside of board)
E
PCI expansion slots (#11 and #12)
F
Optional Video DRAM sockets
G
I/O riser board connector
H
SCSI channel B connector
I
SCSI channel A connector
J
SCSI status cable connector
Features
2-18
K
Option board fan connector
L
Front panel connector
M
Configuration jumpers
N
Reserved
O
Reserved
P
Diskette connector
Q
Real time clock battery
R
Flash board
S
Non-volatile memory
T
Power status cable connector
Figure 2-7. CPU Base Board Component Locations
E
D
F
C
B
G
Features
A
A
DIMM sockets (bank #1, #3, #5, and #7)
B
CPU board #2 connector
C
Configuration switch
D
CPU front fan connector
E
CPU rear fan connector
F
CPU board #1 connector
G
DIMM sockets (bank #2, #4, #6, and #8)
2-19
Figure 2-8. Dual and Triple CPU Board Component Locations
D
E
A
F
a. Dual CPU Board
D
E
C
B
F
A
b. Triple CPU Board
A
Voltage module socket for processor #1
B
Processor #3
C
Voltage module socket for processor #3
D
Voltage module socket for processor #2
E
Processor #2
F
Processor #1
Features
2-20
Processor
The system includes two CPU boards containing
Pentium Pro processor sockets and voltage module
sockets to power each processor (Figure 2-8). The CPU
boards are either dual CPU boards capable of
supporting up to two processors or triple CPU boards
capable of supporting up to three processors. The
Pentium Pro processors plug into a Zero Insertion Force
(ZIF) sockets on these boards. Additional Pentium Pro
processors enhance performance and enable symmetric
multiprocessing (SMP). All processors access the same
memory and I/O space and tasks can run on either CPU
if your operating system (OS) supports SMP.
Memory
The CPU base board contains sixteen 168-pin DIMM
sockets (Figure 2-7, A and G). A minimum system
configuration includes 128 MB (using two 64 MB
DIMMs) of system memory. 16 DIMM sockets allow for
system memory expansion to 4 GB (using sixteen 256
MB DIMMs). ECC generation/checking is provided for
detection and correction of memory errors.
Note: Only use DIMMs approved for use in this server
system. Call your customer service representative for
information.
Bus Master I/O Expansion Slots
The server's expansion capabilities meet the needs of
high performance I/O servers by providing a
combination of PCI local bus and ISA connectors. The
system I/O board offers nine dedicated PCI slots and
two dedicated EISA slots.
The system I/O board contains two ISA bus master I/O
(input/output) expansion slots (Figure 2-6, C). The ISA
architecture supports 32-bit memory addressing and 16bit data transfers for the CPU, DMA, and bus
masters.
Features
2-21
The system I/O board also contains nine PCI bus master
I/O expansion slots (Figure 2-6, A, B, and E).
Real-Time Clock/Calendar
The real-time clock provides system clock/calendar
information stored in a non-volatile memory (NVRAM).
The real-time clock battery (Figure 2-6, Q) provides
power backup for the real-time clock.
BIOS
A BIOS and Setup Utility are located in the Flash
memory (Figure 2-6, R) on the system I/O board and
include support for system setup and PCI/ISA Plug-andPlay auto-configuration. A number of security,
reliability, and management features also have been
incorporated to meet vital server needs.
Video
The onboard super VGA controller (PCI) is a highperformance SVGA subsystem that supports:
■
BIOS compatibility with VGA, EGA, CGA, Hercules
Graphics, and MDA.
■
1 MB of Video Memory expandable to 2 MB (Figure
2-6, F).
■
16-bit bus for high-speed display memory access.
■
Hardware accelerated bit block transfers (BITBLT).
■
Supports 72Hz refresh, non-interlaced at: 640x480,
800x600, or 1280x1024 resolutions.
■
Displays of up to 16M colors at 640x480 and 800x600
resolutions, 64K colors at 1024x768 resolutions and
256 colors at 1280x1024 resolutions with the
optional 2 MB video memory.
Note: SVGA drivers may be required to use the highperformance video modes.
Features
2-22
SCSI Controller
The system I/O board includes a dual ultra wide SCSI-2
controller (Adaptec® AIC-7895) integrated as a PCI bus
master. This controller supports data paths of 8-bit
(fast/narrow SCSI) at a data transfer rate of 10 MB/sec
and 16-bit (fast/wide or ultra /wide SCSI) at a data
transfer rate of 20 MB/sec or 40 MB/sec. As a PCI bus
master, this controller supports burst data transfer
rates up to the maximum of 133 MB/sec.
On this server, channel B is cabled to the four SCSI
devices in the removable media drive bays. Channel A is
either cabled to the first SCSI hard drive cage or
available for optional SCSI devices.
Peripheral Controller
The advanced integrated peripheral controller supports
two serial ports and one parallel port through the I/O
riser board (Figure 2-6, G). The advanced integrated
peripheral controller also supports the connection of
two diskette drives (Figure 2-6, P).
External Device Connectors
The I/O panel provides connectors for a PS/2 compatible
mouse and a keyboard, connectors for VGA monitor, two
serial port connectors, and a parallel port connector. It
also provides a narrow SCSI external connector.
Keyboard and Mouse
The keyboard/mouse controller is PS/2™-compatible.
Features
2-23
Fans
In addition to the power supply fans, the system has an
option board fan (Figure 2-4, B) cabled to the system
I/O board (Figure 2-6, K) and two CPU fans (Figure 2-5,
D and F) cabled to the CPU base board (Figure 2-7, C
and D). The two CPU fans (front and rear) are
redundant in configuration. If one fan fails, its
associated fan changes its rotating speed to high.
Peripheral Devices
This subsection describes the SCSI-2 hard drive bays
and 5 1/4-inch removable media drive bays.
SCSI-2 Hard Drive Bays
The right side of the system can contain up to three
SCSI hard drive cages for 3 1/2-inch SCSI-2 hard drives
(see Figure 2-9). Each hard drive cage has a hot-swap
backplane that supports four drives. The backplanes
require an 80-pin single connector attachment (SCA)
connector on the drives you install.
A drive carrier is required as part of the hot swap
implementation. A 3 1/2-inch peripheral between 1.0
and 1.6 inches high can be accommodated in each
carrier. A drive is mounted in the carrier with four
fasteners, and the carrier is retained in the chassis by a
locking handle.
If your system has RAID, a fault light on the front
panel board gives a general indication that there has
been a fault on a hot-swap drive. Each drive has a set of
three lights to indicate the fault or other status: poweron (green LED), activity (green LED), or fault (yellow
LED).
Features
2-24
Figure 2-9. SCSI-2 Hard Drive Bays
Three hard drive cages
(EMI panel and exterior door
shown open)
The backplane has two main functions: SCSI drive
control and system data logging. Drive status is
monitored to detect failing drives and to control LED
indicators. The backplane features are:
■
Inserting and removing of hard drives while power
is on (referred to as “hot swap”)
■
Simplified cable management
■
SCA connectors to simplify inserting and removing
hard drives
■
SCSI management of fault LEDs.
Each backplane supports SCSI drives with SCA
connectors.
Features
2-25
Removable Media Drive Bays
On the upper left side of the system, four 5 1/4-inch
half-height bays (see Figure 2-10) are designed for
peripherals with removable media (diskette, CD-ROM,
or tape). Two available adjacent 5 1/4-inch bays can be
converted to a single full-height bay. The 5 1/4-inch
drives can be removed directly from the front of the
chassis. Removal of the system top cover may be
required to install/remove the device cables. Cosmetic
filler panel are installed over all unused 5 1/4-inch
bays.
On the upper right side of the system below the LCD
panel, there are two built-in 3 1/2-inch bays one of
which contains a 3 1/2-inch diskette drive that supports
both 720 KB and 1.44 MB media (see Figure 2-10).
Figure 2-10. Removable Media Drive Bays
Factory-installed CD-ROM reader plus
three bays for removable media
drives.
Factory-installed 3 1/2-inch diskette
drive plus second bay for removable
3 1/2-inch drive.
(Exterior doors shown open)
Note: The SCSI termination resistors must be installed
in the last SCSI drive of the daisy chain cabling (bottom
media bay). All other devices must have terminators
removed.
Features
2-26
Power System
The system may be configured with up to three 420
Watt power supplies. Each supply automatically
switches between these input voltage ranges:
■
100-120 VAC at 50/60 Hz; 7 A maximum current
■
200-240 VAC at 50/60 Hz; 3.5 A maximum current
Each power supply provides these DC outputs: +5 V,
+12 V, +3.3 V, -5 V, and -12 V. All output grounds
connect to the power supply chassis and to earth ground
through the AC line cord. Each supply has the
following:
■
Individual AC input line cord that plugs into the
external side of the power supply.
■
An isolating device on each DC output so that the
failure of one supply will not affect the operation of
the others.
■
Cooling fan integral with each power supply
enclosure. The fan circuitry implements fan failure
detection.
In a system, power is drawn equally from all supplies
present. A HX4100 with a single CPU and single SCSI
hard drive cage can be configured with a single power
supply. A system with two power supplies can be fully
loaded (all drive bays and add-in board slots filled). The
supplies use a forced current-sharing technique that
ensures that the supplies will share within 10 percent
at full load. In a high-access system with three power
supplies, the third supply gives redundancy, because
the load is redistributed if one supply fails.
Features
2-27
Software Locks via the BIOS Setup
The BIOS Setup has software features that let you
control access to one or more parts of the system:
■
Set and enable an administrative password.
■
Set and enable a user password.
■
Enable password on boot.
■
Disable writing to the diskette drive when secure
mode is set.
If only a supervisor password is set and enabled: Enter
this password to boot the server and run the SCU.
If both the user and administrative passwords are set
and enabled: Enter either one to boot the server. Enter
the administrative password to access the SCU or BIOS
Setup to change the system configuration.
Features
2-28
Features
Chapter 3
Setup
Contents
Selecting a Site ....................................................................... 1
Unpacking the System ............................................................. 2
Moving the System to the Installation Location .......................... 2
Getting Familiar with the System .............................................. 3
Making Connections ................................................................ 3
Connecting the Power Cord...................................................... 5
Powering On Your System ....................................................... 5
xxx
3-1
Selecting a Site
The system operates reliably in a typical office
environment. Choose a site that is:
■
Near grounded, three-pronged power outlets.
Note: For the United States and Canada, this
means a NEMA 5-15R outlets for 100-120 VAC or
NEMA 6-15R outlets for 200-240 VAC. For other
international sites, this means three-pronged power
outlets applicable for the electrical code of the
region.
!
Caution: Be sure the power service connection is
through a properly grounded outlet
Each power cord can be plugged into a separate
phase of a main AC supply, assuming the circuit is
rated for that load.
Note: For Denmark, the system must be connected
to an AC power source rated at 16 Amps.
■
Clean, dust-free, and well ventilated. Front and rear
ventilating openings kept free of obstructions. Away
from sources of heat, vibration or physical shock
■
Isolated from strong electromagnetic fields and
electrical noise produced by electrical devices (such
as air conditioners, large fans, large electric motors,
radio and TV transmitters, and high-frequency
security devices)
■
Spacious enough to provide at least five inches (13
centimeters) behind the system and three inches
(eight centimeters) on each side of the system for
proper cooling, airflow, and cable clearance
■
Spacious enough to provide at least 11 inches (27
centimeters) in front of the system for proper front
door clearance
■
Easily accessible for system maintenance and
installation of system upgrades.
Setup
3-2
Unpacking the System
!
Caution: Your system weighs approximately 207
pounds (94 kg). To avoid personal injury, make sure you
have someone help you lift or move the system
When you receive your system, inspect the shipping
containers prior to unpacking. If the shipping boxes are
damaged, note the damage, and if possible, photograph
it for reference. After removing the contents of the
containers, keep the cartons and the packing materials.
If the contents appear damaged when you unpack the
boxes, file a damage claim with the carrier immediately.
To unpack your system, see the unpacking instructions
on the shipping carton.
Moving the System to the Installation Location
Once you have selected the server installation site,
move the server as follows:
1. Casters are provided on the bottom of the server.
Slowly push the server to the selected installation
location.
!
Caution: For safety reasons, be sure to attach the
caster holders on the casters when the system is at the
selected location
2. To stabilize the server, attach the caster holders on
the casters as shown below.
Setup
3-3
Getting Familiar with the System
Before setting up your system, refer to Chapter 2 in this
User’s Guide to become familiar with the system’s
features, such as the location of your system's security
keylocks and front and rear panel switches, indicators
and connectors, etc.
Making Connections
Refer to Figure 3-1 and connect your keyboard, monitor,
and mouse. Connect any external peripheral devices
such as a printer or modem by following the
instructions included with these devices. To connect
external SCSI cables, refer to Cabling in Appendix A of
this User’s Guide.
Notice: Damage to the system may result if the
keyboard cable is inserted or removed when power is
applied to the system.
Caution: Inserting a telephone line connector into a
LAN board RJ-45 port may result in personal injury and
equipment damage.
Setup
3-4
Figure 3-1. Making Connections
I
K J I
E
F
G
H
A.
B.
C.
D.
E.
F.
G.
H.
I.
J.
K.
Setup
A
B
C
D
Keyboard, PS/2-compatible 6-pin connector
Printer, parallel port 25-pin connector
VGA monitor, 15-pin connector
External-narrow SCSI, 50-pin high density connector
Mouse, PS/2-compatible 6-pin connector
COM1, serial port 9-pin connector
COM2, serial port 9-pin connector
Reserved, 9-pin connector
PCI slots, nine PCI add-in board slots
Reserved, connector knockout
ISA slots, two ISA add-in board slots
3-5
Connecting the Power Cord
Plug the female end of the AC power cords into the
input receptacles on the rear of the power supplies (see
Figure 3-2). Plug the male end of the power cords into
NEMA 5-15R outlet for 100-120 VAC or NEMA 6-15R
outlet for 200-240 VAC. If the power cord supplied with
the system is not compatible with the AC wall outlet in
your region, obtain a suitable power cord that meets the
following criteria.
!
■
The power cord must be rated for the available AC
voltage and have a current rating that is at least
125% of the current rating of the system.
■
The power cord connector that plugs into the wall
outlet must be terminated in a grounding-type male
plug designed for use in your region. It must have
certification marks showing certification by an
agency acceptable in your region.
■
The power cord connector that plugs into the system
must be an IEC- type CEE-22 female connector.
■
The power cord must be less than 1.8 meters (6.0
feet) long.
Warning: Your system shipped with a power cord. Do
not attempt to modify or use the supplied AC power cord
if it is not the exact type required
Figure 3-2. Connecting the AC Power Cord
Setup
3-6
Powering On Your System
1. Make sure all external devices, such as a video
display, keyboard, and mouse (optional) have been
connected, and the power cords are connected.
2. Power on the video display and any other external
devices.
3. Open the right front door and press the power on/off
switch on the front panel (see Figure 3-3).
4. Verify that the Power LED is lit. If it is not lit,
ensure the ac power cords are connected to a
functional ac power source.
After a few seconds your system begins the internal
Power-On Self Tests (POST). POST automatically
checks the system, CPU module, memory, keyboard, and
most installed peripheral devices. If you have problems
powering on your system, refer to Problem Solving in
Chapter 6 of this User’s Guide.
After you have successfully powered on your system,
verify that the system boots to a DOS prompt. You can
now run the EXPRESSBUILDER CD-ROM.
Figure 3-3. Powering On Your System
Power LED
Power On/Off Switch
Setup
Chapter 4
Configuring Your System
Contents
Configuring Your System ......................................................... 1
Resource Configuration Utility (RCU) ........................................ 2
Using the RCU ................................................................... 3
RCU Command Line Parameters .......................................... 5
RCU Configuration Settings ................................................ 6
ISA Board Configuration ..................................................... 7
BIOS Setup Utility ................................................................. 10
Using the BIOS Setup Utility ............................................. 10
BIOS Setup Configuration Settings .................................... 11
Exiting BIOS Setup ........................................................... 16
SCSISelect Utility .................................................................. 16
Using the SCSISelect Utility .............................................. 17
SCSISelect Configuration Settings .................................... 18
Exiting SCSISelect ........................................................... 18
Using the Utilities Diskette to View the Event Log .................... 20
Configuring the Optional RAID Controller ................................ 21
Configuring System Jumpers and Switches ............................. 23
Before You Begin ............................................................. 23
Configuring I/O Riser Board Function Select Switches ........ 23
Configuring CPU Base Board Function Select Switches ...... 25
Configuring System I/O Board Switches and Jumpers ......... 26
Setting Switches and Jumpers .......................................... 29
BIOS ............................................................................... 30
Updating the BIOS ...................................................... 30
Changing the BIOS Setup Language............................. 31
Resetting the CMOS NVRAM ............................................ 33
Clearing and Changing the Password ................................ 33
1231231
Billy Graham
4-1
Configuring Your System
Configuration and setup utilities are used to change
your system configuration. You can configure your
system, as well as option boards you may add to your
system, using the Resource Configuration Utility (RCU)
diskette. Also, several unique system parameters are
configured using BIOS Setup which is stored in the
system FLASH memory. A diskette is not needed to run
BIOS Setup.
The SCSISelect Utility which is also stored in the
system FLASH memory is used if you need to configure
the SCSI controller in your system or to perform a SCSI
disk format or verify disk operation of these drives. A
diskette is not needed to run SCSISelect.
A Utilities diskette contains the Event Log Utility. The
Event Log Utility is used to read stored system event
information.
If your system has been factory configured, the RCU,
BIOS Setup, or SCSISelect utilities do not need to be
run unless you want to change the password or security
features, add option boards or devices, or upgrade the
boards in your system.
There are some system configuration parameters that
are set by jumpers. However, these parameters do not
usually require change. Finally, the EZ-SCSI utility is
included with your system. This program performs
MS-DOS driver installation for SCSI devices in your
system and also installs basic utilities that format and
manage SCSI hard disk drives. Refer to the
documentation supplied with the EZ-SCSI utility for
more information.
This chapter provides procedures for running the RCU,
BIOS Setup, and the Utilities diskette. Also, a section
describing the system jumper configurations is
presented. Several configuration tables are provided in
this chapter to record changes you make to the default
system configuration.
You use the EXPRESSBUILDER CD-ROM to create the
RCU and Utilities diskettes.
Configuring Your System
4-2
Resource Configuration Utility (RCU)
The Resource Configuration Utility is used to configure
your system. The RCU can be used to configure the
memory subsystem, peripheral device subsystems, and
interface adapters. RCU recognizes ISA Plug-and-Play
boards and PCI boards and displays their configuration.
ISA (non-Plug and Play) adapter boards must be added
to the RCU configuration to reserve the resources
required by the ISA boards.
After you add options using the RCU, the system
automatically configures and initializes them during
system initialization at boot up.
The RCU stores the configuration information in the
non-volatile memory on your system. When you exit the
RCU the configuration information is written to nonvolatile memory. The RCU also maintains the Setup
configuration, which is stored in the battery-backed
memory. This means that when you exit the RCU, the
Setup and RCU configuration will agree with each
other.
Configuring Your System
4-3
Using the RCU
If you are adding a non-Plug and Play ISA option board,
run the RCU before installing the board using
procedures found in the Upgrades and Options chapter
of this guide. If you are upgrading system memory, do
so before running the RCU using procedures found in
the Upgrades and Options chapter of this guide. To use
the RCU:
Notice: The system can fail following improper
configuration. Always save the current settings before
reconfiguring the system.
1. Power on the system.
2. If the diskette drive is disabled, enable it using the
BIOS Setup utility, explained later in this chapter.
Specify the correct type of diskette drive.
3. Using the EXPRESSBUILDER CD-ROM, create the
RCU diskette. Note that the CD-ROM refers to the
RCU as the SCU.
4. Start the RCU by rebooting the system, with the
RCU diskette in Drive A. When the RCU banner is
displayed, press ENTER and the Resource
Configuration Utility Main Menu shown in Table 4-1
is displayed.
5. Select Learn about configuring your computer from
the RCU Main Menu and press ENTER if you need
information on system configuration. Read through
the information and press the F10 key when you are
done.
6. Using the and arrows highlight Configure
Computer and press ENTER. The Resource
Configuration Utility Menu shown in Table 4-2
displays. The keys that are active while viewing a
screen are displayed on the bottom of the screen.
Note: Press the F1 key at any time for help and
additional information on each option. To return
from help, press the ESC key.
Configuring Your System
4-4
Table 4-1. Resource Configuration Utility Main Menu
MENU OPTIONS
DESCRIPTION
1. Learn about configuring
your computer
Provides basic instructions on system configuration and using the Help
program.
2. Configure computer
Lists automatically detected boards, and enables manually adding, moving
and removing boards. Plug-and-Play boards don’t require configuration
files. If the ISA board requires configuration files, use “Add or remove
boards” for a menu to enter or change ISA board configurations. (Refer to
ISA Board Configuration found later in this chapter).
INSERT adds a board not detected or has not been installed.
DEL removes a selected board.
F7 moves a selected board to a different slot.
3. Set date
Enables viewing and changing the date that the computer uses.
4. Set time
Enables viewing and changing the time that the computer uses.
5. Maintain system
configuration diskette
Enables viewing and changing Configuration (.CFG) files and System
Configuration Information (SCI) files.
6. Exit from this utility
Exits from the RCU.
Table 4-2. Resource Configuration Utility Menu
MENU OPTIONS
DESCRIPTION
Step 1. Important System
configuration
information.
Provides information on the Resource Configuration program and how it
differs from ISA board configuration.
Step 2. Add and remove
boards
Lists automatically detected boards, and enables manually adding,
moving and removing boards. Plug-and-Play boards don’t require
configuration files. This list shows all the boards and options that will be
installed in your system.
Step 3. View and Edit
Details
Enables viewing and changing your system configuration settings
including embedded features, functionality, IRQs, and port selections.
Perform Step 3 only if you need to change the system default settings.
Step 4. Examine Switches
or Print Report
Enables viewing the required switch and jumper settings and allows
printing of a configuration report.
Step 5. Save and Exit
Allows you to save your configuration and exits to the operating system.
You can also exit without saving.
Configuring Your System
4-5
7. Select Step 1: Important System Configuration
information and press ENTER to learn more about
the Resource Configuration Utility.
8. Select Step 2 to add an ISA board to your system.
Refer to “ISA Board Configuration” in this chapter.
9. Select Step 3 to view your systems configuration
settings. The normal (default) RCU settings are
shown in Table 4-3.
RCU Command Line Parameters
There are RCU options that can be enabled by starting
the RCU from the command line with the appropriate
switch listed below. To enable an option, insert the RCU
diskette in drive A and type A:SD at the MS-DOS
prompt, followed by one of these command line
parameters:
H
High resolution display. Sets the display mode to
43 lines for an EGA add-in video controller board
or to 50 lines for a VGA board. The default is 25
lines for all add-in video controller boards.
M
Monochrome display. The display screens are
shown using monochrome attributes, even on a
color display. The default is to display color, unless
a monochrome video display is detected. Use this
parameter when you have redirected the console to
one of the onboard serial ports.
/
/
Configuring Your System
4-6
RCU Configuration Settings
Table 4-3 shows the recommended RCU settings for a
sample system and provides a place for you to record
any changes you make to the settings. To display the
configuration settings, select Step 3 under the Resource
Configuration Utility Menu. To edit any of the
configuration parameters, use the up and down arrows
to highlight the desired configuration parameter and
press ENTER. Pressing F6 at this point, allows you to
edit any of the parameters resources (IRQs, DMAs, I/O
ports or memory).
Table 4-3. RCU Configurations
MAIN MENU
NORMAL SETTING
System - Express 5800 HX4100/HX6100 System Board
RS - 232 COM Port 1
PORT 3F8h - 3FFh IRQ 4
RS - 232 COM Port 2
PORT 2F8h - 2FFh IRQ 3
Parallel Port
PORT 378h - 37Fh IRQ 7
Floppy Controller
Enabled
Mouse Controller
Enabled
PCI-2 - PCI Ethernet Controller
PCI Function 1
Enabled
PCI-3 - PCI Ethernet Controller
PCI Function 1
Enabled
Embedded - PCI PCI Bridge - Bus 2
PCI Function 1
Enabled
Embedded - PCI SCSI Controller
PCI Function 1
PCI Function 2
Enabled
Enabed
Embedded - PCI VGA Controller
PCI Function 1
Standard VGA Resources
Enabled
Enabled
Configuring Your System
YOUR
CONFIGURATION
4-7
ISA Board Configuration
If you want to add a non-Plug and Play ISA board to
your system, use the following procedures to define and
add the option board. It is necessary to define an ISA
board to prevent other boards in the system from using
the same IRQ levels, DMA channels, I/O port addresses,
or memory addresses, that your ISA board uses.
You must run the RCU and add the ISA board to the
configuration before installing the ISA board in the
system, otherwise the resources on the ISA board may
conflict with a Plug-and-Plug board in the system.
BIOS automatically assigns ISA Plug-and-Plug boards
to the next available slot. If the slot displayed in Step
2: “Add or Remove Boards” is not the actual slot, it can
be moved by using the F7 function key.
Notice: IRQ levels, DMA channels, I/O port addresses,
and memory addresses defined using this procedure
should reflect the same settings defined by supplied
jumpers and/or configuration documents.
1. Insert the RCU diskette into drive A: and power-on
the system. The system boots-up using the RCU
diskette.
2. The RCU Main Menu shown in Table 4-1 is
displayed. At the Startup Menu, enter choice 2,
Configure Computer.
3. The Resource Configuration Utility Menu shown in
Table 4-2 is displayed. Select Step 2 Add or Remove
Boards and press ENTER.
4. The Step 2: Add or remove boards screen is
displayed. At this screen select Add by pressing
INSERT.
5. The Add screen is displayed telling you to locate the
diskette that contains the .cfg file for the board.
Press ENTER at this screen.
6. The Select a Configuration (CFG) file to add screen
is displayed. At this screen select Not Listed by
pressing F5.
Configuring Your System
4-8
7. The Add a board without a .cfg file screen is
displayed. Read through the information and press
ENTER. The Add a board without a .cfg file screen
reappears. When the screen reappears select Create
.cfg file and press ENTER.
8. The Create A Board CFG File screen is displayed. At
this screen enter the board description and
manufacturer and press ENTER.
9. The New Board Setup screen is displayed. Using the
scrollable list select the resources used by the new
ISA board. Table 4-4 provides a place for you to
record the configuration you assign to the board.
10. Press F10 when you are finished selecting the
resources used by the new ISA board.
11. The View Current Settings screen is displayed. Press
ENTER to save the current settings.
12. The Add confirmation screen is displayed. Review the
manufacturer’s comments and press ENTER.
Table 4-4. ISA Board Configurations
ISA BOARD DEFINITIONS
Board Description:
Manufacturer:
Interrupts (Select from scrollable list)
DMA Channels (Select from scrollable list)
Port address (Select from scrollable list)
Start
End
Memory address (Select from scrollable list)
Start
Length
Slot (Select from scrollable list)
Configuring Your System
YOUR CONFIGURATION
4-9
13. The Add screen is displayed. Select the slot in which
you want to install the board and press ENTER.
Note: If the board you add causes a conflict in the
configuration, a Caution message is displayed. Press
ENTER at the message. This leads you to the
screens that allow you to resolve the conflict.
14. The Step 2: Add or remove boards screen is
displayed. At this screen select Done by pressing
F10.
15. The Steps in configuring your computer screen is
displayed. At this screen select “Step 4: Examine
switches or print report” and press ENTER.
16. The Step 4: Examine switches or print report screen
is displayed. The boards marked with an arrow
indicate that the boards in your system may have
jumpers and switches that you must physically verify
or that a software statement with additional
information about the board is provided. Select Done
by pressing F10.
Note: If the ISA board you are adding to the
configuration does not have switches, jumpers,
software statements or connection information, an
Information message appears on screen. Press
ENTER and proceed to the next step.
17. The Steps in configuring your computer screen is
displayed. At this screen select “Step 5: Save and
exit” and press ENTER.
18. The Save and exit screen is displayed. At this screen
select “Save the configuration and restart the
computer” and press ENTER.
19. The Reboot screen is displayed. At this screen press
ENTER.
20. Now that you have reserved the system resources,
you can install the ISA board.
Configuring Your System
4-10
BIOS Setup Utility
The BIOS Setup Utility, like the RCU, is used to change
system configuration parameters. This utility has some
unique parameters and many parameters that are also
configurable with the RCU. The utility is resident in
the system FLASH memory and does not require a
diskette or an operating system present to run.
However, some parameters set with the BIOS Setup
Utility that can also be set with the RCU, will be
overwritten by the RCU the next time the RCU is run.
Using the BIOS Setup Utility
You access the BIOS Setup Utility when you turn on or
reboot your system. To run the BIOS Setup Utility,
perform the following procedure:
1. Power-on or reboot the system. BIOS displays the
following:
Press <F2> to enter SETUP
2. Press F2. After BIOS POST completes, the BIOS
Setup Utility starts and the Main Menu is displayed.
The menu bar at the top of the Main Menu lists the
following selections:
Menu
Use
Main
Use this menu for basic system configuration.
Advanced
Use this menu for setting the Advanced Features
available on your system.
Security
Use this menu to set User and Supervisor Passwords
and the Backup and Virus-Check reminders.
Server
Use this menu for configuring Server Features.
Exit
Exits the current menu.
Use the arrow keys to select a menu or an item on a
displayed menu. Press the value keys (listed in the
table below) to cycle through the allowable values
for the selected field. Use the Exit menu’s “Save
Values” selection to save the current values on all
the menus.
Configuring Your System
4-11
To display a submenu, position the cursor on a
selection that has a submenu and press ENTER.
Selections with submenus are preceded by an arrow.
Refer to the following table for information on the
keys you use with Setup. These keys are also listed
at the bottom of the Setup menu.
Key
Function in Setup Menu
F1 or Alt-H
General Help window.
ESC
Exit the current menu.
or arrow keys
or arrow keys
Select a different menu.
Move cursor up and down. The cursor
moves only to the settings that you can
change.
TAB or SHIFT-TAB
Cycle cursor up and down.
HOME or END
Move cursor to top or bottom of window.
PAGE UP or PAGE DOWN
Move cursor to next or previous page.
F5 or -
Select the previous value for the field.
F6 or + or SPACE
Select the next value for the field.
F9
Load default configuration values for this
menu.
F10
Load previous configuration values for this
menu.
ENTER
Execute command or Select ➨ submenu.
ALT-R
Refresh the screen.
BIOS Setup Configuration Settings
Table 4-5 shows the normal settings for the BIOS Setup
Utility and provides a place for you to record any
changes you make to these settings.
Configuring Your System
4-12
Table 4-5. BIOS Setup Configurations
MENU PARAMETER NAME
NORMAL SETTING
OR DISPLAY ONLY
MAIN MENU
System Time
Enter current time (hour, minutes, seconds on
24 hour clock).
Current Time
System Date
Enter current date.
Current Date
*Diskette A:
Use +/- to change values; indicates the type of
diskette drive installed.
1.44MB, 3 1/2”
*Diskette B:
Use +/- to change values; indicates the type of
diskette drive installed (Not Installed in your
system).
Not Installed
Memory Cache
Press ENTER for menu.
Memory Cache
Enabled
Cache System BIOS Area
Write Protected
Cache Video BIOS Area
Write Protected
Cache Base 0 - 512K
Write Back
Cache Base 512K - 640K
Write Back
Cache Extended Memory Area
Write Back
*Cache Memory Regions
Cache C800-CBFF
Uncached
Cache CC00-CFFF
Uncached
Cache D000-D3FF
Uncached
Cache D400-D7FF
Uncached
Cache D800-DBFF
Uncached
Cache DC00-DFFF
Uncached
Memory Shadow
Press ENTER for menu.
System Shadow
Enabled
Video Shadow
Enabled
*Regions with Legacy Expansion ROMs
* This parameter will be overwritten by the RCU setting.
Configuring Your System
YOUR
CONFIGURATION
4-13
Table 4-5. BIOS Setup Configurations (Continued)
MENU PARAMETER NAME
NORMAL SETTING
OR DISPLAY ONLY
YOUR
CONFIGURATION
MAIN MENU
*Boot Sequence
Press ENTER for menu.
Boot Sequence
A: then C:
POST Errors
Enabled
*Numlock
Press ENTER for menu.
Numlock
ON
Key Click
Enabled
Key Board auto-repeat rate
10/sec
Key Board auto-repeat delay
1 sec
Base Memory:
640 KB Display only
Extended Memory:
127 MB Display only
ADVANCED MENU
*Integrated Peripherals
Press ENTER for menu.
Serial Port 1
3F8, IRQ 4
Serial Port 2
2F8, IRQ 3
Parallel Port
378, IRQ 7
Parallel Mode
Bi-directional
Diskette Controller
Enabled
Mouse
Enabled
Memory Reconfiguration
Press ENTER for menu.
Memory Reconfiguration
Enabled
DIMM Group #1 Status
Normal
DIMM Group #2 Status
none
DIMM Group #3 Status
none
DIMM Group #4 Status
none
DIMM Group #5 Status
none
DIMM Group #6 Status
none
* This parameter will be overwritten by the RCU setting.
Configuring Your System
4-14
Table 4-5. BIOS Setup Configurations (Continued)
MENU PARAMETER NAME
NORMAL SETTING
OR DISPLAY ONLY
ADVANCED MENU
DIMM Group #7 Status
none
DIMM Group #8 Status
none
Clear DIMM Errors
Press ENTER
DIMM Error Pause
Enabled
CPU Reconfiguration
Press ENTER for menu.
CPU Reconfiguration
Enabled
CPU #11 Status
Normal
CPU #12 Status
Normal
CPU #13 Status
Normal
CPU #21 Status
Normal
CPU #22 Status
Normal
CPU #23 Status
Normal
Clear CPU Errors
Press ENTER
CPU Error Pause
Enabled
PCI Devices
Press ENTER for menu.
PCI Parity Error
Enabled
PCI IRQ1
Auto
PCI IRQ2
Auto
PCI IRQ3
Auto
PCI IRQ4
Auto
PCI IRQ5
Auto
PCI IRQ6
Auto
PCI IRQ7
Auto
PCI IRQ8
Auto
PCI IRQ9
Auto
PCI IRQ10
Auto
PCI IRQ11
Auto
PCI IRQ12
Auto
Configuring Your System
YOUR
CONFIGURATION
4-15
Table 4-5. BIOS Setup Configurations (Continued)
MENU PARAMETER NAME
NORMAL SETTING
OR DISPLAY ONLY
PCI IRQ13
Auto
PCI IRQ14
Auto
PCI IRQ15
Auto
PCI IRQ16
Auto
YOUR
CONFIGURATION
Advanced
Press ENTER for menu.
Plug & Play O/S
No
Reset Configuration Data
No
SECURITY MENU
Supervisor Password is
Disabled
User Password is
Disabled
*Set Supervisor Password
Press ENTER.
Set User Password
Press ENTER.
**Password on boot
Disabled
**Diskette Write
Normal
**Diskette access
Everyone
System backup reminder
Disabled
Virus check reminder
Disabled
Power Switch Mask
Unmasked
SCSI Select Utility Mask
Unmasked
SYSTEM HARDWARE MENU
Thermal Sensor
Press ENTER for menu.
Thermal Sensor
Enabled
Upper Limit
65
Lower Limit
5
ESM IRQ
IRQ 10
Console Redirection
Disabled
SMI
Enabled
Error Log Initialization
No
* Enabling supervisor password requires a password for entering SETUP.
** These parameters require prior setting of supervisor password.
Configuring Your System
4-16
Exiting BIOS Setup
To exit Setup, select Exit from the menu bar to display
the Exit Setup menu.
The following table describes the options on this menu.
Note that ESC does not exit this menu. You must select
one of the items from the menu or menu bar to exit this
menu.
SELECTION
Save changes and
Exit
Exit without Saving
Changes
Get Default Values
Load Previous
Values
Save Changes
DESCRIPTION
Stores the selections displayed in the menus in
CMOS and exits the Setup program.
Exits the program without saving any changes you
have made in this session. Previous selections
remain in effect.
Displays default values for all Setup menus. Useful
if BIOS detects a problem with the values stored in
CMOS.
Reverts to previously saved values if the new
values have not been saved to CMOS.
Stores the current selections without exiting the
Setup program.
SCSISelect Utility
The system I/O board includes an integrated AIC7895
dual SCSI host controller used to manage SCSI devices
in your system. When used, Channel A of this controller
provides support for four internally mounted ultra/wide
hard disk drives. Channel B provides support for
internally mounted tape and CD-ROM devices as well as
externally connected SCSI devices.
The integrated SCSI host controller is configured using
the SCSISelect utility. Use the SCSISelect utility to:
■
Change the SCSI host adapters default values.
■
Check and/or change SCSI device settings for a
particular device.
■
Perform low-level formatting on SCSI disk devices.
■
Perform verify operations on SCSI disk devices.
Configuring Your System
4-17
When disabling access to the SCSISelect Utility, the
SCSISelect utility should be used in conjunction with
the BIOS Setup Utility. Changing the BIOS Setup
Utility “SCSI Select Utility Mask” parameter to Masked
prevents the use of the SCSI Select utility via Ctrl-A,
but the “Press <Ctrl-A> for SCSI Select” prompt is still
displayed. Changing the SCSISelect utility “Display
<Ctrl-A> Message During BIOS Initialization”
parameter to Disabled prevents the prompt from being
displayed. In combination these parameters can be used
to prevent access to the SCSISelect utility during boot.
Using the SCSISelect Utility
To run the SCSISelect Utility, perform the following
procedure:
1. Power-on the system. The system boots up.
2. During initialization, press CONTROL + A. The
SCSISelect Utility starts. When SCSISelect detects
the AIC-7895 host adaptor, it displays a selection
menu listing the bus and device number of each
channel. When the selection menu appears, select
the channel you wish to configure as follows:
Bus : Device : Channel
Selected SCSI Channel
00 : 01 : A
A
00 : 01 : B
B
3. Once you select the channel, the following screen is
displayed:
SCREEN
DESCRIPTION
Configure/View Host Adapter
Settings
Configure host adapter
and device settings.
SCSI Disk Utilities
The utility scans the SCSI
bus for SCSI devices,
reports a description of
each device. Run these
utilities before configuring
SCSI devices.
Configuring Your System
4-18
4. If you wish to format a disk, verify disk media, or
display a list of devices and their SCSI Ids,
select “SCSI Disk Utilities”. If you wish to
configure the adapter or a device, select
“Configure/View Host Adapter Settings”.
SCSISelect Configuration Settings
The following keys are active for all SCSISelect screens:
KEY
Arrows
ENTER
ESC
F5
F6
ACTION
Up and down arrows move from one parameter to
another within a screen.
Displays options for a configurable parameter.
Selects an option.
Moves back to previous screen or parameter or
EXIT if at the Main menu.
Switches between color and monochrome.
Resets to host adapter defaults.
Table 4-6 shows the normal settings for the SCSISelect
Utility and provides a place for you to record any
changes you make to these settings.
Exiting SCSISelect
To exit SCSISelect, press ESC until a message prompts
you to exit (if you changed any settings, you are
prompted to save the changes before you exit).
Configuring Your System
4-19
Table 4-6. SCSISelect Setup Configurations
OPTION
RECOMMENDED SETTING
OR DISPLAY ONLY
YOUR
CONFIGURATION
SCSI Bus Interface Definitions
Host Adapter SCSI ID
7
SCSI Parity Checking
Enabled
Host Adapter SCSI Termination
Enabled
Additional Options
Boot Device Options
Press ENTER for menu
Boot Channel
A First
Boot SCSI ID
0
Boot LUN Number
0
SCSI Device Configuration
7
Press ENTER for menu
Initiate Sync Negotiation
Yes
Maximum Sync Transfer Rate
40.0
Enable Disconnection
Yes
Initiate Wide Negotiation
Yes
5
Send Start Unit Command
Yes
1 and 5
1
BIOS Multiple LUN Support
no
Include in BIOS Scan
Yes
Advanced Configuration Options
4
1
Press ENTER for menu.
Reset SCSI Bus at IC Initialization
Enabled
Extended BIOS Translation for DOS Drives >1
GByte
Enabled
Host Adapter BIOS (Configuration Utility
Reserves BIOS Space)
Enabled.1
Support Removable Disks
Under BIOS as Fixed Disks 1, 2
Boot Only1
Display <Ctrl-A> Messages During BIOS
Initialization
Enabled1
BIOS Support for Bootable CD-ROM
Disabled1
BIOS Support for INT 13 Extensions
Enabled
6
1
1
No effect if BIOS is disabled.
2
Do not remove media from a removable media drive if it is under BIOS control.
3
Set to Disable if NetWare 3.12 or 4.11 Network Operating System is installed.
4
Set to 40.0 for channel A or 10.0 for channel B.
5
Set to Yes for channel A or No for channel B.
6
Set to Enabled for channel B or Disabled for channel A.
7
Set to 0 for channel A or 5 for channel B.
Configuring Your System
4-20
Using the Utilities Diskette to View the Event Log
The utilities diskette contains the Event Log Reader
Utility. The system Event Log Utility displays
information on the events stored in the system log area.
The information stored includes the name of the event,
the date and time the event occurred and data pertinent
to the event. Event data may include POST error codes
that reflect hardware errors or software conflicts within
the system.
Note: Refer to Chapter 5 Problem Solving for
definitions on all POST error codes.
To view the Event Log, perform the following procedure:
1. Using the EXPRESSBUILDER CD-ROM, create the
Utilities diskette.
2. Insert the bootable Utilities diskette into floppy disk
drive A.
3. Power-on the system. The system boots up.
4. The System Event Log Utility starts. The System
Event Log Utility screen is displayed. The screen
choices in Table 4-7 are available.
Table 4-7. System Event Log Utility
SCREEN
DESCRIPTION
File
Saves the Event Log and System information to
a file.
ElogInfo
Displays Event Log information such as: date, time,
and number of times the log was erased; major and
minor revision level; and amount of memory used by
the event log.
SystemInfo
Displays system information such as: system model;
processor type and speed; ROM, SCSI and video
BIOS version; number of ISA and PCI slots; total
system memory size; and serial and parallel port
configuration.
Event log
Displays the Event Log data.
Clear Event log
Not available. Use BIOS Setup to clear the log.
Help
Description of information in this table.
Exit
Exits the System Event Log Utility.
Configuring Your System
4-21
To select an option from the System Event Log
Utility screen, use and to highlight the item
and press ENTER.
To exit the menu item, press ESC.
Configuring the Optional RAID Controller
One of the options available for the HX4100 system is
the three channel DAC960 Redundant Array of
Inexpensive Devices (RAID) Controller board, which
gives your system the added security of fault tolerance.
The RAID controller is included on the HX6100 system.
If you order a system with the RAID controller, the
system is pre-configured at the factory. Use Table 4-8 to
determine how the RAID controller was configured at
the factory. If you want to change the RAID level or add
additional hard disks to the array, you must use the
DACCF utility.
Table 4-8. RAID Configurations
Number of
Hard Drives
1
RAID Level
Configured
JBOD
2
1
3
5
4 or more
5
Hard Drives
in Array
1
Description
JBOD (Mylex RAID 7) JBOD is an acronym
for Just a Bunch Of Disks. Each drive can
operate independently as with a common host
bus adapter; or multiple drives may be
spanned and seen as a single very large drive.
No redundancy is provided.
Mirroring (RAID 1) Drives are paired and
2
mirrored. All data is 100% duplicated on an
equivalent drive (fully redundant).
Striping with Parity (RAID 5) Data is striped
3
across several physical drives. Parity
protection is used for data redundancy.
Striping with Parity (RAID 5) with a standby
4 (one
standby drive) drive The array consists of three ON-LINE
drives and one STANDBY drive. The standby
replacement drive, or hot spare, is one of the
most important features RAID provides to
achieve automatic, non-stop service with a
high degree of fault-tolerance.
Configuring Your System
4-22
If you are adding the RAID controller to an existing
system, the DACCF utility allows you to configure your
disk array before installing your network operating
system.
The DACCF utility is included with the RAID
controller. The DAC960 RAID controller supports
various versions of RAID technology (referred to as
RAID levels). To use any RAID level, you must
configure the RAID controller using the DACCF
configuration utility prior to installing your Network
Operating System. For an explanation of this utility,
refer to the DACCF Utilities Installation Guide and
User Manual that was shipped with the controller.
Chapter 2 of the manual (Configuration Strategies)
describes RAID technology and provides tips on making
your array perform well in your specific application.
Chapter 3 (Preparing the Array) covers array hardware
preparation, configuration, and initialization. After
completing the steps in chapter 3, you can install your
Network Operating System.
If you want to be able to remotely (from a PC client)
configure the array; increase array capacity online; or
monitor statistics on disk and controller activity, you
must install the Global Array Manager (GAM) option
that was provided with your RAID subsystem. The GAM
option includes diskettes and user documentation. Use
of GAM is documented in the Global Array Manager 2
Server Installation Guide. Increasing array capacity is
covered in the MORE User Guide. This user guide
covers enhancements to both the Global Array manager
and DACCF utilities software that implement online
RAID expansion (MORE) technology.
Configuring Your System
4-23
Configuring System Jumpers and Switches
This section describes the jumpers and switches used on
the I/O riser board, CPU base board, and system I/O
board.
Before You Begin
Only a qualified technical person should perform the
procedures in this section.
Notice: Electrostatic discharge (ESD) can damage the
system boards. Modify the boards only at an ESD
workstation. Otherwise, wear an antistatic wrist strap
attached to chassis ground.
The system jumpers enable you to set specific operating
parameters for your system. A jumper is a small plasticencased conductor (shorting plug) that slips over two
jumper pins.
Configuring I/O Riser Board Function Select Switches
This section describes how to configure and set the I/O
riser board function select switches for specific
operating parameters. The function select DIP switches
configure the use of the front panel reset switch and the
use of an optional uninterruptible power supply (UPS)
unit.
!
Caution: Before doing the procedures in this section,
make sure that your system is powered off and unplug
the AC power cord from the back of the chassis. Failure
to disconnect power before setting switches and moving
jumpers can result in personal injury and equipment
damage
Figure 4-1 shows the DIP switches that consist of a
block of four switches, accessible on the I/O panel that
is located on the I/O riser board at the rear of the
chassis.
Configuring Your System
4-24
Figure 4-1. Function Select Switches
A
B
Function Select Switches and Dump
Button
A Function select switches
ON
DIP
B Reserved
1 2 3 4
Note: The switches are set correctly at the factory for
your system configuration. If your system requires a
switch change, change only the switch setting for that
condition. Otherwise keep the switches at their factory
settings.
Table 4-9 shows the switch configurations and
functions. Set the switches per Table 4-9 and the
following steps.
To change a switch setting, use the following procedure.
Note: Power must be completely off before setting the
switches, otherwise the settings will not be recognized.
1. At the front of the server, press the Power switch
off.
2. At the rear of the server, locate the Function Select
DIP switch (see Figure 4-1) that you want to change.
Configuring Your System
4-25
3. Set the appropriate switch on or off, according to
Table 4-9.
Note: If you set SW3 to On for use with an optional
UPS unit, power the unit up before switching power
on the server.
4. Press the main Power switch on.
■
If using an UPS unit, the server powers up as
soon as the UPS unit is turned on.
■
If not using the UPS unit, press the Power
button on the front of the server.
Table 4-9. Function Select Switch Settings
Switch
Description
Settings
Function
SW1
Reserved for
future use.
Off (factory setting)
On
SW2
Reset
pushbutton
control
Off
Front panel Reset pushbutton switch is disabled.
On (factory setting)
Front panel Reset pushbutton switch is enabled.
AC power
source control
Off (factory setting)
DC power can only be turned on from the front panel
switch. If AC goes off and then back on, system will
not power on until front panel switch is used.
On
DC power will turn on when AC power comes on. Use
this setting with an optional uninterruptible power
supply (UPS) that auto-cycles AC power or if no UPS
and auto-power on after power lose is desired.
SW3
SW4
Reserved for
future use.
Off (factory setting)
On
Configuring CPU Base Board Function Select Switches
This section describes how to configure the CPU base
board function switch for the speed of the CPUs. Figure
4-2 shows the location and settings of the CPU base
board switches.
Configuring Your System
4-26
Figure 4-2. CPU Base Board Jumper
CPU Speed
4A
4
3
2
1
ON
OFF
Configuring System I/O Board Switches and Jumpers
The system I/O board switches and jumpers enable you
to set specific operating parameters for your system.
Figure 4-3 shows the location of the switches and
jumpers. Table 4-10 lists the system I/O board switches
and jumpers and their factory default settings.
Configuring Your System
4-27
Figure 4-3. System I/O Board Switches and Jumpers
13A1
1 2 3 4
P25
4J1
10K9
Reserved
Reserved
SCSI Channel A
Reserved
A
A
B
B
C
C
CMOS Clear
Password Clear
13A
1 2 3 4
OFF
FLASH Code
9A2
Model Type
8A2
A
B
1 2 3 4
C
OFF
OFF
Configuring Your System
4-28
Table 4-10. System I/O Board Switch and Jumper Configurations
Switch/
Jumper
Description
Option
Setting
Factory
Default
Your
Setting
SCSI Channel A SCSI channel A select
4J1
Narrow SCSI for channel A
Wide SCSI for channel A
A-B
B-C
B-C
(down)
FLASH Code
9A2
FLASH reprogramming
protection
BIOS write protected; no update
BIOS not write protected; update
A-B
B-C
B-C
(down)
Reserved
P18
All nine jumpers must be
in.
Required on factory default.
IN
IN
IN
Reserved
10K9
Required on factory default.
B-C
B-C
(down)
B-C
(down)
Reserved
13A1 SW1
Required on factory default.
OFF
OFF
OFF
Reserved
13A1 SW2
Required on factory default.
OFF
OFF
OFF
Reserved
13A1 SW3
Required on factory default.
OFF
OFF
OFF
Reserved
13A1 SW4
Required on factory default.
OFF
OFF
OFF
CMOS Clear
13A SW1
Real-time clock CMOS
protection
RTC CMOS clear
RTC CMOS not cleared
ON
OFF
OFF
Password Clear
13A SW2
Password protection
Password clear
Password protected
ON
OFF
OFF
Reserved
13A SW3
Required on factory default.
OFF
OFF
OFF
Reserved
13A SW4
Required on factory default.
OFF
OFF
OFF
Model Type
8A2 SW1
Used with switches 8A2
SW2, 8A2 SW3 and 8A2
SW4 to set server model
Required on factory default.
ON
ON
ON
Model Type
8A2 SW2
Used with switches 8A2
SW1, 8A2 SW3 and 8A2
SW4 to set server model
Required on factory default.
ON
ON
ON
Model Type
8A2 SW3
Used with switches 8A2
SW1, 8A2 SW2 and 8A2
SW4 to set server model
Required on factory default.
OFF
OFF
OFF
Model Type
8A2 SW4
Used with switches 8A2
SW1, 8A2 SW2 and 8A2
SW3 to set server model
Required on factory default.
OFF
OFF
OFF
Configuring Your System
4-29
Setting Switches and Jumpers
!
Caution: Before doing the procedures in this section,
make sure that your system is powered off and unplug
the AC power cord from the back of the chassis. Failure
to disconnect power before moving the jumpers can
result in personal injury and equipment damage
Notice: Observe static precautions. Use an antistatic
wrist strap.
To change the setting of any of the configuration
switches or jumpers on any of the system boards:
1. Power off the system and remove the covers as
described in Chapter 5 of this guide.
2. Check to ensure the system power cord is removed
from the back of the system.
3. Locate the switch or jumper you are changin. Refer
to Figure 4-3.
4. To change a switch setting, use a pen or your finger
to move the switch to the desired setting. To change
a jumper setting, use a pair of needle-nose pliers or
your fingers to remove the jumper from its current
location. Position the jumper over the two pins for
the desired setting and press it onto the pins. Be
careful not to bend the pins. Refer to Table 4-10 for
board switch or jumper settings.
5. Record changes to the board settings in Table 4-10.
6. Install the system covers and power up the system
using procedures in chapter 5 of this guide.
7. Run the Setup Utility to verify your reconfiguration
of the board.
Configuring Your System
4-30
BIOS
This subsection contains procedures for updating your
BIOS and changing the language used by the BIOS
Setup Utility.
Updating the BIOS
You should use this procedure when you receive a BIOS
FLASH diskette from your service representative. To
update the system BIOS:
Note: This procedure clears the event log contents. If
you want to save the event log contents, run the Event
Log Reader Utility.
1. Insert a bootable DOS diskette into Drive A and
power up the system.
2. Remove the MS-DOS diskette and insert the BIOS
FLASH diskette into Drive A.
3. Enter PHLASH and press ENTER.
4. After the system reboots, load the default values by
pressing F2 to enter setup. At the Exit Menu, select
GET DEFAULT VALUES.
5. Clear the event log by selecting CLEAR EVENT LOG
at the Server Menu. Press space bar to change NO to
YES and press ESC. Select SAVE CHANGES & EXIT
and press ENTER to continue. The system will
reboot.
If the procedure fails, perform the following steps and
then retry the Update BIOS procedure.
1. Turn off the system and remove the panels as
described in the Upgrades and Options chapter.
2. Ensure the FLASH Code jumper 9A2 is set to pins BC to enable updates to the BIOS (see Figure 4-3).
3. Replace the panel and power up the system with the
BIOS FLASH diskette inserted in Drive A.
Configuring Your System
4-31
Changing the BIOS Setup Language
The BIOS Setup Utility used by your server supports
two languages: English and one other. As shipped from
the factory, the BIOS Setup Utility supports English
and French. If you want to use either German, Spanish,
or Italian as the second language, you must use the
Multi-Language BIOS FLASH Diskettes to change the
supported languages. The diskettes are:
■
Multi-Language BIOS FLASH Diskette 1 of 2. This
diskette contains the English/French and
English/German language files along with the
PhoenixPhlash Utility.
■
Multi-Language BIOS FLASH Diskette 2 of 2. This
diskette contains the English/Spanish and
English/Italian language files along with the Crisis
Recovery Utility.
Language Change Instructions
Follow these steps to change the BIOS Setup language.
1. Using the EXPRESSBUILDER CD-ROM, create the
Multi-Language BIOS FLASH Diskettes.
2. Insert Multi-Language BIOS FLASH diskette 1 of 2
into floppy disk drive A and power up the system.
3. The BIOS Flash Diskette Language Selector menu
displays. The selections are:
1.
2.
3.
4.
English/German
English/French
English/Spanish
English/Italian.
4. Enter the number corresponding with your language
choice and press ENTER. If you choose either
English/ Spanish or English/Italian, you will be
asked to load diskette 2 of 2. If so, insert MultiLanguage BIOS FLASH diskette 2 of 2 into floppy
disk drive A.
Configuring Your System
4-32
5. An acknowledgment message displays:
You are about to Flash your system in English/xxx
Is this correct
Using the arrow keys, highlight YES and press
ENTER.
6. The PhoenixPhlash Status message displays. This
screen displays the progress of the PhoenixPhlash
Utility. During the loading of the BIOS, the system
sounds a series of short beeps. When the utility is
complete, it displays a complete message along with
the following:
PRESS ANY KEY TO RESTART THE SYSTEM
7. Remove the Multi-Language BIOS FLASH diskette
from floppy disk drive A.
8. Press any key and the system restarts. You can
verify the language change by pressing the F2 key to
enter the BIOS Setup Utility.
BIOS Recovery Instructions
If the BIOS language update procedure fails leaving
your BIOS in an unusable and unrecoverable state,
perform the following steps and then retry the BIOS
language update.
Because of the small amount of code available in the
non-erasable boot block area, video is not available to
direct the recovery procedure. The procedure can be
monitored by listening to the speaker and looking at the
diskette drive LED. When the system gives a continuous
series of short beeps and the diskette drive LED is lit,
the system is copying the recovery code into the FLASH.
As soon as the system gives a long beep, the recovery is
complete (takes approximately 75 seconds).
1. If the BIOS language update procedure fails while
using Multi-Language BIOS FLASH diskette 1 of 2,
insert Multi-Language BIOS FLASH diskette 2 of 2
into floppy disk drive A. Otherwise, keep diskette 2
of 2 in floppy disk drive A.
Configuring Your System
4-33
2. Power off the system and turn the power back on.
3. When the system beeps and the diskette drive LED
is lit, the system is copying the recovery code into
the FLASH. As soon as the system emits a long beep,
the recovery is complete.
4. Power off the system.
5. Remove the Multi-Language BIOS FLASH diskette 2
of 2 from floppy disk drive A. Proceed to the
previous procedure to change the BIOS Setup
language.
Resetting the CMOS NVRAM
To reset the CMOS NVRAM:
1. Power off the system and remove the panels as
described in chapter 5 of this guide.
2. Move the CMOS Clear switch 13A SW1 to OFF (see
Figure 4-3).
3. Turn the system on and wait for the POST to
complete. This will automatically reprogram the
CMOS NVRAM to the default settings.
4. Power off the system.
5. Move the CMOS Clear switch back to ON.
6. Replace the panels and power on the system.
7. Run the Setup Utility to configure your system.
Configuring Your System
4-34
Clearing and Changing the Password
To clear and change the password:
1. Power off the system and remove the panels as
described in the Upgrades and Options chapter.
2. Move the Password Clear switch 13A SW2 to ON (see
Figure 4-3).
3. Power on the system and wait for POST to complete.
This automatically clears the old password.
4. Power off the system.
5. Move the Password Clear switch back to OFF.
6. Replace the panels and power on the system.
7. To specify a new password run the Setup Utility as
described earlier in this chapter.
Configuring Your System
Chapter 5
Upgrades and Options
Contents
Precautions ............................................................................ 1
Preparing Your System for Upgrade.......................................... 3
Equipment Log ................................................................... 3
Removing the Front Doors .................................................. 4
Installing the Front Doors ................................................... 5
Removing the Top Cover and Side Panels ........................... 5
Installing the Top Cover and Side Panels ............................. 7
Modifying the System I/O Board ............................................... 8
Installing Video Memory ..................................................... 8
Replacing the Non-Volatile Memory ................................... 10
Replacing the Real-time Clock Battery ............................... 11
DIMMs .................................................................................. 13
Installing DIMMs .............................................................. 14
Removing DIMMs ............................................................. 15
Processors ........................................................................... 16
Removing the CPU Board ................................................. 16
Installing a Processor ....................................................... 19
Removing a Processor ...................................................... 21
Installing the CPU Board .................................................. 22
Option Boards ....................................................................... 23
Installation Considerations ................................................ 24
Controller/Adapter Hardware Configurations ...................... 25
Installing an Option Board ................................................ 27
Removing an Option Board ............................................... 30
Power Supply ........................................................................ 31
Installing a Power Supply ................................................. 31
Removing a Power Supply ................................................ 32
Hot-Swapping a Power Supply .......................................... 32
Removable Media Devices ..................................................... 34
Installing a 5 1/4-Inch Device or 3 1/2-Inch Diskette Drive .. 36
Removing a 5 1/4-Inch Device or 3 1/2-Inch Diskette Drive . 41
Hard Disk Drives ................................................................... 42
Installing a Hard Drive ...................................................... 43
Removing a Hard Drive ..................................................... 46
Hot-Swapping a Hard Drive ............................................... 47
Installing a Hard Disk Drive Cage ........................................... 49
5-1
Precautions
The following warnings and cautions apply throughout
this chapter. Only a technically qualified person should
integrate and configure the system.
The only procedure that can safely be done with the
system power on is installing (or hot-swapping) an SCA
drive/carrier assembly in one of the SCSI hot-swap
drive cages or hot-swapping a failed power supply. For
any other procedures inside the system, turn off system
power and disconnect the AC power cord(s).
!
Warning: Before doing the procedures in this chapter,
make sure that your system is powered off and unplug
the AC power cords. Failure to disconnect power before
opening your system can result in personal injury and
equipment damage
!
Warning: System power on/off. The DC push-button
on/off switch (a convex button) on the front panel DOES
NOT turn off the system AC power. To remove power
from system, you must unplug the AC power cord(s)
(from wall outlet or power supply).
!
Warning: Hazardous conditions, power supply.
Hazardous voltage, current, and energy levels are
present inside the power supply. There are no user
serviceable parts inside it; servicing should be done by
technically qualified personnel
!
Warning: Hazardous conditions, devices & cables.
Hazardous electrical conditions may be present on
power, telephone, and communication cables. Turn off
the system and disconnect the power cords,
telecommunications systems, networks, and modems
attached to the system before opening it. Otherwise,
personal injury or equipment damage can result
Upgrades and Options
5-2
!
Caution: Electrostatic discharge (ESD) and ESD
protection. ESD can damage disk drives, boards, and
other parts. This system can withstand normal levels of
environmental ESD while you are hot-swapping SCSI
hard drives or hot-swapping a failed fan module or
power supply. However, we recommend that you do all
procedures in this chapter only at an ESD workstation.
If one is not available, provide some ESD protection by
wearing an antistatic wrist strap attached to chassis
ground any unpainted metal surface on your system
when handling parts
!
Caution: ESD and handling boards. Always handle
boards carefully. They can be extremely sensitive to
ESD. Hold boards only by their edges. After removing a
board from its protective wrapper or from the system,
place it component-side up on a grounded, static-free
surface. Use a conductive foam pad if available but not
the board wrapper. Do not slide board over any surface
!
Caution: Ensure complete board insertion. When
installing a CPU board, confirm visually that the board
edge connectors are correctly oriented at the CPU base
board connector—not too low or too high. Make sure the
CPU board is completely seated in the CPU base board
connector before applying power. Incomplete insertion
can result in damage. Also ensure that add-in boards
are completely and correctly seated in the system I/O
board connectors before applying power
!
Caution: Chassis covers, proper cooling and
airflow. For proper cooling and airflow, always install
the chassis side and top covers before turning on the
system. Operating it without these covers in place can
damage system parts
Contact your sales representative or dealer for a list of
approved optional peripheral devices.
Upgrades and Options
5-3
Preparing Your System for Upgrade
Have the following tools available:
■
Phillips screwdriver (#1 bit and #2 bit)
■
Flat-head screwdriver
■
Small needle nose pliers
■
Pen or pencil
■
Utility knife
■
ESD workstation or antistatic wrist strap
(recommended)
■
IC removal tool.
Equipment Log
Use the equipment log form located at the end of this
manual to record the model and serial number of your
system, all installed options, and any other pertinent
information specific to your system. You will need this
information when configuring your system.
Upgrades and Options
5-4
Removing the Front Doors
You must remove the front doors to remove the side
panels on your system. To remove the front doors:
1. Open the front doors and power off the system.
Ensure the power cords are disconnected from their
ac wall outlet.
2. Lift one of the front doors and pull it towards you
(Figure 5-1). The mounting pins of the front door are
disengaged from their mounting holes on the front of
the system.
3. Remove the other front door in the same manner.
Figure 5-1. System Front Doors
Upgrades and Options
5-5
Installing the Front Doors
1. Orient one of the front doors so the mounting pins of
the front door are aligned with their mounting holes
on the front of the system. Slide the lower mounting
pin into its mounting hole and then slide in the
upper pin.
2. Install the other front door in the same manner.
Removing the Top Cover and Side Panels
To install options in your system, you should do the
following:
■
to modify the system I/O board, add an option board,
or add a removable media device, remove the top
cover
■
to add memory or a processor, remove the left side
panel
■
to install a hard disk cage, remove the top cover and
right side panel.
!
Caution: For proper cooling and airflow, do not operate
the system with the top cover or side panels removed.
Always replace them before powering on the system
!
Caution: Do not damage or bend the EMI fingers that
are located along the edges of the top cover and side
panels, as you remove and install them, or your system
may not meet EMI requirements
!
Warning: If you are removing the top cover or side
panels after the system is set up, you must first power
off the system and all external devices. Unplug the
system power cords
Upgrades and Options
5-6
To remove either the top cover or a side panel:
1. Power off the system and ensure the power cords are
disconnected from their ac wall outlet.
2. Observe the safety and ESD precautions listed at
the beginning of this chapter.
3. The top cover and side panels are secured from the
front edge with two thumb lock screws. Loosen the
thumb screws (Figure 5-2).
Figure 5-2. Mounting Screws for Top Cover and Side Panels
Top cover screws
Right panel screws
Left panel screws
4. Slide the top cover or side panel toward the front of
the chassis (Figure 5-3) about an inch until it stops.
5. Pull the top cover or side panel out and away from
the chassis.
6. Set the cover or panel aside for reattaching later.
Upgrades and Options
5-7
Figure 5-3. Top Cover and Side Panels Removal
Installing the Top Cover and Side Panels
1. Before replacing the top cover or side panel, make
sure no tools or loose parts have been left inside the
system chassis.
2. Make sure all option boards are firmly seated in
their respective slots and that all interior cables are
properly connected.
3. The top cover and side panels have tabs that align
with the slots in the chassis(Figure 5-3). Align the
tabs with the slots in the chassis and carefully push
inward.
Upgrades and Options
5-8
4. Slide the cover or panel toward the rear of the
chassis so the tabs firmly engage in the slots.
5. Attach the cover or panel to the chassis by firmly
tightening the two thumb screws.
Note: If your system is already set up, plug the system
back in, reconnect the peripherals, and power on the
peripherals and system.
Modifying the System I/O Board
The following sections provide procedures for upgrading
and configuring the system I/O board in your system.
Topics covered include:
■
Installing video memory
■
Replacing the non-volatile memory
■
Replacing the real-time clock battery.
Notice: Electrostatic discharge (ESD) can damage addin boards and other components; place them on an
antistatic surface. Wear an antistatic wrist strap
attached to chassis ground.
Installing Video Memory
The base system includes two 512K video memory
modules and two sockets on the system I/O board. If you
add two additional 512K video memory modules into the
sockets shown in Figure 5-4, the base video memory size
is increased from 1 MB to 2 MB.
Upgrades and Options
5-9
Figure 5-4. Video Memory Location
To install video memory:
Notice: Observe static precautions. Use an antistatic
wrist strap.
1. If the system is on, power off the system and remove
the top cover as described earlier in this chapter.
2. Align the beveled edge of the video memory module
with the notched corner of the video memory socket.
Refer to Figure 5-4 for the video memory socket
location.
4. Press the video memory module down firmly until it
is fully seated in its socket.
5. Replace the top cover and power on the system.
Upgrades and Options
5-10
Replacing the Non-Volatile Memory
You may need to replace the non-volatile memory
because of its internal integral lithium battery life
span. Contact your sales representative or dealer for a
list of approved devices. Its located on your system I/O
board as shown in Figure 5-5. Notice the dot on the
chip. This dot will assist you in correctly positioning the
chip on the system board.
!
Caution: Danger of explosion if battery is incorrectly
replaced. Replace only with same or equivalent type
recommended by manufacturer. Dispose of lithium
batteries as required by local ordinance or as normal
waste if no local ordinance exists. Do not expose the
component to excessive heat or fire. Keep all batteries
away from children
To replace the non-volatile memory:
Notice: Observe static precautions. Use an antistatic
wrist strap.
1. Power off the system and remove the top cover as
described earlier in this chapter.
2. If the non-volatile memory is secured by a tie-wrap,
remove the tie-wrap. Using a IC removal tool or a
small pointed tool, gently pry up each end of the nonvolatile memory and pull it straight up out of its
socket (Figure 5-5).
3. Orient the new chip over its socket so the dot is
properly oriented. Carefully insert the chip into its
socket connectors.
4. Press down on the chip until it is firmly seated in its
socket.
5. Replace the side panel and turn on the system.
6. Run the BIOS SETUP to restore proper configuration
settings.
Upgrades and Options
5-11
Figure 5-5. Non-Volatile Memory Location
Replacing the Real-time Clock Battery
You may need to replace the real-time clock (RTC)
battery because of its battery life span. The battery
powers the clock in the absence of power. When the
battery starts to weaken, it loses voltage, and the
system settings stored in CMOS RAM (for example, the
date and time) may be wrong.
The battery (Vendor Part No. CR2450) is a commodity
part available through many vendors. Its located on
your system I/O board as shown in Figure 5-6. Notice
the plus (+) sign on the battery. This sign will assist
you in correctly positioning the battery on the system
board. Contact your sales representative or dealer for a
list of approved devices.
Upgrades and Options
5-12
Figure 5-6. Location of the Real-Time Clock Battery
+
!
Caution: Danger of explosion if battery is incorrectly
replaced. Replace only with same or equivalent type
recommended by manufacturer. Dispose of lithium
batteries as required by local ordinance or as normal
waste if no local ordinance exists. Do not expose the
component to excessive heat or fire. Keep all batteries
away from children
To replace the battery:
Notice: Observe static precautions. Use an antistatic
wrist strap.
1. Power off the system and remove the top cover as
described earlier in this chapter.
2. If the battery has a protective plastic cover, remove
the cover by lifting it away from the battery. Using
your finger nail or a small pointed tool, gently push
up the bottom edge of the battery and pry the it out
of its socket. Refer to Figure 5-6 for the socket
location.
Upgrades and Options
5-13
3. Orient the new battery over its socket so the plus (+)
sign on the battery is facing up.
4. Carefully insert the top of the battery into the
socket connectors and gently push the battery into
the socket.
5. Press down on the battery until it is firmly seated in
its socket.
6. Replace the top cover and turn on the system.
7. Run the BIOS Setup to restore configuration
settings to the real-time-clock.
DIMMs
The CPU base board (Figure 2-5) contains sixteen
DIMM sockets arranged in eight banks. Each 168-pin
socket can hold a single 72-bit DIMM module with
64MB, 128MB, or 256MB of memory. When all sixteen
sockets are populated, the memory board supports a
maximum of 4GB of memory with 256MB DIMMs.
DIMMs must be identical within a bank.
The first bank of DIMMs should be installed in sockets
P06 and P08 (Figure 5-7). When you install additional
DIMMs, you must start with bank 2 and continue to
bank 8. When you remove DIMMs, you must start with
the highest populated bank of DIMMs.
The following sections provide procedures for
configuring the memory in your system.
!
Warning: If the system has been running, the CPU
boards will be hot. To avoid the possibility of a burn
while configuring memory, let the components cool for
10 minutes before continuing with the procedures
described here
Upgrades and Options
5-14
Installing DIMMs
When properly installed, the DIMM module is oriented
at an angle of 90 degrees relative to the CPU base
board.
1. Power off the system and remove the left side panel
as described earlier in this chapter.
Notice: Observe static precautions. Use an antistatic
wrist strap. Hold DIMMs only by their edges.
2. Holding the DIMM module only by the edges, remove
it from its antistatic package.
3. DIMMs are keyed so they can only be inserted one
way. Position the DIMM over the socket on the board
(Figure 5-7, A and B). The notches in the bottom
edge of the DIMM mates with the raised bumps in
the DIMM socket.
Figure 5-7. Inserting Memory DIMMs
A
C
B
Bank
Upgrades and Options
P21
P19
8
7
P20
P18
P17
P15
6
5
P16
P14
P13
P11
4
3
P12
P10
P09
P07
2
1
P08
P06
5-15
4. Press down evenly on the DIMM until it seats
correctly. The white levers on the sockets are not
"tools" to aid in the insertion, only to keep the
DIMM's in place and to aid in extraction. The levers
should click in place once the DIMM is fully
inserted.
5. Repeat the above steps to install any remaining
DIMMs.
6. Replace the left side panel and turn on the system.
7. Run the BIOS Setup to confirm the DIMMs are
installed correctly.
Removing DIMMs
1. Power off the system and remove the left side panel
as described earlier in this chapter.
Notice: Use extreme care when removing a DIMM. Hold
DIMMs only by their edges. Place them on an antistatic
surface; do not slide them across any surface. Applying
too much pressure can break the retaining clips or
damage the socket slot. Apply only enough pressure on
the retaining clips to release the DIMM.
2. Remove the DIMM modules one at a time starting
from the highest numbered sockets.
3. To remove each DIMM, gently spread the retaining
clips (Figure 5-7, C) just enough so that you can pull
the top edge of the DIMM away from the clips.
4. Carefully lift the DIMM away from the socket and
store it in an antistatic package.
5. Repeat the above steps to remove the remaining
DIMMs.
Upgrades and Options
5-16
Processors
The following sections provide procedures for upgrading
and configuring the processors in your system. Topics
covered include:
!
■
Removing the CPU board support panel
■
Removing the CPU board and protective cage from
the CPU board
■
Adding or removing processors
■
Attaching the protective cage on the CPU board and
installing the CPU board
■
Installing the CPU board support panel.
Warning: If the system has been running, any processor
and heat sink already installed will be hot. To avoid the
possibility of a burn while removing the CPU board, let
the components cool for 10 minutes before continuing
with the procedures described here
Notice: Electrostatic discharge (ESD) can damage addin boards and other components; place them on an
antistatic surface. Modify the CPU board only at an
ESD workstation. Otherwise, wear an antistatic wrist
strap attached to chassis ground.
Note: The HX4100 server can be purchased with a
single power supply. If you are adding a second
processor to a single power supply HX4100, you must
also add a second power supply.
Removing the CPU Board
The system has a primary and secondary CPU boards.
These boards contain either two or three processor
sockets and voltage module sockets to power each
processor.
1. Power off the system and remove the left side panel
as described earlier in this chapter.
Notice: Observe static precautions. Use an antistatic
wrist strap.
Upgrades and Options
5-17
2. A metal panel supports the primary and secondary
CPU boards (Figure 5-8, B). To remove a CPU board,
you must remove this support panel. The support
panel is secured to the chassis by two pins (Figure 58, A). Release the support panel pins by pulling them
towards you (listen for two clicks).
Figure 5-8. Removing CPU Board Support Panel
A
B
3. Grasp the left side of the support panel and swing it
away from the chassis to remove it. Set the support
panel aside for later installation.
Notice: To prevent damage to the CPU base board from
a partially inserted CPU board and to provide proper
cooling and airflow, always install the metal support
panel before installing the chassis side panels and top
cover and turning on the system. Operating the system
without this support panel in place can damage system
parts.
Upgrades and Options
5-18
4. Open the ejectors on both sides of the CPU board you
want to modify. The primary CPU board is the top
board (Figure 5-9, A) and the secondary CPU board is
the bottom board (Figure 5-9, B).
Figure 5-9. CPU Board Ejectors
A
B
5. Holding the CPU board by its edges, carefully pull it
out until the edge connectors are free.
6. Place the CPU board on an antistatic surface. Store
the CPU board in an antistatic protective wrapper if
you are not installing or removing a processor at this
time.
7. The CPU protective cage is secured to the CPU board
by three nylon rivets (Figure 5-10). Remove the three
nylon rivets and store them in a safe place for reuse.
Upgrades and Options
5-19
Figure 5-10. CPU Board Protective Cage
Installing a Processor
The CPU base board has two connectors for CPU boards,
a primary (top connector) and a secondary (lower
connector). A CPU board can be either a dual or triple
CPU board. Processors are added to the primary CPU
board first. Once the primary CPU is fully populated,
processors are added to the secondary CPU board.
The processor upgrade kit contains a DC to DC
converter board, processor chip, heat sink pad, heat
sink retention clip, and heat sink. The heat sink pad
attaches to the bottom of the heat sink and the
retention clip holds the heat sink to the ZIF socket. The
dark circled numbers in Figure 5-11 illustrate the
sequence the processor upgrade kits should be added to
the system
When adding additional processors, use the same type
and speed as the processors previously installed in your
system. Contact your sales representative.
Notice: Installing processors that are of a different
type than the installed processors, will result in
system damage. Do not touch or bend the processor's
exposed pins.
Upgrades and Options
5-20
Figure 5-11. Installing an Optional Pentium Processor
2
2
D
1
E
1
a. Dual CPU Board
F
2
3
2
C
3
A
G
1
1
B
b. Triple CPU Board
To install an optional processor upgrade kit:
1. Remove the CPU board as described earlier in this
section.
Notice: Observe static precautions. Use an antistatic
wrist strap.
2. If the processor socket has a protective plastic cap,
remove the cap by lifting it away from the ZIF
socket. Raise the lever on the socket to the up
position (Figure 5-11, A).
3. Position the processor (C) over its ZIF socket(B) so
that the processor pins align with the socket holes.
Note that the pins get denser as they get closer to
the lever on the ZIF socket.
Upgrades and Options
5-21
4. Insert the processor pins into the socket. Apply
pressure equally over the top surface of the
processor until it seats in the socket. The processor
should fit easily, do not force it into the socket.
5. Push ZIF socket lever down (G) until it snaps into
the locked position.
6. Remove the protective paper from the adhesive side
of the heat transfer pad (F). Align the pad with the
raised position on the bottom of the heat sink (E)
and press the adhesive side of the pad onto the
bottom of the heat sink.
7. Position the heat sink above the processor so the
retention clip (D) aligns with the tabs on either side
of the ZIF socket. Engage one end of the retention
clip over the tabs at the base of the socket and press
the other end of the retention clip over the other
socket tab.
8. Locate the DC to DC converter board. The board
connector is keyed so it can only be inserted one
way. Position the board over the socket on the board
and press down evenly on the board until it seats
correctly.
9. Record the processor in the equipment log.
10. Install the CPU board back into the system as
described later in this chapter.
Removing a Processor
Refer to Figure 5-11 while performing the following
procedures. To remove a processor:
1. Remove the CPU board as described earlier in this
section.
Notice: Observe static precautions. Use an antistatic
wrist strap.
2. Push one end of the heat sink retention clip (Figure
5-11,.D) to release the clip from the tabs on the ZIF
socket. Remove the heat sink.
Upgrades and Options
5-22
3. Raise the lever on ZIF socket to the up position (A).
4. Grasp the opposite sides of the processor, apply equal
upward force on each side and rock it from side to
side until it releases. Place the processor in an
antistatic package.
5. Push the lever on the ZIF socket down until it snaps
into the locked position (Figure 5-11, G).
6. Install the processor CPU board back into the system
as described later in this chapter.
Installing the CPU Board
Note: Always install the lower (secondary) CPU board
first.
1. Be careful not to touch components or gold edge
connectors on the processor/memory board as you
remove it from its protective wrapper. Place board
component-side up on an antistatic surface.
2. Using the three nylon rivets, mount the CPU
protective cage onto the CPU board (Figure 5-10). Be
sure the cage frame is firmly hung on the edge of the
CPU board.
3. On the CPU base board, locate the CPU board
connector. Hold the CPU board by its edges and start
to insert it into the slot guides.
4. Do not press in on the board yet! Ease board into the
slot guides until it is just touching the connector on
the CPU base board.
!
Caution: Before pressing the board firmly into the CPU
base board connector, confirm visually that the board
edge connectors are correctly oriented—not too low or
high—at the CPU base board connector.
5. Be sure the ejector levers are extended so they can
engage the chassis frame.
Upgrades and Options
5-23
6. Press the board carefully but firmly into the CPU
base board connector to seat the board. Close the
ejectors on both sides of the CPU board (Figure 5-9).
Be sure the ejector is firmly hooked in the chassis
frame before closing the ejector.
!
Caution: Before applying power, do one more check.
Make sure the CPU board is completely seated in the
CPU base board connector before applying power.
Incomplete insertion can result in damage.
7. A metal panel supports the primary and secondary
CPU boards (Figure 5-8, B). Hook the right side of
the support panel into the chassis frame and swing
the support panel into position so that the rear edge
of the CPU boards fits snug against the panel.
8. The support panel is secured to the chassis by two
pins (Figure 5-8, A). Push on the support panel pins
until they click in the locked position.
9. Replace the left side panel and turn on the system.
10. Run the BIOS Setup to confirm the processors are
installed correctly.
Option Boards
This section describes how to install and remove ISA
and PCI option boards. The system I/O board has two
dedicated ISA bus master expansion slots and nine
dedicated PCI bus expansion slots (see Figure 5-12).
The high-performance PCI local bus allows the adoption
of newer networking technology, such as 100 Megabit/second Ethernet NICs, with a minimum of effort and
without concern for I/O bottlenecks. The PCI local bus
offers up to 133 Mega-byte/second bandwidth.
Upgrades and Options
5-24
Figure 5-12. PCI and ISA Slot Locations
P2 PCI #11
P3 PCI #12
P11 ISA #1
P12 ISA #2
P4 PCI #21
P5 PCI #22
P6 PCI #23
P7 PCI #31
P8 PCI #32
P9 PCI #33
P10 PCI #34
Installation Considerations
Newer adapters, designed for Plug-and-Play systems,
are automatically configured by the system without any
user intervention. Older ISA adapters must be manually
configured as detailed below. Once the manual
configuration is complete, the Plug-and-Play adapters
are configured around the manually configured
adapters without causing any resource conflicts.
Upgrades and Options
5-25
ISA adapters can be Plug-and-Play. ISA adapters that
are not Plug-and-Play must be manually configured
following the instructions supplied with the board. The
configuration is defined to the system by creating the
ISA configuration file when running the RCU. If you are
adding a non-Plug-and-Play ISA option board, run the
RCU before installing the board. For details on running
the SCU, refer to Chapter 4.
On system power-up and reboot, BIOS initiates a scan
sequence looking for Plug-and-Play option boards
installed since the last power up or reboot. The Plugand-Play scan sequence is as follows:
First - BIOS scans for any Plug-and-Play ISA option
board installed in slots P11 - P12, starting with slot
P11.
Second - BIOS scans for any Plug-and-Play PCI
option board installed in slots P2 - P10, starting
with slot P2.
Always install option boards in the first available slot
in the scan sequence. As an example, if there are PCI
option boards installed in slots P2 and P3 of your
system and slots P4 - P10 are vacant, install your Plugand-Play option board into slot P4.
Controller/Adapter Hardware Configurations
Table 5-1 lists the option boards you may add to your
system and provides information on slot location.
Upgrades and Options
5-26
Table 5-1. Option Board Hardware Configurations
OPTION BOARD
SMC 9432TX (1st)3
SMC 9432TX (2nd)3
3COM 3c905B (1st) 3
3COM 3c905B (2nd) 3
Adaptec 3940UW1, 4
Mylex DAC9601, 4
Onboard 7895 SCSI
IRQ2
Set by BIOS
Set by BIOS
Set by BIOS
Set by BIOS
Set by BIOS
Set by BIOS
Set by BIOS
MEMORY
ADDRESS
Set by BIOS
Set by BIOS
Set by BIOS
Set by BIOS
Set by BIOS
Set by BIOS
Set by BIOS
I/O ADDRESS
Set by BIOS
Set by BIOS
Set by BIOS
Set by BIOS
Set by BIOS
Set by BIOS
Set by BIOS
1. For disk controllers plugged into slots and the onboard disk controllers, the sequence for BIOS
scanning to determine the primary (Boot) disk controller is:
ISA slots P11 and P12
PCI slot P2 and P3 (first PCI bus)
Onboard 7895 SCSI (first PCI bus)
PCI slot P4 through P6 (second PCI bus)
PCI slot P7 through P10 (third PCI bus).
It is recommended that the BIOS be disabled on all SCSI controllers except for the controller with the
boot disk drive attached (see The SCSISelect Utilities in the Configuring Your System chapter. This
saves memory address resources and provides control over the boot device independent of board slot
locations.
2. Additional IRQ’s can be made available as follows:
Disabling Comm Port 1 = IRQ4 is available
Disabling Comm Port 2 = IRQ3 is available
Disabling Parallel Port = IRQ7 is available.
3.
A maximum of five LAN channels consisting of any combination of single or dual channel. Install ISA
LAN card in the first available ISA slot from the top. Install PCI LAN card in the first available PCI slot
from the top.
4.
A maximum of four SCSI controllers may be installed. Install the first controller card in PCI slot P2
and the second controller in PCI slot P3.
Upgrades and Options
5-27
Installing an Option Board
1. Power off the system and remove the top cover as
described earlier in this chapter.
Notice: Observe static precautions. Use an antistatic
wrist strap.
2. Remove the option board from its protective
wrapper, holding the board only by the edges. Do not
touch the board components or the gold connectors.
3. Record the option board serial number in the
equipment log.
4. Set any board jumpers or switches as described in
the documentation that comes with the option board.
Note: Refer to the documentation accompanying the
option board for information on whether the board is
to be installed in a PCI or ISA expansion slot.
5. If the PCI board has a handle attached to one end,
remove the handle (Figure 5-13).
Figure 5-13. Removing the Board Handle
6. Refer to Table 5-1 to determine the recommended
option board slot assignment and configuration
parameters. Refer to Figure 5-12 to determine system
board slot locations.
Upgrades and Options
5-28
7. Determine the expansion slot cover that corresponds
to desired expansion slot. Release the cover lock by
pressing on the cover tab and remove the expansion
slot cover (Figure 5-14).
Figure 5-14. Removing the Expansion Slot Cover
8. Holding the board by its top edge or upper corners,
firmly press the board into an expansion slot on the
system I/O board. The tapered foot of the option
board retaining bracket must fit into the mating slot
in the expansion slot frame.
9. The retaining bracket fits into the space that was
occupied by the expansion slot cover. Secure the
expansion board by pushing down on the cover tab
(Figure 5-15).
10. If you have installed a SCSI host adapter board, go
to Appendix A for procedures on cabling these boards
into the system. For all other boards, continue with
step 11.
Upgrades and Options
5-29
Figure 5-15. Installing an Option Board
11. Connect any external cables (if they are needed) to
the installed option board.
12. Replace the top cover and power on the system.
Upgrades and Options
5-30
Removing an Option Board
Note: Expansion slot covers must be installed on all
vacant slots to maintain the electromagnetic emissions
characteristics of the system and to assure proper
cooling of the system components.
1. Power off the system and remove the top cover as
described earlier in this chapter.
2. Disconnect any cables attached to the option board
you are removing.
3. Determine the expansion slot retaining bracket that
corresponds to desired expansion slot and release
the cover lock by pressing on the cover tab (Figure
5-14).
4. Hold the board at each end, and carefully rock it
back and forth until the edge connectors pull free.
Make sure that you do not scrape the board against
other components.
5. Remove the board from the expansion slot and place
it in an antistatic wrapper.
6. If you are replacing a board, go to "Installing an
Option Board" earlier in this chapter, otherwise
continue.
7. Install an expansion slot cover over the vacant slot.
Secure the cover by pushing down on the cover tab
(Figure 5-15).
8. Replace the top cover and power on the system.
9. If you removed an non-Plug-and-Play ISA option
board, run the RCU to configure the system as
described in the Configuring Your System chapter.
Upgrades and Options
5-31
Power Supply
The following sections provide procedures for installing
an additional power supply, removing a power supply,
or swapping out a faulty power supply.
Installing a Power Supply
Use this procedure to add an optional power supply to
your system.
Note: The HX4100 server can be purchased with a
single power supply if the server has only one processor
and one hard drive cage. If a processor or hard drive
cage is added to this single power supply server, you
must add an additional power supply.
1. Power off the system.
2. Each empty power supply expansion bay has a blank
cover. From the bay where you want to install a
power supply, remove the two screws securing the
blank cover (Figure 5-16, B).
3. Slide the new power supply into the chassis and
tighten the thumb screws (Figure 5-16, A) that
secure the power supply.
4. Connect the power cord from the AC wall outlet and
to the input receptacle on the rear of the new power
supply.
5. Power on the system.
Upgrades and Options
5-32
Figure 5-16. Power Supply
B
A
Removing a Power Supply
If the LED indicators on a power supply are lit, it is
recommended that power to the system be turned off
before removing the power supply. To remove a power
supply, perform the following steps.
1. Power off the system.
2. Disconnect the power cord from the AC wall outlet
and from the input receptacle on the rear of the
power supply you are removing.
3. Loosen the thumb lock screws (Figure 5-16, A) that
secure the power supply.
4. Hold the handle on the power supply and pull the
power supply out of the system.
5. If you are replacing a power supply, go to “Installing
a Power Supply” in this chapter, otherwise power on
the system.
Upgrades and Options
5-33
Hot-Swapping a Power Supply
If you are swapping out a faulty power supply, you can
pinpoint which one to remove by checking the status
LED indicators on each supply. If either or both of the
LED indicators are off, the power supply can be hotswapped.
If the LED indicators on a power supply are lit, it is
recommended that power to the system be turned off
before removing the power supply. To remove a power
supply, perform the following steps.
1. Disconnect the power cord from the AC wall outlet
and from the input receptacle on the rear of the
power supply.
2. Loosen the thumb lock screws (Figure 5-16, A) that
secure the power supply you want to replace.
3. Hold the handle on the power supply and pull the
power supply out of the system.
4. Slide the replacement power supply into the chassis
and tighten the thumb screws (Figure 5-16, A) that
secure the power supply.
5. Connect the power cord from the AC wall outlet and
to the input receptacle on the rear of the new power
supply.
Upgrades and Options
5-34
Removable Media Devices
A CD-ROM reader is always mounted in bay D. SCSI
removable media devices can be installed in peripheral
bays A, B, and C. SCSI devices should be installed in
the first available bay from the bottom (bay D). Figure
5-17 illustrates the recommended removable media
configuration. These bays are intended to hold tape,
CD-ROM, or other removable media drives. Narrow
SCSI drives in the 5 1/4-inch bays receive control
signals from channel B of the SCSI-2 controller on the
system I/O board.
Notice: The SCSI termination resistors must be
installed in the last SCSI drive of the daisy chain
cabling (bottom media bay D). All other devices must
have terminators removed.
Hard disk drives cannot be installed in a 5 1/4-inch
external bay because the drive generates EMI, is more
susceptible to ESD, and would not have sufficient
cooling.
A 1.44 MB diskette drive is always mounted in bay E.
A second 3 1/2-inch device can be installed in bay F.
Upgrades and Options
5-35
Figure 5-17. Removable Media Device Bays
A
B
C
D
Removable Media Device
Bays
E
F
A 5 1/4-inch expansion bay
B 5 1/4-inch expansion bay
C 5 1/4-inch expansion bay
D CD-ROM reader
E 1.44 MB diskette
F 3 1/2-inch expansion bay
Bay A
SCSI QIC Tape.
SCSI DAT Tape.
Device must have the internal SCSI terminators removed.
BAY B
Second SCSI CD-ROM.
SCSI QIC Tape.
SCSI DAT Tape.
Device must have the internal SCSI terminators removed.
Bay C
SCSI QIC Tape.
SCSI DAT Tape.
Device must have the internal SCSI terminators removed.
Bay D
SCSI CD-ROM (always installed).
Device must have the internal SCSI terminators installed.
Bay E
1.44 MB diskette drive (always installed).
Bay F
Second 3 1/2-inch device.
Upgrades and Options
5-36
Installing a 5 1/4-Inch Device or 3 1/2-Inch Diskette Drive
!
Caution: CD-ROM devices contain a laser system and
are classified as CLASS 1 LASER PRODUCTS. In case
of any trouble with a CD-ROM, please contact your
nearest service representative. To prevent direct
exposure to the laser beam, do not try to open the
enclosure.
Use of controls or adjustments or performance of
procedures other than those recommended by the
manufacturer may result in hazardous radiation
exposure
Note: If you are replacing a diskette drive in Bay E or
installing a diskette drive in bay F, use the internal
diskette drive cables provided with the system. If you
are installing a SCSI device in bays A, B, or C, you
must use the internal SCSI cables. Contact your sales
representative or dealer for a list of approved optional
peripheral devices.
1. Power off the system. Remove the left front door and
the top cover as described earlier in this chapter.
2. Each empty media or diskette drive bay has a blank
panel tray. From the bay where you want to install a
drive, remove the two screws securing the blank
panel tray to the chassis (Figure 5-18).
Note: When installing a full height 5 1/4-inch
device, remove two blank panels.
3. Grasp the blank panel tray and slide it out of the
bay.
4. Remove the two screws securing each side rail to the
blank panel tray (Figure 5-19).
5. Save the blank panel tray and screws to reuse if you
remove a drive from a bay later and do not reinstall
one.
Upgrades and Options
5-37
Figure 5-18. Removing Blank Panel Tray
Figure 5-19. Removing Side Rails
6. Remove the device from its protective wrapper and
place it on an antistatic surface. Record the drive
model and serial number in the equipment log.
Upgrades and Options
5-38
7. Set any device jumpers or switches on the device.
Refer to the installation procedures that came with
the device.
Notice: SCSI termination resistors for the 5 1/4-inch
devices must be installed in the last SCSI device of the
daisy chain cabling (bottom media bay D). All other 5
1/4-inch devices must have terminators removed.
8. Using the four screws supplied with the drive,
reinstall the side rails just removed from the blank
panel tray (Figure 5-20, A). The rails for each side of
the device are identical.
Note: Do not use the screws that were used to
secure the blank panel tray
Figure 5-20. Attaching Side Rails to a Device
A
C
A
B
Attaching side rails to
removable media drive
A Side rails
B Four drive mounting screws
C Drive
B
9. Engage the device side rails into the bay guide rails
(see Figure 5-21). Ensure that the device side rails
(see Figure 5-22, A) are inside the bay guide rails
exactly as shown in Figure 5-22, B.
10. Push the drive into the bay until the screw holes of
the side rails are directly in front of the chassis
screw holes and secure with the screws previously
removed.
Upgrades and Options
5-39
Figure 5-21 Installing Device
Figure 5-22. Engaging the Device Side Rails to the Bay Guide Rails
A
B
Upgrades and Options
5-40
11. Connect a power cable to the back of the drive (see
Figure 5-23).
Note: For 5 1/4-inch devices power cables are
provided in the chassis for removable 5 1/4-inch
media drives (including the CD-ROM that is factoryinstalled). These power cables are interchangeable
for 5 1/4-inch devices only; you can connect any one
of them to any device you install in the 5 1/4-inch
media bays. The connectors are keyed and can be
inserted in only one way.
For 3 1/2-inch diskette drives power cables are
provided in the chassis (including the diskette drive
that is factory-installed). The connectors are keyed
and can be inserted in only one way.
12. Connect the data cable (Figure 5-23) to the device;
the connector is keyed and can be inserted only one
way.
Note: For the 5 1/4-inch devices be certain that you
are using the 50-pin SCSI data cable. This cable
comes from the system I/O board to the removable
media bays and ends at the CD-ROM reader in bay
D. Do not confuse this cable with the 34-pin diskette
drive cable which begins on the system I/O board
and ends at the diskette drive in bay F.
Figure 5-23. Installing Device Cables
A System I/O board
B Signal cable
C Power cable
B
C
A
Upgrades and Options
5-41
13. Reinstall the top cover and the left front door. Power
on the system.
Removing a 5 1/4-Inch Device or 3 1/2-Inch Diskette Drive
1. Power off the system. Remove the left front door and
the top cover as described earlier in this chapter.
2. Disconnect the signal and power cables from the
back of the drive (Figure 5-23).
3. Remove the two screws that secure the device to the
front of the chassis (Figure 5-21).
4. Slide the drive out the front of the bay, and place on
an antistatic surface.
5. Remove and save the side rails and screws (Figure 520).
6. Place drive in an antistatic wrapper.
7. To cover an empty bay, install a blank panel tray in
the bay.(Figure 5-18).
8. Reinstall the top cover and the left front door. Power
on the system.
9. Remove the drive serial number from the equipment
log.
Upgrades and Options
5-42
Hard Disk Drives
The following sections provide procedures for installing
an additional disk drive, removing a disk drive, or
swapping out a faulty disk drive from one of the three
hot-swap drive cages. The 3 1/2-inch SCSI drives must
use the industry standard 80-pin Single Connector
Attachment (SCA) connector. Each drive must be
installed in a carrier.
Note: To order a carrier contact your sales
representative or dealer.
■
If installing new drives, follow an installation
scheme starting with the bottom left drive. Fill the
cages left to right.
■
If an individual SCSI drive fault LED (yellow light)
is on steadily, this indicates that the drive below it
has been flagged as faulty. Follow the procedure
described in this section to remove the faulty drive
and swap in a good one.
Note: Swap SCSI drives without turning off power.
This is one of the few system procedures that is safe to
do with the system power left on. This is true only if a
Redundant Array of Independent Disks (RAID)
controller module is installed and only for the
drive/carrier assemblies in the hot-swap cages, not for
drives in any other bays.
Notice: ESD can damage disk drives, boards, and other
parts. This system can withstand normal levels of
environmental ESD while you are hot-swapping SCSI
hard drives. However, we recommend that you do all
procedures in this chapter only at an ESD workstation
or provide some ESD protection by wearing an
antistatic wrist strap attached to chassis ground any
unpainted metal surface on your system when
handling parts.
Upgrades and Options
5-43
Installing a Hard Drive
Use this procedure to add an optional hard drive to your
system.
1. Power off the system. If locked, unlock and open the
right front door.
2. Determine which hard drive cage will contain the
new hard drive. Open the EMI metal panel in front of
the hard drive cage by turning its two thumb lock
screws counter clockwise (see Figure 5-24).
3. The hard drive cage has four slots for mounting the
hard drives. Confirm which slot of the hard drive
cage the hard drive will be mounted. The SCSI ID (0
through 4) is determined by the slot number from left
to right.
Figure 5-24. Hard Disk Drive Cages
Three hard drive cages
(EMI panel and exterior door
shown open)
Upgrades and Options
5-44
Notice: Observe static precautions. Use an antistatic
wrist strap.
4. The drive carrier is shipped with the add-on drive.
Remove the new drive from its protective wrapper
and place it on an antistatic surface. Record the
drive model and serial numbers in the equipment log.
5. Position the drive so its SCA connector is near the
top surface of the drive. Place drive on the antistatic
surface again. Slide the drive into the carrier with
its SCA connector facing toward the front of the
carrier (open end).
6. While holding the drive in the carrier with your left
hand, align the drive’s screw holes with the carrier’s
screw holes and insert the four screws of appropriate
size and length (see Figure 5-25).
7. Pressing the lock button on the carrier handle, open
the handle. Align the drive/carrier assembly so it
engages the guide rails in the hard drive cage (see
Figure 5-26).
Figure 5-25. Installing Hard Disk in Carrier
Installing 3 1/2inch hard disk
drive in carrier for hot-swap bays
A Carrier
A
B Four screws
C Hard disk drive
C
D
D SCA connector
B
Upgrades and Options
5-45
Figure 5-26. Installing Carrier in the System
8. Gently push the assembly into the bay until the
drive docks with the backplane connector. Be sure
the hook on the bottom of the handle engages the
chassis frame and slowly lift the handle. You will
hear a click when the handle locks in place.
9. Close the EMI metal panel, and secure with the two
thumb screws.
10. Power on the system and close the front door.
Upgrades and Options
5-46
Removing a Hard Drive
Use this procedure to remove a hard drive from your
system.
1. Power off the system. If locked, unlock and open the
right front door.
2. Determine which hard drive cage contains the hard
drive you want to remove. Open the EMI metal panel
in front of the hard drive cage by turning its two
thumb lock screws counter clockwise (see Figure 524).
3. The hard drive cage has four hard drive slots.
Confirm which slot of the hard drive cage contains
the hard drive to be removed.
4. Grasp the handle of the hard disk’s carrier and press
down on its thumb-release button (see Figure 5-27).
5. Remove the hard disk and place it in an antistatic
wrapper. Close the EMI metal panel, and secure with
the two thumb screws.
6. Power on the system and close the front door.
Figure 5-27. Removing the Hard Disk Carrier
Upgrades and Options
5-47
Hot-Swapping a Hard Drive
If you are swapping out a faulty hard drive, you can
pinpoint which drive to remove by checking the status
LEDs that occur in sets of three above each of the four
drive bays. Refer to “Status LED Indicator
Descriptions” in Chapter 2.
Notice: When the SCSI drive fault LED indicates a
drive fault (steady yellow light), you can remove the
drive and swap in a replacement at any time when the
drive is not being accessed, without needing to power
down the system. However, drive manufacturers caution
against moving a drive that is still spinning because of
possible damage to the drive.
1. If locked, unlock and open the right front door.
2. Determine which hard drive cage contains the faulty
hard drive. Open the EMI metal panel in front of the
hard drive cage by turning its two thumb lock screws
counter clockwise (see Figure 5-24).
3. The hard drive cage has four hard drive slots. Check
all the drive LEDs to confirm which drive to remove.
Refer to “Status LED Indicator Descriptions” in
Chapter 2.
Notice: Depending on the drive fault, the drive may be
still spinning when you remove it. Follow the next step
exactly when removing drives.
4. Grasp the handle of the hard disk’s carrier and press
down on its thumb-release button (see Figure 5-27).
Pull the faulty drive out of the bay far enough to
disengage the drive connector from the backplane.
Wait 30 seconds until the drive spins down, then
remove the drive from the drive bay.
Notice: Observe static precautions. Use an antistatic
wrist strap.
5. Place the removed hard drive on an antistatic
surface.
Upgrades and Options
5-48
6. Remove the replacement drive from its protective
wrapper and place it on an antistatic surface. If a
drive carrier was not shipped with the replacement
drive, remove the carrier from the removed drive.
7. Place the removed hard drive in an antistatic
wrapper.
8. Position the replacement drive so its SCA connector
is near the top surface of the drive. Place drive on
the antistatic surface again. Slide the drive into the
carrier with its SCA connector facing toward the
front of the carrier (open end).
9. While holding the drive in the carrier with your left
hand, align the drive’s screw holes with the carrier’s
screw holes and insert the four screws of appropriate
size and length (see Figure 5-25).
10. Pressing the lock button on the carrier handle, open
the handle. Align the drive/carrier assembly so it
engages the guide rails in the hard drive cage (see
Figure 5-26).
11. Gently push the assembly into the bay until the drive
docks with the backplane connector. Be sure the hook
on the bottom of the handle engages the chassis
frame and slowly lift the handle. You will hear a click
when the handle locks in place.
12. Close the EMI metal panel, and secure with the two
thumb screws.
13. Close the front door.
Upgrades and Options
5-49
Installing a Hard Disk Drive Cage
The system has up to three hard disk drive cages that
hold up to four disks each (Figure 5-28). Use this
procedure to add an optional hard disk drive cage to
your system.
Note: The HX4100 server can be purchased with a
single hard drive cage. If a hard drive cage is added to
this server, you must add an additional controller board
(either SCSI or RAID).
Note: The HX4100 server can be purchased with a
single power supply. If a hard drive cage is added to
this server, you must add an additional power supply.
1. Power off the system and remove the right front
door, the top cover, and the right side panel as
described earlier in this chapter.
2. Each empty disk drive expansion bay has a blank
cover. From the bay where you want to install a hard
drive cage, remove the four screws securing the
blank cover (Figure 5-29).
Figure 5-28. Hard Disk Drive Cages
Third Drive Cage
Second Drive Cage
First Drive Cage
Upgrades and Options
5-50
Figure 5-29. Removing Disk Drive Expansion Bay Cover
3. Carefully side the new hard drive cage into the
chassis and secure it with five screws (Figure 5-30).
Figure 5-30. Installing Hard Disk Drive Cage
Upgrades and Options
5-51
4. Connect the status cable (Figure 5-31, A) to the back
of the new hard drive cage; the connector is keyed
and can be inserted only one way.
5. Connect a power cable to the back of the new hard
drive cage (see Figure 5-31, B or D)).
6. Connect a signal cable to the back of the new hard
drive cage (see Figure 5-31, C or E)).
Note: For the signal cable be certain that you are
using the 68-pin SCSI signal cable. This cable comes
from the controller at the top of the server to the
hard drive cage.
7. Reinstall the right side panel, the top cover, and the
right front door. Power on the system.
8. If you are installing a controller for the additional
hard drive cage, refer to Installing an Option Board
in this chapter.
Figure 5-31. Installing Hard Disk Drive Cage Cables
A B C
D
E
A Status cable (P03)
B Power cable (P01) for 3rd cage
C Signal cable (P02) for 3rd cage
D Power cable (P01) for 2nd cage
E Signal cable (P02) for 2nd cage
Upgrades and Options
5-52
Upgrades and Options
Chapter 6
Problem Solving
Contents
Resetting the System............................................................... 1
Troubleshooting Checklists ...................................................... 2
Initial System Startup ......................................................... 2
Running New Application Software ...................................... 4
After System Has Been Running Correctly ........................... 5
Additional Troubleshooting Procedures ..................................... 6
Error Checking ................................................................... 6
Troubleshooting Guide ....................................................... 6
Preparing the System for Diagnostic Testing ................... 7
Monitoring POST while it is running ................................ 8
Verifying Proper Operation of Key System Indicators ....... 9
Confirming Loading of the Operating System .................. 9
Specific Problems and Corrective Actions ............................... 10
Power LED Does Not Light................................................ 11
System Cooling Fans Do Not Rotate .................................. 11
No Characters Appear On Screen...................................... 12
Characters are Distorted or Incorrect................................. 13
Floppy Disk Drive Activity LED Does Not Light ................... 13
Hard Disk Drive Activity LED Does Not Light ...................... 14
Problems with Application Software ................................... 15
Error Message ...................................................................... 16
Alarm Indication during POST ........................................... 16
Alarm Indication during Operation ..................................... 18
CPU Error Messages ................................................... 20
Memory Error Messages .............................................. 20
Status LED ........................................................................... 20
dfgdfg
6-1
This chapter helps you identify and solve problems that
may occur during system installation or while using
your system. The first section of this chapter tells you
how to reset your system in the event of problems. The
next few sections provide troubleshooting checklists and
procedural steps that help you isolate specific system
problems. The last sections include error message and
status LED user information.
!
Warning: The DC push-button on/off switch on the
front panel does not turn off the system AC power.
Before doing the procedures in this chapter, make sure
that your system is powered off and unplug the AC
power cord from the back of the chassis. Failure to
disconnect power before opening your system can result
in personal injury and equipment damage
Resetting the System
There are two ways to reset the system:
Reset button
Pushing the reset button clears the system memory,
restarts the POST, and reloads the operating
system.
Power off/on
Turning the power off and then on with the pushbutton switch on the front panel has the same effect
as pushing the reset button, except that power is
halted to all peripherals.
Problem Solving
6-2
Troubleshooting Checklists
The following subsections provide troubleshooting
checklists for problems that occur at initial system
startup, when you run new application software, and
after the system hardware and software have been
running correctly.
Initial System Startup
Problems that occur at initial system startup are
usually caused by incorrect installation or
configuration. Hardware failure is a less frequent
cause. If you have problems during initial system
startup, check the following:
Problem Solving
■
Is the system power cords properly connected to the
system and plugged into a NEMA 5-15R outlet (100120 V ac) or a NEMA 6-15R outlet (200-240 V ac)?
■
Is AC available at the wall outlets?
■
Is the power on/off push-button switch on the front
panel in the ON position (power on LED should be
lit)?
■
Are all cables correctly connected and secured?
■
Are all the PCI/ISA option boards fully seated in
their connector slots on the system board?
■
Are all jumper settings on the system I/O board
correct? For jumper information, see the
Configuring Your System chapter.
■
Are all jumper and switch settings on option boards
and peripheral devices correct? If applicable, ensure
that there are no conflicts; for example, two option
boards sharing the same interrupt.
■
Are all DIMMs fully seated and installed correctly?
Refer to the Upgrades and Options chapter for
installation instructions.
6-3
■
Are all removable media drives and disk drives
installed correctly? Refer to the Upgrades and
Options chapter.
■
If the system has a hard disk drive, is it properly
formatted or defined?
■
Is the operating system properly loaded? Refer to
the operating system documentation.
■
Are all drivers properly installed? For information
about installing drivers, refer to your network
operating system configuration guide.
■
Are the configuration settings in Setup and the
Resource Configuration Utility (RCU) correct? For
information about running these utilities, refer to
the Configuring Your System chapter.
If the above items are all correct, but the problem
reoccurs, refer to Additional Troubleshooting
Procedures in this chapter.
Problem Solving
6-4
Running New Application Software
Problems that occur when you run new application
software are usually related to the software. Faulty
equipment is much less likely, especially if other
software runs correctly. If you have problems while
running new application software, check the following:
■
Does the system meet the minimum hardware
requirements for the software? Refer to the software
documentation.
■
Is the software an authorized copy? Unauthorized
copies often do not work. Obtain an authorized copy
of the software.
■
If you are running the software from a floppy disk,
is it a good copy?
■
If you are running the software from a hard disk
drive, is the software correctly installed? Were all
necessary procedures followed and files installed?
■
Are the correct device drivers installed?
■
Is the software correctly configured for the system?
■
Are you using the software correctly?
■
Try a different copy of the software to see if the
problem is with the copy you are using.
■
If other software runs correctly on the system,
contact your vendor about the failing software.
If the problems persist with the software, contact the
software vendor's customer service representative.
Problem Solving
6-5
After System Has Been Running Correctly
Problems that occur after the system hardware and
software have been running correctly often indicate
equipment failure. However, many situations that are
easy to correct can also cause such problems. If you
have problems after the system has been running
correctly, check the following:
■
If you are running the software from a floppy disk,
try a new copy of the software.
■
If you are running the software from a hard disk
drive, try running it from a floppy. If the software
runs correctly, there may be a problem with the copy
on the hard disk. Reinstall the software on the hard
disk drive and try running it again. Make sure all
the necessary files are installed.
■
If the problem recurs, you may need to reformat the
hard disk drive. The drive, the drive controller, or
the system boards may be defective.
■
If the problems are intermittent, there may be a
loose cable, dirt in the keyboard (if keyboard input
is incorrect), a marginal power supply, or other
random component failures.
■
If you suspect that a transient voltage spike, power
outage, or brownout might have occurred, reload the
software and try running it again. Symptoms of
voltage spikes include a flickering video display,
unexpected system reboots, and the system not
responding to user commands.
Note: Voltage spikes can corrupt or destroy data
files on the drive. If you are experiencing voltage
spikes on the power line, install a surge suppresser
between the power outlet and the system power
cords.
If the problem recurs after you have checked and
corrected all of the above items, refer to Additional
Troubleshooting Procedures in this chapter.
Problem Solving
6-6
Additional Troubleshooting Procedures
This section provides a more detailed approach to
diagnostic testing and identification of a problem and
locating its source.
Error Checking
Each time you turn on the system, the POST runs
automatically and checks the system boards, processors,
memory, keyboard, and most installed peripheral
devices.
If POST finds an error, it displays an error message.
Refer to the Error Message section in this chapter for an
explanation of each error message.
Troubleshooting Guide
Use the following troubleshooting procedures to help
you identify a problem. These general procedures lead
you through the following:
Problem Solving
■
Preparing the system for diagnostic testing
■
Monitoring POST while it is running
■
Verifying proper operation of key system LEDs
■
Confirming loading of the operating system.
6-7
Preparing the System for Diagnostic Testing
To prepare the system for diagnostic testing, perform
the following:
Notice: Before disconnecting any peripheral cables
from the system, turn off the system and any external
peripheral devices. Failure to do so can cause
permanent damage to the system and/or the peripheral
devices.
1. Turn off the system and all external peripheral
devices. Disconnect all devices from the system
except the keyboard and video monitor.
2. Make sure the system power cords are plugged
into a properly grounded AC outlet.
3. Make sure your video display monitor and
keyboard are correctly connected to the system.
Turn on the video monitor. Set its brightness and
contrast controls to at least two-thirds of their
maximum ranges (refer to the documentation
supplied with your video display monitor).
4. If the operating system normally loads from the
hard disk drive, make sure there is no diskette in
drive A. Otherwise, place a diskette containing
the operating system files in drive A.
5. Turn on the system. If the power indicator LED
does not light, refer to Power Light Does Not
Light found later in this chapter.
Problem Solving
6-8
Monitoring POST while it is running
Each time you turn on the system, the power-on selftest (POST) runs automatically and checks the system
board, CPU, memory, keyboard, and most installed
peripheral devices.
During the memory test, POST displays the amount of
memory that it is able to access and test. Depending on
the amount of memory, it may take several minutes to
complete the memory test. When the memory test
completes, the following is displayed:
Press <F2> to enter SETUP
Press <F2> if you want to run BIOS Setup. When the
utility appears, follow the instructions on your monitor
to configure BIOS. See Chapter 4, Configuring Your
System. If you do not press <F2>, the above message
remains for a few seconds and the boot process
continues.
When this message appears:
Press <Ctrl><A> for SCSISelect™ Utility!
Press <Ctrl+A> if you want to configure SCSI devices in
your system. When the utility appears, follow the
instructions on your monitor to configure the SCSI host
adapter settings and run the SCSI disk utilities. See
Chapter 4, Configuring Your System. If you choose not
to run the SCSISelect Utility, the boot process
continues.
If POST finds an error, it displays an error message.
This information is useful to your service
representative. Refer to the Error Message section in
this chapter for an explanation of each error code.
The BIOS indicates errors by writing an error code to
the PS/2-standard logging area in the Extended BIOS
Data Area, and by displaying a message on the screen,
which is sometimes preceded by the POST Error Code.
The error code will also be logged to the Event Logging
area.
Problem Solving
6-9
Verifying Proper Operation of Key System Indicators
As POST determines the system configuration, it tests
for the presence of each mass storage device installed in
the system. As each device is checked, its activity
indicator should turn on briefly. Check for the
following:
■
Does the diskette drive activity indicator turn on
briefly. If not, refer to Diskette Drive Activity
Indicator Does Not Light in this chapter.
■
If a second diskette drive is installed, does its
activity indicator turn on briefly. If not, refer to
Diskette Drive Activity Indicator Does Not Light in
this chapter.
■
If there is a hard disk drive or SCSI devices
installed in the system, does the hard disk drive
activity indicator turn on briefly. If not, refer to
Hard Disk Drive Activity Indicator Does Not Light in
this chapter.
Confirming Loading of the Operating System
Once the system boots up, the operating system prompt
appears on the screen. The prompt varies according to
the operating system. If the operating system prompt
does not appear, refer to Problems With Application
Software found later in this chapter.
Problem Solving
6-10
Specific Problems and Corrective Actions
This section provides possible solutions for the
following specific problems:
■
Power LED does not light
■
System cooling fans do not rotate
■
No characters appear on screen
■
Characters on the screen appear distorted or
incorrect
■
Floppy disk drive access LED does not light
■
Hard disk drive access LED does not light
■
The RCU does not boot
■
Problems with application software.
Try the solutions in the order given. If you cannot
correct the problem, contact your service representative
for assistance.
Problem Solving
6-11
Power LED Does Not Light
Check the following:
■
Is the system operating normally? If so, the power
LED is probably defective.
■
Are there other problems with the system? If so,
check the items listed under System Cooling Fans
Do Not Rotate.
System Cooling Fans Do Not Rotate
Note: In addition to the cooling fans that are an
integral part of each power supply, the system has an
option board fan and two CPU fans. The two CPU fans
are redundant in configuration. This means if one fan
fails, its associated fan changes its rotating speed to
high. There are no serviceable components inside the
power supply. If the power supply is opened, the
manufacturer's warranty is voided.
Check the following:
■
Is AC power available at the wall outlet?
■
Are the system power cords properly connected to
the system and the AC wall outlet?
■
Are the power connector for the cooling fan
connected to the system I/O board (option board fan)
and the CPU base board (CPU fans)?
■
Is the front panel power on indicator lit?
If the switches and connections are correct and the
power outlet is functioning, the power supply has
probably failed. Contact your service representative for
assistance.
Problem Solving
6-12
No Characters Appear On Screen
Check the following:
■
Is the riser card fully seated in the system I/O board
connector? The riser card is the small card that the
mouse and keyboard plug into.
■
Is the keyboard working?
■
Is the video display plugged in and turned on?
■
Are the brightness and contrast controls properly
adjusted?
■
Are the video display switch settings correct?
■
Is the video display signal cable properly installed?
If you are using an option video controller board,
perform the following:
1. Verify that the video controller board is fully seated
in the system board connector.
2. Run the RCU to disable the onboard video controller.
3. Reboot the system for changes to take effect.
If there are still no characters on the screen after you
reboot the system, contact your service representative
or authorized dealer for assistance.
Problem Solving
6-13
Characters are Distorted or Incorrect
Check the following:
■
Are the brightness and contrast controls properly
adjusted on the video display? Refer to the
documentation supplied with your video display.
■
Are the video display signal and power cables
properly installed?
■
If the problem persists, the video display may be
faulty or it may be the incorrect type. Contact your
service representative for assistance.
Floppy Disk Drive Activity LED Does Not Light
Check the following:
■
Are the floppy disk drive power and signal cables
properly installed?
■
Are all relevant switches and jumpers on the floppy
disk drive set correctly?
■
Is the floppy disk drive properly configured in
Setup?
If you are using the onboard floppy disk controller, use
Setup to make sure that Onboard Floppy is set to
Enabled. Conversely, to use an optional fixed/floppy
disk controller, make sure that Onboard Floppy is set to
Disabled. For information about running Setup, refer to
the Configuring Your System chapter.
If the problem persists, there may be a problem with
the floppy disk drive, system I/O board, or drive signal
cable. Contact your service representative for
assistance.
Problem Solving
6-14
Hard Disk Drive Activity LED Does Not Light
If you have installed one or more hard disk drives in
your system, check the following:
■
Is the optional disk controller board fully seated in
the system I/O board connector?
■
Is the disk drive seated properly?
■
Are the jumpers on the system I/O board set
correctly?
■
Is the hard disk activity LED cable connector
plugged into the optional controller board, if
present?
If you received error messages, refer to the Error
Message section for information about error messages.
If the problem persists, there may be a problem with
the hard disk drive, the optional controller board,
system I/O board, drive signal cable, or LED connector.
Contact your service representative for assistance.
Problem Solving
6-15
Problems with Application Software
If you have problems with application software, perform
the following:
■
Verify that the software is properly configured for
the system. Refer to the software installation and
operation documentation for instructions on setting
up and using the software.
■
Verify a different copy of the software to see if the
problem is with the copy you are using.
■
Make sure all cables are installed correctly.
■
Verify that the system I/O board jumpers are set
correctly. Refer to the Configuring Your System
chapter for jumper settings.
■
If other software runs correctly on the system,
contact your vendor about the failing software.
If the problem persists, contact the software vendor's
customer service representative for assistance.
Problem Solving
6-16
Error Message
The server status is displayed in 16 digits of
alphanumeric characters on the liquid crystal display
(LCD) on the front of the server. Use this indication
together with the status LED indications to solve
problems that may occur while using your system.
Note: Record the indication of LCD before contacting
your service representative. An alarm indication is
useful when maintaining the server.
Alarm Indication during POST
Each time you turn on the system, the power-on selftest (POST) runs automatically. During POST, the test
that is being executed is displayed on the LCD. If the
same code has been displayed for more than 5 minutes,
an occurrence of fatal error is assumed. Record the code
displayed on LCD, then contact your service
representative.
When an alarm that restricts operation (such as
degradation function) or can be recovered by re-setup
has occurred, an error code is displayed on the LCD.
(An error message is also displayed on the display unit.)
Table 6-1 lists the error codes and messages you may
see during POST.
Problem Solving
6-17
Table 6-1. POST Error Codes and Messages
Code
Error message
Description
0710 WARNING: CPU with error taken Off-line.
A CPU error was detected and the CPU is being
degraded.
0718 ERROR: Forced to use CPU with error.
A CPU error was detected.
0720 WARNING: DIMM groups have been disabled.
A memory error was detected and memory is being
degraded.
0728 ERROR - DIMM group with error is enabled.
A memory error was detected.
0B00 Keyboard controller error
A keyboard controller error was detected.
0B01 Keyboard Error
A keyboard error was detected.
0B02 System cache error - Cache disabled
A CPU cache error was detected.
0B03 System battery is dead - Replace and run
SETUP
NvRAM battery is worn out.
0B04 System CMOS checksum bad - run SETUP
Start the Setup utility to correctly set the CMOS.
0B05 Monitor type does not match CMOS - run SETUP The connected display unit does not match the
internal setting.
0B06 Stuck Key
A key is continuously pressed.
0B07 System timer error
A system timer error was detected.
0B08 Real time clock error
A realtime clock error was detected.
0B09 Previous boot incomplete - default configuration
used (xx)
Previous boot was not terminated normally.
0B0A Keyboard Locked - Unlock key switch
Keyboard is locked.
0B0B Diskette drive A error
An error was detected on the floppy disk drive A.
0B0D address conflict
An error was detected on the standard device
and/or extended board.
0B0E combination not supported
An error was detected on the standard device
and/or extended board.
0B0F
0B14
0B15
0B16
0B17
0B1A
0B1B
0B1C
0B1E
0B1F
0B23
IRQs of I/O devices do not match.
A memory error was detected.
A memory error was detected.
A memory error was detected.
A memory error was detected.
NvRAM value is illegal.
A error was detected on PCI bus.
A error was detected on PCI bus.
CPU step was incorrect.
An abnormal temperature was detected.
CPUs of different cache size were detected.
IO device IRQ conflict
System RAM failed
Shadow RAM failed
Extended RAM failed
Failing Bits
Missing or Invalid NVRAM taken
PCI System Error on Bus/Device/Function
PCI Parity Error on Bus/Device/Function
Unsupported CPU detect.
System Temperature is exceeded limit.
WARNING: CPUs with different L2 cache size
are found.
0B30 Fan 1 Alarm occurred.
0B31 Fan 2 Alarm occurred.
A failure on option slot fan was detected.
A failure on CPU fan was detected.
Problem Solving
6-18
Table 6-1. POST Error Codes and Messages (continued)
Code
Error message
0B40 Invalid System Configuration Data - run
configuration utility
0B41 System Configuration Data Read Error
0B42 Resource Conflict
0B43 Warning: IRQ not configured.
0B44 Expansion Rom not initialized
0B45 System Configuration Data Write Error
— BIOS not installed
—
—
Warning: The system detected on illegal CPU
Card combination.
A system error has occurred.
Description
System configuration is illegal.
Read error of system configuration data.
Resource such as IRQ or memory conflicts.
IRQ conflicts.
Initialization of expansion ROM failed.
Write error of system configuration data.
No bootable device is found on Fast SCSI2 bus
channel.
Combination of CPU cards is invalid.
An error occurred on system.
Alarm Indication during Operation
Table 6-2 lists the alarm indications displayed on LCD
during server operation.
Problem Solving
6-19
Table 6-2. Operational Error Codes and Messages
Error Indication
CPU Err #YZ
(Y:1-2)(Z:1-3)
0BYZ
CPU Error
CPU Thermal
(X:1-2)(Y:1-3)
An error was detected on CPU #YZ.
An error was detected on CPU.
0BXY
CPU Thermal
ISA Error
(X: 1-2)
Description
CPU #XY overheated.
CPU overheated.
050X
ISA Error
An error was detected on ISA board slot #X.
An error was detected on ISA boards.
HDD Thermal
1060
The internal hard disks overheated.
Memory Err
(X:1-8) (Y:1-2)
22XY
A DIMM error was detected. X = bank. Y = 1 (lower) or 2 (upper)
PCI PERR#
A parity error was detected on PCI boards.
PCI PERR#
0901
A parity error was detected on PCI boards slot #11 or #12.
PCI PERR#
0902
A parity error was detected on PCI boards slot #21, #22 or #23.
PCI PERR#
0903
A parity error was detected on PCI boards slot #31, #32, #33 or #34.
PCI SERR#
An error was detected on PCI boards or system I/O board.
PCI SERR#
0A01
An error was detected on PCI boards slot #11 or #12.
PCI SERR#
0A02
An error was detected on PCI boards slot #21, #22 or #23.
PCI SERR#
0A03
An error was detected on PCI boards slot #31, #32, #33 or #34.
POW Major B
10F0
An error was detected on the system power supply.
POW Major E
10F1
An error was detected on the disk expansion cabinet power supply.
Power +3.3V
1012
An abnormal +3.3V was detected.
Power +5V
1013
An abnormal +5V was detected.
Power +12V
1014
An abnormal +12V was detected.
Power -12V
1015
An abnormal -12V was detected.
Power -5V
1016
An abnormal -5V was detected.
Power CPU#11
1010
An abnormal voltage was detected for CPU #11.
Power CPU#12
1011
An abnormal voltage was detected for CPU #12.
Power CPU#21
1020
An abnormal voltage was detected for CPU #21.
Power CPU#22
1021
An abnormal voltage was detected for CPU #22.
Thermal Hi
10X7
(X:1-2)
A cabinet overheated error was detected.
WDT-Timeout
0C00
The watchdog timer timed out.
Unknown SMI
An illegal interrupt occurred.
Problem Solving
6-20
CPU Error Messages
The system can have up to six processors. If an error
occurs in a processor (or VRM), the processor (or VRM)
location is displayed on the LCD as follows:
CPU
CPU
CPU
CPU
CPU
CPU
#11
#12
#13
#21
#22
#23
1st primary CPU board processor
2nd primary CPU board processor
3rd primary CPU board processor
1st secondary CPU board processor
2nd secondary CPU board processor
3rd secondary CPU board processor
In addition, it is also possible to know the CPU location
in the BIOS Setup utility (by CPU Configuration in the
Advanced menu).
Memory Error Messages
The system can have up to sixteen DIMMs. If an error
occurs in memory, the DIMM location is displayed on
the LCD as a combination of two numerals specifying
the bank and socket. The numerals in the error message
correspond to the lower two digits of the number of the
relevant DIMM memory socket on the CPU base board.
In addition, it is also possible to know the DIMM
location in the BIOS Setup utility (by Memory
Configuration in the Advanced menu).
Status LED
This section lists and describes the various system and
disk status LED indicators and provides a user response
for the various status conditions. Once your server is up
and running, you can monitor server operation through
the system status LED panel indicators and the SCSI
device status LED panel indicators. See Table 6-3 and
Table 6-4 for a list and description of the LED
indicators and Table 6-5 for a list of the system status
abnormal conditions.
If any problems persist, contact your service
representative for assistance.
Problem Solving
6-21
Table 6-3. System Status LED Indicators
LED
Status
Description
Response
Power
Off
Power OFF
None required (normal)
Green
Power ON
None required (normal)
Amber
System power supply failure
Replace failed power
supply module.
Off
Power OFF
None required (normal)
Green
No alarms
None required (normal)
Amber
Abnormal condition
(see Table 2-3).
Check condition.
Off
Not accessing disk drives
None required (normal)
Amber
Internal disk drive failure
Check disk drive status
LEDs
Green
Accessing disk drives
None required (normal)
Status
Disk
Table 6-4. Disk Drive Status LED Panel Indicators
LED
Status
Description
Response
Disk Drive
Present
Off
Disk drive not present
None required (normal)
Green
Disk drive present
None required (normal)
Off
Not accessing disk drive
None required (normal)
On
Accessing disk drive
None required (normal
Off
No alarms
None required (normal)
Amber
Disk drive failure
Replace disk drive.
Disk Drive
Activity
Disk Drive
Status
Problem Solving
6-22
Table 6-5. System Status Abnormal Conditions
LED (Amber)
Conditions
System Status
Chassis intrusion (front cover)
Unit fan alarm
Memory multi-bit error (SERR)
P6 bus error (SERR)
Thermal sensor
Temperature
Voltage
CPU thermal trip
PCI PERR# (OPB/ESC detect)
PCI SERR#
CPU internal error
WDT
IOCHK
Problem Solving
Appendix A
System Cabling
Contents
Before You Begin .................................................................... 1
Static Precautions ................................................................... 1
SCSI Bus Configuration ........................................................... 2
RAID Configuration.................................................................. 4
Installing the RAID Controller .............................................. 4
Configuring the RAID Controller .......................................... 6
Bill x Graham
A-1
This appendix contains information and procedures on
cabling configurations used in your system. The
configurations include:
SCSI bus
RAID controller.
Before You Begin
!
Warning: The DC push-button on/off switch on the
front panel does not turn off the system AC power.
Before doing the procedures in this chapter, make sure
that your system is powered off and unplug the AC
power cord from the back of the chassis. Failure to
disconnect power before opening your system can result
in personal injury and equipment damage
Static Precautions
An electrostatic discharge (ESD) can damage disk
drives, option boards, and other components. You can
provide ESD protection by wearing an antistatic wrist
strap attached to chassis ground when handling system
components.
Electronic devices can be easily damaged by static
electricity. To prevent damage, keep them in their
protective packaging when they are not installed in
your system.
System Cabling
A-2
SCSI Bus Configuration
Your system is cabled using the dual ultra wide SCSI-2
controller (Adaptec® AIC-7895) on the system I/O
board. Channel B of this on-board controller is used to
control up to four peripherals (CD-ROM and tape
drives) in the removable media drive bays. On the
HX4100 server, channel A can be used to control up to
four hard disk drives in a hot-swap hard drive cage. A 3
1/2-inch diskette drive is installed in all systems and
interfaces separately to the system I/O board. Figure A1 is a diagram of the SCSI cabling.
The narrow SCSI interface cable is connected to the
SCSI connector on the system I/O board (Figure A-1, D).
This cable connects to the rear of the SCSI removable
media peripherals (if present). The last drive on the
daisy chain cable must have it’s internal SCSI
terminators installed (Figure A-1, A).
On the HX4100 server, the ultra wide SCSI interface
cable is connected to the SCSI connector on the system
I/O board (Figure A-1, I). This cable connects to the
SCSI distribution back panel at the rear of the hard
disk drives (Figure A-1, F) to control up to four disk
drives. Termination for the hard disk drives is provided
on the SCSI distribution panel (Figure A-1, E). To
control more then four disks, an optional SCSI
controller can be added (Figure A-1, Q).
The onboard narrow SCSI controller also includes a
connector located at the rear of the system for
connecting external SCSI devices (Figure A-1, M). Three
important rules must be followed if you connect
external narrow SCSI devices:
System Cabling
■
A maximum of seven narrow SCSI devices may be
connected to the onboard SCSI controller. For example
if three SCSI devices in the system cabinet are
connected to the SCSI bus, only four external narrow
SCSI devices can be connected.
■
The maximum cable length for all narrow devices
connected to the controller is 1 meter (39 inches).
■
The last external narrow SCSI device must be
terminated. Active termination is recommended.
A-3
Figure A-1. Standard System Cable Configuration
E
E
0
0
0
1
1
1
K G
G
J
B
G
F
2
2
2
3
3
3
H
H
H
A
E
C
I
D
L
M
N
O
S
P
R
Q
T
U
V
A.
C.
E.
G.
I.
K.
M.
O.
Q.
S.
U.
Device internal SCSI termination
resister
Narrow SCSI interface cable
SCSI back plane terminator
Distribution back plane
SCSI channel A connector
Ultra wide SCSI disks in upper cage
Narrow SCSI connector (50 pin)
External narrow SCSI device
Dual SCSI controller in PCI slot #11
P2 (optional)
Channel B cable connector
2nd 3 1/2-inch device (optional)
B.
D.
F.
H.
J.
L.
N.
P.
R.
Narrow SCSI devices in upper
peripheral bays
SCSI channel B connector
Ultra wide SCSI disks in lower cage
Wide SCSI interface cable
Ultra wide SCSI disks in middle cage
I/O riser board
External narrow SCSI cable
SCSI terminator
Channel A cable connector
T.
V.
Diskette interface cable
3 1/2-inch diskette drive
System Cabling
A-4
RAID Configuration
One of the standard features of the HX6100 and one of
the options available for the HX4100 is the three
channel DAC960 (Redundant Array of Inexpensive
Devices (RAID) Controller board, which gives your
system the added security of fault tolerance. If your
system has RAID at the time you order it, the system is
pre-cabled at the factory (see Figure A-2).
If you are adding the DAC960 controller to an existing
system, you must install, cable, and configure the
controller. The following subsections describe these
procedures.
Installing the RAID Controller
If you are adding the DAC960 controller to an existing
system, you must install and cable the controller. Refer
to the Installing an Option Board section in Chapter 5
of this guide to install the controller in PCI slot P2.
Once you have installed the controller, perform the
following cabling procedure.
1. Power off the system and remove the right front
door, the top cover, and the right side panel as
described in Chapter 5 of this guide.
2. If you need to install any hard drive cages, refer to
the Installing a Hard Disk Drive Cage section in
Chapter 5 of this guide.
3. Carefully remove the ultra wide SCSI interface
cables from their connectors on either the system
I/O board (Figure A-1, I) or the optional SCSI
controller (Figure A-1, Q).
4. Reconnect the ultra wide SCSI interface cable(s)
(just removed) to the RAID controller board (Figure
A-2).
5. Reinstall the right side panel, the top cover, and the
right front door. Power on the system.
System Cabling
A-5
Figure A-2. RAID Cable Configuration
E
E
0
0
1
0
1
J
G
F
2
2
2
3
3
3
H
B
1
K G
G
A
E
H
H
C
I
D
L
M
N
O
S
R
P
W
Q
T
U
V
A.
C.
E.
G.
I.
K.
M.
O.
Q.
S.
U.
W
Device internal SCSI termination
resister
Narrow SCSI interface cable
SCSI back plane terminator
Distribution back plane
SCSI channel A connector
Ultra wide SCSI disks in upper cage
Narrow SCSI connector (50 pin)
External narrow SCSI device
Three channel RAID controller in PCI
slot #11 P2 (optional)
Channel 2 cable connector
2nd 3 1/2-inch device (optional)
Channel 0 cable connector
B.
D.
F.
H.
J.
L.
N.
P.
R.
Narrow SCSI devices in upper
peripheral bays
SCSI channel B connector
Ultra wide SCSI disks in lower cage
Wide SCSI interface cable
Ultra wide SCSI disks in middle cage
I/O riser board
External narrow SCSI cable
SCSI terminator
Channel 1 cable connector
T.
V.
Diskette interface cable
3 1/2-inch diskette drive
System Cabling
A-6
Configuring the RAID Controller
The DACCF utility is included with the RAID
controller. This configuration utility allows you to
configure your disk array before installing your network
operating system. The DAC960 RAID controller
supports various versions of RAID technology (referred
to as RAID levels). To use any RAID level, you must
configure the RAID controller using the DACCF
configuration utility prior to installing your Network
Operating System. For an explanation of this utility,
refer to the DACCF Utilities Installation Guide and
User Manual that was shipped with the server. Chapter
2 of the manual (Configuration Strategies) describes
RAID technology and provides tips on making your
array perform well in your specific application. Chapter
3 (Preparing the Array) covers array hardware
preparation, configuration, and initialization. After
completing the steps in chapter 3, you can install your
Network Operating System.
If you want to be able to remotely (from a PC client)
configure the array; increase array capacity online; or
monitor statistics on disk and controller activity, you
must install the Global Array Manager (GAM) option
that was provided with your RAID subsystem. The GAM
option includes diskettes and user documentation. Use
of GAM is documented in the Global Array Manager 2
Server Installation Guide. Increasing array capacity is
covered in the MORE User Guide. This user guide
covers enhancements to both the Global Array manager
and DACCF utilities software that implement online
RAID expansion (MORE) technology.
System Cabling
Appendix B
Memory Configurations
Contents
Memory DIMM Configurations................................................... 1
Bill x
B-1
Memory DIMM Configurations
The CPU base board contains sixteen 168-pin DIMM
sockets for a total of up to 4 GB of system memory,
using 256MB DIMMs. See Figure B-1. DIMM sockets on
the board are organized as eight 72-bit wide (64-bit
wide data path with 8 parity bits) banks. Parity
generation/checking is provided for each byte. DIMM
sockets accept 168-pin single- or double-sided DIMMs. A
bank must be populated using identical DIMMs. DIMMs
may vary in size from one bank to the other, but all
DIMMs must be the same speed. Timing requires 60 ns
fast page devices.
A memory DIMM upgrade kit consists of 2 identical (of
the same size and type) DIMMs defined as:
■
■
■
2 x 64MB DIMMs = 128MB
2 x 128MB DIMMs = 256MB
2 x 256MB DIMMs = 512MB.
The first bank of DIMMs should be installed in sockets
P06 and P08. When you install additional DIMMs, you
must start with bank 2 and continue to bank 8. When
you remove DIMMs, you must start with the highest
populated bank of DIMMs. Table B-1 lists the
distribution of DIMMs for system memory
configurations that maximize socket availability, other
combinations are possible.
Figure B-1. CPU Base Board DIMM Sockets
Bank
P21
P19
8
7
P20
P18
P17
P15
6
5
P16
P14
P13
P11
4
3
P12
P10
P09
P07
2
1
P08
P06
Memory Configurations
B-2
Table B-1. Memory Configurations
Total
Bank #1
Memory
2 x 64MB
128MB
2 x 128MB
256MB
2 x 128MB
384MB
2 x 256MB
512MB
2 x 256MB
640MB
2 x 256MB
768MB
2 x 256MB
896MB
1024MB 2 x 256MB
1152MB 2 x 256MB
1280MB 2 x 256MB
1408MB 2 x 256MB
1536MB 2 x 256MB
1664MB 2 x 256MB
1792MB 2 x 256MB
1920MB 2 x 256MB
2048MB 2 x 256MB
2176MB 2 x 256MB
2304MB 2 x 256MB
2432MB 2 x 256MB
2560MB 2 x 256MB
2688MB 2 x 256MB
2816MB 2 x 256MB
2944MB 2 x 256MB
3072MB 2 x 256MB
3200MB 2 x 256MB
3328MB 2 x 256MB
3456MB 2 x 256MB
3584MB 2 x 256MB
3712MB 2 x 256MB
3840MB 2 x 256MB
4096MB 2 x 256MB
Bank #2
Bank #3
Bank #4
Bank #5
Bank #6
Bank #7
Bank #8
2 x 64MB
2 x 64MB
2 x 128MB
2 x 128MB
2 x 64MB
2 x 256MB
2 x 256MB
2 x 64MB
2 x 256MB
2 x 128MB
2 x 256MB
2 x 128MB
2 x 256MB
2 x 256MB
2 x 256MB
2 x 256MB
2 x 64MB
2 x 64MB
2 x 256MB
2 x 256MB
2 x 128MB
2 x 256MB
2 x 256MB
2 x 128MB
2 x 256MB
2 x 256MB
2 x 256MB
2 x 256MB
2 x 256MB
2 x 256MB
2 x 64MB
2 x 64MB
2 x 256MB
2 x 256MB
2 x 256MB
2 x 128MB
2 x 256MB
2 x 256MB
2 x 256MB
2 x 128MB
2 x 256MB
2 x 256MB
2 x 256MB
2 x 256MB
2 x 256MB
2 x 256MB
2 x 256MB
2 x 256MB
2 x 64MB
2 x 256MB
2 x 256MB
2 x 256MB
2 x 256MB
2 x 128MB
2 x 256MB
2 x 256MB
2 x 256MB
2 x 256MB
2 x 128MB
2 x 256MB
2 x 256MB
2 x 256MB
2 x 256MB
2 x 256MB
2 x 256MB
2 x 256MB
2 x 256MB
2 x 256MB
2 x 256MB
2 x 64MB
2 x 256MB
2 x 256MB
2 x 256MB
2 x 256MB
2 x 256MB
2 x 128MB
2 x 256MB
2 x 256MB
2 x 256MB
2 x 256MB
2 x 256MB
2 x 128MB
2 x 256MB
2 x 256MB
2 x 256MB
2 x 256MB
2 x 256MB
2 x 256MB
2 x 256MB
2 x 256MB
2 x 256MB
2 x 256MB
2 x 256MB
2 x 256MB
2 x 64MB
2 x 256MB
2 x 256MB
2 x 256MB
2 x 256MB
2 x 256MB
2 x 256MB
2 x 128MB
2 x 256MB
2 x 256MB
2 x 256MB
2 x 256MB
2 x 256MB
2 x 256MB
2 x 256MB
x
Memory Configurations
2 x 64MB
2 x 64MB
2 x 64MB
Glossary
A
AC
(Alternating Current) The type of current available in wall
outlets. All computers must convert alternating current to direct
current to operate. See also DC.
address
A label, name, or number that identifies a location in computer
memory.
ASCII
(American Standard Code for Information Interchange) A
standard number assigned to each of the alphanumeric
characters and keyboard control code keys to enable the transfer
of information between different types of computers and
peripherals.
B
backplane slot
A connector on the backplane board in desktop computers and
expansion boxes that allows you to install circuit cards.
backup
A copy of data for safe-keeping. The data is copied from computer
memory or disk to a floppy disk, magnetic tape, or other media.
backup battery
The battery in your computer that maintains the real-time clock
and the configuration information when the computer's power is
removed.
base memory
An area of memory between 0 and 640 kilobytes.
baud rate
The speed with which data is transmitted during serial
communication. The computer's operating system and software
program must be configured for the same baud rate as the
communication device, such as a serial printer. See also bps.
BIOS
(Basic Input/Output System) A program stored in flash EPROM
or ROM that controls the keyboard, disk drives, video monitor,
and other devices. See also flash EPROM, EPROM, and ROM.
bit
Derived from BInary digiT, a bit is the smallest unit of
information a computer handles. See also byte.
boot
The process of loading the operating system into memory.
bps
(bits per second) The number of bits transferred in one second
during serial communication, such as modem transmission.
byte
A group of eight bits.
Glossary
2
C
cache memory
A very fast, limited portion of RAM set aside for temporary
storage of data for direct access by the microprocessor.
CD-ROM drive
(Compact Disk ROM drive) A type of mass storage device that
reads information from a compact disk.
Centronics port
An industry standard parallel port. See also parallel port.
CGA
(Color Graphics Adapter) A type of video display system that
provides low-resolution text and graphics on TTL monochrome
and color monitors.
CMOS
(Complimentary Metal-Oxide Semiconductor) A type of low-power
integrated circuit used in computers. See also TTL.
COM1 or COM2
The name you can assign a serial port to set or change its
address. See also serial port.
command
An instruction that directs the computer to perform a particular
operation.
configuration
The way in which a computer is set up to operate. Some
configurable options include CPU speed, serial port designation,
and memory allocation.
coprocessor
See math coprocessor.
CPU
(Central Processing Unit) See microprocessor.
CRT
(Cathode-Ray Tube) The type of video display used in monitors
for desktop computers.
D
DC
(Direct Current) The type of current available in the rechargeable
battery packs used in portable computers. See also AC.
default
The factory setting your computer uses unless you instruct it
otherwise. For example, when powering up, the computer will
boot from the default drive.
density
The capacity of information (bytes) that can be packed onto a
storage device, such as a floppy disk.
device driver
A software program that a computer must use to recognize and
operate certain hardware, such as a mouse or a video monitor.
disk drive
A device that stores data on a hard or floppy disk. A floppy disk
drive requires a floppy disk to be inserted; a hard disk drive has a
permanently encased hard disk.
DOS
(Disk Operating System) See operating system.
Glossary
3
DRAM
(Dynamic RAM) See RAM.
E
ECC
(Error Checking and Correction) A method of detecting and
correcting errors.
EEPROM
(Electrically Erasable Programmable Read-Only Memory) A type
of memory device that stores password and configuration
information.
EGA
(Enhanced Graphics Adapter) A type of video display system that
provides medium-resolution text and graphics on TTL
monochrome, color, and enhanced color monitors.
EISA
(Extended Industry Standard Architecture) An industry standard
for computers and circuit cards that transfer 32 bits of data at a
time.
EMI
(Electromagnetic Interference).
EMS
(Expanded Memory Specification) A method of accessing memory
beyond the 640K limit of DOS by exchanging data in and out of
main memory at high speeds. Some software requires EMS to
operate.
EPROM
(Erasable Programmable Read-Only Memory) A type of memory
device that is usually used to store system BIOS code. This code
can be erased with ultraviolet light, but is not lost when the
computer is powered off. See also flash EPROM and ROM.
ESD
(Electrostatic Discharge).
expanded memory
See EMS.
expansion slot
See backplane slot.
extended memory
The protected memory above 1M that is directly accessible by the
microprocessor through certain utilities and operating systems.
This memory is used in computers with 80286, 80386, and 80486
microprocessors.
F
flash EPROM
A type of memory device that is usually used to store system
BIOS code. This code can be replaced with updated code from a
floppy disk, but is not lost when the computer is powered off. See
also EPROM and ROM.
floppy disk drive
See disk drive.
format
The process used to organize a hard or floppy disk into sectors so
it can accept data. Formatting destroys all previous data on the
disk.
Glossary
4
G
(Gigabyte)
1,073,741,824 bytes. See also byte.
H
hard disk drive
See disk drive.
hardware
The physical parts of your computer, including the keyboard,
monitor, disk drives, cables, and circuit cards.
I
IC
(Integrated Circuit) An electronic device that contains
miniaturized circuitry.
(ISA Configuration
Utility)
The program that you use to change the configuration of some
ISA desktop computers. This program also contains information
about the hardware in the computer.
IDE
(Integrated Drive Electronics) A type of hard disk drive with the
control circuitry located inside the disk drive rather than on a
drive controller card.
interface.
A connection between the computer and a peripheral device that
enables them to exchange data. See also parallel port and serial
port.
ISA
(Industry Standard Architecture) An industry standard for
computers and circuit cards that transfer 16 bits of data at a
time.
J
jumper
A small electrical connector used for configuration on some
computer hardware.
K
(Kilobyte)
1,024 bytes. See also byte.
L
LAN
(Local Area Network) A group of computers linked together
within a limited area to exchange information.
LCD
(Liquid Crystal Display) The type of video display used in
portable computers.
Glossary
5
LED
(Light-Emitting Diode) A small electronic device that glows when
current flows through it.
LPT1 or LPT2
The name you can assign a parallel port to specify its address.
See also parallel port.
M
(Megabyte)
1,048,576 bytes. See also byte.
math coprocessor
An IC that works with the microprocessor to speed up
mathematical calculations.
memory
The circuitry in your computer that stores data and programs.
See also EMS, extended memory, RAM, and ROM.
microprocessor
The integrated circuit that processes data and controls the basic
functions of the computer.
modem
A device used to exchange information with other computers over
telephone or data lines.
module
A circuit board that plugs into a dedicated connector on the
system board in your computer.
mouse
A small input device that you guide on a flat surface to control
the cursor movement and operation of the computer when using
certain software programs.
N
NVRAM
(Nonvolatile RAM) A type of RAM that retains its contents even
after the computer is powered off. This memory stores EISA
configuration information. See also RAM and SRAM.
O
operating system
A set of programs that provides the interface between other
software programs and the computer.
P
parallel port
The connector on the back of your computer that allows the
transfer of data between the computer and a parallel device, such
as a parallel printer.
partition
The process of dividing the storage space on a hard disk into
separate areas so that the operating system treats them as
separate disk drives.
Glossary
6
password
A security feature that prevents an unauthorized user from
operating your computer. See also EEPROM.
PCI
Peripheral Component Interconnect. PCI is a high-performance
peripherals I/O bus supporting data transfers of up to 132MB per
second.
Pentium
A type of microprocessor, with a built-in math coprocessor, cache
memory, and memory and bus controllers, that processes and
communicates 32 bits of data at a time. This microprocessor also
contains power management capabilities.
peripheral
A device connected to and controlled by the computer, such as an
external disk drive or a printer.
pixel
The smallest element that is visible on a video display. The
resolution of a video display system is measured in pixels.
POST
Power-On-Self-Test.
R
RAM
(Random-Access Memory) A temporary storage area for data and
programs. This type of memory must be periodically refreshed to
maintain valid data, and is lost when the computer is powered
off. See also NVRAM and SRAM.
real-time clock
The IC in your computer that maintains the time and date.
ROM
(Read-Only Memory) A type of memory device that usually is
used to store system BIOS code. This code cannot be altered and
is not lost when the computer is powered off. See also BIOS,
EPROM, and flash EPROM.
RS-232C port
An industry standard serial port. See also serial port.
S
save
To store information on a floppy disk, hard disk, magnetic tape,
or some other permanent storage device.
SCU
(System Configuration Utility) The program that you use to
change the configuration of your system. This program also
contains information about the hardware in your system.
SCSI
(Small Computer System Interface) An industry standard
interface that provides high-speed access to tape drives, hard disk
drives, and other peripheral devices.
serial
communication
Information sent sequentially, one bit at a time.
serial port
The connector on the back of your computer that allows the
Glossary
7
transfer of data between the computer and a serial device, such
as a mouse, a modem, or a serial printer.
Setup program
The program that you use to change the configuration of some
ISA desktop and notebook computers. This program also contains
information about the hardware in the computer.
SMP
(Symmetrical Multiprocessing).
software
Programs with specific functions, such as word processing, data
base management, communications, and operating system.
SRAM
(Static RAM) A temporary storage area for data and programs.
This type of memory does not need to be refreshed, but it is lost
when the computer is powered off. See also NVRAM and RAM.
SVGA
(Super VGA) A type of video display system that provides very
high-resolution text and graphics on analog color monitors.
system board
The main circuit board in your computer. It contains most of the
connectors and ports.
T
tape drive
A type of storage device using magnetic tape.
TTL
(Transistor-Transistor Logic) A type of integrated circuit used in
computers. See also CMOS.
V
VGA
(Video Graphics Array) A type of video display system that
provides high-resolution text and graphics on analog color
monitors.
Glossary
8
Glossary
Equipment Log
Use this equipment log form to record pertinent
information about your system. You will need some of
this information to run the System Configuration
Utility. Be sure to update the equipment log when you
add options.
Record the model and serial numbers of the system
components, dates of component removal or
replacement, and the name of the vendor from whom
the component was purchased. Be sure to record the
same information for any components added to the
system, such as hard disk drives, add-in boards, or
printers.
Record the model and serial numbers of the unit and
system baseboard. The model and serial numbers of the
system unit are recorded on a label attached to the rear
of the unit. The serial number of the baseboard is
located along the left side of the board, near the PCI
expansion slot covers.
The location of serial numbers on add-in boards, hard
disk drives, and external equipment, such as video
displays or printers, varies from one manufacturer to
another. Literature accompanying these products
should illustrate or describe the location of model and
serial numbers.
rtyrtyrtyrtyry
1
Equipment Log
Component
Manufacturer Name and Model
Serial Number Date
(if available)
Installed
Server
CPU 1
CPU 2
CPU 3
CPU 4
CPU 5
CPU 6
DIMMs
Video Mem. DRAM
Diskette Drive A
Diskette Drive B
Tape Drive 1
Tape Drive 2
Tape Drive 3
CD-ROM Drive 1
CD-ROM Drive 2
CD-ROM Drive 3
Hard Disk Drive 1
Hard Disk Drive 2
Hard Disk Drive 3
Hard Disk Drive 4
Hard Disk Drive 5
Hard Disk Drive 6
Hard Disk Drive 7
Hard Disk Drive 8
(continued)
Equipment Log
2
Equipment Log (continued)
Component
Hard Disk Drive 9
Hard Disk Drive 10
Hard Disk Drive 11
Hard Disk Drive 12
Optional SCSI Controller
Optional RAID Controller
Network Controller 1
Network Controller 2
Monitor
Keyboard
Mouse
External SCSI Peripherals
Equipment Log
Manufacturer Name and Model
Serial Number Date
(if available)
Installed
■
■
■
■
■
■
■
■
■
■
■
■
■
■
■
■
■
■
■
■
■
■
■
■
■
■
■
■
■
■
■
■
■
■
■
■
■
■
■
■
■
■
■
■
■
■
■
■
■
■
■
■
■
■
■
■
■
■
■
■
■
■
■
■
■
■
■
■
■
■
■
■
■
■
■
■
■
■
■
■
■
■
■
■
■
■
■
■
■
■
■
904468