1
JOBNAME: No Job Name PAGE: 1 SESS: 6 OUTPUT: Thu May 13 11:58:31 2010 SUM: 35D3E355
/ford_pdm/ford/supplement/ng2/navi
Table of Contents
Introduction
System introduction
Driving restrictions
Safety information
How to get going
System overview
Map display options
Display voice commands
Status bars
Home screen
Loading pictures
Reverse camera
Quick reference chart
Setting the clock
Voice recognition system overview
How to use voice commands
Adjusting the voice prompt volume
Voice recognition tutorial
Tutorial voice commands
Voice name tags
User profiles
User profile voice commands
Audio features
AM/FM
HD Radio™
Radio voice commands
SIRIUSt satellite radio voice commands
Satellite radio
CD
CD voice commands
Playing a DVD in the system
DVD voice commands
Video CD voice commands
Disc voice commands
4
4
4
5
5
10
13
13
14
14
15
17
18
19
23
24
26
28
28
29
29
31
33
33
36
36
42
43
46
49
49
51
51
52
1
PAGE: 1 OP: root EDIT SESSION: 6 DATE: MAY 13 2010 at 11:58 JOB: @ibm2/ford_pdm/CLS_ford/GRP_supplement/JOB_ng2/DIV_navi
REVIEW COPY ——
2011 Nav in a Box (ng2), Supplement (supplement), 2nd Printing, Market:
USA (fus)
JOBNAME: No Job Name PAGE: 2 SESS: 8 OUTPUT: Thu May 13 11:58:31 2010 SUM: 2A757FFF
/ford_pdm/ford/supplement/ng2/navi
Table of Contents
Jukebox features
Recording (saving) music to your jukebox
Accessing the music in your jukebox
Creating a playlist
Jukebox voice commands
Information menu
Where am I?
Hybrid information
SIRIUSt Travel Link™
SIRIUSt Travel Link™ voice commands
Accessing your calendar
Accessing the help screen
52
53
53
55
57
60
60
60
67
72
73
73
Sound menu features
75
Setting a destination
77
Setting a destination by voice
Quick destination options
Standard destination options
POI categories
Route selection
Destination voice commands
Quick touch buttons
Map icons
78
78
80
85
91
92
95
97
Navigation route preferences
99
Map preferences
Route preferences
Navigation voice commands
General Information
Map updates
Navigation end user license agreement
Glossary
101
102
105
107
107
107
113
2
PAGE: 2 OP: root EDIT SESSION: 8 DATE: MAY 13 2010 at 11:58 JOB: @ibm2/ford_pdm/CLS_ford/GRP_supplement/JOB_ng2/DIV_navi
REVIEW COPY ——
2011 Nav in a Box (ng2), Supplement (supplement), 2nd Printing, Market:
USA (fus)
JOBNAME: No Job Name PAGE: 3 SESS: 10 OUTPUT: Thu May 13 11:58:31 2010 SUM: 0D6F4482
/ford_pdm/ford/supplement/ng2/navi
Table of Contents
Index
118
All rights reserved. Reproduction by any means, electronic or mechanical
including photocopying, recording or by any information storage and retrieval
system or translation in whole or part is not permitted without written
authorization from Mazda Motor Corporation. Mazda may change the contents
without notice and without incurring obligation.
Copyright © 2010 Mazda Motor Corporation
3
PAGE: 3 OP: root EDIT SESSION: 10 DATE: MAY 13 2010 at 11:58 JOB: @ibm2/ford_pdm/CLS_ford/GRP_supplement/JOB_ng2/DIV_navi
REVIEW COPY ——
2011 Nav in a Box (ng2), Supplement (supplement), 2nd Printing, Market:
USA (fus)
JOBNAME: No Job Name PAGE: 4 SESS: 12 OUTPUT: Thu May 13 11:58:31 2010 SUM: 3D5B413C
/ford_pdm/ford/supplement/ng2/navi
Introduction
MOBILE MEDIA NAVIGATION SYSTEM
Your vehicle is equipped with a
mobile media navigation system
which allows you to listen to, record
and save music, play DVDs (audio
and video) and to navigate the
vehicle.
CIMS # com_sysoverngn.maz
itdseq=1
art=expec659_a
Your system has a large range of features, yet is easy to use. The display
screen is the primary means for operating the system through the use of
its vertically tabbed menus, text screens and menu displays. Screen
selections are made by touching the desired selection on the touch
screen. The “tabs” along the left side of the screen represent the major
components of the system. The status bars at the top and bottom of the
screen will stay present for the majority of the time once the system is
turned on and ready for operation. The top status bar will contain menu
names, icons, and a clock. The lower status bar contains icons and
advisory messages. Please refer to Status bars in the System Overview
chapter for more information. Navigation guidance is shown on the
display touch screen and is supplemented with voice prompts.
DRIVING RESTRICTIONS
In order to prevent the navigation system from distracting you while
driving, access to certain functions are restricted when the vehicle is
traveling above 5 mph (8 km/h). At this time, only the Quick Destination
menu items are available for destination entry. Restricted functions
include:
• Touchscreen keyboard during destination entry (Street address, POI,
Freeway Entrance/Exit, Intersection)
• Scrolling of long lists
• Travel Link subscriptions (if active) such as movie times, ski
conditions, sports scores and scrolling of the weather map
• Editing/Adding entries in the Address Book
• Editing/Adding entries in the Avoid Areas List
• Jukebox restrictions such as creating/editing playlists, sorting playlists,
editing track, artist and album names
4
PAGE: 4 OP: root EDIT SESSION: 12 DATE: MAY 13 2010 at 11:58 JOB: @ibm2/ford_pdm/CLS_ford/GRP_supplement/JOB_ng2/DIV_navi
REVIEW COPY ——
2011 Nav in a Box (ng2), Supplement (supplement), 2nd Printing, Market:
USA (fus)
JOBNAME: No Job Name PAGE: 5 SESS: 1 OUTPUT: Thu May 13 11:58:31 2010 SUM: 5FD9ABD5
/ford_pdm/ford/supplement/ng2/navi
Introduction
• Uploading photographs
When the vehicle begins to move, and the Select Route Screen is shown,
the highlighted route is automatically selected and guidance begins.
When the vehicle speed is reduced to 5 mph (8 km/h) or less, system
restrictions are lifted and you have full access to the system.
CIMS #1683381
com_safetyinfo.maz
itdseq=2
SAFETY INFORMATION
WARNING: Driving while distracted can result in loss of vehicle
control, accident and injury. Mazda strongly recommends that
drivers use extreme caution when using any device or feature that may
take their focus off the road. Your primary responsibility is the safe
operation of the vehicle. We recommend against the use of any
handheld device while driving and that you comply with all applicable
laws.
• Do not attempt to service or repair the system. See your authorized
dealer.
• Do not operate playing devices if the power cords and/or cables are
broken, split or damaged. Carefully place cords and/or cables where
they will not be stepped on or interfere with the operation of pedals,
seats and/or compartments, or safe driving abilities.
• Do not leave playing devices in the vehicle in extreme conditions as it
could cause damage to your device. Refer to your device’s user guide
for further information.
• For your safety, some functions are speed dependent and cannot be
performed when the vehicle is traveling at speeds 5 mph (8 km/h) and
below.
CIMS #1683158
com_ngnqkst.maz
itdseq=3
QUICK START
WARNING: Driving while distracted can result in loss of vehicle
control, accident and injury. Mazda strongly recommends that
drivers use extreme caution when using any device that may take their
focus off the road. The drivers primary responsibility is the safe
operation of their vehicle. Only use cell phones and other devices not
essential to the driving task when it is safe to do so.
TO PLAY A RADIO STATION
1. Ensure that the navigation system is on.
2. Press the RADIO hard button.
5
PAGE: 5 OP: root EDIT SESSION: 1 DATE: MAY 13 2010 at 11:58 JOB: @ibm2/ford_pdm/CLS_ford/GRP_supplement/JOB_ng2/DIV_navi
REVIEW COPY ——
2011 Nav in a Box (ng2), Supplement (supplement), 2nd Printing, Market:
USA (fus)
JOBNAME: No Job Name PAGE: 6 SESS: 1 OUTPUT: Thu May 13 11:58:31 2010 SUM: 1EFD0FEF
/ford_pdm/ford/supplement/ng2/navi
Introduction
3. Select the ‘AM’ or ‘FM’ tab on
the touchscreen.
• Turn the TUNE knob to the
right/left to go up/down the
frequency band in individual
increments.
art=expec226_a
art=expec212_a
• Or, press SEEK to find the next strong station up/down the frequency
band.
Note: If RDS is ON and PTY (Program type) is selected, the station
selection will be limited to that specific genre. In satellite radio mode (if
activated), seek is limited to the selected genre.
TO PLAY SATELLITE RADIO (IF ACTIVATED)
1. Ensure that the navigation system is on.
2. Press the RADIO hard button on the navigation system.
3. Select the ‘SAT’ tab on the
touchscreen. (If your vehicle is
equipped with Satellite Radio,
the SAT tab will be present on
the radio screen).
For further information on Satellite
Radio, refer to Satellite Radio in
the Audio Features chapter.
art=expec272_a
TO LOAD A CD OR DVD:
1. Insert a CD or DVD into the slot.
2. A CD will begin to play. A DVD will play audio and video if the
vehicle is in Park (P). Otherwise, only the audio will play.
6
PAGE: 6 OP: root EDIT SESSION: 1 DATE: MAY 13 2010 at 11:58 JOB: @ibm2/ford_pdm/CLS_ford/GRP_supplement/JOB_ng2/DIV_navi
REVIEW COPY ——
2011 Nav in a Box (ng2), Supplement (supplement), 2nd Printing, Market:
USA (fus)
JOBNAME: No Job Name PAGE: 7 SESS: 1 OUTPUT: Thu May 13 11:58:31 2010 SUM: 1F578C95
/ford_pdm/ford/supplement/ng2/navi
Introduction
art=expec302_a
3. Use the touch controls on the
screen to advance tracks, scan,
pause, view the track list, etc.
TO
1.
2.
3.
PLAY A PREVIOUSLY LOADED CD:
Ensure that the navigation system is on.
Press the MEDIA hard button on the navigation system.
Select CD/DVD tab on the
touchscreen (if there is not a
disc loaded into the system, the
tab will be disabled and NO
DISC will appear in the Status
Bar when you try to select it).
4. A CD will begin to play. A DVD
will begin to play audio and
video if the vehicle is in Park
(P). Otherwise, only audio will
play.
TO
1.
2.
3.
art=expec302_a
SET A DESTINATION USING THE NAVIGATION SYSTEM:
Ensure that the navigation system is on.
Press the DEST hard button on the navigation system.
Select the ‘Standard’ tab on the
touchscreen and then press
‘Street Address’ to enter a
specific street address as your
destination. (From this screen
you can also choose POI,
Address book entry, previous
destination, Phone number,
Freeway Entrance/Exit , Map or
intersection as your
destination).
art=expec306_a
7
PAGE: 7 OP: root EDIT SESSION: 1 DATE: MAY 13 2010 at 11:58 JOB: @ibm2/ford_pdm/CLS_ford/GRP_supplement/JOB_ng2/DIV_navi
REVIEW COPY ——
2011 Nav in a Box (ng2), Supplement (supplement), 2nd Printing, Market:
USA (fus)
JOBNAME: No Job Name PAGE: 8 SESS: 1 OUTPUT: Thu May 13 11:58:31 2010 SUM: 1E7D4805
/ford_pdm/ford/supplement/ng2/navi
Introduction
4. Enter the required information.
Please note that:
art=expec329_a
• The system uses a Smart Speller, which helps facilitate entering
information through the keyboard.
• Accented characters in English, Spanish and French are converted
internally to non-accented characters for search purposes.
5. The screen will show the point entered on a map. If this is the
intended destination, press ‘Set As Dest’. A message will pop up
while the system is computing the route.
6. Select the desired route on the
right hand side of the screen.
There will be up to three routes
possible (fastest, shortest and
unrestricted) from which to
choose, each highlighted with a
different color. For each route,
the overall distance, route
conditions and the estimated
travel time are displayed.
art=expec249_a
7. Press ‘Start Route’ and follow the instructions.
USING THE AUXILIARY INPUT JACK:
Your vehicle is equipped with an auxiliary input jack which allows a
portable audio device to be listened to through your vehicle’s audio
system. To access the auxiliary input jack mode:
1. Press the MEDIA hard button on the navigation system.
8
PAGE: 8 OP: root EDIT SESSION: 1 DATE: MAY 13 2010 at 11:58 JOB: @ibm2/ford_pdm/CLS_ford/GRP_supplement/JOB_ng2/DIV_navi
REVIEW COPY ——
2011 Nav in a Box (ng2), Supplement (supplement), 2nd Printing, Market:
USA (fus)
JOBNAME: No Job Name PAGE: 9 SESS: 1 OUTPUT: Thu May 13 11:58:31 2010 SUM: 1323F2CC
/ford_pdm/ford/supplement/ng2/navi
Introduction
art=expec505_a
2. Select the ‘LINE IN’ tab on the
touchscreen.
Once a 3.5 mm input jack is plugged into the Line In jack, sound from
the device will be heard through the vehicle speakers.
For information on the auxiliary input jack location, please refer to
Auxiliary input jack in the Entertainment chapter in your Owner’s
Manual.
VOICE RECOGNITION
Your navigation system is equipped with a voice activated feature that
allows you to “speak” certain commands to the system. For further
information, please refer to Voice recognition system overview chapter.
9
PAGE: 9 OP: root EDIT SESSION: 1 DATE: MAY 13 2010 at 11:58 JOB: @ibm2/ford_pdm/CLS_ford/GRP_supplement/JOB_ng2/DIV_navi
REVIEW COPY ——
2011 Nav in a Box (ng2), Supplement (supplement), 2nd Printing, Market:
USA (fus)
JOBNAME: No Job Name PAGE: 10 SESS: 1 OUTPUT: Thu May 13 11:58:31 2010 SUM: 36F83087
/ford_pdm/ford/supplement/ng2/navi
System overview
NAVIGATION SYSTEM
CIMS # com_navinabox.maz
itdseq=4
art=expec189_a
WARNING: Driving while distracted can result in loss of vehicle
control, accident and injury. Mazda strongly recommends that
drivers use extreme caution when using any device or feature that may
take their focus off the road. Your primary responsibility is the safe
operation of the vehicle. We recommend against the use of any
handheld device while driving and that you comply with all applicable
laws.
1. Memory presets: In radio
and satellite radio mode (if
activated): Press 1-6 to access
your previously saved preset
stations/channels. To save to a preset: Tune to the desired
station/channel. Press and hold the desired preset button in which
you would like to store the station/channel. The sound will
momentarily mute and then return when the preset is saved.
art=expec192_a
10
PAGE: 10 OP: root EDIT SESSION: 1 DATE: MAY 13 2010 at 11:58 JOB: @ibm2/ford_pdm/CLS_ford/GRP_supplement/JOB_ng2/DIV_navi
REVIEW COPY ——
2011 Nav in a Box (ng2), Supplement (supplement), 2nd Printing, Market:
USA (fus)
JOBNAME: No Job Name PAGE: 11 SESS: 1 OUTPUT: Thu May 13 11:58:31 2010 SUM: 2CFDF3DD
/ford_pdm/ford/supplement/ng2/navi
System overview
2. CD/DVD slot: Insert a CD or
DVD, label side up.
art=expec207_a
art=expec193_a
3.
(Eject): Press
(Eject)
to eject the disc in the slot.
4. TUNE: In radio or satellite
radio mode (if activated),
turn to advance in individual
increments up/down the
frequency/channel listing.
In MP3 mode, turn to advance to the next/previous folder.
RPT: In navigation mode, press the knob in while navigation
guidance is active to repeat the last spoken navigation guidance
prompt.
5. MAP: Press MAP to access the
navigation map. Press while the
map display is active to center
the map on the current vehicle position. Press while the map display
is active and a route is active to step through the different map
guidance views.
6. DEST: Press DEST to access
the navigation destination entry
menu. Press while the
navigation destination entry
menu is active to show additional destination entry techniques.
7. NAV: Press NAV to access the
navigation menu. Press while
the navigation menu is active to
step through the navigation
menu tabs.
8. I (Information): Press I to
access the information menu.
Press while the information
menu is active to step through
the information tabs of: Where am I?, HEV (if equipped), SIRIUS
Travel Link (if activated), the Calendar, System Info., and Help.
11
art=expec194_a
art=expec195_a
art=expec196_a
art=expec197_a
art=expec198_a
PAGE: 11 OP: root EDIT SESSION: 1 DATE: MAY 13 2010 at 11:58 JOB: @ibm2/ford_pdm/CLS_ford/GRP_supplement/JOB_ng2/DIV_navi
REVIEW COPY ——
2011 Nav in a Box (ng2), Supplement (supplement), 2nd Printing, Market:
USA (fus)
JOBNAME: No Job Name PAGE: 12 SESS: 1 OUTPUT: Thu May 13 11:58:31 2010 SUM: 2923B0F6
/ford_pdm/ford/supplement/ng2/navi
System overview
9. PHONE: This control is not
operational.
10. DISP: Press the DISP button to
step through the following
display modes: On, Status Bar
Only, and Off.
11. SEEK:In radio and satellite
radio mode (if activated),
/
to seek to the
Press
previous/next available station
or channel within the currently selected Category/Genre.
In CD/DVD mode, press
/
to access the previous/next track
or chapter.
12. MENU: Press MENU to access
the system menu. Press while
the system menu is active to
step through the system menu tabs of Display, Clock, Feedback
Settings, System Settings and Valet Mode.
13. SOUND: Press SOUND to
access the sound menu. Press
while the sound menu is active
to step through the sound menu
tabs of Bass/Treble, Balance/Fade, SCV (Speed compensated
volume), DSP and the Visualizer.
14. MEDIA: Press MEDIA to access
the media menu. Press while
the media menu is active to step
through the available media
sources of CD/DVD, Jukebox, User Device, Rear DVD (if equipped)
and Rear AUX (if equipped).
15. RADIO: Press RADIO to access
the radio menu. Press while the
radio menu is active to step
through the available radio sources of AM, FM1, FM2, SAT1, SAT2,
and SAT3 (satellite radio, if activated).
art=expec199_a
art=expec200_a
art=expec201_a
art=expec202_a
art=expec203_a
art=expec204_a
art=expec205_a
12
PAGE: 12 OP: root EDIT SESSION: 1 DATE: MAY 13 2010 at 11:58 JOB: @ibm2/ford_pdm/CLS_ford/GRP_supplement/JOB_ng2/DIV_navi
REVIEW COPY ——
2011 Nav in a Box (ng2), Supplement (supplement), 2nd Printing, Market:
USA (fus)
JOBNAME: No Job Name PAGE: 13 SESS: 1 OUTPUT: Thu May 13 11:58:31 2010 SUM: 4898218F
/ford_pdm/ford/supplement/ng2/navi
System overview
16. VOL (On/off/volume): Press to
turn the audio system on/off.
Press and hold to turn the
navigation radio completely off.
Turn to adjust the volume of the audio system or the navigation
voice prompts as they are being given.
Note: If a route is active when the navigation system is turned off,
the route is resumed when the system is turned on again.
After the system initializes, the screen will be divided in two sections:
• Status bars: This is the top and bottom portion of screen that
displays the clock or date and useful information, depending on the
current mode.
• Display area: The interactive screen that is activated by finger touch
and changes depending on current system operation. Graphical
buttons are displayed in this area depending on the current screen for
you to make choices.
art=expec206_a
CIMS #1678491
com_differnces.ngn
itdseq=5
SCREEN DIFFERENCES
Depending on your vehicle line and option package, your screen may
vary in appearance from the screens shown in this supplement. These
differences could include: background color, tab options, climate controls
and other features. Your features may also be limited depending on your
market. (For example, SIRIUSt Travel Link™ is only available in the
continental United States). Please check with your authorized dealer for
availability.
CIMS #1659995 com_displaybutton
itdseq=6
Display options
You can choose to turn your screen on/off and also if you would like to
view the status bars on the top and bottom of the screen. To access:
Press DISP repeatedly to cycle through these options.
CIMS #1660455 com_displayvx-cmds
itdseq=7
Voice commands in display mode (if equipped)
or VOICE on the steering wheel
While in display mode, press
controls. When prompted, you may say any of the following commands:
•
•
•
•
Display on
Day
Status bar
Brighter
•
•
•
•
Auto
Night
Display off
Dimmer
13
PAGE: 13 OP: root EDIT SESSION: 1 DATE: MAY 13 2010 at 11:58 JOB: @ibm2/ford_pdm/CLS_ford/GRP_supplement/JOB_ng2/DIV_navi
REVIEW COPY ——
2011 Nav in a Box (ng2), Supplement (supplement), 2nd Printing, Market:
USA (fus)
JOBNAME: No Job Name PAGE: 14 SESS: 1 OUTPUT: Thu May 13 11:58:31 2010 SUM: 36F74391
/ford_pdm/ford/supplement/ng2/navi
System overview
• Help
or VOICE on the steering
Note: If you are not in display mode, press
wheel controls. When prompted, say, “Display mode” and then any of the
above commands.
CIMS #1655927
com_statusbars
itdseq=8
STATUS BARS
Your screens may have status bars on the top and bottom of each screen.
The status bar on the top of the
screen will tell your current mode,
the exterior temperature, the time
as well as display icons if you have
enabled Bluetooth, or are using headphones with your Rear overhead
mounted Family entertainment DVD system among other options.
The status bar on the bottom of the
screen may list the Home icon, the
current temperature selected for the
Driver and Passenger as well as the fan speed and air flow direction, the
current mode being used (if equipped), the Artist and Title of the
currently playing CD (if available), Artist and Title for Jukebox (if
available) and satellite radio (if activated).
Note: As climate controls are vehicle dependent, some vehicles may not
display climate readings in the status bar.
art=expec250_a
art=expec251_a
CIMS #1693681
com_homescreen.maz
itdseq=9
HOME SCREEN
Your navigation system has a Home Screen where you can save/view
favorite pictures, view your current audio and climate control settings as
well as display the audio visualizer or the hybrid fuel economy (if
equipped). You can split the screen in to two or three different sections,
or you can choose to have one main view.
To access your home screen, press the house icon (
left hand corner of any screen.
) at the bottom
14
PAGE: 14 OP: root EDIT SESSION: 1 DATE: MAY 13 2010 at 11:58 JOB: @ibm2/ford_pdm/CLS_ford/GRP_supplement/JOB_ng2/DIV_navi
REVIEW COPY ——
2011 Nav in a Box (ng2), Supplement (supplement), 2nd Printing, Market:
USA (fus)
JOBNAME: No Job Name PAGE: 15 SESS: 1 OUTPUT: Thu May 13 11:58:31 2010 SUM: 24076BDA
/ford_pdm/ford/supplement/ng2/navi
System overview
art=expec658_a
The left side of the screen will
display an uploaded photo or the
map screen. The right side can also
display the uploaded photo. The
upper right panel will only display
the current audio settings. The
lower right panel displays the
vehicle’s climate settings (if
equipped), the visualizer or the
on the bottom of the
hybrid fuel economy (if equipped). Press
display to access the settings screen for the left or right side.
CIMS #1693682 com_loadingpics.maz
itdseq=10
Loading pictures
Your navigation system allows you to save and view up to 32 photos. To
access:
1. Ensure that you are on the
at the
Home Screen. (Press
bottom left of any screen to
access.)
2. Touch the left side of the home
screen to initiate the left screen
photo display and saved photos
screen.
art=expec658_a
art=expec253_a
3. Select the ‘Add’ button on the
touchscreen. The following
disclaimer will appear, “Please
confirm the supported photo
formats”.
15
PAGE: 15 OP: root EDIT SESSION: 1 DATE: MAY 13 2010 at 11:58 JOB: @ibm2/ford_pdm/CLS_ford/GRP_supplement/JOB_ng2/DIV_navi
REVIEW COPY ——
2011 Nav in a Box (ng2), Supplement (supplement), 2nd Printing, Market:
USA (fus)
JOBNAME: No Job Name PAGE: 16 SESS: 1 OUTPUT: Thu May 13 11:58:31 2010 SUM: 2441EF40
/ford_pdm/ford/supplement/ng2/navi
System overview
4. When the pop-up dialog box
with the disclaimer appears,
press OK and ensure that you
are using the proper format.
5. Insert a CD-ROM which contains
your photos as jpegs.
6. Press OK. The photos will be
listed on the right half of the
screen.
7. Select either ADD or ADD ALL. The photos are now saved to the
hard drive.
Photo display limitations:
• The file must be 1.5MB or less.
• The extension of the file must be one of JPE/JPG/JPEG.
• The CD or DVD must be ISO 9660 format, UDF format is not
supported.
• The file path must be 255 characters or less.
• Up to 256 files or folders can be displayed in one folder.
• Not compatible with discs written in Packet Write mode.
• Only the photograph(s) which meet these conditions will be displayed.
Note: When burning a CD, ensure that you ‘close’ or ‘finalize’ the disc
when the CD-burning process finishes (you should select this option
before you start burning). Consult your software manual or the program’s
help files if you’re not sure how to finalize the disc. Also, write the audio
data into the first session of a multi-session CD as audio systems won’t
be able to sort through other sessions to find more audio tracks.
art=expec294_a
Editing and deleting photos
1. Press
to access the home screen.
2. Touch the current photo on the home screen.
3. To edit the photo:
• Select the Edit button.
• You can adjust the photo by zooming in or out, moving right, left, up
or down and also rotating left or right.
• Press the Reset button to return to the original image.
4. To delete the photo, select the Delete button.
16
PAGE: 16 OP: root EDIT SESSION: 1 DATE: MAY 13 2010 at 11:58 JOB: @ibm2/ford_pdm/CLS_ford/GRP_supplement/JOB_ng2/DIV_navi
REVIEW COPY ——
2011 Nav in a Box (ng2), Supplement (supplement), 2nd Printing, Market:
USA (fus)
JOBNAME: No Job Name PAGE: 17 SESS: 1 OUTPUT: Thu May 13 11:58:31 2010 SUM: 2E04CDB9
/ford_pdm/ford/supplement/ng2/navi
System overview
5. To delete all stored photos:
• Press the Menu hard button.
• Select the System Settings tab on the touchscreen.
• Press the View button for Delete Stored Items.
• Select Saved photos.
CIMS #1659986 com_reversecamera
itdseq=11
REVERSE CAMERA (IF EQUIPPED)
Your vehicle may be equipped with a reverse camera on the tailgate
which provides a video image of the area behind the vehicle. When the
transmission is in R (Reverse), an image will automatically display on the
navigation screen. Once the vehicle is back in D (Drive), the image will
continue to display until you are driving over 5 mph (8 km/h). To remove
this image from the screen, press any hard button on the navigation
system.
When the vehicle is in P (Park),
press SETTINGS to make
adjustments to the brightness of the
display as well as the rear camera
display.
art=expec563_a
art=expec562_a
When the rear camera delay
function is ON, it extends the
display of the camera image into
Drive mode until vehicle speed is
greater than 5 mph (8 km/h). This
is useful when trying to
engage/disengage a trailer. Once you
shift out of R (Reverse), the image
will be removed from the screen.
The default for the rear camera
delay is off.
Prior to using, ensure that the camera lens is clear of any debris, mud,
etc. and that both reverse lamps are operational if using at night.
Depending on your vehicle, you may have a Zoom button (if equipped)
as well as additional selections under the Settings button.
17
PAGE: 17 OP: root EDIT SESSION: 1 DATE: MAY 13 2010 at 11:58 JOB: @ibm2/ford_pdm/CLS_ford/GRP_supplement/JOB_ng2/DIV_navi
REVIEW COPY ——
2011 Nav in a Box (ng2), Supplement (supplement), 2nd Printing, Market:
USA (fus)
JOBNAME: No Job Name PAGE: 18 SESS: 1 OUTPUT: Thu May 13 11:58:31 2010 SUM: 3426FB2C
/ford_pdm/ford/supplement/ng2/navi
System overview
For complete information, refer to Rear-view Camera System in the
Driving chapter in your Owner’s Manual.
CIMS #1683384
com_swchart.maz
itdseq=12
QUICK REFERENCE CHART
Below is a quick listing of the functions of your steering wheel controls
and navigation system controls.
Navigation Steering wheel
Function
bezel control
control
Press to activate Voice Recognition.
N/A
VOICE
Press and hold to end an active
voice session.
Refer to the Voice recognition
system overview chapter for further
information.
Press to access the previous/next
SEEK
,
track.
MEDIA
MEDIA
Press repeatedly to access all
available media sources in your
vehicle such as: CD, DVD, Jukebox
and Line In.
CIMS #1675935
com_menufts-intro
itdseq=13
SYSTEM MENU FEATURES
Your system has many menu features such as allowing you to adjust the
touchscreen brightness, adjusting the time and languages, adjusting the
feedback and system settings. To access, press the MENU hard button on
the navigation system.
18
PAGE: 18 OP: root EDIT SESSION: 1 DATE: MAY 13 2010 at 11:58 JOB: @ibm2/ford_pdm/CLS_ford/GRP_supplement/JOB_ng2/DIV_navi
REVIEW COPY ——
2011 Nav in a Box (ng2), Supplement (supplement), 2nd Printing, Market:
USA (fus)
JOBNAME: No Job Name PAGE: 19 SESS: 1 OUTPUT: Thu May 13 11:58:31 2010 SUM: 29560F53
/ford_pdm/ford/supplement/ng2/navi
System overview
Display options
1. Press the MENU hard button on
the navigation system.
2. Select the ‘Display’ tab on the
touchscreen. Select from the
following display options:
Brightness: Select AUTO DIM to
manually adjust the brightness by
pressing + or —.
Contrast: Press + to increase and
— to decrease the level of contrast
on the screen.
Day/Night Mode: Select ‘Day’ to always display day mode or ‘Night’ to
always display night mode. Select ‘Auto’ for the screen to automatically
change between day and night mode.
Daytime color: Press to select Light color or Dark color for the screen
lighting.
Note: When the headlamps are on
under high ambient light conditions,
the system will remain in day mode,
even if night is selected.
CIMS #1683160
com_displayopts.maz
itdseq=14
art=expec243_b
art=expes005_a
CIMS #1658261
com_clock.ngn
Setting the clock
1. Press the MENU hard button.
2. Select the ‘Clock’ tab on the
touchscreen. Select from the
following display options:
art=expec264_b
Time set buttons: To set the time, press +, — to increase/decrease the
time and select AM or PM.
19
PAGE: 19 OP: root EDIT SESSION: 1 DATE: MAY 13 2010 at 11:58 JOB: @ibm2/ford_pdm/CLS_ford/GRP_supplement/JOB_ng2/DIV_navi
REVIEW COPY ——
2011 Nav in a Box (ng2), Supplement (supplement), 2nd Printing, Market:
USA (fus)
itdseq=15
JOBNAME: No Job Name PAGE: 20 SESS: 1 OUTPUT: Thu May 13 11:58:31 2010 SUM: 325D50C5
/ford_pdm/ford/supplement/ng2/navi
System overview
Display clock: Press to turn the clock display on/off.
Format: Press to select between 12 hour and 24 hour format.
Auto time zone: If enabled, the system will automatically adjust the
time when you enter into a new time zone. If disabled, you will have to
manually adjust the time when entering different time zones. Note: The
system does not implement daylight savings time.
Restore defaults: Select ‘Reset’ to reset to the default settings.
Note: If your vehicle is equipped with an in-dash analog clock, you can
set the time on this screen but it may not appear in status bar for
viewing purposes.
Feedback settings
1. Press the MENU hard button.
2. Select the ‘Feedback Settings’
tab on the touchscreen. Select
from the following display
options:
CIMS #1658262
com_feedback.ngn
itdseq=16
art=expec265_b
Voice recognition user profile: You can ‘train’ the system to better
recognize your voice. Two profiles can be created. Refer to the Voice
Recognition section for more information.
Button tone: Select to select/adjust when the system will sound a tone.
Press ‘Button tone’ to then select from:
• All Buttons: Select to have the system sound a tone when any hard
or soft key is touched.
• Touch Screen: Select to have the system only sound a tone when a
selection is made on the touch screen.
• Off: Select to turn off all tones.
Voice volume: Press + to increase or — to decrease the volume level of
the navigation voice. Voice volume adjustment also includes the volume
level of chimes.
Voice recognition interaction mode: This feature determines the level
of interaction/feedback you will receive from the system.
• Standard: This is the default setting. The ‘Standard setting’ provides
you with the most interaction / feedback in the form of prompts.
20
PAGE: 20 OP: root EDIT SESSION: 1 DATE: MAY 13 2010 at 11:58 JOB: @ibm2/ford_pdm/CLS_ford/GRP_supplement/JOB_ng2/DIV_navi
REVIEW COPY ——
2011 Nav in a Box (ng2), Supplement (supplement), 2nd Printing, Market:
USA (fus)
JOBNAME: No Job Name PAGE: 21 SESS: 1 OUTPUT: Thu May 13 11:58:31 2010 SUM: 2996209F
/ford_pdm/ford/supplement/ng2/navi
System overview
• Advanced: This feature has less prompts and feedback.
Voice recognition confirmation:
• On: Select to have the system always ask to confirm/verify a
command.
• Off: Select to have the system ask less frequently to confirm /verify a
command.
System settings
1. Press the MENU hard button.
2. Select the ‘System Settings’ tab
on the touchscreen. Select from
the following display options:
CIMS #1658263
com_syssets.ngn
itdseq=17
art=expec275_b
Language: Select between ‘English’, ‘Francais’ or ‘Espanol’.
Units: Select between ‘English’ and ‘Metric’.
Keyboard layout: Select ‘ABC’ or ‘QWERTY’ for the keyboard layout in
the display.
Delete stored items: Select ‘View’ to see what areas contain stored
items. You can then choose to delete all of the entries from these ’areas’ :
Address Book, Previous Destinations, Avoid areas, Saved Photos and
Voice Recognition Profiles.
Restore factory default settings: Press ‘Reset’ to return to the factory
default settings.
Valet Mode: Press to access Valet Mode.
• Enable Valet Mode: Select to lock the system with a four digit PIN.
The same PIN must be entered to unlock the system and disable valet
mode.
CIMS #1675940
com_valetmode
Valet mode
1. Press the MENU hard button.
21
PAGE: 21 OP: root EDIT SESSION: 1 DATE: MAY 13 2010 at 11:58 JOB: @ibm2/ford_pdm/CLS_ford/GRP_supplement/JOB_ng2/DIV_navi
REVIEW COPY ——
2011 Nav in a Box (ng2), Supplement (supplement), 2nd Printing, Market:
USA (fus)
itdseq=18
JOBNAME: No Job Name PAGE: 22 SESS: 1 OUTPUT: Thu May 13 11:58:31 2010 SUM: 14AE05F6
/ford_pdm/ford/supplement/ng2/navi
System overview
2. Select the ‘Valet Mode’ tab on
the touchscreen. Press ‘Enable
Valet Mode’.
3. Enter a four digit Personal
Identification Number (PIN) and
press ‘Enter’. The system will
ask you to re-enter the PIN.
Once entered, select ‘Enable’ to
activate Valet mode. The system
is then locked until the correct
four digit PIN is entered.
art=expec300_b
art=expec301_a
Note: The PIN can be reset by simultaneously pressing and holding
presets 1 and 5 while on the PIN entry screen. After approximately five
seconds, the system will transition to the Valet mode screen indicating
that the PIN is reset. Once you have reset the PIN, the system will then
allow you to set a new PIN.
22
PAGE: 22 OP: root EDIT SESSION: 1 DATE: MAY 13 2010 at 11:58 JOB: @ibm2/ford_pdm/CLS_ford/GRP_supplement/JOB_ng2/DIV_navi
REVIEW COPY ——
2011 Nav in a Box (ng2), Supplement (supplement), 2nd Printing, Market:
USA (fus)
JOBNAME: No Job Name PAGE: 23 SESS: 1 OUTPUT: Thu May 13 11:58:31 2010 SUM: 4813CC55
/ford_pdm/ford/supplement/ng2/navi
Voice recognition system overview
VOICE RECOGNITION
Your vehicle may be equipped with an advanced interactive Voice
Recognition (VR) system. This system allows you to perform many
operations such as operating the navigation, audio, phone (if equipped),
media, climate (if equipped), display and voice settings by “speaking”
certain commands. The system will respond with a series of audible
tones, prompts, questions and spoken confirmations depending on the
situation and the chosen level of dialogue interaction.
CIMS # com_voice-over.ngn
itdseq=19
CIMS #1676951
com_tones.ngn
Feedback through audible tones
Your VR system will respond through various audible tones. You may
hear a tone at the following times:
• When you press VOICE or
on your steering wheel controls.
• When you access the help feature.
• When the VR system does not understand your request
• When a VR session is completed successfully
• When a VR session is ended unsuccessfully
• When a speed dependent feature has been accessed
• When a new device is connected
The navigation system has five different audible tones that will play
depending on the circumstance.
• Initial: Sounds when you are entering a new mode.
• Positive: Sounds for a positive recognition or a successful VR session
completion.
• Negative: Sounds for a negative recognition, an unsuccessful VR
session, or when a speed dependent feature has been accessed.
• Listening: Sounds when the system is ready to listen for a command.
• Help: Sounds when you ask for ’Help’.
CIMS #1675722
com_prompts.ngn
itdseq=21
Confirmation prompts
Confirmation prompts are short questions asked by the system when the
system has not clearly understood your request or when there are
several possible responses to your request. For example, if you have
Confirmation prompts ON, the system may say, “Phone, is that correct?”.
The system will then listen for a “Yes” or “No” confirmation from you. If
you say “Yes”, the system will proceed. If you say “No”, the system will
ask you to say the command again. If you have Confirmation prompts
23
PAGE: 23 OP: root EDIT SESSION: 1 DATE: MAY 13 2010 at 11:58 JOB: @ibm2/ford_pdm/CLS_ford/GRP_supplement/JOB_ng2/DIV_navi
REVIEW COPY ——
2011 Nav in a Box (ng2), Supplement (supplement), 2nd Printing, Market:
USA (fus)
itdseq=20
JOBNAME: No Job Name PAGE: 24 SESS: 1 OUTPUT: Thu May 13 11:58:31 2010 SUM: 41E914BE
/ford_pdm/ford/supplement/ng2/navi
Voice recognition system overview
OFF, the system may assume it understood your request or may ask you
to repeat your request. If the system is unsure of what was asked, it will
prompt you to try again or ask for help.
Note: Even with Confirmation prompts turned OFF, you may be asked to
confirm certain settings occasionally.
CIMS #1879901 com_usingvoice.maz
itdseq=22
HOW TO USE VOICE COMMANDS WITH YOUR SYSTEM
or VOICE on your steering wheel controls to activate Voice
Press
Recognition. Depending on the feedback setting, you will hear the
prompt, “Please say a command” followed by a tone, or you will hear a
tone, signaling that the system is ready to accept your command. Any
command spoken prior to the beep will not register with the system.
Speak the command clearly to ensure that the system is able to
recognize and perform the desired function. You can, at any time,
or VOICE and say “Help” for a list of possible commands.
press
The main categories of your voice commands are as follows:
• Navigation
• Confirmations
• Audio
• Jukebox
• Radio
• Display mode
• User profile
• Disc
• CD
• DVD
• Video CD
• Line in
• Voice settings
• Tutorial
To access a list of all available voice commands:
1. Press the
hard button on the system.
2. Select the ‘Help’ tab on the touchscreen.
3. Select ‘Voice commands’ at the top of the screen.
4. Select the desired category.
CIMS #1660012
com_voicevisual
itdseq=23
Voice recognition visual feedback
When Voice recognition (VR) is activated, the following icons will appear
in the status bar.
VR State
Main Menu/Generic
VR recognition failure
VR Icon
24
PAGE: 24 OP: root EDIT SESSION: 1 DATE: MAY 13 2010 at 11:58 JOB: @ibm2/ford_pdm/CLS_ford/GRP_supplement/JOB_ng2/DIV_navi
REVIEW COPY ——
2011 Nav in a Box (ng2), Supplement (supplement), 2nd Printing, Market:
USA (fus)
JOBNAME: No Job Name PAGE: 25 SESS: 1 OUTPUT: Thu May 13 11:58:31 2010 SUM: 360EB34C
/ford_pdm/ford/supplement/ng2/navi
Voice recognition system overview
VR State
VR session unsuccessful
Listening
Listening paused
VR Icon
?
CIMS #1660014 com_speakinstruct
itdseq=24
Speaking instructions
For the best voice recognition, please ensure that:
• The interior of the vehicle needs to be as quiet as possible. Wind noise
from open windows and road vibrations may prevent the system from
correctly recognizing voice commands.
• Press
or VOICE and wait until the second tone sounds before
speaking a command.
• Speak naturally without large pauses in between words.
• Speak louder if background noise is preventing the system from
recognizing your command
• Only one person should speak while the system is listening for a
command.
• Please realize voice recognition performance is not 100% and varies by
user. The voice recognition system is meant to be a secondary
convenience control and if it doesn’t operate optimally, you can still
operate your system via the touch screen and hard buttons.
To speak voice commands:
Depending on the feedback setting, the system will respond differently. If
the feedback settings are set to ‘Standard’, the system will respond with
a tone, a prompt and another tone. If the feedback settings are set to
Advanced, the system will respond without a prompt and with tones
only.
1. Press
or VOICE on the steering wheel. A tone will sound.
2. The system will say, “Please say a command” and VOICE/Main Menu
and
will appear in the status bar.
3. A tone will sound and the ’Listening’ icon will appear in the status
bar signifying the system is ready for your command.
4. Speak your command loudly and clearly.
5. If the system is not confident that it recognized the command, it will
ask you for confirmation. If the system does not recognize or hear
25
PAGE: 25 OP: root EDIT SESSION: 1 DATE: MAY 13 2010 at 11:58 JOB: @ibm2/ford_pdm/CLS_ford/GRP_supplement/JOB_ng2/DIV_navi
REVIEW COPY ——
2011 Nav in a Box (ng2), Supplement (supplement), 2nd Printing, Market:
USA (fus)
JOBNAME: No Job Name PAGE: 26 SESS: 1 OUTPUT: Thu May 13 11:58:31 2010 SUM: 2CBBE963
/ford_pdm/ford/supplement/ng2/navi
Voice recognition system overview
6.
7.
8.
9.
10.
your voice command, it will say, “Sorry, please say a command or say
Help” and will allow you to repeat the voice command. The ’voice
failed’ icon will appear in the status bar.
If the system does not recognize or hear your voice command a
second time, the system will say, “Sorry, please say a command” and
will allow you to repeat the voice command. The ’voice failed’ icon
will appear in the status bar.
If the system doesn’t recognize or hear your command a third time,
the voice session is terminated.
Once the system does understand your command, (and the feedback
settings are set to standard), a tone will sound and the system will
say, “<Command> Please say a command.” VOICE/Command and
will appear in the status bar.
The listening tone will sound and the appropriate voice menu name
and the listening icon will appear in the status bar as the system
waits for your response. Speak the command clearly and loudly.
This sequence of events occurs until the voice recognition session is
complete.
ADJUSTING THE VOICE PROMPT VOLUME
There are three different ways you can adjust the voice volume:
• When the system is speaking, turn the volume knob to decrease or
increase the volume.
OR
1. Press the MENU hard button.
2. Select the ‘Feedback Settings’
tab.
3. Press + to increase or — to
decrease the voice volume
levels.
CIMS #1660423
com_vxsettings.ngn
itdseq=25
art=expec219_a
art=expec265_a
OR
26
PAGE: 26 OP: root EDIT SESSION: 1 DATE: MAY 13 2010 at 11:58 JOB: @ibm2/ford_pdm/CLS_ford/GRP_supplement/JOB_ng2/DIV_navi
REVIEW COPY ——
2011 Nav in a Box (ng2), Supplement (supplement), 2nd Printing, Market:
USA (fus)
JOBNAME: No Job Name PAGE: 27 SESS: 1 OUTPUT: Thu May 13 11:58:31 2010 SUM: 32B8BEFC
/ford_pdm/ford/supplement/ng2/navi
Voice recognition system overview
1. Press
or VOICE on the steering wheel. A tone will sound
followed by the prompt, “Please say a command.” Another tone will
sound signaling the system is ready to accept your command.
2. Say “Voice volume decrease” or “Voice volume increase”.
CIMS #1660425
com_vxfeedback
itdseq=26
Voice feedback / interaction
You can adjust the level of interaction and feedback you would like from
your voice recognition system. There are four different levels varying
from the most interaction/feedback to the least.
Standard Interaction Mode with Confirmation Prompts on: This
selection provides the most feedback and guidance from the system. You
will be prompted to say a command. The system will repeat your
command and ask, “Is that correct?”
Standard mode with prompts off: This selection offers the second
highest level of feedback with the system. You will be prompted to say a
command. If the system is not certain of your command, the system will
repeat your command and ask, “Is that correct?”
Advance mode with prompts on: You will be prompted by two tones.
If the system is not certain of your command, the system may repeat
your command and ask, “Is that correct?”.
Advance mode with prompts off: This selection provides the least
interaction with the system. You will be prompted by two tones. You will
rarely be asked to confirm your command.
Standard interaction mode provides more detailed interaction and
guidance with confirmation prompts while the advanced mode has less
audible interaction and more tone prompts. Confirmation prompts are
short questions asked by the system when the system has not clearly
heard or understood your request. Tone prompts are audible sounds
signifying the system has entered a mode or is waiting for your
command.
To access these settings:
1. Press the MENU hard button on the navigation system.
27
PAGE: 27 OP: root EDIT SESSION: 1 DATE: MAY 13 2010 at 11:58 JOB: @ibm2/ford_pdm/CLS_ford/GRP_supplement/JOB_ng2/DIV_navi
REVIEW COPY ——
2011 Nav in a Box (ng2), Supplement (supplement), 2nd Printing, Market:
USA (fus)
JOBNAME: No Job Name PAGE: 28 SESS: 1 OUTPUT: Thu May 13 11:58:31 2010 SUM: 341ED81A
/ford_pdm/ford/supplement/ng2/navi
Voice recognition system overview
art=expec265_a
2. Select the ‘Feedback Settings’
tab on the touchscreen to make
adjustments.
CIMS #1660421
com_vxtutorial
itdseq=27
VOICE RECOGNITION TUTORIAL
Your system has three different tutorials to help you become better
acquainted with the voice recognition system. There are as follows:
• Lesson one: What you can do with speech
• Lesson two: How we’ll work together
• Lesson three: Getting accustomed to the system
To access:
1. Press
or VOICE on the steering wheel.
A tone will sound and the system will prompt you, “Please say a
command.”
2. After the tone, say “Tutorial”. The system will begin with Lesson 1.
on the steering wheel and
3. To listen to a different lesson, press
say one of the voice commands on the screen.
CIMS #1660459 com_tutorialvxcmds
itdseq=28
Tutorial voice commands
While listening to the tutorial lessons, press
or VOICE on the
steering wheel controls and after the tone, you may say any of the
following commands:
• Lesson 1
• Lesson 3
• Previous Lesson
• Lesson 2
• Next Lesson
• Help
or VOICE on the
Note: If you are not in tutorial mode, press
steering wheel controls. When prompted, say, “Tutorial” and then
press
or VOICE on the steering wheel controls again to say any of
the above commands.
28
PAGE: 28 OP: root EDIT SESSION: 1 DATE: MAY 13 2010 at 11:58 JOB: @ibm2/ford_pdm/CLS_ford/GRP_supplement/JOB_ng2/DIV_navi
REVIEW COPY ——
2011 Nav in a Box (ng2), Supplement (supplement), 2nd Printing, Market:
USA (fus)
JOBNAME: No Job Name PAGE: 29 SESS: 1 OUTPUT: Thu May 13 11:58:31 2010 SUM: 36B1BDCB
/ford_pdm/ford/supplement/ng2/navi
Voice recognition system overview
VOICE NAME TAGS
Your voice recognition system includes a feature which allows you to
enter personal names for locations. These are called ’voice name tags’.
You can assign voice name tags to all locations entered in your Address
or VOICE on the
Book and then use them as destinations. Press
steering wheel controls and say, “Destination <nametag>” after the tone.
CIMS #1660422
com_voicenametags
itdseq=29
CIMS #1660441
com_userprofile
itdseq=30
CREATING A USER PROFILE
You can create user profiles in your voice recognition system to help
train the system to fine tune its listening to a specific person (voice). To
access:
1. Press the MENU hard button on the navigation system.
2. Select the ‘Feedback Settings’ tab on the touchscreen.
3. Select ‘Edit’.
4. Select ‘Create’ to create either Profile 1 or Profile 2.
5. Follow the voice prompt instructions.
CREATING A USER PROFILE USING VOICE RECOGNITION
or VOICE on the steering wheel. A tone will sound and the
1. Press
system will say, “Please say a command”. Another tone will sound
signaling the system is ready for your command.
2. Say “User Profile”.
will appear in the status bar and then the
VOICE/User Profile and
).
icon will change to the listening icon (
Listening
3. Say “Create”.
VOICE/User Profile and
will appear in the status bar and then the
icon will change to the listening icon (
).
Listening
4. Say “User Profile 1” or “User Profile 2”.
5. Follow the voice prompts.
Once a user profile has been created, it will then become the active user
profile in the system.
CIMS #1660444 com_selectprofile
itdseq=31
Selecting a user profile
1. Press the MENU hard button on the navigation system.
2. Select the ‘Feedback Settings’ tab on the touchscreen.
29
PAGE: 29 OP: root EDIT SESSION: 1 DATE: MAY 13 2010 at 11:58 JOB: @ibm2/ford_pdm/CLS_ford/GRP_supplement/JOB_ng2/DIV_navi
REVIEW COPY ——
2011 Nav in a Box (ng2), Supplement (supplement), 2nd Printing, Market:
USA (fus)
JOBNAME: No Job Name PAGE: 30 SESS: 1 OUTPUT: Thu May 13 11:58:31 2010 SUM: 339F6B60
/ford_pdm/ford/supplement/ng2/navi
Voice recognition system overview
3. Select the ’Profile 1’ or ’Profile 2’ icon.
Selecting a user profile using voice recognition
1. Press
or VOICE on the steering wheel. A tone will sound and the
system will say, “Please say a command”. Another tone will sound
signaling the system is ready for your command.
2. Say “User Profile”.
VOICE/User Profile and
will appear in the status bar and then the
icon will change to the listening icon (
).
3. Say “Select”.
4. Depending on the chosen level of feedback, you will need to select
which user profile.
Listening
CIMS #1660445
com_editprofile
itdseq=32
Editing a user profile
1. Press the MENU hard button on the navigation system.
2. Select the ‘Feedback Settings’ tab on the touchscreen.
3. Scroll down and select ‘Edit’.
4. Select ‘Continue’ to edit either Profile 1 or Profile 2.
5. A pop-up window will appear to confirm and the system will prompt
“This profile has been partially created by <name>. Only <name>
should continue to create this profile. Would you like to continue to
create this profile?”
Editing a user profile using voice recognition
1. Press
or VOICE on the steering wheel. A tone will sound and the
system will say, “Please say a command”. Another tone will sound
signaling the system is ready for your command.
2. Say “User Profile”.
will appear in the status bar and then the
VOICE/User Profile and
).
icon will change to the listening icon (
Listening
3. Say “Edit”.
4. Depending on the chosen level of feedback, you will need to
tell/confirm which user profile to edit.
CIMS #1660442 com_deleteprofile
itdseq=33
Deleting a user profile
1. Press the MENU hard button on the navigation system.
2. Select the ‘Feedback Settings’ tab on the touchscreen.
30
PAGE: 30 OP: root EDIT SESSION: 1 DATE: MAY 13 2010 at 11:58 JOB: @ibm2/ford_pdm/CLS_ford/GRP_supplement/JOB_ng2/DIV_navi
REVIEW COPY ——
2011 Nav in a Box (ng2), Supplement (supplement), 2nd Printing, Market:
USA (fus)
JOBNAME: No Job Name PAGE: 31 SESS: 1 OUTPUT: Thu May 13 11:58:31 2010 SUM: 34085361
/ford_pdm/ford/supplement/ng2/navi
Voice recognition system overview
3. Use the scroll arrow to go to the second page and press the ‘Edit’
button to ‘Manage Voice Recognition User Profiles’.
4. Select ‘Delete’ to delete either Profile 1 or Profile 2.
5. Select YES when the confirmation pop-up window appears.
Deleting all user profiles at once
1.
2.
3.
4.
Press the MENU hard button.
Select the ‘System Settings’ tab.
Press the ‘View’ button for ‘Delete Stored items’.
Select ‘Voice Recognition User Profile’.
Deleting a user profile using voice recognition
1. Press
or VOICE on the steering wheel. A tone will sound and the
system will say, “Please say a command”. Another tone will sound
signaling the system is ready for your command.
2. Say “User Profile”.
will appear in the status bar and then the
VOICE/User Profile and
).
icon will change to the listening icon (
Listening
3. Say “Delete”.
VOICE/User Profile and
will appear in the status bar and then the
).
icon will change to the listening icon (
Listening
4. Depending on the chosen level of feedback, you will need to
tell/confirm which user profile to delete.
CIMS #1660457 com_userprfvxcmds
itdseq=34
User profile voice commands
In order to create, edit, delete, or select a user profile through voice,
press
or VOICE on the steering wheel controls. After the second
tone, say, “User Profile”. A tone will sound and the system will say, “User
profile, please say a command” (if in ‘Standard mode’) and another tone
will sound. After the second tone, you may say any of the following
commands:
•
•
•
•
Create user profile 1
Delete user profile 1
Select user profile 1
Edit user profile 1
•
•
•
•
Create user profile 2
Delete user profile 2
Select user profile 2
Edit user profile 2
31
PAGE: 31 OP: root EDIT SESSION: 1 DATE: MAY 13 2010 at 11:58 JOB: @ibm2/ford_pdm/CLS_ford/GRP_supplement/JOB_ng2/DIV_navi
REVIEW COPY ——
2011 Nav in a Box (ng2), Supplement (supplement), 2nd Printing, Market:
USA (fus)
JOBNAME: No Job Name PAGE: 32 SESS: 1 OUTPUT: Thu May 13 11:58:31 2010 SUM: 051749CF
/ford_pdm/ford/supplement/ng2/navi
Voice recognition system overview
• Help
32
PAGE: 32 OP: root EDIT SESSION: 1 DATE: MAY 13 2010 at 11:58 JOB: @ibm2/ford_pdm/CLS_ford/GRP_supplement/JOB_ng2/DIV_navi
REVIEW COPY ——
2011 Nav in a Box (ng2), Supplement (supplement), 2nd Printing, Market:
USA (fus)
JOBNAME: No Job Name PAGE: 33 SESS: 1 OUTPUT: Thu May 13 11:58:31 2010 SUM: 2BEF776F
/ford_pdm/ford/supplement/ng2/navi
Audio features
CIMS # com_audio-vx-cmds
itdseq=35
VOICE COMMANDS IN AUDIO MODE
or VOICE on the steering wheel controls.
When in audio mode, press
When prompted, you may say any of the following commands:
•On
•Headphones
•Jukebox
•CD
•Video CD
•Sirius
•SYNC
•USB
• Help
• Read Message
•Off
•Headphones off
•Disc
•DVD
•Radio
•Rear DVD
•Line in
•User Device
•Phone
or VOICE on the steering
Note: If you are not in audio mode, press
wheel controls. When prompted, say, “Audio” and then any of the above
commands.
CIMS #1656280
com_ammode
itdseq=36
AM
1. Ensure that the system is on.
2. Press the RADIO hard button.
3. Select the ‘AM’ tab on the touchscreen. Once in AM mode, you may
select from ‘Show options’ and ‘Show presets’.
4. Press ‘Show Options’ to select from:
33
PAGE: 33 OP: root EDIT SESSION: 1 DATE: MAY 13 2010 at 11:58 JOB: @ibm2/ford_pdm/CLS_ford/GRP_supplement/JOB_ng2/DIV_navi
REVIEW COPY ——
2011 Nav in a Box (ng2), Supplement (supplement), 2nd Printing, Market:
USA (fus)
JOBNAME: No Job Name PAGE: 34 SESS: 1 OUTPUT: Thu May 13 11:58:31 2010 SUM: 2DAD5D51
/ford_pdm/ford/supplement/ng2/navi
Audio features
• Scan: Press for a brief sampling
of all listenable stations. Press
again to disable and remain on
the current selection.
• Scan Presets: Press for a brief
sampling of all the stations held
in the memory presets.
• Autoset Presets: The autoset
feature allows you to set strong
radio stations without losing your original preset stations. This feature
is helpful on trips when traveling between cities with different radio
stations.
To enable, select AUTOSET PRESETS and the six strongest stations
in your current area will be set as presets. To return to your original
presets, press AUTOSET PRESETS again and the feature will disable.
art=muses010_a
• HD Radio (U.S. only): Press to activate HD Radio broadcasts. This
enables you to receive radio broadcasts digitally, (where available),
providing a better quality sound with clear reception and no station
drop off, static or distortion. When this feature is not activated or HD
Radio broadcasts are not available, you will receive analog radio
broadcasts. Refer to HD Radio Information in the following section
for more information.
5. Press SHOW PRESETS to view the preset stations. To set or change
a preset station, press and hold any of the memory presets buttons
(1–6) or any of the soft key memory preset buttons on the screen
while on the desired station. The new station will replace the
previous one recorded.
CIMS #1656391
com_fmmode
itdseq=37
FM
1. Ensure that the system is on.
2. Press the RADIO hard button.
3. Select the ‘FM’ tab on the touchscreen. Press again to toggle
between FM1 or FM2. Once in FM mode, you may select between
‘Show Options’ and ‘Show Presets’.
34
PAGE: 34 OP: root EDIT SESSION: 1 DATE: MAY 13 2010 at 11:58 JOB: @ibm2/ford_pdm/CLS_ford/GRP_supplement/JOB_ng2/DIV_navi
REVIEW COPY ——
2011 Nav in a Box (ng2), Supplement (supplement), 2nd Printing, Market:
USA (fus)
JOBNAME: No Job Name PAGE: 35 SESS: 1 OUTPUT: Thu May 13 11:58:31 2010 SUM: 33DD492D
/ford_pdm/ford/supplement/ng2/navi
Audio features
4. Press ‘Show Options’ to select
from:
art=muses014_a
• Scan: Press for a brief sampling of all listenable stations. Press again
to disable and remain on the current selection.
• Scan Presets: Press for a brief sampling of all the stations held in the
memory presets.
• Autoset Presets: The autoset feature allows you to set strong radio
stations without losing your original preset stations. This feature is
helpful on trips when traveling between cities with different radio
stations.
To enable, select AUTOSET PRESETS and the six strongest stations
in your current area will be set as presets. To return to your original
presets, press AUTOSET PRESETS again and the feature will disable.
• HD Radio (U.S. only): Press to activate HD Radio broadcasts. This
enables you to receive radio broadcasts digitally, (where available),
providing a better quality sound with clear reception and no station
drop off, static or distortion. When this feature is not activated or HD
Radio broadcasts are not available, you will receive analog radio
broadcasts. Refer to HD Radio Information in the following section
for more information.
• Multicast (U.S. only): When HD Radio broadcasts are activated, this
button will appear if the selected station has more than one digital
broadcast. HD1 signifies the main programming status and is available
in analog and digital broadcasts. Any additional multicast stations
(HD2–HD8) are digitally broadcast and can be accessed by pressing
the multicast button. Refer to HD Radio Information in the following
section for more information.
• Set PTY/ALL: Press to select a program type, (as well as between All
Radio and All HD stations). Once selected, the type will be displayed
above the SET PTY button. Press SEEK or SCAN to initiate a search
up or down the frequency. The search will stop when the desired
program type has been reached.
Note: The system will scan the frequency band three times for the
35
PAGE: 35 OP: root EDIT SESSION: 1 DATE: MAY 13 2010 at 11:58 JOB: @ibm2/ford_pdm/CLS_ford/GRP_supplement/JOB_ng2/DIV_navi
REVIEW COPY ——
2011 Nav in a Box (ng2), Supplement (supplement), 2nd Printing, Market:
USA (fus)
JOBNAME: No Job Name PAGE: 36 SESS: 1 OUTPUT: Thu May 13 11:58:31 2010 SUM: 3EF9DB8E
/ford_pdm/ford/supplement/ng2/navi
Audio features
chosen program type. If the program type is unavailable in your
reception range, the system will return to the previous station.
5. Press ‘Show Presets’ to view the preset stations. To set or change a
preset station, press and hold any of the presets while on the
desired station. The new station will replace the previous one
recorded.
CIMS #1660386
com_radiovx-cmds
itdseq=38
Radio voice commands
While listening to the radio, press
or VOICE on the steering wheel
controls. When prompted, you may say any of the following commands:
•
•
•
•
•
•
•
•
On
<530–1710>
AM <530–1710>
AM
FM2
AM preset <1–6>
FM2 preset <1–6>
Help
•
•
•
•
•
•
•
Off
<87.7–107.9>
FM <87.7–107.9>
FM1
Preset <1–6>
FM1 preset <1–6>
Tune
or VOICE on the
Note: If you are not listening to the radio, press
steering wheel controls. When prompted, say, “Radio” and then press
or VOICE on the steering wheel controls again and you can say any of
the above commands.
*If you have said, “Tune”, you can then say any the following
commands:
•<530–1710>
•AM <530–1710>
•AM
•FM2
•AM preset <1–6>
•FM2 preset <1–6>
•<87.7–107.9>
•FM <87.7–107.9>
•FM1
•Preset <1–6>
•FM1 preset <1–6>
CIMS #1831581
com_hdradio.11
HD RADIO™ INFORMATION (U.S. ONLY)
What is HD Radio™ technology and how does it work? HD Radio™
technology is the digital evolution of analog AM/FM radio. Your system
has a special receiver which allows it to receive digital broadcasts (where
available) in addition to the analog broadcasts it already receives. Digital
36
PAGE: 36 OP: root EDIT SESSION: 1 DATE: MAY 13 2010 at 11:58 JOB: @ibm2/ford_pdm/CLS_ford/GRP_supplement/JOB_ng2/DIV_navi
REVIEW COPY ——
2011 Nav in a Box (ng2), Supplement (supplement), 2nd Printing, Market:
USA (fus)
itdseq=39
JOBNAME: No Job Name PAGE: 37 SESS: 1 OUTPUT: Thu May 13 11:58:31 2010 SUM: 17BC3572
/ford_pdm/ford/supplement/ng2/navi
Audio features
broadcasts have better sound quality than analog broadcasts as digital
broadcasts provide free, crystal clear audio with no static or distortion.
For more information, and a guide to available stations and programming,
please visit www.hdradio.com.
Using HD Radio™ technology
1. Press the RADIO hard button.
2. Select the AM or FM tab on the touchscreen.
3. Select ‘HD Radio’. When HD Radio™ reception is enabled and you
are tuned to a station with HD Radio broadcasts, you may notice the
following indicators on your screen:
art=edges021_a
art=taues001_a
1. HD) logo: This indicator will
display in gray when a digital
station is being acquired and
will appear in orange when
digital audio is playing.Note:
When this logo is available, you
will also see Title and Artist
fields on screen.
37
PAGE: 37 OP: root EDIT SESSION: 1 DATE: MAY 13 2010 at 11:58 JOB: @ibm2/ford_pdm/CLS_ford/GRP_supplement/JOB_ng2/DIV_navi
REVIEW COPY ——
2011 Nav in a Box (ng2), Supplement (supplement), 2nd Printing, Market:
USA (fus)
JOBNAME: No Job Name PAGE: 38 SESS: 1 OUTPUT: Thu May 13 11:58:31 2010 SUM: 38EA24EA
/ford_pdm/ford/supplement/ng2/navi
Audio features
2. Multicast button: This button
will appear in FM mode (only) if
the current station has multiple
digital broadcasts. Press the
multicast button repeatedly to
access the other digital
broadcasts. The numbers that
are highlighted signify available
digital channels where new/different content is available. HD1 will
signify the main programming service and is available in analog and
digital broadcasts. Any additional multicast stations (HD2–HD8) are
only broadcast digitally.
When HD Radio broadcasts are active, you can access the
following functions:
• Set PTY/ALL: Select ‘All HD Stations’ to have your system only
access HD stations. Press Seek to initiate the search for HD Radio
stations.
Note: When your system is searching for an HD Radio station, it will
momentarily pause on all strong stations in an attempt to decode the
station (to see if there is a digital broadcast).
• Scan: Press to scan through available stations. Note: You will not be
able to access HD2–HD8 stations but you may see the HD logo appear
if the station has a digital broadcast.
• Seek: Press to seek to the next strong radio station. If the current
station has multiple digital broadcasts, the mutlicast button will
display. Press Seek repeatedly to advance through all available
broadcasts. If you are on the last multicast channel, press Seek to
advance to the next strong station.
• Tune: Turn the tune knob to go up/down the frequency in individual
increments.If the current station has multiple digital broadcasts,
the mutlicast button will display. Turn the tune knob to advance
through all available broadcasts. If you are on the last broadcast
channel, turn to advance to the next frequency on the band.
• Multicast button: Press the multicast button repeatedly to access
other available HD Radio broadcasts (these will be highlighted). HD1
is the main programming status and is available in analog and digital
broadcasts. Any additional multicast stations (HD2–HD8) are only
broadcast digitally.
• Saving a multicast station as a preset When the channel is active
on-screen, press and hold a memory preset slot on the right side of
38
art=edges022_a
PAGE: 38 OP: root EDIT SESSION: 1 DATE: MAY 13 2010 at 11:58 JOB: @ibm2/ford_pdm/CLS_ford/GRP_supplement/JOB_ng2/DIV_navi
REVIEW COPY ——
2011 Nav in a Box (ng2), Supplement (supplement), 2nd Printing, Market:
USA (fus)
JOBNAME: No Job Name PAGE: 39 SESS: 1 OUTPUT: Thu May 13 11:58:31 2010 SUM: 3CBE96AD
/ford_pdm/ford/supplement/ng2/navi
Audio features
the screen until the sound returns. When recalling a HD2/HD3
memory preset, there will be a momentary mute before the digital
audio is played as the system must once again acquire the digital
signal. If you have turned this feature off, this will automatically turn
on HD Radio broadcasts and will tune to the selected frequency.
Note: As with any saved radio station, you will not be able to access
the saved station if your vehicle is outside the station’s reception area.
LIVE broadcasts: If a station has a
live broadcast (such as a baseball
game), LIVE will appear embedded
in the antenna on screen. These are
analog broadcasts with digital
components (i.e. artist, title).
Note: If HD1 is a live broadcast, the
HD Radio broadcast logo will not
appear. If HD2–HD8 is a live
broadcast, the multicast button may
be displayed, but not the HD Radio
broadcast logo.
HD Radio reception factors
Reception area: If you are listening to a multicast station and you are
on the fringe of the reception area, the station may mute due to weak
signal strength. If you are listening to HD1, the system will simply switch
to the analog broadcast until the digital broadcast is available again.
However, if you are listening to any of the possible HD2–HD8 multicast
channels, the station will mute and stay muted unless it is able to
connect to the digital signal again. If it is not able to reconnect, ‘HD
Unavailable’ will appear in the lower status bar.
Station blending: When a station is received, the system will play the
station in the analog version and then, if the receiver verifies the station
is an HD Radio station, it will shift into the digital version. Depending on
the station quality, you may hear a slight sound change when the station
segues from analog to the digital version. The shift from analog to digital
or digital back to analog sound is known as ’blending’.
Station issues
In order to provide the best possible experience, a contact form has been
developed to report any station issues found while listening to a station
broadcasting with HD Radio technology. Every station is independently
owned and operated. These stations are responsible for ensuring all
audio streams and data fields are accurate. This form can be found at:
http://www.ibiquity.com/automotive/report_radio_station_experiences.
39
art=taues003_a
PAGE: 39 OP: root EDIT SESSION: 1 DATE: MAY 13 2010 at 11:58 JOB: @ibm2/ford_pdm/CLS_ford/GRP_supplement/JOB_ng2/DIV_navi
REVIEW COPY ——
2011 Nav in a Box (ng2), Supplement (supplement), 2nd Printing, Market:
USA (fus)
JOBNAME: No Job Name PAGE: 40 SESS: 1 OUTPUT: Thu May 13 11:58:31 2010 SUM: 3B92869E
/ford_pdm/ford/supplement/ng2/navi
Audio features
Troubleshooting
Experience
Echo, stutter, skip or
repeat in audio
Increase or decrease
in audio volume
Sound fading,
blending in and out
Cause
Poor time alignment
by the radio
broadcaster.
Possible action
None — broadcast
issue.
Radio is shifting
Reception issue that
between analog and
may clear up as you
digital audio.
continue to drive.
Audio mute delay
The digital multicast This is normal behavior.
Wait until the audio is
is not available until
when selecting
HD Radio broadcast
available.
HD2/HD3 multicast
preset or using the
can be decoded and
make the audio
direct tune voice
command
available.
The previously stored None — the station is
Cannot access
multicast preset or
not available in your
HD2/HD3 multicast
current location.
channel when
direct tune is not
available in your
recalling a preset or
using the direct tune
current reception
voice command
area.
Text information does Data service issue by
Fill out the station
not match currently
the radio broadcaster.
issue form at
playing audio
www.ibiquity.com/
automotive/report_radio
_station_experiences.
No text information
Data service issue by
Fill out the station
shown for currently
the radio broadcaster.
issue form at
selected frequency.
www.ibiquity.com/
automotive/report_radio
_station_experiences.
HD2–HD8 stations not
Pressing Scan will
None — this is normal
found when Scan is
disable HD2–HD8
behavior.
pressed.
channel search.
HD Radio™ technology is manufactured under license from iBiquity
Digital Corp. U.S. and foreign patents. HD Radio™ and the HD and HD
40
PAGE: 40 OP: root EDIT SESSION: 1 DATE: MAY 13 2010 at 11:58 JOB: @ibm2/ford_pdm/CLS_ford/GRP_supplement/JOB_ng2/DIV_navi
REVIEW COPY ——
2011 Nav in a Box (ng2), Supplement (supplement), 2nd Printing, Market:
USA (fus)
JOBNAME: No Job Name PAGE: 41 SESS: 1 OUTPUT: Thu May 13 11:58:31 2010 SUM: 39C8EAD7
/ford_pdm/ford/supplement/ng2/navi
Audio features
Radio logos are proprietary trademarks of iBiquity Digital Corp. Mazda
Motor Corporation and iBiquity Digital Corp are not responsible for the
content sent using HD Radio technology. Content may be changed,
added or deleted at any time at the station owner’s discretion.
HD voice commands
or VOICE on the steering wheel
While listening to the radio, press
controls. When prompted, you may say any of the following commands:
CIMS #1800841 com_hd-vxcmds
itdseq=40
• <87.7 — 107> HD <1–8>
• FM <87.7-107.9> HD <1-8>
• Tune HD <1-8>
or VOICE on the
Note: If you are not listening to the radio, press
steering wheel controls. When prompted, say, “Radio” and then press
or VOICE on the steering wheel controls again and you can say any of
the above commands.
*If you have said, “Tune”, you can then say any the following
commands:
• <87.7 — 107> HD <1–8>
• FM <87.7-107.9> HD <1-8>
• Tune HD <1-8>
SATELLITE RADIO (SAT) IF ACTIVATED
Once the Satellite Radio feature is activated, your navigation system will
have additional features.
1. Ensure that the navigation system is on.
2. Press the RADIO hard button on the navigation system.
3. Select the ‘SAT’ tab on the touchscreen to enter satellite radio mode
(if activated).
4. Press ‘Show Options’ to select from:
Sat 123: You will be able to access
three different Satellite Radio
modes, SAT1, SAT2 and SAT3.
CIMS #1656392
com_satmode
art=expec272_a
Scan: Press to hear a brief sampling of satellite radio channels within
the currently selected genre. Press again to stop.
41
PAGE: 41 OP: root EDIT SESSION: 1 DATE: MAY 13 2010 at 11:58 JOB: @ibm2/ford_pdm/CLS_ford/GRP_supplement/JOB_ng2/DIV_navi
REVIEW COPY ——
2011 Nav in a Box (ng2), Supplement (supplement), 2nd Printing, Market:
USA (fus)
itdseq=41
JOBNAME: No Job Name PAGE: 42 SESS: 1 OUTPUT: Thu May 13 11:58:31 2010 SUM: 3D62BD12
/ford_pdm/ford/supplement/ng2/navi
Audio features
Scan Presets: Press to hear a brief sampling of all preset channels.
Channel Guide: Press to display a list of satellite radio channels sorted
by genre and also to skip or lock out certain channels. Select the desired
genre and choose a channel by pressing the channel name button. You
can then choose to ‘Skip’ or ‘Lock’ a certain channel. A ‘skipped’ channel
will not be accessible using the tune knob, scan or seek functions. (To
access the skipped channel, select ‘Direct Tune’ and enter the channel
number.) A ‘locked’ channel can only be accessed by entering the
‘Channel Guide’ and then entering the PIN.
Note: The PIN can be reset by simultaneously pressing and holding
presets 1 and 5 while on the PIN entry screen. After approximately five
seconds, the system will transition to the Channel Guide screen
indicating that the PIN is reset. Once you have reset the PIN, the system
will then allow you to set a new PIN.
Direct Tune: Press to enter a specific channel using the keypad and go
directly to that channel.
Set Genre: Press to choose from a list of possible satellite radio genres.
Once a genre is chosen and you press SEEK, it will only seek within the
selected genre.
Memo: The MEMO feature allows you to save a song title and artist to
the system. When the saved song is playing on any satellite radio
channel, the system will alert you with a pop-up in the lower status bar.
You can then choose to tune to the station or to ignore the pop-up.
When you are in the MEMO screen, the following options are available:
• Refresh: Press to refresh the current artist and title information.
• Song Alert: Press to store the song information displayed in the Title
Field. When the stored song is played in the future, an audio and
visual notification will be initiated.
• Artist Alert: Press to store the artist information currently displayed
in the Artist Field. When that artist is played again, the system will
alert you with a pop-up.
• Alert On/Off: Press to enable/disable the audio and visual song and
artists alerts.
Show Presets: Press to display presets at the bottom of the screen.
CIMS #1660387 com_siriusvx-cmds
itdseq=42
SIRIUST satellite radio voice commands (if activated)
While listening to SIRIUSt satellite radio, (if activated), press
or
VOICE on the steering wheel controls. When prompted, you may say any
of the following commands:
42
PAGE: 42 OP: root EDIT SESSION: 1 DATE: MAY 13 2010 at 11:58 JOB: @ibm2/ford_pdm/CLS_ford/GRP_supplement/JOB_ng2/DIV_navi
REVIEW COPY ——
2011 Nav in a Box (ng2), Supplement (supplement), 2nd Printing, Market:
USA (fus)
JOBNAME: No Job Name PAGE: 43 SESS: 1 OUTPUT: Thu May 13 11:58:31 2010 SUM: 3BEDC7A4
/ford_pdm/ford/supplement/ng2/navi
Audio features
• On
• Off
• < Channel name>
• < 1–223 >
• SAT1
• SAT2
• SAT3
• Preset <1–6>
• SAT1 preset <1–6>
• SAT2 preset <1–6>
• SAT3 preset <1–6>
• Seek up
• Seek down
• Store preset <1–6>
• Store SAT1 preset <1–6>
• Store SAT2 preset <1–6>
• Store SAT3 preset <1–6>
• Tune
• Help
or
Note: If you are not listening to SIRIUSt satellite radio, press
VOICE on the steering wheel controls. When prompted, say, “SIRIUS”
and then press
or VOICE on the steering wheel controls again and
you can say any of the above commands.
*If you have said “Tune”, you can then say the following
commands:
•
•
•
•
•
< 1–223 >
SAT1
SAT3
SAT1 preset <1–6>
SAT3 preset <1–6>
•
•
•
•
< Channel name>
SAT2
Preset <1–6>
SAT2 preset <1–6>
CIMS #1660663
com_satgeninfo.ngn
itdseq=43
Satellite radio (if activated)
Your vehicle is equipped with satellite radio capability. The factory
installed SIRIUSt satellite radio system includes a limited subscription
term which begins on the date of sale / lease of the vehicle. Extended
subscription terms are available, please contact SIRIUSt at
1–888–539–7474.
You will need to give SIRIUSt your Satellite Radio ESN Number for
activation. The ESN number is found on the System Information Screen
(SR ESN:XXXXXXXXXXXX). Press the I button (
) on the navigation
system and select the ‘System Info’ tab on the touchscreen.
Satellite radio channels: SIRIUSt broadcasts a variety of music, news,
sports, weather, traffic and entertainment satellite radio channels. For
more information and a complete list of SIRIUSt satellite radio channels,
visit www.sirius.com in the United States, www.sirius-canada.ca in
Canada, or call SIRIUS at 1–888–539–7474.
43
PAGE: 43 OP: root EDIT SESSION: 1 DATE: MAY 13 2010 at 11:58 JOB: @ibm2/ford_pdm/CLS_ford/GRP_supplement/JOB_ng2/DIV_navi
REVIEW COPY ——
2011 Nav in a Box (ng2), Supplement (supplement), 2nd Printing, Market:
USA (fus)
JOBNAME: No Job Name PAGE: 44 SESS: 1 OUTPUT: Thu May 13 11:58:31 2010 SUM: 3AAE1623
/ford_pdm/ford/supplement/ng2/navi
Audio features
Satellite radio reception factors: To receive the satellite signal, your
vehicle has been equipped with a satellite radio antenna located on the
roof of your vehicle. The vehicle roof provides the best location for an
unobstructed, open view of the sky, a requirement of a satellite radio
system. Like AM/FM, there are several factors that can affect satellite
radio reception performance:
• Antenna Obstructions: For optimal reception performance, keep the
antenna clear of snow and ice build-up and keep luggage and other
material as far away from the antenna as possible.
• Terrain: Hills, mountains, tall buildings, bridges, tunnels, freeway
overpasses, parking garages, dense tree foliage and thunderstorms can
interfere with your reception.
• Station overload: When you pass a ground based broadcast repeating
tower, a stronger signal may overtake a weaker one and result in an
audio mute.
Unlike AM/FM audible static, you will hear an audio mute when there is
a satellite radio signal interference. Your radio display may display
ACQUIRING . . . to indicate the interference.
SIRIUSt satellite radio service: SIRIUSt Satellite Radio is a
subscription based satellite radio service that broadcasts music, sports,
news and entertainment programming. A service fee is required in order
to receive SIRIUSt service. Vehicles that are equipped with a factory
installed SIRIUSt Satellite Radio system include:
• Hardware and limited subscription term, which begins on the date of
sale or lease of the vehicle.
For information on extended subscription terms, the online media player
and other SIRIUSt features, please contact SIRIUSt at 1–888–539–7474.
Note: SIRIUSt reserves the unrestricted right to change, rearrange, add
or delete programming including canceling, moving or adding particular
channels, and its prices, at any time, with or without notice to you.
Mazda Motor Corporation shall not be responsible for any such
programming changes.
Satellite Radio Electronic Serial Number (ESN): This 12 digit
satellite serial number is needed to activate, modify or track your
satellite radio account. You will need this number when communicating
with SIRIUSt. While in satellite radio mode, you can view this number by
) on the navigation system and select the
pressing the I button (
‘System Info’ tab on the touchscreen.
44
PAGE: 44 OP: root EDIT SESSION: 1 DATE: MAY 13 2010 at 11:58 JOB: @ibm2/ford_pdm/CLS_ford/GRP_supplement/JOB_ng2/DIV_navi
REVIEW COPY ——
2011 Nav in a Box (ng2), Supplement (supplement), 2nd Printing, Market:
USA (fus)
JOBNAME: No Job Name PAGE: 45 SESS: 1 OUTPUT: Thu May 13 11:58:31 2010 SUM: 2044113F
/ford_pdm/ford/supplement/ng2/navi
Audio features
Radio Display
ACQUIRING
SAT FAULT
INVALID CHANNEL
UNSUBSCRIBED
CHANNEL
Condition
Action Required
Radio requires more
No action required.
than two seconds to
This message should
produce audio for the
disappear shortly.
selected channel.
Internal module or
If this message does
system failure
not clear within a short
present.
period of time, or with
an ignition key cycle,
your receiver may have
a fault. See your
authorized dealer for
service.
Channel no longer
This previously
available.
available channel is no
longer available. Tune
to another channel. If
the channel was one of
your presets, you may
choose another channel
for that preset button.
Subscription not
Contact SIRIUSt at
available for this
1–888–539–7474 to
channel.
subscribe to the
channel, or tune to
another channel.
45
PAGE: 45 OP: root EDIT SESSION: 1 DATE: MAY 13 2010 at 11:58 JOB: @ibm2/ford_pdm/CLS_ford/GRP_supplement/JOB_ng2/DIV_navi
REVIEW COPY ——
2011 Nav in a Box (ng2), Supplement (supplement), 2nd Printing, Market:
USA (fus)
JOBNAME: No Job Name PAGE: 46 SESS: 1 OUTPUT: Thu May 13 11:58:31 2010 SUM: 352D681A
/ford_pdm/ford/supplement/ng2/navi
Audio features
Radio Display
NO SIGNAL
Condition
Loss of signal from
the SIRIUSt satellite
or SIRIUSt tower to
the vehicle antenna.
UPDATING
Update of channel
programming in
progress.
Satellite service has
been deactivated by
SIRIUSt Satellite
Radio.
CALL SIRIUSt
1–888–539–7474
Action Required
You are in a location
that is blocking the
SIRIUSt signal (i.e.,
tunnel, under an
overpass, dense foliage,
etc). The system is
working properly. When
you move into an open
area, the signal should
return.
No action required. The
process may take up to
three minutes.
Call SIRIUSt at
1–888–539–7474 to
re-activate or resolve
subscription issues.
CIMS #1656393
com_cdmode-ngn
itdseq=44
PLAYING A CD
Note: CD units are designed to play commercially pressed 4.75 in
(12 cm) audio compact discs in the ISO 9660 format only. (UDF
format is not supported.) Due to technical incompatibility,
certain recordable and re-recordable compact discs may not
function correctly when used in CD players. Irregular shaped
CDs, CDs with a scratch protection film attached, and CDs with
homemade paper (adhesive) labels should not be inserted into
the CD player. The label may peel and cause the CD to become
jammed. It is recommended that homemade CDs be identified
with permanent felt tip marker rather than adhesive labels.
Ballpoint pens may damage CDs. Please contact your authorized
dealer for further information.
If you press CD/DVD and there is not a disc loaded into the system, NO
DISC will appear in the status bar and you will not be able to access the
CD screen.
• Insert a disc into the slot. The disc will begin to play.
46
PAGE: 46 OP: root EDIT SESSION: 1 DATE: MAY 13 2010 at 11:58 JOB: @ibm2/ford_pdm/CLS_ford/GRP_supplement/JOB_ng2/DIV_navi
REVIEW COPY ——
2011 Nav in a Box (ng2), Supplement (supplement), 2nd Printing, Market:
USA (fus)
JOBNAME: No Job Name PAGE: 47 SESS: 1 OUTPUT: Thu May 13 11:58:31 2010 SUM: 2609B01A
/ford_pdm/ford/supplement/ng2/navi
Audio features
art=expec302_a
You can access any of the following
options in CD mode:
Scan: Press for a brief sampling of all listenable CD tracks.
Compress (Compression) : Press to engage/disengage the compression
feature. Compression boosts more quiet music and lowers louder music
to minimize the need for volume adjustments.
Repeat: Press to engage / disengage the repeat feature. The system will
keep playing the same track continually.
Shuffle: Press to engage / disengage the shuffle feature. The system will
play all tracks on the disc randomly.
Track List: Press to view a list of tracks on the CD.
Record: Press to record and save the CD or any track(s) on the CD to
the Jukebox. You can then later access/play the saved tracks / CD.
: Press to access the previous track. Press and hold to reverse in
the current track.
/
(Play/Pause) : Press to play or pause the current track.
: Press to access the next track. Press and hold to advance within
the current track.
SEEK
hard button on your system to listen to the next
Press
) or previous (
) track.
(
CIMS #1682641
com_mp3.ngn
MP3
If you press the CD/DVD tab and there is not a disc loaded into the
system, NO DISC will appear in the status bar and you will not be able to
access the CD screen.
• Insert a disc into the slot. The disc will begin to play.
47
PAGE: 47 OP: root EDIT SESSION: 1 DATE: MAY 13 2010 at 11:58 JOB: @ibm2/ford_pdm/CLS_ford/GRP_supplement/JOB_ng2/DIV_navi
REVIEW COPY ——
2011 Nav in a Box (ng2), Supplement (supplement), 2nd Printing, Market:
USA (fus)
itdseq=45
JOBNAME: No Job Name PAGE: 48 SESS: 1 OUTPUT: Thu May 13 11:58:31 2010 SUM: 1A123ADB
/ford_pdm/ford/supplement/ng2/navi
Audio features
You can access any of the following
options in MP3 mode:
Scan: Press for a brief sampling of all listenable tracks.
Compress (Compression): Press to engage/disengage the compression
feature. Compression boosts more quiet music and lowers louder music
to minimize the need for volume adjustments.
Repeat: Press to engage / disengage the repeat feature. The system will
keep playing the same track continually.
Shuffle: Press to engage / disengage the shuffle feature. The system will
play all tracks on the disc randomly.
Folder mode: Press to activate folder mode. When activated, song play
and seeking stays within the current folder.
Folder List: Press to access/view a
list of folders on the disc. Select the
root folder (if available).
You may then select from all
possible folders on the disc.
art=expec512_a
art=expec513_a
art=expec514_a
You may also use the following:
48
PAGE: 48 OP: root EDIT SESSION: 1 DATE: MAY 13 2010 at 11:58 JOB: @ibm2/ford_pdm/CLS_ford/GRP_supplement/JOB_ng2/DIV_navi
REVIEW COPY ——
2011 Nav in a Box (ng2), Supplement (supplement), 2nd Printing, Market:
USA (fus)
JOBNAME: No Job Name PAGE: 49 SESS: 1 OUTPUT: Thu May 13 11:58:31 2010 SUM: 3B97CFB7
/ford_pdm/ford/supplement/ng2/navi
Audio features
: Press to access the previous track. Press and hold to reverse in
the current track.
/
(Play/Pause) : Press to play or pause the current track.
: Press to access the next track. Press and hold to advance within
the current track.
Press the
next (
SEEK
) or previous (
hard button on your system to listen to the
) track.
CIMS #1661456 com_cdvoixcmds
itdseq=46
CD voice commands
or VOICE on the steering wheel
While listening to a CD, press
controls. When prompted, you may say any of the following commands:
• Play
• Repeat
• Shuffle
• Play next track
• Play track <1–512>
• Play folder <1–255> track
<1–512>
• Play previous folder
• Folder mode off
•
•
•
•
•
Pause
Repeat off
Shuffle off
Play previous track
Play folder <1–255>
• Play next folder
• Folder mode
• Help
or VOICE on the
Note: If you are not listening to a CD, press
steering wheel controls. When prompted, say, “CD” and then any of the
above commands.
CIMS #1675368
com_dvdmode.ngn
itdseq=47
PLAYING A DVD IN THE SYSTEM
Your navigation system allows you to play DVD audio and video discs.
Ensure that the vehicle is in Park (P) for automatic transmission
vehicles, or that the parking brake is engaged for manual transmission
vehicles. This will allow you to be able to view and hear the DVD. If the
vehicle is moving, you will only be able to hear the audio.
To play a DVD:
1. Ensure that the vehicle and the system are on.
2. Insert a DVD into the system, label side up. The system will
automatically go into DVD mode.
49
PAGE: 49 OP: root EDIT SESSION: 1 DATE: MAY 13 2010 at 11:58 JOB: @ibm2/ford_pdm/CLS_ford/GRP_supplement/JOB_ng2/DIV_navi
REVIEW COPY ——
2011 Nav in a Box (ng2), Supplement (supplement), 2nd Printing, Market:
USA (fus)
JOBNAME: No Job Name PAGE: 50 SESS: 1 OUTPUT: Thu May 13 11:58:31 2010 SUM: 255E8D9D
/ford_pdm/ford/supplement/ng2/navi
Audio features
You can then select any of the
following options on the
touchscreen:
art=expec360_a
: Press to access the previous chapter. Press and hold to reverse in
the current chapter.
/
(Play/Pause) : Press to play or pause the DVD.
: Press to access the next chapter. Press and hold to advance
within the current chapter.
(Stop): Press to stop the current track.
Title: Goes to the main title screen stored on the disc.
Menu: Goes to the main menu of the disc.
Cursor controls: Use these controls to navigate to the desired menu
selections.
Search:: Press to select and go to a specific title or chapter using the
keypad.
Settings: Allows you to adjust the certain settings of the DVD player,
such as:
• Video Display Settings: Press to adjust the brightness and contrast.
You can also choose to return to the default settings by pressing
‘Restore Default’.
• Audio Language: Press to select which language you would like the
DVD to display.
• Subtitle Display: Press to turn subtitles on/off.
• Subtitle Language: Press to select in which language you would like
the subtitles to appear.
• Aspect Ratio: Press to select from wide, full, normal and cinema
display.
• Angle Mark Notification: Some DVD discs may have more viewing
angles from which to select. Once you have made your selection, press
ENTER to confirm. This is disc dependent feature.
50
PAGE: 50 OP: root EDIT SESSION: 1 DATE: MAY 13 2010 at 11:58 JOB: @ibm2/ford_pdm/CLS_ford/GRP_supplement/JOB_ng2/DIV_navi
REVIEW COPY ——
2011 Nav in a Box (ng2), Supplement (supplement), 2nd Printing, Market:
USA (fus)
JOBNAME: No Job Name PAGE: 51 SESS: 1 OUTPUT: Thu May 13 11:58:31 2010 SUM: 397A9187
/ford_pdm/ford/supplement/ng2/navi
Audio features
Note: Some of the above settings are DVD dependent and
availability/operation will vary among DVDs.
Dolbyt noise reduction is manufactured under license from Dolbyt
Laboratories Licensing Corporation. “Dolbyt” and the double-D symbol
are registered trademarks of Dolbyt Laboratories Licensing Corporation.
During DVD play, you can also
touch the screen to access the
‘virtual remote’ which will allow you
to ‘Move controls’ on the screen as
well as use the cursor controls,
‘Enter’ and ‘Return’ to navigate and
make selections within the menus.
art=expec548_a
CIMS #1661457 com_dvdvxcmds
itdseq=48
DVD voice commands
or VOICE on the steering wheel
While watching a DVD, press
controls. When prompted, you may say any of the following commands:
•
•
•
•
•
•
•
•
Play
Menu
Play next title
Play title <1–99>
Play previous chapter
Play next group
Repeat
Play next track <1–512>
•
•
•
•
•
•
•
•
Pause
Menu title
Play previous title
Play next chapter
Play chapter <1–999>
Play group <1–9>
Repeat off
Play previous track
or VOICE on the
Note: If you are not watching a DVD, press
steering wheel controls. When prompted, say, “DVD” and then any of the
above commands.
CIMS #1675676
com_videocd-vx
itdseq=49
Video CD voice commands
or VOICE on the steering wheel
While watching a video CD, press
controls. When prompted, you may say any of the following commands:
• Play
• Pause
51
PAGE: 51 OP: root EDIT SESSION: 1 DATE: MAY 13 2010 at 11:58 JOB: @ibm2/ford_pdm/CLS_ford/GRP_supplement/JOB_ng2/DIV_navi
REVIEW COPY ——
2011 Nav in a Box (ng2), Supplement (supplement), 2nd Printing, Market:
USA (fus)
JOBNAME: No Job Name PAGE: 52 SESS: 1 OUTPUT: Thu May 13 11:58:31 2010 SUM: 411F24AF
/ford_pdm/ford/supplement/ng2/navi
Audio features
• Play previous track
• Play next track
• Play track <1–512>
• Help
or VOICE on the
Note: If you are not watching a video CD, press
steering wheel controls. When prompted, say, “video CD” and then any of
the above commands.
CIMS #1675678
com_discvxcmds
itdseq=50
Disc voice commands
While watching a disc, press
or VOICE on the steering wheel
controls. When prompted, you may say any of the following commands:
• Play
• Pause
• Menu
• Title menu
• Play next title
• Play previous title
• Play title <1–99>
• Play next chapter
• Play previous chapter
• Play chapter <1–999>
• Play next group
• Play previous group
• Play group <1–9>
• Repeat
• Repeat off
• Shuffle
• Shuffle off
• Play next track
• Play previous track
• Play track <1–512>
• Play folder <1–255> track
• Play next folder
<1–512>
• Play previous folder
• Folder mode
• Folder mode off
• Help
or VOICE on the steering
Note: If you are not watching a disc, press
wheel controls. When prompted, say, “disc” and then any of the above
commands.
CIMS #1675926
com_jukebox-intro
itdseq=51
JUKEBOX
Your mobile media navigation system has a Jukebox which allows you to
save desired tracks or CDs to the hard drive for later access. The hard
drive can store up to 10 GB* (164 hours; approximately 2,472 tracks) of
music. The system contains a Gracenotet media database that allows for
display of song title, album title, and album cover art. After saving music
to the hard drive, you can access and play your music by specific tracks,
artists, albums or genres. You can even choose to create and access your
own playlists.
*Note: 1 GB equals one billion bytes (1,000,000,000B).
52
PAGE: 52 OP: root EDIT SESSION: 1 DATE: MAY 13 2010 at 11:58 JOB: @ibm2/ford_pdm/CLS_ford/GRP_supplement/JOB_ng2/DIV_navi
REVIEW COPY ——
2011 Nav in a Box (ng2), Supplement (supplement), 2nd Printing, Market:
USA (fus)
JOBNAME: No Job Name PAGE: 53 SESS: 1 OUTPUT: Thu May 13 11:58:31 2010 SUM: 24CD4088
/ford_pdm/ford/supplement/ng2/navi
Audio features
Recording (saving) music to your jukebox
To record (save) music to your jukebox:
1. Ensure that the system is on.
2. Insert a CD into the system. The CD tab will appear.
3. Select ‘Record’ on the
touchscreen.
CIMS #1673841
com_recording-cd
itdseq=52
art=expec302_a
art=expec303_a
4. Select either individual tracks or
press ‘Select All’ to record the
entire CD. Note: The system
will default to selecting all
tracks if none are selected.
5. Press ‘Start Recording’.
art=expec328_a
The progress will show at the
bottom of the screen.
When the recording process is finished, the system will save your
track(s) / CD to the Jukebox.
Note: If you are not actively listening to the disc being recorded, the
record rate is much quicker (as fast as five minutes).
Accessing the music in your jukebox
Once you have saved music to your jukebox, you can then choose
several ways to play your favorite music. To access:
CIMS #1656811 com_jukebox
itdseq=53
53
PAGE: 53 OP: root EDIT SESSION: 1 DATE: MAY 13 2010 at 11:58 JOB: @ibm2/ford_pdm/CLS_ford/GRP_supplement/JOB_ng2/DIV_navi
REVIEW COPY ——
2011 Nav in a Box (ng2), Supplement (supplement), 2nd Printing, Market:
USA (fus)
JOBNAME: No Job Name PAGE: 54 SESS: 1 OUTPUT: Thu May 13 11:58:31 2010 SUM: 1EC10BF1
/ford_pdm/ford/supplement/ng2/navi
Audio features
1. Press the MEDIA hard button
on the navigation system.
2. Select the ‘Jukebox’ tab on the
touchscreen. You can then
select from the following
options:
art=expec216_a
art=expec364_a
Scan: Press for a brief sampling of the currently selected CD, playlist,
genre, etc. Press again to disengage.
Repeat: Press to repeat the current CD, playlist, etc. Press again to
disengage.
Shuffle: Press to shuffle all the tracks on the current CD, playlist, etc. in
random order. Press again to disengage.
Music library: Press to access all of your saved music. You can choose
to view/play the material in the following ways:
• Play all tracks: Select to play all
tracks saved in the jukebox.
• Playlist: Select to play your own
playlist.
• Play genre: Select to have the
system play only music from a
specific genre.
• Play artist: Select to have the
system play only music by a
specific artist.
art=expec366_a
• Play album: Select to have the system play only music from a specific
album.
54
PAGE: 54 OP: root EDIT SESSION: 1 DATE: MAY 13 2010 at 11:58 JOB: @ibm2/ford_pdm/CLS_ford/GRP_supplement/JOB_ng2/DIV_navi
REVIEW COPY ——
2011 Nav in a Box (ng2), Supplement (supplement), 2nd Printing, Market:
USA (fus)
JOBNAME: No Job Name PAGE: 55 SESS: 1 OUTPUT: Thu May 13 11:58:31 2010 SUM: 1F8FAB1A
/ford_pdm/ford/supplement/ng2/navi
Audio features
art=expec390_a
Options: Select to view your other
options:
• Edit Playlists: Select to edit your playlists.
• Edit Music Library Contents: Select to make changes to the
content in your music library.
• Update Album Information from CD Database: Select to update
the residing album information from the Gracenotet database if a
recent software update was performed.
• Hard Disk Drive Information: Select to access the system’s hard
drive disc information such as used/free space and total capacity.
• CD Database Information: Select to access the CD database
information.
CIMS #1675929
com_createplaylist
itdseq=54
Creating a playlist
1. Press the MEDIA hard button.
art=expec216_a
art=expec364_a
2. Select the ‘Jukebox’ tab on the
touchscreen.
3. Select ‘Options’.
55
PAGE: 55 OP: root EDIT SESSION: 1 DATE: MAY 13 2010 at 11:58 JOB: @ibm2/ford_pdm/CLS_ford/GRP_supplement/JOB_ng2/DIV_navi
REVIEW COPY ——
2011 Nav in a Box (ng2), Supplement (supplement), 2nd Printing, Market:
USA (fus)
JOBNAME: No Job Name PAGE: 56 SESS: 1 OUTPUT: Thu May 13 11:58:31 2010 SUM: 0E1B7CBA
/ford_pdm/ford/supplement/ng2/navi
Audio features
4. Select ‘Edit Playlists’.
5. Select which playlist you would
like to create.
6. Select which category you
would like to access from your
saved music.
For example, say you chose one
saved album from which to select
songs.
art=expec390_a
art=expec367_a
art=expec368_a
art=expec369_a
56
PAGE: 56 OP: root EDIT SESSION: 1 DATE: MAY 13 2010 at 11:58 JOB: @ibm2/ford_pdm/CLS_ford/GRP_supplement/JOB_ng2/DIV_navi
REVIEW COPY ——
2011 Nav in a Box (ng2), Supplement (supplement), 2nd Printing, Market:
USA (fus)
JOBNAME: No Job Name PAGE: 57 SESS: 1 OUTPUT: Thu May 13 11:58:31 2010 SUM: 22DD212C
/ford_pdm/ford/supplement/ng2/navi
Audio features
art=expec370_a
7. Select the desired songs and
then press ‘Add’.
art=expec371_a
The system will show you your
currently selected songs. You can
choose to add more tracks to your
playlist, Sort the Playlist, Delete the
playlist or to edit the name of the
playlist.
8. When you are done making any
adjustment to the playlist, select
‘Edit Name’ to rename your
playlist.
You can then access your playlist by
that name.
art=expec372_a
CIMS #1660383 com_jkeboxvx-cmds
itdseq=55
Jukebox voice commands
or VOICE
While listening to the music stored in the jukebox, press
on the steering wheel controls. When prompted, you may say any of the
following commands:
•
•
•
•
Play
Shuffle
Repeat
Play next track
•
•
•
•
Pause
Shuffle off
Repeat off
Play previous track
57
PAGE: 57 OP: root EDIT SESSION: 1 DATE: MAY 13 2010 at 11:58 JOB: @ibm2/ford_pdm/CLS_ford/GRP_supplement/JOB_ng2/DIV_navi
REVIEW COPY ——
2011 Nav in a Box (ng2), Supplement (supplement), 2nd Printing, Market:
USA (fus)
JOBNAME: No Job Name PAGE: 58 SESS: 1 OUTPUT: Thu May 13 11:58:31 2010 SUM: 493E267C
/ford_pdm/ford/supplement/ng2/navi
Audio features
• Play genre <name>
• Play artist <name>
• Play album <name>
• Play track <name>
• Play playlist <name>
• Play playlist <1–5>
• Help
or VOICE on the
Note: If you are not listening to the jukebox, press
steering wheel controls. When prompted, say, “Jukebox” and then any of
the above commands.
Search commands
Your jukebox has advanced search commands which allow you to have
the system search the stored music in your jukebox for a specific artist,
album or track. You can search for and play a specific type (genre) of
music, a specific album, a specific artist or a specific track.
To use the search commands
or VOICE on the steering wheel
When listening to the jukebox, press
controls. When prompted, you may say any of the following commands:
• Search genre <name>
• Search artist <name>
• Search album <name>
• Search track <name>
Once the system is done searching for the type of music, artist, album,
or track, you can say any of the following commands:
• Play
• Play album <name>
• Play track <name>
• Play artist <name>
‘Refining’ your search
You can choose to ’refine’ your search even farther. For example, if you
told the system to search and play all music by a certain artist, you can
then tell the system to “Refine album” and choose a specific album when
prompted. If you then say “Play”, the system will only play music from
that specific album.
To refine your search, say any of the following commands after system
has finished searching for the type of music, artist, album, or track:
• Refine album <name>
You can then select to:
• Refine artist <name>
• Play
• Play track <name>
LINE IN (AUXILIARY INPUT JACK)
Your vehicle is equipped with an audio input jack which will allow a
portable audio device to be listened to through your vehicle’s audio
system. To activate this feature:
58
CIMS #1675370
com_linein.ngn
itdseq=56
PAGE: 58 OP: root EDIT SESSION: 1 DATE: MAY 13 2010 at 11:58 JOB: @ibm2/ford_pdm/CLS_ford/GRP_supplement/JOB_ng2/DIV_navi
REVIEW COPY ——
2011 Nav in a Box (ng2), Supplement (supplement), 2nd Printing, Market:
USA (fus)
JOBNAME: No Job Name PAGE: 59 SESS: 1 OUTPUT: Thu May 13 11:58:31 2010 SUM: 112CD34C
/ford_pdm/ford/supplement/ng2/navi
Audio features
1. Press the MEDIA hard button on the navigation system.
2. Select the ‘Line In’ tab.
art=expec505_a
Once a 3.5 mm input jack is plugged into the Line in jack, ensure that
the playing device is turned on with the volume set at the maximum
level. Press the play button and sound from the device will be emitted
through the vehicle speakers. Adjust the volume using the volume
control on the navigation system.
For information on the auxiliary input jack location, please refer to the
Auxiliary input jack (Line in) in the Entertainment chapter of your
Owner’s Manual.
59
PAGE: 59 OP: root EDIT SESSION: 1 DATE: MAY 13 2010 at 11:58 JOB: @ibm2/ford_pdm/CLS_ford/GRP_supplement/JOB_ng2/DIV_navi
REVIEW COPY ——
2011 Nav in a Box (ng2), Supplement (supplement), 2nd Printing, Market:
USA (fus)
JOBNAME: No Job Name PAGE: 60 SESS: 1 OUTPUT: Thu May 13 11:58:31 2010 SUM: 376C5937
/ford_pdm/ford/supplement/ng2/navi
Information menu
CIMS # com_i-menu-intro
itdseq=57
INFORMATION MENU
Your navigation system has an Information menu which allows you access
to features such as: Where am I, HEV (Hybrid screen information, if
equipped), SIRIUSt Travel Link™ (if activated), Calendar, System
Information and Help. These can be accessed by pressing the I hard
) on the navigation system.
button (
CIMS #1656902
com_whereami.ngn
itdseq=58
WHERE AM I ?
Your navigation system is able to tell you your vehicle’s current location.
To use the ’Where am I?’ feature:
• Press the I button and select the
‘Where am I?’ tab.
art=expes002_a
The system will give you your current GPS location (latitude and
longitude), the current street you are on as well as the street in front
and behind the vehicle position along with distance information.
Note: Not all tab selections shown here will be available in all markets.
Check with your authorized dealer for availability.
HYBRID INFORMATION
Your navigation system has special
hybrid screens which display Energy
Flow, Fuel Economy and Power and
Efficiency information. To access
these screens, press the I button
) on the navigation system, and
(
then select the ‘HEV’ tab on the
touchscreen.
CIMS #1787408
com_hevscreen.maz
itdseq=59
art=204ec025_a
60
PAGE: 60 OP: root EDIT SESSION: 1 DATE: MAY 13 2010 at 11:58 JOB: @ibm2/ford_pdm/CLS_ford/GRP_supplement/JOB_ng2/DIV_navi
REVIEW COPY ——
2011 Nav in a Box (ng2), Supplement (supplement), 2nd Printing, Market:
USA (fus)
JOBNAME: No Job Name PAGE: 61 SESS: 1 OUTPUT: Thu May 13 11:58:31 2010 SUM: 2834CF3B
/ford_pdm/ford/supplement/ng2/navi
Information menu
ENERGY FLOW SCREEN
The energy flow screen is a graphical representation of how power is
transferred within the hybrid system to accelerate the vehicle or
recharge the battery. These screens are informational and do not require
any input from you.
Note: Due to the screen updates and simplification of the graphics, the
display may not show the actual vehicle status.
art=expec545_a
1. Engine Power: This line represents how much power is being
transferred from the engine to the wheels.
2. Engine: This icon represents the Internal Combustion Engine (ICE).
It will be highlighted only when the ICE is running.
3. Generator Power: This line represents how much power is being
generated by the engine for use by the High Voltage (HV) electric
system, or how much power is being used by the High Voltage (HV)
electric system to control/start the engine.
4. High Voltage (HV) Battery: This icon represents your High
Voltage Battery. It will be highlighted when power is transferred to
and from the battery. The fill level represents the state of charge of
your HV Battery. The fill level will increase and decrease as the
battery charges and discharges during normal operation, but the
hybrid system will attempt to control the level to approximately the
middle of the gauge under most driving conditions.
5. Battery Power: This line represents how much power the HV
battery is providing to accelerate the vehicle (discharging), or how
61
PAGE: 61 OP: root EDIT SESSION: 1 DATE: MAY 13 2010 at 11:58 JOB: @ibm2/ford_pdm/CLS_ford/GRP_supplement/JOB_ng2/DIV_navi
REVIEW COPY ——
2011 Nav in a Box (ng2), Supplement (supplement), 2nd Printing, Market:
USA (fus)
JOBNAME: No Job Name PAGE: 62 SESS: 1 OUTPUT: Thu May 13 11:58:31 2010 SUM: 1AD1FF2C
/ford_pdm/ford/supplement/ng2/navi
Information menu
much power is being delivered from the motor to the battery
(charging).
Note: The battery power line includes battery power being used to
propel the vehicle. It does not include energy being used by
accessories (i.e., air conditioning, headlights, radio, etc.)
6. Electric motor: This icon represents the hybrid electric motor. This
symbol will be highlighted to indicate that the vehicle is ready to be
driven.
7. Motor power: This line represents how much power is being
transferred between the wheels and the hybrid electric motor.
The energy flow screens contain a title to indicate which mode is active
within the hybrid system.
In Hybrid Drive mode, the vehicle
is being powered by both the
electric motor and the engine.
In Charging HV Battery mode,
power is being stored in the high
voltage (HV) battery by the Hybrid
system.
art=expec385_a
art=expec382_a
62
PAGE: 62 OP: root EDIT SESSION: 1 DATE: MAY 13 2010 at 11:58 JOB: @ibm2/ford_pdm/CLS_ford/GRP_supplement/JOB_ng2/DIV_navi
REVIEW COPY ——
2011 Nav in a Box (ng2), Supplement (supplement), 2nd Printing, Market:
USA (fus)
JOBNAME: No Job Name PAGE: 63 SESS: 1 OUTPUT: Thu May 13 11:58:31 2010 SUM: 0EE2D3CC
/ford_pdm/ford/supplement/ng2/navi
Information menu
art=expec388_a
In Idle with Charging mode,
power is being generated to
recharge the high voltage battery.
art=expec386_a
In Idle mode, the vehicle is either
at rest, or is sharing very little
power between the hybrid parts.
art=expec383_b
In Electric Drive mode, the vehicle
is driving in electric mode. The
power is coming from the electric
motor and not the engine.
63
PAGE: 63 OP: root EDIT SESSION: 1 DATE: MAY 13 2010 at 11:58 JOB: @ibm2/ford_pdm/CLS_ford/GRP_supplement/JOB_ng2/DIV_navi
REVIEW COPY ——
2011 Nav in a Box (ng2), Supplement (supplement), 2nd Printing, Market:
USA (fus)
JOBNAME: No Job Name PAGE: 64 SESS: 1 OUTPUT: Thu May 13 11:58:31 2010 SUM: 32B6697D
/ford_pdm/ford/supplement/ng2/navi
Information menu
FUEL ECONOMY SCREEN
The fuel economy screen will
display fuel economy achieved in
the last 10 minutes of driving.
(Refer to Average Fuel Economy in
the Instrument Cluster chapter in
your Owner’s Manual.) To view this
screen, select ’Fuel Economy’ on the
‘HEV’ tab screen.
art=204ec027_a
• Instantaneous Fuel Economy (Inst Econ): This is displayed on
the vertical bar on the left of the screen ranging from 0–60 mpg.
When the vehicle is not moving, the Ins Econ function will display no
bar on the Inst Cons graph indicating 0 mpg. Conversely, if you are
driving in electric mode (engine off), this function will display 60+
mpg. Instantaneous Economy cannot be reset.
• Overall Average Fuel Economy (AVG MPG): The AVG MPG is
displayed on the upper left hand corner of the screen. The AVG MPG
will be retained when the key is turned off and will continue averaging
when driving resumes. Pressing RESET will reset the AVG MPG to
zero.
• Fuel Economy History graph: This graph will indicate average fuel
economy in 10 minute intervals. The graph is updated each minute
with the fuel economy that was achieved during the prior 10 minutes
of driving. Each new average will be added to the left side of the
graph, shifting the past data to the right. When the graph area is full,
the right most point will be deleted, keeping a running scroll with the
bar on the left being the most recent. You will start with an empty fuel
economy history with every ignition cycle.
If the navigation system has been set to units of Kilometer, the Fuel
Economy screen will display the equivalent Consumption Graph in units
of L/100 KM. In Consumption (L/100 KM) mode, the IFE function will
display MAX until the vehicle is moving. For more information on
Average Fuel Economy, refer to Message center in the Instrument
Cluster chapter in your Owner’s Manual.
64
PAGE: 64 OP: root EDIT SESSION: 1 DATE: MAY 13 2010 at 11:58 JOB: @ibm2/ford_pdm/CLS_ford/GRP_supplement/JOB_ng2/DIV_navi
REVIEW COPY ——
2011 Nav in a Box (ng2), Supplement (supplement), 2nd Printing, Market:
USA (fus)
JOBNAME: No Job Name PAGE: 65 SESS: 1 OUTPUT: Thu May 13 11:58:31 2010 SUM: 2F5B8A11
/ford_pdm/ford/supplement/ng2/navi
Information menu
Power and efficiency screen
Your vehicle is equipped with a
Power & Efficiency screen which
provides additional information
about brake efficiency, vehicle
power, accessory power (such as air
conditioning) and efficiency
information.
CIMS #1787409
com_pwreff.maz
itdseq=60
art=204ec028_a
Brake (brake gauge): The narrow band indicates brake power demand.
(The more you press on the brake pedal, the more braking power you
demand of the vehicle). The wide band remains stationary to show the
area in which braking is more efficient (beneath the line) and the
approximate point where the limit of regenerative braking is reached (at
the top of the line) and where conventional friction braking is applied
(over the line).
• When possible, anticipate braking. Moderate braking will help you stay
within the efficient braking zone (keeping the narrow band below the
wide band) thereby improving the regenerative braking energy
recovery.
• Brake demand may be present when coasting (without your foot on
the brake pedal), particularly in low gear as the powertrain is
contributing to slowing the vehicle.
Note: At zero vehicle speed, the narrow band indicator will show zero.
Vehicle (vehicle gauge): The narrow band indicates vehicle power
demand. (The more you press on the accelerator pedal, the more power
you demand of the vehicle.) When the transmission is in D (Drive), the
wide band indicates the gasoline engine on/off transition point. If the
narrow band is above the wide band, the gasoline engine is on. If the
narrow band is below the wide band, the gasoline engine is off and the
vehicle is in electric mode. If you are in electric mode and you press the
accelerator such that the narrow band exceeds the wide band, the
gasoline engine will turn on.
65
PAGE: 65 OP: root EDIT SESSION: 1 DATE: MAY 13 2010 at 11:58 JOB: @ibm2/ford_pdm/CLS_ford/GRP_supplement/JOB_ng2/DIV_navi
REVIEW COPY ——
2011 Nav in a Box (ng2), Supplement (supplement), 2nd Printing, Market:
USA (fus)
JOBNAME: No Job Name PAGE: 66 SESS: 1 OUTPUT: Thu May 13 11:58:31 2010 SUM: 340150CE
/ford_pdm/ford/supplement/ng2/navi
Information menu
• Reduction in vehicle power to
below the wide band will result in
the engine turning off. In this
case, the hybrid’s system is
operating in electric mode and
“EV” is displayed under the
gauge.
art=204ec026_a
• If the power demand is smaller than what is required to turn the
engine on, it will be indicated with the narrow band below the wide
band. Increase in vehicle power to above the wide band will result in
the engine turning on and the “EV” will disappear.
• When the gasoline engine is on for reasons outside of your control
(such as warming up the system or charging a low battery), the
gasoline engine on/off threshold indicator (wide band) disappears.
When the wide band is not displayed, the gasoline engine will not turn
off regardless of how little power you demand (even lifting your foot
off the accelerator).
Accessory (A/C power gauge): The accessory gauge indicates
electrical power demand from your vehicle’s air conditioning system. Air
conditioning uses power but does not contribute to propelling the
vehicle. The higher the level indication on this gauge, the more air
conditioning power is being used. You can see the level of this gauge
change by turning air conditioning on and off or changing the climate
control set point.
• Some air conditioning power may be used when in the AUTO
(Automatic) climate control mode. See the Climate control chapter of
your Owner’s Manual for more information.
• In colder ambient temperatures when the air conditioning is used less
frequently, the A/C power will often display at zero.
Eff (efficiency gauge): The efficiency gauge indicates short term
driving efficiency, measured over the last few minutes. Higher efficiency
is indicated by an increase in the level indication.
• This display can be impacted by your use of brakes, accelerator and
accessories as well as environmental conditions such as terrain and
weather.
• The efficiency display does not reset with the ’Reset’ economy button.
Engine on: This gauge provides you with the reason why the engine is
running. When the gasoline engine is on, the buttons will show the
66
PAGE: 66 OP: root EDIT SESSION: 1 DATE: MAY 13 2010 at 11:58 JOB: @ibm2/ford_pdm/CLS_ford/GRP_supplement/JOB_ng2/DIV_navi
REVIEW COPY ——
2011 Nav in a Box (ng2), Supplement (supplement), 2nd Printing, Market:
USA (fus)
JOBNAME: No Job Name PAGE: 67 SESS: 1 OUTPUT: Thu May 13 11:58:31 2010 SUM: 368CF1F7
/ford_pdm/ford/supplement/ng2/navi
Information menu
reason why. When the gasoline engine is off, ’EV’ will appear in the
display. When the gasoline engine is on, one or two of the following
reasons will appear. For a more complete description of the reason,
simply press the desired button on the touchscreen.
• Engine cold: The engine is on to warm-up. The vehicle will return to
electric mode when the engine is warm. This reason may re-appear
during a drive or after shutting the vehicle down for a short period.
This is normal operation.
• Heater setting: The engine is on because of the heater setting. Reduce
or turn off the heater setting to return to electric mode.
• High speed: The engine is on because the vehicle speed exceeds the
level for electric mode operation. Reduce the speed to return to
electric mode.
• Acceleration: The engine is on because of pressure applied to the
accelerator pedal. Reduce the pressure on the accelerator pedal to
return to full electric mode.
• Neutral Gear: The engine is on because the vehicle is in neutral gear.
Shift out of neutral gear to return to electric mode.
• Low Gear: The engine is on because the vehicle is in low gear. Shift
out of low gear to return to electric mode.
• Batt charging (battery charging): The engine is on to charge the
hybrid battery. The vehicle will return to electric mode once the
battery is charged.
• Normal operation: The engine is on to optimize vehicle operation. The
vehicle will return to electric mode when possible.
Note: You may see ’None’ appear in the engine on reason box(es). This
message indicates that there are no additional reasons for the engine to
be on.
CIMS #1656904
com_dataservice.ngn
itdseq=61
SIRIUST TRAVEL LINK™ (IF ACTIVATED, U.S. ONLY)
Your navigation system contains SIRIUSt Travel Link™ (if activated), a
data service feature which can help you locate the best gas prices, find
movie listings, get current traffic alerts, access the current weather map,
get accurate ski conditions as well as scores to current sports games.
Note: A paid subscription is required to access/use these features. Go to
www.sirius.com/travellink for more information.
67
PAGE: 67 OP: root EDIT SESSION: 1 DATE: MAY 13 2010 at 11:58 JOB: @ibm2/ford_pdm/CLS_ford/GRP_supplement/JOB_ng2/DIV_navi
REVIEW COPY ——
2011 Nav in a Box (ng2), Supplement (supplement), 2nd Printing, Market:
USA (fus)
JOBNAME: No Job Name PAGE: 68 SESS: 1 OUTPUT: Thu May 13 11:58:31 2010 SUM: 30E50518
/ford_pdm/ford/supplement/ng2/navi
Information menu
WARNING: Driving while distracted can result in loss of vehicle
control, accident and injury. Mazda strongly recommends that
drivers use extreme caution when using any device or feature that may
take their focus off the road. Your primary responsibility is the safe
operation of the vehicle. We recommend against the use of any
handheld device while driving and that you comply with all applicable
laws.
) on the
Press the I button (
navigation system and then select
the ‘Sirius Travel Link’ tab on the
touch screen.
art=expec373_a
From this screen you can select from the following options:
Traffic:
• On route: Select to identify
traffic incidents on your route.
You can select any of the list
items to view more details on that
incident. When viewing the
incident, you can select ‘Avoid’ to
have the system re-route you
around the incident.
Note: This button is disabled if a
route is not active or the vehicle
goes off route.
art=expec374_a
• Nearby: Select to identify traffic incidents around the vehicle’s
current location.
• My Places: Select to identify traffic incidents around your personal
traffic places (if programmed).
68
PAGE: 68 OP: root EDIT SESSION: 1 DATE: MAY 13 2010 at 11:58 JOB: @ibm2/ford_pdm/CLS_ford/GRP_supplement/JOB_ng2/DIV_navi
REVIEW COPY ——
2011 Nav in a Box (ng2), Supplement (supplement), 2nd Printing, Market:
USA (fus)
JOBNAME: No Job Name PAGE: 69 SESS: 1 OUTPUT: Thu May 13 11:58:31 2010 SUM: 1DA59AE8
/ford_pdm/ford/supplement/ng2/navi
Information menu
• With Travel Link, traffic
information will be displayed on
the map parallel to the road in a
different color. The color is
determined by the current ‘flow’
of traffic as shown on the Traffic
Legend Speed and Flow screen.
art=expec326_a
• Viewed and unviewed traffic
incidents are differentiated as
shown on the Traffic Legend
Traffic Incidents screen.
• An ‘incident’ which causes a road
closure will be noted by purple
dotted lines and will also have
direction and length information.
art=expec377_a
Note: Please visit www.sirius.com/traffic# and click on ‘coverage map
and details’ for a complete listing of all traffic areas covered by SIRIUSt
Travel Link™.
Weather:
• Current / 5 Day / Ski Info:
Select to view the current
weather, 5 day forecast or ski
information for a selected area.
• Nearby Weather: When ‘Nearby
Weather’ is selected, the system
will automatically display the
weather for the nearest location.
• Weather location display: Press
to select an area for which you would like to view the weather.
art=expec560_b
69
PAGE: 69 OP: root EDIT SESSION: 1 DATE: MAY 13 2010 at 11:58 JOB: @ibm2/ford_pdm/CLS_ford/GRP_supplement/JOB_ng2/DIV_navi
REVIEW COPY ——
2011 Nav in a Box (ng2), Supplement (supplement), 2nd Printing, Market:
USA (fus)
JOBNAME: No Job Name PAGE: 70 SESS: 1 OUTPUT: Thu May 13 11:58:31 2010 SUM: 1E7A8983
/ford_pdm/ford/supplement/ng2/navi
Information menu
You can also select 5 favorite
current / 5 day location,
as well as 5 favorite ski locations
from the location selection screen.
• Weather Map: Select to view a
real time weather map. The map
can be displayed in three
different zoom levels: 500 mi
(1,000 km), 50 mi (100 km) and
5 mi (10 km). The weather map
shows the following information:
Storm: Available with the 500 mi
(1,000 km) and 50 mi (100 km)
zoom levels. Different storms have
different icons. To view storm information, press the desired storm icon.
Then press the ‘Info’ button.
Radar: Radar information is available in all three zoom levels and shows
weather fronts and precipitation.
Charts: Chart overlays show highs “H” and lows “L” and Isobars and are
available with the 500 mi (1,000 km), 50 mi (100 km) zoom levels.
Winds: Wind speed and direction are only shown at 5 mi (10km) zoom
level.
Press ‘Legend’ to view the meaning of the icons used on the map.
Press Blend +/- to adjust transparency of the weather map overlay.
70
art=expec330_b
art=expec561_a
art=expec391_b
PAGE: 70 OP: root EDIT SESSION: 1 DATE: MAY 13 2010 at 11:58 JOB: @ibm2/ford_pdm/CLS_ford/GRP_supplement/JOB_ng2/DIV_navi
REVIEW COPY ——
2011 Nav in a Box (ng2), Supplement (supplement), 2nd Printing, Market:
USA (fus)
JOBNAME: No Job Name PAGE: 71 SESS: 1 OUTPUT: Thu May 13 11:58:31 2010 SUM: 282B6839
/ford_pdm/ford/supplement/ng2/navi
Information menu
Other Services:
• Fuel Prices: Select to show gas
prices at stations close to your
vehicle’s location or gas stations
on an active navigation route. You
can choose to sort the list by
distance, price or alphabetical
order.
art=expec331_a
Fuel Station
You can also select to view Unleaded or Diesel fuel prices from the
‘Navigation Prefs’ (Preferences) tab under the NAV menu features. If you
select ‘Unleaded’, the navigation system will only show list items with
Unleaded fuel prices and if you select ‘Diesel’, the navigation system will
only show diesel prices. List items with ‘NA’ represent stations where
fuel prices are either not available or has a fuel price that is not selected
under ‘Navigation Prefs’ screen. The different hour glass icons indicate
the age of the collected data.
• Movie Listings: Select to display
movie theaters located nearby the Movie Theater
vehicle’s current location. Select
the clock icon to view the show
times. Show times are only
available for the list items which
have a clock next to them.
art=expec375_a
art=expec376_a
• Sports Information: Select to
display scores and schedules for a
variety of sports. You can even
save up to 10 favorite teams for
easier access. The score screen
automatically refreshes when a
game or event is in progress. On
the score screen, a TUNE button
is shown next to the list item
when a live radio broadcast is in
process.
71
PAGE: 71 OP: root EDIT SESSION: 1 DATE: MAY 13 2010 at 11:58 JOB: @ibm2/ford_pdm/CLS_ford/GRP_supplement/JOB_ng2/DIV_navi
REVIEW COPY ——
2011 Nav in a Box (ng2), Supplement (supplement), 2nd Printing, Market:
USA (fus)
JOBNAME: No Job Name PAGE: 72 SESS: 1 OUTPUT: Thu May 13 11:58:31 2010 SUM: 45C28493
/ford_pdm/ford/supplement/ng2/navi
Information menu
Note: Neither SIRIUSt nor Mazda is responsible for any errors or
inaccuracies in the SIRIUSt Travel Link™ services or its use in vehicles.
CIMS #1661811
com_dataserv-vx
itdseq=62
SIRIUST Travel Link™ (if activated) voice commands (if equipped)
or VOICE on the steering
When using SIRIUSt Travel Link™, press
wheel controls. When prompted, say, “Travel Link”, wait for the system
to sound two tones and you may say any of the following commands:
• Traffic
• Weather map
• Weather
• Five day weather forecast
• Movie listings
• Fuel prices
• NFL scores
• NFL schedule
• Baseball scores
• Baseball schedule
• College football scores
• College football schedule
• College basketball scores
• College basketball schedule
• Motor sports results
• Motor sports schedule
• Golf leaderboards
• Golf schedule
• Sports schedules
• Sports scores
• NBA scores
• NBA schedule
• NHL scores
• NHL schedule
• Help
If you say the command, “Sports scores” once, the system is
ready. You may then say any of the following commands:
• NHL scores
• NBA scores
• NFL scores
• Baseball scores
• College football scores
• College basketball scores
• Motor sports results
• Golf leaderboards
• Travel link help
If you say the command “Sports schedules” once, the system is
ready. You may then say any of the following commands:
•
•
•
•
•
NHL schedule
NFL schedule
College football schedule
Motor sports schedule
Travel link help
•
•
•
•
NBA schedule
Baseball schedule
College basketball schedule
Golf schedule
72
PAGE: 72 OP: root EDIT SESSION: 1 DATE: MAY 13 2010 at 11:58 JOB: @ibm2/ford_pdm/CLS_ford/GRP_supplement/JOB_ng2/DIV_navi
REVIEW COPY ——
2011 Nav in a Box (ng2), Supplement (supplement), 2nd Printing, Market:
USA (fus)
JOBNAME: No Job Name PAGE: 73 SESS: 1 OUTPUT: Thu May 13 11:58:31 2010 SUM: 359630DD
/ford_pdm/ford/supplement/ng2/navi
Information menu
CALENDAR
• Press the I button and then select
the ‘Calendar’ tab.
You can then select which month
you would like to view by
/
or you can also
pressing
select ‘Go to Today’.
• You are able to view calendars
from one previous year and the
next 10 years.
Note: Not all tab selections shown here will be available in all markets.
Check with your authorized dealer for availability.
SYSTEM INFORMATION
) on the
• Press the I button (
navigation system and then select
the ‘System Information’ tab on
the touchscreen.
In this screen you can view the following options:
• Phone number for your Customer Service Center
• Current system versions installed
• Current SIRIUSt Radio ESN
• SIRIUSt Travel Link™ ESN
Note: Not all tab selections or features are available in all markets. (For
example, SIRIUSt Travel Link™ is only available in the U.S., and
SIRIUSt Satellite Radio is only available in the U.S. and Canada.) Please
check with your authorized dealer for availability.
HELP
The Help screen allows you to view basic information about controls and
driving restrictions as well as traffic legend information and basic voice
commands available in various modes. To access:
) on the navigation system and then select the
• Press the I button (
‘Help’ tab.
73
CIMS #1656911
com_calendar.ngn
itdseq=63
art=expec242_a
CIMS #1656912 com_systeminfo
itdseq=64
art=expec392_a
CIMS #1656913
com_help.ngn
PAGE: 73 OP: root EDIT SESSION: 1 DATE: MAY 13 2010 at 11:58 JOB: @ibm2/ford_pdm/CLS_ford/GRP_supplement/JOB_ng2/DIV_navi
REVIEW COPY ——
2011 Nav in a Box (ng2), Supplement (supplement), 2nd Printing, Market:
USA (fus)
itdseq=65
JOBNAME: No Job Name PAGE: 74 SESS: 1 OUTPUT: Thu May 13 11:58:31 2010 SUM: 1CEDE3C2
/ford_pdm/ford/supplement/ng2/navi
Information menu
Select ‘Basic Operation’ at the top of
the screen to view hard buttons on
your navigation system. Press the
desired icon to view the button
description.
Select ‘Driving Restriction’ at the
top of the screen to view the
system’s driving restriction.
Select ‘Traffic Legend’ at the top of
the screen to view the color code
for the ‘Speed and Flow’ of roads on
the navigation system. You can also
select ‘Traffic Incidents’ to help you
differentiate between viewed and
unviewed incidents.
Select ‘Voice Commands’ at the top
of the screen. Select any of the
available categories on the screen.
When selected, the system will show
you a brief listing of possible voice
commands in that specific mode.
Please refer to the Voice
recognition system overview
chapter for information on the voice
recognition system.
art=expec324_a
art=expec325_a
art=expec326_a
art=expec327_a
74
PAGE: 74 OP: root EDIT SESSION: 1 DATE: MAY 13 2010 at 11:58 JOB: @ibm2/ford_pdm/CLS_ford/GRP_supplement/JOB_ng2/DIV_navi
REVIEW COPY ——
2011 Nav in a Box (ng2), Supplement (supplement), 2nd Printing, Market:
USA (fus)
JOBNAME: No Job Name PAGE: 75 SESS: 1 OUTPUT: Thu May 13 11:58:31 2010 SUM: 277B8556
/ford_pdm/ford/supplement/ng2/navi
Sound menu features
CIMS #
com_sound
itdseq=66
SOUND FEATURES
The sound menu allows you to access and adjust settings such as Bass,
Treble, Fade, Balance, Digital Signal Processing (DSP), Speed
compensated volume (SCV) and the visualizer. To access:
1. Press the SOUND hard button.
2. Press the appropriate tab to select from:
Bass/Treble: Press + to increase or
— to decrease the levels.
art=expec230_b
art=expec299_c
Balance/Fade: Press to adjust the
sound between the left and right
speakers (Balance) and to adjust
the sound to the front and rear
speakers (Fade).
art=expec298_c
SCV (Speed compensated volume):
With this feature on, the radio
volume changes automatically with
vehicle speed to compensate for
road and wind noise. Select a level
of compensation between 1 and 7 by
pressing the corresponding button.
75
PAGE: 75 OP: root EDIT SESSION: 1 DATE: MAY 13 2010 at 11:58 JOB: @ibm2/ford_pdm/CLS_ford/GRP_supplement/JOB_ng2/DIV_navi
REVIEW COPY ——
2011 Nav in a Box (ng2), Supplement (supplement), 2nd Printing, Market:
USA (fus)
JOBNAME: No Job Name PAGE: 76 SESS: 1 OUTPUT: Thu May 13 11:58:31 2010 SUM: 18052D03
/ford_pdm/ford/supplement/ng2/navi
Sound menu features
DSP (Digital Signal Processing):
Depending on your option package,
you may either select from ‘Stereo’
or ‘Surround Sound’.
Or, you may choose to optimize the
sound quality for ‘All Seats’, ‘Driver
Seat’ or ‘Rear Seat’.
Visualizer: Press to turn the audio
visualizer display on or off.
Note: Turning the visualizer setting
to off will not remove the visualizer
on the home screen. You will need
to select a different view in order to
remove the visualizer.
THX Demo (Mazda vehicles only,
if equipped): Select this tab to
activate the THX audio
demonstration. You may press “X” to
stop the demonstration.
art=expec297_c
art=expec521_b
art=expec295_c
art=expec664_a
76
PAGE: 76 OP: root EDIT SESSION: 1 DATE: MAY 13 2010 at 11:58 JOB: @ibm2/ford_pdm/CLS_ford/GRP_supplement/JOB_ng2/DIV_navi
REVIEW COPY ——
2011 Nav in a Box (ng2), Supplement (supplement), 2nd Printing, Market:
USA (fus)
JOBNAME: No Job Name PAGE: 77 SESS: 1 OUTPUT: Thu May 13 11:58:31 2010 SUM: 33EB488D
/ford_pdm/ford/supplement/ng2/navi
Setting a destination
CIMS # com_destination.ngn
itdseq=67
PROGRAMMING A DESTINATION
The Destination screen gives you many options. You can choose to
access ‘Quick’ selections (available while the vehicle is moving) such as
your preset favorites or emergency points of interest, you can choose to
set a destination using ‘Standard’ resources (such as street address, or
points of interest, etc.) or you can choose the ‘Edit Route’ tab which will
allow you to set any preferences you may have for your current
navigation route.
Note: The navigation system contains map coverage for North America;
including the United States, Puerto Rico and U.S. Virgin Islands, Canada
and Mexico.
To access:
1. Press the DEST hard button on the navigation system.
2. Select from the following on the touchscreen:
Quick: The Quick Destination tab
allows you to Cancel the route,
access Emergency destinations
(such as a hospital or police), save
your favorite destinations to presets
for quick access, find the nearest
POI, and also to use a Previous
Destination or an entry from your
Address Book as a destination.
art=expec292_b
art=expec306_a
Standard: Your Standard
Destination screen allows you to set
a destination using any of the
following: Address Book, Previous
Destination, Phone Number, Map,
Street Address, POI, Freeway
Exit/Entrance or a specific
Intersection.
Note: This is a speed dependent
feature.
77
PAGE: 77 OP: root EDIT SESSION: 1 DATE: MAY 13 2010 at 11:58 JOB: @ibm2/ford_pdm/CLS_ford/GRP_supplement/JOB_ng2/DIV_navi
REVIEW COPY ——
2011 Nav in a Box (ng2), Supplement (supplement), 2nd Printing, Market:
USA (fus)
JOBNAME: No Job Name PAGE: 78 SESS: 1 OUTPUT: Thu May 13 11:58:31 2010 SUM: 35279BEA
/ford_pdm/ford/supplement/ng2/navi
Setting a destination
art=expec381_b
Edit Route: The ‘Edit Route’
screen allows you to make any
adjustments to the currently
selected navigation route such as:
Cancel route, Detour, View Route,
Edit Route Preferences, Edit Traffic
Preferences, Edit Destination / Way
Points and Edit Turn List.
CIMS #1660381
com_setdestbyvoice
itdseq=68
Setting a destination by voice
or VOICE on the steering wheel. A tone will sound followed by
Press
“Please say a command.”
VOICE/Main Menu and
will appear in the status bar first. Then, a
.
tone will sound and the icon will change to
• To enter an address, say “Destination street address”.
• To enter an intersection, say “Destination Intersection”.
• To find a POI by its category, say “Destination <POI category>”. (For
example, “Destination restaurants”). You may also say “Destination
POI category” and “Destination nearest POI”.
• To find a POI by its name, say “Destination POI”. Follow the prompts
to say a POI by name. (For example, “Starbucks”.) You will need to
specify the POI category when prompted.
• If you want to route to a previous destination, say, “Destination
previous destination”.
• If you have programmed a home entry, you may set this as your
destination by saying, 9Destination home”.
• If you have created nametags for any of your address book entries,
you may set any of them as your destination by saying, “Destination
<nametag>”.
• For Help, say, “Destination Help”.
Note: If the system’s language is set to French or Spanish, the city and
street names will need to be spelled. When in ‘Spelling mode’, you may
speak letters or say, “line # ”. The system is designed to work even if you
have made a spelling error.
Listening
CIMS #1659416
com_destquick-ngn
itdseq=69
ACCESSING YOUR QUICK DESTINATION OPTIONS
To access your Quick Destination options:
1. Press the DEST hard button on the navigation system.
78
PAGE: 78 OP: root EDIT SESSION: 1 DATE: MAY 13 2010 at 11:58 JOB: @ibm2/ford_pdm/CLS_ford/GRP_supplement/JOB_ng2/DIV_navi
REVIEW COPY ——
2011 Nav in a Box (ng2), Supplement (supplement), 2nd Printing, Market:
USA (fus)
JOBNAME: No Job Name PAGE: 79 SESS: 1 OUTPUT: Thu May 13 11:58:31 2010 SUM: 301C018C
/ford_pdm/ford/supplement/ng2/navi
Setting a destination
2. Select the ‘Quick’ tab on the touchscreen to select from the
following:
Cancel route: Select to cancel the
current route. The system will ask
you for confirmation.
Emergency: Select to find Hospitals
and Police close to the vehicle’s
current location. The system may
list up to 25 locations.
Favorite Destination Presets:
This feature will store your home
location as well as five address book
entries for quick access. To set a favorite destination preset: press the
desired preset location and follow the system’s screens to choose the
desired selection to store. The system will display the icon and name
associated with the location.
Find nearest POI: Your navigation system allows you to select up to
five different Point of Interest (POI) icons which will appear on the
navigation map. You can change these icons at any time but the default
icons are as follows:
• Gas Station
• ATM
• Restaurant
• Accommodations
• Parking Garage
Once one of these categories is selected, a list will be shown in order of
distance from the vehicle’s current location. The Quick POI search range
will expand to a 50 mile radius automatically if no POI is found in the
default radius of 25 miles.
• List all categories: Select to have the system display a list of all
categories. Select the desired category and then the desired
subcategory. The system will show a list with name and your distance
to each POI from the current location. Once a specific location is
selected, the system will display the Destination map screen for
confirmation.
Previous Destination: Press to select a previous destination.
Address Book: Press to set an entry in your address book as your
destination.
79
art=expec292_b
PAGE: 79 OP: root EDIT SESSION: 1 DATE: MAY 13 2010 at 11:58 JOB: @ibm2/ford_pdm/CLS_ford/GRP_supplement/JOB_ng2/DIV_navi
REVIEW COPY ——
2011 Nav in a Box (ng2), Supplement (supplement), 2nd Printing, Market:
USA (fus)
JOBNAME: No Job Name PAGE: 80 SESS: 1 OUTPUT: Thu May 13 11:58:31 2010 SUM: 2A526DA4
/ford_pdm/ford/supplement/ng2/navi
Setting a destination
CIMS #1659417
com_deststd.ngn
itdseq=70
ACCESSING YOUR STANDARD DESTINATION OPTIONS
1. Press the DEST hard button on the navigation system.
2. Select the ‘Standard’ tab on the
touchscreen to access the
following destination options:
•
•
•
•
Address Book
Previous Destination
Phone Number
Map
•
•
•
•
Street Address
Point of Interest (POI)
Freeway Entrance/Exit
Intersection
art=expec306_a
CIMS #1724321
com_address-bk
itdseq=71
Address book
1. Press the DEST hard button on the navigation system.
2. Select the ‘Standard’ tab on the
touchscreen.
3. Select ‘Address Book’ to access
your ‘Address Book Entries
List’.
Your navigation system can store up
to 25 entries which can be used as
destinations, waypoints, and areas to
avoid.
Entries can be sorted alphabetically
(A-Z), by date or icon. Press the
ADD button to add entries to the
address book and select the desired
destination entry method.
art=expec306_a
art=expec553_a
80
PAGE: 80 OP: root EDIT SESSION: 1 DATE: MAY 13 2010 at 11:58 JOB: @ibm2/ford_pdm/CLS_ford/GRP_supplement/JOB_ng2/DIV_navi
REVIEW COPY ——
2011 Nav in a Box (ng2), Supplement (supplement), 2nd Printing, Market:
USA (fus)
JOBNAME: No Job Name PAGE: 81 SESS: 1 OUTPUT: Thu May 13 11:58:31 2010 SUM: 2C9D5F47
/ford_pdm/ford/supplement/ng2/navi
Setting a destination
Once address book entries are
input, they can be selected for
display. Once displayed on the
map/information split screen, you
can choose to ‘Set as Dest’, ‘Set as
Waypoint’, ‘Delete’ or ‘Edit’ the
address book entry.
Edit allows you to name/change the
entry, add/edit a phone number,
add/edit the icon or set the entry as
a favorite destination. (These are
destination presets which work
similarly to the audio presets. Once
set, the favorite destinations appear
at the bottom of the Quick
destination entry screen for
one-touch fast entry.)
All address book entries can be deleted at once by pressing the MENU
hard button, selecting the ‘System Settings’ tab, and then pressing the
‘View’ button for ‘Delete stored items’. Then, select ‘Address Book.’
Previous Destination
1. Press the DEST hard button on the navigation system.
2. Select the ‘Standard’ tab on the
touchscreen.
3. Press ‘Previous Destination’ to
access your ’Previous
Destination List’.
art=expec557_a
art=expec558_a
CIMS #1724322
com_prevdest
itdseq=72
art=expec306_a
The navigation system can store up to 20 recently used destinations and
waypoints. Destinations already present in the list will not be duplicated.
When a new entry is added to the list, the oldest one will be removed.
• Set as Dest: Select this feature to set the current entry as your
destination. The screen will display the destination map screen
81
PAGE: 81 OP: root EDIT SESSION: 1 DATE: MAY 13 2010 at 11:58 JOB: @ibm2/ford_pdm/CLS_ford/GRP_supplement/JOB_ng2/DIV_navi
REVIEW COPY ——
2011 Nav in a Box (ng2), Supplement (supplement), 2nd Printing, Market:
USA (fus)
JOBNAME: No Job Name PAGE: 82 SESS: 1 OUTPUT: Thu May 13 11:58:31 2010 SUM: 226610EB
/ford_pdm/ford/supplement/ng2/navi
Setting a destination
showing the selected destination. You can then select to set it as a
final destination or a waypoint.
• Delete: Select to delete individual entries.
• Delete all: Select to delete all entries.
You can delete all previous destinations at once by pressing the MENU
hard button, then select the ‘System Settings’ tab, and press the ‘View’
button for ‘Delete stored items’. Then, select ‘Previous Destinations.’
CIMS #1724323 com_phonenumber
itdseq=73
Phone number
1. Press the DEST hard button on the navigation system.
2. Select the ‘Standard’ tab on the
touchscreen.
3. Press ‘Phone Number’.
This feature allows you to search for
a destination using the phone
number of a saved POI or Address
Book entry by entering the phone
number on the keypad on the
screen. After the number is entered,
the system will ask you to confirm
the name under which the phone
number is registered.
art=expec306_a
art=expec308_a
82
PAGE: 82 OP: root EDIT SESSION: 1 DATE: MAY 13 2010 at 11:58 JOB: @ibm2/ford_pdm/CLS_ford/GRP_supplement/JOB_ng2/DIV_navi
REVIEW COPY ——
2011 Nav in a Box (ng2), Supplement (supplement), 2nd Printing, Market:
USA (fus)
JOBNAME: No Job Name PAGE: 83 SESS: 1 OUTPUT: Thu May 13 11:58:31 2010 SUM: 1942748E
/ford_pdm/ford/supplement/ng2/navi
Setting a destination
CIMS #1724324 com_map
itdseq=74
Map
1. Press the DEST hard button on the navigation system.
2. Select the ‘Standard’ tab on the
touchscreen.
3. Select ‘Map’.
art=expec306_a
art=expec310_a
You can now select any point on the
map to set as a destination or
waypoint by using the map cursor.
CIMS #1724325 com_streetaddress
itdseq=75
Street Address
1. Press the DEST hard button on the navigation system.
2. Select the ‘Standard’ tab on the
touchscreen.
3. Select ‘Street Address’.
art=expec306_a
83
PAGE: 83 OP: root EDIT SESSION: 1 DATE: MAY 13 2010 at 11:58 JOB: @ibm2/ford_pdm/CLS_ford/GRP_supplement/JOB_ng2/DIV_navi
REVIEW COPY ——
2011 Nav in a Box (ng2), Supplement (supplement), 2nd Printing, Market:
USA (fus)
JOBNAME: No Job Name PAGE: 84 SESS: 1 OUTPUT: Thu May 13 11:58:31 2010 SUM: 2800F603
/ford_pdm/ford/supplement/ng2/navi
Setting a destination
You can now enter any street
address as a destination or
waypoint.
art=expec329_a
• State/Prov: Type using the keyboard or select the area to search
from the list. The search is based on the current position or the
previous selection. You can also set the Auto Fill preference on or off.
Select USA, Canada or Mexico and then select the desired state,
province or territory (if applicable). Depending on your settings, this
may be automatically filled in.
• City: Enter the desired city name.
• Street: Enter the desired street name. Streets which include numbers
in their name can be searched if the name is input using digits or a
spelling of the number. This applies to street names containing whole
numbers from 1 (one) to 20 (twenty) or 1st (first) to 20th (twentieth)
only.
• Number: Select to enter a house number.
• List: Select to view and select from a list of State, Province,
Territories, Cities, and Names. The system will provide a list based on
the first letter you type into the system.
CIMS #1724326
com_pointofinterest
itdseq=76
Point of Interest (POI)
To set a POI as a destination:
1. Press the DEST hard button on the navigation system.
2. Select the ‘Standard’ tab on the
touchscreen.
3. Select ‘Point of Interest (POI)’.
art=expec306_a
84
PAGE: 84 OP: root EDIT SESSION: 1 DATE: MAY 13 2010 at 11:58 JOB: @ibm2/ford_pdm/CLS_ford/GRP_supplement/JOB_ng2/DIV_navi
REVIEW COPY ——
2011 Nav in a Box (ng2), Supplement (supplement), 2nd Printing, Market:
USA (fus)
JOBNAME: No Job Name PAGE: 85 SESS: 1 OUTPUT: Thu May 13 11:58:31 2010 SUM: 393684B8
/ford_pdm/ford/supplement/ng2/navi
Setting a destination
art=expec307_a
There are three ways to search for
points of interest (POIs) in the
system.
1. You can input a city name into
the city field to narrow the
search.*
2. You can enter the POI name
directly into the name field.*
3. You can choose a category from
the POI listing by selecting ’category’.
* These steps are not mandatory.
POIs can be sorted alphabetically or in the order of distance from the
vehicle’s position. You can view detailed information such as name, city
name, street name, house number and telephone number.
• State/Prov: Type using the keyboard or select the area to search
from the list. The search is based on the current position or the
previous selection. You can also set the Auto Fill preference on or off.
Select USA, Canada or Mexico and then select the desired state,
province or territory (if applicable). Depending on your settings, this
may be automatically filled in.
• City: Enter the desired city name.
• Category: Select the desired POI category or subcategory.
• Name: Select to search for a POI using a full or partial name.
• List: Select to view and select from a list of State, Province,
Territories, Cities, and Names. The system will provide a list based on
the first letter you type into the system.
CIMS #1680391 com_poi-info
itdseq=77
POI categories
Your system offers a variety of POI (Points of Interest) categories.
Note: Some entries are present in multiple categories.
The main categories are as follows:
•
•
•
•
•
Food / drink & dining
Travel & transportation
Financial
Emergency
Community
•
•
•
•
•
Automotive
Shopping
Entertainment & arts
Recreation & sports
Government
85
PAGE: 85 OP: root EDIT SESSION: 1 DATE: MAY 13 2010 at 11:58 JOB: @ibm2/ford_pdm/CLS_ford/GRP_supplement/JOB_ng2/DIV_navi
REVIEW COPY ——
2011 Nav in a Box (ng2), Supplement (supplement), 2nd Printing, Market:
USA (fus)
JOBNAME: No Job Name PAGE: 86 SESS: 1 OUTPUT: Thu May 13 11:58:31 2010 SUM: 39AA2011
/ford_pdm/ford/supplement/ng2/navi
Setting a destination
• Health & medicine
• Domestic services
These main categories contain entries and also sometimes have
subcategories. The following are listings within the main POI categories.
Note: Italic listings denote a subcategory of entries.
The Food / drink & dining category contains:
• All restaurants
• Banquet hall
• Coffee house & cafe
• Convenience store
• Drinking establishments
• Grocery
• Ice cream parlor
• Speciality food
• Wine & liquor
• Winery
The All restaurants sub-category contains:
• All
• Barbecue / Southern Sandwich
• Brew Pub
• Cafeteria
• Canadian
• Deli/Sandwich
• French
• Greek
• Indian
• Italian
• Japanese
• Middle Eastern
• Pizza
• Russian
• Soul food
• Steak house
• Vegetarian
The Automotive category contains:
•
•
•
•
•
•
•
•
•
•
•
•
•
•
•
•
American
Bistro
British Isles
Cajun/Caribbean
Chinese
Fast food
German
Grill
Korean
Mexican
Other
Polish
Seafood
Spanish
Thai
Vietnamese
•
•
•
•
•
•
•
•
Automobile dealership
Fuel station
Parking
Towing
Auto parts
Car wash
Oil change
Rental car
86
PAGE: 86 OP: root EDIT SESSION: 1 DATE: MAY 13 2010 at 11:58 JOB: @ibm2/ford_pdm/CLS_ford/GRP_supplement/JOB_ng2/DIV_navi
REVIEW COPY ——
2011 Nav in a Box (ng2), Supplement (supplement), 2nd Printing, Market:
USA (fus)
JOBNAME: No Job Name PAGE: 87 SESS: 1 OUTPUT: Thu May 13 11:58:31 2010 SUM: 45E66055
/ford_pdm/ford/supplement/ng2/navi
Setting a destination
The Automobile dealership sub-category contains:
• All
• Mazda
• Mazda
• Mazda
The Parking sub-category contains:
• Park and ride
• Parking garage
• Parking lot
The Travel & transportation category contains:
• Accommodations
• Fuel station
• Historical monument
• International border crossing
• Marina
• Parking
• Public transit
• Rental car
• Rest area
• RV Park/Campground
• Tourist attraction
• Tourist info.
The Public transit sub-category contains:
• Airport
• Commuter rail
• Railway station
The Shopping category contains:
• Bus station
• Ferry terminal
• Book store
• Clothing store
• Computer & software
• Convenience store
• Cosmetics/Beauty
• Department store
• Discount store
• Electronics
• Grocery
• Home & Garden
• Office supply
• RV park / campground
• Shoe store
• Shopping center / mall
• Speciality food
• Spectator sports complex
• Sporting goods
• Used merchandise
• Wholesale club
• Wine & Liquor
The Home & Garden sub-category contains:
• Floor covering
• Florist
• Glass & window
• Furniture store
• Garden center
• Hardware store
87
PAGE: 87 OP: root EDIT SESSION: 1 DATE: MAY 13 2010 at 11:58 JOB: @ibm2/ford_pdm/CLS_ford/GRP_supplement/JOB_ng2/DIV_navi
REVIEW COPY ——
2011 Nav in a Box (ng2), Supplement (supplement), 2nd Printing, Market:
USA (fus)
JOBNAME: No Job Name PAGE: 88 SESS: 1 OUTPUT: Thu May 13 11:58:31 2010 SUM: 442019E7
/ford_pdm/ford/supplement/ng2/navi
Setting a destination
• Home center
• Major appliances
• Paint
The Financial category contains:
• ATM
• Banking
The Entertainment & Arts category contains:
•
•
•
•
•
Amusement / Theme Park
Casino
Movie Theater
Performing arts
Zoo & Botanical gardens
•
•
•
•
Night Club
Exhibition / Conference Center
Museum
Video & DVD rentals
The Emergency category contains:
• Hospital
• Police
The Recreation & Sports category contains:
•
•
•
•
•
Bowling
Golf course
Marina
Parks
Recreation facility
•
•
•
•
Fitness center
Ice arena
Ski resort
Race Track
•
•
•
•
Community center
Fire department
Named place
Police
The Community category contains:
•
•
•
•
•
Business facility
Education
Library
Parks
Religious facility
The Education sub-category contains:
• Higher education
• K-12 school
The Government category contains:
• City hall
• Court house
• Embassy
• Government office
• International border crossing
• Post office
The Health & Medicine category contains:
88
PAGE: 88 OP: root EDIT SESSION: 1 DATE: MAY 13 2010 at 11:58 JOB: @ibm2/ford_pdm/CLS_ford/GRP_supplement/JOB_ng2/DIV_navi
REVIEW COPY ——
2011 Nav in a Box (ng2), Supplement (supplement), 2nd Printing, Market:
USA (fus)
JOBNAME: No Job Name PAGE: 89 SESS: 1 OUTPUT: Thu May 13 11:58:31 2010 SUM: 31D3B167
/ford_pdm/ford/supplement/ng2/navi
Setting a destination
• Hospital
• Pharmacy
• Retirement / Nursing Home
• Urgent care center
The Domestic Services category contains:
• Personal care services
• Cleaners / Laundry
• Florist
• Funeral home
• Storage
• Tailor & Alteration
• Vet service
The Personal care services sub-category contains:
• Barber shop
• Cosmetics / Beauty
• Spa
• Beauty salon
• Nail salon
CIMS #1724327 com_freeway
itdseq=78
Freeway Exit/Entrance
Your navigation system allows you to enter a freeway name and then you
can select an entrance or exit to that freeway.
1. Press the DEST hard button on the navigation system.
2. Select the ‘Standard’ tab on the
touchscreen.
3. Select ‘Freeway Exit/Entrance’.
art=expec306_a
art=expec309_a
The entrance/exit can be sorted
alphabetically or in the order of
distance from the vehicle’s position.
The selected entrance/exit can then
be selected as a final destination or
waypoint.
• State/Prov: Type using the keyboard or select the area to search
from the list. The search is based on the current position or the
89
PAGE: 89 OP: root EDIT SESSION: 1 DATE: MAY 13 2010 at 11:58 JOB: @ibm2/ford_pdm/CLS_ford/GRP_supplement/JOB_ng2/DIV_navi
REVIEW COPY ——
2011 Nav in a Box (ng2), Supplement (supplement), 2nd Printing, Market:
USA (fus)
JOBNAME: No Job Name PAGE: 90 SESS: 1 OUTPUT: Thu May 13 11:58:31 2010 SUM: 2D8CFAD0
/ford_pdm/ford/supplement/ng2/navi
Setting a destination
previous selection. You can also set the Auto Fill preference on or off.
Select USA, Canada or Mexico and then select the desired state,
province or territory (if applicable). Depending on your settings, this
may be automatically filled in.
• Freeway: The Smart Speller will help enter a valid freeway in the
area specified.
• List: Select to view and select from a list of State, Province,
Territories, Cities, and Names. The system will provide a list based on
the first letter you type into the system.
Intersection
To set an intersection as a destination:
1. Press the DEST hard button on the navigation system.
2. Select the ‘Standard’ tab on the
touchscreen.
3. Select ‘Intersection’.
Enter the name of the first street
and then the first letter of the
second. The system will pull up a
list of possible matches based on
that letter. Select the desired street.
You can sort the list alphabetically
or in order of distance from the
vehicle.
CIMS #1724328
com_intersection
itdseq=79
art=expec306_a
art=expec311_a
• State/Prov: Type using the keyboard or select the area to search
from the list. The search is based on the current position or the
previous selection. You can also set the Auto Fill preference on or off.
Select USA, Canada or Mexico and then select the desired state,
province or territory (if applicable). Depending on your settings, this
may be automatically filled in.
• City: Enter the desired city name.
90
PAGE: 90 OP: root EDIT SESSION: 1 DATE: MAY 13 2010 at 11:58 JOB: @ibm2/ford_pdm/CLS_ford/GRP_supplement/JOB_ng2/DIV_navi
REVIEW COPY ——
2011 Nav in a Box (ng2), Supplement (supplement), 2nd Printing, Market:
USA (fus)
JOBNAME: No Job Name PAGE: 91 SESS: 1 OUTPUT: Thu May 13 11:58:31 2010 SUM: 3070DA0D
/ford_pdm/ford/supplement/ng2/navi
Setting a destination
• Street #1: Enter the desired street name. Streets which include
numbers in their name can be searched if the name is input using
digits or a spelling of the number. This applies to street names
containing whole numbers from 1 (one) to 20 (twenty) or 1st (first)
to 20th (twentieth) only.
• Street #2: Enter the name of the second street or simply the first
letter of the second street for a list of possible matches.
• List: Select to view and select from a list of State, Province,
Territories, Cities, and Names. The system will provide a list based on
the first letter you type into the system.
CIMS #1724296
com_routeselect
itdseq=80
Route selection screen
Once you have programmed a destination into the system using either
the quick or standard method, a route selection screen will then appear.
This screen will display the route length and estimated time of arrival for
up to three route choices: fastest, shortest and unrestricted. These
choices will appear on the right side of the screen and each will be
highlighted in a different color on the map.
• Fastest: The fastest route uses
the fastest moving roads possible.
• Shortest: The shortest route
considers minimum distance as a
priority.
• Unrestricted: The unrestricted
route does not consider your
avoid preferences (if any are set).
These can be checked by
pressing the ‘Route Prefs’ button.
art=fldes001_a
Avoid areas which have been set are also considered in route calculation
and can be checked by pressing the NAV hard button and then choosing
the ‘Avoid Areas’ tab at the bottom of the screen. If there are not any
avoid preferences set, an unrestricted route will not be presented as an
option.
91
PAGE: 91 OP: root EDIT SESSION: 1 DATE: MAY 13 2010 at 11:58 JOB: @ibm2/ford_pdm/CLS_ford/GRP_supplement/JOB_ng2/DIV_navi
REVIEW COPY ——
2011 Nav in a Box (ng2), Supplement (supplement), 2nd Printing, Market:
USA (fus)
JOBNAME: No Job Name PAGE: 92 SESS: 1 OUTPUT: Thu May 13 11:58:31 2010 SUM: 3794FAFD
/ford_pdm/ford/supplement/ng2/navi
Setting a destination
The gray box contains various icons
above the route selection buttons
indicates what characteristics are
present on each route. The icons
represent:
1. Freeways
2. Tollroads
3. Ferries
4. HOV (High Occupancy Vehicle)
lanes
5. Time restricted roads
6. Avoid area
If, for example, you selected the fastest route and the freeway icon is
illuminated, that means that highways are used on the route. This may
happen even if you have selected ‘Avoid freeways’ set as a route
preference. The system will do its best to consider your avoid
preferences, but if there is no other way to get to a destination, it will
not use the restrictions.
Once you have selected a route, you can either select ‘Start Route’ to
begin route guidance or ‘Cancel Route’ to exit or start over.
You can delete all stored avoid areas at once by pressing the MENU hard
button, selecting the ‘Systems settings’ tab, and then pressing the ‘View’
button for ‘Delete stored items’. Then, select ‘Avoid areas’.
art=fldes002_a
CIMS #1661815
com_destvoix-cmds
itdseq=81
Destination voice commands
When setting a destination by voice, press
or VOICE on the steering
wheel controls. When prompted, say “Destination” and then wait or the
system to sound two tones, and say any of the following commands:
•
•
•
•
•
Home
Nearest POI
POI
Street address
Destination help
•<name tag>
• <POI category>
• POI category
• Previous destination
• Intersection
CIMS #1659418
com_destedit-rte.ngn
itdseq=82
EDITING A NAVIGATION ROUTE
To edit your navigation route:
1. Press the DEST hard button on the navigation system.
92
PAGE: 92 OP: root EDIT SESSION: 1 DATE: MAY 13 2010 at 11:58 JOB: @ibm2/ford_pdm/CLS_ford/GRP_supplement/JOB_ng2/DIV_navi
REVIEW COPY ——
2011 Nav in a Box (ng2), Supplement (supplement), 2nd Printing, Market:
USA (fus)
JOBNAME: No Job Name PAGE: 93 SESS: 1 OUTPUT: Thu May 13 11:58:31 2010 SUM: 1AFA0B9A
/ford_pdm/ford/supplement/ng2/navi
Setting a destination
2. Select the ‘Edit Route’ tab on
the touchscreen to select from
the following:
Cancel Route: Select to cancel an active route.
Detour: Select to set an avoid area on the current route.
View Route: Select to view the
entire current route. You can then
select from the following options:
art=expec381_b
art=expec556_a
• View Destination: The system will display a close up view of the
destination and surrounding area.
• View Next Waypoint: The system will display a close up view of the
next way point and surrounding area.
• View Turn list: The system will display the turn list computed for the
current destination. You can then select to avoid a road on the turn
list if desired.
Edit Route Preferences: Once you have selected a route to be
displayed as the shortest distance or fastest route, you can also select
from the following options:
• Avoid Freeways
• Avoid Toll Roads
• Avoid Ferries
• Avoid Time restrictions
• Avoid HOV lanes
Edit Traffic Preferences: Select to edit traffic preferences.
Note: Requires SIRIUSt Travel Link™ (if activated).
93
PAGE: 93 OP: root EDIT SESSION: 1 DATE: MAY 13 2010 at 11:58 JOB: @ibm2/ford_pdm/CLS_ford/GRP_supplement/JOB_ng2/DIV_navi
REVIEW COPY ——
2011 Nav in a Box (ng2), Supplement (supplement), 2nd Printing, Market:
USA (fus)
JOBNAME: No Job Name PAGE: 94 SESS: 1 OUTPUT: Thu May 13 11:58:31 2010 SUM: 35560960
/ford_pdm/ford/supplement/ng2/navi
Setting a destination
Edit Destination/Waypoints: Select to edit the destination or
waypoints in a defined route.
Edit Turn List: Select to delete or avoid a road in the current turn list.
CIMS #1658276
com_disclaimer.ngn
itdseq=83
DISCLAIMER
The disclaimer will appear once per ignition cycle when the DEST button
is pressed. Press the ‘Accept’ button on the screen to concur and to
access navigaton functions. If you do not press ‘Accept’ you will only
have access to non-navigation functions. The disclaimer will be the
following or similar to the following:
• Always obey local traffic regulations.
• It is recommended to program the system only when stopped.
• Some functions are unavailable while the vehicle is in motion to help
minimize distraction.
• Please refer to your Owner’s Manual for further details.
• Periodic map updates are available at an additional cost.
CIMS #1680025
com_mapmode.ngn
itdseq=84
MAP MODE
To enter map mode:
1. Ensure that the system is on.
2. Press the MAP hard button on the navigation system. The map
screen will display.
When in MAP mode, an icon appears on the upper left side of the
screen; this is a toggle button to change the view of the map displayed.
The following methods exist for orientation of the map:
• Heading up: In this mode, the
direction of forward travel is
always the upward direction on
screen. Available for map scales up to 2.5 mi /5km. For scales above
that, the setting for Heading-Up is remembered, but the map is shown
in North-Up only. If the scale returns below this level, then the
Heading-Up setting is restored.
• North up: In this mode, the
Northern Direction is always the
upward direction on screen.
94
art=expec541_a
art=expec538_a
PAGE: 94 OP: root EDIT SESSION: 1 DATE: MAY 13 2010 at 11:58 JOB: @ibm2/ford_pdm/CLS_ford/GRP_supplement/JOB_ng2/DIV_navi
REVIEW COPY ——
2011 Nav in a Box (ng2), Supplement (supplement), 2nd Printing, Market:
USA (fus)
JOBNAME: No Job Name PAGE: 95 SESS: 1 OUTPUT: Thu May 13 11:58:31 2010 SUM: 351D9B1F
/ford_pdm/ford/supplement/ng2/navi
Setting a destination
MAP SCALE
The map display scale on the map
A
has 17 levels, ranging from
0.02 miles to 1,000 miles. Zoom
scales for ‘North up’ , ‘Heading up’
and 3D map view are synchronized. In MAP mode, you can also zoom in
or out, changing the display scale by pressing on one of the arrows on
the button appearing on the left side of the screen. When in Full Screen
Map Mode, touching this button will cause the Zoom Direct buttons to
appear. The Zoom Direct buttons represent the most common scales and
can be pressed directly to show the map at the desired scale. The scale
is approximate and based on the width of the display button (A). The
size of the scale will vary based on the screen size.
art=expec539_a
Map road colors and building representation on the map:
• Roads: Will be displayed in a variety of colors.
• Building footprints: Will display areas of major buildings in the 20
largest cities in the U.S. These areas will be displayed depending on
their size and the map zoom level.
Quick touch buttons
When in Map mode, you have the
ability to view six quick touch
buttons. In order to view these,
press and release anywhere on the
map display. The map position will
not change and they will appear on
the map. These buttons are:
CIMS #1675721
com_quicktch.ngn
itdseq=85
art=expec389_a
• Set as Dest: Press in order to select a scrolled location on the map as
your destination. (You may scroll the map by pressing your index
finger on the map display. When you reach the desired location,
simply let go and then press ‘Set as Dest’ to go to the Destination Map
View Screen.
• Set as Waypoint: Press to set the current location as a waypoint.
• Save to Address Book: Press to save the current location to the
address book.
95
PAGE: 95 OP: root EDIT SESSION: 1 DATE: MAY 13 2010 at 11:58 JOB: @ibm2/ford_pdm/CLS_ford/GRP_supplement/JOB_ng2/DIV_navi
REVIEW COPY ——
2011 Nav in a Box (ng2), Supplement (supplement), 2nd Printing, Market:
USA (fus)
JOBNAME: No Job Name PAGE: 96 SESS: 1 OUTPUT: Thu May 13 11:58:31 2010 SUM: 2EF33CB6
/ford_pdm/ford/supplement/ng2/navi
Setting a destination
• POI Icons ON/OFF: Press to
view set POI icons to be
displayed on the map. Up to
three icons can be selected for
display on the map at the same
time.
art=expec661_a
• View Traffic: Press to adjust the map display to the right scale. This
scale allows the entire route to be visible in the screen.
• View/Edit Route: Press in order to adjust the following features of
the current active route:
Cancel route: Press cancel the current active route.
View route: Select to view the current route.
Edit route preferences: Press to adjust route preferences.
Edit traffic preferences: Press to adjust traffic preferences.
Note: Requires SIRIUSt Travel Link™ (if activated). Check with your
authorized dealer for availability.
Edit destination/waypoints: Press in order to add, delete or adjust any
waypoints or your destination.
Edit turn list: Press to display the turn list screen and make any
desired adjustments.
CIMS #1680033
com_mapicons.ngn
itdseq=86
Map scrolling
Single scroll: In single scroll mode, press and release on the map
display will bring the pressed position to the center of the screen. The
scroll mode will time out after five minutes of inactivity.
Continuous scroll: During scroll mode, press and hold to begin
scrolling continuously in one of eight directions closest to the point that
is pressed. The scroll will continue until the map is released, and will
increase in speed after three seconds. This is not possible if the vehicle
is moving. The scroll mode will time out after five minutes of inactivity.
96
PAGE: 96 OP: root EDIT SESSION: 1 DATE: MAY 13 2010 at 11:58 JOB: @ibm2/ford_pdm/CLS_ford/GRP_supplement/JOB_ng2/DIV_navi
REVIEW COPY ——
2011 Nav in a Box (ng2), Supplement (supplement), 2nd Printing, Market:
USA (fus)
JOBNAME: No Job Name PAGE: 97 SESS: 1 OUTPUT: Thu May 13 11:58:31 2010 SUM: 31EA6322
/ford_pdm/ford/supplement/ng2/navi
Setting a destination
Map icon descriptions
• Vehicle mark: This icon is shown
in scroll mode also. The ring
around the vehicle mark will
flash. The vehicle mark is shown in the center of the map display,
except when in scroll mode.
• Scroll cursor: This icon is fixed
in the center of the screen. The
map position closest to the cursor
is in a window on the top center
part of the screen.
• Address book entry default
icon: This icon indicates the
location on the map of an address
book entry. This is the default
symbol shown after the entry has been stored to the Address Book by
any method other than the map. A different icon can be selected from
the 22 icons available; each icon can be used more than once.
• Home: This icon indicates the
location on the map currently
stored as the home position. Only
one entry from the Address Book
can be saved as Home. This icon cannot be changed.
• POI (Point Of Interest) icon:
Icons such as this can be
displayed on the map and can be
turned on or off. There are about
56 subcategories of POIs that can
be selected to be displayed on the map one at a time.
• Starting point: This icon
indicates the starting point of a
S
planned navigation route.
• Waypoints: This icon indicates
the location of a waypoint on the
map. The number inside the
circle is different for each
waypoint and represents the
position of the waypoint in the route list.
art=expec543_a
art=expec540_a
art=expec542_a
art=expad766_a
art=expad764_a
art=expad919_a
art=expad918_a
2
97
PAGE: 97 OP: root EDIT SESSION: 1 DATE: MAY 13 2010 at 11:58 JOB: @ibm2/ford_pdm/CLS_ford/GRP_supplement/JOB_ng2/DIV_navi
REVIEW COPY ——
2011 Nav in a Box (ng2), Supplement (supplement), 2nd Printing, Market:
USA (fus)
JOBNAME: No Job Name PAGE: 98 SESS: 1 OUTPUT: Thu May 13 11:58:31 2010 SUM: 2D97F775
/ford_pdm/ford/supplement/ng2/navi
Setting a destination
• Destination symbol: This icon
indicates the location of the final
destination on the map.
art=expad763_a
• Next maneuver point: This icon
shows the location where the
next turn should occur on the
planned route. You may be able
to see up to the next three turns.
• No GPS symbol: This icon
Indicates that insufficient GPS
satellite signals are being received
for accurate map positioning. The symbol may be intermittently
displayed under normal operation in an area with poor GPS access.
Refer to Limited GPS reception in General Information.
art=expad767_a
art=expec544_a
CIMS #1816596
com_incomplete-areas
itdseq=87
Route guidance in incomplete mapped areas
There are some rural areas in the map database where roads have not
been fully verified. When the system is in route guidance mode, and the
navigation system encounters these incomplete mapped areas, the
system will alert you by:
• Announcing 9Entering an area with incomplete map data, please follow
with caution9.
• Saying 9with caution9 in the first route guidance instruction before
each turn.
• Highlighting the route on the map in yellow.
• Highlighting the incomplete mapped streets in yellow on the turn list.
• Coloring the guidance arrows yellow.
Please drive using extra caution when driving in these areas as the
mapping information may be somewhat inaccurate.
98
PAGE: 98 OP: root EDIT SESSION: 1 DATE: MAY 13 2010 at 11:58 JOB: @ibm2/ford_pdm/CLS_ford/GRP_supplement/JOB_ng2/DIV_navi
REVIEW COPY ——
2011 Nav in a Box (ng2), Supplement (supplement), 2nd Printing, Market:
USA (fus)
JOBNAME: No Job Name PAGE: 99 SESS: 1 OUTPUT: Thu May 13 11:58:31 2010 SUM: 26A39CE1
/ford_pdm/ford/supplement/ng2/navi
Navigation route preferences
CIMS #
com_nav-feats.ngn
itdseq=88
NAVIGATION FEATURES
To access the navigation features, press NAV on the navigation system.
You can then select from the following options:
Map Prefs: Select to access/adjust
map content such as Street name,
Time to destination, Speed Limit ,
Bread crumbs, POI, Map views,
Bird’s eye view and Turn list format.
art=expec313_a
art=expec312_a
Route Prefs: Press to select
between Shortest Distance, Fastest
time when navigating a route. Also
select to avoid freeways, toll roads
ferries, etc.
art=expec314_a
Traffic Prefs: Select to have the
system color code roads according
to speed of traffic flow, or if you
would like to receive traffic alerts.
Note: Requires SIRIUSt Travel
Link™ (if activated). SIRIUSt
Travel Link™ is only available in the
U.S.
99
PAGE: 99 OP: root EDIT SESSION: 1 DATE: MAY 13 2010 at 11:58 JOB: @ibm2/ford_pdm/CLS_ford/GRP_supplement/JOB_ng2/DIV_navi
REVIEW COPY ——
2011 Nav in a Box (ng2), Supplement (supplement), 2nd Printing, Market:
USA (fus)
JOBNAME: No Job Name PAGE: 100 SESS: 1 OUTPUT: Thu May 13 11:58:31 2010 SUM: 1A7F01FE
/ford_pdm/ford/supplement/ng2/navi
Navigation route preferences
You can also have the system add
special icons to the map for things
such as road work, accidents, etc.
Navigation Prefs: Select to
access/adjust guidance prompts,
average speed, fuel price display,
calibration and default settings.
Avoid Areas: Press to select
specific areas which you would like
the navigation system to avoid when
routing a destination. The system
will do its best to avoid the items
and areas that have been set. There
will be some situations where it may
be impossible to completely honor
the avoid settings. For example, if a
destination or waypoint is located in
an area that is set to avoid, the system will not be able to avoid it.
art=expec317_a
art=expec315_a
art=expec316_a
100
PAGE: 100 OP: root EDIT SESSION: 1 DATE: MAY 13 2010 at 11:58 JOB: @ibm2/ford_pdm/CLS_ford/GRP_supplement/JOB_ng2/DIV_navi
REVIEW COPY ——
2011 Nav in a Box (ng2), Supplement (supplement), 2nd Printing, Market:
USA (fus)
JOBNAME: No Job Name PAGE: 101 SESS: 1 OUTPUT: Thu May 13 11:58:31 2010 SUM: 274601D2
/ford_pdm/ford/supplement/ng2/navi
Navigation route preferences
MAP PREFERENCES
1. Press the NAV hard button on
the navigation system.
2. Select ’Map Preferences’ tab on
the touchscreen to choose from
the following options:
CIMS #1658277
com_mapprefs.ngn
itdseq=89
art=expec313_a
Map Content
• Street name: This feature will display the current street name in a
window at the top of the screen during guidance.
• Time to Dest: This feature will display the distance to the selected
destination as well as the Estimated Time of Arrival (ETA) on a
pop-up screen activated by an icon on the left side of the map.
• Speed Limit: This feature will display the speed limit of major roads
at the bottom of the map while in route guidance.
• Breadcrumbs: This feature will display the vehicle’s previously
traveled route with white dots. The system can store around 140 miles
(230 km).
• Point of Interest (POI) icons: This feature displays POI icons on
the map.
Map View
• Full map: When selected during guidance, the map will be displayed
in full screen and turn icons will appear in the upper right corner of
the screen.
• Arrow/map: When selected during guidance, the screen will be
divided in two with a map displayed on the left and upcoming turn
information on the right.
• Turn list/map: When selected during guidance, this screen will be
divided in two with the map displayed on the left and a turn list on
the right.
Bird’s eye view
101
PAGE: 101 OP: root EDIT SESSION: 1 DATE: MAY 13 2010 at 11:58 JOB: @ibm2/ford_pdm/CLS_ford/GRP_supplement/JOB_ng2/DIV_navi
REVIEW COPY ——
2011 Nav in a Box (ng2), Supplement (supplement), 2nd Printing, Market:
USA (fus)
JOBNAME: No Job Name PAGE: 102 SESS: 1 OUTPUT: Thu May 13 11:58:31 2010 SUM: 252C0A16
/ford_pdm/ford/supplement/ng2/navi
Navigation route preferences
• On: Select to enable the Bird’s
eye view feature when the map
screen is displayed. This view
provides an elevated perspective.
• Off: Select to disable the Bird’s
eye view feature.
• Adjust angle: Select to adjust
the angle of the Bird’s eye view.
You have six different options.
art=expec318_a
Turn list format
• Top-to-bottom: Select to have the turn instructions begin at the top
and work down.
• Bottom-to-top: Select to have the turn instructions begin at the
bottom and work up.
CIMS #1659386
com_routeprefs.ngn
itdseq=90
ROUTE PREFERENCES
Your navigation system can search for up to three different routes. You
can select from the fastest route, the shortest route, or the ‘unrestricted’
route which does not consider any ‘avoid’ areas which may have been
selected. If there are not any ‘avoid’ settings, the system will only
produce two possible routes. You can select the order in which the
routes are displayed. The system will automatically avoid unpaved roads
as much as possible. To access:
1. Press the NAV hard button on the navigation system.
2. Select the ‘Route Preferences’ tab on the touchscreen and select
from the following:
102
PAGE: 102 OP: root EDIT SESSION: 1 DATE: MAY 13 2010 at 11:58 JOB: @ibm2/ford_pdm/CLS_ford/GRP_supplement/JOB_ng2/DIV_navi
REVIEW COPY ——
2011 Nav in a Box (ng2), Supplement (supplement), 2nd Printing, Market:
USA (fus)
JOBNAME: No Job Name PAGE: 103 SESS: 1 OUTPUT: Thu May 13 11:58:31 2010 SUM: 34981579
/ford_pdm/ford/supplement/ng2/navi
Navigation route preferences
Shortest Distance: Select to have
the navigation system display the
shortest route first.
Fastest Time: Select to have the
navigation system display the fastest
route first.
Avoid Freeways/Toll
Roads/Ferries/HOV Lanes/Time
Restrictions: The system will
search for routes using or attempting to avoid the use of freeways, toll
roads, ferries and or time restrictions whenever possible, according to
your preferences. HOV lanes are High Occupancy Vehicle Lanes also
known as carpool or diamond lanes. These lanes are reserved for people
who ride in buses, vanpools or carpools. Time restricted roads are roads
that have turn, lane or entrance restrictions based on local traffic
conditions or seasonal restrictions. Select the desired preferences from
the avoid menu.
NAVIGATION PREFERENCES
1. Press the NAV hard button on the navigation system.
2. Select the ’Navigation Preferences’ tab on the touchscreen. Select
from the following:
Guidance Prompts
• Voice: Select to have the
navigation system guide you with
tones and voice prompts.
• Tone only: Select to have the
navigation system guide you with
tones only.
• Off: Select to not receive tone or
voice prompts from the system
during an active route.
Auto-fill state/province: When set to ‘On’, the state/province will be
automatically filled in based on the vehicle’s GPS location.
Note: If you live in a border area, you may not want this selection to fill
automatically.
Average speed: Residential When this feature is enabled, the system
will display the average speed on a residential road, initially set to
25 mph (40 km/h). You can adjust the setting using + or — for your
103
art=expec312_a
CIMS #1659391
com_navprefs.ngn
itdseq=91
art=expec315_a
PAGE: 103 OP: root EDIT SESSION: 1 DATE: MAY 13 2010 at 11:58 JOB: @ibm2/ford_pdm/CLS_ford/GRP_supplement/JOB_ng2/DIV_navi
REVIEW COPY ——
2011 Nav in a Box (ng2), Supplement (supplement), 2nd Printing, Market:
USA (fus)
JOBNAME: No Job Name PAGE: 104 SESS: 1 OUTPUT: Thu May 13 11:58:31 2010 SUM: 38AD938F
/ford_pdm/ford/supplement/ng2/navi
Navigation route preferences
specific driving preferences. These settings help the system better
estimate your arrival time at a destination based on your driving
preferences.
Average speed: Main Roads When this feature is enabled, the system
will display the average speed on a main road, initially set to 45 mph
(72 km/h). You can adjust the setting for specific roads. You can adjust
the setting using + or — for your specific driving preferences. These
settings help the system better estimate your arrival time at a destination
based on your driving preferences.
Average speed: Freeways When this feature is enabled, the system will
display the average speed on a freeway, initially set to 65 mph
(105 km/h). You can adjust the setting for specific roads. You can adjust
the setting using + or — for your specific driving preferences. These
settings help the system better estimate your arrival time at a destination
based on your driving preferences.
Parking POI Notification: When enabled, this feature will display
available parking accommodations around a destination (when part of a
route).
Low Fuel POI Notification: When enabled, this feature will display
local gas stations when the fuel level is low.
Fuel Price Display: When enabled, this feature will display fuel prices
at local gas stations. You can choose to display Unleaded or Diesel.
Note: Requires SIRIUSt Travel Link™ (if activated).
Calibrate
• Position: You can adjust the direction of the vehicle by pressing the
arrow buttons on the screen.
• Distance: Press to have the system re-calibrate the distance to the
destination as the vehicle is in motion.
Restore Default Settings: Press to return to the factory default
settings.
Avoid Areas: When enabled, you can select an area you would like the
system to avoid when creating a navigation route.
CIMS #1659392
com_avoidareas.ngn
itdseq=92
AVOID AREAS
You can tell the navigation system to avoid certain areas when
calculating a route.
1. Press the NAV hard button on the navigation system.
104
PAGE: 104 OP: root EDIT SESSION: 1 DATE: MAY 13 2010 at 11:58 JOB: @ibm2/ford_pdm/CLS_ford/GRP_supplement/JOB_ng2/DIV_navi
REVIEW COPY ——
2011 Nav in a Box (ng2), Supplement (supplement), 2nd Printing, Market:
USA (fus)
JOBNAME: No Job Name PAGE: 105 SESS: 1 OUTPUT: Thu May 13 11:58:31 2010 SUM: 31A2D0DE
/ford_pdm/ford/supplement/ng2/navi
Navigation route preferences
art=expec316_a
2. Select the ‘Avoid Areas’ tab to
select specific areas which you
would like the navigation system
to avoid when routing to
destination.
3. Select ‘Add’ to add areas for the
system to avoid.
art=expec555_a
The system will show you your
current avoid area on a map screen.
You can then choose to ’reduce’ the
avoid area, ‘expand’ the avoid area
or to ‘save’ the shown area. When
you are satisfied with your choice,
select ‘Save Area’. You can also
choose to edit the name of the
location. The system will add the
area to your ’avoid list’ and will
avoid that chosen area when calculating a route.
The system will do its best to avoid the items and areas that have been
set by the user. There will be some situations where it may be impossible
to completely honor avoid settings, for example, if a destination or
waypoint is located in an area that is set to avoid, the system will not be
able to avoid it.
CIMS #1661813
com_navvoix-cmds
itdseq=93
Navigation voice commands
or VOICE on the steering wheel controls. When prompted, say,
Press
“Navigation” and then wait for the system to sound two tones and you
may say any of the following commands:
•
•
•
•
•
•
•
Play nametags
Detour
Cancel next waypoint
Show next waypoint
Show turn list
Show heading up
Select map POI icons
•
•
•
•
•
•
•
Repeat instruction
Cancel route
Show destination
Show route
Show north up
Show map
Voice on
105
PAGE: 105 OP: root EDIT SESSION: 1 DATE: MAY 13 2010 at 11:58 JOB: @ibm2/ford_pdm/CLS_ford/GRP_supplement/JOB_ng2/DIV_navi
REVIEW COPY ——
2011 Nav in a Box (ng2), Supplement (supplement), 2nd Printing, Market:
USA (fus)
JOBNAME: No Job Name PAGE: 106 SESS: 1 OUTPUT: Thu May 13 11:58:31 2010 SUM: 11814C84
/ford_pdm/ford/supplement/ng2/navi
Navigation route preferences
• Voice off
• Voice volume decrease
• Zoom out
• Navigation destination <name
tag>
• Destination street address
• Destination Intersection
• Destination POI Category
• Help
• Voice volume increase
• Zoom in
• Destination home
• Destination nearest POI
• Destination previous destination
• Destination POI
• Destination <POI category>
106
PAGE: 106 OP: root EDIT SESSION: 1 DATE: MAY 13 2010 at 11:58 JOB: @ibm2/ford_pdm/CLS_ford/GRP_supplement/JOB_ng2/DIV_navi
REVIEW COPY ——
2011 Nav in a Box (ng2), Supplement (supplement), 2nd Printing, Market:
USA (fus)
JOBNAME: No Job Name PAGE: 107 SESS: 1 OUTPUT: Thu May 13 11:58:31 2010 SUM: 42F51593
/ford_pdm/ford/supplement/ng2/navi
General Information
CIMS # com_license.ngn
itdseq=94
ORDERING MAP, NAVIGATION SOFTWARE AND GRACENOTET
UPDATE DVDS
If you wish to order a replacement or additional map, or an updated
DVD, please contact Mazda Customer Service.
• In USA: 1 (800) 392–3673
• In Canada: 1 (800) 565–3673.
• In Mexico: 1 (800) 719–8466
SYSTEM SOFTWARE UPDATES
NAVTEQ offers system software updates for purchase. You can call
1-888-NAVMAPS or go to www.navteq.com. You will need to specify the
make and model of your vehicle in order to determine if a map update is
available. Updates for the Gracenotet database (CDDBt) that contain
CD song/artist/title/album art are available. There is no charge for the
data, however, there is a nominal shipping and materials fee. Mapping
updates will be available yearly. Gracenotet database (CDDBt) database
updates are complimentary when a map update is purchased.
MAP DATA DVD END-USER LICENSE TERMS
The data (“Data”) is provided for your personal, internal use only and
not for resale. It is protected by copyright, and is subject to the following
terms and conditions which are agreed to by you, on the one hand, and
(Licensee). (“Licensee”) and its licensors (including their licensors and
suppliers) on the other hand. Such licensors include NAVTEQ North
America, LLC. Without limiting the foregoing, you agree that NAVTEQ
North America, LLC shall have the right to enforce these Terms directly
against you. r 2004 NAVTEQ. All rights reserved. The Data for areas of
Canada includes information taken with permission from Canadian
authorities, including: r Her Majesty the Queen in Right of Canada, r
Queen’s Printer for Ontario, r Canada Post Corporation, Geobase t.
TERMS AND CONDITIONS
Personal use only: You agree to use this Data together with your FLM
navigation system for solely personal, non commercial purposes for
which you were licensed, and not for service bureau, time-sharing or
other similar purposes. Accordingly, but subject to the restrictions set
forth in the following paragraphs, you may copy this Data only as
necessary for your personal use to (i) view it, and (ii) save it, provided
that you do not remove any copyright notices that appear and do not
modify the Data in any way. You agree not to otherwise reproduce copy,
107
PAGE: 107 OP: root EDIT SESSION: 1 DATE: MAY 13 2010 at 11:58 JOB: @ibm2/ford_pdm/CLS_ford/GRP_supplement/JOB_ng2/DIV_navi
REVIEW COPY ——
2011 Nav in a Box (ng2), Supplement (supplement), 2nd Printing, Market:
USA (fus)
JOBNAME: No Job Name PAGE: 108 SESS: 1 OUTPUT: Thu May 13 11:58:31 2010 SUM: 4642CBF3
/ford_pdm/ford/supplement/ng2/navi
General Information
modify, decompile, disassemble or reverse engineer any portion of this
Data, and may not transfer or distribute it in any form, for any purpose,
except to the extent permitted by mandatory laws.
Restrictions: Except where you have been specifically licensed to do so
by (Licensee), and without limiting the preceding paragraph, you may
not (a) use this Data with any products, systems, or applications
installed or otherwise connected to or in communication with vehicles,
capable of vehicle navigation, positioning, dispatch, real time route
guidance, fleet management or similar applications; or (b) with or in
communication with any positioning devices or any mobile or
wireless-connected electronic or computer devices, including without
limitation cellular phones, palmtop and handheld computers, pagers, and
personal digital assistants or PDAs.
No warranty: This Data is provided to you “as is,” and you agree to use
it at your own risk. (Licensee) and its licensors (and their licensors and
suppliers) make no guarantees, representations or warranties of any
kind, express or implied, arising by law or otherwise, including but not
limited to, content, quality, accuracy, completeness, effectiveness,
reliability, fitness for a particular purpose, usefulness, use or results to be
obtained from this Data, or that the Data or server will be uninterrupted
or error-free.
Disclaimer of warranty:(Licensee) and its licensors (including their
licensors and suppliers) disclaim any warranties, express or implied, of
quality, performance, merchantability, fitness for a particular purpose or
non infringement. Some States, Territories and Countries do not allow
certain warranty exclusions, so to that extent the above exclusion may
not apply to you.
Disclaimer of liability: (Licensee) and its licensors (including their
licensors and suppliers) shall not be liable to you: in respect of any
claim, demand or action, irrespective of the nature of the cause of the
claim, demand or action alleging any loss, injury or damages, direct or
indirect, which may result from the use or possession of the information;
or for any loss of profit, revenue, contracts or savings, or any other
direct, indirect, incidental, special or consequential damages arising out
of your use of or inability to use this information, any defect in the
information, or the breach of these terms or conditions, whether in an
action in contract or tort or based on a warranty, even if (Licensee) or
its licensors have been advised of the possibility of such damages. Some
States, Territories and Countries do not allow certain liability exclusions
or damages limitations, so to that extent the above may not apply to you.
Export control: You agree not to export from anywhere any part of the
Data provided to you or any direct product thereof except in compliance
108
PAGE: 108 OP: root EDIT SESSION: 1 DATE: MAY 13 2010 at 11:58 JOB: @ibm2/ford_pdm/CLS_ford/GRP_supplement/JOB_ng2/DIV_navi
REVIEW COPY ——
2011 Nav in a Box (ng2), Supplement (supplement), 2nd Printing, Market:
USA (fus)
JOBNAME: No Job Name PAGE: 109 SESS: 1 OUTPUT: Thu May 13 11:58:31 2010 SUM: 414D11E5
/ford_pdm/ford/supplement/ng2/navi
General Information
with, and with all licenses and approvals required under, applicable
export laws, rules and regulations.
Termination for Breach or Bankruptcy: (Licensee) and its licensors,
including NAVTEQ, may terminate this Agreement if you breach any of
its terms. Upon any such termination, you shall immediately cease your
use of the Data and return all copies thereof to LICENSEE or NAVTEQ,
as instructed. (Licensee) and its licensors also may terminate this
Agreement in the event that you (i) fail to pay license fees due for the
Data, or (ii) if any of the following events occur affecting you: (a)
voluntary bankruptcy or application for bankruptcy; (b) involuntary
bankruptcy or application for bankruptcy not discharged within sixty
(60) days; (c) appointment of receiver for all or a portion of your assets;
or (d) any assignment for the benefit of creditors.
Entire agreement: These terms and conditions constitute the entire
agreement between (Licensee) (and its licensors, including their
licensors and suppliers) and you pertaining to the subject matter hereof,
and supersedes in their entirety any and all written or oral agreements
previously existing between us with respect to such subject matter.
Governing law: The above terms and conditions shall be governed by
the laws of the Illinois, without giving effect to (i) its conflict of laws
provisions, or (ii) the United Nations Convention for Contracts for the
International Sale of Goods, which is explicitly excluded. You agree to
submit to the jurisdiction of Illinois for any and all disputes, claims and
actions arising from or in connection with the Data provided to you
hereunder.
FCC COMPLIANCE
Changes or modifications not approved by Mazda Mazda could void user’s
authority to operate the equipment. This equipment has been tested and
found to comply with the limits with the Class B digital device, pursuant
to Part 15 of the FCC Rules. These limits are designed to provide
reasonable protection against harmful interference in a residential
installation. This equipment generates, uses and can radiate radio
frequency energy and, if not installed and used in accordance with the
instructions, may cause harmful interference to radio communications.
However, there is no guarantee that interference will not occur in a
particular installation. If this equipment does cause harmful interference
to radio or television reception, which can be determined by turning the
equipment off and on, the user is encouraged to consult the dealer or an
experienced radio/TV technician for help.
109
PAGE: 109 OP: root EDIT SESSION: 1 DATE: MAY 13 2010 at 11:58 JOB: @ibm2/ford_pdm/CLS_ford/GRP_supplement/JOB_ng2/DIV_navi
REVIEW COPY ——
2011 Nav in a Box (ng2), Supplement (supplement), 2nd Printing, Market:
USA (fus)
JOBNAME: No Job Name PAGE: 110 SESS: 1 OUTPUT: Thu May 13 11:58:31 2010 SUM: 38F83C93
/ford_pdm/ford/supplement/ng2/navi
General Information
GRACENOTET COPYRIGHT
CD and music — related data from Gracenote, Inc., copyright
r2000–2007 Gracenote. Gracenote Software, copyright r 2000–2007
Gracenote. This product and service may practice one or more of the
following U.S. Patents #5,987,525; #6,061,680; #6,154,773, #6,161,132,
#6,230,192, #6,230,207, #6,240,459, #6,330,593, and other patents issued
or pending. Some services supplied under license from Open Globe, Inc.
for U.S. Patent: #6,304,523.
Gracenote and CDDB are registered trademarks of Gracenote. The
Gracenote logo and logotype, and the 9Powered by Gracenote™9 logo are
trademarks of Gracenote.
GRACENOTET END USER LICENSE AGREEMENT (EULA)
This device contains software from Gracenote, Inc. of 2000 Powell Street
Emeryville, California 94608 (“Gracenote”).
The software from Gracenote (the “Gracenote Software”) enables this
device to do disc and music file identification and obtain music-related
information, including name, artist, track, and title information
(“Gracenote Data”) from online servers (“Gracenote Servers”), and to
perform other functions. You may use Gracenote Data only by means of
the intended End User functions of this device
This device may contain content belonging to Gracenote’s providers. If
so, all of the restrictions set forth herein with respect to Gracenote Data
shall also apply to such content and such content providers shall be
entitled to all of the benefits and protections set forth herein that are
available to Gracenote.
You agree that you will use the content from Gracenote (“Gracenote
Content”), Gracenote Data, the Gracenote Software, and Gracenote
Servers for your own personal, non-commercial use only. You agree not
to assign, copy, transfer or transmit the Gracenote Content, Gracenote
Software or any Gracenote Data (except in a Tag associated with a music
file) to any third party. YOU AGREE NOT TO USE OR EXPLOIT
GRACENOTE CONTENT, GRACENOTE DATA, THE GRACENOTE
SOFTWARE, OR GRACENOTE SERVERS, EXCEPT AS EXPRESSLY
PERMITTED HEREIN.
You agree that your non-exclusive licenses to use the Gracenote Content,
Gracenote Data, the Gracenote Software, and Gracenote Servers will
terminate if you violate these restrictions. If your licenses terminate, you
agree to cease any and all use of the Gracenote Content, Gracenote
Data, the Gracenote Software, and Gracenote Servers. Gracenote,
110
PAGE: 110 OP: root EDIT SESSION: 1 DATE: MAY 13 2010 at 11:58 JOB: @ibm2/ford_pdm/CLS_ford/GRP_supplement/JOB_ng2/DIV_navi
REVIEW COPY ——
2011 Nav in a Box (ng2), Supplement (supplement), 2nd Printing, Market:
USA (fus)
JOBNAME: No Job Name PAGE: 111 SESS: 1 OUTPUT: Thu May 13 11:58:31 2010 SUM: 2B848FEA
/ford_pdm/ford/supplement/ng2/navi
General Information
respectively, reserve all rights in Gracenote Data, the Gracenote
Software, and the Gracenote Servers and Gracenote Content, including
all ownership rights. Under no circumstances will either Gracenote
become liable for any payment to you for any information that you
provide, including any copyrighted material or music file information. You
agree that Gracenote may enforce its respective rights, collectively or
separately, under this agreement against you, directly in each company’s
own name.
Gracenote uses a unique identifier to track queries for statistical
purposes. The purpose of a randomly assigned numeric identifier is to
allow Gracenote to count queries without knowing anything about who
you are. For more information, see the web page at www.gracenote.com
for the Gracenote Privacy Policy
THE GRACENOTE SOFTWARE, EACH ITEM OF GRACENOTE DATA
AND THE GRACENOTE CONTENT ARE LICENSED TO YOU “AS IS.”
NEITHER GRACENOTE MAKES ANY REPRESENTATIONS OR
WARRANTIES, EXPRESS OR IMPLIED, REGARDING THE ACCURACY
OF ANY GRACENOTE DATA FROM THE GRACENOTE SERVERS OR
GRACENOTE CONTENT. GRACENOTE COLLECTIVELY AND
SEPARATELY RESERVE THE RIGHT TO DELETE DATA AND/OR
CONTENT FROM THE COMPANIES’ RESPECTIVE SERVERS OR, IN
THE CASE OF GRACENOTE, CHANGE DATA CATEGORIES FOR ANY
CAUSE THAT GRACENOTE DEEMS SUFFICIENT. NO WARRANTY IS
MADE THAT EITHER GRACENOTE CONTENT OR THE GRACENOTE
SOFTWARE OR GRACENOTE SERVERS ARE ERROR-FREE OR THAT
THE FUNCTIONING OF THE GRACENOTE SOFTWARE OR
GRACENOTE SERVERS WILL BE UNINTERRUPTED. GRACENOTE IS
NOT OBLIGATED TO PROVIDE YOU WITH ANY ENHANCED OR
ADDITIONAL DATA TYPES THAT GRACENOTE MAY CHOOSE TO
PROVIDE IN THE FUTURE AND IS FREE TO DISCONTINUE ITS
ONLINE SERVICES AT ANY TIME. GRACENOTE DISCLAIM ALL
WARRANTIES EXPRESS OR IMPLIED, INCLUDING, BUT NOT LIMITED
TO, IMPLIED WARRANTIES OF MERCHANTABILITY, FITNESS FOR A
PARTICULAR PURPOSE, TITLE, AND NON-INFRINGEMENT. NEITHER
GRACENOTE WARRANTS THE RESULTS THAT WILL BE OBTAINED
BY YOUR USE OF THE GRACENOTE SOFTWARE OR ANY
GRACENOTE SERVER. IN NO CASE WILL GRACENOTE BE LIABLE
FOR ANY CONSEQUENTIAL OR INCIDENTAL DAMAGES OR FOR ANY
LOST PROFITS OR LOST REVENUES FOR ANY REASON
WHATSOEVER.
r Gracenote 2007
111
PAGE: 111 OP: root EDIT SESSION: 1 DATE: MAY 13 2010 at 11:58 JOB: @ibm2/ford_pdm/CLS_ford/GRP_supplement/JOB_ng2/DIV_navi
REVIEW COPY ——
2011 Nav in a Box (ng2), Supplement (supplement), 2nd Printing, Market:
USA (fus)
JOBNAME: No Job Name PAGE: 112 SESS: 1 OUTPUT: Thu May 13 11:58:31 2010 SUM: 2EB3DD01
/ford_pdm/ford/supplement/ng2/navi
General Information
PRINCIPLES OF GPS
Your system directs you based on information derived from global
positioning satellites, road maps stored on the hard disk drive, sensors in
your vehicle and the desired destination. The system compiles all
necessary information to guide you to your selected destination. Space
satellites determine the vehicle’s current location and transmit position
and time signals to your car. If the vehicle has been parked for a long
period of time, the navigation function may be temporarily unresponsive.
The navigation system will operate reliably again once GPS reception is
available for a few minutes.
LIMITED GPS RECEPTION
System performance may be adversely affected if GPS reception is
interrupted or interference occurs over a distance of several miles. The
following are possible causes for GPS reception being interrupted. If the
vehicle is:
• In multi-story parking garages
• In tunnels and under bridges
• Inside or in between buildings
• By forests or tree-lined avenues
• In heavy rain showers and thunderstorms
• In valleys and in mountainous regions
• Roads under cliffs
Ensure that you do not have any metal objects on the dashboard and
that if your windows are tinted, they use non-metal tinting instead of
metal oxide tinting. Both of these factors can also interrupt GPS
reception.
SYSTEM LIMITATIONS
Navigation system cold temperature operational limitations: The
navigation system’s performance will be slower than normal at
temperatures lower than -5° F (-20° C). At temperatures lower than -22°
F (-30° C), you will be notified that the system has shut down key
elements to protect itself. Normal system operation will return once the
unit has warmed up enough to operate without damage.
Other conditions: When calculating a route, the system doesn’t take
into consideration any of the following conditions:
• Traffic Conditions
112
PAGE: 112 OP: root EDIT SESSION: 1 DATE: MAY 13 2010 at 11:58 JOB: @ibm2/ford_pdm/CLS_ford/GRP_supplement/JOB_ng2/DIV_navi
REVIEW COPY ——
2011 Nav in a Box (ng2), Supplement (supplement), 2nd Printing, Market:
USA (fus)
JOBNAME: No Job Name PAGE: 113 SESS: 1 OUTPUT: Thu May 13 11:58:31 2010 SUM: 34C40565
/ford_pdm/ford/supplement/ng2/navi
General Information
• Weather Conditions
• Driving Habits
• Construction Zones
• New Roads
Note: The system can consider traffic and construction conditions if the
data is available through SIRIUSt Travel Link™ (if activated) and the
feature setting is enabled. (SIRIUSt Travel Link™ is only available in the
U.S. Check with your authorized dealer for availability.)
CIMS #1661833
com_clean.ngn
CLEANING THE DISPLAY
Clean the display with a clean soft cloth such as one used for cleaning
glasses. If dirt or finger prints are still visible, apply a small amount of
alcohol to the cloth. Do not pour/spray alcohol onto the display. Do not
use detergent or any type of solvent to clean the display.
CIMS #1683391
com_sysgloss.maz
itdseq=96
GLOSSARY OF TERMS
Comp: Compression
Dest: Destination
DSP: Digital Signal Processing
ETA : Estimated Time of Arrival
FCC: Federal Communications Commission
GPS: Global Positioning System
POI: Point(s) Of Interest
PROV: Province
PTY: Program Type
RDS: Radio Data System
SAT: Satellite Radio
SCV: Speed Compensated Volume
Smart Speller: Feature that provides a number of available candidates
matching partial input entered by the user.
Touchscreen: A touch-sensitive screen that lets the user make choices
by touching icons or graphical buttons on the screen.
Waypoint: An intermediate stop or destination before the final
destination.
CIMS #1635766
com_geninfo-nav
itdseq=97
GENERAL OPERATION
Voice Command Control
113
PAGE: 113 OP: root EDIT SESSION: 1 DATE: MAY 13 2010 at 11:58 JOB: @ibm2/ford_pdm/CLS_ford/GRP_supplement/JOB_ng2/DIV_navi
REVIEW COPY ——
2011 Nav in a Box (ng2), Supplement (supplement), 2nd Printing, Market:
USA (fus)
itdseq=95
JOBNAME: No Job Name PAGE: 114 SESS: 1 OUTPUT: Thu May 13 11:58:31 2010 SUM: 37CB7CFF
/ford_pdm/ford/supplement/ng2/navi
General Information
Functions within the Windows Automotive-based system may be
accomplished using only voice commands. Using voice commands while
driving allows you to operate the system without removing your hands
from the wheel.
Prolonged Views of Screen
Do not access any function requiring a prolonged view of the screen
while you are driving. Pull over in a safe and legal manner before
attempting to access a function of the system requiring prolonged
attention. Even occasional short scans to the screen may be hazardous if
your attention has been diverted away from your driving task at a critical
time.
Volume Setting
Do not raise the volume excessively. Keep the volume at a level where
you can still hear outside traffic and emergency signals while driving.
Driving while unable to hear these sounds could cause an accident.
Use of Speech Recognition Functions
Speech recognition software is inherently a statistical process which is
subject to errors. It is your responsibility to monitor any speech
recognition functions included in the system and address any errors.
Navigation Features
Any navigation features included in the system are intended to provide
turn by turn instructions to get you to a desired destination. Please make
certain all persons using this system carefully read and follow
instructions and safety information fully.
Distraction Hazard
Any navigation features may require manual (non-verbal) setup.
Attempting to perform such set-up or insert data while driving can
seriously distract your attention and could cause an accident or other
serious consequences. Stop the vehicle in a safe and legal manner before
attempting these operations.
Let Your Judgment Prevail
Any navigation features are provided only as an aid. Make your driving
decisions based on your observations of local conditions and existing
traffic regulations. Any such feature is not a substitute for your personal
judgment. Any route suggestions made by this system should never
replace any local traffic regulations or your personal judgment or
knowledge of safe driving practices.
Route Safety
114
PAGE: 114 OP: root EDIT SESSION: 1 DATE: MAY 13 2010 at 11:58 JOB: @ibm2/ford_pdm/CLS_ford/GRP_supplement/JOB_ng2/DIV_navi
REVIEW COPY ——
2011 Nav in a Box (ng2), Supplement (supplement), 2nd Printing, Market:
USA (fus)
JOBNAME: No Job Name PAGE: 115 SESS: 1 OUTPUT: Thu May 13 11:58:31 2010 SUM: 33A44061
/ford_pdm/ford/supplement/ng2/navi
General Information
Do not follow the route suggestions if doing so would result in an unsafe
or illegal maneuver, if you would be placed in an unsafe situation, or if
you would be directed into an area that you consider unsafe. The driver
is ultimately responsible for the safe operation of the vehicle and
therefore, must evaluate whether it is safe to follow the suggested
directions.
Potential Map Inaccuracy
Maps used by this system may be inaccurate because of changes in
roads, traffic controls or driving conditions. Always use good judgment
and common sense when following the suggested routes.
Emergency Services
Do not rely on any navigation features included in the system to route
you to emergency services. Ask local authorities or an emergency
services operator for these locations. Not all emergency services such as
police, fire stations, hospitals and clinics are likely to be contained in the
map database for such navigation features.
CIMS #1675933 com_faq.ngn
itdseq=98
FREQUENTLY ASKED QUESTIONS (FAQS)
How do I turn off the Navigation System?
Press and hold the Volume control for at least 3 seconds.
How do I hear the navigation voice prompts?
1. Press the MENU hard button on the navigation system.
2. Select the ‘Feedback settings’ tab on the touchscreen.
3. Press + to increase or — to decrease the voice volume levels.
How do I recover after accidental language re-set?
1. Press the MENU hard button on the navigation system.
2. Select the ‘Feedback settings’/Retour/Reaccion tab on the
touchscreen.
3. Press the ‘English’/Anglais/Ingles button to reset language to English.
4. Press the ‘Spanish’/Espanol/Espanol button to reset language to
Spanish.
5. Press the ‘French’/Francais/Frances button to reset language to
French.
Or, you can also turn vehicle off to restart system. Then from the
DISCLAIMER screen, select the desired language before pressing ‘Agree’.
115
PAGE: 115 OP: root EDIT SESSION: 1 DATE: MAY 13 2010 at 11:58 JOB: @ibm2/ford_pdm/CLS_ford/GRP_supplement/JOB_ng2/DIV_navi
REVIEW COPY ——
2011 Nav in a Box (ng2), Supplement (supplement), 2nd Printing, Market:
USA (fus)
JOBNAME: No Job Name PAGE: 116 SESS: 1 OUTPUT: Thu May 13 11:58:31 2010 SUM: 33DFE5B4
/ford_pdm/ford/supplement/ng2/navi
General Information
CIMS #1678306
com_trbleshoot-ngn
itdseq=99
TROUBLESHOOTING
Symptoms
Focus Error
Possible Cause
Action
System unable to play Contact your dealer.
reproduced disc.
Bad Disc
Disc was inserted
The mechanism will
upside down or the
automatically eject
system is unable to
disc.
read the information
in the disc.
Track Error
The system is unable
The system will skip
to reproduce a corrupt the corrupted track.
MP3 file.
Invalid Disc Detected
Dirty CD/DVD or
Wipe the CD/DVD with
unsupported format
a dry, soft cloth from
the center to the outer
edge of the disc.
Press NO and enter a
Address not found/
The house number
entered is not
valid number for the
Address range does
not exist. Show the
registered in the
specified street, or
press YES to view the
database.
midpoint of the street?
middle point of the
(Popup window)
street.
Navigation Fault. A
System hardware or
Contact your dealer.
system fault has been
software error
detected that may
cause the navigation
to perform abnormally.
Please contact your
dealership. (Popup
window)
Error. PINs did not
A different PIN was
Press OK and try
match. Please re-enter. entered to unlock the entering PIN again. If
(Popup window)
system for valet mode. unable, contact your
dealer.
116
PAGE: 116 OP: root EDIT SESSION: 1 DATE: MAY 13 2010 at 11:58 JOB: @ibm2/ford_pdm/CLS_ford/GRP_supplement/JOB_ng2/DIV_navi
REVIEW COPY ——
2011 Nav in a Box (ng2), Supplement (supplement), 2nd Printing, Market:
USA (fus)
JOBNAME: No Job Name PAGE: 117 SESS: 1 OUTPUT: Thu May 13 11:58:31 2010 SUM: 0B7DAE6E
/ford_pdm/ford/supplement/ng2/navi
General Information
Symptoms
Invalid PIN. Please
Re-enter. (Popup
window)
Possible Cause
System does not
recognize PIN as valid.
Action
Press OK and enter
different PIN to lock
the system.
117
PAGE: 117 OP: root EDIT SESSION: 1 DATE: MAY 13 2010 at 11:58 JOB: @ibm2/ford_pdm/CLS_ford/GRP_supplement/JOB_ng2/DIV_navi
REVIEW COPY ——
2011 Nav in a Box (ng2), Supplement (supplement), 2nd Printing, Market:
USA (fus)
JOBNAME: No Job Name PAGE: 118 SESS: 3 OUTPUT: Thu May 13 11:58:31 2010 SUM: 335F4677
/ford_pdm/ford/supplement/ng2/navi
Index
A
J
Accessing the help screen .........73
Accessing the music in your
jukebox ........................................53
Accessing your calendar ............73
Adjusting the voice prompt
volume .........................................26
AM/FM .........................................33
Jukebox features .........................52
Jukebox voice commands ..........57
C
Map
Map
Map
Map
CD ..........................................46–47
CD voice commands ...................49
Creating a playlist .......................55
L
Loading pictures .........................15
M
display options ....................13
icons ....................................97
preferences .......................101
updates ..............................107
N
D
Destination voice commands .....92
Disc voice commands .................52
Display voice commands ............13
Driving restrictions .......................4
DVD voice commands ................51
Navigation end user license
agreement ..................................107
Navigation voice commands ....105
P
Playing a DVD in the system .....49
POI categories .............................85
G
Q
Glossary .....................................113
GPS reception ...........................112
H
HD Radio™ .................................36
Home screen ...............................14
How to get going ..........................5
How to use voice commands .....24
Hybrid information (if
equipped) ....................................60
118
Quick destination options ..........78
Quick reference chart ................18
Quick touch buttons ...................95
R
Radio voice commands .........36, 41
Reverse camera ...........................17
Route preferences ....................102
Route selection ...........................91
PAGE: 118 OP: root EDIT SESSION: 3 DATE: MAY 13 2010 at 11:58 JOB: @ibm2/ford_pdm/CLS_ford/GRP_supplement/JOB_ng2/DIV_navi
REVIEW COPY ——
2011 Nav in a Box (ng2), Supplement (supplement), 2nd Printing, Market:
USA (fus)
JOBNAME: No Job Name PAGE: 119 SESS: 3 OUTPUT: Thu May 13 11:58:31 2010 SUM: 1C07EFDE
/ford_pdm/ford/supplement/ng2/navi
Index
S
T
Safety information ........................5
Satellite Radio .............................43
Setting a destination by voice ...78
Setting the clock .........................19
SIRIUS satellite radio voice
commands ...................................42
SIRIUS Travel Link .....................67
SIRIUS Travel Link voice
commands ...................................72
Standard destination options .....80
Status bars ..................................14
System introduction .....................4
System limitations ....................112
System overview .........................10
Troubleshooting ........................116
Tutorial voice commands ...........28
U
User profile voice commands ....31
User profiles ................................29
V
Video CD voice commands ........51
Voice name tags ..........................29
Voice recognition tutorial ...........28
W
Where am I? ................................60
119
PAGE: 119 OP: root EDIT SESSION: 3 DATE: MAY 13 2010 at 11:58 JOB: @ibm2/ford_pdm/CLS_ford/GRP_supplement/JOB_ng2/DIV_navi
REVIEW COPY ——
2011 Nav in a Box (ng2), Supplement (supplement), 2nd Printing, Market:
USA (fus)


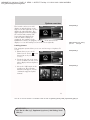


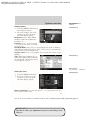
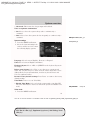
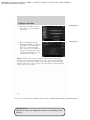

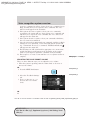

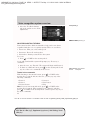
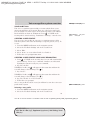
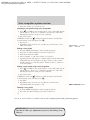

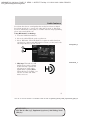


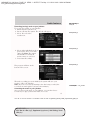
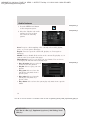

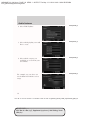


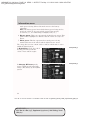
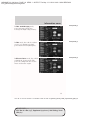

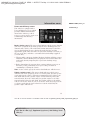
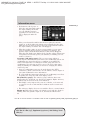
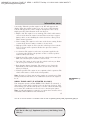


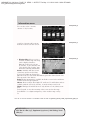
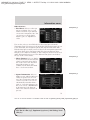
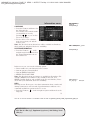
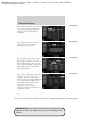

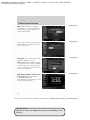
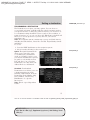


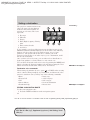


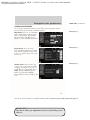


![Epson EB-460 [240v] Enhanced Warranty Education](http://vs1.manualzilla.com/store/data/007232844_1-494e9cd377264c6fcf7922b0cc777270-150x150.png)