1
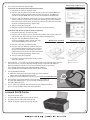
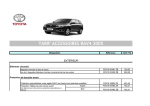
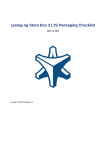
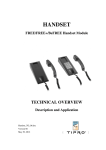
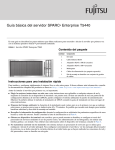
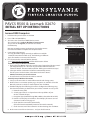
PAVCS R500 & Lexmark X2670
INITIAL SET UP INSTRUCTIONS
2. CTRL + ALT + DELETE
Please read this entire letter before you proceed.
Lenovo R500 Computer
1. Hold down the power button on the R500
2. Press CTRL+ALT+DELETE key
3. The next screen should have PAVCSK12\username. The username is the student’s Blackboard account name
The password is changeme (*use all lower case letters)
Click Enter Key
1. POWER
BUTTON
All of the following images are for visual reference only.
Now you are ready to connect to the internet. You need to connect
to the internet in order to complete the Set Up Procedures
Automatic Setup For Wireless
4. Connecting to the Internet
To set up your PAVCS Laptop correctly you will have to establish a network connection for initial set up. The following are different types of networks to connect to the Internet:
A. For a home wireless network: (Wireless Internet)
go to: http://tinyurl.com/33qt5s4 or follow the directions below:
Automatic Setup For Wireless Connection
1. Click on the Start Button and in the search bar type “network and sharing center”
(You may have to press Fn + F5 to turn on your wireless radio and select the
“Power On” button. The status need to read “On” before you to continue to step 2.)
2. Select your wireless connection and tell it to automatically connect. If it asks you to save the location, Select Home and name it “Home.”
*PAVCS recommends you save this network
3. You will now be connected to the wireless network.
Manually Setup A Wireless Connection
1. Set up a new connection or network from network and sharing center.
2. On the Choose a connection option page, six options are available. Select the Manually connect to a wireless network option, then click Next.
3. The Wizard displays the following: You want to configure the following using the above information you obtain from your wireless network or access point:
a. Network name (SSID)
b. Security type Choices are dependent on the capabilities of your wireless network adapter.
c. Encryption Type (enabled if using WPA or WPA2, select either AES or TKIP).
d. Enter the Security Key or PassPhrase. Check Display Characters to view characters/numbers being typed.
e. Check Start this connection automatically. (This tells Vista to automatically connect to this wireless network.)
f. Check Connect even if this network is not broadcasting, then click Next.
4. At the next screen click on Connect to…and you should connect.
Manual Setup For Wireless
1
Manual Setup For Wireless cont.
B. For a home wired network: (Not Dial Up)
If you have one device (a combined modem and router)
1. Plug the device into an electrical outlet.
2. Plug one end of a phone cord or cable into the wide area network (WAN) port of the device, and then plug the other end into the wall jack. The WAN port should be labeled “WAN.” (DSL users: Do not use a DSL filter on the phone line.)
4. Start (or restart) the computer.
5. Plug in the cable and it will automatically connect you to the Internet.
3. Plug one end of an Ethernet cable into the local area network (LAN) port on the device, and then plug the other end into the networking port of the computer that you want to connect to the Internet. The LAN port should be labeled “LAN.” (If you are connecting wirelessly, skip this step.)
If you have two devices (a separate modem and router)
1. Plug the modem into an electrical outlet.
2. Plug one end of a phone cord or cable into the modem, and plug the other end into the wall jack. (DSL users: Do not use a DSL filter on the phone line.)
3. Plug one end of an Ethernet cable into the modem, and plug the other end into the wide area network (WAN) port on the router.
4. Plug the router into an electrical outlet.
6. Start (or restart) the computer.
7. Plug in the cable and it will automatically connect you to the Internet.
Wired Network: Combined
Wired Network: Separate
5. Plug one end of an Ethernet cable into the local area network (LAN) port on the router, and plug the other end into the networking port on the computer that you want to connect to the Internet. (If you are connecting wirelessly, skip this step.)
C. For Dial Up ISP: *** You will have to call the PAVCS Help Desk at 877.883.3653, between
the hours of 8 a.m. and 6 p.m. Monday through Friday, to install the ISP Software. Once the software is installed, set up can be followed via ISP set up routine. These settings will only have to be changed if laptop is taken to
a new location that uses a different ISP or Internet access method.
5. Joining the PAVCS Network
A. After connecting to the internet through your home network, please click on the “PAVCS Network” icon.
B. Click on the Internet Explorer Icon and Log in to PAVCS.BLACKBOARD.COM.
6. The next time you connect from the same location, just power up, hit CTRL+ALT+DELETE type in your password and Double click on the “PAVCS Network” icon.
5B. Internet
Explorer
Icon
7. If your student has an IEP 0r 504 and require special software/hardware, please contact the PAVCS Help Desk at 877.883.3653.
Lexmark X2670 Printer
1.
2.
3.
4.
Plug in the power cable.
Connect USB cable to the printer and the laptop.
The Printer Drivers will install automatically.
Follow the printer instructions to install the ink.
2