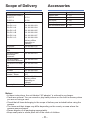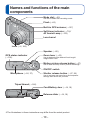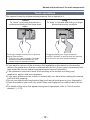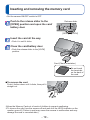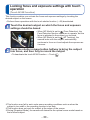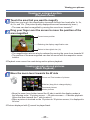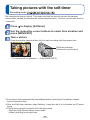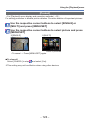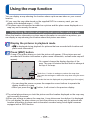
1
LEICA V-LUX 40
Instructions
Table of contents
Before use
Basics
Before use .............................................. 6
About GPS ....................................................8
Scope of Delivery .................................. 9
Accessories ........................................... 9
Names and functions of the main
components ......................................... 10
Cursor buttons............................................. 11
Touch operations .........................................12
Preparations
Charging the battery ........................... 13
Sequence of operations ...................... 25
Taking pictures with automatic
exposure control
[Program AE] mode ............................. 27
Storing a focus setting........................ 28
Releasing the shutter by touch
operation .............................................. 29
Locking focus and exposure settings
with touch operation ........................... 30
Taking pictures with
[Snapshot Mode] ................................. 31
About flash ..................................................31
Automatic Scene Detection .........................32
About the Happy color setting .....................32
[Motion Deblur] ............................................33
[iHandheld Nite Shot] ..................................33
[iHDR] (intelligent High Dynamic Range) ....34
AF Tracking .................................................35
[Snapshot Mode] restrictions.......................36
Inserting the battery ....................................14
Charging the battery....................................15
Remaining battery capacity .........................16
Guidelines for the number of recordable
pictures and operating time .........................17
Inserting and removing the memory
card ....................................................... 19
Picture save destination
(memory card / built-in memory)........ 20
Displaying the picture recording capacity....21
Recording capacity guidelines
(pictures/recording time) .............................22
Taking motion pictures ....................... 37
Recording still pictures while a motion
picture is being recorded .............................41
Viewing your pictures ......................... 42
Viewing an enlarged section .......................43
Viewing several reduced pictures ...............43
Viewing pictures by their recording date .....44
Setting the clock .................................. 23
Changing the time setting ...........................24
Viewing motion pictures ..................... 45
Capturing still pictures from motion
pictures........................................................47
[Video Divide] ..............................................48
Deleting pictures ................................. 49
Deleting multiple (up to 100)/
Deleting all pictures .....................................50
Setting the menu ................................. 51
Menu types..................................................52
Using the Quick menu .................................53
-2-
Table of contents
Using the [Setup] menu ...................... 54
[Clock Set] ...................................................54
[Auto Clock Set] ..........................................54
[World Time] ................................................54
[Travel Date] ................................................54
[Beep] ..........................................................54
[Volume] ......................................................55
[Cust.Set Mem.] ..........................................55
[LCD Display] ..............................................55
[LCD Mode] .................................................55
[Guide Line] .................................................56
[Histogram] ..................................................56
[Video Rec Area] .........................................56
[Zoom Resume]...........................................56
[Economy] ...................................................57
[Auto Review] ..............................................57
[No.Reset] ...................................................58
[Reset] .........................................................58
[USB Mode] .................................................58
[Output] .......................................................59
[HDTV Link] .................................................59
[3D Playback] ..............................................59
[Rotate Disp.] ..............................................60
[Version Disp.] .............................................60
[Format] .......................................................60
[Language] ..................................................61
[O.I.S. Demo.] .............................................61
Recording
Changing recording information
display .................................................. 62
Using the zoom .................................... 63
Zooming with touch operation .....................64
Zoom modes and their application ..............65
Taking pictures with flash................... 66
Taking close-up pictures .................... 68
Focus range ................................................68
[Macro Zoom] ..............................................69
Taking pictures with the self-timer .... 70
Taking pictures with Exposure
Compensation...................................... 71
Taking picture series with automatically
changed exposure.......................................72
Using a pre-set aperture to
determine the depth of field [Aperture-Priority] Mode ..................... 73
Using a pre-set shutter speed to
determine the rendition of moving
subjects - [Shutter-Priority] Mode...... 74
Using a pre-set aperture/shutter
speed combination to achieve full
control of the exposure [Manual Exposure] Mode .................... 75
Taking Pictures with different picture
effects [Creative Control] mode ........ 76
Taking pictures with settings
matched to the encountered scene
[Scene Mode] ....................................... 78
[Portrait].......................................................79
[Soft Skin] ....................................................79
[Scenery] .....................................................79
[Panorama Shot] .........................................79
[Sports] ........................................................81
[Night Portrait] .............................................81
[Night Scenery]............................................81
[Handheld Night Shot] .................................81
[HDR] ..........................................................82
[Food] ..........................................................82
[Baby] ..........................................................82
[Pet] .............................................................82
[Sunset] .......................................................83
[High Sens.].................................................83
[Through window] ........................................83
[High Speed Video] .....................................83
-3-
Table of contents
Taking 3D pictures............................... 84
Registering your own setting
combinations [Custom] Mode ........... 85
[Cust.Set Mem.] ..........................................85
[Custom] ......................................................86
Taking picture series ........................... 87
Taking pictures with the Face
Recognition function........................... 89
Registering faces ........................................90
Editing or deleting information about
registered persons ......................................91
Reviewing
Playing back still pictures
recorded using the serial exposure
function .............................................. 109
Different playback methods ..............111
[2D/3D Settings] ........................................ 111
[Slide Show] .............................................. 112
[Filtering Play] ........................................... 114
[Calendar].................................................. 114
Retouching pictures .......................... 115
[Auto Retouch] .......................................... 115
[Creative Retouch] .................................... 116
Useful features for travel .................... 92
[Travel Date] ................................................92
[World Time] ................................................93
Using the [Playback] menu............... 117
Entering Text ........................................ 94
Using the [Rec] menu.......................... 95
[Aspect Ratio] ..............................................95
[Picture Size] ...............................................95
[Quality] .......................................................96
[Sensitivity] ..................................................96
[White Balance] ...........................................97
[AF Mode]....................................................99
[Quick AF]..................................................100
[Face Recog.] ............................................101
[Metering Mode] ........................................101
[i.Exposure] ...............................................101
[Min. Shtr Speed] ......................................102
[i.Resolution] .............................................102
[Digital Zoom] ............................................102
[Burst] ........................................................103
[Color Mode]..............................................103
[AF Assist Lamp] .......................................103
[Red-Eye Removal] ...................................104
[Stabilizer] .................................................104
[Date Stamp] .............................................105
[Clock Set] .................................................105
Using the [Motion Picture] menu ..... 106
[Rec Mode] ................................................106
[Rec Quality]..............................................107
[Continuous AF].........................................108
[Wind Cut] .................................................108
-4-
[Title Edit] .................................................. 117
[Edit GPS Data] ......................................... 117
[Text Stamp] .............................................. 118
[Resize] .....................................................120
[Cropping]..................................................121
[Favorite] ...................................................122
[Print Set] ..................................................123
[Protect] .....................................................124
[Face Rec Edit]..........................................125
[Copy] ........................................................126
Table of contents
GPS and map functions
Connecting with other devices
Using the GPS function to record
the picture taking location ................ 127
Using the GPS function to execute
positioning .................................................128
Executing the positioning function
immediately to update the current location ...131
Changing place name information to be
displayed ...................................................133
Disabling the positioning function when
the camera is turned off ............................134
Changing the place name
information to be recorded ............... 135
Changing the recorded GPS
information ......................................... 136
Playing back on a TV......................... 155
HDTV Link (HDMI) ....................................157
Playing back 3D still pictures ....................159
Copying the recorded still and
motion pictures.................................. 161
Copying by inserting the SD card into a
recorder .....................................................161
Dubbing playback pictures with the
AV cable ....................................................161
Copying the recorded image data to a
computer with the supplied software .........162
Using with your PC............................ 163
Copying still and motion pictures
recorded in [MP4] and [High Speed Video]
Scene Mode
(except AVCHD motion pictures)...............164
[Edit Location] ...........................................136
[Edit Place Name] .....................................138
Adjusting the time using GPS .......... 139
Reducing the time required for
positioning ......................................... 140
About the “GPS Assist Tool” ......................140
Using the “GPS Assist Tool” ......................141
Updating the GPS assist data ...................143
Checking the expiration date of the
GPS assist data ........................................144
Using the map function..................... 145
Confirming the place where you took a
picture using a map ...................................145
Displaying your current location
on a map ...................................................146
Displaying only pictures taken in the
same area .................................................147
Displaying a map by selecting a country
or region ....................................................148
Printing ............................................... 166
Printing multiple pictures ...........................168
Printing with date and text .........................168
Making print settings on the camera .........169
Miscellaneous
List of monitor displays .................... 170
Message displays .............................. 174
Q&A Troubleshooting ...................... 176
Usage cautions and notes ................ 184
Licence Agreement for
Place Name and Map Data .......................188
Leica service addresses ................... 195
Using the map data on the DVD ....... 149
Installing “LEICA Map Tool” .......................149
Copying the map data to a memory card...150
Registering my landmark.................. 152
Registering my landmark from a map .......152
Registering the recording location as
my landmark..............................................153
Selecting My landmark and displaying it
on a map ...................................................154
Editing or deleting my registered
landmark ...................................................154
-5-
Before use
■Camera handling
Protect the camera against excessive vibration, force, or
pressure.
●Avoid using the camera under the following conditions,
which may damage the lens, LCD monitor, or camera
body. This may also cause the camera to malfunction or
prevent recording.
• Dropping or hitting the camera against a hard surface
• Sitting down with the camera in your pants pocket or
forcing it into a full bag
• Attaching accessories to the wrist strap
• Exerting excessive force on the lens or monitor
The camera is not dust resistant, splash resistant, or
waterproof.
Avoid using the camera in places with excessive dust or
sand, or where it can come into contact with water.
●Avoid using the camera under the following conditions,
which present a risk that sand, water, or foreign material
may enter the camera through the gaps around the lens
or buttons. Be especially careful because these conditions
may damage the camera, and such damage may not be
repairable.
• In extremely dusty or sandy places
• In the rain or by the shore, where the camera may be
exposed to water
■Condensation (When the lens or the monitor is fogged up)
●Condensation may occur when the camera is exposed to
sudden changes of temperature or humidity. Avoid these
conditions, which may temporarily fog up, the lens or the
monitor, cause mold, or damage the camera.
●If condensation does occur, turn off the camera and wait
about two hours before using it. Once the camera takes
on the surrounding temperature, the fogging will disappear
by itself.
-6-
Before use
■Always take a test shot first
Before important events when you intend to use the camera (at weddings, for example),
always take a test shot to make sure that pictures and sound record correctly.
■No compensation for missed shots
Leica Camera AG cannot compensate for missed shots if technical problems with the
camera or card prevent recording.
■Carefully observe copyright laws
Unauthorized use of recordings which contain works with copyright for purposes other
than personal use is prohibited under copyright law. Recording of certain material may
be restricted even for the purpose of personal use.
■Also refer to “Usage cautions and notes” (→184)
●Please note that the actual controls and components, menu items, and other
information for your camera may differ from those in the illustrations and screens
provided in these instructions.
●Recording mode icons
Modes:
Available
Unavailable
-7-
Before use
About GPS
■ About the camera’s location name information
Before using the camera, be sure to read “Licence Agreement for Place Name and Map
Data”. (→188)
■ When [GPS Setting] is [ON], the GPS function works even if the camera is turned
OFF.
• Electromagnetic radiation from the camera can affect instruments and meters. During
takeoff and landing of airplanes or in other restricted areas, set [GPS Setting] to
[OFF] or set [Airplane Mode] to [ON], and then turn off the camera. (→128, 134)
• When [GPS Setting] is [ON] and [Airplane Mode] is [OFF], power will drain from the
battery even if the camera is turned OFF.
■ Recording location information
• The names of recording locations and landmarks (such as buildings) are current as of
December 2011. These will not be updated.
• Depending on the country or area, limited location name and landmark information
may be available.
■ Positioning
• Positioning will take time in environments where it is difficult to receive the signals
from the GPS satellites. (→127)
• Even if GPS reception is good, it will take approx. 2 to 3 minutes to
successfully execute positioning under the following conditions: when
positioning is executed for the first time, or when positioning is executed after
the camera is turned off with the [GPS Setting] set to [OFF] or [Airplane Mode]
set to [ON], and then turned on again.
Positioning can be executed faster using GPS assist data. (→140)
• Because the GPS satellite positions are constantly changing, depending on the
recording location and conditions, contact to some satellites may not be possible,
resulting in inaccurate positioning data.
■ When using in another country
• GPS may not work in China or in the border regions of countries neighboring China.
(Current as of December 2011)
• Some countries or regions regulate the use of GPS or related technology. Because
this camera has a GPS function, before taking it into another country, check with
the embassy or your travel agency whether there are any restrictions on bringing
cameras with a GPS function.
-8-
Scope of Delivery
Accessories
Order No.
Order No.
Rechargeable battery
Leather case
18 751
BP-DC7-E
18 701
HDMI mini cable
14 491
BP-DC7-U
18 702
Mini tripod
14 320
Charger
ACA-DC11-U
423-106.001-003
ACA-DC11-K
423-106.001-004
ACA-DC11-E
423-106.001-005
ACA-DC11-B
423-106.001-006
ACA-DC11-A
423-106.001-007
ACA-DC11-C
423-106.001-008
Tabletop tripod
14 100
Ball and Socket head
14 110
(delivery differs
depending on
markets)
Wrist strap
423-068.801-015
CD-ROM with instr.PDFs
423-106.001-023
DVD with Adobe®
Photoshop®
Elements®
423-106.001-021
423-106.001-022
DVD with Adobe®
Premiere® Elements®
DVD with LEICA Map
Tool
423-106.001-020
USB cable
423-105.001-010
AV cable
423-106.001-009
Button template for
Canada / Taiwan
423-083.001-026 /
-027
Short instructions
93 433 - 93 436
(delivery differs
depending on
markets)
Warranty Card
439-399.100-026
Notes:
• In these instructions, the unit labeled “AC adaptor” is referred to as charger.
• Cards are optional. You can record or play back pictures on the built-in memory when
you are not using a card.
• Check that all items belonging to the scope of delivery are included before using the
camera.
• The items and their shape may differ depending on the country or area where the
camera was purchased.
• Please dispose of all packaging appropriately.
• Keep small parts in a safe place out of the reach of children.
-9-
Names and functions of the main
components
Mode dial (→25)
Use this to select the recording mode.
Flash (→66)
Built-in GPS antenna (→127)
Self-timer indicator (→70) /
AF Assist Lamp (→103)
Lens barrel
Lens (→6, 186)
Speaker (→55)
GPS status indicator
Zoom lever (→63)
Use to determine the desired focal length /
magnification ratio.
(→128)
Motion picture release button (→37)
Use to start and stop motion picture recordings.
ON/OFF switch
Microphone (→26, 37)
Shutter release button (→27, 28)
Use to activate and store focus and exposure
settings and record still pictures.
Tripod thread (→186)
Card/Battery door (→14, 19)
Release slider (→14, 19)
●The illustrations in these instructions may differ from the actual product.
- 10 -
Names and functions of the main components
LCD monitor
REC/PLAY switch (→25)
Use to select the recording or playback mode.
(→55, 62, 170)
We recommend
using the supplied
wrist strap to
avoid dropping
the camera.
[EXPOSURE] / [MAP] button (→73, 145)
In recording mode: Use to set shutter speed or aperture
values. (Only in the , , modes)
In playback mode: Use to display a map.
[DISP.] button
(→62)
Use to switch
displays.
Charging lamp
[HDMI] socket
(→16)
[Q.MENU] / [
/
(→155, 157)
] button
In recording mode: Quick menu is displayed. (→53)
In playback mode: Pictures are deleted. (→49)
During menu operations: Use to recall the previous
screen.
[AV OUT/DIGITAL]
socket
(→15, 155, 164, 166)
Cursor buttons
[MENU/SET]
Up cursor button ( )
• Use to display the menus,
enter the settings, etc. (→51)
• Exposure Compensation,
Auto Bracketing etc. (→71, 72)
Left cursor button ( )
• Self-timer (→70)
Right cursor button ( )
• Flash (→66)
Down cursor button ( )
• Macro Mode etc. (→68)
●In these instructions, the button to be used is indicated by
- 11 -
.
Names and functions of the main components
Touch operations
This camera’s monitor surface senses pressure that is applied to it.
Touch
To “touch” is to press the monitor’s
surface and then pull the finger back
again.
Touching is used to select icons or pictures,
among other actions.
• Touch an icon near its center. If multiple
icons are touched simultaneously, the
camera may not operate normally.
Drag
To “drag” is to touch and slide your finger
across the monitor’s surface.
Dragging (sliding your finger across the
monitor’s surface) is used to scroll the pictures
or to scroll to the next group of pictures.
●If you want to use one of the protective foils available on the market on the monitor,
observe the precautions that are contained with the foil. (Some types of protective foils
may impair the monitor image’s appearance and ease of operation.)
●If the camera is used with a such a foil resulting in the monitor not being very
responsive, apply a little more pressure.
●If you apply pressure to the monitor’s surface with your hand when holding the camera,
it will not work properly.
●Do not use objects with hard pointed tips (such as ball point pens or your fingernails).
●Clean the monitor with a soft, dry cloth if there are fingerprints or other kinds of dirt on
it.
●For details of the icons that appear during touch operations, refer to “List of monitor
displays” (→170).
- 12 -
Charging the battery
• Always use the dedicated charger, USB connection cable, and battery for this
camera.
Always charge before first use! (the battery is shipped uncharged)
• The battery is charged while it is in the camera.
Camera status
Charge
Yes
Turned off (also in [Sleep Mode] (→57))
Turned on
No∗
∗ During playback only, the camera operates using power supplied from the mains through the USB
connection cable. (The battery is not charged.)
●When the battery does not have sufficient remaining power, charging may be done
regardless of the camera ON/OFF switch setting.
●If the battery is not inserted, neither charging nor power supplying is possible.
■About batteries that you can use with this camera
It has been found that counterfeit batteries which look very similar to the
genuine products are available in some markets. Some of these batteries are
not adequately protected with internal protection to meet the requirements of
appropriate safety standards. There is a possibility that these batteries may
lead to fire or explosion. Please be advised that Leica Camera AG is not liable
for any accident or failure occurring as a result of use of a counterfeit battery.
To ensure that the batteries used are safe, we urgently recommend to use only
the dedicated Leica battery BP-DC7 (→9).
- 13 -
Charging the battery
Inserting the battery
To charge the battery, insert it into the camera.
• Set the camera ON/OFF switch to OFF
Push to the release slider to the
[OPEN] position and open the card/
battery door
Release slider
[OPEN]
[LOCK]
Completely insert the battery
• Make sure it is aligned correctly and push it in
until it is locked by the gray lever.
Lever
Close the card/battery door
• Push the release slider to the [LOCK]
position.
■To remove the battery
Move the lever in the card/battery
compartment in the direction of the arrow.
●Always use a genuine Leica BP-DC7 battery (→9).
●Leica Camera AG cannot guarantee the quality of other batteries.
●Remove the battery if you are not going to use the camera for a long time.
• Store batteries e.g. in a case so that their terminals cannot be shorted by metallic
objects.
●To remove the battery, turn the camera off and wait until the LEICA indicator on the
monitor goes off. (Failing to wait may cause the camera to malfunction and may
damage the card or recorded data.)
- 14 -
Charging the battery
Charging the battery
We recommend charging in a location where the ambient temperature is between 10°C
and 30°C (50°F to 86°F) (same for the battery temperature).
Set the camera ON/OFF switch to OFF
Charger
Align the marks ( to ) and
insert the plug.
Charging lamp
(→16)
USB connection cable
• Make sure the plug is aligned correctly and that
it is inserted straight. (Otherwise the connectors
may be bent out of shape which will cause
trouble.)
Computer
Getting ready:
Turn on the computer.
■Charging the battery by connecting the camera to the electrical outlet
Connect the camera and the charger using the USB connection cable, and plug the
latter into a mains outlet.
• Charging should only be performed indoors.
■Charging the battery through a computer
Connect a computer to the camera using the USB connection cable.
●It may not be possible to charge the battery from some computers depending on the
computer specifications.
●If the computer enters hibernation mode during charging, charging may be stopped.
●If the camera is charged from a notebook that is not connected to a mains outlet, the
notebook’s battery will be depleted. Do not leave the camera and notebook connected
for a long period of time.
●Always connect the USB cable to a USB port on your computer. Do not connect it to a
USB port of a monitor, keyboard, printer, or USB hub.
- 15 -
Charging the battery
■Charging lamp indications
On: Charging in progress
Off: Charging is completed (After charging stops, disconnect the camera from the mains
outlet or your computer.)
■Notes on charging time
Charging time
Approx. 260 min
• The charging time indicated above is the time required for charging when the battery
is completely depleted. The time required for charging differs depending on conditions
of battery usage. Charging takes longer when temperatures are either high or low and
when the battery has not been used for a long period of time.
• The time required for charging through the computer varies depending on the
specifications of the computer.
●Do not use any other USB connection cables except the supplied one. Doing so may
cause malfunction of the camera.
●Do not use a USB extension cable.
●The supplied charger and USB connection cable are dedicated accessories of this
camera. Do not use it for other devices.
●If there is any trouble related to the mains outlet (i.e. power failure), charging may not
be completed properly. Disconnect the USB connection cable and reconnect it to the
camera.
●If the charging lamp does not light or flash even when the camera is properly connected
to the charger or your computer, the process has been put in pause status because
the temperature is not in the appropriate range for charging. This is not a malfunction.
Reconnect the USB connection cable and retry charging in a place where ambient
temperature is 10°C and 30°C (50°F to 86°F) (temperature conditions also apply to the
battery itself).
Remaining battery capacity
Remaining battery
(flashes red)
If the battery mark flashes red, recharge or replace the battery.
- 16 -
Charging the battery
Guidelines for the number of recordable pictures and operating time
The number of recordable pictures or available operating time may vary according to
surrounding environment and usage conditions. Figures may be reduced if flash, zoom,
or other functions are used frequently, or in colder climates.
■Recording still pictures
Number of recordable pictures
Approx. 260
Recording time
Approx. 130 min
●Recording conditions by CIPA standard
By CIPA standard
• CIPA is an abbreviation of [Camera & Imaging Products Association].
• [Program AE] Mode
• [GPS Setting] is set to [OFF]
• Temperature: 23°C (73.4°F)/Humidity: 50%RH when LCD monitor is on.
• Using a 32 MB memory card.
• Using the supplied battery.
• Starting recording 30 seconds after the camera is turned on. (When the Optical
Image Stabilizer function is set to [ON].)
• Recording once every 30 seconds with full flash every second recording.
• Zooming from Tele to Wide or vice versa for every recording.
• Turning the camera off every 10 recordings and leaving it until the temperature of the
battery decreases.
The number is reduced if intervals are longer (e.g. to approx. one quarter for 2-minute
intervals under the above conditions).
- 17 -
Charging the battery
■Recording motion pictures
[Rec Mode]
[AVCHD]
[MP4]
[Rec Quality]
[GPH]
[PSH]
[GFS]
[FSH]
[FHD]
Available recording time∗1
Approx. 55 min
Approx. 65 min
Approx. 70 min
Actual available recording time∗2
Approx. 30 min
Approx. 35 min
Approx. 40 min
●Recording conditions
• Temperature is 23°C (73.4°F), humidity 50%RH
• [GPS Setting] is set to [OFF]
∗1 With camera models 18 176 / 18 177
If [Rec Quality] of [AVCHD] motion pictures is set to [GPH], [PSH], [GFS] or [FSH], you can
continuously record a motion picture for up to 29 minutes. (→107)
You can continuously record a motion picture in [MP4] for up to 29 minutes or approx. 4 GB.
(In this case, you can continuously record a motion picture in [FHD] for up to approx. 27 minutes
12 seconds.) The remaining time for continuous recording is displayed on the screen.
With camera model 18 175
Motion pictures can be recorded continuously for up to 29 minutes. Also, motion picture recorded
continuously in [MP4] is up to 4 GB. (In this case, you can continuously record a motion picture in
[FHD] for up to approx. 27 minutes 12 seconds.) The remaining time for continuous recording is
displayed on the screen.
∗2 The time you can actually record when repeatedly turning the power on and off, starting and
stopping recording and using zoom.
■Viewing pictures
Playback time
Approx. 160 min
- 18 -
Inserting and removing the memory card
• Set the camera ON/OFF switch to OFF
Push to the release slider to the
[OPEN] position and open the card/
battery door
Release slider
[OPEN]
[LOCK]
Insert the card all the way
• Push it in until it clicks.
Close the card/battery door
• Push the release slider to the [LOCK]
position.
Card (Check orientation)
Do not touch
the terminals
on the back of
the card.
■To remove the card
Push it further down until it clicks, then pull it
straight out.
●Keep the Memory Card out of reach of children to prevent swallowing.
●To remove the card, turn the camera off and wait until the LEICA indicator on the
monitor goes off. (Failure to wait may cause the camera to malfunction and may
damage the card or recorded data.)
- 19 -
Picture save destination
(memory card / built-in memory)
Pictures will be saved to a card if one is inserted, or to the built-in memory
if not.
■Built-in memory (approx. 12 MB)
●You can store only still pictures.
●Pictures may be copied between cards and the built-in memory. (→126)
●The access time for the built-in memory may be longer than the access time for a
card.
■Compatible memory cards
The following SD standard-based cards
Type of Card
Capacity
SD Memory Cards
8 MB – 2 GB
SDHC Memory Cards
4 GB – 32 GB
SDXC Memory Cards
48 GB, 64 GB
Notes
• Using a card of SD speed “Class 4”∗ or above is
recommended for recording motion pictures.
• The cards can be used with devices compatible
with the respective formats.
• Before using SDXC cards, check that your
computer and other devices support this type of
card.
• Only the cards listed on the left with the given
capacities are supported.
∗ SD speed class refers to a specification for sustained write speeds. Confirm the SD speed by
checking the card label or other card related materials.
(Example)
●Please reformat the card with this camera if it has already been
formatted with a computer or another device. (→60)
●If the write-protect switch is set to “LOCK”, the card cannot be used
to record or delete pictures, and it cannot be formatted.
●It is recommended that you copy important pictures to your
computer (as electromagnetic radiation, static electricity, or faults
may cause data to be damaged).
- 20 -
Switch
Picture save destination (memory card / built-in memory)
Displaying the picture recording capacity
Estimated remaining pictures or recording time capacity
(press [DISP.] button to switch display)
Displayed when no card is inserted
(pictures will be saved to built-in memory)
While the camera is accessing the card or the built-in memory (for an operation such as
picture writing, reading, deletion, or formatting), do not turn off the camera or remove
the battery, the card, or disconnect the charger. Do not subject the camera to vibrations,
impact, or static electricity.
The card or the data on the card may be damaged, and the camera may no longer
operate normally.
If an operation fails due to vibration, impact or static electricity, perform it again.
- 21 -
Picture save destination (memory card / built-in memory)
Recording capacity guidelines (pictures/recording time)
The number of pictures you can take and the recording time vary in proportion to card
capacity (and depending on recording conditions and type of card).
■Recording picture capacity (still pictures)
[Picture Size]
2 GB
32 GB
14 M
Built-in memory
1
330
5490
64 GB
10980
5M
3
650
10620
21490
0.3 M
67
10050
162960
247150
• When the number of recordable pictures exceeds 99,999, “+99999” is displayed.
■Recording time capacity (motion pictures)
([h], [m] and [s] indicate “hour”, “minute” and “second”.)
When the [AVCHD] recording mode is used
[Rec Quality]
Built-in memory
[GPH]
[PSH]
–
[FSH]
[SH]
[GFS]
[GS]
–
2 GB
32 GB
64 GB
8 m 00 s
2 h 31 m 00 s
5 h 07 m 00 s
14 m 00 s
4 h 10 m 00 s
8 h 26 m 00 s
• With camera models 18 176 / 18 177
If [Rec Quality] of [AVCHD] motion pictures is set to [GPH], [PSH], [GFS] or [FSH],
you can continuously record a motion picture for up to 29 minutes (→107). Remaining
time for continuous recording is displayed on the screen.
When the [MP4] recording mode is used
[Rec Quality]
Built-in memory
[FHD]
–
2 GB
12 m 07 s
32 GB
64 GB
3 h 23 m 02 s
6 h 51 m 01 s
[HD]
–
23 m 08 s
6 h 27 m 38 s
13 h 04 m 41 s
[VGA]
–
50 m 56 s
14 h 13 m 08 s
28 h 46 m 57 s
• With camera models 18 176 / 18 177
You can continuously record a motion picture in [MP4] for up to 29 minutes or approx.
4 GB. (In this case, you can continuously record a motion picture in [FHD] for up
to approx. 27 minutes 12 seconds.) The remaining time for continuous recording is
displayed on the screen.
• With camera model 18 175
Motion pictures can be recorded continuously for up to 29 minutes.
A single [MP4]-format motion picture take can be recorded up to a maximum file size
of 4 GB. (In this case, you can continuously record a motion picture in [FHD] for up
to approx. 27 minutes 12 seconds.) The remaining time for continuous recording is
displayed on the screen.
●When map data is copied to a memory card, the number of recordable pictures and
recording time will decrease. (→149)
- 22 -
Setting the clock
The clock is not set when the camera is shipped.
Set the REC/PLAY switch to
before turning on the power.
Turn on the power
Press [MENU/SET] while the
message is displayed
Press
to select the language,
and then [MENU/SET]
The [Please set the clock] message appears.
Press [MENU/SET]
REC/PLAY switch
Press
to select the items
(year, month, day, hour, minute,
display order or time display
format), and then
to set
• To cancel → Press the [
/
] button.
Press [MENU/SET] to set
Press [MENU/SET]
• To return to the previous screen,
press the [ / ] button.
(Continued on the next page)
- 23 -
Setting the clock
Press to select [Yes] and then [MENU/SET] if you want the
time to be corrected automatically by the GPS function
• To manually set date and time → select [No].
• When you select automatic time adjustment using the GPS function, [GPS
Setting] is set to [ON].
When [Please set the home area] is displayed, press
[MENU/SET]
Press
City or area
name
to set your home area and then [MENU/SET]
Current time
Difference from GMT (Greenwich Mean Time)
Changing the time setting
When resetting date and time, select [Clock Set] from the [Setup] or [Rec] menu.
• Clock settings will be saved for approx. 3 months even after the battery is removed,
provided it was fully-charged and installed in the camera for 24 hours beforehand.
Select [Clock Set] from the [Setup] or [Rec] menu
• For details about the setting procedure in the [Setup] menu (→51)
Set the date and time (Perform steps
-
. (→23))
●If the clock is not set, the correct date cannot be printed when you order a shop to
print the picture, or when you stamp the date on the pictures with [Date Stamp] or [Text
Stamp].
●If the clock is set, the correct date can be printed even if the date is not displayed on
the screen.
- 24 -
Sequence of operations
Turn on the power
1
Set to
2
Set to the desired recording mode
Align the desired mode on the dial
→
exactly opposite the index mark.
[Snapshot Mode]
[Program AE] Mode
3
[Aperture-Priority]
Mode
[Shutter-Priority]
Mode
[Manual Exposure]
Mode
[Custom] Mode
[3D Photo Mode]
[Scene Mode]
[Creative Control]
Mode
For taking pictures with snapshot mode
(with extended automatic settings). (→31)
For taking pictures with automatic exposure
control. (→27)
The exposure is determined by the automatically
controlled shutter speed, based on the manually
set aperture value. (→73)
The exposure is determined by the automatically
controlled aperture value, based on the manually
set shutter speed. (→74)
The exposure is determined by the manually set
aperture value and shutter speed. (→75)
For taking pictures with previously registered
settings. (→85)
For taking 3D still pictures. (→84)
For taking pictures with factory-registered settings
matching the scene being recorded. (→78)
For taking pictures with pre-selected effects. (→76)
- 25 -
Sequence of operations
Aim the camera and shoot
■To take still pictures
Motion picture
release button
Press the shutter release button halfway to
focus
Press and hold the button to take the picture
■To record motion pictures
Press the motion picture release button to
start recording
Press the button again to finish recording
Microphone
Shutter release
button
4 ■How to hold the camera
• To avoid camera shake, hold it with both hands
keeping your arms close to your body while
standing with your feet slightly apart.
Flash
• Do not touch the lens barrel.
Wrist
• Do not cover the microphone when recording
strap
motion pictures.
• Do not cover the flash or the lamp. Do not look
at the flash from close range.
• Make sure that the camera does not move
at the moment the shutter release button is
pressed.
●We recommend using the supplied wrist strap to avoid dropping the camera.
AF Assist Lamp
Set to
5
To view pictures (→42, 45)
to select a picture
• Press
• Press to play back motion pictures
or panorama pictures
6
To turn off the power
7
- 26 -
Taking pictures with automatic exposure control
[Program AE] mode
Recording mode:
Use the [Rec] menu to change settings and set up your own recording environment.
• Slide the REC/PLAY switch to
.
Set to
Take the picture
Press halfway
(press lightly to save
focus and exposure
settings)
Press fully
(press the button all the
way to record)
●If the camera-shake warning is displayed, use
[Stabilizer], a tripod, or [Selftimer].
●If the aperture and shutter speed appear in red, this
usually indicates underexposure. In such cases you
should either use the flash, change the [Sensitivity]
settings or set [Min. Shtr Speed] to a slower speed.
Camerashake
warning
display
Aperture value Shutter speed
- 27 -
Storing a focus setting
When [AF Mode] is set to
(1-area-focusing), the camera focuses on the objects
detected in the area defined by the AF marks in the center of the screen. If you wish to
place a correctly focused subject off-center, follow the steps below.
Focus on the desired subject
Aim the AF-area at
the subject
Focus display
(When focusing is successful: illuminated
When focusing is not possible: flashing)
AF area frame
(When focusing is successful: green
When focusing is not possible: red)
Press halfway and
hold
Determine the desired composition
●Subjects/environments which may
make focusing difficult:
• Fast-moving or extremely bright
objects, or objects without color
contrast.
• When taking pictures through glass
or near objects emitting light. In dark
areas, or with considerable camera
shake.
• When an object is too close or when
there are both distant and close
objects within the AF area.
Press fully
AF area
●The focus display flashes and beep sounds when focusing is not
Focus display
successful.
Use the focus range displayed in red as a reference.
Even if the focus display is lit, the camera may be unable to bring
the subject into focus if it is out of range.
●The AF area display may be larger depending on recording
conditions such as dark locations or zoom ratio.
Focus range
- 28 -
Releasing the shutter by touch operation
(Touch Shutter function)
This function enables you to focus on the desired subject and release the shutter simply
by touching the respective subject on the screen.
Touch
on the screen
• The icon changes to
, and you can now proceed
with touch shutter release operation.
Touch the subject you want to have focused
• The subject you touched is focused.
• To release the shutter → Touch
.
●This function is not available for motion pictures.
●This function does not work for subjects at the edges of the screen.
●Please note that the shutter will be released even if you inadvertently touch the screen.
●The setting of this function will be stored even if the camera is turned off.
- 29 -
Locking focus and exposure settings with touch
operation
(Touch AF/AE function)
This function enables you activate the focus and exposure settings by touching the
desired subject on the screen.
• Perform these operations with the touch shutter function (→29) deactivated.
Touch the desired subject on which the focus and exposure
settings should be based
• When [AF Mode] is set to
(Face Detection), the
Face Detection function continues to operate, but the
focus is adjusted to the subject you touched.
• When [AF Mode] is set to
(AF Tracking), the
camera locks onto the subject, automatically
continues to focus on it and adjusts the exposure as
it moves.
Press the shutter release button halfway to bring the subject
into focus, and then fully to record the subject
• To deactivate the touch AF/AE function → Touch
.
●This function may fail to work under some recording conditions such as when the
subject is too small or the recording location is too dark.
●This function does not work for subject at the edges of the screen.
●During [Snapshot Mode], the camera will determine the optimal scene mode based on
the touched subject.
- 30 -
Taking pictures with [Snapshot Mode]
Recording mode:
Optimum settings are made automatically by the camera based on information such
as “face”, “movement”, “brightness”, and “distance” just by pointing the camera at the
subject. This results in sharp and well-exposed pictures without the need to make settings
manually.
.
• Slide the REC/PLAY switch to
Set to
([Snapshot Mode])
Take a picture
Press halfway
(press lightly to save
focus and exposure
settings)
Press fully
(press the button all the
way to record)
Focus display
(When focusing is successful: illuminated
When focusing is not possible: flashing)
About flash
Press
to select
or .
is selected, the best flash mode is selected automatically depending on
conditions ( ,
,
,
).
●When or is selected, the red-eye reduction function is activated.
●When or is selected, slower shutter speeds can be used.
●When
- 31 -
Taking pictures with [Snapshot Mode]
Automatic Scene Detection
The camera recognizes many scene types based on the captured subjects, and makes
optimum settings automatically.
The icon of
the determined
scene mode
A person was recognized
A baby was recognized∗1
A landscape was recognized
A night scene with persons was recognized
(Only when
is selected)∗2
A night scene was recognized∗2
A night scene and considerable camera movement was
recognized∗3
A nearby subject was recognized
A sunset was recognized
Reads subject movement to avoid blurring when the scene does
not correspond to any of the above.
∗1 When babies (under 3 years) registered with the Face Recognition function are recognized
∗2 We recommend using a tripod and the self-timer.
∗3 When [iHandheld Nite Shot] is [ON]
●Depending on recording conditions, different scene types may be determined for the
same subject.
●If the desired scene type is not selected, we recommend manually selecting the
appropriate scene mode.
●When , or is set, Face Detection is activated, and the focus and exposure are
based on recognized faces.
●About Backlight Compensation
Backlight is a condition where the decisive part of the subject is considerably darker
than the rest, resulting in underexposure of that part. Backlight compensation is
automatically activated in [Snapshot Mode], it corrects the exposure by increasing the
brightness of the entire image. When the camera detects backlight, is displayed
on the monitor. The displayed icon ( ) may not correspond to the actual backlight
condition in some cases.
About the Happy color setting
When [Color Mode] is set to [Happy], pictures are recorded with vivid coloring.
■ Settings
Press [MENU/SET]
Use the respective cursor buttons to select [Rec] menu and press [MENU/SET]
Use the respective cursor buttons to select [Color Mode] and press [MENU/SET]
Use the respective cursor buttons to select [Happy] and press [MENU/SET]
- 32 -
Taking pictures with [Snapshot Mode]
[Motion Deblur]
The camera automatically sets the optimum shutter speed in accordance with the
movements of the subject to minimize the blur of the subject.
■ Settings
Press [MENU/SET]
Use the respective cursor buttons to select [Rec] menu and press [MENU/SET]
Use the respective cursor buttons to select [Motion Deblur] and press [MENU/SET]
Use the respective cursor buttons to select [ON] and press [MENU/SET]
●When [Motion Deblur] is set to [ON], appears on the screen.
●The subject may be recorded with a lower resolution than the one that is set.
[iHandheld Nite Shot]
Night scenes with handheld camera are detected automatically. A picture with less noise
and camera shake is produced by combining a series of exposures.
■ Settings
Press [MENU/SET]
Use the respective cursor buttons to select [Rec] menu and press [MENU/SET]
Use the respective cursor buttons to select [iHandheld Nite Shot] and press
[MENU/SET]
Use the respective cursor buttons to select [ON] and press [MENU/SET]
●When the camera is fixed in place on a tripod or by other means, [iHandheld Nite Shot]
will not be activated.
- 33 -
Taking pictures with [Snapshot Mode]
[iHDR] (intelligent High Dynamic Range)
When [iHDR] is set to [ON], the camera creates a single properly exposed picture with
rich gradation by combining the image data of several differently exposed shots.
■ Settings
Press [MENU/SET]
Use the respective cursor buttons to select [Rec] menu and press [MENU/SET]
Use the respective cursor buttons to select [iHDR] and press [MENU/SET]
Use the respective cursor buttons to select [ON] and press [MENU/SET]
●This function is automatically activated only when ∗ is displayed on the monitor.
∗ This icon is displayed when the camera detects a backlight situation.
●The camera does not combine pictures in the following cases:
• When the zoom ratio exceeds 20 times
• When [Burst] mode is used
●Even when [iHDR] is set to [OFF], if the camera detects backlight, backlight
compensation is activated automatically and the camera corrects the exposure by
increasing the brightness of the entire image.
●A subject that was in motion when it was recorded may be rendered as a double/
multiple exposure.
- 34 -
Taking pictures with [Snapshot Mode]
AF Tracking
This function enables the camera to adjust both the focus and exposure settings
continuously for a predetermined moving subject.
■With touch screen operations
Perform these operations with the touch shutter function (→29) deactivated.
Touch the subject
• When switching to lock on to another subject → Touch the other subject.
• To deactivate AF tracking → Touch
.
AF Tracking frame
AF Lock successful: Yellow
AF Lock failed: Red
■With cursor button operations
Press
to set [AF Mode] to AF Tracking
• To cancel AF Tracking → Press
again.
Aim the AF Tracking frame at the subject, and then press
lock
• To cancel AF Lock → Press
to
.
AF Tracking frame
AF Lock successful: Yellow
AF Lock failed: Red
●The optimal scene mode for the AF locked subject is automatically identified.
●Face Recognition will be inactive while using AF Tracking.
●Under certain recording conditions, such as when the subject is small or when it is dark,
[AF Tracking] may not operate correctly.
- 35 -
Taking pictures with [Snapshot Mode]
[Snapshot Mode] restrictions
Only the menu items which are displayed in the [Snapshot Mode] can be set.
The settings selected in the [Program AE] or other modes will reflect on the menu items in
the [Setup] menu that are not displayed.
●The settings for the following items are different from other recording modes:
[Picture Size], [Burst] and [Color Mode] on the [Rec] menu, and [Beep] on the [Setup]
menu
●The settings for the following functions are fixed:
[Setup] menu
• [Auto Review]: [2SEC]
• [Guide Line]:
• [Sleep Mode]: [5MIN.]
[Rec] menu
• [Quality]:
[Fine]
• [Sensitivity]:
• [Stabilizer]: [ON]
• [AF Mode]:
[Face Detection]∗
• [AF Assist Lamp]: [ON]
• [Quick AF]: [ON]
• [Metering Mode]:
[Multi Metering]
• [i.Exposure]: [STANDARD]
• [i.Resolution]: [i.ZOOM]
• [Red-Eye Removal]: [ON]
• [White Balance]: [AWB]
∗
(23-area-focusing) when face cannot be recognized
[Motion Picture] menu
• [Continuous AF]: [ON]
• [Wind Cut]: [AUTO]
●The following functions cannot be used:
[Histogram], [Exposure], [Auto Bracket], [WB Adjust.], [Min. Shtr Speed], [Digital Zoom]
- 36 -
Taking motion pictures
Recording modes:
You can record motion pictures with audio (stereo).
• Slide the REC/PLAY switch to
.
• Motion pictures cannot be recorded in the built-in memory.
Do not cover the microphone
when recording motion pictures.
Press the motion picture release
button to start recording
[Rec Mode] (→106)/[Rec Quality] (→107)
Elapsed recording time
Remaining recording
time (approx.)
●Immediately release the button after
pressing it.
●You can also use zoom while recording
motion pictures.
• The zoom speed will be slower than
normal.
• When using zoom while recording motion
pictures, it may take some time to focus.
●Still pictures can be taken during motion
picture recording. (→41)
Press the motion picture release
button again to end recording
- 37 -
Taking motion pictures
■About the recording format for recording motion pictures
This camera can record motion pictures in either AVCHD or MP4 formats.
AVCHD:
This format allows recording high definition quality images. It is suitable for viewing
on a large format TV or for saving to disc.
AVCHD Progressive:
With camera models 18 176 / 18 177
[GPH] or [PSH] in [AVCHD] is a mode that allows motion pictures to be recorded at
1920 x 1080/60p, the highest quality* that complies with the AVCHD standard.
With camera model 18 175
[GPH] or [PSH] in [AVCHD] is a mode that allows motion pictures to be recorded at
1920 x 1080/50p, the highest quality∗ that complies with the AVCHD standard.
Recorded motion pictures can be saved and played back in this camera or using
the supplied software.
∗ This means the highest quality for this camera.
MP4:
This is a simpler video format best used when extensive editing is needed, or
when uploading videos to the Internet.
■About the compatibility of the recorded motion pictures
Motion pictures recorded in [AVCHD] or [MP4] may be played back with poor
picture or sound quality or playback may not be possible even when played back
with equipment compatible with these formats. Also, the recording information may
not be displayed properly. In this case, use this camera.
• Motion pictures recorded with [GPH] or [PSH] in [AVCHD] can be played back on
equipment that is compatible with AVCHD Progressive.
- 38 -
Taking motion pictures
■Recording motion pictures in
Records a motion picture at your preferred settings.
• Aperture and shutter speed are automatically set.
■Recording motion pictures in
The camera automatically determines the scene mode to record motion pictures with
optimal settings.
When scene does not
correspond to any on the right.
• In
mode, focus and exposure will be set according to the face detected.
•
will be selected for nightscapes and other dark scenes.
• If the camera does not select your desired Scene Mode, choosing an appropriate
mode manually is recommended.
• The following menu options in the [Motion Picture] menu can be set:
• [Rec Mode] • [Rec Quality]
■Motion picture recording in other recording modes
For details, refer to the pages relating to the respective recording modes. (However, a
motion picture cannot be recorded in [Panorama Shot] Scene Mode.)
- 39 -
Taking motion pictures
●If the surrounding temperature is high, or a motion picture is recorded
continuously,
is displayed and recording may be stopped halfway through
to protect the camera. (Only when [Rec Quality] is set to [GPH], [PSH], [GFS] or
[FSH])
●Use a sufficiently charged battery.
●The available recording time displayed on the screen may not decrease regularly.
●If data is repeatedly recorded and deleted, the total available recording time on the SD
card may be reduced. To restore the original capacity, use the camera to format the
SD card. Be sure to save all important data to your computer or other media before
formatting, as all data saved to the card will be erased.
●The Optical Image Stabilizer functions regardless of the settings before a motion picture
is recorded.
●The following functions are not available:
Extra optical zoom, flash, [Face Recog.], [Rotate Disp.] for vertical format pictures.
●For certain memory cards, recording may end while in progress.
●The recording range may become narrower in motion pictures compared to still
pictures. Also, if the Aspect Ratio is different for still pictures and motion pictures, the
angle of view will change when starting to record a motion picture. The recordable area
is displayed by setting [Video Rec Area] (→56) to [ON].
●If Extra optical zoom is used before pressing the motion picture release button, these
settings will be cleared, and the recordable area will be changed significantly.
●Depending on the environment when recording motion pictures, the screen may
turn black for an instant or noise may be recorded because of static electricity,
electromagnetic radiation, etc.
- 40 -
Taking motion pictures
Recording still pictures while a motion picture is being recorded
Still pictures can be recorded even while a motion picture is being recorded.
Press the shutter release button fully during the motion
picture recording
Still pictures are recorded with an [Aspect Ratio] setting of 16:9 and a [Picture Size]
setting of 3.5 M. (Max.15 pictures)
Motion picture recording continues unchanged.
• The clicking sound made when the shutter release button is operated may be
recorded.
If the noise of the camera operation is disturbing, use the touch shutter release
function.
• When still pictures are recorded during zooming, the zooming may stop.
■Serial exposure function
When the serial exposure function has been set in advance, a series of still pictures can
be recorded during motion picture recording.
• With the settings
,
or
, still pictures are automatically recorded using the
setting.
or
settings, the focus setting is based on that for the first picture.
• Even at the
●If the touch shutter release function has been set, still pictures will be recorded if the
screen has been touched inadvertently during motion picture recording.
●The camera will refocus if the shutter release button is pressed halfway during motion
picture recording or if still pictures are recorded using the touch shutter function. This
refocus movement is recorded even during motion picture recording. When priority is to
be given to the motion picture videos, press the shutter release button fully, and record
the still pictures. Still pictures can also be created after motion picture recording. (→47)
●When the shutter release button is pressed halfway, the resolution and the number of
recordable pictures are displayed.
●Still pictures cannot be recorded in the following cases:
• When [Rec Quality] is set to [VGA]
• When recording [High Speed Video]
• [Creative Control] Mode ([Soft Focus])
●The flash is set to [Forced Flash Off].
●Since the electronic shutter is used for recording, the recordings may be distorted.
- 41 -
Viewing your pictures
[Normal Play]
When a card is in the camera, pictures are played back from the card, without a card,
they are played back from the built-in memory.
• Slide the REC/PLAY switch to .
Drag your finger across the screen, and select the picture to
be played back
Scrolling to the next picture:
Drag your finger across the screen from right to left.
Returning to the previous picture:
Drag your finger across the screen from left to right.
• If you keep your finger touching the left or right edge of the
screen after scrolling the pictures, the pictures will continue to
be scrolled. (The pictures are displayed in a reduced size.)
• The pictures can also be scrolled by pressing the
cursor buttons. When the
buttons are held down, the pictures can be scrolled quickly forward or backward.
View pictures
Picture number/Total number of pictures
Location name information and latitude & longitude information are
provided (→130)
Folder/File number
●It may not be possible to view pictures on this camera that were previously edited on a
computer.
●If the REC/PLAY switch is moved from
to
while the power is on, the lens barrel
will retract after approx. 15 seconds.
●This camera is compliant with the unified DCF (Design rule for Camera File system)
standard formulated by the Japan Electronics and Information Technology Industries
Association (JEITA), and with Exif (Exchangeable image file format). Files that are not
DCF-compliant cannot be played back.
- 42 -
Viewing your pictures
Viewing an enlarged section
(Playback Zoom)
Touch the area that you want to magnify
Each time you touch, the magnification increases through four levels after 1x: 2x,
4x, 8x, and 16x. (The picture quality displayed becomes successively lower.)
• The area can also be magnified by moving the zoom lever towards T.
Drag your finger over the screen to move the position of the
area magnified
Current zoom position
Reducing the display magnification rate
Return to the original size (1x)
• The magnification rate can also be reduced by moving the zoom lever towards W.
• The position of the area magnified can also be moved with the respective cursor
buttons.
●Playback zoom cannot be used during motion picture playback.
Viewing several reduced pictures
(Multi Playback)
Move the zoom lever towards the W side
Picture no./Total number of pictures
Slide bar (drag this to change display)
Panorama pictures
Motion pictures
• Move the zoom lever further toward the W side to switch the display modes in
the following order: 12-picture screen → 30-picture screen → Calendar playback.
(Move the lever towards the T side to return.)
• When a picture is touched on the 12-picture or 30-picture screen, it is displayed in
full size.
●Pictures displayed with [!] cannot be played back.
- 43 -
Viewing your pictures
Viewing pictures by their recording date
(Calendar Playback)
Move the zoom lever towards the W side several times
Touch the recording date to be displayed, and [Set] to enter
the date
Select the month
The pictures recorded on the selected date appear on the 12-picture screen.
• The recording date can also be selected by using the respective cursor buttons,
and pressing [MENU/SET].
●Only months when pictures were taken are shown on the calendar screen. Pictures
taken without clock settings are displayed with the date 1st January, 2012.
●Pictures taken with destination settings made in [World Time] are displayed in the
calendar screen using the appropriate date for the destination’s time zone.
- 44 -
Viewing motion pictures
This camera was designed to play motion pictures using the AVCHD, MP4 and
QuickTime Motion JPEG formats.
• Slide the REC/PLAY switch to .
Select a picture with the motion picture icon, and touch
Playback now starts.
• You can also press
to play back motion pictures.
Motion picture recording time
Example: After 10 minutes and 30 seconds: [10m30s]
Motion picture icon (differs depending on the recording mode and picture quality setting)
■Operations during motion picture playback
Touch the screen to display the control panel.
Touch the control panel to perform playback operations.
• If there is no operation for about 2 seconds, the control panel disappears.
Control Panel
: Pause/Play
: Stop
: Capturing still pictures from motion pictures (→47)
: Fast rewind (2 steps)
: Single-frame rewind (while paused)
: Fast forward (2 steps)
: Single-frame forward (while paused)
Volume
level
Volume
adjustment
Playback bar (The playback position can be moved by touch operation.)
- 45 -
Viewing motion pictures
●You can also use the respective cursor buttons to perform playback operations.
: Pause/play
: Stop
: Fast rewind (2 steps)/Single-frame rewind (while paused)
: Fast forward (2 steps)/Single-frame forward (while paused)
[MENU/SET]: Capturing still pictures from motion pictures (→47)
• Volume can be adjusted with the zoom lever.
●It may not be possible to properly play back the motion pictures recorded with other
cameras.
●Some information will not be displayed for motion pictures recorded in [AVCHD].
●Motion pictures can be viewed on your computer using the supplied software.
●With camera models 18 176 / 18 177
Motion pictures recorded with [Miniature Effect] in [Creative Control] Mode play back at
approximately 10 times speed.
With camera model 18 175
Motion pictures recorded with [Miniature Effect] in [Creative Control] Mode play back at
approximately 8 times speed.
- 46 -
Viewing motion pictures
Capturing still pictures from motion pictures
Save a scene from a motion picture as a still picture.
Display the picture that you want to capture as a still picture
by pausing a motion picture during playback
Touch
• A confirmation screen is displayed. Select [Yes] with the
respective cursor buttons and then press [MENU/SET].
• You can also capture still pictures from motion pictures by pressing [MENU/SET].
[Rec Quality] of the original motion picture
[Picture Size]
[Aspect Ratio]
2M
16:9
0.3 M
4:3
[GPH] [GFS] [GS]
[PSH] [FSH] [SH] [FHD] [HD]
[VGA] [High Speed Video]
●The picture quality becomes slightly lower depending on the [Rec Quality] setting of the
original motion picture.
●It may not be possible to capture still pictures from motion pictures that were recorded
with a different camera.
- 47 -
Viewing motion pictures
[Video Divide]
A single motion picture take can be split into 2 parts. This is convenient, e.g. when you
want to keep just the necessary scenes, or if you wish to delete unnecessary scenes to
increase free space on your card, such as when travelling.
Select a motion picture to be split and then touch
• You can also press
a motion picture.
to move to the function for splitting
Play back the motion picture and pause at the place to split
Touch
• A confirmation screen is displayed. Select [Yes] with the
respective cursor buttons and then press [MENU/SET].
• After being split, the original motion picture take is no
longer available.
(The 2 new parts will be retained separately in memory.)
• You can also press to split a motion picture.
●During splitting, do not turn off the camera’s power or remove the card or battery. If you
do so, the motion picture may be deleted.
●Splitting a motion picture recorded in [MP4] or [High Speed Video] changes the order
of the pictures. It is recommended to display with [Calendar] (Calendar Playback) or
[Filtering Play].
●It may not be possible to split motion pictures that were recorded with a different
camera.
●Motion pictures with a short recording time cannot be divided.
- 48 -
Deleting pictures
Pictures will be deleted from the card if one is inserted, or from the built-in memory if no
card is inserted. (Deleted pictures cannot be recovered.)
Press to delete the displayed
picture
• A confirmation screen is displayed. Select
[Yes] with the respective cursor buttons and
then press [MENU/SET].
●Do not turn off the power during deletion.
●Use a sufficiently charged battery.
●Pictures cannot be deleted in the following cases:
• Protected pictures
• Card switch is in “LOCK” position.
• Pictures do not comply with the DCF standard (→42)
- 49 -
Deleting pictures
Deleting multiple (up to 100)/Deleting all pictures
A serial exposure group is handled as one picture. (All the pictures in the selected serial
exposure group are deleted.)
Press to delete the displayed
picture
Use
to select [Delete Multi]/
[Delete All] and press [MENU/SET]
●[Delete Multi]
Use the respective cursor buttons to select
picture and press [DISP.] button
Picture selected
• To cancel → Press [DISP.] button again.
• To execute → Press [MENU/SET].
• You can select [All Delete Except Favorite]
in [Delete All] if there are pictures that have
been set as [Favorite] (→122).
• A confirmation screen is displayed. Select
[Yes] with the respective cursor buttons and
then press [MENU/SET].
• The process may take time depending on
the number of pictures deleted.
- 50 -
Setting the menu
Refer to the procedure below for an example on how to operate the menus.
Press [MENU/SET]
The menu selection screen is displayed.
Use the respective cursor buttons
to select a menu, and then press
[MENU/SET]
• The menu type can also be selected by
touch operations.
Use
to select the menu item,
and then press [MENU/SET]
Menu items
Pages (The pages can
also be selected with the
zoom lever.)
■Menu selection screen
●In recording mode
Current setting
Menu description
Operation guide
• To return to the previous screen,
press the [ / ] button.
●In playback mode
Press
to select a setting, and
then [MENU/SET]
The selected setting is set.
Settings
Selected setting
Setting description
Press the [
times
/
] button several
The menu closes and the monitor returns to
the previous screen.
- 51 -
Setting the menu
Menu types
[Rec] menu (→95)
(Recording mode only)
• You can perform settings such as tones, Sensitivity, Aspect Ratio, and resolution.
[Motion Picture] menu (→106)
(Recording mode only)
• You can select the recording mode and picture quality and other settings.
[GPS] menu (→127)
• You can select the GPS setting, location name display and other settings.
[Setup] menu (→54)
• You can perform settings for convenience of use such as the clock setting and
changing of the beep sounds.
[Playback Mode] menu (→111)
(Playback mode only)
• Choose [Playback Mode] to see Slide Shows or to narrow down the pictures for
display, etc.
[Playback] menu (→117)
(Playback mode only)
• Enables you to specify picture protection, resizing, and other settings for pictures
you have taken.
[Map] menu (→145)
(Playback mode only)
• You can display the current location or select a map you want to display.
●The operation screen examples in this manual may differ from the actual screen display
or some parts of the screen display are omitted.
●The menu types and items that are displayed vary according to the mode.
●The setting methods vary depending on the menu item.
●In recording mode, the menu screen can also be exited by pressing the shutter release
button halfway.
●The following menu is also displayed depending on the recording mode.
• In the [Scene Mode] mode: [Scene Mode] menu (→78)
• In the [Custom] mode: [Custom] menu (→85)
• In the [Creative Control] mode: [Creative Control] menu (→76)
- 52 -
Setting the menu
Using the Quick menu
During recording, you can easily call some of the menu items and set them.
Press the [Q.MENU] button
Press
to select a menu item
• The menu items and setting items that are
displayed differ depending on the recording
mode.
Press
to select the settings
Press [MENU/SET]
- 53 -
Using the [Setup] menu
[Clock Set], [Economy] and [Auto Review] are important for clock setting and
battery life. Please check these before use.
• For details about the setting procedure in the [Setup] menu (→51)
Item
[Clock Set]
Settings, notes
For setting time, date, and display format.
(→23)
[Auto Clock Set]
[ON] / [OFF]
For setting the clock
automatically using GPS.
(→139)
[Destination]: For setting the local time at a travel
destination.
[World Time]
For setting the local time
at travel destination. (→93)
[Travel Date]
For recording the number
of days elapsed in your
travels. (→92)
[Beep]
For changing or mute the
beep/shutter sounds.
[Home]: For setting date and time for the home area.
[Travel Setup]
[SET] (For registering departure and return dates) / [OFF]
[Location]
[SET] (For entering the name of a location) / [OFF]
[Beep Level]
/
/
: Low / High / Mute
[Beep Tone]
/
/
: For changing beep tone.
[Shutter Vol.]
/
/
: Low / High / Mute
[Shutter Tone]
/
/
: For changing shutter tone.
- 54 -
Using the [Setup] menu
• For details about the setting procedure in the [Setup] menu (→51)
Item
[Volume]
For adjusting the speaker
volume (7 levels).
[Cust.Set Mem.]
Settings, notes
[0] / [1] / [2] / [3] / [4] / [5] / [6]
• Cannot be used to adjust TV speaker volume when
connected to a TV.
[C1] / [C2-1] / [C2-2] / [C2-3]
For registering settings
on current camera. (→85)
[LCD Display]
For adjusting brightness
and color of the monitor.
[LCD Mode]
For improving the
visibility of the monitor
image.
Press
to select the setting item and
adjustments
Press [MENU/SET]
to make
• Some subjects may look different on the monitor, but the
recorded picture will not be affected.
[Auto Power LCD]:
The monitor’s brightness is adjusted automatically
depending on the ambient brightness.
[Power LCD]:
Makes the monitor image brighter than normal (for
outdoor use).
[OFF]
• [Auto Power LCD] cannot be selected in playback mode.
• [Power LCD] returns to ordinary brightness if there is no
operation for 30 seconds when recording. (Press any
button to make the screen brighter again.)
• Because the picture shown on the monitor emphasizes
brightness, some subjects may look different than their
actual appearance, but this will not affect the recorded
picture.
• Setting [LCD Mode] reduces the operating time.
- 55 -
Using the [Setup] menu
• For details about the setting procedure in the [Setup] menu (→51)
Item
[Guide Line]
For selecting recording
information display and
the types of guidelines.
Settings, notes
[Rec. Info.]
[ON] (Displays recording information with guidelines.)
[OFF]
[Pattern]
/
: Changes the patterns of guidelines.
• When [Snapshot Mode] is selected, only
is displayed.
Also, recording information and guidelines cannot be
displayed simultaneously.
• This function cannot be used with: [Panorama Shot]
scene mode
[Histogram]
[ON] / [OFF]
For checking brightness
in picture on graph. (→62)
[Video Rec Area]
For verifying the
recordable area for a
motion picture before
recording.
[Zoom Resume]
[ON] / [OFF]
• The recordable area displayed for motion pictures should
be interpreted as a guideline.
• When using Extra optical zoom, the recordable area may
not always be displayed for certain zoom ratios.
• This setting cannot be used with [Snapshot Mode].
[ON] / [OFF]
For saving the zoom
position when turning the
power off.
- 56 -
Using the [Setup] menu
• For details about the setting procedure in the [Setup] menu (→51)
Item
[Economy]
For turning off the power
or the monitor while
not using the camera
to minimize battery
consumption.
Settings, notes
[Sleep Mode]
[2MIN.] / [5MIN.] / [10MIN.] / [OFF]:
Automatically switches the camera off when it is not being
used.
• To restore → Press the shutter release button halfway, or
turn on the power again.
• Cannot be used in the following cases:
When connected to a computer/printer, during motion
picture recording/playback, during Slide Shows
• Settings are fixed to [5MIN.] in [Snapshot Mode].
[LCD Power Save]
[ON] / [OFF]:
The monitor is turned off to minimize power consumption.
• This reduces the picture quality of the monitor image
during recording to minimize battery consumption
(except for the Digital Zoom area). Note, however, that
there is no effect on the recorded picture.
• The setting in [LCD Mode] is prioritized over the setting
in [LCD Power Save] for the brightness of the monitor.
[Auto Review]
For having still pictures
displayed immediately
after taking them.
[1SEC] / [2SEC]
[HOLD]: The auto review screen remains until a button
(other than the [DISP.] button) is pressed
[OFF]
• The following cases are fixed to the settings indicated
below.
[Snapshot Mode]: [2SEC]
Scene Mode [Panorama Shot]: [2SEC]
• Still pictures are automatically displayed immediately
after they are taken regardless of the [Auto Review]
setting in [Auto Bracket], [Burst] mode, and [Handheld
Night Shot] and [HDR] Scene Modes.
• Motion pictures cannot be reviewed automatically.
- 57 -
Using the [Setup] menu
• For details about the setting procedure in the [Setup] menu (→51)
Item
[No.Reset]
For resetting picture file
numbers.
[Reset]
For resetting to the
default settings.
[USB Mode]
For selecting a
communication method
for when connecting the
camera to a computer
or printer with the USB
connection cable.
Update the GPS assist
data.
Settings, notes
• The folder number is updated and the file number starts
from 0001.
• A folder number between 100 and 999 can be assigned.
Numbers cannot be reset once folder number reaches
999. In this case, save all necessary pictures to your
computer, and format the built-in memory/the card (→60).
• To reset folder number to 100:
First, format the built-in memory or the card, then reset
the file numbers using [No.Reset]. Finally, select [Yes] on
the folder number reset screen.
[Reset Rec. settings?]
[Reset setup parameters?]
• Information registered in [Face Recog.] is reset if
recording settings are reset.
• Resetting the setup parameters will also reset the
following:
- Age in years/months and names in [Baby] and [Pet]
Scene Modes, [GPS] menu, [Map] menu
• Folder numbers and clock settings will not be reset.
• Camera movement may be audible as the lens function
is reset. This is not a fault.
[Select on connection]:
Selects the communication method each time you connect
to a computer or PictBridge-compatible printer.
[PictBridge(PTP)]: Selected when connected to a
PictBridge-compatible printer.
[PC]: Selected when connected to a computer.
[GPS assist data]: Updates the GPS assist data. (→140)
- 58 -
Using the [Setup] menu
• For details about the setting procedure in the [Setup] menu (→51)
Item
[Output]
Changes the settings
to be used when the
camera is connected to a
TV or an other device.
Settings, notes
[Video Out] (With camera model 18 175)
[NTSC] / [PAL]
If the default setting is changed, AVCHD motion pictures
may not be played correctly.
[TV Aspect] (This setting is performed when the AV
cable (included in scope of delivery) is
connected.)
/
[HDTV Link]
For enabling automatic
linking with other HDTV
Link-compatible devices,
and operability with a
HDTV remote control
when connected via
the HDMI mini cable
(available as accessory
→9) (→157).
[3D Playback]
For determining how a
3D still picture is output.
[ON]: Operations may be performed via the remote
control of the HDTV Link-compatible device.
(Not all operations will be available.)
Operability of the camera’s own buttons will be
limited.
[OFF]: Operations must be performed via the camera’s
own buttons.
[3D] / [2D]
• If you want to play back a picture in 2D (conventional
picture) on a 3D television, set to [2D].
• This item of the menu functions when the HDMI mini
cable (available as accessory →9) is connected.
• For the procedure for playing back a 3D still picture (→159).
- 59 -
Using the [Setup] menu
• For details about the setting procedure in the [Setup] menu (→51)
Item
[Rotate Disp.]
For having portrait-format
still pictures rotated
automatically.
Settings, notes
: Rotates and displays pictures taken in portrait
format when displayed on a TV screen or on the
monitor of the camera.
: Rotates and displays only pictures displayed on a
TV screen.
[OFF]
• [Rotate Disp.] cannot be used with motion pictures.
• Still pictures taken with the camera facing up or down, or
those taken on other cameras may not be rotated.
• Pictures cannot be rotated during Multi Playback.
• Pictures will only be displayed rotated on a computer if in
Exif-compatible (→42) environment (OS, software).
[Version Disp.]
For checking the camera
firmware version or
displaying the software
information.
[Format]
Use when [Built-In
Memory Error] or
[Memory Card Error]
appears, or when
formatting the built-in
memory or card.
When a card/the built-in
memory is formatted,
the data cannot be
restored. Check the
content of the card/
the built-in memory
carefully before
formatting.
The current version is displayed.
• When you press [MENU/SET] while the version is
displayed, software information such as the license is
displayed.
• This requires a sufficiently charged battery. When
formatting the built-in memory, remove the card.
(Only the card will be formatted if inserted; if not, only the
built-in memory will be formatted.)
• Always format the cards that are to be used in this
camera with this camera.
• All data including protected pictures and copied map
data will be deleted.
• Do not turn off power or perform other operations during
formatting.
• Formatting the built-in memory may take several
minutes.
• Consult your Leica dealer or the nearest Leica Customer
Care center if formatting cannot be successfully
completed.
- 60 -
Using the [Setup] menu
• For details about the setting procedure in the [Setup] menu (→51)
Item
[Language]
Settings, notes
Sets the language displayed on the screen.
For changing the display
language.
[O.I.S. Demo.]
For viewing a
demonstration of
functions.
Extent of camera shake is shown on graph (estimate)
Extent of camera shake
Extent of camera shake after correction
• During a demo screen display, the Optical Image
Stabilizer switches ON and OFF every time [MENU/SET]
is pressed.
• This cannot be displayed during playback mode.
- 61 -
Changing recording information display
For switching between different monitor displays, such as Histograms.
Press the [DISP.] button to change the display
●In Recording Mode
Recording
information∗1
Motion picture recording
information∗1,∗2
No display
●In Playback Mode
Picture
information
Recording
information∗1
Guide lines∗1,∗3
No display
∗1 Set [Histogram] to display a histogram. (→56)
∗2 Return to the “Recording information” display by pressing the shutter release button halfway.
∗3 About [Guide Line] (→56)
●During Playback Zoom, Motion Picture Playback, Slide Show:
You can only turn the display on and off.
●During menu display, Multi Playback or Calendar Playback:
The display cannot be changed.
■Histogram
(Example)
Displays the distribution of brightness in the picture
– e.g. if the graph peaks at the right, this means
there are several bright areas in the picture (Guide).
A peak in the center represents correct brightness
(correct exposure). This can be used as a reference for
Dark ← OK → Bright
exposure compensation, etc. (→71)
• The histogram at the time of recording is different than the one in playback and
it is displayed in orange, when recording with flash or in dark locations. Also, the
histogram may differ from those made with image editing software.
• The histogram is not displayed when using
([Snapshot Mode]) or Playback Zoom.
- 62 -
Using the zoom
Recording modes:
You can determine how much of a subject you wish to capture by using the lens’s zoom
function.
Zooming in/out
For capturing
a larger area
(wide-angle)
For capturing a smaller,
but also enlarged area
(telephoto)
• The zoom speed is determined by how far the zoom lever is rotated; two setting
speeds are available.
Focus range
When Extra optical zoom is set
Zoom ratio
Digital Zoom range
Optical Zoom range
i.Zoom range
Zoom bar
●Adjust the focus after zooming.
●Do not touch the lens barrel during zooming.
●The zoom ratio and the zoom bar displayed on the screen are approximations.
●The camera may make a noise and vibrate when the zoom lever is operated - this is not
a malfunction.
- 63 -
Using the zoom
Zooming with touch operation
Touch
The zoom bar appears on the screen.
Touch the T or W edge of the zoom bar on the screen
Fast zooming all the way to the T end∗
Fast zooming
Fast zooming all the way to the W end∗
Slow zooming
∗ When
or
is touched again while zooming, zooming will stop.
- 64 -
Using the zoom
Zoom modes and their application
The zoom ratio changes when the resolution is changed.
■Optical zooming
Zooming up to a ratio of 20x is possible if recording without
Size] in the [Rec] menu. (→95)
●Optical zooming is not available in the following cases:
• Scene Mode ([Panorama Shot])
• [Macro Zoom]
is selected with [Picture
■Extra optical zoom
Zooming up to a ratio of 42.2x is possible when recording with
is selected with
[Picture Size] in the [Rec] menu (→95). EZ is short for “Extra optical zoom”.
●Extra optical zoom cannot be used in the following cases:
• [Snapshot Mode] (when [Motion Deblur] is [ON])
• [Macro Zoom] • Motion picture • When [Burst] is set to
,
or
• Scene Modes ([Panorama Shot] [HDR] [High Sens.] [High Speed Video])
• [Creative Control] Mode ([Toy Effect])
To increase the zoom ratio further, the following zoom modes can be used in combination.
■[i.ZOOM]
You can use the camera’s Intelligent Resolution technology to increase the zoom ratio
up to 2x higher than the original zoom ratio with limited deterioration of picture quality.
Set [i.Resolution] to [i.ZOOM] in the [Rec] menu. (→102)
●When [i.Resolution] is set to [i.ZOOM], Intelligent Resolution technology is applied to
the picture.
●[i.ZOOM] does not function in the following cases.
• [Snapshot Mode] (when [Motion Deblur] is [ON])
• Scene Modes ([Panorama Shot] [Handheld Night Shot] [HDR] [High Sens.])
• When [Burst] is set to
,
or
• [Creative Control] mode ([Toy Effect])
• [Macro Zoom]
■[Digital Zoom]
This mode allows zooming ratios 4x higher than Optical/Extra optical zoom. Note that,
with Digital Zoom, enlarging will decrease picture quality. Set the [Digital Zoom] in the
[Rec] menu to [ON]. (→102)
●Digital Zoom cannot be used in the following modes:
• [Snapshot Mode] • When [Burst] is set to
,
or
• Scene Modes ([Panorama Shot] [Handheld Night Shot] [HDR] [High Sens.]
[High Speed Video])
• [Creative Control] mode ([Toy Effect] [Miniature Effect])
●When Digital Zoom is used simultaneously with i.Zoom, you can only increase the
zoom ratio up to 2x.
- 65 -
Taking pictures with flash
Recording modes:
Press
to display [Flash]
Use the respective cursor buttons to select the desired mode
and press [MENU/SET]
Type, operations
∗1
Uses
[Auto]
• Flash is activated automatically when necessary
[Auto/Red-Eye]∗2
• Flash is activated automatically when necessary
plus pre-flash to reduce red eye effect
[Forced Flash On]
• Flash always fires
[Slow Sync./Red-Eye]∗2
• Flash is activated automatically when necessary,
plus pre-flash to reduce red eye effect, slower
shutter speeds may be used for a correct
rendition of dark backgrounds
For normal use
For taking pictures of subjects in dark
places
For taking pictures with backlight or
under bright lighting (e.g. fluorescent)
For taking pictures of persons in a
dark environment (using a tripod is
recommended)
For taking pictures in places where
the use of flash is prohibited or
inappropriate
[Forced Flash Off]
• Flash never fires
∗1 Only in the
mode
∗2 Two flashes will be emitted. Photographer and subject should not move until after the second flash.
The interval between flashes varies according to the subject brightness.
If [Red-Eye Removal] in the [Rec] menu is [ON],
appears with the flash icon, red-eye is
automatically detected and still picture data is corrected. (Only when [AF Mode] is
(Face Detection))
●Do not put your hands over the flash reflector (→10) or look at it from close range
(from a few centimeters away).
Do not use the flash at close distances to other subjects (heat/light may damage
the subject).
●The picture edges may be rendered darker in flash pictures with near maximum
wideangle setting. This may be remedied by zooming a little toward telephoto.
●The effect of red-eye reduction varies depending on the subject and is affected by
factors such as distance to the subject, whether the subject is looking at the camera
during preliminary flash, and so on. In some cases, the effect of red-eye reduction may
be negligible.
●Flash modes may change when recording modes are changed.
●Scene Mode flash modes are restored to default when the Scene Mode is changed.
●No pictures can be taken when the mode icons (e.g. ) are flashing (flash is charging).
●If the flash illumination for the subject is insufficient, both the exposure and white
balance settings may be faulty.
●The flash effect may not be sufficient in the following cases:
• Slow shutter speed
• [Flash Burst] is set
●Flash charging may take time if battery capacity is low, or when the flash is used in
quick succession.
- 66 -
Taking pictures with flash
■Available flash modes
(○: Available, –: Not available,
: Default setting)
[Scene Mode]
○∗1
–
–
–
○
○
○
○
○
○
○
○
○
○
○
○
○
○
○
–
○
–
–
–
–
○
○
○
○
○
–
–
–
○
○
○
○
○
–
–
○
○
○
○
○
○
–
–
–
–
○
○
○
○
–
∗1 Set to
,
,
or
depending on the subject and brightness.
• The flash cannot be used when recording motion pictures or in the
,
,
, and
Scene Modes.
,
,
,
,
■The available flash range when [Sensitivity] setting is [AUTO]
Max. W
Approx. 0.6 m-6.4 m (2.0 - 21 feet)
Max. T
Approx. 1.0 m-3.3 m (3.3 - 11 feet)
■Shutter speeds for each flash mode
1/60∗2 - 1/2000th
1∗2∗3 - 1/2000th
∗2 Varies according to [Min. Shtr Speed] setting.
∗3 When [Min. Shtr Speed] is set to [AUTO], and camera shake is detected when [Stabilizer] is
turned to [ON], the maximum speed is 1/4 second. This also varies according to [Snapshot Mode]
and the used Scene Modes, etc.
- 67 -
Taking close-up pictures
Recording modes:
When you want to enlarge the subject, setting to [AF Macro] ( ) enables you to take
pictures at an even closer distance than the normal focus range (up to 3 cm (11/32 inch)
for max. W).
Press
to display [Macro Mode]
Use the respective cursor buttons to select [AF Macro] and
press [MENU/SET]
■Taking close-up pictures without being
close to the subject
display
“Tele macro” operates automatically when you
increase the zoom ratio to 12 times or higher while
[AF Macro] is set, enabling the camera to focus on a
subject as close as 1 m (3.3 feet).
(
changes to
)
Focus range
When a subject is too close to the camera, the picture may not be properly focused. The
shortest recording distance differs depending on the zoom ratio and the setting in macro
recording mode.
■Shortest focusing distance
The shortest focusing distance is the distance from the lens front to the subject. This
distance changes gradually depending on the zoom position. At the time of zooming,
even if [Macro Mode] is set to [AF Macro] (
), the shortest focusing distance is
the same as when the mode is set to OFF (2 m (6.6 feet) when the optical zoom
magnification of 5x to 7x is used).
[Macro Mode]
Zoom
OFF
Max. W
3 cm (11/32 inch)
50 cm (1.6 feet)
Max. T
1 m (3.3 feet)
2 m (6.6 feet)
• The focus range is displayed when operating the zoom, etc.
Focus range
●It may take some time until distant subjects come into focus.
●Using a tripod and [Selftimer] is recommended. Also, when recording a subject that is
close to the camera, setting [Flash] to
[Forced Flash Off] is recommended.
●Moving the camera after focusing is likely to result in poorly focused pictures if the
subject is close to the camera, due to the reduced depth of field.
●The sharpness may be reduced around the edges of the picture.
- 68 -
Taking close-up pictures
[Macro Zoom]
To take even larger images of the subject than when using [AF Macro], select [Macro
Zoom].
Press
to display [Macro Mode]
Use the respective cursor buttons to select [Macro Zoom] and
press [MENU/SET]
Adjust the Digital Zoom magnification with the zoom lever
Minimize
The zoom position is fixed at the Wide
end.
Focus range is 3 cm (11/32 inch) - .
Enlarge
Digital Zoom magnification (1 x to 3 x)
●In [Macro Zoom], higher magnification results in lower picture quality.
●When [Macro Zoom] is set, Extra optical zoom or [i.ZOOM] does not work.
●[Macro Zoom] cannot be set in the following cases:
• [Creative Control] mode ([Toy Effect] [Miniature Effect])
• [3D Photo Mode]
• When [Burst] is set to
,
or
●When [AF Tracking] is set, zoom macro is cancelled.
- 69 -
Taking pictures with the self-timer
Recording mode:
We recommend using a tripod. This mode can also be used to prevent the camera
shake effect caused by pressing the shutter release button. To do so, set the self-timer to
2 seconds.
Press
to display [Selftimer]
Use the respective cursor buttons to select time duration and
press [MENU/SET]
Take a picture
Press the shutter release button fully to start recording after the preset time.
Self-timer indicator
(Flashes for set duration)
• To cancel while in operation → Press [MENU/SET]
●Focusing is done automatically immediately before recording if the shutter release
button is pressed fully.
●After the Self-timer indicator stops flashing, it may then be lit in its function as AF Assist
Lamp.
●This function cannot be used in the following cases:
• With the [High Speed Video] scene mode
• When recording motion pictures
- 70 -
Taking pictures with Exposure Compensation
An exposure compensation allows adjusting the exposure when the desired brightness
level is not attained automatically (e.g. when there are different brightness levels within
the picture).
■ Recording modes:
Press
to display [Exposure]
Use the respective cursor buttons to select a value and press
[MENU/SET]
• If the main subject is too dark, adjust the
exposure to the “+” direction.
• If the main subject is too bright, adjust the
exposure to the “-” direction.
• When an exposure compensation is set,
the compensation value (
for example)
is displayed in the bottom-left corner of the
screen.
●Depending on the brightness, it may not be possible to set an exposure compensation
in some cases.
●The Exposure Compensation value you set is retained even after the camera is turned
off.
- 71 -
Taking pictures with Exposure Compensation
Taking picture series with automatically changed exposure
3 pictures in continuous succession are recorded while the exposure is changed
automatically.
If an exposure compensation value is set, the adjusted exposure is set as the standard.
■ Recording modes:
Press
several times to display [Auto Bracket]
Use the respective cursor buttons to select a value and press
[MENU/SET]
Value displayed
when an
exposure
compensation
value is set
• The first picture is recorded without
compensation, the second with the
exposure adjusted in the “-” direction, and
the third with the exposure adjusted in the
“+” direction.
• The bracketing mode is canceled when
the power is turned off.
●Bracketing cannot be used with flash.
●When [Auto Bracket] is set, [Burst] is canceled.
●[Auto Bracket] cannot be used in the following cases:
• [Creative Control] Mode ([Miniature Effect] [Soft Focus])
• Scene Modes ([Panorama Shot] [Handheld Night Shot] [HDR] [High Speed Video])
• When recording motion pictures
- 72 -
Using a pre-set aperture to determine the depth
of field - [Aperture-Priority] Mode
Recording mode:
By setting the aperture value manually, you can determine the depth of field (i.e. how
much of the subject is rendered sharply) to suit your compositional intentions. The shutter
speed is automatically adjusted accordingly.
Set the mode dial to
([Aperture-Priority] Mode)
Press the [EXPOSURE] button and use the respective cursor
buttons to determine aperture value
• When the aperture value is increased, the
depth of field expands, so that more of
the back-and foreground appear sharp.
• When the aperture value is reduced, the
depth of field decreases, so that less of
back- and foreground appear sharp.
Aperture value
Press the [EXPOSURE] button
●When the picture is too bright or too dark, indicating an incorrect exposure, the aperture
and shutter speed values are shown in red.
●The brightness of the monitor image may differ from the actual picture recorded.
- 73 -
Using a pre-set shutter speed to determine the
rendition of moving subjects - [Shutter-Priority] Mode
Recording mode:
By setting the shutter speed manually, you can determine how sharp moving subjects are
rendered. The aperture value is automatically adjusted accordingly.
Set the mode dial to
([Shutter-Priority] Mode)
Press the [EXPOSURE] button and use the respective cursor
buttons to determine shutter speed
• Faster shutter speeds render moving
subjects sharper (depending on their
speed).
• Slower shutter speeds render moving
subjects increasingly unsharp.
Shutter speed
Press the [EXPOSURE] button
●When the picture is too bright or too dark, indicating an incorrect exposure, the aperture
and shutter speed values are shown in red.
●The brightness of the monitor image may differ from the actual picture recorded.
- 74 -
Using a pre-set aperture/shutter speed combination to achieve
full control of the exposure - [Manual Exposure] Mode
Recording mode:
This mode, in which you set both aperture and shutter speed manually gives you full
control of the exposure, i.e. of how bright a subject is rendered. Also, long-exposure
recording of up to 15 seconds is possible.
Set the mode dial to
([Manual Exposure] Mode)
• Manual exposure assist is displayed.
Press the [EXPOSURE] button and use the respective cursor
buttons to determine aperture value and shutter speed
Aperture value/shutter speed
Press the [EXPOSURE] button
■Manual exposure assist (estimate)
If the shutter release button is pressed halfway, manual exposure assist is displayed.
Indicates exposures with standard brightness.
Indicates a brighter exposure. For standard brightness, either use a
faster shutter speed or increase the aperture value.
Indicates a darker exposure. For standard brightness, either use a slower
shutter speed or reduce the aperture value.
●When the picture is too bright or too dark, indicating an incorrect exposure, the aperture
and shutter speed values are shown in red.
●The brightness of the monitor image may differ from the actual picture recorded.
- 75 -
Taking Pictures with different picture effects
[Creative Control] mode
Recording mode:
You can select various effects for taking pictures and get the results displayed on the
monitor.
Set the mode dial to
Press
to select a setting, and then [MENU/SET]
Setting
Effect
[EXPS]
[Expressive]
This effect creates a pop art style picture that enhances the
color.
[RETR]
[Retro]
This effect creates the soft appearance of a tarnished picture.
[HKEY]
[High Key]
This effect creates a brighter and lighter toned appearance for
the entire picture.
[LKEY]
[Low Key]
This effect creates a darker somber appearance for the entire
picture to emphasize the bright portions.
[SEPI]
[Sepia]
This effect creates a picture with sepia tone.
[MONO]
[Dynamic Monochrome]
This effect creates a monochromatic picture with a higher
contrast and more dramatic atmosphere.
[HDYN]
[High Dynamic]
This effect creates a picture with a well-balanced brightness for
the entire picture (from dark to bright areas).
[TOY]
[Toy Effect]
This effect creates a picture that resembles those taken by a toy
camera with a reduced amount of peripheral light.
• About adjusting color hue
→ Press the [DISP.] button and use the respective cursor
buttons to select the color hues.
[MINI]
[Miniature Effect]
This effect creates a diorama-like picture by intentionally
blurring the outer areas on the picture. (Also known as Tilt Shift
Focus)
[SOFT]
[Soft Focus]
This effect creates a soft appearance by intentionally blurring
the entire picture.
- 76 -
Taking Pictures with different picture effects [Creative Control] mode
■Changing the selected picture effects ([Creative Control] menu)
Press [MENU/SET]
Use the respective cursor buttons to select [Creative Control] menu and press
[MENU/SET]
Press
to select a setting, and then [MENU/SET]
■Recording motion pictures in
This mode records a motion picture at the optimum settings for the selected effects.
●A setting that was selected in [Creative Control] mode is retained even after the camera
is turned off.
●The following [Rec] menu settings will be automatically adjusted and cannot be
selected manually.
[Sensitivity], [White Balance], [i.Exposure], [Min. Shtr Speed], [Color Mode]
●Notes on the [Miniature Effect] setting
• The recording screen is displayed with a slight delay when compared to usual
recording.
• No audio is recorded for motion pictures.
• With camera models 18 176 / 18 177
When a motion picture is recorded, the finished recording will be approximately
1/10th of the actual recorded time period. (If you record a motion picture for
10 minutes, the resulting motion picture recording time will be approximately 1
minute.) The recordable time displayed by the camera is approx. 10 times longer than
actual time needed for recording. When the recording mode is changed, be sure to
check the recordable time.
With camera model 18 175
When a motion picture is recorded, the finished recording will be approximately 1/8th
of the actual recorded time period. (If you record a motion picture for 8 minutes,
the resulting motion picture recording time will be approximately 1 minute.) The
recordable time displayed by the camera is approx. 8 times longer than actual time
needed for recording. When the recording mode is changed, be sure to check the
recordable time.
• If you stop recording motion pictures too soon, the camera may continue recording for
a certain time. Hold the camera still until the camera stops recording.
• When you take a picture using a high resolution setting, the screen will become dark
for a certain period of time after the picture is taken. However, this occurs due to
signal processing and is not a defect.
●Notes on the [Soft Focus] setting
• The recording screen is displayed with a slight delay when compared to usual
recording. (When this effect is set, the recorded motion picture is played back like a
frame dropping.)
• When you take a picture using a high resolution setting, the screen will become dark
for a certain period of time after the picture is taken. However, this occurs due to
signal processing and is not a defect.
- 77 -
Taking pictures with settings matched to the
encountered scene [Scene Mode]
Recording mode:
Using [Scene Mode] enables you to take pictures with optimum settings (exposure,
coloring, etc.) for given scenes.
Set the mode dial to
Use the respective cursor buttons to select the scene and
press [MENU/SET]
■Changing the selected scene mode ([Scene Mode] menu)
Press [MENU/SET]
Use the respective cursor buttons to select the [Scene Mode] menu and press
[MENU/SET]
Use the respective cursor buttons to select the scene and press [MENU/SET]
■Recording motion pictures in
This mode records a motion picture at the optimum settings for the selected scene.
• Some scenes are switched to the following scenes:
Selected scene
Scenes for motion picture
[Baby]
Portrait motion picture
[Night Portrait], [Night Scenery], [Handheld Night Shot]
Low light motion picture
[Sports], [HDR], [Pet]
Normal motion picture
●Selecting a Scene Mode inappropriate for the actual scene may affect the coloring of
your picture.
●The following [Rec] menu settings will be automatically adjusted and cannot be
selected manually.
[Sensitivity], [Metering Mode], [i.Exposure], [Min. Shtr Speed], [i.Resolution],
[Color Mode]
●About using flash in Scene Modes (→67)
- 78 -
Taking pictures with settings matched to the encountered scene [Scene Mode]
• How to select a scene (→78)
• About using flash in Scene Modes (→66)
This mode improves the skin tone of subjects for a healthier appearance in
bright daylight conditions.
[Portrait]
Tip
• The larger the zoom factor in use is and the closer the subject is to the
camera, the greater the effect will be.
This mode smooths skin colors in bright, outdoor daylight conditions
(portraits from chest upwards).
[Soft Skin]
Tip
• The larger the zoom factor in use is and the closer the subject is to the
camera, the greater the effect will be.
This mode takes sharp pictures of wide, distant subjects.
[Scenery]
This mode creates a single panorama picture by stitching together several
pictures taken in rapid succession.
Use the respective cursor buttons to select the recording direction, and press
[MENU/SET] to set.
Check the recording direction and press [MENU/SET]
• Special panorama guidelines will be displayed during recording.
Press the shutter release button halfway to focus
Press the shutter release button fully and pan the camera in a small circular
motion in the selected direction to start recording
• Taking pictures from left to right
[Panorama
Shot]
Pan the camera so that you
make a complete circuit in
approx. 8 seconds
• Pan the camera at a
constant speed.
• You may not be able to
take pictures successfully
if you move the camera too
quickly or too slowly.
• Pan the camera in a small
circular motion.
2 sec.
1 sec.
3 sec.
Press the shutter release button fully again to end recording
• You can also end recording if you stop panning the camera while taking
pictures.
- 79 -
Taking pictures with settings matched to the encountered scene [Scene Mode]
• How to select a scene (→78)
• About using flash in Scene Modes (→66)
Tip
• Pan the camera in the recording direction as steadily as possible.
If the camera shakes too
much, it may not be able to
take pictures or may end up
creating a narrow (small)
panorama picture.
The subjects displayed within the guideline are recorded.
[Panorama
Shot]
(Continued)
Notes
• The zoom position is fixed to the shortest focal length / maximum W setting.
• The focus, White Balance, and Exposure Compensation are all fixed to
optimal values for the first picture.
If the focusing or brightness of pictures recorded as part of a panorama
picture after the first picture are significantly different from those of the first
picture, the panorama picture as a whole (when all pictures are stitched
together) may not have consistent focus and brightness.
• The following functions are fixed to the settings indicated below.
[Stabilizer]: [OFF] [Date Stamp]: [OFF]
• Since several pictures are stitched together to create a panorama picture,
some subjects may be distorted or the joining portions of pictures taken
successively that are stitched may be noticeable.
• The number of recording pixels per horizontal line and vertical line of a
panorama picture varies depending on the recording direction and number of
stitched pictures.
The maximum number of recording pixels is as follows:
- Taking pictures in landscape orientation: Approx. 8000 x 1080
- Taking pictures in portrait orientation: Approx. 1440 x 8000
• Panorama pictures may not be created or pictures may not be recorded
properly when taking pictures of the following subjects or when taking pictures
in the following recording conditions:
- Uniform subjects or those containing a pattern (sky, beach, etc.)
- Moving subjects (persons, pets, vehicles, waves, or flowers swaying in the
wind, etc.)
- Subjects whose colors or patterns change quickly (such as an image
appearing on a display)
- Dark locations
- Locations with a flickering light source (fluorescent lamp, candle light, etc.)
About panorama playback
You can operate the zoom lever or perform touch operations to enlarge still
pictures taken in [Panorama Shot] scene mode in the same way as with other
still pictures. If you play back panorama pictures in the same way as playing
back a motion picture, the panorama pictures are scrolled automatically. (→45)
• Unlike motion picture playback, you cannot perform fast forward or fast rewind
while the panorama pictures are scrolling automatically. (You can perform
single-frame forward or rewind while the automatic scrolling operation is
paused.)
- 80 -
Taking pictures with settings matched to the encountered scene [Scene Mode]
• How to select a scene (→78)
• About using flash in Scene Modes (→66)
This mode is for pictures of scenes with fast movement, e.g. sports.
[Sports]
Tip
• Stand at least 5 m (16 feet) away.
Note
• The shutter speed may slow down up to 1 second.
This mode is for pictures of people and nightscapes with close to actual
brightness.
[Night Portrait]
Tips
• Use flash.
• The subject should not move.
• Using a tripod and/or the self-timer is recommended.
Notes
• The shutter speed may slow down up to 8 seconds.
• After recording, the shutter may stay closed (up to 8 seconds) to process the
signal. This is not a malfunction.
This mode is for sharp pictures of night scenes.
Tip
• Using a tripod and/or the self-timer is recommended.
[Night
Scenery]
Notes
• The shutter speed may slow down up to 8 seconds.
• After recording, the shutter may stay closed (up to 8 seconds) to process the
signal. This is not a malfunction.
This mode is for sharp still pictures of night scenes with less camera
shake and less noise by combining a burst of still pictures.
[Handheld
Night Shot]
Tips
• Stand at least 5 m (16 feet) away.
• After the shutter release button is pressed, serial exposures commence. Hold
the camera still during the complete process.
Note
• Since a series of still pictures are combined after they are recorded, it will take
a few moments before you can take another picture.
- 81 -
Taking pictures with settings matched to the encountered scene [Scene Mode]
• How to select a scene (→78)
• About using flash in Scene Modes (→66)
In this mode, the camera can combine several still pictures taken with
different exposures into a single picture with rich gradation.
Tip
• After the shutter release button is been pressed, serial exposures commence.
Hold the camera still during the complete process.
[HDR]
Notes
• Since a series of still pictures are combined after they are recorded, it will take
a few moments before you can record another picture.
• A subject that was in motion when it was recorded may be rendered as a
double/multiple exposure.
• The camera may take a single still picture instead of several pictures under
certain recording conditions.
For taking natural-looking pictures of food.
[Food]
This mode uses reduced flash output to bring out skin colors.
■ To record age and name
[Baby1] and [Baby2] can be set separately.
[Baby]
Select [Age] or [Name] with the respective cursor buttons, press
[MENU/SET], select [SET], and press [MENU/SET].
Set the birthday and name.
Age: Set birthday with the respective cursor buttons, and press
[MENU/SET].
Name: (See “Entering Text”: (→94))
Use the respective cursor buttons to select [Exit] and press [MENU/SET].
Tip
• Make sure [Age] and [Name] are [ON] before taking a picture.
Notes
• The age display format depends on [Language] setting.
• The shutter speed may slow down up to 1 second.
• A text can be stamped onto the still picture using [Text Stamp].
This mode records a pet’s age and name when taking pictures.
[Pet]
• Refer to [Baby] for other tips and notes.
- 82 -
Taking pictures with settings matched to the encountered scene [Scene Mode]
• How to select a scene (→78)
• About using flash in Scene Modes (→66)
For taking sharp pictures of scenes such as sunsets.
[Sunset]
This mode prevents blurring of subjects in dark, indoor conditions.
[High Sens.]
Select the aspect ratio and the picture size with cursor button and press [MENU/
SET].
This mode is recommended for taking pictures through a window of a
train/vehicle or building.
[Through
window]
Notes
• If there are stains such as dust or a reflection on the window, the camera may
focus on the window surface instead of a subject.
• The color of pictures may appear unnatural due to the color of the window
material. (You may be able to reproduce the appropriate color by adjusting the
White Balance.)
This mode records at a high speed of 220fps, making it ideal for capturing
the details of rapid movements.
Press the motion picture release button to start recording
Press it again to stop recording
• Motion picture recording can also be started or stopped by pressing the
shutter release button. (The touch shutter function will be disabled.)
• During playback, details of a subject’s movements that cannot be seen by
the naked eye can be made recognizable by playing back the motion pictures
using slow motion.
[High Speed
Video]
Notes
• High-speed motion pictures cannot be saved to the built-in memory.
• Motion pictures are recorded in Motion JPEG with a resolution of QVGA
(320x240 pixels). (Up to 2 GB, about 7 minutes 20 seconds at one recording.)
• No sound is recorded.
• Still pictures cannot be recorded while high-speed motion pictures are being
recorded.
• The settings for the focus, zoom, exposure and White Balance are fixed to the
settings specified when recording was started.
• The Optical Image Stabilizer does not work.
• The [AF Mode] is set to
(1-area-focusing).
• Flickering or horizontal stripes may appear while recording under fluorescent
lighting.
- 83 -
Taking 3D pictures
[3D Photo Mode]
Recording mode:
The camera continuously records multiple still pictures while being moved horizontally,
and combines two of them into a 3D still picture.
To view 3D pictures, a television that supports 3D is required (This camera will play back
in 2D). (→159)
Set the mode dial to
• A description of the method is displayed.
Check the instructions, and then press [MENU/SET].
Start the recording and then pan
the camera horizontally straight
from left to right
• A guide is displayed while recording.
• Move the camera approximately 10 cm
(4 inches) within approximately 4 seconds
using the guide.
Tips for 3D pictures
• Select a stationary subject.
• Take pictures with this mode outdoors or in other bright locations.
• Press the shutter release button halfway to fix the focus and the exposure, press it
fully, and then pan the camera.
• Hold the camera so that the subject is slightly to the right of the center on the
display at the start of the recording. This makes it easier to position the subject in
the center of the recorded picture.
●3D still pictures cannot be taken when holding the camera vertically.
●3D still pictures are recorded in MPO format (3D).
●The zoom position is fixed to the shortest focal length / maximum W setting.
●The aspect ratio is fixed to 2 M .
●ISO Sensitivity is automatically adjusted. However, it is increased to allow faster shutter
speeds.
●Motion pictures cannot be recorded.
●When any of the recording conditions listed below exist, it may be impossible to record
any images at all. Or there may be no 3D effect, or the image may be distorted even if a
picture is recorded.
•
•
•
•
When the subject is too dark or too bright
When the subject’s brightness changes
When the subject is moving
When the subject lacks contrast
- 84 -
Registering your own setting combinations
[Custom] Mode
Registering your preferred recording mode, [Rec] menu settings, etc. to [Cust.Set Mem.]
and setting the mode dial to
/
allows you to switch quickly to those settings.
[Cust.Set Mem.]
Up to 4 current camera settings can be registered.
■ Recording modes:
Select the recording mode you wish to register and set the
[Rec] menu, [Motion Picture] menu, [Setup] menu, etc.
Select [Cust.Set Mem.] from the [Setup] menu (→51)
Use the respective cursor buttons to select custom set for
registration and press [MENU/SET]
• A confirmation screen is displayed. Select [Yes] with the respective cursor buttons
and then press [MENU/SET].
• The custom settings registered in [C1] can be used with the
of the mode dial. It
will be convenient if a custom setting used often is registered, since it can be used
by just setting the mode dial.
• The custom settings registered in [C2-1], [C2-2] or [C2-3] can be selected in the
of the mode dial. Up to 3 custom settings can be registered, so select the one
matching the needs.
●The self-timer function cannot be stored in custom set.
●Since certain menu items would be reflected in other recording modes, they are not
saved.
- 85 -
Registering your own setting combinations [Custom] Mode
[Custom]
Settings registered in [Cust.Set Mem.] can be quickly called up by setting the mode dial
to
/
.
■ Recording modes:
Set the mode dial to
/
([Custom] mode)
• When set to
→ The camera switches to the recording mode and settings registered in
• When set to
→ Perform steps
-
.
Use the respective cursor buttons to select custom set
• Use and to confirm the registered settings.
• Only the main menu items are displayed.
Press [MENU/SET] to enter the settings
The camera switches to the recording mode and settings of the selected custom
set.
■When changing the menu settings
Even if the menu settings are changed temporarily when [C1], [C2-1], [C2-2] or
[C2-3] is selected for using the custom set, the currently registered settings will
remain unchanged.
To change the currently registered settings, overwrite the registered data using [Cust.
Set Mem.] (→85) on the [Setup] menu.
■Changing from one
([Custom] menu)
custom setting to another
custom setting
• To use a custom setting for other than the above case, operate the mode dial.
Press [MENU/SET]
Select [Custom] menu and press [MENU/SET]
Use
to select custom set and press [MENU/SET]
■Recording motion pictures in
/
Records motion pictures in registered recording mode.
- 86 -
Taking picture series
Recording modes:
Series of consecutive pictures can be taken by keeping the shutter button fully pressed.
Select [Burst] from the [Rec] menu (→51)
Use the respective cursor buttons to select the exposure
series setting, and press [MENU/SET]
Setting
∗1
Frame rate
Description
No. of
pictures
Approx. 2 - 10
pictures/sec.
• The frame rate is adjusted automatically in
accordance with the movements of people, pets
or other subjects. ([Intelligent Burst mode])
• When a fast-moving subject is recorded, the
frame rate becomes faster and the number
of pictures that can be recorded in a series is
restricted to about 10.
100∗2
• The subject is focused as well as it is possible
during the intervals between the exposures.
The exposure and white balance settings are
controlled for every picture in the series.
(However, when an exposure series is started
during motion picture recording, the focus is
fixed to the first picture.)
• The frame rate may be reduced under certain
recording conditions.
100∗2
Approx. 10
pictures/sec.
• Focus, exposure and White Balance are fixed
to the settings for the first picture.
10
40 pictures/sec.
• Focus, exposure and White Balance are fixed
to the settings for the first picture.
• Consider the resolution setting (→88)
40
60 pictures/sec.
• Focus, exposure and White Balance are fixed
to the settings for the first picture.
• The recordable range is reduced.
• Consider the resolution setting (→88)
60
Complies with
recording
conditions
• Exposure series can be recorded even in low
light conditions as the flash is used. ([Flash
Burst])
• The focus, exposure, and flash level are all
fixed to the settings for the first picture.
• Consider the resolution setting (→88)
5
The series exposure function is canceled.
—
Approx. 2
pictures/sec.
Approx. 5
pictures/sec.
∗3
[OFF]
—
∗1 Only in the
mode
∗2 The number of serially recorded pictures are limited by the picture-taking conditions and the
type and/or status of the card used.
, modes
∗3 Only in the ,
- 87 -
Taking picture series
■Possible resolution settings
[Aspect Ratio]
4:3
5 M, 3 M, 0.3 M
2.5 M, 0.3 M
3M
3:2
4.5 M, 2.5 M, 0.3 M
3 M, 0.3 M
2.5 M
16:9
3.5 M, 2 M, 0.2 M
3.5 M, 0.2 M
2M
1:1
3.5 M, 2.5 M, 0.2 M
2 M, 0.2 M
2.5 M
●Pictures taken with the
or
setting are recorded together as a group (exposure
series group). (→109)
●Depending on changes in the brightness of the subject, the second and subsequent
pictures may be recorded brighter or darker when using the exposure series function at
the
,
,
or
setting.
●The frame rate may be reduced if the shutter speed is reduced in darker locations.
●The pictures taken using the exposure series function at the or setting may be
distorted if the subjects were moving or the camera was moved.
●[Auto Bracket] is deactivated.
●The flash is set to [Forced Flash Off]. (However, when [Flash Burst] is selected,
the flash is fixed to
[Forced Flash On].)
●Settings will be stored even if power is turned off.
●The exposure series function cannot be used in the following cases:
• With [Creative Control] modes ([Toy Effect] [Miniature Effect] [Soft Focus])
• With Scene Modes ([Panorama Shot] [Handheld Night Shot] [HDR] [High Speed
Video])
●When the scene mode is set to [Night Portrait], [Night Scenery] or [High Sens.], or
cannot be selected.
●When [Selftimer] is set, 3 pictures are taken. (When [Flash Burst] is set, 5 pictures are
taken.)
●It may take a while to store still pictures that were taken using the exposure series
function.
●Zooming is not possible during an exposure series recording.
- 88 -
Taking pictures with the Face Recognition function
[Face Recog.]
Recording modes:
• The default [Face Recog.] setting is [OFF].
• When faces are registered, the setting will be [ON] automatically.
■How the Face Recognition function works
During recording
(When [AF Mode] is
(Face Detection))
• The camera recognizes a registered face and adjusts focus and
exposure accordingly.
• When registered faces that have set names are recognized, the
names are displayed (up to 3 people).
During playback
• The name and age are displayed (if information is registered).
• The names that have been set for the recognized faces are displayed (up to 3 people).
• Only pictures of the selected registered people are played back ([Category Selection]).
■Recording tips when registering faces
• Make sure the person’s eyes are open and mouth closed; have the person face the camera
directly, and make sure the outline of the face, the eyes and eyebrows are not hidden by hair.
• Make sure there are no heavy shadows on the face. (During registration, the flash is not used.)
■If the camera seems to have difficulty recognizing faces when recording
• Register additional pictures of the same person’s face, indoors and outdoors or with different
expressions or angles.
• Register additional pictures at the place you are recording.
• If a registered person is no longer recognized, re-register that person.
●During an exposure series, recording information relating to Face Recognition is based
only on the first picture.
●If you press the shutter release button halfway, then point the camera at a different
person and record, recording information for that picture may be based on another
person.
●Face Recognition does not work in the following cases:
• With [Creative Control] mode ([Miniature Effect] [Soft Focus])
• With the Scene Modes ([Panorama Shot] [Night Scenery] [Handheld Night Shot]
[Food])
• With motion picture
●Face Recognition searches for faces similar to those registered, but there is no
guarantee it will always recognize these faces. In some cases, the camera cannot
recognize or incorrectly recognizes even registered people depending on their
expression or the environment.
●Even if Face Recognition information is registered, pictures recorded when the name is
[OFF] are not categorized for Face Recognition in [Category Selection].
●Even if Face Recognition information is changed, the Face Recognition
information for previously recorded pictures is not changed.
For example, if a name is changed, pictures recorded before the change are not
categorized for Face Recognition in [Category Selection].
●To change name information for pictures already recorded, perform a [REPLACE] (→125)
in [Face Rec Edit].
- 89 -
Taking pictures with the Face Recognition function
Registering faces
Up to 6 person’s faces can be registered along with such information as name and
birthdate.
You can improve the Face Recognition by registering a face more than once. Up to
3 pictures can be utilized to register a face.
Select [Face Recog.] from the [Rec] menu (→51)
Select [MEMORY] with the respective cursor buttons and then
press [MENU/SET]
Select [New] with the respective cursor buttons and then
press [MENU/SET]
• If 6 persons are already registered, first delete a registered person. (→91)
Record the face picture
Align the face with the guide and record.
Select [Yes] with the respective cursor buttons and then
press [MENU/SET].
• If re-recording, select [No]
• Faces of subjects other than persons (e.g. pets) cannot be
registered.
• When the [DISP.] button is pressed, an explanation is
displayed.
Use the respective cursor buttons to select the item for editing
and press [MENU/SET]
[Name]
Select [SET] with the respective cursor buttons and then press
[MENU/SET]
Enter the name (Entering text →94)
[Age]
Set the birthdate.
Select [SET] with the respective cursor buttons and then press
[MENU/SET]
Use
to select year, month and day, set with
, and press
[MENU/SET]
[Focus Icon]
Change the icon that is displayed when the subject is in focus.
Select the focus icon with the respective cursor buttons and then press
[MENU/SET]
[Add Images]
Up to 3 face pictures of the person can be registered.
Select an unregistered frame and press [MENU/SET]
• When a registered face picture is selected with the respective cursor
buttons, a screen to confirm deletion is displayed. Select [Yes] to delete
the face picture. (If only one picture is registered, it cannot be deleted.)
Record the picture (Step
above.)
Press [ / ] button
- 90 -
Taking pictures with the Face Recognition function
Editing or deleting information about registered persons
Information about registered people can be edited or deleted.
Select [Face Recog.] in the [Rec] menu (→51)
Select [MEMORY] with the respective cursor buttons and then
press [MENU/SET]
Use the respective cursor buttons to select the face to be
edited or deleted
Use the respective cursor buttons to select the item and press
[MENU/SET]
[Info Edit]
For editing a name or other registered information. (→90)
[Priority]
For setting the priority order for focus and exposure.
Select the registration order with the respective cursor buttons and then
press [MENU/SET]
[Delete]
For deleting information and faces of registered persons.
- 91 -
Useful features for travel
[Travel Date]
• For [Setup] menu setting procedures (→51)
If you set your travel schedule and take pictures, the day of your trip on which they were
taken will be registered.
■ Recording modes: ∗
∗ Recording only. (Cannot be set.)
Select [Travel Date] in the [Setup] menu (→51)
Use the respective cursor buttons to select [Travel Setup] and
press [MENU/SET]
Use the respective cursor buttons to select [SET] and press
[MENU/SET]
Use the respective cursor buttons to select the departure date
and press [MENU/SET]
Use the respective cursor buttons to select the return date
and press [MENU/SET]
■To register [Location]
Once the [Travel Setup] is set, you can set the location.
Select [Location] in step
above
Use the respective cursor buttons to select [SET] and press [MENU/SET]
Enter your location (Entering text →94)
●The travel date is calculated from the set departure date and the date set on the
camera’s clock. When destination is set in [World Time], the days elapsed are
calculated based on local destination time.
●When [Travel Setup] is set to [OFF], the number of days elapsed is not registered. It is
not displayed even if [Travel Setup] is set to [SET] after registering.
●If settings are made before departure date, the number of days to departure are not
registered.
●The [Location] is recorded separately from the location name information which is
registered on the pictures by the GPS function.
●To print [Location] or the number of days that have passed, use [Text Stamp].
●[Travel Date] cannot be set for AVCHD motion pictures recorded when [Rec Quality] is
set to [PSH], [FSH] or [SH].
- 92 -
Useful features for travel
[World Time]
• For [Setup] menu setting procedures (→51)
Set the recording date and time with the local time at your destination.
■ Recording modes:
■ Preparation: Set [Auto Clock Set] to [OFF]. (→139)
Select [World Time] from the [Setup] menu (→51)
• A message will be displayed when setting for the first time. In this case, press
[MENU/SET] and skip to step .
Use the respective cursor buttons to select [Home] or
[Destination] and press [MENU/SET]
Use the respective cursor buttons to select area and press
[MENU/SET]
Current time at selected
destination
City/area name
Difference to home time
When [Destination] has been selected
■To set summer time
Press in step . (Press again to cancel the setting)
• When summer time is set, the current time is advanced by 1 hour. If the setting is
canceled, the time automatically returns to the current time.
●If you cannot find your destination in the area displayed on the screen, set it based on
the difference to the home time.
is displayed on the screen for pictures recorded at the destination when they are
played back.
●When [Auto Clock Set] is set to [ON], only the summer time setting of [Destination] can
be changed.
●
- 93 -
Entering Text
Use the respective cursor buttons to enter names with the Face Recognition function and
in Scene Modes [Baby] and [Pet], or to register locations in [Travel Date] etc.
Use the respective cursor buttons to select characters
Press [MENU/SET] several times until the desired character is
displayed
The text is inserted at the cursor position.
• To change the character type
→ Select
, and press [MENU/SET].
Cursor position
■ Editing text
Use the respective cursor buttons to select
and press [MENU/SET]. Then,
move the cursor to the text to edit
• You can also use the zoom lever to reposition the cursor.
Use the respective cursor buttons to select [Delete], and then press
[MENU/SET]
Use the respective cursor buttons to select the correct text, and then press
[MENU/SET]
When you are finished entering text, use the respective cursor
buttons to select [Set] and press [MENU/SET]
●A maximum of 30 characters can be entered. (A maximum of 9 characters for [Face
Recog.] names)
- 94 -
Using the [Rec] menu
[Aspect Ratio]
• For [Rec] menu setting procedures (→51)
The aspect ratio of still picture can be changed according to printing or playback format.
■ Recording modes:
■ Settings:
/
/
/
●The edges may be cut off when printing – be sure to check in advance.
[Picture Size]
• For [Rec] menu setting procedures (→51)
Set the resolution (number of pixels) for the pictures. The number of pictures which can
be recorded depends on this setting and on [Quality].
■ Recording modes:
■ Settings:
14 M
4320×3240
10 M ∗
3648×2736
Resolution ([Aspect Ratio]:
)
5M
7M ∗
3072×2304
2560×1920
3M ∗
2048×1536
0.3 M
640×480
9M ∗
3648×2432
Resolution ([Aspect Ratio]:
6M ∗
4.5 M ∗
3072×2048
2560×1712
)
12.5 M
4320×2880
2.5 M ∗
2048×1360
0.3 M ∗
640×424
7.5 M ∗
3648×2056
Resolution ([Aspect Ratio]:
5.5 M ∗
3.5 M ∗
3072×1728
2560×1440
)
10.5 M
4320×2432
2M ∗
1920×1080
0.2 M ∗
640×360
10.5 M
3232×3232
7.5 M ∗
2736×2736
2.5 M ∗
1536×1536
0.2 M ∗
480×480
∗ This setting is not available in
Resolution ([Aspect Ratio]: )
5.5 M ∗
3.5 M ∗
2304×2304
1920×1920
([Snapshot Mode]).
●A mosaic effect may appear depending on the subject and recording conditions.
Setting guide
Higher resolution
Lower resolution
Crisper picture
Coarser picture
Lower recording
capacity
Higher recording
capacity
- 95 -
Using the [Rec] menu
[Quality]
• For [Rec] menu setting procedures (→51)
For setting the quality of picture.
■ Recording modes:
■ Settings:
([Fine]) High quality, priority to picture quality
([Standard]) Standard quality, priority to the number of pictures
●The setting is fixed to , in [High Sens.] Scene Mode.
●When [3D Photo Mode] is selected, the displayed icons are different:
([3D+Fine]): An MPO picture and a high quality JPEG picture are recorded
simultaneously.
([3D+Standard]): An MPO picture and a standard quality JPEG picture are recorded
simultaneously.
[Sensitivity]
• For [Rec] menu setting procedures (→51)
For setting ISO Sensitivity (sensitivity to lighting) manually.
We recommend higher settings to take better pictures in darker locations.
■ Recording modes:
■ Settings: [AUTO] /
[Intelligent ISO] / [100] / [200] / [400] / [800] / [1600] / [3200]
Setting guide
[Sensitivity]
Location
(recommended)
Shutter speed
Interference
Subject blur
[100]
Bright
(outdoors)
Slow
Low
High
[3200]
Dark
Fast
High
Low
●[AUTO] is automatically set in a range up to 800 (1600 when flash is used) based on
subject brightness.
[Intelligent ISO] is automatically set in a range up to 1600 based on subject
movement and brightness.
●The [Sensitivity] is automatically set in the following cases:
• When recording motion pictures
• When [Burst] is set to [Flash Burst]
●
- 96 -
Using the [Rec] menu
[White Balance]
• For [Rec] menu setting procedures (→51)
Adjust the coloring to suit the light source if colors otherwise appear unnatural.
■ Recording modes:
■ Settings: [AWB] (automatic) /
(outdoor, clear sky) /
(outdoor, cloudy sky) /
(outdoor, shade) /
(Incandescent lighting) /
(uses value set in
)/
(set manually)
●When [AWB] (Automatic White Balance) is set, the coloring is adjusted in accordance
with the light source. However, if the scene is too bright or too dark or if other extreme
conditions apply, the pictures may appear reddish or bluish. The White Balance may
not operate correctly if there are multiple light sources.
●Under fluorescent lighting, LED lighting fixture etc., the appropriate White Balance will
vary depending on the lighting type, so use [AWB] or
.
●White Balance setting is fixed to [AWB] in the following cases:
Scene Modes ([Scenery], [Night Portrait], [Night Scenery], [Handheld Night Shot],
[Food], [Sunset])
●Even if the camera’s power is OFF, the set White Balance is remembered. (If the Scene
Mode is changed, the white balance setting returns automatically to [AWB].)
■ White Balance fine adjustment (excluding [AWB])
White Balance settings can be individually fine-tuned if colors still do not appear as
anticipated.
Select the white balance to be fine-tuned, and press the [DISP.] button to display the
[WB Adjust.] screen
Adjust with if reds are strong, adjust with if blues are strong
Press [MENU/SET]
• Settings are remembered even if power is turned off.
• Settings remain applied when using flash.
• Fine adjustments cannot be made when [Color Mode] (→103) is set to [B&W] or
[SEPIA].
- 97 -
Using the [Rec] menu
■ Setting White Balance manually (
)
Select
and press [MENU/SET]
Point the camera at a white object (e.g. paper) and press [MENU/SET]
White Balance is set to
.
• Even if the camera’s power is OFF, the White Balance setting is remembered.
• It may not be possible to set the correct White Balance if subjects are too bright or too
dark. In this case, adjust the brightness and try to set the White Balance again.
■ [AWB] operational range:
10000K
9000K
Blue sky
8000K
7000K
6000K
5000K
4000K
3000K
2000K
Overcast sky (rain)
Shade
Sunlight
White fluorescent lighting
Incandescent lighting
Sunset/sunrise
Candlelight
- 98 -
Using the [Rec] menu
[AF Mode]
• For [Rec] menu setting procedures (→51)
The focus setting mode can be changed according to position and number of subjects.
■ Recording modes:
■ Settings:
/
/
Taking front-on
pictures of persons
/
/
Recognizes faces (up to 15 persons) and adjusts exposure and
focus accordingly.
AF area
Yellow: When the shutter release button is
pressed halfway, the frame turns
green when the camera is focused.
White: Displayed when more than one face
is detected. Other faces that are the
same distance away as faces within
the yellow AF area are also focused.
(Face Detection)
For automatically
locking the focus on
a moving subject
(AF Tracking)
Touch the subject
AF Tracking frame
When the subject is recognized, the AF
tracking frame changes from white to yellow,
and the subject is automatically kept in focus.
If AF Lock fails, a red frame flashes.
• Perform these operations with the touch shutter function (→29)
activated.
• To deactivate AF tracking → Touch .
• About focus range (same as macro recording) (→68)
• You can also use to perform this function.
Subject not centered
in picture
Focuses on up to 23 points.
(23-area-focusing)
Determined position
for focusing
(1-area-focusing)
(Spot-focusing)
1-area-focusing: Focuses on AF area in the center of the picture.
(Recommended when focusing is difficult)
Spot-focusing: Focuses on a smaller, limited area.
- 99 -
Using the [Rec] menu
●Focus is fixed to
(1-area-focusing) in the following cases:
• [High Speed Video] scene mode
• [Miniature Effect] in [Creative Control] mode
●Use (1-area-focusing) if focusing is difficult with (Spot-focusing).
● (Face Detection) cannot be set the following cases:
• Scene Modes ([Panorama Shot] [Night Scenery] [Handheld Night Shot] [Food])
• [Creative Control] Mode ([Soft Focus])
●If the camera misinterprets a non-human subject as a face in (Face Detection)
setting, switch to another setting.
●If conditions prevent the face from being recognized, such as when the movement of
the subject is too rapid, the [AF Mode] setting switches to
(23-area-focusing).
●Under certain recording conditions, such as when the subject is small or dark, (AF
Tracking) may not operate correctly.
When
(AF Tracking) does not work, focusing will be set to
(23-area-focusing).
●Cannot set to (AF Tracking) in the following cases.
• [Panorama Shot] Scene Mode
• [B&W] and [SEPIA] in [Color Mode]
• [Creative Control] Mode ([Sepia] [Dynamic Monochrome] [High Dynamic]
[Toy Effect] [Soft Focus])
●When (23-area-focusing) or (Spot-focusing) is set, the [AF Mode] setting at the
time of motion picture recording switches to
(1-area-focusing).
[Quick AF]
• For [Rec] menu setting procedures (→51)
Focusing is performed automatically when camera blurring is small even when the shutter
release button is not pressed. (Increases battery consumption)
■ Recording modes:
■ Settings: [ON] / [OFF]
●Focusing may take time in case of zooming from maximum wide to maximum tele
setting, or if the distance to the subject is suddenly reduced.
●Press the shutter release button if the distance to the subject is suddenly reduced.
●This function will turn [OFF] in the following cases.
[Night Portrait], [Night Scenery], [Handheld Night Shot] and [High Speed Video] Scene
Modes
●[Quick AF] will not work while AF Tracking is operating.
- 100 -
Using the [Rec] menu
[Face Recog.]
• For [Rec] menu setting procedures (→51)
For details (→89).
[Metering Mode]
• For [Rec] menu setting procedures (→51)
This function allows adapting the metering mode to different subjects and situations.
■ Recording modes:
■ Settings:
[Metering Mode]
Metering characteristics
The brightness is detected in different
sections of the frame. The exposure
is then based on the probable main
subject
Conditions
Normal usage (high probability of
automatically correctly exposed
main subjects even with greater
brightness differences)
[Center
Weighted]
The metering sensitivity is
concentrated on the center while also
registering the rest of the frame
Use when subject is in the center,
or to deliberately base the exposure
on an off-center subject (provided,
subject is of medium brightness)
[Spot]
Only a small area in the center is
registered
Use to base the exposure on very
small subject parts (provided, these
parts are of medium brightness)
[Multi
Metering]
[i.Exposure]
• For [Rec] menu setting procedures (→51)
Automatically adjusts contrast and exposure to give more lifelike colors when there is
significant contrast between background and subject.
■ Recording modes:
■ Settings:
[LOW] /
[STANDARD] /
[HIGH] / [OFF]
●[LOW], [STANDARD] and [HIGH] indicate the maximum range of correction.
●When [i.Exposure] works, the color of changes.
●Even if [Sensitivity] is set to [100], when [i.Exposure] is activated, pictures may be taken
at a higher ISO Sensitivity than the setting.
- 101 -
Using the [Rec] menu
[Min. Shtr Speed]
• For [Rec] menu setting procedures (→51)
Allows extending the shutter speed range for automatic exposure control modes. We
recommend using slower shutter speeds to take brighter pictures in dark locations.
■ Recording modes:
■ Settings: [AUTO]
[1/250] [1/125] [1/60] [1/30] [1/15] [1/8] [1/4] [1/2] [1]
●Slower shutter speeds allow for brighter pictures but increase the risk of camera shake,
so we recommend using a tripod and the self-timer.
●As still pictures may become dark when using faster speeds such as [1/250], we
recommend that still pictures are taken in bright locations (
flashes red when the
shutter release button is pressed halfway if the picture will be dark).
● is displayed on screen for settings other than [AUTO].
[i.Resolution]
• For [Rec] menu setting procedures (→51)
You can use the camera’s Intelligent Resolution technology to record still pictures with
sharper outlines and clearer resolution. Also, when [i.ZOOM] is set, the zoom ratio can be
increased two times higher than the original zoom ratio with limited deterioration of picture
quality.
■ Recording modes:
■ Settings: [ON] / [i.ZOOM] / [OFF]
●About [i.ZOOM] (→65)
[Digital Zoom]
• For [Rec] menu setting procedures (→51)
Zoom 4 times further than Optical/Extra optical zoom. (Note that enlarging will decrease
picture quality with Digital Zoom.)
■ Recording modes:
■ Settings: [ON] / [OFF]
●This mode is fixed to [ON] when [Macro Zoom] is set.
●When Digital Zoom is used simultaneously with i.Zoom, you can only increase the
zoom ratio up to 2 times.
- 102 -
Using the [Rec] menu
[Burst]
• For [Rec] menu setting procedures (→51)
For details (→87).
[Color Mode]
• For [Rec] menu setting procedures (→51)
For setting color effects.
■ Recording modes:
■ Settings: [STANDARD] / [VIVID]∗1 (sharper) / [B&W] / [SEPIA] / [Happy]∗2
∗1 Except [Snapshot Mode]
∗2 [Snapshot Mode] only
[AF Assist Lamp]
• For [Rec] menu setting procedures (→51)
Switches on the lamp to facilitate focusing in dark conditions.
■ Recording modes:
■ Settings: [ON] : Lamp illuminated with halfway press of the shutter
release button
[OFF] : Lamp off (for taking pictures of animals in the
dark, etc.)
●The AF Assist Lamp has an effective distance of 1.5 m (4.9 feet).
• Do not cover the lamp with your fingers or look at it from close
range.
●The setting is fixed to [OFF] in the following Scene Modes:
[Scenery] [Night Scenery] [Handheld Night Shot] [Sunset]
[Through window] [High Speed Video]
- 103 -
AF Assist Lamp
Using the [Rec] menu
[Red-Eye Removal]
• For [Rec] menu setting procedures (→51)
This mode automatically detects the red-eye effect and corrects still picture data when
recording with flash red-eye reduction (
).
■ Recording modes:
■ Settings: [ON] / [OFF]
●This mode setting will work only when [AF Mode] is set to (Face Detection).
●Depending on the circumstances, it may not be possible to correct the red-eye effect.
●When the function setting is [ON], appears with the flash icon.
[Stabilizer]
• For [Rec] menu setting procedures (→51)
This mode automatically detects and prevents camera shake.
When recording motion pictures, [Active Mode] (stabilizer for motion pictures) will
automatically function. This decreases the camera shake effect while walking, etc.
■ Recording modes:
■ Settings: [ON] / [OFF]
●The setting is fixed to [ON] in [Handheld Night Shot] Scene Mode.
●The setting is fixed to [OFF] in the following Scene Modes:
• [Panorama Shot] Scene Mode
• [High Speed Video] Scene Mode
●Cases where Optical Image Stabilizer may be ineffective:
Heavy camera shake, high zoom ratios (also in the Digital Zoom range), fast-moving
objects, indoors or in dark locations (due to low shutter speed)
●In [Active Mode], a stronger compensation effect can be achieved with shorter focal
lengths (wideangle).
●In the following case, [Active Mode] will not function even when recording motion
pictures.
• When the recording mode is set to [VGA] in [MP4].
- 104 -
Using the [Rec] menu
[Date Stamp]
• For [Rec] menu setting procedures (→51)
Still pictures can be taken with the recording date and time stamped on the still picture.
■ Recording modes:
■ Settings: [W/O TIME] / [WITH TIME] / [OFF]
●Date stamps on still pictures cannot be erased.
●The date cannot be stamped when [Auto Bracket] or [Burst] is set, when recording a
motion picture, or when the [Panorama Shot] or [High Speed Video] Scene Modes are
set.
●Do not request date printing in a store or make date printing on a printer for still pictures
with date stamps. (Date printing may be overlapping.)
●The setting cannot be changed in [Snapshot Mode]. The setting in other Recording
Modes is applied.
[Clock Set]
• For [Rec] menu setting procedures (→51)
For setting the clock. Same function as that in [Setup] menu.
- 105 -
Using the [Motion Picture] menu
[Rec Mode]
• For [Motion Picture] menu setting procedures (→51)
For setting the data format of the motion picture that is recorded.
■ Recording modes:
■ Settings:
[AVCHD]
• This is a data format suitable for playback on high-definition TVs.
[MP4]
• This data format is suited for playing back motion pictures on a computer and other
such devices.
●For details (→38)
- 106 -
Using the [Motion Picture] menu
[Rec Quality]
• For [Motion Picture] menu setting procedures (→51)
For setting the resolution of the motion picture that is recorded.
■ Recording modes:
■ Settings:
[AVCHD] in [Rec Mode]
Item
Resolution/Bit rate
fps
[GPH]
2 / 50p∗3
∗
1920×1080
pixels/Approx.
28
Mbps
60p
[PSH]∗1
[GFS]
1920×1080 pixels/Approx. 17 Mbps
60i∗2 / 50i∗3
[FSH]∗1
[GS]
1280×720 pixels/Approx. 17 Mbps
60p∗2 / 50p∗3
[SH]∗1
∗1 The positioning location and place name information are not recorded.
[Aspect Ratio]
16:9
[MP4] in [Rec Mode]
Item
Resolution/Bit rate
[FHD]
1920×1080 pixels/Approx. 20 Mbps
[HD]
1280×720 pixels/Approx. 10 Mbps
[VGA]
640×480 pixels/Approx. 4 Mbps
∗2 With camera models 18 176 / 18 177
∗3 With camera model 18 175
●What is a bit rate
fps
[Aspect Ratio]
30∗2 / 25∗3
16:9
4:3
This is the volume of data for a defined period of time, and the quality becomes higher
when the number gets bigger. This unit uses the “VBR” recording method. “VBR” is an
abbreviation of “Variable Bit Rate”, and the bit rate (volume of data for a defined period
of time) is changed automatically depending on the subject being recorded. Therefore,
the recording time is shortened when a subject with fast movement is recorded.
●Motion pictures recorded using [High Speed Video] Scene Mode are recorded in Motion
JPEG with a resolution of QVGA (320×240 pixels).
- 107 -
Using the [Motion Picture] menu
[Continuous AF]
• For [Motion Picture] menu setting procedures (→51)
This mode allows either constant focusing during motion picture recording, or determining
the focus setting at the start of recording.
■ Recording modes:
■ Settings: [ON]
[OFF]: Determines the focusing setting at the start of motion picture
recording.
[Wind Cut]
• For [Motion Picture] menu setting procedures (→51)
This mode automatically detects wind sounds (wind noise) captured by the microphone
and suppresses the sound if the wind is blowing too strongly.
■ Recording modes:
■ Settings: [AUTO] / [OFF]
●When [Wind Cut] is set to [AUTO], the sound quality may differ from that of normal
recordings.
●The setting is fixed to [OFF] in the following cases:
• [Miniature Effect] of the [Creative Control] Mode
• [High Speed Video] scene mode
- 108 -
Playing back still pictures recorded using the
serial exposure function
Pictures taken with the
exposure group).
or
setting are recorded together as a group (serial
■Representative picture display
A representative picture (first picture of the series) is displayed when it is displayed
together with other still pictures or with motion pictures.
• All the pictures in a serial exposure group can be deleted
or edited together.
• Continuous playback can be performed using the same
operations as for motion pictures. (→45)
■Display within each serial exposure group
Still pictures recorded in a single serial exposure group can be displayed separately or
as a list.
Touch
The display within each serial exposure group appears on the screen.
On the display within each serial exposure group, only
the serial exposure picture groups are displayed.
• To return to the representative screen display
→ Touch
.
■Re-acquiring the serial exposure group information
When the power is turned on, the
(acquiring information icon) may appear.
While
is displayed, pictures cannot be deleted and the [Playback] menu cannot
be used. Only [Normal Play] or [Calendar] is available as the [Playback Mode].
- 109 -
Playing back still pictures recorded using the serial exposure function
●[Playback] menu items cannot be used while the display appears within each serial
exposure group.
●Serial exposure picture cannot be displayed as a group during [GPS Area Play] or
[Favorite] playback with [Slide Show] or [Filtering Play].
●[Cropping] cannot be performed together for all the pictures in a serial exposure group.
●Serial exposure recorded after the total number of pictures has exceeded 50,000 will
not be grouped.
If only one picture is left over in a serial exposure group after deletion or other
operations, it will not be formed into a group, either.
●The serial exposure recorded by another device may not be recognized as a serial
exposure group.
●Serial exposure will not be grouped if recorded without setting the clock.
- 110 -
Different playback methods
[Playback Mode]
Recorded pictures can be played back in a variety of ways.
Press [MENU/SET] in playback mode
The menu selection screen is displayed.
Use the respective cursor buttons to select [Playback Mode]
menu and press [MENU/SET]
• The menu type can also be selected by touch operations.
Use the respective cursor buttons to select the playback
method and press [MENU/SET]
• [Normal Play] (→42)
• [2D/3D Settings] (→160)
• [Slide Show] (→112)
• [Filtering Play] (→114)
• [Calendar] (→114)
●When no card is inserted, pictures are played back from the built-in memory.
●The [Playback Mode] automatically becomes [Normal Play] when the REC/PLAY switch
is set to
and the power is turned on, or when switching from recording mode to
playback mode.
[2D/3D Settings]
• For switching [Playback Mode] (above)
The playback method for the 3D pictures can be switched. This menu is only displayed
during HDMI output. For the procedure for playing back a 3D still picture (→159).
- 111 -
Different playback methods
[Slide Show]
• For switching [Playback Mode] (→111)
For automatically playing back pictures in a certain order and to music. Recommended
when viewing on TV screen.
Use the respective cursor buttons to select the playback
method and press [MENU/SET]
[All]
Plays back all pictures.
[Picture Only]
Plays back still pictures.
[Motion Pic. Only]
Plays back motion pictures.
[3D Play]
Plays back only 3D still pictures that were recorded in [3D Photo
Mode].
[GPS Area Play]
For selecting place name or landmark to play back pictures recorded in
the same place. (Use the respective cursor buttons to select the place
name or the landmark and then press [MENU/SET].)
[Travel]
Plays back only pictures that were recorded with the [Travel Setup] or
[Location]. (→114)
[Category
Selection]
For selecting category and playing back motion or still pictures.
(Select category with the respective cursor buttons and press
[MENU/SET].) (→114)
[Favorite]
Plays back the pictures set as [Favorite]. (→122)
Use the respective cursor buttons to set playback effects and
press [MENU/SET]
[Effect] (For selecting music and effects according to the picture atmosphere)
[AUTO] (only available with [Category Selection] setting) / [NATURAL] / [SLOW] / [SWING] /
[URBAN] / [OFF]∗
[Setup]
[Duration]
[1SEC] / [2SEC] / [3SEC] / [5SEC] (Only available when [Effect] is [OFF])
[Repeat]
[ON] / [OFF]
[Sound]
[OFF]: Music and audio will not play back.
[AUTO]: With still pictures, music will play back, and with motion pictures,
audio will play back.
[Music]: Music effect will play back.
[Audio]: Audio is played back from motion pictures.
∗ In the following case, [Effect] is fixed to [OFF].
• [Motion Pic. Only]
• [Burst] of [Category Selection]
Select [Start] with the respective cursor buttons and press
[MENU/SET]
- 112 -
Different playback methods
■Operations during Slide Show
The operation guide appears on the bottom right of the monitor.
• If you do not perform any operation for approx. 2 seconds, the operation guide is
turned off. To display the guide again, press the [DISP.] button.
During motion picture/
serial exposure group/
panorama picture playback
During still picture playback
Pause/play
Pause/play
Previous
Next
Stop
Stop
Volume down
(While paused)
Next
(While paused)
Previous
Volume down
Volume up
Volume up
●When [URBAN] has been selected, the picture may appear in black and white as a
screen effect.
●When panorama pictures are played back, the [Duration] setting is disabled.
●Part of [Effect] cannot be used when displaying pictures on television using the HDMI
mini cable (available as accessory →9) or when displaying pictures recorded in portrait
format.
●Music effects cannot be added.
- 113 -
Different playback methods
[Filtering Play]
• For switching [Playback Mode] (→111)
You can refine the selection of pictures to be viewed by narrowing them down to pictures
in selected categories or to favorite pictures, and then view those pictures.
Select the filtering method using the respective cursor
buttons, and press [MENU/SET]
[Picture Only]
Plays back still pictures
[Video Only]
Plays back motion pictures
[3D Play]
Plays back only 3D still pictures that were recorded in [3D Photo Mode].
[GPS Area
Play]
For selecting the location name of the place where the pictures were taken
or the landmark name, and playing the pictures back.
Select the region whose pictures are to be played back using the
respective cursor buttons, and press [MENU/SET].
Select the location name or landmark name using the respective cursor
buttons, and press [MENU/SET].
[Travel]
Plays back pictures with [Travel Date] that have been set at the time of their
recording.
Select whether to play back the pictures by date or by travel location
using the respective cursor buttons, and press [MENU/SET].
• When [All] is selected, the pictures recorded with [Travel Date] are
played back.
Select the date or travel location using the respective cursor buttons, and
press [MENU/SET].
[Category
Selection]
Plays back pictures that have been narrowed down by category, such as
Scene Mode.
Select the category using the respective cursor buttons, and press
[MENU/SET].
Pictures taken using Face Recognition
[Portrait] /
/ [Soft Skin] / [Night Portrait] /
/ [Baby] /
[Scenery] /
/ [Panorama Shot] / [Sunset] /
/ [Through window]
[Night Portrait] /
/ [Night Scenery] /
/ [Handheld Night Shot] /
[Sports]
[Baby] /
[Pet]
[Food]
[Burst] (
[Favorite]
or
only)
Plays back pictures set as [Favorite]. (→122)
[Calendar]
• For switching [Playback Mode] (→111)
For selecting the date from the calendar screen to view only the pictures taken on that
day. (→44)
- 114 -
Retouching pictures
[Auto Retouch]
With this mode, you can adjust the color and brightness of a still picture to bring them into
balance.
• New pictures are created after editing pictures with [Auto Retouch]. Before starting to
edit, make sure that there is enough free space in the built-in memory or the memory
card.
• Example picture
Select a still picture to retouch during playback and press
Use the respective cursor buttons to select [Auto Retouch]
and press [MENU/SET]
Use the respective cursor buttons to select [ON] and press
[MENU/SET]
• A confirmation screen is displayed. If you select [Yes], the new retouched still
picture is saved.
• When [OFF] is selected, you can restore a picture to its original condition (before
retouching).
●The retouch effect may be less apparent in some still pictures.
●Some still pictures may have higher noise levels after retouching.
●It may not be possible to use [Auto Retouch] with still pictures that have already been
retouched.
●It may not be possible to retouch still pictures recorded with other cameras.
●You cannot retouch the pictures in a serial exposure group together as a group.
Retouch each picture in a serial exposure group after displaying it.
●[Auto Retouch] is not available in the following cases:
• Motion pictures
• Still pictures recorded in [Panorama Shot] Scene Mode
• 3D still pictures
- 115 -
Retouching pictures
[Creative Retouch]
With this mode, you can retouch recorded still pictures by selecting the effect that you
want to apply.
• New pictures are created after editing pictures with [Creative Retouch]. Before starting
to edit, make sure that there is enough free space in the built-in memory or the memory
card.
Select a still picture to retouch during playback and press
Use the respective cursor buttons to select [Creative Retouch]
and press [MENU/SET]
Press
to select a setting
• The picture retouched with the selected effect is displayed.
• When [OFF] is selected, you can restore a picture to its original condition (before
retouching).
Setting
Effect
[EXPS]
[Expressive]
This picture effect creates a pop art style picture that
enhances the color.
[RETR]
[Retro]
This picture effect creates the soft appearance of a tarnished
picture.
[HKEY]
[High Key]
This picture effect creates a brighter and lighter toned
appearance for the entire picture.
[MONO]
[Dynamic Monochrome]
This picture effect creates a monochromatic picture with a
higher contrast and more dramatic atmosphere.
[TOY]
[Toy Effect]
This picture effect creates a picture that resembles those
taken by a toy camera with a reduced amount of peripheral
light.
• About adjusting color hue
→ Press the [DISP.] button and use the respective cursor
buttons to select the color hues.
[SOFT]
[Soft Focus]
This picture effect creates a soft appearance by intentionally
blurring the entire picture.
Press [MENU/SET]
• A confirmation screen is displayed. If you select [Yes], the new retouched still
picture is saved.
●The retouch effect may be less apparent in some still pictures.
●It may not be possible to retouch still pictures recorded with other cameras.
●You cannot retouch the pictures in a serial exposure group together as a group.
Retouch each picture in a serial exposure group after displaying it.
●[Creative Retouch] is not available in the following cases:
• Motion pictures
• Still pictures recorded in [Panorama Shot] Scene Mode
• 3D still pictures
- 116 -
Using the [Playback] menu
With this mode, you can edit a selected picture (e.g. trim it), mark it as protected, a.s.o..
• For [Playback] menu display and operation methods (→51)
• Depending on the [Playback Mode], some [Playback] menu items are not displayed.
• It may not be possible to set or edit pictures taken with other cameras.
• New pictures are created after editing pictures with tools such as [Text Stamp], [Resize]
and [Cropping]. Before starting to edit, make sure that there is enough free space in the
built-in memory or the memory card.
[Title Edit]
• For [Playback] menu display and operation methods (→51).
With this mode, you can give titles, etc. to your favorite still pictures.
Use the respective cursor buttons to select [SINGLE] or
[MULTI], and then press [MENU/SET]
Select a still picture
●[SINGLE]
Use the respective cursor
buttons to select a still picture
and press [MENU/SET]
●[MULTI]
(up to 100 pictures with the same text)
Use the respective cursor buttons to select a
still picture and press [DISP.] button
[Title Edit] setting
[Title Edit] already set
• To cancel
→ Press [DISP.] button
again.
• To execute
→ Press [MENU/SET].
Enter characters (Entering text (→94))
To delete a title, delete all the characters in the character input screen.
●This mode is not available in the following cases:
• Motion pictures
• 3D still pictures
●To print text, use [Text Stamp].
[Edit GPS Data]
For details (→138).
- 117 -
Using the [Playback] menu
[Text Stamp]
• For [Playback] menu display and operation methods (→51).
With this mode, the recording date and time, location name information and the text
registered in the [Baby], [Pet] Scene Modes, [Travel Date] and [Title Edit] can be stamped
on the still picture.
Use the respective cursor buttons to select [SINGLE] or
[MULTI], and then press [MENU/SET]
Select a still picture
●[SINGLE]
Use the respective cursor
buttons to select a still picture
and press [MENU/SET]
●[MULTI] (up to 100 pictures)
Use the respective cursor buttons to select a
still picture and press [DISP.] button
[Text Stamp] setting
• To cancel
→ Press [DISP.] button
again.
• To execute
→ Press [MENU/SET].
Use the respective cursor buttons to select [Set] and press
[MENU/SET]
Use the respective cursor buttons to select items and press
[MENU/SET] (→119)
Use the respective cursor buttons to select settings and press
[MENU/SET] (→119)
Press [
/
] button
Use the respective cursor buttons to select [OK] and press
[MENU/SET]
Use the respective cursor buttons to select whether to stamp
age and press [MENU/SET]
• If [Name] is [OFF] in step , this step will not be displayed.
• A confirmation screen is displayed. If you select [Yes], the operation is executed.
- 118 -
Using the [Playback] menu
■Items that can be stamped
[Shooting Date]
[Name]
[W/O TIME]: Stamps the recording date
[WITH TIME]: Stamps recording date and time
: Stamps the name registered in Face Recognition
: Stamps the name registered in [Baby] or [Pet]
[Location]
Stamps the location registered in [Setup] menu’s [Travel Date]
[Travel Date]
Stamps the Travel Date set in [Setup] menu’s [Travel Date]
[Title]
Stamps the text registered in [Title Edit]
[Country/Region]
[State/Prov./County] Stamps the place name information recorded by the GPS function
[County/Township]
• If text such as the location name or landmark name is long, it may not
be possible to stamp all the text.
[City/Town/Village]
[Landmark]
• Items set to [OFF] are not stamped.
●Stamping texts is not possible with the following types of pictures.
• Motion pictures
• 3D pictures
• Pictures on which the date or other texts have already been stamped
• Pictures taken without setting the clock
• Pictures recorded in [Panorama Shot] Scene Mode
●Characters may be cut off on certain printers.
●The text may be difficult to read when stamped on pictures of 0.3 M or less.
●Do not request date printing in a store or make date printing on a printer for still
pictures with date stamps. (Date printing may be overlapping.)
- 119 -
Using the [Playback] menu
[Resize]
• For [Playback] menu display and operation methods (→51).
With this mode, the resolution can be reduced to facilitate e-mail attachment and use in
web pages, etc.
(Still pictures recorded at the smallest recording pixel level cannot be further reduced.)
■[SINGLE]
Use the respective cursor buttons to select [SINGLE] and
press [MENU/SET]
Use the respective cursor buttons to select a still picture and
press [MENU/SET]
Use the respective cursor buttons to select size and press
[MENU/SET]
Current resolution
Resolution after change
• A confirmation screen is displayed. If you select [Yes], the operation is executed.
■[MULTI]
Use the respective cursor buttons to select [MULTI] and press
[MENU/SET]
Use the respective cursor buttons to select size and press
[MENU/SET]
Use the respective cursor buttons to select a still picture and
press [DISP.] button (up to 100 pictures)
Number of pixels before/after
resizing
• To cancel
→ Press [DISP.] button again.
• To execute
→ Press [MENU/SET].
Resize setting
• A confirmation screen is displayed. If you select [Yes], the operation is executed.
●Picture quality is reduced after resizing.
●Resizing is not possible with the following types of pictures.
• Motion pictures
• 3D still pictures
• Still pictures for which date or other texts have already been stamped
• Still pictures recorded in [Panorama Shot] Scene Mode
- 120 -
Using the [Playback] menu
[Cropping]
• For [Playback] menu display and operation methods (→51).
For enlarging your still pictures and cropping unwanted areas.
Use the respective cursor buttons to select a still picture, and
then press [MENU/SET]
Select the area to crop and press [MENU/SET]
Expand
Change position
• A confirmation screen is displayed. If you select [Yes], the operation is executed.
●Picture quality is reduced after cropping.
●Cropping is not possible with the following types of pictures.
• Motion pictures
• Still pictures for which date or other texts have already been stamped
• Still pictures recorded in [Panorama Shot] Scene Mode
• 3D still pictures
●Original Face Recognition information will not be copied when still pictures are cropped.
- 121 -
Using the [Playback] menu
[Favorite]
• For [Playback] menu display and operation methods (→51).
By labelling your favorite pictures with a star ( ), you can play back your favorite pictures
only, or you can delete all pictures except your favorites.
Use the respective cursor buttons to select [SINGLE] or
[MULTI] and press [MENU/SET]
Use the respective cursor buttons to select picture and press
[MENU/SET]
●[SINGLE]
Favorite picture setting
●[MULTI]
Favorite picture setting
• To cancel → Press [MENU/SET] again.
■ To clear all
Select [CANCEL] in step
and select [Yes].
- 122 -
Using the [Playback] menu
[Print Set]
• For [Playback] menu display and operation methods (→51).
With this mode, picture/picture no./date printing settings can be made for when printing
with DPOF print-compatible shops or printers. (Ask at the shop to check for compatibility.)
Use the respective cursor buttons to select [SINGLE] or
[MULTI] and press [MENU/SET]
Use the respective cursor buttons to select picture and press
[MENU/SET]
Use the respective cursor buttons to set number of pictures
and press [MENU/SET]
(repeat steps
●[SINGLE]
and
when using [MULTI] (up to 999 pictures))
●[MULTI]
Date print set
Date print set
No. to print
No. to print
• Date print setting/release → Press [DISP.] button
■ To clear all
Select [CANCEL] in step
and select [Yes].
●Depending on the type of printer, the printer settings may take priority over camera
settings.
●This setting is not possible for files that are not compliant with the DCF standard.
●Some DPOF information set by other equipment cannot be used. In such cases, delete
all of the DPOF information and then set it again with this camera.
●Date print setting cannot be made for still pictures that have been taken with [Date
Stamp] and pictures with a [Text Stamp] applied.
●Print settings cannot be applied for motion pictures.
- 123 -
Using the [Playback] menu
[Protect]
• For [Playback] menu display and operation methods (→51).
For setting protection to disable picture deletion. Prevents deletion of important pictures.
Use the respective cursor buttons to select [SINGLE] or
[MULTI] and press [MENU/SET]
Use the respective cursor buttons to select picture and press
[MENU/SET]
●[SINGLE]
Picture is protected
●[MULTI]
Picture is protected
• To cancel → Press [MENU/SET] again.
■ To clear all
Select [CANCEL] in step
and select [Yes].
●This setting may not be effective when using other devices.
- 124 -
Using the [Playback] menu
[Face Rec Edit]
• For [Playback] menu display and operation methods (→51).
For editing or deleting the recognition information for pictures with mistaken Face
Recognition.
Use the respective cursor buttons to select [REPLACE] or
[DELETE] and press [MENU/SET]
Use the respective cursor buttons to select the picture and
press [MENU/SET]
Use the respective cursor buttons to select a person and
press [MENU/SET]
• If [DELETE], go to step .
• Persons whose faces have not been registered cannot be selected.
Use the respective cursor buttons to select the person to
replace for another and press [MENU/SET]
Use the respective cursor buttons to select [Yes] and press
[MENU/SET]
●When Face Recognition information is deleted, it cannot be restored.
●Pictures for which all Face Recognition information has been deleted are not
categorized in Face Recognition during [Category Selection].
●Recognition information cannot be edited in protected pictures.
- 125 -
Using the [Playback] menu
[Copy]
• For [Playback] menu display and operation methods (→51).
With this mode, you can copy pictures between the built-in memory and the memory card.
Use the respective cursor buttons to select the copy method
(direction) and press [MENU/SET]
: Copies all pictures from the built-in memory to the card (go to step
: Copies 1 picture at a time from the card to the built-in memory.
).
Use the respective cursor buttons to select picture and press
[MENU/SET]
Use the respective cursor buttons to select [Yes] and press
[MENU/SET]
• To cancel → Press [MENU/SET].
●Copying pictures may take several minutes. Do not turn off power or perform other
operations during copying.
●If identical names (folder/file numbers) are present in the copy destination, a new folder
for copying will be created when copying from the built-in memory to the card (
Identically-named files will not be copied from the card to the built-in memory (
●The following settings are not copied. Set them again after copying.
- [Print Set]
- [Protect]
- [Favorite]
).
).
●Only pictures from Leica digital cameras (exceptions: Digilux, Digilux4.3, Digilux Zoom)
may be copied.
●Motion pictures recorded in [AVCHD] format cannot be set.
- 126 -
Using the GPS function to record the picture
taking location
Before using the GPS function, read “About GPS” (→8) and “Licence Agreement for
Place Name and Map Data” (→188).
GPS stands for Global Positioning System. You can check your current location using
GPS satellites. The camera receives radio signals that contain orbital information and
time information from multiple GPS satellites, and uses them to calculate its current
position. Calculating a position in this manner is known as “positioning”.
This camera can record the location information of a place where a picture was taken on
the pictures.
The camera can also automatically adjust the time or display a place where a picture was
taken on a map during playback.
Precautions on properly receiving a GPS signal
●It is recommended to hold the camera steady with the built-in GPS antenna pointed
at the sky while updating the GPS. (→128)
●The camera cannot properly receive radio signals from the GPS satellites in the
following places. As a result, it may not be able to execute positioning or a significant
error in positioning may occur.
•
•
•
•
Inside buildings
Surrounded by trees, such as in a forest
Inside a moving train, vehicle, etc.
Near high-voltage electrical power lines
•
•
•
•
In building basements
Between tall buildings or in a valley
Inside tunnels
Near devices such as a 1.5 GHz band
mobile phone
●Do not cover the built-in GPS antenna with your hand or other objects.
●If you want to execute positioning while you carry the camera around, do not put it
in a metallic bag or case. If the camera is enclosed in something metallic, it cannot
execute positioning.
- 127 -
Using the GPS function to record the picture taking location
Using the GPS function to execute positioning
When [GPS Setting] is [ON], the camera periodically receives radio signals from the GPS
satellites and executes positioning. When positioning is executed successfully, the place
name and position (latitude and longitude) information are recorded in still pictures and
motion pictures (except for the picture quality settings of [PSH], [FSH], and [SH]).
• If you select automatic time adjustment using the GPS function when you set the clock
of this camera for the first time, [GPS Setting] is set to [ON].
Press [MENU/SET]
Use the respective cursor buttons to select [GPS] menu and
press [MENU/SET]
Use the respective cursor buttons to select [GPS Setting] and
press [MENU/SET]
Use the respective cursor buttons to select [ON] and press
[MENU/SET]
• A message appears on the screen. After confirming the message, press
[MENU/SET].
[GPS Setting]
[ON]
[OFF]
[INFO]
Description
The camera periodically executes positioning. Even if the camera is
turned off, positioning will be continued. (Positioning will stop after a
certain period of time has elapsed.)
The GPS function is set to OFF.
You can check the current reception status.
■About operations during positioning
The GPS status indicator lights up while positioning
is being executed and the GPS reception icon
appears on the screen. (→129)
Built-in GPS
antenna
GPS status indicator
- 128 -
Using the GPS function to record the picture taking location
■Displaying the status and result of positioning
The icons that indicate the status and result of positioning will appear on the monitor.
When the camera successfully executes positioning, it records the current location and
displays the place name information on the screen.
GPS reception icon
Positioning
executed
The same number of icons as the number of
successfully
the GPS satellites (from which radio signals are
successfully received) stop flashing and light (blue).
If the three bars of the GPS reception icon do not
light and the icon turns off, it means that positioning
was unsuccessful.
Place name
information
•
•
•
•
•
Country/region
Province/state
City/borough/county
Town/village
Landmark
Positioning result icons
Icon
Time elapsed after successful positioning
Less than 5 minutes
5 minutes to 1 hour have elapsed.
1 hour to 2 hours have elapsed.
2 hours or more have elapsed.
No positioning information has been acquired.
Even if GPS reception is good, it will take approx. 2 to 3 minutes to
successfully execute positioning in the following cases:
• When positioning is executed for the first time
• When [GPS Setting] is set to [OFF]
• When [Airplane Mode] is set to [ON] and the camera is turned off
• While the battery is removed
Positioning can be executed faster when you download GPS assist data to the
camera using the “GPS Assist Tool”. (→140)
- 129 -
Using the GPS function to record the picture taking location
■Information to be recorded on the pictures
When the camera successfully executes positioning, it records the following information
in still pictures and motion pictures∗ (except for the picture quality settings of [PSH],
[FSH], and [SH]).
• Latitude and longitude
• Place name information (Country/region, province/state, city/borough/county, town/
village, landmark)
∗ Only the information determined at the time when the recording was started is recorded.
●
is displayed during playback for pictures that are recorded with location and place
name information.
●Only the location information is recorded on a picture taken immediately after the
camera had successfully executed positioning (i. e. before the place name information
is displayed).
• You can add the place name information to such a picture when you play it back.
■Place name information
The most appropriate place name is displayed for place name information by searching
for place names and landmarks from the database of this camera based on the latitude
and longitude of positioning. (In some cases, the nearest place name or landmark may
not be displayed.)
• If an appropriate place name or landmark is not found, [---] will appear even if the
positioning is executed successfully. Even if [---] is displayed, in some cases you can
select the place name information by using [GPS Area Select]. (→135)
• There are also cases where the landmarks you are looking for may not be registered
in the camera database. Place name information such as landmarks is current as of
December 2011. (Type of landmarks (→194))
●Place name information (place name and landmark name) may be different from the
official names in some cases.
- 130 -
Using the GPS function to record the picture taking location
Executing the positioning function immediately to update the
current location
If the displayed place name is different from the current location or a previous location is
displayed, update the positioning information.
If some time has elapsed since the last time positioning was executed
successfully ( ,
,
, or
is displayed), we recommend updating
the positioning information.
Before starting the procedure, move to a place where positioning can be performed
successfully. (→127)
(Recording mode only)
Touch the GPS icon
Touch [Repositioning]
The GPS status indicator lights up and the
positioning reception icons appear on the screen
while positioning is executed.
●The positioning information is also updated by the following operations.
• Set [GPS] in the Quick menu to [GPS] again.
• Select [Repositioning] from the [GPS] menu.
- 131 -
Using the GPS function to record the picture taking location
■Interval between positioning operations
Even if the positioning information is not updated, the camera automatically tries
to execute positioning immediately after it is turned on and subsequently at regular
intervals when [GPS Setting] is [ON].
Also, when [Airplane Mode] is set to [OFF], the camera automatically tries to execute
positioning periodically according to the environment, even if the camera is turned off.
Note, however, that the positioning operation is interrupted in the following cases.
is displayed.
• When the battery power is low and
• When the camera has not been turned on for a certain period of time.
■Displaying the GPS reception status
Select [GPS Setting] from the [GPS] menu: Perform steps
and
(→128)
Use the respective cursor buttons to select [INFO] and press [MENU/SET]
• Press [MENU/SET] again to update the positioning information
• Checking GPS reception status
: Time when positioning is executed
: Number of GPS satellites from which the camera has received signals
: Latitude
Longitude
- 132 -
Using the GPS function to record the picture taking location
Changing place name information to be displayed
You can change the recorded place name information items to be displayed on the
screen.
Press [MENU/SET]
Use the respective cursor buttons to select [GPS] menu and
press [MENU/SET]
Use the respective cursor buttons to select [Area Info. Set]
and press [MENU/SET]
Use the respective cursor buttons to select an item to be
changed and press [MENU/SET]
Use the respective cursor buttons to set items that you want
to display to [ON] and items that you do not want to display to
[OFF] and press [MENU/SET]
- 133 -
Using the GPS function to record the picture taking location
Disabling the positioning function when the camera is turned off
When [GPS Setting] is [ON], the GPS function remains activated even if the camera is
turned off.
To disable the positioning function when the camera is turned off, set [Airplane Mode] to
[ON].
Press [MENU/SET]
Use the respective cursor buttons to select [GPS] menu and
press [MENU/SET]
Use the respective cursor buttons to select [Airplane Mode]
and press [MENU/SET]
Use the respective cursor buttons to select [ON] and press
[MENU/SET]
●Electromagnetic radiation from the camera can affect instruments and meters. During
takeoff and landing of an airplane or in other restricted areas, set [GPS Setting] to
[OFF] or set [Airplane Mode] to [ON], and then turn off the camera.
- 134 -
Changing the place name information to be
recorded
When there are other candidate locations as a result of positioning, you can change the
location information to another place name or landmark in the neighborhood.
• When there is a choice for differing place name information,
appears in front of the
place name information.
• You can also perform this operation by touching [GPS Area Select] after touching the
GPS icon.
Press [MENU/SET]
Use the respective cursor buttons to select [GPS] menu and
press [MENU/SET]
Use the respective cursor buttons to select [GPS Area Select]
and press [MENU/SET]
Use the respective cursor buttons to select an item to be
changed and press [MENU/SET]
Use the respective cursor buttons to select a place name or
landmark from the displayed candidates and press
[MENU/SET]
■If you do not want to record a place name or landmark
When you select [Delete all place-names] in step
above, the place names and
landmarks are not recorded.
You can also select the level of the place name and landmark information to be
excluded in step
above. All place names and landmarks that are below the selected
level will be deleted from the recording. (For example, if you delete [County/Township],
the lower level [City/Town/Village] and [Landmark] data will not be recorded either.)
• Note, however, that the latitude and longitude data are recorded. If you do not want to
record the latitude and longitude data, set [GPS Setting] to [OFF].
• To restore the place names and landmarks that you set not to be recorded, perform
the [GPS Area Select] procedure again.
●A landmark may not be displayed at all or a different landmark may be displayed in
places such as a large park. If the landmark that you want cannot be selected using
[GPS Area Select], perform the [My Landmark] procedure (→152) before recording a
picture or the [Edit Place Name] procedure after recording a picture. (→138)
- 135 -
Changing the recorded GPS information
[Edit Location]
You can edit the location information (latitude and longitude) recorded on still pictures and
motion pictures.
appears on the screen
• You can edit the location information only on a picture (
when this picture is played back) recorded with GPS information (location and place
name information) when it was taken.
• When you edit the location information, the place name information is deleted.
Preparation: Before editing the location information using map data, be sure to copy the
map data on the supplied DVD to a memory card. (→150)
Press [MENU/SET]
Use the respective cursor buttons to select [Playback] menu
or [Map] menu and press [MENU/SET]
Use the respective cursor buttons to select [Edit GPS Data]
and press [MENU/SET]
Use the respective cursor buttons to select a picture and
press [MENU/SET]
Use the respective cursor buttons to select [Edit Location]
and press [MENU/SET]
Use the respective cursor buttons to select an item and press
[MENU/SET]
- 136 -
Changing the recorded GPS information
■ Specifying the location from the map
Use the respective cursor buttons to select [Point on map] and press [MENU/SET]
Move the map to a new location that you want to record on the picture and press
[MENU/SET]
• About map operation (→145)
• A confirmation screen will appear. Select [Yes] to overwrite the location information.
■ Using the location information of another picture for reference
Use the respective cursor buttons to select [Use another picture] and press
[MENU/SET]
Use the respective cursor buttons to select a picture and press [MENU/SET]
A map is displayed with the location recorded on a picture at the center.
Move a map to a new location that you want to record on the picture and press
[MENU/SET]
• About map operation (→145)
• A confirmation screen will appear. Select [Yes] to overwrite the location information.
■ Applying the edited location information to other pictures
Use the respective cursor buttons to select [Repeat] and press [MENU/SET]
The location information that was edited last will be displayed.
• A confirmation screen will appear. Select [Yes] to overwrite the location information.
●The location information of a position specified on a map may deviate from the actual
latitude and longitude coordinates.
- 137 -
Changing the recorded GPS information
[Edit Place Name]
You can edit a place name or landmark name recorded in a picture.
Press [MENU/SET]
Use the respective cursor buttons to select [Playback] menu
or [Map] menu and press [MENU/SET]
Use the respective cursor buttons to select [Edit GPS Data]
and press [MENU/SET]
Use the respective cursor buttons to select a picture and
press [MENU/SET]
Use the respective cursor buttons to select [Edit Place Name]
and press [MENU/SET]
Use the respective cursor buttons to select an item and press
[MENU/SET]
■ Selecting a place name from candidates
Use the respective cursor buttons to select [Candidate] and press [MENU/SET]
Use the respective cursor buttons to select an item to be edited and press
[MENU/SET]
Place names or landmark names near the location information recorded in a picture
are searched for.
Select a place name or landmark name and press [MENU/SET]
• A confirmation screen will appear. Select [Yes] to overwrite the place name
information.
■ Directly editing a place name or landmark name
Use the respective cursor buttons to select [Direct] and press [MENU/SET]
Use the respective cursor buttons to select an item to be edited and press
[MENU/SET]
Enter a name (Entering text: →94)
• A confirmation screen will appear. Select [Yes] to overwrite the place name
information.
■ Applying the edited place name and landmark name to other pictures
Use the respective cursor buttons to select [Repeat] and press [MENU/SET]
The place name or landmark name that was selected or entered last will be
displayed.
• A confirmation screen will appear. Select [Yes] to overwrite the place name
information.
- 138 -
Adjusting the time using GPS
You can automatically update the [Clock Set] of the camera using the date and time
information contained in GPS radio signals. When you move to a different time zone
from your home area and positioning is executed successfully, the camera automatically
adjusts the time to the local time.
Select [Auto Clock Set] from [Setup] menu and press
[MENU/SET]
• Displaying the [Setup] menu (→51)
Use the respective cursor buttons to select [ON] and press
[MENU/SET]
(for the first time only)
When [Please set the home area] is displayed, press
[MENU/SET]
Press
City or area
name
to set your home area and press [MENU/SET]
Current time
Difference from GMT (Greenwich Mean Time)
●When [Auto Clock Set] is set to [ON], the following settings are also changed
automatically.
• [GPS Setting]: [ON]
• [World Time]: [Destination]
●You cannot select the area of [Destination]. (You can set the summer time for your
destination.)
To select the area, set [Auto Clock Set] to [OFF], and set [World Time]. (→93)
●The date and time adjusted by [Auto Clock Set] are not as accurate as those of radio
clocks. If the date and time are not adjusted accurately, use [Clock Set] to re-adjust the
date and time.
- 139 -
Reducing the time required for positioning
You can reduce the time required for positioning by copying the predicted satellite
information (GPS assist data) of GPS satellites required for positioning to the camera in
advance.
• A computer that can be connected to the Internet is required to download the GPS
assist data.
• If the camera’s clock is not set, the GPS assist data cannot be used.
●The GPS assist data is valid for 30 days.
●The GPS assist data is updated once a day.
●The GPS assist data provider service may be changed or discontinued without prior
notice. (The current service is provided as of January 2012.)
About the “GPS Assist Tool”
You can use the “GPS Assist Tool” to download the GPS assist data from the Internet and
update the GPS assist data of the camera.
■Operating environment
Supported
OS
Windows® XP (32-bit) SP3
Windows Vista® (32-bit) SP2
Windows® 7 (32-bit, 64-bit) and SP1
Mac® OS X v10.4, v10.5, v10.6, and v10.7
• You do not need to install the software on your computer.
■Using the “GPS Assist Tool”
You can operate the “GPS Assist Tool” using the following methods.
Connecting the camera and a computer to execute the
“GPS Assist Tool” stored in the camera .............................................141
Copying the “GPS Assist Tool” to a memory card and use the
card reader/writer (commercially available) to execute the
“GPS Assist Tool” .................................................................................142
- 140 -
Reducing the time required for positioning
Using the “GPS Assist Tool”
■Using “GPS Assist Tool” by connecting the camera and computer
Preparation: Turn on the computer and close all other open application programs.
Press [MENU/SET]
Use the respective cursor buttons to select [GPS] menu and
press [MENU/SET]
Use the respective cursor buttons to select [Assist Data] and
press [MENU/SET]
Use the respective cursor buttons to select [Update] and
press [MENU/SET]
Use the respective cursor buttons to select [Connect USB]
and press [MENU/SET]
Connect the camera to a computer
Make sure the plug is aligned correctly
and that it is inserted straight.
(Otherwise the connectors may be bent
out of shape which will cause trouble.)
USB connection cable
(always use the supplied cable)
[Access] (sending data)
• Do not disconnect
the USB connection
cable while [Access] is
displayed.
Start up the “GPS Assist Tool” on your computer and update
the GPS assist data (→143)
The GPS assist data of the camera is updated.
Terminate the connection between the camera and computer
and disconnect the USB connection cable
●You can also update the assist data if you select [GPS assist data] for [USB Mode] (→58)
when you connect the camera to a computer.
●Do not use any other USB connection cables except the supplied one.
- 141 -
Reducing the time required for positioning
■Using a card reader/writer (commercially available)
Preparation: • Turn on the computer that is connected to a card reader/writer
(commercially available) and close all other open application programs.
• Insert a memory card in the camera before starting the updating
procedure.
Perform steps to of “Using “GPS Assist Tool” by
connecting the camera and computer” (→141)
Use the respective cursor buttons to select [SD card] and
press [MENU/SET]
The “GPS Assist Tool” is copied to a memory card.
Turn off the camera and remove the memory card
Insert the memory card into a card reader/writer (commercially
available) connected to the computer
Start up the “GPS Assist Tool” stored in the memory card on
the computer and update the GPS assist data (→143)
Remove the memory card from the computer
Insert the memory card into the camera and turn on the
camera
The GPS assist data of the camera is updated.
- 142 -
Reducing the time required for positioning
Updating the GPS assist data
Start up the “GPS Assist Tool” on the computer
■ Windows
Double-click [GPSASIST.EXE] stored in the connected camera or memory card
The “GPS Assist Tool” will start up.
• When the “GPS Assist Tool” is copied to the memory card, [GPSASIST.EXE]
is stored in the [AD_LEICA] folder.
■ Mac
Double-click [GPSASIST.DMG] stored in the connected camera or memory
card
• When the “GPS Assist Tool” is copied to the memory card, [GPSASIST.DMG]
is stored in the [AD_LEICA] folder.
Double-click [GPSASIST]
The “GPS Assist Tool” will start up.
Operate the “GPS Assist Tool”
Click [Update]
Click [Yes]
Click [OK]
Click [Exit]
• Do not terminate the connection
between the camera/card and computer
until the data is updated.
Terminate the connection between camera/card and computer
• Windows: Execute “Safely Remove Hardware” on the taskbar
• Mac: Open the Finder and click the eject icon that appears on the sidebar
■Changing the proxy settings
Perform the proxy settings only if the GPS assist data cannot be updated successfully
when the computer is connected to the Internet via proxy.
Click [Settings]
Perform the proxy settings
Windows: Enable [Use proxy server.] and change the settings.
Mac: Change the settings using the network settings screen of the displayed system
environment settings screen.
- 143 -
Reducing the time required for positioning
Checking the expiration date of the GPS assist data
The GPS assist data expires in 30 days. We recommend using new GPS assist data.
Press [MENU/SET]
Use the respective cursor buttons to select [GPS] menu and
press [MENU/SET]
Use the respective cursor buttons to select [Assist Data] and
press [MENU/SET]
Use the respective cursor buttons to select [Expiry Date] and
press [MENU/SET]
●You can also check the expiration date on the screen when the “GPS Assist Tool” is
started up on the computer.
- 144 -
Using the map function
You can display a map showing the location where a picture was taken or your current
location.
●If you copy the map data stored on the supplied DVD to a memory card, you can
display more detailed maps. (→149)
●The place name information recorded on a picture and the place name displayed on a
map may not be exactly the same.
Confirming the place where you took a picture using a map
When the location information or place name information is recorded on a picture, you
can display a map showing the location where that picture was taken.
Display the pictures in playback mode
•
is displayed during playback for pictures that are recorded with location and
place name information.
Press [MAP] button
A map of the place where you took the picture will appear. (If the picture was not
recorded with location information or place name information, a small scale map will
appear)
• You cannot change the display direction of the
map. The map is oriented so that North is always at
the top of the map.
Touch the +/- button to enlarge or reduce the map size.
(You can also enlarge or reduce the map size using the zoom
lever.)
Map scale level (The levels that can be displayed vary depending on the region)
• You can drag the screen or press the respective cursor buttons to operate the
display location of a map.
• When you press the [ / ] button, it will return to the previous display.
●The actual place where you took the picture and the location displayed on the map may
not be exactly the same.
●When you enlarge or reduce the map size, it may take some time before it is displayed.
●You can display the place where you took the pictures on a map only for pictures with
location information or place name information recorded using Leica digital cameras
equipped with a GPS function.
- 145 -
Using the map function
Displaying your current location on a map
When positioning is executed successfully using GPS, you can display your current
location on a map.
• Make sure to set [GPS Setting] to [ON]. (→128)
Press the [MAP] button in playback mode
Touch [My Location]
Time elapsed after positioning was executed successfully
Touch the +/- button to enlarge or reduce the map size.
(You can also enlarge or reduce the map size using the zoom
lever.)
Map scale level
(The levels that can be displayed vary depending on the region)
• You can drag the screen or press the respective cursor buttons to operate the
display location of a map.
• When you press the [ / ] button, it will return to the previous display.
• You can also use [My Location] in the [Map] menu to display the current location
on a map.
When the current location is being displayed, the camera executes positioning at regular
intervals. When positioning is executed successfully, the map display is updated.
●This camera is not equipped with a navigation function.
●The actual place where you took the pictures and the location displayed on the map
may be quite different under the following conditions.
• When some time has elapsed after positioning was executed successfully.
• When the camera is being moved at high speed
- 146 -
Using the map function
Displaying only pictures taken in the same area
You can select the area of a picture on a map to narrow down the pictures to be
displayed.
Press the [MAP] button in playback mode
Display the map so that the place where you took the pictures
is moved within the display range of the frame
Display range
Touch the +/- button to enlarge or reduce the map size.
(You can also enlarge or reduce the map size using the zoom
lever.)
Map scale level (The levels that can be displayed vary depending on the region)
• You can drag the screen or press the respective cursor buttons to operate the
display location of a map.
Press the [DISP.] button
Touch to display another picture
Place where you took the
selected picture
Touch to narrow down the
pictures to be displayed
Picture list
Place where you took the
pictures displayed in a list
Touch to display another picture
Touch a picture in the picture list to display it
Only pictures taken at a location within the display range of the frame are displayed
([Filtering Play]).
• You can also display a picture by selecting it using the respective cursor buttons
and pressing [MENU/SET].
• Select [Normal Play] from the [Playback Mode] menu to cancel [Filtering Play].
●When the map is at its maximum size the location where the picture was taken and the
picture list will not be displayed.
- 147 -
Using the map function
Displaying a map by selecting a country or region
You can select a place name that you want to display and show it on a map.
Press [MENU/SET] in playback mode
Use the respective cursor buttons to select [Map] menu and
press [MENU/SET]
Use the respective cursor buttons to select [Select Area] and
press [MENU/SET]
Use the respective cursor buttons to select [From Place
Name] and press [MENU/SET]
Use the respective cursor buttons to select a country/region
and press [MENU/SET]
- 148 -
Using the map data on the DVD
You can use “LEICA Map Tool” to copy the map data on the DVD (supplied) to a memory
card. When the map data is copied to the memory card, detailed maps can be displayed
on the camera.
●Install “LEICA Map Tool” on your computer before starting the detailed map display
procedure.
Installing “LEICA Map Tool”
Close all other open application programs before inserting a DVD in the computer drive.
■Operating environment
Supported
OS
Windows® XP (32-bit) SP3
Windows Vista® (32-bit) SP2
Windows® 7 (32-bit, 64-bit) and SP1
Mac® OS X v10.4, v10.5, v10.6, and v10.7
■Windows
Insert the DVD
Click [LEICA Map Tool]
Perform the rest of the steps in accordance with the instructions displayed on the
computer screen.
■Mac
Insert the DVD
Double-click the recognized disc to open
Double-click the [MAPTOOL] folder to open
Double-click [LEICA Map Tool.pkg]
Continue the installation procedure following the instructions displayed on the
screen.
- 149 -
Using the map data on the DVD
Copying the map data to a memory card
Preparation: • Install “LEICA Map Tool” on your computer before starting the copying
procedure. (→149)
• Turn on the computer and close all other open application programs.
• Insert the supplied DVD in your computer drive before starting the copying
procedure.
(Windows: Close the installation menu that starts automatically.)
Insert the memory card into a card reader/writer (commercially
available) connected to the computer
Start “LEICA Map Tool” installed in your computer
• Windows: Click [Start] → [All Programs] → [LEICA] → [LEICA Map Tool]
→ [LEICA Map Tool]
• Double click on the shortcut icon on the desktop if you chose to create one at
the time of installation.
• Mac: Double-click [LEICA_Map_Tool] in [Applications] (Applications)
Select a card from the pulldown menu ( )
Click the checkbox to select
a region to be copied ( )
Click [Execute] (
)
• Perform the rest of the steps in
accordance with the instructions
displayed on the computer screen.
Size of data to be copied
The region confirmation window will appear.
After copying is finished, click [Close] and remove the
memory card from the computer
• Windows: Execute “Safely Remove Hardware” on the taskbar
• Mac: Open the Finder and click the eject icon that appears on the sidebar
- 150 -
Using the map data on the DVD
■Copying map data directly to a memory card in the camera from the
computer instead of a card reader/writer (commercially available)
You can copy the map data to a memory card inserted in the camera by connecting the
camera to a computer using the supplied USB connection cable.
• Select the connected camera in step
(→150).
• For details on making the connection with a computer (→164).
• Do not use any other USB connection cables except the supplied one.
■Deleting the map data
You can free up space on the memory card by deleting map data that is no longer
required.
Click the already copied region in step
(→150)
• The [Executed task] field will change to [Delete].
Click [Execute]
• Perform the rest of the steps in accordance with the instructions displayed on the
computer screen.
●Since the map data volume is large, be sure to check the free space on the memory
card before copying the data. (A memory card of at least 8 GB is needed to copy the
map data for all the regions.)
●Since the map data volume is large, copying will take some time.
●When map data is copied to a memory card, the number of recordable pictures and
recording time will decrease.
●The maps are copied to the memory card. If a different card is inserted in the camera,
no maps are displayed.
●When a memory card is formatted (initialized), all data, including the map data, is
deleted.
●Use “LEICA Map Tool” for copying and deleting the map data. When the map data is
deleted or moved to another location using the file operation of your computer, the
maps may not be displayed correctly.
- 151 -
Registering my landmark
You can register a user-defined location that is not registered in this camera as my
landmark in order to display it when positioning is executed or to record it on a picture.
(Up to 50 landmarks)
●Unless the map data is copied to a memory card, My landmark cannot be registered.
Before registering My landmark, copy the map data on the DVD (supplied) to the
memory card. (→149)
Registering my landmark from a map
You can register a location specified on a map as My landmark.
Press [MENU/SET] in playback mode
Use the respective cursor buttons to select [Map] menu or
[GPS] menu and press [MENU/SET]
Use the respective cursor buttons to select [My Landmark]
and press [MENU/SET]
Use the respective cursor buttons to select [None] and press
[MENU/SET]
Use the respective cursor buttons to select [Point on map]
and press [MENU/SET]
Display the location that you want to register at the center of
the map and press [MENU/SET]
• Operations available when a map is displayed (→145)
Press [MENU/SET]
Enter my landmark name (Entering text: →94)
●You can use the GPS to register your current location as My landmark. If you have
moved to a location where positioning is enabled and when positioning is executed
successfully before starting the My landmark registration procedure, the current location
will be displayed at the center of the map.
- 152 -
Registering my landmark
Registering the recording location as my landmark
You can use the location information of a picture to register it as My landmark.
Press [MENU/SET] in playback mode
Use the respective cursor buttons to select [Map] menu or
[GPS] menu and press [MENU/SET]
Use the respective cursor buttons to select [My Landmark]
and press [MENU/SET]
Use the respective cursor buttons to select [None] and press
[MENU/SET]
Use the respective cursor buttons to select [Picture location
data] and press [MENU/SET]
Display a picture that was taken at a location you want to
register as a landmark
Press [MENU/SET]
Display the location that you want to register at the center of
the map and press [MENU/SET]
• Operations available when a map is displayed (→145)
Press [MENU/SET]
Enter my landmark name (Entering text: →94)
- 153 -
Registering my landmark
Selecting My landmark and displaying it on a map
You can display a map by moving the registered My landmark to the center.
Press [MENU/SET] in playback mode
Use the respective cursor buttons to select [Map] menu and
press [MENU/SET]
Use the respective cursor buttons to select [Select Area] and
press [MENU/SET]
Use the respective cursor buttons to select [From My
Landmark] and press [MENU/SET]
Use the respective cursor buttons to select My landmark and
press [MENU/SET]
Editing or deleting my registered landmark
Press [MENU/SET] in playback mode
Use the respective cursor buttons to select [Map] menu or
[GPS] menu and press [MENU/SET]
Use the respective cursor buttons to select [My Landmark]
and press [MENU/SET]
Use the respective cursor buttons to select an already
registered landmark and press [MENU/SET]
Use the respective cursor buttons to select an item and press
[MENU/SET]
[Edit]
Edits my landmark name.
[Delete]
Deletes my registered landmark.
- 154 -
Playing back on a TV
You can view pictures on a TV by connecting your camera to it with the HDMI mini cable
(available as accessory →9) or the AV cable (included in scope of delivery →9).
●Also consult the TV’s instructions.
Preparation:
• Set [Output] to connect your camera to a TV using the AV cable (→59)
• Turn off both camera and TV.
Connect the camera to the TV
■To connect with the HDMI mini cable
The HDMI mini cable can be used to enable viewing of still and motion pictures in high
resolution.
Make sure the plug is aligned correctly and that it is
inserted straight.
(Otherwise the connectors may be bent out of shape
which will cause trouble.)
To HDMI video/audio input socket
HDMI mini cable
■To connect with the AV cable
Make sure the plug is aligned correctly and that it is
inserted straight.
(Otherwise the connectors may be bent out of shape
which will cause trouble.)
Yellow: To video socket
AV cable
White: To audio socket∗
∗ Monaural audio output.
Turn on the TV
●Set to auxiliary input.
Turn on the camera
Set the REC/PLAY switch to
- 155 -
Playing back on a TV
■To connect with the HDMI mini cable
●Always use the genuine Leica HDMI mini cable (available as accessory →9).
●Some of the playback functions cannot be performed.
●[Playback], [GPS], [Map], and [Setup] menus cannot be used.
●Bars may appear at the sides or at the top and bottom of the screen, depending on
the aspect ratio setting.
●When an HDMI mini cable is connected, pictures are not displayed on the monitor.
●HDMI output will be cancelled if a USB connection cable is connected simultaneously.
●When the AV cable and the HDMI mini cable are connected at the same time, no
picture is output from the AV cable.
●Pictures may be momentarily distorted immediately after commencing playback or
pausing on certain televisions.
●Audio output is stereo.
■To connect with the AV cable
●Always use the genuine Leica AV cable.
●You can play back pictures on TVs in other countries (regions) which use the NTSC
or PAL system when you set [Video Out] in [Setup] menu.
(With camera model 18 175)
●Pictures rotated to portrait may be blurred slightly.
●Change the picture mode settings on the TV if aspect ratios are not displayed
correctly on widescreen or high-definition televisions.
■When TVs or DVD recorders have an SD card slot
Insert the SD Memory Card into the SD card slot
• Still pictures can be played back.
• AVCHD motion pictures can be played back on TVs displaying the AVCHD logo.
• When using both SDHC and SDXC Memory Cards, be sure to play each type of card
in equipment compatible with the particular format.
• You may not be able to play back panorama pictures. Also you cannot perform
automatic scrolling playback of panorama pictures.
- 156 -
Playing back on a TV
HDTV Link (HDMI)
What is the HDTV Link?
●This function allows you to use the remote control of compatible TVs for easy
operations when the camera is connected to a HDTV Link compatible device using
the HDMI mini cable (available as accessory →9) for automatic linked operations.
(Not all operations are possible.)
●HDTV Link is a unique function built on a HDMI control function using the standard
HDMI CEC (Consumer Electronics Control) specification. Linked operations with
HDMI CEC compatible devices made by other companies are not guaranteed.
When using devices made by other companies that are compatible with HDTV Link,
refer to the operating instructions for the respective devices.
●The camera is compatible with HDTV Link Ver.5. HDTV Link Ver.5 is the newest
version and is also compatible with existing HDTV Link compatible devices.
●Always use the genuine Leica HDMI mini cable (available as accessory →9).
●Cables that do not comply with HDMI standards will not work.
●If you are unsure whether or not the TV you are using is compatible with HDTV Link,
read the instructions for the TV.
●If the [HDTV Link] setting on the camera is [ON], operations via the camera buttons will
be limited.
●Ensure that the television you are connecting to has been set up to enable HDTV Link
(HDMI) (consult your television instructions for details).
- 157 -
Playing back on a TV
Preparation: Set [HDTV Link] to [ON] (→59).
Connect the camera to a HDTV Link (HDMI)-compatible
television with the HDMI mini cable (available as accessory →9) (→155)
Turn on the camera
Set the REC/PLAY switch to
Proceed with the operation while referring to what is displayed
on the TV screen
• When operating, refer to the HDTV Link operating panel.
■Other related operations
●Power OFF
The camera’s power can also be switched off when switching the television’s power
off with the remote control.
●Automatic input select
• This function automatically switches the television input to the camera screen
whenever the camera’s power is switched on while it is connected via the HDMI
mini cable. The television can also be switched on via the camera from Standby
Mode (if “Power on link” on the television is set to “on”).
• If HDTV Link (HDMI) does not function correctly (→181)
●To display a map on the TV screen choose [Display map] from the menu by remote
control. (Option available only with HDTV Link (HDMI))
- 158 -
Playing back on a TV
Playing back 3D still pictures
If you connect this camera to a 3D-capable TV and play back still pictures that you
recorded in 3D, you can enjoy impressive 3D still pictures on the TV. If a 3D-capable TV
has an SD card slot, you can play back 3D still pictures that you recorded by inserting the
card into the slot.
Preparation: Set [3D Playback] to [3D] (→59).
Connect the camera to a 3D-capable TV with the HDMI mini
cable (available as accessory →9) to display the playback screen (→155)
Display still pictures recorded in 3D
• When the [HDTV Link] setting on the camera is set to [ON] and the camera is
connected to a HDTV Link (HDMI)-compatible TV, it automatically switches its
input and the playback screen is displayed.
• [3D] appears on the thumbnail of the 3D still pictures.
■To select and play back only still pictures recorded in 3D
Select [3D Play] in [Filtering Play] in the [Playback Mode] menu (→114)
■To perform Slide Show playback of only still pictures recorded in 3D
Select [3D Play] in [Slide Show] in the [Playback Mode] menu (→112)
■The functions that are not operational or available for 3D still pictures:
• [Setup] menu
• [Playback] menu
• [GPS] menu
• [Map] menu
• Playback Zoom
• Delete
- 159 -
Playing back on a TV
■To switch the playback method for the still pictures recorded in 3D
Select the picture recorded in 3D
Select [2D/3D Settings] in the [Playback Mode] menu and then press [MENU/SET]
(→111)
• The playback mode will switch to 3D if it is playing back in 2D (conventional image),
or it will switch to 2D if it is playing back in 3D.
• If you feel tired, uncomfortable or otherwise strange when playing back pictures
recorded in 3D, set to 2D.
●On the monitor of this camera, 3D still pictures will be played back in 2D (conventional
pictures).
●If you switch between 3D still pictures and normal still pictures while playing them back,
the monitor image will be black for a few seconds.
●If you select a thumbnail of 3D still pictures or display a thumbnail after playing back 3D
still pictures, it may take a few seconds to start playing back or displaying the pictures.
●Viewing 3D still pictures too close to a TV may cause eyestrain.
●When a TV has not been converted for viewing 3D still pictures, do the necessary
settings on the TV. (For details about the necessary preparation of the TV, read the
TV’s instructions.)
●When an image is not suitable for 3D viewing (due to excessive parallax, etc.)
• During Slide Show playback: The image is displayed in 2D.
• During [Filtering Play]: A message appears confirming whether to display the image
in 3D or not.
●When a 3D image is played back on a TV that is not 3D-capable, 2 pictures may
appear side-by-side on the screen.
●You can store 3D still pictures on a computer and on some recorders. (→161)
- 160 -
Copying the recorded still and motion pictures
The methods for copying still and motion pictures recorded with this camera to other
devices vary according to the file format (JPEG, MPO, AVCHD, MP4, Motion JPEG).
Follow the correct method for your device.
Copying by inserting the SD card into a recorder
You can copy pictures using compatible equipment (such as Blu-ray disc recorders) with
support for each file format.
• See the recorder’s instructions for details about copying and playing
back.
32
Dubbing playback pictures with the AV cable
Videos that are played on this camera can be dubbed on media such as a disc, hard disk
or videotape using a device such as a video recorder. This method is useful as it allows
dubbing to be performed even with devices that are not compatible with high definition
images. The picture quality will be reduced from high definition to standard definition.
Audio will be monaural.
Connect the camera to a recorder
AV cable
Start playback on the camera
Start recording on the recorder
• To stop recording (dubbing), stop the recording
on your recorder first before stopping the
playback on the camera.
To recorder’s input socket
●Always use the genuine Leica AV cable (included in scope of delivery →9).
●When using a TV with a 4:3 aspect ratio, always change the camera’s [TV Aspect]
setting (→59) to [4:3] before dubbing. Motion pictures copied in the [16:9] setting will
appear vertically stretched when viewed on a 4:3 TV screen.
●For details on dubbing and playback methods, refer to your recorder’s instructions.
- 161 -
Copying the recorded still and motion pictures
Copying the recorded image data to a computer
with the supplied software
Using the software on the supplied DVDs, you can copy the image data recorded with
this camera in all file formats to a computer – with Adobe® Photoshop® Elements® for still
pictures and Adobe® Premiere® Elements® for motion pictures.
Three preparatory steps are necessary when initially installing the software to utilize it.
Install the software to your computer
• For details about the software on the supplied DVDs, operation environment and
installation, refer to the camera Basic Instructions.
Register your camera on the Leica Camera AG homepage
a. Open an account at http://owners.leica-camera.com. As a result, you will receive
access to the “Owners area”.
b. Register your camera at “My products”. Do so by following the respective
instructions.
• The key with which you can activate the software will be sent to you by email.
Activate the software with the key (numbers) you have
received
• Do so by following the respective instructions appearing after opening the
software.
■Using the software
Connect the camera to your computer
• For connection procedures (→164)
Use Adobe® Photoshop® Elements® to copy still pictures, and
Adobe® Premiere® Elements® to copy motion pictures to your
computer
• For details on how to operate the software, refer to the online assistance.
●Files and folders containing copied AVCHD motion pictures cannot be played back or
edited if they have been deleted, modified, or moved using Windows Explorer or similar
methods.
●Always use Adobe® Premiere® Elements® when handling AVCHD motion pictures.
- 162 -
Using with your PC
Still/motion pictures can be copied from the camera to your computer by connecting the
two.
• Some computers can read directly from the camera’s memory card.
For details, see the instructions for your computer.
• If your computer does not support SDXC Memory Cards a message will be displayed
requesting you to format the card. (Do not format the card. This will erase recorded
pictures.)
■Computer specifications
You can connect the camera to a computer that can detect a mass storage device
(device that stores a large volume of data).
• Windows: Windows 7 / Windows Vista / Windows XP / Windows 2000 / Windows Me
• Mac: OS X10.1 - 10.7
Some motion pictures recorded in [AVCHD] may not be scanned correctly by copying
a file or folder.
• When using Windows, be sure to use the supplied software on the supplied disc to
copy motion pictures recorded in [AVCHD].
• When using a Mac with “iMovie ’11”, you can copy motion pictures recorded in the
[AVCHD] format, but not those recorded in the [AVCHD] progressive format.
(For details about iMovie ’11, please contact Apple Inc.)
- 163 -
Using with your PC
Copying still and motion pictures recorded in [MP4] and [High
Speed Video] Scene Mode (except AVCHD motion pictures)
Preparation:
• Charge the battery
sufficiently.
• When importing pictures from
the built-in memory, remove
any memory card.
• Turn on the camera and the
computer.
Make sure the plug is aligned correctly and that it is
inserted straight.
(Otherwise the connectors may be bent out of shape
which will cause trouble.)
USB connection cable
(always use the supplied cable)
[Access] (sending data)
• Do not disconnect
the USB connection
cable while [Access] is
displayed.
Connect the camera to the computer
• Please make sure you use the supplied USB connection cable.
Use of cables other than the supplied USB connection cable may cause
malfunction.
Use the respective cursor buttons on the camera to select
[PC], and press [MENU/SET]
• A message may be displayed on the monitor if [USB Mode] (→58) is set to
[PictBridge(PTP)]. Select [CANCEL] to close the screen, and set [USB Mode] to [PC].
• When [USB Mode] (→58) is set to [GPS assist data], the folder storing the pictures
will not be displayed. Set [USB Mode] to [PC].
Operate with your computer
You can save pictures to use on your computer by dragging and dropping folders
and files into separate folders on your computer.
■To cancel connection
Windows: Execute “Safely Remove Hardware” on the taskbar
Mac: Open the Finder and click the eject icon that appears on the sidebar
■When using Windows XP, Windows Vista, Windows 7, or Mac OS X
The camera can be connected to your computer even if [USB Mode] (→58) is set to
[PictBridge(PTP)].
• Only picture output can be performed.
• It may not be possible to import if there are 1000 or more pictures on the card.
• Motion pictures cannot be read. (Excluding [High Speed Video])
- 164 -
Using with your PC
■Folder and file names on computer
●Windows
DCIM (Still/motion pictures)
100LEICA (Up to 999 pictures/folder)
L1000001.JPG
JPG: Still pictures
:
MP4: [MP4] Motion Pictures
L1000999.JPG
MOV: [High Speed Video]
101LEICA
∗1 MPO: 3D still pictures
:
●Mac
MISC (DPOF files, Favorite)
Drives are displayed
in “My Computer” or
“Computer” folder.
Drives are displayed on
the desktop.
(Displayed as “LEICA”,
“NO_NAME”, or
“Untitled”.)
999LEICA
AD_LEICA∗2 ∗3
PRIVATE∗3
AVCHD (Motion pictures in AVCHD)
MAP_DATA (Map data)
∗1 New folders are created in the following cases:
• When pictures are taken to folders containing files numbered 999.
• When using cards already containing the same folder number (for example, pictures taken with
other cameras, etc.).
• When recording after performing [No.Reset].
∗2 When “GPS Assist Tool” is copied to a memory card, it is stored in this folder.
∗3 This folder is not created in the built-in memory.
• Do not delete or modify folders or data in the AVCHD folder using Windows
Explorer or other tools. The camera may be unable to play back the motion
pictures correctly if any of these files are deleted or modified. For data
management and editing of AVCHD motion pictures, use the supplied software
on the supplied disc.
●Do not use any USB connection cables other than the supplied one.
●Turn off the power before inserting or removing memory cards.
●When the battery begins to run out during communication, a warning beep sounds.
Cancel communication via your computer immediately. Use a sufficiently charged
battery.
●Setting the [USB Mode] to [PC] removes the need to make the setting each time the
camera is connected to the computer.
●For more details, consult your computer’s instructions.
- 165 -
Printing
You can connect directly to a PictBridge-compatible printer for printing.
• Some printers can print directly from the camera’s memory card.
For details, see the instructions for your printer.
Preparation:
• Charge the battery sufficiently.
• When printing pictures from the
built-in memory, remove any memory
cards.
• Adjust the print quality or other
settings on your printer, as needed.
• Turn on the camera and the printer.
• Do not disconnect the USB connection cable
when the cable disconnection icon
is displayed
(it may not be displayed with some printers).
Make sure the plug is aligned correctly and that it
is inserted straight.
(Otherwise the connectors may be bent out of
shape which will cause trouble.)
USB connection cable
(always use the supplied cable)
Connect the camera to the printer
• Please make sure you use the supplied USB connection cable. Use of cables
other than the supplied USB connection cable may cause malfunction.
Use the respective cursor buttons on the camera to select
[PictBridge(PTP)], and press [MENU/SET]
Use the respective cursor buttons to select a picture to print
and press [MENU/SET]
Use the respective cursor buttons to select [Print start] and
press [MENU/SET] (Print settings (→169))
■To cancel print
Press [MENU/SET].
- 166 -
Printing
●Do not use any other USB connection cables except the supplied one.
●Disconnect the USB connection cable after printing.
●Turn off the power before inserting or removing memory cards.
●When the battery begins to run out during communication, a warning beep sounds.
Cancel printing and disconnect USB connection cable. Use a sufficiently charged
battery.
●Motion pictures cannot be printed.
- 167 -
Printing
Printing multiple pictures
Use the respective cursor buttons to select [Multi Print] in
step (→166)
Use the respective cursor buttons to select the desired mode
and then press [MENU/SET]
• [Multi Select]:
Scroll between the pictures with the respective cursor
buttons, select the pictures to print with the [DISP.] button.
(To erase a selection mark, press the [DISP.] button again.)
Press [MENU/SET] when the selection is complete.
• [Select All]:
Prints all pictures.
• [Print Set (DPOF)]: Prints pictures selected in [Print Set]. (→123)
• [Favorite]:
Prints pictures selected as [Favorite]. (→122)
Use the respective cursor buttons to select [Print start] and
then press [MENU/SET]
(Print settings (→169))
• Select [Yes] if print confirmation screen is displayed.
●An orange “●” displayed during printing indicates an error message.
●The printing process may be executed in several steps if a large number of pictures
were selected.
(Remaining sheets display may differ from the number of pictures set for printing.)
Printing with date and text
■ Printing date without [Text Stamp]
●Printing in store: Only the recording date can be printed. If you want the printing date.
• Making [Print Set] (→123) settings on the camera in advance allows settings for
numbers of copies and date printing to be designated before giving the card to the
store.
• When printing still pictures with a 16:9 aspect ratio, check in advance that the store
can accept this size.
●Using a printer: The recording date can be printed by setting [Print Set] on the
camera, or by setting [Print with Date] (→169) to [ON] when connecting
to a printer compatible with date printing.
• The time and the date can be set to be printed on the picture when taking the picture
by activating the [Date Stamp] function in the [Rec] menu. (→105)
- 168 -
Printing
Making print settings on the camera
Make the settings before selecting [Print start].
Use the respective cursor buttons to select the mode and
press [MENU/SET]
Mode
Settings
[Print with
Date]
[ON]/[OFF]
[Num.of
prints]
Set the number (up to 999 pictures)
[Paper Size]
When
[Page
Layout]
is selected, the printer settings take priority.
(printer takes priority) /
(1 picture, with border) /
(1 picture, no border) /
(2 pictures) /
(4 pictures)
Use the respective cursor buttons to select setting and press
[MENU/SET]
●The modes may not be displayed if incompatible with the used printer.
●To arrange “2 pictures” or “4 pictures” in the same still picture, set the number of
prints for the still picture to 2 or 4.
●To print to paper sizes/layouts not supported by this camera, set to
and make
settings on the printer. (Consult your printer’s instructions.)
●Even with completed [Print Set] settings, dates may not be printed, depending on the
shop or printer used.
●When setting [Print with Date] to [ON], check the date printing settings on the printer
(printer settings may be prioritized).
- 169 -
List of monitor displays
The screen shown here is only an example. The actual display may vary.
• Press the [DISP.] button to change displays.
■In recording
1
2
3
4
5
6
7
8
10
9
11
1 Recording Mode (→25)
6 Touch AF/AE function canceled (→30)
2 Backlight Compensation (→32, 34)
Recording quality (→107)
Resolution (→95)
Quality (→96)
Flash (→66)
Optical Image Stabilizer (→104)
Camera shake alert (→27)
[Motion Deblur] (→33)
White Balance (→97)
Color Mode (→103)
7 Histogram (→62)
3 Battery capacity (→16)
4 Wind cut (→108)
Intelligent exposure (→101)
Macro recording (→68)
Series exposure Mode (→87)
Auto Bracket (→72)
8 Touch shutter release (→29)
9 AF area (→28)
10 Touch zoom (→64)
11 Exposure Compensation (→71)
AF Tracking (→35, 99)
AF Assist Lamp (→103)
Metering Mode (→101)
ISO Sensitivity (→96)
Aperture value/Shutter speed (→27, 73)
Minimum shutter speed (→102)
5 GPS reception icon (→129)
Positioning result icons (→129)
(Continued on the next page)
- 170 -
List of monitor displays
The screen shown here is only an example. The actual display may vary.
• Press the [DISP.] button to change displays.
■In recording
20
19
18
17
16
15
14
13
12
12 Elapsed recording time∗1 (→37)
[GPS Area Select] (→135)
17 Custom Set (→85)
13 Self-timer Mode (→70)
19 Save destination (→20)
Recording state
14 LCD Mode (→55)
LCD power save (→57)
15 Date Stamp (→105)
18 Focus (→28)
20 Number of recordable pictures (→22)
Available recording time∗1 (→37)
16 Current date/time
World time (→93)
Name∗2 (→82, 90)
Age in years/months∗2 (→82, 90)
Place name information∗2 (→135)
Destination settings∗2 (→92)
Travel elapsed days∗2 (→92)
Focus range (→68)
Zoom (→63)
∗1 XXhXXmXXs, RXXhXXmXXs
[h], [m] and [s] indicate “hour”, “minute” and “second”.
∗2 The displaying is performed in the following priority order: location name information, travel
destination, name ([Baby]/[Pet]), and name ([Face Recog.]). When the place name information
or the number of days elapsed from day of departure are displayed, age in years/months is not
displayed.
- 171 -
List of monitor displays
The screen shown here is only an example. The actual display may vary.
• Press the [DISP.] button to change displays.
■In playback
1
2
3
4
5
6
7
8
9
1 Playback Mode (→111)
6 Print settings (→123)
2 Protected picture (→124)
Favorites (→122)
Date/text stamped display (→105, 118)
Color Mode (→103)
Retouched picture (→115, 116)
Resolution (→95)
Quality (→96)
7 Histogram (→62)
8 Video Divide (→48)
Series exposure group display (→109)
9 Motion picture playback (→45)
Panorama playback (→80)
Series exposure playback (→109)
3 Battery capacity (→16)
4 Picture number/Total pictures (→42)
5 GPS (→127)
(Continued on the next page)
- 172 -
List of monitor displays
The screen shown here is only an example. The actual display may vary.
• Press the [DISP.] button to change displays.
■In playback
16
15
14
13
12
11
10 Recording date/time
World time (→93)
Name∗1 (→82, 90)
Age in years/months∗1 (→82, 90)
Place name information∗1 (→135)
Destination settings∗1 (→92)
Travel elapsed days∗1 (→92)
Title∗1 (→117)
10
14 Series exposure information is being
retrieved (→109)
15 Recording quality (→107)
Motion picture recording time∗2 (→45)
Number of serial exposure pictures (→109)
16 Folder/File number (→42, 165)
Cable disconnection warning icon (→166)
11 Recording Mode (→25)
Flash (→66)
White Balance (→97)
Exposure Compensation (→71)
ISO Sensitivity (→96)
Aperture value/Shutter speed (→27, 73)
Elapsed playback time∗2 (→45)
12 [Auto Retouch] (→115)
[Creative Retouch] (→116)
13 LCD Mode (→55)
LCD power save (→57)
∗1 The displaying is performed in the following priority order: location name information, title, travel
destination, name ([Baby]/[Pet]), and name ([Face Recog.]). When the place name information
or the number of days elapsed from day of departure are displayed, age in years/months is not
displayed.
∗2 XXhXXmXXs
[h], [m] and [s] indicate “hour”, “minute” and “second”.
- 173 -
Message displays
Meanings of and required responses to major messages displayed on the monitor.
[This memory card cannot be used]
● A MultiMediaCard was inserted.
→ Not compatible with the camera. Use a compatible card.
[Some pictures cannot be deleted]
[This picture cannot be deleted]
● Non-DCF pictures (→42) cannot be deleted.
→ Save the needed data on a computer or other device, and then use [Format] on the camera. (→60)
[No additional selections can be made]
● The number of pictures that can be deleted at once has been exceeded.
● More than 999 pictures have been set as [Favorite].
● The number of pictures allowing [Title Edit], [Text Stamp] or [Resize] (multiple settings) at once has
been exceeded.
[Cannot be set on this picture]
● [Print Set], [Title Edit], or [Text Stamp] cannot be made for non-DCF pictures (→42).
[Please turn camera off and then on again]
[System Error]
● The lens is not working correctly.
→ Turn the camera off and back on again.
(Consult your Leica dealer or the nearest Leica Customer Care center if the message is still
displayed)
[Some pictures cannot be copied]
[Copy could not be completed]
● Pictures cannot be copied in the following cases.
→ A picture of same name already exists in built-in memory when copying from card.
→ A file is not of DCF standard (→42).
→ A picture taken or edited on a different device.
[Not enough space on built-in memory]
[Not enough memory on the card]
● There is no space left on the built-in memory or the card. When you copy pictures from the built-in
memory to the card (batch copy), the pictures are copied until the capacity of the card becomes is
depleted.
[Built-In Memory Error]
[Format built-in memory?]
● Is displayed when formatting the built-in memory with a computer, etc.
→ Reformat directly using the camera. The data will be deleted.
[Memory card error. This card cannot be used in this camera. Format this card?]
● The card format cannot be used with this camera.
→ Save the needed data on a computer or an other device, and then use [Format] on the camera.
(→60)
[Insert SD card again]
[Try another card]
● Access to the card has failed.
→ Insert the card again.
● Try with a different card.
- 174 -
Message displays
[Memory card parameter error]
● The card is not of SD standard.
● With capacities of 4 GB or more, only SDHC or SDXC Memory Cards are supported.
[Read Error] / [Write Error]
[Please check the card]
● Reading the data has failed.
→ Check whether the card has been inserted correctly (→19).
● Writing the data has failed.
→ Turn off the power and remove the card, before re-inserting and turning on the power again.
● The card may possibly be damaged.
● Try with a different card.
[Cannot record due to incompatible format(NTSC/PAL) data on this card.]
● Format the card after saving necessary data on a PC etc. (→60)
● Insert a different card.
[Motion recording was cancelled due to the limitation of the writing speed of the card]
● If recording stops even when using a card of the recommended speed class (→20), the data writing
speed has dropped. If this happens, we recommend backing up the data on the memory card and
formatting it (→60).
● Motion picture recording may be automatically terminated with certain cards.
[A folder cannot be created]
● The folder numbers in use have reached 999.
→ Save the needed data on a computer or an other device, and then use [Format] on the camera.
(→60)Folder number is reset to 100 when performing [No.Reset] (→58).
[Picture is displayed for 16:9 TV]
[Picture is displayed for 4:3 TV]
● The camera is connected through the supplied AV cable.
→ To remove a message immediately → Press [MENU/SET].
→ To change an aspect ratio → Change [TV Aspect] (→59).
● The USB connection cable (supplied) is only connected to camera.
→ The message disappears when the cable is also connected to another device.
[This battery cannot be used]
● Use a genuine Leica battery.
● The battery cannot be recognized as its terminals are dirty.
→ Wipe any dirt away from the battery terminal.
[GPS feature is not available in this region.]
● GPS may not work in China or in the border regions of countries neighboring China. (Current as of
December 2011)
[Recording failed.]
● Recording may be impossible if the recording location for a 3D image is too dark/too bright, or if the
subject lacks contrast.
- 175 -
Q&A
Troubleshooting
Try checking these items (→176 - 183) first.
If the problem persists, performing [Reset] in the [Setup] menu may resolve the issue
(→58). (Note that except for some items such as [Clock Set], all settings are returned to
their values at the time of purchase.)
Battery, power
The charging lamp turns off before the battery is fully charged.
● Charging is being performed in a place with an extremely high or low temperature.
→ Reconnect the USB connection cable (supplied) and retry charging in a place where the ambient
temperature is 10°C to 30°C (50°F to 86°F) (temperature conditions also apply to the battery
itself).
(When the USB connection cable is reconnected after the battery is fully charged, the charging
lamp will light for approximately 15 seconds.)
The charging lamp turns on again after it had turned off.
● The battery is being recharged.
→ If the battery charge level is low when the camera is turned off and [GPS Setting] is set to [ON],
battery recharging may be started automatically.
The camera does not work even if the power is turned on.
● The battery is not inserted correctly (→14), or needs recharging.
The monitor is switched off even if power is turned on.
The camera switches off as soon as the power is turned on.
● [Sleep Mode] is activated. (→57)
→ Press the shutter release button halfway to release.
● The battery needs recharging.
The camera is switched off automatically.
● If you connect to a TV compatible with HDTV Link (HDMI) with the HDMI mini cable (available as
accessory →9) and turn off the power on the TV with the remote control for the TV, the camera is
also switched off.
→ If you are not using HDTV Link (HDMI), set [HDTV Link] to [OFF]. (→59)
GPS
Positioning is not performed.
● When [GPS Setting] is set to [OFF]. (→128)
● Depending on the recording environment, such as when indoors or near buildings, it may not be
possible to correctly receive the signals from the GPS satellites. (→127)
→ When using the GPS, we recommend holding the camera still for a while with the built-in GPS
antenna facing upward in an outdoor location where you can see the entire sky.
The GPS status indicator lights up while the camera’s power is off.
● [GPS Setting] is [ON].
→ Electromagnetic radiation from the camera can affect instruments and meters. During takeoff and
landing of airplanes or in other restricted areas, set [GPS Setting] to [OFF] or set [Airplane Mode]
to [ON], and then turn off the camera.
- 176 -
Q&A Troubleshooting
GPS (continued)
Positioning takes time.
● When using the camera for the first time or after not using it for a while, positioning may take several
minutes.
● Positioning usually takes less than two minutes, but because the positions of the GPS satellites
change, it may take longer depending on the recording location and environment.
→ Positioning can be executed faster when you download GPS assist data to the camera using the
“GPS Assist Tool”. (→140)
● Positioning will take time in environments where it is difficult to receive the signals from the GPS
satellites. (→127)
The location name information is different from the recording location.
● Immediately after the camera’s power is turned on or when the GPS icon is something other than
, the location name information that is recorded in the camera may vary significantly from the
current position.
● When is displayed for the location name information, the information can be changed to a
different candidate before starting to record. (→135)
● You can edit a place name or landmark name recorded in a picture.
The location name information is not displayed.
● “- - -” is displayed if there is no nearby landmark or other points, or no information registered in the
camera’s database. (→130)
→ During playback, a location name or other information can be entered with [Edit Place Name].
(→138)
Map
The detailed maps are not displayed.
● Use the “LEICA Map Tool” software on the DVD (supplied) to copy map data from the DVD. (→149)
Some place names are not displayed.
● Detailed maps are displayed when you copy map data from the DVD (supplied). (→149)
(Note, however, that not all place names are stored in the DVD.)
● Place names may not be displayed for some map scale settings.
→ Enlarge the map scale.
It takes time to copy the map data.
● Since the map data size is large, it may take time to copy the map data. We recommend copying the
map data of a required area only.
● When you copy map data by connecting the camera to the computer, it may take longer than the
time required for copying the data using the commercially available card reader/writer.
Recording
Pictures are not recorded.
● The REC/PLAY switch is not set to (record).
● The built-in memory/card is full. → Create memory capacity by deleting unwanted pictures (→49).
The recorded pictures look clouded.
● The lens is dirty (fingerprints, etc.).
→ Turn on the power to extend lens barrel, and clean the lens surface with a soft, dry cloth.
● The lens is fogged (→6).
The recorded pictures are too bright/too dark.
● Adjust the exposure (→71).
● [Min. Shtr Speed] is set to a fast speed. Check the setting (→102).
- 177 -
Q&A Troubleshooting
Recording (continued)
Several pictures are taken when I press the shutter release button just once.
● The camera is set to use [Auto Bracket] or [Burst].
The focus setting is not correct.
● The mode set is not appropriate for the distance to the subject. (The focus range varies according to
recording mode.)
● The subject is outside of the focus range. (→68)
● This may be caused by camera shake or subject movement. (→27)
The recorded pictures are blurred. The optical Image Stabilizer is ineffective.
● The shutter speed is slower in dark locations and the Optical Image Stabilizer is less effective.
→ Hold the camera firmly with both hands, keeping your arms close to your body.
● Use a tripod and the self-timer (→70) when using slower shutter speed with [Min. Shtr Speed].
[Auto Bracket] cannot be used.
● The remaining memory capacity is only enough for 2 pictures or fewer.
The recorded pictures appear coarse, or there is interference.
● The ISO Sensitivity is high, or the shutter speed is low.
(Default [Sensitivity] setting is [AUTO] – interference may appear with indoor pictures.)
→ Reduce the [Sensitivity] (→96).
→ Take the pictures in brighter locations.
● The camera is set to [High Sens.] Scene mode.
(The picture becomes slightly coarser in response to high sensitivity)
Striping or flicker may appear under lighting such as fluorescent and LED
lighting.
● This is a characteristic of MOS sensors like the one in this camera. This is not a
malfunction.
The brightness and the color of a recorded picture differ from reality.
● When recording under fluorescent or LED lighting etc., increasing the shutter speed may introduce
slight changes to brightness and color. These are a result of the characteristics of the light source
and do not indicate a malfunction.
● When recording subjects in extremely bright locations or recording under fluorescent lighting, LED
lighting, mercury lamps, sodium lighting etc., the colors and screen brightness may change or
horizontal striping may appear on the screen.
Reddish horizontal streaks appear on the monitor during recording.
● This is characteristic of MOS sensors like the one in this camera. It appears when the subject has a
bright part. Some unevenness may occur in the surrounding areas, but this is not a malfunction. It is
recorded in motion pictures but not in still pictures.
● It is recommended that you take pictures while taking care not to expose the screen to sunlight or
any other source of strong light.
- 178 -
Q&A Troubleshooting
Recording (continued)
Motion picture recording stops midway.
● With camera models 18 176 / 18 177
If [Rec Quality] of [AVCHD] motion pictures is set to [GPH], [PSH], [GFS] or [FSH], you can
continuously record a motion picture for up to 29 minutes . (→107)
You can continuously record a motion picture in [MP4] for up to 29 minutes or approx. 4 GB.
(In this case, you can continuously record a motion picture in [FHD] for up to approx. 27 minutes
12 seconds.)
With camera model 18 175
Motion pictures can be recorded continuously for up to 29 minutes. Also, motion picture recorded
continuously in [MP4] is up to 4 GB. (In this case, you can continuously record a motion picture in
[FHD] for up to approx. 27 minutes 12 seconds.)
● If the surrounding temperature is high, or a motion picture is recorded continuously, is displayed
and recording may be stopped halfway through to protect the camera. (Only when [Rec Quality] is
set to [GPH], [PSH], [GFS] or [FSH])
● With some cards, the access display may appear briefly after recording, and recording may end
midway.
● If recording stops even when using a card of the recommended speed class (→20), the data writing
speed has dropped. If this happens, we recommend backing up the data on the memory card and
formatting it (→60).
Panorama picture recording stops before finishing.
● If the pan motion of the camera is too slow, the camera assumes that the operation has been
aborted and stops recording.
● If the pan motion of the camera is too shaky when it is moved in the recording direction, the camera
stops recording.
→ To record panorama pictures, pan the camera in a small circular motion parallel to the recording
direction at a speed of approx. 8 seconds per revolution (guideline).
The subject cannot be locked. (AF tracking fails)
● If the color of the subject is similar to that of its background, AF Tracking may not function. Set the
AF area to those colors specific to the subject by aiming the AF frame at that area.
Monitor
The display brightness changes.
● The aperture value is set while the shutter release button is pressed halfway. (This does not affect
recorded picture.)
This symptom may also occur when the brightness changes because the zoom is operated or the
camera is moved. This is the automatic aperture operation of the camera and is not a malfunction.
The monitor image flickers indoors.
● The monitor may flicker for a few seconds after turning it on. This is an operation to correct flicker
caused by lighting such as fluorescent lights, LED lights etc. and is not a malfunction.
The monitor image is too bright/too dark.
● [LCD Mode] is activated (→55)
● Use [LCD Display] to adjust the brightness of the monitor. (→55)
Black/blue/red/green dots or interference appears. The monitor image looks distorted
when touched.
● This is not a fault, and will not be recorded on the actual pictures.
- 179 -
Q&A Troubleshooting
Flash
No flash is emitted.
● The flash is set to [Forced Flash Off] (→66).
● The flash becomes unavailable in the following cases :
• [Auto Bracket]
• [Burst] (However, when
[Flash Burst] is selected, the flash is fixed to
[Forced Flash On].)
• Scene Modes ([Scenery] [Panorama Shot] [Night Scenery] [Handheld Night Shot] [HDR] [Sunset]
[Through window] [High Speed Video])
• [3D Photo Mode]
• [Creative Control] Mode
Multiple flashes are emitted.
● Red-eye reduction is active (→66). (Flashes twice to prevent eyes appearing red.)
● [Burst] is set to [Flash Burst] (→87).
Playback
Pictures have been rotated.
● [Rotate Disp.] is activated (→60)
Pictures cannot be viewed. There are no recorded pictures.
● The REC/PLAY switch is not set to (play).
● There are no pictures in the built-in memory or on the card (pictures played from the card if one is
inserted, from the built-in memory if not).
● Has the file name of the picture been changed on a computer? If so, it cannot be played back on the
camera.
● The [Playback Mode] has been changed.
→ Set [Playback Mode] to [Normal Play] (→111).
The folder/file number is displayed as [-]. The picture is black.
● The picture has been edited on a computer or a taken with a different device.
● The battery had been removed immediately after the picture was taken, or the picture was taken
with a low battery.
→ Use [Format] to delete (→60).
An incorrect date is displayed in Calendar Playback.
● The picture has been edited on a computer or taken with a different device.
● [Clock Set] is incorrect (→23).
(An incorrect date may be displayed in Calendar Playback on pictures copied to a computer and
then back to the camera, if the computer and camera dates differ.)
White round spots like soap bubbles appear on the recorded picture.
● If you take a picture with the flash in a dark place or indoors, white round spots may
appear on the picture caused by particles such as dust in the air reflecting the light
from the flash. This is not a fault. A characteristic of this is that the number of round
spots and their position differ in every picture.
[Thumbnail is displayed] is shown on the screen.
● The pictures may have been recorded on another device. If so, they may be displayed with poor
picture quality.
- 180 -
Q&A Troubleshooting
Playback (continued)
Red parts are rendered black in the recorded pictures.
● When digital red-eye correction (
,
) is operating, if a subject is recorded that has skincolored areas with red areas inside, the digital red-eye correction function may blacken the red
areas.
→ We recommend setting the flash to
,
or , or [Red-Eye Removal] to [OFF] before
recording.
Sounds of camera operations such as zooming are recorded in motion pictures.
● Camera operation sounds may be recorded when the camera automatically adjusts the lens
aperture during motion picture recording; this is not a fault.
Motion pictures taken by this camera cannot be played back with other cameras.
● When motion pictures recorded in [AVCHD], [MP4] or [High Speed Video] (Motion JPEG) are played
back, they may be displayed with poor picture quality or sound quality or may not be played back at
all even if an AVCHD, MP4 or Motion JPEG compatible device is used. Also, there might be a case
that a recording information does not display correctly.
TV, computer, printer
No image appears on TV. The image is blurred or not colored.
● The devices are not connected correctly (→155).
● The television has not been switched to auxiliary input.
● Check the [Video Out] setting (NTSC/PAL) on the camera. (→59) (With camera model 18 175)
The display on the TV is different than that on the monitor.
● The aspect ratio may be incorrect, or the edges may be cut off with certain televisions.
Cannot play motion pictures on TV.
● The card is inserted into the TV.
→ Connect with the AV cable (included in scope of delivery) or the HDMI mini cable (available as
accessory →9) and play on camera (→155).
The picture is not displayed on the complete TV screen.
● Check the [TV Aspect] settings (→59).
HDTV Link (HDMI) does not work.
● Is the HDMI mini cable (available as accessory →9) connected correctly? (→155)
→ Check that the it is fully inserted.
● Is the camera’s [HDTV Link] setting set to [ON]? (→59)
→ The input setting may not be able to be changed automatically with certain television HDMI
sockets. In this case, please change the input setting with your television’s remote control
(consult your television’s instructions for details).
→ Check the HDTV Link (HDMI) settings on the device you are connecting to.
→ Turn the camera’s power off and on again.
→ Turn the “HDTV Link control (HDMI device control)” setting on your television to off and then to
on again. (Consult your TV’s instructions for details.)
Pictures cannot be sent to a computer.
● The connection is not correct (→164).
● Check whether the computer has recognized the camera.
→ Set [USB Mode] to [PC] (→58).
→ Switch the camera off and then back on again.
- 181 -
Q&A Troubleshooting
TV, computer, printer (continued)
The computer does not recognize the card (it only reads the built-in memory).
● Disconnect the USB connection cable (supplied) and reconnect with a card in place.
The computer does not recognize the card. (When using SDXC Memory Cards)
→ Check whether your computer is compatible with SDXC Memory Cards.
→ A message prompting you to format the card may appear when you connect it. Do not format the
card.
→ If the [Access] indicator on the monitor does not go off, switch off the camera before disconnecting
the USB connection cable.
Printing is not possible when connected to a printer.
● The printer is not compatible with PictBridge.
● Set [USB Mode] to [PictBridge(PTP)] (→58).
The edges of pictures are cut off when printing.
● Cancel any trimming or edgeless printing settings on the printer before printing.
(Consult the printer’s instructions.)
aspect ratio.
● The pictures were recorded in
→ If you are having your pictures printed in a shop, check if 16:9 sizes can be printed.
Printing panorama pictures does not succeed.
● The aspect ratio of panorama pictures is different from that of regular still pictures, and some
panorama pictures may not be printed correctly.
→ Use a printer with support for panorama pictures. (Refer to the instructions for the printer.)
- 182 -
Q&A Troubleshooting
Others
The menu is not displayed in the desired language.
● Change the [Language] setting (→61).
The camera rattles if shaken.
● This sound is made by the lens movement and is not a fault.
The red lamp is illuminated when pressing the shutter release button halfway in dark
locations.
● [AF Assist Lamp] is set to [ON] (→103).
The AF Assist Lamp is not illuminated.
● [AF Assist Lamp] is set to [OFF] (→103).
● The lamp is not switched on in bright locations.
The camera is hot.
● The camera may become a little warm during use, but this does not affect performance or quality.
The lens makes a clicking noise.
● When the brightness changes, the lens may make a clicking noise and the monitor brightness may
also change, but this is due to aperture settings being made.
(This does not affect recording.)
The displayed time is incorrect.
● The camera has not been used for a long time.
→ Reset the clock (→24).
● A long time was taken to set the clock (clock will be behind by the same lapse of time).
Zooming stops momentarily.
● The zoom movement stops momentarily during Extra Optical Zoom operation, but this is not a
malfunction.
The lens does not allow setting the longest focal length/the maximum zoom ratio.
● If the zoom ratio stops at 3 x, [Macro Zoom] has been set. (→69)
The file numbers are not recorded in sequence.
● File numbers are reset when new folders are created (→165).
The file numbers have jumped backwards.
● The battery was removed/inserted with power on.
(Numbers may jump backwards if the folder/file numbers are not correctly recorded.)
- 183 -
Usage cautions and notes
When in use
● The camera may become warm if used for long periods of time, but this is not a fault.
● Keep the camera as far away as possible from electromagnetic equipment (such as
microwave ovens, TVs, video games etc.).
• If you use the camera on top of or near a TV, the pictures and/or sound may be disrupted by
electromagnetic radiation.
• Do not use the camera near cell phones because doing so may result in noise adversely affecting
the pictures and/or sound.
• Recorded data may be damaged, or pictures may be distorted, by strong magnetic fields created
by speakers or large motors.
• Electromagnetic radiation generated by microprocessors may adversely affect the camera,
disturbing the pictures and/or sound.
• If the camera is adversely affected by electromagnetic equipment and stops functioning properly,
turn it off and remove the battery or disconnect the charger. Then reinsert the battery or reconnect
the charger and turn the camera on.
Do not use the camera near radio transmitters or high-voltage lines.
• If you record near radio transmitters or high-voltage lines, the recorded pictures and/or sound may
be adversely affected.
● Do not extend the supplied cord or cable.
● Do not allow the camera to come into contact with pesticides or volatile substances (they can cause
surface damage or the coating to peel).
● Never leave the camera and the battery in a car or on a car hood in the summer.
It may cause leakage of the battery electrolyte, a generation of heat, and may cause a fire and the
battery to explode due to the high temperature.
Caring for your camera
To clean your camera, remove the battery or disconnect the power plug from the outlet, and wipe with
a soft, dry cloth.
● Use a damp cloth to remove stubborn stains, before wiping with a dry cloth.
● Do not use benzine, thinners, alcohol, or kitchen detergent, as these may damage the outer casing
and finish of the camera.
● If using a chemically-treated cloth, read the supplied instructions carefully.
● Do not obstruct the lens barrel’s movement.
When not using for a while
● Switch off the camera before removing the battery and the card (ensure that the battery is removed
to prevent damage through over-discharge).
● Do not leave the camera in contact with rubber or plastic bags.
● Store the camera together with a drying agent (silica gel) if leaving in drawer, etc. Store batteries
in cool (15°C to 25°C (59°F to 77°F)) places with low humidity (40%RH to 60%RH) and no major
temperature changes.
● Charge the battery once per year and deplete it completely before storing again.
- 184 -
Usage cautions and notes
Memory cards
● To prevent damage to cards and data
• Avoid high temperatures, direct sunlight, electromagnetic radiation, and static electricity.
• Do not bend, drop, or expose to strong impacts.
• Do not touch terminals on reverse of card or allow them to become dirty or wet.
● When disposing of/transferring memory cards
• Using the “format” or “delete” functions on your camera or computer only changes the file
management information, and does not completely delete the data on the memory card. When
disposing of or transferring your memory cards, we recommend physically destroying the memory
card itself, or using commercially available computer data erasing software to completely delete
the data from the card. Data within memory cards should be managed responsibly.
Monitor
● Do not exert excessive force on the monitor surface. This may cause an uneven display and
damage it.
● In cold climates or other situations when the camera becomes cold, the monitor may appear slightly
darker than normal immediately after the camera is turned on. Normal brightness will return once
the internal components have warmed up.
Extremely high precision technology is employed to produce the monitor. However some dark or
bright spots (red, blue or green) may appear on the screen. This is not a malfunction. The monitor
screen has more than 99.99% effective pixels with a mere 0.01% of the pixels inactive or always
lit. The spots will not be recorded on pictures on the built-in memory or a card.
About charging the battery
● The time required for charging varies depending on conditions of battery usage. Charging takes
longer at high or low temperatures and when the battery has not been used in some time.
● The battery will get warm during charging and for some time thereafter.
● The battery will run out if not used for long periods of time, even after being charged.
● Do not leave any metal items (such as clips) near the power plug terminals.
Otherwise, a fire and/or electric shocks may be caused by short-circuiting or the resulting heat
generated.
● Frequently charging the battery is not recommended.
(This would reduce maximum usage time and can cause battery to expand.)
● If the available battery power is significantly reduced, it is reaching its end of lifespan. Please
purchase a new battery.
● When charging:
• Wipe dirt from the battery terminals with a dry cloth.
• Keep at least 1 m (3.3 feet) away from an AM radio (otherwise, it might cause radio interference).
● Do not use a damaged or dented battery (especially the terminals), e.g. by dropping (this can cause
faults).
- 185 -
Usage cautions and notes
About the charger (supplied)
● Keep it at least 1 m (3.3 feet) away from an AM radio (otherwise, it might cause radio interference).
● The charger may generate whirring sounds when it is being used. This is not a malfunction.
● After use, be sure to disconnect the connection to the electrical outlet. (A very small amount of
current is consumed if it is left connected.)
Lens
● Images may appear slightly clouded if the lens is dirty (fingerprints, etc.). Turn the power on, hold
the extracted lens barrel with your fingers, and gently wipe the lens surface with a soft, dry cloth.
● Do not leave the lens exposed to direct sunlight.
● Do not obstruct the movement of the lens barrel, as this may damage the lens. Be careful when
removing the camera from a bag, etc.
When using a tripod or unipod
● Do not apply excessive force or damaged or bent screws. (This may damage the camera, the
camera’s tripod thread, or the label.)
● Ensure that the tripod is stable. (Refer to the tripod’s instructions.)
● You may not be able to remove the card or the battery when using a tripod or unipod.
About 3D viewing
● Anyone who is hypersensitive to light, suffers from heart disease or is otherwise unwell should avoid
viewing 3D contents.
• Viewing 3D contents may have an adverse effect to the individual.
● If you feel tired, uncomfortable or otherwise strange when viewing 3D contents, stop viewing at
once.
• Continuing to view may cause illness.
• After stopping viewing, please rest appropriately.
When
viewing 3D contents, we recommend taking a break every 30 to 60 minutes.
●
• Viewing for extended periods may cause eye-fatigue.
● Short-sighted or long-sighted persons, those with differences in the sight of their right and left eyes,
and those with astigmatism are advised to correct their vision by wearing glasses etc.
Stop viewing if you can clearly see a double image while viewing 3D contents.
• There are differences in the way that different people experience 3D contents. Please correct your
sight appropriately before viewing 3D contents.
• You can change the 3D setting of your television or 3D output setting of the unit to 2D.
- 186 -
Usage cautions and notes
Personal Information
If names or birthdays are set in [Baby] Mode or in the [Face Recog.] function, keep in mind that the
camera and recorded pictures will contain personal information.
● Disclaimer
• Data containing personal information can be altered or lost due to malfunction, static electricity,
accidents, breakdowns, repairs, or other operations.
Leica Camera AG will not be liable for any damage that occurs, direct or indirect, as a result of the
alteration or loss of data containing personal information.
● When ordering repairs or transferring/disposing of the camera
• To protect your personal information, please reset the settings. (→58)
• If any pictures are contained in the built-in memory, copy (→126) them to a memory card if
necessary, and then format (→60) the built-in memory.
• Remove the memory card from the camera.
• When ordering repairs, the built-in memory and other settings may be returned to the initial
purchase state.
• If the above operations cannot be performed because of a camera malfunction, consult your Leica
dealer or the nearest Leica Customer Care facility.
When transferring or disposing of your memory card, see “When disposing of/transferring
memory cards” in the previous section (→185).
- 187 -
Usage cautions and notes
Important! Be sure to read the following
before using the location names that
are stored in this product.
Licence Agreement for
Place Name and Map Data
Personal Use Only.
You agree to use this Data together with
this digital camera for the solely personal,
non-commercial purposes for which you
were licensed, and not for service bureau,
time-sharing or other similar purposes.
Accordingly, but subject to the restrictions
set forth in the following paragraphs, you
agree not to otherwise reproduce, copy,
modify, decompile, disassemble or reverse
engineer any portion of this Data, and
may not transfer or distribute it in any
form, for any purpose, except to the extent
permitted by mandatory laws. Multi-disc
sets may only be transferred or sold as a
complete set as provided by Leica Camera
AG and not as a subset thereof.
Restrictions.
Except where you have been specifically
licensed to do so by Leica Camera AG,
and without limiting the preceding
paragraph, you may not (a) use this Data
with any products, systems, or applications
installed or otherwise connected to or in
communication with vehicles, capable
of vehicle navigation, positioning,
dispatch, real time route guidance, fleet
management or similar applications; or
(b) with or in communication with any
positioning devices or any mobile or
wireless-connected electronic or computer
devices, including without limitation cellular
phones, palmtop and handheld computers,
pagers, and personal digital assistants or
PDAs.
Warning.
The Data may contain inaccurate or
incomplete information due to the
passage of time, changing circumstances,
sources used and the nature of collecting
comprehensive geographic data, any of
which may lead to incorrect results.
- 188 -
Usage cautions and notes
No Warranty.
This data is provided to you “as is,” and
you agree to use it at your own risk.
Leica Camera AG and its licensors (and
their licensors and suppliers) make no
guarantees, representations or warranties
of any kind, express or implied, arising
by law or otherwise, including but not
limited to, content, quality, accuracy,
completeness, effectiveness, reliability,
fitness for a particular purpose, usefulness,
use or results to be obtained from this
data, or that the data or server will be
uninterrupted or error-free.
Disclaimer of Warranty:
LEICA CAMERA AG AND ITS
LICENSORS (INCLUDING THEIR
LICENSORS AND SUPPLIERS)
DISCLAIM ANY WARRANTIES,
EXPRESS OR IMPLIED, OF QUALITY,
PERFORMANCE, MERCHANTABILITY,
FITNESS FOR A PARTICULAR PURPOSE
OR NON-INFRINGEMENT. Some States,
Territories and Countries do not allow
certain warranty exclusions, so to that
extent the above exclusion may not apply
to you.
Disclaimer of Liability:
LEICA CAMERA AG AND ITS
LICENSORS (INCLUDING THEIR
LICENSORS AND SUPPLIERS) SHALL
NOT BE LIABLE TO YOU: IN RESPECT
OF ANY CLAIM, DEMAND OR ACTION,
IRRESPECTIVE OF THE NATURE OF
THE CAUSE OF THE CLAIM, DEMAND
OR ACTION ALLEGING ANY LOSS,
INJURY OR DAMAGES, DIRECT OR
INDIRECT, WHICH MAY RESULT FROM
THE USE OR POSSESSION OF THE
INFORMATION; OR FOR ANY LOSS OF
PROFIT, REVENUE, CONTRACTS OR
SAVINGS, OR ANY OTHER DIRECT,
INDIRECT, INCIDENTAL, SPECIAL OR
CONSEQUENTIAL DAMAGES ARISING
OUT OF YOUR USE OF OR INABILITY
TO USE THIS INFORMATION, ANY
DEFECT IN THE INFORMATION, OR
THE BREACH OF THESE TERMS OR
CONDITIONS, WHETHER IN AN ACTION
IN CONTRACT OR TORT OR BASED
ON A WARRANTY, EVEN IF LEICA
CAMERA AG OR ITS LICENSORS HAVE
BEEN ADVISED OF THE POSSIBILITY
OF SUCH DAMAGES. Some States,
Territories and Countries do not allow
certain liability exclusions or damages
limitations, so to that extent the above may
not apply to you.
- 189 -
Usage cautions and notes
Export Control.
Leica Camera AG shall not export from
anywhere any part of the Data or any
direct product thereof except in compliance
with, and with all licenses and approvals
required under, applicable export laws,
rules and regulations, including but not
limited to the laws, rules and regulations
administered by the Office of Foreign
Assets Control of the U.S. Department
of Commerce and the Bureau of Industry
and Security of the U.S. Department
of Commerce. To the extent that any
such export laws, rules or regulations
prohibit NT from complying with any
of its obligations hereunder to deliver
or distribute Data, such failure shall be
excused and shall not constitute a breach
of this Agreement.
Entire Agreement.
These terms and conditions constitute
the entire agreement between Leica
Camera AG (and its licensors, including
their licensors and suppliers) and you
pertaining to the subject matter hereof,
and supersedes in their entirety any and
all written or oral agreements previously
existing between us with respect to such
subject matter.
- 190 -
Usage cautions and notes
About Location Information, Place Name Information, and Maps
About the geographical coordinate system
The latitude and longitude standard (geographical coordinate system) recorded with this
camera is WGS84.
Mapple Digital Map Data
These maps were prepared using the following maps of the Geospatial Information
Authority of Japan (GSI), with the approval of the Director General of GSI: 1:25,000 scale
topographic maps, 1:200,000 scale regional maps, 1:1,000,000 scale maps of Japan, and
1:500,000 scale district maps. (Approval nos. for use of 2011 information: nos. 15-, 13-,
and 12-M055541)
About copyright
According to copyright law, the map data stored in this camera may not be used for
purposes other than personal use without the permission of the copyright holder.
About navigation functions
This camera is not equipped with a navigation function.
Notices related to licensed software copyright holders
© 2011 NAVTEQ. All rights reserved.
“MAPPLE” is a trademark of Shobunsha Publications, Inc.
This data includes information taken with permission from Canadian authorities, including
© Her Majesty the Queen in Right of Canada, © Queen’s Printer for Ontario, © Canada
Post Corporation, GeoBase®, © Department of Natural Resources Canada. All rights
reserved.
© United States Postal Service® 2011, USPS®, ZIP+4®
Fuente: INEGI (Instituto Nacional de Estadística y Geografía)
Traffic Codes for Belgium are provided by the Ministerie van de Vlaamse Gemeenschap
and the Ministèrie de l’Equipement et des Transports.
- 191 -
Usage cautions and notes
Territory
Notice
Australia
© Hema Maps Pty. Ltd, 2011.
Copyright. Based on data provided under license from PSMA
Australia Limited (www.psma.com.au).
Product incorporates data which is © 2011 Telstra Corporation
Limited, GM Holden Limited, Intelematics Australia Pty Ltd,
NAVTEQ International LLC, Sentinel Content Pty Limited and
Continental Pty Ltd.
Austria
“© Bundesamt für Eich- und Vermessungswesen”
Croatia, Cyprus, Estonia, Latvia,
Lithuania, Moldova, Poland,
Slovenia and/or Ukraine
“© EuroGeographics”
Ecuador
INSTITUTO GEOGRAFICO MILITAR DEL ECUADOR
AUTORIZACION N° IGM-2011-01- PCO-01 DEL 25 DE ENERO
DE 2011
France
The following notice must appear on all copies of the Data, and
may also appear on packaging:
“source: © IGN France – BD TOPO ®”
Germany
“Die Grundlagendaten wurden mit Genehmigung der
zuständigen Behörden entnommen” or “Die Grundlagendaten
wurden mit Genehmigung der zustaendigen Behoerden
entnommen.”
Great Britain
“Contains Ordnance Survey data © Crown copyright and
database right 2010
Contains Royal Mail data © Royal Mail copyright and database
right 2010”
Greece
“Copyright Geomatics Ltd.”
Guadeloupe, French Guiana
Martinique
“source: © IGN 2009 - BD TOPO ®”
Guatemala
“Aprobado por el INSTITUTO GEOGRAFICO NACIONAL –
Resolución del IGN No 186-2011”
Hungary
“Copyright © 2003; Top-Map Ltd.”
Israel
“© Survey of Israel data source”
Italy
“La Banca Dati Italiana è stata prodotta usando quale
riferimento anche cartografia numerica ed al tratto prodotta e
fornita dalla Regione Toscana.”
Jordan
“© Royal Jordanian Geographic Centre”.
The foregoing notice requirement for Jordan Data is a
material term of the Agreement. If Client or any of its permitted
sublicensees (if any) fail to meet such requirement, NT shall
have the right to terminate Client’s license with respect to the
Jordan Data.
Mozambique
“Certain Data for Mozambique provided by Cenacarta © 2011
by Cenacarta”
Norway
“Copyright © 2000; Norwegian Mapping Authority”
Portugal
“Source: IgeoE – Portugal”
Réunion
“source: © IGN 2009 - BD TOPO ®”
Spain
“Información geográfica propiedad del CNIG”
Nepal
Copyright © Survey Department, Government of Nepal.
- 192 -
Usage cautions and notes
Territory
Notice
Sri Lanka
This product incorporates original source digital data obtained
from the Survey Department of Sri Lanka
© 2009 Survey Department of Sri Lanka
The data has been used with the permission of the Survey
Department of Sri Lanka
Sweden
“Based upon electronic data © National Land Survey Sweden.”
Switzerland
“Topografische Grundlage: © Bundesamt für
Landestopographie.”
- 193 -
Usage cautions and notes
■Landmark types
Although approx. 1,000,000 landmarks are registered in the built-in memory, there
are also some unregistered landmarks. (The registered information is current as of
December 2011 and will not be updated.)
• It differs from that registered on our GPS-equipped models before 2011.
Zoo
Botanical garden
Aquarium
Amusement park
Golf course
Camp sites
Ski resorts
Skating rinks
Outdoor activity sites
Famous site, tourist attraction,
beauty spot
Castle, ruins
Shrine
Temple
Church
Tomb, monument, mound,
historic site
Airport
Port
Ferry terminal
Baseball park
Athletics ground
Gymnasium
Park
Station
Prefectural or state office
Lifts, cable cars
Art museum
History museum
Theatre
Cinemas, performing theatres
Wineries, breweries
Mountains, meadows, passes
Canyons, mountain streams,
waterfalls, valleys, seashores
Tower, high-rise building
- 194 -
Leica service addresses
Leica Academy
As well as outstanding high-performance products for taking and viewing photographs,
for many years we have also been offering the special services of the Leica Akademie,
with practical seminars and training courses, which are intended to share our knowledge
about the world of photography, projection and magnification with both beginners and
advanced photo graphic enthusiasts.
The contents of the courses, which are run by a trained team of experts in the modern,
well-equipped training suite at our Solms factory and in the nearby Gut Altenberg, vary
from general photography to areas of special interest and offer a range of suggestions,
information and advice for your own work.
More detailed information and the current Leica Academy brochure are available from:
Leica Camera AG
Leica Akademie
Oskar-Barnack-Str. 11
D-35606 Solms
Phone: +49 (0) 6442-208-421
Fax:
+49 (0) 6442-208-425
[email protected]
Leica on the Internet
Current information about products, news, events and the Leica company is available on
our homepage on the Internet at:
http://www.leica-camera.us
http://www.leica-camera.co.uk
- 195 -
Leica service addresses
Leica Information Service
Should you have any technical questions regarding the use of Leica products or the
software included in some cases, Leica information service will be happy to answer in
writing or by phone, fax, or e-mail.
They are also your contact if you need advice concerning an acquisition or if you would
like us to send you instructions.
Alternatively, you can also send us your questions through the contact form on the Leica
Camera AG homepage (see above).
Leica Camera AG
Information-Service / Software-Support
Postfach 1180
D-35599 Solms
Phone: +49 (0) 6442-208-111 / -108
Fax:
+49 (0) 6442-208-490
[email protected] / [email protected]
Leica Customer Care
Leica Camera AG’s Customer Care center, or the repair service of the Leica national
offices (see the Warranty Card for an address list), is available to assist you in
maintaining your Leica equipment or in case of damage.
Please contact your nearest authorised Leica dealer.
Leica Camera AG
Customer Care
Solmser Gewerbepark 8
D-35606 Solms
Phone: +49 (0) 6442-208-189
Fax:
+49 (0) 6442-208-339
[email protected]
- 196 -
• HDMI, the HDMI Logo, and High-Definition Multimedia Interface
are trademarks or registered trademarks of HDMI Licensing
LLC in the United States and other countries.
• “AVCHD Progressive”, “AVCHD”, the “AVCHD Progressive”
Logo and the “AVCHD” Logo are trademarks of Panasonic
Corporation and Sony Corporation.
• Manufactured under license from Dolby Laboratories.
Dolby and the double-D symbol are trademarks of Dolby
Laboratories.
• SDXC Logo is a trademark of SD-3C, LLC.
• QuickTime and the QuickTime logo are trademarks or
registered trademarks of Apple Inc., used under license
therefrom.
• Windows and Windows Vista are either registered trademarks
or trademarks of Microsoft Corporation in the United States
and/or other countries.
• iMovie, Mac and Mac OS are trademarks of Apple Inc.,
registered in the U.S. and other countries.
• This product uses “DynaFont” from DynaComware Corporation.
DynaFont is a registered trademark of DynaComware Taiwan
Inc.
• Leica is a registered trademark of Leica Microsystems IR
GmbH.
• Elmar is a registered trademark of Leica Camera AG.
• Adobe Photoshop Elements and Adobe Premiere Elements are
registered trademarks of Adobe Systems Incorporated.
• Other names, company names, and product names printed in
these instructions are trademarks or registered trademarks of
the companies concerned.
This product is licensed under the AVC patent portfolio license for the personal and non-commercial
use of a consumer to (i) encode video in compliance with the AVC Standard (“AVC Video”) and/or
(ii) decode AVC Video that was encoded by a consumer engaged in a personal and non-commercial
activity and/or was obtained from a video provider licensed to provide AVC Video. No license is
granted or shall be implied for any other use. Additional information may be obtained from MPEG
LA, LLC.
See http://www.mpegla.com.
- 197 -
Leica Camera AG / Oskar-Barnack-Straße 11 /
D-35606 SOLMS / DEUTSCHLAND
Telefon +49 (0) 6442-208-0 / Telefax +49 (0) 6442-208-333
www.leica-camera.com