1
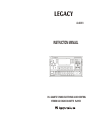
LEGACY
LR-203FX
INSTRUCTION MANUAL
PLL QUARTZ TUNING ELECTRONIC AUDIO CONTROL
STEREO CAR RADIO CASSETTE PLAYER
LOCATION AND FUNCTION OF CONTROLS
200K 50K
10K 9K
USA
EUROPE
IMPORTANT: This radio is set to USA frequency by factory, if European
frequency is required please flip the frequency step switch on
the side of the unit.
SPECIFICATION
GENERAL
Power Supply The Main Unit.........................DC 13.8 Volts. Negative Ground
Maximum Output Power................................................................40W X 4
Unit Dimension.....................................................181(W) x 181(D) x 53(H)
1. VOLUME BUTTON
Press the "+" button to increase volume level; press the "-" button to decrease
volume level.
SELECT BUTTON
Press it can select VOL/BAS/TRE/BAL/FAD, and with the +/- button to adjust
them, and the word which function it is selected will be indicated on LCD.
2. POWER BUTTON
Press it to select you desired radio band and the word which band is selected
will be indicated on LCD.
(NOTE: When it is off, you can press any button to turn on the unit.)
3. MANUAL TUNING UP/DOWN BUTTON
Press them to tune up or down, and the current frequency appears on LCD.
4. EJECT BUTTON
Push it to eject the tape.
5. CASSETTE DOOR COMPARTMENT
6.FAST FORWARD/REWIND PROGRAM BUTTONS
Push the fast forward and rewind buttons together to switch from one
side of the tape to the other.
7. LCD (LIQUID CRYSTAL DISPLAY)
FM SECTION
Frequency Range.......................................................87.5MHz - 107.9MHz
MW SECTION
Frequency Range...........................................................530KHz - 1710KHz
LW SECTION(OPTION)
Frequency Range............................................................144KHz - 290KHz
PRECAUTIONS AND MAINTENANCE
.1.This unit is designed for negative ground operation only. The equipment can
be used safely, if the negative terminal of the battery is connected to the
vehicle metal work.
2.Do not use speakers of impedance less than 4 ohms; and allow the speaker
wires to be shorted together when the unit is switched on.
Otherwise it may overload or burn out the power amplifier stage.
3.If the car interior is extremely hot, as after being parked in the sun, do not use
the player until the car has been driven for a while to cool off the interior.
4.Take care of your tape cassette to preserve the quality of the recordings. Do
not allow them to be exposed to direct sunlight. Store them in a place
protected from dirt and dust and avoid handing with greasy or oily hands.
Also, keep the away from magnets, and motors of the permanent magnet type.
5.It is not advisable to use cassette tapes longer than C-60(30 minutes per side)
in automobile players, since the tape is too thin and tends to become easily
entangled. Always remove cartridge from your tape player as soon as play is
finished.
6.The capstan and tape head should be cleaned about once every six months
with a soft cloth or cotton-wool swab, moistened with alcohol.
This will serve to maintain the richness and clarity of sound, and prevent loss
of volume. Do not use a screwdriver, or ferrous metal rod , in carrying out the
above cleaning. See illustration.
8. BAND BUTTON
Press it to select you desired radio band and the word which band is selected
will be indicated on LCD.
9. SEEK BUTTON
Press it to auto seek up frequency until find the desired broadcast.
10. AS/PS BUTTON
Press it to perform all stations memory for 5seconds each time.while memory
digital and frequency will flash on LCD.If thebutton is pressed for more than2
seconds,it will seek station on current band,Then write to the preset memories
and word ART willappear on :LCD.When the auto-storage operation is
completed, it will automatically perform for 5seconds each time.During the
memory station performing,press 1-6digital buttons to select and stop
scanning function.
11. STEREO/MONO BUTTON
Press it to change the sound effect.( Mono keep remain)
12. FREQUENCY/CLOCK SWITCH
Press this button to select the display mode such as frequency display or clock
display.(you can only adjust tine setting at clock display)
13. CD SWITCH
14. LOUDNESS BUTTON
press it to get the best loudness quality during it is for bass.And word LOUD
will appear on LCD.
7.A loosely wound cassette tape will get damaged. Prior to using such tape,
tighten it in a manner as guided by Fig. 2.A carelessly would cassette tape will
cause unnecessary pressure on the tape resulting in the cassette springing out
while the tape is running .For prevention, rewind the tape through fast for
warding or rewinding.
15. 1-6 PRESET BUTTONS
Press them to recall all storage station frequency which will appear on LCD,
stations can be memorized in band.
16. CD INPUT JACK
17. RET BUTTON
Press it to reset the functions when programms are disorder.
WIRING CONNECTION
INSTALLATION
PRECAUTIONS
ANTENNA PLUG
1. Choose the mounting location carefully so that the unit will not interfere with the
normal driving functions of the driver.
2. Avoid installing the unit where it would be subject to high temperatures, such as
from direct sunlight or hot air from the heater, or where it would be subject to
dust, dirt or excessive vibration.
3. Use only the supplied mounting hardware for a safe and secure installation.
PINK
MEMORY B+
FUSED
FILTER
BOX
0.5A &7A
FUSES
BLACK(GND)
RED (B+)
FRONT
LEFT
SP
REAR
+
GREY
+
GREY/WHITE
-
GREEN/WHITE
RED R
RCA LINE OUT
WHITE L
YELLOW
AUTO ANT
BROWN
BROWN/WHITE
GREEN
BLUE
BLUE/WHITE
+
FRONT
+
RIGHT
-
REAR
SP
ANTENNA PLUG
MEMORY B+
PINK
BLACK(GND)
RED (B+)
+
LEFT
SP
-
FUSED
FILTER
BOX
0.5A &7A
FUSES
RCA LINE OUT
WHITE L
YELLOW AUTO ANT
GREY
GREEN/WHITE
RED R
BROWN
HIGH POWER
BLUE/WHITE
+
-
NOTE:
1. If you have 2 speakers system, use 4 ohm impedance speaker.
2. If you have 4 speakers system, use 8 ohm impedance speaker.
To reduce the distortion during high volume level.
RIGHT
SP