
1
6.5-Inch WIDE TELEVISION
KVC-1000
INSTRUCTION MANUAL
© PRINTED IN JAPAN B64-1454-00 (E)(+)
00/12 11 10 9 8 7 6 5 4 3 2 1 99/12 11 10 9 8 7 6
English
Contents
Before Use
Safety Precautions . . . . . . . . . . . . . . . . . . . . . . . .4
Monitor Control Function
Opening the Monitor . . . . . . . . . . . . . . . . . . . . . .5
Closing the Monitor . . . . . . . . . . . . . . . . . . . . . . .5
Power Off . . . . . . . . . . . . . . . . . . . . . . . . . . . . . .5
Switching the Monitor’s Picture . . . . . . . . . . . . .5
Switching the TV/Video Picture Mode . . . . . . . . .5
Switching the AV Output Picture . . . . . . . . . . . . .6
Switching to the Angle/Screen Control Screen . .6
Turning the Monitor Picture Off . . . . . . . . . . . . . .6
Switching to the Source Control Screen . . . . . . .6
Changing the Background of the Source Control
Screen Picture . . . . . . . . . . . . . . . . . . . . . . . . . .6
Adjusting the Volume . . . . . . . . . . . . . . . . . . . . .6
Angle Control Screen
Adjusting the Angle Position . . . . . . . . . . . . . . . .7
Adjusting the Slide Position . . . . . . . . . . . . . . . . .7
Turning the Automatic Open/Close Function
On/Off . . . . . . . . . . . . . . . . . . . . . . . . . . . . . . . . .7
Switching to the Screen Control Screen . . . . . . .7
Ending the Angle Control Screen . . . . . . . . . . . . .7
Screen Control Screen
Adjusting the Picture Quality . . . . . . . . . . . . . . . .7
Turning the Dimmer Function On/Off . . . . . . . . .7
Switching to the Angle Control Screen . . . . . . . .7
Ending the Screen Control Screen . . . . . . . . . . . .7
System Setup Function
Menu Screen
Switching to the Menu Screen . . . . . . . . . . . . . .8
Switching to the Setup Menu Screen . . . . . . . . .8
Switching to the Audio Control Screen . . . . . . . .8
Switching to the Source Control Screen . . . . . . .8
Cancelling the Menu Screen . . . . . . . . . . . . . . . .8
Setup Menu Screen
Switching to the System Setting Screen . . . . . . .8
Switching to the TV Area Setting Screen . . . . . .8
Switching to the RDS Setting Screen . . . . . . . . .8
Switching to the DAB Setting Screen . . . . . . . . .8
Switching to the Clock Adjustment Screen . . . . .8
Switching to the Touch Panel Adjustment
Screen . . . . . . . . . . . . . . . . . . . . . . . . . . . . . . . . .8
Switching to the Code Security Screen . . . . . . . .8
Cancelling the Setup Menu Screen . . . . . . . . . . .8
System Setting Screen -1
Setting the AV Input . . . . . . . . . . . . . . . . . . . . . .9
Setting the AV Output . . . . . . . . . . . . . . . . . . . . .9
Setting the Built-In Speaker Mode . . . . . . . . . . . .9
Setting the Built-In Speaker Level . . . . . . . . . . . .9
Switching to the Setting Screen -2 . . . . . . . . . . .9
System Setting Screen -2
Setting the Auto Scroll Display Function . . . . . . .9
Setting the Touch Sensor Tone . . . . . . . . . . . . . .9
Setting the On Screen Display Function . . . . . . .9
Returning to the Setting Screen -1 . . . . . . . . . . .9
Ending the System Setting Screen . . . . . . . . . . .9
TV Area Setting Screen
Selecting the Preset Bands . . . . . . . . . . . . . . . .10
Selecting the Television Area . . . . . . . . . . . . . .10
Ending the TV Area Setting Screen . . . . . . . . . .10
Clock Adjustment Screen
Turning the Automatic Time Adjustment
On/Off . . . . . . . . . . . . . . . . . . . . . . . . . . . . . . . .10
Adjusting the Time Manually . . . . . . . . . . . . . . .10
Ending the Clock Adjustment Screen . . . . . . . .10
Code Security Screen
Mask Key . . . . . . . . . . . . . . . . . . . . . . . . . . . . . .11
Ending the Code Security Screen . . . . . . . . . . .11
Touch Panel Adjustment Screen
Adjusting the Touch Position . . . . . . . . . . . . . . .12
2
RDS Setting Screen
News Bulletin Function with PTY News
Timeout Setting . . . . . . . . . . . . . . . . . . . . . . . . .12
Alternative Frequency Function . . . . . . . . . . . . .13
Restricting RDS Region . . . . . . . . . . . . . . . . . . .13
Auto TP Seek Function . . . . . . . . . . . . . . . . . . .13
Ending the RDS Setting Screen . . . . . . . . . . . . .13
Audio Control Function
Audio Control Screen -1
Adjusting the Balance and Fader Levels . . . . . .14
Adjusting the Bass Level . . . . . . . . . . . . . . . . . .14
Adjusting the Treble Level . . . . . . . . . . . . . . . . .14
Switching to the Audio Control Screen -2 . . . . .14
Audio Control Screen -2
Turning the Loudness On/Off . . . . . . . . . . . . . .14
Setting the Preout . . . . . . . . . . . . . . . . . . . . . . .14
Setting the High-Pass Filter for Front and
Rear Output . . . . . . . . . . . . . . . . . . . . . . . . . . . .14
Adjusting the Non-Fading Preout Level . . . . . . .14
Returning to the Audio Control Screen -1 . . . . .14
Ending the Audio Control Screen . . . . . . . . . . . .14
TV Control Function
TV Control Screen (Main)
Selecting the Bands . . . . . . . . . . . . . . . . . . . . . .15
Selecting the Video Inputs . . . . . . . . . . . . . . . . .15
Selecting the Channels . . . . . . . . . . . . . . . . . . .15
Station Preset Memory . . . . . . . . . . . . . . . . . . .15
Recalling a Preset Station . . . . . . . . . . . . . . . . .15
Switching to the TV Control Screen (Shift) . . . .15
Switching to the Next Source Mode . . . . . . . . .15
Switching to the Previous Source Mode . . . . . .15
Switching to the Menu Screen . . . . . . . . . . . . .15
TV Control Screen (Shift)
Auto Memory Entry . . . . . . . . . . . . . . . . . . . . . .16
Selecting the Tuning Mode . . . . . . . . . . . . . . . .16
Switching to the TV List Screen . . . . . . . . . . . .16
Switching to the Name Set Screen . . . . . . . . . .16
Returning to the TV Control Screen (Main) . . . .16
TV List Screen
Selecting the Band List . . . . . . . . . . . . . . . . . . .16
Selecting the Station . . . . . . . . . . . . . . . . . . . . .16
Returning to the Source Control Screen . . . . . .16
Selecting the Channels on the TV
Picture Screen . . . . . . . . . . . . . . . . . . . . . . . . .17
FM/AM Tuner Control Function
Tuner Control Screen (Main)
Selecting the Bands . . . . . . . . . . . . . . . . . . . . . .18
Tuning . . . . . . . . . . . . . . . . . . . . . . . . . . . . . . . .18
Station Preset Memory . . . . . . . . . . . . . . . . . . .18
Recalling a Preset Station . . . . . . . . . . . . . . . . .18
Switching to the PTY Search Screen . . . . . . . .18
Switching to the Tuner Control Screen (Shift) . .18
Switching to the Next Source Mode . . . . . . . . .18
Switching to the Previous Source Mode . . . . . .18
Switching to the Menu Screen . . . . . . . . . . . . .18
Tuner Control Screen (Shift)
Auto Memory Entry . . . . . . . . . . . . . . . . . . . . . .19
Turning the Monaural Reception On/Off . . . . . .19
Selecting the Tuning Mode . . . . . . . . . . . . . . . .19
Turning the Local Seek Function On/Off . . . . . .19
Traffic Information Function . . . . . . . . . . . . . . . .20
Presetting the Volume for Traffic
Information/News . . . . . . . . . . . . . . . . . . . . . . .20
Returning the Tuner Control Screen (Main) . . . .20
PTY Search Screen
Changing the Display Language to French
or German . . . . . . . . . . . . . . . . . . . . . . . . . . . . .21
Selecting the Type of Programme to be
Received . . . . . . . . . . . . . . . . . . . . . . . . . . . . . .21
Seeking the Selected Programme Type . . . . . .21
DAB Setup Screen
Automatic Switching from DAB to RDS . . . . . .22
Dynamic Range Control . . . . . . . . . . . . . . . . . . .22
Restricting the DAB Region . . . . . . . . . . . . . . . .22
DAB Control Screen (Main)
Switching the Ensemble . . . . . . . . . . . . . . . . . .22
Selecting the Type of Programme to be
Received . . . . . . . . . . . . . . . . . . . . . . . . . . . . . .22
Service Preset Memory . . . . . . . . . . . . . . . . . . .22
Turning the DAB PTY Search On/Off . . . . . . . . .22
Switching the DAB Control Screen (Shift) . . . . .22
Switching to the Next Source Mode . . . . . . . . .22
Switching to the Previous Source Mode . . . . . .22
Switching to the Menu Screen . . . . . . . . . . . . .22
DAB Control Screen (Shift)
Selecting the Seek Mode . . . . . . . . . . . . . . . . .23
Auto Memory Entry . . . . . . . . . . . . . . . . . . . . . .23
Dual Channel Audio Switching . . . . . . . . . . . . . .23
Primary/Secondary Switching . . . . . . . . . . . . . .23
Presetting the Volume Level for Traffic
Information/News . . . . . . . . . . . . . . . . . . . . . . .23
Returning to the DAB Control Screen (Main) . . .23
Disc Changer Control Function
Disc Changer Control Screen (Main)
Pausing and Restarting CD Play . . . . . . . . . . . .24
Track Search . . . . . . . . . . . . . . . . . . . . . . . . . . .24
Fast Forwarding and Reversing Disc Play . . . . .24
Disc Search . . . . . . . . . . . . . . . . . . . . . . . . . . . .24
Track Repeat Function . . . . . . . . . . . . . . . . . . . .24
Disc Repeat Function . . . . . . . . . . . . . . . . . . . .24
Track Scan Function . . . . . . . . . . . . . . . . . . . . . .24
Disc Scan Function . . . . . . . . . . . . . . . . . . . . . .24
Track Random Play Function . . . . . . . . . . . . . . .25
Magazine Random Play Function . . . . . . . . . . .25
Switching to the Disc Changer Control
Screen (Shift) . . . . . . . . . . . . . . . . . . . . . . . . . . .25
Switching to the Next Source Mode . . . . . . . . .25
Switching to the Previous Source Mode . . . . . .25
Switching to the Menu Screen . . . . . . . . . . . . .25
Disc Changer Control Screen (Shift)
Selecting the Name or Title Display for Discs . .26
To Scroll Manually . . . . . . . . . . . . . . . . . . . . . . .26
Selecting the Time Display for CDs . . . . . . . . . .26
Switching to the Disc List Screen . . . . . . . . . . .26
Switching to the Name Set Screen . . . . . . . . . .26
Returning to the Disc Changer Control
Screen (Main) . . . . . . . . . . . . . . . . . . . . . . . . . . .26
Disc List Screen
Changing to the Disc List . . . . . . . . . . . . . . . . . .26
Selecting the Disc . . . . . . . . . . . . . . . . . . . . . . .26
Switching the Display for Discs . . . . . . . . . . . . .26
Returning to the Source Control Screen . . . . . .26
English
Cancelling the PTY Search Screen . . . . . . . . . . .21
DAB Tuner Control Function
Name Set Function
Name Set Screen
Station Name Preset (SNPS)/Disc Name Preset
(DNPS) . . . . . . . . . . . . . . . . . . . . . . . . . . . . . . . .27
Remote Control Function . . . . . . . . . . . . . . .28
Installation . . . . . . . . . . . . . . . . . . . . . . . . . . . . .30
Troubleshooting Guide . . . . . . . . . . . . . . . . . .34
Specifications . . . . . . . . . . . . . . . . . . . . . . . . . .36
The control screens shown in this manual are for explanation purposes only.
The actual screens and design differ.
The TV must be set according to the TV Area Setting Screen (see page 10).
3
English
Safety Precautions
Mask key
2 WARNING
To prevent injury and/or fire, take the
following precautions:
• Ensure that the unit is securely installed. Otherwise
it may fly out of place during collisions and other
jolts.
• When extending the ignition, battery or ground
cables, make sure to use automotive-grade cables or
other cables with an area of 0.75mm2 (AWG18) or
more to prevent cable deterioration and damage to
the cable coating.
• To prevent short circuits, never put or leave any
metallic objects (e.g., coins or metal tools) inside the
unit.
• If the unit starts to emit smoke or strange smells,
turn off the power immediately and consult your
Kenwood dealer.
• Do not touch the liquid crystal fluid if the LCD is
damaged or broken due to shock. The liquid crystal
fluid may be dangerous to your health or even fatal.
If the liquid crystal fluid from the LCD contacts your
body or clothing, wash it off with soap immediately.
2 CAUTION
To prevent damage to the machine, take the
following precautions:
• Make sure to ground the unit to a negative 12V DC
power supply.
• Do not open the top or bottom covers of the unit.
• Do not install the unit in a spot exposed to direct
sunlight or excessive heat or humidity. Also avoid
places with too much dust or the possibility of water
splashing.
• Do not subject the faceplate to excessive shock, as
it is a piece of precision equipment.
• When replacing a fuse, only use a new one with the
prescribed rating. Using a fuse with the wrong rating
may cause your unit to malfunction.
• To prevent short circuits when replacing a fuse, first
disconnect the wiring harness.
• Do not use any screws except for the ones provided.
The use of improper screws might result in damage
to the main unit.
• You cannot view video pictures whilst the vehicle is
moving. To enjoy TV/video pictures, find a safe place
to park and engage the parking brake.
If you have transmitted the Mask Key's signal once to
the unit in advance, you will have to transmit it once
again if the unit has been removed from the battery.
If this procedure is not carried out, the control panel of
the unit will re-open even with your vehicle's ignition
turned off.
2 CAUTION
Do not loose the "Mask Key".
If power is disconnected from the unit, correct operation
can only be restored by the "Mask Key's" signal.
The "Mask Key" will also be required for service repair.
NOTE
If you send products in for repair that include a mask
key, make sure to present the unit together with the
mask key.
Cleaning the Unit
If the front panel gets dirty, turn off the power and
wipe the panel with a dry silicon cloth or soft cloth.
2 CAUTION
Do not wipe the panel with a stiff cloth or a cloth
dampened by volatile solvents such as paint thinner
and alcohol. They can scratch the surface of the panel
and/or remove the indicator letters.
Screen brightness during low temperatures
When the temperature of the unit falls such as during
winter, the liquid crystal panel's screen will become
darker than usual. Normal brightness will return after
using the monitor for a whilst.
Loading and Replacing the Batteries for the
Remote
2 CAUTION
Do not set the remote on hot places such as above
the dashboard.
Loading and Replacing the Batteries
1. Use two "AAA" batteries.
Slide the cover while pressing downwards to
remove it as illustrated.
2. Insert the batteries with the ª and · poles
aligned properly following the illustration inside the
case.
NOTE
• If you experience problems during installation,
consult your Kenwood dealer.
• If the unit does not seem to be working right, try
pressing the reset button first. If that does not solve
the problem, consult your Kenwood dealer.
Reset button
2 WARNING
Store unused batteries out of the reach of children.
Contact a doctor immediately if the battery is
accidentally swallowed.
NOTE
• The provided batteries are intended for use in
operation checking, and their service life may be
short.
• When the remote controllable distance becomes
short, replace both of the batteries with new ones.
4
Monitor Control Function
1 Set the vehicle’s parking brake.
2 Press the OPEN/CLOSE button. The monitor will
open.
English
3 Opening the Monitor
2 CAUTION
The gear shift lever or other parts may interfere with
the monitor when it opens. If so, move the gear shift
lever (being sure to do so safely) before operating the
set. (The monitor is drawn back in automatically if it
cannot be opened normally due to an obstacle.)
OPEN/CLOSE
NOTE
The monitor cannot be opened unless the parking
brake is set.
3 Closing the Monitor
Press the OPEN/CLOSE button. The monitor will
close.
NOTE
MODE
• The monitor cannot be closed unless the parking
brake is set.
• The position to which the monitor slides or angle
when the power is turned on can be set. (Refer to
the angle control screen on ( Page 7).)
FNC
V.SEL
KVC-1000
SCRN
V.OFF
6.5-inch WIDE COLOR LCD TELEVISION
AV OUT SEL.
VISUAL
TOUCH PANEL
MULTIPLE SOURCE CONTROL
AUDIO
3 Power Off
Hold down the OPEN/CLOSE button for one second
or more to turn the set’s power off.
Press the OPEN/CLOSE button to turn the power on.
3 Switching the Monitor’s Picture
FNC
MODE
V.SEL
Each time you press the V.SEL button, the monitor’s
picture switches as follows:
SCRN
AV IN setting during "VD" (Page 9)
Video input terminal (AV-IN 2) (3.5ø-Monaural)
▼
Television or Video 1 or Video 2
Audio input terminal (AV-IN 2) (3.5ø-Stereo)
yyyyyy
,,,
,,,
,,,yyy
yyy
,,,
• Normal mode
• Full mode
,,,
yyy
,,,
,,,
yyy
,,,
,,,,
yyyy
• Just mode
• Zoom mode
• Cinema mode
,,,,
yyyy
▼
Navigation (RGB pictures)
AV IN setting during "NAV" (Page 9)
▼
Television or Video 1 or Video 2
▼
Navigation (Video 1 pictures)
NOTE
The video 1 will not select when the "IN-OUT" switch
is set to “OUT” (Page 32).
2 CAUTION
You cannot view television and video pictures whilst
the vehicle is moving. To enjoy television and video
pictures, find a safe place to park and engage the
parking brake.
3 Switching the TV/Video Picture Mode
Each time you press the MODE button, the picture
mode switches between full, zoom, just, cinema and
normal.
NOTE
You cannot operate when the wide navigation system is
connected.
5
Monitor Control Function
English
3 Switching the AV Output Picture
Each time you press the V.SEL button for one second
or more, AV output picture switches as follows:
▼
NORMAL : Picture selected from the TV control
screen(Page 15)
▼
TV
: Picture of television
▼
VD2
: Picture input from the front AV-IN
terminal
NOTE
MODE
FNC
V.SEL
KVC-1000
SCRN
V.OFF
VISUAL
TOUCH PANEL
MULTIPLE SOURCE CONTROL
FNC
MODE
6.5-inch WIDE COLOR LCD TELEVISION
AV OUT SEL.
AUDIO
V.SEL
SCRN
Video input terminal (AV-IN 2) (3.5ø-Monaural)
Audio input terminal (AV-IN 2) (3.5ø-Stereo)
The unit will not operate when the "IN-OUT" switch is
set to “IN” (Page 32).
3 Switching to the Angle/Screen Control
Screen
Pressing the SCRN button will cause the angle
control screen(monitor angle adjustment mode) or
screen control screen (screen adjustment mode) to
be displayed on the TV or video picture (Page 7).
3 Turning the Monitor Picture Off
Hold down the SCRN button for two seconds or
more to turn the monitor’s picture off.
NOTE
The picture reappears when the one of the SCRN,
FNC, MODE or V.SEL buttons is pressed.
3 Switching to the Source Control Screen
Press the FNC button to switch to the source control
screen (Page 15-27).
3 Changing the Background of the Source
Control Screen Picture
Each time you press the FNC button, you can select
the background between 5 different patterns for the
source control screen and menu screen.
3 Adjusting the Volume
When the KTC-1000R/A907 is not connected to
the system
Press the 5 button to increase the volume of the
built-in speaker.
Press the ∞ button to decrease the volume of the
built-in speaker.
When the KTC-1000R/A907 is connected
Press the 5 button to increase the volume of the
KTC-1000R/A907.
Press the ∞ button to decrease the volume of the
KTC-1000R/A907.
6
A NG L E
Screen Control Screen
CTRL
SCREEN
CTRL
SCREEN
A NG L E
A NG L E
English
Angle Control Screen
BRT
T I N
ON
CO L
D I M
S L I DE
AUTO
OPEN - C LOSE
CON T
OFF
B L K
O
N
OF F
OK
3 Adjusting the Angle Position [ANGLE]
Each time you touch [ 3 ], the monitor slants back
one step.
Each time you touch [ 2 ], the monitor slants forward
one step
NOTE
The angle can be adjusted in 9 steps.
3 Adjusting the Slide Position [SLIDE]
Touch [ 3 ] to slide the monitor one step to the front.
Touch [ 2 ] to slide the monitor one step to the back.
OK
3 Adjusting the Picture Quality
[BRT]
Touch [
Touch [
[TIN]
Touch [
Touch [
[COL]
Touch [
Touch [
[CONT]
Touch [
Touch [
[BLK]
Touch [
Touch [
3 ] for a brighter screen.
2 ] for a darker screen.
3 ] for a stronger green level.
2 ] for a stronger red level.
3 ] for a deeper colour.
2 ] for a paler colour.
3 ] for less contrast.
2 ] for stronger contrast.
3 ] for less blackness.
2 ] for a stronger black level.
NOTE
NOTE
This slide position can be adjusted in 3 steps.
3 Turning the Automatic Open/Close
Function On/Off [AUTO OPEN-CLOSE]
Touch [ ON ] or [ OFF ] to switch the function on and
off.
• The [ TIN ] and [ COL ] cannot be adjusted for the
navigation screen or the graphic screens (Audio
source control, etc.).
• The [ TIN ] cannot be adjusted for the picture of
PAL/SECAM.
• Separate picture quality settings can be stored for
the television, video 1, video 2, graphic screens and
navigation screens and for day and night use.
3 Turning the Dimmer Function On/Off
Touch [ ON ] or [ OFF ] to switch the function on and
off.
■O N
■O N
■OFF
: Switch the ACC ON/OFF to open/close
the monitor
: Use the OPEN/CLOSE button to
open/close the monitor
NOTE
If the shift lever or other parts of the vehicle interfere
with the monitor when it opens, select [ OFF ].
3 Switching to the Screen Control Screen
Touch [ SCREEN ] to switch to the screen control
screen.
3 Ending the Angle Control Screen
■OFF
: Switch head light ON, and switch to
nighttime viewing screen picture
: Leave the set in nighttime viewing screen
picture
NOTE
When adjusting nighttime picture quality, switch this
function ON and switch head lights ON.
3 Switching to the Angle Control Screen
Touch [ ANGLE ] to switch to the angle control
screen.
3 Ending the Screen Control Screen
Touch [ OK ].
Touch [ OK ] .
7
English
System Setup Function
Menu Screen
Setup Menu Screen
T I
1 2:0 0
SOURC E
S Y S T EM
TV
AREA
SE L ECT
Setup
RDS
DAB
C L OC K
T OUCH
Audio
SECUR I T Y
RTN
3 Switching to the Menu Screen
1 Press the FNC button on the monitor. The source
control screen is displayed (Page 15-27).
RTN
3 Switching to the System Setting Screen
Touch [ SYSTEM ] to switch to the system setting
screen (Page 9).
2 Touch [ MENU ] to switch to the menu screen.
3 Switching to the TV Area Setting Screen
3 Switching to the Setup Menu Screen
Touch [ TV AREA ] to switch to the TV area setting
screen (Page 10).
Touch [ Setup ] to switch to the setup menu screen.
3 Switching to the Audio Control Screen
<With the KTC-1000R/A907>
Touch [ Audio ] to switch to the audio control screen
(Page 14).
3 Switching to the Source Control Screen
Touch the marks to switch to the source control
screen as follows:
Touch this mark to switch to the Tuner control
screen (Page 18). <With the KTC-1000R/A907>
Touch this mark to switch to the DAB control
screen (Page 22). <With the KTC-959DAB>
Touch this mark to switch to the disc changer
control screen (Page 24).
<With the disc changer >
Touch this mark to switch to the TV control screen
(Page 15).
Touch this mark to switch to the standby mode
screen.
The mark for the currently selected source is
displayed in light pink.
NOTE
Up to two disc changers can be operated.
3 Cancelling the Menu Screen
Touch [ RTN ] to switch to the source control screen
for the current source.
8
SETUP
3 Switching to the RDS Setting Screen
Touch [ RDS ] to switch to the RDS setting screen
(Page 12).
3 Switching to the DAB Setting Screen
Touch [ DAB ] to switch to the DAB setting screen
(Page 22).
3 Switching to the Clock Adjustment
Screen
Touch [ CLOCK ] to switch to the clock adjustment
screen (Page 10).
3 Switching to the Touch Panel
Adjustment Screen
Touch [ TOUCH ] to switch to the panel adjustment
screen (Page 12).
3 Switching to the Code Security Screen
Keep touching [ SECURITY ] for two seconds or more
to switch to the code security screen (Page 11).
3 Cancelling the Setup Menu Screen
Touch [ RTN ] to switch to the menu screen.
A V - I N
V
D
A V - O U T
NORM
S P
SP
MO D E
NORM
S C R O L L
AUTO
NAV
T
V
N
OF F
OF F
O N
L EVE L
1 0
S Y S T EM
RTN
3 Setting the AV Input [AV-IN]
Touch [ VD ] or [ NAV ] to switch the AV IN 1
terminal’s input setting between Video and
Navigation mode.
■V
D : Set the video mode
■ N A V : Set the navigation mode
NOTE
• There is no display when the unit’s "IN-OUT" switch
is set to "OUT" (Page 32).
• If a navigation unit is connected to AV IN, be sure to
set it to [ NAV ].
3 Setting the AV Output [AV-OUT]
Touch [ NORM ], [ TV ] or [ VD2 ]. The video of the
AV output terminal will be switched as follows:
■ NORM : Picture selected from the TV control
screen (Page 15)
■T
V : Picture of the television
■ V D 2 : Picture input from the front AV-IN
terminal
NOTE
There is no display when the unit’s "IN-OUT" switch is
set to "IN" (Page 32).
3 Setting the Built-In Speaker Mode
[SP MODE]
■ NORM : Sound with monitor picture
■ N A V : Sound with navigation
■OFF
MA NU
VD2
B E E P
O
NAV
English
System Setting Screen - 2
System Setting Screen - 1
: Switch off the built-in speakers
3 Setting the Built-In Speaker Level
[SP LEVEL]
Touch [ 3 ] to increase the volume.
Touch [ 2 ] to decrease the volume.
NOTE
S C R E E N
AUTO
MA NU
S Y S T EM
RTN
3 Setting the Auto Scroll Display Function
[SCROLL]
This function permits the text to be scrolled and
the entire text to be displayed. Switching
between manual scrolling and automatic scrolling
is permitted.
Touch [ AUTO ] or [ MANU ] to switch the function
automatic and manual scrolling.
■ AUTO : Automatic scrolling
■ MANU : Manual scrolling
3 Setting the Touch Sensor Tone [BEEP]
Touch [ ON ] or [ OFF ] to switch the function on
and off.
■O
N : Touch sensor tone is turned on
■OFF
: Touch sensor tone is turned off
3 Setting the On Screen Display Function
[ON SCREEN]
Touch [ AUTO ] or [ MANU ] to switch the function
between automatic and manual.
■ AUTO : When a button on the main unit or remote
control unit is pressed, or the disc track is
changed, the audio source control
information is temporarily superimposed on
the picture
■ MANU : When the lower centre of the screen is
touched whilst a TV/video picture is
displayed, the audio source control
information is temporarily superimposed on
the picture
3 Returning to the Setting Screen -1
Touch [ 2 ] to return to the setting screen-1.
3 Ending the System Setting Screen
Touch [ RTN ] to return to the setup menu screen.
No display when the "SP MODE" is set to "OFF".
3 Switching to the Setting Screen -2
Touch [ 3 ] to switch to the setting screen-2.
9
English
System Setup Function
Clock Adjustment Screen
TV Area Setting Screen
•
•
•
•
•
•
•
•
T V 1
1
2
3
T V 2
4
5
6
A
D
G
N
N
I
S
Y
TV
u
e
e
e
o
c
w
u
s
n
m
t
r
e
i
g
t
m
a
h
w
l
t
o
r
r
n
e
a
a
z
s
i
k
y
r
y
n
e
l
AREA
a
l a n d
• P o r t u g a l
d
• S w e d e n
r l a n d
a v i a
• S p a i n
SET
RTN
Touch [ TV 1 ] or [ TV 2 ]. The band switches
between the TV1 and TV2.
3 Selecting the Television Area
Select the area for video broadcast viewing.
Touch [ 1 ] - [ 6 ] to select the channel setting for
your country as follows.
(A1)
Germany
Iceland
Portugal
Netherlands
Belgium
Switzerland
Austria
Sweden
Norway
Denmark
Finland
Yugoslavia
Spain
PAL-B/G
PM
N
C L OC K
R E S E T
OF F
AD J UST
RTN
3 Turning the Automatic Time Adjustment
On/Off [SYNC]
With automatic time adjustment, you can set the
clock time automatically according to time data
sent from RDS stations (after receiving RDS
signals for several minutes). You can also set the
time manually if the automatic time adjustment
function is turned off. The factory default is
automatic time adjustment.
Touch [ ON ] or [ OFF ] to switch the function on and
off.
N
■OFF
: Tune into an RDS station for 3 or 4
minutes
The time adjusts automatically to the
correct local time
: Manual adjusting
NOTE
The time is not adjusted when the RDS station you
are tuned to be not transmitting a time signal. Choose
another RDS station in such a case.
3 Adjusting the Time Manually [CLOCK]
(A2)
■ 3
(A3)
United Kingdom
Ireland
PAL-I
■ 4
(A4)
France
SECAM-L
■ 5
(A5)
Russia
Poland
Hungary
Czech
Slovakia
Bulgaria
Roumania
SECAM-D/K
Greece
SECAM-B/G
(A6)
S Y N C
O
■O
■ 2
■ 6
1 2 : 0 0
• B e l g i u m
• F i n l a n d
3 Selecting the Preset Bands
■ 1
C L O C K
Italy
Albania
Touch [ 5 ] to advance
the minutes.
Touch [ 5 ] to advance
the hours.
C L O C K
1 2 : 0 0
Touch [ ∞ ] to make the
hours go back.
3 Ending the TV Area Setting Screen
Touch [ RTN ] to return to the setup menu screen.
Touch the [ ∞ ] to make
the minutes go back .
Setting the Minutes to "00":
Touch [ RESET ] to set the minutes to "00".
NOTE
• Touch [ RESET ] whilst the minute is below "30"
rounds it off, and whilst the minute is "30" or more
rounds it up.
• No display when the "SYNC" is set to "ON".
3 Ending the Clock Adjustment Screen
Touch [ RTN ] to return to the setup menu screen.
10
English
Code Security Screen
T h e
s y s t em
i s
n ow
wa i t i n g
f o r
y o u r
MA S K
KEY
s i g n a l .
P l e a s e
COD E
i n p u t
n ow .
SECUR I T Y
RTN
3 Mask Key
If you have transmitted the Mask Key's signal
once to the unit in advance, you will have to
transmit it once again if the unit has been
removed from the battery. This function helps
prevent theft.
When using the unit for the first time:
If this procedure is not carried out, the control panel of
the unit will re-open even with your vehicle's ignition
turned off.
1 Hold down the transmit button on the Mask Key
until the half transmit level indicator lights up in the
display. “System now checking for valid signal
code”will be displayed.
S y s t em
n ow
f o r
c h e c k i n g
c o d e .
s i g n a l
v a l i d
Transmission part
Transmit button
COD E
SECUR I T Y
RTN
NOTE
• Keep the Mask Key close to the signal sensor when
you transmit the Mask Key signal.
• If the Mask Key signal does not be received
correctly, the display will return to “Code rejected.
Please check MASK KEY”. In this case, repeat the
procedure in step 1.
2 Hold down the transmit button on the Mask Key
again until the full transmit level indicator lights up
in the display.
"Code APPROVED" will appear in the display, with
the Mask Key function turning on.
If you press the RESET button or remove the battery:
The first time you turn the unit on again, “The
system in now waiting for your MASK KEY signal.
Please input now.” will appear in the display,
indicating the setting mode has been entered. Repeat
steps 1 and 2 above, and transmit the signal.
You can start operating the unit again when "Code
APPROVED" appears in the display.
S y s t em
n ow
f o r
c h e c k i n g
c o d e .
s i g n a l
COD E
SECUR I T Y
v a l i d
RTN
3 Ending the Code Security Screen
Touch [ RTN ] to return to the setup menu screen.
11
English
System Setup Function
Touch Panel Adjustment Screen
RDS Setting Screen
N EWS
T O U C H
P A N E L
1 0m i n
A D J U S T
A F
P
t
t
L
l
h
h
e
e a s e
e
Ce n
e
B u t
f t - B o
T
t
t
t
o
e
o
t
C A N C E L
u c h
r
o f
n
i n
t h e
om Co r n e r
R E S E T
O
N
OF F
O
N
OF F
A T P S
O
N
OF F
R E G
RDS
3 Adjusting the Touch Position
The touch panel can be adjusted if the position
touched and the operation performed do not
match.
Accurately touch the mark at the lower left and the
mark at the upper right, following the instructions in
the messages.
When the mark at the upper right is touched, the
adjustment is completed and the system setup menu
screen reappears.
NOTE
• If [ CANCEL ] is touched without touching the button
at the lower left, the adjustment is cancelled and the
screen that was set before switching to the system
setup menu reappears.
• If [ CANCEL ] is touched after touching the button at
the lower left, the button at the lower left reappears.
• If [ RESET ] is touched, the settings are reset to the
factory defaults and the setup menu screen
reappears.
SETUP
RTN
RDS (Radio Data System)
RDS is a digital information system that lets you
receive signals besides those of regular radio
programmes, such as network information being
transmitted from radio stations.
When listening to an RDS station (ie, a station
with RDS capability), the programme service
name of the station is displayed along with the
frequency, advising you quickly which station is
being received.
RDS (Radio Data System) stations also transmit
frequency data for the same station. When you
are making long trips, this function automatically
switches to the particular frequency with the best
reception for the particular network of stations
that you want to listen to. The data is
automatically stored, allowing you to switch
quickly to another RDS stations, broadcasting the
same programme, that has better reception.
These include stations stored in the station
preset memory that you often listen to.
EON (Enhanced Other Network)
Stations that offer EON also transmit information
about other RDS stations that have traffic
information. When you are tuned to a station that
is not transmitting traffic information, but
another RDS station starts transmitting a traffic
bulletin, the tuner automatically switches to the
other station for the duration of the bulletin.
Alarm
When an emergency transmission (announcing
disasters, etc.) is sent, all current functions are
interrupted to allow the warning to be received.
3 News Bulletin Function with PTY News
Timeout Setting [NEWS]
You can arrange to have news bulletins interrupt
your current listening source, including other
radio stations. When the News Bulletin function
is on, the PTY News Timeout setting allows you
to set the interval during which further news
interruption cannot take place. You can adjust the
PTY news interruption period from 10 to 90
minutes for each journey.
12
Changing the Function Setting:
Touch [ 2 ] or [ 3 ] repeatedly until the desired
setting is displayed.
Touch [ 3 ] to increase the interval, and the [ 2 ] to
decrease it.
OFF ↔ 00min ↔ 10min ↔ 20min ↔ 30min ↔
40min ↔ 50min ↔ 60min ↔ 70min ↔ 80min ↔
90min
(min= minutes)
When you select the news interruption timeout
interval, the News function turns on and the NEWS
indicator is displayed.
NOTE
• If you choose the " 20min " setting, further news
bulletins will not be received for 20 minutes once
the first news bulletin is received.
Setting the interval at the "OFF" factory default
indicates no News Timeout will be made, meaning
that additional news bulletins will continue to be
searched for.
•This function is only available if the desired station
sends PTY-code for news bulletin or belongs to
EON-Network sending PTY-code for news bulletin.
English
When a news bulletin is received, the NEWS
indicator will blinks and reception will begin at the
preset volume.
3 Alternative Frequency Function [AF]
When poor reception is experienced,
automatically switch to another frequency
broadcasting the same programme in the same
RDS network with better reception.
The AF indicator is displayed when the AF
function is turned on.
Turning AF Function On/Off:
Touch [ ON ] or [ OFF ] to switch the function on and
off.
■O
N
■OFF
: AF function is turned on
: AF function is turned off
NOTE
When no other stations with stronger reception are
available for the same programme in the RDS
network, you may hear the incoming broadcast in bits
and snatches. Turn off the AF function in such a case.
3 Restricting RDS Region (Region Restrict
Function) [REG]
You can choose whether or not to restrict the
RDS channels, received with the AF function for a
particular network, to a specific region. When the
Region Restrict Function is on, the region is
restricted and the REG indicator is displayed.
Turning Region Restrict Function On/Off:
Touch [ ON ] or [ OFF ] to switch the function on and
off.
■O
N
■OFF
: Region restrict function is turned on
: Region restrict function is turned off
NOTE
Sometimes stations in the same network broadcast
different programmes or use different programme
service names.
3 Auto TP Seek Function [ATPS]
When the TI function is on and poor reception
conditions are experienced when listening to a
traffic information station, another traffic
information station with better reception will be
searched for automatically. This function is on,
when unit is first powered on.
Turning Auto TP Seek Function On/Off:
Touch [ ON ] or [ OFF ] to switch the function on and
off.
■O
N : Auto TP seek function is turned on
■OFF
: Auto TP seek function is turned off
3 Ending the RDS Setting Screen
Touch [ RTN ] to return to the setup menu screen.
13
English
Audio Control Function
Audio Control Screen - 1
BA L / FAD
F
Audio Control Screen - 2
L OUD
O
N
BASS
P R EOU T
R E A R
L
HP - F
1 5 0
HP - R
2 2 0
O F F
N F
NF - L V - 1 0
R
TREB L E
R
AUD I O
RTN
3 Adjusting the Balance and Fader Levels
[BAL/FAD]
Each time you touch [ 2 ](L), the sound in the left
channel is emphasized.
Each time you touch [ 3 ](R), the sound in the right
channel is emphasized.
Each time you touch [ 5 ](F), the sound in the front
channel is emphasized.
Each time you touch [ ∞ ](R), the sound in the rear
channel is emphasized.
3 Adjusting the Bass Level [BASS]
Each time you touch [ 3 ], the bass level is
increased.
Each time you touch [ 2 ], the bass level is
decreased.
3 Adjusting the Treble Level [TREBLE]
Each time you touch [ 3 ], the treble level is
increased.
Each time you touch [ 2 ], the treble level is
decreased.
3 Switching to the Audio Control Screen -2
Touch [ 3 ] to switch to the audio control screen-2.
AUD I O
RTN
3 Turning the Loudness On/Off [LOUD]
This function amplifies low and high tones when
the volume is turned down.
The LOUD indicator is displayed on the source
control screen, when the loudness function is on.
Touch [ ON ] or [ OFF ] to switch the function on and
off.
■O
N
■OFF
: Loudness function is turned on
: Loudness function is turned off
3 Setting the Preout [PREOUT]
Touch [ REAR ] or [ NF ] to switch the non-fading
preout and rear preout.
■ REAR
■NF
: Set the rear preout
: Set the non-fading preout
3 Setting the High-Pass Filter for Front and
Rear Output [HP-F] [HP-R]
Each time you touch [ 2 ] or [ 3 ], you can select the
frequency to be cut, as follows:
OFF “ 40Hz “ 60Hz “ 80Hz “ 100Hz “
220Hz “ 180Hz “ 150Hz “ 120Hz “
3 Adjusting the Non-Fading Preout Level
[NF-LV]
Each time you touch [ 3 ], the non-fading sound
increased.
Each time you touch [ 2 ], the non-fading sound
decreased.
3 Returning to the Audio Control Screen -1
Touch [ 2 ] to return to the audio control screen-1.
3 Ending the Audio Control Screen
Touch [ RTN ] to return to the menu screen.
14
TV Control Function
ME NU
T I
VD
1 2:0 0
TV
TV
TV 1
A 1
P 1
NO N AME
MANU
LOUD
1 2 c h
3 Switching to the TV Control Screen
(Shift)
Touch [
] to swicth the TV control screen (Shift).
English
TV Control Screen (Main)
3 Switching to the Next Source Mode
Touch the mark located at the lower side of ∞
to switch to the next source control screen.
3 Switching to the Previous Source Mode
Touch the mark located at the upper side of 5
to switch to the previous source control screen.
P 1
P 2
P 3
P 4
P 5
P 6
3 Switching to the Menu Screen
Touch [ MENU ] to switch to the menu screen.
3 Selecting the Bands
Touch [ TV ] to select the band.
Each time you touch [ TV ], the band switches
between the TV1 and TV2.
3 Selecting the Video Inputs
Each time you touch [ VD ], the video input switches
between the video 1 and video 2.
NOTE
The video 1 will not select when the "IN-OUT" switch
is set to “OUT” (Page 32).
3 Selecting the Channels
Auto Seek Tuning (AUTO1)
Touch [ ¢ ] to seek for channels up the band.
Touch [ 4 ] to seek for channels down the band.
Preset station Seek Tuning (AUTO2)
Touch [ ¢ ] to move to the next preset station (i.e.,
the one with the next highest number).
Touch [ 4 ] to move to the last preset station (i.e.,
the one with the next lowest number).
Manual Tuning (MANU)
Touch [ ¢ ] to increase the channel by one step.
Touch [ 4 ] to decrease the channel by one step.
3 Station Preset Memory
Store the channel of the station currently being
listened to. You can then recall that station with a
single touch of a button.
1 Select the band/ station that you want to store.
2 Hold down preset station number [ P1 ] - [ P6 ] on
which you want to store the station, for two
seconds or more.
NOTE
You can store 6 stations in each of the TV1 and TV2
bands.
3 Recalling a Preset Station
Touch the preset station number [ P1 ] - [ P6 ] for the
desired station. The number of the recalled station is
displayed.
15
English
TV Control Function
TV Control Screen (Shift)
T I
ME NU
VD
1 2:0 0
TV
TV
TV 1
A 1
P 1
NO N AME
MANU
1 2 c h
3 Selecting the Tuning Mode
You can choose from three tuning modes: auto
seek, preset station seek, and manual. The
“AUTO1” indicator is displayed when auto seek
tuning is selected, and the “AUTO2” indicator is
displayed when preset station seek tuning is
selected.
Each time you touch [ SEEK ], the mode switches as
follows:
▼
AUTO 1
(Auto Seek Tuning)
▼
AME
LIST
SEEK
NAME
You can automatically store all the receivable
channels in the band currently being listened to,
and then recall them with the touch of a button
later. This function is especially useful when you
are travelling and do not know what stations are
available. Up to 6 stations can be stored this way.
1 Select the band for auto memory entry.
2 Touch [ AME ].
The preset station numbers [ P1 ] - [ P6 ] are shown
in order.
When all the stations on a certain band have been
stored in the preset memory, the auto memory
entry stops. The tuner then plays the last station
received.
TV List Screen
ME NU
1 2:0 0
1 2 c h
1 I N FO - T V
2 T V - J A P AN
3 5 c h
4 7 c h
TV
5 8 c h
VD
CTRL
6 1 0 c h
3 Selecting the Band List
Each time you touch [ TV ], the list switches between
the TV1 and TV2.
3 Selecting the Station
Touch station number or name in the list for the desired
station. The number of the recalled station is displayed.
3 Returning to the Source Control Screen
Touch [ CTRL ] to return to the source control
screen (Shift) .
16
3 Switching to the TV List Screen
Touch [ LIST ] to switch to the TV list screen.
3 Switching to the Name Set Screen
Touch [ NAME ] to switch to the name set screen
(Page 27).
NOTE
[ ¢ ] and [ 4 ] blink.
P 1
(Manual Tuning)
You cannot operate unless the parking brake is set.
3 Touch [ ¢ ] or [ 4 ] to start auto memory entry.
T V 1
(Preset Station Seek Tuning)
▼
MANU
3 Auto Memory Entry
T I
AUTO 2
3 Returning to the TV Control Screen
(Main)
Touch [
] to return to the TV control screen (Main).
English
Selecting the Channels on the TV Picture Screen
Touch the upper centre to switch between the TV1 and
TV2 bands
MODE
FNC
V.SEL
KVC-1000
SCRN
V.OFF
6.5-inch WIDE COLOR LCD TELEVISION
AV OUT SEL.
VISUAL
TOUCH PANEL
MULTIPLE SOURCE CONTROL
AUDIO
Touch the right part to increase the
channel
Touch the left part to decrease the
channel
The lower centre of the screen is touched whilst a TV/video picture is displayed, the audio source,
picture settings, video out settings, etc., are superimposed on the picture (On Screen Display). The
display turns off when the lower centre of the screen is pressed again.
Tuning mode
TV band
AUTO2
TV 1
1 0 c h
Screen mode
W I DE
C I N EMA
FM
E URO
AV
OU T
V I DEO
9 7 . 5
Channel
AV output picture
mode
M Hz
I NFO
Audio source control information
17
English
FM/AM Tuner Control Function
Tuner Control Screen (Main)
ME NU
T I
AM
1 2:0 0
TUNER
FM
FM1
P 1
1 0 8 . 0
M Hz
FM - I NFO
MANU
ALM NEWS REG AF
TI
ST
P 2
P 3
P 4
P 5
P 6
3 Selecting the Bands
Touch either [ FM ] or [ AM ] to select the band.
Each time you touch [ FM ] , the band switches
between the FM1, FM2 and FM3.
Touch [ AM ] to select the MW and LW bands.
3 Tuning
Auto Seek Tuning (AUTO1)
Touch [ ¢ ] to seek increasing frequencies.
Touch [ 4 ] to seek decreasing frequencies.
Preset Station Seek Tuning (AUTO2)
Touch [ ¢ ] to move to the next preset station (i.e.,
the one with the next highest number), and [ 4 ] to
move to the last preset station (i.e., the one with the
next lowest number).
Manual Tuning (MANU)
Touch [ ¢ ] to increase the frequency by one step.
Touch [ 4 ] to decrease the frequency by one step.
NOTE
The ST indicator is displayed when stereo broadcasts
are being received.
3 Station Preset Memory
Store the frequency of the station currently being
listened to. You can then recall that station with a
single touch of a button.
1 Select the band/station that you want to have
stored.
2 Hold down preset station number [ P1 ] - [ P6 ] that
you want to use for the station, for two seconds or
more.
NOTE
You can store 6 stations in each of the FM1, FM2,
FM3, and AM (MW and LW) bands.
3 Recalling a Preset Station
Touch the preset station number [ P1 ] - [ P6 ] for the
desired station. The number of the recalled station is
displayed.
3 Switching to the PTY Search Screen
Touch [ PTY ] to switch the PTY search screen.
(Page 21)
3 Switching to the Tuner Control Screen
(Shift)
Touch [
(Shift).
18
Touch the mark located at the lower side of ∞
to switch to the next source control screen.
3 Switching to the Previous Source Mode
Touch the mark located at the upper side of 5
to switch to the previous source control screen.
3 Switching to the Menu Screen
Touch [ MENU ] to switch to the menu screen.
PTY
P 1
3 Switching to the Next Source Mode
] to switch to the tuner control screen
T I
ME NU
AM
1 2:0 0
TUNER
FM
FM1
P 1
1 0 8 . 0
M Hz
FM - I NFO
ALM NEWS REG AF
TI
MANU
ST
PTY
3Selecting the Tuning Mode
You can choose from three tuning modes: auto
seek, preset station seek, and manual. The
“AUTO1” indicator is displayed when auto seek
tuning is selected, and the “AUTO2” indicator is
displayed when preset station seek tuning is
selected.
Each time you touch [ SEEK ], the mode switches as
follows.
English
Tuner Control Screen (Shift)
▼
AUTO 1
(Auto Seek Tuning)
▼
AME
MONO
SEEK
LO.S
TI VOL
3 Auto Memory Entry
You can automatically store all the receivable
frequencies in the band currently being listened
to, and then recall them with the touch of a
button later. This function is especially useful
when you are travelling and do not know what
stations are available. Up to 6 frequencies can be
stored this way.
1 Select the band for auto memory entry.
2 Touch [ AME ].
AUTO 2
(Preset Station Seek Tuning)
▼
MANU
(Manual Tuning)
3Turning the Local Seek Function On/Off
With the local seek function turned on, auto seek
tuning skips stations with relatively poor
reception.
Touch [ LO.S ] to switch the local seek function on
and off.
The LO.S indicator is displayed when the local seek
function is on.
[ ¢ ] and [ 4 ] blink.
3 Touch [ ¢ ] or [ 4 ] to start auto memory entry.
The preset station numbers [ P1 ] - [ P6 ] are shown
in order.
When all the stations in a certain band are stored in
the preset memory, the auto memory entry stops.
The tuner then plays the last station received.
NOTE
• When the AF function is turned on whilst auto
memory entry takes place, only RDS stations (i.e.,
stations with RDS capability) are stored. RDS
stations that have been preset for FM1 cannot also
be preset in FM2 or FM3.
• When the local seek function is turned whilst auto
memory entry takes place, stations with poor
reception are not stored.
• When the Traffic Information function is on, only the
local traffic information station frequency will be
stored.
3Turning the Monaural Reception On/Off
When poor stereo reception is experienced, this
function will reduce noise and improve listening
conditions.
Touch [ MONO ] to switch the monaural reception on
and off.
The MONO indicator is displayed when monaural
reception is on.
19
English
FM/AM Tuner Control Function
Tuner Control Screen (Shift)
3 Traffic Information Function
You can listen to traffic information. If you are
listening to discs, they will continue playing until
a traffic bulletin is broadcast.
Turning TI function On/Off:
Touch [ TI ] on the control screen to turn the function
on and off.
When the function is on, the TI indicator is turned on.
When a traffic information station is received, the TI
indicator blinks.
If you are listening to a disc when a traffic bulletin
begins, playback will be interrupted. When the
bulletin ends or poor reception causes signal losses ,
the disc will continue to play again.
Switching to a Different Traffic Information Station:
Use [ 4 ] / [ ¢ ] to make an auto seek of the TI
stations in a certain band.
NOTE
• When you are listening to a disc, you cannot change
to another TI station.
• When the auto TP seek function is turned on and
reception starts to weaken, the tuner automatically
seeks stations with better reception.
• If you are tuned to a station that is not a traffic
information station itself but which provides EON
services, you can still have traffic information
received.
3 Presetting the Volume for Traffic
Information/News
Preset the volume to be used when traffic
information/news starts to be broadcast.
1 Tune into the station for which you want to set the
volume.
2 Adjust the volume to the desired level.
3 Keep touching [ TI VOL ] for two seconds or more.
The volume level that the data has been stored.
Future traffic information broadcasts are heard at
the preset level.
NOTE
• The volume cannot be lowered by this function
during tuner reception. The volume is only set when
it is louder than the listening volume of the tuner.
• You can arrange only to listen to traffic information
/news bulletins with at preset volume with the
volume set at minimum.
3 Returning to the Tuner Control Screen
(Main)
Touch [
(Main).
20
] to return to the tuner contorl screen
FM -
ENG.
I N FO
J a z z
Mu s i c
LANG.
S o c i a l
R e l
A f
L e i s u r e
J a z z
r s
i g i o n
P h o n e
T r a v e l
f a i
&
&
Touch [ ¢ ] to make a seek of frequencies with
your selected type of programme.
If your selected type of programme is found, the
name of the station is displayed and the station is
tuned into.
3 Cancelling the PTY Search Screen
I n
T o u r
3 Seeking the Selected Programme Type
English
PTY Search Screen
Touch [ CTRL ] to return to the source control
screen.
i n g
H o b b y
Mu s i c
CTRL
Conduct auto seek tuning only on those stations
with selected kinds of programmes.
NOTE
You cannot use this function whilst the traffic
information function is turned on.
3 Changing the Display Language to
French or German
In the PTY mode, touch [ LANG. ] to display the name
of the language currently used.
3 Selecting the Type of Programme to be
Received
1 Touch either [ ∞ ] or [ 5 ] repeatedly to select the
type of programme in the list.
2 Touch the list to select the type of programme you
want to listen to.
News
Current Affairs
Information
Sports
Education
Drama
Culture
Science
Varied Speech
Pop Music
Rock Music
Easy Listening
Light Classics M
Serious Classics
Other Music
Weather & Metr
Finance
Children’s progs
Social Affairs
Religion
Phone In
Travel & Touring
Leisure & Hobby
Jazz Music
Country Music
National Music
Oldies Music
Folk Music
Documentary
All Speech
All Music
News
Current Affairs
Information
Sports
Education
Drama
Culture
Science
Varied Speech
Pop Music
Rock Music
Easy Listening
Light Classics Music
Serious Classics
Other Music
Weather & Metr
Finance
Children’s programs
Social Affairs
Religion
Phone In
Travel & Touring
Leisure & Hobby
Jazz Music
Country Music
National Music
Oldies Music
Folk Music
Documentary
All Speech
All Music
S
S
S
S
S
S
S
S
S
M
M
M
M
M
M
S
S
S
S
S
S
S
S
M
M
M
M
M
M
S
M
(S: Speech, M: Music)
21
English
DAB Tuner Control Function
DAB Setup Screen
R D S
3 Dynamic Range Control [DRC]
C H G
O N
Touch [ ON ] or [ OFF ] to switch the DRC function on
and off.
OF F
■O
D R C
O
R E G
N
OF F
I N T
O N
DAB
N
■OFF
: Dynamic range control is turned on
: Dynamic range control is turned off
3 Restricting the DAB Region (Region
Restrict Function) [REG INT]
OF F
Touch [ ON ] or [ OFF ] to switch the Region restrict
function on and off.
SETUP
RTN
3 Automatic Switching from DAB to RDS
■O
N : Region restrict function is turned on
■OFF
: Region restrict function is turned off
[RDS CHG]
Touch [ ON ] or [ OFF ] to switch the function on and
off.
■O
N
■OFF
: Automatic DAB-RDS switching function is
turned on
: Automatic DAB-RDS switching function is
turned off
DAB Control Screen (Main)
T I
S -
ME NU
1 2:0 0
DAB
S +
DAB 1
P 1
1 4 5 1 . 0 7
E N S EMB L E L A B E L # #
AUTO1 ALM NEWS REG AF
MAIN DAB DRC
3 Service Preset Memory
1 Touch [ BAND ] to select the preset band.
2
#
TI
PR
Each time you touch [ BAND ], the preset band
switches between the DAB1, DAB2 and DAB3.
2 Receive the service to be preset.
3 Hold down preset number [ P1 ] - [ P6 ] for two
seconds or more to preset the service.
BAND
PTY
P 1
P 2
P 3
P 4
P 5
P 6
3 Switching the Ensemble
In Auto Ensemble Seek Mode (AUTO1)
Each time you touch [ ¢ ], Auto Ensemble Seek
begins toward higher frequencies, and each time you
touch [ 4 ], seeking begins toward lower
frequencies.
In Preset Ensemble Seek Mode (AUTO2)
Touch [ ¢ ] to move to the next preset station (i.e.,
the one with the next highest number), and [ 4 ] to
move to the last preset station (i.e., the one with the
next lowest number).
In Manual Seek Mode (MANU)
Touch [ ¢ ] to increase the receiving frequency by
one step or each touch [ 4 ] to decrease it by one
step.
3 Selecting the Type of Programme to be
Received
Touch [ S- ] or [ S+ ] repeatedly to select the type of
programme you want to listen to.
NOTE
See KTC-959DAB Instruction Manual for type of
programme.
22
The service is preset when the number of the
button blinks once.
Recalling a Preset Service:
Touch [ BAND ] to select the preset band, and press
the desired preset number [ P1 ] - [ P6 ]. The number
of the pressed button is shown in the display.
3Turning the DAB PTY Search On/Off
Touch [ PTY ] to switch the DAB PTY search on and
off.
3 Switching to the DAB Control Screen
(Shift):
Touch [ ] on the DAB control screen (Main) to
swicth to the DAB control screen (Shift).
3 Switching to the Next Source Mode
Touch the mark located at the lower side of ∞
to switch to the next source control screen.
3 Switching to the Previous Source Mode
Touch the mark located at the upper side of 5
to switch to the previous source control screen.
3 Switching to the Menu Screen
Touch [ MENU ] to switch to the menu screen.
<See KTC-959DAB Instruction Manual for details on DAB functions>
T I
P -
ME NU
1 2:0 0
DAB
P +
DAB 1
P 1
1 4 5 1 . 0 7
E N S EMB L E L A B E L # #
AUTO
ALM NEWS REG AF
MAIN DAB DRC
3 Primary/Secondary Switching
Each time you touch [ P/S ], the service switches as
follows:
2
#
TI
PR
English
DAB Control Screen (Shift)
▼
Primary
▼
Secondary 1
▼
Secondary 2
BAND
PTY
SEEK
AME
SUB
P/S
TI VOL
TITLE
3 Selecting the Seek Mode
Each time you touch [ SEEK ], the mode switches as
follows:
(Auto Ensemble Seek)
▼
MANU
Preset the volume level to be used when traffic
information/news start to be broadcast.
1 Tune into the station for which you want to set the
volume.
▼
AUTO
3 Presetting the Volume Level for Traffic
Information/News
(Manual Seek)
3 Auto Memory Entry
You can automatically store all the receivable
frequencies in the band currently being listened
to, and then recall them with the touch of a
button later. This function is especially useful
when you are travelling and do not know what
stations are available. Up to 6 frequencies can be
stored this way.
1 Select the band for auto memory entry.
2 Touch [ AME ].
[ ¢ ] and [ 4 ] blink.
3 Touch [ ¢ ] or [ 4 ] to start auto memory entry.
The preset station numbers [ P1 ] - [ P6 ] are shown
in order.
2 Adjust the volume to the desired level.
3 Keep touching [ TI VOL ] for two seconds or more.
The volume level that has now been stored.
Future traffic information/news broadcasts are
heard at the preset level.
NOTE
• The volume level cannot be lowered by this function
during tuner reception. The volume is only set when
it is louder than the current listening volume of the
tuner.
• When the volume level is set to minimum, it is still
possible to listen to traffic information bulletins at
preset volume.
3 Returning to the DAB Control Screen
(Main)
Touch [
(Main).
] to return to the DAB control screen
When all the stations on a certain band have been
stored in the preset memory, the auto memory
entry stops. The tuner then plays the last station
received.
Recalling a Preset Station:
Touch the preset station number [ P1 ] - [ P6 ] for the
desired station. The number of the recalled station is
displayed.
3 Dual Channel Audio Switching
The Dual Channel Audio can be switched between
Main and Sub.
Touch [ SUB ] to switch the dual channel audio
between main and sub.
NOTE
When "SUB" is selected, the sub audio continues to
be received even when the service is switched to
another, provided that the new service also
broadcasts a dual channel audio programme.
23
English
Disc Changer Control Function
Disc Changer Control Screen (Main)
T I
D -
ME NU
1 2:0 0
CD - CH 1
D+
Disc 5 - Tr 1 2
BEST
H I TS
2 : 3 4 P
REP
3 Track Repeat Function
Repeat playing the current track.
Turning Track Repeat Play Function On/Off:
Touch [ REP ] to switch the track repeat play function
on and off.
The REP indicator is displayed when the track repeat
play function is turned on.
NOTE
The track repeat play function is cancelled when you
stop playing the disc.
DSCN
SCN
DREP
REP
MRDM
RDM
3 Pausing and Restarting CD Play
Touch [ 38 ] to make the disc pause.
Touch [ 38 ] again to start play again.
NOTE
When one disc has finished playing its last track, the
next disc in the changer starts playing. When the last
disc in the changer has finished, the player returns to
the first disc and starts playing it.
3 Track Search
Repeat playing the current disc.
Turning Disc Repeat Play Function On/Off:
Touch [ DREP ] to switch the disc repeat play
function on and off.
The DREP indicator is displayed when the disc repeat
play function is turned on.
NOTE
The disc repeat play function is cancelled when you
stop playing the disc.
3 Track Scan Function
Search forwards or backwards through the tracks
on the disc until you reach the one that you want
to listen to.
Successively play the beginning of each track on a
disc until you find the one that you want to listen
to.
Making a Forward Track Search:
Touch [ ¢ ] to display the desired track number.
Touch once to fast forward to the next track, twice to
fast forward to the track after that, and so forth.
Play starts at the beginning of the displayed track
number.
Making a Reverse Track Search:
Touch [ 4 ] to display the desired track number.
Touch once to search back to the beginning of the
current track, twice to search back to the beginning
of the previous track, and so forth.
Play starts at the beginning of the displayed track
number.
Turning Track Scan Function On/Off:
Touch [ SCN ] to switch the track scan function on
and off.
The SCN indicator is displayed when the track scan
function is turned on.
The first 10 seconds of each track are played, and the
tracks are played in order.
Stopping to Listen to the Track Being Scanned:
Touch [ 38 ] or [ SCN ] again to stop the scan and
keep on listening to a track normally.
3 Fast Forwarding and Reversing Disc Play
Fast Forwarding Disc Play:
Hold down on [ ¢ ].
Release your finger to play the disc at that point.
Reversing Disc Play:
Hold down on [ 4 ].
Release your finger to play the disc at the point.
3Disc Search
Search forwards or backwards through the discs
in a disc changer until you reach the one that you
want to listen to.
Making a Forward Disc Search:
Touch [ D + ] to display the desired disc number.
Each time [ D + ] is touched, the displayed disc
number increases by one.
Play starts at the beginning of the displayed disc.
Making a Reverse Disc Search:
Touch [ D – ] to display the desired disc number.
Each time [ D – ] is touched, the displayed disc
number decreases by one.
Play starts at the beginning of the displayed disc.
NOTE
"LOAD" is displayed when discs are being exchanged
on the disc changer.
24
3 Disc Repeat Function
NOTE
• The track scan function is cancelled when you stop
playing a disc.
• The track scan function only scans each track on a
disc once.
3 Disc Scan Function
Successively play the beginning of each disc on a
changer until you find the one that you want to
listen to.
Turning Disc Scan Function On/Off:
Touch [ DSCN ] to switch the disc scan function on
and off.
The DSCN indicator is displayed when the scan
function is turned on.
The first 10 seconds of each disc are played, in the
order in which they are loaded on the changer.
Stopping to Listen to the Disc Being Scanned:
Touch [ 38 ] or [ DSCN ] again to stop the scan and
keep on listening to the disc normally.
NOTE
• The disc scan function is cancelled when you stop
playing a disc.
• The disc scan function only scans each disc on the
changer once.
• "LOAD" is displayed when discs are being exchanged
on the disc changer.
Play all the tracks on the current disc in random
order.
English
3 Track Random Play Function
1 Touch [ RDM ] to switch the random play function
on and off.
The RDM indicator is displayed when the random
play function is turned on.
The display of the track number changes
continuously as the next track is being selected.
When the track has been selected, play starts.
2 To change the track being heard, touch [ ¢ ].
Another track is selected and played.
NOTE
The random play function is cancelled when you stop
playing a disc.
3 Magazine Random Play Function
Play the tracks on all the discs in the disc changer
in random order.
1 Touch [ MRDM ] to switch the magazine random
play function on and off.
The MRDM indicator is displayed when the
magazine random play function is turned on.
The display of the disc and track numbers change
continuously as the next track is being selected.
When the disc/track has been selected, play starts.
2 To change the track being heard, touch [ ¢ ].
Another disc/track is selected and played.
NOTE
• The magazine random play function is cancelled
when you stop playing a disc.
• The time needed for random selection depends on
the number of discs loaded in the disc magazine.
3 Switching to the Disc Changer Control
Screen (Shift)
Touch [ ] to switch to the disc changer control
screen (Shift).
3 Switching to the Next Source Mode
Touch the mark located at the upper side of ∞ to
switch to the next source control screen.
3 Switching to the Previous Source Mode
Touch the mark located at the lower side of 5 to
switch to the previous source control screen.
3 Switching to the Menu Screen
Touch [ MENU ] to switch to the menu screen.
25
English
Disc Changer Control Function
Disc Changer Control Screen (Shift)
T I
D -
ME NU
1 2:0 0
CD - CH 1
D+
Disc 5 - Tr 1 2
BEST
H I TS
2 : 3 4 P
REP
3 To Scroll Manually
Touch [ SCRL ] to display the disc title or the track
title. The titles will be displayed in one scrolling
display.
3 Selecting the Time Display for CDs
Each time you touch [ TIME ], the time display during
disc play switches as follows:
▼
P : Elapsed time of track being played
▼
A : Elapsed time of entire disc
TITLE
SCRL
LIST
TIME
NAME
3 Selecting the Name or Title Display for
Discs
Each time you touch [ TITLE ], the display during disc
play switches as follows:
▼
R : Remaining time of entire disc
3 Switching to the Disc List Screen
Touch [ LIST ] to switch the disc list screen.
(Page 26)
3 Switching to the Name Set Screen
▼
Disc name (DNPS)
Touch [ NAME ] to switch the name set screen.
(Page 27)
▼
Disc title (CD text)
▼
NOTE
Track title (CD text)
You cannot operate unless the parking brake is set.
NOTE
• You can give names to discs through the presetting
disc name function.
• If you try to display the name of a disc that does not
have one, "NO NAME" is displayed instead.
• If you try to display the title of a disc that does not
have one, “NO TEXT” is displayed instead.
3 Returning to the Disc Changer Control
Screen (Main)
Touch [ ] to return to the disc changer control
screen (Main).
Disc List Screen
T I
ME NU
Disc 5 - Tr 1 2
CTRL
1 2:0 0
2 : 3 4
1 B E S T
H I T S - V 1
2 B E S T
H I T S - V 2
3 N o
N ame
4 N o
N ame
5 N o
N ame
6 N o
N ame
Touch [ TITLE ] to swich the display between the disc
title and disc name in the list.
3 Returning to the Source Control Screen
Touch [ CTRL ] to return to the source control
screen (Shift) .
TITLE
3 Changing to the Disc List
Each time you touch [ ] , the disc list switches
between the disc1-6 and disc 7-10.
NOTE
Depending on the connected model, a 6-disc changer
might be identified as a 10-disc changer.
3 Selecting the Disc
Touch the disc number or name in the list for the
desired disc. The number of the changed disc is
displayed.
26
3 Switching the Display for Discs
Name Set Function
BEST
English
Name Set Screen
H I TS
A
B
C
D
E
F
G
H
I
J
K
L
M
N
O
P
Q
R
S
T
U
V
W
X
Y
Z
A B
a b
S P C
1 2
Ä ä
N AME
SET
O K
3 Station Name Preset (SNPS) /Disc Name
Preset (DNPS)
1 If the cursor is in the desired character input
position, go on to step 4. If not, touch either [ 2 ] or
[ 3 ] to move the cursor to the desired position.
Touching [ 2 ] moves the cursor to the left and
touching [ 3 ] moves it to the right.
2 Touch [ ∞ ] or [ 5 ] to switch the character lists.
NOTE
When all characters are displayed on the character
list, [ ∞ ] and [ 5 ] do not appear.
3 Touch [ A B ], [ a b ], [ 1 2 ] or [ Ä ä ] to switch the
character lists.
4 Touch a character.
5 Continue steps 1 and 4 until all the characters have
been input for the name.
NOTE
• You can enter up to 12 characters for each name.
• To enter a space, touch [ SPC ]. A blank is inserted
and the cursor moves to the right.
6 Touch [ OK ] to finish name entry and leave the
name preset mode.
NOTE
• If you want to change the name of a station, first
display the name of the station (following step 1),
then change the letter(s) that you by following steps
2, and 4.
• You can assign names for up to 30 TV stations.
• You can only store names for up to 100 CDs. If you
store the name for an 101st CD, the first one will be
erased automatically.
• CDs are identified by their total length and number
of tracks. If you play another CD that happens to
have exactly the same specifications as another CD
whose name is stored, the wrong name may be
displayed.
27
English
Remote Control Function
VOLUME buttons
+
–
SRC
SRC button
4
ATT button
TV/VD
FM
+
TUNE ¢
TRACK
ATT
38
DISC
AM
–
M/S
V.SEL button
MODE
V.SEL
FNC
MODE button
FNC button
AME
REAR AV
REAR AV button
SP
OPEN
SP button
OPEN button
Basic Source Control Function
• SRC button
Each time you press the SRC button, the source mode switches as follows:
▼
Tuner mode
▼
Disc changer mode
▼
TV mode
▼
Standby mode
NOTE
• The mode switches to the next mode from any mode which cannot be used.
• The tuner mode and disc changer mode will differ depending on the unit that is connected.
• VOLUME buttons
Press the ª button to increase the volume.
Press the · button to decrease the volume.
• ATT button
Turn down the volume quickly. To return the volume to its original level, press the button again.
• SP button
Switch to the built-in speaker mode.
• OPEN button
Open/Close the monitor.
NOTE
The “
” button cannot be used.
Visual Function
• V.SEL button
Each time you press V.SEL button, the image video will switch between the navigation, television and video.
• MODE button
Each time you press MODE button, the screen mode switches between the full, zoom, just, cinema and
normal.
• FNC button
Press the FNC button to switch the source control screen.
Each time you press FNC button, the back picture in the source control screen changes.
• REAR AV button
Each time you press REAR AV button, the AV output mode switches between the normal, television and
video 2 (from the front AV-IN terminal).
28
SRC
4
FM+ button
+
ATT
AM– button
TV/VD
FM
TUNE ¢
TRACK
DISC
38
AM
–
4 button
¢ button
English
+
–
38 button
M/S
MODE
AME button
V.SEL
FNC
AME
REAR AV
SP
OPEN
TV Control Function
• 38 button
Each time you press the 38 button, the tuning mode switches to auto 1, to auto 2 and manual.
• TUNE buttons
Press the 4 button to make decreasing seeks.
Press the ¢ button to make increasing seeks.
Start the auto memory entry during the auto memory entry mode.
• FM+ button
Switch between the TV1, TV2, video1 and video2.
• AME button
1 Selects the band for auto memory entry.
2 Press the AME button.
3 Press the ¢ button or 4 button to start auto memory entry.
Tuner Control Function
• 38 button
Each time you press the 38 button, the tuning mode switches to auto 1, auto 2 and manual.
• TUNE buttons
Press the 4 button to make decreasing seeks.
Press the ¢ button to make increasing seeks.
• FM+ button
Select and switch between the FM1, FM2 and FM3 bands.
• AM– button
Select the MW and LW bands.
Disc Changer Control Function
• 38 button
Press the 38 button to make the disc pause.
Press the 38 button to start play again.
• TRACK buttons
Press the 4 button to search through the tracks backwards.
Press the ¢ button to search through the tracks forwards.
• DISC buttons
Press the AM– button to search through the discs backwards.
Press the FM+ button to search through the discs forwards.
29
Installation
English
Accessories
Installation Procedure
External view
......... Number of items
1
........1
2
........1
2 CAUTION
3
........1
4
........2
5
........1
NA0
TEN
A33
AN
CX-
ITY R
ERSSTE
DIVBOO
ON
OST
H
CAR
WIT
OFF
BO
6
1. To prevent short circuits, remove the key from the
ignition and disconnect the - terminal of the battery.
2. Make the proper input and output cable connections
for each unit.
3. Connect the wiring harness cables in the following
order: ground, battery, ignition.
4. Connect the wiring harness connector to the unit.
5. Install the unit in your car.
6. Reconnect the - terminal of the battery.
7. Press the reset button.(See p. 4)
........2
7
........1
8
........6
• If your car's ignition does not come with an ACC
position, connect the ignition cables to a power
source that can be turned on and off with the
ignition key. If you connect the ignition cable to a
power source that receives a constant
voltage supply, as with battery cables, the battery
may die.
• If the fuse blows, first make sure that the cables
have not caused a short circuit, then replace the old
fuse with one with the same rating.
• Do not let unconnected cables or terminals touch
metal on the car or anything else conducting
electricity. To prevent short circuits do not remove
the caps from unused terminals or from the ends of
the unconnected cables.
• After the unit is installed, check whether the brake
lamps, blinkers, wipers, etc. on the car are working
properly.
• Insulate unconnected wires with vinyl tape or other
similar material.
• Mount the unit so that the mounting angle is 30° or
less.
9
........1
0
........2
2 CAUTION
The use of any accessories except for those provided might result in damage to the unit. Make sure only to use
the accessories shipped with the unit, as shown above.
Installation of Monior Unit
2 CAUTION
When mounting the main unit after checking the operation, close the monitor first.
NOTE
• Move the fittings on both sides to suit the installation chassis and select the embedding position from among
the 3 positions.( :Fixing screw)
• When the fittings are set closest to the front (i.e., the embedding position is farthest back), use the hard rubber
frame (Accessory 5).
Accessory 5
30
Accessory 9
U
P
On cars lacking a centre
compartment
English
On cars where there is no compartment in the centre for installing a car audio unit:
Use the spacer (Accessory 0) to affix the centre unit sleeve and the sleeve attached to the main unit in such a way
that they are correctly aligned both depthwise and horizontally.
U
P
7
Accessory
0
Removing Unit
■ Removing the Hard Rubber Frame
1 Engage the catch pins on the removal tool and
remove the two locks on the lower level.
Lower the frame and pull it forward as shown in the
figure.
Lock
2 When the lower level is removed, remove the upper
two locations.
NOTE
The frame can be removed from the top side in the
same manner.
Catch
Accessory 4
■ Removing the Unit
1 Refer to the section “Removing the Hard Rubber
Frame” and then remove the hard rubber frame.
2 Remove the Hex-head screw (Accessory 9) with
integral washer (M4×8) on the back panel.
Catch facing up
5 Pull the unit all the way out with your hands, being
careful not to drop it.
3 Insert the two removal tools deeply into the slots on
each side, as shown.
2 CAUTION
Be careful to avoid injury from the catch pins on the
removal tool.
4 Lower the removal tool toward the bottom, and pull
out the unit halfway whilst pressing towards the
inside.
31
Installation
English
Connections
Accessory 6
OFF ON
BOOST
CAR DIVERSITY ANTENNA
WITH BOOSTER CX-A330
OFF ON
BOOST
CAR DIVERSITY ANTENNA
WITH BOOSTER CX-A330
Audio/Visual Input or Output
•Visual (Yellow)
•Audio left (White)
•Audio right (Red)
Kenwood navigation unit
2CAUTION
Accessory 3
When disconnecting the I/F cable,
pull on the connector’s ring.
KVC-1000
M4
IN
OUT
NAV
I/F
Accessory 2
Accessory 1
To parking brake detection switch harness
of car
NOTE
IN-OUT setting
•Set to "IN" when using a video
player or when connecting a
navigation unit other than
Kenwood.
•Set to "OUT" when connecting to
another monitor.
Connection cable
(Provided with the KTC-1000R/A907)
Parking sensor cable (Green)
PRK SW
2 CAUTION
For the sake of safety, be sure to connect
the parking sensor.
Automatic illumination control
cable (Orange)
To car headlight switch
ILLUMI
Ignition cable (Red) ª12V
ACC
Ignition key switch
ACC
KTC-1000R/A907
Car fuse box
(Main fuse)
Battery cable (Yellow) ª12V
BATT
Connection cable
(Provided with the C907)
C907
Fuse (5A)
Ground cable (Black) · (To car chassis)
–
MASTER SW cable (White/Red)
NOTE
32
When the KTC-1000R is connected,
see the KTC-1000R Instruction
Manual
MASTER
SW
+
Battery
When not connected to the KTC-1000R/A907,
this cable should be connected to ·.
2 CAUTION
The unit will not operate unless the cable is
connected.
Connecting and Install Antenna Units
English
■ Connection of Antenna Unit
2 CAUTION
Incar antennas have a lower reception sensitivity than antennas intended for outside mounting. The picture may not
appear or may be disturbed if the signal in your area is weak.
To the monitor unit
Booster switch
ON
OFF ON
BOOST
CAR DIVERSITY ANTENNA
WITH BOOSTER CX-A330
Set this booster switch to
"OFF" if there is ghosting
of the on-screen image
due to electromagnetic
fields.
OFF
Ignition cable (Red)ª12V
ACC
Ignition key switch
Fuse(1A)
Car fuse box
(Main fuse)
Ground cable (Black) · (To car chassis)
–
+
Battery
■ Installation for Antenna Unit
• Attach the antenna to the inner glass surface of the rear window using double-sided tape. Carefully check the installation
location as the tape can only be stuck on once.
• If the surface temperature of the glass of the rear window is low, warm it by turning on the power of the rear defogger.
A cold window glass surface will weaken the adhesive strength of the double-sided tape.
Also, if installation inside the cabin is performed on a day with high humidity or when it is raining, the high humidity level
will weaken the adhesive strength of the double-sided tape.
• Do not install the antenna in a location where it may obstruct the field of view during driving, such as on the windshield.
1 Check the location where the antenna is to be attached. Clean off any grease
Antenna parts
or dirt from the installation location using the supplied glass cleaner, clean the
area with water and allow to dry.
2 CAUTION
Antenna unit
Clean the glass thoroughly as failure to clean the glass can not only weaken
the adhesive strength of the double-sided tape, but may also cause it to come
loose.
2 Remove the protective strips from the antenna parts and the back of the
antenna unit.
3 Attach the double-sided tape of the antenna parts and the antenna unit to the
rear windshield glass. Attach the double-sided tape by firmly pressing down
from the top. Secure cables using the supplied clampers.
Bundle cables
with the
clamper bar
Rear window
4 After attaching the antenna with the double-sided tape, allow it to sit
undisturbed for 24 hours. Take care not to apply force to the antenna or allow it
to get wet during this time.
5 Wire the antenna cable to the hideaway unit.
Accessory 8
Rear seat
33
English
Troubleshooting Guide
What might appear to be a malfunction in your unit may just be the result of slight
misoperation or miswiring. Before calling service, first check the following table for possible
problems.
PROBLEM
The power does not turn on.
SOLUTION
The fuse has blown.
After checking for short circuits in the
cables, replace the fuse with one having
the same rating.
No ACC position on vehicle ignition.
Connect the same cable to the ignition as
the battery cable.
Nothing happens when the
buttons are pressed.
The computer chip in the unit is not
functioning normally.
Press the reset button on the unit (see
page 4).
The monitor does not
open/close.
The parking brake is not engaged.
For safety reasons, the monitor does not
open while the vehicle is moving.
Engaging the parking brake.
No television/ video image
appears.
The unit is not connected to the parking brake
detection switch.
Make proper connections according to
”Connections“ (See page 32).
The parking brake is not engaged.
For safety reasons no television/ video
images are displayed while the vehicle is
moving. Engaging the parking brake will
cause images to be displayed.
The screen is dark.
The unit is in a location where temperature is
low.
If the temperature of the monitor unit
drops, the screen may appear darker
when power is first turned on due to the
characteristics of a liquid crystal panel.
Wait a while after turning power on for
the temperature to rise. Normal
brightness will return.
The screen does not darken
when the vehicle’s lights are
turned on
The unit is set to auto dimmer.
When the unit is set to auto dimmer, it is
not linked to the vehicle's light switch.
The illumination cable has not been
connected. (If manual dimmer is set)
Make proper connections according to
”Connections“ (See page 31).
The TV antenna and vehicle‘s radio antenna
are too close.
• Separate the two antennas as far as
possible.
• Turn off the main unit.
AM/FM radio reception is poor
and/or there is noise.
34
POSSIBLE CAUSE
BUS-E50:
BUS-W02:
BUS-W08:
Two or more the KTC-1000R or A907 are connected.
The No. switch of the connected disc changers is set to the same number (1 or 2) for both units.
] Set the No. switch of one disc changer to "1" and the other unit to "2" to enable proper use.
Two or more monitors are connected to the BUS terminal.
English
The following indications are used to inform you that there is a problem with the connections of
the system.
The following messages are displayed when certain problems are occurring in your system.
Take the recommended actions.
EJECT
No disc magazine has been loaded in the changer. The disc magazine is not completely loaded.
] Load the disc magazine properly.
No CD in the unit.
] Insert the CD.
NO DISC
No disc has been loaded in the disc magazine.
] Load a disc into the disc magazine.
E-04
No disc has been loaded in the disc magazine.
] Load a disc into the disc magazine.
The CD is quite dirty. The CD is upside-down. The CD is scratched a lot.
] Clean the CD and load it correctly.
BLANK
Nothing has been recorded on the MD.
] The next MD will automatically be played.
NO TRACK
No tracks are recorded on the MD, although it has a title.
] The next MD will automatically be played.
E-99
Something is wrong with the disc magazine. Or the unit is malfunctioning for some reason.
] Check the disc magazine. And then press the reset button on the unit. If the "E- 99" code does not
disappear, consult your nearest service center.
HOLD
The protective circuit in the unit activates when the temperature inside the automatic disc changer
exceeds 60°C (140°F), stopping all operation.
] Cool down the unit by opening the windows or turning on the air conditioner. As the temperature
falls below 60°C (140°F), the disc will start playing again.
35
Specifications
English
Specifications subject to change without notice.
Monitor Section
Picture size ......................................................................................................................................6.5 inches wide
142.6(W) × 80.7(H) mm
Display system ................................................................................................................Transparent TN LCD panel
Drive system......................................................................................................................TFT active matrix system
Number of pixels ............................................................................................336.960 pixels (480 H × 234 V × RGB)
Effective pixels ............................................................................................................................................99.99%
Pixel arrangement..............................................................................................................RGB striped arrangement
Back lighting ................................................................................................................................Cold cathode tube
Buit-in speaker ........................................................................................................................1 W (40mm × 20mm)
TV Tuner Section
Colour system ......................................................................................................................................PAL/SECAM
NTSC/PAL (Video)
Channel selection system....................................................................................PLL frequency synthesizer system
Demoduration system ................................................................................................................Split carrier system
Television system
Channel converge
VHF
PAL-B/G
PAL-I
SECAM-L
SECAM-D/K
SECAM-B/G
2 - 12ch
A - Jch
2 - 10ch
1 - 12ch
2 - 12ch
A - Hch
UHF
21 - 69ch
Antenna input ....................................................................................................4-ch diversity (75 Ω /3.5 ø minijack)
External video input level (miniplug)........................................................................................................1 Vp-p/75 Ω
External audio max. input level (miniplug) ..................................................................................................1 V/22 KΩ
External video input level (RCA jacks) ....................................................................................................1 Vp-p/75 Ω
External audio max. input level (RCA jacks) ..............................................................................................1 V/22 KΩ
Video output level (RCA jacks) ................................................................................................................1 Vp-p/75 Ω
Audio output level (RCA jacks)..............................................................................................................500 mV/1 KΩ
General
Operating voltage ..................................................................................................................14.4 V DC (11 to 16 V)
Consumed current ............................................................................................................................................2.0 A
Operational temperature range ........................................................................................................–10°C to +60°C
Storage temperature range ..............................................................................................................–20°C to +85°C
Size ..............................................................................................................................180(W) × 50(H) × 182(D) mm
7-1/16(W) × 1-15/16 (H)× 7-3/16(D) inch
Installation size ............................................................................................................178(W) × 50(H) × 165(D) mm
7(W) × 1-15/16(H) × 6-1/2(D) inch
Weight ................................................................................................................................................1.8 kg(4 LBS)
TV Antenna Unit
Output inpedance ......................................................................................................................75 Ω /3.5 ø miniplug
Operating voltage ........................................................................................................................................12 V DC
Consumed current ............................................................................................................................................1.0 A
Cable length ........................................................................................................................................................5 m
Size ............................................................................................................................50(W) × 14.5(H) × 500(D) mm
1-15/16(W) × 9/16(H) × 19-11/16(D) inch
Weight ........................................................................................................................................................70 g (x2)
36
Although the effective pixels for the liquid crystal panel is given as 99.99% or more, 0.01% of pixels may not light or
may light incorrectly.


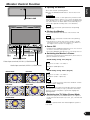
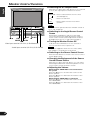

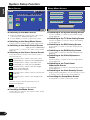
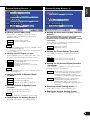


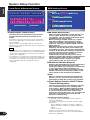


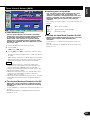
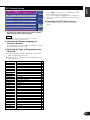


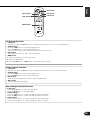


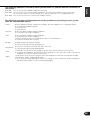


![Kenwood Z910DVD[R] User's Manual](http://vs1.manualzilla.com/store/data/007020200_1-b05420062acc26a5eda7b041010caf89-150x150.png)