1
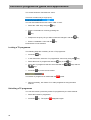
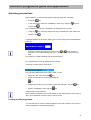
Operating Manual
DVB Satellite Receiver
UFD 510
Order No.: 260 463
Controls, displays and connections
Controls, displays and connections.................................................................................4
View of front panel ......................................................................................................................................... 4
View of rear panel .......................................................................................................................................... 4
Front panel controls and displays .................................................................................................................. 4
Rear panel controls and connections............................................................................................................. 4
Remote control handset ................................................................................................................................. 5
Remote control handset keys ........................................................................................................................ 5
Safety instructions.............................................................................................................6
Important notes regarding operation.............................................................................................................. 6
Repairs........................................................................................................................................................ 6
Children-at-play........................................................................................................................................... 6
Mains lead................................................................................................................................................... 6
Extended absence / thunderstorms............................................................................................................ 6
Cleaning...................................................................................................................................................... 6
Important notes for siting and installation ...................................................................................................... 7
Place of installation ..................................................................................................................................... 7
Ventilation ................................................................................................................................................... 7
Mains voltage.............................................................................................................................................. 7
Humidity ...................................................................................................................................................... 7
Solar radiation/heat..................................................................................................................................... 7
Grounding ................................................................................................................................................... 7
Connecting up and putting into operation.......................................................................8
Connecting up the unit ................................................................................................................................... 8
Satellite signal connection .......................................................................................................................... 8
Receiving system presets........................................................................................................................... 8
TV and video recorder connection.............................................................................................................. 8
Audio connection ........................................................................................................................................ 8
Secondary receiver connection .................................................................................................................. 9
Switching over remote control’s command set .............................................................................................. 9
Decoder connection .................................................................................................................................. 10
Inserting batteries into remote control handset............................................................................................ 10
Checking connections and operation........................................................................................................... 10
On-screen display OSD ............................................................................................................................... 10
Receiver operation...........................................................................................................11
Switching the unit on .................................................................................................................................... 11
Switching the Navigator on .......................................................................................................................... 11
Selecting a TV or radio programme ............................................................................................................. 12
TV or radio programme selection by entering a number ............................................................................. 13
Switchover between TV and radio programmes.......................................................................................... 14
Information about the current programme ................................................................................................... 14
Adjusting the volume.................................................................................................................................... 14
Selecting TV programmes using bouquet selection .................................................................................... 15
Calling up the programme list ...................................................................................................................... 16
Multilingual programmes.............................................................................................................................. 17
Muting the sound.......................................................................................................................................... 17
Switchover between two TV programmes ................................................................................................... 17
Sort programmes ......................................................................................................................................... 17
Parental lock ................................................................................................................................................ 19
Changing locked programmes.................................................................................................................. 19
Locking a TV programme ......................................................................................................................... 20
Unlocking a TV programme ...................................................................................................................... 20
Activating parental lock ................................................................................................................................ 21
Locking a radio programme ...................................................................................................................... 21
Electronic programme guide and applications .............................................................22
Initial settings ...................................................................................................................25
Calling up the “Installation” menu ................................................................................................................ 25
Bouquet organisation ................................................................................................................................... 26
Programme organisation.............................................................................................................................. 26
Automatic search run ................................................................................................................................... 28
New digital transponder ............................................................................................................................... 31
2
Contents
New digital programme ................................................................................................................................ 32
Parental lock ................................................................................................................................................ 32
Settings ........................................................................................................................................................ 33
Timer ............................................................................................................................................................ 37
Application control........................................................................................................................................ 38
Language selection (OSD)........................................................................................................................... 38
Common interface........................................................................................................................................ 38
Menu structure .................................................................................................................39
Features of the UFD 510 ..................................................................................................40
Specifications...................................................................................................................41
UHF characteristics .................................................................................................................................. 41
Video......................................................................................................................................................... 41
Audio......................................................................................................................................................... 41
Power supply ............................................................................................................................................ 41
Connectors................................................................................................................................................ 41
General ..................................................................................................................................................... 42
Temperature range ................................................................................................................................... 42
Accessories............................................................................................................................................... 42
Scart socket pin assignments ...................................................................................................................... 42
Connection examples ......................................................................................................43
Connection scheme 1: .............................................................................................................................. 43
Connection scheme 2: .............................................................................................................................. 44
Connection scheme 3: .............................................................................................................................. 45
Service and dealer settings.............................................................................................46
Glossary, abbreviations ..................................................................................................47
Glossary, abbreviations ..................................................................................................48
3
Controls, displays and connections
Controls, displays and connections
This section contains a brief description of all the control elements, displays and
connections. The key symbols presented here are also used when describing the
operating sequences.
View of front panel
View of rear panel
Front panel controls and displays
Rear panel controls and connections
1
2
1
3
4
5
6
7
8
Mains switch (with mains isolation)
LED display (4-figure, 7-segment display)
To display programme slot and the parameters
selected.
EXIT button
To exit from a menu or submenu.
MENU button
For calling up the main menu.
OK button
To confirm a selection.
PCMCIA card slot
For insertion of code cards for Pay-TV.
P+, P- buttons
a)
To increment or decrement the programme slot by 1.
b)
To step through programme list up or down
pagewise.
+, - buttons
For volume adjustment, + louder, - quieter.
2
3
4
5
6
7
8
Video socket
S-VHS video output
Audio output
2 Cinch sockets, left and right channel
Scart socket, VCR connection
Scart socket, TV connection
Scart socket, AUX connection
DATA socket
Interface for serial data transfer
Satellite IF signal input
Output of LNB supply voltage and
control signals (22 kHz and DiSEqC 1.1)
Satellite IF signal output
Output for a secondary receiver. The Sat-IF signal
is looped through.
If connected up improperly, faulty operation may result or the unit may be rendered
defective.
4
Controls, displays and connections
Remote control handset
Remote control handset keys
Read character key.
ON/OFF (Standby)
Attention: no mains isolation results!
Function key.
Multilingual audio channels selection
a) Last-function. Allows you to switch back to the last
programme selected
b) Turns parental lock on and off
Sound muting
Calls up the timer menu
Switchover between two receivers
Calls up the Electronic Programme Guide
a) Increases programme slot number step-by-step
b) In programme selection, pages up by one page
a) Decreases programme slot number step-by-step
b) In programme selection, pages down by one page
Calls up main menu
Page to left or right in a menu- or programme
selection.
Pages up or down in a menu or programme selection.
Confirm a menu- or programme selection
a) Exit from a menu or submenu
b) Cancel an application
Red, green, amber, blue colour keys
a) Red key: overlay the programme selection
b) Menu selection in Electronic Programme Guide
0 = Calls up the micro EPG
to
Numeric keys to enter the programme selection or to
enter data
Switches between TV and radio programmes
Volume adjustment
Switches between TV and satellite system
5
Controls, displays and connections
Safety instructions
The following section contains important information relating to operation, place of
installation and connecting-up of the receiver.
Read these notes carefully before putting the unit into operation.
Important notes regarding operation
Repairs
On no account remove the housing cover since dangerous voltages inside the unit
are then exposed. The unit must be opened only by qualified specialists, so allow
them to carry out any repairs or adjustments to your receiver. Unauthorised
opening entails loss of guarantee.
The unit‘s electrical safety can be affected by improper tampering with the unit.
The manufacturer‘s liability excludes personal injury resulting from the unit being
opened.
Children-at-play
Pay attention that children do not insert objects into the ventilation slots. There is a
risk of mortal danger due to electric shock.
Mains lead
Make certain that the mains lead (power supply lead) is undamaged. Never put the
unit into service if the mains lead is damaged.
Extended absence / thunderstorms
Always switch the unit off via its mains switch during periods of extended absence
or at the onset of thunderstorms. This also applies to any other equipment
attached.
Take account of any possible timer programming and switch the unit on again in
good time prior to the time of recording.
Cleaning
Withdraw the mains plug before cleaning the unit. Use a dry cloth for cleaning.
6
Safety instructions
Important notes for siting and installation
Place of installation
Every electronic device generates some heat. The rise in temperature, however,
lies within safe limits. Nevertheless, this does not rule out the possibility of slight
colour changes to sensitive furniture surfaces and veneers over the course of time
due to the constant effect of heat.
In conjunction with treated furniture surfaces, the unit‘s rubber feet can likewise
give rise to changes in colour. Where necessary, place the unit on a suitable pad.
Ventilation
The heat that is generated in this unit is dissipated quite adequately. Never install
the receiver in a cabinet, shelf or rack with inadequate ventilation. Never close-off
the openings on the unit that are intended for heat dissipation.
Do not place objects on top of the unit. Maintain a clearance of at least 10 cm
above the unit so that the heat generated within the unit is convected away without
obstruction.
Mains voltage
Run the receiver only from a mains voltage of 230V / 50Hz
The unit is not to be connected to the mains until after all installation work has been
carried out properly.
Humidity
Protect the unit against humidity, drips and splashes.
Solar radiation/heat
Do not place the receiver close to radiators nor expose it to direct sunlight.
Grounding
The parabolic antenna is to be grounded in accordance with regulations. Here, the
relevant German VDE regulations (or equivalent) are to be observed.
7
Connecting up and putting into operation
Connecting up and putting into operation
The following section is intended specifically for the specialist dealer. If you are not
carrying out the installation yourself, there is no need to pay any attention to this
section. Sample configurations are to be found in the “Connection examples“
section.
Do not connect the unit to the mains until after all installation work has been carried
out properly.
Follow the guidance given in section “Safety- and Installation Instructions“.
Connecting up the unit
Satellite signal connection
•
Connect the Sat IF input (5) of the receiver to the satellite receiving system.
For the connection use a coaxial cable with an F-type connecting plug.
If the F connector is not yet fitted to the cable:
•
Insulate the cable as indicated in the following illustration, and
•
Carefully screw the F connector onto the cable until it is firmly seated on it.
When fitting the plug, make certain that none of the fine wires of the braided shield
makes contact with the inner conductor giving rise to a short-circuit.
Receiving system presets
Presetting carried out for the control signals was for conventional receiving
systems, thus 14/18 V for polarity switching and 22 kHz switching signal for
satellite selection in the case of multifeed receiving systems.
If DiSEqC or tone-burst switching matrices are to be used in the receiving system,
the default setting must be changed in the initial setup menu, menu entry
“DiSEqC“..
For this, refer to section “Initial settings, DiSEqC menu“.
It is essential to comply with instructions for use of the multiswitch employed.
TV and video recorder connection
•
Connect-up the satellite receiver (TV Scart socket) and TV set with a Scart
cable.
If your TV set has stereo capability, a Scart connection allows you to receive the
sound in stereo.
•
Connect-up the video recorder and satellite receiver (VCR Scart socket) again
using a Scart cable.
Audio connection
If you want to hear the sound via the hi-fi system, connect the audio Cinch sockets
(view of rear panel, 2) and the hi-fi system with a Cinch cable.
8
Connecting up and putting into operation
Secondary receiver connection
You can connect an analogue secondary receiver to your digital receiver.
•
For this, connect the Sat IF input of the secondary receiver to the Sat IF output
of your digital receiver.
•
Connect the AUX Scart socket of your digital receiver to the TV Scart socket of
the secondary receiver.
•
For correct operation, the unused receiver must be in standby mode.
It is essential to comply with the secondary receiver‘s instructions.
The schematic for connecting-up the secondary receiver is to be found in the
“Connection examples“ chapter.
Switching over remote control’s command set
The remote control handset contains two command sets. This allows two receivers
to be operated independently in a room (not in conjunction with a twin receiver).
Switchover is possible with all Kathrein remote control handsets.
For this, programme one receiver to command set A and the second receiver to
command set B.
•
Switch on receiver 1. Switch off receiver 2 using the mains switch on the unit.
•
Press the
•
Using the numeric keys
•
To adopt the code, switch receiver 1 into standby using the
and then to off via the mains switch on the unit.
•
Set receiver 2 back into operation.
•
Press the
•
Using the numeric keys
•
To adopt the code, switch receiver 2 into standby using the
(standby) key
and then back into operation again. Set receiver 1 back into operation as well.
•
Press the
•
Using the numeric keys
key and keep it pressed.
to
enter “901“.
(standby) key,
key and keep it pressed.
to
enter “902“.
key and keep it pressed.
to
enter “903“.
With the first two settings the remote control must be pointer towards the
respective receiver which is switched on.
With the
key you can now switch between the two command sets A and B
(toggle function) and operate the two receivers in alternation.
Operate only one receiver. If, due to maloperation, the active command set has
been switched over rendering the receiver inoperable, the remote control can be
switched back to command set A without difficulty. The procedure for this has
already been described above.
With remote control handsets that have 24 keys (remote controls of the 200-series
receivers from Kathrein) code numbers 001, 002 and 003 are to be entered in
place of codes 901, 902 and 903.
9
Connecting up and putting into operation
Decoder connection
Decoders for reception of analogue Pay-TV programmes can be connected up only
via an analogue secondary receiver (see connection diagram 3 in “Connection
examples“ chapter.)
•
Set up the connection to the secondary receiver as described above.
•
Using a Scart cable, connect the decoder to the decoder Scart socket of the
secondary receiver.
Take note of secondary receiver and decoder instructions.
Inserting batteries into remote control handset
Remove the cover on the rear of the remote control handset.
•
Insert both of the batteries supplied into the remote control handset.
Make certain that the batteries are inserted with the correct polarity! Polarity is
marked at the bottom of the battery compartment.
•
Replace the cover again.
Exhausted batteries are special waste and should not be disposed of with
household refuse. Instead, hand them in to a collection centre for used batteries!
Checking connections and operation
•
Switch the satellite receiver on via the mains switch on the front of the unit. The
LED display on the unit shows the programme slot P001.
•
Switch on your TV set.
•
Tune in to an audio-visual (AV) programme slot on your TV set.
You can now receive the factory-preset TV and radio programmes. To find out how
to tune in additional TV and radio programmes, refer to sections: “Programming TV
programmes“ and “Programming radio station programmes“.
If the “No Signal“ display is shown for all programme slots, the installation of the
system should be checked out. However, if only certain programme slots are
affected, this may be due to an interruption in the signal on the transmission side.
On-screen display OSD
Note: All figures refere to German programmes and the OSD in German language.
How to select the OSD in English is explained on page 37.
10
Electronic programme guide and applications
Receiver operation
In this chapter, you learn how to select both TV and radio programmes using your
receiver, how to adjust the volume and how to programme the timer functions.
In describing the functions, it is assumed that the receiver has already been
properly connected up by the specialist.
Should you want to undertake the connections yourself, please read the section:
“Connecting up and putting into operation“ beforehand.
Switching the unit on
•
Press the mains switch (1) on the front of the unit.
After a little while four horizontal bars “– – – –“ appear on the LED display
indicating that the unit is switched on. Programme slot P001 appears.
•
key on the remote control handset can be used to switch the unit
The
between normal operation and standby.
In standby mode a horizontal line appears in the LED display “ –“.
If you switch on the receiver from standby with the
LED display.
key,
is shown on the
On switching on with the
standby key on the remote control, the last TV
programme slot that was selected is always tuned in.
If the receiver was switched off via the mains switch, the time setting is lost. On
switching on the time shows 1:00 (= Offset). After approximately 10 seconds the
time is updated automatically.
Switching the Navigator on
•
Press the
key on the remote control.
On the screen, the receiver shows the Navigator‘s first page:
The name and time are displayed in the header line. The remote control keys that
can be used for navigation are indicated in the footer line. If an open envelope is
displayed in the bottom right-hand corner, a new software version can be loaded
from the satellite (see “Initial settings“, “Settings“, “Software Update“).
A selected menu entry is displayed in white typeface on a dark background.
11
Electronic programme guide and applications
This starting page can be selected from all levels of the submenus by pressing the
key. With the
key, one is taken to the TV programme or, via the selection
page, to the corresponding menu entry.
The menu selection is displayed on the right-hand side of the screen. It contains
the following entries:
Bouquet selection
The Bouquets (compilations of programmes) are displayed on the left-hand side of
the screen. The Bouquets shown in the illustration are for example only, and the
Bouquets that appear on your screen may be different.
TV programmes
A list of all the TV programmes which can be received is displayed on the left-hand
side of the screen. You can alter the order of the programmes in this list as desired
(see “Initial settings“, “Programme organisation“).
Radio programmes
Digital radio programmes can be received via satellite with your receiver. Factory
pre-programming for a multitude of programmes is already done. If you connect the
Cinch inputs of your stereo system to the Cinch outputs (2) on the rear of your
receiver, you will be able to listen to radio programmes with greater fidelity. You
can turn off your TV set.
A list of all the radio programmes which can be received is displayed on the lefthand side of the screen. You can alter the order of the programmes in this list as
desired (see “Initial settings“, “Programme organisation“)
Installation
With this menu entry you can make settings and carry out checks on the receiver
(see “Initial settings“).
Selecting a TV or radio programme
To select a TV or radio programme proceed as follows::
•
Using the
keys move step-by-step to the menu entry
“TV programmes“ or “Radio programmes“.
•
With the
•
Move step-by-step to the desired programme using the
•
Confirm your selection with the
•
To select a programme you can also use the
key or the
key, select the left side of the Navigator.
keys.
.
keys.
Both keys have two different functions:
The key
12
key
-
scrolls up a page if you are located in programme selection.
-
increments the programme number by one if you have selected a programme.
Electronic programme guide and applications
The
Example
key
-
scrolls down a page if you are located in the programme selection.
-
decrements the programme number by one if you have selected a programme.
You want to select the TV programme, “Pro 7“. You start with the menu selection
“Bouquet selection“. The order of the TV programmes is, of course, for example
only and depends on your settings.
•
Press the
key. The menu option “TV programmes“ is selected, and the TV
programmes which can be selected are shown on the left-hand side.
•
. key. As a result the topmost TV programme, “Das Erste“ in our
Press the
example, is selected.
•
Now continue pressing the
selected.
•
Confirm your selection by pressing the
displayed on the screen.
key until the TV programme, “Pro 7“, is
key. The programme selected is
TV or radio programme selection by entering a number
Whilst a TV programme is running, you can also select another TV programme by
entering the number of the programme slot. The same also applies for selection of
a radio programme.
•
Example
To enter the number of the programme slot use the numeric keys
to
You want to select the TV programme “DSF“. This is located at programme slot
015. The order of the TV programmes is naturally just an example, and depends on
your particular settings.
•
in sequence. The time that the receiver waits for input of
Enter the digits
the next position is approximately 3 seconds.
13
Electronic programme guide and applications
Leading zeros must be omitted.
After the programme changeover, the programme slot, programme name and time
are superimposed on the upper part of the screen for approximately. 3 seconds.
If the particular programme is encrypted, the character
next to the programme slot
appears on the left
Switchover between TV and radio programmes
Whilst a TV programme is running you can switch over to a radio programme.
•
Press the
key on the remote control.
The receiver switches over to the most recently used radio programme slot. With
the same key you can also switch back to the TV programme.
Information about the current programme
Programme information giving the programme slot, programme name and time is
key. If further information relating to the current and
called up via the
subsequent broadcast in the DVB data stream is also present, this is displayed as
well.
Adjusting the volume
Ensure that the TV set‘s volume control is set to a comfortable listening level for
the room.
•
14
Adjust the desired volume using the
key on the remote control, pressing
either “+“ (louder) or “-“ (quieter). A 15-level bar display appears on the screen
which indicates the volume selected. This volume bar can be seen only when
the TV set is turned on.
Electronic programme guide and applications
Selecting TV programmes using bouquet selection
A bouquet is a selection of programmes put together by the broadcasting
institution. This selection is displayed under a common name,
e.g. “ZDF.vision“.
•
Choose “Bouquet selection“ on the right-hand side in the Navigator.
•
Press the
key. This results in selection of the topmost programme indicated
in the bouquet selection (“ARD Digital“ in our example).
•
key. The programme, “Das Erste“,
Confirm your selection by pressing the
is displayed on the screen.
After a brief pause an electronic programme guide, EPG, is overlaid on the
screen.
Menu bar for further
information
Information about the
current programme
TV programmes
Selection bar
Upper screen
The bouquet name, and a menu bar for further information, is displayed in the
upper part of the screen. The menu entries are underscored in colour and can be
displayed using the corresponding colour keys on the remote control handset.
These menu entries are described in the section entitled “Electronic Programme
Guide (EPG) and Applications“.
Centre screen
In the centre part of the screen, the picture for the current programme is obscured
by the selectable TV programmes, and by data relating to the current programme.
Lower screen
The lower part of the screen contains a selection bar with the following entries:
tv
The screen display of the selected programme is shown without the additional
information superimposed.
select
The TV programme can be selected in picture section “now“ using the
keys. The selected programme is displayed in reverse video, i.e. white
typeface on a black background. Where available, the title of the current
broadcast and broadcasting time is displayed for the selected programme. The
TV programme is selected with
.
15
Electronic programme guide and applications
After this
The information for the current programme shows the title and broadcasting
time of the subsequent programme. The lettering of the menu entry changes
into “now“. This allows you to switch back to the current programme.
These menu entries in the selection bar can be selected with the
.
selection must be confirmed with
Example
keys. A
You want to select “Bayerische FS“ from the “ARD Digital“ bouquet. “Das Erste“ is
selected as the current programme. The order of the TV programmes is, of course,
only an example, and depends on your settings in the bouquet.
•
Keep pressing the
key until “Bayerisches FS“ is selected. The title and
broadcasting time of the current programme is displayed.
•
Confirm your selection with
•
Press the
.
key once. In the selection bar “tv“ is selected or confirm your
selection with
.
The current programme of Bayerisches Fernsehen is shown on the screen.
•
Press the
key to return to programme selection again.
If you are located within a bouquet (APPL), a programme change can be carried
out using the
keys.
Calling up the programme list
By pressing the red key on the remote control handset the programme selection is
superimposed on the screen transparently (not in the bouquet).
The current TV or radio programme is indicated on the screen in black typeface on
a light background.
•
Use the
keys to scroll through the programme choice and select a
new programme with the
•
keys.
Confirm your programme selection with the
key.
The superimposed programme choice disappears again when the red key is
pressed once more.
A further pressing of the red key again causes the programme choice and current
programme to be superimposed.
With a radio programme tuned in, the programme choice can be seen only when
the TV set is turned on.
16
Electronic programme guide and applications
Multilingual programmes
Certain TV programmes are broadcast in a number of different languages. In the
case of a film, both the original sound and the English translation, for example, may
be broadcast.
•
You can switch between the various languages by pressing the
remote control.
key on the
Muting the sound
•
Press the
key on the remote control. The sound is turned off, allowing you
to telephone in peace, for example. The indication “:“ appears on the receiver‘s
LED display.
•
Pressing the
•
Programme changeover or volume adjustment turns the sound back on.
key again turns the sound back on.
Switchover between two TV programmes
With a TV programme currently running, the
key allows you to switch back to
the TV programme previously selected. With this key you can therefore switch
between the two most recently selected TV programmes.
In the same way, you can also switch between two radio programmes.
Sort programmes
TV and radio programmes can be sorted to suit your requirements. The
programmes will be displayed on the screen in this order. The programmes are
sorted by shifting the entries in the “TV list“ or “Radio list“. To do this proceed as
follows:
•
Press the
•
In the main menu, select the “Installation“ menu entry using the
key.
confirm the selection with
key and
.
The “Installation“ menu is displayed on the screen (see “Initial settings“ chapter).
•
Using the
key select the second menu entry “Programme Organisation“
and confirm the selection with
.
The “Programme Organisation“ menu is displayed on the screen.
•
Using the
selection with
key select menu entry “TV list“ or “Radio list“ and confirm the
.
The TV list or radio list is displayed on the screen with the present order of
programmes.
17
Electronic programme guide and applications
•
Using the
keys select the TV or radio programme, e.g. “Das Erste“ and
confirm the selection with
.
For moving the
programme highlighted
The selected programme is identified by means of a small amber double arrow on
the right-hand side of the screen.
•
Move the selected programme using the
keys to the position at which it is
to be subsequently displayed in the “TV programmes“ or “Radio programmes“
list.
•
Confirm the new programme slot with the
•
Move all of the other programmes by the same method until the order that you
want is established.
•
Use the
A further possibility:
key.
keys to scroll up or down a page at a time.
To avoid having to scroll through long lists, programme slots can be selected
directly:
•
Selection of the programme to be sorted with the
the
keys or pagewise with
keys.
The selected programme is moved with the
key. After pressing this key the
programme slot is set to 0000 and the maximum programme number is displayed.
•
18
Enter the programme slot using the numeric keys
to
.
Electronic programme guide and applications
•
By pressing the
selected.
•
Whilst you remain in the TV or radio list, you can sort programmes using the
key or the
•
key, the programme is moved to the programme slot
key
Exit from the “TV list“ or “Radio list“ menu by pressing the
key .
•
Then respond to the following query with the
•
End each of the menus “Programme Organisation“ and “Installation“ with the
key.
key.
The TV and radio programmes are now sorted into your desired order.
Parental lock
You have the facility for locking TV or radio programmes. If a locked TV
programme is selected, the message “Channel locked“ appears on the screen.
The same message appears if a locked radio programme is selected, assuming
that the TV set is turned on.
Changing locked programmes
To change parental lock the following steps are necessary:
•
Press the
•
In the main menu, select the “Installation“ menu entry using the
key.
confirm the selection with
key and
.
The “Installation“ menu (see “Installation“)is displayed on the screen
•
Using the
selection with
key, select the sixth menu entry, “Parental lock“, and confirm the
.
A request appears on the screen asking you to enter a PIN (personal identification
number).
•
Enter the number 3010 using the numeric keys
to
. This number is
entered in a concealed manner with only “* “ being shown in the white entry
field.
The number is a fixed presetting and cannot be altered.
19
Electronic programme guide and applications
The screen shows the “Parental lock“ menu.
This menu contains only a single query:
You can switch between the two entries “YES“ or “NO“.
•
Select the “YES“ entry using the
•
End the “Parental lock“ menu by pressing the
key.
key.
•
Respond to the query “Do you want to save the changes?“ with the
•
End the “Installation“ menu with the
key.
key .
Parental lock is now activated.
Locking a TV programme
The following steps are necessary to lock a TV programme:
•
Press the
•
In the main menu, select the “TV programmes“ menu entry using the
•
Select the list of TV programmes with the
•
Select the TV programme that is to be locked with the
key.
key or the
key.
key.
keys and the
keys.
•
Press the
key on the remote control.
The locked TV programme is marked with the
•
symbol.
Where necessary, lock further TV or radio programmes using the same
method.
Unlocking a TV programme
You can also unlock a previously locked TV programme by the same method.
20
•
Select the locked TV programme.
•
Press the
key . The symbol
disappears again.
Electronic programme guide and applications
Activating parental lock
After locking TV or radio programmes the following steps are necessary:
•
Press the
•
In the main menu, select the “Installation“ menu entry using the
confirm with
key.
key and
.
The “Installation“ menu (see “Installation“).is displayed on the screen.
•
Using the
selection with
key, select the sixth menu entry “Parental lock“ and confirm the
.
A request appears on the screen asking you to enter a PIN (personal identification
number).
•
Enter the number 3010 using the numeric keys
to
. This number is
entered in a concealed manner with only “* “ being shown in the white entry
field..
The number is a fixed presetting and cannot be altered.
The “Parental lock“ menu is displayed on the screen .
This menu contains only a single query:
You can switch between the two entries “YES“ or “NO“.
•
Select the “NO“ entry using the
•
End the “Parental lock“ menu by pressing the
key.
key.
•
Respond to the query “Do you want to save the changes?“ with the
•
End the “Installation“ menu with the
key.
key.
Parental lock is now activated.
After locking a programme you should always set the “Parental lock“ menu entry to
“NO“, since otherwise it is all too easy to cancel a lock.
Locking a radio programme
You can also lock or unlock a radio programme in the same manner. Proceed in a
manner analogous to that described above.
21
Electronic programme guide and applications
Electronic programme guide and applications
The UFD 510 receiver works in accordance with the OpenTV standard. This allows
for reception of the Electronic Programme Guide (EPG), the ARD Online channel
and other additional functions. When one of the programme provider‘s applications
is running, this is indicated on the LED display by
receiver has no effect on these applications.
The Electronic Programme Guide is called up with the
shows
. The software in the
key. The LED display
briefly. The application is then overlaid.
If the programme has no EPG information, “EPG not available“ is displayed on the
screen. However, you can call up the programme data that is available anytime
with the
key.
The channel, “ARD digital“, is displayed in the top line along with the following
menu entries:
“tip“
Tips are shown for the various sections of a TV programme.
“preview“
A preview is shown of the programmes for the coming days.
“menu“
An overview of topics is displayed for the various sections of
a TV programme.
“memo“
This allows you to put together TV programme with your
personal areas of interest.
These four menu entries are selected with the corresponding colour keys
on the remote control (see also “Selecting TV programmes using
bouquet selection“).
If, with the application running, you have selected a programme (TV picture visible
without on-screen display), the
programme slot.
22
keys can be used to step on to the next
Electronic programme guide and applications
“tip“
The screen for selecting tips on the TV programmes is displayed. For example,
here you can select tips on films, series, special themes etc. The following picture
shows tips on topic “Series, Talk, Show“:
“preview“
With this menu entry you can obtain information on the broadcasts for the coming
days. The following picture shows an example:
“menu“
Here all of the TV programmes are ordered by category. You can also access the
radio broadcast programmes, the online channel and the “digital journal“. The latter
contains still further information on ARD-DIGITAL.
The following picture shows an example for “tv by genre“:
23
Electronic programme guide and applications
“memo“
The following picture shows an example for compilation of personal TV
programmes:
Read character
The read character is a special feature of the EPG. With this read character you
obtain additional information on the current broadcast or broadcasts can be noted
down. You will be notified of broadcasts that deal with similar topics or which
explain the topic even further.
The read character is called up with the
key.
The presentation shown is for example only and may vary according to the
particular programme provider. The programme providers reserve the right to make
changes to the bouquet. Further information can be obtained with the application
running by pressing the blue key.
24
Initial settings
Initial settings
The “Installation“ menu entry in the main menu is used for initial setting of the
satellite receiver and for matching it to the satellite system.
The receiver has already been factory preprogrammed for standard satellite
receiving systems with a universal LNB. Thus changes are required only if the
receiving system deviates from this type of system.
Changes in the basic setting of the receiver are generally carried out by the
installer when the satellite receiving system is installed. We recommend that the
installer notes down the altered basic setting on page 45 in this operating manual.
In addition to this, you can:
-
alter the order of the bouquets
-
alter the order of TV and radio programmes
-
execute an automatic search run on a new digital broadcasting station
-
install a new digital transponder
-
activate or deactivate parental lock
-
alter antenna settings, TV type and time
-
load new system software
-
programme the timer
-
carry out an application check
-
stipulate the language for the screen displays
-
stipulate common interface settings
Calling up the “Installation” menu
The following steps need to be carried out to call up the menu:
•
Press the
•
Select the “Installation“ menu entry in the main menu using the
key on the remote control.
confirm the selection with
key and
.
The “Installation“ menu is displayed on the screen
25
Initial settings
You can select the menu entries using the
key. The
keys and action them with the
key is used to leave the “Installation“ menu.
You can exit from a menu or submenu at any time with the
key. No further
reference will be made to this in describing the menu entries. The
you from all submenus to the starting page of the Navigator. The
key exits
key returns
key returns you to the Installation menu.
you to the TV programme, the
Bouquet organisation
After selecting this menu entry, the bouquets available on your receiver are
displayed on the screen in the order that they appear in the main menu under
menu entry “Bouquet selection“. You can change this order:
•
Select the bouquet using the
key.
keys and confirm this selection with
An amber double arrow is overlaid on the right-hand side of the screen (see “Sort
programmes“ section).
•
Move the bouquet selected to the desired position using the
•
Confirm the move with the
key, exit from the menu with the
keys.
key and
key
save the change with the
Programme organisation
This menu contains the following submenu entries:
“Transponder list“
“TV list“
“Radio list“
List of all programmed transponder
List of all TV programmes
List of all radio programmes
Transponder list
After selecting this submenu entry, the list of all programmed transponders is
displayed on the screen.
A transponder entry contains:
Name of transponder
Transmission frequency (in MHz)
Polarisation (vertical, horizontal)
Name of satellite
e.g. RTL
e.g. 11054
e.g. H
e.g. EUTEL13
You can scroll through the transponder list using the
keys and the
keys. When you select a transponder with the
key, you are shown which TV
programmes and which radio programmes are broadcast via this transponder.
26
Initial settings
A selected programme is displayed in white typeface, a TV programme is shown in
black typeface and a radio programme in dark blue. The programme name and the
number of the programme slot is indicated for each programme.
Deleting a transponder or a programme
In the transponder list, you can delete a transponder and all its programmes or just
a single programme of a transponder:
•
Using the
keys and the
that you want to delete.
•
Press the
keys select the particular transponder
key. A warning message is displayed on the screen:
In this example, “MediaSet“ is the name of the transponder to be deleted.
•
Press the
key if you really want to delete this transponder. The “NO“
changes into “YES“.
•
Confirm the deletion with the
key. The transponder list is displayed on the
screen with the deleted transponder now no longer present.
•
Terminate the menu using the
key and save the change with the
key
If you want to delete a programme belonging to a particular transponder, select the
key. From the programme list
transponder and confirm the selection with the
select the particular programme that is to be deleted. The rest of the procedure
corresponds to that for deleting a transponder.
If you should have deleted transponders or programmes by mistake, they can be
found again via the autoscan routines. Once found, the programmes are appended
to the end of the programme list.
27
Initial settings
TV list
A list comprising all the TV programmes that can be received is displayed on the
screen. You can scroll through the TV list using the
keys.
keys and
Programme name and number of the programme slot are shown in each case. The
order of the programmes can be changed (see “Sort programmes“ section).
The frequency, polarisation and name of the satellite can also be displayed for the
chosen TV programme.
•
Press the
key on the remote control handset. The display changes:
The following are displayed:
Transmission frequency (in MHz)
Polarisation (vertical, horizontal)
Name of satellite
Programme slot
•
Press the
e.g. 12603
e.g. H
e.g. ASTRA19
e.g. 1
key in order to reset the display again.
Radio list
A list comprising all the radio programmes that can be received is displayed on the
screen. The remarks made regarding the TV list are also applicable here. The
order of the programmes can likewise be changed (see “Sort programmes“
section).
Automatic search run
This menu contains the following submenu entries:
28
“Automatic search run“
Automatic search run for programmes with
predefined transponder data
“Transponder search run“
Automatic search run for programmes without
corresponding transponder information
“Transponder list“
List of the transponders that can be searched
Initial settings
Automatic search run
An automatic search is carried out for TV and radio programmes. After selecting
this submenu entry the settings for the search run can be entered:
The meaning of the entries is as follows:
Search run on satellite
The particular satellite on which a search is to be carried out for TV programmes
can be selected using the
keys. The default setting is ASTRA19.
Search run on transponder
All transponders of the selected satellite are searched for programmes.
A particular transponder can be selected with the
is “ALL“.
keys. The default setting
Satellite frequency MHz If a particular transponder has been selected, the frequency and polarisation are
entered here automatically. No default setting.
Search run
With the “ARD Digital“ transponder, an ASIUS search run can be carried out.
YES
All programmes are searched for via the ASIUS system on
ASTRA 19.
NO
Only the selected transponder is searched.
ASIUS is a search routine for ASTRA satellites, which allows TV and radio
programmes to be discovered rapidly (ASIUS = Astra Service Information Update
System).
Encrypted programmes
NO
No encrypted programmes are entered in the programme
list. The default setting is “NO“.
YES
Encrypted programmes are entered in the programme list.
The following screen image shows the entries for an ASIUS search run:
If the “Start search run“ field is selected with the
search run.
key, the
key starts the
29
Initial settings
A conveyor belt indicating the progress of the search appears in the lower part of
the screen. Below it are displayed the number of new transponders found, number
of services found and number of new bouquets found.
The services found comprise all TV programmes, all radio programmes and all
data services.
After completing the search run a message appears: “Search run has finished!“,
which you should confirm with the
key.
Transponder search run
A search is carried out for new TV and radio programmes, even if the transponder
information (satellite frequency, polarisation etc.) is not available. After selecting
this submenu entry, the settings can be entered for the search run:
The meaning of the entries is as follows:
Symbol rate
The symbol rate specifies the amount of data that is transmitted per second. It is
measured in MSymbols/s and is equal to the number of symbols that arrive per
second.
Symbol rate 27500
YES
A search is carried out for transponders with a symbol rate
of 27,500 MS/s. The default setting is “YES“.
NO
No search is carried out for transponders with a symbol rate
of 27,500 MS/s.
YES
A search is carried out for transponders with a symbol rate
of 22,000 MS/s.
NO
No search is carried out for transponders with a symbol rate
of 22,000 MS/s. The default setting is “NO“.
Symbol rate 22000
30
Initial settings
Optional other symbol rate
Enter an optional symbol rate using the numeric keys
to
.
Encrypted programmes
Search run on satellite
NO
No encrypted programmes are recorded. the default setting
is “NO“.
YES
Encrypted programmes are recorded.
The
keys can be used to select the satellite on which a search is to be
made for new transponders, e.g. ASTRA19.
If the “Start search run“ field is selected with the
search run.
Transponder list
key, the
key starts the
The transponder list contains all of the transponders on which a search run can be
carried out for programmes. All of the transponders recorded in blue typeface are
defaults and cannot be changed. If a new transponder is set up with “New digital
transponder“, this is recorded in the list in black typeface. The data for this
transponder can be altered with the
key.
The duration of the search run can vary from 5 minutes up to approximately 60
minutes.
The faster option for finding programmes on the ASTRA satellites is the ASIUS
search run.
New digital transponder
The input field for entering data for the new digital transponder is displayed on the
screen.
Name
Think up a name for the new transponder.
•
Using the
•
key. The choice starts with the letter “A“ at the
Select the letter with the
point marked dark blue. Following the last letter, “Z“, the numerals “0“ to “9“ are
displayed. If the desired letter is displayed, move to the next input position with
the
keys enter the name of the new transponder as follows:
key.
•
Select the desired letter there.
•
Enter the name of the new transponder in this way.
If you want to change a letter proceed as follows:
Satellite
•
Using the
•
With the
keys move to the position that you want to change.
key, the selection begins with the letter “A“ again.
In this menu line you can select a satellite that your receiving system is aligned
towards.
31
Initial settings
•
Select the desired satellite using the
keys, e.g. “EUTELSAT13“.
Satellite frequency MHz The frequency of the new transponder is entered in this line.
•
Polarisation
, e.g. 12379.
Select the desired polarisation with the
keys, e.g. vertical.
The symbol rate of the new transponder is entered in this line.
•
Viterbi rate
to
The polarisation of the new transponder is selected in this line.
•
Symbol rate
Enter the frequency using the numeric keys
Enter the symbol rate using the numeric keys
to
, e.g. 12379
The Viterbi rate of the new transponder is entered in this line.
•
Select the desired Viterbi rate with the
•
Confirm your entries with the
•
Leave the menu with the
keys, e.g. 2/3.
key.
key and save the changes with the
New digital programme
This menu entry is intended for subsequent extensions.
Parental lock
This menu entry is described in the “Receiver operation“ chapter.
32
key
Initial settings
Settings
This menu entry contains the following submenu entries:
SATELLITE MENU
This submenu entry contains a list of the predefined
satellites.
DiSEqC MENU
With this submenu the settings can be carried out for
the DiSEqC signal.
TV TYPE
This submenu contains settings for the type of TV
set used.
TIME
This submenu contains the time information and the
time zone.
SOFTWARE UPDATE
With this submenu a new software version can be
downloaded from the satellite.
SYSTEM DIAGNOSIS
This submenu contains information on the receiver.
ANTENNA DIAGNOSIS
With this submenu the alignment of the antenna can
be checked.
SATELLITE MENU
After selecting this submenu entry the list of predefined satellites is displayed on
the screen:
The list contains the following details:
Name of the satellite,
e.g. ASTRA19
Frequency of local oscillator 1.
LO1=9750 MHz
Frequency of local oscillator 2.
LO2=10600 MHz
Order of connection when using
DiSEqC multiswitches
e.g. 1
LNB supply voltage in operation and in standby.
33
Initial settings
DiSEqC MENU
The settings for the DiSEqC signal are displayed on the screen:
The settings have the following meaning:
22 KHz
Settings:
High/Low
Switchover from low band to high band on LNB.
Pos A/B
Switchover between two satellite positions.
OFF
No 22kHz-controlled LNB is present in the system .
The default setting is “High/Low“.
Tone burst
Settings:
OFF
The tone burst signal is switched off.
Pos A/B
Switchover between two satellite positions.
Opt. A/B
Optional selection
High/Low
Switchover from low band to high band on LNB.
The default setting is “OFF“.
DiSEqC
Settings:
ON
The DiSEqC signal is switched on.
OFF
The DiSEqC signal is switched off.
The default setting is “ON“.
DiSEqC repeat
Settings:
OFF
The DiSEqC repeat is switched off.
1
The DiSEqC signal is repeated once.
2
The DiSEqC signal is repeated twice.
The default setting is “OFF“.
UFO mini
Settings:
OFF
No subscriber-controlled preprocessing system is present.
ON
A subscriber-controlled preprocessing system is present.
The default setting is “OFF“.
Remote frequency
Intermediate frequency of subscriber-controlled preprocessing system.
Settings in the DiSEqC menu should be carried out only by trained specialists.
Incorrect settings can result in loss of the satellite signals (reception no longer
possible).
34
Initial settings
TV TYPE
The settings for the TV set are displayed on the screen:
The settings have the following meaning:
Screen format
The screen format for the TV set is determined by this setting.
4:3
The aspect ratio of the screen is 4:3.
16:9
The aspect ratio of the screen is 16:9.
The default setting is “4:3“.
TV standard
The TV standard is determined by this setting.
PAL
Video output
The PAL standard is permanently set.
The signal at the video output is adjusted with this setting.
RGB
The RGB signal appears at the video output.
SUPER
The S-VHS signal appears at the video output.
Select only the video output signal which your TV set is capable of processing.
TIME
The settings for the time are displayed on the screen.
The settings have the following meaning:
Local time
Local time is displayed. The satellite is used as timing element.
Time zone
The time zone is shown in relation to GMT (Greenwich Mean Time).
GMT+1 = MEZ (Central European Time). During summer time set to GMT+2.
An incorrectly set time also affects the timer.
If you have selected the menu line “Local time“, the
key can be used to
advance the time by one hour. With this the time zone is also increased. With the
key the local time is retarded by one hour and the time zone is decreased.
The time zones can be adjusted in the “Time zone“ menu line using the
keys, which also results in simultaneous correct setting of the local time.
SOFTWARE UPDATE
The UFD 510 digital receiver comes supplied with the optimum system software.
Over the course of time, it may become necessary to adapt the software to
changed conditions.
This ensures that your digital receiver is always kept right up-to-date. The internal
settings (e.g. TV and radio lists) are not altered as a result.
35
Initial settings
If an open envelope is displayed in the main menu, this indicates that a new
version of the software can be downloaded from the satellite. The download
process takes approximately 10 minutes. The result is displayed on the screen.
The software update operation is entirely menu-driven.
SYSTEM DIAGNOSIS
The system settings are displayed on the screen:
These settings are for display only, and can only be altered with a software update.
ANTENNA ALIGNMENT
The antenna settings are displayed on the screen:
The settings have the following meaning:
Satellite
The satellite whose antenna alignment is to be checked is selected in this menu
line.
Sat. freq. MHz
The frequency of the current transponder is displayed.
Polarisation
The polarisation of the signal is shown.
Eb/No [dB]
The Eb/No ratio in dB indicates whether the receiver is sufficiently locked on to the
digital Sat signal. For good reception the receiver needs an Eb/No ratio of at least
4.8 dB. With Eb/No values below the reference value of 4.8 dB reception is
generally no longer possible and the receiver switches off accordingly.
If your receiver is showing Eb/No values that are too low there may be several
reasons for this:
Signal level
36
-
The gain of your satellite antenna is too low. That is, the diameter of your
satellite dish is possibly too small.
-
There is a bad weather front situated between satellite and antenna which is
temporarily impairing the reception.
-
Your satellite antenna is not aligned correctly.
-
You have selected a satellite at which your antenna is not aligned. In such a
case, “not locked on“ is displayed.
The signal level is displayed by means of a percent modulation indicator. The
further it is modulated into the green area on the right, the better is the alignment of
the antenna on the satellite. An evaluation of the analogue signals is also carried
Initial settings
out. That is, if a signal level is shown and the Eb/No display indicates “not locked
on“, there is inadequate reception of the digital satellite signals.
Timer
With the “Timer“ menu entry, TV or radio programmes can be preprogrammed for
key takes you straight to this menu.
automatic switch-on of the receiver. The
The screen shows the following input mask:
By pressing the
entered.
key, programme “TV“ is selected and the current time is
Menu line for programming the timer:
The
keys are used to switch between columns. A selected column is
highlighted in dark blue.
DATE
The date is entered in this column using the numeric keys
to
. You switch
keys. The date is entered in the form
from position to position with the
dd.mm.yyyy. After entering the date, the day of the week is displayed next to the
date.
START
In this column, the programme starting time is entered using the numeric keys
to
.
STOP
In this column, the programme finishing time is entered using the numeric keys
to
.
REPEAT
keys are used to specify the repetition of the
In this column, the
programme‘s start-stop time.
Day
daily repetition
Week
weekly repetition
Month
monthly repetition
No
no repetition
37
Initial settings
PROGRAMME
The programme slot is entered in this column using the numeric keys
the
to
and
keys are used to select the type of programme.
TV
TV programme
RADIO
Radio programme
NO
No programme
If a timer event is being processed, all the remote control handset keys are barred
except the Standby key. After processing a timer event the receiver switches into
standby.
Application control
The EPG and the applications in general can be closed down.
The screen display shows which application programmes are switched on.
The settings have the following meaning:
SURFER
EPG
ALL
ON
The on-screen programme information is switched on.
OFF
The on-screen programme information is switched off.
ON
The programme information called up via the colour keys
is switched on.
OFF
The programme information called up via the colour keys
is switched off.
ON
All applications are switched on.
OFF
All applications are switched off.
These settings are valid only for bouquets.
All positions of application control are set to ON.
Language selection (OSD)
The language for the OSD (on-screen display) is selected with this menu entry.
Use the
key.
keys to select the language and confirm this selection with the
Common interface
The contents of this menu entry is dependent on the code card for Pay-TV which is
inserted into the PCMCIA slot (view of front panel, item 6).
38
Menue structure
Menu structure
Bouquet selection
Display of bouquets
TV selection
Display of TV programmes
Radio selection
Display of radio programmes
Installation
Bouquet organisation
Programme organisation
Automatic search run
Transponder list
TV list
RADIO list
Automatic search run
Transponder search
run
Transponder list
New digital transponder
Parental lock
Settings
Timer
Application control
Language selection
Common interface
SATELLITE MENU
DiSEqC MENU
TV TYPE
TIME
SOFTWARE UPDATE
SYSTEM DIAGNOSIS
ANTENNA
ALIGNMENT
39
Features
Features of the UFD 510
The UFD 510 receiver in equipped with the following features:
40
•
Based on the Open-TV standard
•
Reception of electronic programme guides( EPG) (currently ARD and ZDF)
•
Reception of additional information channels (e.g. ARD online channel)
•
Prepared for future applications such as those from programme providers (e.g.
games, home-shopping)
•
Suitable for videotext
•
1000-channel memory
•
Satellite input frequency range from 950 MHz to 2150 MHz
•
Freely selectable oscillator frequencies, therefore suitable for all feed systems
•
Radio button
•
8 event, 1-year programmable timer, with daily, weekly, monthly or no repeated
switch-on
•
Mains switch with mains isolation
•
Automatic settings for date and time via DVB data stream
•
Switching of language output
•
On-screen display (OSD) 2 languages (German, English)
•
22-kHz control signal, programmable
•
DiSEqC 1.1 and tone-burst control signal
•
LNB supply voltage can be turned off
•
Connecting socket for data copying function, RS232
•
Sort functions for programme slots
•
Sound muting
•
Volume control
•
Infrared remote control with command set changeover
(allowing two receivers to be operated in a room)
•
3 Scart sockets (TV, VCR and AUX connection)
•
Additional audio outputs via Cinch sockets
•
Last-channel memory
Specifications
Specifications
UHF characteristics
Sat IF frequency range
Input level range
IF frequency
Reception threshold (Eb/No)
Input connector
Input impedance
950 to 2150 MHz
44 to 84 dBµV
479.5 MHz
4.8 dB
F socket
Frequency range
Output voltage
20 Hz to 5 MHz
75Ω
Video
S/N
Input data rates
Modulation FEC demultiplex
Video resolution
1 Vss / 75Ω
53 dB typ.
2-45 MSymbols/s
Corresponds to DVB-S standard
CCIR 601 (720 x 576)
Audio
Frequency range
Output voltage
S/N
Audio decoding
Audio bit rate
40 Hz to 15 kHz
typ. 770 ± 50 mV into 10kΩ (TV Scart and Cinch)
>65 dB
MPEG-1/2 lowers 1 and 2
32 / 44.1 / 48 kHz
Power supply
Mains voltage
230 V ±10%, 50 Hz
Power consumption
< 30 W
Power consumption in standby
<8W
0, +14 V (vert.), +18 V (hor.)
400 mA max.
22 kHz square-wave 0.6 Vss
DiSEqC 1.1
Tone burst
LNB supply voltage
LNB supply current
Control signal
Connectors
TV connector
VCR connector
AUX connector
Audio output
Data interface
Scart/Peritel socket, 21-way
Scart/Peritel socket, 21-way
Scart/Peritel socket, 21-way
Cinch sockets
RS 232 C
41
Specifications
General
Unit dimensions (B/H/T)
Weight
370 / 71 / 285 mm
Approx. 2.5 kg
Ambient temperature
+5 °C to + 40 °C
Temperature range
Accessories
Infrared remote control
2 x 1.5 V batteries, type: LR 03, size: AAA (Micro)
1 Scart cable
Scart socket pin assignments
42
Signal
Pin No.
TV
VCR
AUDIO Output Right
AUDIO Input Right
AUDIO Output Left
AUDIO Ground
BLUE Video Ground
AUDIO Input Left
BLUE Video
Function switching
GREEN Video Ground
Commn. Data Line 2
GREEN Video
Commn. Data Line 1
RED Video Ground
Commn. Data Ground
RED Video
Blanking Signal
VIDEO Ground
Blanking Ground
VIDEO Output
VIDEO Input
Common Ground
1
2
3
4
5
6
7
8
9
10
11
12
13
14
15
16
17
18
19
20
21
X
X
X
X
X
X
X
X
X
X
X
X
X
X
X
X
X
X
X
X
X
X
X
X
X
X
X
X
X
X
X
X
X
AUX
X
X
X
X
X
X
X
X
X
X
X
Connection examples
Connection examples
Connection scheme 1:
Reception of digital programmes from the ASTRA satellite system via a multisubscriber system or via a single system
Connection of the UFD 510 digital receiver to a TV set, VCR and a hi-fi system for
reception and recording of digital Sat TV- and radio programmes.
The link-up requires two Scart cables and one Cinch cable. If your TV set has
stereo capability, the stereo sound can also be output via the TV set‘s stereo
loudspeakers.
The TV set‘s UHF/VHF input is connected to the UHF/VHF output of the ESD 30
satellite socket via the video recorder‘s UHF/VHF output and input sockets. This
connection allows reception of terrestrially broadcast TV programmes.
Connection of the hi-fi system‘s antenna input socket to the radio output of the ESD
30 satellite socket permits reception of terrestrially broadcast radio programmes.
43
Connection examples
Connection scheme 2:
Reception of digital programmes from the ASTRA and EUTELSAT satellite
systems via a multi-feed antenna with two quattro feeder systems. The UFD 510
receiver supplies the required DiSEqC signals to the DiSEqC multi-switch EXR 904
for switching over both satellite positions.
The DiSEqC multi-switch EXR 904 allows four subscribers to be connected.
Connection of the UFD 510 digital receiver to a TV set, VCR and a hi-fi system for
reception and recording of digital satellite TV- and radio programmes.
The link-up requires two Scart cables and one Cinch cable. If your TV set has
stereo capability, the stereo sound can also be output via the TV set‘s stereo
loudspeakers.
The TV set‘s UHF/VHF input is connected to the UHF/VHF output of the ESD 30
satellite socket via the video recorder‘s UHF/VHF output and input sockets. This
connection allows reception of terrestrially broadcast TV programmes.
Connection of the hi-fi system‘s antenna input socket to the radio output of satellite
socket ESD 30 permits reception of terrestrially broadcast radio programmes.
44
Connection examples
Connection scheme 3:
Connection of an analogue secondary receiver and analogue decoder for the
further reception of encrypted analogue TV programmes.
This configuration allows reception and VCR recording of digital programmes via
the UFD 510 receiver as well as analogue, encrypted and unencrypted
programmes via the secondary receiver (UFD 400 in this example).
In this installation, connection of the UFD 510 digital receiver to the TV set is done
via the UFD 510 Scart sockets TV, AUX and VCR and the TV Scart socket of the
analogue secondary receiver.
The TV set‘s UHF/VHF input is connected to the terrestrial antenna via the video
recorder‘s UHF/VHF output and input sockets. This connection allows reception of
terrestrially broadcast TV programmes.
45
Service and dealer settings
Service and dealer settings
If the installer changes the receiver’s basic settings, we recommend that a record be kept of the new settings
by marking the entries with a cross on this page.
In you should happen to change the basic settings by mistake, you can then call upon the reference data at
any time.
OSD language
Picture format
German
4:3
English
16:9
LNB supply voltage
Operation:
ON
OFF
Standby:
ON
OFF
Satellite 1
Satellite 2
Satellite:
Satellite 3
Satellite:
Satellite:
LO1:
9750
LO1:
9750
LO1:
9750
LO2:
10600
LO1:
10600
LO1:
10600
OrbitPos.
OrbitPos.
OrbitPos.
DiSEqC menu
22 kHz:
High/low
PosA/B
OFF
Tone burst:
High/low
PosA/B
Opt.A/B
DiSEqC
ON
OFF
DiSEqC repeat
ON
OFF
UFOmini
ON
OFF
Remote frequency
1608 MHz
Date
46
Signature
OFF
Glossary, abbreviations
Glossary, abbreviations
ASIUS
Audio output
AV programme channel
Bouquet
Common Interface
Decoder
DiSEqC
DVB
Eb/No [dB]
Eb/No ratio
EPG
LED display
LNB
Mute
Navigator
Online-Kanal
OpenTV
OSD
PAL
Pay-TV
PCMCIA
PIN
Receiver
RGB
Satellite IF signal
Scart cable
Standby
Surfer
S-VHS
Symbol rate
Timer function
Transponder
TV by genre
UFD
VCR connection
Viterbi rate
Astra Service Information Update System
Sound output on the receiver
TV‘s preferred programme channel for Scart input
Package of programmes
Standard interface for card readers
Decoding device for Pay-TV
Control system between receiver and LNB, multi-switches
Digital Video Broadcasting
Power density per information unit
Digital signal-to-noise ratio
Electronic Programme Guide
Display on receiver
Low Noise Block Converter
Sound muting
Main menu
ARD‘s information channel
Operating system for digital satellite receivers
On Screen Display
Analogue TV standard
Subscription TV (e.g. DF1, Premiere)
Standard for internal decoder interface for Pay-TV
Personal Identification Number
Receiver
Video signal composed of 3 discrete colour signals (Red, Green, Blue)
Receiver input signal
21-way connecting cable
Standby
Additional information displayed on-screen for current programme
Super Video Home System (video recorder standard)
Transmission data rate of satellite signal
Clock function for preprogrammed switch-on/off times
Refer to lexicon
TV divided up by category
Receiver designation specific to Kathrein
Video recorder connection
Refer to lexicon
47
Glossary, abbreviations
Glossary, abbreviations
DiSEqC
DiSEqC (Digital Satellite Equipment Control) is a
EUTELSAT-specified communications system
between sat. receiver (master) and the peripheral
sat. components (slaves) such as, for example,
LNBs, multiswitches, rotatable antenna systems.
DiSEqC is a single master / multi slave system, i.e.
there is always only one master in the sat. system.
All activities are always initiated by the master.
DiSEqC components
If DiSEqC switching matrices are connected in
cascade, the master receiver must send out the
DiSEqC signal repeatedly, in order that all DiSEqC
multiswitches in the cascade receive their
commands.
DiSEqC components (slaves) need to be
downward compatible nowadays, i.e. they must
also respond to the analogue switching criteria of
receivers that are only equipped with H/V and 22
kHz control signals.
A DiSEqC switching matrix keeps working with
analogue switching criteria until the DiSEqC
command arrives from the master. After this all
analogue switching criteria are ignored.
DVB MPEG-2
DVB is the abbreviation for Digital Video
Broadcasting. DVB-S indicates the type of
transmission. (S=Satellite). MPEG is an
abbreviation for Moving Picture Experts Group, a
working group that sets out internationally
applicable standards for digital compression of
video, along with audio. MPEG-2 has been
elevated to the standard for compression of digital
TV signals. MPEG-2 works up to a data rate of 100
Mbit/s.
signal. The PID-PCR is generally identical to the
PID video. With programmes broadcast in several
languages, the audio PID of another language of
the TV broadcast can be assigned through manual
entry. After entry of the PID, the digital receiver
automatically fetches from the data stream the
audio data identified through the PID number and
assigns this to the video signal.
Programme package
A digital transponder‘s programme package mostly
contains several TV and radio programmes. Every
programme package has a fixed relationship to the
transponder transmission frequency, polarisation
(horizontal or vertical), to the symbol rate and to
the Viterbi rate or error rate.
Symbol rate
The symbol rate describes the amount of data that
is transmitted per second. It is measured in
Msymbols/s and is equal to the number of symbols
that arrive per second.
Transponder
A transponder is a transmitter in the satellite that
transmits TV and radio signals on a high
transmission frequency to the sat. receiving
antennas. A satellite has a number of
transponders.
Transponder, analogue
An analogue broadcasting transponder always
transmits only one TV programme and possibly a
number of radio programs on its transmission
frequency..
Eb/No ratio
The Eb/No ratio is a measure for the signal-tonoise ratio of digital signals. This value is not
identical to the S/N value known from analogue
receiving technology. With Eb/No values below
5dB reception is generally no longer possible.
Transponder, digital
A digital broadcasting transponder is able to
transmit several TV and several radio programs
simultaneously on its transmission frequency.
When a program provider beams down several TV
programs via a digital transponder, one then also
talks of the program provider’s “program package”
The terms “Digital transponder” and “Program
package” have the same meaning.
FEC
FEC is an abbreviation for Forward Error
Correction. The FEC error rate corresponds to the
Viterbi rate.
Video bit rate
The video bit rate describes the amount of
digitalized video signal data that is transmitted per
second.
PID
The PID number (Packed IDentification) is an
identification number for video signals and audio
signals in the digital data stream of DVB MPEG-2signals. With the PID number, the receiver
establishes a unique assignment of the video- and
audio data transmission. The PID-PCR is the
identification number for the synchronisation
Viterbi rate
The Viterbi rate (code rate, error rate)
characterises the error protection used by the
program provider. The DVB standard has
earmarked the following values: 1/2 - 2/3 – 3/4 4/5 – 5/6 – 6/7 – 7/8..
48
Notes
49
9985.725/E/0599/1/SKS/PF Subject to alteraion!
KATHREIN-Werke KG telephone +49 (0 80 31) 18 40 fax (0 80 31) 18 43 06
Anton-Kathrein-Straße 1-3 P.O.B. 10 04 44 D-83004 Rosenheim