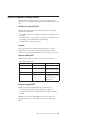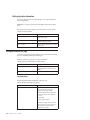
1
IBM Proventia Network Enterprise Scanner
User Guide
Version 2.3
Copyright statement
© Copyright IBM Corporation 1997, 2009.
All Rights Reserved.
U.S. Government Users Restricted Rights — Use, duplication or disclosure restricted by GSA ADP Schedule Contract with
IBM Corp.
Publication Date: February 2009
Trademarks and Disclaimer
IBM® and the IBM logo are trademarks or registered trademarks of International
Business Machines Corporation in the United States, other countries, or both.
ADDME™, Ahead of the threat, BlackICE™, Internet Scanner®, Proventia®,
RealSecure®, SecurePartner™, SecurityFusion™, SiteProtector™, System Scanner™,
Virtual Patch®, X-Force® and X-Press Update are trademarks or registered
trademarks of Internet Security Systems™, Inc. in the United States, other countries,
or both. Internet Security Systems, Inc. is a wholly-owned subsidiary of
International Business Machines Corporation.
Microsoft®, Windows®, and Windows NT® are trademarks of Microsoft Corporation
in the United States, other countries, or both.
Other company, product and service names may be trademarks or service marks of
others.
References in this publication to IBM products or services do not imply that IBM
intends to make them available in all countries in which IBM operates.
Disclaimer: The information contained in this document may change without
notice, and may have been altered or changed if you have received it from a
source other than IBM Internet Security Systems (IBM ISS). Use of this information
constitutes acceptance for use in an “AS IS” condition, without warranties of any
kind, and any use of this information is at the user’s own risk. IBM Internet
Security Systems disclaims all warranties, either expressed or implied, including
the warranties of merchantability and fitness for a particular purpose. In no event
shall IBM ISS be liable for any damages whatsoever, including direct, indirect,
incidental, consequential or special damages, arising from the use or dissemination
hereof, even if IBM Internet Security Systems has been advised of the possibility of
such damages. Some states do not allow the exclusion or limitation of liability for
consequential or incidental damages, so the foregoing limitation may not apply.
Reference herein to any specific commercial products, process, or service by trade
name, trademark, manufacturer, or otherwise, does not necessarily constitute or
imply its endorsement, recommendation, or favoring by IBM Internet Security
Systems. The views and opinions of authors expressed herein do not necessarily
state or reflect those of IBM Internet Security Systems, and shall not be used for
advertising or product endorsement purposes.
Links and addresses to Internet resources are inspected thoroughly prior to release,
but the ever-changing nature of the Internet prevents IBM Internet Security
Systems, Inc. from guaranteeing the content or existence of the resource. When
possible, the reference contains alternate sites or keywords that could be used to
acquire the information by other methods. If you find a broken or inappropriate
link, please send an email message with the topic name, link, and its behavior to
mailto://[email protected].
© Copyright IBM Corp. 1997, 2009
iii
iv
Enterprise Scanner: User Guide
Contents
Trademarks and Disclaimer . . . . . . iii
About this book . . . . . . . . . . . vii
Related publications . . .
Technical support contacts .
.
.
.
.
.
.
.
.
.
.
.
.
.
.
. viii
. viii
Part 1. Scanning from the Proventia
Manager . . . . . . . . . . . . . . 1
Chapter 1. Ad hoc scanning in the
Proventia Manager . . . . . . . . . . 3
Section A: Network configuration . . . . . .
Configuring the management network interface
Configuring the scanning network interface . .
Configuring scanning interface DNS settings .
Assigning perspective to a scanning interface .
Configuring routes for perspective . . . . .
Section B: Policy configuration . . . . . . .
Defining assets for a discovery scan . . . .
Displaying assessment checks by groups . . .
Displaying information about assessment checks
Selecting assessment checks with filters . . .
Configuring common assessment settings for an
Assessment policy . . . . . . . . . .
Defining assessment credentials for a policy .
Defining the service names associated with TCP
and UDP ports . . . . . . . . . . .
Defining ports or assets to exclude from a scan
Configuring and saving a scan policy in the
Proventia Manager . . . . . . . . . .
. 4
. 4
. 5
. 6
. 7
. 7
. 8
. 8
. 9
10
. 11
. 12
. 16
. 18
19
. 20
Chapter 2. Interpreting scan results in
the Proventia Manager . . . . . . . . 21
Running an ad hoc scan . . . . . . . .
Monitoring the status of a scan . . . . . .
Viewing the results of an ad hoc scan . . .
Exporting scan results from Proventia Manager
Purging scan data from the database . . . .
.
.
.
.
.
.
.
.
.
.
22
23
24
24
25
Part 2. Scanning from the
SiteProtector Console . . . . . . . 27
Chapter 3. Enterprise Scanner policies
29
Policy inheritance with Enterprise Scanner policies
Deploying an Enterprise Scanner policy from the
policy repository . . . . . . . . . . .
Migrating a locally managed Enterprise Scanner
agent into SiteProtector . . . . . . . . .
Viewing asset or agent policies for Enterprise
Scanner. . . . . . . . . . . . . . .
Getting vulnerability help for a SiteProtector
Console without Internet access . . . . . .
30
© Copyright IBM Corp. 1997, 2009
. 31
. 32
. 33
. 34
Agent policies for Enterprise Scanner . . . . .
Agent policy descriptions for Enterprise Scanner
Network Locations policy . . . . . . .
Notification policy . . . . . . . . . .
Access policy . . . . . . . . . . . .
Networking policy . . . . . . . . . .
Services policy . . . . . . . . . . .
Time policy . . . . . . . . . . . .
Update Settings policy. . . . . . . . .
Asset policies for Enterprise Scanner . . . . .
Asset policy descriptions for Enterprise Scanner
Discovery policy. . . . . . . . . . .
Assessment policy . . . . . . . . . .
Assessment Credentials policy . . . . . .
Scan Control policy. . . . . . . . . .
Scan Window policy . . . . . . . . .
Scan Exclusion policy . . . . . . . . .
Network Services policy . . . . . . . .
Ad Hoc Scan Control policy . . . . . . .
. 35
35
. 36
. 38
. 39
. 40
. 43
. 44
. 45
. 45
45
. 46
. 48
. 55
. 57
. 59
. 61
. 62
. 64
Chapter 4. Understanding scanning
processes in SiteProtector . . . . . . 67
What is perspective? . . . . . . .
Defining perspectives . . . . . . .
Scan jobs and related terms . . . . .
Types of tasks . . . . . . . . .
Priorities for running tasks . . . . .
Stages of a scanning process . . . . .
Optimizing cycle duration, scan windows,
subtasks for Enterprise Scanner. . . .
. .
. .
. .
. .
. .
. .
and
. .
.
.
.
.
.
.
.
.
.
.
.
.
68
69
71
72
73
74
.
. 76
Chapter 5. Background scanning in
SiteProtector . . . . . . . . . . . . 79
Determining when background scans run . . . .
How policies apply to ad hoc and background scans
Background scanning checklists for Enterprise
Scanner. . . . . . . . . . . . . . . .
Enabling background scanning . . . . . . . .
Defining when scanning is allowed . . . . . .
Defining ports or assets to exclude from a scan . .
Defining network services . . . . . . . . .
Defining assessment credentials for a policy . . .
80
81
83
84
85
87
88
89
Chapter 6. Monitoring scans in
SiteProtector . . . . . . . . . . . . 91
Viewing your scan jobs . . .
Viewing discovery job results .
Viewing assessment job results .
.
.
.
.
.
.
.
.
.
.
.
.
.
.
.
.
.
.
. 92
. 92
. 93
Chapter 7. Managing scans in
SiteProtector . . . . . . . . . . . . 95
Stopping and restarting scan jobs . . . . .
Suspending and enabling all background scans
Minimum scanning requirements . . . . .
.
.
.
. 96
. 97
. 98
v
Scanning behaviors for ad hoc scans .
.
.
.
.
. 99
Chapter 8. Interpreting scan results in
SiteProtector . . . . . . . . . . . 103
OS identification (OSID) certainty . . . . . .
How OSID is updated in Enterprise Scanner . . .
Setting up a Summary view for vulnerability
management . . . . . . . . . . . . .
Summary page for vulnerability management . .
Viewing vulnerabilities in the SiteProtector Console
using Enterprise Scanner . . . . . . . . .
Viewing vulnerabilities by asset in Enterprise
Scanner . . . . . . . . . . . . . .
Viewing vulnerabilities by detail in Enterprise
Scanner . . . . . . . . . . . . . .
Viewing vulnerabilities by object in Enterprise
Scanner . . . . . . . . . . . . . .
Viewing vulnerabilities by target operating
system in Enterprise Scanner . . . . . . .
Viewing vulnerabilities by vulnerability name in
Enterprise Scanner. . . . . . . . . . .
Running reports in the SiteProtector Console . . .
Types of assessment reports . . . . . . . .
Viewing an Enterprise Scanner report in the
SiteProtector Console . . . . . . . . . . .
104
105
106
106
108
108
111
113
114
115
117
117
119
Chapter 9. Logs and alerts. . . . . . 121
Log files and alert notification . . . . .
System logs . . . . . . . . . . .
Getting log status information . . . .
Enterprise Scanner (ES) logs . . . . .
Downloading Enterprise Scanner (ES) log
Alerts log . . . . . . . . . . .
Downloading and saving an Alerts log .
Clearing the Alerts log . . . . . .
Finding specific events in the Alerts log
. .
. .
. .
. .
files
. .
. .
. .
. .
.
.
.
.
.
.
.
.
122
123
124
124
126
127
128
129
129
Part 3. Maintenance. . . . . . . . 139
Chapter 11. Performing routine
maintenance . . . . . . . . . . . . 141
Shutting down your Enterprise Scanner .
Removing an agent from SiteProtector . .
Options for backing up Enterprise Scanner
Backing up configuration settings . . .
Making full system backups . . . . .
.
.
.
.
.
.
.
.
.
.
.
.
.
.
.
142
143
144
145
146
Chapter 12. Updating Enterprise
Scanner. . . . . . . . . . . . . . 147
XPU basics . . . . . . . . . . . . .
Updating options . . . . . . . . . . .
Configuring explicit-trust authentication with an
XPU server . . . . . . . . . . . . .
Configuring an Alternate Update location . . .
Configuring an HTTP Proxy . . . . . . .
Configuring notification options for XPUs . . .
Scheduling a one-time firmware update . . .
Configuring automatic updates . . . . . .
Manually installing updates . . . . . . .
. 148
. 149
.
.
.
.
.
.
.
150
151
153
153
154
154
156
Chapter 13. Viewing the status of the
Enterprise Scanner agent . . . . . . 157
Proventia Manager Home page . . . . . .
Viewing agent status in the SiteProtector Console
Viewing agent status . . . . . . . . . .
Viewing the status of the CAM modules . . .
Troubleshooting the Enterprise Scanner sensor .
. 158
160
. 160
. 161
. 161
Part 4. Appendixes . . . . . . . . 163
Appendix. Safety, environmental, and
electronic emissions notices. . . . . 165
Chapter 10. Ticketing and remediation 133
Ticketing and Enterprise Scanner . . . . .
Remediation process overview for Enterprise
Scanner . . . . . . . . . . . . .
Remediation tasks for Enterprise Scanner . .
vi
Enterprise Scanner: User Guide
.
. 134
.
.
. 135
. 136
Index . . . . . . . . . . . . . . . 177
About this book
This section describes the audience for this guide; identifies related publications;
and provides contact information.
Audience
Users of this guide should understand their network topology, including the
criticality of network assets. In addition, because Enterprise Scanner can be
managed through the SiteProtector Console, you must have a working knowledge
of the SiteProtector system, including how to set up views, manage users and user
permissions, and deploy policies.
Topics
“Related publications” on page viii
“Technical support contacts” on page viii
© Copyright IBM Corp. 1997, 2009
vii
Related publications
Use this topic to help you access information about your Enterprise Scanner
appliance.
Publications
The following documents are available for download from the IBM ISS
Documentation Web site at http://www.iss.net/support/documentation/.
v IBM Proventia Network Enterprise Scanner Version 2.3 Quick Start Card (Models
ES750 and ES1500)
v IBM Proventia Network Enterprise Scanner Version 2.3 Getting Started Guide
v IBM Proventia Network Enterprise Scanner Version 2.3 User Guide
License agreement
For licensing information on IBM Internet Security System products, download the
IBM Licensing Agreement from http://www.ibm.com/services/us/iss/html/
contracts_landing.html.
Technical support contacts
IBM Internet Security Systems (IBM ISS) provides technical support through its
Web site and by email or telephone.
The IBM ISS Web site
The IBM ISS Customer Support Web page at http://www.ibm.com/services/us/
iss/support/ provides direct access to online user documentation, current versions
listings, detailed product literature, white papers, and the Technical Support
Knowledgebase.
Hours of support
The following table provides hours for Technical Support at the Americas and
other locations:
Table 1. Hours of technical support
Location
Hours
Americas
24 hours a day
All other locations
Monday through Friday, 9:00 A.M. to 6:00
P.M. during their local time, excluding IBM
ISS published holidays
Note: If your local support office is located
outside the Americas, you may call or send
an email to the Americas office for help
during off-hours.
Contact information
For contact information, go to the IBM Internet Security Systems Contact Technical
Support Web page at http://www.ibm.com/services/us/iss/support/.
viii
Enterprise Scanner: User Guide
Part 1. Scanning from the Proventia Manager
This section explains how to manage scans from the Proventia Manager for the
Enterprise Scanner agent.
Chapters
Chapter 1, “Ad hoc scanning in the Proventia Manager,” on page 3
Chapter 2, “Interpreting scan results in the Proventia Manager,” on page 21
© Copyright IBM Corp. 1997, 2009
1
2
Enterprise Scanner: User Guide
Chapter 1. Ad hoc scanning in the Proventia Manager
This chapter explains how to use perspective and the high-level processes behind
ad hoc scanning from the Proventia Manager.
Section A: Network configuration
“Configuring the management network interface” on page 4
“Configuring the scanning network interface” on page 5
“Configuring scanning interface DNS settings” on page 6
“Assigning perspective to a scanning interface” on page 7
“Configuring routes for perspective” on page 7
Section B: Policy configuration
“Defining assets for a discovery scan” on page 8
“Displaying assessment checks by groups” on page 9
“Displaying information about assessment checks” on page 10
“Selecting assessment checks with filters” on page 11
“Configuring common assessment settings for an Assessment policy” on page 12
“Defining assessment credentials for a policy” on page 16
“Defining ports or assets to exclude from a scan” on page 19
“Configuring and saving a scan policy in the Proventia Manager” on page 20
© Copyright IBM Corp. 1997, 2009
3
Section A: Network configuration
This section explains how to define the network interfaces for the management and
scanning ports, how to assign perspectives to network interfaces, and how to
configure the Enterprise Scanner appliance to select routes for traffic.
Configuring the management network interface
Use the Management Interface tab on the Network Interface Configuration page on
the appliance to configure the management interface network settings (ETH0).
About this task
You configured the management interface when you set up the appliance with the
Proventia Setup Assistant. Use the procedures in this topic to change those
settings.
Procedure
1. Click Configuration → Network Interfaces in the navigation pane.
2. Click the Management Interface tab, and then type or change the following
information:
Option
Description
Host Name
The fully qualified domain name for the
Enterprise Scanner agent. Use the format:
gateway1.example.com
Interface
The management port used by the
Enterprise Scanner agent.
IP address
The IP address of the management interface
for the agent.
Subnet Mask
The IP address of the subnet mask for the
agent.
Gateway
The address of the network gateway.
3. Select the Use Persistent IP if sensor is behind NAT if you want to avoid
conflicts with NAT rules, and then provide the IP address.
4. Click Save Changes.
4
Enterprise Scanner: User Guide
Configuring the scanning network interface
Use the Scan Interface tab on the Network Interface Configuration page on the
appliance to configure the scanning interface network settings (ETH1 - ETH5).
About this task
You configured the scanning interface when you set up the appliance with the
Proventia Setup Assistant. Use the procedures in this topic to change those
settings.
Procedure
1. Click Configuration → Network Interfaces in the navigation pane.
2. Click the Scan Interface tab, and then type or change the following
information:
Option
Description
Interface
The Ethernet port of the interfaces for the
agent.
IP Address
The IP address of the scanning network
interface for the agent.
Subnet Mask
The IP address for the scanning network
interface subnet mask of the agent.
Gateway
The address of the network gateway.
Maximum IPs per discovery subtask
The maximum number of IP addresses to
discover in a subtask (of a task for each scan
job).
Note: This value applies to all discovery
scans that the agent runs.
Maximum assets per assessment subtask
The maximum number of assets to scan in a
subtask (of a task for each scan job).
Note: This value applies to all assessment
scans that the agent runs.
Perspective (network location)
The name of the network location to
associate with this scanning port.
Values: Global, the default, and any network
locations defined in the Network Locations
policy.
3. Click Save Changes.
Chapter 1. Ad hoc scanning in the Proventia Manager
5
Configuring scanning interface DNS settings
Use the DNS tab on the Network Interface Configuration page on the appliance to
configure the DNS settings for the scanning interface.
About this task
You configured these settings when you set up the appliance with the Proventia
Setup Assistant. Use the procedures in this topic to change those settings.
Procedure
1. Click Configuration → Network Interfaces in the navigation pane.
2. Click the DNS tab.
3. Choose an option:
If you want to...
Then...
Specify DNS settings
1. Type the IP addresses for the primary,
secondary, and tertiary DNS servers.
2. Click Save Changes.
Add a DNS search path
1. In the DNS Search Path section, click the
Add icon.
2. Type the domain name to add to the
search list, and then click OK.
3. Click Save Changes.
Edit a DNS search path
1. In the DNS Search Path list, select a
domain name, and then click the Edit
icon.
2. Edit the domain name, and then click
OK.
3. Click Save Changes.
Copy and paste a DNS search path
1. In the DNS Search Path section, select a
domain name, and then click the Copy
icon. The agent copies the search path to
the clipboard.
2. Click the Paste icon. The agent copies the
search path to the end of the list.
3. If necessary, edit the policy, and then
click OK.
4. Click Save Changes.
Remove a DNS search path
1. In the DNS Search Path section, select a
domain name, and then click the
Remove icon.
2. Click Save Changes.
Change the order of a DNS search path
1. In the DNS Search Path section, select a
domain name.
2. Click the Up or Down arrows.
Tip: It is more efficient to place the most
likely used search path at the top of the
list.
3. Click Save Changes.
6
Enterprise Scanner: User Guide
Assigning perspective to a scanning interface
Use the Network Locations tab on the Network Locations page on the appliance to
assign a perspective (network location) to a scanning interface.
About this task
You can only configure the ETH0 and ETH1 interfaces in Proventia Setup. You
must configure the remaining interfaces on this page (Network Locations page).
When you register the agent with SiteProtector, the perspectives you set here
(ETH2 - ETH5) are not automatically imported by the Network Locations policy in
SiteProtector. You must redefine those perspectives for this policy in SiteProtector.
Procedure
1. Click Configuration → Network Locations in the navigation pane.
2. Click the Network Locations tab.
3. Click the Add icon.
4. Type a name for the perspective in the Network Locations Name field, and
then click OK.
Important: You can only assign one unique perspective per scanning port. You
cannot assign the same perspective to more than one scanning port.
Configuring routes for perspective
Use the Routes tab on the Network Locations page on the appliance to configure
the appliance to select paths for (routes) traffic.
About this task
In a multi-segmented network, you might experience unnecessary network traffic if
your agent traffic is routed through your default gateway. You can reduce network
traffic if you configure routes for perspectives that provide more direct routes to
targeted segments.
Procedure
1. Click Configuration → Network Locations in the navigation pane.
2. Click the Routes tab.
3. Click the Add icon.
4. Complete the following fields:
Option
Description
Perspective
The perspective for which you are defining a
route.
Destination Network
A network segment for which you want to
define a specific route for a perspective.
Gateway
The IP address of the router the agent
should use to find IP addresses in the
Destination Network. Use the IP address
that is on the same network as the agent,
not the IP address of the route from inside
the target segment.
Chapter 1. Ad hoc scanning in the Proventia Manager
7
Option
Description
Metric
If you configure more than one route to the
same segment for one perspective, a number
that indicates the preferred route. The closer
to 1, the more preferred the route.
Note: The numbers you use do not have to
be consecutive.
5. Click Save Changes.
Section B: Policy configuration
This section explains how to configure policy settings in order to manage
vulnerabilities.
Defining assets for a discovery scan
Use the Discovery policy type on the Policy Management page on the appliance to
configure a policy that defines the parameters used to perform a discovery scan on
a portion of a network.
Before you begin
Before it can perform OS fingerprinting on an asset, your agent must find one
open and one closed port. To find an open and a closed port, the agent scans ports
1–1023 and any other ports specified in the applicable Network Services policy.
About this task
In a discovery task, a range of IP addresses is scanned to locate active network
interfaces, and the type of device associated with each active network interface is
determined through OS identification.
Procedure
1.
2.
3.
4.
Click Scan → Policy Management in the navigation pane.
Select Discovery from the Policy Types list, and then click Add.
Type a name for the scan policy.
Type the IP addresses (in dotted-decimal or CIDR notation) of the assets to
discover in the IP range(s) to scan box as in the following examples:
v Type an IP address, and then press ENTER.
v Type a range of IP addresses, and then press ENTER.
Example: 172.1.1.100-172.1.1.200
v Type a combination of both choices above, and then press ENTER.
Note: A red box appears around the IP range(s) to scan box until the data is
validated.
5. If you want to ping each IP address before scanning to exclude unreachable
hosts from the scan, select the Ping hosts in this range, before scanning, to
exclude unreachable hosts check box.
6. If you want to add newly discovered assets to the group where you have
defined the scan, rather than to the Ungrouped Assets group, select the Add
newly discovered assets to group check box.
8
Enterprise Scanner: User Guide
7. If you want to add previously known assets that are already defined in other
groups to the scan group, select the Add previously known assets to group
check box.
Displaying assessment checks by groups
Use the Checks tab in the Assessment policy to group checks by any combination
of columns that you have chosen to display. For example, you might want to see
checks by category, then by severity within that category.
About this task
The current grouping selections are displayed just above the column headers of the
checks.
v If no groups are selected, the following message is displayed on the screen:
Right click on the column header to group by that column.
v If groups are selected, the group names are displayed on in the screen as in the
following example:
Procedure
1. Click Scan → Policy Management in the navigation pane.
2. Select Assessment from the Policy Types list, and then click Add.
3. Type a name for the scan policy.
4. Click the Checks tab.
5. Choose an option:
If you want to...
Then...
Clear groupings
Choose an option:
v Right-click any column header, and then
select Clear Groupings from the pop-up
menu.
v Click Clear Groupings.
Create groupings interactively
1. Right-click a column heading, and then
select Group By from the pop-up menu.
2. Repeat the previous step until you have
created the groupings that you want.
Chapter 1. Ad hoc scanning in the Proventia Manager
9
If you want to...
Then...
Create groupings from a selection list
1. Click the Group By icon.
The Group by Columns window
appears.
2. Select a column to group by in the All
Columns list, and then click Add.
The column moves to the Group by these
Columns list.
3. Repeat the previous step for each column
that you want to group by.
4. If you want to remove items from the
list, select an item in the Group by these
Columns list, and then click Remove.
The item and any items below it move to
the All Columns list.
5. Click OK.
Displaying information about assessment checks
Use the Checks tab in the Assessment policy to choose how much information to
display about each assessment check in the Assessment policy.
Procedure
1. Click Scan → Policy Management in the navigation pane.
2. Select Assessment from the Policy Types list, and then click Add.
3. Type a name for the scan policy.
4. Click the Checks tab.
5. Choose an option:
10
If you want to...
Then...
Add a single column
Right-click a column and then select the
column to add from the pop-up menu.
Note: The column appears at the far right.
Remove a single column
Right-click a column and then select the
column to remove.
Note: The column is removed.
Add multiple columns
Click the Column to display icon, and then
select the check box for each column to add.
Remove multiple columns
Click the Column to display icon, and then
clear the check box for each column to
remove.
Enterprise Scanner: User Guide
Selecting assessment checks with filters
Use the Checks tab in the Assessment policy to provide filtering values on a
selected list of assessment checks.
About this task
The following rules apply to using regular expressions:
v The match occurs against all columns in the table, whether or not the column is
displayed.
v If you use more than one regular expression, every regular expression must
match for a check to be selected.
Procedure
1. Click Scan → Policy Management in the navigation pane.
2. Select Assessment from the Policy Types list, and then click Add.
3. Type a name for the scan policy.
4. Click the Checks tab.
5. Select the Filter check box, and then click Filter.
6. To filter with a regular expression, type one or more regular expressions on
separate lines in the Regular Expression box.
Tip: For example, use http.* to match the value in any column that starts with
http; or use .*http.* to match the value in any column that contains http.
7. To filter by one or more of the remaining filter types, select the values to filter
by in the filtering boxes.
Tip: You can select ranges of filtering values by holding down the SHIFT key
and random filtering values by holding down the CTRL key.
8. Click OK.
Chapter 1. Ad hoc scanning in the Proventia Manager
11
Configuring common assessment settings for an Assessment
policy
Use the Common Settings tab in the Assessment policy to choose settings that
define additional scanning behavior for the checks you have selected to run in an
assessment scan.
Procedure
1.
2.
3.
4.
Click Scan → Policy Management in the navigation pane.
Select Assessment from the Policy Types list, and then click Add.
Type a name for the scan policy.
Click the Common Settings tab.
5. Type the URL or file location for the assessment check Help documentation in
the Help HTML Prefix box:
v The IBM ISS Web site location of up-to-date assessment check
documentation.
v The file location of a locally stored version of the documentation.
6. If you want to run the checks that are enabled by default, including checks
added in an X-Press Update (XPU), select a policy in the Compliance Policies
section.
CAUTION:
Custom Policy (All) runs all vulnerability checks, including DOS checks.
7. Configure options for service discovery in the Service Discovery section:
Option
Description
Discover and report TCP services
Reports active TCP services for which the
Service Scan flag is enabled in the Network
Services policy.
Discover and report UDP services
Reports active UDP services for which the
Service Scan flag is enabled in the Network
Services policy.
8. Configure options for assessment port ranges in the Assessment Port Ranges
section:
Option
Description
Ports to scan with generic TCP checks
The set of TCP ports to scan with generic
TCP checks. You can specify ports using any
of the following methods:
v Type a port or range of ports.
v Click Well known and select ports from
the list.
v Select All.
Note: A generic TCP check is one whose
target type is tcp.
12
Enterprise Scanner: User Guide
Option
Description
Ports to scan with generic UDP checks
The set of UDP ports to scan with generic
UDP checks. You can specify ports using any
of the following methods:
v Type a port or range of ports.
v Click Well known and select ports from
the list.
v Select All.
Note: A generic UDP check is one whose
target type is udp.
9. Configure options for using OS information in the Use of OS Information
section:
Option
Description
Dynamically determine OS if previously
obtained information is older than
The maximum age (in minutes) of usable OS
information.
If the OS information for an asset is older
than the time specified, Enterprise Scanner
reassesses OSID when it runs an assessment
scan.
Default: 120
For unverified OS’s:
Specify which checks to run if the OS is
uncertain.
v Run all checks (lowest performance): If
Enterprise Scanner is uncertain about the
OS of the asset, it runs all assessment
checks.
v Run all checks that apply to general OS
(intermediate performance): If Enterprise
Scanner is uncertain about the OS of the
asset, it runs checks for all versions of an
operating system. (For example, if
Enterprise Scanner is uncertain about
which version a Windows operating
system is, it runs all the checks for all
versions of Win dows operating systems.)
v Run only checks that apply to specific
OS (Best performance): If Enterprise
Scanner is uncertain about the OS of the
asset, runs only the checks that apply to
the exact version of the operating system.
10. Configure options for application fingerprinting in the Use of Application
Fingerprinting section:
Chapter 1. Ad hoc scanning in the Proventia Manager
13
Option
Description
Do not perform application fingerprinting
Does not try to specifically identify which
applications are communicating over which
ports, and runs the checks as selected in the
Assessment policy.
This option does not identify applications
communicating over non-standard ports.
(Checks are run against standard ports as
defined in the Network Services policy.)
Fingerprint applications and run checks
that apply to application protocol (e.g.,
http)
Identifies applications communicating over
specific ports, and then runs checks that
apply to the protocol in use.
This option identifies applications
communicating over non-standard ports.
Fingerprint applications and run checks
that apply to specific application (e.g.,
apache)
Identifies applications communicating over
specific ports, and then runs checks that
apply only to the application identified.
This option identifies applications
communicating over non-standard ports.
11. The settings in the Account Verification section apply only if an Assessment
Credentials policy is available for the group being scanned.
Option
Description
Verify account access level before using
v If disabled, Enterprise Scanner assumes
that whatever is specified in the
Assessment Credentials policy is accurate.
v If enabled, Enterprise Scanner tries to
confirm that the access level specified in
the Assessment Credentials policy is
correct.
Important: You should enable the Check
local group membership to verify access
level if you enable account verification.
Access domain controllers to verify access
level
v If disabled, Enterprise Scanner does not
communicate with a Domain Controller in
the process of verifying access levels.
v If enabled, Enterprise Scanner tries to
communicate with a Domain Controller in
the process of verifying access levels.
Check local group membership to verify
access level
v If disabled, Enterprise Scanner does not
try to confirm the access level for the
account during assessment by checking
which local groups the asset belong to.
v If enabled, Enterprise Scanner tries to
confirm the access level for the account
during assessment by checking which
local groups the asset belong to.
12. Configure the options for locking out accounts in the Account Lockout
Control section:
14
Enterprise Scanner: User Guide
Option
Description
Allowed account lockout
Select a type of lockout:
v No lockout allowed: Enterprise Scanner
avoids running password guessing checks
if account lockout is enabled on the target
host, or if its status cannot be determined.
v Temporary lockout allowed: Enterprise
Scanner runs password guessing checks
only if the account lockout duration is less
than or equal to the value specified in the
Maximum Allowable Lockout Duration
option later in this section.
v Permanent lockout allowed:Enterprise
Scanner runs password guessing checks
even if the account lockout duration is set
to run infinitely.
Longest allowed temporary lockout
Specifies the maximum time (in minutes)
that accounts are allowed to be locked out
by password guessing checks.
This value applies only if Temporary
Lockout Allowed is enabled. When
temporary lockout is allowed, password
guessing checks are run only against assets
whose lockout policy disables locked out
accounts for no more than the maximum
allowed lockout time.
Chapter 1. Ad hoc scanning in the Proventia Manager
15
Defining assessment credentials for a policy
Use the Assessment Credentials policy type on the Policy Management page to
define authentication credentials for your assets.
About this task
The appliance uses authentication credentials to access accounts during assessment
scans. Enterprise Scanner uses all instances of the credentials that are defined for
the group when it scans assets in the group. You can define different instances of
this policy for different groups, which makes it possible to supply different log on
credentials to scan different parts of the network.
Important: The Assessment Credentials policy currently works only with assets
that run Windows operating systems.
Procedure
1. Click Scan → Policy Management in the navigation pane.
2. Select Assessment Credentials from the Policy Types list, and then click Add.
3. Confirm your password, and then click OK.
4. Type a name for the scan policy.
5. In the Assessment Credentials tab, click Add, and then provide the following
account information:
Option
Description
Username
The user identification for an account.
Password
The password to use with the user name to
log into an account.
Account Type: Windows Local
Indicates that the user account is defined
locally on a single Windows device. The
account is used to attempt to log in to a
single Windows device.
When you choose this option, you must
provide a Windows host name in the
Domain/Host box.
Account Type: Windows
Domain/Workgroup
Indicates that the user account is defined in
a Windows Domain or Workgroup. The
account is used to attempt to log in to all
Windows devices within the domain or
workgroup.
When you choose this option, you must
provide the Windows Domain or Workgroup
name in the Domain/Host box.
Account Type: Windows Active Directory
Indicates that the user account is defined in
a Windows Active Directory Domain. The
account is used to attempt to log in to all
Windows devices within the Active
Directory domain.
When you choose this option, you must
provide the Active Directory Domain name
in the Domain/Host box.
16
Enterprise Scanner: User Guide
Option
Account Type: SSH Local
Description
Indicates that the user account is defined
locally on a single Unix device that allows
SSH logons. The account is used to attempt
login to a single Unix device.
When you choose this option, you must
provide an IP address in the Domain/Host
box.
Account Type: SSH Domain
Indicates that the user account is defined for
Unix devices that allow SSH logons. In this
context, ″Domain″ loosely refers to a set of
devices, rather than to a specific type of
domain. The account is used to attempt to
log in to all SSH devices covered by the
policy.
When you choose this option, you should
supply a descriptive name in the
Domain/Host box. This is for
documentation purposes only; it is not used
by Enterprise Scanner.
Domain/Host
Applies to one of the following domains or
hosts:
v For Windows accounts, the domain or
host name to which the account applies.
v For SSH Local accounts, the IP address of
the device to which the account applies.
v For SSH Domain accounts, any text.
Account Level
Applies to one of the following accounts:
v Administrator
v User
v Guest
Important: To avoid locking an account, do not add the account more than
once.
Chapter 1. Ad hoc scanning in the Proventia Manager
17
Defining the service names associated with TCP and UDP
ports
Use the Network Services policy type on the Policy Management page to define
service names associated with TCP and UDP ports.
Procedure
1.
2.
3.
4.
Click Scan → Policy Management in the navigation pane.
Select Network Services from the Policy Types list, and then click Add.
Type a name for the scan policy.
For default or customized services, choose an option:
If you want to...
Then...
Change the description of a service
Slowly click Description two times to switch
to edit mode, and then change the
description.
Allow each service to operate over SSL in
at least some part of your network
Select the May use SSL check box for that
service.
Allow service scans for this service over
any TCP and UDP ports specified in the
Assessment policy
Select the Service scan check box.
Note: You cannot change the Service name, Port, or Protocol of default
services. You cannot delete default services.
5. For customized services, choose an option:
18
If you want to...
Then...
Add a service
Click the Add icon.
Modify a service
Click the Modify icon.
Delete a service
Click the Delete icon.
Enterprise Scanner: User Guide
Defining ports or assets to exclude from a scan
Use the Scan Exclusion policy type on the Policy Management page to define
specific ports or assets to exclude from a scan of a group of assets.
Procedure
1.
2.
3.
4.
Click Scan → Policy Management in the navigation pane.
Select Scan Exclusion from the Policy Types list, and then click Add.
Type a name for the scan policy.
Choose an option:
If you want to...
Then...
Exclude ports
Use a combination of typing the ports to
exclude and choosing the ports:
v Type the ports to exclude, separated by
commas, in the Excluded Ports box.
v Click Well Known Ports, and then select
the ports to exclude.
Exclude assets
Type the IP addresses (in dotted-decimal or
CIDR notation) of the hosts to exclude in the
Excluded Hosts box:
v Type an IP address, and then press ENTER.
v Type a range of IP addresses, and then
press ENTER.
Example: 172.1.1.100-172.1.1.200
v Type a combination of both choices above,
and then press ENTER.
Note: A red box is displayed around the
Excluded Hosts box until the data is
validated.
Chapter 1. Ad hoc scanning in the Proventia Manager
19
Configuring and saving a scan policy in the Proventia
Manager
Use the Policy Management page on the appliance to configure discovery and
assessment scan policies from Proventia Manager for auditing purposes, and then
use those policies for one-time (ad hoc) scans that you initialize from the LMI Scan
Control page.
Before you begin
You will not be able to run scans from Proventia Manager if the appliance is
registered with SiteProtector.
Procedure
1. Click Scan → Policy Management in the navigation pane.
2. Choose the scan policy that you want to configure from the Policy Types list,
and then click Add.
3. Type a name for the scan policy, and then configure the settings for the scan
policy. Policy names are limited to 32 characters using any combination of
letters or numbers. You cannot use a dash (-) or underscore (_) in the policy
name. You can run the following combinations of scans:
v Discovery scan
v Discovery and an assessment scan
You cannot run an assessment only scan from the Proventia Manager. The
following table lists which scan policies are required to run an ad hoc scan
from Proventia Manager:
Table 2. Policies used for ad hoc scanning in Proventia Manager
Scan policy
Required
Discovery
Yes
Assessment
Yes
Assessment Credential
No
Network Services
No
Scan Exclusion
No
*You should run a discovery scan policy first (to identify assets on the network) before you
run an assessment scan.
4. Click Save Changes to save the scan policy. You are now ready to run an ad
hoc scan using a configured scan policy.
5. Click Scan → Run Scan in the navigation pane. The LMI Scan Control page is
displayed in Proventia Manager.
20
Enterprise Scanner: User Guide
Chapter 2. Interpreting scan results in the Proventia Manager
This chapter explains how to monitor and view scan results in the Proventia
Manager.
Topics
“Running an ad hoc scan” on page 22
“Monitoring the status of a scan” on page 23
“Viewing the results of an ad hoc scan” on page 24
“Exporting scan results from Proventia Manager” on page 24
“Purging scan data from the database” on page 25
© Copyright IBM Corp. 1997, 2009
21
Running an ad hoc scan
Use the LMI Scan Control page on the appliance to define and run ad hoc scans
for assessment and discovery.
Before you begin
Before you can run a scan, make sure you have configured a scan from the Policy
Management page.
Procedure
1. Click Scan → Run Scan in the navigation pane.
2. Depending on what type of scan you are running (discovery or assessment),
provide a name for the scan job in the Discovery Job Name or Assessment Job
Name field.
Tip: The scan job name is useful when you want to view the results and status
of the scan.
3. From the fields provided in the LMI Scan area, determine what type of scan
you need to run, and then select a configured scan policy from the list. You can
run the following combinations of scans:
v Discovery scan
v Discovery and an assessment scan
You cannot run an assessment only scan from the Proventia Manager. Because
the appliance does not use a database to store asset information, you must run
a discovery scan followed by an assessment scan.
4. Select what network location (or perspective) you need to run the scan policy
against from the Perform scans from this perspective (Network location) list.
5. Click Save Changes to start the ad hoc scan.
22
Enterprise Scanner: User Guide
Monitoring the status of a scan
Use the Scan Status page on the appliance to view the status of ad hoc discovery
and assessment scans you have initialized from the LMI Scan Control page.
About this task
While Proventia Manager processes the scan, you can perform one of the following
actions on the scan:
Table 3. Processing status of a scan
Action
Icon
Description
Pause
Use the Pause option only
when a job is in the
processing status. Pausing a
job in any other status might
cause problems if you try to
resume or rerun the scan.
Resume
Resume the scan after you
have paused it
Cancel
Cancel the scan altogether
Procedure
1. Click Scan → Scan Status in the navigation pane.
The Scan Status page appears with a table displaying the status of the scan.
Note: The results of the scan can take up to a minute to display on this page.
2. Click the link for the scan in the Name column to display the results of the
scan on the Scan Results page.
Chapter 2. Interpreting scan results in the Proventia Manager
23
Viewing the results of an ad hoc scan
Use the Scan Results page on the appliance to analyze security-related data
discovered by an ad hoc scan.
Procedure
1. Click Scan → Scan Results in the navigation pane.
2. Choose the scan date (time stamp) from the List Scans list, and then click Go.
3. Select the scan job from the Scan Type list, and then click Go. The results of
the scan are displayed in the table.
4. Click View/Manage Log Files.
5. Select the scan job in the File Name list. The name of the log file contains the
date the scan was run and uses this format: lmiScans/mmddyyyy_xxxxx.log
6. Click Download to the download the log file for the scan to a directory on
your computer. Scan data files are located in the /var/log/esm/lmiScans
directory.
Exporting scan results from Proventia Manager
Use the Scan Reports page on the appliance to export scan results to HTML or
CSV files from Proventia Manager.
About this task
This feature provides basic reporting for ad hoc scans initialized from Proventia
Manager. It is not intended to replace the full analysis and reporting functions of
SiteProtector.
Procedure
1. Click Scan → Scan Reports in the navigation pane.
2. Select the discovery or assessment scan that you want to export from the List
Scans list.
3. Select how you want to sort the hosts in the report.
4. Select the Report checks which found no vulnerability check box if you want
to include information about checks that did not find a vulnerability.
5. Depending on the type of report you need to generate, click Generate HTML
Report or Generate CSV Files.
6. Save the file to your local system. Enterprise Scanner uses the following file
name convention for exported results:
Discovery: DiscoveryResults-<YYYYMMDD>-<HHMMSS><timezone>-<scannername>-<jobname>.csv
Assessment: AssessmentResults-<YYYYMMDD>-<HHMMSS><timezone>-<scannername>-<jobname>.csv
Example: A discovery scan that ran on March 30, 2008 at 1:20:39 PM EST with
a scanner name of testscan and a job name of testjob would display the
following file name: DiscoveryResults-20080330-132039EST-testscantestjob.csv
24
Enterprise Scanner: User Guide
Purging scan data from the database
Use the Scan Results page on the appliance to schedule the removal of scan data
files from the /var/log/esm/lmiScans directory.
Procedure
1. Click Scan → Scan Results in the navigation pane.
2. Click the Purge Scan Data link. The Purge Scan Data window provides the
following information about the current scan data:
Field
Description
Number of Scans
The number of individual scans, not scan
jobs.
Disk Space Used by Scans
The amount of disk space consumed by the
scan data.
Total Disk Space Available
The amount of available disk space.
Earliest Scan
The date of the first scan.
Latest Scan
The date of the latest scan.
Purge Scans Older than: Number of Days
The number of days in which all scan data
older than this amount are deleted from the
disk.
Note: When you purge scan data, that data
is also removed from the Scan Status page
and the Scan Results page.
3. Click Go.
Chapter 2. Interpreting scan results in the Proventia Manager
25
26
Enterprise Scanner: User Guide
Part 2. Scanning from the SiteProtector Console
This section explains how to manage scans from the SiteProtector Console for the
Enterprise Scanner agent.
Chapters
Chapter 3, “Enterprise Scanner policies,” on page 29
Chapter 4, “Understanding scanning processes in SiteProtector,” on page 67
Chapter 5, “Background scanning in SiteProtector,” on page 79
Chapter 6, “Monitoring scans in SiteProtector,” on page 91
Chapter 7, “Managing scans in SiteProtector,” on page 95
Chapter 8, “Interpreting scan results in SiteProtector,” on page 103
Chapter 9, “Logs and alerts,” on page 121
Chapter 10, “Ticketing and remediation,” on page 133
© Copyright IBM Corp. 1997, 2009
27
28
Enterprise Scanner: User Guide
Chapter 3. Enterprise Scanner policies
This chapter explains how to use Enterprise Scanner policies to customize your
scanning processes. The policies belong to meaningful categories based on their
scope and impact on scans.
Topics
“Policy inheritance with Enterprise Scanner policies” on page 30
“Deploying an Enterprise Scanner policy from the policy repository” on page 31
“Migrating a locally managed Enterprise Scanner agent into SiteProtector” on page
32
“Viewing asset or agent policies for Enterprise Scanner” on page 33
“Getting vulnerability help for a SiteProtector Console without Internet access” on
page 34
“Agent policies for Enterprise Scanner” on page 35
“Asset policies for Enterprise Scanner” on page 45
© Copyright IBM Corp. 1997, 2009
29
Policy inheritance with Enterprise Scanner policies
The inheritance properties of policies in SiteProtector provide a flexible and
efficient method for setting up your scanning environment in a hierarchical group
structure.
General inheritance behavior
In general, inheritance works as follows:
v When you define a policy for a group in your group structure, the policy
automatically applies to the subgroups for the group unless a subgroup already
has its own version of the policy. Then, that subgroup retains its version of the
policy.
v You can break the inheritance at any level in the group structure by redefining
(overriding) the policy for a subgroup. When you define a policy for a
subgroup, the changes apply to its subgroups.
v If you have defined a policy for a subgroup that you want to apply to groups
above it, you can promote the policy to a higher group.
Inheritance with Enterprise Scanner policies
As you plan your Site grouping structure for vulnerability management, keep these
points in mind:
v Most asset policies follow the general rules of inheritance.
v Many agent policies apply only to a single agent or scanning network interface.
v Some asset and some agent policies have specialized inheritance characteristics.
These differences are described in more detail in the following topics.
Inheritance indicators
When you select a group in the left pane of the SiteProtector Console, policies
applicable to the group are displayed in the right pane. The inheritance indicators
of the policies are displayed in the Inheriting From column as follows:
Table 4. Policy inheritance indicators
If the Inheriting From Value is...
Then...
blank
The policy is defined at the group
level/agent selected in the left pane.
UNCONFIGURED
You have chosen to override the policy with
one that is defined higher in the group
structure, but a higher-level policy is not
defined.
a_group_name
The policy is inherited from the referenced
group.
Initially blank or unconfigured?
The initial inheritance indicators for agent policies can be blank or unconfigured
depending on whether you override SiteProtector group settings when you register
your agent with SiteProtector:
v If you override the settings, the settings for the agent are applied to the
SiteProtector policies, so that the Inheriting From column is blank.
30
Enterprise Scanner: User Guide
v If you do not override the settings, the column follows the inheritance described
in the table above; however, you must configure those policies.
Deploying an Enterprise Scanner policy from the policy repository
Use the policy repository to create, edit, and deploy Enterprise Scanner policies in
SiteProtector. The repository keeps an archive of each saved version of your
policies. After creating or editing a policy, you must deploy it to the appropriate
Enterprise Scanner agents or groups.
About this task
Each time you edit a policy, SiteProtector saves a new version in the repository.
You can deploy any version of a policy to an Enterprise Scanner agent or group on
your Site. You can use the default repository in SiteProtector to manage all of your
policies, or create additional repositories to separate different types or groups of
policies.
Important: You cannot delete a policy from the repository if you have deployed it
anywhere in your Site.
Note: Central Responses can only use Network Objects that are in the default
repository.
Procedure
1. Choose an option:
v Drag the policy icon from the repository to the Enterprise Scanner group or
agent in the left pane.
v Right-click the policy icon in the repository, and then select Deploy from the
pop-up menu.
2. To deploy additional policies, click the Policies icon, and then click Add to
select more policies. The Deploy Policy window displays the policy you chose,
and the target(s) it will be deployed to.
3. Click OK.
4. To select a target to deploy the policy to, click the Targets icon, and then select
the Enterprise Scanner groups or agents to deploy this policy to.
5. Click the Schedule icon.
6. To deploy the policy immediately, select Now.
7. To schedule a specific date and time to deploy the policy, select Start Time,
click the list, and then select a date and time for deployment.
8. Click OK.
Chapter 3. Enterprise Scanner policies
31
Migrating a locally managed Enterprise Scanner agent into
SiteProtector
You must migrate the Enterprise Scanner agent out of the Locally Managed Agents
area to take advantage of the policy features available in SiteProtector.
About this task
If the policies for the Enterprise Scanner agent are managed locally (from Proventia
Manager), they will be displayed in the Locally Managed Agents node.
The Locally Managed Agents node is designed to be a temporary access point for
Enterprise Scanner agents whose local policies have not yet been imported into
SiteProtector. You should move these policies into the policy repository to manage
them in SiteProtector.
Procedure
1. Select the Policy view, and then select Locally Managed Agents.
2. Select the Enterprise Scanner agent, and then select Migrate to Repository from
the pop-up menu.
3. Type a unique policy name for any policy files that duplicate those already in
the repository.
4. Click OK. The policies for the Enterprise Scanner agent are displayed in the
Repository and can be deployed to other Enterprise Scanner groups or agents
in SiteProtector.
32
Enterprise Scanner: User Guide
Viewing asset or agent policies for Enterprise Scanner
In the SiteProtector Console, you can view asset and agent policies together, or you
can view them separately. If you view the policies separately, you can use the
views and tabs in SiteProtector to easily move back and forth between asset and
agent policies.
Procedure
1.
2.
3.
4.
From the SiteProtector Console, click a tab with the Policy view.
From the left pane, select the asset or agent whose policies you want to view.
If you want to see policies from a different repository, select that repository.
Select Network Enterprise Scanner from the Agent Type list.
5. Select your version of Enterprise Scanner for the agent from the Version list.
Note: The version can apply to the agent whose properties you are defining or
to the agent responsible for scanning the group whose properties you are
defining.
Important: Enterprise Scanner policies can apply to one or more versions, as
indicated in the policy view. If you use multiple agents at different versions
that do not share the same policy, you must define separate policies for each
version.
6. Choose an option:
If you want to view...
Then...
All policies
Select All from the Mode list.
Asset policies
Select Asset from the Mode list.
Agent policies
Select Agent from the Mode list.
Chapter 3. Enterprise Scanner policies
33
Getting vulnerability help for a SiteProtector Console without Internet
access
If you use the SiteProtector Console on a computer without an Internet connection,
you need to store the vulnerability Help on the computer or one it can access over
your company’s network.
Procedure
1. Download the vulnerability Help file (XForceHelpFiles.zip) from
http://www.iss.net/security_center/reference/vuln to a directory on your
computer.
2. When the File Download window opens, click Save to store the files on your
computer.
Important: Do not click Open.
3. After you download the files, specify the full path, including the final
backslash, in the Help HTML Prefix box on the Common Settings panel for
Assessment Scans.
Example: c:\data\XF-help-files\
34
Enterprise Scanner: User Guide
Agent policies for Enterprise Scanner
Agent policies apply to Enterprise Scanner appliances and describe operational
settings for the agents or global settings for all scans. In addition, some agent
policies apply to only one agent.
Agent policy descriptions for Enterprise Scanner
Agent policies apply to both ad hoc and background scans.
Contents of an agent policy
The general contents of an agent policy include:
v The passwords to use for local accounts
v Scan management (breaking scans down into smaller subtasks per task)
v The relative location of the agent on the network, known as its perspective
v Updates to the agent
v Network configuration settings and DNS servers for the network interfaces
v Log file management
Policy inheritance with agent policies
The following rules describe policy inheritance for agent policies:
v You must define a unique Access, Networking, Services, and Time policy for
each agent.
v You can set up the Notification and Update policies to inherit their definitions
from policies defined higher in the group structure.
v You can define only one Network Locations policy, to be used for all agents and
assets, at the Site level in your group structure.
In the SiteProtector Console, you select a group in the left pane and the applicable
policies are displayed in the right pane. If you expand the group or agent, the
policies are also displayed below the group or agent.
Chapter 3. Enterprise Scanner policies
35
Network Locations policy
Use the Network Locations policy to define the perspective (network location) of
an agent and to define routes for those perspectives.
Note: The Network Locations policy does not automatically import the
perspectives you set up in the Network Locations tab in the Proventia Manager
(LMI). If you have defined perspectives in the Proventia Manager, you must
redefine those perspectives for this policy in SiteProtector.
What is perspective?
A perspective is a name that represents the network location of one or more
agents. You associate a perspective with a group to scan in the Scan Control policy.
The agent(s) assigned to that perspective in the Networking policy run the scans.
Default perspective
The Network Locations policy contains a default perspective, Global, which you
cannot delete. You can use the Global perspective without adding any additional
perspectives, or you can use it along with user-defined perspectives.
When to use additional perspectives
Perspective is most important when you have multiple scanners located at
different locations on your network. To distinguish among them, you must use
more than one perspective.
You can only assign one unique perspective per scanning port. You cannot assign
the same perspective to more than one scanning port.
Perspective names
When you choose a perspective name, choose a name that represents the location
on the network that the perspective references. Consider that, technically, a
perspective represents a set of subnets from which you would expect the same
results for scanning and monitoring your network regardless of where you
connected your scanners within that set of subnets.
Scanning without full permissions
To perform any Enterprise Scanner scan with SiteProtector SP™ 6.1 or later, a user
must have permission to view the Network Locations policy. This permission is
granted for the predefined user groups that provide full Enterprise Scanner
permissions. If you define users or user groups with restricted permissions, you
must grant this permission explicitly. The way you grant permission is based on
the inheritance behavior of your policy:
36
If you...
Then...
Do not change the inheritance behavior of
the policy
You can define the permission once at the
Site level.
Change the inheritance behavior of the
policy
You must grant the permission for the group
where you need the permission and for all
the groups above it in the hierarchy.
Enterprise Scanner: User Guide
Important: Users who do not have permission to view the Network Locations
policy, either through group association or by a specific grant, cannot run
Enterprise Scanner scans.
Assigning perspective to a scanning interface
Use the Network Locations tab in the Network Locations policy on the
SiteProtector Console to assign a perspective (network location) to a scanning
interface.
Procedure
1. From the SiteProtector Console, create a tab to display agent policies.
2. In the navigation pane, select a group, and then open the Network Locations
policy for that group.
3. Click the Network Locations tab.
4. Click the Add icon.
5. Type a name for the perspective in the Network Locations Name field, and
then click OK.
Important: You can only assign one unique perspective per scanning port. You
cannot assign the same perspective to more than one scanning port.
Configuring routes for perspective
Use the Routes tab in the Network Locations policy on the SiteProtector Console to
configure the appliance to select paths for (routes) traffic.
About this task
In a multi-segmented network, you might experience unnecessary network traffic if
your agent traffic is routed through your default gateway. You can reduce network
traffic if you configure routes for perspectives that provide more direct routes to
targeted segments.
Procedure
1. From the SiteProtector Console, create a tab to display agent policies.
2. In the navigation pane, select a group, and then open the Network Locations
policy for that group.
3. Click the Routes tab, and then click the Add new item to list icon.
4. Complete the following fields:
Option
Description
Perspective
The perspective for which you are defining a
route.
Destination Network
A network segment for which you want to
define a specific route for a perspective.
Gateway
The IP address of the router the agent
should use to find IP addresses in the
Destination Network. Use the IP address
that is on the same network as the agent,
not the IP address of the route from inside
the target segment.
Chapter 3. Enterprise Scanner policies
37
Option
Description
Metric
If you configure more than one route to the
same segment for one perspective, a number
that indicates the preferred route. The closer
to 1, the more preferred the route.
Note: The numbers you use do not have to
be consecutive.
5. Click OK.
Notification policy
Use the Notification policy to configure responses sent from the Enterprise Scanner
appliance to the SiteProtector Console.
Event notification settings for Enterprise Scanner
Use the Event Notification tab in the Notification policy on the SiteProtector
Console to Enterprise Scanner enable the agent to send system events to the
SiteProtector Console.
About this task
You can configure three types of system events:
v System error events
v System warning events
v System informative events
Procedure
1. From the SiteProtector Console, create a tab to display agent policies.
2. In the navigation pane, select a group, and then open the Notification policy
for that group.
3. Click the Event Notification tab.
4. Select the check boxes for each type of event to enable:
v Alert Logging for System Error Events
v Alert Logging for System Warning Events
v Alert Logging for System Informative Events
5. Select the Enable Event Delivery to SiteProtector Console check box for each
type of event to enable:
v System error notification
v System warning notification
v System informative event notification
38
Enterprise Scanner: User Guide
Configuring advanced parameters for event notification
Use the Advanced Parameters tab in the Notification policy on the SiteProtector
Console to provide greater control over the event notification behavior of your
appliance.
Procedure
1. From the SiteProtector Console, create a tab to display agent policies.
2. In the navigation pane, select a group, and then open the Notification policy
for that group.
3. Click the Advanced Parameters tab.
4. If the parameter you want to tune is not displayed in the Advanced Parameters
tab, follow these steps:
a. Click the Add icon.
b. Type the name of the parameter.
c. Type a description of the parameter.
d. Specify the value type and value of the parameter.
5. If the parameter you want to tune is already displayed in the Advanced
Parameters tab, click the value or description field and change the setting.
Attention: In most cases, it should not be necessary to change advanced
parameters. However, you should not change these parameters unless you are
instructed by IBM ISS Technical Support personnel.
6. Click OK.
Access policy
Use the Access policy on the SiteProtector Console to change agent passwords and
to enable (require) or disable the bootloader password for backing up or restoring
your agents.
Before you begin
To change a password, you must know the current password.
About this task
When you configure the appliance, you must supply passwords for these accounts:
Table 5. Appliance passwords
Account
Purpose
root
This password accesses the operating system
of the appliance.
Admin (agent user)
This password accesses the Proventia Setup
Assistant on the appliance if the Enterprise
Scanner agent is not managed by a
SiteProtector.
Admin (Web user)
This password accesses Proventia Manager
through a Web browser over a network
connection.
Procedure
1. From the SiteProtector Console, create a tab to display agent policies.
Chapter 3. Enterprise Scanner policies
39
2. In the navigation pane, select a group, and then open the Access policy for that
group.
3. For each password you want to change, complete the following steps:
a. Type the current password in the Current Password box.
b. Click Enter Password, type the new password in the Password and in the
Confirm password boxes, and then click OK.
4. If you want to require the use of the bootloader password to back up or restore
the agent, select the Enable bootloader password check box.
Important: If you enable the bootloader password, you must be connected to
the Enterprise Scanner agent with a serial connection and supply a password to
backup or to restore the agent.
Networking policy
Use the Networking policy on the SiteProtector Console to reconfigure the network
configuration settings for the management and scan interfaces and for the DNS
servers and search paths.
Configuring the management network interface
Use the Management Interface tab in the Networking policy on the SiteProtector
Console to configure the management interface network settings (ETH0).
About this task
You configured the management interface when you set up the appliance with the
Proventia Setup Assistant. Use the procedures in this topic to change those
settings.
Procedure
1. From the SiteProtector Console, create a tab to display agent policies.
2. In the navigation pane, select a group, and then open the Networking policy
for that group.
3. Click the Management Interface tab, and then type or change the following
information:
Option
Description
Host Name
The fully qualified domain name for the
Enterprise Scanner agent. Use the format:
gateway1.example.com
Interface
The management port used by the
Enterprise Scanner agent.
IP address
The IP address for the management network
interface that connects to SiteProtector.
Subnet Mask
The subnet mask for the management
network interface that connects to
SiteProtector.
Gateway
The address of the network gateway.
4. Select the Use Persistent IP if sensor is behind NAT if you want to avoid
conflicts with NAT rules, and then provide the IP address.
40
Enterprise Scanner: User Guide
Configuring the scanning network interface
Use the Scan Interface tab in the Networking policy on the SiteProtector Console to
configure the scanning interface network settings (ETH1 - ETH5).
About this task
You configured the scanning interface when you set up the appliance with the
Proventia Setup Assistant. Use the procedures in this topic to change those
settings.
Procedure
1. From the SiteProtector Console, create a tab to display agent policies.
2. In the navigation pane, select a group, and then open the Networking policy
for that group.
3. Click the Scan Interface tab, and then type or change the following
information:
Option
Description
Interface
The Ethernet port of the interfaces for the
Enterprise Scanner agent.
IP Address
The IP address of the scanning network
interface for the Enterprise Scanner agent.
Subnet Mask
The IP address for the scanning network
interface subnet mask of the Enterprise
Scanner agent.
Gateway
The address of the network gateway.
Maximum IPs per discovery subtask
The maximum number of IP addresses to
discover in a subtask (of a task for each scan
job).
Note: This value applies to all discovery
scans that the agent runs.
Maximum assets per assessment subtask
The maximum number of assets to scan in a
subtask (of a task for each scan job).
Note: This value applies to all assessment
scans that the agent runs.
Perspective (network location)
The name of the network location to
associate with this scanning port.
Values: Global, the default, and any network
locations defined in the Network Locations
policy.
Chapter 3. Enterprise Scanner policies
41
Configuring scanning interface DNS settings
Use the DNS tab in the Networking policy on the SiteProtector Console to
configure the DNS settings for the scanning interface.
About this task
You configured these settings when you set up the appliance with the Proventia
Setup Assistant. Use the procedures in this topic to change those settings.
Procedure
1. From the SiteProtector Console, create a tab to display agent policies.
2. In the navigation pane, select a group, and then open the Networking policy
for that group.
3. Click the DNS tab.
4. Choose an option:
If you want to...
Then...
Specify DNS settings
1. Type the IP addresses for the primary,
secondary, and tertiary DNS servers.
2. Click Save Changes.
Add a DNS search path
1. In the DNS Search Path section, click the
Add icon.
2. Type the domain name to add to the
search list, and then click OK.
3. Click Save Changes.
Edit a DNS search path
1. In the DNS Search Path list, select a
domain name, and then click the Edit
icon.
2. Edit the domain name, and then click
OK.
3. Click Save Changes.
Copy and paste a DNS search path
1. In the DNS Search Path section, select a
domain name, and then click the Copy
icon. The agent copies the search path to
the clipboard.
2. Click the Paste icon. The agent copies the
search path to the end of the list.
3. If necessary, edit the policy, and then
click OK.
4. Click Save Changes.
Remove a DNS search path
1. In the DNS Search Path section, select a
domain name, and then click the
Remove icon.
2. Click Save Changes.
Change the order of a DNS search path
1. In the DNS Search Path section, select a
domain name.
2. Click the Up or Down arrows.
Tip: It is more efficient to place the most
likely used search path at the top of the
list.
3. Click Save Changes.
42
Enterprise Scanner: User Guide
Services policy
Use the Services policy on the SiteProtector Console to enable or disable access to
your appliance from SSH (Secure Shell) applications on your network and to
enable SNMP to monitor the Enterprise Scanner appliance for conditions that
warrant administrative attention.
Procedure
1. From the SiteProtector Console, create a tab to display agent policies.
2. In the navigation pane, select a group, and then open the Services policy for
that group.
3. Choose an option:
If you want to...
Then...
Enable SSH
Select the Enabled check box to enable SSH;
clear the Enabled check box to disable SSH.
Note: SSH is enabled and accessible to the
internal and external interfaces by default.
Enable an SNMP Get
1. Select the SNMP Get Enabled box.
2. Provide a name for the system, a system
location, relevant contact information,
and an appropriate community name.
Enable an SNMP Trap
1. Select the SNMP Traps Enabled box.
2. Type the IP address in the Trap Receiver
Address field.
Note: This IP address is the server
address where the SNMP Manager is
running. The SNMP host must be
accessible to the appliance to send e-mail
notification.
3. Type the appropriate community name
(public or private) in the Trap
Community field.
4. Select a trap version from the Trap
Version list. The following versions are
available:
v V1: Simple Network Management
Protocol version 1
v V2c: Community-Based Simple
Network Management Protocol
version 2
4. Click Save Changes.
Chapter 3. Enterprise Scanner policies
43
Time policy
Use the Time policy on the SiteProtector Console to change the date and the time
of the Enterprise Scanner agent, and to enable the network time protocol (NTP) to
synchronize the agent time with a network time server.
About this task
The Time policy always contains the last manually configured values for date and
time options, not the actual date and time. When you save the settings, the agent is
set to the currently configured values, whether you have changed them or not.
Important: To avoid resetting the time and date to the previously configured
values, update the time and date before you save the settings.
Procedure
1. From the SiteProtector Console, create a tab to display agent policies.
2. In the navigation pane, select a group, and then open the Time policy for that
group.
3. Choose an option:
If you want to...
Then...
Change the date and time for the agent
1. Click the Date and Time arrow to see
the calendar.
2. Select the correct month and date.
Tip: Use the arrows at the top to change
the month and year in the calendar.
3. Select the hour and minutes in the Time
boxes.
4. Click outside the calendar to close it.
5. Click the Time Zone arrow and select
the correct time zone for your region.
6. Click Save Changes.
Enable the network time protocol (NTP)
Note: NTP synchronizes the configuration
time with a network time server.
1. In the Network Time Protocol section,
select the Enable NTP check box.
2. Type the name of the server in the
Server box.
3. Save the Time policy.
4. Change the tab to an Agent view.
5. Right-click the agent or the group of
agents affected by the policy change, and
then select Refresh Agent from the
pop-up menu.
Important: To ensure that the agent
starts to use NTP time immediately, you
must refresh the agent. If you do not
refresh the agent, NTP time does not
take effect until the agent sends a
heartbeat to SiteProtector. If you cannot
save this policy and refresh the agent
immediately, set the time as described in
the Changing the date and time
procedure before you save the policy.
44
Enterprise Scanner: User Guide
Update Settings policy
Use the Update Settings policy on the SiteProtector Console to configure how the
agent automatically locates, downloads, and installs available updates.
Asset policies for Enterprise Scanner
Asset policies apply to groups of assets and describe the security policy for those
assets.
Asset policy descriptions for Enterprise Scanner
Asset policies apply to both discovery scans and assessment scans depending on
the policy.
Scope of scanning
The following table identifies which asset policies apply to discovery scans, which
apply to assessment scans, and which apply to both:
Table 6. Asset policies
Policy
Discovery
Assessment
Assessment
No
Yes
Assessment Credentials
Yes
Yes
Discovery
Yes
No
Network Locations
Yes
Yes
Network Services
No
Yes
Scan Control
Yes
Yes
Scan Exclusion
No
Yes
Scan Window
Yes
Yes
Contents of an asset policy
The general contents of an asset policy include:
v Information about how to run discovery scans, assessment scans, or both types
of scans against the group
v The IP addresses to scan for discovery scans
v The checks to run, and other assessment parameters (for assessment scans
v
v
v
v
v
The days to run scans and during which hours to run them
Refreshed information from scans about the assets in a group
The assets in the group, if any, that you do not want to scan
The list of accounts and log on credentials to use for assets in a group
The service names associated with TCP and UDP ports
Policy inheritance with asset policies
The following rules describe policy inheritance for agent policies:
v You can define only one Network Locations policy, to be used for all agents and
assets, at the Site level in your group structure.
Chapter 3. Enterprise Scanner policies
45
v A Discovery policy applies to only the group where you define it.
v The remaining policies are inheritable. A subgroup inherits a policy from the
first group higher than itself in the group structure that has a defined policy.
In the SiteProtector Console, you select a group in the left pane and the applicable
policies are displayed in the right pane in a Policy tab.
Discovery policy
Use the Discovery policy on the SiteProtector Console to define parameters used to
perform discovery on a portion of a network.
In a discovery task, a range of IP addresses is scanned to locate active network
interfaces, and the type of device associated with each active network interface is
determined through OS identification.
Scope
The Discovery policy applies to background discovery scans. An ad hoc scan reads
this policy and uses its settings to initialize the ad hoc discovery scan. You can
change the settings in the ad hoc scan without changing the background policy.
Policy contents
Each Discovery policy defines the following information:
v A range of IP addresses to be scanned (specified as a combination of
dotted-decimal IP addresses and address ranges, and subnetworks specified in
CIDR notation).
v Whether to ping each IP address before scanning to exclude unreachable hosts
from the scan.
v Whether newly discovered assets should be added to the associated group.
v Whether previously known assets that do not already belong to the associated
group should be added to the group.
46
Enterprise Scanner: User Guide
Defining assets to discover
Use the Discovery policy on the SiteProtector Console to define the parameters
used to perform a discovery scan on a portion of a network.
Before you begin
Before it can perform OS fingerprinting on an asset, your agent must find one
open and one closed port. To find an open and a closed port, the agent scans ports
1–1023 and any other ports specified in the applicable Network Services policy.
About this task
In a discovery task, a range of IP addresses is scanned to locate active network
interfaces, and the type of device associated with each active network interface is
determined through OS identification.
Procedure
1. From the SiteProtector Console, create a tab to display asset policies.
2. In the navigation pane, select a group, and then open the Discovery policy for
that group.
3. Type the IP addresses (in dotted-decimal or CIDR notation) of the assets to
discover in the IP range(s) to scan box as in the following examples:
v Type an IP address, and then press ENTER.
v Type a range of IP addresses, and then press ENTER.
Example: 172.1.1.100-172.1.1.200
v Type a combination of both choices above, and then press ENTER.
Note: A red box appears around the IP range(s) to scan box until the data is
validated.
4. If you want to ping each IP address before scanning to exclude unreachable
hosts from the scan, select the Ping hosts in this range, before scanning, to
exclude unreachable hosts check box.
5. If you want to add newly discovered assets to the group where you have
defined the scan, rather than to the Ungrouped Assets group, select the Add
newly discovered assets to group check box.
6. If you want to add previously known assets that are already defined in other
groups to the scan group, select the Add previously known assets to group
check box.
Chapter 3. Enterprise Scanner policies
47
Assessment policy
Use the Assessment policy on the SiteProtector Console to define the checks to run
for assessment scans.
The Assessment policy contains the following tabs:
v Checks (display checks by groups, display information about checks, select
checks with filters)
v Common Settings
Scope
The Assessment policy applies only to assessment scans that run in the
background. Ad hoc scans read this policy and use its settings to initialize the ad
hoc Assessment policy. You can change the ad hoc version of the policy without
changing the saved background version.
Displaying information about assessment checks
Use the Checks tab in the Assessment policy on the SiteProtector Console to choose
how much information to display about each assessment check in the Assessment
policy.
Procedure
1. From the SiteProtector Console, create a tab to display asset policies.
2. In the navigation pane, select a group, and then open the Assessment policy for
that group.
3. Choose an option:
48
If you want to...
Then...
Add a single column
Right-click a column and then select the
column to add from the pop-up menu.
Note: The column appears at the far right.
Remove a single column
Right-click a column and then select the
column to remove.
Note: The column is removed.
Add multiple columns
Click Column to display icon, and then
select the check box for each column to add.
Remove multiple columns
Click Column to display icon, and then
clear the check box for each column to
remove.
Enterprise Scanner: User Guide
Displaying assessment checks by groups
Use the Checks tab in the Assessment policy on the SiteProtector Console to group
checks by any combination of columns that you have chosen to display. For
example, you might want to see checks by category, then by severity within that
category.
About this task
The current grouping selections are displayed just above the column headers of the
checks.
v Assessment checks
v If no groups are selected, the following message is displayed on the screen:
Right click on the column header to group by that column.
v If groups are selected, the group names are displayed on in the screen as in the
following example:
Procedure
1. From the SiteProtector Console, create a tab to display asset policies.
2. In the navigation pane, select a group, and then open the Assessment policy for
that group.
3. Click the Checks tab.
4. Choose an option:
If you want to...
Then...
Clear groupings
Choose an option:
v Right-click any column header, and then
select Clear Groupings from the pop-up
menu.
v Click Clear Groupings.
Create groupings interactively
1. Right-click a column heading, and then
select Group By from the pop-up menu.
2. Repeat the previous step until you have
created the groupings that you want.
Create groupings from a selection list
1. Click the Group By icon.
The Group by Columns window
appears.
2. Select a column to group by in the All
Columns list, and then click Add.
The column moves to the Group by these
Columns list.
3. Repeat the previous step for each column
that you want to group by.
4. If you want to remove items from the
list, select an item in the Group by these
Columns list, and then click Remove.
The item and any items below it move to
the All Columns list.
5. Click OK.
Chapter 3. Enterprise Scanner policies
49
Selecting assessment checks with filters
Use the Checks tab in the Assessment policy on the SiteProtector Console to
provide filtering values on a selected list of assessment checks.
About this task
The following rules apply to using regular expressions:
v The match occurs against all columns in the table, whether or not the column is
displayed.
v If you use more than one regular expression, every regular expression must
match for a check to be selected.
Procedure
1. From the SiteProtector Console, create a tab to display asset policies.
2. In the navigation pane, select a group, and then open the Assessment policy for
that group.
3. Click the Checks tab.
4. Select the Filter check box, and then click Filter.
5. To filter with a regular expression, type one or more regular expressions on
separate lines in the Regular Expression box.
Tip: For example, use http.* to match the value in any column that starts with
http; or use .*http.* to match the value in any column that contains http.
6. To filter by one or more of the remaining filter types, select the values to filter
by in the filtering boxes.
Tip: You can select ranges of filtering values by holding down the SHIFT key
and random filtering values by holding down the CTRL key.
7. Click OK.
50
Enterprise Scanner: User Guide
Configuring common assessment settings
Use the Common Settings tab in the Assessment policy on the SiteProtector
Console to choose settings that define additional scanning behavior for the checks
you have selected to run in an assessment scan.
Procedure
1. From the SiteProtector Console, create a tab to display asset policies.
2. In the navigation pane, select a group, and then open the Assessment policy
for that group.
3. Click the Common Settings tab.
4. Type the URL or file location for the assessment check Help documentation in
the Help HTML Prefix box:
v The IBM ISS Web site location of the latest assessment check
documentation.
v The file location of a locally stored version of the documentation.
Note: If you do not have access to the Internet, but you want to view Help
for checks in the Assessment policy, you must copy the files to your hard
drive. See Getting vulnerability help for a SiteProtector Console without
Internet access for details.
5. If you want to run the checks that are enabled by default, including checks
added in an X-Press Update (XPU), select a policy in the Compliance Policies
section.
6. Configure options for service discovery in the Service Discovery section:
Option
Description
Discover and report TCP services
Reports active TCP services for which the
Service Scan flag is enabled in the Network
Services policy.
Discover and report UDP services
Reports active UDP services for which the
Service Scan flag is enabled in the Network
Services policy.
7. Configure options for assessment port ranges in the Assessment Port Ranges
section:
Option
Description
Ports to scan with generic TCP checks
The set of TCP ports to scan with generic
TCP checks. You can specify ports using any
of the following methods:
v Type a port or range of ports.
v Click Well known and select ports from
the list.
v Select All.
Note: A generic TCP check is one whose
target type is tcp.
Chapter 3. Enterprise Scanner policies
51
Option
Description
Ports to scan with generic UDP checks
The set of UDP ports to scan with generic
UDP checks. You can specify ports using any
of the following methods:
v Type a port or range of ports.
v Click Well known and select ports from
the list.
v Select All.
Note: A generic UDP check is one whose
target type is udp.
8. Configure options for using OS information in the Use of OS Information
section:
Option
Description
Dynamically determine OS if SiteProtector
information is older than
The maximum age (in minutes) of usable OS
information in SiteProtector.
If the OS information for an asset is older
than the time specified, Enterprise Scanner
reassesses OSID when it runs an assessment
scan.
Default: 120
For unverified OS’s:
Specify which checks to run if the OS is
uncertain.
v Run all checks (lowest performance): If
Enterprise Scanner is uncertain about the
OS of the asset, it runs all assessment
checks.
v Run all checks that apply to general OS
(intermediate performance): If Enterprise
Scanner is uncertain about the OS of the
asset, it runs checks for all versions of an
operating system. (For example, if
Enterprise Scanner is uncertain about
which version a Windows operating
system is, it runs all the checks for all
versions of Win dows operating systems.)
v Run only checks that apply to specific
OS (Best performance): If Enterprise
Scanner is uncertain about the OS of the
asset, runs only the checks that apply to
the exact version of the operating system.
9. Configure options for application fingerprinting in the Use of Application
Fingerprinting section:
52
Enterprise Scanner: User Guide
Option
Description
Do not perform application fingerprinting
Does not try to specifically identify which
applications are communicating over which
ports, and runs the checks as selected in the
Assessment policy.
This option does not identify applications
communicating over non-standard ports.
(Checks are run against standard ports as
defined in the Network Services policy.)
Fingerprint applications and run checks
that apply to application protocol (e.g.,
http)
Identifies applications communicating over
specific ports, and then runs checks that
apply to the protocol in use.
This option identifies applications
communicating over non-standard ports.
Fingerprint applications and run checks
that apply to specific application (e.g.,
apache)
Identifies applications communicating over
specific ports, and then runs checks that
apply only to the application identified.
This option identifies applications
communicating over non-standard ports.
10. The settings in the Account Verification section apply only if an Assessment
Credentials policy is available for the group being scanned.
Option
Description
Verify account access level before using
v If disabled, Enterprise Scanner assumes
that whatever is specified in the
Assessment Credentials policy is accurate.
v If enabled, Enterprise Scanner tries to
confirm that the access level specified in
the Assessment Credentials policy is
correct.
Important: You should enable the Check
local group membership to verify access
level if you enable account verification.
Access domain controllers to verify access
level
v If disabled, Enterprise Scanner does not
communicate with a Domain Controller in
the process of verifying access levels.
v If enabled, Enterprise Scanner tries to
communicate with a Domain Controller in
the process of verifying access levels.
Check local group membership to verify
access level
v If disabled, Enterprise Scanner does not
try to confirm the access level of the
account during assessment by checking
which local groups the asset belong to.
v If enabled, Enterprise Scanner tries to
confirm the access level of the account
during assessment by checking which
local groups the asset belong to.
11. Configure the options for locking out accounts in the Account Lockout
Control section:
Chapter 3. Enterprise Scanner policies
53
Option
Description
Allowed account lockout
Select a type of lockout:
v No lockout allowed: Enterprise Scanner
avoids running password guessing checks
if account lockout is enabled on the target
host, or if its status cannot be determined.
v Temporary lockout allowed: Enterprise
Scanner runs password guessing checks
only if the account lockout duration is less
than or equal to the value specified in the
Maximum Allowable Lockout Duration
option later in this section.
v Permanent lockout allowed:Enterprise
Scanner runs password guessing checks
even if the account lockout duration is set
to run infinitely.
Longest allowed temporary lockout
Specifies the maximum time (in minutes)
that accounts are allowed to be locked out
by password guessing checks.
This value applies only if Temporary
Lockout Allowed is enabled. When
temporary lockout is allowed, password
guessing checks are run only against assets
whose lockout policy disables locked out
accounts for no more than the maximum
allowed lockout time.
54
Enterprise Scanner: User Guide
Assessment Credentials policy
Use the Assessment Credentials policy on the SiteProtector Console to define
authentication credentials for your assets.
The appliance uses authentication credentials to access accounts during assessment
scans. Enterprise Scanner uses all instances of the credentials that are defined for
the group when it scans assets in the group. You can define different instances of
this policy for different groups, which makes it possible to supply different log on
credentials to scan different parts of the network.
Important: The Assessment Credentials policy currently works only with assets
that run Windows operating systems.
Scope
The Assessment Credentials policy applies to all types of scans.
Defining assessment credentials for a policy
Use the Assessment Credentials policy on the SiteProtector Console to define
authentication credentials for your assets.
About this task
The appliance uses authentication credentials to access accounts during assessment
scans. Enterprise Scanner uses all instances of the credentials that are defined for
the group when it scans assets in the group. You can define different instances of
this policy for different groups, which makes it possible to supply different log on
credentials to scan different parts of the network.
Important: The Assessment Credentials policy currently works only with assets
that run Windows operating systems.
Procedure
1. From the SiteProtector Console, create a tab to display asset policies.
2. In the navigation pane, select a group, and then open the Assessment
Credentials policy for that group.
3. In the Assessment Credentials policy, click Add, and then provide the
following account information:
Option
Description
Username
The user identification for an account.
Password
The password to use with the user name to
log into an account.
Account Type: Windows Local
Indicates that the user account is defined
locally on a single Windows device. The
account is used to attempt to log in to a
single Windows device.
When you choose this option, you must
provide a Windows host name in the
Domain/Host box.
Chapter 3. Enterprise Scanner policies
55
Option
Description
Account Type: Windows
Domain/Workgroup
Indicates that the user account is defined in
a Windows Domain or Workgroup. The
account is used to attempt to log in to all
Windows devices within the domain or
workgroup.
When you choose this option, you must
provide the Windows Domain or Workgroup
name in the Domain/Host box.
Account Type: Windows Active Directory
Indicates that the user account is defined in
a Windows Active Directory Domain. The
account is used to attempt to log in to all
Windows devices within the Active
Directory domain.
When you choose this option, you must
provide the Active Directory Domain name
in the Domain/Host box.
Account Type: SSH Local
Indicates that the user account is defined
locally on a single Unix device that allows
SSH logons. The account is used to attempt
login to a single Unix device.
When you choose this option, you must
provide an IP address in the Domain/Host
box.
Account Type: SSH Domain
Indicates that the user account is defined for
Unix devices that allow SSH logons. In this
context, ″Domain″ loosely refers to a set of
devices, rather than to a specific type of
domain. The account is used to attempt to
log in to all SSH devices covered by the
policy.
When you choose this option, you should
supply a descriptive name in the
Domain/Host box. This is for
documentation purposes only; it is not used
by Enterprise Scanner.
Domain/Host
Applies to one of the following domains or
hosts:
v For Windows accounts, the domain or
host name to which the account applies.
v For SSH Local accounts, the IP address of
the device to which the account applies.
v For SSH Domain accounts, any text.
Account Level
Applies to one of the following accounts:
v Administrator
v User
v Guest
Important: To avoid locking an account, do not add the account more than
once.
56
Enterprise Scanner: User Guide
Scan Control policy
Use the Scan Control policy on the SiteProtector Console to define the duration of
scanning cycles and to assign user-defined perspectives to scans.
Background scanning is based on scanning cycles. Scanning cycles define how
frequently you want to rerun scans for a group.
Note: Background scans run during open scan windows that you define in the
Scan Window policy.
Important: This policy initiates background scanning, so you should configure it
after you have configured the other policies required for background scanning.
Scope
The Scan Control policy applies to background discovery and background
assessment scans. This policy does not affect ad hoc scans. Consequently, the
behavior for ad hoc scans is different:
v An ad hoc discovery scan runs only on the group where you define the scan.
v An ad hoc assessment scan applies to the group where you define the scan and
to all the subgroups. This is different from background scans in that background
scanning behavior is determined by which Scan Control policy applies to each
subgroup.
What is perspective?
When you scan a group of assets, you anticipate and interpret results based on the
location of your scanner relative to the location of the assets. Scanning a group of
assets from inside a firewall, for example, would produce different results from
scanning that same group of assets from outside the firewall. With Enterprise
Scanner, you use perspective to identify scanners by their location on the network,
such as inside or outside the firewall, and then you configure scans based on the
perspective from which you want to scan your assets. You define perspectives in
the Network Locations policy.
Chapter 3. Enterprise Scanner policies
57
Defining scanning cycles and assigning perspectives to scans
Use the Scan Control policy on the SiteProtector Console to define the duration of
scanning cycles and to assign user-defined perspectives to scans.
Procedure
1. From the SiteProtector Console, create a tab to display asset policies.
2. In the navigation pane, select a group, and then open the Scan Control policy
for that group.
3. Select the Enable background discovery/assessment scanning of this group
check box, for the type(s) of background scanning you want to define, in the
Background Discovery and Background Assessment sections.
4. Configure background scanning for each type of scan:
Option
Description
Job name
The name you want displayed for the
scanning job in the Command Jobs window.
Note: This name identifies the scan when it
runs, so choose a meaningful name.
Cycle start date
The date on which you want the scan cycle
to start.
Note: Future scans are created in
SiteProtector at midnight at the beginning of
the next refresh cycle.
Cycle duration
The length (up to three digits) of the cycle as
in one of the following units:
v Hours (for Enterprise Scanner version 2.1
agents or later only)
v Days
v Weeks
v Months
Current cycle start date
The beginning date of the current scan cycle.
(Display only.)
Next cycle start date
The beginning date of the next scan cycle.
(Display only.)
Use Discovery’s start date/duration and
wait for discovery scan to complete before
scheduling assessment scan
Delays the start of the assessment scan until
the discovery scan has finished to ensure
that the discovery scan has identified all
discoverable assets before the assessment
scan begins.
Note: This check box applies to assessments
scans only.
5. If you want to scan from a user-defined perspective, select a perspective from
the Perform background scans from this perspective (Network location) box.
Tip: If you have not yet defined the perspective, click the Configure the
referenced list icon to open the Network Locations policy and define a new
perspective.
58
Enterprise Scanner: User Guide
Scan Window policy
Use the Scan Window policy on the SiteProtector Console to define hours of
allowed scanning for discovery scans (scan windows), assessment scans (scan
windows), and the time zone in which you want the scanning to occur, which is
typically the time zone of the assets.
By default, scanning is allowed at any time. If you want to limit scanning, be sure
to define scan windows.
Scope
The Scan Window policy applies to background discovery and assessment scans.
For an ad hoc scan, you can choose whether to run the scan only during the
windows defined in this policy or to run the scan without restriction.
By default, all scan windows are open, so that scanning is allowed at any time.
When you open a Scan Window policy, however, the default changes; and all scan
windows are closed. If you modify a Scan Window policy, be sure to define scan
windows for discovery and for assessment scans.
Important: If you start a scan when there are no scan windows, the job appears in
the Command Jobs window in the idle state; but it will not run until you define
scan windows.
Important consideration for multiple agents
If you have multiple agents, you should stagger your scan windows so that the
discovery scan can finish before the assessment scan begins. If a discovery scan
adds assets to a group while an assessment scan is running, there is no guarantee
that those assets will be included in the assessment scan.
Chapter 3. Enterprise Scanner policies
59
Defining when scanning is allowed
Use the Scan Window policy on the SiteProtector Console to define the days and
hours that scanning is allowed.
About this task
The Scan Window policy applies to background discovery and assessment scans.
For an ad hoc scan, you can choose whether to run the scan only during the
windows defined in this policy or to run the scan without restriction.
Procedure
1. From the SiteProtector Console, create a tab to display asset policies.
2. In the navigation pane, select a group, and then open the Scan Window policy
for that group.
3. Click the Discovery Windows tab or the Assessment Windows tab.
Note: Scanning hours are selected; non-scanning hours are not selected.
4. Select the periods of allowed scanning using the following methods:
If you want to...
Then...
Allow scanning during specific hours
Click and drag your cursor over the hours
in each day to allow scanning.
Allow scanning at any time
Click Fill All.
Remove all defined scans periods
Click Clear All.
Important: To enable background scanning, you must define at least one scan
window.
5. Click the Time Zone tab.
6. Select the time zone during which you want the scan windows to run from the
Time zone for scan windows list.
Note: Typically, you would choose the same time zone as the time zone of the
assets in the group. For example, you might be in the Eastern time zone but
scanning assets in the Pacific time zone. You would define your scanning hours
according to the considerations of the Pacific time zone and set your appliance
to the Pacific time zone.
60
Enterprise Scanner: User Guide
Scan Exclusion policy
Use the Scan Exclusion policy on the SiteProtector Console to define specific ports
or assets to exclude from a scan of a group of assets.
Each Scan Exclusion policy defines the following information for the asset group
associated with the policy (and the groups that inherit from it):
v A list of ports against which no assessment checks will be run. (No checks run
against these ports on any host in the group. This applies to both TCP and UDP
ports.)
v A list of IP addresses not to scan.
Important: You should define the Scan Exclusion policy at a high level in your
group structure and allow the lower groups to inherit from it. If needed, you can
then override the policy at lower groups.
Scope
The Scan Exclusion policy applies to ad hoc and background assessment scans. It
does not apply to discovery scans.
Defining ports or assets to exclude from a scan
Use the Scan Exclusion policy on the SiteProtector Console to define specific ports
or assets to exclude from a scan of a group of assets.
Procedure
1. From the SiteProtector Console, create a tab to display asset policies.
2. In the navigation pane, select a group, and then open the Scan Exclusion policy
for that group.
3. Choose an option:
If you want to...
Then...
Exclude ports
Use a combination of typing the ports to
exclude and choosing the ports:
v Type the ports to exclude, separated by
commas, in the Excluded Ports box.
v Click Well Known Ports, and then select
the ports to exclude.
Exclude assets
Type the IP addresses (in dotted-decimal or
CIDR notation) of the hosts to exclude in the
Excluded Hosts box:
v Type an IP address, and then press ENTER.
v Type a range of IP addresses, and then
press ENTER.
Example: 172.1.1.100-172.1.1.200
v Type a combination of both choices above,
and then press ENTER.
Note: A red box is displayed around the
Excluded Hosts box until the data is
validated.
Chapter 3. Enterprise Scanner policies
61
Network Services policy
Use the Network Services policy on the SiteProtector Console to define service
names associated with TCP and UDP ports.
You can modify some properties of a default service in the policy, and you can add
your own customized services to the policy.
Scope
The Network Services policy applies to assessment scans that run as either
background or ad hoc scans.
Default settings
The IBM ISS X-Force defines the default Network Services policy and might
update the policy in an X-Press Update (XPU). The default policy applies to all
groups that do not override it. The service names defined in the policy are
referenced as target types in Enterprise Scanner check definitions. X-Force adds a
service name when a new check uses a service that was not previously defined in
the policy.
Policy inheritance
A Network Services policy defined in association with a group overrides the
default definitions only for those services explicitly referenced in the user-defined
policy. A user-defined Network Services policy includes only explicit overrides of
inherited service definitions, which ensures that all groups automatically inherit
XPU updates to the default Network Services policy.
Service definition
The network services policy includes the following information about each service:
v Service name
Service description
Port number
Protocol (TCP or UDP)
Whether some (or all) instances of the service operate over SSL on this port
within your network
v Whether to include the port in the service scan
v Whether you have customized a default service or created a custom service
v
v
v
v
62
Enterprise Scanner: User Guide
Configuring a Network Services policy
Use the Network Services policy on the SiteProtector Console to define service
names associated with TCP and UDP ports.
Procedure
1. From the SiteProtector Console, create a tab to display asset policies.
2. In the navigation pane, select a group, and then open the Network Services
policy for that group.
3. For default or customized services, choose an option:
If you want to...
Then...
Change the description of a service
Slowly click Description two times to switch
to edit mode, and then change the
description.
Allow each service to operate over SSL in
at least some part of your network
Select the May use SSL check box for that
service.
Allow service scans for this service over
any TCP and UDP ports specified in the
Assessment policy
Select the Service scan check box.
Note: You cannot change the Service name, Port, or Protocol of default
services. You cannot delete default services.
4. For customized services, choose an option:
If you want to...
Then...
Add a service
Click the Add icon.
Modify a service
Click the Modify icon.
Delete a service
Click the Delete icon.
Chapter 3. Enterprise Scanner policies
63
Ad Hoc Scan Control policy
Use the Ad Hoc Scan Control policy on the SiteProtector Console to define
Enterprise Scanner ad hoc scans for assessment and discovery.
Configuration options
For ad hoc scans you configure the following options:
v With the Ad Hoc Scan Control option, you determine whether to run
assessment or discovery scans, whether to run the scans only during available
scan windows, how to lower the impact on the network from scanning, and the
perspective to use.
v With the Assessment option, you select which checks to run for assessment
scans.
v With the Discovery option, you select which IP addresses to scan and how to
handle the hosts that you discover.
Running an ad hoc discovery scan with Enterprise Scanner
When you run an ad hoc discovery scan from the SiteProtector Console, you must
define the ranges of IP addresses to scan, including additional scanning control
parameters.
Procedure
1. In the SiteProtector navigation pane, create a tab with any view except for a
Policy view.
2. Expand the Site to see the group you want to scan.
3. Right-click the group to scan; if given a choice of Internet Scanner or
Enterprise Scanner, select Enterprise Scanner; and then select Scan from the
pop-up menu.
4. In the Ad Hoc Discovery section, select the Perform one-time discovery scan
of this group check box.
5. Type a Job name to identify the job when it appears in the Command Jobs
window.
6. If you want the scan to run only during your scheduled scanning windows,
select the Run only during open discovery windows check box.
7. Click Discovery in the left pane.
8. Type the range, or ranges, of IP addresses to scan in the IP range(s) to scan
box.
9. Type the IP addresses (in dotted-decimal or CIDR notation) of the assets to
exclude in the IP range(s) to scan box as in the following examples:
v Type an IP address, and then press ENTER.
v Type a range of IP addresses, and then press ENTER.
Example: 172.1.1.100-172.1.1.200
v Type a combination of both choices above, and then press ENTER.
Note: A red box appears around the IP range(s) to scan box until the data is
validated.
10. If you want to ping each IP address before scanning to exclude unreachable
hosts from the scan, select the Ping hosts in this range, before scanning, to
exclude unreachable hosts check box.
64
Enterprise Scanner: User Guide
11. If you want to add newly discovered assets to the group where you have
defined the scan, rather than to the Ungrouped Assets group, select the Add
newly discovered assets to group check box.
12. If you want to add previously known assets (that are not in the group) to the
group, select the Add previously known assets to group check box.
13. Click OK. The ad hoc discovery scan is displayed in the Command Jobs
window.
Running an ad hoc assessment scan with Enterprise Scanner
When you run an ad hoc assessment scan from the SiteProtector Console, you can
use the default settings, or choose the checks you want to run and other scanning
parameters.
Procedure
1. In the SiteProtector navigation pane, create a tab with any view except for a
Policy view.
2. Expand the Site to see the group you want to scan.
3. Right-click the group to scan; if given a choice of Internet Scanner or
Enterprise Scanner, select Enterprise Scanner; and then select Scan from the
pop-up menu.
4. In the Ad Hoc Discovery section, select the Perform one-time discovery scan
of this group check box.
5. Type a Job name to identify the job when it appears in the Command Jobs
window.
6. If you want the scan to run only during your scheduled scanning windows,
select the Run only during open discovery windows check box.
7. Click Assessment in the left pane.
8. Configure the policy the same way you would configure the background
Assessment policy.
9. Select Global in the Perform scans from this perspective (Network location)
list.
10. Click the Advanced Settings tab.
11. In the Assessment Throttling section, use the Bandwidth Throttling slider to
set the amount of bandwidth the scan should consume.
The Enterprise Scanner agent will monitor threads once the value becomes
greater than you specified.
To enable logging, add the following advanced parameter to the logging
parameters in SiteProtector: esm.portN.debug.logging where N is the port
number of the scan interface
The agent writes the log information to iss-esm-<port number of scan
interface>.log.
12. Use the remaining sliders to enable settings that prevent the scan from
overwhelming or flooding a slow network:
Option
Description
Connections per host
The maximum number of connections the
scan should make per host.
SMB Connections
The maximum number of SMB connections
the scan should make during a scan job.
Chapter 3. Enterprise Scanner policies
65
Option
Description
Half-Scan Connections
The maximum number of connections the
scan should use for opening and closing
ports.
13. Click the Debug Settings tab.
14. In the Packet Capture section, select Enabled and then set the filters for the
agent to use during the ad hoc assessment scan for network analysis.
Note: Packet capturing is not available for ad hoc background scanning.
The agent writes the capture results to
<filename>_<interface>_<timestamp>.cap located in /cache/log/esm/
PacketCapture. To view the results of the capture file:
a. Start Proventia Manager, and then click Support → System Support File.
b. Click Generate Support Data File.
c. Download the file to your computer, extract it, and then open the file in
any PCAP compatible software.
15. Click OK. The ad hoc assessment scan appears in the Command Jobs window.
66
Enterprise Scanner: User Guide
Chapter 4. Understanding scanning processes in
SiteProtector
This chapter explains the high-level processes behind ad hoc and background
scanning. It also explains how policy settings affect those processes.
Use the following strategies for managing vulnerabilities with Enterprise Scanner:
v Use background scanning for automated vulnerability management.
v Use ad hoc scanning as needed to handle exceptional cases.
Topics
“What is perspective?” on page 68
“Defining perspectives” on page 69
“Scan jobs and related terms” on page 71
“Types of tasks” on page 72
“Priorities for running tasks” on page 73
“Stages of a scanning process” on page 74
“Optimizing cycle duration, scan windows, and subtasks for Enterprise Scanner”
on page 76
© Copyright IBM Corp. 1997, 2009
67
What is perspective?
When you scan a group of assets, you anticipate and interpret results based on the
location of your agent relative to the location of the assets. Scanning a group of
assets from inside a firewall, for example, produces different results than scanning
the same group of assets from outside the firewall.
Perspective identifies network location
With Enterprise Scanner, you use perspective to define logical locations on your
network. When you add an agent to SiteProtector, you assign it to a perspective
that identifies the agent’s location on the network. When you configure a scan, you
choose the perspective from which you want to scan the IP addresses or the assets
in the group.
Default perspective
Enterprise Scanner contains one predefined perspective, Global. If you plan to scan
from just one location on your network, you may use the default perspective. Or,
you can create a user-defined perspective to use instead of the default.
Technical requirements
The network location that a perspective represents must meet the following
technical requirements:
v A perspective is a set of subnets from which you expect the same results from
scanning or monitoring your network regardless of where you connect the
agents within that set of subnets.
v Within that set of subnets, no network traffic is blocked and no network address
translation occurs.
Use for distributed scanning
Perspective makes it possible to easily distribute the workload among multiple
agents:
v If you have just one agent in a perspective, that agent performs all the scans that
run from that perspective.
v If you have two or more agents in a perspective, Enterprise Scanner
automatically balances the distribution of tasks among the agents in that
perspective.
Flexibility
Identifying agents by perspective instead of by a specific name or IP address
makes it easier to respond to changes in your scanning environment. If you add an
agent to a perspective, then that agent automatically shares the workload with the
other agents in that perspective. If you remove an agent from a perspective that
contains multiple agents, the remaining agents continue to run the scans assigned
to that perspective. In either case, no additional configuration is required, and
there is no interruption to your scanning cycles.
Use meaningful perspective names
The name you use for a perspective should reflect the implications of scanning
from that location. Using the example of setting up agents inside and outside a
68
Enterprise Scanner: User Guide
firewall, descriptive perspective names might be Atlanta-InsideFirewall and
Atlanta-OutsideFirewall.
Placing agents in the correct perspective
A perspective name has no meaning to Enterprise Scanner. You must make sure
that the agents you add to each perspective make logical sense placed there. If you
add an agent to a perspective that is not logical for that agent, Enterprise Scanner
cannot determine that you have made a mistake.
Defining perspectives
To use perspectives, you must define the perspective, assign at least one agent to
the perspective, and then associate the perspective with a group of assets to scan.
Perspectives in policies
The exact role of perspective depends on the policy where you define or select it.
The following table describes how to use perspective in different policies:
Table 7. Perspectives in policies
Policy
How to use
Applies to...
Network Locations policy
Define a perspective as a
network location
The entire Site
Network Locations policy
Assign an agent to a
perspective
A particular agent
Scan Control policy
Identify the perspective from The group, or groups, to
which you want to scan
scan with that policy
groups of assets
The following image illustrates the relationships between perspectives and policies
described in the table labeled Perspectives in policies:
Chapter 4. Understanding scanning processes in SiteProtector
69
Figure 1. Network locations and perspectives
To scan some asset groups from inside your firewall and others from within your
DMZ, follow these steps:
1. Set up two groups in SiteProtector:
v One group contains assets to scan from inside the firewall.
v One group contains assets to scan from the DMZ.
2. Define a perspective to identify the scanners at each place on your network.
3. Assign one or more scanners to each perspective.
4. Set up a scan control policy for each asset group and specify, in each policy, the
perspective from which scanning should occur.
70
Enterprise Scanner: User Guide
Scan jobs and related terms
To tune your system correctly, you must understand how scan jobs run and how
the options you define in policies affect jobs and subtasks.
Definitions
The following table describes the terms used by the Enterprise Scanner agent in
the scanning process:
Table 8. Terms related to scanning jobs
Term
Description
Criticality
A user-assigned setting that indicates the
relative importance of an asset to other
assets:
v Critical
v High
v Medium
v Unassigned (the default)
v Low
Scan job
SiteProtector schedules a scan job in the
Command Jobs window, either at the
beginning of a refresh cycle or when you
initiate an ad hoc scan. The scan job divides
the scan into subtasks and displays its
progress. Scans might not start processing as
soon as they are posted if they run only
within scan windows and no scan window
is open.
Task
A scan job is divided into tasks as described
in “Types of tasks” on page 72.
Subtask
The portion of a task assigned to an agent at
one time. A subtask includes the number of
IPs to discover or the number of assets to
scan based on settings in the Networking
policy for the agent that runs the scan. You
should change the following field names:
v Maximum IPs per Discovery Subtask
v Maximum Assets per Assessment Subtask
Assets with unassigned criticality
The criticality levels in the definition above are listed in order from highest to
lowest criticality. The Unassigned level is intentionally higher than the Low level for
the following reasons:
v The default criticality level for a newly discovered asset is Unassigned because
the criticality is unknown until you assign it another criticality level.
v Because you must specifically assign the Low level to an asset, Enterprise
Scanner places it below Unassigned assets because unassigned assets might be of
a higher criticality.
Chapter 4. Understanding scanning processes in SiteProtector
71
Scheduled and running scans
To make it easier to explain the scanning processes, scans are considered scheduled
when they are displayed in the Command Jobs window. Because jobs might not
start to scan immediately, they are considered scheduled until the job actually
starts to create tasks and run subtasks.
The importance of tasks and subtasks
Because a task assumes the criticality of the assets it contains, Enterprise Scanner
can assign priority factors to tasks based on asset criticality. Because tasks run in
units determined by subtask size, Enterprise Scanner can run subtasks that can run
to completion during an open scanning window.
Types of tasks
This topic describes the types of tasks in a scan and explains which apply to
discovery and which apply to assessment scans.
A scanning job is organized by tasks. Tasks manage other tasks or subtasks, or they
manage the subtasks that actually scan your network and assets. Several factors,
including whether the scan is for discovery or assessment influence, which types of
tasks a scan job contains.
Common management tasks
Every scan, whether for discovery or assessment, includes the following
management tasks:
Table 9. Common management tasks for discovery and assessment scans
Management task
Description
A job-level task
A task that appears once for each type of
scan. It is identified by the name given to
the scan.
One or more Parent-level tasks
A task that appears for each group and
subgroup affected by the scan. It is
identified by the following components:
v Parent
v Type_of_Scan, such as Ad Hoc Discovery
or Ad Hoc Assessment
v Name_of_Asset_Group
Base management tasks
For assessment scans, Enterprise Scanner uses a base task for each group in the
scan. The base task manages the scanning tasks for each criticality in a group. The
base task is identified as ″Base Assessment Scan for Group.″
72
Enterprise Scanner: User Guide
Tasks per type of scan
The following table explains the tasks needed for discovery and assessment scans:
Table 10. Tasks per type of scan
Scan type
Number of tasks
Discovery
1 job-level task
1 parent task
1 scanning task
Note: There is no way to prioritize the order
in which a discovery scan scans IP
addresses, therefore there is no reason to
divide the job into more than one scanning
task. The scanning task is divided into
subtasks, however, based on the maximum
number of IP addresses allowed per subtask.
Assessment
1 job-level task
1 parent task
1 base task for each group
1 scanning task for each asset criticality level
represented in each group
Priorities for running tasks
To determine the order for scanning your network, each task in a scan job is
assigned a priority.
The tasks for all jobs assigned to a perspective run in priority order as follows:
v Ad hoc scans run before background scans.
v Discovery scans run before assessment scans.
v Assessment scans run tasks in the order of the criticality of the assets in the task.
Criticality and assessment tasks
User-assigned criticality ratings indicate the relative importance of assets in a
group. A group can contain assets with different criticality ratings. When
Enterprise Scanner divides the job into tasks, it creates separate tasks for each
criticality level and assigns assets to the tasks with the corresponding criticality.
Consequently, the assets in an assessment task are of the same criticality, with the
following results:
v An assessment scan contains at least one task for each asset criticality
represented in each group.
v Asset criticality affects the priority of the task.
Example: If a scan job includes a group with one subgroup, and each group
contains assets with all levels of criticality, the job will run as at least ten tasks: one
task for each criticality in each group.
Chapter 4. Understanding scanning processes in SiteProtector
73
Task prioritization
The following table explains the reasons behind prioritization of scanning tasks:
Table 11. Reasons for task prioritization
Type of scan
Reason for prioritization
Ad hoc versus background
Ad hoc scans run at higher priority than
background scans because ad hoc scans fill
extraordinary scanning needs:
v Ad hoc scans help you identify major
changes to your network or assess your
assets against newly identified threats.
v Background scans are cyclical scans for
ongoing vulnerability management.
Discovery versus assessment
Assessment scans work only on already
discovered assets. Therefore, a discovery
task has a higher priority so that assets
maybe discovered before the assessment
scan runs.
Criticality of assets in assessment scans
To ensure the best protection for your most
critical assets, your agent scans tasks in
order of criticality from highest to lowest.
Stages of a scanning process
Many factors affect when and how scan jobs run. This topic provides a process
that identifies the stages of a scanning cycle and explains the factors to consider at
each stage.
Dynamic prioritization
Scanning jobs are prioritized at the task level so that a scan job does not have to
finish before another scan job with higher priority tasks can be processed. When an
agent completes a subtask, it processes the next subtask with the highest priority
next.
Example: A background scan might be running when you start an ad hoc scan.
You do not have to stop the background scan. The background scan continues until
it has processed its current subtask, then the ad hoc scan takes priority and starts
to run.
74
Enterprise Scanner: User Guide
The process for a scanning cycle
The following table describes the general process for a scanning cycle:
Table 12. The process of a scanning cycle
Stage
Description
1
Scanning jobs are displayed in the Command Jobs window as they are scheduled:
v A job for a background scan is scheduled at midnight on the first day of the
refresh cycle defined in the Scan Control policy for a group.
v A job for an ad hoc scan is scheduled when you initiate the scan.
2
A job is ready to run follows this order:
v For background scans or ad hoc scans that run in scan windows, the job runs as
soon as an open scan window is available.
v For ad hoc scans that can run any time, the job runs as soon as possible after
you initiate it.
3
When a job is scheduled, the agent divides it into tasks:
v The first task created for all scans is a management (parent) task that oversees
the scanning tasks.
v For discovery scans, there is one additional scanning task.
v
For assessment scans, additional scanning tasks are created based on the
priorities described in “Priorities for running tasks” on page 73.
4
When an agent is available to run the scan, the agent finds the task with the
highest priority. The agent then runs a subtask of that task. The subtask is equal to
the subtask size determined by the maximum number of IP addresses or of assets
defined for that agent in the Networking policy.
5
The remaining subtasks run as follows:
v If you have only one agent, the same agent takes the next subtask.
v If you have more than one agent, the first available agent takes the next subtask.
6
Subtasks continue to run until you pause or cancel the scan, or until one of the
following occurs:
v For ad hoc scans, until all the assets have been scanned.
v For background scans, until all the assets have been scanned or until the
scanning cycle ends, whichever occurs first.
Chapter 4. Understanding scanning processes in SiteProtector
75
Optimizing cycle duration, scan windows, and subtasks for Enterprise
Scanner
Background scanning jobs persist throughout a scan cycle, but are active only
during open scan windows.
The efficiency of background scanning relies on carefully calibrating the following
items:
v Quantity of IP addresses and assets to scan
v The duration of the scan cycle
v The size of subtasks and the size of the smallest scan window
Size of scan windows
You define scan windows for each day in multiples of hours. The shortest possible
scan window is one hour; the longest is 24 hours.
Calibration considerations
If a subtask does not finish during a scanning window, one of the following events
occur:
v If another scan window is available during the same scan cycle, the subtask
starts from the beginning and runs again in its entirety. The second subtask
scans every asset in the subtask, including any that the previous subtask already
scanned.
Important: Subtasks that carry over to another scan window during the same
scan cycle always start from the beginning, repeating any scanning that occurred
in that subtask before the scan window closed.
v If no more scan windows are available during the scan cycle, the unscanned
assets in the subtask, and any unscanned assets in the rest of the job, remain
unscanned.
Important: New scan cycles always start from the beginning of the command
job even if any tasks or subtasks from the previous scan cycle did not finish.
Discovery cycle duration
The duration of your discovery scan cycle will depend on how frequently you add
or change the assets on your network.
v If your network changes frequently, you should scan more frequently.
v If your network is fairly stable, you can scan less frequently.
Assessment cycle duration
The duration of your assessment scan cycle will depend on how important it is for
you to scan every asset during every scan cycle. Consider the following issues:
v If you define a scan cycle for a group that contains critical assets only, it is
probably important to your network security that you scan each asset during the
cycle.
v If you define a scan cycle for a group that contains assets with different levels of
criticality, you might be less concerned if the scan cycle does not scan all the
assets with lower criticality.
76
Enterprise Scanner: User Guide
Achieving the right balance
If a refresh cycle is too short, you cannot scan all of your assets during the cycle. If
a scan window is too short to finish subtasks, you can rerun subtasks that were
nearly finished. To achieve the right balance, take the following actions:
v Try to size your subtasks according to the size of your smallest scan window.
v Try to size the quantity of IP addresses and assets to scan according to the
duration of your refresh cycle.
If you still are unable to finish your scanning in the time allowed, you can reduce
the number of checks you run, or you can add another Enterprise Scanner to the
perspective.
Chapter 4. Understanding scanning processes in SiteProtector
77
78
Enterprise Scanner: User Guide
Chapter 5. Background scanning in SiteProtector
This chapter describes the minimum requirements and options for defining
background scanning in the SiteProtector Console. Because ad hoc scans use some
of the background policies, this chapter also describes the impact of those shared
policies on ad hoc scans. In addition, checklists in this chapter guide you through
the process of setting up background scans.
Topics
“Determining when background scans run” on page 80
“How policies apply to ad hoc and background scans” on page 81
“Background scanning checklists for Enterprise Scanner” on page 83
“Enabling background scanning” on page 84
“Defining when scanning is allowed” on page 85
“Defining ports or assets to exclude from a scan” on page 87
“Defining network services” on page 88
“Defining assessment credentials for a policy” on page 89
© Copyright IBM Corp. 1997, 2009
79
Determining when background scans run
This topic describes two important concepts for background scanning: scanning
refresh cycles and scanning windows. These concepts control when background
scans run.
Scanning refresh cycle
A scanning refresh cycle is the maximum duration (in days, weeks, or months) of a
background scan. You define separate scanning refresh cycles for discovery and for
assessment scans in a Scan Control policy. The cycles apply to the scans for all
groups that the policy controls.
Important points about refresh cycles
Refresh cycles affect scanning as follows:
v Refresh cycles apply to background discovery and background assessment scans;
they do not apply to ad hoc scans.
v At the end of a refresh cycle, any background scanning jobs that are still running
are stopped. Their status appears as expired.
v The refresh cycle begins at midnight on the first day of the cycle, and the jobs
for that cycle are scheduled in the Command Jobs window at that time.
Scanning windows
Scanning windows are the hours that are available for scanning each day of the
week. A scan that runs only during scanning windows pauses when a window
closes, and then resumes when the window reopens.
Scans affected by scanning windows
Scanning windows affect scans as follows:
v Scanning windows apply to all background scans for the groups controlled by a
particular Scan Windows policy.
v When you run an ad hoc scan, you choose whether to confine the scan to the
user-defined scanning windows.
Cycle and window dependencies
Background scanning for a group requires a refresh cycle and one or more
scanning windows. Although you define refresh cycles and scanning windows in
different policies, they work together to define the extent of your background
scans. The cycle defines the duration, or elapsed time, of the scan; the scanning
windows define the days and hours when scanning may occur during the cycle.
Flexibility
Because you define refresh cycles and scanning windows in different policies, you
can use the policy inheritance properties to more precisely define your scans. For
example, you can define refresh cycles and apply the Scan Control policy to a
group with several subgroups. For each subgroup, you can define different scan
windows to control the amount of scanning on different parts of your network at
different times. For more about policy inheritance, see Chapter 3, “Enterprise
Scanner policies,” on page 29.
80
Enterprise Scanner: User Guide
How policies apply to ad hoc and background scans
Agent policies apply to both ad hoc and background scans, while asset policies
apply to both ad hoc and background scans; however, you can reconfigure some
asset policies when you define an ad hoc scan.
The following table describes ad hoc and background scans:
Table 13. Descriptions of ad hoc and background scans
Type of scan
Description
Ad hoc
One-time scans that you start manually for
discovery scans, assessment scans, or both,
typically in response to network changes or
newly discovered threats.
Note: You can run an ad hoc scan
immediately, or you can run it only during
the scan windows defined for the group in
the Scan Window policy.
Background
Automatic, recurring scans that run on
separately definable refresh cycles for
discovery and for assessment scanning.
Asset policies and ad hoc scans
The following table defines configuration options for policies used by ad hoc scans:
Table 14. Asset policies for ad hoc and background scans
Background asset policies that...
Include the following policies:
You can reconfigure scans
v Assessment
v Discovery
Differ for ad hoc scans
Scan Control
Contain the same settings for ad hoc scans
as for background scans
v Assessment Credentials
v Network Services
v Scan Exclusion
Note: This policy applies only to
assessment scans, but it applies to both ad
hoc and background scans.
v Scan Window (optional)
Changing assessment and discovery policies
An ad hoc scan initially uses any settings currently configured in the Assessment
and Discovery policies for the group. You can run the scan with those settings, or
you can modify the settings. The following table describes the advantages of each
method:
Table 15. Changes to Assessment and Discovery policies
If you...
Then you...
Use the configured settings
Can easily start an ad hoc scan that
duplicates a configured background scan.
Chapter 5. Background scanning in SiteProtector
81
Table 15. Changes to Assessment and Discovery policies (continued)
If you...
Then you...
Modify the configured settings
Cannot save the policy. Therefore, the
changes apply to only that ad hoc scan and
do not affect configured background scans.
Scan Control policy
You cannot configure refresh cycles or scan windows for ad hoc scans because they
are not included in the ad hoc Scan Control policy. The following table describes
how refresh cycles and scan windows from the background Scan Control policy
affect ad hoc scans:
Table 16. Ad Hoc Scan Control policy
Option from Background Scan Control
policy
Impact on ad hoc scans
Scan Windows
You can choose whether to run an ad hoc
scan only during the open scan windows
defined for background scans and to pause
when the windows close.
Refresh cycles
Ad hoc scans are never bound by the refresh
cycles that apply to background scans. Ad
hoc scans continue to scan until they finish
or until you stop them. Ad hoc scans pause
when scan windows close if you select the
option to run the scans only during open
scan windows.
Scan window and refresh cycle examples
Assume the following points:
v Your scanning refresh cycle is every two days.
v Scanning windows run from 8:00 P.M. until midnight and from 1:00 A.M. until
4:00 A.M. each day.
Table 17. Examples of scan windows and refresh cycles with ad hoc scans
At 11:00 P.M. on the...
82
You start an ad hoc scan that takes three
hours. The scan runs from 11:00 P.M. until
midnight, and then the scan runs from...
First night of a refresh cycle
1:00 A.M. until 3:00 A.M. on the second day
of the same refresh cycle.
Second night of a refresh cycle
the scan runs from 1:00 A.M. until 3:00 A.M.
on the first day of the next refresh cycle.
Enterprise Scanner: User Guide
Background scanning checklists for Enterprise Scanner
This topic describes the minimum requirements to set up background discovery
and background assessment scanning. You should also use any other policies that
help you configure your scanning environment to meet your security goals.
Checklist for background discovery scanning
The following table describes the requirements for setting up background
discovery scanning for a group:
1. Apply a Discovery policy to the group.
2. Apply a Scan Window policy to the group (either directly or through
inheritance from a group that is at a higher level in the group structure).
3. Optional: Apply an Assessment Credentials policy to the group for better OS
identification.
4. Apply a Scan Control policy to the group (either directly or through inheritance
from a group that is at a higher level in the group structure).
Checklist for background assessment scanning
The following table describes the requirements for setting up background
assessment scanning for a group:
1. Verify that the group already contains assets, possibly from a recent discovery
scan.
2. Apply an Assessment policy to the group (either directly or through inheritance
from a group that is at a higher level in the group structure).
3. Apply a Scan Window policy to the group (either directly or through
inheritance from a group that is at a higher level in the group structure).
4. Optional: Apply an Assessment Credentials policy to the group for better OS
identification.
5. Apply a Scan Control policy to the group (either directly or through inheritance
from a group that is at a higher level in the group structure).
Chapter 5. Background scanning in SiteProtector
83
Enabling background scanning
Use the Scan Control policy on the SiteProtector Console to define the duration of
refresh cycles and to assign user-defined perspectives to scans.
About this task
Background scanning is based on scanning refresh cycles. Refresh cycles define
how frequently you want to rerun scans for a group.
Note: Background scans run during open scan windows that you define in the
Scan Window policy.
Important: This policy initiates background scanning, therefore you configure it
after you have configured the other policies required for background scanning.
The Scan Control policy applies to background discovery and background
assessment scans. This policy does not affect ad hoc scans. Consequently, the
behavior for ad hoc scans is different:
v An ad hoc discovery scan runs only on the group where you define the scan.
v An ad hoc assessment scan applies to the group where you define the scan and
to all the subgroups. This is different from background scans in that background
scanning behavior is determined by which Scan Control policy applies to each
subgroup.
Procedure
1. From the SiteProtector Console, create a tab to display asset policies.
2. In the navigation pane, select a group, and then open the Scan Control policy
for that group.
3. Select the Enable background discovery/assessment scanning of this group
check box, for the type(s) of background scanning you want to define, in the
Background Discovery and Background Assessment sections.
4. Configure background scanning for each type of scan:
Option
Description
Job name
The name you want displayed for the
scanning job in the Command Jobs window.
Note: This name identifies the scan when it
runs, therefore choose a meaningful name.
Cycle start date
The date on which you want the scan cycle
to start.
Note: Future scans are created in
SiteProtector at midnight at the beginning of
the next refresh cycle.
Cycle duration
The length (up to three digits) of the cycle as
in one of the following units:
v Hours (for use with Enterprise Scanner 2.1
agents or later only)
v Days
v Weeks
v Months
Current cycle start date
84
Enterprise Scanner: User Guide
The beginning date of the current scan cycle.
(Display only.)
Option
Description
Next cycle start date
The beginning date of the next scan cycle.
(Display only.)
Use Discovery’s start date/duration and
wait for discovery scan to complete before
scheduling assessment scan
Delays the start of the assessment scan until
the discovery scan has finished to ensure
that the discovery scan has identified all
discoverable assets before the assessment
scan begins.
Note: This check box applies to assessments
scans only.
5. If you want to scan from a user-defined perspective, select a perspective from
the Perform background scans from this perspective (Network location) box.
Tip: If you have not yet defined the perspective, click the Configure the
referenced list icon to open the Network Locations policy and define a new
perspective.
Defining when scanning is allowed
Use the Scan Window policy on the SiteProtector Console to define the days and
hours that scanning is allowed.
About this task
The Scan Window policy applies to background discovery and assessment scans.
For an ad hoc scan, you can choose whether to run the scan only during the
windows defined in this policy or to run the scan without restriction.
By default, all scan windows are open, therefore scanning is allowed at any time.
When you open a Scan Window policy, however, the default changes; and all scan
windows are closed. If you modify a Scan Window policy, be sure to define scan
windows for discovery and for assessment scans.
Important: If you start a scan when there are no scan windows, the job appears in
the Command Jobs window in the Idle state. The job will not run until you define
scan windows.
The following rules apply to scan windows:
v You define the scan windows for discovery and assessment policies separately,
on separate tabs of the policy. Important: Be sure to define a scan window for
both types of scans if you intend to run both as background scans.
v You can define scan windows only in increments of hours, therefore the
minimum scan window is one hour.
v You can define as many scan windows as you want on any day of the week.
If you have multiple agents, you should stagger your scan windows so that the
discovery scan finishes before the assessment scan begins. If a discovery scan adds
assets to a group while an assessment scan is running, there is no guarantee that
those assets will be included in the assessment scan.
Chapter 5. Background scanning in SiteProtector
85
Procedure
1. From the SiteProtector Console, create a tab to display asset policies.
2. In the navigation pane, select a group, and then open the Scan Window policy
for that group.
3. Click the Discovery Windows tab or the Assessment Windows tab.
Note: Scanning hours are selected; non-scanning hours are not selected.
4. Select the periods of allowed scanning using the following methods:
If you want to...
Then...
Allow scanning during specific hours
Click and drag your cursor over the hours
in each day to allow scanning.
Allow scanning at any time
Click Fill All.
Remove all defined scans periods
Click Clear All.
Important: To enable background scanning, you must define at least one scan
window.
5. Click the Time Zone tab.
6. Select the time zone during which you want the scan windows to run from the
Time zone for scan windows list.
Tip: Typically, you would choose the same time zone as the time zone of the
assets in the group. For example, you might be in the Eastern time zone but
scanning assets in the Pacific time zone. You would define your scanning hours
according to the considerations of the Pacific time zone and set your appliance
to the Pacific time zone.
86
Enterprise Scanner: User Guide
Defining ports or assets to exclude from a scan
Use the Scan Exclusion policy on the SiteProtector Console to define the specific
ports, specific assets, or both, that you want to exclude from a scan of a group of
assets.
Procedure
1. From the SiteProtector Console, create a tab to display asset policies.
2. In the navigation pane, select a group, and then open the Scan Exclusion policy
for that group.
3. Choose an option:
If you want to...
Then...
Exclude ports
Use a combination of typing the ports to
exclude and choosing the ports:
v Type the ports to exclude, separated by
commas, in the Excluded Ports box.
v Click Well Known Ports, and then select
the ports to exclude.
Exclude assets
Type the IP addresses (in dotted-decimal or
CIDR notation) of the hosts to exclude in the
Excluded Hosts box:
v Type an IP address, and then press ENTER.
v Type a range of IP addresses, and then
press ENTER.
Example: 172.1.1.100-172.1.1.200
v Type a series of individual IP addresses, a
range of addresses separated by commas,
or both, and then press ENTER.
Note: A red box is displayed around the
Excluded Hosts box until the data is
validated.
Chapter 5. Background scanning in SiteProtector
87
Defining network services
Use the Network Services policy on the SiteProtector Console to define service
names associated with TCP and UDP ports.
Procedure
1. From the SiteProtector Console, create a tab to display asset policies.
2. In the navigation pane, select a group, and then open the Network Services
policy for that group.
3. For default or customized services, choose an option:
If you want to...
Then...
Disable a service definition
Clear the Enabled check box for that service.
Change the description of a service
Slowly click Description two times to switch
to edit mode, and then change the
description.
Allow each service to operate over SSL in
at least some part of your network
Select the May use SSL check box for that
service.
Allow service scans for this service over
any TCP and UDP ports specified in the
Assessment policy
Select the Service scan check box.
Note: You cannot change the Service name, Port, or Protocol of default
services. You cannot delete default services.
4. For customized services, choose an option:
88
If you want to...
Then...
Add a service
Click the Add icon.
Modify a service
Click the Modify icon.
Delete a service
Click the Delete icon.
Enterprise Scanner: User Guide
Defining assessment credentials for a policy
Use the Assessment Credentials policy on the SiteProtector Console to define
authentication credentials for your assets.
About this task
The appliance uses authentication credentials to access accounts during assessment
scans. Enterprise Scanner uses all instances of the credentials that are defined for
the group when it scans assets in the group. You can define different instances of
this policy for different groups, which makes it possible to supply different log on
credentials to scan different parts of the network.
Important: The Assessment Credentials policy currently works only with assets
that run Windows operating systems.
Procedure
1. From the SiteProtector Console, create a tab to display asset policies.
2. In the navigation pane, select a group, and then open the Assessment
Credentials policy for that group.
3. In the Assessment Credentials policy, click Add, and then provide the
following account information:
Option
Description
Username
The user identification for an account.
Password
The password to use with the user name to
log into an account.
Account Type: Windows Local
Indicates that the user account is defined
locally on a single Windows device. The
account is used to attempt to log in to a
single Windows device.
When you choose this option, you must
provide a Windows host name in the
Domain/Host box.
Account Type: Windows
Domain/Workgroup
Indicates that the user account is defined in
a Windows Domain or Workgroup. The
account is used to attempt to log in to all
Windows devices within the domain or
workgroup.
When you choose this option, you must
provide the Windows Domain or Workgroup
name in the Domain/Host box.
Account Type: Windows Active Directory
Indicates that the user account is defined in
a Windows Active Directory Domain. The
account is used to attempt to log in to all
Windows devices within the Active
Directory domain.
When you choose this option, you must
provide the Active Directory Domain name
in the Domain/Host box.
Chapter 5. Background scanning in SiteProtector
89
Option
Account Type: SSH Local
Description
Indicates that the user account is defined
locally on a single Unix device that allows
SSH logons. The account is used to attempt
login to a single Unix device.
When you choose this option, you must
provide an IP address in the Domain/Host
box.
Account Type: SSH Domain
Indicates that the user account is defined for
Unix devices that allow SSH logons. In this
context, ″Domain″ loosely refers to a set of
devices, rather than to a specific type of
domain. The account is used to attempt to
log in to all SSH devices covered by the
policy.
When you choose this option, you should
supply a descriptive name in the
Domain/Host box. This is for
documentation purposes only; it is not used
by Enterprise Scanner.
Domain/Host
Applies to one of the following domains or
hosts:
v For Windows accounts, the domain or
host name to which the account applies.
v For SSH Local accounts, the IP address of
the device to which the account applies.
v For SSH Domain accounts, any text.
Account Level
Applies to one of the following accounts:
v Administrator
v User
v Guest
Important: To avoid inadvertently locking an account, do not add the account
more than once.
90
Enterprise Scanner: User Guide
Chapter 6. Monitoring scans in SiteProtector
This chapter uses terms that define scanning parameters for scan jobs with
SiteProtector.
Topics
“Viewing your scan jobs” on page 92
“Viewing discovery job results” on page 92
“Viewing assessment job results” on page 93
© Copyright IBM Corp. 1997, 2009
91
Viewing your scan jobs
Use the Command Jobs window on the SiteProtector Console to view the status of
a job, watch its progress, and view its final results.
Procedure
1. In the SiteProtector Console, right-click the Site or a group, and then select
Properties from the pop-up menu.
2. Select Command Jobs from the options in the left pane. The command jobs are
displayed for the selected group.
Tip: If you enable viewing of subgroups (View → Include Subgroups), jobs for
any subgroups of the Site or group you select are also displayed in the list.
Viewing discovery job results
You can open a running scan job in the Command Jobs window to see a snapshot
of the currently available information. Some information is not available until the
job has finished running. To see the latest information about a running job, you
must close and then reopen the window.
Procedure
1. In the SiteProtector Console, right-click the Site or a group, and then select
Properties from the pop-up menu.
2. Select Command Jobs from the options in the left pane. The command jobs are
displayed for the selected group.
3. Right-click a job in the Command Jobs window, and then select Open from the
pop-up menu.
4. Click Results in the left pane. The Remote Scan window is displayed on the
screen as in the example of the illustration above.
92
Enterprise Scanner: User Guide
Viewing assessment job results
You can open a scanning job in the Command Jobs window as the job runs to see
additional information it. Some information is not available until the job has
finished running.
About this task
The Remote Scan window presents a snapshot of the information available when
you open the job. To refresh the information, you must close and then reopen the
job.
Assessment subtask explanation
Assessment scans include a task for each group, and then for each asset criticality
in each group. The example in the illustration above shows the subtasks for an ad
hoc assessment scan. The following components provide details about the subtask:
Table 18. Subtask description
This part of the description...
Describes...
Finished Assessment X
For each group, a scan has at least one
subtask for each asset criticality represented
in the group, where X is a consecutive
number assigned to those subtasks.
on Scan_Group_Name for hosts with
The name of the group for which the
subtask was run.
criticality_level criticality.
The criticality of the assets in the subtask,
for example, High or Unassigned.
Procedure
1. In the SiteProtector Console, right-click the Site or a group, and then select
Properties from the pop-up menu.
2. Select Command Jobs from the options in the left pane. The command jobs are
displayed for the selected group.
3. Right-click a job in the Command Jobs window, and then select Open from the
pop-up menu.
4. Click Results in the left pane.
Chapter 6. Monitoring scans in SiteProtector
93
94
Enterprise Scanner: User Guide
Chapter 7. Managing scans in SiteProtector
This chapter explains different ways to stop and restart scans. It also describes
expected scanning behaviors and provides tips for troubleshooting your scan jobs.
Topics
“Stopping and restarting scan jobs” on page 96
“Suspending and enabling all background scans” on page 97
“Minimum scanning requirements” on page 98
“Scanning behaviors for ad hoc scans” on page 99
© Copyright IBM Corp. 1997, 2009
95
Stopping and restarting scan jobs
You can stop a scan job by pausing or canceling the job. You can also rerun a scan
job. These actions apply to current scan jobs, not to scans to be scheduled in the
future.
Impact of stopping scan jobs
The following table describes the impact of stopping scans with the Pause and
Cancel options:
Table 19. Impact of stopping scans
Command
Impact
Pause
Affects scanning for the remainder of the
refresh cycle.
Important: Use the Pause option only when
a job is in the processing status. Pausing a
job in any other status can cause problems if
you try to resume or rerun the scan.
Cancel
Affects scanning for that day:
v No more subtasks are processed that day.
v Processing continues on subtasks the next
day that a scan window is open.
Impact of restarting scan jobs
The following table describes the impact of restarting scans with the Rerun and
Resume options:
Table 20. Impact of restarting scans
96
Command
Impact
Rerun
The entire scan job runs again.
Note: A job that you rerun is not confined
by the refresh cycle; therefore, it never goes
into an expired state.
Resume
If you resume the scan job, only incomplete
subtasks run again, but they run in their
entirety.
Note: If large subtasks must run again, the
progress shown on your progress bar will
drop back accordingly.
Enterprise Scanner: User Guide
Suspending and enabling all background scans
You can suspend and enable all scanning for the groups controlled by a Scan
Control policy. This applies to current and future background scans.
About this task
If you stop background scans by disabling all scanning in the Scan Control policy,
all current scans go into the idle status, and no more scans can be scheduled until
you enable scanning again.
The following occurs when you enable scanning again:
Table 21. Effects of enabling scanning during the same or a later refresh cycle
If you...
Then...
Enable scanning during the same refresh
cycle
The job runs again in its entirety, or until the
end of the refresh cycle.
Enable scanning during a later refresh cycle
v The job from the previous scan goes into
the expired state at the end of its refresh
cycle.
v If there are interim refresh cycles, no jobs
are started.
v A job is scheduled for the refresh cycle
during which you enabled scanning.
Procedure
1. In the SiteProtector Console, create a tab to display asset policies.
2. In the navigation pane, select a group, and then open the Scan Control policy
for that group.
3. Choose an option:
If you want to...
Then...
Suspend scans
Clear the Enable background
discovery/assessment scanning of this
group check box in the Background
Discovery and Background Assessment
sections, for the type(s) of background
scanning you want to suspend.
Enable scans
Select the Enable background
discovery/assessment scanning of this
group check box in the Background
Discovery and Background Assessment
sections, for the type(s) of background
scanning you want to define.
Chapter 7. Managing scans in SiteProtector
97
Minimum scanning requirements
This topic provides a brief review and summary of the minimum requirements for
initiating different types of scans.
Registration and authentication
Your agent must be registered and authenticated with SiteProtector. You can check
the status in Proventia Manager in Configuration → Authentication.
Steps to initiate a scan
The following table provides a brief reminder of the steps needed to initiate a scan:
Table 22. Minimum scanning requirements
Type of scan
Steps to initiate
Ad hoc scans for either discovery or
assessment
You start an ad hoc scan to begin
immediately. To run an ad hoc scan only
during periods of allowed scanning:
1. Define periods of allowed scanning for
discovery and assessment scans in the
Scan Window policy only if you do not
want to use the default.
2. Start an ad hoc scan to run during open
discovery or open assessment windows.
Background discovery scan
To run a background discovery scan:
1. Define a Discovery policy.
2. Define periods of allowed scanning in
the Scan Window policy only if you do
not want to use the default.
3. In the Scan Control policy, enable
discovery scans, define a refresh cycle,
and set a current (or earlier) start date.
Background assessment scans
To run a background assessment scan:
1. Define an Assessment policy.
2. Define periods of allowed scanning in
the Scan Window policy only if you do
not want to use the default.
3. In the Scan Control policy, enable
assessment scans, define a refresh cycle,
and set a current (or earlier) start date.
98
Enterprise Scanner: User Guide
Scanning behaviors for ad hoc scans
Different aspects of scanning behaviors are discussed in detail in different parts of
this guide. This topic answers some of the most common questions about how jobs
are scheduled and how they are displayed in the Command Jobs window.
Inheritance
Expect the following regarding inheritance:
v There is a one-to-one correspondence between Scan Control policies and
assessment jobs. A single assessment scan covers the group that has the Scan
Control policy and any groups that inherit the policy.
v Discovery policies are not inherited. (See “Stopping and restarting scan jobs” on
page 96.)
Priority
Expect the following regarding scan priority:
v Scans run in the following priority order:
– Ad hoc discovery scans
– Ad hoc assessment scans (in order of asset criticality)
– Background discovery scans
– Background assessment scans (in order of asset criticality)
v A change in processing order does not have to wait for an entire job to finish;
scan priorities can cause changes in job processing order that take effect at the
completion of the work assigned to a subtask.
Troubleshooting scanning behaviors for ad hoc scans
This section answers questions you might have about what to expect from ad hoc
scans in different circumstances.
Expect the following with ad hoc scans:
Q: When is an ad hoc scan scheduled in the Command Jobs window?
A: As soon as you start it if it runs without regard to scanning windows. If it runs
only during scanning windows, it is not scheduled until a scanning window is
open.
Q: When does an ad hoc scan start to run?
A: An ad hoc scan starts to run immediately after it appears in the Command Jobs
window as follows: You set up the scan to run at any time, not only during scan
windows. You set up the scan to run during scan windows, and a scan window is
open. You set up the scan to run during scan windows, but you have not defined a
Scan Window policy for the group. (This is not the same as having defined a Scan
Window policy without defining scan windows. See the next question.)
Q: Why would an ad hoc scan not start to process?
A: You did not enable a discovery or an assessment scan when you started the ad
hoc scan.
Chapter 7. Managing scans in SiteProtector
99
A: You did not define at least one IP address for a discovery scan.
A: If you set up the scan to run during scan windows, but you have not defined
Scan Windows for the group you are scanning. This could happen if you define a
Scan Window policy for the group, but you have not defined any Scan Windows in
the policy. The default for an unmodified Scan Window policy is that scan
windows are open at all times. If you open and save the Scan Window policy for
any other reason; however, the windows change to closed. You must define scan
windows for both discovery and assessment scans if you modify the Scan Window
policy.
Q: Why does it take so long for an ad hoc scan to start?
A: An ad hoc scan might not start right away if both of these conditions are true:
v You initiate the scan during a closed scan window.
v You configure the scan to run only during scan windows.
Q: Why did my ad hoc scan continue to run even when the refresh cycle started
again?
A: Refresh cycles do not apply to ad hoc scans, therefore ad hoc scans continue to
run even if a new refresh cycle starts.
Q: When I rerun an ad hoc discovery scan, why does the assessment scan for the
group sometimes run again, but not always?
A: The answer depends on how you set up your Scan Control policy:
If you set up the Scan Control policy so
that the assessment scan...
Then, the assessment scan...
Waits for the discovery scan to finish before
the assessment scan begins
Also runs again when you rerun the
discovery scan.
Does not wait for the discovery scan to
finish before the assessment scan begins
Does not run again when you rerun the
discovery scan.
Expected scanning behaviors for background scans
This section answers question you might have about what to expect from
background scans in different circumstances.
Expect the following with background scans:
Q: I changed a Scan Control policy when there were additional scan windows
available in the refresh cycle, but the scans did not start until the new refresh
cycle.
A: Scans will run only once during a refresh cycle. If you change the Scan Control
policy after the scans have run for that cycle, the changes do not go into effect
until the beginning of the next refresh cycle.
Q: When is a background scan scheduled in the Command Jobs window?
A: Background scans are displayed in the Command Jobs window in the following
ways:
100
Enterprise Scanner: User Guide
v If the agent to run the background scan is available, the scan job appears in the
Command Jobs window at midnight on the day of a new refresh cycle.
v If the agent to run the background scan is not available, the scan job appears in
the Command Jobs window when the agent is available, provided it is on a
valid start date.
Q: How many states does a background job go through?
A: A background job starts out in the Pending state. It quickly goes to one of these
states:
v The job moves to the Idle state if a scan window is not open.
v The job moves to the Processing state when a scan window is open, if an agent
is available, and if it is the highest priority job.
Q: Why does a scanning job expire?
A: If a scan job has not finished when a new refresh cycle begins, the job goes into
the Expired state shortly after midnight on the day of the new refresh cycle.
Q: Why did my background scan continue to run even when the refresh cycle
started again?
A: If you rerun a background scan, it is not confined by refresh cycles. It runs like
an ad hoc scan in that respect.
Q: Why did my background scanning job stop when I ran an ad hoc scan on the
same group?
A: According to the rules for prioritization, an ad hoc scan has priority of a
background scan. If you run an ad hoc scan on a group where background scan is
running, the background scan pauses after it completes its current subtask and
then gives priority to the ad hoc scan. The background scan will resume after the
ad hoc scan has finished.
Q: When I run background scans for discovery and assessment, why does the
assessment scan run as a single job sometimes but as separate jobs for each group
at other times?
A: The answer depends on how you set up your policies. Assume the following
conditions:
v You have defined a Scan Control policy for a parent group, and that policy is
inherited by the subgroups.
v You have defined separate Discovery policies for each subgroup.
In that case, you can expect the following:
If you set up the Scan Control policy so
that the assessment scan...
Waits for the discovery scan to finish before
the assessment scan begins
Then, the assessment scan...
Starts as a separate job for each subgroup as
soon as the discovery scan finishes. This
allows assessment scanning to begin for a
subgroup whose discovery scan has finished
without having to wait for the discovery
scans of all groups to finish.
Chapter 7. Managing scans in SiteProtector
101
If you set up the Scan Control policy so
that the assessment scan...
Does not wait for the discovery scan to
finish before the assessment scan begins
102
Enterprise Scanner: User Guide
Then, the assessment scan...
Starts as a single job. There is no need to
create a separate assessment job for each
subgroup because the assessment scan does
not have to wait for the discovery job to
finish before it can start.
Chapter 8. Interpreting scan results in SiteProtector
This chapter explains how to use OS identification and the views in SiteProtector
to analyze the results of vulnerability assessment scans by the Enterprise Scanner
agent.
Topics
“OS identification (OSID) certainty” on page 104
“How OSID is updated in Enterprise Scanner” on page 105
“Setting up a Summary view for vulnerability management” on page 106
“Summary page for vulnerability management” on page 106
“Running reports in the SiteProtector Console” on page 117
“Types of assessment reports” on page 117
“Viewing an Enterprise Scanner report in the SiteProtector Console” on page 119
© Copyright IBM Corp. 1997, 2009
103
OS identification (OSID) certainty
Enterprise Scanner determines whether to run a check against a host based on the
certainty of the OS information in SiteProtector and the setting in the Assessment
policy that specifies what action to take if the OSID is uncertain.
What determines certainty?
The certainty with which a source provides a completely accurate OSID is based
on the quality of the information available to the source. For example, OSID from
an IBM Proventia Desktop agent is always considered certain because the agent
has full access to information about the asset. OSID from an Enterprise Scanner
scan is considered certain if the scanner had authenticated access but uncertain if it
did not.
Sources of OSID
Information that identifies the operating system of an asset can come from
different sources, such as agents or even directly from users. Each source has
access to slightly different data, which makes some sources relatively more certain
than others. SiteProtector receives OSID information in any of the following
methods:
v Entered manually by a user
v Imported from Active Directory
v Reported by Proventia Desktop agent
v Discovered by Enterprise Scanner
v Discovered by Internet Scanner
Certainty of OSID sources
The following table describes the relative certainty of the sources of OSID data:
Table 23. Relative certainty of the sources of OSID data
Source of OSID Data
Relative Certainty
User
Certain
Active Directory
Desktop agent
Enterprise Scanner
Certain if obtained with authenticated access
Uncertain if not obtained with authenticated
access
Internet Scanner
Uncertain
Comparing Enterprise Scanner and Internet Scanner results
If you want to make a valid comparison of OSID results between Enterprise
Scanner and Internet Scanner, you must make sure that you provide equivalent
login access to both products.
104
Enterprise Scanner: User Guide
How OSID is updated in Enterprise Scanner
Enterprise Scanner uses OSID information or reassesses the OSID during an
assessment scan, and it explains when SiteProtector updates OSID that it has for an
asset.
Conditions for reassessing OSID
The following conditions must be met for Enterprise Scanner to use the OSID
information from SiteProtector:
v The operating system name, the certainty of the OSID, and a timestamp must all
be available.
v The OSID information is user supplied, or the age of the of the information is no
more than the age that is defined in the Assessment Policy.
v The OSID matches a valid operating system.
Exception
The concept of certainty was introduced with SiteProtector SP6, so that it is
undefined for the assets already in SiteProtector. Because OSID is undefined,
SiteProtector accepts the first reported OSID for each asset, regardless of its source.
Rules for updating OSID
SiteProtector updates OSID for existing assets based on the following rules:
Table 24. Rules for updating OSID
Certainty of Old Data
Certainty of New Data
Updated?
Certain
Certain
Yes
Certain
Uncertain
No, unless both sources of
OSID are Enterprise Scanner
Uncertain
Certain
Yes
Uncertain
Uncertain
Yes, unless the old OSID is
from Enterprise Scanner and
the new OSID is from
Internet Scanner
About user-supplied OSIDs
SiteProtector updates user-supplied OSIDs only in the following cases:
v A local Desktop agent reports an OSID to SiteProtector for that asset.
v A scan from Enterprise Scanner with authenticated access reports an OSID for
that asset.
Important: If you enter user-supplied OSIDs and do not meet either of the
preceding conditions, you are responsible for maintaining any changes to the
OSID.
Chapter 8. Interpreting scan results in SiteProtector
105
Setting up a Summary view for vulnerability management
Use the Summary view in the SiteProtector Console to dynamically display
information about scanning and vulnerability management.
Procedure
1. From the Tools menu, select Options.
2. Select Summary in the left column.
3. If you always want the portlets to reflect the summary information for the
current group selected in the navigation pane, select the Update Content on
Group Change check box. If you do not select this check box, you must refresh
the view to update information after you select a different group.
4. Choose an option:
If you want to...
Then...
Add portlets to a view
Double-click the portlet in the Available list.
Remove portlets from a view
Double-click the portlet in the Displayed
list.
Change the order in which portlets are
displayed
Select a portlet in the Displayed list, and
then click Up or Down.
Summary page for vulnerability management
Use the Summary page in the Summary view on the SiteProtector Console to view
information about scanning and vulnerability management.
Vulnerability management options
The following table describes the information portal options especially related to
vulnerability management:
Table 25. Vulnerability management options
Portal
Description
Scan Progress
Shows the number of scan jobs currently in
progress and provides a link to the
Properties tab for the Site where you can
view all command jobs for the Site.
Ticket Status
Displays the total number of critical, high,
medium, and low priority tickets by status,
including the following statuses:
v New
v Open
v In Progress
v Closed
v Verified closed
v Pending System Verification
v System Verified Still Vulnerable
v System Verified Success
106
Enterprise Scanner: User Guide
Table 25. Vulnerability management options (continued)
Portal
Description
Vulnerability History by Day
Displays a bar graph that illustrates the
following information:
v Total number of high priority
vulnerabilities by day
v Total number of medium priority
vulnerabilities by day
v Total number of low priority
vulnerabilities by day
v Total number of all vulnerabilities by day
Vulnerability History by Month
Displays a bar graph that illustrates the
following information:
v Total number of high priority
vulnerabilities for the month
v Total number of medium priority
vulnerabilities for the month
v Total number of low priority
vulnerabilities for the month
v Total number of all vulnerabilities for the
month
Vulnerability History by Week
Displays a bar graph that illustrates the
following information:
v Total number of high priority
vulnerabilities by week
v Total number of medium priority
vulnerabilities by week
v Total number of low priority
vulnerabilities by week
v Total number of all vulnerabilities by
week
Vulnerability Summary by OS
Lists vulnerabilities for each operating
system and provides the following
information for each operating system:
v Total number of high priority
vulnerabilities on the operating system
v Total number of medium priority
vulnerabilities on the operating system
v Total number of low priority
vulnerabilities on the operating system
v Total number of vulnerabilities in all
categories on the operating system
Chapter 8. Interpreting scan results in SiteProtector
107
Viewing vulnerabilities in the SiteProtector Console using Enterprise
Scanner
Use the Analysis view in the SiteProtector Console to view event data collected by
the Enterprise Scanner agent.
About vulnerability assessment
Vulnerability assessment data identifies weaknesses in your network and hosts.
Intruders or employees can exploit these weaknesses and attack or compromise
your network and hosts. This type of data is collected by the Enterprise Scanner.
Creating custom views
If the default views do not suit your needs, you can create custom analysis views.
When you customize a view, you can add or remove columns or filters, change the
values of filters, or rearrange the columns.
Exceptions are automatically cleared from the Console, but they remain in the Site
database.
Viewing vulnerabilities by asset in Enterprise Scanner
Use this view to identify weaknesses in your network and hosts. Intruders or
employees can exploit these weaknesses and attack or compromise your network
and hosts.
Benefits
You can sort your view to identify your most important to least important assets
and develop a risk profile to protect your assets. You can view vulnerabilities by
asset to display for the time period you specify:
v IP address of the affected hosts
v Priority level of the vulnerabilities
v Objects affected
v Most recent event
Important: You should set the time period of this view to the time of your most
recent scan. Otherwise, the view displays vulnerability events for previous scans.
108
Enterprise Scanner: User Guide
Field descriptions
The following table describes the fields and descriptions for this vulnerability
view:
Table 26. Vulnerability view by asset
Field
Description
Target IP
Use this filter to monitor a specific IP
address that you suspect is the target of
attacks. The IP address can be either internal
or external. This information is typically
modified for you as you explore event data.
v If you do not know the exact IP address,
use the options in the Operation list to
request IP addresses when you do not the
exact one to request.
v If you only know the IP address you do
not want to see, you can exclude one or
more IP addresses.
Target DNS Name
Use the filter to display the Domain Name
Service (DNS) name of a host that you
suspect is the target of events. You can also
use this filter to suppress hosts that you do
not want to monitor.
Status
Use the Status filter differently for events
and vulnerabilities.
v Events: The Status column indicates the
impact of the event.
v Vulnerabilities: The Status column
indicates whether the vulnerability was
found.
# High
Security issues that allow either or both of
the following situations:
v Immediate remote or local access
v Immediate execution of code or
commands with unauthorized privileges
# Medium
Security issues that have the potential of
granting access or allowing code execution
through complex or lengthy exploit
procedures, or low risk issues applied to
major Internet components.
# Low
Security issues that deny service or provide
non-system information that can be used to
formulate structured attacks on a target, but
not directly gain unauthorized access.
Chapter 8. Interpreting scan results in SiteProtector
109
Table 26. Vulnerability view by asset (continued)
110
Field
Description
Tag Count
Use to filter events according to the Tag
Count column in the analysis views.
SiteProtector calculates the Tag Count
according to the number of events that are
associated with each row of data in the
analysis view. This filter filters data only in
views that contain the Tag Count column.
For example, if you apply this filter to the
Attacker view, SiteProtector can apply the
criteria you specified to each IP address (or
row) that appears in the view.
Object Count
Use to filter events according to the Object
Count column in the analysis views.
SiteProtector calculates the Object Count
according to the number of objects that are
associated with each row of data in the
analysis view. This filter filters data only in
views that contain the Object Count column.
For example, if you apply this filter to the
Attacker view, SiteProtector can apply the
criteria you specified to each IP address (or
row) that appears in the view.
Latest Event
Use to filter events according to the Latest
Event column in the analysis views.
SiteProtector calculates the time and date for
the latest event on each row of data in an
analysis view. This filter filters data only in
views that contain the Latest Event column.
For example, if you apply this filter to the
Event Name view, SiteProtector can apply
criteria you specified to each Tag name (or
row) that appears in the view.
Enterprise Scanner: User Guide
Viewing vulnerabilities by detail in Enterprise Scanner
Use this view to examine event details that might be related to an attack or that
you consider unusual.
Benefits
You analyze event data to evaluate the effectiveness of your system’s security and
to investigate any suspicious activity. You can analyze event data in several ways:
v Examine events affecting specific agents, hosts, and groups.
v Review high-level results and trends for groups or Sites. This method is
particularly useful for printing or distributing reports about network and host
security status.
Field descriptions
The following table describes the fields and descriptions for this vulnerability
view:
Table 27. Vulnerability view by detail
Field
Description
Tag Name
Use this filter to display or suppress events
that match one or more tag names. You can
filter on tag names from the Site database or
on user-defined tag names.
Severity
Use this filter to display events according to
their level of severity.
Status
You use the Status filter differently for
events and vulnerabilities.
v Events: The Status column indicates the
impact of the event.
v Vulnerabilities: The Status column
indicates whether the vulnerability was
found.
Use this filter to show only the statuses that
interest you.
Target IP
Use this filter to monitor a specific IP
address that you suspect is the target of
attacks. The IP address can be either internal
or external. This information is typically
modified for you as you explore event data.
v If you do not know the exact IP address,
use the options in the Operation list to
request IP addresses when you do not the
exact one to request.
v If you only know the IP address you do
not want to see, you can exclude one or
more IP addresses.
Agent DNS Name
Use this filter to display or suppress events
that match the Domain Name Service (DNS)
name of a host computer where a agent is
installed.
Chapter 8. Interpreting scan results in SiteProtector
111
Table 27. Vulnerability view by detail (continued)
Field
Description
Object Type
Use this filter to analyze a specific type of
object that you suspect is the target of
attacks.
Object Name
Use this filter to see events involving a
specific object according to the object’s
name.
User Name
Use this filter to display or suppress events
that match the User Name, if any, associated
with an event.
CVSS Base
Use this filter to assess qualities intrinsic to a
vulnerability, such as:
v Is the vulnerability exploitable remotely
(as opposed to only locally).
v How complex must an attack be to exploit
the vulnerability?
v Is authentication required to attack?
v Does the vulnerability expose confidential
data?
v Can attacking the vulnerability damage
the integrity of the system?
v Does it impact availability of the system?
CVSS Temporal
Use this filter to assess characteristics that
evolve over the lifetime of the vulnerability.
v How complex (or how long will it take) to
exploit the vulnerability?
v How hard (or how long) will it take to
remediate the vulnerability?
v How certain is the existence of the
vulnerability?
112
CVSS Score
Use this filter to establish a measure of how
much concern a vulnerability warrants,
compared to other vulnerabilities, so that
efforts to remedy the vulnerability can be
prioritized.
Source Port
The port on which the vulnerability was
detected.
Enterprise Scanner: User Guide
Viewing vulnerabilities by object in Enterprise Scanner
Use this view to examine objects on your network or desktop computers that are a
source of vulnerabilities.
Benefits
You can analyze specific objects that are more affected by vulnerabilities, such as
ports or URLs. You can view an object by the type, name, events, or vulnerability
type.
Field descriptions
The following table describes the fields and descriptions for this vulnerability
view:
Table 28. Vulnerability view by object
Field
Description
Object Type
Use this filter to analyze a specific type of
object that you suspect is the target of
attacks.
Object Name
Use this filter to see events involving a
specific object according to the name of the
object.
Status
You use the Status filter differently for
events and vulnerabilities.
v Events: The Status column indicates the
impact of the event.
v Vulnerabilities: The Status column
indicates whether the vulnerability was
found.
# High
Security issues that allow either or both of
the following situations:
v Immediate remote or local access
v Immediate execution of code or
commands with unauthorized privileges
# Medium
Security issues that have the potential of
granting access or allowing code execution
through complex or lengthy exploit
procedures, or low risk issues applied to
major Internet components.
# Low
Security issues that deny service or provide
non-system information that can be used to
formulate structured attacks on a target, but
not directly gain unauthorized access.
Chapter 8. Interpreting scan results in SiteProtector
113
Table 28. Vulnerability view by object (continued)
Field
Description
Tag Count
Use to filter events according to the Tag
Count column in the analysis views.
SiteProtector calculates the Tag Count
according to the number of events that are
associated with each row of data in the
analysis view. This filters data only in views
that contain the Tag Count column. For
example, if you apply this filter to the
Attacker view, SiteProtector can apply the
criteria you specified to each IP address (or
row) that appears in the view.
Target Count
Use to filter by the count of target hosts.
Latest Event
Use to filter events according to the Latest
Event column in the analysis views.
SiteProtector calculates the time and date for
the latest event on each row of data in an
analysis view. This filter filters data only in
views that contain the Latest Event column.
For example, if you apply this filter to the
Event Name view, SiteProtector can apply
the criteria you specified to each Tag name
(or row) that appears in the view.
Viewing vulnerabilities by target operating system in
Enterprise Scanner
Use this view to identify weaknesses that affect specific operating systems.
Benefits
You can analyze specific operating systems that are more affected by
vulnerabilities.
Field descriptions
The following table describes the fields and descriptions for this vulnerability
view:
Table 29. Vulnerability view by target operating system
114
Field
Description
Target OS
Use this filter to monitor a specific operating
system that you suspect is the target of
attacks.
Tag Name
Use this filter to display or suppress events
that match one or more tag names. You can
filter on tag names from the Site database or
on user-defined tag names.
Severity
Use this filter to display events according to
their level of severity.
Enterprise Scanner: User Guide
Table 29. Vulnerability view by target operating system (continued)
Field
Description
Status
Use the Status filter differently for events
and vulnerabilities.
v Events: The Status column indicates the
impact of the event.
v Vulnerabilities: The Status column
indicates whether the vulnerability was
found.
Event Count
Use this filter to determine which events
occur most frequently.
Target Count
Use to filter by the count of target hosts.
Latest Event
Use to filter events according to the Latest
Event column in the analysis views.
SiteProtector calculates the time and date for
the latest event on each row of data in an
analysis view. This filter filters data only in
views that contain the Latest Event column.
For example, if you apply this filter to the
Event Name view, SiteProtector can apply
the criteria you specified to each Tag name
(or row) that appears in the view.
Viewing vulnerabilities by vulnerability name in Enterprise
Scanner
Use this view to examine high-level information about the types of vulnerabilities
detected on your network.
Benefits
You can sort your view by most severe vulnerabilities to identify the most to least
important vulnerabilities on your network or by priority of fix.
Field descriptions
The following table describes the fields and descriptions for this vulnerability
view:
Table 30. Vulnerability view by vulnerability name
Field
Description
Tag Name
Use this filter to display or suppress events
that match one or more tag names. You can
filter on tag names from the Site database or
on user-defined tag names.
Severity
Use this filter to display events according to
their level of severity.
CVSS Score
Use this filter to establish a measure of how
much concern a vulnerability warrants,
compared to other vulnerabilities, so that
efforts to remedy the vulnerability can be
prioritized.
Chapter 8. Interpreting scan results in SiteProtector
115
Table 30. Vulnerability view by vulnerability name (continued)
Field
Description
Status
You use the Status filter differently for
events and vulnerabilities.
v Events: The Status column indicates the
impact of the event.
v Vulnerabilities: The Status column
indicates whether the vulnerability was
found.
Use this filter to show only the statuses that
interest you.
116
Event Count
Use this filter to determine which events
occur most frequently.
Target Count
Use to filter by the count of target hosts.
Object Count
Use to filter events according to the Object
Count column in the analysis views.
SiteProtector calculates the Object Count
according to the number of objects that are
associated with each row of data in the
analysis view. This filter filters data only in
views that contain the Object Count column.
For example, if you apply this filter to the
Attacker view, SiteProtector can apply the
criteria you specified to each IP address (or
row) that appears in the view.
Latest Event
Use to filter events according to the Latest
Event column in the analysis views.
SiteProtector calculates the time and date for
the latest event on each row of data in an
analysis view. This filter filters data only in
views that contain the Latest Event column.
For example, if you apply this filter to the
Event Name view, SiteProtector can apply
the criteria you specified to each Tag name
(or row) that appears in the view.
Enterprise Scanner: User Guide
Running reports in the SiteProtector Console
Use the Report view in the SiteProtector Console to schedule Enterprise Scanner
reports.
Procedure
1. In the navigation pane for the SiteProtector Console, select the group for which
you want to run reports.
2. In the right pane, select and tab, and then select the Report view.
3. Right-click the report name to create, and then select New Report from the
pop-up menu.
4. Customize the report according to your needs on the Report Specification tab.
Note: The default reporting period on the Report Period tab is the previous
day, which might not provide the results you need. You can customize the
report period to start on another day or to stop and start at particular times on
different days.
5. Set up a schedule to run the report on a regular basis if needed on the
Recurrence tab.
6. Click OK.
Types of assessment reports
Use the Report tab to view the types of assessment reports available for Enterprise
Scanner.
Report descriptions
The following Assessment reports are displayed on the Report tab:
Table 31. Assessment reports descriptions
Report
Description
Asset Assessment Detail
A detailed list of vulnerabilities and services
for each asset, including vulnerability
remedies and references.
Asset Assessment Summary
A list of discovered assets, and for each
asset, its network services and
vulnerabilities.
Operating System Summary
Percentage and number of assets by
operating system discovered during an
automated network scan.
Operating System Summary by Asset
A list of assets scanned, and for each asset,
its operating systems.
PCI Detail
A detailed list of vulnerabilities and services,
including remedies and references according
to Payment Card Industry (PCI) standards.
PCI Summary
A list of vulnerabilities by severity, operating
system, including a summary of asset risk
scores according to Payment Card Industry
(PCI) standards.
Service Summary by Asset
A list of services discovered for each asset
scanned.
Chapter 8. Interpreting scan results in SiteProtector
117
Table 31. Assessment reports descriptions (continued)
118
Report
Description
Top Vulnerabilities
A list of the top vulnerabilities, by frequency,
for a specified group and time.
Vulnerability by Asset
A list of the top assets by number of
vulnerabilities for a specified group and
time.
Vulnerability by Group
A comparison of vulnerabilities across
subgroups of a selected group.
Vulnerability by OS
A comparison of vulnerability counts by
operating systems.
Vulnerability Counts
A list of detected vulnerabilities by total
number and by percentage.
Vulnerability Counts by Asset
The number of vulnerabilities discovered for
each asset by severity.
Vulnerability Detail by Asset
A detailed list of all vulnerability
information available for each asset.
Vulnerability Differential
A summary comparison of vulnerabilities
and details for each asset.
Vulnerability Names by Assets
A list of vulnerability names for each asset.
Vulnerability Remedies by Asset
A list of vulnerabilities their remedies for
each asset.
Vulnerability Summary by Asset
A list of vulnerabilities and their
descriptions for each asset.
Vulnerability Assets
A lists of assets by criticality for each
vulnerability.
Enterprise Scanner: User Guide
Viewing an Enterprise Scanner report in the SiteProtector Console
Use the Report view in the SiteProtector Console to open an Enterprise Scanner
report on your computer.
Procedure
1. In the navigation pane for the SiteProtector Console, select the group that you
want to run reports for.
2. In the right pane, select and tab, and then select the Report view.
3. Right-click the report name to create, and then select Properties from the
pop-up menu.
4. Select Reports in the left pane.
5. Right-click an instance of the report, and then select Open Report from the
pop-up menu.
6. Follow the prompts to open the report file on your computer.
Chapter 8. Interpreting scan results in SiteProtector
119
120
Enterprise Scanner: User Guide
Chapter 9. Logs and alerts
This chapter explains how to generate log files and to set up alert notifications for
the appliance.
Topics
“Log files and alert notification” on page 122
“System logs” on page 123
“Getting log status information” on page 124
“Enterprise Scanner (ES) logs” on page 124
“Downloading Enterprise Scanner (ES) log files” on page 126
“Alerts log” on page 127
“Downloading and saving an Alerts log” on page 128
“Clearing the Alerts log” on page 129
“Finding specific events in the Alerts log” on page 129
© Copyright IBM Corp. 1997, 2009
121
Log files and alert notification
Enterprise Scanner maintains log files on the appliance to use for diagnosing
problems with the agent. The log files contain details about the scanning and
operational processes running on the agent.
Two types of log files
Enterprise Scanner maintains two types of log files:
Table 32. Types of log files
Log type
Description
Enterprise Scanner (ES)
Contains details about the scanning
processes controlled by the agent.
System
Contains details about the operational
processes running on the appliance.
Two types of information
System and ES logs provide two types of information:
Table 33. Types of log information
Header
Description
Alerts (notifications)
An informational message sent from an
agent; triggered when an event meets set
criteria.
Logs
Traces the execution logic of the agent.
Log size
Enterprise Scanner performs a refresh procedure to limit the size of individual log
files. When a log file reaches 50 MB, Enterprise Scanner backs up and stores the
current log file, and then generates a new log file.
Viewing log files
The Proventia Manager does not provide detailed analysis of log files. You can
download and save the file in a text editor if you want to view log files.
122
Enterprise Scanner: User Guide
System logs
Use the System Event Log page in the Proventia Manager to examine entries in the
system logs.
System log descriptions
The following table describes the system logs for Enterprise Scanner:
Table 34. System logs
Log name (file_name)
Description
Architecture Services Log (AS_Log.log)
Contains low-level debugging information
from the management services library
resulting from the scheduler interactions
with the Asset Service and the Task Service.
This log file is used for debugging problems
involving interaction with these services.
Configuration and Response Module (CRM)
Low-level Communication Log
(CrmCommTrace.log)
stdout and stderr Output Log
(iss-esmScheduler-stdout.log)
Provides information about issdk/issDaemon
communications with SiteProtector.
This log file is created under the file
name\tmp\issCommTrace.tmp; the log file
name is changed about half way through the
initialization of the CRM.
Contains output for the Enterprise Scanner
task scheduler.
This log file might not be necessary; it
includes errors that are only displayed to
stdout or stderr for debugging purposes.
Scheduler Process Log (issesmSchedWatch.log)
Contains messages regarding the status of
the Scheduler process.
stdout and stderr Output Log
(iss-esm-stdout.log)
Contains output for the ESM blade.
ESM Process Log (iss-esmWatch.log)
Contains messages regarding the status of
the ESM process.
This log file might not be necessary; it
includes errors that are only displayed to
stdout or stderr for debugging purposes.
Chapter 9. Logs and alerts
123
Getting log status information
Use the Log Status page in the Proventia Manager to view usage information for
alert event log statistics.
Navigation: To access the Log Status page, click Status → Logs in the navigation
pane.
This page provides usage information for the following alert event log statistics:
Table 35. Alert event log statistics
Statistic
Description
Number of Logged Alerts
The number of alert events that have been
written to the log file.
Percentage Full
The percentage of allocated space that
contains alert event log entries.
Time of Last Alert
The date and time the last alert was written
to the log file.
Enterprise Scanner (ES) logs
Use the ES Logs page in the Proventia Manager to view details about the scanning
processes controlled by the Enterprise Scanner agent.
Enterprise Scanner (ES) logs provide two types of information:
Table 36. Information provided by Enterprise Scanner (ES) logs
Type of information
Description
Alerts (notifications)
An informational message sent from an
agent; triggered when an event meets set
criteria.
Logs
Traces the execution logic of the agent.
Log descriptions
The following table describes the Enterprise Scanner (ES) logs:
Table 37. Enterprise Scanner (ES) log descriptions
Log name (file_name)
Description
Trace Log (CrmTrace.log)
Handles interaction with SiteProtector
Sensor Services and Event Services
components. The log file includes
information about the following processes:
v Interaction with the Sensor and Event
services
v ESM startup
v Other operational details
This log file is created under the file name
\tmp\issCSFTrace.tmp; the log file name is
changed about half way through the
initialization of the CRM.
124
Enterprise Scanner: User Guide
Table 37. Enterprise Scanner (ES) log descriptions (continued)
Log name (file_name)
Description
Interface Log (crm-esm.log)
Details communications between the CRM
and the ESM.
Engine (ESM Blade) Log (iss-esm.log)
Contains low-level information related to
Common Assessment Module (CAM)
sessions that are executed by discovery and
assessment tasks, including all exception,
information, and trace messages produced
by CAM.
Scheduler Log (iss-esmScheduler.log)
Includes high-level information about the
following processes:
v Interactions with the Asset Service and
Task Service
v The scheduling and running of
background and ad hoc discovery and
assessment tasks
Changing logging detail
If you want to generate more logging detail, or if you suspect that your scanner is
not functioning properly, you can change the logging detail with the assistance of
your IBM ISS Technical Support Representative.
Important: To avoid setting log levels incorrectly, which can impact your scanning
performance and fill your disk with logs, make sure you work with your IBM ISS
Technical Support Representative.
You can change the logging detail settings for these Enterprise Scanner (ES) logs:
v CrmTrace.log (Trace Log)
v crm-esm.log (Interface Log)
v iss-esmScheduler.log (Scheduler Log)
v iss-esm.log (Engine Log)
Chapter 9. Logs and alerts
125
Downloading Enterprise Scanner (ES) log files
Use the Log File Management page in the Proventia Manager to download an
Enterprise Scanner (ES) log file from the Enterprise Scanner agent to a local
workstation.
About this task
When you download a log file, Enterprise Scanner creates a backup of the log file
for you to download. Enterprise Scanner saves the file with the standard name for
the log file, but it appends the current time and date stamp, as in the following
example: Crm.Trace.log.20060324141336.bak
This backup log file remains on your agent after you download it. You should
delete these backup log files when you no longer need them.
This task also provides a procedure on downloading get log files. The get log files
are as follows:
v getFullLogs (fulllogs.tz): A compressed tar archive that contains all the files
and subdirectories in the following directories:
/cache/log/esm
/etc/crm
/tmp /usr/bin/esm/GroupInfo
v getLogs (logs.tz): A compressed tar archive that contains all the files and
subdirectories from the /cache/log/esm directory.
Procedure
1. Log on to the Proventia Manager for the Enterprise Scanner agent.
2. Click Logs → Alerts in the navigation pane.
3. Choose an option:
If you want to...
Then...
Download an Enterprise Scanner (ES) log
file or a get log file
1. Click Manage Log Files.
2. Select a file to download, and then click
Download.
3. At the prompt, click OK.
4. Click Save, and then click OK.
5. Go to the folder where you want to save
the file.
6. Type a file name, and then click Save.
Delete a log file
1. Click View/Manage Log Files.
2. Choose an option:
v Select a file to delete, and then click
Delete.
v Click Delete All.
3. Click OK.
126
Enterprise Scanner: User Guide
Alerts log
Use the Alert Event Log page in the Proventia Manager to view and manage
security and system-related alerts.
Navigation: You can access this page from (Logs → Alerts, Maintenance → Updates
→ Alerts, or Logs → Scanning Alerts)
Risk level icons
You can determine the risk level of an event by the icon in the Risk Level column
of the log file:
Table 38. Risk level icons for events
Icon
Description
Low risk event
Medium risk event
High risk event
Event information icons
Additional information about an event is available by clicking the event
information icon in the Alert Name column of the log file:
Chapter 9. Logs and alerts
127
Downloading and saving an Alerts log
Use the Alerts page in the Proventia Manager to save an alert log file to use for
forensic purposes.
About this task
The Alert log is saved in three comma-separated values (CSV) files. The three files
refer to the data displayed in the Alerts log:
Table 39. Alert log files
File
Description
filename_eventdata.csv
v The distinct records that match the alert
record number
v The event name and the risk level
filename_eventinfo.csv
The data listed in the event specific
information section of the alert.
filename_eventresp.csv
The data from the responses executed
section of the alert.
Procedure
1. Log on to the Proventia Manager for the Enterprise Scanner agent.
2. Click Logs → Alerts in the navigation pane.
3.
4.
5.
6.
7.
Click Generate new log file from Alerts.
Select a file to download, and then click Download.
At the prompt, click OK.
Click Save, and then click OK.
Go to the folder where you want to save the file.
8. Type a file name, and then click Save.
128
Enterprise Scanner: User Guide
Clearing the Alerts log
Use the Alerts page in the Proventia Manager to clear all events from the Alert log.
Before you begin
Clearing the Alert log deletes the records and removes the alerts from the Alerts
page. Before you clear the Alert log, you might want to save a copy for archiving.
Procedure
1.
2.
3.
4.
Log on to the Proventia Manager for the Enterprise Scanner agent.
Click Logs → Alerts in the navigation pane.
Click Clear current Alerts from event log.
Click OK.
Finding specific events in the Alerts log
Use the Alerts page in the Proventia Manager to search for alerts sent from the
Enterprise Scanner agent; triggered when an event meets set criteria.
Procedure
1. Log on to the Proventia Manager for the Enterprise Scanner agent.
2. Click Logs → Alerts in the navigation pane.
3. Choose an option:
If you want to...
Then...
Refresh the Alert log file
Select an option from the Refresh Data list.
Chapter 9. Logs and alerts
129
If you want to...
Then...
Search the Alert log file by filtering
options
1. Select Auto Off from the Refresh Data
list.
2. Select an option from the Filter Options
list.
Search value fields appropriate to the
option are displayed later in this section
in the Filter Options list.
3. Specify a search value for the chosen
filtering option:
v Select: No filter is selected.
v Risk Level: Select a risk level from the
list:
– High
– Medium
– Low
v Alert Name: Type any valid alert
name in the box.
Note: You can use an asterisk (*)
wildcard character for this option.
v Alert Type: Choose one of the
following alert types from the list:
– Enterprise Scanner
– All Update
– Update Package
– Update Install
– Update Error
– System
v Date and Time: Type the start and end
dates. Use the following format:
mm/dd/yyyy hh:mm:ss
v Source IP: Type the IP address of the
source of the alert.
Note: You can use an asterisk (*)
wildcard character for this option.
v Destination IP: Type the IP address of
the destination of the alert.
Note: You can use an asterisk (*)
wildcard character for this option.
v Source and Destination IP: Type the
IP address of the source of the alert
and the IP address of the destination
for the alert.
v Multiple Values: Specify the filter
values you want to use based on the
descriptions above.
4. Click Go.
5. If you want to refresh the view, select a
refresh option from the Refresh Data list.
The log data is refreshed at the selected
interval.
130
Enterprise Scanner: User Guide
If you want to...
Then...
Search the Alert log file by Alert ID
number
1. Type the 26-character alert ID number in
the Search by Alert Id# box.
Tip: You can copy the ID# from an Alert
Event Details window and paste it into
the search box to find all events with
that ID#. To see the details window, click
the name of the alert in the Alert Name
column.
2. Click Go.
Note: The search is limited to selected
filtering options. Change your filtering
options if you want to search for an alert
that is excluded from a selected filtering
option.
Chapter 9. Logs and alerts
131
132
Enterprise Scanner: User Guide
Chapter 10. Ticketing and remediation
This chapter explains how to use information from Enterprise Scanner with the
ticketing feature in SiteProtector to manage tracking and remediation.
Topics
“Ticketing and Enterprise Scanner” on page 134
“Remediation process overview for Enterprise Scanner” on page 135
“Remediation tasks for Enterprise Scanner” on page 136
© Copyright IBM Corp. 1997, 2009
133
Ticketing and Enterprise Scanner
SiteProtector works with Enterprise Scanner to streamline your event tracking and
remediation processes. This topic explains how to use information from Enterprise
Scanner with the ticketing feature in SiteProtector to manage tracking and
remediation.
When remediation is necessary, such as patching a vulnerability, you can create a
ticket directly from the SiteProtector Console. You can then assign the ticket to
another SiteProtector user and track the status of the ticket from creation to
resolution.
Tickets
A ticket is a work request created in response to a situation that requires further
investigation. Here are some examples of tickets:
v Patching a range of assets against vulnerabilities
v Investigating a new asset that recently appeared on the network, and dealing
with it as appropriate
v Locating an asset that is running an unapproved operating system, and updating
it or removing it from the network
You can use right-click menus to create tickets directly from the information
displayed in the Asset, Agent, and Analysis views.
Vulnerability auto ticketing
Use the vulnerability auto ticketing feature to create auto ticketing rules that apply
to vulnerable events in a group. When a vulnerable event matches an auto
ticketing rule, SiteProtector automatically generates a new ticket.
Note: Only users with global ticketing permissions can create and modify auto
ticketing rules.
To group the assets, select the Group By Asset check box in the Vulnerability
Auto Ticketing pane in the Properties tab. You can modify the number of
vulnerabilities per ticket in the Auto Ticketing tab in the Ticketing Setup window.
Auto ticketing rule inheritance occurs when a subgroup inherits the auto ticketing
rules from a group of assets in the next higher group in your Site structure (if the
subgroup does not have any auto ticketing rules).
Reference: See the IBM SiteProtector Help for detailed information and procedures
on auto-ticketing.
Custom categories
You can use the Custom Category tab to add new custom categories with up to
five user-specified fields.
SiteProtector ticketing or third party
You can use the SiteProtector ticketing tool or configure SiteProtector to export
tickets into another action request (AR) system, such as Remedy Help Desk or
Remedy Change Management. After you have integrated the remedy solution with
SiteProtector, SiteProtector shares new ticket information to the remedy application.
134
Enterprise Scanner: User Guide
When you save the ticket in SiteProtector, the action request system stores the
information, too. You can edit and maintain tickets in the action request system.
SiteProtector retains a copy of the ticket on the database server.
Note: If you use Remedy to maintain tickets, then you cannot edit them in
SiteProtector. However, SiteProtector saves a copy of each ticket you create.
Remediation process overview for Enterprise Scanner
The tracking feature available with Enterprise Scanner and SiteProtector are
adaptable, and you can easily integrate them into the workflow for your company.
This topic suggests some ways to use these tracking and remediation features.
You can use Enterprise Scanner to collect the following information about your
enterprise:
v What assets are on the enterprise networks?
Scenario: You do not want assets added to the network without approval. You
want to know what assets are currently running on your network.
Action plan: Run a discovery scan to identify all assets on the network. If you
discover an unauthorized asset, create a ticket to locate the asset and then take
appropriate action.
v What services are running on these assets?
Scenario: You want to verify that assets on your network are running only
approved services.
Action plan: Identify services you do not want to run on any assets in the
network. Run an assessment scan to determine what services are running on
network assets. Enterprise Scanner can scan for TCP services, UDP services, or
both. Create a ticket to investigate and disable unauthorized services or to
remove assets from the network.
v What applications are running on these assets?
Scenario: You want to verify that assets on the network are running only
approved operating systems.
Action plan: Run a discovery scan for the range of IP addresses for active assets.
Identify any assets running unapproved or outdated operating systems. Create a
ticket to locate assets that are out of compliance, and update their operating
systems.
v What vulnerabilities exist on these assets?
Scenario: You want to check all assets on the network for vulnerabilities.
Action plan: Run an assessment scan to identify which assets on the network
have vulnerabilities that have not been patched. If you discover vulnerable
assets, create a ticket to patch the vulnerabilities.
After Enterprise Scanner has collected this information, you can determine which
conditions require attention and create work tickets from the SiteProtector Console.
Scanning recommendations
If you are relying on regular background scans to verify and close tickets, make
sure that the cycle duration is short enough to verify work items within the time
period allocated. That is, if your company policy states that high risk
vulnerabilities be corrected within 24 hours, make sure that a background scan
happens within 24 hours to verify completion.
Chapter 10. Ticketing and remediation
135
If you do not want to modify the cycle duration for your background scans, you
can run an ad hoc scan to verify and close tickets that are pending system
verification.
Remediation tasks for Enterprise Scanner
Use information from Enterprise Scanner with the ticketing feature in SiteProtector
to manage tracking and remediation.
Task overview
Task 1: Scan your network
Use the information collected during your regularly scheduled scans, or you can
run an ad hoc scan. After the scans have finished running, SiteProtector
consolidates the information for easy viewing.
Task 2: View the information
View the information in the SiteProtector Console and identify situations that need
to be corrected or that require further investigation. The following table indicates
where you can view the information collected during scans:
The results of the...
Are displayed in the...
Assessment Scan
Analysis View.
Discovery Scan
Asset View.
Task 3: Create and assign tickets
After you determine that a vulnerability is a risk to your enterprise, you should
start an investigation and track the threat using tickets. You can create tickets for
single assets and events, or for groups. You can create separate tickets, however, if
the ticket properties are different. For example, if different SiteProtector users are
responsible for different assets, you should create a separate ticket for each user. If
the ticket due dates are different, you should create separate tickets for each due
date. You can create tickets using right-click menus from the Asset, Agent, and
Analysis views.
Task 4: Track tickets and edit status
Use the ticketing view in SiteProtector to view or edit tickets. You can click any
column header to sort tickets by that column, and double-click any ticket to open
the item.
Task 5: Report on tickets
SiteProtector offers the following ticketing reports from the Reports tab:
v Ticket Activity Summary
v Ticket Time Tracking
v Ticket Trend
The following table describes the options for the Ticketing reports and the tabs that
they are displayed on:
136
Enterprise Scanner: User Guide
Table 40. Options for the Ticketing reports
Option
Tab
Description
Share report with other
SiteProtector users
General
Select this option to give
other SiteProtector users
permissions to view the
report you are running.
Display assigned users
Display
Select this check box if you
want users, who have been
assigned tickets, to be
displayed in the report.
Display category
Display
Select this check box if you
want custom categories that
are assigned to tickets to be
displayed in the report.
Display status
Display
Select this check box if you
want the ticketing statuses
(New, Open, In Progress, and
so on) to be displayed in the
report.
Display priority
Display
Select this check box if you
want the priority of the
ticket (Critical, High,
Medium, Low) to be
displayed in the report.
Assigned Users
Filter
Select the individual users
that you want displayed in
the report. These users will
be displayed in the report
only if you selected the
Display assigned users check
box on the Display tab.
Category
Filter
Select the categories that you
want displayed in the report.
These categories will be
displayed in the report only
if you selected the Display
category check box on the
Display tab.
Status
Filter
Select the statuses that you
want displayed in the report.
These statuses will be
displayed in the report only
if you selected the Display
status check box on the
Display tab.
Priority
Filter
Select the priority values that
you want displayed in the
report. These values will be
displayed in the report only
if you selected the Display
priority check box on the
Display tab.
Chapter 10. Ticketing and remediation
137
Table 40. Options for the Ticketing reports (continued)
Option
Tab
Description
Number of Records
Report Format
Specifies the number of
records that will be
displayed in the report from
five to ALL records.
Show Graph
Report Format
Select this check box if you
want a graph to be displayed
on the report.
Task 6: Close the ticket
After the work outlined in the ticket has been completed, you can close the ticket
in one of two ways:
v You can manually close the ticket by changing the status to Closed.
v You can change the ticket status to Pending System Verification. If you select this
status, Enterprise Scanner and SiteProtector work together to determine when
work items have been completed.
Scans refresh vulnerability information and other system information that the
ticketing system checks. When Enterprise Scanner completes a scan, the ticketing
system can determine whether situations identified in earlier scans have been
remedied. After a scan verifies that the situation has been resolved, SiteProtector
closes the ticket.
138
Enterprise Scanner: User Guide
Part 3. Maintenance
This section explains how to maintain and update the Enterprise Scanner agent.
Chapters
Chapter 11, “Performing routine maintenance,” on page 141
Chapter 12, “Updating Enterprise Scanner,” on page 147
Chapter 13, “Viewing the status of the Enterprise Scanner agent,” on page 157
© Copyright IBM Corp. 1997, 2009
139
140
Enterprise Scanner: User Guide
Chapter 11. Performing routine maintenance
This chapter explains maintenance procedures that you need to perform on the
Enterprise Scanner agent.
Topics
“Shutting down your Enterprise Scanner” on page 142
“Removing an agent from SiteProtector” on page 143
“Options for backing up Enterprise Scanner” on page 144
“Backing up configuration settings” on page 145
“Making full system backups” on page 146
© Copyright IBM Corp. 1997, 2009
141
Shutting down your Enterprise Scanner
You can shut down Enterprise Scanner from the Proventia Manager. The shut
down option also turns off the appliance.
Before you begin
If you have an agent with an early BIOS, the shut down command may not turn
off the appliance.
About this task
Use this option if you need to turn off the appliance temporarily, but plan to
continue using the agent with the same instance of SiteProtector. If you want to
shut down the agent so that you can register it with a different instance of
SiteProtector, see “Removing an agent from SiteProtector” on page 143.
In the SiteProtector Console, the agent continues to appear online for a couple of
hours. If you do not restart the appliance within a couple of hours, the status of
the agent becomes inactive. The agent goes through the normal statuses when you
restart the appliance.
Procedure
1. Log on to the Proventia Manager for the Enterprise Scanner agent.
2. Click Configuration → Registration in the navigation pane.
Note: It might take some time for Java™ to initialize the first time you do this.
3. Click System → Tools in the navigation pane.
4. Click SHUT DOWN. The application shuts down and the appliance is turned
off.
142
Enterprise Scanner: User Guide
Removing an agent from SiteProtector
Use this procedure to remove an agent from SiteProtector.
Procedure
1. In the SiteProtector Console, open a tab with an Agent view, and then select the
group that contains your agent.
2. In the right pane, right-click the agent, and then select Delete from the pop-up
menu.
3. If you want to delete the group, right-click the group in the navigation pane,
and then select Delete from the pop-up menu.
Important: Never delete a group that contains an agent unless you delete the
agent first. If you delete a group that contains an agent, the group is deleted,
but the agent goes into the Ungrouped Assets group.
4. Log on to the Proventia Manager for the Enterprise Scanner agent.
5. Click Configuration → Registration in the navigation pane.
Note: It might take some time for Java to initialize the first time you do this.
6. Clear the Register With SiteProtector check box, and then click Save Changes.
Note: The Authentication window opens and indicates that the agent is
unregistered.
7. If you want to shut down the application and turn off the appliance, click
System → Tools in the navigation pane, and then click SHUT DOWN. The
application shuts down and the appliance is turned off.
Chapter 11. Performing routine maintenance
143
Options for backing up Enterprise Scanner
Use the Backup and Recovery page to manage snapshots of configuration settings
and to create complete system backups.
Types of backups
Settings backup
A settings backup is a snapshot file that stores all of your appliance
configuration settings. You can have many settings snapshot files of
different configurations.
Full backup
A full backup stores a complete image of the operating system and current
configuration settings of the appliance. You can have only one system
backup file. When you restore from a system backup, you restore the
appliance to a previous state. Is this still valid for 2.4 agents?
For ES version 1.4 agents only: You cannot back up the operating system
for an Enterprise Scanner version 1.4 agent if you are upgrading to an
Enterprise Scanner version 2.1 or later agent, and then restore the settings
for the version 1.4 system. You must use the version 1.4 of the IBM
Proventia Network Enterprise Scanner Recovery CD, included in the package
with the appliance, if you want to restore the settings for the version 1.4
system.
If you restore a system before you make backups
The default system backup for a new appliance contains the original installation. If
you restore a system backup or apply settings snapshot files before you create your
own backup files, you are restoring the appliance to its installation defaults. The
following consequences result:
v You lose the configuration settings you have already applied.
v If you restore from a system backup, you lose any updates you have already
applied.
Important: You must reconfigure the agent starting with running the Proventia
Setup Assistant. (The configuration process is described in the IBM Proventia
Network Enterprise Scanner Getting Started Guide.)
v You must reconfigure the appliance starting with running the Setup Assistant.
v You cannot access Proventia Manager until you reconfigure the appliance.
Important: Follow the recommended backup procedures to avoid having to
reconfigure your agent in case of an emergency.
Date of last system backup
The System Status information about the Home page includes the date of the last
backup in the Last System Backup field.
144
Enterprise Scanner: User Guide
Backing up configuration settings
Use the Settings Backup tab on the Backup and Recovery page to create a settings
snapshot file of the configuration settings for your agent.
About this task
A settings snapshot file contains the configuration settings, including the logon
account credentials and networking settings, of the agent.
The default settings snapshot file, factoryDefault.settings, contains the original
agent settings. You should create a settings snapshot file before you change your
configuration settings.
Procedure
1. Click Maintenance → Backup and Recovery in the navigation pane.
2. Click the Settings Backup tab.
3. Click Add.
4. Choose an option:
If you want to...
Then...
Create a snapshot file
1. Click Add.
2. In the Create settings snapshot file
section, type a name for the settings
snapshot file in the Specify a file name
box.
Download a snapshot file
1. In the Settings Backup table, select the
settings snapshot file to download.
2. Click Download to copy the file to your
local computer.
Upload a snapshot file
1. Type the name of the settings snapshot
file in the Snapshot file to Upload field,
and then click Browse to select the file.
2. Click Upload. The settings snapshot file
appears in the Settings Backup table.
Apply a snapshot file
1. In the Settings Backup table, select the
settings snapshot file to apply.
2. Click Apply.
Delete a snapshot file
1. In the Settings Backup table, select the
snapshot file to delete.
2. Click Delete.
Chapter 11. Performing routine maintenance
145
Making full system backups
Use the Full Backup tab on the Backup and Recovery page to create a complete
image of the operating system and current configuration settings before you apply
firmware updates or apply snapshot files that change the original configuration
settings of the appliance.
Procedure
1. Click Maintenance → Backup and Recovery in the navigation pane.
2. Click the Full Backup tab.
3. Choose an option:
If you want to...
Then...
Create a full system backup
Click Create System Backup.
Restore a system backup
Click Restore System Backup.
Important: The IP address for the appliance is unavailable during the backup
process, and you cannot access Proventia Manager in the browser window.
146
Enterprise Scanner: User Guide
Chapter 12. Updating Enterprise Scanner
This chapter describes how to configure an agent for XPUs, how to schedule
automatic and one-time XPUs, and how to apply XPUs manually.
Occasionally, you must install XPUs for other products, such as for SiteProtector
components, when you install an XPU for Enterprise Scanner. Additional update
requirements, such as migrating policies, might also apply.
Important: When you apply XPUs to Enterprise Scanner, check the applicable
Enterprise Scanner Read Me document for other XPU requirements.
Topics
“XPU basics” on page 148
“Updating options” on page 149
“Configuring explicit-trust authentication with an XPU server” on page 150
“Configuring an Alternate Update location” on page 151
“Configuring an HTTP Proxy” on page 153
“Configuring notification options for XPUs” on page 153
“Scheduling a one-time firmware update” on page 154
“Configuring automatic updates” on page 154
“Manually installing updates” on page 156
© Copyright IBM Corp. 1997, 2009
147
XPU basics
This topic describes the types of updates for your Enterprise Scanner agent and
explains where you can get the updates.
Types of updates
The following table describes the contents of firmware and assessment content
updates:
Table 41. Contents of firmware and assessment content updates
Type of update
Content
Firmware
An update that contains any of the
following components:
v New program files
v Fixes or patches
v Enhancements
v Online Help
Important: Some firmware updates might
reboot your agent after installation.
Assessment content
An update that contains security content.
Update locations
The following table describes the two locations that the IBM ISS X-Press Update
process accesses to retrieve updates for your agent:
Table 42. Update locations
148
Update location
Description
IBM ISS Download Center
The default location for XPUs for all IBM ISS
products.
Note: Your agent must be able to access the
IBM ISS Download Center over the Internet
to use this update location.
X-Press Update Server (XPU Server)
If your agent cannot access the Download
Center over the Internet, you can update it
from an XPU Server on your internal
network. Your SiteProtector administrator
can provide the information you need to
configure a local XPU Server
Enterprise Scanner: User Guide
Updating options
The XPU process provides the option to schedule automatic updates on a periodic
basis, schedule one-time updates, or update an agent manually. You should
configure automatic updates and use one-time and manual updates as needed
between the automatic updates.
Update options
The following table describes the three update options:
Table 43. Automatic and one-time updates
Update option
Considerations
Automatically download and install updates Automatic updates keep your agent
on a periodic basis
up-to-date by regularly downloading and
installing updates on a recurring schedule.
Automatically download and install
one-time updates
Schedule one-time updates as needed
between scheduled updates.
Manually download and install updates
Use manual updates to download and install
updates immediately.
Note: You can manually install updates only
from the Proventia Manager, not from the
SiteProtector Console.
Installation options with scheduled updates
The following table describes options for installing assessment content and
firmware updates with scheduled updates:
Table 44. Installation options with scheduled updates
This type of update...
Is installed...
Assessment content
Immediately because these updates do not
impact appliance availability.
Firmware
As you configure it, either immediately or at
a later time.
Note: Firmware updates might cause the
agent to reboot, therefore you can delay
installing them to minimize any potential
impact on your network.
Rollbacks and backups
You can roll back a content assessment update, but you cannot roll back a
firmware update. Because you cannot roll back a firmware update, you should
make a full system backup before you install a firmware update. You can configure
automatic backups for scheduled periodic or one-time updates.
Note: You can troubleshoot and roll back updates from Proventia Manager on the
agent, but not from SiteProtector.
Chapter 12. Updating Enterprise Scanner
149
Configuring explicit-trust authentication with an XPU server
You can configure the authentication between an Enterprise Scanner agent and a
SiteProtector X-Press Update Server (XPU Server) to use either trust-all or
explicit-trust authentication.
Before you begin
To use explicit-trust authentication with an XPU Server, follow these steps:
v Copy the certificate file from the XPU Server to the agent as described in the
procedure later in this section.
v Specify the fully qualified path of the certificate file in the CA Certificate box
when you configure the XPU Server.
About this task
The default trust level in the Proventia Manager is trust-all. In the SiteProtector
Console, the default trust level is left blank. The following table describes the
advantages and disadvantages of using each authentication method:
Table 45. Advantages and disadvantages of each authentication method
Authentication method
Advantages and Disadvantages
Trust-all
Requires no additional set up, but it is less
secure than explicit-trust authentication
Explicit-trust
More secure than trust-all authentication;
but to use it, you must copy the certificate
file from the alternate XPU Server to the
agent.
Procedure
1. Locate the following certificate file on the SiteProtector X-Press Update Server:
server-rsa.crt The default location of this file for a stand-alone installation of
the SiteProtector X-Press Update server is the following path: C:\Program
Files\ISS\SiteProtector\X-Press Update Server\webserver\Apache2\conf\
ssl.crt\server-rsa.crt
2. Use a secure copy tool, such as SSH or Windows Secure Copy, to copy the
server-rsa.crt certificate file, and then paste it in the following directory on
the agent: /var/spool/leafcerts/server-rsa.crt
3. Rename the certificate file using the following format: IPaddress_port.pem
Note: The port number for the X-Press Update Server is 3994. Enterprise
Scanner recognizes the update server by the IP address.
150
Enterprise Scanner: User Guide
Configuring an Alternate Update location
Use the Alternate Update Server page in the Update Settings policy on the
SiteProtector Console if you want to update your Enterprise Scanner appliance
from within your network instead of getting updates from the IBM ISS Download
Center.
About this task
By default, an agent receives updates from the IBM ISS Download Center. You can
also update your agent from a locally managed SiteProtector X-Press Update
Server (XPU Server) instead. The SiteProtector XPU Server mirrors and caches
updates from the IBM ISS Download Center.
If you do not use an X-Press Update Server, every appliance must have access to
the Internet so that it can download its own updates from the IBM ISS Download
Center. An X-Press Update Server provides these advantages:
v Security is greater because only the Server needs access to the Internet.
v The use of Internet bandwidth is reduced because you need to download the
update to the Server just once for all the appliances that use the Server.
Procedure
1. From the SiteProtector Console, create a tab to display agent policies.
2. In the navigation pane, select a group, and then open the Update Settings
policy for that group.
3. Select the Use Alternate Update Server check box.
4. Provide the following information:
Option
Description
Host or IP
The DNS name or IP address of the
SiteProtector update server that provides
update downloads to the agent.
Name
The port that the agent uses to communicate
with the SiteProtector update server. The
SiteProtector X-Press Update Server listens
for update requests on this port.
Note: By default, the agent uses port 443 to
communicate with the IBM ISS Download
Center at http://www.iss.net. The
SiteProtector server uses port 3994 by
default. For more information about
configuring ports on the SiteProtector server,
see your IBM SiteProtector documentation.
Chapter 12. Updating Enterprise Scanner
151
Option
Description
Trust Level
The authentication level for communications
with the SiteProtector update server.
Authentication level options for the
SiteProtector update server are as follows:
v Trust-all: The appliance trusts the
SiteProtector update server, and does not
use SSL certificates for authentication.
This is the easiest way to set up the
connection to the SiteProtector update
server.
v Explicit-trust: The appliance uses the local
certificate to authenticate the connection
to the SiteProtector update server. This is
a more secure connection, but you must
first copy the certificate of the update
server to the correct location on the
appliance. See “Configuring explicit-trust
authentication with an XPU server” on
page 150.
CA Certificate
5. Click Save Changes.
152
Enterprise Scanner: User Guide
If you use explicit-trust level, the fully
qualified path of the certificate file you
copied from the X-Press Update Server to
the agent, such as the following path:
/var/spool/CRM/leafcerts/server-rsa.crt
Important: If you have not yet copied this
certificate file to the agent, follow the
procedure in “Configuring explicit-trust
authentication with an XPU server” on page
150.
Configuring an HTTP Proxy
Use the Proxy Server page in the Update Settings policy on the SiteProtector
Console to configure proxy server information if your Enterprise Scanner agent
uses a proxy server to access the Update Server.
Procedure
1. From the SiteProtector Console, create a tab to display agent policies.
2. In the navigation pane, select a group, and then open the Update Settings
policy for that group.
3. Select Enable Proxy.
4. Complete the following fields:
Option
Description
Address
Type the address of the proxy server.
Port
Type the port of the proxy server.
Enable Authentication
Select this option if you want the agent to
authenticate to the proxy server, and then
type the user ID and password.
User ID/Password
Type the user ID and password to be used
for authentication.
Configuring notification options for XPUs
Use the Event Notification tab in the Update Settings policy on the SiteProtector
Console to configure the Enterprise Scanner agent to send notifications for update
events (available updates, available installations, and update errors) to the
SiteProtector Console.
Procedure
1. From the SiteProtector Console, create a tab to display agent policies.
2. In the navigation pane, select a group, and then open the Update Settings
policy for that group.
3. Click the Event Notification tab.
4. Select the check box for each type of event to enable:
v Alert Logging for Available Updates
v Alert Logging for Update Installation
v Alert Logging for Update Installation
5. Select the Enable Event Delivery to SiteProtector Console check box for each
type of event to enable.
Chapter 12. Updating Enterprise Scanner
153
Scheduling a one-time firmware update
Occasionally, you might not want to wait for your automatic update process to
install an important update. You can schedule a one-time firmware update between
automatic updates.
Procedure
1. From the SiteProtector Console, open the Update Settings policy for the agent
you want to update.
2. Click the Update Settings tab.
3. In the Firmware Updates section, select Schedule One-time Install
4. In the Which version to Install section, select one of the following options:
If you want to install all versions up to...
Then select...
The most recent version
All Available Updates
A specific version number
Up To Specific Version, and then type the
version in the Version field.
Example: To install up to version 2.1, type
the following version number in the Version
field: 2.1
Configuring automatic updates
Use the Updates Settings policy on the SiteProtector Console to automate your
processes for checking, downloading, and installing updates.
About this task
As you define the installation schedule for firmware updates, you have the option
to request a full system backup before the firmware is installed. This backup
provides a way to restore your appliance to its state before the firmware was
installed. If you need to uninstall the firmware update, you have a full system
backup that you can restore.
Note: Only the latest backup is available at any given time. When the system
completes a new backup, the previous backup is overwritten.
Procedure
1. From the SiteProtector Console, create a tab to display agent policies.
2. In the navigation pane, select a group, and then open the Update Settings
policy for that group.
3. Click the Update Settings tab.
4. Configure to frequently to check for updates:
Option
Description
Check for updates daily or weekly
Checks for updates daily or on a particular
day of each week according to the following
values:
v Day of Week
v Time of Day
154
Enterprise Scanner: User Guide
Option
Description
Check for updates at given intervals
Checks for updates at the interval that you
specify.
Note: The range is 60 minutes to 1440
minutes (1-24 hours).
Make sure that your agent checks for updates at least one hour before
automatic installations to ensure sufficient time for downloading updates.
5. Configure your downloading and installation options for assessment content
updates from the following choices in the Assessment Content section:
Option
Description
Automatically Download
Automatically downloads any new
assessment content updates.
Automatically Install
Automatically installs any new assessment
content updates.
6. If you want the agent to automatically download firmware updates, select
Automatically Download in the Firmware Updates section.
7. If you want to perform a backup before the agent installs the firmware, select
Perform Full System Backup Before Installation.
Important: This option is the default. You should perform a full system backup
before you install a firmware update. Your agent stores only one system
backup, therefore this option overwrites the previous system backup.
8. Configure the following firmware installation options:
Option
Description
Do Not Install
Automatically downloads updates, but does
not automatically install them. You must
install them manually or schedule the
installation.
Automatically Install Updates
If you select this option, the agent might go
offline while the firmware is installed.
Specify when you want the firmware
updates to be installed:
v Delayed
If you choose to delay installation, select
Every Day or the day of week, and then
select the time of day to install updates.
v Immediate (not recommended)
If you select this option, the agent installs
the update as soon as it discovers that an
update is available.
Note: You should not use this option,
because it might cause the agent to restart
while a scan is in progress.
Chapter 12. Updating Enterprise Scanner
155
Manually installing updates
In the Proventia Manager for the agent, you can manually download and install
updates. You download firmware and assessment content updates at the same
time, but you install them separately.
Procedure
1. Log on to the Proventia Manager for the Enterprise Scanner agent.
2. Click Maintenance → Updates in the navigation pane, and then click Available
Downloads.
3. If downloads are available to download, click Download Updates to download
them immediately.
Note: If updates are available to download, the Downloads row contains a link
to Download Updates and the Firmware, Assessment Scanner, or both rows
contain a link for Downloads Pending.
Tip: To see the list of updates before you download them, click View Details,
and then click Download All Available Updates.
4. To install available firmware updates, click Updates → Available Installs. If you
want to see the list of updates before you install them, click View Details, and
then click Install Firmware Updates.
5. Following the instructions in the Proventia Manager, close your Web browser,
and wait for at least 5 minutes before you log back on to the Proventia
Manager.
6. Click Updates in the navigation pane.
7. If Assessment Scanner updates are available to install, click Updates →
Available Installs.
Tip: If you want to see the list of updates before you install them, click View
Details, and then click Install Assessment Scanner Updates.
8. After the update process has finished, check the Update History to make sure
that all the updates installed successfully.
156
Enterprise Scanner: User Guide
Chapter 13. Viewing the status of the Enterprise Scanner
agent
This chapter explains the status information that is available for Enterprise Scanner
in Proventia Manager and in the SiteProtector Console.
Topics
“Proventia Manager Home page” on page 158
“Viewing agent status in the SiteProtector Console” on page 160
“Viewing agent status” on page 160
“Viewing the status of the CAM modules” on page 161
“Troubleshooting the Enterprise Scanner sensor” on page 161
© Copyright IBM Corp. 1997, 2009
157
Proventia Manager Home page
The Proventia Manager Home page provides the latest diagnostic information
about the appliance.
Navigation: To access the Proventia Manager Home page, click Home in the
navigation pane.
System status
The system status group box describes the current status of the system:
Table 46. Current status of the system
Statistic
Description
Model Number
The model number of the agent.
Serial Number
The serial number of your agent.
Base Version Number
The base version of the agent software,
which is one of the following versions:
v The base version is the software version
shipped with the agent
v The software version of the most recent
system backup
Uptime
The length of time that the agent has been
online. The time is given in the following
format: x days, x hours, x minutes
Last Restart
The time the agent was last restarted. The
time is given in the following format:
yyyy-mm-dd hh:mm:ss
Example: 2008-11-21 16:24:37
Last System Backup
The time the last system backup was
created. The time is given in the following
format: yyyy-mm-dd hh:mm:ss
Example: 2008-11-21 16:24:37
Backup Description
The type of backup on the agent:
v No System Backup
v Full System Backup
Network interface status
The network interface status group box shows which network interfaces are
configured for the appliance:
Table 47. Current status of network interfaces
Model
Network interfaces
ES750
ETH0 (management port)
ETH1 (scanning port)
158
Enterprise Scanner: User Guide
Table 47. Current status of network interfaces (continued)
Model
Network interfaces
ES1500
ETH0 (management port)
ETH1 (scanning port)
ETH2 (scanning port)
ETH3 (scanning port)
ETH4 (scanning port)
ETH5 (scanning port)
Updates status
The update status group box provides the latest update information of the
appliance:
Table 48. Current status of updates
Header
Header
Last Firmware Update
The time the agent firmware was last
updated.
The time is given in the following format:
mm/dd/yyyy hh:mm:ss - version: x.x
Example: 11/21/2008 16:25:56 - version: 1.7
Last Assessment Scanner Update
The time the agent assessment content was
last updated.
The time is given in the following format:
mm/dd/yyyy hh:mm:ss - version: x.x
Example: 11/21/2008 16:25:56 - version: 1.7
Protection status
The protection status area provides the current operational status of the modules
for the appliance:
Table 49. Current operational status
Icon
Description
The module is active.
The module has stopped.
The module is in an unknown state.
Important: This status might require
immediate attention.
Chapter 13. Viewing the status of the Enterprise Scanner agent
159
Viewing agent status in the SiteProtector Console
The same system status information that is available in the Proventia Manager
Home page is available in the SiteProtector Console. You can also check your
authentication status in the SiteProtector Console.
Procedure
1. Log on to the Proventia Manager for the Enterprise Scanner agent.
2. In an Agent or Policy tab in the SiteProtector Console, right-click an agent, and
then select Properties from the pop-up menu.
3. If you want to see system status, double-click Agent Status on the middle
pane, and then click Agent Information.
4. If you want to see authentication status, double-click Agent Authentication in
the left pane.
Viewing agent status
Use the System Diagnostics page in the Proventia Manager to view information
about your Enterprise Scanner agent that might be helpful if you need to contact
IBM ISS Technical Support about a problem.
Procedure
1. Log on to the Proventia Manager for the Enterprise Scanner agent.
2. Click Status → System Status in the navigation pane.
3. If you want to refresh the diagnostics information, select a refresh option from
the Refresh Data list.
160
Enterprise Scanner: User Guide
Viewing the status of the CAM modules
Use the CAM Modules page in the Proventia Manager to view information about
CAM sessions in Enterprise Scanner.
Procedure
1. Log on to the Proventia Manager for the Enterprise Scanner agent.
2. Click Status → CAM Modules in the navigation pane.
3. If you want to refresh the diagnostics information, select a refresh option from
the Refresh Data list.
Troubleshooting the Enterprise Scanner sensor
Use the Sensor Maintenance page in the Proventia Manager to troubleshoot the
processes used by the Enterprise Scanner sensor.
Before you begin
To avoid compromising your sensor, which can impact your scanning performance,
make sure you work with your IBM ISS Technical Support Representative for
troubleshooting issues.
Procedure
1. Log on to the Proventia Manager for the Enterprise Scanner agent.
2. Click Maintenance → Sensor in the navigation pane.
3. From the list of processes, find the one you need to troubleshoot:
Table 50. Sensor processes
Module or process
Description
Troubleshooting option
Enterprise Scanner Sensor
The agent that runs on the
appliance, which creates and
executes discovery and
assessment scanning tasks.
v Clean: (Before you use this
option stop the scanner
and scheduler modules.)
Remove all scanner,
scheduler, and CRM logs.
v Restart: Restart all the
processes for Enterprise
Scanner.
Enterprise Scanner scan
module or iss-esm process
The program file that runs
Enterprise Scanner scans.
v Clean: Remove ESM log
files. (If the scanner
module is running, this
process only removes
*.bak files, otherwise all
scanner module logs are
removed.)
v Restart: Restart the ESM
process.
v Start: Start the ESM
process.
v Stop: Use this option to
stop the ESM process.
Chapter 13. Viewing the status of the Enterprise Scanner agent
161
Table 50. Sensor processes (continued)
Module or process
Description
Enterprise Scanner scheduler The program file that
module or iss-esmScheduler schedules and runs
process
Enterprise Scanner ad hoc
discovery and assessment
tasks.
Troubleshooting option
v Clean: Remove
esmScheduler log files. (If
the scheduler module is
running, this process only
removes *.bak files,
otherwise all scheduler
module logs are removed.)
v Restart: Restart the
esmScheduler process.
v Start: Start the
esmScheduler process.
v Stop: Stop the
esmScheduler process.
162
Enterprise Scanner: User Guide
Part 4. Appendixes
© Copyright IBM Corp. 1997, 2009
163
164
Enterprise Scanner: User Guide
Appendix. Safety, environmental, and electronic emissions
notices
Safety notices may be printed throughout this guide. DANGER notices warn you
of conditions or procedures that can result in death or severe personal injury.
CAUTION notices warn you of conditions or procedures that can cause personal
injury that is neither lethal nor extremely hazardous. Attention notices warn you
of conditions or procedures that can cause damage to machines, equipment, or
programs.
DANGER notices
DANGER
To prevent a possible shock from touching two surfaces with different
protective ground (earth), use one hand, when possible, to connect or
disconnect signal cables. (D001)
DANGER
Overloading a branch circuit is potentially a fire hazard and a shock hazard
under certain conditions. To avoid these hazards, ensure that your system
electrical requirements do not exceed branch circuit protection requirements.
Refer to the information that is provided with your device or the power
rating label for electrical specifications. (D002)
DANGER
If the receptacle has a metal shell, do not touch the shell until you have
completed the voltage and grounding checks. Improper wiring or grounding
could place dangerous voltage on the metal shell. If any of the conditions are
not as described, STOP. Ensure the improper voltage or impedance conditions
are corrected before proceeding. (D003)
DANGER
An electrical outlet that is not correctly wired could place hazardous voltage
on the metal parts of the system or the devices that attach to the system. It is
the responsibility of the customer to ensure that the outlet is correctly wired
and grounded to prevent an electrical shock. (D004)
DANGER
© Copyright IBM Corp. 1997, 2009
165
When working on or around the system, observe the following precautions:
Electrical voltage and current from power, telephone, and communication
cables are hazardous. To avoid a shock hazard:
v Connect power to this unit only with the IBM ISS provided power cord.
Do not use the IBM ISS provided power cord for any other product.
v Do not open or service any power supply assembly.
v Do not connect or disconnect any cables or perform installation,
maintenance, or reconfiguration of this product during an electrical storm.
v The product might be equipped with multiple power cords. To remove all
hazardous voltages, disconnect all power cords.
v Connect all power cords to a properly wired and grounded electrical outlet.
Ensure that the outlet supplies proper voltage and phase rotation according
to the system rating plate.
v Connect any equipment that will be attached to this product to properly
wired outlets.
v When possible, use one hand only to connect or disconnect signal cables.
v Never turn on any equipment when there is evidence of fire, water, or
structural damage.
v Disconnect the attached power cords, telecommunications systems,
networks, and modems before you open the device covers, unless
instructed otherwise in the installation and configuration procedures.
v Connect and disconnect cables as described in the following procedures
when installing, moving, or opening covers on this product or attached
devices.
To
1.
2.
3.
4.
disconnect:
Turn off everything (unless instructed otherwise).
Remove the power cords from the outlets.
Remove the signal cables from the connectors.
Remove all cables from the devices.
To connect:
1. Turn off everything (unless instructed otherwise).
2. Attach all cables to the devices.
3. Attach the signal cables to the connectors.
4. Attach the power cords to the outlets.
5. Turn on the devices.
(D005)
CAUTION notices
CAUTION:
Data processing environments can contain equipment transmitting on system
links with laser modules that operate at great than Class 1 power levels. For this
reason, never look into the end of an optical fiber cable or open receptacle.
(C027)
166
Enterprise Scanner: User Guide
CAUTION:
The battery contains lithium. To avoid possible explosion, do not burn or charge
the battery.
Do not:
v Throw or immerse into water
v Heat to more than 100°C (212°F)
v Repair or disassemble
Exchange only with the IBM ISS-approved part. Recycle or discard the battery as
instructed by local regulations. In the United States, IBM ISS has a process for
the collection of this battery. For information, call 1-800-426-4333. Have the IBM
ISS part number for the battery unit available when you call. (C003)
CAUTION:
For 19” rack mount products:
v Do not install a unit in a rack where the internal rack ambient temperatures
will exceed the manufacturer’s recommended ambient temperature for all your
rack-mounted devices.
v Do not install a unit in a rack where the air flow is compromised. Ensure that
air flow is not blocked or reduced on any side, front, or back of a unit used
for air flow through the unit.
v Consideration should be given to the connection of the equipment to the
supply circuit so that overloading the circuits does not compromise the supply
wiring or overcurrent protection. To provide the correct power connection to a
rack, refer to the rating labels located on the equipment in the rack to
determine the total power requirement of the supply circuit.
v (For sliding drawers) Do not pull or install any drawer or feature if the rack
stabilizer brackets are not attached to the rack. Do not pull out more than one
drawer at a time. The rack might become unstable if you pull out more than
one drawer at a time.
v (For fixed drawers) This drawer is a fixed drawer and must not be moved for
servicing unless specified by the manufacturer. Attempting to move the
drawer partially or completely out of the rack might cause the rack to become
unstable or cause the drawer to fall out of the rack.
(R001 Part 2 of 2)
Product handling information
One of the following two safety notices may apply to this product. Please refer to
the specific product specifications to determine the weight of the product to see
which applies.
CAUTION:
This part or unit is heavy but has a weight smaller than 18 kg (39.7 lb). Use care
when lifting, removing, or installing this part or unit. (C008)
CAUTION:
The weight of this part or unit is between 18 and 32 kg (39.7 and 70.5 lb). It
takes two persons to safely lift this part or unit. (C009)
Appendix. Safety, environmental, and electronic emissions notices
167
Product safety labels
One or more of the following safety labels may apply to this product.
DANGER
Hazardous voltage, current, or energy levels are present inside any component
that has this label attached. Do not open any cover or barrier that contains
this label. (L001)
DANGER
Multiple power cords. The product might be equipped with multiple power
cords. To remove all hazardous voltages, cdisconnect all power cords. (L003)
World trade safety information
Several countries require the safety information contained in product publications
to be presented in their national languages. If this requirement applies to your
country, a safety information booklet is included in the publications package
shipped with the product. The booklet contains the safety information in your
national language with references to the US English source. Before using a US
English publication to install, operate, or service this IBM ISS product, you must
first become familiar with the related safety information in the booklet. You should
also refer to the booklet any time you do not clearly understand any safety
information in the US English publications.
168
Enterprise Scanner: User Guide
Laser safety information
The following laser safety notices apply to this product:
CAUTION:
This product may contain one or more of the following devices: CD-ROM drive,
DVD-ROM drive, DVD-RAM drive, or laser module, which are Class 1 laser
products. Note the following information:
v Do not remove the covers. Removing the covers of the laser product could
result in exposure to hazardous laser radiation. There are no serviceable parts
inside the device.
v Use of the controls or adjustments or performance of procedures other than
those specified herein might result in hazardous radiation exposure. (C026)
CAUTION:
Data processing environments can contain equipment transmitting on system
links with laser modules that operate at greater than Class 1 power levels. For
this reason, never look into the end of an optical fiber cable or open receptacle.
(C027)
Laser compliance
All lasers are certified in the U.S. to conform to the requirements of DHHS 21 CFR
Subchapter J for class 1 laser products. Outside the U.S., they are certified to be in
compliance with IEC 60825 as a class 1 laser product. Consult the label on each
part for laser certification numbers and approval information.
Product recycling and disposal
This unit must be recycled or discarded according to applicable local and national
regulations. IBM encourages owners of information technology (IT) equipment to
responsibly recycle their equipment when it is no longer needed. IBM offers a
variety of product return programs and services in several countries to assist
equipment owners in recycling their IT products. Information on IBM ISS product
recycling offerings can be found on IBM’s Internet site at http://
www.ibm.com/ibm/environment/products/prp.shtml.
Esta unidad debe reciclarse o desecharse de acuerdo con lo establecido en la
normativa nacional o local aplicable. IBM recomienda a los propietarios de equipos
de tecnología de la información (TI) que reciclen responsablemente sus equipos
cuando éstos ya no les sean útiles. IBM dispone de una serie de programas y
servicios de devolución de productos en varios países, a fin de ayudar a los
propietarios de equipos a reciclar sus productos de TI. Se puede encontrar
información sobre las ofertas de reciclado de productos de IBM en el sitio web de
IBM http:// www.ibm.com/ibm/environment/products/prp.shtml.
Appendix. Safety, environmental, and electronic emissions notices
169
Notice: This mark applies only to countries within the European Union (EU) and
Norway.
Appliances are labeled in accordance with European Directive 2002/96/EC
concerning waste electrical and electronic equipment (WEEE). The Directive
determines the framework for the return and recycling of used appliances as
applicable through the European Union. This label is applied to various products
to indicate that the product is not to be thrown away, but rather reclaimed upon
end of life per this Directive.
In accordance with the European WEEE Directive, electrical and electronic
equipment (EEE) is to be collected separately and to be reused, recycled, or
recovered at end of life. Users of EEE with the WEEE marking per Annex IV of the
WEEE Directive, as shown above, must not dispose of end of life EEE as unsorted
municipal waste, but use the collection framework available to customers for the
return, recycling, and recovery of WEEE. Customer participation is important to
minimize any potential effects of EEE on the environment and human health due
to the potential presence of hazardous substances in EEE. For proper collection and
treatment, contact your local IBM representative.
Remarque: Cette marque s’applique uniquement aux pays de l’Union Européenne
et à la Norvège.
L’etiquette du système respecte la Directive européenne 2002/96/EC en matière de
Déchets des Equipements Electriques et Electroniques (DEEE), qui détermine les
dispositions de retour et de recyclage applicables aux systèmes utilisés à travers
l’Union européenne. Conformément à la directive, ladite étiquette précise que le
produit sur lequel elle est apposée ne doit pas être jeté mais être récupéré en fin de
vie.
Battery return program
This product contains a lithium battery. The battery must be recycled or disposed
of properly. Recycling facilities may not be available in your area. For information
170
Enterprise Scanner: User Guide
on disposal of batteries outside the United States, go to http://www.ibm.com/
ibm/environment/products/ batteryrecycle.shtm or contact your local waste
disposal facility.
In the United States, IBM has established a return process for reuse, recycling, or
proper disposal of used IBM sealed lead acid, nickel cadmium, nickel metal
hydride, and other battery packs from IBM equipment. For information on proper
disposal of these batteries, contact IBM at 1-800-426- 4333. Please have the IBM
part number listed on the battery available prior to your call.
For Taiwan:
Please recycle batteries
For the European Union:
Notice: This mark applies only to countries within the European Union (EU).
Batteries or packing for batteries are labeled in accordance with European Directive
2006/66/EC concerning batteries and accumulators and waste batteries and
accumulators. The Directive determines the framework for the return and recycling
of used batteries and accumulators as applicable throughout the European Union.
This label is applied to various batteries to indicate that the battery is not to be
thrown away, but rather reclaimed upon end of life per this Directive.
Les batteries ou emballages pour batteries sont étiquetés conformément aux
directives européennes 2006/66/EC, norme relative aux batteries et accumulateurs
en usage et aux batteries et accumulateurs usés. Les directives déterminent la
marche à suivre en vigueur dans l’Union Européenne pour le retour et le recyclage
des batteries et accumulateurs usés. Cette étiquette est appliquée sur diverses
batteries pour indiquer que la batterie ne doit pas être mise au rebut mais plutôt
récupérée en fin de cycle de vie selon cette norme.
Appendix. Safety, environmental, and electronic emissions notices
171
In accordance with the European Directive 2006/66/EC, batteries and accumulators
are labeled to indicate that they are to be collected separately and recycled at end
of life. The label on the battery may also include a symbol for the metal concerned
in the battery (Pb for lead, Hg for the mercury, and Cd for cadmium). Users of
batteries and accumulators must not dispose of batteries and accumulators as
unsorted municipal waste, but use the collection framework available to customers
for the return, recycling, and treatment of batteries and accumulators. Customer
participation is important to minimize any potential effects of batteries and
accumulators on the environment and human health due to potential presence of
hazardous substances. For proper collection and treatment, contact your local IBM
representative.
For California:
Perchlorate Material - special handling may apply. See http://www.dtsc.ca.gov/
hazardouswaste/perchlorate.
The foregoing notice is provided in accordance with California Code of
Regulations Title 22, Division 4.5, Chapter 33. Best Management Practices for
Perchlorate Materials. This product, part, or both may include a lithium manganese
dioxide battery which contains a perchlorate substance.
Electronic emissions notices
The following statements apply to this IBM product. The statement for other IBM
products intended for use with this product will appear in their accompanying
manuals.
Federal Communications Commission (FCC) Statement
Note: This equipment has been tested and found to comply with the limits for a
Class A digital device, pursuant to Part 15 of the FCC Rules. These limits are
designed to provide reasonable protection against harmful interference when the
equipment is operated in a commercial environment. this equipment generates,
uses, and can radiate radio frequency energy and, if not installed and used in
accordance with the instructions contained in the installation manual, may cause
harmful interference to radio communications. Operation of this equipment in a
residential area is likely to cause harmful interference, in which case the user will
be required to correct the interference at his own expense.
Note: Properly shielded and grounded cables and connectors must be used in
order to meet FCC emission limits. IBM is not responsible for any radio or
television interference caused by using other than recommended cables and
connectors, by installation or use of this equipment other than xvi IBM Internet
Security Systems as specified in the installation manual, or by any other
unauthorized changes or modifications to this equipment. Unauthorized changes
or modifications could void the user’s authority to operate the equipment.
172
Enterprise Scanner: User Guide
Note: This device complies with Part 15 of the FCC Rules. Operation is subject to
the following two conditions: (1) this device may not cause harmful interference,
and (2) this device must accept any interference received, including interference
that may cause undesired operation.
Canadian Department of Communications Compliance Statement
This Class A digital apparatus complies with Canadian ICES-003.
Avis de conformité aux normes du ministère des Communications du Canada
Cet appareil numérique de las classe A est conform à la norme NMB-003 du
Canada.
European Union (EU) Electromagnetic Compatibility Directive
This product is in conformity with the protection requirements of EU Council
Directive 2004/108/ EEC on the approximation of the laws of the Member States
relating to electromagnetic compatibility. IBM ISS cannot accept responsibility for
any failure to satisfy the protection requirements resulting from a
non-recommended modification of the product, including the fitting of non-IBM
ISS option cards.
This product has been tested and found to comply with the limits for Class A
Information Technology Equipment according to European Standard EN 55022. The
limits for Class equipment were derived for commercial and industrial
environments to provide reasonable protection against interference with licensed
communication equipment.
Warning:
This is a Class A product. In a domestic environment, this product may cause radio
interference in which case the user may be required to take adequate measures.
European Community contact:
IBM Technical Regulations
Pascalstr. 100, Stuttgart, Germany 70569
Telephone: 0049 (0) 711 785 1176
Fax: 0049 (0) 711 785 1283
e-mail: [email protected]
EC Declaration of Conformity (In German)
Deutschsprachiger EU Hinweis: Hinweis für Geräte der Klasse A EU-Richtlinie zur
Elektromagnetischen Verträglichkeit
Dieses Produkt entspricht den Schutzanforderungen der EU-Richtlinie
89/336/EWG zur Angleichung der Rechtsvorschriften über die elektromagnetische
Verträglichkeit in den EUMitgliedsstaaten und hält die Grenzwerte der EN 55022
Klasse A ein.
Um dieses sicherzustellen, sind die Geräte wie in den Handbüchern beschrieben zu
installieren und zu betreiben. Des Weiteren dürfen auch nur von der IBM
empfohlene Kabel angeschlossen werden. IBM übernimmt keine Verantwortung für
die Einhaltung der Schutzanforderungen, wenn das Produkt ohne Zustimmung der
Appendix. Safety, environmental, and electronic emissions notices
173
IBM verändert bzw. wenn Erweiterungskomponenten von Fremdherstellern ohne
Empfehlung der IBM gesteckt/eingebaut werden.
EN 55022 Klasse A Geräte müssen mit folgendem Warnhinweis versehen werden:
″Warnung: Dieses ist eine Einrichtung der Klasse A. Diese Einrichtung kann im
Wohnbereich Funk-Störungen verursachen; in diesem Fall kann vom Betreiber
verlangt werden, angemessene Maßnahmen zu ergreifen und dafür
aufzukommen.″
Deutschland: Einhaltung des Gesetzes über die elektromagnetische
Verträglichkeit von Geräten
Dieses Produkt entspricht dem “Gesetz über die elektromagnetische Verträglichkeit
von Geräten (EMVG)“. Dies ist die Umsetzung der EU-Richtlinie 89/336/EWG in
der Bundesrepublik Deutschland.
Zulassungsbescheinigung laut dem Deutschen Gesetz über die
elektromagnetische Verträglichkeit von Geräten (EMVG) vom 18. September
1998 (bzw. der EMC EG Richtlinie 89/336) für Geräte der Klasse A.
Dieses Gerät ist berechtigt, in Übereinstimmung mit dem Deutschen EMVG das
EGKonformitätszeichen - CE - zu führen.
Verantwortlich für die Konformitätserklärung nach Paragraf 5 des EMVG ist die
IBM Deutschland GmbH, 70548 Stuttgart.
Informationen in Hinsicht EMVG Paragraf 4 Abs. (1) 4:
Das Gerät erfüllt die Schutzanforderungen nach EN 55024 und EN 55022 Klasse
A
update: 2004/12/07
People’s Republic of China Class A Compliance Statement:
This is a Class A product. In a domestic environment, this product may cause radio
interference in which case the user may need to perform practical actions.
Japan Class A Compliance Statement:
This product is a Class A Information Technology Equipment and conforms to the
standards set by the Voluntary Control Council for Interference by Information
Technology Equipment (VCCI). In a xviii IBM Internet Security Systems domestic
environment, this product may cause radio interference in which case the user may
be required to take adequate measures.
174
Enterprise Scanner: User Guide
Korean Class A Compliance Statement:
Appendix. Safety, environmental, and electronic emissions notices
175
176
Enterprise Scanner: User Guide
Index
A
Access policy 35, 39
account lockout 12
account lockout (SiteProtector) 51
active module icon 158
ad hoc assessment scan 65
monitoring status 23
ad hoc discovery scan 64
monitoring status 23
ad hoc scan
running 22
types of 81
Ad Hoc Scan Control policy 64, 82
ad hoc scan policies 20
ad hoc scans
expected scanning behavior 99
Admin password 39
advanced parameters
event notification 39
event notification advanced
parameters 39
agent managers 151
agent policies 35, 43, 44
descriptions 35
policy inheritance 35
viewing 33
agent status
viewing (Proventia Manager) 160
Alert Event Log page 127
alert log
clearing events from 129
downloading 128
finding specific events 129
refreshing 129
saving 128
searching by alert ID 129
searching by filtering options 129
statistics 124
alert logging (SiteProtector) 153
alert risk icons 127
alerts 122
Alerts page 128, 129
Alternate Update location 151
Alternate Update Server tab 151
AS_Log.log 123
assessment 65
assessment checks
filtering 11, 50
grouping 9
Assessment checks 9
sorted by groups 9
assessment checks (SiteProtector)
grouping 49
sorted by groups 49
assessment content update 148
Assessment Credentials policy 16, 45, 55
Assessment Credentials policy
(SiteProtector) 89
assessment modules 161
Assessment policy 9, 10, 11, 45, 48, 49,
50
© Copyright IBM Corp. 1997, 2009
Assessment reports 117
Asset Assessment Detail 117
Asset Assessment Summary 117
Operating System Summary 117
Operating System Summary by
Asset 117
PCI Detail 117
PCI Summary 117
Service Summary by Asset 117
sorting options 117
Top Vulnerabilities 117
Vulnerability Assets 117
Vulnerability by Asset 117
Vulnerability by Group 117
Vulnerability by OS 117
Vulnerability Counts 117
Vulnerability Counts by Asset 117
Vulnerability Detail by Asset 117
Vulnerability Differential 117
Vulnerability Names by Assets 117
Vulnerability Remedies by Asset 117
Vulnerability Summary by Asset 117
assessment subtask 5, 41
assessment task 73
assessment throttling 65
asset checks
displaying information about 10, 48
asset policies 45, 58
scope 45
viewing 33
asset policy 8, 9, 19, 48, 49, 50, 55, 61, 63
asset policy (SiteProtector) 47, 51, 87, 88,
89
authentication credentials
(SiteProtector) 89
authentication methods 150
authentication status
viewing in SiteProtector 160
automatic update 149
automatic updates 154
configuring 154
available downloads 156
available installs 156
available updates
download 45, 156
install 45, 156
locate 45
B
background assessment scan
minimum requirement 98
background discovery scan
minimum requirement 98
background discovery scans 46
background scan
enabling 97
suspending 97
types of 81
background scanning checklists 83
background scans 57, 76, 83
backup 144, 145, 146
Backup and Recovery page
base management task 72
bootloader password 39
144, 146
C
CA Certificate 152
CAM modules 161
status of 161
CAM modules page 161
Cancel scan icon 23
Checks tab 10
Command Jobs window 99
Common Settings 12
Common Settings (SiteProtector)
configuration settings 145
configuring a scan policy 20
criticality 71
unassigned 71
CRM 124
crm-esm.log 124
CrmCommTrace.log 123
CrmTrace.log 124
CSV file
generate from LMI 24
CVSS Base 111
CVSS Score 111
CVSS Temporal 111
51
D
date 44
change appliance setting 44
Debug Settings tab 65
diagnostic information 160
Discovery policy 45, 46
scope 46
Discovery policy (SiteProtector) 47
discovery subtask 5, 41
distributed scanning (SiteProtector) 68
DNS search path
configuring 6, 42
DNS settings 40
DNS tab 6, 42
documentation viii
documentation web site viii
E
Engine Log 124
Enterprise Scanner
remove from SiteProtector 143
shutting down (Proventia
Manager) 142
Enterprise Scanner (ES) logs
downloading 126
Enterprise Scanner policies
policy inheritance 30
Enterprise Scanner policy repository
31
177
Enterprise Scanner report
viewing in SiteProtector Console 119
Enterprise Scanner reports
running in SiteProtector 117
Enterprise Scanner scan module 161
Enterprise Scanner scheduler
module 162
ES logs 122, 124
changing detail 124
ESM blade log 124
ETH0 40
ETH1 40
event notification 38
configuring 38
Event Notification tab 153
explicit-trust 150, 152
L
F
N
filename_eventdata.csv 128
filename_eventinfo.csv 128
filename_eventresp.csv 128
fingerprinting 12
fingerprinting (SiteProtector) 51
firmware update 148
install 154
one-time firmware update 154
schedule 154
Full Backup tab 146
full system backups 146
NAT rules 4, 40
Network Interface Configuration page 4,
5, 6
network interface status 158
network interfaces 40
changing settings 40
network location 36
Network Locations page 7
Network Locations policy 35, 36, 37, 45
Network Locations tab 36
network services 18, 63
Network Services policy 62, 63
Network Services policy
(SiteProtector) 88
network time protocol (NTP) 44
Networking policy 35, 40, 41, 42
Notification policy 35, 38
NTP (Network Time Protocol) 44
G
get log file 126
getFullLogs 126
getLogs 126
Global perspective (SiteProtector)
68
M
Management Interface tab 4, 40
management task 72
manually download 156
manually install 156
migrating local agents 32
R
remediation 135
remediation tasks 136
Remedy 134
Report view 119
restore 144
Resume scan icon 23
rollbacks 149
root password 39
Routes tab 7, 37
routing 7, 37
routing mode 40
running Enterprise Scanner reports
117
O
H
Half-Scan Connections 65
Home page 158
HTML reports
generate from LMI 24
HTTP proxy 153
configuring 153
I
IBM Internet Security Systems
technical support viii
Web site viii
IBM ISS Download Center 148, 151
IBM license agreement viii
Interface Log 124
IP range 8, 47, 64
iss-esm process 161
iss-esm.log 124
iss-esmScheduler process 162
iss-esmScheduler-stdout.log 123
iss-esmScheduler.log 124
iss-esmSchedWatch.log 123
iss-esmWatch.log 123
178
LMI Scan Control page 22
Locally Managed Agents node 32
Log File Management page 126
log status 124
Log Status page 124
logs 122
perspective (continued)
configuring routes for 7, 37
default 36
defining 36
defining routes 36
Network Locations tab 7, 37
selecting for a scan 22
perspective (SiteProtector) 68
adding for an agent 69
in policies 69
network locations 69
user-defined 85
perspectives, assigning 58
policy inheritance 99
Policy Management page 8, 10, 12, 16,
18, 20
port ranges 12
port ranges (SiteProtector) 51
portlets 106
preface vii
protection status 158
Proventia Manager Home page 158
Proxy Server page 153
purging scan data 25
Enterprise Scanner: User Guide
one-time update 149
operational status 158
OS fingerprinting 8, 12
OS fingerprinting (SiteProtector) 47, 51
OS identification 12, 46, 104, 105
certainty 104
exceptions 105
reassessing 105
rules 105
sources of 104
user-supplied 105
OS identification (SiteProtector) 51
OSID 104, 105
See OS identification
P
packet capturing 65
password guessing checks
password guessing checks
(SiteProtector) 51
passwords 39
changing 39
Pause scan icon 23
perspective 5, 41, 57
assigning 7, 37
12
S
safety notices 165
scan
excluding assets from 19, 61, 87
excluding hosts from 19, 61, 87
excluding ports from 19, 61, 87
range of IPs 8
viewing results 24
without full permissions 36
scan (SiteProtector)
allowed 86
initiating 98
range of IPs 47
Scan Control policy 45, 57, 58
Scan Control policy (SiteProtector) 84
scan cycle duration 76
Scan Exclusion policy 19, 45, 61
Scan Exclusion policy (SiteProtector) 87
Scan Interface tab 5, 41
scan job 72
canceling 96
finding 92
pausing 96
rerunning 96
restarting 96
scan job (continued)
resuming 96
scan jobs (SiteProtector) 71
scan policy
configuring from LMI 20
scan priority 99
Scan Reports page 24
scan results
exporting 24
Scan Results page 24, 25
Scan Status page 23
Scan Window policy 45, 59, 60, 85
Scan Window policy (SiteProtector) 85
allowed scanning 85
scan windows 59, 76
scanning (SiteProtector)
minimum requirements 98
scanning behaviors 99
ad hoc scan 99
background scan 100
scanning cycle 75
scanning cycles 57
scanning interface
assigning perspective 7, 37
scanning refresh cycle 80
scanning windows 80
scans
define allowed times for 60
scheduled updates
installing 149
Scheduler Log 124
Sensor Maintenance page 161
sensor processes 161
troubleshooting 161
Services policy 35, 43
SiteProtector
alert logging 153
authentication level options 152
event delivery 153
SiteProtector Console
viewing agent status 160
SiteProtector ticketing 134
SiteProtector X-Press Update Server 150
SiteProtector XPU server 150
SMB Connections 65
snapshot files 145
applying 145
creating 145
deleting 145
downloading 145
uploading 145
snapshots 144, 145
SNMP Get 43
SNMP Trap 43
SSH domain 17, 56, 90
SSH logon 17, 56, 90
SSL 18, 62, 63, 88
static route
adding 7, 37
stderr 123
stdout 123
stopped module icon 158
subtask 71, 72, 77
importance 72
Summary page 106
Summary view 106
SiteProtector Console 106
vulnerability view
vulnerability view
system 114
vulnerability view
vulnerability view
names 115
system backup
create 146
restore 146
System Diagnostics page 160
System Event Log page 123
system events 38
configuring notification for 38
system logs 122, 123
system status 158, 160
viewing in SiteProtector 160
by object 113
by target operating
by vuln names 115
by vulnerability
W
Web site, IBM Internet Security
Systems viii
T
X
task prioritization 73, 74
TCP 12, 18, 51, 63, 88
Temporary Lockout Allowed 12
Temporary Lockout Allowed
(SiteProtector) 51
ticketing 134, 135
ticketing reports
Enterprise Scanner 136
time 44
change appliance setting 44
Time policy 35, 44
Trace Log 124
tracking and remediation 135
trust-all 150, 152
X-Force alert icon 127
X-Force help 34
X-Press Update Server 148, 150, 151
certificate file 150
path 150
port number 150
XPU 148
types of 148
XPU process 148, 149
XPU server 148
U
UDP 12, 18, 51, 63, 88
unknown state module icon 158
unverified OS 12
unverified OS (SiteProtector) 51
Update Settings policy 35, 45, 151, 153,
154
updates 156
locations of 148
roll back 149
types of 148
updates status 158
user-defined perspective 57
user-defined perspective
(SiteProtector) 85
V
Vuln Analysis-Detail 108
Vuln Analysis-Object 108
Vuln Analysis-Target OS 108
Vuln Analysis-Vuln Name 108
Vuln Analysis–Asset 108
vulnerabilities
creating custom views 108
viewing by asset 108
viewing by detail 111
viewing by object 113
viewing by target OS 114
viewing by vuln names 115
viewing in the SiteProtector
Console 108
vulnerability auto ticketing 134
vulnerability help 34
vulnerability management options
vulnerability view by asset 108
vulnerability view by detail 111
106
Index
179