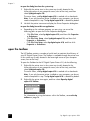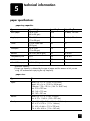
1
hp digital
copier printer 410
printing guide
© Copyright Hewlett-Packard
Company 2003
All rights are reserved. No part of the
document may be photocopied,
reproduced, or translated to another
language without the prior written
consent of Hewlett-Packard Company.
Adobe and the Acrobat
logo are either registered
trademarks or trademarks
of Adobe Systems
Incorporated in the United
States and/or other
countries.
Portions Copyright © 1989-2002
Palomar Software Inc. The HP Digital
Copier Printer 410 includes printer
driver technology licensed from
Palomar Software, Inc.
www.palomar.com
Hewlett-Packard assumes no
responsibility for any errors
that may appear in this
document, nor does it make
expressed or implied warranty
of any kind with regard to this
material, including, but not
limited to, the implied
warranties of merchantability
and fitness for a particular
purpose.
The Hewlett-Packard Company shall
not be liable for incidental or
consequential damages in connection
with, or arising out of the furnishing,
performance, or use of this document
and the program material which it
describes.
Note: Regulatory information can be
found in the “Technical Information”
section of the HP Digital Copier Printer
410 Reference Guide.
Copyright © 1999-2001 Apple
Computer, Inc.
Apple, the Apple logo, Mac, Mac
logo, Macintosh, and Mac OS are
trademarks of Apple Computer, Inc.,
registered in the U.S. and other
countries.
Publication number: Q1645-90109
First edition: January 2003
Printed in U.S.A. or Germany
®
®
Windows , Windows NT , Windows
ME®, Windows XP®, and Windows
2000® are U.S.-registered trademarks
of Microsoft Corporation.
Intel® and Pentium® are registered
trademarks of Intel Corporation.
notice
The information contained in this
document is subject to change without
notice and should not be construed as
a commitment by the Hewlett-Packard
Company.
It is not lawful in many places to make
copies of the following items. When in
doubt, check with a legal
representative first.
• Governmental paper or
documents:
- Passports
- Immigration papers
- Selective service papers
- Identification badges, cards, or
insignias
• Governmental stamps:
- Postage stamps
- Food stamps
• Checks or drafts drawn on
Governmental agencies
• Paper currency, traveler’s checks,
or money orders
• Certificates of deposit
• Copyrighted works
safety information
Warning! To prevent fire
or shock hazard, do not
expose this product to
rain or any type of
moisture.
Always follow basic safety precautions
when using this product to reduce risk
of injury from fire or electric shock.
WARNING: potential shock
hazard
1
Read and understand all
instructions in the setup poster.
2
Use only a grounded electrical
outlet when connecting the unit to
a power source. If you do not
know whether the outlet is
grounded, check with a qualified
electrician.
3
Observe all warnings and
instructions marked on the
product.
4
Unplug this product from wall
outlets before cleaning.
5
Do not install or use this product
near water or when you are wet.
6
Install the product securely on a
stable surface.
7
Install the product in a protected
location where no one can step
on or trip over the line cord, and
where the line cord will not be
damaged.
8
If the product does not operate
normally, see the online
Troubleshooting help.
9
No operator-serviceable parts
inside. Refer servicing to qualified
service personnel.
10 Use in a well-ventilated area.
contents
1
set up printing . . . . . . . . . . . . . . . . . . . . . . . . . . . . . . . . . . . . . . 1
about this guide. . . . . . . . . . . . . . . . . . . . . . . . . .
install your hp digital copier printer software . . . . . .
uninstall and reinstall software . . . . . . . . . . . . . . . .
open the printer properties dialog box . . . . . . . . . .
open the toolbox . . . . . . . . . . . . . . . . . . . . . . . . .
2
...
...
...
...
...
...
...
...
...
...
...
...
...
...
...
....
....
....
....
....
. 7
10
10
11
11
12
use printing features . . . . . . . . . . . . . . . . . . . . . . . . . . . . . . . . . 13
make the hp digital copier printer the default printer . . . . . . . . . . . . . .
change print settings . . . . . . . . . . . . . . . . . . . . . . . . . . . . . . . . . . .
use the quality tab . . . . . . . . . . . . . . . . . . . . . . . . . . . . . . . . . . . . .
use the layout tab. . . . . . . . . . . . . . . . . . . . . . . . . . . . . . . . . . . . . .
use the features tab . . . . . . . . . . . . . . . . . . . . . . . . . . . . . . . . . . . .
use the color tab . . . . . . . . . . . . . . . . . . . . . . . . . . . . . . . . . . . . . .
use the hp toolbox . . . . . . . . . . . . . . . . . . . . . . . . . . . . . . . . . . . . .
stop a print job . . . . . . . . . . . . . . . . . . . . . . . . . . . . . . . . . . . . . . .
4
1
1
5
5
6
load paper and envelopes. . . . . . . . . . . . . . . . . . . . . . . . . . . . . . 7
load paper . . . . . . . . . . . . . . . . . . . . . . . . . . . . . . . . . . . . . . . . . .
load envelopes . . . . . . . . . . . . . . . . . . . . . . . . . . . . . . . . . . . . . . .
load postcards or hagaki cards . . . . . . . . . . . . . . . . . . . . . . . . . . . .
load photo paper . . . . . . . . . . . . . . . . . . . . . . . . . . . . . . . . . . . . .
tips for loading other types of paper. . . . . . . . . . . . . . . . . . . . . . . . .
set the paper type and size . . . . . . . . . . . . . . . . . . . . . . . . . . . . . . .
3
.
.
.
.
.
13
13
15
18
21
25
26
28
troubleshooting help . . . . . . . . . . . . . . . . . . . . . . . . . . . . . . . . . 29
hp digital copier troubleshooting tips . . . . . . . . . . . . . . . . . . . . . . . . 29
printing problems. . . . . . . . . . . . . . . . . . . . . . . . . . . . . . . . . . . . . . 29
hp digital copier printer error messages . . . . . . . . . . . . . . . . . . . . . . 36
5
technical information. . . . . . . . . . . . . . . . . . . . . . . . . . . . . . . . . 37
paper specifications . . . . . . . . . . . . . . . . . . . . . . . . . .
print specifications . . . . . . . . . . . . . . . . . . . . . . . . . . .
print margin specifications. . . . . . . . . . . . . . . . . . . . . .
physical specifications . . . . . . . . . . . . . . . . . . . . . . . .
power specifications . . . . . . . . . . . . . . . . . . . . . . . . . .
environmental specifications . . . . . . . . . . . . . . . . . . . .
additional specifications . . . . . . . . . . . . . . . . . . . . . . .
...
...
...
...
...
...
...
...
...
...
...
...
...
...
....
....
....
....
....
....
....
37
38
39
40
40
40
40
index . . . . . . . . . . . . . . . . . . . . . . . . . . . . . . . . . . . . . . . . 41
iii
contents
iv
hp digital copier printer 410
set up printing
1
about this guide
This HP Digital Copier Printer 410 Printing Guide contains the information you
need to connect your new HP Digital Copier Printer to a computer rather than
using the unit as a stand-alone copier. This connected option allows you to use
your unit as a copier/printer with a wide range of settings and print functions.
Before you use this guide, be sure to thoroughly read and understand the HP
Digital Copier Printer 410 Reference Guide, which contains information that you
need to know about your copier/printer before installing the software.
install your hp digital copier printer software
Your HP Digital Copier Printer comes with a universal serial bus (USB) cable you
can use to connect your copier/printer to a computer running Windows 98,
98SE, Me, 2000, or XP. This USB connection turns your stand-alone copier into
a copier/printer that lets you print from your computer.
before you install the software
Connecting to your HP Digital Copier Printer with the USB cable is very simple.
1
Before connecting your copier/printer with the USB cable, follow the
instructions on the HP Digital Copier Printer 410 Setup Poster that came
with the copier/printer, and make a test copy.
2
Close all virus protection programs and other software running on your
computer.
3
With your copier/printer powered on, connect your copier/printer to your
computer by plugging in the USB cable.
what works
what does not work
Plugging into the USB port on your
computer
Plugging into the USB port located on
the keyboard
Plugging into a powered hub that is
connected to the USB port on your
computer
Plugging into a non-powered USB hub
Tip: The ends of the USB cable are not identical. One end will fit
into your computer or hub and the other end will only fit into the
HP Digital Copier Printer.
1
chapter 1
4
The Add New Hardware Wizard appears. Depending on your operating
system, proceed with either install on Windows 98, 98SE, Me, or 2000 on
page 2, or install on Windows XP on page 3.
install on Windows 98, 98SE, Me, or 2000
After you perform steps 1 through 4 in before you install the software on page 1,
the Add New Hardware Wizard dialog box appears.
Note: The Wizard may identify the HP Digital Copier Printer 410 by name,
or it may identify the device as “Unknown.” This does not affect the success
of the installation.
2
1
Insert the CD that came with your copier/printer into your computer’s
CD-ROM drive.
2
Click Next in the Add New Hardware Wizard dialog box.
3
Select the option to have Windows search your computer for the correct
print driver, and then click Next.
Depending on your operating system, this is either Search for the best
driver for your device or Search for a suitable driver for my device.
4
Select CD-ROM drive, and then click Next.
Windows asks you to wait while it searches for files.
5
When the appropriate .inf file is located, click Next to start the installation.
For Windows 98, 98SE, and Me, this is hpf4100b.inf. For Windows
2000, this is hpf4100p.inf.
hp digital copier printer 410
set up printing
Wait while Windows copies additional files. This may take a few minutes.
Caution! The installation is not complete until the HP Digital
Copier Printer 410 icon appears in the lower-right corner of your
computer screen. This may take several minutes. During this time,
the computer may not appear to be working. However, the
installation will fail if you try to use the copier/printer or turn it off
before the installation is complete.
6
Click Finish.
You are now ready to print from your computer to your HP Digital Copier Printer.
install on Windows XP
After you perform steps 1 through 4 in before you install the software on page 1,
the following Found New Hardware Wizard dialog box appears.
Note: Windows XP incorrectly identifies the HP Digital Copier Printer 410
as “Hewlett-Packardhp digital copier 410.” This does not affect the success
of the installation.
1
Insert the CD that came with your copier/printer into your computer’s
CD-ROM drive.
2
Select Install the software automatically, and then click Next.
Windows searches for the correct files. A list of acceptable print drivers for
the HP Digital Copier Printer 410 appears.
3
Select the first hpf4100p.inf file from this list (this is the .inf file at the top
level of your CD-ROM drive), and then click Next to start the installation.
Caution! It may take several minutes for Windows XP to install the
software. During this time, the computer may not appear to be
working. However, do not interrupt the installation process.
4
printing guide
Click Finish.
Wait while Windows copies additional files. This may take a few minutes.
The installation is finished when one of the following occur:
– A taskbar message lets you know that the copier/printer is ready.
– A new printer icon appears in the lower-right corner of your screen.
3
chapter 1
You are now ready to print from your computer to your HP Digital Copier Printer.
add a printer
If you choose not to install the HP Digital Copier Printer software on your
computer with the New Hardware Wizard when you first connect the copier/
printer to your computer, you can install it later with the Add a Printer utility.
1
Depending on the operating system you are using, use one of the following
paths to open the Add Printer Wizard:
– From the Windows Start menu, select Settings, Printers, and then
double-click Add Printer.
– For Windows XP, navigate from the Start menu to Printers and Faxes,
and then click Add a printer.
2
Click Next.
3
Select to install a local printer, and then click Next.
– If you select Automatically detect and install my Plug and Play printer,
Windows opens the Add New Hardware wizard. See install on
Windows 98, 98SE, Me, or 2000 on page 2 or install on Windows XP
on page 3 for more information.
– If you do not select Automatically detect and install my Plug and Play
printer, continue to step 4.
4
Click Use the following port, select the port where you connected your
copier/printer, and then click Next.
5
Click Have Disk.
The Install from Disk dialog box appears.
6
Insert the CD that came with your copier/printer into your computer’s
CD-ROM drive.
7
Select your computer’s CD-ROM drive from the drop-down menu, and then
click OK.
Windows searches until it identifies a valid print driver on the CD.
8
Select hp digital copier 410, and then click Next.
9
Click Yes if you want to make the HP Digital Copier Printer 410 the default
printer on your computer, and then click Next.
10 Click Do not share this printer, and then click Next.
11 Click Yes if you want to print a test page, and then click Next.
12 Click Finish.
Wait while Windows copies additional files. This may take a few minutes.
Caution! The installation is not complete until the Add Printer
Wizard closes. This may take several minutes. During this time, the
computer may not appear to be working. However, the installation
will fail if you try to use the copier/printer or turn it off before the
installation is complete.
4
hp digital copier printer 410
set up printing
uninstall and reinstall software
Caution! This is the only way to completely remove the HP Digital
Copier Printer software from your computer. Using any other
method may fail.
The following steps uninstall then reinstall the HP Digital Copier Printer software
on your computer:
1
Disconnect the USB cable from your HP Digital Copier Printer.
Caution! You must complete this step first. If you do not disconnect
the copier/printer from your computer, the software will not
uninstall completely. You will need to follow this procedure again
after disconnecting the printer.
2
Close all virus protection programs and other software running on your
computer.
3
Insert the CD that came with your copier/printer into your computer’s
CD-ROM drive.
Note: If you have misplaced the CD that came with your copier/printer, you
can download the software from the Internet at:
http://www.hp.com/support
4
From the Windows Start menu, select Run, and then click Browse.
5
Navigate to your CD-ROM drive, then locate and double-click the file
labeled uninstall_dc410.bat.
6
When the uninstall feature finishes, restart your computer.
Tip: This step takes several minutes to complete, even though your
system may look like it is idle and the cursor is ready. The uninstall
process occurs in the background after restart. Do not interrupt the
process or reconnect the HP Digital Copier Printer for a minimum
of five minutes.
7
After a minimum of five minutes, reconnect your HP Digital Copier Printer to
your computer with the USB cable.
The New Hardware Wizard appears.
8
Reinstall the software according to the instructions for your operating
system in install on Windows 98, 98SE, Me, or 2000 on page 2, or install
on Windows XP on page 3.
open the printer properties dialog box
There are three main ways to open the Printer Properties dialog box. You can
open it from the Windows Start menu, the system tray, or within an application.
to open the dialog box from the Windows Start menu:
printing guide
1
Choose one of the following methods:
– From the Windows Start menu, select Settings, Printers.
– For Windows XP, navigate from the Start menu to Printers and Faxes.
2
Right-click hp digital copier 410, and select Properties; or, for Windows XP,
select Printing Preferences.
5
chapter 1
to open the dialog box from the system tray:
1
Right-click the printer icon in the system tray (usually located in the
lower-right corner of your computer screen, next to the time), and then
select hp digital copier 410.
The menu closes, and hp digital copier 410 is marked with a checkmark.
Note: If you only have one printer installed on your computer, you do not
need to complete this step. The hp digital copier 410 is selected by default.
2
Left-click the printer icon once to display the Printer Properties dialog box.
to open the dialog box within an application:
`
Depending on the software program you are using, use one of the
following paths to open the Printer Properties dialog box:
– Click File, Print, select hp digital copier 410, and then click Properties
or Preferences.
– Click File, Print, Setup, select hp digital copier 410, and then click
Properties or Preferences.
– Click File, Print Setup, select hp digital copier 410, and then click
Properties or Preferences.
open the toolbox
The HP Toolbox contains a number of useful tools to maintain the efficiency of
your HP Digital Copier Printer. The Toolbox is available through the printer icon
in the system tray (usually located in the lower-right corner of your computer
screen, next to the time).
To open the Toolbox for the HP Digital Copier Printer 410, do the following:
1
Right-click the printer icon in the system tray (usually located in the
lower-right corner of your computer screen, next to the time), and then
select hp digital copier 410.
The menu closes, and hp digital copier 410 is marked with a checkmark.
Note: If you only have one printer installed on your computer, you do not
need to complete this step. The hp digital copier 410 is selected by default.
2
Right-click the printer icon again, and then select Open hp digital
copier 410 Toolbox.
For information on using the features within the Toolbox, see use the hp
toolbox on page 26.
6
hp digital copier printer 410
load paper and envelopes
2
This chapter contains the following topics:
•
load paper
•
load envelopes
•
load postcards or hagaki cards
•
load photo paper
•
tips for loading other types of paper
load paper
Following is the basic procedure for loading blank paper. There are specific
considerations for loading certain types of paper and transparency film. After
you review this procedure, see tips for loading other types of paper on page 11.
For best results, adjust the paper settings each time you change paper types or
paper sizes. For more information, see set the paper type and size on page 12.
to load the paper tray:
1
Remove (pull out) the output tray and slide the paper-width and
paper-length guides to their outermost positions.
2
Tap the stack on a flat surface to align the edges of the paper, and then
check the paper for the following:
– Make sure it is free of rips, dust, wrinkles, and curled or bent edges.
– Make sure all the paper in the stack is the same size and type.
3
Insert paper into the input tray print side down until it stops. If you are using
letterhead, insert the top of the page first, face-down.
Check that the stack of paper contains several sheets but is no higher than
the top of the paper-length guide.
7
chapter 2
4
Slide the paper-width and paper-length guides in until they stop at the
edges of the paper. Make sure that the paper stack lies flat in the input tray
and fits under the tab of the paper-length guide.
5
Put the output tray back into position.
6
To prevent printed paper from falling off the tray, fully extend the output-tray
extender.
recommended papers
If you want the best print quality, we recommend HP Premium Inkjet papers.
Using paper that is too thin, paper that has a slick texture, or paper that stretches
easily can cause paper jams. Using paper that has a heavy texture or does not
accept ink can cause printed images to smear, bleed, or not be filled in
completely. For more information about HP Premium Inkjet papers, check our
website at:
http://www.hp.com
8
hp digital copier printer 410
load paper and envelopes
Following is a list of HP papers you can use for printing:
•
HP Bright White Inkjet Paper delivers high-contrast colors and sharp text. It
is opaque enough for two-sided color usage, with no show-through, which
makes it ideal for newsletters, reports, and flyers.
•
HP Photo Paper, HP Premium Photo Paper, HP Premium Plus Photo Paper,
and HP Premium High-Gloss Film are high-quality, glossy-finish or
matte-finish, photo-based papers. They look and feel like photographs and
can be mounted under glass or in an album. Photo papers dry rapidly and
resist fingerprints and smudges.
•
HP Premium Plus Photo Paper and HP Photo Paper, Glossy are available in
4” x 6” photo-card sizes for printing full-bleed photos from your HP Digital
Copier Printer.
•
HP Inkjet T-Shirt Transfer Iron-On can be used to transfer your designs or
photos onto T-shirts, sweatshirts, and fabric crafts.
•
HP Premium Inkjet Transparency Film and HP Premium Plus Inkjet
Transparency Film makes your color presentations vivid and even more
impressive. This film is easy to use and handle and dries quickly without
smudging.
•
HP Everyday Photo Paper, Semi-Gloss or Matte, is coated on both sides for
two-sided copying. It is perfect for near-photographic reproductions and
business graphics for report covers, special presentations, brochures,
mailers, and calendars.
•
HP Premium Inkjet Paper is the ultimate coated paper for high-resolution
usage. A smooth, matte finish makes it ideal for your special documents.
•
HP Banner Paper allows you to print banners easily on perforated,
continuously connected sheets.
•
HP Matte Greeting Cards, HP Glossy Greeting Cards, HP Felt-Textured
Greeting Cards, and HP Linen Greeting Cards allow you to make your own
greeting cards. HP Matte Greeting Cards are available in quarter-fold, and
HP Glossy Greeting Cards are available in half-fold.
•
HP Professional Brochure & Flyer paper is matte-coated or glossy-coated on
both sides for two-sided use. It is the perfect choice for near-photographic
reproductions and business graphics for report covers, special
presentations, brochures, mailers, and calendars.
•
16 to 36 lb. (60 to 135 gsm) copier paper or letterhead.
•
Letter or A4-size label sheets designed for use with HP Inkjet products (like
Avery Inkjet labels).
papers to avoid when printing
We do not recommend the following papers for printing:
printing guide
•
Highly textured stock, such as linen. It may not print evenly, and the ink can
bleed into these papers.
•
Extremely smooth, shiny, or coated papers not specifically designed for
your unit. They can jam the unit or actually repel ink.
•
Multi-part forms, such as duplicate and triplicate forms. They can wrinkle or
get stuck. The ink is also more likely to smear.
9
chapter 2
load envelopes
Your HP Digital Copier Printer provides two methods for working with envelopes:
single-feed and multiple-feed. Do not use shiny or embossed envelopes, or
envelopes that have clasps or windows.
•
If you are printing one envelope, slide the envelope into the envelope slot,
which is located on the right side toward the back of the output tray. Insert
the envelope with the flap up and on the left, as shown in the illustration.
Slide the envelope on the top until it stops.
•
If you are printing multiple envelopes, remove all paper from the main tray,
and then slide a stack of envelopes down the right side of the tray, with the
envelope flaps up and to the left (print side down), until they stop.
Adjust the paper-width guide against the envelopes, being careful not to
bend the envelopes. Make sure the envelopes fit within the tray; do not
overload it.
Consult the help files in your word processing software for details on how
to format text for printing on envelopes.
load postcards or hagaki cards
Following is the procedure for loading postcards or hagaki cards:
10
1
Remove all paper from the paper tray, and then slide a stack of cards, print
side down, into the right side of the tray until they stop.
2
Adjust the paper-width guide against the cards, and then slide the
paper-length guide in until it stops.
Make sure the cards fit within the tray; do not overload it.
hp digital copier printer 410
load paper and envelopes
load photo paper
Following is the procedure for loading 4” x 6” inch photo paper:
1
Remove all paper from the paper tray, and then slide a stack of cards, print
side down, into the right side of the tray until they stop. If the photo paper
you are using has perforated tabs, load the photo paper so the tabs are
closest to you.
2
Adjust the paper-width guide against the cards, and then slide the
paper-length guide in until it stops.
Make sure the cards fit within the tray; do not overload it.
tips for loading other types of paper
The following table provides guidelines for loading certain types of paper and
transparency film. For best results, adjust the paper settings each time you
change paper types and paper sizes. For more information, see set the paper
type and size on page 12.
paper
tips
HP papers
• HP Premium Inkjet Paper: Locate the gray arrow on the non-printing
side of the paper, and then insert paper with the arrow side facing up.
• HP Premium or Premium Plus Photo Paper: Load the glossy (print) side
down. Always load at least five sheets of regular paper in the paper
tray first, and then place the photo paper on top of the regular paper.
• HP Premium or Premium Plus Inkjet Transparency Film: Insert the film so
the white transparency strip (with arrows and the HP logo) is on top
and is going into the tray first.
• HP Inkjet T-Shirt Transfer Iron-On: Flatten the transfer sheet completely
before using it; do not load curled sheets. To prevent curling, keep
transfer sheets sealed in the original package until you are ready to use
them. Manually feed one sheet at a time, with the unprinted side facing
down (the blue stripe faces up).
• HP Greeting Cards, HP Linen Greeting Cards, or HP Felt-Textured
Greeting Cards: Insert a small stack of HP greeting-card paper, print
side down, into the paper tray until it stops.
Labels
• Always use letter-size or A4-size label sheets designed for use with
HP inkjet products (like Avery Inkjet Labels), and make sure the labels
are not over two years old.
• Fan the stack of labels to make sure none of the pages are sticking
together.
• Place a stack of label sheets on top of standard paper in the paper
tray, print side down. Do not insert labels one sheet at a time.
Postcards or Hagaki
cards
printing guide
Insert a stack of postcards or hagaki cards, print side down, into the paper
tray until it stops. Line up the postcards on the right side of the paper tray,
slide the paper-width guide up against the left side of the cards, and then
slide the paper-length guide in until it stops.
11
chapter 2
paper
tips
4” x 6” photo paper
Insert the photo paper, print side down, into the paper tray until it stops.
Place the long edge of the photo paper against the right side of the paper
tray, slide the paper-width guide up against the long edge of the photo
paper, and then slide the paper-length guide in until it stops. If the photo
paper you are using has perforated tabs, load the photo paper so the tabs
are closest to you.
Continuous (banner)
paper
Continuous banner paper is also known as computer or z-fold paper.
• Before loading banner paper, remove all other paper from the paper
tray, then remove the output tray.
Remove the output
tray.
Insert the unattached
edge of the paper into
the paper tray.
• If you use non-HP banner paper, use 20-lb. paper, and fan the paper
before loading it.
• Verify that the stack of banner paper contains at least five pages in the
stack.
• Carefully tear off the perforated edge strips from both sides of the
paper stack, if any, and unfold and refold the paper to make sure the
pages do not stick together.
• Put the paper in the paper tray so the unattached edge is at the top of
the stack. Insert the first edge into the paper tray until it stops, as
shown in the illustration above.
set the paper type and size
If you want to use a different type of paper, such as photo paper or transparency
film, simply load that paper in the main tray. The HP Digital Copier Printer’s
automatic media sensor automatically selects the paper type and size for your
print job; however, you can also choose your own paper-type and paper-size
settings to ensure the best print quality.
For information on changing your print settings manually, see select paper type
on page 16 or select paper size on page 19.
12
hp digital copier printer 410
use printing features
3
The printing features described in this chapter are available only if you connect
your HP Digital Copier Printer to your computer and install the software
provided. The software allows you to easily manage all of your print settings.
Note: You cannot control the HP Digital Copier Printer’s copy functions with
this software. If you want to use the copy functions you must use the
front-panel, as described in the HP Digital Copier Printer 410 Reference
Guide.
When your HP Digital Copier Printer is connected, most print settings are
automatically handled by the program you are printing from or by HP’s
ColorSmart technology. You only need to change the settings manually when you
change print quality, print on specific types of paper or film, or use special
features.
Tip: Whenever you make a change to the print settings in the
dialog box, images on the tabs in the dialog box change to
display a preview of the way your document will print.
This chapter contains the following topics:
•
make the hp digital copier printer the default printer
•
change print settings
•
use the quality tab
•
use the layout tab
•
use the features tab
•
use the color tab
•
use the hp toolbox
•
stop a print job
make the hp digital copier printer the default printer
If you have more than one printer installed, you can set your HP Digital Copier
Printer as the default printer to use for all your print jobs, regardless of the
program you use for printing.
1
Use one of the following methods, depending on your operating system:
– From the Windows Start menu, select Settings, Printers.
– For Windows XP, navigate from the Start menu to Printers and Faxes.
2
Right-click hp digital copier 410, and then select Set as default.
change print settings
You can change print settings temporarily for a current job or change them to
become the new default settings for all future print jobs.
13
chapter 3
to change the print settings for a current print job
1
Open the file you want to print.
2
Depending on the software program you are using, use one of the
following paths to open the printer Properties dialog box:
– Click File, Print, select hp digital copier 410, and then click Properties
or Preferences.
– Click File, Print, Setup, select hp digital copier 410, and then click
Properties or Preferences.
– Click File, Print Setup, select hp digital copier 410, and then click
Properties or Preferences.
The HP Digital Copier Printer 410 Properties dialog box appears.
3
Change the desired settings, and then click OK to print the job.
For information about changing settings on a specific tab, see the
appropriate section in this chapter.
to change the print settings for all future jobs
1
Choose one of the following methods:
– From the Windows Start menu, select Settings, Printers.
– For Windows XP, navigate from the Start menu to Printers and Faxes.
– If you have a printer icon in the lower-right corner of your computer
screen, right-click the icon, make sure hp digital copier 410 is marked
with a check mark, select Change Default Print Settings, and then skip
to step 3.
2
Right-click hp digital copier 410, and select Properties; or, for Windows XP,
select Printing Preferences.
3
Make changes as desired, and then click OK to save all your changes as
the new default settings for future print jobs.
The following topics provide more information about using the HP Digital Copier
Printer 410 Properties dialog box to adjust print settings.
14
hp digital copier printer 410
use printing features
use the quality tab
The Quality tab allows you to adjust the following print settings:
•
increase print speed or quality
•
print using hp digital photography
•
select paper type
•
print using high resolution
•
restore factory defaults
increase print speed or quality
Using your HP device, you can customize the speed and quality of the print
process with the following options:
•
Best: Best mode produces the highest print quality for all media and
eliminates the banding effect that sometimes occurs in solid areas.
However, the Best setting prints more slowly than Normal mode for most
documents.
•
Normal: Letter-quality printing. Normal mode delivers high-quality output
and is the recommended setting for speed and quality. Normal is the
default print-quality setting for most paper types.
•
Everyday: Everyday mode balances speed and quality for everyday
printing.
•
FastDraft: Draft-quality printing. FastDraft mode prints faster than the
Normal setting and produces lighter output. Using FastDraft reduces the
frequency of replacing your print cartridges because it uses less ink.
Your HP Digital Copier Printer can also print up to 4800 optimized dpi,
depending on the paper type you are using and the image you are printing. For
more information, see print using high resolution on page 18.
Your HP device automatically sets the print quality depending on the paper-type
setting. See select paper type on page 16 for more information.
Follow these steps to manually adjust the Print Quality setting.
1
In the Printer Properties dialog box, click the Quality tab.
2
In the Print Quality area, do one of the following:
– Select Best to increase print quality.
– Select Normal for most print jobs.
– Select Everyday to increase print speed.
– Select FastDraft to produce draft-quality output.
3
Click OK.
Tip: Regardless of the settings, your print quality will improve on a
high-quality paper such as HP Premium Photo.
printing guide
15
chapter 3
print using hp digital photography
Use the HP Digital Photography options to improve the quality of your printed
photographs. These features should be used for high resolution images (600 dpi
or higher) printed on photo quality paper and are not recommended for text.
•
Contrast enhancement: adjusts the amount of contrast in the photograph
•
Digital Flash: lightens the photograph, similar to a flash
•
SmartFocus: automatically focuses the photograph if it is out of focus
•
Sharpness: sharpens the photograph
•
Smoothing: smoothes, or reduces, the graininess in the image
Follow these steps to improve the quality of your printed photographs:
1
In the Printer Properties dialog box, click the Quality tab.
2
Set the print quality to Best or Normal.
The HP Digital Photography button is only available in Best or Normal
mode. It is not available when the quality is set to Everyday or FastDraft.
3
In the Print Quality area, click hp Digital Photography.
The HP Digital Photography dialog box appears.
4
Adjust the settings you want by moving the slider left or right, or select Auto
to have the software automatically adjust the photograph.
Tip: Whenever you make a change to the print settings in this
dialog box, the preview images change to reflect your adjustment.
5
Click OK.
select paper type
The HP Digital Copier Printer’s automatic media sensor automatically selects the
paper type and size for your print job, but you can also choose your own
paper-type settings.
16
1
In the Printer Properties dialog box, click the Quality tab.
2
Select the Paper Type setting that matches the paper or transparency film
you are using. For best print quality, use only the types listed in the
following chart.
hp digital copier printer 410
use printing features
papers
paper-type setting
Copier
Plain Paper
Letterhead
Plain Paper
Labels
Plain Paper
Inkjet Papers
Choose one of the following:
• hp bright white paper
• hp premium paper
• Other Inkjet Papers
Photo Papers
Choose one of the following:
• hp premium plus photo paper, glossy
• hp premium plus photo paper, matte
• hp colorfast photo paper, glossy
• hp premium photo paper, glossy
• hp photo paper, glossy
• hp premium high-gloss film
• hp everyday photo paper, semi-gloss
• hp everyday photo paper, matte finish
• Other Photo Papers
If you are using 4” x 6” photo paper, choose
hp photo paper, glossy or hp premium plus photo
paper, glossy, and then set the paper size on the
Layout tab accordingly.
Transparency Films
Choose one of the following:
• hp premium inkjet transparency film
• hp premium plus inkjet transparency film
• Other Transparency Films
Special Papers
Choose one of the following:
• hp banner paper
• hp iron-on transfer
• Other Specialty Papers
Greeting Cards
Choose one of the following:
• hp matte greeting cards
• hp photo greeting cards
• hp textured greeting cards
• Other Greeting Cards
• hp linen greeting cards
Brochure Papers
Choose one of the following:
• hp brochure & flyer, glossy
• hp brochure & flyer, matte finish
• Other Brochure Papers
• hp tri-fold brochure paper, glossy
printing guide
17
chapter 3
print using high resolution
The availability of the High Resolution Control options depends on the paper
type and print quality you have selected. Use the following guidelines to
determine which high-resolution setting to use.
•
Photo Paper Printing
PhotoREt: select this option to have the software automatically choose
the best combination of print speed and quality for the image.
– 4800 x 1200 optimized dpi: select this option for printing
high-resolution (1200 x 1200 input dpi or higher) images on photo
paper. Selecting this option requires large amounts of temporary disk
space and may take much longer to print than PhotoREt mode. If you
do not have sufficient disk space, select PhotoREt and reprint. This
option is not recommended for text.
Inkjet Paper Text Rendering
–
•
–
–
Automatic: select this option to have the software automatically choose
the best combination of print speed and quality for the image or
document.
1200 dpi: select this option for high-resolution text printed on inkjet
paper. This option requires large amounts of temporary disk space and
may take longer to print than Automatic mode. If you lack sufficient disk
space, select Automatic and reprint. This print mode is available only
when you select an inkjet paper type that supports it, and set the print
quality to Best.
restore factory defaults
Click Factory Settings to return the Quality tab settings to the original defaults.
This will not affect settings in the other tabs.
use the layout tab
The Layout tab allows you to adjust the following print settings:
•
select paper size
•
print borderless photos
•
scale a document’s size
•
change the page orientation
•
reverse an image for iron-on transfers
•
rotate a document to print envelopes
•
set the number of copies
•
print the last page first
•
restore factory defaults
Whenever you make a change in print settings in this tab, you can confirm your
change by viewing the images in this tab.
18
hp digital copier printer 410
use printing features
select paper size
The HP Digital Copier Printer’s automatic media sensor automatically selects the
paper type and size for your print job, but you can also choose your own
paper-size settings.
1
In the Printer Properties dialog box, click the Layout tab.
2
Select the Paper Size setting that matches the paper you are using. For
information to help you choose the appropriate paper size for your print
job, see paper specifications on page 37.
print borderless photos
Borderless printing lets you print to the top and side edges of small media such
as photographs and cards. For great results use HP 4” x 6” (102 x 152 mm)
paper with a tear-off tab. When the tab is removed, the printed image is
borderless.
1
In the Printer Properties dialog box, click the Layout tab.
2
Click Borderless Printing.
The Borderless Printing dialog box appears.
3
Select the Paper Size and Paper Type you have loaded in the device.
4
If you want to print on both sides of the paper, select the Two-Sided
Printing check box.
This feature is not available with all paper types. Depending on the paper
type, a dialog box may appear to inform you that the option is not
available and will be turned off.
5
If you want to save the paper size and paper type as the default settings for
borderless printing, select the Make this my default check box.
6
Click OK.
You are returned to the Printer Properties dialog box to finish configuring
the current print job. The paper-size, paper-type, and two-sided printing
settings you selected in the Borderless Printing dialog box overwrite the
original settings in the Printer Properties dialog box.
scale a document’s size
Follow these steps to scale a document to a specific size or to make it fit a specific
paper size.
printing guide
1
In the Printer Properties dialog box, click the Layout tab.
2
Select the Scale to Fit check box.
19
chapter 3
The Scale to Fit dialog box appears.
3
In the Scale to Fit dialog box, select one of the following options:
– To reduce the size of the document, select Resize to, and then select a
percentage relative to the size of the original.
– To scale the document to fit on a specific paper size, select Scale to fit
paper in device. Select a paper size that corresponds to the size of the
document in your software program, as well as a paper size for the
paper that is loaded in the input tray.
4
Click OK to close the Scale to Fit dialog box, and then click OK again to
close the Printer Properties dialog box.
change the page orientation
Use this procedure if you want to change the direction of your printed document
or if you cannot set the page orientation from your software program.
1
In the Printer Properties dialog box, click the Layout tab.
2
In the Orientation area, choose Portrait or Landscape, and then click OK.
reverse an image for iron-on transfers
This feature reverses an image so you can use it for iron-on transfers. This feature
is also useful for transparencies if you want to make notations on the back and
erase them later without scratching the original.
1
In the Printer Properties dialog box, click the Layout tab.
2
In the Orientation area, select the Mirror Image check box.
3
For paper size, select A4 or Letter.
4
Click the Quality tab.
5
For the paper type, select Automatic; or, in the Special Papers area, select
hp iron-on transfers.
6
For print quality, select Normal or Best.
7
Click OK to close the dialog box.
For information about loading iron-on transfers, see tips for loading other
types of paper on page 11.
rotate a document to print envelopes
Use the Rotate 180° feature to turn the image upside down. This feature is only
available when the paper-type and paper-size settings are set to envelope.
20
hp digital copier printer 410
use printing features
set the number of copies
Use this feature if the Print dialog box of your program does not support printing
a specific number of copies. You can set the number of copies using the
HP Digital Copier Printer 410 Properties dialog box.
1
In the Printer Properties dialog box, click the Layout tab.
2
In the Number of Copies box, type or select the number of copies you want
to print, and then click OK.
print the last page first
Use this feature to print the pages of a document from the last page to the first.
Because the pages appear face-up in the output tray, you can select this option
to ensure that your printout comes out in the correct order. When you are printing
multiple copies, each set is printed completely before the next is printed.
1
In the Printer Properties dialog box, click the Layout tab.
2
In the Copies area, select the Start Printing from Last Page check box, and
then click OK.
restore factory defaults
Click Factory Settings to return the Layout tab settings to the original defaults. This
will not affect settings in the other tabs.
use the features tab
The Features tab allows you to adjust the following settings:
•
print on both sides of the page
•
print multiple pages on a single sheet
•
print a poster
•
preview your document before printing
•
use the advanced features
•
restore factory defaults
Whenever you make change print settings in this tab, you can confirm your
changes by viewing the image in the right corner.
print on both sides of the page
You can print documents on both sides of the page.
printing guide
1
In the Printer Properties dialog box, click the Features tab.
2
Select the Two-Sided Printing check box.
3
Select one of the following methods for two-sided printing:
– Long side: prints on both sides of the page, with the binding along the
long side of the paper, like a book.
– Short side: prints on both sides of the page, with the binding along the
short side of the paper, like a tablet.
21
chapter 3
4
If you have the optional Two-sided Printing accessory installed, select the
Automatic check box. The Two-sided Printing accessory will automatically
turn the pages over for printing on the reverse side.
Note: If you have the Two-sided Printing accessory installed, you cannot
use it with the copying functions from the front-panel.
5
If you do not have the optional Two-sided Printing accessory installed,
make sure the Automatic check box is not selected. You will have to reverse
the pages manually, when the following dialog box prompts you.
print multiple pages on a single sheet
You can print several pages on a single sheet of paper.
1
In the Printer Properties dialog box, click the Features tab.
2
In the Pages per Sheet list, select 1, 2, or 4 pages per sheet.
3
To print a border around each page image, select the Draw Page Border
check box.
4
To select the page order, click the Page Order list box and choose Right
then Down, Down then Right, Left then Down, or Down then Left.
5
Click OK to close the dialog box.
print a poster
You can create a poster by printing a single document on multiple pages. The
HP Digital Copier Printer prints dotted lines to indicate where to trim the pages
before taping them together.
Tip: Your HP Digital Copier Printer also provides a way to create
a poster with the copier features. For more information, see the HP
Digital Copier Printer 410 Reference Guide.
22
1
In the Printer Properties dialog box, click the Features tab.
2
Select the Poster Printing check box, and choose either 2x2, 3x3, or 4x4.
This selection tells your HP Digital Copier Printer how to enlarge your
document to fit on 4, 9, or 16 sheets of paper.
hp digital copier printer 410
use printing features
Each page of your original will become a separate 2x2, 3x3, or 4x4
poster. For example, if you have a one-page original and you select 3x3,
you will get 9 pages; if you select 3x3 for a two-paged original, 18 pages
will print.
You can confirm the
poster settings you
select by viewing the
preview image.
3
Click OK to close the dialog box.
preview your document before printing
The HP Preview option enables you to view an image preview of your document
before printing your pages. This is useful when you want to make sure that
margin settings, page orientation, and other print settings are correct before
printing.
To generate previews of the pages in the current document:
1
Depending on the software program you are using, use one of the
following paths to select the Printer Properties dialog box:
– Click File, Print, select hp digital copier 410, and then select Properties
or Preferences.
– Click File, Print, Setup, select hp digital copier 410, and then select
Properties or Preferences.
2
Change the settings you want in the Printer Properties dialog box.
3
Click the Features tab.
4
Select the Show hp Preview check box, and then click OK.
You are returned to the Print dialog box.
5
Click OK or Print to print your document.
Before your pages print, the HP Preview window appears. From the HP Preview
window, you can choose to:
printing guide
•
print to the hp digital copier printer
•
cancel the print job
•
adjust the print settings
•
save the page previews for future reference
23
chapter 3
print to the hp digital copier printer
Once you are satisfied with the way that your printed document will look, you
can continue printing the document from the HP Preview window.
1
Use the
and
buttons to check all the pages in your document. You
can also click
and
to go to the first and last pages in your document.
Tip: Zoom in or out on a page by selecting View, Zoom and then
selecting a percentage from the menu. You can zoom up to
1000% to view very small details on the page.
2
Click
to print your document.
cancel the print job
If you find that you need to make changes to your document before printing, you
can cancel the print job.
`
Click
to cancel your print job.
adjust the print settings
You can change any setting in the Printer Properties dialog box from the HP
Preview window and then continue printing your document.
1
In the HP Preview window, click
.
The Printer Properties dialog box appears.
2
Change the settings you want, and then click OK.
3
Click
to print your document with the new print settings.
save the page previews for future reference
If you want to be able to reference the document preview in the future, you can
save it. Each page in the print preview will be saved as a separate .bmp file.
1
In the HP Preview window, click
The Save dialog box appears.
2
Navigate to the location where you want to save your page previews.
3
Type a name for the first page, then click Save.
HP Preview saves the page preview as .bmp image and then displays the
Save dialog box again.
4
Repeat step 3 for each page in your document.
.
The Save dialog box stops appearing when you have named and saved the last
page in the document.
use the advanced features
Use the Advanced Features options to adjust the amount of ink the HP Digital
Copier Printer uses on the page, the amount of time that the copier/printer holds
onto the page to allow adequate drying time, and to print in low-memory mode.
adjust the ink volume and dry time
Ink volume is the amount of ink used on the page; drying time is the amount of
time that passes before the next print job can begin. Both are adjustable.
24
1
In the Printer Properties dialog box, click the Features tab.
2
Click Advanced Features.
hp digital copier printer 410
use printing features
3
Use the sliders to adjust the ink volume and drying time.
Tip: The ink volume affects the time needed to dry. A lighter ink
volume means faster drying time.
4
Click OK.
print in low memory mode
If your computer does not have enough memory or disk space to print the job
you have requested, you can print in low memory mode. Use this option for
documents containing complex/high resolution images only. Selecting this
option for text or text with simple line art results in poorly formatted output and
does not save any significant memory.
restore factory defaults
Click Factory Settings to return the Features tab settings to the original defaults.
This will not affect settings in the other tabs.
use the color tab
The Color tab allows you to adjust the characteristics that affect the appearance
of your print job. You can choose to:
•
print in grayscale
•
change the saturation, brightness, or color tone
print in grayscale
Use the following Print in Grayscale options to print your color document as
shades of gray.
•
High Quality: uses the tri-color ink cartridge to print high-quality grayscale
•
Black Print Cartridge Only: uses the black ink cartridge to print grayscale
•
Optimize for Photocopy or Fax: uses the black ink cartridge and optimizes
images for faxing or photocopying
Whenever you change print settings in this tab, you can confirm your changes
by viewing the image in the right corner.
printing guide
25
chapter 3
change the saturation, brightness, or color tone
Use the following options to adjust the way colors in your document will print.
•
Saturation: adjusts the relative purity of printed colors
•
Brightness: adjusts the lightness or darkness of the printed image
•
Color tone: adjusts the perceived warmth or coolness of printed colors
Tip: Whenever you change print settings in this tab, you can
confirm your changes by viewing the image in the right corner.
restore factory defaults
Click Factory Settings to return the Color tab settings to the original defaults. This
will not affect settings in the other tabs.
use the hp toolbox
The HP Toolbox contains a number of useful tools to maintain the efficiency of
your HP Digital Copier Printer. The Toolbox is available through the printer icon
in the system tray (usually located in the lower-right corner of your computer
screen, next to the time). For information on accessing the Toolbox, see open the
toolbox on page 6.
use the device services tab
access the device services tab
`
Right-click the printer icon in the system tray, make sure hp digital copier
410 is marked with a checkmark, and then select Open the hp digital
copier 410 Toolbox.
The HP Digital Copier 410 Toolbox appears. It contains two tabs. By default, the
Toolbox opens to the Device Services tab.
calibrate your hp digital copier printer
This option automatically aligns the printheads in your copier/printer.
26
1
In the Device Services tab, click Calibrate the Device.
2
Click Calibrate to start the calibration process.
hp digital copier printer 410
use printing features
clean the printheads
Use this feature when the self-test report, which is generated from the front-panel,
shows streaking or white lines through any of the colored bars. Do not clean
printheads unnecessarily; this wastes ink and shortens the life of your printheads.
Tip: Although this feature is available in the Device Services tab,
we recommend that you use the front-panel instead.
1
In the Device Services tab, click Clean the Printheads.
2
On the next screen, click Clean.
A test page will print, and a dialog box will appear with the options
Intermediate Clean or Done.
– If the print quality on the test page is poor, click Intermediate Clean.
– If the print quality on the test page is good, click Done.
If you select Intermediate Clean, a new test page will print and a new
screen will appear with the options, Prime or Done.
– If the print quality is poor, click Prime.
– If the print quality on the test page is good, click Done.
If you select Prime, a new test page will print and a new screen will appear
with the options Clean Again or Done. Select Clean Again if further
cleaning is needed, or click Done.
3
When you are finished, click Close.
print a test page
This tool allows you to confirm that the connection between your HP Digital
Copier Printer and your computer is working properly. This test page is different
than the self-test report that you can print from the front-panel.
`
In the Device Services tab, click Print a Test Page.
The test page prints as long as your connection is working properly.
use the configuration tab
The Configuration tab allows you to specify the way your HP Digital Copier
Printer is set up. It also allows you to configure the copier/printer to conserve
energy by automatically running in power-saving mode after it has not been used
for a certain amount of time.
Note: The following options are permanently disabled, because they are
not available with the HP Digital Copier Printer 410:
–
–
–
–
Display Print Settings Confirmation Dialog
Display Status Window
Configure Status Messages
Attempt to Use Hardware ECP
access the configuration tab
printing guide
1
Right-click the printer icon in the system tray, make sure hp digital copier
410 is marked with a checkmark, and then select Open the hp digital
copier 410 Toolbox.
The HP Digital Copier 410 Toolbox appears. It contains two tabs. By
default, the Toolbox opens to the Device Services tab.
2
Click the Configuration tab.
27
chapter 3
enable the two-sided printing module
`
If you have the optional Two-sided Printing accessory installed, select the
Automatic Two-Sided Printing Module check box.
This enables you to use the Automatic two-sided printing option, described
in print on both sides of the page on page 21.
configure the print cartridges
This option enables you to specify whether you have the HP photo print cartridge
(#58) installed, for printing photographs with a six-ink system.
`
In the Configuration tab, select the print cartridge configuration you have
installed from the Configure Print Cartridges drop-down menu:
– One Tri-color Print Cartridge: use this option if you have the tri-color
print cartridge (#57) and the black print cartridge (#56) installed.
– Two Print Cartridges: use this option if you have the tri-color print
cartridge (#57) and the photo print cartridge (#58) installed.
activate the hardware auto-off feature
`
Select the Activate the Hardware Auto-off feature check box, as desired.
This configures the copier/printer to conserve energy by automatically
running in a low-energy power-saving mode after it has not been used for a
certain amount of time.
stop a print job
Whenever you cancel a print job, your HP Digital Copier Printer prints any pages
it has already started printing and then cancels the rest of the job. This can take
a few minutes.
cancel from the front-panel
`
Press Cancel.
Look for the Print cancelled message on your front-panel display. If it does
not appear, press Cancel again.
cancel from the computer
Although we recommend that you stop print jobs from the front-panel, you can
also cancel print jobs in the Printers folder.
1
Choose one of the following:
– From the Windows Start menu, select Settings, Printers.
– For Windows XP, navigate from the Start menu to Printers and Faxes.
– Double-click the printer icon in the lower right taskbar.
2
Double-click hp digital copier 410.
3
Select the job you want to cancel.
4
In the Document menu, choose Cancel Printing or Cancel, or press the
Delete key on your keyboard.
It may take a few minutes to cancel your print job.
If these procedures do not cancel your print job, consult the instructions for
canceling background printing in the online help for your program.
28
hp digital copier printer 410
troubleshooting help
4
This chapter provides tips for solving problems and improving the quality of your
copying. If you cannot find your problem here, refer to the Troubleshooting
chapter in the HP Digital Copier Printer 410 Reference Guide.
hp digital copier troubleshooting tips
communication problems
The following tips can help you diagnose communication problems between your
HP Digital Copier Printer and your PC:
•
Check the cable. You must use a high-speed (12 Mbps) USB cable. Verify
that the cable does not exceed three meters in length and that the PC is
USB ready.
•
Check the connection. Verify that the cable is securely connected to your
HP Digital Copier Printer and directly connected to a USB port on your PC.
After the cable is connected properly, turn your HP Digital Copier Printer
off and then on again.
create a self-test report for diagnostic troubleshooting
The self-test report provides detailed information concerning the status of the print
cartridges, including status information and ink levels.
Print a self-test report when you:
•
Encounter print quality problems
•
Want to view information about print cartridges
•
Want to see the printer serial number
•
Plan to call HP Services and Support (if possible)
to print a self-test report from your front-panel:
1
Make sure you have paper loaded.
2
Press the Menu button.
3
Press 2, and then 2.
4
Press Enter.
Check the color bars for streaks or missing colors. Make sure cyan, magenta,
yellow, violet, green, and red print. If colors are missing or streaked, you need
to clean or replace the print cartridges.
printing problems
paper jams
Paper can jam in the paper tray or back of the unit when printing.
29
chapter 4
tips to avoid paper jams
• Make sure the input tray is not overfilled. The input tray capacity varies
depending on the type of paper you are using.
•
Check that the input tray is in place.
•
Do not add paper to the input tray while the HP Digital Copier Printer is
printing.
•
Use recommended paper types.
•
Do not let paper stack up in the output tray. The paper type and the
amount of ink used affects the output tray capacity.
cause
solution
The paper has
jammed where it
enters the HP Digital
Copier Printer.
1
Open the print carriage access door by lifting the handle until the
door locks into place. The print carriage moves to the center of the
unit.
2
Grasp the edge of the paper and gently pull the paper out of the
unit.
1
Unlock and remove the back door.
2
Gently pull the paper out of the rollers.
3
Replace and lock the back door.
The paper has
crumpled and
jammed in the back
of the copier.
If the paper has jammed where it exits the HP Digital Copier Printer:
`
30
Grasp the leading edge of the paper and gently pull the paper out
through the output tray.
hp digital copier printer 410
troubleshooting help
hp digital copier printer is not responding
cause
solution
The HP Digital Copier For information on clearing a paper jam, see paper jams on page 29.
Printer has a paper
jam.
The PC is not
communicating with
the HP Digital Copier
Printer.
If the HP Digital Copier Printer is not properly connected to the PC,
communication errors can occur. Make sure the USB cable is securely
connected at both ends. For information on troubleshooting
communication issues, see communication problems on page 29.
nothing happens when I try to print
cause
solution
The unit is off.
Look on the HP Digital Copier Printer display. If the display is blank, the
HP Digital Copier Printer is turned off. Make sure the unit is connected to
a power outlet, then press the On button.
The HP Digital Copier If you tried to print several minutes ago and you are not getting any output,
Printer is busy.
check the HP Digital Copier Printer status. Some documents take a long
time to print.
The HP Digital Copier Check to make sure your HP Digital Copier Printer is selected as the printer
Printer is not the
in your program.
default printer.
The PC is not
If the HP Digital Copier Printer is not properly connected to the PC,
communicating with communication errors can occur. Make sure the USB cable is securely
the HP Digital Copier. connected at both ends. For information on troubleshooting
communication issues, see communication problems on page 29.
The unit has a paper
jam.
For information on clearing a paper jam, see paper jams on page 29.
the last page of my document did not print
cause
solution
The input tray is
empty.
Make sure paper is in the input tray. For information on loading paper, see
load paper on page 7.
The HP Digital Copier For information on clearing a paper jam, see paper jams on page 29.
Printer has a paper
jam.
printing guide
31
chapter 4
paper does not get picked up from the print tray
cause
solution
The paper tray does
not have enough
paper.
If the HP Digital Copier Printer has run out of paper, or there are only a
few sheets remaining, load more paper. If you have paper loaded, remove
it, tap the stack against an even surface, and then reload it. To continue
your job, press Enter on the front-panel of the HP Digital Copier Printer.
meaningless characters print
cause
solution
The memory is full.
Turn off the HP Digital Copier Printer and your PC for 60 seconds, and
then turn them both on and try printing again.
The PC is not
If the HP Digital Copier Printer is not properly connected to the PC,
communicating with communication errors can occur. Make sure the USB cable is securely
the HP Digital Copier. connected at both ends. For information on troubleshooting
communication issues, see communication problems on page 29.
The document is
corrupt.
If you can print other documents from the same program, try printing a
backup copy of your document.
ink is not filling the text or graphics completely
cause
solution
The print cartridges
need cleaning.
First, print a self-test report to check the status of the print cartridges. Use
the self-test report to diagnose if the print cartridges need to be cleaned.
If that does not work, try replacing the print cartridges.
The print quality is set In the Printer Properties dialog box, select Best from the Print Quality menu.
too low.
The paper type is not When printing on transparencies or other special paper types, select the
set correctly.
corresponding paper-type setting. Sometimes the unit does not
automatically set the correct paper type.
printout is faded or colors are dull
cause
solution
The print cartridges
need cleaning.
First, print a self-test report to check the status of the print cartridges. Use
the self-test report to diagnose if the print cartridges need to be cleaned.
If that does not work, try replacing the print cartridges.
The print quality is set In the Printer Properties dialog box, select Best from the Print Quality menu.
too low.
If the paper you are
using is too fibrous,
the ink may not cover
the print surface.
32
Make sure you are using paper that is appropriate for your HP Digital
Copier Printer. For information on choosing a paper type, see
recommended papers on page 8 and papers to avoid when printing on
page 9.
hp digital copier printer 410
troubleshooting help
printout has horizontal streaks
cause
solution
The print cartridges
have clogged
nozzles.
If your printout has white streaks across it, the nozzles may be clogged.
Use a self-test report to determine the problem. If the self-test report has
streaks, clean the ink cartridges. If cleaning the print cartridges does not
help, one or both of your print cartridges may be out of ink.
The print quality is set In the Printer Properties dialog box, select Best from the Print Quality menu.
too low.
colors are bleeding into each other
cause
solution
Color documents can Try using the Everyday setting, or use HP Premium Papers.
use excessive
amounts of ink.
The paper type is not For information on choosing a paper type, see recommended papers on
suitable for the unit.
page 8 and papers to avoid when printing on page 9.
printout is fuzzy or blurry
cause
solution
The paper is not the
right type for your
project.
For most documents, plain paper works well. For documents with dense
printing, such as high-contrast graphics or photographs, use HP Premium
paper for best results.
The HP Digital Copier When printing on transparencies or other special paper types, select the
Printer is not set to the corresponding paper-type setting. Sometimes the unit does not
correct paper type.
automatically set the correct paper type.
The print quality is set In the Printer Properties dialog box, select Best from the Print Quality menu.
too low.
text edges are jagged
cause
solution
The font is custom
sized.
Some programs offer custom fonts that have jagged edges when enlarged
or printed. Also, if you want to print a bitmap of text, it may have jagged
edges when enlarged or printed. Use True Type fonts to ensure that the
HP Digital Copier Printer is able to print smooth fonts. When selecting a
font, look for the TrueType icon.
printing guide
33
chapter 4
margins are not printing as expected
cause
solution
The margins are not
set correctly in your
program.
Check the margin settings in the program you used to create the document
(check the Page Setup dialog box in your program). The HP Digital Copier
Printer uses the margins you have set in your program, as long as they
exceed the minimum margins. Use your program’s print preview to make
sure the entire document is visible before printing.
Make sure you have Verify that you have selected the proper paper size for your project, and
selected and loaded that the correct paper size is loaded in the input tray.
the proper paper size
for the project you
are printing.
The paper guides
must be positioned
correctly.
Move the paper guides close to the edges of the paper in the input tray,
but not so close as to bend the paper. Try removing the paper, then move
the left paper guide all the way to the left, insert the paper, move the front
paper guide to the correct position for the paper you are using, and move
the left paper guide to the edge of the paper.
Envelopes are not
loaded correctly.
For more information on loading envelopes, see load envelopes on
page 10.
text or graphics are cut off at the edge of the paper
cause
solution
The margins in your
program are not set
correctly.
Make sure margin settings for the document do not exceed the printable
area of HP Digital Copier Printer.
• If your program has a print preview feature, you can check the
The size of the
document from there. Check the graphics in the document to make sure
document you are
that the current size fits within the printable area of HP Digital Copier
printing is larger than
Printer.
the paper in the tray.
• If the layout of the document you are trying to print fits on a paper size
supported by HP Digital Copier Printer, load the correct paper size.
Select the correct page orientation.
• Some programs allow you to select a print mode that scales the
document to fit the paper size currently selected.
The paper is not
loaded correctly.
If the paper is misfeeding, it could cause parts of the document to cut off.
a blank page came out while printing
cause
solution
The print cartridges
are out of ink.
From the front-panel, print a self-test report to determine the problem. If the
report shows gaps or streaks, clean the print cartridges. If the problem
persists, replace the appropriate print cartridge.
34
hp digital copier printer 410
troubleshooting help
printout is slanted or skewed
cause
solution
The paper is not
loaded properly.
Check the paper adjusters to make sure the paper is feeding correctly. The
paper guides should be close to the edges of the paper in the input tray,
but must not bend the paper. Remove the paper, and then move the left
paper guide all the way to the left. Insert the paper, and then move the
front paper guide even with the paper. Move the left paper guide to the
edge of the paper.
More than one paper Unless you are printing labels, load only one type of paper at a time.
type is loaded.
envelopes are not printing correctly
cause
solution
The envelope is not
loaded correctly.
If you are printing one envelope using the envelope slot, slide the envelope
evenly into the envelope slot located on the right side toward the back of
the output tray, with the envelope flap up and to the left, until it stops.
The stack of
envelopes is not
loaded correctly.
Remove all paper from the input tray, and then slide a stack of envelopes
evenly into the input tray, with the envelope flaps up and to the left, until
they stop.
problems printing banners
cause
solution
Paper is not loaded
correctly.
For more information on loading banner paper, see tips for loading other
types of paper on page 11.
The HP Digital Copier For information on clearing a paper jam, see paper jams on page 29.
Printer has a paper
jam.
Your program may
not support banner
printing with the
HP Digital Copier
Printer.
If the banner does not print completely or if the HP Digital Copier Printer
puts spaces between the pages, the problem is specific to the program you
are printing from and how it interacts with the HP Digital Copier Printer.
Refer to the program's documentation.
drop-down menus are empty
cause
solution
The screen resolution
and color quality
need to be adjusted.
Open the Display control panel, and click the Settings tab. Adjust the
screen resolution and color quality settings.
printing guide
Note: The settings required to solve this problem vary depending on
your monitor and video card. Check the Printer Properties dialog box.
If the problem persists after entering new values, return to the Display
control panel and try again with different settings.
35
chapter 4
hp digital copier printer error messages
communication test failed
cause
solution
The HP Digital Copier Look on the HP Digital Copier Printer display. If the display is blank or
Printer is not on.
there are no green lights visible on the front-panel, press the On button.
Make sure the unit is plugged in to a power outlet and that the power cord
is connected securely to the back of your HP Digital Copier Printer.
The HP Digital Copier If the HP Digital Copier Printer is not properly connected to the PC,
Printer is not
communication errors can occur. Make sure the communication cable is
connected to the PC. securely connected at both ends. For more information on troubleshooting
communication issues, see communication problems on page 29.
firmware revision mismatch
cause
solution
The firmware revision Call HP for instructions.
number does not
match the software.
hp digital copier printer not found
cause
solution
The software did not
find a connected
HP Digital Copier
Printer.
Make sure that your HP Digital Copier Printer is properly connected to
your PC and that it is turned on.
out of paper
cause
solution
The paper tray does
not have enough
paper.
Make sure you have the paper tray loaded and on an even surface.
The back door is off
the unit.
If you have removed the back door to clear a paper jam, replace it.
paper size error
cause
solution
The paper size you
are using is not
compatible with the
HP Digital Copier
Printer.
Load a different-sized paper, then adjust the paper-type and paper-size
settings.
36
hp digital copier printer 410
5
technical information
paper specifications
paper-tray capacities
Type
Paper Weight
Input Tray*
Output Tray†
Plain paper
16 to 24 lb.
(60 to 90 gsm)
100
50 black, 20 color
Legal paper
20 to 24 lb.
(75 to 90 gsm)
100
50 black, 20 color
Cards
110 lb. index max
(200 gsm)
40
10
Envelopes
20 to 24 lb.
(75 to 90 gsm)
15
10
Banners
16-24 lb. (60-90 gsm)
20
20 or less
Transparency film
N/A
25
25 or less
Labels
N/A
20
20
4” x 6” Photo paper
145 lb. (236 gsm)
30
30
* Maximum capacity
† Output tray capacity is affected by the type of paper and the amount of ink you are
using. HP recommends emptying the tray frequently.
paper sizes
Type
Size
Paper
Letter: 8.5 x 11 in. (215.9 x 279.4 mm)
Legal: 8.5 x 14 in. (215.9 x 355.6 mm)
Executive: 7.25 x 10.5 in. (184.2 x 266.7 mm)
A4: 210 x 297 mm
A5: 148 x 210 mm
B5: 182 x 257 mm
Banner
Letter: 8.5 x 11 in. (216 x 279 mm)
A4: 8.27 x 11.69 in. (210 x 297 mm)
Envelopes
U.S. #10: 4.12 x 9.5 in. (104.8 x 241.3 mm)
A2: 4.37 x 5.75 in. (111 x 146 mm)
DL: 4.33 x 8.66 in. (110 x 220 mm)
C6: 4.49 x 6.38 in. (114 x 162 mm)
37
chapter 5
Type
Size
Transparency films
Letter: 8.5 x 11 in. (216 x 279 mm)
A4: 210 x 297 mm
Cards
3 x 5 in. (76.2 x 127 mm)
4 x 6 in. (101.6 x 152 mm)
5 x 8 in. (127 x 203.2 mm)
A6: 105 x 148.5 mm
Hagaki post card: 100 x 148 mm
Labels
Letter: 8.5 x 11 in. (216 x 279 mm)
A4: 210 x 297 mm
Custom
3 x 5 in. up to 8.5 x 14 in. (76.2 x 127 up to 216 x 356 mm)
print specifications
•
1200 x 1200 dpi black with resolution enhancement technology (REt)
•
1200 x 1200 dpi color with HP PhotoREt III
•
Method: Drop-on-demand thermal inkjet
•
Language: HP PCL Level 3, PCL3 GUI or PCL 10
•
Print speeds vary according to the complexity of the document.
•
Duty cycle: 500 printed pages per month (average)
•
Duty cycle: 3000 printed pages per month (maximum)
Mode
Best/inkjet/
1200
Normal
Everyday
Fast
Resolution (dpi)
Speed (ppm)
Black
1200 x 1200
2
Color
1200 x 1200
(up to 4800 optimized dpi*)
.5
Black
600 x 600
7
Color
600 x 600
4
Black
600 x 600
8
Color
600 x 600
6
Black
300 x 300
up to 14.0
Color
300 x 300
up to 10.0
* Up to 4800 x 1200 optimized dpi color printing on premium photo
papers, 1200 x 1200 input dpi.
38
hp digital copier printer 410
technical information
print margin specifications
Top
(leading edge)
Bottom
(trailing edge)*
Left
Right
U.S. letter
.07 in. (1.8 mm)
.46 in. (11.7 mm)
.25 in. (6.4 mm) .25 in. (6.4 mm)
U.S. legal
.07 in. (1.8 mm)
.46 in. (11.7 mm)
.25 in. (6.4 mm) .25 in. (6.4 mm)
U.S. executive
.07 in. (1.8 mm)
.46 in. (11.7 mm)
.25 in. (6.4 mm) .25 in. (6.4 mm)
ISO A4
.07 in. (1.8 mm)
.46 in. (11.7 mm)
.13 in. (3.4 mm) .13 in. (3.4 mm)
ISO A5
.07 in. (1.8 mm)
.46 in. (11.7 mm)
.13 in. (3.4 mm) .13 in. (3.4 mm)
JIS B5
.07 in. (1.8 mm)
.46 in. (11.7 mm)
.13 in. (3.4 mm) .13 in. (3.4 mm)
U.S. No. 10
.13 in. (3.2 mm) .46 in. (11.7 mm)
.13 in. (3.2 mm) .13 in. (3.2 mm)
A2 (5.5 baronial)
.13 in. (3.2 mm) .46 in. (11.7 mm)
.13 in. (3.2 mm) .13 in. (3.2 mm)
Intnl. DL
.13 in. (3.2 mm) .46 in. (11.7 mm)
.13 in. (3.2 mm) .13 in. (3.2 mm)
Intnl. C6
.13 in. (3.2 mm) .46 in. (11.7 mm)
.13 in. (3.2 mm) .13 in. (3.2 mm)
U.S. 3 x 5 in.
.07 in. (1.8 mm)
.46 in. (11.7 mm)
.13 in. (3.2 mm) .13 in. (3.2 mm)
U.S. 4 x 6 in.
.07 in. (1.8 mm)
.46 in. (11.7 mm)
.13 in. (3.2 mm) .13 in. (3.2 mm)
U.S. 5 x 8 in.
.07 in. (1.8 mm)
.46 in. (11.7 mm)
.13 in. (3.2 mm) .13 in. (3.2 mm)
ISO and JIS A6
.07 in. (1.8 mm)
.46 in. (11.7 mm)
.13 in. (3.2 mm) .13 in. (3.2 mm)
Hagaki
(100 x 148 mm)
.07 in. (1.8 mm)
.46 in. (11.7 mm)
.13 in. (3.2 mm) .13 in. (3.2 mm)
Borderless photo
(4 x 6)
0
.46 in. (11.7 mm)
0
0
Borderless A6 card
(105 x 148.5 mm)
0
.46 in. (11.7 mm)
0
0
Borderless Hagaki
(100 x 148 mm)
0
.46 in. (11.7 mm)
0
0
Sheet Paper
Envelopes
Cards
* This margin is not LaserJet-compatible, however, the total writing area is compatible. The
writing area is offset from center by .21 inches (5.4 mm), which causes asymmetric top
and bottom margins.
printing guide
39
chapter 5
physical specifications
•
Height: 11.8 in. (30 cm)
•
Width: 19.5 in. (49.6 cm)
•
Depth: 15.5 in. (39.4 cm)
•
Weight: 24 lb. (10.9 kg)
power specifications
•
Power consumption: 60W maximum
•
Source (Input) Voltage: 100 to 240 VAC, grounded
•
Input Frequency: 50 to 60 Hz
•
Current: 1 A maximum
environmental specifications
•
Recommended Operating Temperature Range: 15º to 32º C (59º to 90º F)
•
Allowable Operating Temperature Range: 5º to 40º C (41º to 104º F)
•
Humidity: 15% to 85% RH non-condensing
•
Non-operating (Storage) Temperature Range: -40º to 60º C
(-40º to 140º F)
•
In the presence of high electromagnetic fields it is possible the output from
the HP Digital Copier Printer 410 may be slightly distorted.
additional specifications
•
Memory: 8.0-MB ROM, 16.0-MB RAM
If you have Internet access, you can get acoustic information from the HP website:
http://www.hp.com/support
40
hp digital copier printer 410
index
Numerics
4" x 6" photo paper
borderless printing, 19
load, 11, 12
4800 x 1200 dpi, 18
A
advanced features
dry time, 24
ink volume, 24
low memory mode, 25
automatic two-sided printing
module, 28
print a test page, 27
digital flash, 16
dry time, 24
E
enable two-sided printing
module, 28
envelopes
load, 10
rotate 180°, 20
F
banner paper
load, 12
borderless printing, 19
brightness, 26
factory settings, 18, 21, 25, 26
features tab, 21
advanced features, 24
multiple pages per sheet, 22
poster printing, 22
show hp preview, 23
two-sided printing, 21
C
G
calibrate printer, 26
cancel print job, 28
change print settings
for current print job, 14
make default, 14
clean printheads, 27
color tab, 25
brightness, 26
color tone, 26
grayscale, 25
saturation, 26
color tone, 26
configuration tab, 27
automatic two-sided printing
module, 28
hardware auto-off
feature, 28
print cartridge
configuration, 28
configure print cartridges, 28
continuous paper, load, 12
contrast enhancement, 16
grayscale
black print cartridge
only, 25
high quality, 25
optimize for photocopy or
fax, 25
greeting cards, load, 11
B
D
default printer, 13
device services tab, 26
calibrate printer, 26
clean the printheads, 27
H
hagaki cards
load, 10, 11
hardware auto-off feature, 28
high resolution control
inkjet paper text
rendering, 18
photo paper printing, 18
hp digital photography, 16
contrast enhancement, 16
digital flash, 16
sharpness, 16
SmartFocus, 16
smoothing, 16
hp papers, tips on loading, 11
hp preview, 23
cancel print job, 24
change print settings, 24
print, 24
save as .bmp, 24
zoom, 24
I
ink volume, 24
inkjet paper
load, 11
text rendering, 18
install software, 1, 4
See also uninstall software,
reinstall software
connect printer to
computer, 1
Windows 2000, 2
Windows 98, 2
Windows 98SE, 2
Windows Me, 2
Windows XP, 3
iron-on transfers, 20
L
labels
load, 11
layout tab, 18
borderless printing, 19
mirror image, 20
number of copies, 21
orientation, 20
paper size, 19
rotate 180°, 20
scale to fit, 19
start printing from last
page, 21
load
continuous (banner)
paper, 12
envelopes, 10
hagaki cards, 10, 11
labels, 11
paper, 7
photo paper, 11, 12
postcards, 10, 11
tips, 11
transparency film, 11
low memory mode, 25
M
mirror image, 20
41
index
N
number of copies, 21
O
output tray extender, 8
P
page orientation
landscape, 20
portrait, 20
paper
change the type, 12
load, 7
orientation, 20
recommended, 7
tips on loading, 11–12
paper tray, load, 7
paper-size setting, 19
paper-type setting,
recommended, 17
photo paper, load, 11, 12
PhotoREt, 18
postcards, load, 10, 11
posters, 22
print
envelopes, 10
grayscale, 25
last page first, 21
low memory mode, 25
multiple copies, 21
multiple pages on one
sheet, 22
posters, 22
reverse image, 20
scale to fit, 19
42
settings, 13
test page, 27
two-sided pages, 21
print cartridge
configuration, 28
print driver
Windows 2000 or XP, 2, 3
Windows 98, 98SE, or
Me, 2
print quality
best, 15
everyday, 15
FastDraft, 15
normal, 15
printer
calibrate, 26
change settings, 13
make default, 13
printheads, clean, 27
Q
quality tab, 15
high resolution control, 18
hp digital photography, 16
paper type, 16
print quality, 15
quality, increase, 15
R
reinstall software, 5
reverse image, 20
rotate 180°, 20
S
saturation, 26
scale to fit, 19
services tab, 26
hp toolbox, 26
setup tab, 18, 21, 25, 26
sharpness, 16
SmartFocus, 16
smoothing, 16
software
install, 1, 4
uninstall and reinstall, 5
specifications, 38
speed
increase, 15
start printing from last page, 21
stop print job, 28
T
test page, 27
Toolbox, 26
configuration tab, 27
device services tab, 26
transparency film
load, 11
T-shirt transfer
load, 11
two-sided printing, 21
automatic, 22, 28
long side, 21
short side, 21
U
uninstall software, 5
uninstall_dc410.bat, 5
USB cable, 1
hp digital copier printer 410
Visit the hp digital copier printer information center
It has everything you need to get the most value from your HP Digital Copier
Printer.
•
Technical Support
•
Supplies and Ordering Information
•
Project Tips
•
Ways to Enhance Your Product
www.hp.com/support
© 2003 Hewlett-Packard Company
Printed in the U.S.A. or Germany.
*Q1645-90109*
*Q1645-90109*
Q1645-90109