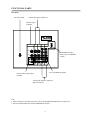
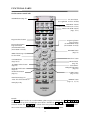
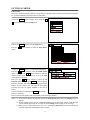
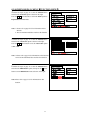
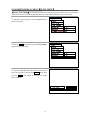
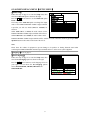
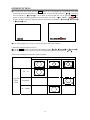
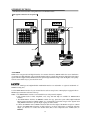
1
INSTRUCTION MANUAL Projection Color Television &)/ &:' z Thank you for your purchasing HITACHI projection TV products. z In order to use the Projection color TV properly, please read this instruction manual carefully before using it. CONTENTS SAFETY TIPS ·································································································································3 BEFORE USING THIS PROJECTION COLOR TV····································································7 Note ··········································································································································7 Location ····································································································································7 The best spot for viewing ···········································································································7 Connect the power cord and the antenna·····················································································8 Insert the batteries······················································································································8 FUNCTIONAL PARTS···················································································································9 Control panel and side panel ······································································································9 Rear panel ······························································································································· 11 On the remote control unit ·······································································································12 GETTING STARTED···················································································································13 Power on/off ··························································································································13 Instructions for operating menu································································································14 Selecting the on-screen display language··················································································15 Easy Preset ······························································································································16 ON-SCREEN DISPLAY MENU ···································································································17 Picture Menu ···························································································································17 Audio Menu ····························································································································19 Timer Menu·····························································································································20 Function Menu ························································································································21 Setup Menu ·····························································································································23 CONVERGENCE ADJUSTMENT ······························································································32 MULTI PICTURE ·······················································································································33 CH SURF FUNCTION··················································································································38 TELETEXT ···································································································································40 OTHER FUNCTIONS ··················································································································41 CONNECTION WITH OTHER EQUIPMENT···········································································48 Jacks and connections of side panel··························································································48 Jacks and connections of rear panel··························································································49 About the jacks and connections of rear panel ··········································································52 ADDENDA·····································································································································53 A guide to simple problem solving ···························································································53 Accessories······························································································································53 Specifications ··························································································································54 2 SAFETY TIPS In order to use this TV safely, you must pay attention to the notice shown below. This symbol indicates forbidden actions. This symbol indicates additional cautions (including warning). This symbol indicates required actions. Refer to the Power Supply as indicated on the rating label pasted at the back of the TV set. Do not use the TV outside the specified voltage range. It may cause a fire or an electric shock. Never insert or remove the power plug with wet hands. This may cause electric shock. gDo not place any objects on the cord or allow it to overpass. If the cord or plug is damaged, please cut power supply immediately, then contact a service technician for inspection. gDo not overload wall outlets and extension cords as this can result in fire or electric shock. gDo not apply excessive force to the power cord. gDo not allow the power cord to overheat as this may cause damage. gDo not pull on the power cord when removing the plug from the outlet, please hold the plug firmly when removing it. gDo not place the TV into a closet or bookshelf where the ventilation is poor. gDo not cover the TV with cloth or other objects. gDo not place the TV with its screen facing upwards, or on its side. Allow sufficient space between the TV and walls. Ensure that there is sufficient ventilation and that vents are unobstructed to prevent the buildup of heat inside the TV, or else, it may result in a malfunction. gDo not place the TV on an unstable cart, stand or table. gDo not place the TV in an unstabilized location such as on a bed, sofa, etc. gDo not use the TV in locations exposed to high humidity levels such as close to a bathtub, washbowl, kitchen, washing machine, swimming pool or moisture, etc. Please always keep the TV in a dry place. If the TV gets damp, it may cause a malfunction. 3 SAFETY TIPS not place the TV near heat source (such as a radiator, stove etc.) or a gDo place where sunlight shines directly on the screen. Overheating will cause failure of the TV. g gDo not place the TV in a dusty place or exposed to rain. Since accumulated dust inside the chassis may cause failure of the set when high humidity persists. gDo not place containers filled with liquids or other objects, e.g. house plant, vase, tea sets, etc. In case liquids are spilled inside the TVˈplease remove the plug from the wall outlet immediately and contact a service technician. In addition, if rubber or vinyl products remain in contact with the cabinet or screen of the TV for a long time, the TV surface may get damaged or a stain may result. gDo not insert objects or pour water inside the TV from ventilation holes and other slots. Be especially careful that children do not insert objects in the TV, such as coins, nails, clips, toys, etc. If these objects drops inside the TV, turn off the TV and remove the power plug from the outlet immediately and contact a service technician. gDo not climb or sit on top of the TV. Do not stand or hang on the TV. It may result in the TV falling over, damaging, the screen broken etc. or causing an injury. gAvoid any kind of impact to your television. Be especially careful not to damage the screen face. gDo not attempt to touch the screen, marks may result. 4 SAFETY TIPS gIn order not to damage the parts in the set, please unplug and remove the outdoor antenna connection during lightning storms. gWhen going out or your TV is set to remain unused for a long periods of time, please turn off the television and unplug it from the wall outlet. Accumulated dust on the plug or the humidity may cause a fire or electric shock due to reduced insulation on it. So when the TV won’t be used for a long period of time, be sure to remove the power plug from the wall outlet. gDo not disassemble, repair or modify the TV by yourself. To prevent shock, disassembling the cabinet or touching the parts inside the TV by other than professional person is prohibited. Precautions when moving gWhen moving the TV, be sure to remove the plug from the wall outlet and disconnect the aerial cable, audio/video cable. gAs this TV is heavy, wherever it is moved, at least two people are required to transport it safely. gDo not move the TV forcefully as it may leave scratch marks on the floor. gBe careful when moving the TV. Avoid any bumps onto the screen. Cleaning 1.Before cleaning the TV, remove the power plug from the wall outlet. 2.Do not use solvents such as volatile substances, diluent to clean the TV. These solvents may distort the cabinet and screen or damage its finish. 3.Do not use vacuum cleaner, polish, sand paper to clean the cabinet or screen of the TV. 4.If accumulated dust cover the cabinet or screen, please use a soft, dry cloth to clean. 5.Do not directly use liquid or an aerosol sprays to clean the cabinet of the TV. 6.Do not use the detergent directly on the TV if it is dirty. ˉPlease use a clean soft cloth moistened with water to clean it. ˉThen wipe with a dry soft cloth. 5 SAFETY TIPS Moisture Condensation If the room temperature suddenly rises or falls (e.g. the TV is moved from a cool place to a warm place), condensation may occur on the screen or lenses resulting in picture fading or color distortion. In such case, please wait a while for the condensation to evaporate. The sound and picture will be restored to normal. gPrecautions on stationary images If you watch TV programs, please select proportional active images, or by setting the aspect mode to display such proportional active images on your screen. Avoid displaying stationary images on your screen for an extended period of time. Some bright and stationary patterns generated by computer displays, video games or multi window, etc. can cause permanently ingrained on the picture tube. Should you wish to display still images, it is always advisable to reduce the brightness and contrast settings. This damage is not protected by your warranty as it is the result of misuse. Maintenance gIf the set does not work properly, and you are unable to restore normal operation by following the “A guide to simple problem solving” section in your Instruction Manual, please unplug the set and consult service personnel. gIf the TV is dropped or the cabinet is damaged, remove the power plug immediately and contact a service technician for inspection. gIf there are smoke or strange smell from the TV, please remove the power plug from the wall outlet immediately and contact a service technician for inspection. 6 BEFORE USING THIS PROJECTION COLOR TV Note This is not an integrated digital TV. To watch digital broadcast programs (if available), you have to purchase a Digital Set-Top Box that will receive and decode digital broadcast signals and input to the TV via the component input terminals. Location Select an area where sunlight or bright indoor illumination will not fall directly on the picture screen. Also, be sure that the location selected allows a free flow of air to and from the perforated back cover of the set. Do not place the TV where temperature is excessively high, for example in direct sunlight or near a heating appliance, etc. The best spot for viewing The major benefit of the TV is its large viewing screen. To see this large screen at its best, please test various locations in the room to find the best spot for viewing. The following gives some suggestions. The best picture and audio performance are obtained directly in front of the TV and about 2.5 to 4.5 meters from the screen. Picture brightness decreases as the viewer moves to left and right of the receiver. Best vertical viewing angle Best horizontal viewing angle Note: Do not put magnetism source such as external stereo system close to the TV, as the picture distortion may occur under magnetism from the speakers. Please move the stereo system in locations where the picture will not be affected. 7 BEFORE USING THIS PROJECTION COLOR TV Connect the power cord and the antenna Please read the rating label pasted at the back of the TV set carefully, and then insert the plug into the power outlet conformity to the rating label. Optimum reception requires that an outdoor aerial or CATV system must be used. Meanwhile, please note that a good antenna adaptor is necessary. See the following diagram. Precautions when connecting the antenna ķ When you use an outdoor antenna instead of CATV system, avoid erecting in locations where there are elevated wires or other electrical circuit. ĸ When choosing an outdoor antenna make sure the groundings are correct. Ĺ Please use a coaxial cable that is free from interference to connect the antenna. Avoid using a parallel feeder wire as interference may occur, causing reception to be unstable and stripe noise to appear on the screen. For safety, install an external aerial conformity to AS 1417.1(in Australia only). ĺ Clamp section A using pliers when installing the coaxial cable. If other types of adaptors are used, be sure that the core and shielding are good. Ļ Avoid using indoor aerial as this may be affected by interference. ļ Keep the power cord as far away from the antenna wire as possible. Insert the batteries Insert the batteries into the remote control unit. Under normal use, the life of the batteries is approximately one year. ķ Open the battery cover of the ĸ Insert the batteries, paying Ĺ Replace the cover. special attention to their remote control unit by pushing the polarities. notched part of the cover with your fingers. Precautions when using the batteries ķ Do not use old and new batteries together. ĸ Do not use different types of batteries (for example, Manganese and Alkaline batteries) together. Ĺ Remove the batteries from the remote control unit if you do not intend to use the unit for long periods of time. Otherwise the batteries may leak and cause damage. ĺ Do not throw the batteries into the fire. Precautions when using the remote control unit ķ Do not drop the remote control unit or subject it to physical shocks. ĸ Keep the remote control unit dry. Wetting it may cause the unit to malfunction. Ĺ Replace the batteries with new ones when the operating range of the unit is shortened. 8 FUNCTIONAL PARTS Control panel and side panel (The control panel and side panel shown as below is designed for the C43-FL9000 model.) Side panel input jacks (For AV5 input) POWER button A U D I O I N P POWER indicator U Remote control sensor T 5 TV/VIDEO selector VOLUME UP/DOWN buttons(When the menu appears on the screen, press VOLŻ / VOLŹ buttons to select the menu left and right.) PROGRAM UP/DOWN buttons (When the menu appears on the screen, press PROG Ÿ/ PROGź buttons to select the menu up and down.) MENU/RETURN button MANUAL FOCUS button Note: Before using these input jacks, please refer to the INSTRUCTION MANUAL on page 48. 9 FUNCTIONAL PARTS Control panel and side panel (The control panel and side panel shown as below is designed for the C52-WD9000 model.) Side panel input jacks (For AV5 input) A U D I O I N P U T 5 POWER button Remote control sensor POWER indicator TV/VIDEO selector VOLUME UP/DOWN buttons(When the menu appears on the screen, press VOLŻ / VOLŹ buttons to select the menu left and right.) PROGRAM UP/DOWN buttons (When the menu appears on the screen, press PROG Ÿ/ PROGź buttons to select the menu up and down.) MENU/RETURN button MAGIC FOCUS button Note: Before using these input jacks, please refer to the INSTRUCTION MANUAL on page 48. 10 FUNCTIONAL PARTS Rear panel Antenna terminal Audio/Video input terminals 3,4 Monitor output terminals HDMI INPUT INPUT 4 MONITOR OUT INPUT 3 S-VIDEO INPUT 2 INPUT 1 Y/ VIDEO Y/ VIDEO PB CB PB CB PR CR PR CR (MONO) (MONO) HDMI INPUT interface (Only for the C52-WD9000 model ) VIDEO (MONO) (MONO) L TV AS CENTER AUDIO R FIXED/VARIABLE TV AS CENTER input jacks Fixed/Variable Audio output terminals Audio/Video input & Component input terminals 1,2 Note: 1. Before using these rear panel jacks, please refer to the INSTRUCTION MANUAL on page 49-52. 2. The C43-FL9000 model does not have HDMI INPUT interface. 11 FUNCTIONAL PARTS On the remote control unit POWER button (Page 13) AV NET button (Not applicable for these models) TELETEXT buttons AV direct select buttons (AV1~AV5) MULTI PICTURE buttons (Page 33-37) Program selector buttons Program up button Page up button (In TELETEXT mode) (In CH SURF 12 mode) Program down button Page down button (In TELETEXT mode) (In CH SURF 12 mode) RETURN button (Page 14) MENU button (Page 14) See the remark. RECALL button CH SURF button (Page 38,39) MUTE button (Page 46) Stereo/Mono/ Bilingual (I/II) button (Page 46) TV/VIDEO selector button (Page 46) PICTURE mode button (Page 45) AUDIO mode button (Page 45) P.SIZE button (Page 41-44) DVD buttons (Page 45) *Note: For selected brands of DVD player only. FREEZE button (Page 33, 35, 39) Remark: The ENTER button is used to set or confirm MENU, please see page 14 for details. The ŸP+ źPbuttons are used as up, down, left and right cursor buttons. Alternatively, ŸP+ / źP- can be used as program up and down buttons and as volume down and up buttons. The characters “Ÿ ź Ż Ź cursor” shown in this instruction manual will be referring to the ŸP+ źPbuttons. 12 GETTING STARTED Power on/off TO TURN ON THE POWER Press the POWER button on the TV set. The power indicator will light up to indicate that the power is on. POWER button POWER indicator (C52-WD9000) (C43-FL9000) WHEN THE SET IS AT STANDBY The TV will be in standby mode and the blue power indicator becomes dimmer if the TV set is turned off using the button on the remote control unit. This indicates that the TV is not powered off completely and is in low power consumption mode, waiting for your new command at anytime. You can turn on the TV set using the button on the remote control unit. The picture will appear in a few seconds. You can also press the PROG Ÿ/ PROGźbuttons on the side panel to turn it on. TO TURN OFF THE POWER Press the POWER button on the TV set to turn off it. The power indicator will go off. CAUTION: If you are not going to use this set for a long time, turn off the set using the POWER button on the TV set and disconnect the plug from the power outlet. 13 GETTING STARTED Instructions for operating menu ƽBefore watching the TV, please familiarize yourself with this method to use the menu function of this TV. ƽInstructions in this manual are based on using the remote control unit. The words or symbols with frames refer to the buttons on the remote control unit. ƽThe Chinese characters on the TV screen are supplied by Rico Company. The logos and symbols used in this instruction manual are intended for explanation purposes, they might differ from those shown on the TV. 1. Menu: After the power is on, press the MENU button to enter the menu screen which shows a list of optional main adjustment items, such as Picture, Audio, Timer, etc. Adjustment items: After a main adjustment item is “selected” and “entered”, the screen will enter into the selection and show a list of related optional sub-adjustment items. After a sub-adjustment item is “selected” and “entered”, it may enter the next stage of sub-menu display until the last stage of the adjustment item is entered. When an adjustment item is selected, the characters of the adjustment item will be highlighted and usually accompanied with a Ź mark. 2. Common symbols in menu display Symbols 1 Select 2 4. Set This symbol is displayed at the bottom of the menu, indicating that you can enter the adjustment item highlighted by pressing the ENTER button on the remote control unit. 3 Set This symbol is displayed at the bottom of the menu, indicating that you can adjust the selected item by pressing the Ż or Ź cursor buttons on the remote control unit. 4 L-U Set This symbol is displayed at the bottom of the menu, indicating that you can enter the number you desired when pressing the number buttons ( 0 – 9 ) on the remote control unit. 5 Reset The characters Reset is displayed in the menu, indicating that you can return the current menu setting to the factory default setting by pressing the ENTER button on the remote control unit. 6 3. Description This symbol is displayed at the bottom of the menu, indicating that you can select the adjustment item on the menu by pressing the Ÿ or ź cursor buttons on the remote control unit. Return This symbol is displayed on the menu, indicating that you can return to the previous page by pressing the RETURN button on the remote control unit. You can stop and exit from the menu operation by pressing the MENU button anytime. If there is no operation in the menu after some times, it will automatically exit from the menu screen. If the item in the menu is shown in grey, it means that it cannot be adjusted. 14 GETTING STARTED Selecting the on-screen display language You can choose from two different languages (Chinese and English) for the on-screen displays. When necessary, you may change the displayed language following the procedures below. 1 Press the MENU button to display menu as shown on the right. 2 Press the Ÿ ź cursor buttons to select the Setup option as shown on the right. 3LFWXUHŹ $XGLR 7LPHU )XQFWLRQ 6HWXS 6HOHFW6HW 3LFWXUH $XGLR 7LPHU )XQFWLRQ 6HWXS Ź 6HOHFW6HW 6HWXS ź 3 Press the ENTER button to enter the Setup menu. 3UHVHW Press the Ÿ ź cursor buttons to select the Language option (shown on the right), then press the Ż Ź cursor buttons to select the desired language: Ё᭛(CHINESE) or ENGLISH. (DV\3UHVHW $XWR/LQN 6SHDNHU2Q $XGLR2XW)L[HG (1*/,6+ /DQJXDJHЁ᭛ Ź 7H[W/DQJXDJH($67(8523( 6HOHFW 6HW 5HWXUQ 4 Press the RETURN button to return to the previous screen, or press the MENU button to quit. 15 GETTING STARTED Easy Preset It becomes convenient for the customers to program the TV using the remote control unit and detailed OSD of the TV set. Please follow the procedures below to start tuning. 1 Press the MENU button to display menu. Press the Ÿ ź cursor buttons to select the Setup option. 2 Press the ENTER button to enter the Setup menu. 3LFWXUH $XGLR 7LPHU )XQFWLRQ Ź 6HWXS Ź 6HOHFW6HW 6HWXS ź Press the Ÿ ź cursor buttons to select the Easy Preset 3UHVHW option. (DV\3UHVHW Ź $XWR/LQN 6SHDNHU2Q $XGLR2XW)L[HG /DQJXDJHЁ᭛ (1*/,6+ 7H[W/DQJXDJH($67(8523( 6HOHFW 6HW 5HWXUQ 3 Press the ENTER button to enter the Easy Preset menu. ź (DV\3UHVHW Press the Ÿ ź cursor buttons to select the Sound System Ź 6RXQG6\VWHP$XWR optionˈthen press the Ż Ź cursor buttons to select the $OO3URJUDP0+] required sound system in your area or set it to the Auto 5HWXUQ 6HOHFW 6HW mode (shown on the right). Now press the Ÿ ź cursor buttons to select the All Program option, then press the ENTER button to begin the auto tune procedure. The character Searching appears at the bottom of menu, and the TV will begin the auto search procedure and store all signals available in the area or CATV. You can interrupt it by pressing the ENTER button in the process of searching. The set will exit menu display mode automatically after searching is finished. Notes:˄1˅If you want to arrange the programs obtained by All Program, please refer to the Tuning section on page 23. ˄2˅If your equipment (such as VCR, GAME MACHINE) only has RF output, connect it with RF cable into the antenna input of the TV set, and refer to the Tuning section on page 23 for presetting. ˄3˅When you are in video mode (AV1, AV2, etc. ), accessing the Easy Preset menu will enable the TV to switch to RF mode automatically. This is normal. 16 ON-SCREEN DISPLAY MENUǏPICTURE MENUǐ Picture Menu Picture menu allows you to adjust various picture settings such as brightness, color, contrast and sharpness. You can also adjust the settings for color temperature, dynamic contrast, etc. Please follow the steps below. 1 Press the MENU button to display menu. Press the Ÿ ź cursor buttons to select the Picture option as shown on the right. 2 Press the ENTER button to display the Picture menu as Ź 3LFWXUH $XGLR 7LPHU )XQFWLRQ 6HWXS 6HOHFW6HW 3LFWXUH ź shown on the right. This is the first page in the Picture menu, providing 4 different picture modes (Dynamic, Natural, Theater, Favorite). Press the Ż Ź cursor buttons to select. We suggest that you try every item to obtain the desired picture effect. To set the picture effect you desired, press the Ÿ ź cursor buttons to select the item to be adjusted, and then press the Ż Ź cursor buttons to adjust. Ź 3LFWXUH0RGH)DYRULWH &RQWUDVW %ULJKWQHVV &RORU 7LQW 6KDUSQHVV &RORU7HPS&RRO 3$/&RPE)LOWHU2Q 5HVHW 6HOHFW 6HW 5HWXUQ Notes˖ ˄1˅Press the PICTURE button on the remote control unit, you can switch among the above four picture modes easily. ˄2˅Only when receiving NTSC signals or Y, PB/CB, PR/CR inputs or HDMI INPUT interface, the Tint option can be adjusted.˄The C43-FL9000 does not have HDMI INPUT interface.˅ ˄3˅Only when receiving PAL system, the PAL Comb Filter option can be set to On or Off; when receiving other systems, the comb filter is automatically set. ˄4˅If the Reset option is selected and confirmed by pressing the ENTER button, the current setting on the menu will return to the factory setting. ˄5˅For AV1̚AV5 inputs, different picture modes can be set individually. 17 ON-SCREEN DISPLAY MENUǏPICTURE MENUǐ 3 Press the ź cursor button until the second page in the 3LFWXUH ź Picture menu appears as shown on the right. These settings allow you to enhance or improve the visual condition of the picture. )LOP0RGHŹ 2Q 1RLVH5HGXFWLRQ /RZ 90 2II '\QDPLF&RQWUDVW 2Q %ODFN6WUHWFK /RZ &7, /RZ &RORU0DQDJHU 5HVHW 6HOHFW 6HW 5HWXUQ Notes:˄1˅If Noise Reduction is set to High or Lowˈthe Sharpness option cannot be adjusted. ˄2˅While Film Mode is on, your projection TV will activate the circuitry for special feature to improve the video performance when viewing film based sources. ˄3˅When HD or Progressive signals are inputˈFilm Mode option cannot be adjusted. 4 Repeatedly press the ź cursor button as shown on the top right to select the Color Manager option, then press the Ź cursor button to display the menu as shown on the &RORU0DQDJHU ź Ź 2Q &RORU0DQDJHU ί3KDVHΰί*DLQΰ right. When the Color Manager option shown on the right is set to On, you can adjust and balance their individual color for your personal preference to obtain the deeper and purer color effect. 0DJHQWD0 0 5HG0 0 <HOORZ0 0 *UHHQ0 0 &\DQ0 0 %OXH0 0 5HVHW If the option of Reset was selected and press the ENTER button, the Color Manager menu will return to factory default setting. Each color in the menu provides two options (Phase and Gain). Press the Ÿ ź cursor buttons to select the adjustment item, and then press the Ż Ź cursor buttons 6HOHFW 6HW 5HWXUQ to adjust. 3KDVH Ź *DLQ 6HOHFW 18 6HW 5HWXUQ ON-SCREEN DISPLAY MENUǏAUDIO MENUǐ Audio Menu Audio menu allows you to adjust various sounds settings such as treble, bass and balance. You can also adjust the settings for surround effect etc. Please follow the steps below. 1 Press the MENU button to display menu. Press the Ÿ ź cursor buttons to select the Audio option as shown on the right. 2 3LFWXUH Ź $XGLR 7LPHU )XQFWLRQ 6HWXS 6HOHFW6HW Press the ENTER button to display the Audio menu as shown on the right. This is the first page in the Audio menu, providing 4 different audio modes (Theater, Music, Narration and Favorite). Press the Ż Ź cursor buttons to select. We suggest that you try every item to obtain the desired sound effect. To set the sound effect you desired, press the Ÿ ź cursor buttons to select the item to be adjusted, then press the Ż Ź cursor buttons to adjust. During the process of adjustment, the indicator will move left or right, allowing you to know the state of adjustment. $XGLR ź $XGLR0RGHŹ )DYRULWH 7UHEOH %DVV %DODQFH 5HVHW 6HOHFW 6HW 5HWXUQ Note: Press the AUDIO button on the remote control unit, you can switch among the above four audio modes easily. 3 Press the ź cursor button until the second page in the Audio menu appears as shown on the right. These settings allow you to enhance or improve the sound effect. $XGLR ź 6XUURXQG2II Ź /RXGQHVV2II 5HVHW 6HOHFW 19 6HW 5HWXUQ ON-SCREEN DISPLAY MENUǏTIMER MENUǐ Timer Menu The Timer function for this TV uses a countdown timer system. It features On Timer, Off Timer and Auto Off. 1 Press the MENU button to display the menu. Press the Ÿ ź cursor buttons to select the Timer option as shown on the right. 3LFWXUH $XGLR Ź 7LPHU )XQFWLRQ 6HWXS 6HOHFW6HW 2 7LPHU ź Press the ENTER button to enter the Timer menu as shown on the right. The adjustment items are shown below: Off Timer Example˖To turn off after 1 hour and 25 minutes. Press the Ÿ ź cursor buttons to select the Off option. Press number buttons to enter the specified amount of time (the maximum time is 23:59), input the hour, then input the minute, i.e.01:25 (shown on the right). Timer starts countdown after quitting the Timer menu. After 1 hour and 25 minutes, the TV will go into standby mode. 2Q 2II Ź $XWR2II2Q 6HOHFW Set 5HWXUQ Note: As a precautionary measure, after setting Off Timer, if the power is turned off or power supply is cut off accidentally before the set time elapses, the TV will be in standby mode when you restart the TV. On Timer The setting of On Timer is similar to that of Off Timer. After On Timer is set, please turn off the TV by pressing the button on the remote control unit to start the countdown, the power indicator on the front of the TV will be blinking. This is normal. The power is turned on when the set time has elapsed. Notes: 1) If turning off the power using the POWER button on the front panel, On Timer will not work. 2) If the power is turned off by pressing the POWER button on the front panel before the set time elapses or the power supply is cut off accidentally, the TV will be in standby mode when you restart the TV. 3) As a precautionary measure, if there is no operation for 2 hours after the power is turned on by the On Timer function, the TV will go into standby mode automatically. Auto Off If Auto Off is set to On and there is no more broadcasting transmission (i.e. no signal is detected), the TV will go into standby mode automatically after 60 minutes. If Auto Off is set to Off, this function will be cancelled. Notes: 1) Auto Off is only valid if no signal transmission is received from the antenna terminals. 2) If Within 60 minutes after no signal is detected, switching TV to any channel with signal will cancel the Auto Off function. 20 ON-SCREEN DISPLAY MENUǏFUNCTION MENUǐ Function Menu Function menu allows you to select scan mode, multi picture mode etc. Please follow the steps below. 1 Press the MENU button to display the menu. Press the Ÿ ź cursor buttons to select the Function option as shown on the right. 2 Press the ENTER button to enter the Function menu. Press the Ÿ ź cursor buttons to select the Scan Mode option as shown on the right. 3LFWXUH $XGLR 7LPHU Ź )XQFWLRQ 6HWXS 6HOHFW6HW )XQFWLRQź 6FDQ0RGHŹ 3URJUHVVLYH 7936L]H ([SDQGHG $XWR36L]H 2Q 0XOWL3LFWXUH 5HVHW Note: The menu of the C43-FL9000 model as shown on the right does not include the TV P.Size option and the Auto P.Size option. 3 6HOHFW 䗝乍 6HW 䆒ᅮ 5HWXUQ Ϟϔ义 Press the ENTER button to enter the Scan Mode menu as shown on the right. You can press the Ż Ź cursor buttons to select different scan modes to improve picture effect. ˄1˅For PAL or SECAM systemˈyou can select scan mode from 100Hz,Virtual HD or Progressive. ˄2˅For NTSC system, you can select scan mode from Virtual HD or Progressive. ˄3˅When the input signal format is 480p signal, the scan mode setting will be fixed at Progressive. Scan Mode 3URJUHVVLYH Ź ˄4˅When the input signal format is 576p signal, you can 6HW 5HWXUQ select scan mode from 100Hz or Progressive. The 100Hz mode can eliminate flicker. ˄5˅When the input signal format is 1080i/60 or 720p/60 HD signal, the scan mode setting will be fixed at HD. ˄6˅When the input signal format is 1080i/50 HD signal, you can select scan mode between 100Hz or HD. The 100Hz mode can eliminate flicker. 21 ON-SCREEN DISPLAY MENUǏFUNCTION MENUǐ 4 Follow the steps on page 21 to enter the Function menu and select the TV P.Size option as shown on the right. Press the Ż Ź cursor buttons to set the TV P.Size option to Expanded, 4:3 or 16:9 mode. Note: 1. Please refer to page 42-43 for information on this function. 2. The C43-FL9000 model does not have this function. 5 Follow the steps on page 21 to enter the Function menu )XQFWLRQź 6FDQ0RGH 3URJUHVVLYH Ź 7936L]H ([SDQGHG $XWR36L]H 2Q 0XOWL3LFWXUH 5HVHW 䗝乍 6HOHFW 6HW 䆒ᅮ 5HWXUQ Ϟϔ义 )XQFWLRQź and select the Auto P.Size option as shown on the right. Press the Ż Ź cursor buttons to set the Auto P.Size option 6FDQ0RGH 3URJUHVVLYH 7936L]H ([SDQGHG to On or Off. $XWR36L]H Ź 2Q 0XOWL3LFWXUH 5HVHW Note: 1.Please refer to page 44 for information on this function. 2.The C43-FL9000 model does not have this function. 6HOHFW 䗝乍 6HW 䆒ᅮ 5HWXUQ Ϟϔ义 6 Follow the steps on page 21 to enter the Function menu 0XOWL3LFWXUH ź and select the Multi Picture option, then press the Ź cursor 0XOWL3LFWXUH button to enter Multi Picture menu as shown on the right. &+6XUI )UHH]H 5HVHW 6WLOO 6HOHFW 䗝乍 Note: Please refer to page 33-39 for information on this function. 22 3LQ3 5HWXUQ 䆒ᅮ Ϟϔ义 ON-SCREEN DISPLAY MENUǏSETUP MENUǐ ǏPreset: TuningǐYou can perform search, skip, color system, sound system, program name,etc. on the Tuning menu. When the Easy Preset tuning is not desirable, you can adopt the following method to select programs. 1 Press the MENU button to display menu. Press the Ÿ ź cursor buttons to select the Setup option as shown on the right. 2 Press the ENTER button to enter the Setup menu. 3LFWXUH $XGLR 7LPHU )XQFWLRQ 6HWXS Ź 6HOHFW6HW 6HWXS ź Press the ź cursor button to select the Preset option as shown on the right. 3UHVHW Ź (DV\3UHVHW $XWR/LQN 6SHDNHU2Q $XGLR2XW)L[HG /DQJXDJHЁ᭛ (1*/,6+ 7H[W/DQJXDJH ($67(8523( 6HOHFW 6HW 5HWXUQ 3 Press the ENTER button to enter the Preset menu. 3UHVHWź 7XQLQJ Press the ź cursor buttons to select the Tuning option as Ź )LQH7XQLQJ shown on the right. 3URJ([FKDQJH $QWHQQD$WW2II $XWR0XWH2II 6HOHFW 23 6HW 5HWXUQ ON-SCREEN DISPLAY MENUǏSETUP MENUǐ 4 Press the ENTER button to enter the Tuning menu as shown on the right. Press the Ÿ ź cursor buttons to select Tuning Mode. Select the channel receiving mode in your region using the Ż Ź cursor buttons. For example, in Singapore, please select CCIR on the menu. Note: If without CCIR and China, you can select Freq. to tune. 5 Press the Ÿ ź cursor buttons to select the Program 7XQLQJź 7XQLQJ0RGHŹ &&,5 3URJUDP1XPEHU 6HDUFK 0+] 6NLS 2II 6RXQG6\VWHP $XWR &RORU6\VWHP $XWR 3URJUDP1DPH 7915 $OO3URJUDP 6HOHFW 6HW 2II 5HWXUQ 7XQLQJź Number option as shown on the right. Choose a particular program number by pressing the Ż Ź 7XQLQJ0RGH cursor buttons or directly enter the program number buttons, for example,001,002ĂĂ199,etc.Then press the ź cursor button to select the Search option. Press the Ź or Ż cursor 6HDUFK 0+] 6NLS 2II 6RXQG6\VWHP $XWR button, the TV will begin searching automatically forward (high frequency) or backward (low frequency) until adjacent broadcast is found. You can continue to press the Ż or Ź &RORU6\VWHP $XWR 3URJUDP1DPH 7915 $OO3URJUDP 2II 3URJUDP1XPEHU Ź &&,5 cursor button to search the channel until the desired channel 5HWXUQ 6HOHFW 6HW is available. In this way, you can manually select the desired program easily. Also, you can receive programs from RF output terminal of some equipment. In addition, you can receive AV program using a particular Program Number. Select the Search option and press the TV/VIDEO button on the remote control unit to select AV1, AV2, etc. If you do not want to preset AV program, please press the ENTER button on the remote control unit to quit the AV program setting. 6 Select Skip using the Ÿ ź cursor buttons as shown on the right. The Skip option in the menu allows you to skip those programs you do not like, for example, some repeated programs or programs with weak signal, etc. When Skip option is set to On using the Ż Ź cursor buttons, it will skip these programs automatically if you are to select the channels by the Program up/down buttons. Skipped program numbers can still be selected by entering the respective number buttons. You can access the menu to reset the Skip option. 7XQLQJź &&,5 3URJUDP1XPEHU 6HDUFK 0+] Ź 6NLS 2II 6RXQG6\VWHP $XWR &RORU6\VWHP $XWR 3URJUDP1DPH 7915 $OO3URJUDP 2II 6HOHFW 24 7XQLQJ0RGH 6HW 5HWXUQ ON-SCREEN DISPLAY MENUǏSETUP MENUǐ 7 The Sound System option in the Tuning menu allows you to select between various sound systems i.e. Auto, 4.5, 5.5, 6.0 or 6.5 (Note: Here the unit MHz is omitted.). Press the Ÿ ź cursor buttons to select the Sound System optionˈthen press the Ż Ź cursor buttons to select the desired sound systems as shown on the right. Auto is recommended, as this will automatically determine what system is being broadcast. Note: This option is valid only for RF signal from antenna. 8 The Color System option in the Tuning menu allows you to select different color systems i.e. Auto, PAL, SECAM, NTSC4.43 or NTSC3.58. Press the Ÿ ź cursor buttons to select the Color System option, then press the Ż Ź cursor buttons to select the desired color systems as shown on the right. Auto is recommended, as this will automatically determine what system is being broadcast. However, some weak broadcast signals might cause incorrect judgment by the TV and it may become necessary to allocate a particular system to that program number. 7XQLQJź 7XQLQJ0RGH &&,5 3URJUDP1XPEHU 6HDUFK 0+] 6NLS 2II 6RXQG6\VWHP Ź $XWR &RORU6\VWHP $XWR 3URJUDP1DPH 7915 $OO3URJUDP 2II 6HOHFW 5HWXUQ 6HW 7XQLQJź 7XQLQJ0RGH &&,5 3URJUDP1XPEHU 6HDUFK 0+] 6NLS 2II 6RXQG6\VWHP $XWR &RORU6\VWHP Ź $XWR 3URJUDP1DPH 7915 2II $OO3URJUDP 6HOHFW 6HW 5HWXUQ Note: Please set Color System to Auto when receiving signal without color burst. 9 Program Name in the Tuning menu allows you to 7XQLQJź assign a name for each channel. The detail steps are shown below: Press the Ÿ ź cursor buttons to select the Program Name option, then press the Ź cursor button to select the 7XQLQJ0RGH &&,5 3URJUDP1XPEHU 6HDUFK 0+] 6NLS 2II letter to be changed from the left to right. When the letter is selected, press the Ÿ ź cursor buttons to select the desired 6RXQG6\VWHP $XWR &RORU6\VWHP $XWR letter. When you select a channel that has been named, the channel No., name and other information will appear on the top right corner of the screen. Also, you can press the RECALL button to display the same information. 3URJUDP1DPH 7915 $OO3URJUDP 6HOHFW 6HW Ź 2II 5HWXUQ Notes˖ (1) The letters above include 39 letters such as *, ˉ, SPACE, 0-9, A-Z, etc. (2) When [] appears in the Program Name, this implies that the channel is not named. (3) Try to avoid using all spaces to name the program. 25 ON-SCREEN DISPLAY MENUǏSETUP MENUǐ 10 If the picture is noisy due to weak RF signals from some channels, you can reduce noise by using TV NR function. Press the Ÿ ź cursor buttons to select the TV NR option and then press the Ż Ź cursor buttons to select Off, Low and High to turn off noise reduction function, activate low noise reduction and high noise reduction respectively. Different channels can be set independently. Note: This option is valid only for RF signal from antenna. 11 7XQLQJź 7XQLQJ0RGH &&,5 3URJUDP1XPEHU 6HDUFK 0+] 6NLS 2II 6RXQG6\VWHP $XWR &RORU6\VWHP $XWR 3URJUDP1DPH 7915 $OO3URJUDP 6HOHFW 6HW Ź 2II 5HWXUQ All Program in Tuning menu can automatically 7XQLQJź search all available frequencies and store all stations 7XQLQJ0RGH &&,5 available to the program numbers starting from the current 3URJUDP1XPEHU program No. 6HDUFK 0+] Press the Ÿ ź cursor buttons to select the Program 6NLS 2II Number option on the menu, press the Ż Ź cursor 6RXQG6\VWHP $XWR &RORU6\VWHP $XWR buttons or number buttons to select program No. 3URJUDP1DPH Press the Ÿ ź cursor buttons to select the All Program 7915 2II option as shown on the right. Then press the ENTER $OO3URJUDP Ź button to begin the auto tune procedure. The word 5HWXUQ 6HOHFW 6HW Searching will appear at the bottom of the menu, and the TV will search for all frequencies and store all tuned frequencies to the program numbers starting from the Program Number selected. In the process of searching, press the ENTER button to quit. After complete the searching, the TV will quit the menu automatically. AV PRESETTING 3UHVHWź Press the TV/VIDEO button to switch the picture to the $90RGH$9 Ź AV mode. &RORU6\VWHP$XWR Enter the Preset menu to display the menu as shown on the 5HWXUQ 6HOHFW 6HW right. Press the Ÿ ź cursor buttons to select the AV Mode option and the Ż Ź cursor buttons or the TV/VIDEO button to select AV1, AV2, AV3, AV4 or AV5. Press the Ÿ ź cursor buttons to select the Color System option, then press Ż Ź cursor buttons to select Auto, PAL, SECAM, NTSC4.43 or NTSC3.58. If the picture in AV mode is abnormal resulted from incorrect color system, you can use the Color System option to select the correct system. When receiving component signal (Y, PB/CB, PR/CR) from INPUT1 (or HDMI INPUT interface) or INPUT2 terminal, though the Color System option can be set, it has no effect on the picture. This is normal. (The C43-FL9000 model does not have HDMI INPUT interface.) 26 ON-SCREEN DISPLAY MENUǏSETUP MENUǐ ǏPreset˖Fine TuningǐIt is unnecessary to fine tune in normal receiving condition. However, fine tuning is required in some areas where the broadcasting signals are weak. Please follow the steps as shown below. 1 Follow the steps on page 23 to enter the Preset menu as 3UHVHW ź 7XQLQJ shown on the right. )LQH7XQLQJ 3URJ([FKDQJH $QWHQQD$WW2II $XWR0XWH2II 5HWXUQ 6HOHFW 2 Press the Ÿ ź cursor buttons to select the Fine Tuning 3UHVHWź 7XQLQJ option as shown on the right. )LQH7XQLQJ Ź 3URJ([FKDQJH $QWHQQD$WW2II $XWR0XWH2II 6HW 6HOHFW 5HWXUQ 3 The Fine tuning adjustment bar is shown on the screen as shown on the right by pressing the ENTER button. Then press the Ż Ź cursor buttons to fine tune for desired picture condition. )LQH7XQLQJ Ź 27 6HW 5HWXUQ ON-SCREEN DISPLAY MENUǏSETUP MENUǐ ǏPreset: Prog.ExchangeǐThe menu allows you to set the program to your desired channel position. Please follow the steps below. 1 Follow the steps on page 23 to enter the Preset menu, 3UHVHWź then select the Prog. Exchange option as shown on the right. 7XQLQJ )LQH7XQLQJ 3URJ([FKDQJH Ź $QWHQQD$WW2II $XWR0XWH 2II 6HOHFW 6HW 5HWXUQ 2 Press the ENTER button to display the Prog. Exchange ź 3URJ([FKDQJH menu as shown on the right. Select the Prog.No. option to be exchanged (left side of arrow shows green), press the Ʒ ͩ cursor buttons to %HIRUH $IWHU 3URJ1R&K)UHT3URJ1R&K)UHT : 0+]ĕė0+] select program No. 001 as shown on the right. 6HOHFW &RQILUP 5HWXUQ 3 Press the ENTER button to select the other Prog.No. ź 3URJ([FKDQJH (right side of arrow shows green) and press the Ÿ ź cursor %HIRUH$IWHU buttons to select the program No. desired to be exchanged (No.199) as shown on the right. Then press the ENTER 3URJ1R&K)UHT3URJ1R&K)UHT : 0+]ĕė0+] button to carry out the exchange. 6HOHFW ([FKDQJH 5HWXUQ 28 ON-SCREEN DISPLAY MENUǏSETUP MENUǐ ǏPreset˖Antenna Att.ǐIn some cases, the quality of picture may be impaired due to strong RF signal from the antenna terminal. You can set the antenna attenuation to prevent such problem. Please follow the steps below. Follow the steps on page 23 to enter the Preset menu, then ź 3UHVHW select the Antenna Att. option as shown on the right. 7XQLQJ Press the Ż Ź cursor buttons to set the Antenna Att. )LQH7XQLQJ option On or Off to turn on or off the Antenna Att. function. 3URJ([FKDQJH $QWHQQD$WW2II Ź $XWR0XWH2II 6HOHFW 6HW 5HWXUQ ǏPreset˖Auto MuteǐIf Auto Mute is On, the noise from TV will be controlled when there is no signal transmission from the antenna terminal. Follow the steps on page 23 to enter the Preset menu, then select the Auto Mute option as shown on the right. Press the Ż Ź cursor buttons to set the Auto Mute option On or Off to turn on or off the Auto Mute function. 3UHVHWź 7XQLQJ )LQH7XQLQJ 3URJ([FKDQJH $QWHQQD$WW2II $XWR0XWH2II Ź 6HOHFW ǏEasy PresetǐRefer to page 16. 29 6HW 5HWXUQ ON-SCREEN DISPLAY MENUǏSETUP MENUǐ ǏAuto Linkǐ Use this function to automatically switch on the TV and switch it to AV1 or AV5 mode when it detects a video signal from INPUT1 (or Y signal or HDMI INPUT interface) or INPUT5 (or S-VIDEO signal) terminal of the TV. It provides you ease when using with your external equipment. (The C43-FL9000 model does not have HDMI INPUT interface.) Connect external equipment to INPUT1 or INPUT5 terminal of the TV. Refer to CONNECTION WITH OTHER EQUIPMENT on page 48-51 for more information. Follow the steps on page 23 to enter the Setup menu and select the Auto Link option. Enter the Auto Link menu as shown below. Press the Ÿ ź cursor buttons to select AV1 or AV5. Then press the Ż Ź cursor buttons to set AV1 or AV5 to On, Auto Link function for the respective inputs will be activated. (1)If you switch on the power of the external equipment connected to INPUT1 or INPUT5 terminal of the TV when its power is on, and there is an output signal from $XWR/LQNź these external equipment, Auto Link function will 2Q $9Ź automatically switch the TV from the TV channel or any $92Q other AV modes to AV1 or AV5 mode accordingly. 5HWXUQ 6HOHFW 6HW (2)If you switch on the power of the external equipment connected to INPUT1 or INPUT5 terminal of the TV when it is at standby mode, and there is an output signal from these external equipment. Auto Link function will automatically switch on the TV and switch to AV1 or AV5 automatically. The set will turn to standby mode automatically from the time when there is no operation on the set for a long time. Note: When the HDMI INPUT interface has been connected and the TV is in standby. If you switch on the power of the HDMI equipment, the TV keep in standby. (The C43-FL9000 model does not have HDMI INPUT interface.) Remarks˖ ˄1˅If the performance of your external equipment connected to AV1 or AV5 on the TV is not reliable, it is recommended to turn off the Auto Link function to avoid the misoperation. ˄2˅If you use your external equipment or the video cassette recorder to perform recording after they are set to On Timer, do not activate Auto Link function to avoid the misoperation. ǏSpeakerǐ Follow the steps on page 23 to enter the Setup menu, then select the Speaker option as shown on the right. 6HWXS ź 3UHVHW (DV\3UHVHW Press the Ż Ź cursor buttons to set the Speaker option $XWR/LQN On or Off to turn on or off the speakers of the TV. 6SHDNHU2Q Ź $XGLR2XW)L[HG /DQJXDJHЁ᭛ (1*/,6+ Note: When the external stereo system is connected to the FIXED/VARIABLE AUDIO output terminals of the TV, you can set the Speaker option to Off to turn off the speakers of the TV. 30 7H[W/DQJXDJH($67(8523( 6HOHFW 6HW 5HWXUQ ON-SCREEN DIPLAY MENUǏSETUP MENUǐ ǏAudio Outǐ 6HWXS ź Follow the steps on page 23 to enter the Setup menu, then 3UHVHW select the Audio Out option as shown on the right. (DV\3UHVHW Press the Ż Ź cursor buttons to set the Audio Out option $XWR/LQN Fixed or Variable. 6SHDNHU2Q The setting of the Audio Out option can change the output $XGLR2XW)L[HG Ź mode of the FIXED/VARIABLE AUDIO output terminals. /DQJXDJHЁ᭛ (1*/,6+ It provides you with two modes (Fixed or Variable) for 7H[W/DQJXDJH($67(8523( selection. 6HOHFW 6HW 5HWXUQ When Audio Out is set Fixed, the audio volume via the FIXED/VARIABLE AUDIO output terminals will be fixed. When Audio Out is set Variable, the audio volume via the FIXED/VARIABLE AUDIO output terminals will be variable. You can control the volume by pressing Volume up/down buttons on the remote control unit of the TV set. Note: Please lower the volume of equipment to prevent damage to its speakers or hearing distorted sound when connecting the FIXED/VARIABLE AUDIO output terminals on the TV to the stereo system equipment. ǏLanguageǐRefer to page 15. ǏText Languageǐ 6HWXS ź Follow the steps on page 23 to enter the Setup menu, then select the Text Language option as shown on the right. Press the Ż Ź cursor buttons to set the language of text in your region. You can choose the Text Language options such as EAST EUROPE, ARABIC, IRANIAN and WEST EUROPE. 3UHVHW (DV\3UHVHW $XWR/LQN 6SHDNHU2Q $XGLR2XW)L[HG /DQJXDJHЁ᭛ (1*/,6+ 7H[W/DQJXDJH($67(8523( Ź 31 6HOHFW 6HW 5HWXUQ CONVERGENCE ADJUSTMENT Over a period of time, the picture tubes can drift out of alignment due to abnormal bumps and vibrations or shifting of the TV. You may then notice that there are color rings or halos around the objects in the picture. You may have to converge (align) the colors(refer to note*1). If the picture on the screen is very clear, you may skip the below procedures. The TV provides two modes of convergence adjustment (AUTO CONVERGENCE and MANUAL CONVERGENCE). Please ensure that the TV is powered on for at least 20 minutes before you proceed with the convergence adjustment. AUTO CONVERGENCE (The C43-FL9000 model does not have this function.) Press the MAGIC FOCUS button on the side panel for one second or so to enter the AUTO CONVERGENCE mode. At anytime during this convergence correction process, you may press the MAGIC FOCUS button to exit, and the picture condition will remain unchanged. MAGIC FOCUS 0$*,& )2&86 This process will take approximately 20 seconds. (Do not move the TV during this auto convergence process.) MANUAL CONVERGENCE For the C52-WD9000 model, press and hold the MAGIC FOCUS button for more than 3 seconds to enter the MANUAL CONVERGENCE mode. Press and hold the MAGIC FOCUS button more than 3 Release the MAGIC 0$18$/)2&86 FOCUS button. seconds. (Note: If you press the MANUAL FOCUS button on the side panel of the C43-FL9000 model, the TV will enter the MANUAL CONVERGENCE mode directly.) (1) Press the Ÿ ź Ż Ź cursor buttons to move the selection box to select the adjustment point. Press the ENTER button to change the color of the selection box to red. Press the Ÿ ź Ż Ź cursor buttons to adjust red convergence. Note: Press the number buttons (2, 5, 4, 6) can also move the selection box to select the adjustment point, and then to adjust red convergence directly. (2) Press the ENTER button to change the selection box to blue. Press the Ÿ ź Ż Ź cursor buttons to adjust blue convergence. (3) Press the ENTER button to change the selection box to white. Press the Ÿ ź Ż Ź cursor buttons to move the selection box to select another adjustment point, then perform (1)~(2) to adjust. Notes: 1. During the adjustment, press the ENTER button frequently to return to the moving mode ( is shown in white, which means the selection box is in the moving mode.) and affirm convergence of the selection box so as to get the best convergence. 2. If you cannot insure perfect alignment, please try to get balance in alignment between and . (4)When adjustment is done, press the MENU button and the following screen will display as below. Press the number keys to perform the following procedure. [0]: To cancel the adjusted data and exit from adjustment mode. [1]: To save the adjusted data and exit from adjustment mode. [2]: To return to manual convergence mode. [3]: To recall the adjusted data from previous auto convergence and return to manual convergence mode. Notes: 1) During the adjustment, you are suggested to adjust again and again, and confirm the alignment of the selection box in the moving mode. PLEASE ENTER NUMBER CANCEL ˖[ 0 ] DONE ˖[ 1 ] BACK ˖[ 2 ] RESET ˖[ 3 ] 2) If there is no operation for 3 minutes from the remote control unit, the TV will exit from MANUAL CONVERGENCE mode. Note*1˖The TV has three color projection tubes: one for red, one for green and one for blue. When mixed together in the proper proportion, the output of these three color tubes can produce any color. To produce these colors, however, the beams must be precisely aligned over each other so that the color can be mixed. The process of aligning these picture beams is called convergence. 32 MULTI PICTURE ˄The function shown as below is designed for the C43-FL9000 model.˅ The Multi Picture function of this projection TV provides two modes, Split and P in P. To use the Multi Picture function allows you to enjoy the programs easily and comfortably. In normal picture mode, press the MULTI PIC. button to enter the Split or P in P mode. ǏSplitǐ Follow the steps on page 21 to enter the Function menu and select the Multi Picture option, then enter the Multi Picture menu and select the Multi Picture option as shown on the right. Press the Ż Ź cursor buttons to set Multi Picture option to 0XOWL3LFWXUH ź 0XOWL3LFWXUH )UHH]H 5HVHW 6HOHFW 䗝乍 enter the Split mode as shown below. Picture A and B will show the programs of two channels respectively. ƽOnce you have entered the Split mode, press the A/B button to select any one of the two pictures. A red symbol will appear on top of the selected picture, indicating: ˄1˅The TV speakers will output the sound from the selected signals from the selected picture. ˄3˅The operations such as program selection, etc. are valid for the selected picture. However, the program No. selected in one picture cannot be the same as that in the other one. Otherwise, the characters !Not Available will appear. 6SOLW &+6XUI Split mode, then exit from the menu. ƽIn normal picture mode, press the MULTI PIC. button to picture. ˄2˅The monitor out terminals will output audio and video Ź 6WLOO 5HWXUQ 6HW 䆒ᅮ Ϟϔ义 A B Notes˖ When the RECALL button is pressed, the picture A and B will display their respective program No. instantly, and the red symbol will appear on the top of the selected picture momentarily. ƽIn the Split mode, you can press the SWAP button to switch between the two pictures, ie, to exchange the program sources of picture A and B. ƽIf the Freeze option in the Multi Picture menu is set to Still, while in the normal TV mode, pressing the FREEZE button will enter the Split mode automatically. Picture A will display the current active program and picture B will display a freeze frame of the TV program captured at the moment you press the FREEZE button. MONITOR OUT terminals will output audio and video signals from picture A. Please refer to page 39 for information if the Freeze option in the Multi Picture menu is set to Strobe. ƽIn the Split mode, the POSITION button does not work. ƽIn the Split mode, press the MULTI PIC. or the RETURN button to exit. ƽIn the Split mode, you may enter the Audio menu to make adjustment by pressing the MENU button. However, if you enter other menus such as Picture, it will exit from the Split mode. 33 MULTI PICTURE ǏP in Pǐ Follow the steps on page 21 to enter the Function menu and select the Multi Picture option, then enter the Multi Picture menu and select the Multi Picture option as shown on the right. Press the Ż Ź cursor buttons to set the Multi Picture option to P in P mode, then exit from the menu. ƽIn normal TV mode, press the MULTI PIC. button to enter the P in P mode as shown below. The picture A and B will show two programs of two channels respectively. 0XOWL3LFWXUH ź 0XOWL3LFWXUH Ź 3LQ3 &+6XUI )UHH]H 5HVHW 6HOHFW 䗝乍 6WLOO 5HWXUQ 6HW 䆒ᅮ Ϟϔ义 ƽOnce you enter the P in P mode, press the A/B button to select any one of the two pictures and the red symbol will appear on the top of the selected picture, indicating: ˄1˅The speakers on this TV output the sound from the selected picture. ˄2˅The monitor out terminals output audio and video signals from the selected picture. ˄3˅The operations such as program selection, etc. are valid for the selected picture. However, the program No. selected in one picture can not be the same as that in the other one. Otherwise the characters ! Not Available will appear. A B Notes: When the RECALL button is pressed, the picture A and B will display their respective program No. instantly, and the red symbol will appear on the top of the selected picture momentarily. ƽAfter accessing the P in P mode, you can press the SWAP button to switch between the two pictures, ie, to exchange the program sources in the picture A and B. ƽPress the POSITION button to move the picture B on the screen in sequence as shown above. Do not fix the picture B on a particular position of the screen for a long time, or else, it will damage the PRT. ƽIn the P in P mode, you can press the MULTI PIC. or the RETURN button to exit. ƽIn the P in P modeˈyou may enter the Audio menu by pressing the MENU button to make adjustment. When entering other menus such as Picture, it will exit from the P in P mode. Note: Not all input signal formats are valid for P in P. Even if the signal may be displayed in TV mode before entering P in P, it may not be displayed while in the P in P mode. In such case, the characters ! Invalid Signal will appear in the picture A, or the ! symbol will appear in the picture B. This is normal. 34 MULTI PICTURE ˄The function shown as below is designed for the C52-WD9000 model.˅ The Multi Picture function of this projection TV provides two modes, Split and P in P. To use the Multi Picture function allows you to enjoy the programs easily and comfortably. In normal picture mode, press the MULTI PIC. button to enter the Split or P in P mode. ǏSplitǐ Follow the steps on page 21 to enter the Function menu and select the Multi Picture option, then enter the Multi Picture menu and select the Multi Picture option as shown on the right. Press the Ż Ź cursor buttons to set Multi Picture option to 0XOWL3LFWXUH ź 0XOWL3LFWXUH Ź 6SOLW &+6XUI )UHH]H 5HVHW 6HOHFW Split mode, then exit from the menu. ƽIn normal picture mode, press the MULTI PIC. button to 䗝乍 enter the Split mode as shown below. Picture A and B will show the programs of two channels respectively. ƽOnce you have entered the Split mode, press the A/B button 6WLOO 5HWXUQ 6HW 䆒ᅮ Ϟϔ义 to select any one of the two pictures. A red symbol will appear on top of the selected picture, indicating: ˄1˅The TV speakers will output the sound from the selected picture. ˄2˅The monitor out terminals will output audio and video signals from the selected picture. ˄3˅The operations such as program selection, etc. are valid for the selected picture. However, the program No. selected in one picture cannot be the same as that in the other one. Otherwise, the characters !Not Available will appear. A B Notes˖ When the RECALL button is pressed, the picture A and B will display their respective program No. instantly, and the red symbol will appear on the top of the selected picture momentarily. ƽIn the Split mode, you can press the SWAP button to switch between the two pictures, ie, to exchange the program sources of picture A and B. ƽIf the Freeze option in the Multi Picture menu is set to Still, while in the normal TV mode, pressing the FREEZE button will enter the Split mode automatically. Picture A will display the current active program and picture B will display a freeze frame of the TV program captured at the moment you press the FREEZE button. MONITOR OUT terminals will output audio and video signals from picture A. Please refer to page 39 for information if the Freeze option in the Multi Picture menu is set to Strobe. ƽIn the Split mode, the POSITION button does not work. ƽIn the Split mode, press the MULTI PIC. or the RETURN button to exit. ƽIn the Split mode, you may enter the Audio menu to make adjustment by pressing the MENU button. However, if you enter other menus such as Picture, it will exit from the Split mode. 35 MULTI PICTURE ǏP in Pǐ Follow the steps on page 21 to enter the Function menu and select the Multi Picture option, then enter the Multi Picture menu and select the Multi Picture option as shown on the right. Press the Ż Ź cursor buttons to set the Multi Picture 0XOWL3LFWXUH ź Ź 0XOWL3LFWXUH 3LQ3 &+6XUI )UHH]H 6WLOO option to P in P mode, then exit from the menu. 5HVHW 6HOHFW ƽIn normal TV mode, press the MULTI PIC. button to 䗝乍 enter the P in P mode as shown below. Picture A and B will show the programs of two channels respectively. 5HWXUQ 6HW 䆒ᅮ Ϟϔ义 ƽP in P mode will have different display formats according to the signal format received. ˄1˅When both the main picture and sub picture are receiving from RF, video or component signals (525i or 625i) or HDMI signal (525i or 625i), the P in P mode will display as shown in figure 1. A B Figure 1. Note: In this mode, press the SWAP button to exchange the program sources of picture A and B. ˄2˅When the main picture receives 1125i HD signal and the sub picture receives RF, video or component signals (525i or 625i) or HDMI signal (525i or 625i), the P in P mode will display as shown in figure 2. $9 A B Figure 2. Note: In this mode, press the SWAP button, it will change from figure 2 condition to figure 1. However, picture B will not be displayed normally and the ! symbol will appear. This is normal. 36 MULTI PICTURE ƽOnce you enter the P in P mode, press the A/B button to select any one of the two pictures. A red symbol will appear on top of the selected picture, indicating: ˄1˅The TV speakers will output the sound from the selected picture. ˄2˅The monitor out terminals will output audio and video signals from the selected picture. ˄3˅The operations such as program selection, etc. are valid for the selected picture. However, the program No. selected in one picture cannot be the same as that in the other one. Otherwise the characters !Not Available will appear. Notes: When the RECALL button is pressed, picture A and B will display their respective program No. instantly, and a red symbol will appear on top of the selected picture momentarily. ƽPress the POSITION button to move picture B on the screen in sequence as shown on previous page. Do not fix picture B on a particular position of the screen for a long time, this will damage the PRT. ƽIn the P in P mode, you can press the MULTI PIC. or the RETURN button to quit. ƽIn the P in P modeˈyou can press the MENU button to enter the menu, then select the Audio option to perform audio adjustment. However, if you enter other menus such as Picture, it will exit from the P in P mode. Note: Not all input signal formats are valid for P in P. Sometimes, the signal may be able to be displayed in TV mode before entering P in P, it may not be able to be displayed once in the P in P mode. In such case, the characters !Invalid Signal will appear in picture A, or the ! symbol will appear in picture B. This is normal. 37 CH SURF FUNCTION The CH Surf function of this TV provides two modes, mode 3 and mode 12. To use this function allows you to enjoy the programs easily and comfortably. In normal picture mode, press the CH SURF button to enter mode 3 or mode 12. 0XOWL3LFWXUH ź ǏMode 3ǐ Follow the steps on page 21 to enter the Function menu and select the Multi Picture option, then enter the Multi Picture menu and select the CH Surf option as shown on the right. Press the Ż Ź cursor buttons to set the CH Surf option to mode 3, then exit from the menu. mode 3 (4-Picture display mode) as shown below. Picture A will display the current active program. The speakers will output the sound from picture A. The monitor out terminals will output audio and video signals from picture A too. Picture B1, B2 and B3 will rotate to refresh individual program after a few seconds starting from the program No.0, except those programs that are skipped. ƽWhen entering mode 3, you can select the program for picture A by pressing the program up/down buttons Ÿ ź or number buttons. As for the pictures in group B, you can press the ŸP+ źP- buttons to select one of the pictures 3LQ3 Ź &+6XUI )UHH]H 5HVHW 6HOHFW 䗝乍 ƽIn normal TV mode, press the CH SURF button to enter 0XOWL3LFWXUH 6WLOO 5HWXUQ 6HW 䆒ᅮ Ϟϔ义 A B1 B2 B3 among the B1, B2, B3 picture. The color of the program No. in the selected picture will turn from white to green. If you press the ENTER button, the picture selected in group B will be switched to the picture A. ƽIn this mode, press the CH SURF or the RETURN button to quit. ƽIn this mode, you can enter the Audio menu to perform the adjustment. However, if you enter other menus such as Picture, it will exit from the 4-Picture display mode. ƽIn this mode, the A/B, SWAP and POSITION buttons are invalid. Note: Not all input signal formats are valid for mode 3. Sometimes the signal may be able to be displayed in TV mode before entering mode 3, it may not be able to be displayed once in mode 3. In such case, the characters !Invalid Signal will appear in picture A, or the ʽsymbol will appear in picture B. This is normal. 38 CH SURF FUNCTION ǏMode 12ǐ Follow the steps on page 21 to enter the Function menu and select the Multi Picture option, then enter the Multi Picture menu and select the CH Surf option as shown on the right. Press the Ż Ź cursor buttons to set the CH Surf option to mode 12, then exit from the menu. 0XOWL3LFWXUH ź ƽIn this mode, directly entering the program No. by using the number buttons will quit this mode, and the selected picture will fill the entire TV screen. 3LQ3 Ź &+6XUI )UHH]H 5HVHW 6HOHFW ƽIn normal TV mode, press the CH SURF button to enter mode 12(12-picture) as shown below. The 12 pictures will rotate to refresh individual program after a few seconds starting from the program No.0 except for those skipped program. If the preset channels are less than 12, it will display the actual number of searched program. If the preset channels are more than 12, use the Page up/down buttons to select the next group of program. ƽIn this mode, you can press the Ÿ ź Ż Ź cursor buttons to select one of the pictures, and the program No. of the selected picture will turn from white to green. If you press the ENTER button to quit, the selected picture will fill the entire TV screen. 0XOWL3LFWXUH 䗝乍 6WLOO 5HWXUQ 6HW 䆒ᅮ Ϟϔ义 ƽIn this mode, there will be no signal output from the speakers and the monitor out terminals. ƽIn this mode, press the CH SURF or the RETURN button to quit. If you enter the menu by pressing the MENU button, it will exit from this mode. ƽIn this mode, the A/B, SWAP and POSITION buttons are invalid. The Strobe function is as shown below. Follow the steps on page 21 to enter the Function menu and select the Multi Picture option, then enter the Multi Picture menu and select the Freeze option. Press the Ż Ź cursor buttons to set the Freeze option to Strobe, then exit from the menu. ƽIn normal TV mode, press the FREEZE button to enter the mode 12 automatically. The 12th picture will display the current active program. The other 11 pictures will display the continuous freeze frames of the TV program captured at the moment you press FREEZE. This function is not valid for all input signal formats. When ʽNot Available appears, it is invalid. ƽIn this mode, you can quit by pressing the RETURN or the FREEZE button. ƽIn this mode, you can enter the Audio menu to perform the adjustment. However, if you enter other menus such as Picture, it will exit from this mode. ƽThe monitor out terminals will output the video and audio signals from the current active program. ƽIn this mode, the A/B, SWAP and POSITION buttons are invalid. 39 TELETEXT Name of buttons TV/TEXT INDEX SUB Operation Switches between TV mode and TELETEXT mode. Selects the index page. Allows receiving of a sub page. The sub page number and the color key will be displayed. Each of these buttons select a link page displayed on the lower part of the screen. RED˄POSITION˅ GREEN˄SWAP˅ YELLOW˄A/B˅ BLUE˄MULTI PIC.˅ Changes the screen display mode through the following. U.N.L yupper half screen enlarged ylower half screen enlarged ynormal state Holds the page currently being displayed on the screen. Instead of the number, HOLD ‘HOLD’ indicator appears on the top left of the screen. Press this button again to release the hold state. Allows hidden information (found on some teletext pages) to be displayed on the REVEAL screen. Increase/ decrease the page number. PAGE / This button is used to return the screen to the TV mode temporarily while the TV CANCEL is searching a required text page. Press this button again to display the teletext screen. This button is used to switch between FASTEXT and LIST mode. MODE FASTEXT is to link the four ‘prompt’ information on the lower part of the screen, represented by the four colors which match the color buttons on the remote control. 3LFWXUH ź TO ADJUST THE TELETEXT CONTRAST &RQWUDVW While in TELETEXT mode, press the MENU button to display the menu as shown on page 17, and press the Ÿ ź cursor buttons to select the Picture option, then press the ENTER button to display the Picture menu as shown on 5HVHW 6HOHFW 5HWXUQ the right. Press the Ÿ ź cursor buttons to select the Contrast option, then press Ż Ź cursor buttons to adjust the contrast as shown on the right. In TELETEXT mode, the TV will exit from this mode when it enters the Audio, Timer or Function menu. &RQWUDVW Ź 6HW 40 5HWXUQ OTHER FUNCTIONS ASPECT MODE ˄The function shown as below is designed for the C43-FL9000 model.˅ 1.When non HD component signal is received You may set different aspect modes to view the image with different signal formats. You can change between four different modes,lj4:3NJ, lj4:3 ZoomNJ,lj16:9NJandlj16:9 ZoomNJ. Please see the following on each of four modes for details. Signal sources For example: Conventional TV broadcast format For example: 16:9 widescreen cinema For example: signal transformed from HD ljNJ Suggested aspect mode lj=RRPNJ ljNJ lj=RRPNJ ƽTo switch aspect mode, please press the P.SIZE button, the TV will display the corresponding aspect mode momentarily on the lower part of the screen. For example, set the current aspect mode to lj4:3NJ as shown on the lower left side. If lj4:3 ZoomNJ is set as shown on the lower right side, you can press the ŸP+ źPcursor buttons to adjust the display position up and down before the words Ālj=RRPNJ6FUROOā disappears as shown on the lower right side. ` lj=RRPNJ6FUROO ljNJ 2.When HD component signal is received Press the P.SIZE button to switch between two different modes,lj16:9NJandlj16:9ZoomNJ. Remark: If you change program No. or power on the TV, the aspect mode will return to the mode of lj16:9NJ(when HD signal is received ) or lj4:3NJ(when conventional signal is received). Notes˖ 1ˊ Do not watch TV at non full screen, as this may cause damage to your PRT. 2ˊ Using this special function (aspect mode) to change the size of image displayed (i.e., change the ratio of height and width) for the purpose of public release or some commercial interests may infringe the copyright law. 3ˊ In multi picture, pressing the P.SIZE button does not function. 41 OTHER FUNCTIONS ASPECT MODE ˄The function shown as below is designed for the C52-WD9000 model.˅ You may set different aspect modes to view the image with different signal formats. ǏTV P.Sizeǐ This function is available for conventional TV broadcast (RF) signal input. When other non RF signals are received, this function is not available and the size of the picture may not vary though TV P.Size can be set. This is normal. 1. When conventional TV broadcast (RF) signal is received Follow the steps on page 20, 21 to enter the menu, then access the Function menu and select the TV P.Size. Press the Ż Ź cursor buttons to change between three different modes including 16:9, 4:3 and Expanded. ƽIf the P.SIZE button is pressed, the aspect modes will switch between six different modes, lj16:9NJ, lj16:9ZoomNJ,lj4:3NJ, ljExpandedNJˈlj lj4:3Zoom1NJ and lj4:3Zoom2NJ. ƽWhen you press the P.SIZE button, the aspect mode will change to lj16:9NJ, lj16:9ZoomNJ,lj4:3NJ, ljExpandedNJ,lj4:3Zoom1NJ or lj4:3Zoom2NJ mode. However, if you change program No. or power on the TV, the aspect mode will automatically return to the mode that you set in TV P.Size option. 2. When video, s.video or non HD component signal is received Press the P.SIZE button to switch between six different modes, lj16:9NJ,lj16:9ZoomNJ,lj4:3NJ, ljExpandedNJˈ lj4:3Zoom1NJ and lj4:3Zoom2NJ. Please see the following on each of six modes for details. For example: Conventional TV broadcast format Signal sources For example: For example: For example: signal transformed signal transformed widescreen cinema from HD from HD ljNJ ` lj=RRPNJ ljNJ Suggested aspect mode lj([SDQGHGNJ lj=RRPNJ lj=RRPNJ 42 OTHER FUNCTIONS ƽTo switch aspect mode, please press the P.SIZE button, the TV will display the corresponding aspect mode momentarily at the lower part of the screen. For example, set the current aspect mode to lj16:9NJ as shown at the lower left side. If lj16:9 ZoomNJ is set as shown at the lower right side, you can press the Ÿ ź cursor buttons to adjust the display position up and down before the words Ālj16 : 9Zoom +3NJ Scroll” disappear as shown at the lower right side. Likewise, the function is available in lj4:3Zoom1NJ, lj4:3Zoom2NJ orljExpandedNJmode. lj˖=RRPNJ6FUROO ljNJ ƽIf you change program No. or power on the TV, the aspect mode will not change. 3. When HD component signal is received ƽPress the P.SIZE button to switch between three different modes,lj16:9NJ,ljExpandedNJandlj16:9ZoomNJ. ƽIf you change program No. or power on the TV, the aspect mode will return to the mode of lj16:9NJ. Please see the following on each of three modes for details. Signal Sources HD Signal HD Signal ljNJ Suggested aspect mode lj([SDQGHGNJ lj=RRPNJ 43 HD Signal OTHER FUNCTIONS ǏAuto P.Sizeǐ The Auto P.Size is designed for HDMI INPUT interface. Follow the steps on page 21, 22 to enter the menu, then access the Function menu and select the Auto P.Size option. Press the Ż Ź cursor buttons to change between On and Off. 1. With the signals such as 576i, 576p, 480i and 480p from the HDMI INPUT interface on INPUT1 ƽSet the Auto P.Size option to Off To press the P.SIZE button, the aspect mode will switch between six different modes, lj16:9NJ,lj16:9ZoomNJ, lj4:3NJ,ljExpandedNJ,lj4:3Zoom1NJ and lj4:3Zoom2NJ. If you change program No. or power on the TV, the aspect mode will not change. ƽSet the Auto P.Size option to On To press the P.SIZE button, the aspect mode will switch between six different modes, lj16:9NJ,lj16:9ZoomNJ, lj4:3NJ,ljExpandedNJ,lj4:3Zoom1NJ and lj4:3Zoom2NJ. There are three cases as shown below. 1)The aspect ratio of HDMI signal is 4:3 If you change program No. or power on the TV, the aspect mode of the TV will not change. 2)The aspect ratio of HDMI signal is LETTER If you change program No. or power on the TV, the aspect mode of the TV will automatically return to the mode of lj4:3Zoom1NJ. 3)The aspect ratio of HDMI signal is 16:9 If you change program No. or power on the TV, the aspect mode of the TV will automatically return to the mode of lj16:9NJ. 2. With the signals such as 1080i and 720p from the HDMI INPUT interface on INPUT1 To press the P.SIZE button, the aspect mode will switch between three different modes, lj16:9NJlj , 16:9ZoomNJ andljExpandedNJ. If you change program No. or power on the TV, the aspect mode of the TV will return to the mode oflj16:9NJ. Notes˖ 1ˊ In multi picture, pressing the P.SIZE button does not function. 2ˊ Do not watch TV at non full screen, as this may cause damage to your PRT. 3ˊ Using this special function (aspect mode) to change the size of image displayed (i.e., change the ratio of height and width) for the purpose of public release or some commercial interests may infringe the copyright law. 44 OTHER FUNCTIONS AUDIO button Press the AUDIO button to switch the sound mode as shown below: TheaterėMusicėNarrationėFavorite ĖĘ PICTURE button Press the PICTURE button to switch the picture mode as shown below: DynamicėNaturalėTheaterėFavorite ĖĘ DVD buttons With this remote control unit, you can use it to operate the selected brands of DVD players by pressing the following buttons on this remote control unit simultaneously. Example To operate HITACHI DVD player, press and hold the RECALL button, followed by the ķbutton. Brands of DVD Player HITACHI Press PIONEER RECALL , ĸ PANASONIC RECALL , Ĺ TOSHIBA RECALL , ĺ PHILIPS RECALL , Ļ JVC RECALL , ļ SAMSUNG RECALL , Ľ SONY RECALL , ľ RCA MITSUBISHI RECALL , Ŀ RECALL , ONKYO RECALL , INDEX ZENITH RECALL , MODE ORITRON RECALL , SUB SKYWORTH RECALL , REVEAL BBK RECALL , TV/TEXT SHINCO RECALL , CANCEL RECALL , ķ Note˖Not all models of the listed brands can be operated using this remote control unit. 45 OTHER FUNCTIONS TV/VIDEO button Press the TV/VIDEO button to AV DIRECT SELECTOR buttons Press the AV1̚AV5 buttons to select select the input mode. one of them directly. AV1 MUTE button The sound is muted by pressing the button. To release the muting, press the button again or press the Volume up button. AV2 AV3 Muting is indicated in purple. AV5 AV4 CH I/II button Mode will exchange among I (MAIN), II(SUB) and FM(MONO) when bilingual broadcast is being received. RECALL button Press the RECALL button to display the program No. or AV No. and the related information. Pressing the RECALL button again, the display will disappear. NICAM[I] When stereo broadcast is being received, mode will exchange between STEREO and MONO. NICAM ķWhen receiving in the TV mode: A few seconds later A few seconds later 0+] 3LFWXUH)DYRULWH $XGLR)DYRULWH 6FDQ+] 36L]H When A2 stereo broadcast is being received, mode will exchange between STEREO and MONO. AUDIO MODE P.SIZE button Press the P.SIZE button to switch the aspect mode. Refer to page41-44. STEREO MONO I MAIN II SUB ĸWhen receiving in the AV mode: A few seconds later A few seconds later AV1 NICAM[II] AV1 3LFWXUH )DYRULWH $XGLR )DYRULWH 6FDQ +] 36L]H 46 OTHER FUNCTIONS ˄The function shown as below is designed for the C52-WD9000 model.˅ HD SIGNAL THROUGH MODE This TV incorporates a HD signal through mode to display more actual HD picture. When receiving HD signal, you can switch between the HD signal through and HD signal non-through modes to obtain optimum picture. To access HD signal through mode, please follow the following procedures: 1.Input HD signal to component terminals˄Y, PB/CB, PR/CR˅of INPUT1 (or HDMI INPUT interface) or INPUT2. Note:HD signal through mode is only for 1080i/50Hz and 1080i/60Hz. It is not available for other HD signal formats (for example:720p/60Hz). 2.Set the Dynamic Contrast and Color Manager in the Picture menu to Off, and set the Scan Mode in the Function menu to HD. Note:If you set the Dynamic Contrast or Color Manager to On, or you do not set Scan Mode to HD, it will exit from HD signal through mode. 3.Set the aspect mode tolj16:9NJby pressing the P.SIZE button. Note:When the aspect mode is set toljExpandedNJorlj16:9 ZoomNJ, it will exit HD signal through mode. Notes˖ 1. When HD signal through and non-through mode are swapping, the picture will become black instantly. This is normal. 2. In this mode, the multi pictures displayed will be in non-through mode when using Multi Picture function. Exit from Multi Picture mode, the TV will return to HD signal through mode. 47 CONNECTION WITH OTHER EQUIPMENT Jacks and connections of side panel The side panel jacks are provided to allow you to conveniently connect a camcorder, VCR, etc. ǏThe typical connection of video camera, VCR, etc.ǐ Side panel jacks A U D I O A U D I O or S.VIDEO S.VIDEO ˄Outputs from VCR, DVD, S-VHS video camera, etc˅ Notes˖ 1.Insert connection cord plugs completely when connecting to side panel jacks, and ensure that they are properly connected. S.VIDEO and VIDEO input jacks at the side panel cannot be used at the same time, or else, the playback picture may be abnormal. Thus, before you connect the cable to S.VIDEO jack, please check that VIDEO jack is not connected, and vice versa. 2.If your equipment has S.VIDEO outputˈplease use S.VIDEO cable instead of the standard video cable. 3.If your equipment has a mono sound output, please insert the audio cable into the left audio (L/MONO) jack of your TV. 48 CONNECTION WITH OTHER EQUIPMENT Jacks and connections of rear panel ǏThe typical connection of rear panel 1ǐ 2XWVLGHDQWHQQDRU &$79FRD[LDOFDEOH 5) DGDSWHU HDMI INPUT INPUT 4 MONITOR OUT INPUT 3 S-VIDEO INPUT 2 INPUT 1 Y/ VIDEO Y/ VIDEO PB CB PB CB PR CR PR CR (MONO) (MONO) VIDEO (MONO) (MONO) L AUDIO TV AS CENTER R FIXED/VARIABLE RU RU S-VIDEO L R INPUT L VIDEO R VIDEO L R CB Y PB or CR L R L R OUTPUT PR OUTPUT INPUT ODVHUGLVFSOD\HU9&'SOD\HU FDPFRUGHUHWF 6WHUHRV\VWHP Y 9&5 S-VIDEO VIDEO L R OUTPUT ANT IN 9&5 Note: The C43-FL9000 model does not have HDMI INPUT interface. 49 OUTPUT '9'3'9'SOD\HU +'796(7723%2;HWF OTHER FUNCTIONS ˄The function shown as below is designed for the C52-WD9000 model.˅ ǏThe typical connection of rear panel 2ǐ HDMI INPUT MONITOR OUT INPUT 4 INPUT 3 S-VIDEO INPUT 2 INPUT 1 Y/ VIDEO Y/ VIDEO PB CB PB CB PR CR PR CR HDMI INPUT MONITOR OUT INPUT 4 INPUT 3 S-VIDEO INPUT 2 INPUT 1 Y/ VIDEO Y/ VIDEO PB CB PB C PR CR PR C (MONO) (MONO) DVI to HDMI Cable VIDEO VIDEO (MONO) (MONO) (MONO) (MONO) (MONO) (MONO) L L AUDIO TV AS CENTER AUDIO TV AS CENTER R R FIXED/VARIABLE FIXED/VARIABLE HDMI Cable DIGITAL OUTPUT HDMI Output R L AUDIO OUT About HDMI HDMI is the next-generation all digital interface for consumer electronics. HDMI enables the secure distribution of uncompressed high-definition video and multi-channel audio in a single cable. Because digital television (DTV) signals remain in digital format, HDMI assures that pristine high-definition images retain the highest video quality from the source all the way to your television screen. HDMI, the HDMI logo and High-Definition Multimedia Interface are trademarks or registered trademarks of HDMI Licensing LLC. Use the HDMI INPUT interface for your external devices such as set-top boxes or DVD players equipped with an HDMI output connection as shown on the top. Notes: 1. The HDMI INPUT interface is not intended for use with personal computers. 2. Only formats such as 1080i, 720p/60Hz, 576i, 576p, 480i and 480p are available for HDMI INPUT interface. 3. The HDMI INPUT interface on INPUT1 contains the copy protection system called High-bandwidth Digital Content Protection (HDCP). HDCP is a cryptographic system that encrypts video signals when using HDMI connections to prevent illegal copying of video contents. 4. Connect the HDMI or DVI to HDMI connection cable from the output of the HDTV set-top box or DVD player to the HDMI INPUT interface as shown on the TV set above. When using a component with DVI output, you also have to connect the AUDIO OUT (R/L) of the component to the AUDIO (R/L) of INPUT1. 50 CONNECTION WITH OTHER EQUIPMENT ǏThe typical connection of79$6&(17(5ǐ ᴀᴎⱘৢ䴶ᵓ Rear panel HDMI INPUT MONITOR OUT INPUT 4 INPUT 3 S-VIDEO INPUT 2 INPUT 1 Y/ VIDEO Y/ VIDEO PB CB PB CB PR CR PR CR (MONO) (MONO) VIDEO (MONO) (MONO) L AUDIO TV AS CENTER R FIXED/VARIABLE CENTER OUT 6WHUHRV\VWHP'9'SOD\HUHWF L R L R FRONT OUT CENTER OUT 6WHUHRV\VWHP '9'SOD\HUHWF REAR OUT R L LFE/SUB OUT SUB WOOFER S S Note: The C43-FL9000 model does not have HDMI INPUT interface. 51 CONNECTION WITH OTHER EQUIPMENT About the jacks and connections of rear panel 1.Refer to the operation manual of your electronic equipment for additional information on connections. 2.If your device has only one audio output (mono sound), please connect it to the left channel jack (L/MONO). 3.Audio and video signal from the same source should be connected to the same group of terminals. Do not mix them. 4.Terminals˄Y/VIDEO,PB/CB,PR/CR˅in INPUT1 and INPUT2 are used to connect component outputs of HDTV STB, DVD, PDVD, etc. Y/VIDEO input terminal can also be used as the standard video terminal. When you use Y/VIDEO, PB/CB, PR/CR terminals to connect component signals, press the RECALL button on the remote control unit to show the characters COMPONENT and AV1 or AV2 on the top right corner of the screen, which indicates that you are using component terminals to receive signals. However, when you use Y/VIDEO terminal instead of Y/VIDEO, PB/CB, PR/CR terminals to receive video signal, only the character AV1 or AV2 will appear on the top right corner of the screen. The HDMI INPUT interface on INPUT1 can be used to connect your external devices equipped with an HDMI output. When the HDMI INPUT interface on INPUT1 is connected, press the RECALL button on the remote control unit to show the characters HDMI or DVI and AV1 on the top right corner of the screen, which indicates that you are viewing the program through the HDMI INPUT interface on INPUT1. Note: 1. When the HDMI INPUT interface on INPUT1 is used, please do not connect terminals (Y/VIDEOˈ PB/CBˈPR/CR) on INPUT1. 2. The C43-FL9000 model does not have HDMI INPUT interface. 5.If your device has s-video signal output, please use s-video signal instead of the standard video signal. If there are signals input from the same group of S-VIDEO and VIDEO terminals, the TV will receive signal from S-VIDEO and the characters S and AV3 or AV4 will appear on the top right corner of the screen by pressing the RECALL button, which indicates that you are using S-VIDEO terminal to receive signals. 6.˄VIDEO˅MONITOR OUT terminal outputs video signal receiving from RF, S-VIDEO or VIDEO terminal to external equipment. When receiving component signals (YˈPB/CBˈPR/CR) or HDMI INPUT interface signal, there is no output from˄VIDEO˅MONITOR OUT terminal. 7.˄S-VIDEO˅MONITOR OUT terminal outputs S-VIDEO signal receiving from S-VIDEIO inputs to external equipment. When receiving signals from RF, VIDEO, Y, PB/CB, PR/CR terminals or HDMI INPUT interface, there is no output from˄S-VIDEO˅MONITOR OUT terminal. 8.˄FIXED/VARIABLE AUDIO˅MONITOR OUT terminals provide fixed or variable audio level output to external stereo system. 9.TV AS CENTER input jacks These jacks are for stereo amplifiers with center signal output capability. This feature allows the TV speakers to be used as a center speaker. 52 ADDENDA A guide to simple problem solving gBefore calling up the service personnel, please check the following chart for a possible cause to the problem you are encountering. Symptom Possible causes No picture,no sound,power/standby indicator is OFF. gThe power cord is not plugged in. No picture,no sound,power/standby indicator is ON. gThe TV is in standby mode. No sound gThe volume control is set to minimum. gThe Speaker option in Setup menu is set to Off. gThe antenna signal is too weak or too strong. Twist image and poor sound gThe TV is not tuned correctly. Poor brightness, color or tint gThe contrast, brightness, color or tint may be misadjusted. Snowy picture gInterference from motorcycles, high-tension line, electric hair drier, personal computer or radio station. Ghosts gCheck the direction, height or position of the antenna. No color gThe antenna signal is too weak. gColor System or Sound System is not set properly. Remote controller does not work. gThe batteries in the remote controller may be exhausted. gThe batteries may be improperly installed. gThere is obstruction between the remote controller and the TV. HITACHI Projection Television incorporates advanced power surge protection technology designed to protect against component or circuit damage due to external or internal power surges. If your TV appears A LOSS OF POWER, please follow the following procedure: 1. Press the POWER button once. 2.If there is still no power, wait for 30 seconds and press the POWER button again. 3.If there is still no power, unplug the power cord from the wall outlet. Wait for 30 seconds and plug the power cord in. Press the POWER button again. The protective technology should provide you years of lasting entertainment from your HITACHI Projection Television. The following phenomena are not failures: ˄1˅The picture takes a while to appear on the screen when the power is on. ˄2˅The cabinet clicks. The clicking is a creaking sound produced when the cabinet expands or contracts due to changes in temperature. ˄3˅Unevenness in color sometimes develops in part of the screen. Such unevenness in color may occur depending upon the nature or setting of the picture. The proper color may be restored by reducing the contrast or adjusting other settings. ˄4˅The TV set can generate sound distortion in external devices such as a radio. Please place the radio equipment away from the TV set. Accessories No. Description Quantity C43-FL9000 C52-WD9000 1 Instruction manual 1 Yes Yes 2 Remote control unit (CLE-962) 1 Yes Yes 3 Battery (For CLE-962) 2 Yes Yes 4 Caster holder 4 Yes Yes 5 Antenna adapter 1 Yes Yes 53 ADDENDA Specifications Model Screen size &)/ &:' FP FP Power supply Power consumption Refer to the values as indicated on the rating label pasted at the back of the TV set. 3$/%*,'. 6(&$0%*'. 176& RF/VIDEO 0176& Reception 176& system 176& 3$/6(&$0 COMPONENT/HDMI Total scan lines 1125i 750p Active scan lines 1080i 720p Vertical frequency˄Hz˅ 50/60 60 Frequency range 625p 625i 525p 525i 576p 576i 480p 480i 50 50 60 60 44MHz-863 MHz Antenna input impedance 75Ohm non balance type hh Speaker :h Sound output '3$/'176& Comb filter Digital convergence Yes Yes Magic focus No Yes NICAM/A2 Yes Yes Surround Yes Yes P in P Yes Yes Teletext Yes Yes S-VIDEO INPUT VLGHUHDU VLGHUHDU VIDEO INPUT VLGHUHDU VLGHUHDU UHDU UHDU HDMI INPUT No 1(rear) AUDIO INPUT VLGHUHDU VLGHUHDU MONITOR OUT 1(rear) 1(rear) UHDU UHDU COMPONENT INPUT ˄Y, PB/CB, PR/CR˅ FIXED/VARIABLE AUDIO OUT Shielding Weight Dimension (mm) (widthhheighthdepth) No Yes .J .J PPhPPhPP PPhPPhPP Note:Specifications may be subject to change without notice for improvement. 54