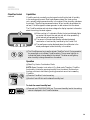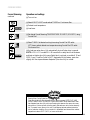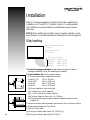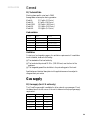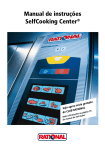
1
Applications Manual
and Cooking Guide
ClimaPlus Combis
All LCS and LCG Models
®
This manual should be retained in a convenient location for future reference.
Wiring diagram for this appliance is located inside the unit, behind the control panel.
WARNING: Improper installation, adjustment, alteration, service or maintenance can cause property damage,
injury or death. Read the installation, operating and maintenance instructions thoroughly before installing or
servicing this equipment.
LIMITED WARRANTY FOR HENNY PENNY APPLIANCES
Subject to the following conditions, Henny Penny Corporation makes the following limited warranties to the original purchaser only for Henny
Penny appliances and replacement parts:
New Equipment Any part of a new appliance, except lamps and fuses, which proves to be defective in material or workmanship within one
year from date of original installation, will be repaired or replaced without charge F.O.B. factory, Eaton, Ohio, or F.O.B. authorized distributor.
To validate this warranty, the registration card for the appliance must be mailed to Henny Penny within 10 days after installation.
Replacement Parts Any appliance replacement part, except lamps and fuses, which proves to be defective in material or workmanship within
90 days from date of original installation will be repaired or replaced without charge F.O.B. factory, Eaton, Ohio, or F.O.B. authorized distributor.
This warranty covers only the repair or replacement of the defective part and does not include any labor charges for the removal and installation
of any parts, travel or other expenses incidental to the repair or replacement of a part.
Any claim must be presented to either Henny Penny or the distributor from whom the appliance was purchased. No allowance will be granted
for repairs made by anyone else without Henny Penny’s written consent. If damage occurs during shipping, notify the carrier at once so that a
claim may be filed.
THE ABOVE LIMITED WARRANTY SETS FORTH THE SOLE REMEDY AGAINST HENNY PENNY FOR ANY BREACH OF WARRANTY OR OTHER TERM.
BUYER AGREES THAT NO OTHER REMEDY (INCLUDING CLAIMS FOR ANY INCIDENTAL OR CONSEQUENTAL DAMAGES) SHALL BE AVAILABLE.
The above limited warranty does not apply (a) to damage resulting from accident, alteration, misuse, or abuse; (b) if the equipment’s serial
number is removed or defaced; or (c) to lamps and fuses.
THE ABOVE LIMITED WARRANTY IS EXPRESSLY IN LIEU OF ALL OTHER WARRANTIES, EXPRESS OR IMPLIED, INCLUDING MERCHANT ABILITY AND
FITNESS, AND ALL OTHER WARRANTIES ARE EXCLUDED. HENNY PENNY NEITHER ASSUMES NOR AUTHORIZES ANY PERSON TO ASSUME FOR IT
ANY OTHER OBLIGATION OR LIABILITY.
Indication of Safety Warnings
Throughout this manual you will see the following words and symbols relating to
important issues of personal safety and proper operation. Their usage is described here:
The word DANGER indicates an imminent hazard
which will result in highly serious injury, such as severe burns.
The word WARNING is used to alert you to a procedure,
that if not performed properly, may cause personal injury.
The word CAUTION is used to alert you to a procedure,
that if not performed properly, may damage the equipment.
The word IMPORTANT is used to highlight especially important information.
The word NOTE is used to separate additional useful subject matter for the sake of clarity.
1
Dear Customer,
Congratulations on your decision to purchase a new Henny Penny
ClimaPlus® Combi. In our opinion, you now possess the most advanced
combi in the industry, featuring IQT–Intelligent Cooking Technology–
and the unique ClimaPlus® Control which provides the ideal cooking
climate for every type of food. As you begin to become familiar with its
operation and more confident in the results, you will see the incredible
potential for quality, variety and productivity this unit has to offer.
The new ClimaPlus® Combi is not difficult to operate, but it is a fairly
sophisticated piece of equipment. We recommend a thorough study
of this Applications Manual. It is filled with information, suggestions,
and explanations that will help you achieve the potential of the unit.
Keep the manual in a safe place, but accessible for easy reference.
Henny Penny products are known for their outstanding craftsmanship,
leading edge technology and user-friendly operation. As a company, we
believe in establishing a partnership with our customers that leads both
parties to long-term success. In that spirit, we remain interested in any
questions, comments, suggestions or ideas you may have concerning the
combi you have purchased, as well as this manual.
We hope you enjoy good food and good profits with your new Henny
Penny ClimaPlus® Combi. Welcome to the world of imaginative cooking.
Henny Penny Corporation
+1 937 456.8400
Toll free in USA
800 417.8417
www.hennypenny.com
2
Table of Contents
General Information
Models and Features ................................................................................................5
Control Panel Functions ..........................................................................................8
Basic Operation and Settings ..................................................................................9
Loading and Unloading..........................................................................................10
ClimaPlus® Control................................................................................................13
Operating the Clima Plus Combi
Cooking Modes ..............................................................................................................16
Moist Heat Mode ..................................................................................................17
Tender Steaming ....................................................................................................19
Forced Steaming ....................................................................................................21
Dry Heat Mode ....................................................................................................23
Combination Mode ..............................................................................................25
Rethermalizing ......................................................................................................27
Cooking Functions
Probe Cooking with IQT Sensor ....................................................................................30
IQT Logic Programs
IQT +Profile Cooking............................................................................................33
IQT +Low-T Cooking ..........................................................................................35
IQT +Delta-T Cooking ........................................................................................37
IQT Key Special Functions
Preset Program Library ..........................................................................................39
Half-Energy............................................................................................................39
Delta-T ................................................................................................................40
HACCP Interface ..................................................................................................41
Programming ..................................................................................................................43
Additional Key Pad Functions
Steam Injection ......................................................................................................51
Half Speed Fan ......................................................................................................52
Pulse Fan................................................................................................................52
Cool Down ............................................................................................................53
Cleaning..........................................................................................................................54
Conventional Cleaning ..........................................................................................54
Using CleanJet® ......................................................................................................55
CDS CalcDiagnosis System....................................................................................58
Installation – Electric and Gas Units ..............................................................................59
Cooking Guides ..............................................................................................................68
Distributors ....................................................................................................................83
3
General Information
In this section:
Models and Features at a glance
Control Panel Functions at a glance
Basic Operation
Loading and Unloading
ClimaPlus Control
ClimaPlus Combis from Henny Penny have the potential to make your entire
approach to foodservice production simpler, more consistent and more productive.
Simpler because, ultimately, you will use fewer appliances as you become more
adept at utilizing the ClimaPlus for different applications.
More consistent because the ClimaPlus Combi is designed to produce the perfect
cooking climate for just about any type of food. With its sophisticated electronics
and program capacity, the ClimaPlus can do it every time.
More productive because its versatility and automation combine to make efficient
use of both skilled and unskilled labor. Not to mention, ClimaPlus cooks faster
with less food shrinkage than conventional appliances and practically cleans itself.
The ClimaPlus Combi uses pressureless steam and hot-air convection, along with
the patented ClimaPlus Control, in nearly infinite combinations to create perfect
foods. IQT Sensor and IQT Logic enable self-regulating cooking processes. There
are plenty of other features and functions, all designed to make cooking easier and
more precise.
As you become more familiar with the way the machine operates and the cooking
concepts it employs, experiment! Try different settings. Change modes and
ClimaPlus settings at any time in the cooking cycle (you can.) Observe the results,
adjust your approach. In short, learn and use the capabilities of the ClimaPlus
Combi to create the kind of food you want to create.
4
GENERAL
INFORMATION
Models and Features at a glance
Models and sizes available
Model numbers are designated according to pan capacity. Units are available
in either electric (LCS) or gas (LCG.)
Base-top
models
LCS-6
LCG-6
6 steam table pans or
6 half sheet pans
12 x 20 x 21⁄2 (325 x 530 x 65)
13 x 18 (330 x 457)
LCS-10
LCG-10
10 steam table pans or
10 half sheet pans
12 x 20 x 21⁄2 (325 x 530 x 65)
13 x 18 (330 x 457)
10 full sheet pans
with rack adapter or
20 steam table pans or
10 steam table pans
18 x 26 (457 x 660)
LCS-1020
LCG-1020
LCS-20
LCG-20
20 steam table pans or
20 half sheet pans
12 x 20 x 21⁄2 (325 x 530 x 65)
13 x 18 (330 x 457)
LCS-40
LCG-40
40 steam table pans or
20 steam table pans or
40 half sheet pans or
20 full sheet pans
12 x 20 x 21⁄2 (325 x 530 x 65)
20 x 24 x 21⁄2 (530 x 650 x 65)
13 x 18 (330 x 457)
18 x 26 (457 x 660)
Floor
models
12 x 20 x 21⁄2 (325 x 530 x 65)
20 x 24 x 21⁄2 (530 x 650 x 65)
NOTE: Features may vary between gas and electric models. Accessories may vary
according to unit size.
A reference such as “LCS models” or “LCS-6/10/1020/20/40” designates the LCS
electric model in all sizes. A reference such as “LCG base-top models” or “LCG6/10/1020” designates only LCG gas models of those sizes.
Features
Cooking modes and applications
■ Moist Heat
• Steaming
• Tender Steaming
• Forced Steaming
■ Dry Heat
■ Combination Moist and Dry
• Rethermalizing
5
GENERAL
INFORMATION
Models and Features Control
continued
■ ClimaPlus Control regulates precise humidity for unlimited combinations of
moist and dry heat.
■ Fully digital operation
■ Alphanumeric LED readouts featuring optional Asian character display
■ Auto-reverse fan
■ Cooking control functions:
• Steam Injection
• Half Speed Fan (Available on all LCS electric models and the LCG-40)
• Pulse Fan
• Half Energy (Available on all LCS electric models)
■ IQT Sensor food probe with five point temperature measurement
Automated cooking
■ 99 nine-step custom cooking program capacity
■ IQT key access to preset program library, Half Energy operation, Delta-T and
Profile cooking applications, HACCP interface
■ IQT automated cooking applications:
• +Delta-T
• +Low-T
• +Profile
Design and operation
■ Auto-reverse fan
■ Filterless grease extraction
■ Cool down
■ Dual glass door
■ Safety latch handle (Standard on all floor models, available as option on all
base-top models)
■ HACCP interface and serial port
■ Auto flush
■ Built-in retractable hand shower
■ CleanJet automated cleaning system
■ CDS CalcDiagnosis displays level of sediment build-up in steam generator
6
GENERAL
INFORMATION
Models and
Features
How it works
continued
5
8
3
1
6
2
7
4
9
1. Steam is created and dispersed
rapidly from the self-cleaning
steam generator.
2. Dry heat up to 575°F (300°C)
is produced by tubular electrical
elements or gas burners.
3. Select either Moist Heat or
Dry Heat modes, or both for
Combination cooking. Set the
desired humidity level with the
ClimaPlus control.
4. Precise combinations of moist
and dry heat create the ideal
cooking climate for virtually
any type of food. Patented
ClimaPlus Control measures
and regulates the humidity in
all modes.
5. ClimaPlus regulates cooking
climate by automatically
removing excess humidity
7
to maintain desired level.
6. IQT Sensor and IQT Logic enable
cooking applications that selfadjust to conditions of the food
and the environment in the cabinet.
7. Auto-reverse fan and air circulation
system keep temperatures precise
and heat distribution uniform
throughout the cabinet, even when
cooking full loads.
8. Hinged racking system or mobile
oven rack accepts a wide range of
pans and grids.
9. Coved corners, filterless grease
extraction system, built-in
handshower and CleanJet
automated cleaning system
minimize cleaning labor.
GENERAL
INFORMATION
Control Panel Functions at a glance
LCS COMBI
ClimaPlus COOK SYSTEM
0
I
ON/OFF switch
ClimaPlus function key with control arrows (green)
ClimaPlus display window
MOIST HEAT MODE key
DRY HEAT MODE key
• Press MOIST HEAT MODE key and
DRY HEAT MODE key for COMBINATION MODE
CABINET TEMPERATURE indicator key
CABINET TEMPERATURE display
TIMER activation key
• Press and hold for continuous run
COOKING TIME display
IQT SENSOR key
IQT SENSOR display
IQT key
IQT display
• Program Library Additional Functions
PROG
START
PROGRAM/START key & additional PROGRAM display
COOL DOWN key
PULSE FAN key
HALF SPEED FAN key (not available on LCG gas models)
STEAM INJECTION key
LCG gas models
will have this
key pad display
reset
STEAM
RESET
indicator INJECTION
KEY
PULSE
FAN
key
COOL
DOWN
key
CENTRAL DIAL
Unit serial number (located on the left side
of cabinet in the lower right hand corner)
• Please refer to this number when requesting service
8
GENERAL
INFORMATION
Basic Operation and Settings
Turning unit on
0
I
■ Press the ON/OFF button.
■ “ON” appears in the display for 2 seconds followed by the current time.
Select Cooking Mode
■ Press Moist Heat key for steaming (See Moist Heat Mode, page 17.)
■ OR press Dry Heat key for baking or roasting without added humidity
(See Dry Heat Mode, page 23.)
■ OR press Moist and Dry Heat keys at the same time for Combination Mode
(See Combination Mode, page 25.)
Choosing Time and Temperature Cooking
■ Press TIMER key and set desired Cooking Time.
■ Press TEMPERATURE key and set desired Cooking Temperature.
Dial in settings while the display is flashing. In most cases, settings can be changed
in this manner at any time during the cooking process.
Choosing IQT Sensor Cooking
■ Press IQT Sensor key and set “Done” temperature (see Probe Cooking, page 31.)
■ Set desired level of ClimaPlus Control (See ClimaPlus Control, page 14.)
■ Set other desired functions.
Dial in settings while the display is flashing. In most cases, settings can be changed
in this manner at any time during the cooking process.
Choosing Custom Program Cooking
PROG
START
■ DO NOT select Cooking Mode. Deactivate if mode has already been selected.
■ Press PROG/START key and use Central Dial to select desired custom cooking
program by name or number. Do not select flashing numbers. In this case, they
indicate empty (available) program slots.
■ Press PROG/START again to activate selected program.
Checking current cooking conditions
While unit is operating, press Temperature key and hold to display:
■ Current humidity in cabinet
■ Current temperature in cabinet
■ Elapsed cooking time
■ Current probe temperature
■ Program number/step if running on automatic program
9
GENERAL
INFORMATION
Loading and Unloading
Your Henny Penny ClimaPlus Combi includes either a removable hinged
racking system (standard with 6 and 10-pan units) or a mobile oven rack that
is integral to the equipment’s operation. All pans and grids are loaded directly
onto the hinged racking system, or onto the mobile oven rack which is then
rolled into the cooking cabinet.
Removable Hinged Racking–Standard LCS/G- 6 & 10
To remove, simply lift rack upward and out of mountings. Reverse the action to
replace the rack. To move rack laterally on hinges, lift front of rack slightly to clear
mounting and swivel rack.
Mobile Oven Racks
Base-top Models
Mobile Oven Racks (Standard on 1020)
Oven rack on transport cart rolls up to the front
of the unit. Oven rack rolls completely into the
cabinet. Standard with LCS/LCG-1020, available
separately (rail system required) for LCS/LCG-6
and10.
Floor Models
Mobile Oven Racks (Standard on 20 and 40)
Mobile oven rack rolls directly into unit. Specially designed oven
rack allows cabinet door to close easily and completely around the
rack. Standard with LCS/G-20 and 40. Additional mobile oven
racks or specially designed oven plate racks are available separately.
Transport Cart
(optional)
IMPORTANT!
When using the oven rack on transport cart, be sure to lock the front casters of
the transport cart when it is in the loading or unloading position at the front of
the cabinet. Keep the front wheels of the oven rack locked at all times (using the
locking lever near the right front wheel) except when rolling it into or out of the
cabinet and onto the transport cart itself. Following this procedure stabilizes the
load. To keep pans in place lock both vertical hinged bars.
To Load
■ Preheat unit to set temperature.
■ Place food product on appropriate grids, pans and racks.
■ If using mobile oven rack, slide full grids, pans and racks into shelves on mobile
oven rack. Be sure containers are secure on both sides.
Opening door during operation
■ Open door slightly until fan stops and heat dissipates. Open door fully with care.
10
GENERAL
INFORMATION
Loading and
Unloading
continued
NOTE: LCS & LCG models 20 & 40 have a built-in safety latch that lets steam
and heat out before door fully opens. Safety latch is optional on models 6, 10 and
1020. If your ClimaPlus Combi is NOT equipped with this feature, open door
slightly until fan stops and steam dissipates. Open door fully with care to unload.
X
Opening Door During Operation
Open door slightly to allow hot steam and/or vapors to escape. KEEP FACE
AND HANDS AWAY FROM OPENING or burns could result. When
steam and/or heat has dissipated open door fully with care. Escaping hot steam
and/or vapors can cause serious burns. Interior surfaces, including pans, grids
and oven racks, can be extremely hot. To prevent burns, allow unit to cool or
use appropriate heat resistant protective mitt or pad when handling. Do not
use built-in retractable hand shower when cabinet temperature is above 212°F
(100°C) or burns could result.
■ Load hinged racking system with food containers or roll loaded mobile oven rack
directly into unit.
■ Shut door and begin cooking.
To unload
■ Open door slightly until fan stops and heat dissipates. Open door fully with care.
■ Remove cart handle.
■ Using oven mitts or pads, remove food containers carefully from shelves in
hinged racking system.
■ With floor units, roll mobile oven rack straight out of unit to appropriate location.
■ With base-top models using transport cart, roll transport cart up to front of
unit and lock front casters. Roll oven rack out of unit and onto transport cart.
Be sure wheels on oven rack are locked to stabilize load and reduce the chances
of spills.
WARNING: Surfaces of food containers, mobile oven racks and inside
cabinet surfaces may be extremely hot. Always use insulated oven mitts or
pads when removing food containers or handling mobile oven racks or
burns could result.
11
GENERAL
INFORMATION
Loading and
Unloading
continued
Partial Loads
Individual pans or racks of product can be easily loaded or unloaded while the unit
is in operation.
■ Open door slightly until fan stops and heat dissipates. Open door fully with care.
■ Using oven mitts or pads, load or unload individual containers.
■ Shut door. Cooking process continues automatically.
Tips
■ Preheat cooking cabinet prior to loading for full loads.
■ Since no flavor transfer occurs during cooking, try to plan full loads based on
similar cooking climates (Moist, Dry, Combination) rather than food compatibility.
■ When cooking for longer periods, or on continuous run cooking, load items
that will be done sooner toward the front of the oven. These can be removed
individually when done.
■ For the greatest efficiency, try to cook with full loads. In general, cooking times
and temperatures are not affected by the quantity of product in the cooking
cabinet.
■ When loading roasts or large cuts of meat, place product grids and load grids
directly onto shelves near the bottom of the unit. Load an empty pan directly
beneath the roast to catch drippings and roast bones.
■ For base-top models, consider the purchase of Combi Base Units. Several styles
are available that offer storage for convenient access to pans, grids, and racks.
■ If rethermalizing plated portions is a frequent part of your production, consider
the purchase of special plate racks and thermal covers.
12
GENERAL
INFORMATION
ClimaPlus® Control Precise automatic humidity control
Use ClimaPlus Control to set, measure and maintain desired humidity in the
cooking environment. ClimaPlus is a patented technology that precisely and
automatically measures and controls the amount of humidity in the cooking
climate. This gives operators the flexibility and control to produce crisp crusts
for roast chicken... tender consistency for roasts, ribs, and meat loaf... delicate
evenness for light breads, cakes and pastries... perfect browning for au gratin
dishes, casseroles, and pies.
Advantages
Control humidity to:
■ Improve the quality of foods with different textures and consistencies.
■ Enable precise finishing of delicate items.
■ Cook a wide variety of foods at the same time, including sauces and stocks.
■ Achieve proper cooking intensity for doughy pastries.
Increase humidity to:
■ Promote basting.
■ Retain food’s natural flavors and nutrients.
■ Prevent dehydration for increased portions.
Remove humidity to:
■ Achieve browning.
■ Increase crispness and texture.
■ Maintain a consistent environment when baking or roasting “wet” foods.
Tips
A good approach to using ClimaPlus is to observe the cooking process and react
with the appropriate adjustment to the humidity level. Use ClimaPlus when:
• Food perspires
• Condensation forms on pans
• Browning needs to proceed more rapidly
■ ClimaPlus Control is most effective with foods that have high moisture content.
■ ClimaPlus is well suited to maintain a consistent environment when cooking
frozen or partially frozen meats, casseroles, entrées or side dishes.
■ Be sure to use Combination Mode if you wish ClimaPlus to add humidity.
13
GENERAL
INFORMATION
ClimaPlus Control
Capabilities
continued
ClimaPlus works by constantly monitoring and controlling the level of humidity
in the cooking environment. Most foods release moisture into the air as they
cook, naturally building excess humidity in the cabinet. When humidity rises above
the set level, ClimaPlus removes excess moisture. When humidity drops below the
set level, ClimaPlus signals the steam generator to add moisture into the cabinet .
The ClimaPlus window and controls are designed to display important information
about the cooking climate at a glance:
■ When cooking in Combination Mode, the horizontal display lights
up as a bar that is part blue and part red, with blue representing
moist heat and red representing dry heat.
■ The amount of blue and red showing indicates the desired
combination of moist and dry heat as set by the Central Dial.
■ The small green number displayed above the red/blue bar is the
actual percentage of relative humidity in the cabinet.
■ The ClimaPlus arrow key is used to activate ClimaPlus Control. During operation,
the arrows light up to indicate ClimaPlus activity. The up arrow lights up to
indicate that steam is being added to the cabinet. The down arrow lights up
when humidity is being removed from the cabinet.
Operation
■ Select Dry Heat or Combination Mode.
NOTE: Steam Generator is not active in Dry Heat mode. Therefore, ClimaPlus
functionality is limited to removing humidity from the cabinet. Moisture from
food may continue to build during cooking process but cannot be increased by
ClimaPlus.
■ Press the ClimaPlus Control arrow key.
■ Use the Central Dial to set the desired humidity level.
To check the current humidity level:
■ Press and hold TEMPERATURE key. The current humidity level in the cooking
cabinet is displayed in the ClimaPlus window.
14
Operating the
ClimaPlus Combi
®
In this section:
Cooking Modes
Cooking Functions
Cleaning
Installation
The following section presents in some detail a complete overview of the
operation of your Henny Penny ClimaPlus Combi. You'll find the advantages,
tips and step-by-step operating instructions for each feature of the LCS
and LCG models, from cooking modes to IQT applications and additional
keypad functions.
The programming section included in Cooking Functions will help you
customize the day-to-day operation of the ClimaPlus Combi to your
particular production needs. Simple instructions, accompanied by visual
icons of the appropriate control panel keys, make it easy to do everything
from creating custom programs to setting up the displays for the desired
time, temperature and language formats.
The Cleaning section explains the advantages and operation of the CleanJet
automated cleaning system and CDS CalcDiagnosis feature. The Installation
section offers basic information about site requirements and the water,
electrical and gas connections necessary to properly install and set up the
ClimaPlus Combi for operation.
15
Cooking Modes
ClimaPlus Combis have two basic cooking modes: Moist Heat and
Dry Heat. These two cooking modes can be used individually, in sequence,
or together in a third Combination mode. Almost all traditional cooking
processes can be accomplished in these modes.
Moist Heat Mode
The steam generator produces hygienic steam and releases it (without pressure)
into the cooking cabinet where it is circulated at high speeds by the fan. The
cooking temperature in this mode can be regulated from 85-265°F (30-130°C)
to accomplish:
■
■
■
Steaming
Tender Steaming
Forced Steaming.
Dry Heat Mode
Powerful heating elements heat the air inside the cabinet. The fan circulates this
hot, dry air evenly throughout the interior. Temperature can be regulated precisely
between 85-575°F (30-300°C).
■ Cooking environment can be manipulated extensively with additional functions
and ClimaPlus Control.
Combination Mode
The unit’s control system combines both Moist Heat and Dry Heat modes to create
a cooking environment in which variable amounts of humidity can be introduced
and controlled at temperatures from 85-575°F (30-300°C).
■ Cooking environment can be manipulated extensively with additional functions
and ClimaPlus Control.
■ Rethermalizing is accomplished in Combination Mode at 60% humidity or less.
16
COOKING MODES
Moist Heat Mode 212°F (100°C)
Pressureless steam generation and auto-reverse fan quickly produce a cooking
environment of 100% humidity. Perfect for steaming a wide variety of foods
with no flavor transfer. Also used for stewing, blanching, poaching, simmering,
soaking, thawing, rethermalizing, preserving.
Advantages
■ Extremely short preheating time.
■ Excellent food consistency.
■ Conserves nutrients, color.
■ No added fats or oils.
■ Cook different products at the same time with no flavor transfer.
■ Can be partially unloaded for serving convenience.
■ No need to boil water in pots.
Menu suggestions
■ Ingredients preparations–tomato concasees, garnish, mushrooms, blanched
vegetables for stuffing, peeling, etc.
■ Starters, appetizers–scrambled, poached or boiled eggs; vegetable pate, asparagus,
stuffed vegetables, cannelloni.
■ Entrees–cooked beef, ham, turkey legs, steamed fish, chicken breasts.
■ Sides–rice, dumplings, pasta, fresh and frozen vegetables, boiled potatoes, and
grains.
Tips
■ Determine which foods can be cooked together for the greatest production
efficiency. This is best done by considering the cooking modes and temperatures.
Keep in mind that fish, meat, vegetables, fruit, etc. can be cooked at the same
time because no flavor transfer occurs.
■ Potatoes should always be cooked in perforated pans. This allows steam to
circulate for faster, more even cooking.
■ In general, two shallower pans are better than one deeper pan. This avoids bruising.
■ Dumplings should be placed in shallow pans not too close together.
■ Rice, dry pasta, beans, and grains are foods to which water must be added prior
to cooking. Longer soaking times mean shorter cooking times.
■ Tomatoes can be skinned easily when steamed for 30 to 60 seconds, then chilled
in cold water.
■ Stock can be collected by inserting a container in the bottom of the oven rack.
17
COOKING MODES
Moist Heat
Operation and Settings
continued
■ Turn unit on.
■ Select MOIST HEAT mode and set TIMER on Continuous Run. Only blue
bars appear in ClimaPlus window indicating 100% moist heat.
CONT-RUN
CONT-RUN
■ Preheat until temperature reaches 212°F (100°C), or to desired temperature.
■ Load oven.
■ Select TIMER key. Set desired cooking time using Central Dial OR select IQT
Sensor and set desired Sensor core temperature OR select Continuous Run.
■ ClimaPlus control is preset at 100% humidity and cannot be changed in Moist
Heat mode.
■ Unload oven when done. Unit automatically shuts off when door is opened.
NOTE: LCS & LCG models 20 & 40 have a built-in safety latch that lets steam
and heat out before door fully opens. Safety latch is optional on models 6, 10 and
1020. If your ClimaPlus Combi is NOT equipped with this feature, open door
slightly until fan stops and steam dissipates. Open door fully to unload.
X
Opening Door During Operation
Open door slightly to allow hot steam and/or vapors to escape. KEEP FACE AND
HANDS AWAY FROM OPENING or burns could result. When steam and/or heat
has dissipated open door fully with care. Escaping hot steam and/or vapors can cause
serious burns. Interior surfaces, including pans, grids and oven racks, can be extremely
hot. To prevent burns, allow unit to cool or use appropriate heat resistant protective
mitt or pad when handling. Do not use built-in retractable hand shower when cabinet
temperature is above 212°F (100°C) or burns could result.
18
COOKING MODES
Tender Steaming 85-210°F (30-99°C)
A gentle cooking application in Moist Heat mode that uses steam with less air
turbulence at temperatures below the boiling point. Use Tender Steaming for
scalding, poaching, thawing, proofing, simmering, blanching, rethermalizing,
soaking, vacuum cooking, and preserving.
Advantages
■ Fast preheating.
■ The ability to select and maintain precise low cooking temperatures.
■ Gentle steaming for a variety of delicate items.
■ Excellent consistency and taste for many kinds of meat and fish.
■ Lower cooking temperatures mean less sticking and crumbling.
■ Less shrinkage resulting in moist, attractive portions for display merchandising.
■ No added fats or oils are needed for cooking.
■ Excellent method for proofing breads and doughs at 95-99°F (35-37°C).
■ Can be partially unloaded for serving convenience.
Menu suggestions
■ Ingredients preparations–blanching bacon and ham, proofing, soups, sauces,
stocks, fish garnishings, etc.
■ Starters, appetizers–Poached eggs, seafood, cakes, patés, etc.
■ Entrees–Fish (salmon, sole, orange roughy), poultry, vacuum cooking items,
boneless chicken and turkey filets, beef filets, sausages, etc.
■ Sides-Vegetable casseroles
■ Desserts–fruit, cheese cakes, delicate moist items, etc.
■ Yeast doughs–breads, rolls, bagels, etc.
Tips
Approximate temperature ranges for some common Tender Steamed items:
19
Soup garnishings
Fish, seafood
Pork, veal
Chicken/white meat
167-194°F
149-194°F
161-167°F
167-185°F
75-90°C
65-90°C
72-75°C
75-85°C
Chicken/dark meat
Poultry (other)
Beef, lamb
Desserts
Breads, doughs
176-194°F
176°F
135-165°F
149-194°F
95-99°F
80-90°C
80°C
58-74°C
65-90°C
35-37°C
COOKING MODES
Tender Steaming
Cooking times
continued
Moist Heat mode principles apply: generally, the lower the cooking temperature the
longer the cooking time.
Seasoning
Season lightly. Low temperature cooking intensifies a food’s natural taste, as well as
the taste of seasonings. For the same reason, use less essences or reducing agents.
Texture, appearance
Tender Steaming imparts excellent characteristics to food for presentation in display
merchandisers:
■ Excellent color
■ Firm structure for clean portioning
■ Less shrinkage for plump, taut skins
■ Fewer and smaller “bursts” even when skin is damaged
Operation and settings
CONT-RUN
■ Turn unit on.
■ Select MOIST HEAT mode and set TIMER on Continuous Run.
■ Preheat until temperature reaches 212°F (100°C) or to desired temperature.
■ Load oven.
■ Set desired Tender Steaming TEMPERATURE 85-210°F (30-99°C) using
Central Dial.
■ Select TIMER key. Set desired cooking time using Central Dial OR
■ Select IQT Sensor and set desired core temperature using Central Dial OR
select Continuous Run.
■ Unload oven when done. Unit automatically shuts off when door is opened.
CONT-RUN
NOTE: LCS & LCG models 20 & 40 have a built-in safety latch that lets steam
and heat out before door fully opens. Safety latch is optional on models 6, 10 and
1020. If your ClimaPlus Combi is NOT equipped with this feature, open door
slightly until fan stops and steam dissipates. Open door fully to unload.
X
Opening Door During Operation
Open door slightly to allow hot steam and/or vapors to escape. KEEP FACE AND
HANDS AWAY FROM OPENING or burns could result. When steam and/or heat
has dissipated open door fully with care. Escaping hot steam and/or vapors can cause
serious burns. Interior surfaces, including pans, grids and oven racks, can be extremely
hot. To prevent burns, allow unit to cool or use appropriate heat resistant protective
mitt or pad when handling. Do not use built-in retractable hand shower when cabinet
temperature is above 212°F (100°C) or burns could result.
20
COOKING MODES
Forced Steaming
213-265°F (101-130°C)
A cooking application in Moist Heat mode using additional heat to allow
full-humidity steaming at temperatures well above boiling. Forced Steaming
is excellent for cooking dense products, such as root vegetables and frozen
casseroles.
Advantages
■ Creates an intensified cooking process
■ Shorter cooking times
■ Product retains color, nutrients
■ Less shrinkage
Menu suggestions
■ Potatoes, carrots, celery
■ Frozen prepared foods
Tips
Approximate temperature ranges for some common Forced Steamed items:
Celery
Carrots
Potatoes
Turnips, yams
Frozen lasagna
Frozen vegetables
Rice
21
230°F
240°F
257°F
248°F
248°F
248°F
248°F
110°C
115°C
125°C
120°C
120°C
120°C
120°C
COOKING MODES
Forced Steaming
Operation and settings
continued
■ Turn unit on.
■ Select MOIST HEAT mode and set TIMER on Continuous Run.
■ Preheat to set temperature.
CONT-RUN
■ Load oven.
■ Set desired Forced Steaming TEMPERATURE 213-265°F (101-130°C) using
Central Dial.
■ Select TIMER. Set desired cooking time using Central Dial OR select
IQT Sensor and set desired core temperature using Central Dial OR select
Continuous Run.
■ Unload oven when done. Unit automatically shuts off when door is opened.
CONT-RUN
NOTE: LCS & LCG models 20 & 40 have a built-in safety latch that lets steam
and heat out before door fully opens. Safety latch is optional on models 6, 10 and
1020. If your ClimaPlus Combi is NOT equipped with this feature, open door
slightly until fan stops and steam dissipates. Open door fully to unload.
X
Opening Door During Operation
Open door slightly to allow hot steam and/or vapors to escape. KEEP FACE AND
HANDS AWAY FROM OPENING or burns could result. When steam and/or heat
has dissipated open door fully with care. Escaping hot steam and/or vapors can cause
serious burns. Interior surfaces, including pans, grids and oven racks, can be extremely
hot. To prevent burns, allow unit to cool or use appropriate heat resistant protective
mitt or pad when handling. Do not use built-in retractable hand shower when cabinet
temperature is above 212°F (100°C) or burns could result.
22
COOKING MODES
Dry Heat Mode 85-575°F (30-300°C)
Powerful convection heating and auto-reverse fan create the ideal environment for
fast, even broiling, roasting, baking, browning, thawing, grilling and sautéing.
Advantages
■ Powerful heating capability up to 575°F (300°C), even when fully loaded.
■ Fast pre-heating.
■ High-speed air circulation creates even heating for high quality food production.
■ Consistent cooking and even browning at all rack levels.
■ No added fats or oils are needed for cooking.
■ Cook different products at the same time with no flavor transfer.
■ Can be partially unloaded for serving convenience.
Menu suggestions
■ Ingredients preparations–roasted bones for stock, melting butter, thawing
frozen ingredients.
■ Starters, appetizers–meatballs, roast beef, grilled ham, sausage, chicken wings,
quiches, tarts, breadsticks, bread rolls, etc.
■ Entrees–beef and pork roasts, ribs, chicken whole or piece, turkey, frozen lasagna,
pizza, pizza rolls.
■ Sides–baked potatoes, soufflés, casseroles.
■ Desserts–sponge cake, marble cake, puff pastries, frozen fruit puffs, pies, etc.
Tips
Cooking times
Proper cooking times will vary depending on the quality, weight, or size of the
product being cooked. Generally, cooking time is not affected by the size of the
load. However, avoid overloading grids or pans so air will circulate evenly around
all product.
Roasting, broiling
■ Preheat up to 575°F (300°C). Load and set to desired temperature.
■ Ideal thickness for steaks, chops, cutlets, or loin cuts: 1⁄2-1 in. (13-25mm).
■ Cook on grids with drip pans underneath. This allows even browning on all sides.
■ Group similarly sized products on the same grids.
Sautéing
■ Preheat enamel pan.
■ Shallow pans work best.
Browning, finishing
23
■ Preheat up to 575°F (300°C). Load and set to desired temperature.
COOKING MODES
Dry Heat
Baking
continued
■ Preheat to desired baking temperature. In general, ClimaPlus Combi baking
temperatures will be 70-80°F (20-25°C) LOWER than conventional ovens.
■ When baking do NOT preheat pans.
■ For bread, rolls, and muffins use only every second rack. Trays should not be
deeper than 23⁄4 in. (70mm).
■ Defrost frozen bread dough and let rise for a short time before baking.
■ When baking full loads of “wet” product (frozen or dough), adjust ClimaPlus to
remove built-up humidity.
■ Lightly mist breaded products with water or vegetable oil or brush with eggwash.
■ When baking whole fish, wrap tail in foil and support it from underneath with
raw potatoes.
Operation and settings
CONT-RUN
CONT-RUN
■ Turn unit on.
■ Select DRY HEAT mode and set TIMER on Continuous Run.
■ Two red bars appear in ClimaPlus window.
■ Preheat, set to desired cooking TEMPERATURE.
■ Load oven.
■ Select TIMER key. Set desired cooking time using Central Dial OR select IQT
Sensor and set desired core temperature using Central Dial OR select
Continuous Run.
NOTE: Steam generator does not operate during Dry Heat Mode. However,
humidity builds in the cabinet from the moisture escaping food as it cooks. Use
ClimaPlus Control to limit the level of this humidity buildup if desired.
■ If desired, press arrow key and set ClimaPlus Control using Central Dial.
■ Unload oven when done. Unit automatically shuts off when door is opened.
NOTE: LCS & LCG models 20 & 40 have a built-in safety latch that lets steam
and heat out before door fully opens. Safety latch is optional on models 6, 10 and
1020. If your ClimaPlus Combi is NOT equipped with this feature, open door
slightly until fan stops and steam dissipates. Open door fully to unload.
X
Opening Door During Operation
Open door slightly to allow hot steam and/or vapors to escape. KEEP FACE AND
HANDS AWAY FROM OPENING or burns could result. When steam and/or heat
has dissipated open door fully with care. Escaping hot steam and/or vapors can cause
serious burns. Interior surfaces, including pans, grids and oven racks, can be extremely
hot. To prevent burns, allow unit to cool or use appropriate heat resistant protective
mitt or pad when handling. Do not use built-in retractable hand shower when cabinet
temperature is above 212°F (100°C) or burns could result.
24
COOKING MODES
Combination Mode 85-575°F (30-300°C)
Fast, consistent method for cooking foods that require a combination of moist
and dry heat. Enables practically any percentage of humidity and precise
control of the desired level. Use when combi-baking, combi-roasting, combisteaming, browning, braising, glazing, basting.
Advantages
■ Fast preheating.
■ Cook with steam at temperatures above 212°F (100°C).
■ Less food shrinkage from dehydration.
■ More servings per cooked pound.
■ Automatic basting.
■ Foods retain more nutrients and flavor.
■ No added fats or oils are needed for cooking.
■ Even heating improves cooked quality of large meat portions.
■ Cook different products at the same time with no flavor transfer.
■ Consistent cooking and browning at all rack levels.
■ Can be partially unloaded for serving convenience.
Menu suggestions
■ Ingredients preparations–roasted bones for stock.
■ Starters, appetizers–quiche, pastas, bread, rolls (frozen), etc.
■ Entrees–roasts (beef, veal, pork, lamb) stuffed peppers, whole roast chicken,
turkey legs, casseroles, lasagna, etc.
■ Sides–potatoes au gratin, baked potatoes, frozen vegetables, baked apples, etc.
■ Desserts–yeast dough (choux pastry).
Tips
■ To achieve even cooking and browning, always cook roasts on grids with plenty
of space around each roast for air to circulate.
■ When practical, place roasts on grids with meat grain parallel to airflow for even
better results.
■ Cook large, fat-encrusted roasts in MOIST HEAT mode for the first one-third
of the total cooking time, then switch to COMBINATION mode with desired
settings for the remainder. This technique helps seal in juices, flavors and nutrients
while reducing shrinkage.
■ Condensation and juices can be collected in a pan under the roasts to be used
later with roasted bones for sauce stocks.
■ Use chicken grid to roast whole chickens upright for even cooking, browning.
25
COOKING MODES
Combination
Operation and settings
continued
■ Turn unit on.
■ Press Moist Heat and Dry Heat keys at the same time to set on
COMBINATION mode.
CONT-RUN
■ Set TIMER on Continuous Run.
■ A bar that is mostly blue and partly red appears in ClimaPlus window, indicating
that the ClimaPlus Control is set at 90% humidity.
■ Preheat to desired temperature.
■ Load oven.
■ Set desired cooking TEMPERATURE using Central Dial.
■ Select TIMER key. Set desired cooking time using Central Dial OR set for
Continuous Run. Select IQT Sensor and set desired core temperature using
Central Dial.
CONT-RUN
■ To change ClimaPlus Control setting, press the control arrow key and set the
desired humidity level with the Central Dial.
■ Unload oven when done. Unit automatically shuts off when door is opened.
NOTE: LCS & LCG models 20 & 40 have a built-in safety latch that lets steam
and heat out before door fully opens. Safety latch is optional on models 6, 10 and
1020. If your ClimaPlus Combi is NOT equipped with this feature, open door
slightly until fan stops and steam dissipates. Open door fully to unload.
X
Opening Door During Operation
Open door slightly to allow hot steam and/or vapors to escape. KEEP FACE AND
HANDS AWAY FROM OPENING or burns could result. When steam and/or heat
has dissipated open door fully with care. Escaping hot steam and/or vapors can cause
serious burns. Interior surfaces, including pans, grids and oven racks, can be extremely
hot. To prevent burns, allow unit to cool or use appropriate heat resistant protective
mitt or pad when handling. Do not use built-in retractable hand shower when cabinet
temperature is above 212°F (100°C) or burns could result.
26
COOKING MODES
Rethermalizing
Rethermalizing is a cooking application that utilizes a combination of moist
and dry heat plus ClimaPlus Control to maintain flavor and textures when
bringing chilled cooked foods back up to serving temperatures.
Advantages
■ Different food products can be reheated without being covered.
■ Perfect mode for re-heating ingredients, servings or meals previously cooked and
chilled as part of a cook/chill production process.
■ Whole meals can be plated and chilled in quantity on special racks that roll
directly from the blast chiller into the ClimaPlus Combi for rethermalizing.
■ Allows more efficient use of time to prepare dishes and trays ahead of time.
■ Less shrinkage.
Menu suggestions
■ Starters, appetizers–pasta, vegetable dishes, macaroni & cheese, casseroles, spring
rolls, etc.
■ Entrees–roasts, pasta, casseroles, chilled or frozen meat and fish, chilled or frozen
prepared entrees, stuffed vegetable dishes.
■ Sides–rice and rice dishes, vegetables, noodles, new potatoes, potatoes au gratin,
potato pancakes, fries, etc.
■ Desserts–fruit pies, cheese cakes, stewed fruit, etc.
Tips
■ Proper rethermalizing temperatures will vary depending on type of food.
■ Generally, a ClimaPlus Control setting of 60% humidity or lower is
recommended for rethermalizing.
■ Rethermalizing times depend on the type of food, the beginning internal
temperature and the number of plates of pans in the load. Times should be
from 5 to 8 minutes.
■ Use probe cooking with the IQT Sensor when practical. Ideal serving
temperatures are easier to achieve.
■ Re-heating plated servings is more efficient, especially when preparing meals in
volume.
■ Use special mobile oven rack designed to hold plates for rethermalizing. Racks
roll from blast chiller or walk-in directly into the ClimaPlus Combi. Fitted
thermal covers are available to keep plates on rack warm for short periods or
during transport.
■ Make sure food is arranged evenly on plates.
■ Sauces should be poured over product prior to re-heating or on side after
re-heating.
27
COOKING MODES
Rethermalizing
continued
■ Create a custom cooking program with Rethermalizing settings that can be used
for similar recurring situations.
■ Use ClimaPlus Control to “fine tune” Rethermalizing to achieve desired results.
Operation and settings
■ Turn unit on.
■ Press Moist Heat and Dry Heat keys at the same time to set on COMBINATION
mode.
CONT-RUN
■ Set TIMER on Continuous Run.
■ Preheat to desired temperature.
■ Load oven.
■ Set desired Rethermalizing TEMPERATURE using Central Dial.
■ Select TIMER key. Set desired cooking time using Central Dial OR select
Continuous Run. Select IQT Sensor and set desired probe “done” temperature
using Central Dial.
CONT-RUN
■ Adjust ClimaPlus Control setting to achieve desired humidity level, generally
60% humidity or below, by pressing the control arrow key. Set desired humidity
level with the Central Dial
■ Unload oven when done. Unit automatically shuts off when door is opened.
NOTE: LCS & LCG models 20 & 40 have a built-in safety latch that lets steam
and heat out before door fully opens. Safety latch is optional on models 6, 10 and
1020. If your ClimaPlus Combi is NOT equipped with this feature, open door
slightly until fan stops and steam dissipates. Open door fully to unload.
X
Opening Door During Operation
Open door slightly to allow hot steam and/or vapors to escape. KEEP FACE AND
HANDS AWAY FROM OPENING or burns could result. When steam and/or heat
has dissipated open door fully with care. Escaping hot steam and/or vapors can cause
serious burns. Interior surfaces, including pans, grids and oven racks, can be extremely
hot. To prevent burns, allow unit to cool or use appropriate heat resistant protective
mitt or pad when handling. Do not use built-in retractable hand shower when cabinet
temperature is above 212°F (100°C) or burns could result.
28
Cooking Functions
ClimaPlus Combis feature a host of digital controlled functions that can be
employed to create the perfect cooking environment for practically any type of
food. These functions also help automate the cooking process, saving labor and
providing consistent results, load after load.
Probe cooking with IQT Sensor
The new IQT Sensor 5-point probe works with IQT Logic and the ClimaPlus
Control to automatically produce the desired browning, texture and core food
temperature every time–regardless of load size.
IQT Intelligent Cooking Functions
The IQT key accesses three IQT Logic programs that use the IQT Sensor to
provide feedback for real-time control and adjustment of the cooking process.
These programs are designed to completely automate the lengthy process of
cooking roasts or other large cuts of meat. (To access these programs, be sure no
cooking mode is active before pressing the IQT key.)
■ +Profile Cooking
■ +Low Temperature Cooking
■ +Delta -T Cooking
■ Preset program library
The IQT key is also used to access other special functions. (To select these functions,
a cooking mode must be activated before pressing IQT key.)
■ Half Energy (available on all LCS electric models and the LCG-40)
■ Delta-T (without IQT Logic)
■ HACCP interface
■ Lime scale check (CalcDiagnosis System)
■ Program Lock/Unlock
PROG
START
Programming
Use PROG/START key when inputting up to 99 nine-step custom cooking
programs and when working with programs and programmable operations of the
unit. Use this key to access and start selected custom program.
Additional Key Pad Functions
■ Steam Injection
■ Half Speed Fan (available on all LCS electric models)
■ Pulse Fan
■ Cool Down
29
COOKING
FUNCTIONS
Probe Cooking with IQT Sensor
The Probe Cooking function allows the operator to select the food’s desired “done”
temperature. The IQT Sensor probe is inserted into the food to measure the actual
internal temperature of the food as it cooks. The IQT Logic controls the cooking
time and stops the cooking cycle when the selected internal temperature is achieved.
Advantages
■ Cook to proper “doneness” for precise, consistent results with different types
of food.
■ Prevents over cooking, less waste.
■ Results in less shrinkage, more portions.
■ Does not require constant observation of cooking process.
■ IQT Sensor 5-point measurement eliminates false readings due to improper
insertion.
■ Check elapsed time and current core temperature at any time.
■ Eliminates wasteful and unattractive intrusive testing methods such as needle,
fork or cutting.
When to use
Probe cooking can be used for practically any type of food, most often with roasts,
meats, poultry, casseroles, entreés, soups, rethermalizing plated portions.
Tips
■ When roasting meat for sliced cold servings, set food core temperature about
9°F (5°C) lower than recommended “done” temperature. Roast will continue to
cook as it cools.
■ A hot probe may sear the meat on contact, leaving a hole or scar when probe is
removed. Always cool probe prior to insertion.
■ Probe cooking temperatures can be changed or reset at any time during the
cooking process. For example, you may wish to change cooking modes or
accelerate the cooking process after a certain core temperature is reached.
Simply make those changes and reset probe “done” temperature to the desire
cooked setting.
■ Consider using IQT +Profile automated cooking program that allows the
selection of core temperature and desired surface texture and browning.
30
COOKING
FUNCTIONS
Probe Cooking
with IQT Sensor
continued
Operation and settings
■ Turn unit on.
■ Load oven rack.
■ Insert probe into thickest part of meat, or into central location of other types of
foods, on center oven rack.
NOTE: Be sure IQT Sensor is clean and cool prior to insertion.
■ Select cooking mode (probe cooking is enabled in all modes.)
■ Select IQT Sensor and set desired “done” temperature using Central Dial.
■ Display shows selected “done” temperature and current core temperature.
NOTE: TIMER function does not operate when using probe function. If TIMER
is set before selecting IQT Sensor, the cook time continues to run in the background, but does not control the cooking process. To display time remaining,
press and hold both IQT Sensor and TIMER keys. To return to probe temperature
display, press IQT Sensor key
■ To check elapsed cooking time, press and hold TEMPERATURE key.
■ Completion signal sounds when “done” temperature is reached. Unit shuts off
automatically.
IQT Sensor
The IQT Sensor
■ Monitors the surface temperature of the food.
reads temperatures
■ Regulates the degree of browning when
at five different
using IQT +Profile
points:
■ Calculates the precise core temperature,
even when improperly inserted.
Surface temperature
■ Computes and displays the exact
remaining cooking time.
■ Constantly updates
information as
conditions change.
Plus four separate core temperatures
X
Probe sensor may be extremely hot
When not in use, always place probe sensor in holder. Do not let probe sensor hang loose outside
the cooking cabinet. Remove probe sensor from food before unloading unit.
31
COOKING
FUNCTIONS
Probe Cooking
with IQT Sensor
continued
Probe Cooking Guide to “Doneness”
Meat
Beef
Veal
Pork
Lamb
Probe “Done Temp”
Rare
130°F
55°C
Medium rare 140F
60°C
Medium
145°F
63°C
Well done
167-189°F 75-65°C
Fully cooked 155-170°F 69-77°C
Medium
150°F
65°C
Well done
167-176°F 75-80°C
Cured
150°F
65°C
Fully cooked 165°F
74°C
Mutton Fully cooked 165°F
Poultry Fully cooked 185°F
74°C
85°C
Appearance
Dark, blood red
Red meat, blood-red juice
Light pink core
Gray-brown throughout
Red-brown to gray-white
Light pink
Pale brown to gray-white
Pale red-brown or nearly
colorless
Gray to pale-red juice,
clear juice
Pale gray meat, red juice
White meat, nearly colorless
juice
32
COOKING
FUNCTIONS
+PROFILE
IQT +Profile Cooking
IQT +Profile Cooking allows operators to dial in both the desired core
temperatures AND the degree of browning/crispness–IQT Logic does the rest.
Capabilities
+Profile is an automated cooking control program that is essentially “self-regulating”
in nature. That is, it adjusts cooking parameters in response to real-time conditions.
Information on food and cabinet conditions is acquired by IQT Sensor and
ClimaPlus Control. The IQT Logic intelligent software automatically and continuously analyzes this data, factors in the size of the roast or bird, and makes any
adjustments in temperature and humidity necessary to ensure that the desired
core temperature is reached at the same time as the ideal degree of browning.
Advantages
■ Five point sensing system of IQT Sensor insures accurate core and crust
temperatures, even with inaccurate probe insertion.
■ Select from seven degrees of browning (1-7 lighter/darker) to produce just the
type of outer skin or crust you want, automatically.
■ Constant automatic monitoring and adjustments produce the perfect cooking
cycle, resulting in moist flavorful meats, less shrinkage, and crisp skins without
the dryness.
■ Updates and display of remaining cook time allows for better production
planning.
■ Get precise, consistent results every time regardless of meat size or size of load.
When to use
■ +Profile is most suitable for larger cuts of meat, such as a variety of pork, meat
loaf, turkey breast, chuck, brisket, veal roasts, and chicken.
■ For best results, cuts should be a minimum of 3 in. (7.6 cm) thick and at least
6 lbs. (2.7 kg).
■ Loads should be composed of similar sized cuts.
■ Cooking time should not be less than 30-40 minutes.
■ Select foods best sutied for Combi mode.
33
COOKING
FUNCTIONS
IQT +PROFILE
Operation and settings
continued
■ Turn unit on.
■ Load oven rack.
■ Insert probe into thickest part of meat, or into central location of other types
of foods, on center oven rack.
NOTE: Be sure IQT Sensor is clean and cool prior to insertion.
+PROFILE
PROG
■ DO NOT select cooking mode. Deactivate if mode has already been selected.
■ Press IQT key: “+PROFILE” appears in the adjacent display.
■ Press PROG/START key to activate program.
START
BROWN 4
162
PROG
START
■ “BROWN 4” appears in the temperature display. While the figure 4 is flashing,
use Central Dial to select desired level of browning from 1 to 7 (light to dark).
■ The IQT Sensor display shows a pre-selected core temperature of 162°F (72°C).
Press the IQT Sensor key and use Central Dial to set the desired core temperature.
■ Press PROG/START to confirm and initiate +Profile cooking.
During operation
■ Since all modes and humidity levels are enabled by the automated process, the
ClimaPlus window will display a blue-red bar and Moist Heat and Dry Heat
modes will be active during the entire cooking cycle.
■ Cook time remaining is displayed and constantly updated during the latter stages
of the cycle.
■ Actual core temperature is displayed next to selected “Done” temperature.
■ The control panel is not accessible during operation to prevent automatically
selected settings from being accidentally altered. HACCP, Half Energy and Half
Speed Fan functions can be selected during operation.
■ Opening the door during operation merely interrupts the cooking process.
When door is closed, all functions resume.
■ To stop any IQT program altogether, it is necessary to turn off the unit.
NOTE: +Profile is a complete cooking program that automatically controls
the cooking process. It cannot be used as a step in another program. However,
IQT +Profile can be saved with specific settings as an individual custom program
(See Programming, page 43.)
34
COOKING
FUNCTIONS
+PROFILE
IQT +Low-T Cooking
IQT +Low-T Cooking offers operators a completely automated low
temperature slow-cook solution for maximizing yield, color and consistency
of large roasts.
Capabilities
+Low-T (low temperature) is a gentle cooking process designed for cooking large
roasts over a long period of time. The completely automated cook cycle begins with
a brief searing phase followed by a progressive lowering of the cabinet temperature
until it matches the desired core temperature of the food. Over the remaining time,
the actual core temperature of the slowly cooking meat continues to rise until it
reaches the desired core temperature. At this point, the entire roast has reached the
same temperature as its surrounding environment and can be held up to 24 hours.
Searing phase
Searing temperature
range 266-392°F
(130-200°C)
Desired core
temperature range
110-176°F
(45-80°C)
Progressive
temperature drop
Cabinet
temperature
Finishing phase
Holding
Actual core temperature
Advantages
■ Slow, gentle process results in uniform cooking and prevents overcooking.
■ Mild cooking climate helps meat retain natural juices and flavor with minimal
weight loss and shrinkage.
■ Completely automated process compensates for load size and type of meat.
■ Rapid temperature drop after searing prevents overcooked exteriors. Steady
increase in core temperature results in uniform color and texture inside.
■ Automatic cook and hold process permits unattended, overnight cooking to
improve production efficiency and take advantage of lower energy rates.
NOTE: +Low-T is a complete cooking program that automatically controls the
cooking process. It cannot be used as a step in another program. However, IQT
+Low-T can be saved with specific settings as an individual custom program
(See Programming, page 43.)
35
COOKING FUNCTIONS
IQT +LOW-T COOKING
continued
Operation and settings
■ Turn unit on. DO NOT load yet.
■ DO NOT select cooking mode. Deactivate if mode has already been selected.
■ Press IQT key: (“+PROFILE” appears in the adjacent display.) Use Central Dial
to select +LOW-T.
+LOW-T
PROG
START
■ Press PROG/START key to activate program. Pre-selected settings will appear
on the TEMPERATURE and IQT Sensor displays.
■ Press TEMPERATURE key and use Central Dial to enter desired searing
temperature–266-392°F (130-200°C).
■ Press IQT Sensor key and use Central Dial to enter desired core temperature–
110-176°F (45-80°C).
PROG
START
■ Press PROG/START to confirm and initiate +Low-T cooking.
■ Unit now begins preheating. When preheating temperature is reached, the
display will flash “LOAD” and buzzer will sound.
■ Load oven rack.
■ Insert IQT Sensor probe.
■ Close door to begin +Low-T cooking.
During operation
■ Since +Low-T cooking operates in Dry Heat mode, the ClimaPlus window will
display a red bar and Dry Heat mode key will be active during the cooking cycle.
■ After a period of time, the actual core temperature will appear in the display next
to “done” core temperature.
■ When the finishing phase begins, “RIPENING” appears in the TIMER display.
■ When the core temperature reaches the desired “done” temperature, the word
“HOLDING” appears in the TIMER display. This phase can be maintained for
up to 24 hours.
■ The control panel is not accessible during operation to prevent automatically
selected settings from being accidentally altered. HACCP and Half Energy
functions can be selected at the start of operation.
■ Opening the door during operation merely interrupts the cooking process.
When door is closed, all functions resume.
■ To stop the IQT +Low-T program prior to the holding phase, it is necessary to
turn off the unit. During holding phase, the program can be stopped simply by
pressing the lit mode key to de-activate the mode.
36
COOKING
FUNCTIONS
+DELTA-T
IQT +Delta-T Cooking (with IQT Logic)
IQT +Delta-T Cooking offers operators a gentle, effective and completely automated program for cooking hams and large marinated, salted or cured cuts of
meat with the best flavor and yield.
Capabilities
+Delta-T uses IQT Logic to provide a gentle slow-cooking process in which
the cabinet temperature rises slowly in direct proportion to the rise in the core
temperature of the meat. The constant difference between the two is called the
Delta-T or “difference in temperature.” The operator enters both the “done” core
temperature of the meat and the Delta-T number. The actual cabinet temperature
rises quickly to forma mild crust that seals in juices and nutrients, then rises gradually pulling the temperature of the meat up gently to the desired core temperature.
180°F Done cooking temperature
130°F Done core temperature
Cabinet temperature
Delta-T = 110°F
Actual core temperature
Advantages
■ Creates a specific, gentle cooking process for hams and large cuts of marinated
or cured meat.
■ Process causes proteins to coagulate and meat fibers to swell, retaining juices
and nutrients.
■ Rapidly created outer crust seals in flavor and natural juices.
■ When core temperature is reached unit remains in holding phase.
■ Completely automated, no observation of the cooking process is necessary.
Great for off-peak hours production.
NOTE: +Delta-T is a complete cooking program that uses IQT Logic to automatically control the cooking process. It cannot be used as a step in another program.
However, IQT +Delta-T can be saved with specific settings as an individual custom
program (See Programming, page 43.)
37
COOKING
FUNCTIONS
IQT +DELTA-T
COOKING
continued
+DELTA-T
PROG
START
Operation and settings
■ Turn unit on.
■ Load oven rack.
■ Insert IQT Sensor probe.
■ DO NOT select cooking mode. Deactivate if mode has already been selected.
■ Press IQT key: (“+PROFILE” appears in the adjacent display.) Use Central Dial
to select +DELTA-T.
■ Press PROG/START key to activate program. Pre-selected settings will appear
on the TEMPERATURE and IQT Sensor displays.
■ Press TEMPERATURE key and use Central Dial to enter desired Delta
temperature–68-140°F (20-60°C).
■ Press IQT Sensor key and use Central Dial to enter desired core
temperature–110-210°F (45-99°C).
PROG
START
■ Press PROG/START to confirm and initiate +Delta-T cooking.
During operation
■ Since +Delta-T cooking operates in Moist Heat mode, the ClimaPlus window
will display a blue bar and the Moist Heat mode key will be active during the
cooking cycle.
■ The actual core temperature will appear in the display next to “done” core
temperature.
■ The control panel is not accessible during operation except for the following
functions (may depend on model.)
• IQT, HACCP (all LCS and LCG models)
• Half Energy (all LCS Electric models)
• Half Fan Speed (all LCS Electric models and the LCG-40 Gas)
■ Opening the door during operation merely interrupts the cooking process.
When door is closed, all functions resume.
■ To stop the IQT +Delta-T program altogether, it is necessary to turn off the unit.
NOTE: For a Delta-T Cooking program without IQT Logic see “Special Functions:
Delta-T Cooking”, page 40.
38
COOKING
FUNCTIONS
+ROASTCHI
Preset Program Library
Built-in programs for cooking, preheating, rethermalization and cleaning.
The IQT key can be used to access a library of preset programs based on manufacturer’s
research and testing. The library includes a host of cooking programs for basic items.
There are also programs for efficient preheating, rethermalizing plated portions, and
a cleaning program.
Operation
+ROASTCHI
■ Turn unit on.
■ Load oven rack.
■ DO NOT select cooking mode. Deactivate if mode has already been selected.
■ Press IQT key: Use Central Dial to select desired preset program.
NOTE: The three IQT programs are first in order of display, followed by a series of
asterisks. Preset programs are next, each preceded by a single asterisk.
■ Press PROG/START key to activate program.
PROG
START
Available on all LCS electric models only
E1/2 ON
Special Function: Half Energy
A feature that efficiently reduces the unit’s electrical operating requirement
to about half the energy normally used.
Advantages
■ Saves on energy costs when operating during hours of peak power rates.
■ Helps control slow cooking process at lower temperatures.
NOTE: In most cases, cooking times will be longer when using HALF ENERGY
feature.
Operation
■ SELECT any mode.
■ Select desired cooking TIME (adjusted for Half Energy), TEMPERATURE
and/or probe “done” temperature.
39
COOKING
FUNCTIONS
Half Energy
continued
■ Press IQT key. Use Central Dial to select Half Energy.
Display will read “E 1/2 OF”.
E 1/2 OF
PROG
START
■ Press PROG/START key to activate function. Display will change to “E 1/2 ON”.
E 1/2 ON
210 oF E
■ When Half Energy is in operation, the letter “E” will appear at the right in the
Temperature display.
Special Function: Delta-T (without IQT Logic)
DELTA
A special program for slow-cooking large curd or mari natedroasts for best
flavor and yield.
NOTE: This function does NOT use IQT Logic. For detailed description of
capabilities and advantages of Delta-T Cooking, see “IQT +Delta-T Cooking”,
page 37.
Operation
■ SELECT desired mode. Insert IQT Sensor probe.
DELTA OF
■ Press IQT key. Use Central Dial to select DELTA. “DELTA OF” appears in the
display.
■ Press PROG/START key to activate function. “DELTA ON” appears in display.
DELTA ON
■ Press IQT Sensor key and use Central Dial to enter desired core
temperature–65-210°F (20-99°C).
■ Press TEMPERATURE key and use Central Dial to enter desired Delta
temperature–35-110°F (20-60°C).
40
COOKING
FUNCTIONS
HACCP
Special Functions: HACCP Interface
A special capability that records, prints and/or transmits actual cooking data
for conformance with HACCP procedures.
The ClimaPlus Combi is equipped with a serial interface to output key cooking
data, such as core temperature progression, cabinet temperature, start and end
times, etc. This data can be printed out directly in report form or downloaded to a
PC environment. HACCP requires CCP (Critical Control Points) reports to be
archived.
Set Up
First, connect a printer or PC to your ClimaPlus Combi using a standard serial
cable. The combi serial port is located on the underside of the unit near the front.
Once connected, follow the instructions below to begin recording data.
Recording data
Be sure mode and cooking parameters are selected. Recording can only take place
when using probe cooking. Be sure food probe is inserted.
■ Press IQT key. Use Central Dial to select HACCP.
HACCP
PROG
START
1.60
■ Press PROG/START key to activate function. A flashing dot appears in the
display to indicate that data is being recorded.
■ Close cabinet door and begin cooking.
■ The function stops at the end of the cooking cycle, or if the unit is turned off
for longer than 4 seconds. Data recording can be terminated prior to completion
of the cooking process by pressing active mode key to deactivate.
Outputting data
Data can be output to the following devices:
■ A standard printer equipped with a serial RS232 interface that can be set
to the specified transmission format.
■ Any PC with Windows 95 or higher operating system. Windows 95 and 98
include a terminal program in the “Hyper Terminal” folder within the
Accessories program group. After launching the "Hypertrm" application
program, the following settings must be made:
41
COOKING FUNCTIONS
HACCP Interface
Windows 95 and Windows 98
continued
1. Create a new connection in Hyper Terminal and name it “HACCP.”
2. In the “Phone Number” dialog box, click on Connect Using and select
either COM 1, COM 2, ...OR COM n, depending on which of the PC’s
serial interfaces is connected to the combi steamer. Click “OK.”
3. In the Properties dialog box that appears, select the following settings:
Bits per second:9600
Data Bits: 8
Parity: None
Stop bits:
Flow control: None
Click “OK.”
4. In the Hyper Terminal main window, click File and select Properties from
the pull down menu.
5. Click on the Settings tab and select VT-100 from the Emulation menu.
Click “OK.”
6. In the Hyper Terminal main window, click Transfer and select “Capture Text.”
7. A name must be given for the text file. You must include the “txt” with
your file name. Click “OK.”
■ For Windows NT 4.0 or higher and Windows 2000, please refer to the
appropriate operating manuals or consult your organization’s network
technical support personnel.
Evaluating data
Data downloaded from the combi includes a header, the temperature data, and
an end character. Tabs separate the individual temperatures in a data record.
This makes it easy to import data into suitable spreadsheet or database software.
■ A “data record” is comprised of the following three values:
1. Core temperature of food
2. Cabinet temperature
3. Number of minutes elapsed since the start of recording.
■ The current date and the start time (of the cooking process) should be entered
(manually) via the PC.
■ A graphical display of temperature progressions has proved useful.
■ Always ensure that once cooking is over, a clear signal is sent to the staff
operating the unit that the cooking process parameters have been adhered
to (i.e. that the core temperature has been reached).
■ A “non-temperature data record” can be identified by the fact that the first
character is a semicolon.
■ The batch number is automatically numbered from 0 upwards for each
cooking cycle.
■ The temperature data measured is sent at 60-second intervals.
■ The termination time is output in minutes and seconds.
■ The end character consists of the message “end***.”
42
COOKING
FUNCTIONS
PROG
START
Programming
Programming capabilities of the ClimaPlus Combi allow operators to:
■ Create custom cooking programs
■ Incorporate IQT functions into custom programs
■ Lock/Unlock programs
If you are not already familiar with the LCS control panel, please review page 8
before attempting to program your unit.
Capabilities
Memory
■ Up to 99 total cooking programs are available to the operator. Up to 9 steps
(sets of parameters) are available for each cooking program.
■ An additional 11 programs have been pre-set at the factory (see Preset Program
Library, page 39.) These include 10 programs for common menu items as well
as a cleaning program.
■ ClimaPlus Combis also feature 3 IQT Logic programs (See +Profile Cooking,
+Low-T Cooking, and +Delta-T Cooking, page 37.)
Control
■ Automatic–Unit begins operation when PROG/START key is pressed.
Unit shuts down when last program step has been completed.
■ Manual Override–Program operation can be interrupted at any time by simply
selecting or setting a new value or special function. The new value or function
affects the cooking process only in the step in which the program was overridden.
Overriding the program DOES NOT cancel it. When the new value or function
is achieved, and/or that step of the program is completed, program operation
continues with the next programmed step, or shuts down unit if program is
complete.
■ Program Lock–Cooking programs can be locked to prevent any unauthorized or
undesired changes to the programs. If programming is locked out, only stored
programs will be displayed.
43
COOKING
FUNCTIONS
Programming
continued
PROG
START
LASAGNA
12
Programming the ClimaPlus Combi
To create custom cooking programs:
■ Turn unit on and open door.
■ Press the PROG/START key. The display shows the current program
number/name.
■ Select the desired program number (1-99) using Central Dial. Flashing numbers
indicate available program numbers.
NOTE: Most cooking programs require preheating. To make preheating the first
step in a program, follow these steps.
■ Select the desired Cooking Mode for preheating (this begins the first program
step.) The selected program number and the current program step are displayed
(e.g. 12/1, indicating program #12, step 1).
12/1
■ Select desired preheating cabinet temperature.
PREHEAT
■ Press and hold TIMER key until “PREHEAT” is displayed.
■ Select a Cooking Mode to save this step and activate step two.
■ Continue with step two by selecting additional parameters, such as cooking
temperature, probe “done” temperature, additional functions, etc. For each
parameter or function, press the appropriate key and use the Central Dial to
dial in the desired value.
■ To move on to the next step in the program, select a cooking mode. It can be
the same mode or a different one. This saves the cooking parameters of the
previous step and activates the next program step (e.g. 12/2).
12/2
PROG
START
■ When all steps have been entered in this manner, press PROG/START to
save settings and store the program.
■ To review the program, press PROG/START repeatedly to step through the
program until the display is blank.
■ Close door.
44
COOKING
FUNCTIONS
Programming
Naming programs:
continued
You may wish to name programs in order to identify them faster and more reliably.
Names can contain up to eight characters.
PROG
START
12
12
P2
■ Press the PROG/START key. The display shows the current program number.
Select the desired program number using the Central Dial.
■ Press and hold the IQT key until the cursor flashes under the first digit position
in the display. The Central Dial will now run through all alphanumeric characters.
Select the first character of the program name and press IQT key to confirm.
The cursor then flashes in the next position to the right.
■ Continue selecting letters and/or numbers in this manner.
PI
PIE A
■ To save the name, press and hold IQT key until the underscore disappears.
Programs are stored by name or by number. Named programs will be stored in
alphabetical order and will appear first in the display, followed by the numeric display. Named programs are no longer associated with program numbers. Program
numbers which have been given names no longer appear in the numeric display.
Tip:
■ If you use the same name more than once, ClimaPlus will index them by number.
■ Always enter letters of name before any numbers you may wish to include, e.g.,
Chicken 1, Chicken 2, etc.
Working with programs
To run a saved program
PROG
START
PIE A
■ Press the PROG/START key again to begin the program.
PROG
■ Once all cooking steps have completed, signal will sound and unit will shut
down automatically.
START
To make changes to a saved program
PROG
START
■ Turn unit on.
■ Press the PROG/START key and select the desired program using the
Central Dial.
PIE A
■ Press the PROG/START key and select the desired program using the
Central Dial.
■ Press PROG/START until the step you wish to change changed is displayed.
PROG
START
■ Make desired changes by selecting new mode, temperatures, time and/or any
additional functions.
PROG
START
45
■ To save changes press and hold the TEMPERATURE and PROG/START
keys simultaneously until the program number or name begins flashing. This
confirms that changes have been saved.
COOKING
FUNCTIONS
Programming
NOTES:
continued
■ Any cooking parameter in any step of a program can be changed. However, once
saved, no step can be added or removed.
■ Factory Preset Programs (See Library of Preset Programs, page 39) CANNOT
be edited. However, they can be copied and saved as a custom program, and
then edited. See “Copying programs” below.
Copying programs
Preset programs can be copied and saved as custom programs and edited as
desired. IQT Logic programs with specific values can be copied and saved as
custom programs. They cannot be edited.
To copy Preset programs:
*CC CHICK
■ Press the IQT key and use the Central Dial to select the desired program to copy.
Each Preset program is preceded by an asterisk.
■ Press PROG/START once to activate program.
PROG
START
14
CC CHICK
■ Press and hold IQT key until flashing (available) program number appears in
program display. You may now accept this number for use or select any other
available number using the Central Dial.
■ Press the IQT key. All displays go out, indicating that the Preset program has
been saved into the custom program memory. The Preset program name will
now appear in the program display WITHOUT the asterisk. Access, rename and
edit this program as desired, following the procedures above.
To copy an IQT Logic program:
+PROFILE
■ Press the IQT key and use the Central Dial to select the desired IQT Logic
program to copy.
■ Follow procedures (pages 33-37 ) to enter required settings.
■ DO NOT Press PROG/START to confirm/activate.
20
■ Instead, press and hold IQT key until flashing program number appears in
program display. You may now accept this number for use or select any other
available number using the Central Dial.
+PORKTND
■ Press the IQT key again. All displays go out, indicating that the IQT Logic
program has been saved into the custom program memory. The IQT program
name will now appear in the program display WITH the +. Access and rename
this program as desired, following the procedures above.
NOTE: IQT Logic programs, while appearing to contain many changes or steps are
nevertheless integral–they are NOT themselves composed of separate programming
steps that may be edited. They do not work this way. When in operation, they
respond with changes to real-time conditions in the cabinet. While these programs
cannot be edited, they MAY be inserted whole as an individual step in a custom
program.
■ Changes must be saved before moving to the next step of the program.
46
COOKING
FUNCTIONS
To insert IQT Logic programs as custom program steps:
Follow the procedures for creating a new program or changing a saved program.
When the desired step is displayed, follow the procedures above for copying an IQT
Logic program. The program name (with the required settings entered) will appear
as a step in the current program.
PROG
START
PIE A
To delete a program
■ Press the PROG/START key and select the desired program using the Central Dial.
■ Press any cooking mode key.
■ “00:00” appears on the display.
PROG
START
12
■ Press and hold PROG/START for five seconds. The program number will begin
to flash indicating that the program has been deleted and that the number is
now available. If you are deleting a named program, the text disappears and the
original program number flashes in its place.
Program Lock and Passwords
To lock or unlock the programming function of the unit, a password must be
entered. The password that has been pre-programmed at the factory is: CLIMA+
This password can be changed later.
To lock or unlock programming
■ With unit on and door open, press any Cooking Mode key.
■ Press the IQT key and select “LOCK” or “UNLOCK” using the Central Dial.
■ Press and hold the PROG/START key until the TIMER display shows a line of
asterisks, with the cursor flashing under the first asterisk position.
PROG
START
*********
C********
*L*******
PROG LOCK
PROG
START
47
■ Enter password CLIMA+ by using the Central Dial to select a character and
by pressing the TIMER key after each character to save it and advance the
cursor. Do this carefully, as the display shows only the letter being entered.
For security purposes, the other positions remain visible only as asterisks.
■ When the complete password is entered, press the TEMPERATURE key to
toggle between PROG LOCK and UNLOCK.
■ Press PROG/START key to save the desired setting.
NOTE: After starting a program when programming is locked, it is not possible to
change any function of the program. The selected program can only be cancelled by
turning the unit off.
COOKING
FUNCTIONS
To Change Programming Password
IMPORTANT: If the pre-programmed password is changed and then forgotten,
it is only possible to deactivate the program locking system with a total reset
procedure. If a total reset must be performed all custom programs in the system
will be lost.
A password may consist of (1 to 8) letters, numbers and symbols.
To change the password, follow the procedures for “Locking/Unlocking” above to
enter the current password. If no new password has been entered, this will be the
factory set password: CLIMA+
UNLOCK
*********
START
@@@@@@@@@
START
■ Turn the Central Dial. The TIMER display shows the flashing cursor and
asterisks. Enter the new password in the same manner as above.
■ When finished, press the PROG/START key to submit the new password.
As a security measure, the TIMER display responds with a line of @ symbols,
with the first symbol flashing. Re-enter the new password to confirm.
PROG
PROG
■ When the complete password is entered, press the TEMPERATURE key to
toggle from PROG LOCK to UNLOCK.
■ Be sure PROG LOCK/UNLOCK is set to desired status.
■ Press the PROG/START key to save the new password and program locking
status.
Time, Temperature and Language Settings
The ClimaPlus® Combi offers the operator the choice of:
Time formats:
■ Military (24:00)
■ Standard time (AM:PM)
Languages
■ English
■ Spanish
■ Portuguese
■ French
■ German
■ User choice
Temperature scales
■ Fahrenheit
■ Celsius
48
COOKING
FUNCTIONS
To specify settings
■ Turn unit on. If unit is already on, switch off and turn on again.
■ Press TEMPERATURE and TIMER keys simultaneously for about 10 seconds
or until the TIMER display reads “24:00” or “AM:PM”.
■ Select the desired time format using the Central Dial.
AM:PM
ENGLISH
FAHRENH
■ Press the TEMPERATURE key to save the selected time format and activate the
next setting, language selection. Select the desired language using the Central Dial.
■ Press the TEMPERATURE key to save language selection and move to the next
step, temperature selection. Select “CELSIUS” or “FAHRENH” using the
Central Dial.
■ Press PROG/START to save all selections and exit.
PROG
START
NOTE: If you have chosen the USER language selection, DO NOT exit with
PROG/START.
To convert text commands to User language:
WATER
WATER
■ Press TEMPERATURE key again to begin converting text commands. The first
term appears in English (default language) in the temperature display. The term
is repeated in English in the program display with a flashing cursor under the
first character.
■ Using the Central Dial select the letters for the desired spelling of the term in the
user’s preferred language. Press the IQT key after each letter selection to confirm
it and advance the cursor.
■ When done, press the TEMPERATURE key to access the next term and
proceed in this manner.
PROG
START
■ Press PROG/START at any time to save all entries and exit User language text
conversion.
Setting the clock
The unit’s clock can be set to display continuous operation or real time. Automatic
start-up time can also be set.
■ Be sure unit is on and NO cooking mode is selected
To display continuous operation:
■ Press the TIMER key once to display “00:00 A:M.”
■ Press and hold TIMER briefly to display “DURATION”.
49
COOKING
FUNCTIONS
To set real time:
REALTIME
■ Press and hold the TIMER key for about 10 seconds, skipping the start-time
display. Display shows “REALTIME”.
■ Use Central Dial to set correct real time.
9:15 AM
■ Press TIMER once to store real time.
To set automatic Start Time:
STRTTIME
■ Press TIMER key for about 5 seconds, skipping the duration display. Display
shows “STRTTIME”.
■ Use the Central Dial to set the desired starting time.
■ Press TIMER once more to store starting time.
NOTE: Start Time is stored in memory and remains until changed. It does not
have to be entered every day.
To operate unit with Start Time:
PROG
START
■ Follow proper procedures for entering cooking parameters, selecting the first step
of a cooking program, or selecting IQT Logic programs and entering required
values. DO NOT START cooking process.
■ Activate Start Time by pressing and holding first the TIMER key and then the
PROG/START key. Hold both keys for a few seconds until unit goes into
standby mode.
■ While unit is in standby mode, waiting to switch itself on, the current time and
the Start Time alternate in the display.
50
COOKING
FUNCTIONS
Additional functions: Steam Injection
Steam Injection is a keypad function enabled in Dry Heat mode that, when
activated, sprays a four-second burst of water onto heating elements, creating
an immediate and brief humidified environment in the cooking cabinet.
Advantages
■ Improves rising and browning of dough.
■ Adds slight glaze to pastries.
■ Keeps foods, and especially skins and crusts from dehydrating.
■ Additional control for fruit, meat pastries and other items with varied textures,
densities and consistency.
Tips
■ Use Steam Injection sparingly. If ongoing humidity is desired, use Combination
Mode or Forced Steaming.
■ Use early in the baking process to improve dough and pastry rising.
■ Can be used in all program steps that use Dry Heat between 248°F and 482°F
(120-250°C). When programmed, a four-second burst occurs every two minutes.
Operation and settings
■ Steam Injection can only be activated when cooking in Dry Heat mode.
■ Cooking temperature must be set between 248°F and 482°F (120-250°C).
NOTE: Steam Injection will not operate until cabinet temperature is 248°F
(120°C) or higher.
■ To activate, press and hold STEAM INJECTION key. Hold for up to four
seconds per burst. Release to stop at any time.
■ Repeat as desired.
51
COOKING
FUNCTIONS
Available on all LCS electric models and the LCG-40
Additional functions: Half Speed Fan
Half Speed Fan is a keypad function that reduces fan speed by one-half to
produce less turbulence in the cooking environment.
Advantages
■ Maintains a gentle cooking environment for light pastries, custards and other
items with exposed fillings.
■ Less turbulence when rising or finishing doughs and pastries.
■ Maintains even heating and browning.
Tips
■ Use Half Speed Fan when baking large braided or shaped loaves.
■ Create a gentler cooking environment by combining Half Speed Fan with the
Pulse Fan function (see below).
■ Half Speed Fan may be used in any cooking program.
Operation and settings
■ Half Speed Fan can be used in any cooking mode, temperature setting, and at
any time during the cooking process.
■ To activate, press the HALF SPEED FAN key. Green LED on key will light.
■ Press again to return to normal fan speed.
Additional functions: Pulse Fan
Pulse Fan is a keypad control feature that, when activated, causes the fan to
run intermittently–on for 10 seconds and then off–at intervals.
Advantages
■ Promotes gentle, even cooking at lower temperatures.
■ Conserves energy over longer cooking times.
■ Enables consistent, quality results when slow-cooking.
■ Perfect control feature for slow cooking large cuts of meat, such as leg of lamb,
beef roast, cured ham, leg of veal, pork roast, whole turkey.
Advantages of slow cooking
■ Meat tenderizes as it cooks.
■ Meat retains moisture and natural juices resulting in less shrinkage and weight
loss. This means more portions served per uncooked pound.
■ Cook and hold overnight with no supervision necessary.
52
COOKING
FUNCTIONS
Additional Functions: Tips
Pulse Fan
■ When cooking large roasts, use Pulse Fan when core temperature reaches
continued
140°F (60°C).
■ The existing heat in the cabinet and from the bulk of the roast is enough to
complete the cooking process with Pulse Fan operation.
■ Pulse Fan can be programmed at any stage of the cooking process.
■ For low temperature cooking, experiment by using Pulse Fan along with Half
Speed Fan and/or Half Energy features to create a gentle cooking environment.
Operation and settings
■ Pulse Fan can be used in any cooking mode, temperature setting, and at any
time during the cooking process.
■ To activate, press the PULSE FAN key. Green LED on key will light.
■ Press again to return to normal fan operation.
Additional functions: Cool Down
Cool Down is a keypad convenience function that enables the fan to continue
operating when the door is open. This dissipates heat quickly.
Advantages
■ Achieve rapid reduction in cabinet temperature when switching to a lower
cooking temperature from preheating or from a higher cooking temperature.
■ Saves time for efficient operation.
■ Prevents overcooking, especially with shorter cooking times.
Operation and control
OPEN DOOR
COOL DOWN
■ Cool Down can be used in any cooking mode, at any temperature setting, and
at any time during the cooking process.
■ Unit must be in operation with door closed.
■ Press the Cool Down key. Green LED on key will light. “OPEN DOOR”
appears in display.
■ Open door with care. “COOL DOWN” appears in display.
■ Actual cabinet temperature appears with flashing digits in Temperature display.
NOTE: Always cool unit down 20-30° below desired cooking temperature.
Press cool down to de-activate cool down function.
53
Cleaning
Your ClimaPlus® Combi MUST be cleaned at least once a day to ensure
proper sanitation and continued trouble-free operation. Daily cleaning can be
accomplished in two ways:
■ Conventionally using Moist Heat mode and/or pre-set cleaning program.
■ With the CleanJet automated cleaning feature.
Conventional Cleaning
All ClimaPlus Combis are equipped with a preset cleaning program and a
built-in retractable hand shower for rinsing. The unit uses its own built-in
water supply, plus heat and steam from Moist Heat mode operation to do
most of the work.
For best results with conventional cleaning, use Henny Penny Oven and Grill
Cleaner and follow the procedures outlined below:
1. Leave hinged racks or mobile oven racks and grids. Stainless steel containers
may also be left in the cooking cabinet.
2. Allow cooking cabinet to cool down below 130°F (55°C).
3. Spray all interior cabinet surfaces (even behind the pivoted air baffle) as well
as oven rack, grids and pans thoroughly with Henny Penny Oven and Grill
Cleaner. (Goggles and gloves should be worn when using chemicals.)
To initiate factory pre-set cleaning program (about 40 minutes)
NOTE: If you do not wish to use pre-set cleaning program, skip steps 4-6.
+CLEAN
PROG
4. Press IQT key
5. Select “*CLEAN” using central dial.
6. Press PROG/START and skip steps 7-9.
START
OR
7. Let cleaner act for approximately 20 minutes.
8. Select Moist Heat mode.
9. Select TIMER and set for 15 minutes.
10. Repeat process for heavily soiled cabinet.
11. Rinse thoroughly with built-in hand shower.
NOTE: To activate the hand shower water flow, pull hose to full extension and
release to rest position. Press spray gun button.
54
CLEANING
CLEANJET
Using CleanJet®
ClimaPlus Combis are now equipped with CleanJet, a unique, patented
system that cleans and rinses the cabinet interior with no labor or supervision
whatsoever.
The CleanJet cleaning arm
The special CleanJet arm attaches to the inside of the cabinet and lays down a
powerful “vortex” spray pattern that works in conjunction with high heat and timed
cleaning stages to completely clean and rinse the combi.
Dispensing detergent and rinsing agent
■ CleanJet detergent and rinsing agent are dispensed automatically in the proper
amounts, depending on the cleaning cycle selected.
■ On base-top models, a special drawer dispenser slides out from under the unit
to be filled, then slides back under to engage and store.
■ On floor models, detergent and rinsing agent containers are connected with a
hose directly to the ClimaPlus.
To begin the automatic CleanJet cleaning:
1. Be sure unit is turned off and cabinet has cooled to 150°F (83°C) or below.
2. For base top units, be sure dispensing drawer has sufficient detergent and
rinsing agent. For models 20 and 40, be sure detergent and rinsing agent
containers are properly connected with the connecting hose to the appropriate
nozzles located under the front edge of the unit to the left of the handshower.
3. Connect CleanJet arm to the fixture inside the cabinet on the back wall. Floor
models 20 and 40 require two CleanJet arms (included.)
DO NOT place soiled racks, pans or grids in cabinet for cleaning
when using CleanJet. CleanJet arm could be damaged during operation.
4. Close door.
CLEANJET
DO NOT open door while cycle is in progress. CLEANJET
CYCLE WILL NOT STOP IMMEDIATELY.
STEP 0
5. Turn unit on. “CLEANJET” appears in the TIMER display. “STEP 0”
or “STEP 1” appears in the IQT display.
6. Use the Central Dial to select the desired cleaning stage based on the condition
of the cabinet. CleanJet offers a total of seven cleaning programs, steps 0-6, and
QUICK”.
55
NOTE: If you do not find “Step O” or “Step 5” and “Step 6” in the display,
it is because they must first be copied into the CleanJet menu by means of
another method of access. This will only need to be done once. To make Step
0 or Steps 5 and 6 available in the CleanJet display, follow the procedure below:
CLEANING
■ Unit must be on, WITHOUT CleanJet arm(s) attached, and no mode selected.
■ Press TEMPERATURE and TIMER keys simultaneously for about 10 seconds
or until the TIMER display reads “24:00” or “AM:PM”.
24:00
■ Press TEMP key three times. Either “+STEP 0”, “STANDARD” or
“+STEP56” will appear.
■ Use Central Dial to select desired step.
+STEP56
■ Press PROG/START. All displays go out indicating program was copied and
saved to CleanJet location.
PROG
START
■ Turn unit off and follow the procedures above beginning with step 2.
ACTIV
CLEANJET
7. Press PROG/START to begin cleaning cycle. “ACTIV” and “CLEANJET”
shows in the display. Remaining cycle time shows in the TIMER display.
See charts on page 57 for duration of each cleaning program.
8. Unit shuts off automatically when cycle is complete.
Tips
■ To stop the cycle for any reason, it is necessary to switch the unit off.
■ If the unit is turned off for any reason during cleaning cycle (or if power to the
unit is interrupted,) cycle will be suspended. When the unit is switched back
on (or when power is restored,) the cleaning cycle will NOT continue. Instead,
“ABORT” is displayed. Press PROG/START to run through a short rinsing
cycle to clear the cabinet of any remaining detergent and/or loose debris.
Operator may now repeat entire cleaning cycle.
Hand cleaning accessibility
■ The hinged racks can be removed for cleaning by lifting up on the racks,
swiveling them inward, and lifting them off their mountings.
■ If using the mobile oven rack system, roll the rack out of the unit and remove
the guide frame from the bottom of the unit by lifting it upward out of its
mountings.
■ The air baffle, covering the left side of the interior cabinet, provides even airflow and
protects operator from heating elements and fan. To open the baffle for cleaning:
1. Turn unit off and disconnect electrical power to unit.
2. Swivel left hinged rack inward. (If using mobile oven rack, remove rack and
guide frame.)
3. Using a flat-head screwdriver or a coin, turn the two quick fastening locks
one-quarter turn counterclockwise. Baffle will swing open for cleaning.
NOTE–floor units have 2 air baffles that open in this manner.
Safety protection (gloves, goggles, etc.) is required when working with cleaning
products. Please refer to cleaning product guidelines before use.
56
CLEANING
Cycle time in minutes. Detergent and rinse values in ounces. Water values in gallons.
Cycle
CleanJet®
continued
Tables of
cycle times and
water usage for
CleanJet®.
Level 0
Level 1
Level 2
Level 3
Level 4
Level 5
Level 6 Quick
Duration (min)
23
24
52
70
89
108
127
13
Model 6
Detergent (oz)
Rinse Aid (oz)
Water (gal)
3
17
8
7
17
12
10
17
23
20
17
35
27
17
48
47
17
60
57
17
72
14
17
14
Model 10
Detergent (oz)
Rinse Aid (oz)
Water (gal)
3
17
8
7
17
12
14
17
23
24
17
35
37
17
48
54
17
60
68
17
72
20
17
14
Duration (min)
39
42
61
82
103
124
145
13
Model 1020 Detergent (oz)
Rinse Aid (oz)
Water (gal)
14
34
16
24
34
21
34
34
35
44
34
54
54
34
73
71
34
92
84
34
111
41
34
21
Model 20
Detergent (oz)
Rinse Aid (oz)
Water (gal)
7
30
17
10
30
22
17
30
36
37
30
55
51
30
76
68
30
95
84
30
115
24
30
22
Model 40
Detergent (oz)
Rinse Aid (oz)
Water (gal)
20
51
17
41
51
22
51
51
37
68
51
58
84
51
79
112
51
100
135
51
121
61
51
22
Cycle time in minutes. Detergent, rinse and water values in liters.
Cycle
Guide to selecting
cleaning level.
Level 0
Level 1
Level 2
Level 3
Level 4
Level 5
Level 6 Quick
Duration (min)
23
24
52
70
89
108
127
13
Model 6
Detergent
Rinse Aid
Water
0.1
0.5
31
0.2
0.5
44
0.3
0.5
88
0.6
0.5
134
0.8
0.5
180
1.4
0.5
226
1.7
1.5
273
0.4
0.5
52
Model 10
Detergent
Rinse Aid
Water
0.1
0.5
31
0.2
0.5
44
0.4
0.5
88
0.7
0.5
134
1.1
0.5
180
1.6
0.5
226
2
0.5
273
0.6
0.5
52
Duration (min)
39
42
61
82
103
124
145
13
Model 1020 Detergent
Rinse Aid
Water
0.4
1
16
0.7
1
21
1
1
35
1.3
1
54
1.6
1
73
2.1
1
92
2.5
1
111
1.2
1
81
Model 20
Detergent
Rinse Aid
Water
0.2
0.9
65
0.3
0.9
85
0.5
0.9
138
1.1
0.9
207
1.5
0.9
287
2
0.9
360
2.5
0.9
435
0.7
0.9
85
Model 40
Detergent
Rinse Aid
Water
0.6
1.5
65
1.2
1.5
85
1.5
1.5
140
2
1.5
220
2.5
1.5
300
3.3
1.5
380
4
1.5
460
1.8
1.5
85
Level 0 Very small amounts of crumbs from bakery products.
Level 1 Cooking vegetables and fat-free products.
Level 2 Minimal level of grease and oils from mixed loads of vegetables and meat.
Level 3 Moderate amounts of grease and oils from roasted meats and vegetables.
Level 4 Heavier amounts of grease and oils from roasted meats and products heavy in starch, sugar and
marinades.
Level 5 High amounts of grease and oils from roasted meats and vegetables.
Level 6 Excessive amounts of grease and oils from multiple loads of grilled or roasted meats and products
heavy in starch, sugar and marinades.
Quick
57
Fast program for intermediate rinsing during heavy use. Use throughout the day to remove heavy
levels of grease and deposits that cause scorching and odors.
CLEANING
CALCCHECK
Descaling maintenance
Limescale deposits occur naturally inside the steam generator. Time, heavy
use and hard water conditions result in a gradual build-up of these deposits,
eventually affecting the performance of the ClimaPlus Combi. Periodic,
professional cleaning of the steam generator (descaling) must be performed by
a certified and properly trained technician to ensure peak performance of your
ClimaPlus Combi.
Auto Flush
Auto Flush is an automatic feature of ClimaPlus that drains and flushes the steam
generator on a regular basis in order to keep the unit operating reliably between
descalings. While it extends the time between service calls, it is not meant to make
descaling unnecessary.
IMPORTANT: Descaling should ALWAYS be performed by a certified and
properly trained technician.
CDS CalcDiagnosis
Henny Penny ClimaPlus Combis are equipped with a special feature called CDS
CalcDiagnosis that monitors limescale build-up and warns the operator when
descaling is necessary. This is a particular advantage because the CalcDiagnosis
system permits the operator to schedule descaling not just regularly or randomly,
but when needed.
To check the level of limescale deposits at any time:
■ To check the level of limescale deposits at any time:
■ Press any Cooking Mode key.
■ Press IQT key and use Central Dial to select “LIMSCAL”.
LIMSCAL
PROG
START
*******
CALCCHECK
■ Press and hold PROG/START key. A horizontal line of asterisks will appear
in the IQT display, indicating graphically the relative build-up of deposits in
the steam generator.
■ When deposits reach 80 percent of the permissible level, the “CALCCHECK”
warning display flashes for two minutes. When the level reaches 90 percent,
the warning remains on without flashing for two minutes.
■ Service call for descaling should be scheduled within 14 days.
■ When descaling has been completed the display with the horizontal line of
asterisks must be reset. (Should be reset by the service technician.)
58
Installation
Refer to the following pages for important information regarding the
installation of LCS and LCG ClimaPlus Combis. It is recommended
that installation be accomplished by a certified and properly trained
technician.
NOTE: When installing a ClimaPlus combi, humidity calibration must
be performed. This process takes approximately 45-60 minutes. (page 62)
Site, leveling
Minimum clearance sides and back:
2 in. (50 mm)
Service clearance, left side:
20 in. (500 mm)
Clearance for door opening:
Model 6 & 10:
Model 1020:
Model 20:
Model 40:
Fig. 1
1) Check for any transport damages. Should there be any signs of transport
damage immediately inform your dealer/freight forwarder.
2) Check installation site. Check entrance clearance.
Minimum entrance space needed without pallet:
Model 6 & 10:
Model 1020:
Model 20:
Model 40:
Fig. 2
201⁄2 in. (521 mm)
291⁄2 in. (749 mm)
283⁄4 in. (730 mm)
303⁄4 in. (781 mm)
■
■
■
■
■
351⁄2 in. (902 mm)
495⁄8 in. (1262 mm)
397⁄8 in. (1012 mm)
521⁄2 in. (1332 mm)
Floor at installation site must be level.
Cold water line in place. (page 63)
2 in. (50 mm) drain connection installed.
Max. drain height for floor units: 4 in. (100mm)
Electrical power supply/protective measures installed and sized correctly.
(page 60-61)
3) Remove all cartons, packing materials, documents etc. from the interior cabinet.
4) Remove grid shelves/trolley from cabinet.
5) Take unit off the pallet.
■ Moving unit without pallet: Sizes 6, 10, 1020 (Fig. 1)
59
■ Moving unit without pallet: Sizes 20, 40 (Fig. 2)
INSTALLATION
continued
Fig. 3
Unit weights:
LCS 6:
270 lbs. (123 kg)
LCG 6
335 lbs. (152 kg)
LCS 10
334 lbs. (152kg)
LCG 10
384 lbs. (174 kg)
LCS 1020
484 lbs. (220 kg)
LCG 1020
584 lbs. (265 kg)
LCS 20
686 lbs. (312 kg)
LCG 20
798 lbs. (362 kg
LCS 40
972 lbs. (442 kg)
LCG 40
888 lbs. (403 kg)
6) Installation models 6, 10, 1020
■ Place floor stand at the installation place and level by adjusting legs. (Fig. 3).
■ Minimum clearance required to neighboring equipment or walls. (page 59)
■ Place the unit on top of the stand. The unit’s legs must be centered on
the locating pins of the stand (Fig. 4).
■ Unit must be level (Fig. 5).
7) Installation models 20, 40
Fig. 4
Fig. 5
■ The unit must be secured against shifting on the floor by means of floor
fixtures (Fig. 6). If floor fixtures are glued to the floor (use polyurethane
glue or similar), remove all grease from the floor first.
■ Place the unit at its final location and level by adjusting legs. (Fig. 5).
■ Minimum clearance required to neighboring equipment or walls. (page 59)
■ The area of floor under the unit where Mobile Oven Racks will roll in
must be level or door will not seal. (Fig. 7).
Electrical
8) Electrical connection
Fig. 6
■
■
■
■
■
■
Connect the unit only according to the information given on the data plate.
Observe all regulations of your local Electrical Code.
The appliance may only be connected by a licensed electrician.
Each appliance requires an independent fused power supply line.
Connection via GFI circuit breaker is advisable.
On-site installation: provide accessible all-pole disconnection device with
minimum of 1⁄8 in. (3 mm) contact gap (not required for 120v gas units.)
■ Connect appliance to ground.
■ Special voltages on request. Circuit diagram is located behind the operator
panel.
Connected load for electric units:
Fig. 7
Amps
Model
KW
LCS-6
10
LCS-10
19
53
45.8
31.5
87.5
75.9
LCS-20
38
105.6
91.5
LCS-40
63
175.1
151.8
LCS-1020
208v 3Phase
28
240v 3 Phase
24
208v 1 Phase
48
240v 1 Phase
42
60
INSTALLATION
Electrical requirements of gas units:
Fig. 8
Model
Voltage
Phase
Cycle/Hz
KW
LCG-6
120
1
60
1
LCG-10
120
1
60
1
LCG-1020
208/240
1
60
1.5
LCG-20
208/240
1
60
1.6
LCG-40
208/240
3
60
3.5
Choose conductor size according above tables and your local regulations.
L L L N
1 2 3
IMPORTANT
Gas units are voltage specific. Supply voltage must match voltage rated on data plate.
■ Gas units are supplied with grounded power cord and plug.
■ Electric units are NOT supplied with power cord.
Fig. 9
To connect power supply for electric units, models 6, 10:
■ Open the operator panel. (Fig. 8)
■ Insert power cord through cable inlet under left side of unit to desired
length and secure the cable connection tight. (Fig. 9)
■ The circuit diagram is located behind the control panel.
Cable
Inlet
To connect power supply for electric units, models 1020, 20, 40:
■ Access power connection terminals by removing left side panel.
■ Insert power supply cable through cable inlet under left side of unit to desired
length and secure the cable connection tight. (Fig. 9)
■ Connect supply wires as follows:
Fig. 10
240 volt tap
Gray terminals:
Common tap
208 volt tap
Blue terminal:
Yellow/Green terminal:
L1, L2, L3, phase sequence
does not need to be observed
Neutral (if applicable)
Ground
IMPORTANT
Fig. 11
In some areas Henny Penny Electric Combis are shipped set up for 240 volts, but
can be converted to 208 volt operation. If conversion is necessary the unit must be
reset and calibrated.
Jumper
wire
Terminal
location
K3.1 relay
61
Convert from 240 volt to 208 volt operation
■ Disconnect unit from power supply source.
■ Open service door (Fig. 8) by loosening fastener at top of the unit over the
control panel using a 5 mm Allen wrench. A rubber grommet must first be
removed to access the bolt.
■ Move transformer primary lead from the 240v tap to the 208v tap (Fig. 10).
■ Open left side panel and locate relay K3.1 (Fig. 11).
■ Remove the jumper wire from the appropriate terminal positions. The
terminals on K3.1 relay socket are numbered. Use the chart below to
determine from which terminals to disconnect jumpers.
Model
Terminal Positions
LCG-6
5 and 6
LCG-10
5 and 6
LCG-1020
5 and 6
LCG-20
6 and 7
LCG-40
5 and 6
■ Once conversion has been completed, a “total reset” of the CPU-PCB must be
done.
Record all end-user (custom) programs before undertaking a Total Reset.
■ Secure all panels and covers.
Total reset
■ Turn on unit.
■ Press and hold IQT Sensor key, IQT key, and PROG/START
simultaneously and turn unit off.
■ Release all keys. Wait at least 4 seconds and turn unit on.
NOTE: With total reset procedure all custom programs are deleted. After a total
reset, 12:00 or 13:00 will be indicated on the timer display. Real time must be
reset. To set clock to actual time, see page 50.
Humidity calibration
■ The interior cabinet must be clean. If it is not, wipe clean.
■ The interior cabinet temperature must be below 122°F (50°C) and the
cabinet must be dry.
■ Turn on unit.
■ Open cabinet door.
■ Select any cooking mode.
■ Access diagnostic program by pressing TEMPERATURE key, IQT
Sensor key, and IQT key simultaneously until the word “VERSION”
appears next to the IQT key.
■ Use Central Dial to select CALIBRATE.
■ Close cabinet door.
■ To start calibration press PROG/START and TEMPERATURE key
simultaneously.
■ Calibration starts automatically and lasts 45-60 minutes.
■ After calibration, unit must be switched off for 5 seconds before using again.
■ During calibration, several values will be shown on the display.
■ Once calibration begins, do not interrupt the process.
■ Do not open door until calibration is complete.
After calibration, very hot steam–around 392°F (200°C)–remains in the cabinet.
When opening the cabinet door hot steam will escape, and burns could result.
62
INSTALLATION
Water supply
9) Drain Connection (WA)
Fig. 12
■ For drain connection (Fig. 12) use only steam temperature resistant pipe,
diameter 2 in. (50 mm) and constant slope 5%. No hose should be used.
■ Direct drain connection is possible, ventilated gap is an integrated part of the
appliance (Fig. 13).
■ Drain pipe should be supported to the wall/floor.
■ Max. water discharge rate during Auto Flush:11 gal./min. (0.7 liter/sec.)
■ Average drain water temperature: 150°F (65°C).
WA
Fig. 13
10) Water Connection (WZ)
WA
■
■
■
■
Fig. 14
■
WZ
C
B
A
■
■
■
■
Fig. 15
WZ1 WZ2
■
■
■
■
Observe all local plumbing codes.
Flush water line before connecting the water supply to the unit.
Connect to cold, potable water only.
Operational water pressure: MIN: 30 psi (200kPa) MAX: 88 psi (600kPa).
RECOMMENDED: 44 psi (300kPa). Water flow must be at least 3 gal/min
(12 l/min).
Water connection supplied by customer: 1⁄2 in. pressure hose with R 3⁄4 in. tapered
fitting.
Customer fitted shut-off valve for each appliance.
Water conductivity: 50-2000 µS, lower conductivity on request.
Maximum chloride concentration (Cl-): below 150 ppm (150 mgr/liter)
at any time.
For conductivity above 2000 µS or higher chloride concentration use
hydrogen-ion exchanger (A in Fig. 15) in the supply water line.
Water Redox-Potential must be below 300mV at any time.
For higher Redox Potential use Active Carbon Filter (B in Fig. 14). Observe
maintenance period of active carbon filter.
Use a 3 micron (0.08mm) particle filter (C in Fig. 14) to prevent excessive
soiling of the supply water.
Recommended test instruments: Cl2 Tester (swimming pool accessories),
conductivity tester, redox meter.
Optional Treated Water Connection
■ To connect a dual water supply–treated soft water or warm water below
■ 140°F (60°C)–disconnect T-water connection at the two water inlets (Fig. 15).
Connect treated water to water inlet marked WZ2 and standard water to inlet
marked WZ1. Treated water must comply with the above-mentioned water
specifications.
NOTE: If using external filter to treat hard water: Contact your Henny Penny
distributor for average water consumption when using CleanJet. Increases in
average water consumption may exceed specifications of external filters and may
affect the frequency of filter maintenance. (See page 57)
63
INSTALLATION
General
11) Technical Data
Working place specific noise level: <70dB
Average water consumption during operation:
Model 6:
Model 10:
Model 1020:
Model 20:
Model 40:
3.17 gal/hr (0.2 l/min.)
6.7 gal/hr (0.42 l/min.)
10.9 gal/hr (.069 l/min.)
13.2 gal/hr (0.83 l/min.)
15.8 gal/hr (1.0 l/min.)
Heat emission:
Model
Latent
Sensible
LCS/G-6
.64 W (2.30 kJ)/hr
84 W (2.93 kJ)/hr
LCS-G-10
1.05 W (8.50 kJ)/hr
1.4 W (5.00 kJ)/hr
LCS/G-1020
1.67 W (6.00 kJ)/hr
2.4 W (8.50 kJ)/hr
LCS-G-20
2.13 W (7.67 kJ)/hr
2.67 W (9.60 kJ)/hr
LCS/G-40
3.7 W (13.35 kJ)/hr
4.26 W (15.34 kJ)/hr
Ventilation
Contact your local regulatory agency for ventilation requirements. If a ventilation
hood is installed, observe the following:
■ The standards of the local authority.
■ The hood should protrude 12-20 in. (300-500 mm) over the front of the
appliance.
■ The integrated grease filter should be in the protruding part of the hood.
Specifications and technical descriptions in this applications manual are subject to
change without prior notice.
Gas supply
12) Gas supply (for LCG units only)
The ClimaPlus gas model is available for either natural or propane gas. Check
the data plate on the left corner of the unit to determine the proper gas supply
requirement.
Model
Gas Line
LCG-6
3
LCG-10
Connection
⁄4 in.
1
3
⁄4 in.
3
LCG-1020
1 in.
3
LCG-20
1 in.
3
LCG-40
1 ⁄4 in.
1 in.
1
⁄2 in.
⁄4 in.
⁄4 in.
⁄4 in.
64
INSTALLATION
continued
DO NOT attempt to use any type of gas other than that specified on the data
plate. Incorrect gas supply could result in fire or explosion resulting in severe
injuries and/or property damage.
To avoid possible serious personal injury, the installation must conform with local
codes, or in the absence of local codes, with the National Fuel Gas Code, ANSI
Z223.1-1988 or latest edition. In Canada, CAN/CGA-B 149.1 Natural Gas
Installation Code CAN/CGA-B 149.2 Propane Installation Code.
■ All Henny Penny Combi-Steamers are equipped with two heat exchanger
systems. One is responsible for steam production, the second for dry heat. Each
individual heat exchanger is heated with a separate burner assembly.
■ Separate gas valves for the steam burner and dry heat burner are responsible for
the gas supply to the individual burners. All LCG models have manual shut-off
valves that can be accessed from the left without tools. To operate the valves,
unscrew the two knurled screws and remove the service cover. Open or close
manual valves as desired.
Gas Leak Test
■ After piping and fittings have been installed, check for gas leaks. A simple
checking method is to turn on the gas and brush all connections with a soap
solution. The appearance of bubbles indicates escaping gas. In this event, the
piping connection must be redone until no bubbles occur.
Never use a lighted match or open flame to test for gas leaks. Escaping gas could
result in fire or explosion resulting in severe injuries and/or property damage.
Gas pressure
■ The gas pressure should be measured when all other gas appliances in the
kitchen are on high flame. The minimum and maximum incoming line flow
pressures should be as follows:
Natural: 7-10 in. water column (18-25 mb)
Propane: 12-14 in. water column (30-35 mb)
65
INSTALLATION
continued
During pressure testing note the following:
1. The unit and its individual shut-off valves must be disconnected from the gas
supply piping system during any pressure testing of that system when test
pressures exceed 1⁄2 psig (3.45kPa). Turn OFF main gas shut-off valve or main
gas supply line.
2. The unit must be isolated from the gas supply piping system by closing its
individual manual shut-off valves during any pressure testing of the gas supply
piping system at test pressure equal to or less than 1⁄2 psig (3.45kPa).
3. If incoming pressure is over 14 in. water column (35 mb) a separate regulator
must be installed ahead of the manual gas shut-off valve.
To prevent damage to the control valve regulator, the first time the gas valve knob is
turned to the ON position, it is very important to turn the knob very slowly.
NOTE
After turning on the gas, the manual shut-off valve must remain open, except
during pressure testing as outlined above, or when necessary during service
maintenance.
■ Incoming pressure reading can be taken by installing a gas pressure gauge on
the front of the unit’s main gas valves test port. This should be done with all
gas appliances in operation on the same gas supply line. Should the manifold
pressure drop below the desired level, consult your local gas utility service.
Gas Hook-up
RIGHT
WRONG
A minimum pull of appliance
away from wall is acceptable in
order to disconnect hook-up.
Maximum pull prior to disconnect
will result in kinked ends and reduce
hose and connector life.
66
INSTALLATION
continued
Utilize elbows when necessary to avoid sharp kinks or excessive bending. For ease of
movement, install with a “lazy” loop. Gas appliance must be disconnected prior to
maximum movement. (Minimum movement is permissible to disconnect gas line.
Couplings and hose should be installed in the
same plane as shown at left. DO NOT OFFSET
COUPLINGS. This results in twisting and undue
torsion causing premature failure.
Correct way to install metal hose for vertical traverse.
Note single, natural loop. Allowing a sharp bend,
shown at right, strains and twists the metal hose to
a point of early failure at the coupling.
Maintain the minimum or larger bending diameter
between couplings for the longest life. Couplings too
close together, as shown at right, create double bends
causing work fatigue failure of fittings.
In all installations where self-draining is not necessary,
connect metal hose in a vertical loop. DO NOT
CONNECT METAL HOSE HORIZONTALLY
unless self-draining is necessary. Then use support on
lower plane as show at left.
Cable Restraint
Please refer to the illustration at left when installing cable restraint on all moveable
gas appliances
Eye-bolt is to be secured to the building using acceptable building practices.
Dry wall construction
Secure eye-bolt to a framing stud. DO NOT attach to dry wall only. Locate eye-bolt
at the same height as the gas service approximately 6 in. (150 mm) to either side of
service. Cable restraint must be at least 6 in. (150 mm) shorter than flexible gas line.
67
Cooking Guides
The following section offers basic guidelines for preparing a wide variety
of popular menu items in the Henny Penny ClimaPlus Combi.
Menu items are charted in a format that covers quantities, proper containers, times,
temperatures, ClimaPlus Control settings, and whether probe cooking or and/or
additional items should be employed. As you gain experience with this equipment,
you may wish to adjust these parameters or to add items that better suit the needs
of your foodservice operation and the preferences of your customers. For your
convenience, a blank chart has been included at the end of the section to assist you
in recording data for your individual recipes.
Key to terms and abbreviations
Units of measure–temperature
Temperatures in the charts appear as number values without degree marks or
F/C. Unless other wise indicated, temperatures measured in degrees Fahrenheit
appear first; the Celsius equivalent follows immediately enclosed by parentheses.
212 (100)
=
212°F (100°C)
Units of measure-weight
Weights for quantities of food in the charts often appear as number values
without unit measure abbreviations. Unless otherwise indicated, weight values
are always represented in pounds and kilograms. The value representing weight
or range of weight measured in pounds appears first; the metric equivalent in
kilograms follows immediately enclosed by parentheses.
5-7 (2.3-3.2) =
5-7 lbs. (2.3-3.2 kg)
Total Time
As a convenience, cooking times for items with multiple time-cook only steps
have been totaled and appear as Total Time. This cannot be done when any step
includes probe cooking, preheating or an IQT program.
ALT
=
Ctrl
=
Containers
Perf
Pan
Sheet, Sht
Alum
Enamel, Enam
Grid
Chicken grid
Drip pan
=
=
=
=
=
=
=
=
Designates an alternate method that can be used in
place of the steps listed.
ClimaPlus is controlled by the IQT program and cannot
be adjusted by the operator.
Perforated
Stainless steel steam table pan
Sheet pan
Aluminum
“Granite” style enamel cooking pan
Grid rack that fits right into the shelf
Special grid for cooking whole birds upright
Single pan set on bottom rack to catch drippings
from above
68
Meat & Poultry
Item/Prep notes
Container
Max yield
Cooking stages and suggested parameters
Rotisserie Style Chicken
Chicken grid
8 birds
Step
Mode
Temp
2 ⁄2-3 lb. whole birds. Season.
Time cook–check for internal
temp. 185 (85).
Or, use IQT +Profile.
Per load
Per load
1
Combi
350 (177)
13
—
80
6
2
16 birds
2
Combi
360 (183)
13
—
60
10
3
24 birds
3
Dry Heat
370 (188)
13
—
30
1020
6
48 birds
20
5
40 birds
40
12
96 birds
185 (85)
Ctrl
1
Total Time
ALT
IQT +Profile
Probe Temp
Clima %
39
Browning Level: 6
Item/Prep notes
Container
Max yield
Baked Chicken, pieces
1
⁄2 sheet pan
16 pieces, mixed Step
Mode
Temp
Eight cut. Season.
Time cook–check for internal
temp. 185 (85).
Or, use IQT +Profile.
Per load
Per load
1
Combi
340 (171)
10
—
100
6
6
96 pieces
2
Combi
360 (182)
10
—
60
10
10
160 pieces
3
Combi
380 (194)
5
—
30
1020
20
320 pieces
20
20
320 pieces
40
40
640 pieces
Item/Prep notes
Container
Max yield
Oven Fried Chicken
1
⁄2 sheet pan
16 pieces, mixed Step
Mode
Temp
Eight cut. Bread and prepare to
oven fried recipe. Grease pan
lightly.
Time cook–check for internal
temp. 185 (85).
Or, use IQT +Profile.
Per load
Per load
1
Combi
385 (196)
6
6
96 pieces
2
Combi
415 (213)
10
10
160 pieces
1020
20
320 pieces
20
20
320 pieces
40
40
640 pieces
Container
Max yield
Cooking stages and suggested parameters
Item/Prep notes
69
Time
Cooking stages and suggested parameters
Time
Total Time
Probe Temp
Clima %
25
Cooking stages and suggested parameters
Time
Probe Temp
Clima %
15
—
60
10
—
20
25
Total Time
Turkey, whole
Grid/drip pan
1 bird
Step
Mode
Temp
12-18 lb. (5.5-8 kg) bird.
Wash, stuff, season, baste.
Probe cook or IQT +Profile.
Per load
Per load
1
Combi
280 (138)
—
165 (74)
80
6
2
2 birds
2
Combi
340 (171)
—
185 (85)
50
10
3
3 birds
1020
6
6 birds
20
6
6 birds
40
12
12 birds
185 (85)
Ctrl
ALT
IQT +Profile
Time
Browning Level: 5
Probe Temp
Clima %
Item/Prep notes
Container
Max yield
Cooking stages and suggested parameters
Turkey Breast, boneless
Grid/drip pan
2 per grid
Step
Mode
Temp
8-10 lb. (3.6-4.5 kg) boneless
breast.
Season.
With bone-in breasts, increase
final core temp to 185 (85).
Per load
Per load
1
Combi
280 (138)
—
145 (63)
80
6
3
6 breasts
2
Combi
345 (174)
—
165 (74)
50
10
5
10 breasts
1020
10
20 breasts
20
10
20 breasts
40
20
40 breasts
Time
Probe Temp
Clima %
Item/Prep notes
Container
Max yield
Cooking stages and suggested parameters
Steaks, chops
Grid
10-12 steaks
Step
Season. Preheat grids to
575 (300). Vary time for
thickness and desired
doneness.
Pork, add 3-5 min.
Serving tip: Plate grid side up.
Per load
Per load
6
6
60-72
10
10
100-120
1020
20
200-240
20
20
200-240
40
40
400-480
Item/Prep notes
Container
Max yield
Roast Beef
Rib Roast (Prime Rib)
Grid/drip pan 1 per grid
Mode
Temp
1
Dry Heat
Preheat 575 (300)
2
Dry Heat
485 (251)
Time
Probe Temp
7-10
—
Clima %
20
Cooking stages and suggested parameters
Mode
Temp
Per load
Per load
Step
1
Dry Heat
280 (138)
—
130 (54)
60
10-18 lb. (4.5-8 kg) roast.
Season.
Probe cook or IQT +Low-T.
For lighter or darker crust,
adjust IQT +Low-T sear
temperature accordingly.
6
3
30-54 (13.5-24)
2
Dry Heat
340 (171)
—
5
50-90 (22.5-40)
1020
10
100-180 (45-80)
135 (57) rare
145 (63) medium
155 (68) well
20
10
20
10
100-180 (45-80)
40
20
200-360 (90-160)
135-155 (57-68)
Ctrl
Item/Prep notes
Container
ALT
IQT +Low-T
Time
Sear: 360 (182)
Max yield
Cooking stages and suggested parameters
Probe Temp
Beef Tenderloin
Grid/drip pan
2 per grid
Step
Mode
Temp
5-8 lb. (2.3-3.6 kg) pieces.
Season.
Per load
Per load
1
Dry Heat
280 (138)
—
120 (49)
2
Dry Heat
340 (171)
—
135 (57) rare
145 (63) medium
155 (68) well
6
3
30-48 (14-22)
10
5
50-80 (23-36)
1020
10
100-160 (46-72)
20
10
100-160 (46-72)
40
20
200-320 (92-144)
Item/Prep notes
Container
Hamburgers
1
4 oz. frozen patties. Season.
For fresh patties, use 60%
ClimaPlus setting.
Per load
Per load
6
6
48 patties
10
10
80 patties
1020
20
160 patties
20
20
160 patties
40
40
320 patties
⁄2 sheet pan
Max yield
1
Mode
Temp
Time
Probe Temp
Combi
425 (218)
8-12
—
Item/Prep notes
Container
Meatballs
3
⁄4 in. enamel 5-7 lbs. (2.3-3.2 kg) Step
Mode
Temp
1-2 ⁄2 oz. each meatball.
Mix ingredients and form
according to recipe.
Per load
Per load
Dry Heat
350 (177)
6
6
30-42 (14-19)
10
10
50-70 (23-32)
1020
20
100-140 (46-64)
20
20
100-140 (46-64)
40
40
200-280 (92-128)
1
Probe Temp
Clima %
60
Cooking stages and suggested parameters
8 patties per pan Step
Max yield
Time
Clima %
Clima %
40
Cooking stages and suggested parameters
1
Time
10
Probe Temp
—
Clima %
20
70
Meat & Poultry continued
Item/Prep notes
Container
Corned Beef Brisket, raw
Grid/drip pan 1 piece per grid
Max yield
Texture is more important
than core temperature. Allow
sufficient cook time for brisket
to become very tender.
Per load
Per load
6
3
3 briskets
10
5
5 briskets
1020
10
10 briskets
20
10
10 briskets
40
20
20 briskets
Cooking stages and suggested parameters
Step
Mode
Temp
1
Combi
280 (138)
Item/Prep notes
Container
Max yield
Beef Stew
21⁄2 in. pan
8-12 lbs. (3.6-5.5 kg) Step
Mode
Temp
Step 1: Brown meat with
Dry Heat mode.
Step 2: Mix all ingredients,
cover and simmer to taste.
Per load
Per load
1
Dry Heat
320-360 (160-182)
6
6
48-60 (22-33)
2
Combi
280 (138)
10
10
80-120 (36-55)
1020
20
160-240 (72-110)
20
20
160-240 (72-110)
40
40
320-480 (144-220)
Max yield
Time
Probe Temp
—
Clima %
165-170 (74-77)
100
Cooking stages and suggested parameters
Time
Add’l Functions
Clima %
5
—
30
1-1.5 hrs.
Half Speed Fan*
70
* If unavailable, use Pulse Fan.
Item/Prep notes
Container
Meatloaf
2 ⁄2 in. pan
8-10 lbs. (3.6-4.5 kg) Step
Mode
Temp
Mix ingredients and form
according to recipe.
Molds can be substituted
for pans.
Probe cook or IQT +Profile.
Per load
Per load
1
Moist
180 (82)
15
—
100
6
3
24-30 (11-13.5)
2
Combi
280-320 (138-160)
—
150 (66)
40
10
5
40-50 (18-22.5)
3
Dry Heat
335 (168)
10
—
20
1020
10
80-100 (36-45)
20
10
80-100 (36-45)
40
20
160-200 (72-90)
155 (68)
Ctrl
1
Cooking stages and suggested parameters
ALT
IQT +Profile
Time
Browning Level: 4
Probe Temp
Clima %
Pork
71
Item/Prep notes
Container
Max yield
Cooking stages and suggested parameters
Ribs (pork or beef)
Grid
2 slabs
Step
Mode
Temp
Time
Probe Temp
Season or marinate.
Per load
Per load
1
Moist
180 (82)
12-15
—
100
6
6
12 slabs
2
Combi
280 (138)
15-20
—
70
10
10
20 slabs
3
Dry Heat
350 (177)
15
—
30
1020
20
40 slabs
20
20
40 slabs
40
40
80 slabs
Total Time
Clima %
42-50
Item/Prep notes
Container
Max yield
Cooking stages and suggested parameters
Bacon
1
⁄2 sheet pan
Approx.: 1 (.5)
Step
Mode
Temp
Tray up. Approximately
1 lb. (.5 kg) per pan.
Per load
Per load
1
Combi
400 (204)
6
6
6 (3)
10
10
10 (5)
1020
20
20 (10)
20
20
20 (10)
40
40
40 (20)
Time
5-7
Add’l Functions
Half Speed Fan*
Clima %
40
* If unavailable, use Pulse Fan.
Item/Prep notes
Container
Max yield
Sausage, links or patties
1
⁄2 sheet pan
1.5 (.7) per pan Step
Mode
Temp
Time
Probe Temp
Per load
Per load
Combi
325 (163)
8-12
—
6
6
9 (4.2)
10
10
15 (7)
1020
20
30 (14)
20
20
30 (14)
40
40
60 (28)
Max yield
Cooking stages and suggested parameters
1
Item/Prep notes
Container
Smoked Sausage
Grid or 1⁄2 sheet 4 (1.8) per grid Step
Mode
Temp
Time
Probe Temp
Time cook or probe cook.
Per load
Per load
1
Combi
325 (163)
12-15
—
6
6
24 (11)
ALT
Combi
325 (163)
—
165 (74)
10
10
40 (18)
1020
20
80 (39)
20
20
80 (39)
40
40
160 (78)
Max yield
Clima %
30
Cooking stages and suggested parameters
Clima %
30
Item/Prep notes
Container
Cooking stages and suggested parameters
Italian Sausage, Bratts
Grid or ⁄2 sheet 4 (1.8) per grid Step
Mode
Temp
Per load
Per load
1
Moist
180 (82)
7
—
100
6
6
24 (11)
2
Combi
280 (138)
7
—
40
10
10
40 (18)
3
Dry Heat
350 (177)
5
—
20
1020
20
80 (39)
20
20
80 (39)
40
40
160 (78)
Item/Prep notes
Container
Max yield
Pork Loin
Grid/drip pan 1 per grid
1
8-12 lb. (3.6-5.5 kg) loin roasts. Per load
Season.
6
3
Total Time
ALT 3 Dry Heat
Time
Probe Temp
Clima %
19
—
165 (74)
Cooking stages and suggested parameters
Step
Mode
Temp
Per load
1
Moist
212 (100)
10
—
100
24-36 (11-16.5)
2
Combi
320 (160)
—
155 (68)
60
3
Combi
350 (177)
—
165 (74)
35
10
5
40-60 (18-27.5)
1020
10
80-120 (36-55)
20
10
80-120 (36-55)
40
20
160-240 (72-110)
Item/Prep notes
Container
Pork Tenderloin
Grid or enamel 8-12 pieces
Max yield
Season.
Per load
Per load
6
6
48-72
10
10
80-120
1020
20
160-240
20
20
160-240
40
40
320-480
Time
Probe Temp
Clima %
Cooking stages and suggested parameters
Step
Mode
Temp
1
Combi
320 (160)
Time
—
Probe Temp
165 (74)
Clima %
40
72
Pork continued
Item/Prep notes
Container
Max yield
Cooking stages and suggested parameters
Pork Roast
Fresh Ham, large
Grid/drip pan
2 per grid
Step
Per load
Per load
1
6
2
4 roasts
10
3
6 roasts
1020
6
12 roasts
20
6
12 roasts
40
12
24 roasts
Item/Prep notes
Container
Max yield
Smoked ham
Grid/drip pan 1 per grid
12-15 lbs. (5.5-6.8 kg) hams.
Per load
Per load
6
2
2 hams
10
3
3 hams
1020
6
6 hams
20
6
6 hams
40
12
12 hams
8 lbs. (3.6 kg) or more.
Season.
IQT +Profile
Mode
Temp
Time
IQT +Profile Browning Level:6
Probe Temp
165 (74)
Clima %
Ctrl
Cooking stages and suggested parameters
Step
Mode
Temp
1
Combi
250 (121)
Time
—
Probe Temp
165 (74)
Clima %
40
Fish, Seafood
Item/Prep notes
Container
Max yield
Cooking stages and suggested parameters
Fish, poached
Perf pan
8 lbs. (3.6 kg)
Step
Mode
Temp
Season.
Per load
Per load
1
Moist
180 (82)
6
6
48 (21.6)
10
10
80 (36)
1020
20
160 (72)
20
20
160 (72)
40
40
320 (144)
—
Probe Temp
140 (60)
Item/Prep notes
Container
Max yield
Cooking stages and suggested parameters
Fish, baked
1
⁄2 sheet pan
5 lbs. (2.3 kg)
Step
Mode
Temp
Time
Probe Temp
Lightly grease pan. Season
and top.
Per load
Per load
1
Combi
345 (174)
8-12
—
6
6
30 (14)
10
10
50 (23)
1020
20
100 (46)
20
20
100 (46)
40
40
200 (92)
Item/Prep notes
73
Time
Container
Max yield
Cooking stages and suggested parameters
Fish steaks, grilled
Grid
8-12 steaks
Step
Mode
Temp
11⁄2 - 21⁄2 in. (38-63 mm)
steaks. Season. Preheat grid
to 575 (300).
Per load
Per load
1
Combi
Preheat 575 (300)
6
3
24-36 steaks
2
Combi
485 (252)
10
5
40-60 steaks
1020
10
80-120 steaks
20
10
80-120 steaks
40
20
160-240 steaks
Time
Probe Temp
Clima %
100
Clima %
60
Clima %
90
6-8
—
40
Item/Prep notes
Container
Max yield
Cooking stages and suggested parameters
Breaded Fish Pieces
3
⁄4 in. enamel
21⁄2 lbs. (1.1 kg)
Step
Mode
Temp
Lightly grease pan.
Spray top of product with
shortening prior to cooking.
Per load
Per load
1
Combi
425 (218)
6
6
15 (6.6)
10
10
25 (11)
1020
20
50 (23)
20
20
50 (23)
40
40
100 (45)
Time
Probe Temp
6-8
—
Item/Prep notes
Container
Max yield
Cooking stages and suggested parameters
Cocktail Shrimp
Perf pan
5 lbs. (2.3 kg)
Step
Mode
Temp
Time
Probe Temp
Season. Cook in shell.
Remove and blast-chill
immediately.
Per load
Per load
1
Moist
180 (82)
6-10
—
6
6
30 (13.8)
10
10
50 (23)
1020
20
100 (46)
20
20
100 (46)
40
40
200 (92)
Item/Prep notes
Whole Lobster, steamed
Item/Prep notes
Container
Max yield
Cooking stages and suggested parameters
Step
Mode
Temp
Time
Probe Temp
1
Moist
212 (100)
10-14
—
Perf pan
3-4 lobsters
Per load
Per load
6
3
9-12
10
5
15-20
1020
10
30-40
20
10
30-40
40
20
60-120
Container
Max yield
Cooking stages and suggested parameters
Clams, Mussels
Perf pan
3 lbs. (1.4 kg)
Step
Mode
Temp
Time
Probe Temp
Cook in shell. Ladle butter,
sauce over after cooking.
Per load
Per load
1
Moist
212 (100)
8-10
—
6
3
9 (4.2)
10
5
15 (7)
1020
10
30 (14)
20
10
30 (14)
40
20
60 (28)
Item/Prep notes
Container
Max yield
Cooking stages and suggested parameters
Scallops, broiled
Enamel
3 lbs. (1.4 kg)
Step
Mode
Temp
Drain and clean. Dredge in
flour. Season. Lightly oil pan
and preheat to 425 (218).
Stir into pans when loading.
Per load
Per load
1
Combi
385 (196)
6
3
9 (4.2)
10
5
15 (7)
1020
10
30 (14)
20
10
30 (14)
40
20
60 (28)
Time
Probe Temp
4-8
—
Clima %
30
Clima %
100
Clima %
100
Clima %
100
Clima %
30
74
Meats, Special Cuts
Item/Prep notes
Container
Max yield
Cooking stages and suggested parameters
Cutlets, breaded
3
⁄4 in. enamel
12-15 pieces
Step
Mode
Temp
Bread. Preheat pans to
575 (300).
Spray top of product with
shortening prior to cooking.
Per load
Per load
1
Combi
Preheat 575 (300)
6
6
72-90
2
Combi
425 (218)
10
10
120-150
1020
20
240-300
20
20
240-300
40
40
480-600
Time
Probe Temp
6-8
—
Clima %
90
Item/Prep notes
Container
Max yield
Cooking stages and suggested parameters
Medallions
3
⁄4 in. enamel
12-15 pieces
Step
Mode
Temp
Season or marinate. Preheat
pan to 575 (300).
Per load
Per load
1
Combi
Preheat 575 (300)
6
6
72-90
2
Combi
485 (252)
10
10
120-150
1020
20
240-300
20
20
240-300
40
40
480-600
Time
Probe Temp
30
Clima %
90
6-8
Item/Prep notes
Container
Max yield
Cooking stages and suggested parameters
Scaloppini
3
⁄4 in. enamel
12-15
Step
Mode
Temp
Dredge in seasoned flour.
Mist with oil. Oil pan lightly
and preheat to 575 (300).
Serving tip: Plate pan side up.
Per load
Per load
1
Combi
Preheat 575 (300)
6
6
72-90
2
Combi
485 (252)
10
10
120-150
1020
20
240-300
20
20
240-300
40
40
480-600
Time
—
Probe Temp
20
Clima %
90
5-7
—
30
Potatoes
Item/Prep notes
Container
Steamed Potatoes
21⁄2 in. perf pan 6 lbs. (2.7 kg)
Wash and cut. Preheat.
Per load
6
6
10
10
60 (27)
1020
20
120 (54)
20
20
120 (54)
40
40
240 (108)
Item/Prep notes
Baked Potatoes
80 ct.
Wash, oil lightly or season.
75
Container
Max yield
Cooking stages and suggested parameters
Step
Mode
Temp
Per load
1
Combi
Preheat 280 (138)
36 (16)
2
Moist
230 (110)
Max yield
⁄2 sheet or grid 20 potatoes
Probe Temp
30-35
—
Clima %
90
100
Cooking stages and suggested parameters
Step
Mode
Temp
Per load
Per load
1
Combi
Preheat 525 (270)
6
6
120 potatoes
2
Combi
385 (196)
10
10
200 potatoes
1020
20
400 potatoes
20
20
400 potatoes
40
40
800 potatoes
1
Time
Time
Probe Temp
Clima %
90
45
—
40
Item/Prep notes
Roasted Potatoes
Cut, oil, season.
Container
Max yield
⁄2 sht or enam 6 lbs. (2.7 kg)
1
Cooking stages and suggested parameters
Step
Mode
Temp
Per load
Per load
1
Combi
Preheat 525 (270)
6
6
36 (16)
2
Combi
425 (218)
10
10
60 (27)
1020
20
120 (54)
20
20
120 (54)
40
40
240 (108)
Time
Probe Temp
Clima %
90
20
—
20
Breads
Item/Prep notes
Proofing
Lightly grease pan.
Proof until dough doubles in
size.
Item/Prep notes
Bread Dough
Proof first.
Lightly grease pan.
Item/Prep notes
Rolls
4 oz. rolls.
Proof first.
Lightly grease pan. Egg wash
rolls.
Container
⁄2 sheet pan
1
Max yield
Cooking stages and suggested parameters
2 lbs. (.9 kg)
Step
Mode
Temp
Time
1
Moist
95 (35)
see note
Per load
Per load
6
3
6 (2.7)
10
5
10 (4.5)
1020
10
20 (9)
20
10
20 (9)
40
20
40 (18)
Container
⁄2 sheet pan
1
Cooking stages and suggested parameters
2 lbs. (.9 kg)
Step
Per load
6
3
6 (2.7)
10
5
10 (4.5)
1020
10
20 (9)
20
10
20 (9)
40
20
40 (18)
Container
⁄2 sheet pan
1
1
Mode
Temp
Dry Heat
350 (177)
Time
15-20
Max yield
Cooking stages and suggested parameters
12-15 rolls
Step
Per load
Per load
6
3
36-45 rolls
10
5
60-75 rolls
1020
10
120-150 rolls
20
10
120-150 rolls
40
20
240-300 rolls
Clima %
—
100
Note: Proof until dough doubles in size.
Max yield
Per load
Probe Temp
1
Mode
Temp
Dry Heat
335 (168)
Time
15-17
Probe Temp
Clima %
—
70
Add’l Function
Steam Injection
Clima %
100
Item/Prep notes
Container
Max yield
Muffins
1
⁄2 sheet pan
1 dozen per pan Step
Cooking stages and suggested parameters
Mode
Temp
4 oz. muffins.
Lightly grease pan.
Per load
Per load
1
Dry Heat
335 (168)
5
Half Speed Fan*
80
6
3
3 dozen
2
Dry Heat
335 (168)
12-15
—
30
10
5
5 dozen
1020
10
10 dozen
20
10
10 dozen
40
20
20 dozen
Total Time
Time
17-20
Add’l Function
Clima %
* If unavailable, use Pulse Fan.
76
Breads continued
77
Item/Prep notes
Container
Max yield
Cooking stages and suggested parameters
Cinnamon Rolls
1
⁄2 sheet pan
2 lbs. (.9 kg)
Step
Proof first.
Lightly grease pan.
Per load
Per load
6
3
6 (2.7)
10
5
10 (4.5)
1020
10
20 (9)
20
10
20 (9)
40
20
40 (18)
Mode
Temp
1
Dry Heat
335 (168)
5
Half Speed Fan*
80
2
Dry Heat
335 (168)
10-13
—
30
Total Time
Time
Add’l Function
15-18
Clima %
* If unavailable, use Pulse Fan.
Item/Prep notes
Container
Max yield
Biscuits, frozen
1
⁄2 sheet pan
2 dozen per pan Step
Cooking stages and suggested parameters
Mode
Lightly grease pan.
Serving tip: Melted butter
may be brushed on biscuit
tops after cooking.
Per load
Per load
1
Preheat
6
3
6 dozen
2
Dry Heat
335 (168)
7
—
80
10
5
10 dozen
3
Dry Heat
335 (168)
15
—
20
1020
10
20 dozen
20
10
20 dozen
40
20
40 dozen
Temp
Time
Probe Temp
Clima %
—
Total Time
22
Item/Prep notes
Container
Max yield
Sheet Cake
Brownies
1
Cooking stages and suggested parameters
⁄2 sheet pan
54 2in. squares Step
Mode
Temp
Per load
Per load
1
Dry Heat
350 (177)
15
Half Speed Fan*
10
Lightly grease pan.
6
6
324 pieces
2
Dry Heat
340 (171)
20
—
10
10
10
540 pieces
1020
20
1080 pieces
20
20
1080 pieces
40
40
2160 pieces
Total Time
Time
Add’l Function
35
Clima %
* If unavailable, use Pulse Fan.
Item/Prep notes
Container
Max yield
Cookies
1
Cooking stages and suggested parameters
⁄2 sheet pan
1 dozen per pan Step
Mode
Temp
2 oz. cookies.
Lightly grease pan.
Per load
Per load
1
Dry Heat
335 (168)
3
Half Speed Fan*
20
6
6
6 dozen
2
Dry Heat
335 (168)
3-6
—
20
10
10
10 dozen
1020
20
20 dozen
20
20
20 dozen
40
40
40 dozen
Item/Prep notes
Container
Max yield
Cooking stages and suggested parameters
Strudel
Perf alum
2 per pan
Step
Mode
Temp
Brush with egg wash.
Per load
Per load
1
Combi
335 (168)
6
3
6
10
5
10
1020
10
20
20
10
20
40
20
40
Total Time
Time
Add’l Function
6-9
Time
45-55
Clima %
* If unavailable, use Pulse Fan.
Probe Temp
—
Clima %
60
Item/Prep notes
Container
Max yield
Cooking stages and suggested parameters
Cobbler
21⁄2 in. pan
12 lbs. (5.5 kg)
Step
Mode
Temp
According to recipe.
Per load
Per load
1
Combi
365 (185)
20
—
70
6
6
72 (33)
2
Dry Heat
345 (174)
40
—
25
10
10
120 (55)
1020
20
240 (110)
20
20
240 (110)
40
40
480 (220)
Item/Prep notes
Pie, fresh
Brush tops with egg wash.
Item/Prep notes
Container
⁄2 sheet pan
Mode
Temp
Per load
Dry Heat
335 (168)
6
3
6-9 pies
10
5
10-15 pies
1020
10
20-35 pies
20
10
20-35 pies
40
20
40-60 pies
Container
Max yield
Cooking stages and suggested parameters
12 lbs. (5.5 kg)
2 ⁄2 in. pan
Clima %
Cooking stages and suggested parameters
Per load
1
Step
Mode
Temp
Per load
Per load
1
Combi
280-300 (138-149)
6
3
36 (16.5)
2
Combi
10
5
60 (27.5)
3
Dry Heat
1020
10
120 (55)
20
10
120 (55)
40
20
240 (110)
1
Probe Temp
60
2-3 pies per pan Step
1
Bread Pudding
According to recipe.
Lightly grease pans.
Max yield
Total Time
Time
Time
35-45
Probe Temp
—
Clima %
30
Time
Probe Temp
40
—
80
320-340 (160-171)
30
—
50
350 (177)
10
—
20
Total Time
Clima %
80
Miscellaneous
Item/Prep notes
Container
Entrees, frozen
Brush with egg wash.
Item/Prep notes
21⁄2 in. pan
Cooking stages and suggested parameters
12 lbs. (5.5 kg)
Step
Mode
Temp
1
Combi
280-320 (138-160)
Per load
Per load
6
6
72 (33)
10
10
120 (55)
1020
20
240 (110)
20
20
240 (110)
40
40
480 (220)
Container
Entrees, fresh
Use also for thawed entrees.
Max yield
21⁄2 in. pan
Time
45-60
Max yield
Cooking stages and suggested parameters
12 lbs. (5.5 kg)
Step
Mode
1
Combi
Per load
Per load
6
6
72 (33)
10
10
120 (55)
1020
20
240 (110)
20
20
240 (110)
40
40
480 (220)
Temp
280 (138)
Time
—
Probe Temp
—
Probe Temp
165 (74)
Clima %
60
Clima %
40
78
Miscellaneous continued
Item/Prep notes
Vegetables, frozen
Item/Prep notes
Vegetables, fresh
Cut to desired serving size.
Container
Per load
Per load
6
6
54 (24)
10
10
90 (40)
1020
20
180 (80)
20
20
180 (80)
40
40
360 (160)
Container
21⁄2 in. perf. pan
Max yield
6 lbs. (2.7 kg)
Per load
Per load
6
6
36 (16)
10
10
60 (27)
1020
20
120 (54)
20
20
120 (54)
40
40
240 (108)
Step
Mode
Temp
1
Moist
212-225 (100-107)
Time
8-15
Probe Temp
—
Clima %
100
Cooking stages and suggested parameters
Step
Mode
Temp
1
Moist
212 (100)
Time
6-10
Probe Temp
—
Clima %
100
Container
Beans, dry
2 ⁄2 in. pan
6 lbs. (2.7 kg) dry
Step
Mode
Temp
Time
Probe Temp
Rinse and soak beans.
Stir every 10 to 15 minutes
during step 2.
Per load yield is indicated in
dry wt./cooked wt.
Per load
Per load dry/cooked
1
Moist
265 (129)
30
—
100
6
6
36/90 (16/41)
2
Combi
280 (138)
40-60
—
40
10
10
60/150 (27/68)
1020
20
120/300 (54/136)
20
20
120/300 (54/136)
40
40
240/600 (108/272)
1
Max yield
Cooking stages and suggested parameters
Item/Prep notes
Container
Rice
2 ⁄2 in. pan
3 lbs. (1.4 kg) dry
Step
Mode
Temp
Add liquid to rice and let stand
for a minimum of 20 minutes
before cooking.
Converted rice will cook quicker.
Per load yield is indicated in
dry wt./cooked wt.
Per load
Per load dry/cooked
1
Combi
260 (127)
6
6
18/42 (8.2/19)
10
10
30/70 (14/32)
1020
20
60/140 (28/64)
20
20
60/140 (28/64)
40
40
120/280 (56/128)
1
Container
Pasta
Add water to pan covering
pasta completely. Stir pasta
thoroughly after Step 1. When
done, remove from unit and
drain immediately.
Per load yield is indicated in
dry wt./cooked wt.
4 in. pan
Max yield
Cooking stages and suggested parameters
Item/Prep notes
Item/Prep notes
79
Max yield
21⁄2 in. perf. pan 9 lbs. (4 kg)
Max yield
Clima %
Cooking stages and suggested parameters
Time
20-40
Probe Temp
—
Clima %
100
Cooking stages and suggested parameters
6 lbs. (2.7 kg) dry
Step
Mode
Temp
Per load
Per load dry/cooked
1
Moist
6
3
18/54 (8/24)
2
Moist
10
5
30/90 (13.5/40.5)
1020
10
60/180 (27/81)
20
10
60/180 (27/81)
40
20
120/360 (54/162)
Time
Probe Temp
Clima %
212 (100)
8
—
100
212 (100)
8-15
—
100
Item/Prep notes
Container
Egg Rolls, frozen
1
3-4 oz. egg rolls.
Item/Prep notes
⁄2 sheet pan
Item/Prep notes
Mode
Temp
Per load
Per load
1
Combi
480 (250)
6
6
144 egg rolls
10
10
240 egg rolls
1020
20
480 egg rolls
20
20
480 egg rolls
40
40
960 egg rolls
Container
Perf alum
Time
8-12
Max yield
Cooking stages and suggested parameters
1 pie per pan
Step
Mode
Temp
Per load
Per load
1
Combi
340 (171)
3-5
6
6
6 pies
2
Dry Heat
365 (185)
8-10
10
10
10 pies
1020
20
20 pies
20
20
20 pies
40
40
40 pies
Container
Eggs, hard cooked
Set layer pack directly on
combi grids.
For loose eggs, use perf pan.
Cooking stages and suggested parameters
Step
Pizza, frozen
Maximum diameter pizza for
half sheet pan is 12 in.
Models 1020 and 40 can
accommodate larger pizzas
on full size sheet pans
Max yield
24 per pan
Grid
Time
Probe Temp
Clima %
—
40
Add’l Function
Half Speed Fan*
Clima %
20
10
* If unavailable, use Pulse Fan.
Max yield
Cooking stages and suggested parameters
5 dozen per grid
Step
Mode
Temp
1
Moist
212 (100)
Time
Clima %
Per load
6
6
30 dozen
10
10
50 dozen
1020
20
100 dozen
20
20
100 dozen
40
40
200 dozen
Item/Prep notes
Container
Max yield
Egg Casserole
2 ⁄2 in. pan
5-7 lbs. (2.3-3.2 kg) Step
Mode
Temp
Mix ingredients according to
recipe.
Lightly grease pan.
Per load
Per load
1
Combi
280 (138)
10
—
100
6
6
15-21 (7-9.5)
2
Combi
320 (160)
7-10
—
40
10
10
25-35 (11.5-16)
1020
20
50-70 (23-32)
20
20
50-70 (23-32)
40
40
100-140 (46-64)
1
14-18
Probe Temp
Per load
—
100
Cooking stages and suggested parameters
Total Time
Time
Clima %
17-20
Item/Prep notes
Container
Max yield
Cooking stages and suggested parameters
Quiche
1
⁄2 sheet pan
2-3 per pan
Step
Mode
Temp
Mix ingredients according to
recipe. Place mixture in pie
shells. Pie shells may require
par-baking.
Per load
Per load
1
Combi
350 (177)
20
6
6
12-18
2
Combi
365 (185)
25
10
10
20-30
1020
20
40-60
20
20
40-60
40
40
80-120
Total Time
Probe Temp
Time
45
Add’l Function
Half Speed Fan*
Clima %
100
40
* If unavailable, use Pulse Fan.
80
Miscellaneous continued
81
Item/Prep notes
Container
Max yield
Stir Fry
21⁄2 in. enam
8 lbs. (3.6 kg)
Prepare ingredients according
to recipe.
Preheat pans to 575 (300).
Sauce after removing food
from unit.
Per load
6
6
10
10
80 (36)
1020
20
160 (72)
20
20
160 (72)
40
40
320 (144)
Cooking stages and suggested parameters
Step
Mode
Temp
Per load dry /cooked
1
Combi
Preheat 575 (300)
48 (21.6)
2
Combi
425 (218)
Time
Probe Temp
Clima %
90
8-10
—
80
Item/Prep notes
Container
Max yield
Cooking stages and suggested parameters
Step
Per load
Per load
Mode
Temp
Time
Probe Temp
Clima %
Probe Temp
Clima %
Probe Temp
Clima %
Probe Temp
Clima %
Probe Temp
Clima %
1
6
2
10
3
1020
20
40
Item/Prep notes
Container
Max yield
Cooking stages and suggested parameters
Step
Per load
Per load
Mode
Temp
Time
1
6
2
10
3
1020
20
40
Item/Prep notes
Container
Max yield
Cooking stages and suggested parameters
Step
Per load
Per load
Mode
Temp
Time
1
6
2
10
3
1020
20
40
Item/Prep notes
Container
Max yield
Cooking stages and suggested parameters
Step
Per load
Per load
Mode
Temp
Time
1
6
2
10
3
1020
20
40
Item/Prep notes
Container
Max yield
Cooking stages and suggested parameters
Step
Per load
Per load
Mode
Temp
Time
1
6
2
10
3
1020
20
40
82
Henny Penny Corporation
P.O. Box 60
Eaton, OH 45320
+1 937 456.8400
+1 937 456.8402 Fax
Toll free in USA
800 417.8417
800 417.8402 Fax
www.hennypenny.com
Form No.: FM01-795 ©2000 Henny Penny Corporation, Eaton, OH 45320, Revised 11-00, Printed 11-00 Printed in USA