1
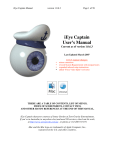
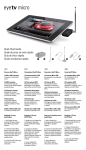
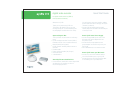
Quick Start Guide
digital video recorder
for digital satellite television (DVB-S)
with CI (Common Interface)
Welcome to EyeTV!
Thank you for purchasing EyeTV 310.
This guide is designed to get you up and
running with EyeTV. You'll be watching and
recording digital satellite television shortly.
•
•
•
•
•
•
Open and Unpack Box
Your EyeTV box should contain the following
items:
EyeTV 310 digital satellite TV tuner (DVB-S)
hardware with CI slot for Conditional Access
Module (CAM) (not included)
EyeTV software and PDF product manual on
CD-ROM
FireWire cable
Power supply and cables (UK, Europe)
IR remote control
2 AAA batteries
•
•
•
•
•
•
•
Attach EyeTV 310 to Satellite Dish
Ensure that the satellite dish and its digital LNB
are aligned to the satellite you wish to
receive the program from.
You will need to select the satellite's orbital
position and name when setting up the EyeTV
software (see below).
Connect a RG-6 (satellite quality grade)
coaxial cable from the LNB to the ANT IN port
on the EyeTV 310.
Attach EyeTV 310 to Power Supply
Connect the applicable power cord to the
AC input of the power adapter and into
the power socket.
Connect the DC output cable from the
power adapter into the DC-12V port of your
EyeTV 310.
Put 2 AAA batteries in the remote control.
Attach EyeTV 310 to your Macintosh
Connect one end of the FireWire cable to
one of the FireWire ports on your EyeTV.
Connect the other end of the FireWire cable
to a FireWire port on your Macintosh.
Enjoy
using EyeTV!
Quick Start Guide
•
•
•
•
•
•
•
Install EyeTV Software
Insert the EyeTV CD-ROM.
Drag the EyeTV application to the
Applications folder on your hard disk.
You can also drag the EyeTV documentation PDF
file from the CD-ROM to your computer.
Start using EyeTV
Launch the EyeTV software.
The EyeTV setup assistant will
start automatically. Please follow the
on-screen instructions.
During this process, you will be asked to
select your satellite from a pop-up menu. All
presently orbiting satellites that are
broadcasting DVB signals are listed by orbital
position and name.
After picking up the satellite, EyeTV will
auto-tune and find all available channels.
If you want to receive PayTV you need to
purchase a CAM* and a contract from your
desired service provider.
•
After the setup assistant has completed,
you will be able to launch the EyeTV software
by pressing the red power button on the
remote control.
NOTE: If you have more than one
satellite dish, or you wish to connect
another satellite receiver to your dish via a
DiSEqC 1.0 compatible switch, please
complete the setup. Then go to the
EyeTV preferences dialog and select the
setup pane. You can choose your switch
type, and optionally add up to 3
additional satellites.
Once setup is complete, you can watch
your programs in the live TV window. Use the
on-screen remote control to pause or skip
through video, or to start a manual recording.
Refer to the user's guide for more details on
scheduling automated recordings, and for
Internet programming using the Electronic
Program Guide (EPG) from tvtv.
* Not included
.