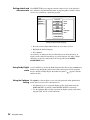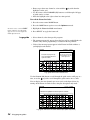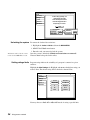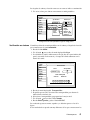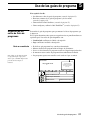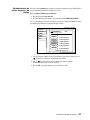
1
OWNER’S MANUAL DIRECTV Digital Satellite Receiver POWER MENU SELECT POWER MENU SELECT Models GAEB0 GCEB0 1030674-0001 Rev. D Copyright © 2001, 2002 Hughes Network Systems, a Hughes Electronics Corporation company. All rights reserved. This publication and its contents are proprietary to Hughes Network Systems, a Hughes Electronics Corporation company. No part of this publication may be reproduced in any form or by any means without the written permission of Hughes Network Systems, 11717 Exploration Lane, Germantown, Maryland 20876. Hughes Network Systems has made every effort to ensure the correctness and completeness of the material in this document. Hughes Network Systems shall not be liable for errors contained herein. The information in this document is subject to change without notice. Hughes Network Systems makes no warranty of any kind with regard to this material, including, but not limited to, the implied warranties of merchantability and fitness for a particular purpose. Covered by one or more of the following U.S. Patents: 6,075,526;5,828,419; 5,751,372; 5,694,176; and 5,635,989. This product is subject to one or more U.S. or foreign patents pending. Software contained in the GAEB0 and GCEB0 receivers and referenced in this manual is copyright© 1995-2001 by Hughes Network Systems, a Hughes Electronics Corporation company. Some features are patent pending. WatchWord, PreSelect, TurboTune, and OneLine Guide are trademarks of Hughes Network Systems. DIRECTV, DIRECTV HOME SERVICES, and DIRECT TICKET are trademarks of DIRECTV, Inc. a unit of Hughes Electronics Corp., and are used with permission. “NFL,” the NFL Shield, and “NFL SUNDAY TICKET” are registered trademarks of the National Football League and its affiliates. “NHL,’” the NHL Shield, and “NHL CENTER ICE” are registered trademarks of the National Hockey League. “MLB,” “MLB EXTRA INNINGS,” “Major League Baseball,” and the Major League Baseball silhouetted batter logo are service marks of Major League Baseball Properties, Inc. Major League Baseball trademarks and copyright are used with permission of Major League Baseball Properties, Inc. All other trademarks and service marks are the property of their respective owners. Disclaimer – Every effort has been made to ensure the correctness and completeness of the material in this document. No company shall be liable for errors contained herein. The information in this document is subject to change without notice, No warranty of any kind is made with regard to this material, including, but not limited to, the implied warranties of merchantability and fitness for a particular purpose. Trademarks – DIRECTV, the Cyclone Design logo and DIRECTV INTERACTIVE are trademarks of DIRECTV, Inc., a unit of Hughes Electronics Corp. All trademarks, marks, names, or product names referenced in this publication are the property of their respective owners, and Hughes Network Systems neither endorses nor otherwise sponsors any such products or services referred to herein. Dolby Laboratories Information – Manufactured under license from Dolby Laboratories. “Dolby,” “Pro Logic,” and the double-D symbol are trademarks of Dolby Laboratories. Macrovision® Information – Macrovision is a registered trademark of Macrovision Corporation. This device incorporates an anticopy process technology that is protected by U.S. patents 4,631,603; 4,577,216; 4,819,098; and other intellectual property rights. The anticopy process is licensed for noncommercial, home use only. Reverse engineering or disassembly is prohibited. StarSight® Information – StarSight® features licensed under one or more of the following patents: 4,706,121; 5,151,789; 5,353,121; 5,353,277; 5,479,266; 5,479,268; and 5,532,754. Use rights reserved. symbol TruSurround™ Information – TruSurround™ and the are trademarks of SRS Labs, Inc. TruSurround technology is incorporated under license from SRS Labs, Inc. Note on recording programming – Most television programs and films are copyrighted. This means that someone has legal rights governing the reproduction and distribution of this material. In certain circumstances, copyright law may apply to private in-home taping of copyrighted materials. In most cases, it is permissible to record for your personal use, as long as you do not sell the material. You must act responsibly in this area–check into the matter if you are unsure. Some pay per view programs may be licensed from producers as “view-only” programs. These are copyrighted programs, and may not be copied or reproduced for any purpose without the express written permission of the copyright owner. DIRECTV® Programming – ACTIVATION OF PROGRAMMING MAY BE SUBJECT TO CREDIT CARD APPROVAL AND REQUIRES VALID SERVICE ADDRESS, SOCIAL SECURITY NUMBER, AND/OR MAJOR CREDIT CARD. Programming subject to change. You must be physically located in the United States (U.S.) to receive DIRECTV service. DIRECTV services are not available outside the United States. DIRECTV programming is sold separately and independently of DIRECTV System hardware. A valid programming subscription is required to operate DIRECTV System hardware. Activate your DIRECTV programming today at 1-800-DIRECTV (1-800-347-3288). DIRECTV System hardware and installation To arrange for professional installation of your DIRECTV System, ask questions, or resolve problems related to your DIRECTV System, contact your dealer. If you need more information, please contact our technical support line at 1-800-274-8995. Please record the following information for warranty System Model #: HSYS- ___ ___ ___ ___ ___ Receiver Model #: ___________________________ Receiver Serial #: ___________________________ Access Card #: _________ __________ _________ LNB Serial #: _______________________________ Important Safety Instructions For your safety and protection, read this entire Owner's Manual before you attempt to install or use your satellite system. In particular, read this safety section carefully. Keep this safety information where you can refer to it if necessary. Heed Cautions–All cautions on the product and in the operating instructions should be adhered to. Follow Instructions–All operating and use instructions should be followed. THESE CAUTIONS AND SYMBOLS APPEAR ON THE BACK OF THE RECEIVER WARNING or CAUTION Double insulated systems are protected by additional board clearances and creepage, so that the unit will not be a safety hazard to the end-user. CAUTION RISK OF ELECTRICAL SHOCK DO NOT OPEN IMPORTANT SAFETY INSTRUCTIONS 1. 2. 3. 4. 5. 6. 7. Read these instructions. Keep these instructions. Heed all warnings. Follow all instructions. Do not use this apparatus near water. Clean only with dry cloth. Do not block any ventilation openings. Install in accordance with the manufacturer’s instructions. 8. Do not install near any heat sources such as radiators, heat registers, stoves, or other apparatus (including amplifiers) that produce heat. 9. Do not defeat the safety purpose of the polarized or grounding-type plug. A polarized plug has two blades with one wider than the other. A grounding type plug has two blades and a third grounding prong. The wide blade or the third prong is provided for your safety. If the provided plug does not fit into your outlet, consult an electrician for replacement of the obsolete outlet. 10. Protect the power cord from being walked on or pinched particularly at plugs, convenience receptacles, and the point where they exit from the apparatus. 11. Only use attachments/accessories specified by the manufacturer. 12. Use only with the cart, stand, tripod, bracket, or table specified by the manufacturer or sold with the apparatus. When a cart is used, use caution when moving the cart/apparatus combination to avoid injury from tip-over. 13. Unplug this apparatus during lightning storms or when unused for long periods of time. 14. Refer all servicing to qualified service personnel. Servicing is required when the apparatus has been damaged in any way, such as power-supply cord or plug is damaged, liquid has been spilled or objects have fallen into the apparatus, the apparatus has been exposed to rain or moisture, does not operate normally, or has been dropped. INSTALLATION Polarization – This DIRECTV Receiver is equipped with a plug that will fit into the power outlet only one way. Do not modify the plug defeating this feature. If the plug does not fit, contact your electrician to replace your outlet. To prevent electric shock, do not use this plug with an extension cord or outlet unless you can fully insert the blades without blade exposure Power Sources – Operate this DIRECTV Receiver only from the type of power source indicated on the marking label. If you are not sure of the type of power supply to your home, consult your dealer or local power company. Power-Cord Protection – Protect the power cord from being walked on or pinched particularly at plugs, convenience receptacles, and the point where they exit from the apparatus. Overloading – Do not overload wall outlets, extension cords, or integral convenience receptacles as this can result in a risk of fire or electrical shock. Ventilation – Slots and openings in the cabinet are provided for ventilation to ensure reliable operation of the product and to protect it from overheating. Do not block any ventilation openings. Install in accordance with the manufacturer’s instructions. The openings should never be blocked by placing the product on a bed, sofa, rug, or similar surface. This product should not be placed in a built-in installation such as a bookcase or rack unless proper ventilation is provided and the manufacturer’s instructions have been adhered to. For electrical safety, power line operated equipment or accessories connected to this unit should bear the UL listing mark and should not be modified so as to defeat the safety features. This will help avoid any potential hazard from electrical shock or fire. If in doubt, contact qualified service personnel. Heat–Do not Install near any heat sources such as radiators, heat registers, stoves, or other apparatus (including amplifiers) that produce heat. Accessories – To avoid personal injury or damage to the DIRECTV Receiver, do not place the DIRECTV Receiver on any unstable cart, stand, table, or bracket. Any mounting of the product should follow the manufacturer’s instructions. Attachments – Do not use attachments unless recommended by DIRECTV as they may cause hazards. Satellite Dish Antenna Grounding – The outdoor satellite dish antenna used to receive satellite signals and the cable used to connect the satellite dish antenna to the indoor receiving unit are required to comply with local installation codes and the appropriate sections of the National Electric Code (NEC) and in particular Article 810-15, which covers proper installation and grounding of television receiving equipment, as well as to Article 820-33, which specifies that the satellite dish antenna cable ground shall be connected to the grounding system of the building as close to the point of cable entry as practical. These codes require proper grounding of the metal structure of the outdoor satellite dish antenna and grounding of the connecting cable at a point where it enters the house (or other building). If you are having a professional installer perform the installation, the installer must observe installation codes. This manual contains instructions on how to make the installation in compliance with the NEC. If additional local installation codes apply, contact local inspection authorities. Example of Antenna Grounding according to the National Electrical Code instructions contained in “Radio and Television Equipment”. Ground clamp Electric service equipment Ground clamps Coaxial cable Grounding block Coaxial cable Grounding conductor Power service grounding electrode Note: The DIRECTV Receiver shall be grounded through the satellite/ local antenna cable before plugging into the telephone jack, and it must remain grounded thereafter. Water and Moisture – WARNING! To reduce the risk of fire or electric shock, do not expose this product to rain or moisture. Lightning – For added protection for this product during a lightning storm, or when it is left unattended and unused for long periods of time, unplug it from the wall outlet, disconnect the antenna and cable system, and disconnect it from the telephone line. This will prevent damage to the product due to lightning and power-line surges. Television Antenna Information – Installing an outdoor antenna can be hazardous and should be left to a professional antenna installer. Do not locate the outside antenna system in the vicinity of overhead power lines or other electric light or power circuits, or where it can fall into such power lines or circuits. When installing an outside antenna system, take extreme care to keep from touching such power lines or circuits, as contact with them might be fatal. If an outside antenna is connected to the DIRECTV Receiver, be sure the antenna system is grounded so as to provide some protection against voltage surges and built-up static charges. This DIRECTV Receiver is equipped with a plug that will fit into the power outlet only one way. Do not modify the plug defeating this feature. If the plug does not fit, contact your electrician to replace your outlet. To prevent electric shock, do not use this plug with an extension cord or outlet unless you can fully insert the blades without blade exposure. Section 810 of the NEC, NFPA No. 70 1987, provides information with respect to proper grounding of the mast and supporting structure, grounding of the lead-in wire to an antenna discharge unit, size of the grounding conductors, location of antenna discharge unit, connection to grounding electrodes, and requirements for the grounding electrode. Power Lines – Extreme care must be taken when installing and adjusting or maintaining the outdoor antenna and connecting cable, especially in the vicinity of overhead power lines, electric lights, or power circuits. When installing the outdoor antenna or cable, extreme care should be taken to keep from touching or approaching such power lines or circuits, as contact with them might be fatal. Cleaning – Unplug this receiver from the wall outlet before cleaning. Do not use liquid or aerosol cleaners. Use only a damp cloth for cleaning. Object and Liquid Entry – Never push objects of any kind into this DIRECTV Receiver through openings as they may touch dangerous voltages or “short out” parts that could result in a fire or electric shock. Never spill liquid of any kind on the receiver. No objects filled with liquids, such as vases, shall be placed on the apparatus. SERVICE Servicing–Do not attempt to service this DIRECTV Receiver yourself as opening or removing covers may expose you to dangerous voltage or other hazards. There are no user serviceable parts inside. Refer all servicing to qualified service personnel. Conditions Requiring Service–Unplug the DIRECTV Receiver from the wall outlet and refer servicing to qualified personnel under the following conditions: • When the power supply cord or plug has been damaged. • If liquid has been spilled on, or objects have fallen into, the DIRECTV Receiver or it has been exposed to water. • If the DIRECTV Receiver does not operate normally by following the operating instructions. Adjust only those controls that are covered by the operating instructions. Other adjustments may result in damage and will often require extensive work by a qualified technician to restore the DIRECTV Receiver to its normal operation. • If the DIRECTV Receiver has been dropped or the cabinet has been damaged. • When the DIRECTV Receiver exhibits a distinct change in performance. Replacement Parts–When replacement parts are required, have the technician verify that the replacements being used have the same safety characteristics as the original parts. Use of replacement parts specified by the manufacturer can prevent fire, electric shock, or other hazards. Safety Check–Upon completion of any service or repairs to this DIRECTV Receiver, ask the service technician to perform safety checks recommended by the manufacturer to determine that the l DIRECTV Receiver is in safe operating condition. Multi-satellite capable if used with a DIRECTV Multi-Satellite Dish Antenna, not included, Your DIRECTV Receiver is able to receive upgrades or modifications to some of its features and functions. These modifications will occur automatically, usually at times when the receiver would likely be turned off. If your receiver is on when an upgrade or modification is sent, you may experience a disruption in reception for a minute or two. Your reception should return to normal after the modification is complete. Your receiver must be plugged in to receive any upgrades. Do not unplug you receiver while an upgrade is in progress. Please consult the Upgrade menu to find a schedule of upgrades or modifications planned by DIRECTV. With this receiver (GAEB0, GCEB0) and the proper satellite dish antenna, you may be able to subscribe to local channels from DIRECTV in certain areas. Additional equipment may be required in some markets. Check with your retailer or visit DIRECTV.com for information on availability of local channels from DIRECTV in your area. Federal Communications Commission (FCC) Regulatory Information Declaration of Conformity– Standards to which Conformity is declared: FCC Part 15 This device complies with Part 15 of the FCC Rules. Operation is subject to the following two conditions: (1) this device may not cause harmful interference, and (2) this device must accept any interference received, including interference that may cause undesired operation. • Responsible Party’s Name: Hughes Network Systems Address: 11717 Exploration Lane, Germantown, MD 20876 Telephone: 1-800-274-8995 • Trade Name: Hughes • Type of Equipment: Satellite Receiver • Model Numbers: GAEB0, GCEB0, HRMC-8, HRMC-9 Federal Communications Commission (FCC)–This equipment complies with both Part 15 and Part 68 of the FCC rules Part 15 Compliance–This equipment has been tested and found to comply with the limits for a Class B digital device, pursuant to Part 15 of the FCC rules. Theses limits are designed to provide reasonable protection against harmful interference in a residential installation. This equipment generates, uses, and can radiate radio frequency energy and, if not installed and used in accordance with the instructions, may cause harmful interference to radio communications. However there is no guarantee that interference will not occur in a particular installation. If this equipment does cause harmful interference to radio or television reception, which can be determined by removing and applying power to the equipment, the user is encouraged to try to correct the interference by one or more of the following measures: • • • • Reorient or relocate the receiving satellite dish antenna. Increase the separation between the equipment and the DIRECTV Receiver. Connect the equipment into an outlet on a circuit different from that to which the DIRECTV Receiver is connected. Consult the dealer or an experienced radio/TV technician for help. The user may find the following booklet, prepared by the Federal Communications Commission, helpful: “How to Identify and Resolve Radio and TV Interference Problems.” This booklet is available from the U.S. Government Printing Office, Washington, DC. To meet FCC requirement, only peripherals (computer input/output devices, terminals, printers, etc.) certified to comply with Class B limits may be attached to this device. Operation with noncertified peripherals is likely to result in interference to radio and TV reception. To meet FCC requirements, shielded cables are required to connect the device to a personal computer, peripheral, or other Class B certified device. Part 68 Compliance –This equipment complies with Part 68 of the FCC rules. On the modem card is a label that contains, among other information, the FCC registration number and Ringer Equivalence Number (REN) for this equipment, If requested, this information must be provided to the Telephone Company. The REN is used to determine the quantity of devices which may be connected to the telephone line. Excessive RENs on the telephone line may result in devices not ringing in response to an incoming call. In most, but not all areas, the sum of the RENs should not exceed five (5). To be certain of the number of devices that may be connected to the line, contact the Telephone Company to determine the maximum number of RENs for the calling area. If the DIRECTV Receiver (Model Numbers: GAEB0, GCEB0) terminal equipment causes harm to the telephone network, the Telephone Company will notify you in advance that temporary discontinuance of service may be required. But, if advance notice is not practical, the Telephone Company will notify the customer as soon as possible. Also, you will be advised of your right to file a complaint with the FCC, if you believe it is necessary. The Telephone Company may request that you remove the equipment from the network until the problem is resolved. The telephone company may make changes in its facilities, equipment, operations, or procedures that could affect the operation of the equipment. If this happens, the Telephone Company will provide advance notice in order for you to make the necessary modifications in order to maintain uninterrupted service. If trouble is experienced with the DIRECTV Receiver (Model Numbers: GAEB0, GCEB0) equipment, please contact Hughes Customer Care Center Germantown, MD 20876 Telephone Number: 1-800-274-8995 http://www.hns.com email: [email protected] for repair and/or warranty information. Hughes Network Systems must make any necessary repairs to the modem portion of this equipment in order to maintain valid FCC registration. Do not attempt to repair or service your modem. Return it to Hughes Network Systems. No repairs can be made by customers. All repairs must be done by Hughes Network Systems Authorized Service Centers (ASC). This equipment cannot be used on public coin service provided by the Telephone Company. Connection to Party Line Service is subject to state tariffs. v vi Contents Getting started. . . . . . . . . . . . . . . . . . . . . . . . 1 Setup overview . . . . . . . . . . . . . . . . . . . . . . . . . . . . 1 Attach the antenna cable . . . . . . . . . . . . . . . . . . . 2 Connect your TV . . . . . . . . . . . . . . . . . . . . . . . . . 3 Determine antenna angles . . . . . . . . . . . . . . . . . . 4 Testing your system . . . . . . . . . . . . . . . . . . . . . . 5 Setting default and alternate audio . . . . . . . . . . 24 Using Dolby Digital audio . . . . . . . . . . . . . . . . 24 Using the Optimize setting . . . . . . . . . . . . . . . . 24 Adjusting audio balance . . . . . . . . . . . . . . . . . . 25 Adjusting the screen image. . . . . . . . . . . . . . . . 25 Using WatchWord™ . . . . . . . . . . . . . . . . . . . . . . 26 Adding system components . . . . . . . . . . . . . 9 Using program guides . . . . . . . . . . . . . . . . .27 Connecting components . . . . . . . . . . . . . . . . . . . . . 9 Connect a terrestrial antenna . . . . . . . . . . . . . . . . 9 Connect the RF remote control antenna . . . . . . . 9 Connecting a VCR . . . . . . . . . . . . . . . . . . . . . . . . 10 Connect the VCR Control Cable . . . . . . . . . . . . 10 Test the VCR (Record/Stop) . . . . . . . . . . . . . . . 11 Connecting a home entertainment system. . . . . . . 12 Selecting a program guide style . . . . . . . . . . . . . . 27 Grid guide . . . . . . . . . . . . . . . . . . . . . . . . . . . . . 27 Logo guide . . . . . . . . . . . . . . . . . . . . . . . . . . . . 28 Program guide and menu features . . . . . . . . . . . . 29 The OneLine™ Guide. . . . . . . . . . . . . . . . . . . . . . 30 Using TurboTune™ . . . . . . . . . . . . . . . . . . . . . . . 30 Using the remote control . . . . . . . . . . . . . . 13 Remote control functions . . . . . . . . . . . . . . . . . . . 15 Installing remote control batteries. . . . . . . . . . . 16 Programming the remote control. . . . . . . . . . . . . . 16 Code scanning . . . . . . . . . . . . . . . . . . . . . . . . . . 16 Code Entry. . . . . . . . . . . . . . . . . . . . . . . . . . . . . 17 Using DIRECTV INTERACTIVE™ powered by Wink Communications® . . . . . . . . . . 17 Using favorite channel lists. . . . . . . . . . . . . . . . . . 31 Creating a channel list. . . . . . . . . . . . . . . . . . . . 31 Renaming a channel list:. . . . . . . . . . . . . . . . . . 32 Creating an Auto Set list . . . . . . . . . . . . . . . . . . 32 Adding and removing all channels . . . . . . . . . . 32 Filtering the program guide . . . . . . . . . . . . . . . . . 33 Using Theme Filters . . . . . . . . . . . . . . . . . . . . . 33 Selecting guide times . . . . . . . . . . . . . . . . . . . . 34 Using the menus . . . . . . . . . . . . . . . . . . . . . 19 Using access controls . . . . . . . . . . . . . . . . . .35 Purchasing pay per view . . . . . . . . . . . . . . . . . . . . 20 Cancelling purchases. . . . . . . . . . . . . . . . . . . . . 20 Viewing Mail. . . . . . . . . . . . . . . . . . . . . . . . . . . . . 21 Using Caller ID . . . . . . . . . . . . . . . . . . . . . . . . . . . 21 Using the program Director. . . . . . . . . . . . . . . . . . 22 To schedule or edit an event . . . . . . . . . . . . . . . 22 Setting guide preferences . . . . . . . . . . . . . . . . . . . 23 Adjusting audio and video. . . . . . . . . . . . . . . . . . . 23 Locking & unlocking the system . . . . . . . . . . . . . 35 How to lock the system. . . . . . . . . . . . . . . . . . . 35 Unlocking the system . . . . . . . . . . . . . . . . . . . . 36 Setting ratings limits . . . . . . . . . . . . . . . . . . . . . 36 Setting spending and time limits. . . . . . . . . . . . 37 Setting favorites and filters . . . . . . . . . . . . .31 Questions & Answers . . . . . . . . . . . . . . . . . .39 Manufacturers device control codes . . . . . .41 Contents vii viii Contents Getting started 1 This chapter explains how to: You may connect a second DIRECTV Receiver to the unused LNB output. These instructions also apply to an additional receiver. • Connect the DIRECTV satellite dish antenna to your DIRECTV Receiver (this page). • Connect your DIRECTV Receiver to your TV (see page 3). • Find antenna azimuth and elevation settings for your location (see page 4). • Test the DIRECTV System operation (see page 5). How to use this manual This manual uses these typographical conventions to help clarify instructions: Text Example Description Click Cancel. On-screen command buttons that execute an action. Highlight the Messages button. Pull-down and pop-up box selections, or other option buttons within a menu pane. Remote control buttons, or receiver front panel. Press the INFO button. Names of equipment cable connections on Connect a pair of A/V cables to the AUDIO IN jack. equipment. Setup overview Highlight the Options tab. Menu tab names Display the MAIN MENU. Menu and pane names, names of pop-up and sub-menu panes. At this point, you should have: • Mounted the DIRECTV satellite antenna and pointed it in the general direction of the satellite. • Grounded the antenna as described in your antenna installation instructions. • Attached RG-6 coaxial cable(s) to the antenna LNB connector(s). • Routed the other end of the antenna cable to the back of your DIRECTV Receiver. • Placed the DIRECTV Receiver accessible to a telephone modular jack. Ensure that you have completed these procedures, then continue to the next page to begin installing the DIRECTV Receiver. Getting started 1 Attach the antenna cable You can configure your system several ways, depending on what additional components (such as a VCR, DVD player, or A/V receiver) you select. For now, however, use the simplest configuration to check your antenna and cabling. • Ensure that the DIRECTV Receiver is not plugged into an electrical outlet. • Attach the RG-6 coaxial antenna cable to the SATELLITE IN connector on the back of the DIRECTV Receiver. Refer to the appropriate figure below and on the next page. GAEB0 AUDIO/VIDEO APPARATUS 52BN E212442 This device complies with Part 15 of the FCC rules. Operation is subject to the following two conditions: (1) This device may not cause harmful interference, and (2) This device must accept any interference received, including interference that may cause undesired operation. Complies with part 68, FCC rules. FCC registration #: 5L4MUL-36248DT-E; REN=0.2B This product and service are covered by one or more U.S. patents. Other U.S. and foreign patents pending. See Users Manual for details. 1 2 3 4 5 6 7 9 8 10 Table 1: Rear panel connections - DIRECTV Receiver model GAEB0 1 SATELLITE IN connector 6 AUDIO OUTPUT (L) jack 2 RF REMOTE antenna jack 7 VIDEO OUTPUT jack 3 TV ANTENNA/CABLE IN connector 8 S-VIDEO jack 4 OUT TO TV connector 9 TELEPHONE JACK 5 AUDIO OUTPUT (R) jack 1 0 AC POWER CORD 5 GCEB0 7 9 11 13 AUDIO/VIDEO APPARATUS 52BN E212442 This device complies with Part 15 of the FCC rules. Operation is subject to the following two conditions: (1) This device may not cause harmful interference, and (2) This device must accept any interference received, including interference that may cause undesired operation. Complies with part 68, FCC rules. FCC registration #: 5L4MUL-36248DT-E; REN=0.2B This product and service are covered by one or more U.S. patents. Other U.S. and foreign patents pending. See Users Manual for details. Manufactured under license from Dolby Laboratories. Dolby and the double-D symbol are trademarks of Dolby Laboratories. Confidential unpublished works. C 1992-1997 Dolby Laboratories. All rights reserved. 1 2 3 4 6 8 10 12 14 15 Table 2: Rear panel connections - DIRECTV Receiver model GCEB0 2 Getting started 1 SATELLITE IN connector 9 AUDIO OUTPUT (L) jack 2 RF REMOTE antenna jack 10 VIDEO OUTPUT jack 3 DIGITAL AUDIO OUTPUT optical jack 11 VIDEO OUTPUT jack 4 OUT TO TV connector 12 S-VIDEO jack 5 TV ANTENNA/CABLE IN connector 13 VCR CONTROL cable jack 6 AUDIO OUTPUT (R) jack 14 TELEPHONE JACK 7 AUDIO OUTPUT (R) jack 15 AC POWER CORD 8 AUDIO OUTPUT (L) jack Connect your TV Depending on your TV, you can connect it to the receiver in one of three ways: • S-Video cable (best picture quality) or • Video cable (very good picture quality) or • Coaxial cable (good picture quality) In addition to your video connection, use a set of audio cables (L/R) to provide stereo sound. If your TV does not have audio jacks, you will hear monophonic audio. This is acceptable for the procedures described in the next section. To connect your TV to the DIRECTV Receiver: 1. Select the appropriate connection: If your TV has an S-Video jack – • Use an S-Video cable (not supplied) to connect the DIRECTV Receiver’s S-VIDEO jack to the TV’s S-VIDEO jack. • Use audio cables to connect the DIRECTV Receiver’s AUDIO jacks to the TV’s AUDIO IN jacks. If your TV has RCA-type A/V connectors – • Connect the DIRECTV Receiver’s AUDIO and VIDEO jacks to the TV’s A/V IN jacks. • If your TV has only one AUDIO IN jack, connect the receiver’s AUDIO L jack to the TV AUDIO IN jack. If your TV only has an RF (coaxial) connector – • Connect the DIRECTV Receiver’s OUT TO TV connector to the TV’s VHF/UHF IN or RF IN jack. 2. Connect one end of the telephone line cord provided into the DIRECTV Receiver’s PHONE JACK. 3. Connect the other end into a modular telephone outlet. 4. Plug the TV into an electrical outlet. 5. Plug the DIRECTV Receiver power cord into an electrical outlet. If the front panel Power indicator does not illuminate, press the POWER button. Onscreen Menu Icons These icons appear in onscreen menus and are used throughout this manual: Toggle or Step Press SELECT to toggle (switch) a setting from ON to OFF or step through the available choices each time you press SELECT. List of Options Menu button will display a list of choices in a pop-up menu when you press SELECT. Series of Boxes Multiple screens will appear in a series requesting you to enter numbers and/or letters for the particular feature when you press SELECT. Getting started 3 Determine antenna This section explains how to determine the proper antenna position. This is angles expressed in degrees of azimuth (horizontal) and elevation (vertical). Use the receiver front panel controls shown below to complete this procedure. Power Power Main Menu Direction SELECT On/Standby Indicator Button Buttons Button MENU POWER MENU POWER SELECT SELECT 1. Press the front panel MENU button to display the MAIN MENU below. 2. Use the button to highlight the System Setup tab. MAIN MENU Wed, Jun 20 8:45PM Program Guide Guide Options Audio & Video Caller ID Program Director Watchword Interactive Purchases Lock & Limits View Mail System Setup Watch TV Main Menu tabs Tilt angle also appears if you have select an Oval Antenna from the Dish Type menu. 3. Press the front panel SELECT button. 4. The INSTALL menu allows you to determine the correct antenna position using your 5-digit ZIP code. Enter your ZIP code and press SELECT. The correct azimuth and elevation angles appear as shown below. 5. Use these values to properly align your dish antenna. INSTALLATION Install Signal Wed, Jun 13 Dish Type VCR Prefs Test New Card Upgrades Features Watch TV Main Menu Alignment Round Dish ZIP Code Entry ZIP Code ZIP Code Oval Dish 2OK Lat/Long 2 0 9 0 Oval 2 dishCancel 3 Round dish for 1 satellite location ZIP Code: 20902 Latitude: Longitude: Elevation: 38 Azimuth: 224 SW Tilt: Finding antenna settings based on ZIP code 4 Getting started 1:31 PM Testing your system When you have aligned your dish antenna to the azimuth and elevation angles shown on the Install pane: 1. Highlight the Signal tab. 2. Use the button to highlight the Source pull-down menu 3. Signal quality is indicated by a scale at the bottom of the pane and with an audible indication. The frequency and tempo of the tone increase with signal strength. SIGNAL STRENGTH Install Signal Thu, Jun 14 Signal Strength VCR Transponder Source Prefs Test 4:14 PM ) Satellite 101 (A) 04 New Card Status: Unlocked Upgrades Features Current: 95 Highest: 95 Watch TV Main Menu 4. Highlight the Transponder pull-down menu. 5. You may need to select another transponder to achieve the highest signal indication. 6. Select the transponder providing the best signal. 7. Use the button to highlight the Test tab. 8. Highlight Begin Test and press the SELECT button. Results appear within a few seconds and should resemble those in the figure. If your test results are much different from those shown in the figures, or you receive no signal indication, refer to page 6. SYSTEM TEST Install Signal Wed, Jun 13 System Tests VCR Prefs Test New Card Upgrade Features Watch TV Main Menu 10:14 PM Begin Test Xponder Test Version Wink Version Signal Tuning : 5317.6 :0.0.0.75 :OK :OK Phone Access Card :OK :OK (ID 0000-0000-0000) :OK Front Panel To perform the Transponder test: 1. Move the highlight to the Xponder Test pull-down menu. 2. Press the SELECT button. Getting started 5 3. Press SELECT again to test the first selection on the pop-up menu. SYSTEM TEST Install Signal VCR Prefs Wed, Jun 13 System Tests Begin Test Xponder Test Xponder Test Satellite 101 (A) : 5317.6 Satellite 119 (B) :0.0.0.75 Satellite 110 (C) :OK Cancel Wed, Jun 13 :OK Test New Card Upgrade SYSTEM TEST Features WatchInstall TV Signal Main Menu VCR Prefs Begin Test Watch TV Main Menu Xponder Test Satellite 101 (A) Signal Strength New Card Features 10:16 PM System Tests Test Test Upgrade 10:15 PM 18 95 95 95 94 95 95 94 93 916 94 94 93 94 94 92 94 94 1724 93 95 93 93 93 92 93 93 2532 94 94 95 95 93 94 94 92 Your results will differ slightly from those shown, depending on your geographic location and specific installation. However, if your results are very different from these examples (i.e, rows of zeros or single-digit numbers): • Highlight the Install tab on the INSTALLATION menu. Verify your settings. INSTALLATION Install Signal Wed, Jun 13 Dish Type Alignment VCR Prefs Round Dish ZIP Code Test Oval Dish 2 Lat/Long New Card Upgrades Features Watch TV Main Menu Oval dish 3 Round dish for 1 satellite location 1:31 PM ZIP Code: 20974 Latitude: Longitude: Elevation: 38 Azimuth: 224 SW Tilt: Installation pane • Re-enter your ZIP code if necessary to verify you have used the correct antenna pointing parameters for your location. • Check your cable connections. • Ensure the DIRECTV Receiver is connected to a modular telephone jack. Once you have successfully obtained a signal and your test results resemble those shown in the figures, call DIRECTV (or your subscription service provider) to activate service if you have not done so already. 6 Getting started Adding system components 2 You can configure your DIRECTV Receiver several ways depending on the additional audio/video components you want to use. This chapter explains how to: • • • • Connecting components Connect a terrestrial (broadcast) TV antenna (this page). Connect the optional RF remote control antenna (this page). Connect and set-up a VCR (see page 10). Integrate the DIRECTV Receiver into your existing audio or A/V system (see page 12). At this point, you should have: Verified that your system is operating properly. Connected your DIRECTV Receiver to your TV. Unplugged all components from electrical outlets. Connect a terrestrial You can connect a terrestrial (broadcast) TV antenna to your DIRECTV antenna Receiver by connecting it to the DIRECTV Receiver’s TV ANT/CABLE IN jack (refer to figures on page 3). The remote control INPUT button allows you to switch between DIRECTV® programming and input from the terrestrial antenna. Connect the RF remote The DIRECTV Receiver uses an optional RF (radio frequency) remote control control antenna antenna that allows you to control your receiver from other rooms in your house. 1. Slide the antenna into the base as shown. No tools are required. Assembling the optional RF antenna 2. Plug the RF remote control cable into the RF REMOTE connector on the DIRECTV Receiver rear panel (refer to figures on page 2 and page 3. 3. Extend the cable and place the antenna in the desired location. To achieve the best operating range from the remote control, position the antenna as high and as far away from metal objects as possible. Adding system components 9 Connecting a VCR Follow these instructions to connect your TV and VCR to the DIRECTV Receiver. Connect the satellite antenna RG-6 coaxial cable to the DIRECTV Receiver’s SATELLITE IN jack (refer to figures on page 3). 1. Depending on your VCR, select the appropriate connection to the DIRECTV receiver: If your VCR has A/V connectors – • Connect the DIRECTV Receiver’s AUDIO and VIDEO jacks to the VCR’s A/V IN jacks. If your VCR only has an RF (coaxial) connector– • Connect the DIRECTV Receiver’s OUT TO TV connector to the VCR’s VHF/UHF IN or RF IN jack. • If your VCR has only one AUDIO IN jack, connect the receiver’s lower (mono) AUDIO L jack to the VCR’s AUDIO IN jack. 2. Depending on your TV and VCR, select the appropriate method to the connect the VCR to the TV: If your TV and VCR have A/V connector – • Connect the DIRECTV Receiver’s AUDIO and VIDEO jacks to the TV’s A/V IN jacks. If your TV or VCR only has an RF (coaxial) jack – • Connect the VCR’s VHF/UHF OUT jack to the TV’s VHF/UHF IN jack. 3. Plug the TV, VCR, and DIRECTV Receiver power cords into an electrical outlet. Connect the VCR Control (Model GCEB0 only) The DIRECTV Receiver can control your VCR for Cable unattended recording, using the VCR Control Cable provided 1. Plug the VCR control cable into the rear panel VCR CONTROL jack. 2. Temporarily position the other end over the VCR’s remote control sensor (normally a small dark plastic window on the VCR front panel). The remote control sensor may be labeled or identified in your VCR manual. If it is not identified, scan the front of the VCR with your VCR remote control: 3. Hold the VCR remote control about ½-inch (1.3 cm) from the front left side. 4. Slowly move the remote control to the right as shown in the figure. 5. Repeatedly press the remote control’s power key on and off. Scanning for the VCR remote control sensor 6. When your VCR responds to your pressing the remote control power, note the position. Temporarily tape the emitter to the position you marked until you verify that it works properly. 7. Test the VCR control feature as described on page 11. 10 Adding system components 8. Remove the temporary mounting tape. Attach the emitter permanently with peel-and-stick backing. This will not interfere with normal VCR operation. The VCR SETUP menu provides the settings to allow the DIRECTV Receiver to communicate with your VCR. VCR SETUP Install Signal Thu, Jul 19 VCR Prefs Test New Card Brand Code Admiral 1 Aiwal 2 Stop Upgrade Features Akai 3 Clear Audio Dynamics 4 Bell & Howell 5 Brooksonic 6 Canon 7 Watch TV Main Menu 2:33 PM Test Record VCR SETUP menu pane 9. Scroll through the VCR brands using the joystick and buttons. If you cannot find the correct code listed for your brand of VCR brand, try related brands that use the same code. Also, your VCR may respond to multiple codes. S 10. Use the remote control SELECT button to try each code. 11. Alternate between this procedure and testing the code. Test the VCR This Record/Stop test verifies the specified brand and code controls your VCR. (Record/Stop) Before starting the test: • Turn the VCR power on. • Verify the VCR Control Cable is properly connected. • Insert a recordable videotape into the VCR. Signals coming from the remote control at the same time as signals coming from the VCR Control cable may provide unreliable test results. Use the DIRECTV Receiver front panel controls, rather than the remote control, to test the codes. Test the VCR record and stop commands, If either command does not function, try other codes shown for your VCR brand. If you are unsuccessful after trying all available codes, recheck your VCR Control Cable connections and IR emitter placement. Adding system components 11 Connecting a home entertainment system The A/V receiver must be turned on in order to send the video signal to your TV. You can integrate the DIRECTV Receiver into your entertainment system to take advantage of enhanced audio and video capability. Follow these instructions to connect your DIRECTV Receiver. • To connect the DIRECTV Receiver to your audio system, use A/V cables to connect the satellite receiver to the audio receiver’s AUDIO IN jacks. • Dolby Digital - With the GCEB0 model, you can enjoy programs that contain a Dolby Digital sound track. We recommend that you listen in surround sound for maximum enjoyment of these programs. You can connect the stereo outputs of the GCEB0 to a receiver that contains a Dolby Surround Pro Logic decoder. This will provide you with three audio channels in the front and a mono surround channel. • To take full advantage of Dolby Digital programming, connect the GCEB0 digital audio output to an external 5.1-channel Dolby Digital decoder or receiver. This provides you with three front channels, two independent surround channels, and a sub-woofer channel. 1. Connect the satellite antenna RG-6 coaxial cable to the DIRECTV Receiver’s SATELLITE IN jack. 2. Connect the DIRECTV Receiver’s A/V jacks to the VCR and A/V receiver’s A/V jacks. 3. AUX, optical connection, and digital output connections – If your audio receiver has coaxial or optical digital connectors, connect the appropriate type of cable to the DIRECTV Receiver’s DIGITAL AUDIO OUT for two-channel digital stereo. If your A/V receiver is also capable of decoding Dolby Digital, use this connection in order to listen in full 5.1-channel surround sound. Additional audio information begins on page 23. 4. Connect the VCR’s A/V OUT jacks to a pair of the A/V receiver’s A/V IN jacks. 5. Connect the A/V receiver’s MONITOR OUT jack to the TV’s VIDEO IN jack. 6. Plug the components into an electrical outlet. Note: If you have connected a VCR to your entertainment system in a way that routes the satellite receiver’s signal to your VCR before it reaches the TV, You may see a distorted picture if you try to record a copy-protected program. A Can’t Tape symbol in the screen banner identifies these programs. If this occurs, simply stop recording and the picture will automatically correct itself. 12 Adding system components Using the remote control 3 This chapter explains how to: • • • • Use the HMRC-8 and HMRC-9 remote control functions. (see page 15) Install and replace the remote control batteries. (see page 16) Program the remote to work with your system components. (see page 16) Access interactive programming features. (see page 17) Power Turns satellite receiver power on/off(standby). Turns selected component power on/off. PWR AUX VCR DVD TV SAT Component control Selects the component that you want to control. Buttons illuminate to indicate the component that the remote control is set to operate. Receiver control group Most frequently used functions are grouped together (see below). VOL CH PREV MUTE CH DIRECTOR 1 2 3 4 5 6 7 8 9 INPUT 0 REW PLAY FF REC STOP PAUSE P A G E Channel (CH) up/down Moves to next or previous channel during viewing. Display next program guide page (Grid guide only). Previous channel Toggle between the current channel and the last channel watched. Director group One-touch navigation to setup menus for audio, video, program guide and WatchWord searches. Numeric keypad Reserved for future upgrade Input Change video input source (CATV, terrestrial antenna, or other video device). VCR control Performs VCR control functions Backlight Turn on keypad backlight Program guide View the list of available programming TurboTune View the TurboTune guide Interactive guide Access interactive features Favorites View listings of your preferred programming Main menu View the Main Menu Information View information about a program Clear Cancel the on-screen function and return to previous activity S Select/Move/OneLine guide Press to select an on-screen option, Press the arrows to move the screen highlight, Press to view the OneLine Guide (if no menu option) HRMC-9 Remote Control Function Quick Reference Using the remote control 13 AUX VCR DVD Power Turns satellite receiver power on/off(standby). Turns selected component power on/off. PWR 8 TV SAT Component control Selects the component that you want to control. Buttons illuminate to indicate the component that the remote control is set to operate. Receiver control group Most frequently used functions are grouped together (see below). VOL CH PREV MUTE CH DIRECTOR 1 2 3 4 5 6 7 8 9 INPUT 0 REW PLAY FF REC STOP PAUSE P A G E Channel (CH) up/down Moves to next or previous channel during viewing. Display next program guide page (Grid guide only). Previous channel Toggle between the current channel and the last channel watched. Director group One-touch navigation to setup menus for audio, video, program guide and WatchWord searches. Numeric keypad Reserved for future upgrade Input Change video input source (CATV, terrestrial antenna, or other video device). VCR control Performs VCR control functions Program guide View the list of available programming TurboTune View the TurboTune guide Interactive guide Access interactive features Favorites View listings of your preferred programming Clear Cancel the on-screen function and return to previous activity Main menu View the Main Menu Information View information about the currently selected program S Select/Move/OneLine guide Press to select an on-screen option, Press the arrows to move the screen highlight, Press to view the OneLine Guide (if no menu option) HMRC-8 Remote Control Function Quick Reference The DIRECTV Receiver front panel buttons can provide the basic controls needed to access major DIRECTV System features. However, using the remote control simplifies accessing the basic system functions, enhances your system’s capabilities, and provides convenient shortcuts to extended features. Additionally, most remote control buttons can also control other home entertainment system components. 14 Using the remote control Remote control functions The joystick is the most versatile (and most used) remote control feature. Using only the joystick, you can perform virtually all on-screen functions including: • • • • Selecting a highlighted screen menu item. Moving the screen highlight (or cursor) up, down, left and right. Jumping directly to the OneLine™ Guide. Changing channels using the OneLine Guide. Use the joystick to move up, down, left, or right through the on-screen displays. This icon appears throughout this manual to instruct you to use the joystick to navigate through on-screen menus and guides. SELECT means press the joystick in the center to activate or choose a highlighted menu option. S Press the joystick up or down to display the OneLine guide while you are watching a program. When the OneLine guide appears, press the joystick up or down to step to the next higher- or lower-numbered channel. GUIDE Press the GUIDE button to display the current program guide. Press it a second time (while a program title is highlighted) to display the Guide Options menu. INFO Press the INFO button to display a brief description about the program you are viewing. For more details, press it again to display the Information Banner. The INFO button provides scheduling information (and pay per view purchase information) about the program highlighted in the program guide. See Chapter 5 – Using program guides, on page 27 for more information. CH P A G E CLEAR INPUT SAT DIRECTOR PROG SEARCH AUDIO VIDEO Use the CHANNEL (CH) button to move up or down to the next available channel in the OneLine Guide or scroll through a page of program guide selection. Press the CLEAR button to exit from any on-screen guide, remove banners, or terminate an action. The INPUT button allows you to select programming from additional program sources connected to the satellite receiver such as a DVD player, VCRs, or a terrestrial TV antenna signal. Repeatedly press INPUT to cycle through each available input source in your system. Press the SAT component select button to control the DIRECTV Receiver. The other component select buttons indicate the devices they control. You can program the AUX button to control another digital device such as an audio CD player. The DIRECTOR buttons provide convenient shortcuts to find programming and adjust system features to suit your personal preferences. Using the remote control 15 Installing remote control To install or replace the remote control batteries: batteries 1. Locate the battery compartment on the back of the remote control. 2. Remove the battery compartment cover. 3. Insert two “AAA” size batteries as shown, observing the correct polarity. 4. Replace the battery compartment cover. Installing batteries in the remote control Programming the remote control You can operate your TV, VCR, and Audio/Video receiver using your HRMC-8 or HMRC-9 remote control. Use the Code Scanning or Code Entry method to program the remote control. Code scanning may be more time-consuming, but you don’t need to know manufacturer’s control codes. Using the Code entry method may be quicker, but you’ll need to know the correct manufacturer’s control codes for each component you want to operate. 1. Aim your remote control at the component you want to use. 2. Hold down the desired device button (TV, for example). TV MUTE 3. Press the MUTE button for one second. 4. Release both buttons together. 5. The device button (in this example, the TV button) glows and remains lit. If the button does not light, repeat the previous steps. 6. Use one of the two programming methods described above. Code scanning To use this method: 1. Repeatedly tap the top part of the CHANNEL (CH) button. CH P A G E 2. Continue to step through the codes until the component turns off, indicating you have found the correct component code. If you accidentally pass a code that responds or realize you may not have been aiming the remote control at the component, tap the lower part of the CHANNEL (CH) button to step backward through the codes. 3. Press the remote control POWER button to verify the proper code by turning the device on and off. 4. Press the device button (in this example, TV) again to lock in the code. 16 Using the remote control Code Entry To use this method: 1. Find the three-digit code or codes for the type and brand of the component you want to control (in this example, TV). Refer to Appendix B – Manufacturers device control codes, on page 41. 2. If several codes are listed, you may have to try some or all of them. After entering a code, press the remote control’s POWER button to test it. The correct code turns the device on and off. 3. Press the device (DVD, VCR, AUX, TV, SAT) button again to lock the code. Using DIRECTV INTERACTIVE™ powered by Wink Communications® DIRECTV INTERACTIVE™ powered by Wink Communications® is a free, easy-to-use service that allows you to interact with the television shows and advertisements. When the blinking symbol appears in the upper left part of your screen, you know that the program you're watching has been enhanced with DIRECTV INTERACTIVE™. Simply press the button on your remote control.You can use your remote control to access up-to-the-minute sports scores, news and weather, get program trivia, respond to offers during commercials, and purchase products, all while watching TV. DIRECTV INTERACTIVE The, Jun 12 11:32 PM Interact Watch TV Main Menu DIRECTV INTERACTIVE TM Check your local weather, see the latest sports scores, interact with popular shows and shop from your couch. It is FREE, easy to use and lots of fun! Go to the DIRECTV INTERACTIVE Center to get started TM DIRECTV INTERACTIVE Center TM Select the DIRECTV INTERACTIVE™ Center menu bar, then follow the simple directions provided on the subsequent screens. Using the remote control 17 18 Using the remote control 4 Using the menus This chapter describes: • • • • How to find the menus you need to perform common tasks (this page). Using the Program Director (see page 20). How to purchase pay per view events (see page 20). How to set and modify preferences (see page 23). The table below lists the MAIN MENU tabs, their submenus, and what they do. Menu function overview Main Menu tab Screens (see page) If you want to: Program Guide Program Guide • View and modify the program guide. Guide Options Theme (page 23) Times (page 34) Favorites List (page 31) Favorites Setup (page 31) Set Options (page 31) Set Turbo (page 30) • • • • • Change the name of a program list. Change the period of time shown in the program guide Create/edit up to four channel lists (Fav. A, Fav. B, Fav. C, Family) Create a program listing that contains selected channels Guide Options: – Guide style (grid or Logo) – Picture in guide, zoom (on or off) – Multi-Color guide (on or off) – Channel Sort (numeric or alpha) – Filters, (temporary or persistent) – Reset options to the default selections – Set and edit TurboTune guide channels Audio & Video Audio Adjustment (page 23) Video Adjustment • • • • • Set Default Audio language Set Alternate Audio language Set left/right audio balance Select 4:3 or 16:9 screen ratio Center menus on your monitor (up/down and right/left) Caller ID Caller ID (page 21) • See the names and telephone numbers of recent callers Program Director Schedule (page 20) • Automatically tune to programs for viewing or taping WatchWord Setup (page 26) Results (page 26). • Search for programming using specific words • Display search results Interactive DIRECTV INTERACTIVE™ (page 17) • Access interactive programming features Purchases Upcoming & Past Purchases (page 20) • View a list of scheduled pay per view event • Display recently purchased pay per view events Lock & Limits Lock (page 35) Fav Setup (page 31) Rating (page 36) Limits (page 37) • • • • • View Mail Mail (page 23) • Read messages from DIRECTV System Setup Install (page 2) Signal (page 4) VCR (page 10) Prefs (page 23) Test (page 5) New Card Upgrade Features • • • • • • • Lock and unlock the system Set viewing times and maximum viewing hours Create/edit up to four channel lists (Fav. A, Fav. B, Fav. C, Family) Set maximum program rating allowed for viewing Select programming content to be shown in the program guide Determine proper antenna azimuth and elevation setting Test signal reception Setup VCR for unattended recording Test system operation Prepare a new access card Display upgrade status and history Display current receiver features Using the menus 19 Purchasing pay per view Select the Purchases menu tab to display lists of recently viewed and advance purchased pay per view events. You can choose PAST PURCHASES and UPCOMING PURCHASES. The event channel, title, start date and time, and cost is shown for each purchase. PAST PURCHASES Thu, Jul 19 Upcoming 2:54 PM Purchase History Past Watch TV Main Menu 1/12 Recently viewed event 9:00PM 102 $2.99 2/12 Previously viewed event 8:00PM 140 $29.99 Pay per view purchases list The PAST PURCHASES pane shows recent pay per view events charged to your account. You cannot remove listed events. The list does not show: • events purchased, but later canceled. • purchased, cancelable events to which the DIRECTV Receiver never tuned. • events ordered by calling DIRECTV. The UPCOMING PURCHASES pane displays: • PPV events you have purchased but not yet viewed • PPV events purchased but never viewed. Events ordered by calling DIRECTV do not appear on this list. For additional information about a specific event, highlight the event and press the INFO key. If you are not authorized for purchases using your DIRECTV Receiver, contact DIRECTV for assistance. To purchase a pay per view event: 1. Highlight the Buy menu pane option 2. Press SELECT 3. Press SELECT again to confirm your purchase. Cancelling purchases You may cancel some events after purchasing them. You can usually cancel unviewed purchases, however some events cannot be cancelled. If the Cancel Purchase button appears, you can clear the purchase. If this button is unavailable, part of the event has probably already been viewed, and you must accept the purchase. To cancel a Pay Per View event: 1. Highlight the event you want to cancel. 2. Press CLEAR on the remote control. 3. Use the pop-up menu panel to cancel the purchase. 20 Using the menus Viewing Mail DIRECTV uses the MAIL feature to send you important information, inform you of special events, and tell you about special offers.When you receive a new message, a New Mail icon appears at the top of all menus until you read the message. Highlight and SELECT the View Mail tab from the MAIN MENU.. VIEW MAIL Mail Watch TV Main Menu Fri, Jul 6 5:24AM Read Message Erase Message 1 of 3 Page 2 Second page of message text... VIEW MAIL menu pane Message – Cycle through multiple messages. SELECT the Messages button. Use the joystick to navigate messages. S Page – Use the CHANNEL(CH) button to cycle through multi-page message. Erase – Permanently remove a message. Messages are automatically deleted as they become outdated or if space is needed for newer incoming messages. Using Caller ID Your DIRECTV Receiver shows you the name, time, and telephone number of recent calls on your TV as shown in the figure below. CALLER ID Caller ID Watch TV Main Menu Sun, Apr 1 3:42PM Call History 10:16 AM Today John Customer 1 (765) 163-7133 9:11 AM 7/29/01 Joe Callow 1 (405) 163-5256 Call history screen You must subscribe to Caller ID from your local telephone company to use this feature. Highlight and SELECT the Caller ID tab from the MAIN MENU. Using the menus 21 Using the program Director You can program up to 32 events in advance for viewing or unattended recording. The PROGRAM DIRECTOR will tune to a program at a specific date and time, or tune on a repeating basis. As shown below, you can: • Schedule programs for viewing (ü) • Schedule programs for taping ( ) • Select Cancel from the menu if you decide not to schedule anything. Wed, Jun 13 PROGRAM DIRECTOR Schedule Watch TV Main Menu Chan Start Length 6:24 PM Frequency Schedule Options Schedule to View ( ) Schedule to Tape ( ) Delete Event Cancel The PROGRAM DIRECTOR Schedule pane popup menu To schedule or edit an The Schedule pane displays up to seven previously scheduled events at a time. event If more than seven events are already scheduled, use the joystick to scroll S down to view the additional events. Small arrows at the top or bottom of the list indicate that there are additional events. You can schedule events up to eleven months in advance. To schedule a program: 1. Highlight an upcoming program in the program guide and press SELECT. Press SELECT again to cycle through the next available option. If you choose a scheduling option, the DIRECTV Receiver will turn on (if necessary) and tune to the specified channel at the chosen date and time. 2. If you chose Schedule to Tape and you have set up your VCR (see page 10), the DIRECTV Receiver will record the event. For unattended recording: – Attach the VCR Control Cable and set up your VCR. – Set your VCR for the correct DIRECTV Receiver output: RF (channel 3/4) or A/V (phono or S-Video). – Insert a blank videotape and leave the VCR turned on. Select Delete Event to clear a scheduled event. 3. Use the joystick to specify AM or PM (or N for noon, or M for midnight if the you specified12:00). S 4. Use the same procedure set the program Length in hours and minutes 5. Use the S joystick to advance to the Frequency column. 6. Specify when, or how often, the event occurs: Today, Tomorrow, Every Mon, Every Tue, Every Wed, Every Thu, Every Fri, Every Sat, Every Sun, Everyday, Mon-Fri, or “/” (specify a date). 22 Using the menus If you specify a date, use the month/day format. The year is set automatically. 7. After setting the Frequency, use the joystick S to advance. 8. Review your settings and choose OK, or choose Cancel to delete the edits. To cancel a program scheduled for viewing or taping: Find the upcoming program in the program guide you wish to cancel and press SELECT until the check mark (✓ ) or videotape icon ( ) disappears. If the program is currently airing, you must delete the event from the Schedule menu pane accessed from the PROGRAM DIRECTOR. Setting guide preferences Options on the GUIDE PREFERENCES menu permits you to customize operation to best suit your needs. Wed, Jul 4 GUIDE OPTIONS Theme Times Fav List Fav Setup Options Set Turbo Watch TV Main Menu Guide Style Grid Picture In Guide On Guide Zoom On Multi-Color Channel Sort Filters 12:25AM On Numeric Temporary Reset Options Selecting guide options Adjusting audio and video From the MAIN MENU, highlight and SELECT the Audio & Video tab. From the AUDIO ADJUSTMENT menu pane, you can change: • • • • • Default Audio and Alternate Audio Audio Left/Right Balance TruSurround® Audio Processing Dolby Digital Output Output Optimization AUDIO ADJUSTMENT Audio Video Watch TV Main Menu Fri, Jul 13 Default Audio English Alternate Audio English Audio Balance 0,0 SRS TruSurround On Digital Output Optimize 11:15 AM Dolby Digital Stereo Factory Defaults Using the menus 23 Setting default and Your DIRECTV Receiver supports alternate audio services. Icons below the alternate audio date and time in the Information Banner or program guide to inidcate if these services are available for a particular program. AUDIO ADJUSTMENT Audio Video Watch TV Main Menu Fri, Jul 13 11:15 AM Default Audio Default Audio English Spanish Audio Alternate Alternate Audio French Audio Balance Enhanced Bass German Italian SRS TruSurround Dolby Digital Japanese Digital Output Korean Chinese Optimize English English 0,0 On Dolby Digital Stereo Factory Defaults Setting the default audio language 1. Press the remote control INPUT button to access these services. 2. Highlight the desired language. 3. Press SELECT. Occasionally, an audio track may be offered that is not being broadcast, in which case the audio will not change or you will not hear any audio. Change channels to restore the audio track to the one specified on the AUDIO ADJUSTMENT menu. Using Dolby Digital (model GCEB0 only) Select the Dolby Digital audio, then use the CHANNEL(CH) audio button to step through the audio tracks for the current program. For programs that are offered in Dolby Digital, the double-D symbol ( audio track title. ) appears with the Using the Optimize The Optimize selection allows you to select the preferred audio optimization setting based on the receiver-to-TV connection used. • Set Optimize to Stereo to provide highest quality audio when using the AUDIO OUTPUT (L) and (R), and/or DIGITAL OUTPUT connection. • Use the Optimize Mono setting to provide the highest-quality audio when using the OUT TO TV coaxial connection. 24 Using the menus Adjusting audio balance To adjust the left/right audio balance, highlight and SELECT Audio Balance. Fri, Jul 13 AUDIO ADJUSTMENT Audio Video Default Audio English Alternate Audio English Audio Balance 0,0 SRS TruSurround On Watch TV Main Menu Audio Balance Left Speaker Right Speaker Digital Output Done 0 0 Optimize 7:16 AM Dolby Digital Stereo Factory Default [ Setting left/right speaker balance Use the joystick to increase or decrease the Audio Balance settings in the pop-up menu. S Adjusting the screen Adjust video display brightness, contrast, and saturation for the best image. image 1. Highlight the Audio & Video tab from the MAIN MENU. 2. Press SELECT. 3. Highlight the PicturePerfect menu pane button. 4. Press SELECT. 5. Use the joystick to increase/decrease the screen Brightness, Contrast, and image Saturation settings in the pop-up menu (as shown bellow). S VIDEO ADJUSTMENT Fri, Jul 13 Audio Video Watch TV Main Menu Screen Ratio 4:3 Menu Centering 0,0 PicturePerfect Black Level Filter 6:25 AM 0,0,0 On PicturePerfect Brightness Contrast Saturation 0 0 0 Done Factory Default Adjusting screen image controls Using the menus 25 Using WatchWord™ Use WatchWord to search for specific words used in titles or descriptions. Press the remote control SEARCH button to access the setup pane shown below. WATCHWORD SETUP Setup Result Wed, Apr 11 3:45 PM Search for words in the Program Titles and Descriptions within Guide. Watch TV Main Menu rodeo casino tropical Roberts Empty Empty Empty Empty Search word entry list You can specify up to eight words to identify programming of interest to you. While the DIRECTV Receiver is in standby mode, it searches program titles and guide descriptions. Programs with matching words appear in the Result pane. Note: For WatchWord to have the opportunity to find programs with matching words, your DIRECTV Receiver must be in standby mode (Off). Allow the system to look for your words while you sleep or while you are at work. The DIRECTV Receiver cannot search for words while it is turned on. Highlight one of the eight choices and press SELECT. A pop-up panel appears where you can enter a search word. If you entered “ALIEN,” WatchWord might find the movie “Aliens” as well as any program which includes the word “alien” in the description. You may also use partial words. Use the pop-up button board to enter search words. You can highlight and the toggle icon on the default button board (see figure) to change it to a standard keyboard layout, if you desire. Highlight the desired letter using the joystick. Press SELECT to enter the letter. Select OK when you are finished entering the desired search words. SELECT S WATCHWORD SETUP Setup Result Watch TV Main Menu ! 1 Q A Z @ 2 W S X # 3 E D C $ 4 R F V % 5 T G B -6 Y H N & 7 U J M * 8 I K . ( ) 9 O L / 0 P : ? Del Wed, Apr 11 Search forWatchWord words in theEntry Program Titles and Descriptions within Guide. ! 1 A K T @ 2 B L U # 3 C M V $ 4 D N W % 5 E O X -- rodeo & * ( 6 casino 7 8 9 F G H I P tropical Q R S YRoberts Z . / Empty ) 0 J : ? OK Cancel Clear Del Empty Empty Empty Using the toggle key to switch button board layout 26 Using the menus 3:45 PM Using program guides 5 This chapter describes: • • • • Selecting a program guide style The different program guide styles (see page 27). Common program guide and menu features (see page 29). How to use the OneLine™ Guide (see page 30). How to set-up and use the TurboTune™ Guide (see page 30). Personalize the program guide to show program listings that interest you. You determine how your choices appear onscreen by your guide selection. Available guide styles are: • Grid with Picture-in-Guide or description • Logo with Picture-in-Guide or description Grid guide Cells with arrows indicate the program started at an earlier time or continues later than can be shown in the selected 2-hour period. • • • • • Easy to see what programs are available at a particular time. Shows two hours of programming divided into 30-minute blocks. Picture-in-Guide displays the current program in the upper right corner. Four channels of programming are displayed using Picture-in-Guide. Programs appear in a row with the channel on which they are broadcast. Thu, Jul 4 PROGRAM GUIDE All Channels Instant Weather by TWC G TODAY ® 8:03PM An image of the currently airing program highlighted in the menu selection appears here 8 PM 8:30 Instant Weather byTWC 9 PM 9:30 Local Forecast Local Forecast DIRECTV INTERACTIVE Center DIRECTV Pay Per View Previews DIRECTV Freeview If a program title cannot entirely fit in the space provided, an ellipsis (…) indicates that a portion of the title is not shown. DIRECTV Customer News You can browse five channels by turning the Picture-in-Guide off. PROGRAM GUIDE Wed, Jul 4 All Channels Instant Weather by TWC G A detailed description of the selected programming appears here. Descriptions include names of the stars and co-stars, year produced, a brief summary of the subject or plot and other information. TODAY ® 8 PM 8:30 9 PM 10:00PM 9:30 Instant Weather by TWC DIRECTV INTERACTIVE Center ... Previews DIRECTV Pay Per View Previews ... Previews DIRECTV Pay Per View Previews DIRECTV Freeview DIRECTV Customer News Using program guides 27 • Browse up or down one channel at a time with the joystick when the highlight is in the grid. • Use the remote control CHANNEL(CH) button to scroll through a full page of guide entries at a time. • Move the highlight to the right to show later time periods. S Turn off the Picture-In-Guide: 1. Press the remote control GUIDE button. 2. Press the GUIDE button again to access the Options menu tab. Press the remote control GUIDE button while the program guide appears on-screen to display the Guide Options menu. Logo guide 3. Highlight the Picture-in-Guide menu button. 4. Press SELECT to toggle the feature off. • Select channels, rather than specific programs. • The current program title appears above the logo grid as you highlight each channel. Only current programming is available in the Logo Guide. • Video of the current program appears in the Picture-in-Guide window as you highlight each channel. LOGO GUIDE All Channels Wed, May 16 10:54 PM An image of the currently airing program highlighted in the menu selection appears here A description of the program currently airing on the highlighted network menu appears here, if available. Title of the program on the network selected in menu SM cinemax TM ® TM Logo guide with Picture-In-Guide active Use the Channel (CH) button to scroll through the guide entries a full page at a time, or use the joystick to scroll through the guide entries one at a time. S You can display the most channels per screen (refer to the figure below) by turning off the Picture-in Guide feature, using the description-only mode. Fri, Jul 6 LOGO GUIDE All Channels 10:54AM A description of the highlighted menu selection appears here, if available. Title of the program on the network selected in menu SM cinemax TM ® TM Logo guide with Picture-In-Guide disabled (description-only mode) 28 Using program guides Selecting a guide style 1. 2. 3. 4. Program guide and menu features Press the remote control MENU button. Use the joystick to highlight and SELECT the Guide Options menu tab. From the Options menu tab, highlight your selection and press SELECT. Highlight and SELECT the WatchTV tab to return to the program you were viewing. S The on-screen guides and menus provide a logical and convenient way to access system features and settings. Every guide and menu contain these elements: • The guide or menu title • The day of the week, date, and time appear in the upper right corner • Menu pane selection tabs Menu Title Menu Tabs VIEW MAIL Program Guide Guide Options Audio & Video Caller ID Program Director Active Tab Date Menu Pane Time Fri, Jun 15 5:24 AM Read Message Erase 1 of 3 Message Page 2 Second page of message text... WatchWord Interactive Purchases Lock & Limits View Mail System Setup Watch TV Common menu features • Use the joystick to move the highlight from tabs into menu panes. • Any sub-filters appear under the guide title. The label left of the bullet shows the current class filter. The channel list appears right of the bullet. • Below the date and time, small icons indicating the status of the system or details about the currently highlighted program title may appear. These icons also appear in the Channel Banner as shown in the figure below. S Family 4:00 PM 340 to 5:00 PM Icon Meaning $ Fri, May 8 $ TNN: Automobiles CC 10:54 AM CC NEW MAIL Rated: NR (Not Rated) CANT ALT. DATA TAPE AUDIO SVCS. NEW MAIL Pay Interactive Dolby Digital Closed Unread Limits Data Limits Taping Other caption mail per programming audio audio available enforced over- not available view available available ride allowed available Channel Banner Icons Using program guides 29 The Channel Banner appears at the top of the screen whenever you use the CHANNEL(CH) button to change channels. Press the remote control INFO button to display the banner at any time. More detailed information appears in the Info Banner beneath the Channel Banner if you press the INFO button a second time. Banners disappear from the screen after a few seconds, but you can remove them from the screen instantly by pressing the CLEAR button on the remote control. The OneLine™ Guide The OneLine™ Guide appears at the bottom of the screen when you press the joystick up or down while watching TV. You will see the channel call sign and number, titles, and program start and end times.Use the joystick to move up or down while using the OneLine Guide to see the next or previous available channel. Press SELECT to tune to the channel. S S 360 10:30 11 AM 11:30 Family Classics The OReilly Factor NOON TheStreet.com PROGRAM GUIDE Family FNC OneLine Guide You can also enter a channel number using the numeric keypad to display the OneLine Guide for that channel. OneLine Guide content varies according to FAV LIST menu selections and other filters. Press the CLEAR button on the remote control to instantly remove the guide. Using TurboTune™ The TurboTune™ feature is a quick access guide to nine of your favorite channels. Press the TURBO button on the remote control to show the TurboTune panel. Use the joystick to highlight the desired channel. The header area of the panel displays the title of the program currently airing on the highlighted channel. Press SELECT to tune to that channel. S DIRECTV Pay Per View Prev cinemax TM Setup TurboTune Menu Specify these channels using the Set Turbo menu tab after selecting Guide Options from the MAIN MENU, or highlight and SELECT the Setup pane below the TurboTune Menu. Highlight an unassigned channel box and press SELECT. Enter the desired channel using the joystick, numeric remote control buttons, or the CHANNEL(CH) button. S 30 Using program guides 6 Setting favorites and filters This chapter explains: • • • • • Using favorite channel lists Creating a channel list How to create a channel list (this page). Renaming a channel list (see page 32). Using Auto Set, Add All, and Del All functions (see page 32). How to filter the program guide (see page 33). How to change guide times (see page 34). Channel Lists are provided to help you organize the hundreds of available channels into groupings suitable for your household. Each list can contain as many or as few channels as you wish. You can customize these groups several ways. For example, Fav. A could be Dad’s favorite channels, Fav. B could be Mom’s favorites, Fav. C could be the kids’ channels, and Family could be all channels that Mom and Dad have deemed appropriate for the entire family. 1. 2. 3. 4. Press the remote control MENU button. Select the Guide Options from the MAIN MENU. Use the joystick to highlight the Fav Setup tab. Press SELECT to open the FAVORITE LIST SETUP pane shown below. S FAVORITE LIST SETUP Wed, Jul 18 Theme 7:10 PM List: MYLIST Times Fav List Channel 120 WABC Fav Setup 121 WQED Options 122 ESPN Add All Set Turbo 123 HBOW Del. All Watch TV Main Menu Auto Set Rename Quality entertainment for the whole family, featuring animated XYZ classics, original series, entertainment specials, and movies. Included at no additional charge in DIRECTV Total Choice Packages. The four columns of small boxes on the right hand side of the pane are the Tag Boxes. The first three columns are the Fav.A, Fav.B, and Fav.C. channel lists. The farthest right hand column is the Family list. Note: If the receiver is locked, only existing Family list channels are accessible. If the Family list has not had channels added to it, no channels can be viewed without first unlocking the receiver. To avoid this inconvenience, create the Family list before locking the receiver. See Chapter 7 – Using access controls, on page 35 for additional details about controlling system access. 5. Use the joystick to highlight the tag box that corresponds to the channel number and list that you wish to create or change. 6. Press SELECT to add or remove the check mark, which indicates that the channel in that row is included in the list shown at the top of the column. S Setting favorites and filters 31 To help you decide whether to include or exclude a certain channel, the title of the program currently airing on that channel appears at the top of the screen. 7. Scroll up or down to view channels and descriptions. Press SELECT to add channels to your list. 8. When you have added all of the channels you want to your list, use the joystick to highlight and SELECT the Watch TV tab to resume viewing. S Once you have created your lists, Use the remote control FAV button to cycle through them quickly and easily. Each press cycles to next channel list. You can also select a list by highlighting the Fav List tab. FAVORITE LIST Theme Times Fav List Fav Setup Options Set Turbo Watch TV Main Menu Wed, Jul 18 8:16 PM Select Favorite List to filter Guide All Channels FAV. A FAV. B FAV. C Family Renaming a channel list: 1. Highlight the Rename button and press SELECT. A Rename List pop-up menu appears. You can rename the first three lists. You cannot rename the All and Family lists. 2. Highlight the list you wish to rename and press SELECT. A buttonboard pop-up panel appears. 3. Highlight the desired letter using the joystick. 4. Press SELECT to enter the letter. 5. When finished, Select OK. S Creating an Auto Set list 1. SELECT the Auto Set button. A pop-up menu appears showing each of the channel lists. 2. Highlight and SELECT a channel list to be programmed. Once selected, the Auto Set Progress pop-up status panel appears. It may take several minutes for the receiver to scan through all of the channels and determine which ones you are authorized to receive. The results of this scan will be stored in the designated channel list. Note: Auto Set may exclude some channels such as the Music Choice channels or include some pay per view channels. This does not mean that the receiver is faulty. These channels were excluded or included due to the DIRECTV Receiver’s analysis process. You can manually edit the lists to correct these oversights. Adding and removing all Selecting the Del All menu button clears all channels from the list you have channels chosen. Add All has the opposite effect, creating a list of all the channels you are authorized to receive. 32 Setting favorites and filters Filtering the program guide Press the remote control GUIDE button while in a guide. A pop-up menu provides filtering tools and ways to access other guide styles. By combining each of these filter options, you can quickly narrow down channels to those that match your viewing interests. Using Theme Filters From the MAIN MENU, SELECT the GUIDE OPTIONS tab. The CATEGORY FILTER menu appears, listing all available program category groups. CATEGORY FILTER Wed, Jul 18 7:15 PM Theme Times Fav List Select a Category to filter Guide All Fav Setup Options Movies Set Turbo Sports Watch TV Main Menu Specials Series News Shopping After choosing a category (other than All), the drop-down menu is replaced by the Types pop-up menu. This menu allows you to further refine a chosen theme. In addition to All, you can select popular categories that can be quickly selected using the remote control GUIDE button. For example, if you chose Series for the category, you can now choose a type of movie such as Children, Comedy, Cultural Arts, Drama, and others. Refer to the figure below CATEGORY FILTER Wed, Jul 18 Theme Times Fav List Fav Setup Options Set Turbo Watch TV Main Menu 7:15 PM CATEGORY FILTER Theme Select a Category to filter Guide All Times Fav List Movies Fav Setup Options Sports Set Turbo Specials Series News Shopping Watch TV Main Menu Wed, Jul 18 Series 7:15 PM Category Select a Category to filter Guide All All All Children Movies Comedy Movies Sports Cultural ArtsSports Drama Specials Specials Educational Series Gen. InterestSeries How-To News News Mature Shopping Shopping After selecting one of these, the guide will be further filtered to show only those channels offering programs of the selected category and type. Setting favorites and filters 33 Selecting guide times Highlight the Times menu tab. The GUIDE TIMES menu shown below provides easy access to future programming information. Simply select the time you want the guide to begin. After a few seconds, the selected guide appears. Wed, Jul 18 GUIDE TIMES Theme Times Fav List Advance Program Guide to Chosen Time Fav Setup Current Options Set Turbo Wed, 11:00PM Watch TV Main Menu Thu, 5:00AM Thu, 11:00AM Thu, 5:00PM Thu, 11:00PM Fri, 5:00AM 34 Setting favorites and filters 9:24PM 7 Using access controls This chapter explains: • How to lock and unlock the system (this page). • How to set a maximum ratings limit (see page 36). • Setting maximum spending and time limits (see page 37). Locks & Limits provides settings to help you control the viewing restrictions of DIRECTV® programming. When accompanied by the channel lists, these limits provide a great degree of control. The DIRECTV Receiver must be locked for the TV Timer, Rating and Spending limits to be enforced. Locking & unlocking the system When you first receive your satellite system, it will be unlocked; (i.e., no limits or restrictions are in effect). You must lock the system to enforce the limits (spending, ratings, TV timer, and “Family” favorite list). Note: Once the DIRECTV Receiver is locked, only existing Family list channels will be accessible. If the Family list does not contain any channels, no channels can be viewed without first unlocking the receiver. To avoid this, verify the contents of the Family list before locking the receiver. How to lock the system When you SELECT the Lock button, the LOCK SYSTEM pop-up panel appears. PARENTAL LOCK Lock Fav Setup Ratings Limits Watch TV Main Menu Wed, Jul 18 9:15 AM Enforce rating, spending, and viewing limits, and restrict access to Family list channels. Enter the 4 digit passcode to lock(unlock) your receiver. Lock 1. Enter a four-digit passcode using the remote control. Press Cancel to clear the locking process. 2. Highlight and SELECT OK. 3. Enter the code again to confirm. 4. Highlight and SELECT OK. If you forget your four-digit code, you must call DIRECTV. Once you select OK, the satellite receiver is locked. You must enter the passcode to unlock it. A lock symbol icon appears at the top of every menu screen to remind you that the system is locked. Using access controls 35 . PARENTAL LOCK Lock Fav Setup Ratings Limits Watch TV Main Menu Wed, Jul 18 9:15 AM Enforce rating, spending, and viewing limits, and restrict access to Family list channels. Enter the 4 digit passcode to lock(unlock) your receiver. Lock LOCK SYSTEM Passcode Lock OK * * * * Cancel CONFIRM PASSCODE Passcode OK Lock * * * * Cancel Unlocking the system To remove the lock and its restrictions: 1. Highlight the Locks & Limits tab from the MAIN MENU. 2. SELECT the Unlock menu button. 3. Enter the code you entered to lock the system. The button used to lock the system is also used to unlock the system. Once the system is unlocked, all limits and restrictions are removed! Choose Cancel to keep the lock in effect. Setting ratings limits Program ratings indicate the suitability of a program’s content for a given audience. Highlight the Max Ratings tab. Highlight and SELECT the highest rating you wish to allow. The chosen rating will be checked as shown below. PARENTAL LOCK Lock Fav Setup Wed, Jul 18 9:15 AM Ratings Limits Watch TV Main Menu Lock All NR (Not Rated) NR-Content R G NR-Mature PG NC-17 PG-13 Allow All You may choose to Lock All or Allow All instead of setting a specific limit. 36 Using access controls Setting spending and Highlight the Limits tab to set the maximum spending limit. You can set the time limits maximum purchase price on a per-event basis. To change the displayed limit: 1. Highlight the Max Spending button 2. Press SELECT to display the SPENDING LIMIT pop-up panel. Use this menu to set the specific hours and maximum hours the satellite receiver can be used for viewing. SPENDING/VIEWING LIMITS Lock Fav Setup Ratings Limits Watch TV Main Menu Wed, Jul 18 Max Spending 10:11 AM $5.00 Monday 24:00 Hours allowed Tuesday 24:00 Hours allowed Wednesday 24:00 Hours allowed Thursday 24:00 Hours allowed Friday 24:00 Hours allowed Saturday 24:00 Hours allowed Sunday 24:00 Hours allowed Total time watched today: 1:12 3. Use the number buttons on the remote control to set the limit or use the joystick to increase or decrease each digit. 4. Use the joystick to highlight the digit that you want to change. The maximum limit is $655 per event. 5. Highlight OK and press SELECT to confirm the entered amount. Using access controls 37 38 Using access controls Questions & Answers A Questions? Did we forget to tell you something? We have compiled some the most common questions and their answers here. We hope they help! Q I had a signal but now I am getting a message “Searching for satellite signal. To access related utilities, press SELECT.” What happened? A Rain clouds and snow can affect the satellite signal reception. This loss of signal is temporary. Also check for new growth on trees and bushes that could be blocking the signal. One other possibility is that the wind or someone has moved the satellite dish antenna. Q Why can’t I control my TV? A Before you can control your TV, VCR, or any other device besides your satellite receiver, you must program your remote control to match your different devices. See Chapter 3 – Using the remote control in this manual for specific instructions. If you have already successfully programmed your remote control, try pressing the appropriate device key to put your remote in the proper mode. Then try controlling that device. Also, make sure that the batteries in the remote control are good. Q My satellite receiver does not respond when I press keys. What’s wrong? A Most likely, if the front panel keys work but the remote control doesn’t work, try pressing the SAT button before trying to control the digital satellite receiver. If that doesn’t work, press the SAT and MUTE buttons together and try again. If that doesn’t work, or if the front panel buttons don’t work either, unplug your digital satellite receiver for 30 seconds, then plug it back in. Your satellite receiver is a computing device. It is susceptible to erratic changes in power and/or signal, just as any other computer, and these sudden changes can cause it to become “confused.” Q Some channels look good, while others freeze or indicate that no signal is available. What’s wrong? A The most common causes for this behavior relate to an improperly grounded satellite cable. Check the cable between your digital satellite receiver and the satellite dish antenna. Confirm that RG-6 (not RG-59) cable is used and does not exceed 100 feet in length. Longer cable runs require amplification. This special amplifier is available from your dealer. Q How can I watch one channel while recording another? A With only one digital satellite receiver, unfortunately, you can’t. Each receiver can only decode one channel at a time. Q I’m getting a message to call some extension. Why? A There are many different reasons for this. If you want to watch the channel that is displaying the message, call DIRECTV at 1-800-531-5000. Q Why don’t I have an on-screen offer to purchase pay per view programs? A There are three possibilities; your digital satellite receiver must be connected to a phone line and it is not, or DIRECTV doesn’t realize that Questions & Answers 39 your phone line is connected or has disabled your ability to make on-screen purchases. Call DIRECTV at 1-800-531-5000 for assistance. Q Can I receive my local TV programs through my digital satellite receiver? A There are three ways to receive local programming: •If you are in an area where local programming is available via satellite and have the proper satellite dish antenna, contact DIRECTV to arrange for the necessary subscription package. •Install a traditional antenna (i.e., roof mounted, attic mounted, rabbit ears). •Arrange for basic or “lifeline” cable TV service from your local cable company. If you select item 1 above, your local programming appears in the program guide like any other channel. For options 2 or 3, connect the local signal to the IN FROM ANTENNA jack on the back of your digital satellite receiver. Use the INPUT key to switch between DIRECTV® programming and local programming provided on the OUT TO TV connector. Q If I have questions about my satellite system or need to have it serviced, who should I call? A For issues regarding your equipment, contact Hughes Consumer Care Center directly at 1-800-274-8995, or if you prefer, call your dealer first. They are most familiar with your installation and needs. Also, they are likely to be local to you. If you need assistance with your subscription, such as adding channels, contact DIRECTV at 1-800-531-5000. Q I think I set an event to record on my VCR, but when I played the tape back nothing was there. What could be wrong? A There are several possible reasons for this. First, check that the VCR was programmed correctly and left turned on and the input matches the output from your digital satellite receiver. Confirm that you were authorized to tape the chosen program. Q Why do I need to connect the satellite receiver to a telephone line? A The telephone connection is used by the satellite receiver report purchase activity to DIRECTV. Q I picked up my telephone and it was making a hissing and squealing sound. Why? A Your digital satellite receiver was reporting any pay per view activity that may have occurred. This rarely happens and only lasts for a minute or so. Q What if my question isn’t listed here? A Call your dealer or Hughes Consumer Care Center at 1-800-274-8995. We will do our very best to answer your questions. 40 Questions & Answers Manufacturers device control codes B Use these codes to program your control operate your system components. Table 3: VCR brands and remote control codes BRAND CODE NUMBER BRAND CODE NUMBER BRAND CODE NUMBER Aiwa 034 Lloyd 034 Samsung 102 040 032 104 107 109 112 113 115 120 122 125 159 Akai 016 043 046 124 125 142 146 LXI 034 003 009 017 Sansui 043 048 135 022 Ampro 072 Magin 040 Sanyo 003 010 102 007 014 134 Anam 031 Magnavox 067 031 034 041 068 154 160 064 Scott 017 037 044 129 131 112 159 Audio Dynamics 012 023 039 043 Marantz 067 069 031 067 012 023 Sears 001 003 008 009 010 014 017 081 101 Broksonic 035 037 044 129 152 Marta 101 Sharp 031 054 053 Canon 028 031 Matsui 027 030 Shintom 024 Capehart 108 MEI 031 Signature 034 Craig 003 040 135 Memorex 102 101 003 010 014 031 034 053 072 139 134 Sony 003 031 052 056 057 058 149 155 Curtis Mathes 031 041 156 MGA 045 046 059 Soundesign 034 Daewoo 117 119 005 116 007 010 065 108 110 112 Minolta 001 156 STS 001 Daytron 031 059 034 067 108 Mitsubishi 001 059 061 046 051 142 045 162 Sylvania Dimensia 156 MTC 034 040 Symphonic 034 DBX 012 023 039 043 Multitech 024 034 Tandy 010 034 Dynatech 034 053 NEC 012 023 043 048 039 Tatung 039 043 023 Electrohome 059 Nordmende 043 Teac 034 039 043 023 Emerson 006 029 035 025 027 034 036 037 046 101 129 131 138 017 031 044 152 157 153 Optonica 053 054 Technics 031 070 Fisher 003 008 009 010 Panasonic 070 133 031 066 160 161 Teknica 031 019 034 101 Funai 034 Pentax 001 013 063 156 TMK 006 GE 031 072 144 147 063 151 107 109 156 126 Philco 031 034 067 Toshiba 112 008 131 047 059 082 001 042 Go Video 040 132 136 Philips 031 067 034 101 054 071 Totevision 040 101 Goldstar 101 123 012 001 114 Pilot 101 Unitech 040 Harman Kardon 012 045 Pioneer 021 013 048 Vector Research 012 Hughes 001 Portland 108 Video Concepts 012 046 034 141 Hitachi 040 001 026 034 063 137 150 156 Quartz 002 014 Videosonic Instantreplay 031 Quasar 070 133 160 161 031 066 Wards 003 001 024 031 034 040 053 054 017 131 JCL 031 Radio Shack 123 Yamaha 012 043 034 039 JCPenney 001 012 040 101 156 066 RCA 001 107 109 144 147 151 041 034 040 156 031 140 Zenith 072 080 056 048 034 101 058 Jensen 043 Realistic 003 008 010 014 031 034 040 053 054 101 JVC 048 050 043 130 060 012 031 150 055 158 Rico 058 078 Kenwood 014 034 047 048 023 Salora 014 Manufacturers device control codes 41 Table 4: Television brands and remote control codes BRAND CODE NUMBER BRAND CODE NUMBER BRAND CODE NUMBER Admiral 072 081 160 161 JBL 164 RCA 160 161 156 165 065 070 004 023 024 056 074 152 167 145 A Mark 112 143 JCPenney 070 004 008 009 024 030 065 101 160 143 156 Realistic 007 019 043 047 Akai 070 146 Jensen 013 Runco 072 130 Amstrad 052 JVC 001 034 038 083 199 Sampo 004 070 058 207 Anam 043 054 056 080 112 KEC 043 Samsung 101 004 050 089 105 160 127 143 133 AOC 007 020 053 057 082 070 004 058 112 Kenwood 070 001 Sanyo Audiovox 076 120 Kloss 002 059 Scott 004 028 043 048 143 Blaupunkt 088 KMC 143 Sears 015 030 028 094 004 007 057 082 143 160 167 Cairn 206 KTV 043 143 154 070 Seleco 200 Candle 070 002 003 004 Lodgenet 072 Sharp 081 004 014 019 022 028 143 Capehart 058 Logik 072 Siemens 088 CCE 001 004 024 Luxman 004 Signature 072 Cetronic 043 LXI 007 015 052 081 160 Sony 001 085 126 166 079 Citizen 070 002 003 004 043 101 103 143 Magnavox 003 004 022 059 060 061 063 064 070 094 127 160 164 Soundesign 028 003 004 043 Classic 112 043 Marantz 070 164 Spectricon Concerto 004 Matsui 164 SSS 004 043 Contec 043 050 051 Memorex 004 007 072 Supre Macy 002 Coronado 143 Metz 088 Sylvania 003 044 059 060 063 064 070 127 160 164 Craig 043 054 191 MGA 024 070 004 024 028 042 Symphonics 194 052 Crown 043 143 Minerva 088 Tandy 081 Curtis Mathes 070 101 143 004 Mitsubishi 004 024 040 042 028 146 Tatung 056 062 CXC 043 MTC 070 004 062 101 Technics 034 080 Daewoo 076 103 004 016 043 114 120 127 143 128 136 192 044 NAD 015 025 Techwood 004 Daytron 002 003 004 024 028 043 072 101 143 004 143 NEC 070 040 016 056 024 130 134 019 004 Teknika Dynasty 043 Nikei 043 Telerent 072 Dynatech 062 Onking 043 Tera 173 Electrohome 024 076 120 143 Onwa 043 TMK 004 Emerson 004 005 028 043 047 048 050 051 076 120 143 151 153 154 155 070 096 191 Optonica 019 081 Toshiba 015 030 007 040 062 101 Fisher 007 057 Orion 201 202 203 204 205 Universal 008 009 Fujitsu 198 Panasonic 034 080 056 164 Video Concepts 146 Funal 028 043 Philco 070 003 059 060 064 004 056 063 024 164 Vidtech 004 Futuretech 043 Philips 164 093 038 005 059 127 070 003 004 Wards 004 019 064 008 009 028 060 061 063 072 074 143 164 165 GE 160 165 161 070 008 009 034 056 073 074 130 155 167 004 145 Pioneer 025 070 004 018 023 190 Westinghouse 076 120 Goldstar/LG 004 106 110 112 119 127 143 193 Portland 004 143 065 Yamaha 004 070 Gradiente 004 038 106 Proscan 160 161 167 145 065 York 004 Hall Mark 004 Proton 004 058 112 143 171 173 Yupiteru 043 Hitachi 007 011 004 009 010 012 023 072 075 143 158 Quasar 034 056 080 164 Zenith 072 073 095 103 Infinity 164 Radio Shack 004 019 043 127 143 Zonda 112 42 Manufacturers device control codes Table 5: AUX audio brands and remote control codes AUX CODE NUMBER AUX CODE NUMBER AUX CODE NUMBER Adcom 146 149 227 244 Jerrold 141 Pioneer 093 132 138 210 165 189 195 201 081 230 AMC 083 084 JVC 112 198 252 Quasar 131 187 Arcam 100 Kenwood 096 104 119 125 148 151 163 171 173 242 RCA 109 213 166 Audio File 093 098 Krell 223 Realistic 103 122 123 124 172 174 177 179 180 194 Audio Techinica 221 Lexicon 215 250 Rotel 204 218 239 Aiwa 111 114 117 156 170 199 203 219 231 241 254 Luxman 066 120 205 229 Sansui 196 214 126 139 075 197 Akal 181 233 LXI 123 177 Sanyo 157 129 Anam 180 Magnavox 126 162 185 186 224 228 Samsung 068 Bose 064 137 219 Marantz 074 105 126 128 139 155 162 186 232 Scott 180 190 B&K 150 152 McIntosh 251 Sharp 096 125 151 161 169 182 193 Carver 013 098 107 126 129 160 163 220 245 249 Mondial 069 225 Sherwood 089 127 Clarion 151 169 MCS 108 178 Sony 097 117 147 183 200 253 237 238 188 192 Denon 101 133 191 202 208 246 247 Mitsubishi 253 Soundstream 197 Englightened Audio 078 153 Meridian 013 067 Starcom 141 Fisher 107 129 157 163 176 NAD 128 Symphonic 124 Fosgate Audionics 228 248 Nakamichi 072 212 234 235 Teac 102 159 180 062 GE 216 123 Niles 236 Technics 131 184 187 200 202 208 165 Harmon Kardon 073 195 248 249 Onkyo 094 115 116 209 211 255 Toshiba 175 Haitai 119 Optimus 121 125 140 181 Wards 163 Hitachi 088 Panasonic 131 144 187 200 Yamaha 092 120 166 240 125 169 216 JCPenney 109 154 178 Parasound 085 086 090 Zenith 222 061 Jesen 099 Philips 136 186 126 197 Table 6: AUX-CATV brands and remote control codes CATV CODE NUMBER CATV CODE NUMBER CATV CODE NUMBER Hamlin 015 017 022 Pioneer 007 026 027 TOCOM 003 Jerrold/G.I 010 021 025 Scientific Atlanta 002 006 013 Zenith 004 Oak 008 016 023 Pioneer 007 026 027 Manufacturers device control codes 43 Table 7: DVD player brands and remote control codes BRAND Alpine CODE NUMBERS BRAND Magnavox 009 CODE NUMBERS BRAND Proscan 038 042 008 CODE NUMBERS 035 036 Apex Digital 076 Marantz 006 007 RCA 035 036 Denon 030 226 Mitsubishi 032 Samsung 029 040 GE 004 035 036 NAD 077 Sharp Goldstar, LG 028 041 Onkyo 207 Sony 037 Harmon Kardon 217 Panasonic 003 039 Toshiba 038 001 Hitachi 011 Philips 038 042 006 007 Yamaha 039 079 JVCt 031 Pioneer 034 005 010 Zenith 028 041 Table 8: DVD-Laser Disc Player brands and remote control codes BRAND California Audio 44 CODE NUMBER BRAND CODE NUMBER 047 Quasar 047 Denon 043 044 Radio Shack 056 Fisher 047 RCA 046 Kenwood 060 Realistic 049 Magnavox 048 057 Runco 058 Mitsubishi 057 Sanyo 052 NAD 057 Sharp 060 Optimus 049 Sony 050 053 Panasonic 047 051 054 Technics 047 051 054 Philips 048 Toshiba 060 Pioneer 055 057 Yamaha 045 059 Manufacturers device control codes Index A A/V receiver, connecting 12 Advance select 22 Aligning the antenna 4 Alternate audio 24 Antenna alignment values 4 cable, connecting 2 pointing 4 RF remote control 9 terrestrial 9 Audio balance 24 balance control 25 connection 24 digital 24 AUX audio brands and control codes 43 Azimuth angle, determining 4 DIRECTOR buttons 15 Dish antenna pointing 4 Dolby digital connection 12 logo icon 24 Pro Logic 12 DVD player remote control codes 44 E Edit preselected program 23 Elevation angle, determining 4 Emitter, VCR control cable 11 Entering remote control codes 17 Entertainment system, connecting 12 F Front panel controls 4 J Joystick functions 13, 14, 15 icon 15 remote control 15 L Locate satellite 4 M Mail Erase 21 message 21 viewing 21 Menu features 29 function overview 19 icons 3 tabs 29 Multiple box icon 3 B G Balance, audio 25 Batteries, installiing 16 Brightness, video 25 Broadcast TV antenna 9 Button board, change layout 26 Guide features 29 grid style 27 logo style 28 selecting style 27 setting preferences 23 styles 29 GUIDE button 15 N H P History, purchase 20 Past puchases pane 20 Pay per view history 20 purchase 20 upcoming events 20 Phone jack connection 3 Picture-In-Guide options 27 turning off 28 PicturePerfect, adjusting 25 Preferences, guide 23 Program guide features 29 preferences 23 styles 27 Programming devices 17 Purchase Pay Per View event 20 Purchases not listed 20 C Caller ID service 21 Can’t Tape message 12 Cancel purchase 20 CATV brands and remote control codes 43 Channel banner location 30 removing from screen 30 CLEAR button 15 Codes, device control 41 Contrast, screen 25 Controls device 16, 41 front panel 4 VCR, testing 11 D Default audio 24 Delete event, preselected 22 Device control codes 41 Device programming 17 I Icons interactive features 17 menu 3 multiple box 3 new mail 21 on-screen display 3 option list 3 taping 22 toggle 3, 26 viewing 22 Info Banner, using 30 INFO button 15 INPUT button 15 New mail icon 21 O Optimize 24 Options list icon 3 Ordering events via phone 20 Index 45 R Rear panel connections 2 phone jack connector 3 Recording unattended 22 VCR setup 22 Remote control batteries 16 manufacturers device codes 41 models 13 programming 16, 17 quick reference 13, 14 sensor, VCR 10 TV codes 42 Replacing batteries 16 RF antenna 9 S SAT button 15 Saturation, video 25 Scanning remote control codes 13 Schedule programs 22 Search for words 26 46 Index SELECT control 15 Selecting a menu item 15 Signal indication 5 Standby mode 26 Surround sound, Dolby 12 S-Video connection 3 System Setup screen 4 T Tabs, menu 29 Tag boxes 31 Telephone connection 3 Testing results 5, 6 satellite signal 5 Toggle icon 26 Transponder signal strength 5 testing 5 TurboTune, assigning channels 30 TV connection types 3 TV remote control codes 42 U Unattended recording 22 Unviewed purchases 20 Upcoming purchases menu 20 V VCR Brands 41 connecting 10 control cable 10, 11 control codes 41 remote control sensor 10 SETUP menu 11 testing 11 Video contrast 25 saturation 25 W WatchWord entries 26 Z ZIP code antenna alignment 4 Limited Warranty Hughes Network Systems (HNS) provides the following limited equipment warranty on this equipment. This limited warranty is in lieu of all other warranties, whether express, implied, or statutory, including, without limitation, the implied warranties of merchantability and fitness for a particular purpose. HNS shall not be liable for damages in excess of the purchase price of the product less reasonable amount for use and wear, or for any incidental, special, punitive, or consequential damages of any nature whatsoever, or for any delays, loss of use, time, profits, revenue or savings, any commercial loss, inconvenience, damage to buyer's or to other person's property, arising from the use or inability to use the product, or otherwise for any failure to perform. HNS neither assumes nor authorizes any customer care center or any other person or entity to assume any other obligation or liability beyond that which is provided for in this limited warranty. No oral or written information or advice given by HNS, its dealers, distributors, agents or employees, shall create a warranty or in any way increase the scope of this warranty. Some states do not allow the exclusion or limitation of incidental or consequential damages, or limitations of implied warranties, so the above limitations or exclusions may not apply to Purchaser. This Limited Warranty gives specific legal rights to Purchaser, and Purchaser also may have other rights which may vary from state to state. Provisions Your Hughes manufactured DIRECTV Digital Satellite receiver, Satellite dish Antenna, and Remote Control are warranted against defects in materials and workmanship for parts and labor. Part GAEB0 Satellite Receiver GCEB0 Satellite Receiver Warranty 1 year parts, 1 year parts, Period 90 days 90 days labor labor HRMC-8, HANT-XX HRMC-9 Dish and Remote LNB(s) Control 90 days parts 1 year parts This limited warranty does not cover: • • • • • • • • • • a unit that has been modified damage from misuse, negligence, or accident any installation, or damages caused by installation shipments to HNS that are damaged in transit removal and reinstallation of equipment for repair loss of programming damage due to lightning (for example, power surges, nearby strikes) cost of shipping to HNS batteries or cables after installation acts of God This limited warranty is not transferable and is valid only in the United States. Service If you have any questions or encounter any problems, you may contact your authorized HNS dealer or call our Customer Care Center, at 1-800-274-8995. To ensure prompt and efficient service, please have your model and serial numbers handy. Space to note these numbers is provided inside the front cover of this manual. In the event of repair or replacement, you will need these numbers, along with your bill of sale. Return Procedures If your equipment requires repair or replacement, you can: OR • contact your authorized HNS dealer or call our Customer Care Center to find the authorized service center nearest you. • choose the “replace after receipt” option, whereby you must ship HNS your defective equipment and, once your unit is received, a new or refurbished unit (at the sole discretion of HNS) will be shipped to you. Packing Instructions for Equipment to be Returned 1. Call the Customer Care Center. The Customer Care technician will give you an RMA (Return Merchandise Authorization) and a mailing address for returning your unit. 2. If you are returning the digital satellite receiver, please keep your access card and return only the digital satellite receiver. 3. Pack the unit in the original box and packing material, if possible, or in other packaging that provides adequate protection for shipping. Include your name and address, the model number, the serial number, and a copy of the bill of sale. 4. Write: "Attention: RMA #" (the number given to you by the Customer Care technician) on the return shipping label. 5. Insure the shipment for the full replacement value. 1030674-0001 Rev. D January 18, 2002 MANUAL DEL USUARIO DIRECTV Receptor Digital de Satélite POWER MENU SELECT POWER MENU SELECT Modelos GAEB0 GCEB0 1030674-0001 Rev. D Copyright © 2001, 2002 Hughes Network Systems, una empresa de Hughes Electronics Corporation.Todos los derechos reservados. Esta publicación y su contenido son propiedad de Hughes Network Systems, una compañía de Hughes Electronics Corporation. Ninguna parte de esta publicación se puede reproducir de ninguna forma ni por ningún medio, sin el permiso por escrito de Hughes Network Systems. 11717 Exploration Lane, Germantown, Maryland 20876 Hughes Network Systems ha hecho todos los esfuerzos para asegurar que el material de este documento sea completo y correcto. Hughes Network Systems no es responsable de los errores que pueda contener este documento. La información contenida en este documento está sujeta a cambios sin previo aviso. Hughes Network Systems no hace ninguna garantía de ninguna clase con respecto a este material, incluyendo, pero no limitado a, las garantías implícitas de la comerciabilidad y uso para algún propósito específico. Cubierto por una o más de las siguientes patentes de los EE.UU.: 6,075,526;5,828,419; 5,751,372; 5,694,176; y 5,635,989. Este producto está pendiente de una o más patentes de los EE.UU. o extranjeras. El software contenido en los receptores GAEB0 y GCEB0 y a los que se hace referencia en este manual tienen copyright© 1995-2001 by Hughes Network Systems, una compañía de Hughes Electronics Corporation. Algunas características están pendientes de patente. WatchWord, PreSelect, TurboTune y La Guía OneLine son marcas comerciales de Hughes Network Systems. DIRECTV, DIRECTV HOME SERVICES y DIRECT TICKET son marcas comerciales de DIRECTV, Inc. una unidad de Hughes Electronics Corp., y se usan con permiso. “NFL,” el escudo de NFL y “NFL SUNDAY TICKET” son marcas comerciales registradas de National Football League y sus afiliados. “NHL,” el escudo de NHL y “NHL CENTER ICE” son marcas comerciales registradas de National Hockey League. “MLB,” “MLB EXTRA INNINGS,” “Major League Baseball,” y el logo de la silueta del bateador de Major League Baseball son marcas de servicio de Major League Baseball Properties, Inc. Las marcas comerciales y el copyright de Major League Baseball se usan con permiso de Major League Baseball Properties, Inc. Todas las demás marcas comerciales y marcas de servicios son propiedad de sus respectivos titulares. Exención de responsabilidad – Se han hecho todos los esfuerzos posibles para asegurar que toda la información de este documento sea correcta y completa. Ninguna compañía será responsable por errores que pueda haber en este documento. La información de este documento está sujeta a cambios sin previo aviso, No se dan garantías respecto a este material, incluyendo, pero no limitado a, las garantías implícitas de comerciabilidad y uso para algún propósito específico. Marcas comerciales – DIRECTV, el logo de Cyclone Design y DIRECTV INTERACTIVE son marcas comerciales de DIRECTV, Inc., una unidad de Hughes Electronics Corp. Todas las marcas comerciales, marcas, nombres o nombres de productos a los que se hace referencia en esta publicación, son propiedad de sus respectivos titulares y Hughes Network Systems no avala a ninguno de estos productos o servicios aquí mencionados. Información sobre Dolby Laboratories – Fabricado bajo licencia de Dolby Laboratories. “Dolby," "Pro Logic" y el símbolo de la doble D son marcas comerciales de Dolby Laboratories. Información sobre Macrovision® – Macrovision es una marca comercial registrada de Macrovision Corporation. Este dispositivo incluye una tecnología de proceso anticopia protegida por las patentes de EE.UU 4,631,603; 4,577,216; 4,819,098; y otros derechos de propiedad intelectual. El proceso anticopia está licenciado para el uso no comercial, en el hogar únicamente. Se prohibe la ingeniería inversa o el desensamblaje. Información sobre StarSight® – Las funciones de StarSight® están licenciadas bajo una o más de los siguientes patentes de los EE.UU: 4,706,121; 5,151,789; 5,353,121; 5,353,277; 5,479,266; 5,479,268; y 5,532,754. Derechos de uso reservados. ii Información sobre TruSurround™ – TruSurround™ y el símbolo son marcas comerciales de SRS Labs, Inc. TruSurround technology está incorporado bajo licencia de SRS Labs, Inc. Nota sobre la grabación de programación – La mayoría de los programas y películas de televisión tienen derechos de copyright. Esto significa que alguien tiene los derechos legales que rigen la reproducción y distribución de este material. En algunas circunstancias, la ley de derechos de propiedad puede ser aplicada a grabaciones residenciales de material registrado. En la mayoría de los casos está permitida la grabación para uso personal, mientras no se venda el material. Usted debe actuar responsablemente en este área; averigüe más sobre la materia si no está seguro. Es posible que algunos programas pay per view estén licenciados por productores como programas para ser vistos solamente ("view’only”). Estos son programas con derechos de copyright y no se pueden copiar o reproducir con ningún propósito sin el consentimiento escrito y expreso del propietario de los derechos. Programación de DIRECTV® – LA ACTIVACIÓN DE LA PROGRAMACIÓN PUEDE ESTAR SUJETA A LA APROBACIÓN DE LA TARJETA DE CRÉDITO Y REQUIERE UNA DIRECCIÓN VÁLIDA DEL SERVICIO PRESTADO, UN NÚMERO DE SEGURIDAD SOCIAL Y UNA DE LAS PRINCIPALES TARJETAS DE CRÉDITO. Programación sujeta a cambios. Debe estar ubicado físicamente en los EE.UU. de América para recibir servicio de DIRECTV. Los servicios de DIRECTV no están disponibles fuera de los EE.UU. La programación de DIRECTV se vende por separado e independientemente del sistema DIRECTV. Es necesario tener una suscripción válida de programación para usar el hardware del sistema DIRECTV. Active su programación de DIRECTV hoy llamando a 1-800-DIRECTV (1-800-347-3288). Instalación del hardware de DIRECTV System Para la instalación profesional de su DIRECTV System, hacer preguntas o resolver problemas relacionados con su DIRECTV System, comuníquese con su distribuidor. Si necesita información adicional, comuníquese con el Centro de asistencia técnica llamando al 1-800-274-8995. Registre la siguiente información para la garantía N° de modelo del Sistema: HSYS- ___ ___ ___ ___ __ N° de modelo del Receptor: _____________________ N° de Serie del receptor: _______________________ N° de Tarjeta de Acceso: _______ ________ _______ N° de Serie LNB: ______________________________ Instrucciones importantes de seguridad Para su seguridad y protección, lea este Manual del Usuario en su totalidad antes de intentar la instalación o uso de su sistema de satélite. En particular, lea atentamente esta información de seguridad. Mantenga esta información de seguridad donde pueda consultarla si la necesita. Preste atención a las advertencias - Todas las advertencias del producto y las instrucciones de operación deben ser respetadas. Siga las instrucciones - Todas las instrucciones de operación y uso deben ser respetadas. ESTAS PRECAUCIONES Y SÍMBOLOS APARECEN EL LA PARTE POSTERIOR DEL RECEPTOR AVISO o PRECAUCIÓN Los sistemas con doble aislamiento están protegidos con placas adicionales y separaciones para que la unidad no suponga riesgos para el usuario final. CAUTION RISK OF ELECTRICAL SHOCK DO NOT OPEN INSTRUCCIONES IMPORTANTES DE SEGURIDAD 1. 2. 3. 4. 5. 6. 7. Lea estas instrucciones. Siga estas instrucciones. Tenga en cuenta todos los avisos. Siga todas las instrucciones. No use este aparato cerca del agua. Límpielo solamente con un trapo seco. No bloquee ninguna salida de ventilación. Instale según las instrucciones del fabricante. 8. No instale cerca de fuentes de calor como radiadores, salidas de calor, hornillas u otros aparatos (incluyendo amplificadores) que produzcan calor. 9. No ignore el propósito de seguridad de los enchufes polarizados o tomas de tierra. Los enchufes polarizados tienen dos placas, una más ancha que la otra. Un enchufe con toma de tierra, tiene dos placas y un tercer vástago que es la toma de tierra. La placa ancha del tercer vástago se proporciona para su seguridad. Si el enchufe que se proporciona no se puede conectar a su toma, consulte con un electricista para sustituir la toma obsoleta. 10. Evite que el cable de corriente se pueda pisar o pinzar, especialmente en los enchufes y en el punto donde salen del aparato. 11. Use solamente los accesorios especificados por el fabricante. 12. Use solamente con el carro, el soporte, el trípode, la sujeción o la mesa especificados por el fabricante o que se vende con el aparato. Cuando se usa un carro, tenga cuidado al moverlo para evitar heridas por caída. 13. Desenchufe el aparato durante las tormentas eléctricas o cuando no se use por largos períodos de tiempo. 14. Refiera todas las reparaciones a personal de servicio calificado. Son necesarios los servicios de un técnico cuando el aparato se ha dañado de cualquier manera, (como el cable de toma de corriente) si le ha caído líquido o si le han entrado objetos, si el aparato ha estado expuesto a la lluvia o la humedad, si no funciona con normalidad, o si se ha caído. iii INSTALACIÓN Polarización – Este Receptor Digital de DIRECTV está equipado con un enchufe que sólo se puede introducir en la toma de corriente de una manera. No modifique el enchufe anulando esta seguridad. Si el enchufe no encaja, llame al electricista para cambiar la toma de corriente. Para evitar descargas eléctricas, no use este enchufe con un cable alargador o en una toma de corriente que no cubra las hojas completamente Instrucciones de ejemplo de toma de tierra de la antena, de National Electrical Code contenidas en "Radio and Television Equipment”. Abrazadera a tierra Cable coaxial Electricidad – Opere este Receptor Digital de DIRECTV sólo con el tipo de electricidad indicada en la etiqueta. Si no está seguro del tipo de suministro eléctrico de su hogar, consulte a su distribuidor o a su compañía de electricidad. Equipo de servico eléctrico Bloque de puesta a tierra Protección del cable de corriente – Evite que el cable de corriente se pueda pisar o pinzar, especialmente en los enchufes y en el punto donde salen del aparato. Abrazaderas a tierra Sobrecarga – No sobrecargue las tomas de corriente, los cables alargadores ni los receptáculos de conveniencia integrados, porque habría riesgos de descarga eléctrica. Ventilación – Se proveen ranuras y aberturas en la carcasa para ventilación para asegurar una operación fiable del producto y protegerlo de recalentamiento. No bloquee ninguna salida de ventilación. Instale según las instrucciones del fabricante. No bloquee nunca las aberturas colocando el producto encima de una cama, sofá, manta o superficie similar. No coloque este producto en un lugar cerrado como una estantería o armario, a menos que esté bien ventilado y que esté siguiendo las instrucciones del fabricante. Para seguridad eléctrica, los aparatos y accesorios eléctricos conectados a esta unidad deben tener la marca UL y no debe ser modificada para no anular esta medida de seguridad. Esto ayudará a evitar cualquier daño potencial de shock eléctrico o fuego. Si tiene alguna duda, llame a personal adecuado de servicios. Calor – No instale el producto cerca de fuentes de calor como radiadores, salidas de calor, hornillas u otros aparatos (incluyendo amplificadores) que produzcan calor. Accesorios – Para evitar daños personales o al Receptor Digital de DIRECTV, no ponga el Receptor Digital de DIRECTV en carritos, mesas o soportes inestables. Cualquier montaje de este producto debe seguir las instrucciones del fabricante. Dispositivos anexos – No use dispositivos anexos a menos que estén recomendados por DIRECTV, porque podrían causar accidentes. Conexión a tierra de la mini-parabólica – La mini-parabólica exterior usada para recibir señales del satélite y el cable usado para conectar la mini-parabólica a la unidad receptora de interior requieren que se cumpla con las regulaciones locales de instalación y las secciones correspondientes al National Electric Code (NEC) y en particular el artículo 810-15, que cubre la instalación apropiada y puesta a tierra del equipo receptor de televisión, así como el artículo 820-33, que especifica que la puesta a tierra del cable de la mini-parabólica debe ser conectada al sistema de puesta a tierra del edificio lo más cerca posible de la entrada del cable. Estos códigos requieren una toma de tierra apropiada a la estructura de metal de la mini-parabólica exterior y al cable que hace conexión en el punto donde entra en la casa (u otro edificio). Si es un instalador profesional el que hace la instalación, debe atenerse a los códigos de instalación. Este manual contiene instrucciones sobre cómo hacer la instalación cumpliendo con la NEC. Si hubiera que aplicar regulaciones locales, llame a la autoridad de inspección local. Cable coaxial Conductores de puesta a tierra Electrodo de servico eléctrico de puesta a tierra Nota: El Receptor Digital de DIRECTV debe tener toma de tierra mediante el cable de satélite/antena local antes de enchufar al teléfono y debe permanecer con la toma después. Agua y Humedad – ¡CUIDADO! Para reducir el riesgo de fuego o shock eléctrico, no exponga este producto a la lluvia o a la humedad. Relámpagos – Para lograr una protección mayor durante las tormentas eléctricas, o cuando no se utiliza por largos períodos de tiempo, desenchúfela de la toma de corriente, desconecte la mini-parabólica y el sistema de cables, y desconéctela de la línea telefónica. Esto evitará daños al producto causados por relámpagos y aumentos de electricidad. Información sobre la Antena de Televisión – Instalar una antena exterior puede ser peligroso y debería hacerlo un instalador profesional. No coloque el sistema de la antena exterior cerca de cables elevados u otros circuitos eléctricos, circuitos de alto voltaje, o donde pueda caer sobre cables o circuitos eléctricos. Al instalar un sistema de antena exterior, ponga extremo cuidado en no tocar tales cables eléctricos o circuitos, ya que entrar en contacto con ellos puede resultar fatal. Si una antena exterior está conectada al receptor de satélite, asegúrese de que el sistema de la antena tiene toma de tierra para que provea alguna protección contra aumentos de voltaje y cargas de estática acumulada. Este Receptor Digital de DIRECTV está equipado con un enchufe que sólo se puede introducir en la salida de corriente de una manera. No modifique el enchufe anulando esta seguridad. Si el enchufe no encaja, llame al electricista para cambiar la toma de corriente. Para evitar descargas eléctricas, no use este enchufe con un cable alargador o en una toma de corriente que no cubra las hojas completamente. La sección 810 del NEC, NFPA No. 70 1987, proporciona información sobre la manera apropiada de hacer la toma de tierra del mástil y la estructura de apoyo, toma de tierra del cable de entrada a una unidad de descarga de la antena, el tamaño de los conductores a tierra, ubicación de unidad de descarga de la antena, conexión a electrodos de toma de tierra y requisitos del electrodo de toma de tierra. Cables Eléctricos – Hay que tener mucho cuidado al instalar y ajustar o mantener la antena exterior y el cable de conexión, especialmente cerca de cables de electricidad elevados, luces eléctricas o circuitos eléctricos. Al instalar la antena exterior o el cable, debe tener mucho cuidado de no tocar o acercarse a los cables eléctricos o circuitos, ya que el contacto con ellos podría ser fatal. Limpieza – Desenchufe este receptor de la toma de corriente de la pared antes de limpiarlo. No use productos de limpieza líquidos o aerosol. Use sólo un paño húmedo para limpiar. Entrada de objetos o líquidos – Nunca introduzca objetos de ningún tipo dentro de este Receptor Digital de DIRECTV, por las aberturas porque podrían tocar voltajes peligrosos o causar un cortocircuito a componentes que podrían producir fuego o descargas eléctricas. Nunca derrame líquido de ninguna clase sobre el receptor digital. No coloque objetos que contengan líquido, como vasos, jarrones, etc. encima del aparato. iv SERVICIO Reparaciones – No intente reparar este Receptor Digital de DIRECTV usted mismo ya que abrir y quitar las coberturas puede exponerlo a voltajes peligrosos u otros peligros. No hay ninguna pieza dentro del equipo que pueda ser reparada por el usuario. Refiera todas las reparaciones a personal de servicio calificado. Condiciones que Requieren Reparaciones – Desenchufe el Receptor Digital de DIRECTV de la toma de corriente y encargue la reparación a personal capacitado bajo las siguientes condiciones: • Si el cable eléctrico o el enchufe están dañados. • Si se ha derramado líquido o caído algún objeto sobre el Receptor Digital de DIRECTV o si ha sido expuesto a agua. • Si el Receptor Digital de DIRECTV no funciona normalmente después de seguir las instrucciones de operación. Ajuste sólo los controles tratados en las instrucciones de uso. Otros ajustes pueden resultar en daños que requerirán mucho trabajo de un técnico calificado para devolver el Receptor Digital de DIRECTV a su funcionamiento normal. • Si el Receptor Digital de DIRECTV se ha caído o la carcasa se ha dañado. • Cuando el Receptor Digital de DIRECTV muestra un cambio claro en su funcionamiento. Piezas de Reemplazo – Cuando se necesite sustituir piezas, asegúrese de que el técnico verifique que las partes sustituidas tienen las mismas características de seguridad que las originales. El uso de piezas de reemplazo especificadas por el fabricante puede evitar fuego, descargas eléctricas u otros peligros. Comprobación de Seguridad – Después de completar cualquier reparación en este Receptor Digital de DIRECTV, pida al técnico que haga las pruebas de seguridad recomendadas por el fabricante para ver si el Receptor Digital de DIRECTV está en condiciones de funcionamiento. Capacidad multi-satélite si lo usa con una mini-parabólica DIRECTV Multi-satélite, que no se incluye. Su Receptor Digital de DIRECTV puede recibir actualizaciones o modificaciones a algunas de sus características o funciones. Estas modificaciones se producirán de modo automático, normalmente cuando es probable que el receptor esté desactivado. Si su receptor está conectado cuando se envía una actualización, es posible que note una pequeña distorsión en la recepción durante uno o dos minutos. La recepción volverá a la normalidad después de haberse completado la modificación. El receptor debe estar enchufado para recibir actualizaciones. No desenchufe el receptor mientras está recibiendo actualizaciones. Consulte el menú de actualización para averiguar cuándo tiene DIRECTV previsto hacer actualizaciones o modificaciones. Con este receptor (GAEB0, GCEB0) y la mini-parabólica adecuada, es posible que se pueda suscribir a los canales locales de DIRECTV en ciertas áreas. En algunos lugares es posible que sea necesario más equipo. Compruebe con su distribuidor o visite DIRECTV.com para obtener la información sobre disponibilidad de los canales locales de DIRECTV en su área. v Información regulatoria de la comisión federal de comunicaciones (FCC) Declaración de conformidad - FCC Part 15 Este equipo cumple el apartado 15 de las Reglas del FCC. El funcionamiento está sujeto a las siguientes dos condiciones: (1) este dispositivo no puede causar interferencia dañina, y (2) este dispositivo debe aceptar cualquier interferencia recibida, incluso interferencia que puede causar el funcionamiento indeseable. Responsable: Hughes Network Systems Dirección: 11717 Exploration Lane, Germantown, MD 20876 U.S.A Nº Teléfono: 1-800-274-8995 Nombre comercial: Hughes Equipo: Satelite Receptor Nº de modelo: GAEB0, GCEB0, HRMC-8, HRMC-9 Federal Communications Commission (FCC) – Este equipo cumple tanto con el apartado 15 como con el apartado 68 de las normas FCC. Cumplimiento con el apartado 15 – Este equipo se ha probado y se ha encontrado que cumple con los límites para un dispositivo Clase B, que cumple las normas del apartado 15 de FCC. Estas limitaciones han sido designadas para dar protección contra interferencias en instalaciones residenciales. Este equipo genera, utiliza y puede irradiar energía de frecuencias de radio y si no se instala y usa según las instrucciones, puede causar interferencias en comunicaciones de radio. Pero, no hay garantías de que no se produzca alguna interferencia en alguna instalación determinada. Si este equipo causa interferencias en la recepción de radio o televisión, lo que se puede comprobar quitando y devolviendo la corriente al equipo, debe intentar corregir la interferencia por medio de uno de los siguientes métodos: • • • • Reoriente o reubique la mini-parabólica receptora. Aumente la distancia entre el equipo y el Receptor Digital de DIRECTV. Conecte el equipo a una toma de corriente en un circuito distinto al del Receptor Digital de DIRECTV. Consulte al distribuidor o a un técnico experimentado de radio/televisión. El usuario podría encontrar útil el siguiente folleto, preparado por la Comisión Federal de Comunicaciones: "Cómo Identificar y Resolver Problemas de Interferencia de Radio y Televisión." Este folleto se puede obtener del U.S. Government Printing Office, Washington, DC. Para cumplir con los requisitos de FCC, sólo se pueden conectar periféricos (dispositivos de entrada/salida de computadoras, terminales, impresoras, etc.) que cumplan con los límites de Clase B. La operación con periféricos no certificados probablemente produzca interferencias en la recepción de radio y TV. Para cumplir con los requisitos de la FCC, es necesario usar cables blindados para conectar el aparato a una PC, periférico u otro dispositivo de Clase B. Cumplimiento con el apartado 68 – Este equipo cumple las normas del apartado 68 de FCC. En la tarjeta de módem hay una etiqueta que contiene, entre otra información, el número de registro de FCC y REN para este equipo, si se solicita, esta información se debe proporcionar a la compañía telefónica. El REN se usa para determinar la cantidad de dispositivos que pueden estar conectados a la línea telefónica. Demasiados RENs en una línea telefónica pueden producir que los aparatos no suenen como respuesta a una llamada entrante. En la mayoría de las zonas, pero no en todas, la suma de RENs debería superar 5. Para estar seguro del número de dispositivos que pueden estar conectados a la línea, póngase en contacto con la compañía telefónica para determinar el máximo número de RENs de su área. Si el equipo de terminal del Receptor Digital de DIRECTV (modelos números: GAEB0, GCEB0) causa daños a la red telefónica, la compañía telefónica le informará de antemano que es posible que se requiera una suspensión temporal del servicio. Pero si no resulta práctico avisar con antelación, la compañía telefónica informará al usuario lo antes posible. También se le notificará de su derecho a presentar una queja a la FCC si lo considera necesario. Es posible que la compañía telefónica le pida que quite el equipo de la red hasta que se solucionen los problemas. La compañía telefónica puede hacer cambios en su instalaciones, equipo, operaciones o procedimientos que pueden afectar al funcionamiento del equipo. Si sucede esto, la compañía telefónica le informará por adelantado para que haga las modificaciones necesarias para mantener el servicio ininterrumpido. Si hay problemas con el Receptor Digital de DIRECTV (Modelos Números: GAEB0, GCEB0), póngase en contacto con Hughes Customer Care Center Germantown, MD 20876 Teléfono: 1-800-274-8995 http://www.hns.com email: [email protected] para obtener reparaciones o información de garantía. Hughes Network Systems debe hacer las reparaciones necesarias en el módem del equipo para mentener un registro válido con FCC. No intente reparar su módem. Devuélvalo a Hughes Network Systems. No hay reparaciones que puedan hacer los clientes. Todas las reparaciones las debe realizar Hughes Network Systems Authorized Service Centers (ASC). Este equipo no se puede usar en el servicio público de moneda que proporciona la compañía telefónica. La conexión a Party Line Service está sujeta a tarifas estatales. vi Contenido Primeros pasos . . . . . . . . . . . . . . . . . . . . . . . 1 Resumen de la configuración . . . . . . . . . . . . . . . . . 1 Conecte el cable de la antena . . . . . . . . . . . . . . . 2 Conecte su TV . . . . . . . . . . . . . . . . . . . . . . . . . . . 3 Determinación de ángulos de la antena. . . . . . . . 4 Verificación su sistema . . . . . . . . . . . . . . . . . . . . 5 Configuración del sonido predet. y alternativo. 26 Uso del sonido Dolby Digital . . . . . . . . . . . . . . 27 Uso de la configuración Optimizar . . . . . . . . . . 27 Ajuste del balance de sonido. . . . . . . . . . . . . . . 27 Ajuste de la imagen en pantalla . . . . . . . . . . . . 27 Uso de WatchWord™. . . . . . . . . . . . . . . . . . . . . . 28 Para agregar componentes al sistema . . . . . 9 Uso de las guías de programa . . . . . . . . . . .31 Conexión de componentes . . . . . . . . . . . . . . . . . . . 9 Conexión de una antena terrestre . . . . . . . . . . . . 9 Conexión de la antena del control remoto de RF 9 Conexión de un VCR . . . . . . . . . . . . . . . . . . . . . . 10 Conexión del Cable de Control de su VCR. . . . 10 Pruebe el VCR (Record/Stop) . . . . . . . . . . . . . . 12 Conexión de un sistema de entretenimiento doméstico . . . . . . . . . . . . . . . . . . . . . . . . . . . . . . . 12 Selección de un estilo de Guía de programas . . . . 31 Guía en cuadrícula . . . . . . . . . . . . . . . . . . . . . . 31 La guía de logos . . . . . . . . . . . . . . . . . . . . . . . . 32 Guía de programas y funciones del menú. . . . . . . 33 La Guía OneLine™. . . . . . . . . . . . . . . . . . . . . . . . 35 Uso de TurboTune™ . . . . . . . . . . . . . . . . . . . . . . 35 Uso de los botones del control remoto. . . . 15 Funciones del Control Remoto . . . . . . . . . . . . . . . 17 Instalación de las Baterías del Control Remoto 18 Programación del control remoto . . . . . . . . . . . . . 18 Registración de códigos . . . . . . . . . . . . . . . . . . 19 Configuración de códigos . . . . . . . . . . . . . . . . . 19 Uso de DIRECTV INTERACTIVE™ con Wink Communications®. . . . . . . . . . . . . . . . . 19 Uso de los menús . . . . . . . . . . . . . . . . . . . . . 21 Compra de pay per view . . . . . . . . . . . . . . . . . . . . 22 Cancelación de compras . . . . . . . . . . . . . . . . . . 23 Ver correo . . . . . . . . . . . . . . . . . . . . . . . . . . . . . . . 23 Uso de Caller ID . . . . . . . . . . . . . . . . . . . . . . . . . . 23 Uso de director de programa . . . . . . . . . . . . . . . . . 24 Para programar o editar un programa . . . . . . . . 24 Configuración de las preferencias de la guía . . . . 25 Ajuste del audio y del vídeo . . . . . . . . . . . . . . . . . 26 Establecimiento de favoritos y de filtros . .37 Uso de la lista de canales favoritos . . . . . . . . . . . . 37 Creación de una lista de canales . . . . . . . . . . . . 37 Cambio de nombre de una lista de canales: . . . 38 Creación de una lista Autoconfiguración . . . . . 38 Agregar y eliminar todos los canales . . . . . . . . 39 Filtrado de la guía de programas. . . . . . . . . . . . . . 39 Uso de filtros de tema . . . . . . . . . . . . . . . . . . . . 39 Selección de las horas de la guía. . . . . . . . . . . . 40 Uso de los controles de acceso . . . . . . . . . . .41 Bloqueo y desbloqueo del sistema . . . . . . . . . . . . 41 Cómo bloquear el sistema. . . . . . . . . . . . . . . . . 41 Desbloqueo del sistema. . . . . . . . . . . . . . . . . . . 42 Establecimiento de los límites de clasificación 42 Establecimiento de límites de gasto y de tiempo. . . . . . . . . . . . . . . . . . . . . . . . . . . . . . 43 Preguntas y Respuestas . . . . . . . . . . . . . . . .45 Códigos de control de los fabricantes . . . . .49 Contenido vii viii Contenido Primeros pasos 1 Este capítulo explica cómo: Conectar un segundo Receptor Digital de DIRECTV a la salida LNB libre. Estas instrucciones también se aplican para un receptor adicional. • Conecte la mini-parabólica DIRECTV a su Receptor Digital de DIRECTV (esta página) • Conecte su Receptor Digital de DIRECTV a su TV (consulte la página 3). • Averigüe los valores de acimut y elevación de la antena en su ubicación (consulte la página 4). • Compruebe el funcionamiento del Sistema DIRECTV (consulte la página 5). Cómo usar este manual Este manual usa estas convenciones tipográficas para ayudar a aclarar las instrucciones: Ejemplo de texto Haga clic en Salir. Botones de comando en pantalla que ejecutan una acción. Resalte el botón Mensajes. Opciones de menús desplegables y cuadros emergentes, u otros botones de opciones dentro de un panel de menú. Presione el botón INFO. Conecte un par de cables A/V al conector AUDIO IN. Botones del control remoto o panel frontal del receptor. Nombres de conexiones para cables del equipo. Resalte la ficha Opciones. Nombres de fichas de menú Mostrar el Nombres de paneles y menús, nombres de paneles emergentes y de submenús. MENÚ PRINCIPAL Resumen de la configuración Descripción En este punto, debería haber: • Montado su mini-parabólica DIRECTV y haberla orientado en la dirección del satélite. • Efectuado la toma de tierra de la mini-parabólica tal como se describe en las instrucciones de instalación. • Conectado los cables coaxiales RG-6 a los conectores LNB de la mini-parabólica. • Llevado el otro extremo del cable de la antena a la parte posterior del Receptor Digital de DIRECTV. • Colocado el Receptor Digital de DIRECTV cerca de una salida modular de teléfono. Asegúrese de que ha completado estos procedimientos, luego continúe en la siguiente página para iniciar la instalación del Receptor Digital de DIRECTV. Primeros pasos 1 Conecte el cable de la Puede configurar el sistema de varias maneras, según los componentes antena adicionales (VCR, reproductor de DVD o receptor A/V) que elija. Por ahora, use la configuración más simple para comprobar la antena y los cables. • Asegúrese de que el Receptor Digital de DIRECTV no esté conectado a la corriente eléctrica. • Conecte el cable coaxial de la antena al conector SATELLITE IN de la parte posterior del Receptor Digital de DIRECTV. Consulte la figura correspondiente que hay más abajo y en la página siguiente. GAEB0 AUDIO/VIDEO APPARATUS 52BN E212442 This device complies with Part 15 of the FCC rules. Operation is subject to the following two conditions: (1) This device may not cause harmful interference, and (2) This device must accept any interference received, including interference that may cause undesired operation. Complies with part 68, FCC rules. FCC registration #: 5L4MUL-36248DT-E; REN=0.2B This product and service are covered by one or more U.S. patents. Other U.S. and foreign patents pending. See Users Manual for details. 1 2 3 4 5 7 6 8 9 10 Tabla 1: Conexiones del panel posterior - modelo GAEB0 de Receptor Digital de DIRECTV 1 Conector SATELLITE IN 6 Conector AUDIO OUTPUT (L) 2 Conector de antena RF REMOTE 7 Conector de VIDEO OUTPUT 3 Conector de TV ANTENNA/CABLE IN 8 Conector S-VIDEO 4 Conector OUT TO TV 9 TELEPHONE JACK 5 Conector AUDIO OUTPUT (R) 10 CABLE DE CORRIENTE AC 5 GCEB0 7 9 11 13 AUDIO/VIDEO APPARATUS 52BN E212442 This device complies with Part 15 of the FCC rules. Operation is subject to the following two conditions: (1) This device may not cause harmful interference, and (2) This device must accept any interference received, including interference that may cause undesired operation. Complies with part 68, FCC rules. FCC registration #: 5L4MUL-36248DT-E; REN=0.2B This product and service are covered by one or more U.S. patents. Other U.S. and foreign patents pending. See Users Manual for details. Manufactured under license from Dolby Laboratories. Dolby and the double-D symbol are trademarks of Dolby Laboratories. Confidential unpublished works. C 1992-1997 Dolby Laboratories. All rights reserved. 1 2 3 4 6 8 10 12 14 15 Tabla 2: Conexiones del panel posterior - modelo GCEB0 de Receptor Digital de DIRECTV 2 Primeros pasos 1 Conector SATELLITE IN 9 2 Conector de antena RF REMOTE 10 Conector de VIDEO OUTPUT Conector AUDIO OUTPUT (L) 3 Conector óptico DIGITAL AUDIO OUTPUT 11 Conector de VIDEO OUTPUT 4 Conector OUT TO TV 12 Conector S-VIDEO 5 Conector de TV ANTENNA/CABLE IN 13 Conector del cable VCR CONTROL 6 Conector AUDIO OUTPUT (R) 14 TELEPHONE JACK 7 Conector AUDIO OUTPUT (R) 15 CABLE DE CORRIENTE AC 8 Conector AUDIO OUTPUT (L) Conecte su TV Según el tipo de su aparato de TV, puede conectarlo al receptor digital de una de estas tres maneras: • Cable S-Video (la mejor calidad de imagen) o • Cable de vídeo (muy buena calidad de imagen) o • Cable coaxial (buena calidad de imagen) Además de su conexión de vídeo, use un juego de cables de audio (L/R) para proporcionar sonido estéreo. Si su TV no tiene conexión de audio, escuchará un sonido monótono. Esto es aceptable para los procedimientos que se describen en la sección siguiente. Para conectar su TV al Receptor Digital de DIRECTV: 1. Seleccione la conexión adecuada: Si su TV tiene conector S-Video • Use un cable S-Video (que no se suministra) para unir el conector S-VIDEO del Receptor Digital de DIRECTV al conector S-VIDEO de su TV. • Use cables de audio para unir los conectores AUDIO del Receptor Digital de DIRECTV a los conectores AUDIO IN de su TV. Si su TV tiene conectores A/V tipo RCA • Conecte AUDIO y VIDEO del Receptor Digital de DIRECTV a los conectores A/V IN de su TV. • Si su TV sólo tiene un conector AUDIO IN una el conector AUDIO L del receptor al conector AUDIO IN de su TV. Si su TV sólo tiene un conector RF (coaxial) • Una el conector OUT TO TV del Receptor Digital de DIRECTV al conector de la TV VHF/UHF IN o RF IN. 2. Conecte un extremo del cable de teléfono que se proporciona a PHONE JACK del Receptor Digital de DIRECTV. 3. Conecte el otro extremo en una toma de teléfono modular. 4. Enchufe la TV a la corriente eléctrica. 5. Enchufe el cable del Receptor Digital de DIRECTV a la corriente eléctrica. Si el indicador Power del panel frontal no se ilumina, oprima el botón POWER. Iconos menú de pantalla Estos iconos aparecen en los menús de pantalla y se usan a lo largo del presente manual: Cambio o avance – Presione SELECT para cambiar un valor de “ON” a “OFF” o avanzar por las opciones disponibles cada vez que presione SELECT. Lista de opciones – Este botón de menú mostrará una lista de opciones en un menú emergente cuando se presione SELECT. Serie de pantallas – Varias pantallas aparecerán en serie pidiéndole que escriba números o letras para una función particular cuando presione SELECT. Primeros pasos 3 Determinación de Esta sección explica cómo determinar la correcta posición de la antena. Esto se ángulos de la antena expresa en grados de acimut (horizontal) y elevación (vertical). Use los controles del panel frontal del receptor digital, que se muestran abajo, para completar este procedimiento. Power On/Standby Indicador de energía MENU MENU POWER POWER Botón del Botones de menú principal dirección Botón SELECT SELECT SELECT 1. Presione el botón MENU del panel frontal para mostrar el MENÚ PRINCIPAL que se muestra abajo. 2. Use el botón para resaltar la ficha Configuración del sistema. MENU PRINCIPAL Mie, Jun 20 8:45PM Guía Opc. de Guía Audio y Video Caller ID Dire. de Programa WatchWord Interactivo Compras Bloq. y Limites Ver Correo Configuracion Ver TV Fichas del menú principal También aparecerá el ángulo de inclinación si ha seleccionado una antena oval en el menú Dish Type (tipo de antena). 4 Primeros pasos 3. Presione el botón SELECT (seleccionar) del panel frontal. 4. El menú INSTALACIÓN le permite determinar la posición correcta de la antena utilizando su código postal de 5 dígitos. Escriba su código postal y presione SELECT. Los ángulos de acimut y elevación correctos son como se indica a continuación. 5. Use estos valores para alinear correctamente su mini-parabólica. INSTALACION Instalar Senal Mie, Jun 13 Tipo de antena VCR Prefs Prueba Tarjeta Mejoras 0 Rasgos Ver TV Menu Ant. Circ. Entre su ZIP Entre suDish ZIP 2 Oval ZIP ZIP OK OK Oval dish 3 0 0 00 00 Salir Salir Antena circular para 1 satelite. 1:31 PM Ubicacion por ZIP Lat/Longitud ZIP: 20902 Latitud: Longitud: Elevacion: 38 Acimut: 224 SW Inclinacion: Configuración de la mini-parabólica según el código postal Verificación su sistema Cuando haya alineado su mini-parabólica con el acimut y el ángulo de elevación que se muestran en el panel Instalación: 1. Resalte la ficha Señal. 2. Use el botón para resaltar el menú desplegable Origen 3. La calidad de la señal la indican una escala que hay en la parte inferior del panel y un sonido. La frecuencia y el tempo del sonido aumentan con la fuerza de la señal. POTENCIA DE LA SENAL Instalar Senal VCR Prefs. Prueba Jue, Jun 14 4:14 PM Potencia de Senal Transpondedor Fuente ) Satelite 101 (A) 04 Tarjeta Mejoras Rasgos Stado: Desbloqueada Actual: 95 Maxima: 95 Ver TV Menu 4. Resalte el menú desplegable Transpondedor . 5. Es posible que necesite seleccionar otro transpondedor para obtener la indicación de señal más alta. 6. Seleccione el transpondedor que proporcione la mejor señal. 7. Use el botón para resaltar la ficha Prueba. 8. Resalte Iniciar prueba y pulse el botón SELECT. Los resultados aparecen en unos segundos y se deberían parecer a los de la figura. Si los resultados de su prueba son muy diferentes de los que se muestran en las Primeros pasos 5 figuras, o si no recibe indicación de señal, consulte la página 6. PRUEBA SISTEMA Instalar Senal VCR Prefs. Prueba Tarjeta Mejoras Rasgos Ver TV Menu Mie, Jun 13 10:14 PM Prueba Sist Prueba Transpondedores Version Wink Version Senal Sintonizacion : 5317.6 :0.0.0.75 :OK :OK Telefono Tarjeta de Acceso :OK :OK (ID 0000-0000-0000) :OK Panel frontal Para realizar la comprobación del transpondedor: 1. Mueva el resalte al menú desplegable Prueba del transpondedor 2. Presione el botón SELECT 3. Presione SELECT de nuevo para probar la primera opción del menú emergente. PRUEBA SISTEMA Instalar Senal VCR Prefs. Mie, Jun 13 Prueba Sist Prueba Transpomdedores Transpondedores Satelite 101 (A) Satelite: 5317.6 119 (B) Satelite:0.0.0.75 110 (C) :OK Salir Mie, Jun 13 :OK Prueba Tarjeta Mejoras PRUEBA SISTEMA Rasgos Ver TVInstalar Menu Senal VCR Prefs. Prueba Ver TV Menu Transpondedores Potencia de la Senal Satelite 101 (A) Tarjeta Rasgos 10:16 PM System Tests Test Prueba Mejoras 10:15 PM 18 95 95 95 94 95 95 94 93 916 94 94 93 94 94 92 94 94 1724 93 95 93 93 93 92 93 93 2532 94 94 95 95 93 94 94 92 Sus resultados diferirán ligeramente de los que se muestran, según su situación geográfica y su instalación específica. Sin embargo, si sus resultados son muy diferentes de los de los ejemplos, (listas de ceros o números de un solo dígito): 6 Primeros pasos • Resalte la ficha Instalar del menú INSTALACIÓN. Verifique la configuración. INSTALACION Instalar Senal VCR Prefs. Prueba Tarjeta Mejoras Rasgos Ver TV Menu Mie, Jun 13 Tipo de antena 1:31 PM Ubicacion por Ant. Circ. ZIP Ant. Oval 2 Lat/Longitud Ant. Oval 3 Antena circular para 1 satelite. ZIP: 20974 Latitud: Longitud: Elevacion: 38 Acimut: 224 SW Inclinacion: Panel de instalación • Vuelva a escribir su código postal si fuera necesario para verificar que ha usado los parámetros correctos para orientar la antena en su ubicación. • Compruebe la conexión de los cables. • Asegúrese de que el Receptor Digital de DIRECTV esté conectado a una salida de teléfono modular. Una vez que haya obtenido una señal satisfactoria y los resultados de la prueba se parecen a los de las figuras, llame a DIRECTV (o a su proveedor de suscripción) para activar el servicio si no lo ha hecho aún. Primeros pasos 7 8 Primeros pasos Para agregar componentes al sistema 2 Puede configurar su Receptor Digital DIRECTV de varias maneras, según los componentes adicionales de audio o vídeo que desee usar. Este capítulo explica cómo: • • • • Conexión de componentes Conectar una antena terrestre de TV (en esta página). Conecte la antena opcional de control remoto de RF (en esta página). Conectar y programar un VCR (consulte la página 10). Integre su Receptor Digital DIRECTV a un sistema existente de audio o de A/V (consulte la página 12). En este punto, debería haber: Verificado que su sistema está funcionando correctamente. Conectado el Receptor Digital DIRECTV a su TV. Desconectado todos los componentes de las tomas eléctricas. Conexión de una antena Puede conectar una antena terrestre de TV a su Receptor Digital DIRECTV y terrestre conectarla a la toma TV ANT/CABLE (consulte las figuras de página 3). El botón INPUT (entrar) de su control remoto le permite cambiar entre programación de DIRECTV® y entrada desde la antena terrestre. Conexión de la antena El Receptor Digital de DIRECTV usa una antena opcional de control remoto de del control remoto de RF RF que le permite controlar su receptor desde otras habitaciones de la casa. 1. Deslice la antena en su base, como se muestra. No se necesitan herramientas. Ensamblaje de la antena opcional de RF (radio-frecuencia) 2. Enchufe el cable del control remoto RF al conector RF REMOTE en el panel posterior del Receptor Digital de DIRECTV (consulte las figuras de página 2 y página 3). 3. Extienda el cable y coloque la antena en el lugar que desee. Para lograr el mejor alcance de funcionamiento con el control remoto, coloque la antena lo más alto y lejos que pueda de objetos metálicos. Para agregar componentes al sistema 9 Conexión de un VCR Siga estas instrucciones para conectar su TV y VCR al Receptor Digital de DIRECTV. Conecte el cable coaxial RG-6 de la antena de satélite al conector SATELLITE IN del Receptor Digital de DIRECTV (consulte las figuras de página 3). 1. Según su VCR, seleccione la conexión apropiada para el Receptor Digital de DIRECTV: Si su VCR tiene conectores A/V – • Conecte AUDIO y VIDEO del Receptor Digital de DIRECTV a los conectores A/V IN de su VCR. Si su VCR sólo tiene un conector RF (coaxial)– • Conecte la salida OUT TO TV del Receptor Digital de DIRECTV a la toma VHF/UHF IN o RF IN de su VCR. • Si su VCR sólo tiene un conector AUDIO IN, enchufe el conector más bajo del receptor (mono) AUDIO L a la toma AUDIO IN de su VCR. 2. Según su TV y VCR, seleccione el método apropiado para conectar el VCR a su TV: Si su TV y VCR tienen conectores A/V – • Conecte AUDIO y VIDEO del Receptor Digital de DIRECTV a las tomas A/V IN de su TV. Si su TV o VCR sólo tiene un conector RF (coaxial) – • Conecte VHF/UHF OUT de su VCR al VHF/UHF IN de su TV. 3. Enchufe los cables de corriente de su TV, VCR y del Receptor Digital de DIRECTV a la toma eléctrica. Conexión del Cable de (Modelo GCEB0 solamente) El Receptor Digital de DIRECTV puede controlar Control de su VCR su VCR para efectuar grabaciones desatendidas usando el cable de control de VCR que se suministra. 1. Enchufe el cable del control de VCR a la toma VCR CONTROL del panel posterior. 2. Coloque temporalmente el otro extremo por encima del sensor del control remoto del VCR (normalmente es una pequeña ventana de plástico oscuro en el panel frontal del VCR). Es posible que el sensor del control remoto esté indicado en el manual de su VCR. Si el sensor no está indicado, tendrá que rastrear el frente de su VCR con el control remoto: 3. Sostenga el control remoto de su VCR alrededor de 1/2 pulgada (1,5 cm) del lado frontal izquierdo de su VCR. 4. Mueva el control remoto despacio hacia la derecha, como se muestra en la figura. 10 Para agregar componentes al sistema 5. Oprima repetidamente el botón de encendido del control remoto. Búsqueda del sensor del control remoto de su VCR 6. Cuando su VCR responda al oprimir el botón de encendido, fíjese en la posición. Sujete con cinta adhesiva el emisor en la posición que marcó hasta que verifique que funciona bien. 7. Pruebe la función de control de VCR como se describe más abajo. 8. Quite la cinta temporal de montaje. Coloque el emisor de manera permanente con la superficie adhesiva de la parte posterior. Esto no interfiere con el uso normal de su VCR. El menú PROGRAMACIÓN DE VCR proporciona las configuraciones que permiten al Receptor Digital de DIRECTV comunicarse con su VCR. BASA EL VCR Instalar Senal Jue, Jul 19 2:33 PM VCR Prefs. Prueba Tarjeta Tipo Codigo Admiral 1 Aiwal 2 Parada Mejoras Resgos Akai 3 Aligerarse Audio Dynamics 4 Bell & Howell 5 Brooksonic 6 Canon 7 Ver TV Menu Prueba Ingreso panel de menú programación de VCR 9. Recorra las marcas de VCR usando los botones y del joystick. Si no puede encontrar el código correcto para su marca de VCR, intente marcas relacionadas que usen los mismos códigos. También es posible que su VCR responda a varios códigos S 10. Use el botón SELECT del control remoto para probar cada uno de los códigos. 11. Alterne entre este procedimiento y la prueba del código. Para agregar componentes al sistema 11 Pruebe el VCR Esta prueba de grabar/parar verifica que la marca y código especificados pueden (Record/Stop) controlar su VCR. Antes de empezar la prueba: • Encienda su VCR. • Compruebe que el cable de control de VCR está correctamente conectado. • Inserte en su VCR un videocasete para grabar. Las señales que salen del control remoto al mismo tiempo que señales salen del cable de control de su VCR podrían dar resultados no fiables. Use los controles del panel frontal de receptor de DIRECTV, en lugar del control remoto, para probar los códigos. Conexión de un sistema de entretenimiento doméstico Puede integrar su Receptor Digital de DIRECTV a su sistema de entretenimiento para aprovechar las ventajas de audio y vídeo. Siga estas instrucciones para conectar su Receptor Digital de DIRECTV. El receptor de A/V debe estar encendido para enviar señal de vídeo a su TV. Pruebe los comandos record (grabar) y stop (alto), si alguno de los comandos no funciona, intente con otros códigos que se muestren para su marca de VCR. Si no tiene éxito después de haber probado todos los códigos disponibles, vuelva a revisar las conexiones del cable de control de su VCR y la ubicación del emisor IR. • Para conectar el Receptor Digital de DIRECTV a su sistema de audio, use cables A/V para conectar el receptor de satélite a AUDIO IN del receptor de audio. • Dolby Digital - Con el modelo GCEB0, puede disfrutar de programas que incluyan banda sonora Dolby Digital. Recomendamos que escuche en surround sound para disfrutar más de estos programas. Puede conectar las salidas estéreo del GCEB0 a un receptor que tenga decodificador Dolby Surround Pro Logic. Esto le proporcionará tres canales de audio en el frente y un canal mono de surround. • Para aprovechar completamente las ventajas de la programación Dolby Digital, conecte la salida de audio digital de GCEB0 a un decodificador o receptor 5.1-channel externo Dolby Digital. Esto le proporciona tres canales frontales, dos canales independientes de surround y un canal sub-woofer. 1. Conecte el cable coaxial RG-6 de la antena de satélite a la toma SATELLITE IN del Receptor Digital de DIRECTV. 2. Conecte A/V del receptor de DIRECTV a las tomas A/V de su VCR. 3. Conexiones AUX ópticas y conexiones de salida digital - Si su receptor de audio tiene conectores coaxiales u ópticos, conecte el tipo de cable apropiado al Receptor Digital de DIRECTV DIGITAL AUDIO OUT para estéreo digital de dos canales. Si su receptor A/V también puede decodificar Dolby Digital, use esta conexión para oír surround sound en 5.1 channel. La información adicional sobre audio empieza en la página 26. 4. Conecte la salida A/V OUT de su VCR a la entrada A/V IN de un par de receptores A/V. 5. Conecte MONITOR OUT del receptor A/V a VIDEO IN de su TV. 6. Enchufe los componentes en una toma eléctrica. 12 Para agregar componentes al sistema Nota: Si ha conectado un VCR a su sistema de entretenimiento, de modo que canalice la señal del receptor digital a su VCR antes de llegar a su TV, es posible que vea una imagen distorsionada si intenta grabar un programa protegido. Estos programas se identifican por un símbolo No se puede grabar que aparece en la pantalla. Si ocurre esto, simplemente detenga el proceso de grabación y la imagen se corregirá automáticamente. Para agregar componentes al sistema 13 14 Para agregar componentes al sistema Uso de los botones del control remoto 3 Este capítulo explica cómo: • Usar las funciones de los controles remotos HMRC-8 y HMRC-9. (Consulte la página 17) • Instalar y sustituir las baterías del control remoto. (Consulte la página 18) • Programar el control remoto para que funcione con los componentes de su sistema. (consulte la página 18) • Acceder a las funciones de programación interactiva. (Consulte página 19) Power Enciende el Receptor Digital on/off (en espera). Enciende el componente seleccionado on/off. PWR AUX VCR DVD VOL TV SAT PREV MUTE CH CH Control de componentes Selecciona el componente que desea controlar. Los botones se iluminan para indicar el componente que el control remoto está controlando. P A G E DIRECTOR Grupo de control del receptor Frecuentemente estas funciones se agrupan juntas (vea abajo). Canal (CH) arriba/abajo Va al canal anterior o siguiente mientras se está viendo. Muestra la siguiente página de guía de programas (sólo en la guía cuadrícula). Canal anterior Cambia entre el canal actual y el canal que es estaba viendo inmediatamente antes. Grupo Director Navegación con un sólo toque de botón para configurar menús sonido, vídeo, guía de programas y búsqueda de palabras con WatchWord. Teclado numérico 1 2 3 4 5 6 7 8 9 INPUT 0 REW PLAY FF REC STOP PAUSE Reservado para una actualización posterior Entrada Cambia el origen de la imagen (CATV, antena terreste u otro dispostivo de imagen). Control de VCR Realiza las funciones de control de su VCR Iluminación Enciende la iluminación del control remoto Guía de programas Vea la lista de programación disponible TurboTune Vea la guía TurboTune Guía interactiva Acceso a las funciones interactivas Menú principal Vea el menú principal Información Vea información sobre el programa actual S Favoritos Vea listas de sus programas favoritos Borrar Cancelar una función en pantalla y vuelve a la actividad anterior Seleccionar/Mover/Guía OneLine Presione para seleccionar una opción de pantalla, Presione las flechas para mover la selección de pantalla, Presione para ver la guía OneLine (si no hay opción de menú) Referencia rápida de las funciones del control remoto HRMC-9 Uso de los botones del control remoto 15 AUX VCR DVD Power Enciende el Receptor Digital on/off (en espera). Enciende el componente seleccionado on/off. PWR 8 TV SAT Control de componentes Selecciona el componente que desea controlar. Los botones se iluminan para indicar el componente que el control remoto está controlando. Grupo de control del receptor Frecuentemente estas funciones se agrupan juntas (vea abajo). VOL PREV MUTE CH CH P A G E DIRECTOR 1 2 3 4 5 6 7 8 9 INPUT 0 REW PLAY FF REC STOP PAUSE Canal (CH) arriba/abajo Va al canal anterior o siguiente mientras se está viendo. Muestra la siguiente página de guía de programas (sólo en la guía cuadrícula). Canal anterior Cambia entre el canal actual y el canal que es estaba viendo inmediatamente antes. Grupo Director Navegación con un sólo toque de botón para configurar menús sonido, vídeo, guía de programas y búsqueda de palabras con WatchWord. Teclado numérico Reservado para una actualización posterior Entrada Cambia el origen de la imagen (CATV, antena terreste u otro dispostivo de imagen). Control de VCR Realiza las funciones de control de su VCR Guía de programas Vea la lista de programación disponibleg TurboTune Vea la guía TurboTune Guía interactiva Acceso a las funciones interactivas Favoritos Vea listas de sus programas favoritos Borrar Cancelar una función en pantalla y vuelve a la actividad anterior Menú principal Vea el menú principal Información Vea información sobre el programa actual S Seleccionar/Mover/Guía OneLine Presione para seleccionar una opción de pantalla, Presione las flechas para mover la selección de pantalla, Presione para ver la guía OneLine (si no hay opción de menú) Referencia rápida de las funciones del control remoto HRMC-8 Los botones del panel frontal del Receptor Digital de DIRECTV le ofrecen los botones básicos que necesita para acceder a las principales funciones del sistema DIRECTV. Sin embargo, el uso del control remoto le simplifica el acceso a las funciones básicas, aumenta las posibilidades de su sistema y le ofrece unos métodos más breves para acceder a las funciones ampliadas. Además, la mayoría de los botones del control remoto pueden controlar también otros componentes de su sistema de entretenimiento. 16 Uso de los botones del control remoto Funciones del Control Remoto El joystick es la parte más versátil y más usada del control remoto. Usando solamente el joystick puede realizar prácticamente todas las funciones de pantalla, incluyendo: • Seleccionar un elemento de menú resaltado. • Mover el resalte en pantalla (o cursor) arriba, abajo, a la derecha o a la izquierda. • Saltar directamente a la guía OneLine™. • Cambiar canales usando la guía OneLine. Use el joystick para moverse arriba, abajo, a la derecha o a la izquierda por la pantalla. Este icono aparece a lo largo de este manual para indicarle que use el joystick para moverse por los menús de pantalla y guías. SELECT significa que presione el joystick en el centro para activar o elegir una opción de menú resaltada. S Presione el joystick arriba o abajo para mostrar la guía OneLine mientras mira algún programa. Cuando aparezca la guía OneLine, presione el joystick arriba o abajo para avanzar la guía al canal siguiente o al anterior. GUIDE Presione el botón INFO para mostrar una breve descripción del programa que está viendo. Para obtener más información, presiónelo otra vez para mostrar el Cartel de información. Presione el botón INFO para acceder a la programación (e información de compra de pay-per-view) acerca del programa resaltado en la Guía de programas. Consulte el Capítulo 5 – Uso de las guías de programa, en la página 31 para obtener más información. INFO CH P A G E CLEAR INPUT SAT Presione el botón GUIDE para mostrar la guía actual de programas. Presiónelo por segunda vez (mientras está resaltado un título de programa) para mostrar el menú Opciones de la guía. Use el botón CANAL (CH) para avanzar o retroceder al siguiente canal disponible en la guía OneLine o desplácese por una página de la guía de programas. Presione el botón CLEAR para salir de cualquier guía en pantalla, eliminar carteles o terminar una acción. El botón INPUT le permite seleccionar programación de fuentes de programas adicionales conectadas al Receptor Digital, como DVD, VCR o TV terrestre o señal de antena. Presione INPUT repetidamente para ver cada una de las fuentes disponibles en su sistema. Presione el botón de selección de SAT para controlar el Receptor Digital de DIRECTV. Los botones de selección de otros componentes indican los dispositivos que controlan. Puede programar el botón AUX para controlar otros dispositivos digitales como, un reproductor de CD de música. Uso de los botones del control remoto 17 DIRECTOR PROG SEARCH AUDIO VIDEO Los botones del DIRECTOR ofrecen métodos cómodos de encontrar programación y ajustar las características del sistema para que se ajusten a sus preferencias. Instalación de las Para instalar o sustituir las baterías del control remoto: Baterías del Control 1. Localice la tapa del compartimento de las baterías de la parte posterior del Remoto control remoto. 2. Retire la tapa del compartimento de las baterías. 3. Inserte dos baterías tipo "AAA" como se indica. 4. Vuelva a colocar la tapa de las baterías. Instalación de las baterías en el control remoto Programación del control remoto Puede controlar su TV, VCR y receptor de Audio/Vídeo usando su control remoto HMRC-8 ó HMRC-9 Use el método Registración de códigos o Configuración de Códigos para programar el control remoto. El método de registración de códigos puede tardar más tiempo, pero no es necesario saber los códigos de control del fabricante. Usando el método de configuración de códigos puede ser un método más rápido, pero es necesario saber los códigos asignados por el fabricante a cada uno de los componentes que desea controlar. 1. Mantenga el control remoto dirigido hacia el componente que desea usar. 2. Mantenga presionado el botón correspondiente al dispositivo que de sea (por ejemplo TV). TV MUTE 3. Presione el botón MUTE durante un segundo. 4. Suelte los dos botones a la vez. 5. El botón del dispositivo (en este ejemplo el botón TV), brillará y permanecerá encendido. Si el botón no se ilumina, repita los pasos anteriores. 6. Use uno de los dos sistemas de programación descritos arriba. 18 Uso de los botones del control remoto Registración de códigos Para usar este método: CH P A G E 1. Presione repetidas veces la parte superior del botón CANAL (CH). 2. Continúe pasando por los códigos hasta que el componente se apague, indicando que ha encontrado el código correcto para ese componente. Si pasa el código accidentalmente, o si se da cuenta que no ha estado dirigiendo el control remoto al componente, presione la parte baja del botón CANAL (CH) para ir hacia atrás por los códigos. 3. Presione el botón POWER del control remoto para verificar el código correcto encendiendo y apagando el dispositivo. 4. Presione una vez más el botón del dispositivo (en este ejemplo, la TV) para bloquear el código. Configuración de Para usar este método: códigos 1. Encuentre el código o códigos de tres dígitos para el tipo y marca de componente que desea controlar, en las tablas siguientes (en este ejemplo, la TV). Consulte Apéndice B – Códigos de control de los fabricantes, en la página 49. 2. Si se muestran varios códigos, es posible que tenga que probar varios o todos. Después de entrar un código, presione el botón POWER del control remoto para probarlo. El código correcto encenderá y apagará el dispositivo. 3. Presione el botón del dispositivo (DVD, VCR, AUX, TV, SAT) de nuevo para bloquear el código. Uso de DIRECTV INTERACTIVE™ con Wink Communications® DIRECTV INTERACTIVE™ con Wink Communications® es un servicio gratuito y fácil de usar que le permite interactuar con programas de televisión y publicidad. Cuando aparezca el símbolo intermitente en la parte superior izquierda de la pantalla, sabrá que el programa que está viendo dispone de la función DIRECTV INTERACTIVE™. Basta con que presione el botón de su control remoto. Puede usar el control remoto para acceder a los resultados deportivos actualizados al minuto, noticias y el tiempo, pequeños concursos, responder a ofertas de la publicidad y comprar productos, todo mientras está mirando la TV. DIRECTV INTERACTIVO Jue, Jun 12 11:32 PM Interact Ver TV Menu DIRECTV INTERACTIVO TM Chequee su tiempo local, vea los ultimas escores de los deportes, actue interactivamente con los shows mas populares y vaya de compras desde su sofa. Es Gratis facil de usar y divertido! Vaya al Centro DIRECTV INTERACTIVO para empezar. TM Centro DIRECTV INTERACTIVO TM Uso de los botones del control remoto 19 Seleccione la barra de menú DIRECTV INTERACTIVE™ Center, luego siga las sencillas instrucciones que se le dan en las pantallas siguientes. 20 Uso de los botones del control remoto Uso de los menús 4 Este capítulo describe: • Cómo encontrar los menús que necesita para realizar las tareas frecuentes (esta página). • Uso de director de programa (consulte la página 22). • Cómo comprar programas pay per view (consulte la página 22). • Cómo configurar y modificar las preferencias (consulte la página 25). La tabla que sigue muestra la ficha MENÚ PRINCIPAL, sus submenús y lo que hacen. Repaso de las funciones de los menús Ficha menú principal Pantallas (consulte la página) Si desea: Guía de programas Guía de programas • Ver y modificar la guía de programas. Opciones de la guía Tema (página 25) Horas (página 40) Lista de favoritos (página 37) Configuración de favoritos (página 37) Configurar opciones (página 37) Configurar Turbo (página 35) • Cambiar el nombre de una lista de programas. • Cambiar el período de tiempo que se muestra en la guía de programas • Crear/editar hasta cuatro listas de canales (Fav. A, Fav. B, Fav. C, Familiar) • Crear un listado de programas que contenga los canales seleccionados • Opciones de la guía: – Estilo de guía (cuadrícula o logo) – Picture in guide, zoom (activado o desactivado) – Guía multicolor (activado o desactivado) – Ordenación de canales (numérica o alfabética) – Filtros, (temporal o persistente) – Restablecer opciones a los valores predeterminados – Configurar y editar los canales de la guía TurboTune Audio y Vídeo Ajuste del sonido (página 26) Ajuste de la imagen • • • • • Caller ID Caller ID (página 23) • Ver los nombres y números de teléfono de las últimas llamadas director de programa Horarios (página 22) • Sintonizar canales automáticamente para ver o grabar WatchWord Configurar (página 28) Resultados (página 28) • Buscar programas usando palabras determinadas • Mostrar los resultados de la búsqueda Interactivo DIRECTV Interactivo™ (página 19) • Acceso a las funciones de programación interactiva Compras Compras programadas y pasadas (página 22) • Ver la lista de pay per view programada • Mostrar los programas pay per view comprados recientemente Bloqueos y límites Bloqueo (página 41) Configuración de favoritos (página 37) Clasificación (página 42) Límites (página 43) • Bloqueo y desbloqueo del sistema • Configurar las horas y horas máximas de visión • Crear/editar hasta cuatro listas de canales (Fav. A, Fav. B, Fav. C, Familiar) • Configurar la clasificación máxima permitida para ver • Seleccionar el contenido de los programas en la guía de programas Configurar el idioma del sonido Configurar el idioma alternativo del sonido Configurar el balance de sonido izquierda/derecha Seleccionar la proporción de pantalla 4:3 ó 16:9 Centrar los menús en la pantalla (vertical y horizontal) Uso de los menús 21 Repaso de las funciones de los menús Ficha menú principal Pantallas (consulte la página) Si desea: Ver correo Correo (página 25) • Leer los mensajes de DIRECTV Configuración del Sistema Instalación (página 2) Señal (página 4) VCR (página 10) Preferencias (página 25) Prueba (página 5) Nueva tarjeta Actualizar Funciones • • • • • • • Compra de pay per view Determinar el acimut y elevación correctos de la antena Probar la recepción de la señal Configurar VCR para grabación automática Probar el funcionamiento del sistema Preparar una nueva tarjeta de acceso Mostrar el estado de la actualización y la historia Mostrar las funciones actuales del receptor Seleccione la ficha de menú Compras para mostrar listas de los programas pay per view vistos recientemente y futuros. Puede elegir COMPRAS PASADAS y PRÓXIMAS COMPRAS. Para cada compra, se muestra el canal del programa, el título, la fecha y hora de inicio y el precio. PROXIMAS COMPRAS Jue, Jul 19 Futuro 2:54 PM Historial de Compras Pasado Ver TV Menu 1/12 2/12 el Evento Recientemente Visto 9:00PM $2.99 102 el Evento Anterior 8:00PM 140 $29.99 lista de compras pay per view El panel COMPRAS PASADAS muestra los programas pay per view recientemente cargados en su cuenta. No puede eliminar los programas que se muestran. La lista no muestra: • programas comprados, pero cancelados luego. • programas comprados y cancelables con los que el Receptor Digital de DIRECTV no se sintonizó. • Programas comprados llamando a DIRECTV El panel PRÓXIMAS COMPRAS muestra: • Programas PPV que ha comprado pero no ha visto todavía • Programas PPV que compró pero no vio. Los programas comprados llamando directamente a DIRECTV no se muestran en esta lista. Para obtener información adicional acerca de un programa determinado, resalte el programa y presione el botón INFO. 22 Uso de los menús Si no está autorizado para efectuar compras usando su Receptor Digital de DIRECTV, póngase en contacto con DIRECTV para recibir asistencia. Para comprar un programa pay per view: 1. Resalte la opción Comprar del panel de menú 2. Presione SELECT 3. Presione SELECT de nuevo para confirmar la compra. Cancelación de compras Puede cancelar algunos programas después de haberlos comprado. Normalmente se pueden cancelar los programas que no se han visto aún, sin embargo, algunos programas no se pueden cancelar. Si aparece el botón Cancelar compra, puede eliminar la compra. Si este botón no está disponible, lo más probable es que el programa se haya visto ya, y deberá aceptar la compra. Para cancelar un programa Pay Per View: 1. Resalte el programa que desea cancelar. 2. Presione CLEAR en el control remoto. 3. Use el panel de menú emergente para cancelar la compra. Ver correo DIRECTV usa la función CORREO para enviarle información importante, hacerle saber de los programas especiales y contarle las ofertas especiales. Cuando reciba un mensaje nuevo, aparecerá un icono de Correo nuevo en la parte superior de todos los menús hasta que haya leído el mensaje. Resalte y elija SELECT para la ficha Ver correo del MENÚ PRINCIPAL. VER CORREO Correo Ver TV Menu Vie, Jul 6 5:24AM Lea el Mensaje Borra Mensaje 1 de 3 Pag. 2 Segunda pagina del texto del mensaje... VER CORREO Mensaje - pasa por varios mensajes. SELECT el botón Mensajes. Use el joystick para desplazarse por los mensajes. S Página - Use el botón CANAL(CH) para pasar por varios mensajes. Borrar - borrar permanentemente un mensaje. Los mensajes se borran automáticamente cuando quedan obsoletos o si hace falta espacio para nuevos mensajes. Uso de Caller ID Su Receptor Digital de DIRECTV le muestra en su TV el nombre, hora y número de teléfono de las llamadas recientes, como se muestra en la figura de Uso de los menús 23 abajo. CALLER ID Dom, Avr 1 Caller ID Ver TV Menu 3:42PM Llamada Historia 10:16 AM Hoy John Cliente 1 (765) 163-7133 9:11 AM 7/29/01 Joe Callow 1 (405) 163-5256 Pantalla de historia de llamadas Para usar esta función debe suscribirse a Caller ID con su compañía de teléfonos. Resalte y SELECT la ficha Caller ID en el MENÚ PRINCIPAL. Uso de director de programa Puede programar hasta 32 programas por adelantado para verlos o grabarlos automáticamente. DIRECTOR DE PROGRAMA sintonizará un programa en una fecha y hora determinadas de manera repetitiva. Como se muestra abajo, puede: • Programación para ver (✓) • Programación para grabar ( ) • Seleccione Salir en el menú si decide no programar nada. Mie, Jun 13 DIRECTOR DE PROGRAMA Programa Ver TV Menu 6:24 PM Agregue y Modifique los Eventos Canal Inicio Dura Frecuencia Programe las Opciones Para Ver ( ) Para Registrar Borre el Evento Salir El menú emergente del panel de programación de DIRECTOR DE PROGRAMA Para programar o editar El panel Programar muestra hasta siete programaciones a la vez. Si ya hay más joystick para desplazarse hacia abajo y ver un programa de un evento programado, use el S los eventos adicionales. Las flechas pequeñas en la parte superior o inferior de la lista indican que hay más programas. Puede programar hasta con 11 meses de antelación. 24 Uso de los menús Para hacer una programación: 1. Resalte un programa futuro en la guía de programas y presione SELECT. Presione SELECT de nuevo para pasar a la siguiente opción disponible. Si elige una opción de programación, el Receptor Digital de DIRECTV se encenderá (si es necesario) y sintonizará el canal especificado en la fecha y hora correspondientes. 2. Si elige Programar para grabar) y ha configurado su VCR (consulte página 10) el Receptor Digital de DIRECTV grabará el programa. Para grabación automática: – Conecte el cable de control del VCR y configure su VCR. – Configure su VCR para la salida correcta del Receptor Digital de DIRECTV RF (canal 3/4) o A/V (phono o S-Video). – Inserte una cinta vacía y deje su VCR encendido. Seleccione Borrar evento para quitar una programación. 3. Use el joystick para especificar AM o PM (o N para mediodía y M para medianoche si se ha especificado las 12:00). S 4. Use el mismo procedimiento para configurar la longitud del programa Duración en horas y minutos 5. Use el S joystick para avanzar a la columna Frecuencia. 6. Especifique cuándo o con cuánta frecuencia se emite el programa: Hoy, Mañana, Cada Lun, Cada Mar, Cada Miér, Cada Jue, Cada Vier, Cada Sáb, Cada Dom, Cada día, Lun a Vier o "/" (especificar un día). Si especifica una fecha, use el formato mes/día. El año se inserta automáticamente. 7. Después de configurar la frecuencia, use el S joystick para avanzar. 8. Revise la configuración y elija OK, o elija Salir para borrar las modificaciones. Para cancelar una programación para ver o grabar: Encuentre la programación que hizo que desea borrar en la guía de programas y presione SELECT hasta que la marca de verificación (✓ ) o el icono de cinta de vídeo ( ) desaparezca. Si el programa se está emitiendo, debe borrar el programa desde el panel de menú Programar al que se accede desde DIRECTOR DE PROGRAMA. Configuración de las preferencias de la guía Opciones en el menú PREFERENCIAS DE LA GUÍA le permite personalizar la operación para que se adapte mejor a sus necesidades. Mie, Jul 4 OPCIONES DE GUIAS Tema Tiempo Lista fav. Conf. fav. Opciones Set Turbo Ver TV Menu Estilo Guia 12:25AM Grid Guia en Video Encendido Guide Zoom Encendido Multi-Color Encendido Secuencia Numerico Filtros Temporal Config. de Fabrica Selección de las opciones de guía Uso de los menús 25 Ajuste del audio y del vídeo Desde el MENÚ PRINCIPAL, resalte y SELECT la ficha Audio & Vídeo. Desde el panel de menú AJUSTE DEL AUDIO, puede cambiar: • • • • • Audio predeterminado y Audio alternativo Balance de sonido izquierda/derecha TruSurround® Audio Processing Salida Dolby Digital Optimización de salida AJUSTE DE AUDIO Audio Video Ver TV Menu Vie, Jul 13 Audio Preferido Ingles Audio Alternativ. Ingles Balance de audio 0,0 SRS TruSurround Encendido Digital Fruto Dolby Digital Optimiza Estereo 11:15 AM Reajuste las Preferencias Configuración del sonido Su receptor de DIRECTV es compatible con servicios alternativos de audio. Los predet. y alternativo iconos que hay bajo la información de fecha y hora en el Cartel de información o en la guía de programas le indican si estos servicios están disponibles para un programa determinado. AJUSTE DE AUDIO Audio Video Ver TV Menu Vie, Jul 13 11:15 AM Audio Preferido Default Audio Ingles Ingles Espanol Ingles Alternate Audio Alternate Audio Frances Audio Balance Enhanced Bass 0,0 Aleman Italiano SRS TruSurround Encendido Dolby Digital Japones Digital Output Dolby Digital Coreano Chino Estereo Optimize Config. de Fabrica Configuración del idioma de audio predeterminado 1. Presione el botón INPUT en el control remoto para acceder a estos servicios. 2. Resalte el idioma que le interesa. 3. Presione SELECT. Ocasionalmente, es posible que se ofrezca una pista de audio que no se emite, en cuyo caso el sonido no cambiará o no escuchará sonido alguno. Cambie de canales para recuperar la pista de sonido al especificado en el menú AJUSTE DEL AUDIO. 26 Uso de los menús Uso del sonido Dolby (modelo GCEB0 solamente) Seleccione el sonido Dolby Digital, luego use el Digital botón CHANNEL(CH) para pasar por las pistas de sonido del programa actual. Para los programas que se ofrecen en Dolby Digital, aparecerá el símbolo de la doble D ( ) con el título de la pista de sonido. Uso de la configuración La opción Optimizar le permite seleccionar la optimización de sonido basado en Optimizar la conexión que se use de receptor a TV. • Configure Optimizar a Estéreo para que le de la mejor calidad de sonido cuando utilice una conexión AUDIO OUTPUT (L) y (R), o DIGITAL OUTPUT. • Use la opción Mono de Optimizar para lograr la mejor calidad de sonido cuando utilice conexión coaxial OUT TO TV. Ajuste del balance de Para ajustar el balance de sonido izquierda/derecha, resalte y SELECT Audio sonido Balance. Vie, Jul 13 AJUSTE DE AUDIO Audio Video Ver TV Menu Balance de audio Audio Preferido Ingles Audio Alternativ. Ingles Balance de audio 0,0 SRS TruSurround Digital Fruto Altavoz Izquierdo Altavoz Derecho 0 0 Salida Optimiza 7:16 AM Encendido Dolby Digital Estereo Config. de Fabrica Configuración del balance de altavoces izquierda/derecha Use el joystick para aumentar o disminuir la configuración de Audio Balance en el menú emergente. S Ajuste de la imagen en Ajuste el brillo de la imagen de pantalla, el contraste y la saturación para tener pantalla la mejor imagen. 1. Resalte la ficha Audio & Video en el MENÚ PRINCIPAL. 2. Presione SELECT. 3. Resalte el botón del panel de menú PicturePerfect. Uso de los menús 27 4. Presione SELECT. 5. Use el joystick para aumentar/disminuir la configuración de Brillo, Contraste y Saturación de imagen en el menú emergente (como se muestra abajo). S ADJUSTE DE VIDEO Audio Video Mar, Jul 3 Ver TV Menu Relac. Patalla 4:3 Centrar el Menu 0,0 PicturePerfect 0,0,0 Filtro Nivel Negro Brillo 0 6:25 AM Encendido PicturePerfect Contraste Saturacion 0 0 Salir Config. de Fabrica Ajuste de los controles de imagen en pantalla Uso de WatchWord™ Use WatchWord para buscar palabras específicas en los títulos o descripciones. Presione el botón del control remoto SEARCH para acceder al panel de configuración que se muestra abajo. CONFIGURACION DE WATCHWORD Mie, Avr 11 3:45 PM Config Resultado Busque palabras en los Titulos y Descripciones de Programas en la Guia. Ver TV Menu rodeo casino tropical Roberts Vacio Vacio Vacio Vacio Lista de entrada de búsqueda de palabras Puede especificar hasta 8 palabras para identificar la programación que le interesa. Mientras el Receptor Digital de DIRECTV está en modo de espera, busca títulos de programas y descripciones en la guía. Los programas con palabras que correspondan aparecerán en el panel Resultado. Nota: Para que WatchWord tenga la posibilidad de encontrar programas con palabras que correspondan, el Receptor Digital de DIRECTV debe estar en modo de espera (desactivado). Permita al sistema buscar las palabras mientras usted duerme o mientras está en el trabajo. El Receptor Digital de DIRECTV no puede buscar palabras mientras está conectado. Resalte una de las 8 posibilidades y presione SELECT. Aparece un panel 28 Uso de los menús emergente en el que puede escribir una palabra de búsqueda. Si escribió la palabra "ALIEN", WatchWord puede encontrar la película "Aliens" así como cualquier programa que incluya la palabra "alien" en la descripción. También puede usar partes de palabras. Use el teclado emergente para escribir las palabras de búsqueda. Puede resaltar Cambio en el teclado predeterminado (vea la figura) para y SELECT el icono cambiar a la distribución de teclado estándar, si lo desea. Resalte la letra que desee usando el joystick. Presione SELECT para escribir la letra. Seleccione OK cuando haya terminado de escribir las palabras de búsqueda que desee. S CONFIGURACION DE WATCHWORD Mie, Avr 11 Config Resultado Search forIngrese words inWatchWord the Program Titles and Descriptions within Guide. Ver TV Menu ! 1 Q A Z @ 2 W S X # 3 E D C $ 4 R F V % 5 T G B -6 Y H N & 7 U J M * 8 I K . ( ) 9 O L / 0 P : ? Del ! 1 A K T @ 2 B L U # 3 C M V $ 4 D N W % 5 E O X -- rodeo & * ( 6 casino 7 8 9 F G H I P tropical Q R S YRoberts Z . / Empty ) 0 J : ? 3:45 PM OK Salir Borrar Del Vacio Vacio Vacio Uso de la tecla de cambio para cambiar de distribución de teclado Uso de los menús 29 30 Uso de los menús Uso de las guías de programa 5 Este capítulo describe: • Los diferentes estilos de guías de programa (consulte la página 31). • Funciones comunes de la guía de programas y de los menús (consulte la página 33). • Cómo utilizar la Guía OneLine™ (consulte la página 35). • Cómo configurar y utilizar la Guía TurboTune™ (consulte la página 35). Selección de un estilo de Guía de programas Personalice la guía de programas para que muestre las listas de programas que le interesan. Es Ud. quien determina cómo aparecen sus preferencias en pantalla mediante su opción de guía. Los estilos de guía disponibles son: • Cuadriculado con Picture-in-Guide o descripción • Logo con Picture-in-Guide o descripción Guía en cuadrícula Las celdas con flechas muestran los programas que empezaron antes o que continúan después del período de 2 horas que se muestra. • • • • • Es fácil ver qué programas hay a una hora determinada. Muestra dos horas de programación en bloques de 30 minutos. Picture-in-Guide muestra el programa actual en el ángulo superior derecho. Se muestran cuatro canales de programación usando Picture-in-Guide. Los programas aparecen en una fila con el canal en el que se emiten. Jue, Jul 4 GUIA DE PROGRAMAS Todos los Canales Tiempo inmediato de TWC G HOY 8 PM ® 8:03PM Una imagen del programa actualmente que muestra cuál se elige en la selección del menú aparece aquí 8:30 9 PM Tiempo inmediato de TWC 9:30 Pronóstico Local Pronóstico Local DIRECTV INTERACTIVO Centro DIRECTV Pay Per View Previoes DIRECTV Freeview DIRECTV Noticias Del Cliente Uso de las guías de programa 31 Si el título de un programa no cabe completo en el espacio provisto, unos puntos suspensivos (...) indican que falta parte del título. Puede ojear cinco canales si desactiva Picture-in-Guide. GUIA DE PROGRAMAS Mie, Jul 4 10:00PM Todos los Canales Tiempo inmediato de TWC G Una descripción detallada de la programación seleccionada aparece aquí. Las descripciones incluyen los nombres de las estrellas y de las co-estrellas, del año producido, del resumen abreviado del tema o del diagrama y de la otra información. HOY 8 PM ® 8:30 9 PM 9:30 Tiempo inmediato de TWC DIRECTV INTERACTIVO Centro ... Previoes DIRECTV Pay Per View Previoes ... Previoes DIRECTV Pay Per View Previoes DIRECTV Noticias Del Cliente DIRECTV Freeview • Pase los canales arriba o abajo uno a uno con el joystick cuando esté destacada la cuadrícula. • Use el botón CANAL(CH) del control remoto para pasar toda una página de la guía a la vez. • Mueva el resalte a la derecha para mostrar los períodos posteriores. S Desactive Picture-in-Guide 1. Presione el botón GUIDE del control remoto. 2. Presione el botón GUIDE de nuevo para acceder a la ficha de menú Opciones. Presione el botón GUIDE (Guía) del control remoto mientras aparece en pantalla la Guía de programas para mostrar el menú Opciones de guía. La guía de logos 3. Resalte el botón de menú Picture-in-Guide. 4. Presione SELECT para activarlo o desactivarlo. • Seleccione canales en lugar de programas específicos. • Aparecerá el título del programa actual encima de la cuadrícula del logo, conforme resalta cada canal. En la Guía de logos sólo está disponible la programación actual. • Conforme se resalta cada canal, se muestra un vídeo del programa actual en la ventana Picture-in-Guide. GUÍA DE LA INSIGNIA Todos los Canales Mie, May 16 Una imagen del programa actualmente que muestra cuál se elige en la selección del menú aparece aquí Una descripción del programa que muestra actualmente en el menú seleccionado de la red aparece aquí, si esta' disponible. Título del programa sobre la red seleccionada en menú SM cinemax TM ® TM Guía de logos con Picture-in-Guide activo 32 Uso de las guías de programa 10:54 PM Use el botón CANAL (CH) para desplazarse por las entradas de la guía en páginas completas, o use el joystick para deslizarse por las entradas una a una. S La mayor cantidad de canales (vea la figura de abajo) se ve desactivando la función Picture-in-Guide usando sólo el modo de descripción. Vie, Jul 6 GUÍA DE LA INSIGNIA Todos los Canales 10:54AM Una descripción del menú seleccionado aparece aquí, si esta' disponible. Título del programa sobre la red seleccionada en menú SM cinemax TM ® TM La guía de logos con Picture-in-Guide desactivada (modo de sólo descripción) Selección de un estilo de guía 1. Oprima el botón MENU del control remoto. 2. Use el joystick para resaltarla y SELECT (seleccionar) la ficha de menú Opciones de guía. 3. Desde la ficha Opciones, resalte su opción y presione SELECT. 4. Resalte y SELECT la ficha Ver TV para volver al programa que estaba viendo. S Guía de programas y funciones del menú Las guías en pantalla y los menús le ofrecen un método cómodo y lógico de acceder a las funciones y configuración. Cada guía y menú contiene estos elementos: • La guía o título de menú • El día de la semana, la fecha y la hora aparecerán en el ángulo superior derecho Uso de las guías de programa 33 • Fichas de selección del panel de menú Título de menú Sección de menú VER CORREO Guía Opc. de Guía Audio y Video Caller ID Dir. de Programa WatchWord Interactivo Compras Bloq. y Limites Ver Correo Sección activa Fecha y hora Panel de menú Vie, Jun 15 5:24 AM Lea el Mensaje Borre 1 de 3 Mensaje Pag. 2 Segundo pagina de mensaje texto... Configuracion Ver TV Funciones comunes de menú • Use el joystick para mover el resalte de las fichas a los paneles de menú. • Cualquier sub-filtro aparecerá bajo el título de la guía. La etiqueta que queda en el indicador muestra el tipo de filtro. La lista de canales aparece a la derecha del indicador. • Bajo la fecha y hora pueden aparecer unos pequeños iconos que indican el estado del sistema o detalles sobre el programa resaltado. Estos iconos también aparecen en el Cartel de canales como se muestra en la figura de abajo. S Familia 4:00 PM 340 a 5:00 PM Icono Signific. $ Vie, May 8 $ TNN: Coches 10:54 AM CC NEUVO CORREO Clasificado: NR (No clasificado) ALT. DATOS NO GRABO AUDIO SVCS. CC NUEVO CORR. Pay Interactivo Dolby Digital Closed correo Límites caption no per programación audio hecho view disponible disponible disponibleabierto cumplir Datos Límites El grabar Otro audio disponible invalid- no ación permitido disponible Iconos de Cartel de canales El Cartel de canales aparece en la parte superior de la pantalla cuando usa el botón CANAL(CH) para cambiar de canales. Presione el botón INFO del control remoto para mostrar el cartel en cualquier momento. Aparece información más detallada en el Cartel de información bajo el Cartel de canales si presiona el botón INFO por segunda vez. Los carteles desaparecen de la pantalla al cabo de unos segundos, pero puede eliminarlos de pantalla inmediatamente presionando el botón CLEAR del botón remoto. 34 Uso de las guías de programa La Guía OneLine™ La Guía OneLine™ aparece en la parte inferior de la pantalla cuando presiona el joystick arriba o abajo mientras mira la TV. Verá el indicativo del canal y el número, los títulos y las horas de inicio y final de los programas. Use el joystick para moverse arriba o abajo cuando esté usando la Guía OneLine para ver los canales disponibles anterior o posterior. Presione SELECT para sintonizar el canal. S S 360 10:30 11 AM 11:30 Mediodía Clás. De la Familia El Factor De OReilly GUÍA DEL PROGRAMA FNC TheStreet.com Familia La Guía OneLine También puede indicar directamente un número de canal con los botones para ir a la Guía OneLine de ese canal. El contenido de la Guía OneLine varía según la selección del menú FAV LIST y otros filtros. Presione el botón CLEAR del control remoto para quitar la guía inmediatamente. Uso de TurboTune™ La función TurboTune™ es una guía de acceso rápido a nueve de sus canales favoritos. Presione el botón TURBO del control remoto para mostrar el panel TurboTune. Use el joystick para resaltar el canal que desee. El encabezamiento del panel muestra el título del programa que se está emitiendo actualmente en el canal resaltado. Presione SELECT para sintonizar ese canal. S DIRECTV Pay Per View Prev cinemax TM Disposición Menú TurboTune Especifique estos canales usando la ficha de menú Set Turbo después de seleccionar Opciones de guía en el MENÚ PRINCIPAL o resalte y SELECT el panel Setup bajo el menú TurboTune. Resalte una casilla de canal no asignado joystick, los botones y presione SELECT. Escriba el canal deseado usando el numéricos del control remoto o el botón CANAL (CH) S Uso de las guías de programa 35 36 Uso de las guías de programa 6 Establecimiento de favoritos y de filtros Este capítulo explica: • Cómo crear una lista de canales (esta página). • Cambio de nombre de una lista de canales (consulte la página 38). • Uso de las funciones Autoconfiguración, Seleccionar todos y Borrar todos (consulte la página 38). • Cómo filtrar la guía de programas (consulte la página 39). • Cómo cambiar las horas de la guía (consulte la página 40). Uso de la lista de canales favoritos Creación de una lista de canales Se proporcionan listas de canales para ayudarle a organizar los cientos de canales disponibles en grupos adecuados para su hogar. Cada lista puede contener tantos o tan pocos canales como desee. Puede personalizar estos grupos de diversas maneras. Por ejemplo, FAV A puede ser los canales favoritos de Papá, FAV B los de Mamá, FAV C los de los niños y Familiar podrían ser los canales que Papá y Mamá estimen convenientes para toda la familia. 1. 2. 3. 4. Oprima el botón MENU del control remoto. Seleccione Opciones de la guía del MENÚ PRINCIPAL. Use el joystick para resaltar la ficha Fav Setup. Presione SELECT (seleccionar) para abrir el panel de CONFIGURACIÓN DE LISTA DE FAVORITOS que se muestra abajo. S CONFIG. DE LISTAS FAVORITAS Tema Mie, Jul 18 7:10 PM Lista: MI LISTA Tiempo Lista fav. Canal 120 WABC Conf. fav. 121 WQED Opciones 122 ESPN Llenar HBOW Borrar Set Turbo Ver TV Menu 123 Auto Renombre Televisión de la calidad para la familia entera, ofreciendo obras clásicas animadas de XYZ, serie original, specials de la televisión, y películas. Incluido en ninguna carga adicional en DIRECTV Total Choice Conjuntos. Las cuatro columnas de cajas pequeñas en el lado derecho de la pantalla son las Cajas de Etiquetas. Las tres primeras columnas son las listas FAV A, FAV B y FAV C. La columna del extremo derecho es la lista de Familiar. Nota: Si el receptor está bloqueado, sólo se podrán ver los canales de la lista Familiar existente. Si la lista Familiar no tiene canales, no se verá ningún canal sin desbloquear el receptor. Para evitar esta inconveniencia, cree la lista Familiar antes de bloquear el receptor. Consulte Capítulo 7 – Uso de los controles de acceso, en la página 41 para obtener detalles sobre el control del acceso al sistema. 5. Use el joystick para resaltar la caja de etiquetas que corresponde al número del canal y la lista que desea crear o modificar. S Establecimiento de favoritos y de filtros 37 6. Oprima el botón SELECT para añadir o quitar la marca que indica que el canal de esa fila está incluido en la lista que se muestra en la parte superior de la columna. Para ayudarle a decidir si incluir o excluir un determinado canal, aparecerá en la parte superior de la pantalla el título del programa que es está emitiendo actualmente. 7. Recorra hacia arriba y hacia abajo para ver los canales y las descripciones. Presione SELECT para añadir canales a su lista. 8. Cuando haya agregado todos los canales que desee a la lista, use el joystick para resaltar y SELECT la ficha Ver TV para seguir viendo. S Una vez que ha creado sus listas, use el botón FAV del control remoto para pasar por los canales rápida y fácilmente. Cada vez que oprima pasará un canal de la lista. También puede seleccionar una lista resaltando la ficha Listas Favoritas. LISTAS FAVORITAS Tema Tiempo Lista fav. Conf. fav. Opciones Set Turbo Ver TV Menu Mie, Jul 18 8:16 PM Seleccione la Lista Favorita para filtrar la Guia Todos los Canales FAV. A FAV. B FAV. C Familiar Cambio de nombre de una lista de canales: 1. Resalte el botón Renombre y presione SELECT. Aparecerá un menú Renombre lista. Puede cambiar el nombre de las tres primeras listas. No puede cambiar el nombre de las listas Todos ni Familiar. 2. Resalte la lista que desea cambiar de nombre y presione SELECT. Aparecerá un panel de botones. 3. Resalte la letra que desee usando el joystick. 4. Presione SELECT para ingresar la letra. 5. Cuando haya terminado, Seleccione OK. S Creación de una lista Autoconfiguración 1. SELECCIONE el botón Autoconfiguración. Aparecerá un menú emergente que mostrará cada uno de las listas de canales. 2. Resalte y SELECCIONE una lista de canales que desea programar. Una vez seleccionada, aparacerá el panel de estado de Progreso de la autoconfiguración. Es posible que se tarde varios minutos en revisar todos los canales y determinar cuáles está autorizado a recibir. Los resultados de esta búsqueda se guardarán en la lista de canales designados. Nota: Autoconfiguración podría excluir canales como Music Choice o incluir algunos canales pay per view. Esto no significa que el receptor esté fallando. Estos canales se excluyeron o incluyeron debido al análisis de proceso de DIRECTV. Puede editar las listas manualmente para corregir estas discrepancias. 38 Establecimiento de favoritos y de filtros Agregar y eliminar todos Seleccionar el botón de menú Borrar todos vacía la lista de canales que ha los canales elegido. El botón Añadir todos realiza la operación opuesta, creando una lista con todos los canales que está autorizado a recibir. Filtrado de la guía de programas Presione el botón GUIDE del control remoto mientras está en la guía. Un menú emergente le proporciona herramientas de filtro y maneras de acceder a otros estilos de guía. Combinando estas opciones de filtro, puede reducir rápidamente la lista canales a solamente los que le interesan. Uso de filtros de tema Desde el MENÚ PRINCIPAL, SELECCIONE la ficha OPCIONES DE LA GUÍA. Aparecerá el menú FILTRO DE CATEGORÍAS con todos los grupos de programas disponibles. FILTRO DE CATEGORIAS Mie, Jul 18 7:15 PM Tema Tiempo Lista fav. Seleccione la Categoria Todo Conf. fav. Opciones Películas Set Turbo Deportes Ver TV Menu Especiales Serie Noticias Compras Después de elegir una categoría (distinta de Todos), el menú desplegable se sustituye con el menú emergente Tipos. Este menú le permite afinar más en un tema elegido. Además de Todos puede seleccionar categorías de selección frecuente usando el botón GUIDE del control remoto. Por ejemplo, si elige Serie para esta categoría, podrá ahora elegir el tipo de película Niños, Comedia, Artes y cultura, Drama y otros. Consulte la figura que de abajo FILTERO DE CATEGORIAS Mie, Jul 18 Tema Tiempo Lista fav. 7:15 PM FILTERO DE CATEGORIAS Tema Seleccione la Categoría Todo Tiempo Lista fav. Conf. fav. Opciones Peliculas Conf. fav. Opciones Set Turbo Deportes Set Turbo Ver TV Menu Especiales Serie Noticias Compras Ver TV Menu Mie, Jul 18 Serie 7:15 PM Category Seleccione una categoría a la guía de filtro Todo All All Infantil Movies Comedia Movies Sports Artes Culturales Sports Drama Specials Educativo Specials Series Interes General Series Como-Hacer News News Adultos Shopping Shopping Después de seleccionar una, la guía se filtrará aún más para mostrar sólo aquellos canales que ofrezcan programas de la categoría y clase seleccionados. Establecimiento de favoritos y de filtros 39 Selección de las horas Resalte la ficha Horarios. El menú de la GUÍA DE HORARIOS que se muestra de la guía abajo, ofrece fácil acceso a información sobre programación futura. Simplemente, seleccione la hora a la que desea que empiece la guía. Tras unos segundos, aparecerá la guía seleccionada. HORARIOS GUIA Tema Tiempo Mie, Jul 18 Seleccione La Hora de empezar de la Guia Lista fav. Conf. fav. Actualidad Opciones Set Turbo Mie, 11:00PM Ver TV Menu Jue, 5:00AM Jue, 11:00AM Jue, 5:00PM Jue, 11:00PM Vie, 5:00AM 40 Establecimiento de favoritos y de filtros 9:24PM 7 Uso de los controles de acceso Este capítulo explica: • Cómo bloquear y desbloquear el sistema (esta página). • Cómo establecer un límite máximo en las categorías (consulte la página 42). • Configuración de los límites máximos de gasto y de horas (consulte la página 43). Bloqueos y límites proporciona configuraciones para ayudarle a controlar las restricciones de los programas de DIRECTV®. Estos límites, cuando están acompañados de la lista de canales, ponen un gran nivel de control en sus manos. El Receptor Digital de DIRECTV debe estar bloqueado para que se puedan aplicar el cronómetro, las categorías y los límites de gastos. Bloqueo y desbloqueo del sistema Cuando reciba su sistema de satélite, estará desbloqueado; (es decir, sin límites ni restricciones). Debe bloquear el sistema para que los límites (gastos, categorías, cronómetro y lista de favoritos de la familia) se puedan aplicar. Nota: Una vez que el Receptor Digital de DIRECTV esté bloqueado, sólo estarán accesibles los canales de la lista Familiar. Si la lista Familiar no tiene canales, no se podrá ver ningún canal sin desbloquear primero el receptor digital. Para evitar esto, verifique el contenido de la lista Familiar antes de bloquear el receptor digital. Cómo bloquear el Cuando SELECCIONE el botón BLOQUEO, se muestra el panel emergente de sistema BLOQUEAR EL SISTEMA. BLOQUEO PARENTAL Bloqueo Conf. fav. Clasific. Limites Ver TV Menu Mie, Jul 18 9:15 AM Active limites de clasificacion, gasto y ver TV, y limite el acceso a canales de liste Familiar. Ingrese la clave de 4 digitos para bloquear su receptor. Bloqueo 1. Escriba un código de cuatro dígitos usando el control remoto. Presione Salir para parar el proceso de bloqueo. 2. Resalte y SELECCIONE OK 3. Escriba el código de nuevo para confirmar. 4. Resalte y SELECCIONE OK. Uso de los controles de acceso 41 Si olvida el código, debe llamar a DIRECTV. Una vez haya seleccionado OK, el receptor de satélite estará bloqueado. Debe indicar el código de acceso para desbloquearlo. En la parte superior de cada pantalla de menú aparecerá un candado para recordarle que el sistema está bloqueado. BLOQUEO PARENTAL Bloqueo Conf. fav. Clasific. Limites Ver TV Menu Mie, Jul 18 9:15 AM Active limites de clasificacion, gasto y ver TV, y limite el acceso a canales de liste Familiar. Ingrese la clave de 4 digitos para bloquear su receptor. Bloqueo BLOQUEE SISTEMA Cod. de Seguridad Lock * * * * CONFIRME COD. SEGUR. Cod. de Seguridad Lock OK * * * * Salir OK Salir Desbloqueo del sistema Para eliminar el bloqueo y sus restricciones: 1. Resalte la ficha Bloqueos y límites del MENÚ PRINCIPAL. 2. SELECCIONE el botón Desbloquear del menú 3. Escriba el código que escribió para bloquear el sistema. El botón que usó para bloquear el sistema se usa ahora para desbloquear el sistema. Una vez que el sistema está desbloqueado, desaparecen todos los límites y restricciones. Elija Salir para mantener el bloqueo. Establecimiento de los La clasificación de programas indica que el contenido es adecuado para una límites de clasificación audiencia determinada. Resalte la ficha Categorías máximas. Resalte y SELECCIONE la clasificación más alta que desea permitir. La clasificación elegida se marcará como se indica abajo. LIMITES DE CLASIFICACION Bloqueo Conf. fav. Mie, Jul 18 9:15 AM Clasific. Limites Ver TV Menu Bloquear Todo NR (Not Rated) G PG PG-13 NR-Content R NR-Mature NC-17 Permitir Todos Podría elegir Bloquear Todos o Permitir Todos en vez de fijar un límite específico. 42 Uso de los controles de acceso Establecimiento de Resalte la ficha Límites para establecer el límite máximo de gasto. Puede fijar el límites de gasto y de precio máximo permitido de compra por evento. tiempo Para cambiar el límite que se muestra: 1. Resalte el botón Gasto máximo 2. Presione SELECT para mostrar el panel emergente LÍMITE DE GASTO. Use este menú para establecer las horas específicas y número máximo de horas permitidas para disfrutar programación por satélite. LIMITES DE GASTO/VER TV Bloqueo Conf. fav. Clasific. Limites Ver TV Menu Mie, Jul 18 Limite de gasto 10:11 AM $5.00 Lunes 24:00 Hrs permitidas Martes 24:00 Hrs permitidas Miercoles 24:00 Hrs permitidas Jueves 24:00Hrs permitidas Viernes 24:00 Hrs permitidas Sabado 24:00 Hrs permitidas Domingo 24:00 Hrs permitidas Tiempo total visto hoy: 1:12 3. Use los botones numéricos del control remoto para fijar el límite o use el joystick para aumentar o disminuir cada dígito. S 4. Use el joystick para resaltar el dígito que quiere cambiar. El límite máximo por evento es de $655. S 5. Resalte OK y presione SELECT para confirmar la cifra. Uso de los controles de acceso 43 44 Uso de los controles de acceso Preguntas y Respuestas A ¿Tiene preguntas? ¿Hemos olvidado decirle algo? Hemos compilado aquí las preguntas más comunes y sus respuestas. Esperamos que le sean útiles. P Yo tenía señal pero ahora recibo un mensaje que dice "Buscando la señal de satélite. Para acceder funciones relacionadas oprima SELECT.” ¿Qué pasó? R La lluvia y la nieve pueden afectar la recepción de la señal del satélite. Esta pérdida de señal es temporal. Revise además el nuevo crecimiento de árboles y arbustos que pueden estar bloqueando la señal. Otra posibilidad es que el viento o alguien haya movido la mini-parabólica. P ¿Por qué no puedo controlar mi televisor? R Antes de poder controlar su televisor, VCR o cualquier otro aparato, además de su receptor digital de satélite, debe programar el control remoto para los diferentes aparatos. Consulte Capítulo 3 – Uso de los botones del control remoto en este manual para obtener instrucciones específicas. Si ya ha programado el control remoto con éxito, trate de oprimir el botón del aparato adecuado para poner su control en el modo apropiado. Después trate de controlar ese aparato. Además, asegúrese de que las baterías de su control remoto estén cargadas. P Mi receptor digital no responde cuando oprimo los botones. ¿Qué le pasa? R Si los botones del panel frontal funcionan pero no los del control remoto, oprima el botón SAT antes de intentar controlar el receptor digital de satélite. Si eso no funciona, oprima los botones SAT y MUTE al mismo tiempo y pruebe nuevamente. Si eso no funciona, o si los botones del panel frontal tampoco funcionan, desenchufe su receptor digital de satélite por 30 segundos y vuélvalo a enchufar. El receptor de satélite es un dispositivo de computación. Es susceptible a cambios erráticos en la electricidad o en la señal, como cualquier otra computadora y estos cambios súbitos pueden ocasionar que se "equivoque". P Algunos canales se ven bien, mientras otros se congelan o indican que la señal no está disponible. ¿Qué le pasa? R Las causas más comunes de este comportamiento están relacionadas con una mala toma de tierra del cable del satélite. Revise el cable que conecta el receptor digital de satélite y la mini-parabólica. Confirme que se está usando el cable RG-6 (no el RG-59) y que no excede los 100 pies de largo. Los cables más largos requieren amplificación. Este amplificador especial está disponible a través de su distribuidor. P ¿Cómo puedo mirar un canal mientras grabo otro? R Desafortunadamente, con un solo receptor digital de satélite, no puede. Cada receptor puede decodificar sólo un canal a la vez. P Estoy recibiendo un mensaje para llamar a una extensión. ¿Por qué? R Hay muchas razones para esto. Si desea mirar el canal que muestra el mensaje, llame a DIRECTV al 1-800-531-5000. Preguntas y Respuestas 45 P ¿Por qué no tengo una oferta en pantalla para comprar programas pay per view? R Hay tres posibilidades; su receptor digital de satélite debe estar conectado a una línea de teléfono y no lo está; DIRECTV no se da cuenta que su línea de teléfono está conectada; o ha desactivado su capacidad de hacer compras en pantalla Llame a DIRECTV al 1-800-531-5000 para asistencia. P ¿Puedo recibir mis programas de televisión locales a través del receptor digital de satélite? R Hay tres maneras de recibir programación local: • Si está en un área donde la programación local está disponible vía satélite y tiene la mini-parabólica adecuada, llame a DIRECTV para subscribirse al paquete necesario. • Instale una antena tradicional (por ejemplo; montada en el tejado, en el ático u "orejas de conejo"). • Póngase en contacto con la compañía local de Cable para recibir servicio de cable básico o "lifeline". Si elige la primera opción, la programación local aparecerá en la guía de programación como cualquier otro canal. Para las opciones 2 ó 3, conecte la señal local en la toma IN FROM ANTENNA de la parte trasera de su receptor digital de satélite. Use el botón INPUT para cambiar entre programación de DIRECTV® y programación local provista en el conector OUT TO TV. P Si tengo preguntas sobre el sistema de satélite o necesito arreglarlo, ¿a quién llamo? R Para temas relacionados con el equipo, llame al Centro de Servicio al Cliente de Hughes al 1-800-274-8995, o si lo prefiere, llame primero a su distribuidor. Ellos están muy familiarizados con su instalación y necesidades. Además, es posible que ellos estén en la misma zona que usted. Si necesita asistencia con su suscripción, como añadir canales, llame a DIRECTV al 1-800-531-5000. P Creo que dejé un programa para grabar en mi VCR, pero cuando revisé el cassette no había nada. ¿Qué puede haber pasado? R Hay varias razones posibles para esto. Primero, revise que su VCR se haya programado correctamente, haya quedado encendido y que los enchufes de entrada y salida coincidan con los de su receptor digital de satélite. Confirme que tenía autorización para grabar el programa elegido. 46 Preguntas y Respuestas P ¿Por qué necesito conectar el receptor digital de satélite con una línea telefónica? R La conexión del teléfono la usa el receptor digital de satélite para informar a DIRECTV de cualquier actividad de compra P Levanté el teléfono y hacía ruidos y chirridos. ¿Por qué? R Su receptor digital de satélite estaba reportando a los proveedores de servicio actividad pay per view. Esto sucede raras veces y sólo suele durar un minuto más o menos. P ¿Qué pasa si mi pregunta no aparece aquí? R Llame a su distribuidor o al Centro de Servicio al Cliente de Hughes al 1-800-274-8995. Haremos lo posible para contestar sus preguntas. Preguntas y Respuestas 47 48 Preguntas y Respuestas Códigos de control de los fabricantes B Use estos códigos para programar los controles para operar los componentes de su sistema. Tabla 3: Marcas de VCR y códigos de control remoto MARCA NÚMERO DE CÓDIGO MARCA NÚMERO DE CÓDIGO MARCA NÚMERO DE CÓDIGO Aiwa 034 Lloyd 034 Samsung 102 040 032 104 107 109 112 113 115 120 122 125 159 Akai 016 043 046 124 125 142 146 LXI 034 003 009 017 Sansui 043 048 135 022 Ampro 072 Magin 040 Sanyo 003 010 102 007 014 134 Anam 031 Magnavox 067 031 034 041 068 154 160 064 Scott 017 037 044 129 131 112 159 Audio Dynamics 012 023 039 043 Marantz 067 069 031 067 012 023 Sears 001 003 008 009 010 014 017 081 101 Broksonic 035 037 044 129 152 Marta 101 Sharp 031 054 053 Canon 028 031 Matsui 027 030 Shintom 024 Capehart 108 MEI 031 Signature 034 Craig 003 040 135 Memorex 102 101 003 010 014 031 034 053 072 139 134 Sony 003 031 052 056 057 058 149 155 Curtis Mathes 031 041 156 MGA 045 046 059 Soundesign 034 Daewoo 117 119 005 116 007 010 065 108 110 112 Minolta 001 156 STS 001 Daytron 031 059 034 067 108 Mitsubishi 001 059 061 046 051 142 045 162 Sylvania Dimensia 156 MTC 034 040 Symphonic 034 DBX 012 023 039 043 Multitech 024 034 Tandy 010 034 Dynatech 034 053 NEC 012 023 043 048 039 Tatung 039 043 023 Electrohome 059 Nordmende 043 Teac 034 039 043 023 Emerson 006 029 035 025 027 034 036 037 046 101 129 131 138 017 031 044 152 157 153 Optonica 053 054 Technics 031 070 Fisher 003 008 009 010 Panasonic 070 133 031 066 160 161 Teknica 031 019 034 101 Funai 034 Pentax 001 013 063 156 TMK 006 GE 031 072 144 147 063 151 107 109 156 126 Philco 031 034 067 Toshiba 112 008 131 047 059 082 001 042 Go Video 040 132 136 Philips 031 067 034 101 054 071 Totevision 040 101 Goldstar 101 123 012 001 114 Pilot 101 Unitech 040 Harman Kardon 012 045 Pioneer 021 013 048 Vector Research 012 Hughes 001 Portland 108 Video Concepts 012 046 034 141 Hitachi 040 001 026 034 063 137 150 156 Quartz 002 014 Videosonic Instantreplay 031 Quasar 070 133 160 161 031 066 Wards 003 001 024 031 034 040 053 054 017 131 JCL 031 Radio Shack 123 Yamaha 012 043 034 039 JCPenney 001 012 040 101 156 066 RCA 001 107 109 144 147 151 041 034 040 156 031 140 Zenith 072 080 056 048 034 101 058 Jensen 043 Realistic 003 008 010 014 031 034 040 053 054 101 JVC 048 050 043 130 060 012 031 150 055 158 Rico 058 078 Kenwood 014 034 047 048 023 Salora 014 Códigos de control de los fabricantes 49 Tabla 4: Marcas de televisores y códigos de control remoto MARCA NÚMERO DE CÓDIGO MARCA NÚMERO DE CÓDIGO MARCA NÚMERO DE CÓDIGO Admiral 072 081 160 161 JBL 164 RCA 160 161 156 165 065 070 004 023 024 056 074 152 167 145 A Mark 112 143 JCPenney 070 004 008 009 024 030 065 101 160 143 156 Realistic 007 019 043 047 Akai 070 146 Jensen 013 Runco 072 130 Amstrad 052 JVC 001 034 038 083 199 Sampo 004 070 058 207 Anam 043 054 056 080 112 KEC 043 Samsung 101 004 050 089 105 160 127 143 133 AOC 007 020 053 057 082 070 004 058 112 Kenwood 070 001 Sanyo Audiovox 076 120 Kloss 002 059 Scott 004 028 043 048 143 Blaupunkt 088 KMC 143 Sears 015 030 028 094 004 007 057 082 143 160 167 Cairn 206 KTV 043 143 154 070 Seleco 200 Candle 070 002 003 004 Lodgenet 072 Sharp 081 004 014 019 022 028 143 Capehart 058 Logik 072 Siemens 088 CCE 001 004 024 Luxman 004 Signature 072 Cetronic 043 LXI 007 015 052 081 160 Sony 001 085 126 166 079 Citizen 070 002 003 004 043 101 103 143 Magnavox 003 004 022 059 060 061 063 064 070 094 127 160 164 Soundesign 028 003 004 043 Classic 112 043 Marantz 070 164 Spectricon Concerto 004 Matsui 164 SSS 004 043 Contec 043 050 051 Memorex 004 007 072 Supre Macy 002 Coronado 143 Metz 088 Sylvania 003 044 059 060 063 064 070 127 160 164 Craig 043 054 191 MGA 024 070 004 024 028 042 Symphonics 194 052 Crown 043 143 Minerva 088 Tandy 081 Curtis Mathes 070 101 143 004 Mitsubishi 004 024 040 042 028 146 Tatung 056 062 CXC 043 MTC 070 004 062 101 Technics 034 080 Daewoo 076 103 004 016 043 114 120 127 143 128 136 192 044 NAD 015 025 Techwood 004 Daytron 002 003 004 024 028 043 072 101 143 004 143 NEC 070 040 016 056 024 130 134 019 004 Teknika Dynasty 043 Nikei 043 Telerent 072 Dynatech 062 Onking 043 Tera 173 Electrohome 024 076 120 143 Onwa 043 TMK 004 Emerson 004 005 028 043 047 048 050 051 076 120 143 151 153 154 155 070 096 191 Optonica 019 081 Toshiba 015 030 007 040 062 101 Fisher 007 057 Orion 201 202 203 204 205 Universal 008 009 Fujitsu 198 Panasonic 034 080 056 164 Video Concepts 146 Funal 028 043 Philco 070 003 059 060 064 004 056 063 024 164 Vidtech 004 Futuretech 043 Philips 164 093 038 005 059 127 070 003 004 Wards 004 019 064 008 009 028 060 061 063 072 074 143 164 165 GE 160 165 161 070 008 009 034 056 073 074 130 155 167 004 145 Pioneer 025 070 004 018 023 190 Westinghous e 076 120 Goldstar/LG 004 106 110 112 119 127 143 193 Portland 004 143 065 Yamaha 004 070 Gradiente 004 038 106 Proscan 160 161 167 145 065 York 004 Hall Mark 004 Proton 004 058 112 143 171 173 Yupiteru 043 Hitachi 007 011 004 009 010 012 023 072 075 143 158 Quasar 034 056 080 164 Zenith 072 073 095 103 Infinity 164 Radio Shack 004 019 043 127 143 Zonda 112 50 Códigos de control de los fabricantes Tabla 5: Marcas de audio AUX y códigos de control remoto AUX NÚMERO DE CÓDIGO AUX NÚMERO DE CÓDIGO AUX NÚMERO DE CÓDIGO Adcom 146 149 227 244 Jerrold 141 Pioneer 093 132 138 210 165 189 195 201 081 230 AMC 083 084 JVC 112 198 252 Quasar 131 187 Arcam 100 Kenwood 096 104 119 125 148 151 163 171 173 242 RCA 109 213 166 Archivo de audio 093 098 Krell 223 Realistic 103 122 123 124 172 174 177 179 180 194 Audio Techinica 221 Lexicon 215 250 Rotel 204 218 239 Aiwa 111 114 117 156 170 199 203 219 231 241 254 Luxman 066 120 205 229 Sansui 196 214 126 139 075 197 Akal 181 233 LXI 123 177 Sanyo 157 129 Anam 180 Magnavox 126 162 185 186 224 228 Samsung 068 Bose 064 137 219 Marantz 074 105 126 128 139 155 162 186 232 Scott 180 190 B&K 150 152 McIntosh 251 Sharp 096 125 151 161 169 182 193 Carver 013 098 107 126 129 160 163 220 245 249 Mondial 069 225 Sherwood 089 127 Clarion 151 169 MCS 108 178 Sony 097 117 147 183 200 253 237 238 188 192 Denon 101 133 191 202 208 246 247 Mitsubishi 253 Soundstream 197 Englightened Audio 078 153 Meridian 013 067 Starcom 141 Fisher 107 129 157 163 176 NAD 128 Symphonic 124 Fosgate Audionics 228 248 Nakamichi 072 212 234 235 Teac 102 159 180 062 GE 216 123 Niles 236 Technics 131 184 187 200 202 208 165 Harmon Kardon 073 195 248 249 Onkyo 094 115 116 209 211 255 Toshiba 175 Haitai 119 Optimus 121 125 140 181 Wards 163 Hitachi 088 Panasonic 131 144 187 200 Yamaha 092 120 166 240 125 169 216 JCPenney 109 154 178 Parasound 085 086 090 Zenith 222 061 Jesen 099 Philips 136 186 126 197 Tabla 6: Marcas de AUX-CATV y códigos de control remoto CATV Hamlin NÚMERO DE CÓDIGO CATV NÚMERO DE CÓDIGO CATV NÚMERO DE CÓDIGO 015 017 022 Pioneer 007 026 027 TOCOM 003 Jerrold/G.I 010 021 025 Scientific Atlanta 002 006 013 Zenith 004 Oak 008 016 023 Pioneer 007 026 027 Códigos de control de los fabricantes 51 Tabla 7: Marcas de DVD y códigos de control remoto MARCA Alpine NÚMEROS DE CÓDIGO MARCA Magnavox 009 NÚMEROS DE CÓDIGO MARCA Proscan 038 042 008 NÚMEROS DE CÓDIGO 035 036 Apex Digital 076 Marantz 006 007 RCA 035 036 Denon 030 226 Mitsubishi 032 Samsung 029 040 GE 004 035 036 NAD 077 Sharp Goldstar, LG 028 041 Onkyo 207 Sony 037 Harmon Kardon 217 Panasonic 003 039 Toshiba 038 001 Hitachi 011 Philips 038 042 006 007 Yamaha 039 079 JVCt 031 Pioneer 034 005 010 Zenith 028 041 Tabla 8: Marcas de tocadiscos DVD láser y códigos de control remoto MARCA California Audio 52 NÚMERO DE CÓDIGO MARCA NÚMERO DE CÓDIGO 047 Quasar 047 Denon 043 044 Radio Shack 056 Fisher 047 RCA 046 Kenwood 060 Realistic 049 Magnavox 048 057 Runco 058 Mitsubishi 057 Sanyo 052 NAD 057 Sharp 060 Optimus 049 Sony 050 053 Panasonic 047 051 054 Technics 047 051 054 Philips 048 Toshiba 060 Pioneer 055 057 Yamaha 045 059 Códigos de control de los fabricantes Índice A Alineación de la antena 4 Alineación de la antena según código postal 4 Ángulo de acimut, determinación 4 Ángulo de elevación, determinación 4 Antena cable, conexión 2 control remoto de RF 9 direccionamiento 4 terrestre 9 valores de alineación 4 Antena de emisión de TV 9 Antena de RF 9 Audio alternativo 26 balance 26 conexión 27 control de balance 27 digital 27 predeterminado 26 B Balance, sonido 27 Baterías, instalación 18 Borrar programa, preseleccionado 24 Botón CLEAR 17 Botón GUIDE 17 Botón INFO 17 Botón INPUT 17 Botón SAT 17 Botones del DIRECTOR 18 Brillo, vídeo 28 Búsqueda de los códigos del control remoto 15 Búsqueda de palabras 28 C Cajas de Etiquetas 37 Cancelar compra 23 Cartel de canales eliminar de pantalla 34 ubicación 34 Cartel de información, uso 34 Códigos de control de dispositivos 49 Códigos de control remoto de TV 50 Códigos, control de dispositivos 49 Compra de programas Pay Per View 23 Compras no listadas 22 Compras no vistas 23 Conexión de teléfono 3 Conexión del cable de teléfono 3 Conexión S-Video 3 Contraste, pantalla 28 Control Remoto baterías 18 Control remoto código de dispositivos del fabricante 49 códigos de TV 50 modelos 15 programación 18, 19 referencia rápida 15, 16 sensor, VCR 10 Controles dispositivo 18, 49 panel frontal 4 VCR, prueba 12 Controles del panel frontal 4 Correo borrar 23 mensaje 23 ver 23 F Fichas, menú 33 G Grabación automática 24 configuración de VCR 25 Grabación automática 25 Guía configuración de preferencias 25 en cuadrícula 31 estilos 33 estilos con logos 32 funciones 33 selección de estilo 31 Guía de programas estilos 31 funciones 33 preferencias 25 H Historia, compra 22 I Direccionamiento de la antena parabólica 4 Dolby conexión digital 12 icono del logo 27 Pro Logic 12 DVD y códigos de control remoto 52 Icono de cambio 29 Icono de correo nuevo 23 Icono de cuadro múltiple 3 Iconos cambio 3, 29 características interactivas 19 correo nuevo 23 cuadro múltiple 3 grabar 24 lista de opciones 3 menú 3 presentación en pantalla 3 ver 24 Indicación de señal 5 E J Edición de programas preseleccionados 25 Emisor, cable de control de VCR 11 Entrada de códigos del control remoto 19 Entradas de WatchWord 28 Joystick control remoto 17 funciones 15, 16, 17 icono 17 D L Localización del satélite 4 Índice 53 M Marcas de audio AUX y códigos de control 51 Marcas de CATV y códigos de control remoto 51 Mensaje No se puede grabar 12 Menú fichas 33 funciones 33 iconos 3 repaso de las funciones 21 Menú de compras de programas futuros 22 Modo de espera 28 O compra 22 historia 22 programas futuros 22 Picture-in-Guide desactivación 32 Picture-in-guide opciones 31 PicturePerfect, ajuste 27 Preferencias, guía 25 Programación de dispositivos 19 Programar 24 Programas comprados por teléfono 22 Prueba resultados 5, 6 R Opciones icono de lista 3 Optimizar 27 receptor A/V, conexión 12 P Saturación, vídeo 28 Selección por adelantado 24 Seleccionar un elemento de menú. 17 SELECT control 17 Servicio de Caller ID 24 Sistema de entretenimiento, conexión 12 Panel de compras pasadas 22 Panel posterior conector de teléfono 3 conexiones 2 Pantalla de configuración del sistema 4 Pay per view 54 Índice S Surround sound, Dolby 12 Sustitución de las baterías 18 T Teclado, cambio de distribución 29 Tipos de conexión de TV 3 Transpondedor fuerza de la señal 5 verificación 5 TurboTune, asignación de canales 35 V VCR cable de control 10, 12 códigos de control 49 conexión 10 marcas 49 menú de programación 11 probar 12 sensor del control remoto 10 Verificación señal del satélite 5 Vídeo contraste 27 saturación 27 Garantía limitada Hughes Network Systems (HNS) proporciona la garantía limitada siguiente en este equipo. Esta garantía limitada toma preferencia sobre cualquier otra garantía, sea expresa, implícita o estatutaria incluyendo, sin limitaciones, las garantías implícitas de comerciabilidad y aptitud para un propósito en particular. HNS no será responsable por daños más allá del precio de compra menos una cantidad razonable por uso, o por cualquier daño incidental, especial, punitivo o indirecto de cualquier índole, o por cualquier demora, pérdida de uso, tiempo, ganancias, ingresos o ahorros, cualquier pérdida comercial, inconveniencia, daños a la propiedad del comprador o de cualquier otra persona, debido al uso o imposibilidad de usar el producto o por alguna falla de funcionamiento. HNS no asume ni autoriza a ningún centro de atención al cliente o alguna otra persona o entidad a asumir ninguna otra obligación o responsabilidad fuera de la que está especificada en esta garantía limitada. Ninguna información verbal o escrita o consejo dado por HNS, sus vendedores, distribuidores, agentes o empleados deberá crear una garantía o de ninguna manera incrementar el alcance de esta garantía. Algunos estados no permiten la exclusión o limitación de daños incidentales o indirectos, o limitaciones de garantías implícitas, por lo que es posible que las limitaciones o exclusiones anteriores no se apliquen al Comprador. Esta Garantía Limitada otorga derechos específicos legales al Comprador y puede ser que el Comprador tenga otros derechos que pueden variar de estado a estado. Condiciones de la garantía Su receptor Digital de Satélite DIRECTV fabricado por Hughes, la mini-parabólica y el Control Remoto están garantizados contra defectos en los materiales y mano de obra para piezas y trabajo. Producto Período de garantía Receptor Digital de satélite GAEB0 Receptor Digital de satélite GCEB0 90 días 90 días trabajo, trabajo, 1 año piezas 1 año piezas Control remoto HRMC-8, HRMC-9 Parabólica HANT-XX y LNB 90 días piezas 1 año piezas Esta garantía limitada no cubre: • • • • • • • una unidad que ha sido modificada daños por mal uso, negligencia o accidente cualquier instalación, o daños causados por instalación envíos a HNS que hayan sido dañados en tránsito desmantelamiento y reinstalación del equipo para reparaciones pérdida de programación daños por relámpagos (por ejemplo, subida de tensión, relámpagos cercanos) • costo de envío a HNS • baterías o cables después de la instalación • problemas originados por la naturaleza Esta garantía limitada no es transferible y es válida sólo en los Estados Unidos de América. Servicio Si tiene alguna pregunta o encuentra problemas, puede comunicarse con su vendedor autorizado o llamar al Centro de Servicio al Cliente de Hughes Network System, al 1-800-274-8995. Para asegurar un servicio rápido y eficiente, tenga a la mano el número de modelo y de serie. Hay espacio para anotar esos números en la cubierta frontal de este manual. En caso de que necesite reparar o sustituir, necesitará estos números junto con el recibo de venta. Procedimientos de devolución Si su equipo necesita reparaciones, puede: O • comunicarse con su vendedor autorizado de HNS o llamar a nuestro Centro de Servicio al Cliente para localizar el centro de servicio autorizado más cercano. • elegir la opción "reemplazar después de recibido", donde usted debe enviar su equipo defectuoso a HNS y, cuando se reciba su unidad se le enviará una nueva o reconstruida (a discreción de HNS). Instrucciones de embalaje para devolver el equipo 1. Llame al Centro de Servicio al Cliente. El técnico de Servicio al Cliente le dará un RMA (autorización para devolver la mercancía) y la dirección donde devolver su unidad. 2. Si está devolviendo el receptor digital de satélite, quédese con la tarjeta de acceso y devuelva sólo el receptor digital de satélite. 3. Empaque la unidad en la caja y material de embalaje original, si es posible, o en otro embalaje que de una protección adecuada. Incluya su nombre y dirección, número de modelo y de serie y una copia del recibo de venta. 4. Escriba: "Atención: RMA #" (el número que le dio el técnico de Servicio al Cliente) en la etiqueta de envío. 5. Asegure el envío por el precio total de sustitución. 55 1030674-0001 Rev. D 18 enero de 2002