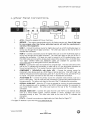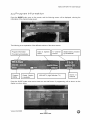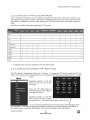
1
VlZlO SV470XVT1A
User Manual
Dear VlZlO Customer,
Congratulations on your new VlZlO SV470XVT1A
LCD Television purchase.
Thank you for your
support. For maximum benefit of your set, please
read these instructions
before making any
adjustments, and retain them for future reference.
We hope you will experience many years of
enjoyment from your new VlZlO SV470XVT1A
Television.
For assistance, please call (877) 698-4946
mail us at [email protected].
or e-
To purchase or inquire about accessories and
installation services for your VlZlO LCD HDTV,
please visit our website at www.vizio.com
or call
toll free at 888-VlZlOCE (888-849-4623).
We recommend you register your VlZIO
SV470XVT1A TV either at our website
www.vizio.com
or fill in your registration card
and mail it in. For peace of mind and to protect
your investment beyond the standard warranty,
VlZlO offers on-site extended warranty service
plans. These plans give additional coverage
during the standard warranty period. Visit our
website or calI us to purchase a plan.
Write down the serial number located on the back
of your SV470XVT1A.
Purchase Date
WZtO is a registered trademark
of VIZIO, Inc. dba V, Inc.
HDMI logo and "High Definition Multimedia
Interface" are
registered trademarks of HDMI Licensing LLC.
Manufactured
under license from Dolby Laboratories.
Dolby and the double-D symbol are trademarks of Dolby Laboratories.
TruSurround,
SRS and the symbol are trademarks
of SRS Labs, Inc
THE TRADEMARKS SHOWN HEREIN ARE THE PROPERTY OF THEIR RESPECTIVE OWNERS; IMAGES USED ARE FOR
ILLUSTRATION
PURPOSES ONLY. BRAVO, VlZIO AND THE V LOGO AND WHERE VISION MEETS VALUE AND OTHER
VIZlO TRADEMARKS ARE THE INTELLECTUAL
PROPERTY OF VtZlO INC. PRODUCT SPECIFICATIONS
ARE SUBJECT TO
CHANGE WITHOUT NOTICE OR OBLIGATION. © 2008 VIZIO INC. ALL RIGHTS RESERVED.
Version 6/2/2008
1
www,VlZlO.com
VlZlO SV470XVT1A
lmporbanb
Sa 8 V
User Manual
lnsbrucbions
This product is designed and manufactured to operate within defined design limits, and misuse
may result in electric shock or fire. To prevent the product from being damaged, the following
rules should be observed for the installation, use and maintenance of the product. Read the
following safety instructions before operating the display. Keep these instructions in a safe place
for future reference.
To reduce
SV470XVT1
the
A
risk
of electdc
shock
or component
damage,
switch
off
the
power
before
connecting
other
components
to the
Unplug the power cord before cleaning the SV47OXVT1A
LCD. A damp cloth is sufficient for cleaning the SV470XVT1A.
Do not use a
liquid or a spray cleaner for cleaning the product. Do not use abrasive cleaners.
Always use the accessories
recommended
by the manufacturer
to insure compatibility
When mowng the SV470XVT1A
from an area of low temperature
to an area of high temperature,
condensation
may form on the
housing. Do not turn on the SV470XVT1A
immediately
after this to avoid causing fire, electric shock or component
damage.
Do not place the SV470XVT1A
on an unstable cart, stand, or table. If the SV470XVTtA
falls, it can injure a person and cause serious
damage to the appliance.
Use only a cart or stand recommended
by the manufacturer
or sold with the SV470XVT1A
A distance of at least 3 feet should be maintained
between the SV47OXVT1A
and any heat source, i.e radiator, heater, oven, amplifier
etc.
Do not install the product close to smoke. Operating the product close to smoke or moisture may cause fire or electbc shock.
Slots and openings in the back and bottom of the cabinet are provided for ventilation.
To ensure reIiable operation of the SV470XVTtA
and to protect it from overheating,
be sure these openings are not blocked or covered
Do not place the SV470XVT1A
in a bookcase or
cabinet unless proper ventilation
is provided.
Never push any object into the slot on the SV47OXVTtA
cabinet. Do not place any objects on the top of the product.
It couId short
circuit parts causing a fire or electric shock Never spi_l liquids on the SV470XVT1A
The SV47OXVT1A
should be operated
only from the type of power source indicated on the Iabel. If you are not sure of the type of
power supplied to your home, consult your dealer or local power company.
The power cable must be reptaced when using different voltage from that specified
in the User Manual. For more information,
contact
your dealer.
The SV470XVT1A
is equipped
with a three-pronged
grounded
plug, a plug with a third (grounding)
pin. This plug will fit only into a
grounded power outlet as a safety feature.
If your ouflet does not accommodate
the three-wire
plug,
have an electrician
install the correct
culler,
or use an adapter
to ground
the appIiance
safely
DO
not defeat the safety purpose of the grounded plug.
Appliance inlet (or AC inlet) is used as the disconnect
device.
Use only with the cart, stand, tripod, bracket or table specified
by manufacturer,
or sold
apparatus
When a cart is used, use caution when moving the cart/apparatus
combination
injury from tip-over.
./i/_\X\\
accompanying
with the
to avoid
presence of not isolated dangerous
voltage within the inside of the product that may be sufficient magnitude to
constitute
a risk
of electric
shock to persons
The lightning
flash
with arrowhead
symbol , within an equiIateral triangle, is intended to alert the user to the
The exclamation
point within an equiIateral triangle is intended to alert the user to
the presence
of important operating
and servicing
instructions in the literature
the appliance.
Do not overload power strips and extension cords. Overloading
can result in fire or electric shock.
The wall socket shaII be instaIled near the equipment and shall be easily accessible.
Only the marked power source can be used for the product.
Any power source other than the specified
one may cause fire or electric shock.
Do not touch the power cord during
Unplug the unit during a lightening
damage due to power surges
Iightning.
To avoid electric shock, avoid handling the power cord during electrical storms.
storm or when it will not be used for long period of time This wiII protect the SV470XVT1A
from
Do not attempt to repair or service the product yourself. Opening or removing the back cover may expose you to high voltages, the risk
of electric shock, and other hazards. If repair is required, please contact your dealer and refer all servicing to qualified service personnel.
Keep the product away from moisture.
Do not expose this appliance
to rain or moisture
If water penetrates
into the product, unplug
the power cord and contact your denier. Continuous
use in this case may result in fire or electric shock.
Do not use the product if any abnormality
occurs.
If any smoke or odor becomes apparent,
unplug the power cord and contact your
dealer immediately
Do not try to repair the product yourself.
Avoid using dropped or damaged appliances.
If the product is dropped and the housing is damaged,
the internal components
may
function abnormaIly.
Unplug the power cord immediately
and contact your dealer for repair
Continued
use of the product may cause
fire or electric shock.
Do not install the product in an area with heavy dust or high humidity.
Operating the product in environments
with heavy dust or high
humidity may cause fire or electric shock.
FoIIow instructions for moving the product
Ensure that the power connector
and any other cables are unplugged
before moving the
product.
Hold the power connector when removing the power cable.
Pulling the power cable itself may damage the wires inside the cable and
cause fire or eIectdc shock. When the product will not be used for an extended period of time, unplug the power connector.
To reduce risk of electric shock, do not touch the connector with wet hands.
Version 6/2/2008
2
www.VlZIO.com
VlZlO SV470XVT1A
Insert batteries in accordance
and contamination
the remote
with instructions,
controiler.
incorrect
polarities
may cause damage
If any of the foIIowing occurs please contact the dealer:
o
The power connector fails or frays.
o
Liquid sprays or any object drops into the SV47OXVTtA.
o
The Display is exposed to rain or other moisture.
o
The Display is dropped or damaged in any way.
o
The performance
of the Display changes substantially.
Operating environment.
Temperature:
40F ~ 95F, Humidity: 20% ~ 80% non-condensing,
Te evisiom
Extecnal
Rmtemna
Television
Oomneotiom
Rntenna
and leakage
Attitude:
of the batteries,
User Manual
operator
injury
g ~ 650Off (O ~ 200gin)
Probeotiom
Gcoundinq
If an outside antenna/satellite dish or cable system is to be connected to the TV, make sure that the
antenna or cable system is electrically grounded to provide some protection against voltage surges and
static charges.
Article 810 of the National Electrical Code, ANSIINFPSA 70, provides information with regard to proper
grounding of the mast and supporting structure, grounding of the lead-in wire to an antenna discharge
unit, size of the grounding conductors, location of antenna discharge unit, connection to grounding
electrodes, and requirements of the grounding electrode.
Lightning
Protection
\
For added protection of the TV during a
lightning storm or when it is left
unattended or unused for long periods
of time, unplug the TV from the wall
outlet and disconnect the antenna or
cable system.
Power Lines
Do not locate
the antenna
near
overhead light or power circuits, or
where it could fall into such power lines
or circuits.
Remember, the screen
installation.
FCC
8_ttethh
of the coaxial cable is intended to be connected to earth in the building
#o_
Ne_
T_J O_neFs
After February 17, 2009, a television receiver with only an analog broadcast tuner will require a
converter box to receive full power over-the-air broadcasts with an antenna because of the
Nation's transition to digital broadcasting. Analog-only TVs should continue to work as before to
receive low power, Class A or translator television stations and with cable and satellite TV
services, gaming consoles, VCRs, DVD players, and similar products.
Information about the DTV transition is available from http://www.DTV.qov or this manufacturer at
877 MY VtZlO (877-698=4946), and from http://www.dtv2OO9._ov
or 1-888-DTV-2009 for information
about subsidized coupons for digital-to-analog
converter boxes,
Your VIZIO TV comes with a built-in tuner capable of processing digital broadcasts, making it
easier for you, the end user, to receive this type of signal without the need of an extra converter
box.
Version 6/2/2008
3
www.VlZIO.com
VlZlO SV470XVT1A
Opeoinq
bhe
User Manual
Psoksqe
Your VlZlO SV470XVT1A and it accompanying accessories are carefully packed in a cardboard carton
that has been designed to protect it from transportation damage. Now you have opened the carton check
that the SV470XVT1A is in good condition and that all of the accessories are included.
The SV470XVTIA weighs approximately 78Ibs and about 44" wide x 30" tall we strongly advise that you
have at least 2 people to unpack and install the HDTV.
The glass surface can easily be scratched or broken so please handle the product gently and never place
the HDTV with the glass facing downwards on a surface without protective padding.
IMPORTANT: Save the carton and packing material for future shipping.
Psoksqe
Con eobs
VlZlO SV470XVTIA
VlZIO Remote Control VUR9
HDMI Cable
Power Cord
Safety Strap
VlZIO Bezel and Screen Cleaning Cloth
This User Manual
Quick Setup Guide
Registration Card
VlP Services Brochure
2 AAA Batteries for the Remote Control
IMPORTANT: Do not apply pressure or throw any object into the screen display area which may
compromise the integrity of the display. The manufacturer's warranty does not cover user abuse
or improper installations.
Version 6/2/2008
4
www.VlZlO.com
VlZlO SV470XVT1A
SVAToXVTIA
are
sold
User Manual
separatetv
Wall Mounts
High Definition Cables
Extra or replacement Remote
VlZlO also offers Installation Services and Extended Warranty Services for your VlZIO SV470XVT1A
To purchase or inquire about additional accessories and services for your VlZlO product, visit our web
site at www.vizio.com or call us toll free at 888-VlZlOCE (888-849-4623)
InstalLation
Preparation
Please read this user manual carefully before installing your VlZlO HDTV.
The power consumption of the TV is about 400W; please use the power cord designated for TV. When
an extension cord is required, use one with the correct power rating. The cord must be grounded and the
grounding feature must not be defeated.
The TV should be installed on a flat surface to avoid tipping. For proper ventilation, you must allow space
between the back of the TV and the wall. If you would like to mount your TV on the wail, please see
below 'Preparing Your LCD HDTV for Wail Mounting' for additional information. Avoid installing the TV in
places with high humidity, dust or smoke so as not to shorten the service life of the electronic components.
Install the TV in landscape orientation; any 90 ° clockwise or counter-clockwise
poor ventilation and excessive component damage.
installation may induce
VlZIO offers professional installation services.
Please contact VlZlO for more information
services at 888-VlZlOCE (888-849-4623) or www.vizio.com.
Abbschinq
bhe
Ss ebV
on these
Sbrsp
For when the SV470XVT1A is not mounted on the wall with a Wall Mount, a Safety Strap has been
included to attach the HDTV to the waIi to reduce the chance of the HDTV being pulled over. The Safety
Strap should be used with common sense practice such as ensuring that children (or adults) do not climb
up, grabbing the top of the HDTV and pulling it onto themselves.
1.
Fix one end of the strap to the wall. If you have a drywall
finish it is preferable to fix it to a stud, using a washer
underneath the screw head. If you have a solid wall you
should use a lag bolt, again using a washer under the nut.
2.
Fix the other end of the Safety
Strap to one of the upper wall
mounting holes on the back of
the HDTV, using a washer
under the screw head.
Version 6/2/2008
5
www,VlZlO.com
VlZlO SV470XVT1A
Preparinq
Your
LEO
HOTV
f°or
Wall
User Manual
Mounbinq
The VIZlO SV470XVT1A can either be kept on the stand base or mounted on the wall for viewing. If you
choose to mount the SV479XYT1A on the wail, please fellow the instructions below for removing the
stand base.
To
remove
the
sband
base
1.
2.
Unplug all of the cables and cords from your SV479XVT1A.
Place the SV470XVT1A face down on a soft
and fiat surface (blanket, foam, cloth, etc) to
prevent any damage to the TV.
3.
Remove the total of eight (8) screws
the base to the SV470XVT1A.
4.
Carefully remove the stand base
base towards you.
pulling the
Now, the SV470XVT1A can fit securely to a mount (sold separately) by utilizing the mounting holes in the
center of the back panel of the TV. Please
make sure to read the instructions of your
specific mount to properly hang the
SV479XVT1A.
The pitch of the mounting holes is 600mm
horizontally and 20Omm vertically.
The screw type required is metric M8,
1.25mm pitch. The length of the screws will
depend on the thickness plate being attach
to the TV set; our brackets come with
different length screws.
To find the perfect mount for the VlZlO SV470XVT1A, browse VlZlO's
www.VlZIO.com or call directly 888-VIZIOCE (888-849-4623).
Version 6/2/2008
6
www,VlZlO.com
certified
mount selection
at
VlZlOSV470XVT1A
UserManual
Ta©te
o#
Contents
Chapter
z Basic
Eontrots
and (Zonn_cbions
zo
1.1FrontBezel.................................................................................................
16
1.2 Right Side Panel Controls .................................................................................................................................
10
1.3 Rear Panel Connections ...................................................................................................................................
11
1.4 Right-Side Panel Connection ............................................................................................................................
12
1.5 VlZlO Universal Remote Control .......................................................................................................................
13
1.5.1 Insertion of Batteries in the Remote Control ..............................................................................................
16
1.5.2 Remote Control Range ..............................................................................................................................
16
1.5.3 VtZIO Universal Remote Control Precautions ...........................................................................................
16
Cff_pter
3 Et©nnectimc)
@qulpment
..................................................................................
17
2.1 Which Video Connection Should ! Use? ............................................................................................................
17
2.2 Connecting Your Cable or Satellite Box ............................................................................................................
18
2.2.1 Using HDMt ...............................................................................................................................................
18
2.2.2 Using Component Video ............................................................................................................................
20
2.3 Connecting Coaxial (RF) ...................................................................................................................................
21
2.3.1 Using Your Antenna or Digital Cable for DTV ............................................................................................
21
2.3.2 Using Your Antenna or Cable for TV .........................................................................................................
22
2.3.3 Using the Antenna or Cable through your VCR .........................................................................................
22
2.4 Connecting Your DVD Player ............................................................................................................................
23
2.4.1 Using HDMI ...............................................................................................................................................
23
2.4.2 Using Component Video ............................................................................................................................
25
2.4.3 Using S-Video (AV1) ..................................................................................................................................
26
2.4.4 Using Composite (AV) Video .....................................................................................................................
27
2.5 Connecting Your VCR or Video Camera ...........................................................................................................
28
2.6 Connecting an external Receiver/Amp ..............................................................................................................
29
2.6.1 Optical Output of Audio received with HD Programs .................................................................................
29
2.7 Connecting a PC Computer ..............................................................................................................................
30
2.7.1 Preset PC Resolutions ...............................................................................................................................
31
2.7.2 Resolution (1920x1980) through RGB (15-Pin VGA) Input ........................................................................
31
Chapter;3Se,t't"im_L;ipto Wat'Gh "Te'iLeuIsiom..................................
3_
3.1Basic LCD HDTV StartUp .....................................................................................
32
3.2Watching a TV Program .......................................................................................
36
3.3AdjustingBasic HDTV Settings.................................................................................
37
3.4Program Information
..........................................................................................
38
Chapter
4 Rdvamced
RdOustmenb
og H©T'V ...................................................................
3c_
4.1 Using the On Screen Display (OSD) .................................................................................................................
39
4.2 DTV / TV Input Picture Adjustment ....................................................................................................................
40
4.2.1 Picture Mode .............................................................................................................................................
40
4.2.2 Backlight ....................................................................................................................................................
40
4.2.3 Brightness ..................................................................................................................................................
40
4.2.4 Contrast .....................................................................................................................................................
41
4.2.5 Color ..........................................................................................................................................................
41
4.2.6 Tint .............................................................................................................................................................
41
4.2.7 Sharpness .................................................................................................................................................
42
4.2.8 Advanced Video Features .........................................................................................................................
42
4.2.9 Reset Picture Mode ...................................................................................................................................
45
4.3 DTV / TV Audio Adjustment ..............................................................................................................................
46
4.3.1 Audio Mode ...............................................................................................................................................
46
4.3.2 Equalizer ....................................................................................................................................................
46
4.3.3 Balance ......................................................................................................................................................
46
4.3.4 Digital Audio Out ........................................................................................................................................
47
4.3.5 Speakers ...................................................................................................................................................
47
4.3.6 Analog Audio Out ......................................................................................................................................
47
4.3.7 Lip Sync .....................................................................................................................................................
47
Added Audio (Sound) Features ...............................................................................................................................
48
4.3.8 Wireless Speaker ......................................................................................................................................
48
4.3.9 Speaker Setting .........................................................................................................................................
48
4.3.10 Wireless Sound Effect .............................................................................................................................
50
Version 6/2/2008
7
www,VlZlO.com
VlZlO SV470XVT1A
User Manual
4.3.11 Sound Effect ............................................................................................................................................
4.3.12 DRC (Dynamic Range Compression) ......................................................................................................
4.3.13 Reset Audio Mode ...................................................................................................................................
4.4 DTV / TV Tuner Setup .......................................................................................................................................
4.4.1 Tuner Mode ...............................................................................................................................................
4.4.2 Auto Search ...............................................................................................................................................
4.4.3 Partial Channel Search ..............................................................................................................................
4.4.4 Skip Channel .............................................................................................................................................
4.4.5 MTS ...........................................................................................................................................................
4.4.6 Time Zone .................................................................................................................................................
4.4.7 Daylight Saving ..........................................................................................................................................
4.5 DTV / TV Input Setup ........................................................................................................................................
4.5.1 Language ...................................................................................................................................................
4.5.2 PIP (Picture-in-Picture) ..............................................................................................................................
4.5.3 Sleep Timer ...............................................................................................................................................
4.5.4 Wide ..........................................................................................................................................................
4.5.5 lnput Naming .............................................................................................................................................
4.5.6 CC (Closed Caption) ..................................................................................................................................
4.5.7 HN Position ...............................................................................................................................................
4.5.8 DTV / TV Input Parental ControI ................................................................................................................
4.5.9 Channel Block ...........................................................................................................................................
4.5.10 US TV Rating ...........................................................................................................................................
4.5.11 US Movie Rating (For US) .......................................................................................................................
4.5.12 Canadian English Rating .........................................................................................................................
4.5.13 Canadian French Rating ..........................................................................................................................
4.5.14 Check for DTV Rating ..............................................................................................................................
4.5.15 Blocked Unrated Programming ................................................................................................................
4.5.16 Change the Password .............................................................................................................................
4.5.17 Reset All Settings ....................................................................................................................................
4.6 HDMI Input Picture Adjustment .........................................................................................................................
4.7 HDMI Input Audio Adjustment ...........................................................................................................................
4.8 HDMI Input Setup ..............................................................................................................................................
4.9 Video Input Picture Adjustment .........................................................................................................................
4.10 Video Input Audio Adjustment .........................................................................................................................
4.11 Video Input Setup ............................................................................................................................................
4.12 Auto Phase (for Component input) ..................................................................................................................
4.13 Video Input Parental Control ...........................................................................................................................
4.14 PC Input Picture Adjustment ...........................................................................................................................
4.14.1 Auto Adjust ..............................................................................................................................................
4.14.2 H-Position ................................................................................................................................................
4.14.3 V-Position ................................................................................................................................................
4.14.4 H-StZE .....................................................................................................................................................
4.14.5 V-SIZE .....................................................................................................................................................
4.14.6 Fine Tune ................................................................................................................................................
4.15 PC Input Audio Adjustment .............................................................................................................................
4.16 PC Input Setup ................................................................................................................................................
4.17 Understanding Viewing Features ....................................................................................................................
4.17.1 Viewing Modes ........................................................................................................................................
4.17.2 Picture-In-Picture (PIP) Mode ..................................................................................................................
4.17.3 Adjusting Basic PIP Settings ...................................................................................................................
Programming the VIZlO Universal Remote Control ................................................................................................
4.17.4 Programming for VCR .............................................................................................................................
4.17.5 Programming for Cable Set-Top Box .......................................................................................................
4.17.6 Programming for DVD Player ..................................................................................................................
4.17.7 Searching for Component Codes ............................................................................................................
4.18 Using a CaMe or Satellite Remote ..................................................................................................................
Ct'-_apt_r
S Matnt'_i_nance
_nd Tr©ubkesh©otlr_q
..............................................................
5.1 Maintenance ......................................................................................................................................................
5.2 Troubleshooting Guide ......................................................................................................................................
5.3 Wireless Speakers System and TV Pairing .......................................................................................................
5.4 Telephone & Technical Support ........................................................................................................................
5.5 Compliance .......................................................................................................................................................
Version 6/2/2008
8
www,VlZlO.corn
50
51
51
52
52
52
53
53
53
54
54
55
55
55
57
57
58
59
60
61
62
62
63
63
64
64
65
65
66
67
67
67
68
68
68
69
69
70
70
70
70
71
71
71
72
72
73
73
74
74
75
75
75
76
76
76
77
77
77
79
79
80
VlZlOSV470XVT1A
UserManual
5.6 FCC Class B Radio Interference Statement ......................................................................................................
Ch@pter
5 Mi_cettan_©os
Infiormation
6.1 Specifications ....................................................................................................................................................
6.2 GIossary- Standard Definitions ........................................................................................................................
6.3 Index .................................................................................................................................................................
Component Program Codes ....................................................................................................................................
Version 6/2/2008
9
www,VlZlO.corn
80
_z
81
82
83
89
VlZlOSV470XVT1A
UserManual
Chapter
1 Basic
1ol Front
Beze[
Controks
and
Connections
POWER 'VlZlO' LIGHT- The VlZlO name lights white
when powered on and orange when powered off.
REMOTE
CONTROL
SENSOR - This is the window
through which all of the remote control signals pass to
the sensor.
Point the remote control directly at this
window for the best response to the remote signal.
z°2
Riqht
Side
Pane[
Controls
,4,
POWER ( LO, ) _ Switch the SV470XVT1A
turn the SV470XVT1A off.
on by pressing the button once.
Press the button again to
MENU - This button activates the On Screen Display (OSD). If a submenu is active, pressing this button will return to the previous menu level.
CHANNEL +/- - Use these buttons to step up or down the TV channels.
While the OSD is active, these buttons _
.............
function as up and down controls in the
Main
OSD menus.
VOLUME +/- - Use these buttons to
increase or decrease to the speaker volume.
While the OSD is active, these buttons
function as left and right controls in the
OSD menus.
INPUT (ENTER) - Repeated pressing of
this buttons steps through the input sources
in the following sequence: TV, AV1, AV2
(S-Video), Component
1, Component 2,
RGB, HDMI1, HDMI2, HDMI3 and HDM]4.
Once you have stepped through the entire
sequence, you will return to the beginning.
Additionally, when the OSD is active, this button confirms the menu
function to be adjusted. When the OSD is not active, this button will
show the current input selections.
.............
TX INPUT - This slot is used only when upgrading your TV to Dolby Digital 5.1wireless surround system.
Do not insert any object into the slot which may compromise
the integrity and functionality
of
your TV. The manufacturer's
warranty does not cover user abuse or improper use of this input.
Version 6/2/2008
10
www,VlZlO.com
VlZlOSV470XVT1A
UserManual
1.S
Re8
Paine[
Coooeotioos
1.
AC IN - Plug-in the supplied AC Power Cord here.
2.
SERVICE - This custom communication port is for factory service only. Use of this input
for any purpose other than factory authorized service will void the manufacturer's
warranty of this equipment.
8.
HDMI 1 - Connect the primary source for digital video such as a DVD multimedia player or
set top box through this all digital connector. The white color band on the rear of the TV
indicates this connection.
4.
HDMI 2 - Connect a secondary source for digital video such as a DVD multimedia player or
set top box through this all digital connector. The white color band on the rear of the TV
indicates this connection. For users who want to connect to a DVl enabled device, use a
DVI-HDMI cable and connect the Analog Audio output of the device to the L+R AUDIO here.
Your VlZlO Certified HDMI and HDMI-DVl cables are available for purchase from
www.VIZIO.com or by calling 888-VlZlOCE (888-849-4623).
6.
RGB PC - Connect the video and audio from a computer here. The btue color band on the
rear of the TV indicates this connection. A cable with a 1/8" mini plug stereo connector at
the end connecting to the TV is needed if sound is also transmitted with this signal.
6.
COMPONENT
1 (YPb/CbPr/Or with Audio L/R) - Connect the primary source for
component video devices such as a DVD Player or set top box here. From left to right, use
white for left audio and red for right audio, green for Y, blue for Pb (or Cb), and red for Pr (or
Cr) inputs. The green color band on the rear of the TV indicates this connection.
7.
AVt/$-VIDEO
IN - Connect the primary source for composite video devices, such as a
VCR or video game. Use the white and red connectors to connect the external audio from
the same source. The yellow color band on the rear of the TV indicates this connection.
8.
OPTICAL AUDIO OUT - When the DTV input is selected for viewing, the audio associated
with the programming wilI be available on this SPDIF Optical connector for connection to
your home theatre system.
The white color band on the rear of the TV indicates this
connection.
9.
10.
ANALOG AUDIO OUT - Connect the audio from the LCD HDTV to an external device,
such as a home theatre system, external amplifier or stereo, Speakers can not be
connected directly to here, The white color band on the rear of the TV indicates this
connection,
DTV/TV - Connect to an antenna or digital cable (no Cable Box) for Digital TV.*
* For digital TV stations in your area visit www.antennaweb.orq.
Version 6/2/2008
11
www,VlZlO.com
VlZlO SV470XVT1A
14
Rlqhto,
1.
Side
Panek
User Manual
Connection
AV2 - Connect the secondary source for composite video devices,
such as a VCR or video game. Use the white and red connectors
to connect the external audio from the same source, and then use
the yellow connector to connect the externai video from the same
source. Note: he red snd whte a,_o conr ect )rs are sha _d
between AV2 a_d COMPONENT2
2.
COMPONENT2 (YPb/CbPr/Cr with Audio L/R) - Connect the
secondary source for component video devices such as a DVD
Player or set top box here. From top to bottom, left to right, use
green for Y, blue for Pb (or Cb), red for Pr (or Cr), then connect
white for left audio and red for right audio inputs. HoRn: /he fed
and v_btc au:o
c@mecors
se s_s_:)_ bot',Jo_
AV and
COMPONENT2
3.
HDMI 3 - Connect the third source for digital video such as a DVD
multimedia player or set top box through this all digital connector.
4.
HDMI 4 - Connect the third source for digital video such as a DVD
multimedia player or set top box through this all digital connector.
Certified HDMI and HDMI-DVI cables are available for purchase from www.VIZlO.com
VlZlOCE (888-849-4623)
Version 6/2/2008
12
www.VlZlO.com
or by calling 888-
VlZlO SV470XVT1A
V ZIO
UoivemsBL
Remo e
User Manual
Con mo
The VlZlO Universal Remote Control is a comprehensive remote that can be
used to control up to four different components. The remote button functions are
explained on the following pages.
This button starts ali programming of the Remote Control.
Press this button to turn the TV on from the Standby mode.
it again to return to the Standby mode.
Press
Repeated pressing of this button will switch between HDMI 1, HDMI 2,
HDMI 3 and HDMI 4 inputs.
Repeated pressing of this button will switch between Component 1
and Component 2 inputs
Repeated pressing of this button will switch between AVl
inputs.
and AV2
Press this button to select TV programming.
Use these buttons to select a channei or enter a password.
This button allows the user to cycle through the inputs.
This DASH button is for the DTV mode.
When selecting a digital
channel directly use this button for the separation of main and subchannels. For example, channel 28-2 would be selected by the button sequence
2 8 DASH 2.
NOTE: This is a programmable remote supporting up to 4 devices (see TV, VCR, CABLE, DVD buttons
at the top of the remote). If the remote is not working with your VIZIO TV, press the TV button on the
remote to set the functions back to TV.
Version 6/2/2008
13
www,VlZlO.com
VlZlOSV470XVT1A
UserManual
UsethisbuttonfortheOn-Screen
Display(OSD)menus.
LAST- Thisbuttonrecallsthepreviously
viewedchannel.
Use the Navigation Wheel to operate the On-Screen
Display (OSD) after it has been activated by pressing the MENU button.
Use the
button to select your chosen option
(OSD) menus.
6UlDE - This button displays
function is only available on DTV.
_EXIT
program
in On-Screen
information.
Display
Note: This
- This button exits the On-Screen Display (OSD) menus.
(+ or -) - These buttons turn the volume up or down.
Surround Sound - This function is not available on this model
and pressing this button has no effect, unless wireless speaker system is
present.
MUTE - This button turns the sound on and off.
CI-I (+ or -) - These buttons change the channels up or down.
Version 6/2/2008
14
www,VlZlO.com
VlZlO SV470XVT1A
User Manual
When CABLE is selected and the code to match your Cable (or Satellite) Box has been entered,
this button will operate the Cable (or Satellite) Box the same as this button on your Cable (or
Satellite) Remote. When TV is selected, this button activates Picture-in-Picture mode.
When CABLE is selected and the code to match your Cable (or
Satellite) Box has been entered, this button will operate the Cable
(or Satellite) Box the same as this button on your Cable Remote.
When TV is selected, press this button to select the size of the PIP screen
from one of the following: small, medium or large
When CABLE is selected and the code to match your Cable Box
(or Satellite) has been entered, this button will operate the Cable
Box (or Satellite) the same as this button on your Cable Remote (or
Satellite). When TV is selected, press the button to choose the PIP input.
Noi_,: The TV m_s h_ in PiP mode fc_ ths b_tto!_ to be _ct on_
When CABLE is selected and the code to match your Cable Box (or
Satellite) has been entered, this button will operate the Cable Box
(or Satellite) the same as this button on your Cable Remote (or
Satellite). When TV is selected, this button is used to select the channels
within the PiP screen when DTV/TV is the PIP input selected
This button cycles through the available screen formats. The options
are Zoom, Panoramic, Normal and Wide.
Press this button to "Freeze-Frame" the current screen. Press this
button again to continue playing.
This button will select the MTS options of Stereo, SAP or Mono in
standard TV mode and alternate audio channels, where available, in
DTV mode.
While in PIP/POP mode; pressing SWAP will switch the displays
from the main screen to the sub-screen or vice versa.
Use this button to change the picture mode from Custom, Standard,
Movie and Game
This button displays the image and system information display.
Press this button to switch the audio from the main screen to the
sub-screen while in PIP or POP mode.
This button will select the Closed Caption mode. The options are
OFF, CCl, CC2, CC3, and CC4 and if Digital Cable Service is the
signal; you would get Service1 through Service6, depending on your
local company.
This button selects a programmed DVD player.
This button selects a programmed Audio Receiver/Amp/Home
Theater System.
This button selects a programmed cable TV set-top box or a satellite
TV set-top box.
m
This button has been pre-programmed
Version 6/2/2008
to select the codes to operate the VlZlO HDTV.
15
www,VlZlO.com
VlZlOSV470XVT1A
UserManual
l 5ol
Insertion
of
Batteries
in the
Remote
Eontrot
Open battery compartment by sliding cover in the direction of the arrow and insert two AAA batteries into
the remote control. Make sure that you match the (+) and (-) symbols on the batteries with the (+) and (-)
symbols inside the battery compartment. Close the battery cover by sliding it in opposite direction to the
arrow.
Precautionary Tips for Inserting
the Batteries:
For longer life and use of the batteries, please use alkaline.
Only use the specified AAA batteries.
Do not mix new and old batteries. This may result in cracking or
leakage that may pose a fire risk or lead to personal injury.
Inserting the batteries incorrectly may also result in cracking or
leakage that may pose a fire risk or lead to personal injury.
Dispose of the batteries
regulations.
in accordance
with
local laws
and
Keep the batteries away from children and pets.
I°S°2
Remote
[ontrol
Range
Point the remote control at the remote control sensor to transmit the commands.
Do not place any obstacles between the remote control and the receiver window.
The effective range of the remote control is approximately
receiver window, 80 ° to the left and right 20 ° up and down.
i,,So3 VIZlO
Uni Jersal
Remote
30 feet (10 meters) from the front of the
[ontrol
Precautions
The remote control
shouldbe keptdryand away from heatsources.Avoid humidity.
If the TV responds erratically to the remote control or does not respond at all, check the batteries.
batteries are low or exhausted, replace them with fresh batteries.
When not using the remote controi for a long period of time, remove the batteries.
Do not take the batteries apart, heat them, or throw them into a fire.
Do not subject the remote control to undue physical stress, such as striking or dropping it.
Do not attempt to clean the remote control with a volatile solvent. Wipe it with a clean, damp cloth.
Version 6/2/2008
16
www,VlZlO.com
If the
VlZlO SV470XVT1A
Ohap sr
8
2.1
ideo
Which
Oommeo imq
Equipmem
Comneobiom
The VIZIO SV470XVT1A
has six different
to the most advanced for digital displays.
Should
ways to connect
White
and
Best
Side of
TV
(digital)
Best
(digital)
Black
Good
(analog)
Best
Blue
(analog)
Green
and
Better
Side of
TV
(analog)
Good
Red
Yellow
and
Side of
TV
(analog)
Note:
Fo_ more _o
Version 6/2/2008
_efi,rtotheQ
c
Use
your video equipment
from
a basic
connection
HDMI (High-Definition Multimedia Interface) - It is the
first and only industry-supported, uncompressed, alldigital audio/video
interface.
HDMI provides an
interface between any audio/video source, such as a
set-top box, DVD player, or A/V receiver and an
audio and/or video monitor, such as a digitat
television (DTV), over a single cable.
DTV Coaxial RF. When used for MPEG2 encoded
bit streams from ATSC broadcast programming, this
input takes advantage of the High Definition content.
TV Coaxial RF. This is the connection
NTSC TV using antenna or cable.
for standard
RGB PC (VGA) - This video input has
green and blue color components. The
horizontal and vertical sync information
signal. This is most commonly used for
separate red,
signal carries
on the green
PC input.
Component 1/2 - The video signal is separated into
three signals, one containing the black-and-white
information and the other two containing the color
information. This enhancement over S-Video takes
advantage of the superior picture provided
by
progressive scan DVD players and HDTV formats.
S-Video (AVl) - The video signal is separated into
two signals, one containing the black-and-white
information
and the other containing
the color
information. Separating the color in this way avoids
'cross color' effects where closely spaced black and
white lines are erroneously displayed in color. It also
enables text to be displayed more sharply.
(analog)
Good
User Manual
AV1/2(Composite)
- The complete video signal is
carried through this single pin connector. This is the
most commonly used video connection.
StartGude
17
www,VlZlO.com
VlZlOSV470XVT1A
UserManual
2°a
Connectinq
2.2,1
Usinq
Your
Cable
or
Sate[Ute
Box
HDMI
Cable and Satellite Boxes that have a HDMI digital interface shouId be connected to the HDMI input of
the LCD HDTV for optimaI results.
Connectinq
your
Cable
or"
Sate[Ute
Box
(Best}
1.
Turn off the power to the LCD HDTV and HDTV Set-Top Box.
2.
Connect a HDMI cable to the HDMI output of your HDTV Set-Top Box and the other end to
the HDMI Input (white color area) at the rear of the LCD HDTV.
3.
4.
Turn on the power to the LCD HDTV and HDTV Set-Top Box.
Select HDMI using the INPUT button on the remote or side of the LCD HDTV, or directly by
pressing the HDMI button on the Remote Control.
Version 6/2/2008
18
www,VlZlO.com
VlZlOSV470XVT1A
UserManual
For
GabLe
©P SateWte
Boxes
with
O_q:
1.
Turn off the power to the LCD HDTV and HDTV Set-Top Box.
2.
Using a HDMI-DVI cable, connect the DVI end to your HDTV Set-Top Box and the HDMI end
to the HDMI2 Input (white color area) at the rear of the LCD HDTV.
3.
Using an audio cable (white and red connectors), connect the cable to the audio output
connectors associated with the DVI output on your HDTV Set-Top Box and connect the other
end to the audio connectors associated with the HDMI input (white area) at the rear of the
LCD HDTV.
4.
5.
Turn on the power to the LCD HDTV and HDTV Set-Top Box.
Select HDMI2 using the INPUT button on the remote or side of the LCD HDTV, or directly by
pressing the HDMI button on the Remote Control.
Version 6/2/2008
19
www,VlZlO.com
VlZlOSV470XVT1A
UserManual
2.2.2
usinq
Connectlnq
1.
Component
your"
Cable
Video
or
SatelUte
Box
(Better]
Turn off the power to the LCD HDTV and HDTV Set-Top Box.
2.
Connect the Y (green color) connector on your HDTV Set-Top Box to the corresponding Y
(green color) connector in the Component 1 group (green color area - row of connectors
nearest to you when viewing from the rear of the TV) at the rear of the LCD HDTV.
3.
Connect the PbCb (blue color) connector on your HDTV Set-Top Box to the corresponding
Pb (blue color) connector in the Component 1 group (green color area - row of connectors
nearest to you when viewing from the rear of the TV) at the rear of the LCD HDTV.
4.
Connect the PrCr (red color) connector on your HDTV Set-Top Box to the corresponding Pr
Cr (red color) connector in the Component ! group (green color area - row of connectors
nearest to you when viewing from the rear of the TV) at the rear of the LCD HDTV.
5.
Using an audio cable (white and red connectors), connect the cable to the audio output
connectors associated with the Component output on your HDTV Set-Top Box and connect
the other end to the audio connectors associated with the Component 1 input (green color
area) at the rear of the LCD HDTV.
6.
7.
Turn on the power to the LCD HDTV and HDTV Set-Top Box.
Select Component 1 using the INPUT button on the remote or side of the LCD HDTV, or
directly by pressing the COMP button on the Remote Control.
Version 6/2/2008
2O
www,VlZlO.com
VlZlOSV470XVT1A
UserManual
2 3 Connectinq
203ol
Usinq
Your
Eoaxial_
{RF}
Rnte_n8
or
Oiqital
Gable
for
DTg
1.
Turn offthe power to the LCD HDTV.
2.
Connect the coaxial (RF) connector from your antenna or digital cable to the
DTV/TV CABLE/ANTENNA connector at the rear of the LCD HDTV.
3.
4.
Turn on the power to the LCD HDTV.
Select DTV using the iNPUT button on the remote or side of the LCD HDTV,
or directly by pressing the TV button on the Remote Control.
Version 6/2/2008
21
www,VlZlO.com
VlZlOSV470XVT1A
UserManual
a,30a
Usinq
Your
Rnterna
or ° Cable
for
TV
1.
Turn offthe power to the LCD HDTV.
2.
Connect the coaxial (RF) connector from your antenna or cable to the
DTV/TV CABLE/ANTENNA connector at the rear of the LCD HDTV
3.
Turn on the power to the LCD HDTV.
4.
Select TV using the iNPUT button on the remote or side of the LCD HDTV,
or directly by pressing the TV button on the Remote Control.
2°3°3
Usirsq
the
Rntenna
or
Cs©_e
throuqh
your
VER
I.
Turn offthe power to the LCD HDTV and VCR.
2.
Connect the "Output to TV", "RF Out" or "Antenna Out" connector on the rear of
your VCR to the DTV/TV CABLEIANTENNA connector at the rear of the LCD
HDTV.
3.
Turn on the power to the LCD HDTV and VCR.
4.
Select TV using the INPUT button on the remote or side of the LCD HDTV, or
directly by pressing the TV button on the Remote Control.
Version 6/2/2008
22
www,VlZlO.com
VlZlOSV470XVT1A
UserManual
£4
Connectlnq
Your
DVD
Prayer
You have several options for connecting your DVD player to your SV470XVT1A - HDMI, Component, SVideo and Composite (AV) inputs. Based on your home theater configuration, you can decide which
option is the right one for you.
2_4_I
Usinq
HDMI
DVD players that have a digital interface such as HDMI (High Definition Multimedia Interface) should be
connected to the HDMI input of the VlZlO SV470XVT1A for optimal results.
Connectlnq
your
OqO
Raver
{Best}:
1.
Turn off the power to the LCD HDTV and DVD player.
2.
Connect a HDMI cable to the HDMI output of your DVD player and the other end to the HDMI
Input (white color area) at the rear of the LCD HDTV.
3.
Turn on the power to the LCD HDTV and your DVD player.
4.
Select HDMI using the INPUT button on the remote or side of the LCD HDTV, or directly by
pressing the HDMI button on the Remote Control.
Version 6/2/2008
23
www,VlZlO.com
VlZlOSV470XVT1A
UserManual
For
DVD
P[avePs
with
Dgt:
1.
Turn off the power to the LCD HDTV and DVD player.
2.
Using a HDMI-DVI cable, connect the DVl end to your DVD player and the HDMI end to the
HDMI2 Input (white color area) at the rear of the LCD HDTV.
3.
Using an audio cable (white and red connectors), connect the cable to the audio output
connectors associated with the DVl output on your DVD player and connect the other end to
the audio connectors associated with the HDMI input (white area) at the rear of the LCD
HDTV.
4.
Turn on the power to the LCD HDTV and your DVD player.
5.
Select HDMI 2 using the INPUT button on the remote or side of the LCD HDTV, or directly by
pressing the HDMI button on the Remote Control.
Version 6/2/2008
24
www,VIZlO.com
VlZlO SV470XVT1A
20A02
Usinq
Conmeoblmq
Component
your
O_JO
User Manual
Video
Player
{Setter]:
I.
Turn off the power to the LCD HDTV and DVD player.
2.
Connect the Y (green color) connector on your DVD player to the corresponding Y (green
color) connector in the Component 1 group (green color area - row of connectors nearest to
you when viewing from the rear of the TV) at the rear of the LCD HDTV.
3.
Connect the PbCb (blue color) connector on your DVD player to the corresponding PbCb
(blue color) connector in the Component I group (green color area - row of connectors
nearest to you when viewing from the rear of the TV) at the rear of the LCD HDTV.
4.
Connect the PrCr (red color) connector on your DVD player to the corresponding PrCr (red
color) connector in the Component 1 group (green color area - row of connectors nearest to
you when viewing from the rear of the TV) at the rear of the LCD HDTV.
5.
Using an audio cable (white and red connectors), connect the cable to the audio output
connectors associated with the Component output on your DVD player and connect the other
end to the audio connectors associated with the Component 1 input (green color area) at the
rear of the LCD HDTV.
6.
Turn on the power to the LCD HDTV and DVD player.
7.
Select Component 1 using the INPUT button on the remote or side of the LCD HDTV, or
directly by pressing the COMP button on the Remote Control.
Version 6/2/2008
25
www,VlZlO.com
VlZlOSV470XVT1A
UserManual
2°4°3
Usinq
Connecblnq
1.
S-Video
your
DWD
{RV1}
Prayer
{Good}:
Turn off the power to the LCD HDTV and DVD player.
2.
Connect the S-Video jack on the rear of your DVD player to the S-Video jack in the AV1 at
the rear of the LCD HDTV.
3.
Using an audio cable (white and red connectors), connect the cable to the audio output
connectors associated with the S-Video output on your DVD player and connect the other
end to the audio connectors associated with the AVl input at the rear of the LCD HDTV.
4.
5.
Turn on the power to the LCD HDTV and DVD player.
Select AV1 using the INPUT button on the remote or side of the LCD HDTV, or directly by
pressing the AV button on the Remote Control.
Version 6/2/2008
26
www,VlZlO.com
VlZlOSV470XVT1A
UserManual
2°4°4
Usinq
Connect_nq
1.
Composite
your
DVD
{RV} Video
Player
{Good}:
Turn off the power to the LCD HDTV and DVD player.
2.
Connect the Video (yellow color) connector on your DVD player to the Video (yellow color)
connector in the AVI input row (yellow color area) of connectors at the rear of the LCD HDTV.
3.
Connect the R (red color) and L (white color) audio connectors on your DVD player to the
corresponding R (red color) and L (white color) audio input connectors in the AV input (yellow
color area) row of connectors at the rear of the LCD HDTV.
4.
5.
Turn on the power to the LCD HDTV and DVD Player.
Select AVl using the INPUT button on the remote or side of the LCD HDTV, or directly by
pressing the AV button on the Remote Control.
Version 6/2/2008
27
www,VlZlO.com
VlZlOSV470XVT1A
UserManual
2o5 Conneatinq
Your
VCR
or
Video
Camera
I.
Turn off the power to the LCD HDTV and VCR or Video Camera.
2.
Connect the S-Video jack on the rear of your VCR or Video Camera to the S-Video jack in the
AV1 group (red area color) at the back of the LCD HDTV.
3.
Using an audio cable (white and red connectors), connect the cable to the audio output
connectors associated with the S-Video output on your VCR or Video Camera and connect
the other end to the audio connectors associated with the AV1 input (red color area) at the
rear of the LCD HDTV.
4.
Turn on the power to the LCD HDTV and VCR or Video Camera.
5.
Select AV1 using the INPUT button on the remote or side of the LCD HDTV, or directly by
pressing the AV button on the Remote Control.
Version 6/2/2008
28
www,VlZlO.com
VlZlOSV470XVT1A
UserManual
Connectlnq
an
Receiuer/Rmp
e×temna[
1.
Turn off the power to the LCD HDTV and Receiver/Amp.
2.
Using an audio cable (white and red connectors), connect the
cable to the audio input connectors on the Receiver/Amp and
connect the other end to the ANALOG OUT (white area)
audio connectors at the rear of the LCD HDTV.
3.
Turn on the power to the LCD HDTV and Receiver/Amp.
4.
Then press the MENU button on the remote control to open
the On-Screen Display (OSD) menu.
Press _ button on the remote control to select the Audio
menu.
8.
6.
7.
2oB l
Press _
on the remote control to select SPEAKERS.
Press _ on the remote control to select OFF so that the
sound from the LCD HDTV will now be routed through your
Receiver/Amp system.
Opticat
Output
of'
Rudio
received
with
HO
If your sound system has a SPDIF (optical) digital audio input you can connect it to the optical
DIGITAL AUDIO OUT (white area) at the rear of the LCD HDTV. This is active when receiving audio with
the programs being viewed no matter what input is being used.
Version 6/2/2008
29
www,VlZlO.com
VlZlOSV470XVT1A
UserManual
Connecbinq
a PC
Compuber
1.
Turn off the power to the LCD HDTV and PC Computer.
2.
Connect a 15-pin D-Sub RGB (VGA) cable to the RGB output of your pc computer and the
other end to the RGB PC input (blue area) at the rear of the LCD HDTV.
3.
Connect the Audio Out on your pc computer to the RGB PC Audio input (blue area) at the
rear of the LCD HDTV.
4.
Turn on the power to the LCD HDTV and PC Computer.
5.
Select RGB using the INPUT button on the remote or side of the LCD HDTV.
Version 6/2/2008
30
www,VlZlO.com
VlZlOSV470XVT1A
UserManual
27.1
Preset
PC
ResoLut°ions
If connecting to a PC through the RGB PC input, set the TV timing mode to VESA 1360x768 at 6OHz
for better picture quality (refer to the graphic cares user guide for questions on how to set this timing
mode). Please see the table below for the factory preset resolutions. Also see chart in Section 2.7.2,
for the best resolution that can be obtained through RGB PC input when video card supports
1920x1080 resolution.
640x480
60
31.46
59.94
N
N
25.17
640x480
75
37.50
75,00
N
N
31.50
"720x400
70
31.46
70.08
N
P
28,32
800x600
60
37,87
60,317
P
P
40.00
800x600
75
46.87
76
P
P
49.50
1024x768
60
48.36
60.01
N
N
65.00
1024x768
70
56.47
70,07
N
N
75,00
1024x768
75
60.02
75.03
P
P
78,75
*'1920xt080
60
66.65
60.00
P
P
136.50
NOTES: N = Negative, P = Positive, * = In DOS Mode only, ** = Primary Mode. Please refer to 2.7.2 for
moreinformation.
2.7°2
ResoLution
VGR}
#spu_
If your PC supports VESA Reduce Blanking timing via the VGA card drive program (usually offered
by the VGA Card Manufacturer), your TV set is equipped to have the 1920XI080 resolution display
through this connection using the following timing 186.5MHz. The following parameters are often the
values required by the software or programs to set up the display:
Parameters
Address
Horizontal
Values (Pixels)
1920
1080
Front Porch
32
1
Sync Width
32
3
Back Porch
64
27
Total
Frequency
2048
66.65 kHz
Sync Polarity
p
Pixel Rate (MHz)
136.5
Refresh Rate (Hz)
Version 6/2/2008
Vertical Values
(Lines)
60
31
www,VlZIO.com
1111
60 Hz
P
VlZlO SV470XVT1A
Chspter
3 Se inq
Up
bo
Wsboh
User Manual
Tetevisiom
For Preparing Your LCD HDTV for Wail Mounting; see page 6 for details.
Basic
1.
2.
LED
HDTV
Sbarb
Up
Connecting the Power Cable
Connect the power cord to the power cord connector on the back of the HDTV, and then plug the
power cord into an AC wail socket.
Connect Audio and Video Cables to the
t4DTV
(see pages 17 - 30 for detailed steps)
3.
Turning Power On
Once all the components are connected,
press the Power ON button on the side of
the HDTV, or press the Power ON (Red)
button on the remote control.
4.
Initial Setup
After powering on the TV set, the Initial
Setup screen will come up; please press
the _
button on the remote control.
The Language choice screen will be
displayed; the default English option is
highlighted. If you wish to change the
OSD language to Espafiol or Fran£ais,
press the _
button on the remote controI
to select the language you want.
A
Press the _
button on the remote to go
to the next screen.
Note:
At this point, if a Set-Top Box from your
Local Cable or Satellite Service Company or other
equipment is been used; please press the EXIT
key on the remote control and skip to Step 5. If
this is not your case, please continue at Step b.
a.
The Tuner screen will be
displayed; default choice is
Antenna. If you are using Cable
(No Box) Service, press the
button on the remote control to
highlight CABLE.
Version 6/2/2008
32
www.VlZlO.com
VlZlO SV470XVT1A
User Manual
A
Press the _
button on the
remote to go to the next screen.
b.
The Channel Scan screen will be
displayed; default choice is Scan.
Press the _
button on the
remote controi to commence the
search for available channels to be
stored into memory.
If you do not want to scan for channels at this time, press the ,_
highlight Skip Scan and then press the
button on the remote to
button.
Note: If you select Skip Scan, next time that you
decide to complete this procedure; you will need to
select the TV as input and then go through the
Menu option to select the Tuner setup to get the
option of scanning the channels again.
c.
The screen will now change to show the progress of the search for Analog (NTSC) and
Digital (ATSC) channels.
#Iote: DTV digital broadcast is _'_otavailable ira all areas Refer to www.antennaweb.orq to i}et
nformat o_} abo_t avai ab Iity ir_ yo_r a_ea type of a_ter}r}a arad it} whch dhection to point yo_J_
ante_sna, The channe_ avaHabifity through cane depends eros whch channels yo_ir cable
operator s_app_iee n C_ear QAM; cens_JIt yo_J_cane operator fo_ mo_e _sformat o_s,
Version 6/2/2008
33
www,VlZlO.com
VlZlO SV470XVT1A
d.
User Manual
When finished, the Complete
screen wil! be displayed to inform
you that the HDTV has completed
the Initial Setup.
A
Press the _
button on the
remote control to exit and begin
watching TV.
5.
Select Input Source
Select the Input Source for the HDTV by
pressing the INPUT button on the side of the TV or using the Input button on the remote control.
Pressing this button will cycle you through the following options: TV, AV1/S-VIDEO, AV2,
Component1, Component2, RGB, HDMI1, HDMI2, HDMI3 and HDMI4.
Main
Now follow the procedure below to display channels from a different
signal (External TV Tuner, VCR, Cable Box or Satellite Receiver) source,
using different inputs at the back of you TV set.
a. Select the correct input connection;
Composite (Yellow, Red and White) connectors,
Blue plus Red and White) connectors, HDMI
Video (S-Video) plus Red and White connectors
physical connection or hook up.
RF (DTV/TV) connector,
Component (Red, Green,
connectors or Separate(if applicable). Make the
b. If you have an HD service you must use the HDMI (best) or
Component connection.
Note:
Composite (AV) and S-Video Cables can only be used for SD (480i) pictures.
c. Turn on your Cable Box, VCR, External TV Tuner or Satellite Receiver and you will see a
picture on your TV set. If there is not picture, make sure you have selected the correct input on the
TV set.
d. If the selected input is RF, you should be aware that the TV set needs to be on either
channel 3 or channel 4 matching the channel which has been selected on the back of the VCR, Cable
Box, External TV Tuner or Satellite Receiver; please refer to Owner or User's Manual of such
equipment for details.
Note: The TV set will be displaying any television station or program selected by the Cable Box, VCR,
External Tuner or Satellite Receiver. The TV set will not be able to change programs or channels; this is
controlled by the equipment sending the signal. If the service being used is the one which setup
includes a box with two different outputs for two different (distant) rooms, then scanning
channels would help you to find the signal. Be aware that the channel to be selected varies from
provider to provider; meaning that, you may have to call your provider company so they could
provide you the specific channel when using high definition made TV sets. Some examples of
these channels are: 105, 106, 115 and t16.
Version 6/2/2008
34
www.VlZlO.com
VlZlO SV470XVT1A
6.
User Manual
Fine Tuning your TV set for Home Use.
After completing Procedure 4 or Procedure 5; please follow the steps
below to optimize your TV set display:
a. Press the MENU key to bring up the Menu display. Use the _,
or ," button to scroll to the Advanced Video option.
b. Press the O
button to select it.
c. Use the _ or _ button to change setting to
Normal Temperature option.
d. Press the MENU key again to go back to previous screen.
e. Press either 4 or _ button to change the Picture Mode option to Standard.
f. Press the EXIT key to exit the on screen
display Menu.
Note:
If Procedure 4 had been done, you would like to do the following to
ensure that the correct program times are shown
when pressing the Guide key:
Press the Menu key, this will bring up the picture
mode menu.
Press either _or _ button scroll down to the next page. The next screen will
appear showing Time Zone.
Press either _
button to select it.
Press either 4 or _ button to choose the proper Time Zone of your area.
Press the EXIT key once
completed.
to return to your program
if task
has been
Your new TV set is now ready to automatically reproduce the best picture quality out of the input signal
which is been fed into it. Enjoy your TV watching!!
Version 6/2/2008
35
www.VlZlO.com
VlZlO SV470XVT1A
3°8 Wsbchinq
8 TV
User Manual
Proq sm
Before you start watching TV, please make sure that any cable, satellite or off-air antenna connections
are secure. Also, verify that the power cord is plugged into a correctly grounded electrical outlet or surge
protector.
1.
Press the power button on the remote or on the side of the HDTV.
front will change from orange to white.
2.
There are 3 options for selecting your programming:
3.
The VlZlO logo on the
a.
If you are using an antenna or cable connected through the DTV/TV CABLE/ANTENNA
input, you can select TV directly by pressing the TV button on the remote, or by pressing
the iNPUT button on the remote or on the side of the HDTV.
b.
If you are watching broadcasts through a cable or satellite set-top box connected by an
HDMI cable, select HDMI directly by pressing the HDMI button on the remote, or by
pressing the INPUT button on the remote or on the side of the HDTV.
c.
If you are watching broadcasts through a cable or satellite set-top box connected by a
Component (YPbPr) cable, select Component directly by pressing the Component button
on the remote, or by pressing the INPUT button on the remote or on the side of the HDTV.
When using option 2a, press the Channel buttons on the remote or the CH+ / CH- buttons on
the side of the HDTV to change the channel. Note: Ti_o Channe bt tons _:n the sde of the
HD/V arx o the remote co_ro wl riot work f you _re w_tc,hng _ pm(_r_;_r/snf_ HDM,
Compone _tand AV _psts
Version 6/2/2008
36
www,VlZlO.com
VlZlOSV470XVT1A
UserManual
3,3
Rd]ustinq
Basic
HDTV
Settinqs
Volume
To adjust the volume, press and hold the
VOL+ or VOL- button on the side of the
LCD HDTV or remote control until the
desired level is reached.
TV Channels
To step up or down through the available
TV channels, press the CH+ or CH- button
on the side of the HDTV or remote control
once for the next or previous channel, or
hold it depressed until the desired channel
is reached.
Note: Cha_,ne cp anc_ dowq
w ony ope ate
DTV a!_d TV modes
Wide
Using this feature, you can watch video
content in different size modes on the
HDTV.
Press the MENU
button
on the
remote
control to bring up the OSD screen.
Press the
,_ button
and scroll
down
to
Setup.
Press the
button to select this option.
Press the,
button and scroll down to Wide.
Press either the _ or _ button to select among the modes.
Fore more information see Section 4.17.1 - Viewing Modes, on page 73.
Version 6/2/2008
37
www,VlZlO.com
VlZlO SV470XVT1A
3°4 Pmoqmam
User Manual
loffommatloo
Press the GUIDE buttononce on the remote,and the following
screen willbe displayed;showing the
information
ofthechannelbeingviewed:
The following is an explanation of the different sections of the above banner:
Program Information:
Provided by Broadcaster
Program
Rating
I
is
available
Closed
Caption
Stereo
Audio is Spanish
TV Channel
Number
Station Name: provided
by Broadcaster
I 1080i HDTV (High Definition TV)
Press the GUIDE button twice and at least two and half hours of programming
display; as shown below:
Version 6/2/2008
38
www,VlZlO.com
I
Antenna
Source is
will be shown on the
VlZlO SV470XVT1A
Chapter
Usinq
4
the
Advanced
On
Screen
Ad]ustment
Display
of
User Manual
HDTV
{OSD}
The remote control or the control buttons on the right hand side of the TV can control all the function
settings. The On Screen Display (OSD) allows you to adjust the save contrast, brightness and other
settings. The TV will save changes made to the settings, even if the TV is turned off.
The OSD consists of several menu options: Picture Adjust, Audio Adjust, Setup and TV Tuner Setup.
The main menu options may very depending on your selected input source.
Note: Some of the main menu options may have additional submenus, i.e. the TV Rating submenu for
Parental Controls.
Press the MENU button on the remote control or the side of the TV and the Picture menu will be shown
on the screen.
Press the _ or _ button on the remote control or the CH + or CH - button on
the side of the HDTV to select one of the other menu options:
Picture (Picture Adjust)
Audio Mode (Audio Adjust)
TV (TV Tuner Setup)
Setup (Global Settings)
Press O
to select the option or feature which you want to adjust.
Once the menu option is displayed, press the ,4 or _ button on the remote control or the VOL + or VOL
- button on the side of the TV to adjust the desired option.
Press the MENU key once to return to the previous screen or press the EXIT to return to your program if
task has been completed.
Version 6/2/2008
39
www,VlZlO.com
VlZlOSV470XVT1A
UserManual
/ TV
OTV
4.a,IPicture
npub
Picture
Rd]ustmemb
Mode
When the MENU buttonispressed,the On Screen Display(OSD) appears
on thePICTURE adjustmentpage.
Press the_
buttonto selectthePictureMode selection.
Use the -4 or b button to choose from Custom, Standard, Movie, Game,
Vivid, Football, Golf, BasketbalI and Baseball.
Picture Adjustments
settings.
are available for you to set them to your preferred
Once the adjustments are completed press the EXIT button to exit the OSD
completely.
4,,2 2 BackUqht
Press the ,_button to highlight the Backlight selection.
Use the 4 or _ button to adjust the level.
The Backlight level does not affect the Brightness (black level) or Contrast
(white level) of the picture, it adjusts the lamp current and this affects the
overall brilliance of the picture.
Once the adjustments are completed press the EXIT button to exit the OSD
completely.
Not:,: I s s_;tt (!w
s t :_d o
b_ds_:_d_:_
d d_
:p,:_
i J _c::d
Co tost
Rsto
Press the _ button to highlight the Brightness selection.
Use the 4 or _ button to adjust the level.
The Brightness adjusts the black levels in the picture. If the brightness is too
low you will not be able to see the detail in darker parts of the picture and if
the brightness is too high the picture will look washed out.
Once the adjustments are completed press the EXIT button to exit the OSD
completely.
Version 6/2/2008
40
www,VlZlO.com
VlZlO SV470XVT1A
Press the _ button to highlight the Contrast selection.
Use the 4 or _ button to adjust the level.
The Contrast adjusts the white levels in the picture. If the contrast is too low
the picture wiii look washed out and if the contrast is too high you wiii not be
able to see any detail in the bright parts of a picture.
Once the adjustments
completely.
are completed
press the EXIT button to exit the OSD
Press the _ button to highlight the Color selection.
Use the 4 or _ button to adjust the level.
The Color adjusts the amount of color in the picture.
Once the adjustments
completely.
4o2o6
are completed
press the EXIT button to exit the OSD
Tint
Press the '_ button to highlight the Tint selection.
Use the _ or _ button to adjust the level.
The Tint adjusts the hue of the picture. The easiest way to set tint is to look at
flesh tones and adjust for a realistic appearance.
In most cases, the default
middle position is correct. If people's faces look too orange try reducing the
level of color first as the case d this is often too much color.
Once the adjustments
completely.
Version 6/2/2008
are completed press the EXIT button to exit the OSD
41
www,VlZlO.com
User Manual
VlZlO SV470XVT1A
User Manual
Press the '_ button to highlight the Sharpness selection.
Use the 4 or _button to adjust the level.
The Sharpness adjusts the sharpness of the picture.
Once the adjustments
completely.
are completed press the EXIT button to exit the OSD
Rduanced
Video
Features
Press the _ button to highlight the option for Advanced Video selection. Press either the _
button to
select it. A new menu will be displayed showing the advanced functions available for fine tuning of the
picture.
Noise Reduction
(SNR)
Press the _ button to highlight Smart Noise Reduction
(SNR).
Use this
feature to diminish picture artifacts caused by the digitizing of image motion
content that may be present in the picture.
Press the -4 or _ button to choose from the Off, Low, Medium or Strong
setting.
Once the adjustments
completely.
are completed press the EXIT button to exit the OSD
Color Enhancement
Press the _ button to highlight Smart Color Enhancement. Use this feature to
increase the picture reproduction performance of the picture.
Press the -4 or _ button to choose from Off, Normal, Rich Color, Green/Flesh and Green/Blue setting.
Once the adjustments are completed press the EXIT button to exit the OSD completely.
Version 6/2/2008
42
www.VlZlO.com
VlZlO SV470XVT1A
Advanced
Adaptive
User Manual
Luma
Press the v button to highlight Advanced Adaptive Luma. Large areas of darkness in a picture will result
in a lower Average Picture Level (APL) and the overall picture will look too dark; activation of this feature
will raise the APL to counteract this effect.
Press the 4_ or _ button to choose from the Off, Low, Medium, Strong or Extend setting.
Once the adjustments are completed press the EXIT button to exit the OSD completely.
Enhanced
Contrast
Ratio (DCR)
Press the _' button to highlight Enhanced Contrast Ratio. This feature can be
set to On or OFF to allow the TV set to adjust its backIight to display dark and
bright scenes with a more vivid or intense quality.
Press the -4 or _ button to turn this feature On or Off. Note: Backlight setting
would be disabled if this option is set to On.
Once the adjustments
completely.
are completed press the EXIT button to exit the OSD
Color Temperature
Press the _ button to highlight the option for Color Temperature selection.
The default is COOL; this is the 9300K setting.
Press the ,4 or _ button if you want to choose the Normal, Warm or Custom
option.
If you select any option, then a new menu will be displayed
primary colors; Red, Green and Blue.
showing the
Press the '_ button to highlight the color you wish to adjust.
Press the -,_or _button
to start adjusting the color.
Use the _ or _button to adjust the color.
Press the MENU button when finished.
other colors if desired.
Once the adjustments
completely.
Version 6/2/2008
Repeat the procedure to adjust the
are completed press the EXIT button to exit the OSD
43
www,VlZlO.com
VlZlO SV470XVT1A
Smooth
Motion
User Manual
Effect
The Smooth Motion option is a switch option which controls the intensity or
levels of intensity of the video (Smooth and Precision) features incorporated
in this TV model.
Press the '_ button to highlight the Smooth Motion option.
Use the ,4 or _ button to select your choice. There are four choices; Off, Low,
Middle or High, please select your preference.
Real Cinema Mode
The use of this option will allow you to select the two new features built-in in
this model. These features are described as operational (features) functions designed to enhance the
quality of the images or programming being viewed.
Press the ,' button to highlight the Real Cinema Mode option.
Use the _ or _button
Precision and Smooth.
Precision
to select your choice. There are three choices; Off,
Feature
When selecting this feature you will obtain a sharper image of the scene you
are watching; sometimes depending on the quality of the signal and quality of
the recorded pictures (movies), the presence of the halo effect will not be
noticeable.
Smooth
Feature
This feature wilt allow increasing the quality of the picture as far as to motion
on the scenes it refers, eliminating the effect of juddering during a fast action
moving scene and sports programs. Depending on the quality of the signal
being watched, the halo effect is noticeable.
Once the adjustments
completely.
Version 6/2/2008
are completed press the EXIT button to exit the OSD
44
www,VlZlO.com
VlZlO SV470XVT1A
4_2,,q
Rese_
Pic_ure
Mode
Press the _ button to highlight the option for Reset Picture Mode selection
Press _ button to return the Picture settings to factory default.
A screen will come up to give you the options of either to confirm your
selection or to cancel it, if you had changed your mind
Press either _ or _ to make the selection.
Press O
to accept it.
Once the adjustments are completed press the EXIT button to exit the OSD completely.
Note: Only settings under the Picture adjustments will be reset.
Version 6/2/2008
45
www,VlZlO.com
User Manual
VlZlO SV470XVT1A
43
DTW
4.3ol
/ TV
Rudio
Rudio
RdOusbment
Mode
When the MENU button is pressed, the On Screen Display (OSD) appears on
the PICTURE adjustment page.
Press the _ button to display the AUDIO ADJUST page.
Press the '_ button to highlight the Audio Mode selection.
Use the 4 or _ button to choose from Fiat, Rock, Pop, Classic or Jazz.
Equalizer
settings.
adjustments
are available for you to set them to your preferred
Once the adjustments
completely.
are completed press the EXIT button to exit the OSD
Press the '_ button to highlight the Equalizer selection.
A new menu will be displayed
(pitches).
showing volumes
of different
frequencies
Use the 4 or _ button to select the frequency to be adjusted.
Starting from lowest to the highest pitch, they are 120 Hz, 500Hz, 1.5 kHz,
5kHz and 10kHz.
Press the '_ or ,_ button to adjust the selected frequency to your preference.
For example if you want to boost the bass you would highlight 120Hz and
turn it up.
Once the adjustments are completed press the EXIT button to exit the OSD
completely.
Note: The equalizer option is not available in the SRS TSXT surround effect mode,
Press the _ button to highlight the Balance selection.
Use the <_or _ button to adjust the left!right balance.
Once the adjustments are completed press the EXIT button to exit the OSD completely.
Version 6/2/2008
46
www,VlZlO.com
User Manual
VlZlO SV470XVT1A
4°34
Dtqitsl
Rudio
User Manual
Oub
This feature uses the SPDIF (OpticaI connector)
through Home Theatre system.
audio signal to be used
Press the _ button to highlight the Digital Audio Out selection.
Press the ,< or _ button to make the proper selection. The options are OFF,
Dolby Digital and PCM.
Once the adjustments
completely.
are completed press the EXIT button to exit the OSD
Press the " button to highlight the Speakers selection.
Press either 4 or _ button to turn the internal speakers On or Off. You may
want to turn-off the internal speakers when listening to the audio through your
Home Theatre System.
Once the adjustments are completed press the EXIT button to exit the OSD completely.
4o3_6
Rna[oq
Rudio
Out
When using the RCA (white and red) connectors as audio line out to connect a stereo system.
Press the * button to highlight the Analog Audio Out seIection.
Press either -4 or _ button to turn the audio out signal to Fixed or Variable. When it is set to variable,
volume from the external speakers will change according to the volume setting on the TV. If it is fixed, the
volume can onIy be changed by the settings on the external stereo system.
Once the adjustments are completed press the EXIT button to exit the OSD completely.
437LIP
Symc
Included with the advanced technology of your TV, a feature which will
compensate the shortcomings of signal transmission called audio sync (Lip
Sync). Lip Sync is designed to adjust the audio of the program being viewed
so that it matches the movement of the lips of someone talking on the screen.
This feature is built into your set, and it can be applied to all inputs. To use
this feature, follow the steps below.
Press the MENU key to bring up the OSD.
Press either * or _ button to scroll either up or down to Lip Sync.
Press either _ or _ button to make the appropriated adjustment.
Press either the MENU key once to return to the previous screen or the EXIT
key to return to your program if task has been completed.
Version 6/2/2008
47
www,VlZlO.com
VlZlOSV470XVT1A
UserManual
Rdded
Rudio
(Sound}
Features
Even though; the SV470XVT1A comes equipped with SRS (TruSurroundXT) digital audio, your TV has a
built-in enhancement feature called Wireless Speaker which allows you to upgrade the audio to DoIby
Digital 5.1 surround sound; through the purchasing of our Wireless Speakers System.
4°3°@
W retess
Speaker
Press either _ or _ button to scroll either up or down to Wireless Speaker.
Press either < or _ button to select it either On or Off.
If you select ON and the following message appears; that implies that the TV has not been upgraded with
the Wireless Speaker System. By no having the upgrade, all the features or options which apply to the
Dotby Digital 5.1 surround sound are not available
If you had obtained the upgrade (Wireless Speaker System) kit, and still the
above message is displayed please refer to the instructions which come with
the upgrade kit to verify that you had done the correct steps to match up or
pair up the Wireless set and the TV.
4,,8oq
Spes ,4er
Se tinq
This option allows having a better or handing control of the Wireless System.
Press the ,' button to highlight the Speaker Setting selection.
Press _
to accept it. The following options and adjustments
will become
available to you to set the TV sound to your desired preferences.
Speakers
Location
When selecting this option, the TV will reproduce a sound which will indicate
the location of the different speakers as well and their proper operation. It
means that while the screen wilI show the an icon of the speaker being test,
the sound will let you know not only if the speaker is properly functioning,
but also will let you know if it is in the right position (Left, Center, Right, Left
Rear, Subwoofer and Right Rear) maximizing the sound quality of the
surround sound and the reproduction of the special effects (i.e; airplanes
traveling direction, explosions,., etc) of a movie.
Press the _' button to highlight the Speaker Location option.
Press _ button to run this option.
Press either the MENU key to stop the cycling of this option and go back to
previous menu display or the EXIT key to exit the OSD completely.
Version 6/2/2008
48
www,VlZlO.com
VlZlO SV470XVT1A
Speakers
Distance
The range of the wireless system is up to 35 feet for the subwoofer and each
satellite speaker (Rear Left and Rear Right) comes with a 15 feet of speaker
wire. Adjusting this option will allow you to take advantage of setting the TV
to the specific distances within the constraints of your room. The distance
between subwoofer and TV is set in increments of 5 feet up to 35 feet, and
the values applicable to the satellites are in increments of 3 feet up to 15 feet.
These values are used to adjust the response needed for the audio signal to
reach the Subwoofer and satellite speaker without loss of quality output by
the speakers.
Press the ," button to highlight the Speaker Distance option.
Press
Press
to choose the speaker which value needs to be adjusted.
either -4 or _ to set the value.
Press either the MENU key to go to the previous menu to adjust a second
speaker or the EXIT key to exit the OSD completely.
Trim
This allows the adjustments of each individual speaker volume according to your preferences.
Press the _ button to highlight the Trim option.
Press the _ button to select it.
Press either the - or _ button to select the speaker which value needs to be
adjusted.
Press either 4_ or _ to make the desired adjustment.
Press either the,
or _ button again to select the next speaker.
Press either _ or _ to make the desired adjustment.
You can repeat these two steps to set the values for all six (Left, Right, Rear
Left, Rear Right, Center and Subwoofer) speakers, or press the MENU key
to go to previous menu or press EXIT key to exit the OSD completely.
Version 6/2/2008
49
www,VlZlO.com
User Manual
VlZlO SV470XVT1A
4°3°io
Wireless
Sound
User Manual
E#ffeGt
This feature allows making a selection of the output sound reproduce by the wireless speaker system,
depending on the type of the audio signal being supplied.
Press the _ button to highlight this option.
Press either _ or b to select (Dolby Digital ProIogic II Music, Dolby Digital
Prologic II Movie or Dolby Digital Prologic II Matrix) the kind of sound you
want to match with the audio signal being supplied to the TV.
If Wireless speaker has been selected Off, then you can continue with the
next option of the menu.
Note: When a program carrying a Dolby Digital 5,1 signal; is supplied
to the TV, a LED (red 5.1) indicator displaying such signal can be seen
on the bottom right hand side of the center speaker
4,,3oii Sound
Effffect
As it was previously mentioned your TV comes with a factory setting of SRS (TruSurroundXT)
audio selection which is the perfect option when using the TV as stand
alone unit, but we at VlZlO gives you the options to select the audio output
to your own preferences.
Press the • button to highlight this option.
Press either 4 or b to go through the different (Regular Stereo, Stereo +
Center Speaker and SRS TSXT) adjustments and select the one to your
preference.
Version 6/2/2008
5O
www,VlZlO.com
digitai
VlZlO SV470XVT1A
4.301a
DRC
[Dynamic
Ranqe
Compression]
This option allows adjusting the dynamic range compression
encoded in a Dolby Prologic II signal input into the TV.
of the audio
Press the _ button to highlight the DRC option.
Press either 4 or _ to select the desired setting. The values are either Full,
¼, ½, ¾ and Off.
Once the adjustments are completed press the EXIT button to exit the OSD
completely.
4 3, 13
Reset
Rudio
Mode
Press the '_ button to highlight the option for Reset Audio Mode selection
Press _ button to return the Audio settings to factory default.
The options of either accepting or cancelling the resetting will be display.
Press either -_ or _ to make the selection.
Press O
to accept it.
Note: Only settings under the Audio adjustments will be reset.
Once the adjustments are completed press the EXIT button to exit the OSD completely.
Version 6/2/2008
51
www,VlZlO.com
User Manual
VlZlO SV470XVT1A
DTV
/ TV
Tuner
User Manual
Setup
When you first
used your HDTV you will
have setupyourTV forDTV /TV channelsusingthe Initial
Setup
screens.Ifyou didnotdo thisor ifyour setup has changed,you can do thisfrom theTV TUNER SETUP
menu.
Once theadjustmentsarecompleted presstheEXIT buttontoexittheOSD completely.
4o4ol
Tuner
Mode
When the MENU button is pressed, the On Screen Display (OSD) appears
on the PICTURE adjustment page. Press the _ button to display the TV
page.
Press the _ button to highlight the Tuner Mode selection.
Press the _ button to choose Cable or Air (Antenna) depending
which equipment you have attached to the DTV / TV Input.
upon
Once the adjustments are completed press the EXIT button to exit the OSD
completely.
Auto
Search
Press the _ button to highlight the Auto Search selection.
Press the _ button to Auto Search for TV channels available.
The TV will
automatically search for analog and digital channels.
Once the adjustments are completed press the EXIT button to exit the OSD
completely.
Version 6/2/2008
52
www,VlZlO.com
VlZlOSV470XVT1A
UserManual
4°4°3
Parbial
Channel
Search
If you believe channels are missed from the auto search, you can do a
partial channel search to look for channel in a certain channel range again.
Press the v button to highlight the Partial Channel Search selection.
Press the _ button to enter the submenu.
Press the _ button to select scan mode to look for Analog, Digital, or both
Analog/Digital channels.
Press the v button to highlight the "To" and "From" selection. Press the
button to select the range of channel numbers you want to start searching in.
Press _
to start channel search.
Once the adjustments are completed
exit the OSD completely.
44°4
Skip
press the EXIT button repeatedly to
Chsnnek
After the TV has stored atl of the available DTV channels in memory you wilI
find that some channels will be too weak to watch comfortably or they may
be channels you do not want to see. Select the channel you wish to remove
by pressing the MENU button to bring up the OSD.
Press the _ buttons to open the TV TUNER SETUP menu.
Press the _ button to highlight SKIP CHANNEL.
Press the _ button to select this channel to be skipped when using the CH+
or CH- button. You will still be able to select this channel using the number
buttons on the remote control.
This feature allows you, the user to select the different languages in which
the signal provider or broadcaster is transmitting the audio with the program
you are watching. This signal is usually or in most cases Spanish language.
Press the v button as many times as it takes to scroll down to this option and
get it highlighted.
Press either _ or _ button to go through the settings of this feature to make
your selection.
Once the adjustments are completed press the EXIT button to exit the OSD
completely.
Version 6/2/2008
53
www,VlZlO.com
VlZlOSV470XVT1A
UserManual
4,4.6
Time
Zone
Setting the correct Time Zone for your area will ensure that the correct
program times are shown after pressing the GUIDE button on the remote
control.
Press the '_ button to highlight the Time Zone selection.
Press the _ button to select your area.
Once the adjustments are completed press the EXIT button to exit the OSD
completely.
4 47
OavUqht
Savimq
As for Time Zone, setting the daylight saving time for your area will ensure
that the correct program times are shown after pressing the GUIDE button
on the remote control.
Press the _ button to highlight the Daylight Saving selection.
Press the b button to select On or Off.
Once the adjustments are completed press the EXIT button to exit the OSD
completely.
Version 6/2/2008
54
www,VlZlO.com
VlZlOSV470XVT1A
UserManual
4,5
DTV
/ Tg
Input
Setup
When the MENU button is pressed, the On Screen Display (OSD)
appears on the PICTURE adjustment page. Press the _ button until the
SETUP page is displayed.
Press the '_ button to highlight the Language selection.
The default is
English.
Press the _ button to select Espafioi or Frangais.
Once the adjustments
OSD completely.
4o5o2
are completed
press the EXIT button to exit the
P_P {Pictur°e4nopictur°e}
Press the v button to highlight the PIP (Picture-in-Picture)
selection.
Press the _ button. A separate menu will appear with the following PIP settings.
PIP Mode
Press the ', button to highlight the PIP mode selection.
Press the 4 or _ button to select Off, PIP or POP (Picture-outside
picture). In the PIP mode a smaller sub screen will be displayed on top of
the main screen. For the POP mode the main screen and sub screen will
be of equal size and be positioned side by
side.
Version 6/2/2008
55
www,VlZlO.com
VlZlO SV470XVT1A
User Manual
PIP Source
When PIP or POP is selected, Press the v button to highlight the PIP input selection.
Press the < or _ button to choose the input source for the sub screen. The input sources available will
vary according to which input is used for the main screen; see the table below to find which inputs can
PIPIPOP with each other.
See below for detailed information regarding the PIP sources.
DTV
TV
",_" - Indicates which inputs are available for PIP and POP modes.
PIP Position
When PIP is selected, Press the _ button to highlight the PIP position selection.
Press the -4 or _ button to choose where on the picture you want the PIP screen positioned over the
main screen.
PIP Size
When PIP is selected, Press the _' button to highlight the PIP size selection.
Press the -4 or _ button to choose Small, Medium or Large.
PIP Audio Source
When PIP or POP is selected, Press the _ button to highlight the PIP audio source selection.
Press the _ or _ button to choose the audio source from the main screen or the sub screen.
Once the adjustments are completed press the EXIT button to exit the OSD completely.
Version 6/2/2008
56
www,VIZlO.com
VlZlO SV470XVT1A
4oS,,3
Sleep
Timer
Press the '_ button to highlight the Sleep Timer selection.
Press the _ button to select the timer to turn-off the TV in 30, 60, 90 or
120 minutes.
Once the adjustments
OSD completely.
are completed press the EXIT button to exit the
The Wide option is the feature which allows you to select how your
display would be size wise. When in TV mode; the selections are
Normal, Wide, Panoramic and Zoom views.
Press the _ button as many times as it takes to scroll down to this
option and highlight it.
Press either -4 or _ button to make the correct selection; you will see
the screen adjusting to the different sizes which apply to this feature.
Once the adjustments
OSD completely.
Version 6/2/2008
are completed press the EXIT button to exit the
57
www,VlZlO.com
User Manual
VlZlO SV470XVT1A
€SoS
input
User Manual
daminq
This feature has been added to facilitate you, the user in identifying or
label the input and signal which Js being watched. You could use up to 8
characters; either letters or numbers or combinations of both.
Press '_ button to highlight this option.
Press _ button to obtain the next screen which shows the different
inputs.
Press _ button to select the desired
input which you want to label or name
(Examples: VCR, DVD,.., etc.) it with
any name which wilt make easier for
you to recognize it.
Press the _
key to go to the first
space (_) in the bracket.
Press either the _ or • button and
select either the letter
belongs to this place.
or number
Press the _ button to go to the next space (_) and again
Using either the _,or _ button select the second character of the name
given to this Input.
Repeat the last previous two steps until the name of the input is
completed.
A
Press the _
key to accept the name of the input or the EXIT key to
cancel the setting..
Press the MENU key when you have finished to go to the previous
menu.
Since you are already in this feature; it is recommendable to name all
the Inputs which are being used as well as these for which you have an
idea what their name is going to be.
Once the adjustments
OSD completely.
Version 6/2/2008
are completed press the EXIT button to exit the
58
www,VlZlO.com
VlZlOSV470XVT1A
UserManual
4o5,,6
CC
(Closed
Captiom}
Press the '_ button to highlight the CC (Closed Caption) selection.
Press the _ button. A separate menu will appear with the following CC
settings
CC
When watching regular analog (NTSC) TV, the CC feature is available in
the Setup menu.
Press the _button to highlight the CC selection.
Press the _button to select CCl, CC2, CC3 or CC4.
Once the adjustments
OSD completely.
are completed
press the EXIT button to exit the
Closed Caption for regular TV is usually CC1 or CC2.
Bigital Closed Caption Style
When watching DTV, the Digital CC Style feature is available in the Setup
menu.
Press the ,_button to highlight the Digital CC Style selection.
Press the _ button to go to the next screen.
Press either _ or _ button to toggle between
Broadcaster and Custom.
the two options;
As
If Custom is selected then you will have the way of customize the way
Closed Caption will be displayed by changing these different parameters
to your like: Font Size (letters size), Font Color (letters color) Font
Opacity (transparency of the letters), Background
Color (color of the
background area where Closed Caption is going to be displayed),
Background
Opacity (allows to either see through at the scene being
played or it could be a solid screen), Window Color (it gives the color to
the area where characters will be displayed on) and finally Window
Opacity (allows the area of the characters to be changed). There are no
recommendations of setting these parameters since you, the user would
have your own taste or like of them.
Once the adjustments
OSD completely.
Version 6/2/2008
are completed
press the EXIT button to exit the
59
www.VlZlO.com
VlZlO SV470XVT1A
4 5o7
H/V
Position
Press the _ button to highlight the H/V Position selection.
Press the bbutton.
Position settings
A separate menu will appear with the following HN
H - Position
Press the _ button to highlight the Horizontal Shift selection.
Use the ,< or b button to adjust the horizontal position.
Once the adjustments are completed press the EXIT button to exit the OSD
completely.
V - Position
Press the '_ button to highlight the Vertical Shift selection.
Use the _ or b button to adjust the vertical position.
Once the adjustments are completed press the EXIT button to exit the OSD
completely.
H - SIZE
Press the '_ button to highlight the H-Size selection.
Use the _ or b button to adjust the horizontal size.
Once the adjustments are completed press the EXIT button to exit the OSD
completely.
V - SIZE
Press the '_ button to highlight the V-Size selection.
Use the _ or b button to adjust the vertical size.
Once the adjustments are completed press the EXIT button to exit the OSD
completely.
Version 6/2/2008
60
www.VIZlO.com
User Manual
VlZlO SV470XVT1A
4.5o8
DTV
/ TV
Input
Parental
User Manual
Cont-rol
If you want to restrict certain channel and program viewing, you can do
this by turning on the Parental Control. Selected programs, movies and
channels can then be made available only after an authorized password
has been entered and accepted by the TV.
When the MENU button is pressed, the On Screen
appears on the PICTURE adjustment page.
Display (OSD)
Press the _ button to display the SETUP
page.
Press the _ button to highlight Parental,
and then press the _ button.
The Password must be entered before the TV will continue with Parental
settings. The default password set in the factory is 0 0 0 0. If you are going
to use the Parental Control feature you should change the password.
Version 6/2/2008
61
www,VlZlO.com
VlZlO SV470XVT1A
4 S0q
Channst
Block
Press the '_ button to highlight the Channel Block selection.
Press the _ button to go to the next screen.
Press the _ button to highlight the channel you want to block.
Press the _
button to block the highlighted channel.
Once the adjustments are completed press the EXIT button to exit the OSD
completely.
4°S,IO
US
TU
Ratinq
Follow the procedure in the previous section to display the Parental Control
menu and then press the '_ button to highlight the US TV Rating selection.
Press the _ button and the Block TV Rating paneI wiIi be displayed.
In the Block TV Rating panel you can customize the program blocking of the
following TV ratings:
Y - All children
Y7 - Older children
G - General audience
PG - Guidance suggested
14 - Strongly cautioned
MA - Mature audience
You can also customize the TV ratings for the following content:
A - All subratings
D - Sexual dialog
L - Adult language
S - Sexual situations
V - Violence
FV - Fantasy violence
Press the _ or _ button to navigate through the TV rating options.
Press the _
button to block (locked) or allow (unlocked).
Version 6/2/2008
62
www,VlZlO.com
User Manual
VlZlOSV470XVT1A
UserManual
4oSolz
US
Movie
Ratinq
[For
US]
Press the '_ button to highlight the US Movie Rating selection.
Press the _ button and the Block Movie Rating panel will be displayed.
In the Block Movie Rating panel you can customize the program blocking of
the following Movie ratings:
G
- General audience
PG
- Parental guidance suggested
PG-13
R
- Recommended for children 13 years of age or older
- Mature audience
NC-17
- No one under 17 years of age
X
- No one under 17 years of age
Press the ,_or _ button to navigate through the Movie rating options.
Press the _
4 5o12
button to block (locked) or allow (unlocked).
Camadiam
Emq[ish
Ratinq
Press the _ button to highlight the Canadian English Rating selection.
Press the b button and the Block Canadian
displayed.
English Rating panel will be
In the Block Canadian English Rating panel you can customize the program
blocking of the following ratings:
C
- Children
C8+
- Children 8 years or older
G
- General Programming, suitable for all audiences
PG
- Parental guidance
14+
- Viewers 14 years or older
18+
- Adult programming
Press the _ or _ button to navigate through the Movie rating options.
Press the _
button to block (locked) or allow (unlocked).
Version 6/2/2008
63
www,VlZlO.com
VlZlOSV470XVT1A
UserManual
4o5o13
French
Canadian
Ratin@
Press the '_ button to highlight the Canadian French Rating selection.
Press the _ button and the Block Canadian French Rating panel will be
displayed.
In the Block Canadian French Rating panel you can customize
program blocking of the following ratings:
G
- General audience
8 ans+-
the
General - not recommended for young children
13 ans+- Not suitable for children under 13 years of age
16 ans+- Not suitable for under 16 years of age
18 arts+- Adults only
Press the ,_or _ button to navigate through the Movie rating options.
Press the _
4oSom4
button to block (locked) or allow (unlocked).
CheGH
flora OTU
Ratimq
This option is designed to update the TV or Movie table of different ratings for programs being viewed in
your local or regional area. It will allow the parental guidance control
feature in your TV to have the most current parental control database for
a digital signal. This option may be available in the future for activation.
This option works as follows: Whenever you decide to use the Parental
Control feature and this option has been activated in your area, the
Check for New DTV Rating will be a solid color indicating that an update
is available for any rating tables. After entering the password, the
Parental menu will appear on the screen, and then do the following.
Observe the status of the DTV Rating. If option is faded out, no update is
available (the option is not activated in your area).
If it is not faded out, press either _ or _ button to select this option.
Press _ button to execute this operation.
instructions to complete this procedure.
Please follow the on screen
Press either _ or _' to select and then adjust any other option in this
menu.
Once the adjustments
OSD completely.
Version 6/2/2008
are completed press the EXIT button to exit the
64
www,VlZlO.com
VlZlOSV470XVT1A
UserManual
45. 5
Blocked
Unrabed
Pmoqramminq
Follow the procedure in the previous section 4.5.8 to display the Parental
Control menu and then press the _ button to highlight the Block Unrated
TV selection.
Press the _ button to turn-on or turn-off the blocking of programming
that does not have a rating.
Once the adjustments
OSD completely.
q, S,l
Chanqe
are completed press the EXIT button to exit the
the
Password
Press the _ button to highlight the Access Code Edit selection.
Press the _ button and the new Password panel wiii be displayed.
Enter the new, 4-digit password using the number buttons on the remote.
Enter it a second time to confirm you entered it correctly.
Once the adjustments
OSD completely.
Version 6/2/2008
are completed
65
www,VlZlO.com
press the EXIT button to exit the
VlZlOSV470XVT1A
UserManual
4 S, m7
Reset-
R[[ Settinqs
Press the _ button to highlight the Reset AIi Settings selection.
Press the _ button to reset the TV to the default factory settings.
The screen will display a message to confirm that you want to reset
the values to factory settings.
Use the 4 or _ button to highlight your selection.
Press the O
button to confirm your choice.
Once the adjustments are completed press the EXIT button to exit the OSD completely.
Note: This does NOT reset the Parental Control Password.
Version 6/2/2008
66
www,VlZlO.com
VlZlO SV470XVT1A
4.6
HDM_
input
Picture
Rd]ustment
The Picture Adjust menu operates in the same way for the HDMI Input as for
the DTV / TV input in section 4.2.
Once the adjustments
completely.
4o7 HDM_
are completed press the EXIT button to exit the OSD
Input
Rudio
Rd3ustment
The Audio Adjust menu operates in the same way for the HDMI Input as for the
DTV I TV input in section 4.3.
_.8
HOM_
Input
Sebup
The Setup menu operates in the same way for the HDMI Input as for the TV
input in section 4.4. The menu difference is that there is no DTV / TV or
Parental Control adjustments.
Version 6/2/2008
67
www,VlZlO.com
User Manual
VlZlOSV470XVT1A
UserManual
4-q
Video
_nput
Picture
Rd]ustment
The Picture Adjust menu operates in the same way for Video Inputs
(Component and AV) as for the DTV / TV input in section 4.2. The menu
difference is that there is no icon along the top for DTV / TV adjustments.
4°zo
Video
_nput
Rudio
Rd]ustment
The Audio Adjust menu operates in the same way for Video Inputs
(Component and AV) as for the DTV / TV input in section 4.3. The menu
difference is that there is no icon along the top for DTV I TV adjustments.
4°is
Video
_nput
Setup
The Setup menu operates in a similar way for Video Inputs (Component and
AV) as for the TV input in section 4.4. The menu difference is that there is an
auto phase setting under the H/V Position submenu when using Component
input.
Version 6/2/2008
68
www,VlZlO.com
VlZlO SV470XVT1A
4°12
Rubo
Phase
{f_om Component
inpub}
Press the ,_button to highlight the H/V Position.
Press the _ button and the new H/V Position submenu will be displayed.
Press the _' button to highlight Auto Phase.
Press the _ button to execute this option. The TV will automatically
the phase of the signal to fine tune the picture.
Once the adjustments
completely.
4.s3
Video
look for
are completed press the EXIT button to exit the OSD
Inpub
Parentak
Controt
The Parental Control menu operates in the same way for Video Inputs
(Component and AV) as for the DTV / TV input in section 4.5.8. The menu
difference is that there is no icon along the top for DTV / TV adjustments.
Version 6/2/2008
69
www,VlZlO.com
User Manual
VlZlO SV470XVT1A
AoiA
PE
nput
Picture
User Manual
Rd3ustmemb
The Picture Adjust menu operates in the same way for the PC Input as for the DTV / TV input in section
4.2 for BackIight, Contrast, Brightness and Color Temperature.
A,,IAol Ru o
Rd]usb
When the MENU button is pressed, the On Screen Display (OSD) appears
on the PICTURE adjustment page.
Press the _ button to highlight the Auto Adjust selection.
Press the _ button for the LCD HDTV to adjust to the PC signal timing
automatically.
Once the adjustments are completed press the EXIT button to exit the OSD
completely.
A,iA,,
H,oPosittom
Press the _ button to highlight the Horizontal Shift selection.
Press the b button to start adjusting the horizontal position of the picture.
Use the 4 or b button to adjust the horizontal position.
Once the adjustments are completed press the EXIT button to exit the OSD
completely.
AoIAo3
UoPositiom
Press the '_ button to highlight the Vertical Shift selection.
Press the _ button to start adjusting the vertical position of the picture.
Use the 4 or _ button to adjust the vertical position.
Once the adjustments are completed press the EXIT button to exit the OSD completely.
Version 6/2/2008
70
www,VlZlO.com
VlZlOSV470XVT1A
UserManual
4 m4o4
H-SIZE
Press the _ button to highlight the H-Size selection.
Press the b button to start adjusting the horizontal size of the picture.
Use the 4 or b button to adjust the horizontal size.
Once the adjustments are completed press the EXIT button to exit the OSD
completely.
4o14o5
U,oS ZE
Press the _' button to highlight the H-Size selection,
Press the _ button to start adjusting the horizontal size of the picture,
Use the ,4 or b button to adjust the horizontal size,
Once the adjustments are completed press the EXIT button to exit the OSD
completely,
401406
Fine
Tone
Press the _ button to highlight the Fine Tune selection.
Press the _ button to start tuning the to the PC signal.
Use the ,4 or b button to adjust the tuning.
Once the adjustments are completed press the EXIT button to exit the OSD
completely.
Version 6/2/2008
71
www,VlZlO.com
VlZlO SV470XVT1A
4.15
PC
Input
Rudio
Rd]ustment
The Audio Adjust menu operates in the same way for the PC Input as for
the DTV I TV input in section 4.3. The menu difference is that there are
no icons along the top for DTV / TV and Parental Control adjustments.
4°16
PC
Input
Setup
The Setup menu operates in the same way for the PC Input as for the
DTV / TV input in section 4.4. The menu difference is that there is no
icon along the top for TV adjustments and no Closed Caption.
Version 6/2/2008
72
www,VIZlO.com
User Manual
VlZlO SV470XVT1A
4¢7
Understandin9
Viewin9
User Manual
Features
Your HDTV features the following viewing modes. You can switch viewing modes using the remote
control, please follow the instructions in page 37.
¢m7¢
Wewinq
Modes
Normal Mode
The original 4:3 aspect ratio (I.33:1 source) is preserved, so black oars are
added to the left and right of the display image. Standard TV broadcasts are
displayed with a 4:3 Aspect Ratio. Movies in 4:3 Aspect Ratio may be referrec
to as pan-and-scan or full frame. These movies were originally filmed in 16:9
(widescreen), and then modified to fit a traditional TV screen (4:3).
Wide Mode
When watching a standard broadcast or full-frame movie in this mode,
the display image is stretched proportionately to fill the TV screen.
When watching a widescreen (1.78:1 source) program or movie, the
display image fills the TV screen. If you are watching a widescreen
(1.85:1 or 2.35:1 source) program or movie, there will still be black
bars at the top and bottom.
Panoramic Mode
When watching a standard broadcast or full frame movie in this mode,
the 4:3 Aspect Ratio (1.33:1 source) display image is stretched
horizontally on the left and right sides to fill the TV screen. The center
of the image is not stretched.
Zoom Mode
When watching a widescreen (1.78:1, 1.85:I, or 2.35:1 source)
program or movie, the display image is zoomed proportionally to fill
the width of the screen. The top and bottom are cut off to remove
most of the source materials black bars. This mode is good for
programs or movies with sub-titles.
Version 6/2/2008
73
www.VlZlO.com
VlZlO SV470XVT1A
4o17.2
Picture=In=Picture
User Manual
(PIP) Mode
Your TV featuresPiP mode so you can watch two pictures
atthe same time.When PiP isturnedon,you
can display two pictures at one time. One picture is displayed as the furl screen (main screen) and the
other picture is displayed in a small window (sub screen). The sub-screen can be set to small, medium or
large.
See below for detailed information regarding the PIP sources.
DTV
"/
"/
"/
,/
,/
"/
"/
TV
"/
"/
"/
"/
"/
"/
"/
AV1
"/
"/
"/
"/
"/
"/
"/
AV2
"/
"/
"/
"/
"/
"/
"/
Component
1
-/
,f
-/
,1
-/
-/
-/
-/
Component
2
-/
,/
-/
-/
-/
-/
-/
-/
_
-/
-/
-/
-/
-/
HDMI
1
-/
HDMI
2
-/
_
-/
-/
-/
-/
-/
HDMI
3
-/
_/
-/
-/
-/
-/
-/
HDMI
4
-/
_
-/
-z
./
-/
-/
-/
_
-/
-/
RGB
-/
-/
-/
-/
",/" - Indicates which inputs are available for PIP and POP modes.
Ao17o3
Rd3usblm
q Basic
PiP
Settlmqs
The PiP channel is independent of the main TV channel. To change the PiP channel, press the PiP CH
button on the remote control. Alternatively, you can change the PIP channel by pressing the CH+ or CH
button.
Main
Repeated pressing of the PIP
button will turn on, turn off the
PIP mode.
Press the PIP SIZE button to
alternate between Small, Medium
and Large PIP sizes.
Repeated pressing of the PIP
INPUT button will cycle through
the inputs for PiP. This button has no effect when PiP is off.
You can swap the program that is in the main picture
)rogram in the
PiP sub-picture. To swap the main picture program with the PIP sub-picture program, press SWAP on
the remote control. If you press SWAP again, it will return the program to the main picture.
Version 6/2/2008
74
www,VlZlO.com
VlZlO SV470XVT1A
Proqramminq
bhe
VJ£10 Universat
Remote
User Manual
Conbrot
You can program the remote control to work with up to four different pieces of equipment including your
VIZlO SV470XVT1A. Listed below are the steps for programming your VCR, Cable Box and DVD Player.
q, 174
Proqrammir q
for
VER
1.
2.
Manually turn on the VCR.
Press the VCR button on the remote control.
3.
Press and hold the SET button until the LED LIGHT flashes twice.
4.
Find the programming code for your VCR in the code list in the back of this book and enter it using
the Number Buttons. If the code is accepted, the LED flashes twice after the last digit is entered.
If the LED does not flash twice, repeat Steps 2 through 4 with the next code listed for the component
and manufacturer.
5.
Point the remote control at the VCR and press the POWER button. The VCR wil! turn off.
4o17oS
P -oqrammimq
Cabte
SetoTop
Box
1.
2.
Manually turn on the Cable Box.
Press the CBL button on the remote control.
3.
Press and hold the SET button until the LED LIGHT flashes twice.
4.
Find the programming code for your Cable Box in the code list in the back of this book and enter it
using the Number Buttons.
If the code is accepted, the LED flashes twice after the last digit is
entered.
if the LED does not flash twice, repeat Steps 2 through 4 with the next code tisted for the component and
manufacturer.
5.
Point the remote control at the Cable Box and press the POWER button. The Cable Box will turn off.
if the LED does not flash twice, repeat Steps 2 through 4 with the next code tisted for the component and
manufacturer.
Version 6/2/2008
75
www,VlZlO.com
VlZlOSV470XVT1A
UserManual
4176
Proqramminq
P<aver
OVO
1. Manually turn on the DVD Player.
2. Press the DVD button on the remote control.
3. Press and hold the SET button until the LED LIGHT flashes twice.
4. Find the programming code for your DVD player in the code list in the back of this book and enter it
using the Number Buttons.
If the code is accepted, the LED flashes twice after the last digit is
entered.
If the LED does not flash twice, repeat Steps 2 through 4 with the next code listed for the component
and manufacturer.
5. Point the remote control at the DVD Player and press the POWER button.
off.
q,.17,
7 Searchinq
for
Component
The DVD Player will turn
Codes
If you cannot find the manufacturer in the component list or the program code does not work, you can use
the remote control to search for the correct component code.
To search for a component code:
1.
Turn on the component.
2.
3.
Press the matching component button on the remote control.
Press and hold the SET button until the LED flashes twice.
4.
Press 9 9 1. The LED flashes twice.
5.
Point the remote control at the component and then alternate between pressing the POWER
button and the component button on the remote control until the component turns off.
If the component still does not respond, clear the component button, then repeat the search
procedure.
4°18
Usinq
a Cable
or
Satelloite
Remote
Your VIZlO remote uses codes 000, 047, 050, 067, 329, 331 and 339 to work your LCD HDTV. To use a
cable or satellite remote to work the LCD HDTV, refer to your cable or satellite remote user guide for
more information on how to program the remote. If your cable or satellite remote uses a 5-digit code (like
most Direct TV units), first try 11758 and then, if that does not work, 10178. If your cable or satellite
remote uses a 4-digit code, try 1758 and then 0178 as an alternative. If your cable or satellite remote
uses a 3-digit code (Echostar or Dish Network for example), use code 627.
_,_ote: Some )utto_s may _0t functon
vo meandmutew!wok
Version 6/2/2008
as expected on yo r <able or sateite
76
www,VlZlO.com
remote
Typcay
r_c,_,_eL
VlZlOSV470XVT1A
UserManual
Ehapter
5 Maintenance
and
Troubteshoobinq
S01 Maimbenance
1.
Make sure that the power cable is removed from the socket before cleaning the TV.
2.
Do not use volatile solvent (such as toluene, rosin and alcohol) to clean the TV. Such
chemicals may damage the housing, screen glass and remote control, and cause paint to
peel.
CLeaninq
the
Housinq
and
Remote
Control
Use the VlZlO soft cloth for cleaning.
1.
2.
If the housing or remote control is seriously contaminated, use a soft cloth moistened with
diluted neutral cleaner to clean the display. Wring water out of the cloth before cleaning to
prevent water from penetrating into the housing. Wipe the display with a dry cloth after
cleaning.
Eteaninq
the
Screen
1.
Use the VIZlO soft cotton cloth to gently clean the screen.
2.
The screen glass is very fragile. Do not scrape it with any sharp object. Do not press or tap
the screen to avoid cracking. When the screen is seriously contaminated, use a soft cloth
moistened with diluted neutral cleaner to clean the display. Wring water out of the cloth
before cleaning to prevent water from penetrating into the housing. Wipe the display with a
dry cloth after cleaning.
5,2 Troubleshootinq
Guide
If the TV fails or the performance changes dramatically, check the display in accordance with the
following instructions.
Remember to check the peripherals to pinpoint the source of the failure. If the
display still fails to perform as expected, contact the VlZIO for assistance by calling 1-877-698-4946 or
e-mail us at techsupport(_,vizio.com.
No power.
Make sure the power button is ON (White VlZlO Logo).
Make sure AC power cord is securely connected to the AC socket.
Plug another electrical device (like a radio) to the power outlet to verify that the
outlet is suppIyJng the proper voltage.
No sound.
Check your audio connection
Press MUTE on the remote control again, so that MUTE disappears from the screen
Check your audio settings, your TV audio may be set to SAP, min or speakers off.
Press the Volume + (Up) key on your remote control
Make sure that headphones are not connected
If the screen is black.
Power
Check your input connections.
is ON but no scree_
Version 6/2/2008
77
www,VlZlO.com
VlZlOSV470XVT1A
UserManual
image.
output port on the back of the VCR and the TV. Make any cable you have attached
to the TV is secured to the correct output your Set-Top Box, DVD, etc.
Adjust brightness and contrast.
Check Source settings.
Wrong or
appear,
abnormal
colors
If any colors (red, green, or blue) are missing, check the video cable to make sure it
is securely connected.
Control buttons do not work.
Press only one button at a time.
Remote
work.
Make sure batteries are inserted correctly
Batteries could be weak.
Control
does
not
Make sure you have selected TV on the remote.
There appears
quality issues,
to be image
You cannot see a picture.
For best image quality, view HD wide screen programs where possible.
If HD
content is not available view "Standard Definition" from a digital source. Standard,
analog TV will always be noticeably inferior to HD because your digital fiat panel TV
has video that is many times better than old TV's and so you can see interference
and deficiencies you did not know you had.
Make sure that the power cord is plugged into a grounded electrical outlet.
Make sure that the power button is turned on.
Make sure that the selected input source is connected to a working input source.
If your TV is connected to your computer in RGB or HDMI mode, press any key on
your keyboard to "wake" your computer.
You see a distorted picture or
hear unusual sound,
You may be getting interference from electrical appliances, cars, motorcycles, or
fluorescent lights. If you have not mounted it on the wall, try moving your TV to
another location to see if this is the cause of the problem.
The picture
patterns,
Make sure that the input source cable is attached securely and correctly to the back
of your TV.
has
abnormaI
Make sure that the video input source is within the range of your TV. Compare the
video input source's specifications with your TV specifications.
The display image does not
cover the entire screen.
If you are using RGB mode, make sure that H Size and V Position in the On Screen
Display (OSD) are set correctly.
tf you are using TV, AV1, AV2 or Component with 480i input, use the WIDE button
on the remote control to scroll through various screen modes.
You can see a picture but you
cannot hear sound.
Make sure that the volume is not turned down.
Make sure that the sound is not muted.
Make sure that your audio input source cables are connected
securely and correctly.
The TV has pixels that are
always dark or colored,
Your LCD HDTV is manufactured
using an extremely high level of precision
technology, however, sometimes some pixels of your LCD HDTV may not display.
Pixel defects within industry specifications are inherent to this type of product and do
not constitute a defective product.
You see "noise" or "trash" on
the screen,
When your LCD HDTV's digital capabilities exceed a digital broadcast signal, the
signal is up-converted (increased) to match your TV's display capabilities. Upconverting can cause noise or trash.
You switch to a different input
and the volume changes,
The TV remembers the volume level from the last time you adjusted it. If the sound
level is higher or lower from another source, then the loudness will change.
Tips for High-Definition
The LCD HDTV is an ideal platform for viewing High Definition Content.
Users.
Best image Quality will be achieved by the HDMI Input, then YPbPr, then RGB.
However, due to variances
distortions can occur.
Version 6/2/2008
in broadcast
78
www,VlZlO.corn
practices,
it is possible
some
image
VlZlOSV470XVT1A
UserManual
Tips for
Users.
5°3
Letterbox
Wireless
Content
Letterboxed (or "Widescreen")
versions of DVD movies are most commonly
formatted for standard 4:3 Televisions.
The LCD HDTV has the capability of
expanding this content so the entire screen is filled at the expense of image
accuracy. To use this function, press the "ZOOM" key on the remote control and
cycle among the available options.
Speakers
System
amd
TV
Pairinq
If pairing of the Wireless Speakers System is needed, please follow the steps below:
1.
Make sure that the slide switch in the Tx Card is to the ID position and insert it into TV
slot.
2.
Plug AC Power cord into subwoofer, subwoofer LED power indicator will flash
intermittently.
Press and hold down the Channel Search button at the back side of the Subwoofer for
approximate 5 seconds; a long beep will be heard.
3.
5,4
4.
Light of the LED indicator will stop flashing and a solid light will be displayed. Pairing is
done.
5.
To have the two sets working as one, please take the Tx Card out from the slot. Slide
the switch to the Play position and reinsert it into the TV slot.
6.
Your TV and Wireless
entertainment system.
Tetephone
Speakers
8 Technical
System
have become now a Dolby 5.1 theatre
Suppor
Products are often returned due to a technical problem rather than a defective product that may result in
unnecessary shipping charges billed to you. Our trained support personnel can often resolve the problem
over the phone. For more information on warranty service or repair, after the warranty period, please
contact our Support Department at the number below.
Customer support and quality service are integral parts of VIZlO's commitment to service excellence.
For technical assistance contact our VIZIO Technical Support Department via e-mail or phone.
E-mail: [email protected]
Tel: (877) 698-4946 Fax: (949) 585-9563
Hours of operations:
6:00am - 9:00pm PST Monday - Friday
8:00am - 4:00pm PST Saturday - Sunday
Please have your VIZIO model number, serial number and date of purchase available before you call.
VtZtO
39 Tesla
Irvine CA 92618
Tel: (949) 428-2525 Fax: (949) 585-9514
Version 6/2/2008
79
www,VlZlO.com
VlZlO SV470XVT1A
S,S
User Manual
Compliance
caution: Always use a power cable that is properly grounded. Please use the AC cords listed below for
each area.
So6 FCC
Glass
USA
UL
Canada
CSA
Germany
UK
VDE
BASE/BS
Japan
Electric Appliance Control Act
B Radio
lnterffer°ence
Statement
NOTE: This equipment has been tested and found to comply with the limits for a Class B digital device,
pursuant to Part 15 of the FCC Rules. These limits are designed to provide reasonable protection against
harmful interference in a residential installation. This equipment generates, uses and can radiate radio
frequency energy, and if not installed and used in accordance with the instructions, may cause harmful
interference to radio communications. However, there is no guarantee that interference will not occur in a
particular installation. If this equipment does cause harmful interference to radio or television reception,
which can be determined by turning the equipment off and on, the user is encouraged to try to correct the
interference by one or more of the following measures:
1.
Reorient or relocate the receiving antenna.
2.
Increase the separation between the equipment and receiver.
3.
Connect the equipment into an outlet on a circuit different from that to which the receiver is
connected.
4.
Consult the dealer or an experienced radio/TV technician for help.
Notice:
1.
The changes or modifications not expressly approved by the party responsible for compliance
could void the user's authority to operate the equipment.
2.
Shielded interface cables and AC power cord, if any, must be used in order to comply with
the emission limits.
3.
The manufacturer is not responsible for any radio or TV interference caused by unauthorized
modification to this equipment.
It is the responsibilities of the user to correct such
interference.
Version 6/2/2008
80
www,VlZlO.com
VlZlO SV470XVT1A
Chapter
6 Miscettaneous
User Manual
lntormation
6°i Specifications
Panel
47" Diagonal, 16:9 Aspect Ratio
Resolution
1920 x 1080 pixels
Pixel (Dot) Pitch
0.5415 mm x 0.5415 mm
Display Compatibility
1080P (FuU HDTV)
Colors
_6
Billion
Brightness
500 cd/m 2 (typical)
Contrast
1300:1 (typical), 6500:1
Response Time
5ms (typical)
Viewing Angle
Horizontal and VeRicat 178° (typical)
Inputs
(with DCR)
lx Coaxial RF (ATSC/QAM/NTSC),4x
HDMI TM** with HDCP (1 with Stereo Audio RCA), 2x
Component
YPbPr plus Stereo Audio, lx RGB PC plus Stereo Audio (1/8" stereo jack), 2x
Composite Video plus Stereo Audio, lxS-Video plus Stereo Audio
Outputs
lx Optical Audio (SPDIF Optical), lx Stereo Audio (RCA)
Features
FULL HD, PIP, POP, Noise Reduction, CC, V-Chip, 3D Comb Filter, Freeze, Support Motion
Enhancement and Motion Correction, Picture Enhancement, MPEG-2 Decoding via DTV input,
NTSC Video decoding via Video (AV, S-Video or Component), Progressive Scan Video via
HDMl TM**, Component or RGB, HDTV via HDMI TM**, Component or RGB (Set-Top Box
required), Computer 640x480, 800x6g0, 1024x768, 1280x1024, 192gx108g via RGB or
1920x1080 via HDMI, Built-in SRS (TruSurroundXT) Audio, Supports 1080P (Full HDTV), 1080i
(HDTV) , 720P (HDTV) , 480P (EDTV) and 480i (SDTV) video signals. 1080P FHDTV, HDMt
V.1.3, 120 Hz Motion Estimation & Motion Compensation, 3.0 channel audio, built-in Dolby
Digital Decoding,
upgradeable to 5.1 Dolby Surround sound speakers w/ wireless linked
subwoofer.
Speakers
3 x 10 W
Panel Life
50,000 hours to half the original brightness
Input
Voltage Range
100 ~ 240Vac at 50/60Hz
Power Consumption
400W
Operating
Temperature:
5 o C~35 o C, Relative Humidity: 20~80 0%, Altitude: 0~14,000 ft
Non-Operating
Temperature:
-20°C~50°C, Relative Humidity: 10~90%, Altitude: 0~40,000 ft
Dimensions
43.9" W x 29.7" H x 10" D with stand; 43.9" W x 28.1" H x 4" D without stand
Net Weight
62.41bs with stand, 56.91bs without stand
Gross Weight
77.81bs
Certifications
CSA, CSA-us, FCC class B
*Product
specifications
Version 6/2/2008
may change
without
notice or obligation.
81
www,VlZlO.com
VlZlO SV470XVT1A
6.8
Gtossar
v
- Standard
User Manual
Definit°lons
Analog TV: Today's TV system using radio frequency waves to transmit and display pictures and sound.
Aspect Ratio (4x3): Traditional TV "aspect ratio", that is, the screen's width as compared to its height.
For example, a '32 inch TV screen" would be 25 inches wide and 19 inches tall.
Aspect Ratio (16x9): "Wide screen TV" aspect ratio which is more like a movie screen than a traditional
TV. For example, a "32 inch TV screen" would be 28 inches wide and 16 inches tall.
Digital TV (DTV): Television delivered and displayed using radio frequency
information that is digitally encoded for improved quality and efficiency.
waves
that contain
Enhanced Definition TV (EDTV): A better digital television transmission than SDTV with at least 480P,
in a 16x9 or 4x3 display and Dolby digital surround sound. 480P is the quality used by most DVD players.
EDTV provides 300-400,000 pixels.
HDTV Monitor (sometimes called HDTV Ready): A set that can display HDTV programming if you have
a separate HDTV tuner, HD Cable Set-Top Box or HD Satellite Set-Top-Box Receiver.
HDTV Tuner (also decoder, receiver, set-top box): A device capable of receiving and outputting HDTV
signals for display. It may be stand-alone or integrated in the set.
High-Definition
Television (lIB'R/): The best quality picture, wide screen (16x9) display with at least
720 progressively scanned lines (72gP) or 1080 interlaced lines (1080i) and Dolby digital surround sound.
HDTV provides 900,000-2.1 million pixels.
Integrated HDTV: An HDTV that has the digital tuner built into the set. It does not need a separate settop box to receive over-the-air DTV signals.
Interlace Scan: A way to scan vertical lines onto a TV picture by scanning all the odd lines first, then
filling the in the even lines (this happens instantaneously).
Plug-and-Play
or Digital Cable Ready: A DTV or other device for digital cable consumers that plugs
directly into the cable jack and does not require a separate set-top box. Plug-and-Play TV owners must
obtain a CableCARD from their cable company in order to view scrambled programming services.
Progressive Scan: A way to scan vertical lines onto a TV picture by scanning all the lines consecutively
(progressively).
Standard Definition TV (SDTV): Basic digital television transmission that may be displayed with fewer
than 480 progressively scanned lines (480P) in 16 x 9 or 4 x 3 format. 480 interlaced (480i) is the quality
of today's analog TV system.
Source:BuyngaD:tta
reevsx_
CEA HDTVGui_e,
2005
_Sote: _he Fede_xs Commt _catons Commssor
(FCC} the Consume Electl'orcs Assocaton
(CEA)
and theCo_s me_ ElecbonicsReaiesCoal
on(CERC} _avemadea
_ewtpsheetava
abefordgtal
teievse i (DTV} [etaiers to eprod _ce and dstr bute to consun ers on the saes fog
The fe may be
down oaded on neatwww.dtv.qov
Whiey(
'ethe_xhcheckout
heothe
iseftx Fformato_ in theFCC
smakingavaiabietocons
mers nteresed nieamn 9mo_eab(:ut bea_aiogtodr_talb_nston
Version 6/2/2008
82
www.VlZlO.com
VlZlO SV470XVT1A
ndex
Advanced Video, 42
Backlight, 40
Brightness. 40
Color, 4t
Contrast, 41
Reset Pictme Mode. 45
Shaq)ness, 42
Tint. 41
DTV Special Featmes
Digital Closed Caption, 59
Input Naming, 58
Language, 55
PIP, 55
Reset, 66
Sleep Timer, 55, 57
Wide, 57
DTV Tuner Setup
Auto Search, 52
Daylight Saving, 54
MTS, 53
Pmlial Channel Search, 53
Skip Chaimel, 53
Time Zone, 54
Tuner Mode, 52
DVI
Connecting yottr Cable Box, 19
Connecting yore DVD Player, 24
Connecting yore Sa*ellite Box, t9
A
Accessories 5
A(tiustments
Closed Caption, 15
Selecting the Scleen Size, I5.37. 82
Stepping thlough TV Channels, 37
Vohnne, 10, 37, 77
Advanced Video Features
Black Level Extender, 42
Color Temperature (Color Temperarme, 43
CTI (Color Transient Iml)rovenlent, 43
DNR (Dynamic Noise Reduction, 42
Flesh Tone, 43
C
Cleaning your VIZIO TV, 77
Co-axial RF
Connecting tbr DTV, 21
Connecting for TV, 22
Component
Connecting yore Cable Box, 20
Connecting your DVD Player, 25
Connecting yore Satellite Box, 20
Composite (AV)
Connecting your DVD Player, 26, 27
Connecting yore VCR, 28
Connecting yore Video Camera, 28
Controls, 10
Side Panel, t0
G
GlossmT, 82
D
H
DTV
Audio A@lstment. 46
Parental Control, 61
Pictme Acliustment, 40
Special Features. 55
Tuner Setup, 52
DTV Audio Adjust
Equalizer, 46
DTV Audio Adjust
Volume, 46
DTV Audio Adjust
Balance, 46
DTV Audio Adjust
Digital Audio Out, 47
DTV Audio Adjust
Speakers, 47
DTV Audio Adjust
Line Out, 47
DTV Audio Adjust
Lip Sync, 47
DTV Audio Adjust
Reset Audio Mode, 51
DTV Pictme Adjust
Version 6/2/2008
HDMI
Connecting yore Cable Box, 18
Connecting your DVD Player, 23
Connecting yore Satellite Box, 18
HDMI Input
Audio A@tstment, 67
Pictme A@lstment, 67
Seialp, 67
I
Inputs
Ante_ma, 3
Connectors, 17
Side Label, 12
Installation
Base removal, 6
Preparation, 5
Safetey Stlap, 5
Wall Mounting, 5, 6, 32
83
www,VlZlO.corn
User Manual
VlZlOSV470XVT1A
UserManual
O
Tloubteshooting Guide. 77
TV
Audio Adjustment, 46
Parental Control, 61
Pictttre Adjustment, 40
Special Features, 55
TV Audio Adjust
Balance, 46
Digital Audio Out, 47
Equalizer, 46
Line Out. 47
Lip Sync, 47
Reset Audio Mode, 51
Speakers, 47
Volume, 46
TV Pictme Adjust
Advanced Video, 42
BackligN, 40
Brightness, 40
Color, 4t
Contrast, 41
Reset Pictme Mode, 45
Shatpness, 42
Tint. 41
TV Special Featmes
Closed Caption, 59
Input Naming, 58
Language, 55
PIP, 55
Reset, 66
Sleep Timer, 55, 57
Wide, 57
TV Tuner Setup, 52
Auto Search, 52
MTS, 53
Partial Channel Search. 53
Skip Chmmel. 53
Tuner Mode, 52
OSD
Brightness A@lstment, 81
Closed Caption Selection, 15
Color Adjustment, 17
Contrast Adiustment, 81
Outputs
Using 5.1 Surround with a Home Theatre System, 29
Using an external Receiver/Amp, 29
P
Parental Control
Block Unrated Proglallmfing, 65
Canadian English Rating, 63
Canadian French Rating, 64
Channel Block, 62
Check for New DTV Rating, 64
Movie Rating, 63
Password change, 65
TV Rating, 62
PC Input
Audio Adjustment, 72
Auto Adjust, 70
Pictttre Adjustment, 70
Seia_p, 72
PC Picture Adjust
Fine Tune, 71
H/V Position, 60
Horizontal Position, 60, 70
Horizontal Size, 60. 71
Vertical Position, 60, 70
PiP and POP Inputs, 74
R
Renlote
Batteries,
16
V
Range, 16
Remote Control
Proglanmfing
to work your DVD Player.
Connecting
Video Input
Audio A(liustment, 68
Auto Phase, 69
Parental Control, 69
Pictme A(liustment, 68
Setup, 68
76
Plogramming
to work yore Set-Top Box, 75
Proglamming
to WOlk your VCR, 75
Using your Cable or Satellite Remote to Operate
VIZIO TV, 76
RGB
your
yore PC, 30
W
S
Watching TV
Basic A@_stments, 37
Basic com_ections. 32
First Stalmp, 32
Getting your Programs, 36
Program Information, 38
Status Information, 38
Screen Size explanation, 73
S-Video
Connecting your DVD Player, 26, 27
T
Technical Specifications, 8t
Version 6/2/2008
84
www.VlZlO.corn
VlZlOSV470XVT1A
UserManual
VIZIO
LIMITED
PRODUCT WARRANTY
VIZlO provides a "ONE-YEARLIMITEDWARRANTY"against manufacturingdefects in materialsand workmanshipto the
original purchaserof a new VlZtO display purchasedfrom an authorizedVlZtO U.S. resellerand used in the fifty (50) United
Statesor PuertoRico.
VIZIO's
Responsibility
VtZlO displayspurchasednewfrom an authorizedVtZlO U.S.resellerand that are usedin the fifty (50) UnitedStatesor Puerto
Rico are warrantedto be free from manufacturingdefects in materialsand workmanshipfor one (t) year from the date d the
originalretailpurchase,tf the displayfails to conformto this limitedwarranty,VlZlOwill, at its optionand solediscretion,repair or
replacethe display.
Labor
Duringthe one-yearlimitedwarrantyperiod,VtZlO wilI provide,when needed,service labor to repair a manufacturingdefect.
Repairsrequiredon displayswhich are thirty(30) inchesand largergenerallywilI be made"on-site"wherethe displayis installed.
Thedeterminationfor performingthe on-siterepairis dependentuponthe manufacturingdefectand is at VIZlO'soptionand sole
discretion Repairsrequired on displayswhich are less than thirty (30) inches generallywilI be performedat a VIZlO service
center.
Parts
Repairsmay be madewithnew or recertifiedparts,or the entireunit may be replacedwith a newor recertifiedunit, at VtZlO's
optionand sole discretion.Replacementparts or replacementunits providedunder this timitedwarrantyare warrantedfor the
remainingportiond the originalwarrantyperiod,or for ninety(90)days from warrantyserviceor replacement,whicheveris later.
How to Obtain Warranty
Service
To obtainwarrantyservice,contactVlZlO TechnicalSupportvia emaiIat [email protected],
via phoneat 877-MYVtZtO
(877-698-4946),or via postal mail at VlZtO TechnicalSupport,39 Tesla, lrvine, CA 92618.You must providethe model,serial
number,and date d purchase.VlZlO TechnicalSupportis availablefrom 6:00AM to 9:00PM PacificTime, Monday through
Friday,and 8:00AM to 4:00PM PacificTime, Saturdayand Sunday. Pleasenote that holidayhours may vary. For up to date
information,pleasevisit www.VlZlO.com.
VtZlO reservesthe right to assess all warranty claims and to determineif defects or damagesare covered by this limited
warranty.Incase of a claimthat is not coveredby this warranty,you will be contactedto determinewhetherVtZtOshouldrepair
the damagefor a fee or whetherthe productshouldbe returnedto youas receivedbythe servicetechnicianor servicecenter.
Parts and service labor that are VtZtO's responsibilityunder this limited warranty wilt be providedwithout charge. All other
service is at the customer'sexpense.VlZlO reservesthe right to charge the customerfor any servicecall for anything not
coveredbythis limitedwarranty.Beforeyou ask for warrantyservice,pleasereviewyour User Manual.You mayavoid a service
calland a servicecharge.
Pleasereferto the reversesideof this pagefor additionalinformationregardinghowto obtainwarrantyservice.
PLEASE DONOTRETURNYOUR UNITTO VIZIOWITHOUTPRIORAUTHORIZATION.
Not Covered
This limitedwarrantydoesnot cover thefollowing: cosmeticdefects;damage,malfunctionsor failuresresultingfrom shippingor
transit,improperor faulty installation,abuse,operationcontraryto furnishedinstructions,operationon incorrectpowersupplies,
productsnot suppliedby VlZtO, modification,alteration,improperservicingor tampering;damagefrom fire, water, lightning,
powersurges,abnormalenvironmentalconditionsor otheracts of nature; normalwear and tear; unsatisfactoryvisualor audio
performancenot causedby a manufacturingdefect; or displayswith a missingor unreadableserial number.Operationof the
displayfor commercialpurposesor in applicationsor uses for which the display is not intendedis not coveredby this limited
warranty."ImageSticking",causedby static imageson thescreenfor extendedperiodsand or excessivebrightnessandcontrast
Version 6/2/2008
85
www,VlZlO.corn
VlZlO SV470XVT1A
User Manual
levels, is not coveredby this Iimitedwarranty. Installation,removal,transportationand reinstallationof a display,and routine
maintenanceand cleaning,are not coveredbythis limitedwarranty.
THERE ARE NO EXPRESS WARRANTIESOTHER THAN THOSE LISTED OR DESCRIBEDABOVE. ANY IMPLIED
WARRANTIES,INCLUDINGANY IMPLIED WARRANTYOF MERCHANTABILITYAND FITNESS FOR A PARTICULAR
PURPOSE,SHALLBE LIMITEDIN DURATIONTO THE PERIODOF TIME SET FORTHABOVE.VlZtO'S TOTAL LIABILITY
FOR ANY AND ALL LOSSES AND DAMAGES RESULTINGFROM ANY CAUSE WHATSOEVER,INCLUDINGVlZtO'S
NEGLIGENCE,ALLEGED DAMAGE,OR DEFECTIVEGOODS, WHETHERSUCH DEFECTSARE DISCOVERABLEOR
LATENT,SHALLtN NO EVENTEXCEEDTHE PURCHASEPRICEOFTHE DISPLAY.VtZlO SHALLNOT BE RESPONSIBLE
FOR LOSS OF USE, COMMERCIAL LOSS, LOST REVENUE OR LOST PROFITS, OR OTHER INCIDENTAL OR
CONSEQUENTIALDAMAGES.SOMESTATESDO NOT ALLOWLIMITATIONSON HOW LONGAN IMPLIEDWARRANTY
LASTS OR THE EXCLUSIONOR LIMITATIONOF INCIDENTALOR CONSEQUENTIALDAMAGES,SO THE ABOVE
LIMITATIONSOR EXCLUSIONSMAYNOTAPPLYTO YOU.
This warrantygives you specificlegal rights,and youmay also have otherrights,whichvary from stateto state. This is the only
warrantyapplicable;no one is authorizedto extendor modifyit or to grantany otherwarrantyon VtZlO'sbehalf.
Owner's Responsibility
To ensurewarrantyservice, keep the dated bill or sales receipt as evidence of the purchasedate and location.This limited
warrantyappliesonlyto originalpurchaserand is non-transferable.
Warrantyserviceconditionsare subjectto change. For the latestWarrantyTerms and Conditionsand additionalinformation
regardingVtZtO'sLimitedProductWarranty,pleaseseecompletedetailsonlineat www.VlZtO.com.
Version 6/2/2008
86
www,VlZlO.com
VlZlOSV470XVT1A
UserManual
VIZIO RETURNPOLICY
VtZlO'sreturnpolicyallowsfor productspurchaseddirectlyfrom VtZtO to be returnedby the originalpurchaserduringthe initial
thirty (30) day period following the date of purchase.A VtZtO returnauthorizationnumbermust first be obtainedas provided
below. The refundwill be the purchase priceactuallypaid by the purchaserless a ten percent(10%) restockingfee per each
item returned.Shippingand handlingare not refundable.
The return authorization number must first be obtained from VlZlO's Customer Service by emaiting
[email protected]
or by calling 949-428-2525,6:00AM to 9:00PM Pacific Time, Monday through Friday, and
10:00AMto 2:00PMPacificTime, Saturdayand Sunday.Pleasenote that holidayhours may vary. For up to date information,
pleasevisitwww.VtZtO.com.
Productsmust be returnedto the addressspecifiedby VIZlO CustomerServiceand must be shippedin the originalpackaging,
with freight prepaidto VIZlO, and must be receivedin new and unused condition.The return authorizationnumber must be
includedin the packaging.VIZlO reservesthe right to assess fees for any damagedor missing parts in additionto the ten
percent(10%)restockingfee.
Returnauthorizationnumbersare validfor only fifteen(15)days from issuance.Thecustomeris responsiblefor and mustprepay
all shippingchargesand shallassumeall risk of loss or damageto the productwhilein transitto VIZlO. If the productis returned
to VlZtO (i) withouta VIZlO returnauthorizationnumber,and/or(ii) beyondthe fifteen (15) day period,and/or(iii) withoutproper
packaging,VtZtO retains the right to refuse deliveryof such returnor may return the unit to the customerat the customer's
expenseand with no refundissued.This returnpolicydoes notapplyto defectiveproducts.Pleaseread VlZtO'sLimitedProduct
Warrantyfor warrantytermsandconditions.
On-Site
Warranty
and larger.
Repair
ON-SITE
WARRANTY
REPAIR
PROCEDURE
generally
is performed
on repairable
displays
which
are 30 inches
tf VlZlO TechnicalSupportdeterminesthat a problemwith a displayunitmay be within thetermsand conditionsof the VlZtO
LimitedProductWarrantyandthat an on-siterepairmay be performed,the customerwiIi be providedwith an on-siterepair
authorizationnumberand on-siterepairinstructions.The determinationfor performingtheon-site repairmay be dependentupon
the manufacturingdefectand is at VlZlO'soptionand solediscretion.Proofof purchaseis requiredto confirmthe productis
withinthe one-yearlimitedwarrantyperiodand meetsthe termsand conditionsof the VtZtOLimitedProductWarranty.
On-siterepairserviceis requestedthroughVlZlO'sthird-partyserviceprovider.After VlZlO providesthe customerwiththe onsite repair(OSR)authorizationnumber,the third-partyserviceproviderwill contactthe customerand will schedulethe repairat
the customer'slocation.Thetotal approximatetime for the repairprocess,which includesthe repairdiagnosis,dispatchingthe
technician,shippingthe replacementpart(s),and arrangingthe appointmentwith the customer,is completedwithin
approximately3 to 5 businessdays,pendingavailabilityof thesefactors.
If it is determinedthe productcannot be repairedon-site,thecustomerwill be requiredto shipthe unitto VlZlO's servicecenter,
per the belowwarrantyreplacementprocedure.
VIZlO is not responsibleforthe de-installationor re-installationof the product.However,some standardinstallationmay be
performedduringthe on-siterepair,at VlZtO'soptionand solediscretion.Pleaseread VtZlO'sLimitedProductWarrantyfor
warrantytermsand conditions.
WARRANTY
Warranty Replacement generally
economically unrepairable,
REPLACEMENT PROCEDURE
is performed
on displays which are determined
to be
If VtZlO TechnicalSupportdeterminesthat a problemwith a displayunitmay be within thetermsand conditionsof the VlZtO
LimitedProductWarrantyandthat a repair is noteconomicallypossible,basedon certainmanufacturingdefectsin materials
and/orworkmanship,and/orat VIZlO'soptionand solediscretion,the customerwill be providedwith a returnauthorization
numberand replacementinstructions.Proofof purchaseisrequiredto confirmthe productiswithin the one-yearlimitedwarranty
periodand meetsthe termsand conditionsof the VlZlO LimitedProductWarranty.
Version 6/2/2008
87
www,VlZlO.com
VlZlO SV470XVT1A
User Manual
Fordisplaysforty-twoinches(42")and larger,VtZtOwillgenerallycoverthe transportationchargesto performan on-siteswapof
the originalunitwith the replacementunit. Fordisplaysunderforty-twoinches(42"),the customeris responsiblefor the
transportationchargesto VlZtO'sservicecenter.VlZlOwill be responsiblefor the returntransportationchargesfrom the service
centerto the customer.Pleaseread VlZlO's LimitedProductWarrantyfor warrantytermsand conditions.
MAIL-IN
Mail-In
Warranty
Repair generally
WARRANTY
is performed
REPAIR PROCEDURE
on displays which are smaller than 30 inches.
tf VlZlO TechnicalSupportdeterminesthat a problemwith a displayunitmay be within thetermsand conditionsof the VlZlO
LimitedProductWarrantyandthat a mail-inrepairmay be performed,the customerwill be providedwith a returnauthorization
numberand mail-inrepairinstructions.Proofof purchaseis requiredto confirmthe productis withinthe one-yearlimited
warrantyperiodand meetsthe termsandconditionsof theVtZlO LimitedProductWarranty.
Thecustomerwilt be providedwith instructionsfor packingand shippingthe unitto the VlZlO servicecenter.The originalcarton
boxand packingmaterial,or an equivalentas designatedbyVtZlO,must be utilized.Thecost of shippingto VlZlO'sservice
centeris at the customer'sexpense.After the productis repairedandtested, theVtZlO servicecenterwill shipthe unitback to
the customerat VlZtO'sexpense.VlZtOis notresponsiblefor the de-installationor re-installationofthe product.Pleaseread
VtZlO'sLimitedProductWarrantyfor warrantytermsand conditions.
PLEASE DONOTRETURNYOUR UNITTO VlZlOWITHOUTPRIORAUTHORIZATION.
Version 6/2/2008
88
www,VlZlO.com
VlZlO SV470XVT1A
Componemb
ABS
Admiral
Proqram
Codes
458
ESA
445 446 447 448
460 525 539 551
543 549 553 569
Adventura
452 459
Citizen
Aiko
551 554
Colortyme
Colt
Aiwa
452 459 460 536
539 552 571 578
Akai
442 457 570
Alienware
America
Action
American
High
Amoisonic
Anam
Anam
National
Asha
458
552
539 548 550 551
Audio
Dynamics
Audiovox
Bang &
Otufsen
Beaumark
BelI& HowelI
443 579
446 460 539 551
567
527
445 550 560
444
451 482 487 526
537 549 552 558
Broksonic
Calix
Candle
Craig
443
523 546 562
562
Fisher
Fuii
Fujitsu
Funai
Cybernex
CyberPower
449 538 544 548
555 578
445 550 560
Daewoo
563
Davidson
459
DBX
443 579
Dell
458
Denon
575
DiamondVisi
on
520
Dimensia
441
DIRECTV
574
445 446 447 448
461 540
Dynatech
452 459
Emerex
449 538 555 572
Carver
547 561
CCE
441 445 449 524
538 544 550 555
GE
GeneraI
Changhong
CineVision
GoIdstar
443 446 448 460
539 540 549
Gradiente
Haoiie
Harley
Davidson
Harman/Kar
don
Headquarter
Hewtett
Packard
Hi-q
Version 6/2/2008
452 459 578
550
452 522
443 540 547 561
546 562
444
458
4S0
454 457 459 500
522 539 572 575
446 460 539
576
542 549 550 551
552 556 558 559
Emerson
542
495 507 560
Hitachi
500 512 515 525
526 538 539 541
543 547
505
560 569
Go Video
446 460 539
446 447 449 451
452 459 460 488
546 551 554 562
452 459 485 488
500 522 556 578
458
Howard
Computers
Canon
542
Gateway
Harwood
Durabrand
Electrophoni
c
442 449 538 555
458
447 451 452 505
525 542 551 554
Electrohome
444 450
452 459
559
446 460 539
470
Garrard
441 443 445 448
Curtis
Mathes
548
445 550 560
554
445 446 450 460
539 546 550 560
551 567
449 538 555
User Manual
573 577 578
89
www,VlZlO.com
HP
458
458
Hughes
Network
Systems
Humax
574 575
574
Hush
458
iBUYPOWER
458
Insignia
478 506
VlZlO SV470XVT1A
User Manual
Instant
Replay
449 572
444445446449
450452456459
538 548 555 557
564 565 572
460461462487
518521538539
460 524 538 539
540 550 555 560
443 444 445 446
JC Penney
JCL
Jensen
449 454 579
449
454 457
543 548 549 550
552553555560
443 444 448 457
465 475 476 496
JVC
542 545 579
KEC
460 539 551
Memorex
MGA
569 571
524 541 550 560
Penney
575 577
Pentax
454 575
Pentex
Research
PhiIco
MGN
Kenwood
KLH
Kodak
Kolin
443 444 448 457
540 545 579
546 562
446 449 460 538
539 555
541
446 478 480 506
539 540 542 549
LG
578
Linksys
458
Lloyd's
Logik
Technology
Microso£
Midland
453
Mind
458
Minolta
Magnasonic
454 466 541 545
569
Motorola
449 538 543 553
555 569
MTC
445 459 550 560
452 459 522
546 562
443 444 448 457
538 539 540 543
525 556
449 456 459 461
486 509 512 515
Newave
522 534 538 547
555 556 561 572
Niveus Media
Nikko
Noblex
Magnin
446 524 550 560
443 444 448 449
538547 555561
Marantz
Marta
Media Center
PC
MEI
449 538 552 555
572
449 488 499 509
534 538 547 555
PhiIips
561 572 574
PhiIips
Magnavox
Pilot
509
446 460 539
Pioneer
454 483 545 572
579
Polaroid
510 519
Polk Audio
547 561
Presidian
488
Profitronic
550 560
Proscan
441 544 572
Protec
546 562
Pulsar
456 461
Pye
485
545 579 580
Qisheng
544
539
Quarter
444
446 460 539
quartz
444
449 521 531 538
458
445 550 560
Quasar
548 555 572
Northgate
458
Radio Shack
446 459 522
Olympic
572
Olympus
449 538 555
Radio
Shack/Realis
tic
444 445 446 449
450 452
579 580
446 460 521 539
543 548 553 556
446 460 539
Optimus
Matsushita
445 452 453 459
546 562 578
446 460 539 578
NEC
Magnavox
454 575
Mitsubishi
MuItitech
LXI
445 550 560
458
448
449 538 548 555
Radix
446 460 539
Randex
446 460 539
557 569
Orion
462 526 549 552
558 559
Panasonic
449 463 479 481
497 514 521 531
441445 449454
501 503 524 533
458
449 538 555
Version 6/2/2008
90
www,VlZlO.com
538 544 550 560
RCA
569572 575
VlZlO SV470XVT1A
Stack
444 445 446 447
449 450 452 459
Stack 9
STS
ReaIi_ic
ReplayTV
Ricavision
460 538 539 543
553 555 569 578
Superscan
456 461
Sampo
539 543
Bansui
Banyo
Sco_
456 461 543 553
458
Tandy
444
445 550 560
Viewsonic
458
Villain
459
Voodoo
458
445 446 447 449
450 452 454 459
538 543 544 546
547 550 553 555
458
Tashiko
446 539
Tatung
457 542 545
Wards
We_inghous
e
560 561 562 569
575
562
White
We_inghous
e
500 546 549
549 552 558 579
Teac
452 457 459 578
444 445 450 511
Technics
449 538 548 555
565
XR-1000
449 452 459 538
546 555 562
524 550 560
447 451 541 542
559 563
Teco
538 539 540 543
Yamaha
443 444 448 457
540 579
Teknika
446 449 452 459
460 538 539 555
Thomas
459 522
538 539 555 575
578
Tivo
566 568 574 581
TMK
445 550 560 577
569
Shintom
442 546 562
Shogun
445 550 560
Signature
2000
578
Singer
Sonic Blue
449 546 562
564
447 454 458 469
474 490 494 498
442 455 458 459
464 467 471 472
473 489 492 522
535 538 555 568
Toshiba
513 530 541 542
545 563 566 581
Totevision
445 446 460 539
550 560
Zenith
549 552 558
ZT Group
458
ABS
Alienware
AT&T
410
410
398
Bang &
CyberPower
Dell
DIRECTV
458
413
410
410
399 400 401 402
405 408 411 414
416 417 418 421
422
Unitech
445 550 560
Vector
542 563
Dish
Network
406 407
443 447 540 579
Dishpro
Echostar
406
406 407
Vector
Research
Victor
443 545 579
576
Version 6/2/2008
442 456 459 461
470 478 522 526
Olu_en
Touch
Sony
Videosonic
522 556 578
Tagar
Sy_ems
468 485 502 516
529 543 549 553
Sharp
460 539
578
Systemax
444 446 449 450
454 459 460 522
Bears
Videomagic
512 515
517 528 542 550
560 563 570 574
457 459 462 484
487 522 526 545
579
452 459 488 500
Symphonic
569
443 447 542 563
449 575
532 538 541 547
555 556 561 572
Bylvania
Sanky
458
500 504 512515
445 447 453 477
491 493 495 508
Samsung
Video
Concepts
449 452 459 488
564
458
Runco
458
User Manual
91
www,VlZlO.corn
Expressvu
Gateway
406
410
VlZlO SV470XVT1A
GOI
Hewlett
Packard
HNS
Howard
Computers
HP
HTS
Hughes
Network
Systems
Humax
Hush
iBUYPOWER
JVC
Linksys
Media Center
PC
Microsoft
Mind
Niveus Media
Northgate
Panasonic
Philips
RCA
RepiayTV
Samsung
Sonic BIue
Sony
Stack 9
Sy_emax
Tagar
Systems
Tivo
Toshiba
Touch
UItimateTV
Viewsonic
Voodoo
ZT Group
User Manual
406
410
4O5
410
410
406
401 402405 408
414 416417 418
421 422
405 414
410
410
406 407414
410
410
410
410
410
410
398 420
402 405408 414
416 417 418 419
405 411 414 416
398 404 412
405 416 418
398 404 412
403 409 410 415
410
410
410
401 403405 409
414 415416 419
421 422423
410
410
411
410
410
410
Americast
Antronix
004 005
Archer
005
AT&T
042
Jerrotd
028 037 063 159
161 163 164
KNC
160
162
Bell & Howell
002
LG
Bell South
031
Magnavox
Memorex
012
013 026
Cable Vision
038 039
Monarch
058
Cabtetenna
004
Motorola
028 033 037 042
061 062 063 163
Cableview
003
Citizen
058
164
Movie Time
014 058
030
Multi Canal
058
ClearMax
030
Multitech
030
MultiVision
161
Colour Voice
007
CIearmaster
Comcast
040 061 063
NEC
002
NET Brazit
043
Novavision
049
NSC
014
Comtronics
058
Contec
053
CooImax
030
Pace
044 045 046 047
048 049 051
COX
063
Panasonic
023 026 034 160
Daeryung
049 160 165 168
Panther
166 167
Digi
Director
166 167
063 164
Paragon
026
006 007 012 015
Dumont
167
Philips
016 017
038 044 045 049
059 060 162
£verquest
Focus
027 058
029
Pioneer
Popular
Mechanics
GC
£iectronics
GE
029
005 058
Proscan
000 001
000 001
Pulsar
026 058
Gehua
164
Quasar
026
Gemini
008 027
General
001 025 028 037
040 063 159 163
Radio Shack
RCA
027 030
003 021 023 025
164
Realistic
005
Goldstar
058 059 162
Recoton
029
Hamlin
009 018 035
Regal
Hitachi
001
Iliico
038
Jasco
027
Instrument
Version 6/2/2008
001 002008 010
011 024025 027
031
92
www,VlZlO.com
009 018 035
Rembrandt
001
Rogers
Runco
038
026
VlZlO SV470XVT1A
Samsung
Scientific
Atlanta
058 059 060 162
038 042 044 045
046 049 050 051
Vortex View
Zenith
022 026 031 036
052 053 054 055
056 057 160 165
Zentek
029
030
Systems
131
Humax
138
IIo
106
Jerrotd
105
JVC
Signal
Signature
SL Marx
Sony
Sprucer
008 027 058
001
058
023
008 024 027 159
Stargate
008 027 058
Starquest
008 027
SupercabIe
028 163
Supermax
030
TeleView
058
TIME
WARNER
038 041
Timeless
058
097
Coolsat
135
CrossdigitaI
Toshiba
026
Trans PX
163
Tristar
030
114 115 116 118
121 122 123 125
008 027
TV86
014
Dish Network
United Cable
Universal
073 074 075 076
077 078 079 080
084 087 llO 124
149
Dishpro
Drake
087 110 149
098
Echostar
065 084 087 110
117 124 149
Expressvu
Freecom
Unika
126 127 128 130
131 132 133 156
GE
108 132
053
004 005
024
004 005
GeneraI
Instrument
099 105
GOI
110
GoldStar
151
030
Goodmans
146
Videotron
038
Grothusen
151
View Star
012 014
Hisense
106
Hitachi
111 150 158
030
Vision
030
Version 6/2/2008
Lenco
151
LG
Lorraine
HTS
Hughes
Network
094 151
151
Magnavox
Memorex
081 104 157
104
Mitsubishi
109 118 141
Motorola
105 112 153
Muratto
151
NEC
152
Next Levee
105
Panasonic
107 130 140
Pansat
134
Paysat
104
081 082 089 104
109 111 123 156
Philips
157
Pioneer
082
Primestar
101
Proscan
086 108 125
Proton
106
Radio Shack
105
085 089 090 096
108 119 120 121
RCA
Realistic
122 139 142 144
lOg
081 082 089 127
V2
Viewmaster
151
087 110 117
151
065 084 110 124
Kosmos
065 066 067 068
069 070 071 072
159
Tusa
147
081 082 083 085
086 088 089 094
095 096 104 107
108 109 111 113
010 161
159
U.S,
Electronics
137
Chaparral
DIRECTV
Torx
TS
CaptiveWorks
019 020
Starcom
Tocom
102
032 039
Standard
Component
Atphastar
User Manual
110
081 082 089 095
109 115 118 126
93
www,VlZlO.corn
Samsung
129 145
Sanyo
148
SatPartner
151
Sharp
Silva
143
151
SKY
153
083 088 091 092
Sony
113 128
Star Choice
105
VlZlOSV470XVT1A
UserManual
STS
103
Sylvania
064
Tivo
Toshiba
Triad
UItimateTV
Uniden
081 082 089
BOSE
174 345 353
Gradiente
001 183
BOSS
288
GreenhilI
017
Grundi_
012
Broksonic
168 259
109 111 131 154
California
Audio Labs
151
Harman/Kar
don
083 085
104 155 157
CambridgeSo
undWorks
Hitachi
138 361
083 159 196 278
310
Hiteker
015
iLive
393
IIo
299
001
382
US DigitaI
106
USDTV
106
Viewsat
136
Changhong
CineVision
Voom
105
Clarion
175
Insignia
021 072 250 380
Zenith
093 114 153
Classic
148 176 375
005 064 121 137
Integra
Irradio
013 023 426
231
Coby
Curtis
307 358
358
Curtis
Nathes
025
AcceIe Vision
100
Advent
004
CyberHome
Aiwa
312 439
Akai
168 319 320 323
Aico
003
Aiiegro
028
Denon
Alpine
160
Amphion
MediaWorks
Desay
DiamondVisi
on
167
AMW
167
Anaba
029
Cytron
Daewoo
Disney
DuaI
JVC
328 372 373
Jwin
033
Kawasaki
003
182
189 331 341
016 071
030
001 051 128 141
154 155 164 165
Kenwood
KLH
Konka
309 327
003 017 078 186
290
178
Lexicon
034
006
243
Eclipse
022
021 169
Fisher
170
Fun TV
031
Funai
LG
394
Liquid Video
007
016 021 248 263
Liteon
222 224 227 247
437
035
224 434 437
GE
011 017 060 104
Loewe
Go Video
054 113 159 224
279 280 282 285
Magnavox
Goldstar
285
Gateway
GPX
002 007 087 356
072 214 233 238
250 296 316 370
Lite-On
018
Version 6/2/2008
153 193 216 217
218 219 256 257
020
Aspire
Astar
013
014 057 065 082
084 120 146 147
Lenoxx
Enterprise
ESA
Blue Parade
005
Lasonic
019
017 095 287
Jensen
286
000 016 021 177
302 335 376
Arrgo
Blaupunkt
361
010
Emerson
Bang &
Otufsen
JBL
DVD2000
289
325
032
Koss
Apple
Axion
Jamo
019 044 430 431
432 435 436
322
077 277 440
001 051 096 119
131 374
017 299
020
Apex DigitaI
003 058 161 304
305 314 381
Initial
Durabrand
015
063
098
366
Audiovox
017 047 054
079 090 093
114 223 291
433
426 433
277
185 358 367
94
www,VlZlO.corn
000 009 012 016
021 045 061 086
226 252 264 273
299 302 335 349
VlZlO SV470XVT1A
364
Prima
326
Marantz
012 149 150 162
Princeton
037
Memorex
071 081 166 339
Proceed
015
Microsoft
011
Proscan
011 060 115
Mintek
Mitsubishi
NAD
017 161 299
010 074 092 099
129
179
Nesa
017
Next Base
024
Nexxtech
184
Norcent
qwe_ar
072 177
Nakamichi
Nissoho Iwai
Pye
031
Oppo
187 330
Optiview
Oritron
029
002 007
001 009 051 056
110 112 123 142
143 144 195 196
197 237 272 396
297 300 306 333
334 346 347 350
Panasonic
Philco
Philips
Technics
001 051
115 130 188 271
276 314 315 338
Techwood
173
Terapin
040
Rio
028
Theta Digital
013
014
Tivo
041
Sampo
168 194 199 200
201 209 210 211
221 225 232 239
251 258 267 269
212 213 215 228
229 230 245 254
270 281 282 337
351 354 363 390
255 266 293 294
298 303 332 377
397
Toshiba
Sansui
168 261 318
Tredex
042
Sanyo
170 246 284 378
Trutech
044
TView
029
Samsung
Sensory
Science
Sharp
224
016 069 080 118
220 241 242 262
275 313 336 383
428
105 107 127 134
135 157 191 202
Sherwood
384
Shinco
172
231 235 240 273
295 299 317 326
Shinsonic
008
Sigma
Designs
Sonic Blue
037
026 028
038 435
008 048 049 050
053 055 068 076
133 139 156 192
198 203 204 205
Pioneer
236 260 344 368
088 122 140 163
206 207 208 253
Polaroid
167 283 308 321
324 340 433
265 268 311 342
343 348 352 391
Urban
Concepts
009
V Inc.
424 425
Venturer
003 379
Vizio
043
Westinghous
e
301
Xbox
011
Yamaha
001 012 046 0S1
111 124 127 145
152 244 273 365
369
Zenith
009 072 125 249
250 285 359 370
ADC
049
Adcom
098 148
Admiral
075
181
ADS
076
000 335
039
Aiwa
048 114 133 164
Polk Audio
012
Sony
392
Portland
036
Sun,ale
Presidian
016
Superscan
SVA
Version 6/2/2008
009 045 062 066
070 106 109 126
180 427 428
001 073 103 136
158 159 190 196
Sharper
Image
013 059 075 085
089 094 108 132
Teac
016 081
003 161 424 429
438
002
003 011 013 017
052 060 067 101
009 012 016 045
061 081 091 102
356 360
Symphonic
263
302 329 335
Rotel
357 385 386 387
388 389 395
027
Sylvania
355
009 023 097 116
117 362 371 426
000 016 021 081
234 248 274 292
RCA
151 171
Onkyo
User Manual
95
www.VlZlO.corn
VlZlO SV470XVT1A
Akai
Atco
048 053 161 180
073
Glory Horse
058
GPX
Attec Lansing
Amphion
Media Works
Gradiente
072
Harman/Kar
don
059
069
192 200
166
048 055 145
Hitachi
060
AMW
059
iLive
224
Anam
052 074
Inkel
064
Apex
191
Insignia
210
Arcam
068
Integra
JBL
047
055 185
Jensen
078
Audiophase
Audiotronic
Audiovox
163
058 159 211
150
Bang &
Oiufsen
156
BOSE
Boston
Acoustics
165 174
162
049 051 085 088
096 099 129 132
Pioneer
140 168 193
Polaroid
158
Polk Audio
048 151
Proscan
306
Qisheog
305
Quasar
115
Radio Shack
069
Kenwood
056 090 091 094
101 103 116 122
Realistic
065
KLH
058
071
061
Koss
057 180
Regent
Rio
Lenoxx
071
054 195 223 227
RCA
Rotet
049 051 052 058
155 179 306
149
187 221 225 226
Samsung
230
048
Bansui
048
Lloyds
065
048 049 053 173
Sanyo
060 208
Magnavox
Marantz
189
048 053 152 154
Sharp
147 213
069
131 214
Linn
CambridgeSo
undWorks
Philips
Magnavox
184 202
JVC
LG
063
PhiIips
087 097 104 109
128 198 199
053
B& K
User Manual
212
MCS
066
Sharper
Image
Sherwood
065
Memorex
079
Silsonic
303
081
Mitsubishi
146
Sonic Blue
061
Clarinette
065
Modulaire
065
Classic
205
Nakamichi
045 046
Coby
182
Nexxtech
062
Creative
067
Curtis
200
Dell
070
Denon
102
120
139
203
Eclipse
153
Capetronic
049
Carver
048 053
Casio
CCE
Emerson
047 089 092 093
112 117 118 186
Onkyo
110 111 119
121 127 138
141 142 143
304
Optimus
Oritron
157 206
ESA
077
Fisher
060
Fonmix
304
Version 6/2/2008
Panasonic
Penney
Philco
082 083 084 086
100 106 107 108
113 124 125 167
171 178 188 222
Sony
231
197
Soundesign
050
Stereophonie
s
051
115 130 160 169
170 172 175 176
Sunfire
056
177 181 196 201
215 216 217 218
219 220 228 229
307
Symphonic
Teac
049 050 051 052
057
065
080
96
www,VlZlO.com
075
052 058
Technics
105 115 307
Thorens
053
Toshiba
204 207
VlZlOSV470XVT1A
UserManual
Venturer
058 209
Harman/Kar
don
Addison
497
004
Admiral
002 020 032 038
498
041 045
Victor
087
Wards
048 140
JBL
030
Advent
047 095 123 126
134 135 136 137
JVC
002
Adventura
Yamaha
Yorx
Zenith
144 190 194 303
065
054 183 195
Knoll
021
Adyson
508 509
Systems
Kreli
021
037
Agashi
508
Left Coast
004
Aiko
009 497 508 511
Logitech
022
Luxman
023
Aiwa
190 194 451 491
Marantz
004 041
Mark
Levinson
024
025 040
003 029 042 044
076 077 078 079
Accuphase
010
McIntosh
Acurus
011
Midland
026
Adcom
034
Nakamichi
308
Akai
Angstrom
012
NEC
005
Ataron
Aragon
011
Nikko
027
Alba
Audio Source
013
Onkyo
033
Atbatron
001
042
Aileron
012
America
Action
035
Amplivision
Amstrad
509
511
Amtron
011
BeI Canto
Design
014
Biamp
BOSE
015
003
California
Audio Labs
Cary Audio
Design
006
009
Optimus
Parasound
Philips
Pioneer
004
001 031
Polk Audio
004
RCA
001
Realistic
309
Sansui
309
Anam
Shure
005
Sony
029 044
Anam
Nationat
Chase
Technologies
Cinema
Sound
Classe
007
016
Soundesign
Soundmatter
s
000
043
017
Curtis
Mathes
001
Denon
035 036
Soundstream
028
Victor
002
Wards
000
Yamaha
DigitaI Audio
Control
008
Durabrand
018
Elan
019
Fosgate
GE
020
000
080 081 082 083
084 428 457 493
Version 6/2/2008
517
019
Acer
376
Acura
511
97
www,VlZlO.com
508 511
024 025 524
035 504 511 524
004 011 504
511
494 512
Anitech
511
Ansonic
511
005 006 029 071
082 083 084 298
AOC
888
508
Anglo
Anhua
032 038 039
Abex
507 508 511
329 493 496 497
498 502 505
Aolinpiya
517
Aotinpu
515
033 040 046 139
172 249 276 432
Apex Digital
526
VlZlO SV470XVT1A
Arcam
508 509
Astar
330
Carnivale
Astra
511
Carver
Asuka
508
Cascade
Atlantic
508
CCE
Atori
511
Celebrity
Celera
Audiosonic
029 082 083 493
031 527
ChangChen 9
Changfei
051 217 509
003 492
040
494 506 512 513
514 516 517 518
448 497 505
Aventura
034
Chan_feng
514 517
Awa
508
Changhai
514 516
Axion
453
Baile
516 517
506 513 516
Bang &
Otufsen
049
BaoHuaShi
517
Baoshenc_
514 516
Basic Line
511
Baysonic
035
506 513 514 516
Beiiing
BeIcor
517 518
329
Bell & Howell
002 013 521
Benq
Binatone
026 314 331
509
Boots
Bradford
509
011 035
040 501 514 516
Changhong
518
Chengdu
514
Ching Tai
497
Chun Yun
025 035 492 497
524
Chunfen9
516 517
Chung Hsin
Chunsun
035 495
514 516
Citizen
City
51i
035
508
Coby
446
Colortyme
Candle
493
Version 6/2/2008
CTX
209
Curtis
084
001 006 013 017
018 029 030 031
032 037 042 043
044 080 082 083
Curtis
Mathes
329 493 496 498
499 505 520 521
527
116 124 250 329
358 421 483 493
CMS
006 007 021 029
082 083 084 329
508
082 083 329 483
493 496 497
509
515 526
CS
Electronics
005 006 009 018
037 071 084 094
CME
Calling
011 015 035 511
006 007 009 011
017 018 029 042
511
514 516
Crown
214 459
084
Caihon 9
031 527
Cytron
Classic
220
CrosIey
507
CIatronic
byd:sign
011 035
Cinema
329
511
Craig
011 035
Brockwood
Bush
008 011
511
CXC
508
151 428 484 503
Contec/Cony
Cosmel
511
Britannia
035038081084
035 508 511
Cimline
Clarion
Broksonic
499 501 516 517
514 516
Audiovox
Baihua
Contec
511
511
011 035 037 274
290 310 328 442
Conrowa
User Manual
Colt
006 082 329
480
Daewoo
497 502 505 506
507 508 511 524
Dainichi
508
Dansai
508
Daytron
006 018 329 511
Dayu
Dell
Denon
Diamond
Commercial
Solutions
030 525
Concerto
006 329
Concorde
511
Condor
508
98
www,VlZlO.com
DiamondVisi
on
506 513
086 320
043 053 499
508
221 467 477
Dimensia
001
Dixi
511
VlZlO SV470XVT1A
DongBao
518
DongDa
516 518
Feiyue
Fenner
514 516
511
User Manual
Gradiente
082 218 510
Granada
509
511
Donghai
516
Fidelity
508
Grandin
DongHua
DTS
518
511
FIRST LINE
511
Grunpy
Haler
011 012 035
027 052
Dual Tec
509
Firstar
503
HaiHong
518
DuaI-Tec
511
Firstline
Dumont
Durabrand
028 171 329
027 034 035 038
210 502
Fisher
508 509
013 163 318 381
509 521
Formenti
508
508
Dwin
032
Formenti/Ph
eenix
Dynatech
ELECTRO
TECH
509
Fortress
082 498
Frontech
511
EIectroband
Electrograph
Electrohome
511
003 492
377
003 004 006 082
084 329
Element
334
Elin
508
Elite
385
Elta
508 511
Fuiitsu
012 361 369 370
Funai
011 012 034 035
113 380 479
Furl
Futuretech
Ganxin
Gateway
GBC
006 008 010 011
012 013 018 023
Emerson
521
Emprex
338
006 029 082 083
329 493
Envision
011 035
494 497 502 505
525
Geloso
511
General
Technic
511
ESA
034
GoldHand
508
Ether
493
Etron
511
Euroman
508
Europhon
508
FeiIang
516
Version 6/2/2008
Hampton
Hankook
508
035 493 502
Hanseatic
511
Hantarex
511
Harley
Davidson
479
Harman/Kar
don
Harvard
011 035
Havermy
032 498
HelloKitty
Hewlett
Packard
Goodmans
037 505
285 349 365 426
Higashi
508
Hinari
511
Hisense
319 499 501 523
526
006 008 043 095
101 141 173 181
186 200 227 279
329 353 360 389
390 400 411 412
479 493 497 499
Hitachi
GoIdstar
031 084 527
374
028 029 082 083
171 329 493
517
006 084 329 502
Helios
GibraIter
Feiyan
Hallmark
047 377 423
511
299
514 516
516
508
511
Epson
Feilu
Halhon 9
Halifax
HCM
092 108 111 139
329 416 481 493
GE
514 517
514
001 004 006 014
030 037 084 090
034 035 038 082
084 094 321 329
344 456 468 471
483 484 502 503
499
Haiyan
501 502 509
005 006 008 018
019 029 061 062
Hitch Fufian
071 082 083 084
329 482 493 502
Hongmei
498 514 516 517
508 509 511
Hongyan
514 517
085 285 340 365
426
509 511
99
www,VlZlO.corn
HP
514 517
VlZlOSV470XVT1A
UserManual
Huafa
Huanghaimei
Huanghe
499 516
514 516
516
Huangshan
514 5:1.6517
Huanyu
508 514 517
Huodateii
Hygashi
494 497 501 503
Kyoto
Lenco
508
511
Jensen
006 045 082 212
329
Lenoir
511
516
Huanglong
Huaqiang
Huari
Jean
517
499 517
494 512
Jiahua
494 512
JiaLiCai
516 517 518
Jinfeng
494 512 514
Jinque
514516 517
Jinta
508 511
508 509 511
ICeS
508
499 501 514 517
LG
496 502 508 511
524
Jinxing
527
Life
511
Juhua
514 517
Lifetec
511
Lihua
514
Lloyd's
479
Loewe
015
Logik
002
008 014 143 183
185 187 204 251
JVC
IIo
IMA
326 336 344 455
011
ImperiaI
Crown
506 513 517
Infinity
InFocus
015 031 527
425
IngersoI
Initial
511
455
Inno Hit
511
Innovation
511
064 065 066 071
270 284 438 493
516 517
508
Hyper
ICE
005 024 056 057
058 059 060 063
263 278 280 406
445 495 510
Kaige
514 516 517
Kaisui
508 509 511
Kamp
508
506 513 514 516
Kangli
517
Kangyi
KanLi
516 517
518
Karcher
511
Kawasho
003 006 329 508
Longiiang
Luxman
001 006 013 015
030 031 033 084
LXI
M Electronic
Magnafon
KEC
035
514 517
006 329
Magnasonic
501 502 521 527
509 511
508
082 084 483
210 213 215 222
006 007 015 029
Insignia
337
Inteq
028
Kenwood
006 029 082 083
084 329 463 493
Interbuy
511
Kingsley
KLH
508
040 046
114 128 130 134
162 175 179 256
InternationaI
508
Intervision
509
Kloss
Novabeam
011 021
Irradio
511
Kolin
035 495 500
298 324 329 379
404 435 455 465
ITS
508
Kongque
Konka
514 516 517
429
ITT
ITV
Janeil
JBL
511
511
JCB
511
021
011 018 029 035
051 082 083 493
015 031 527
001 005 006 007
014 017 018 019
JC Penney
Koyoda
KTV
KuaiIe
071 084 329
003 492
Version 6/2/2008
031 082083 084
Magnavox
468 479 489 493
527
Magnin
481
Magnum
511
M_e_ic
002
Manesth
509
509
006 015 029 031
082 083 307 329
516 517
494 506 512 513
Kuntun
514 517
Maran_
IO0
www,VlZlO.com
378 382 493 527
VlZlO SV470XVT1A
Mark
Matsui
508
005 006 017 029
042 071 082 083
509 511
Matsushita
036 504
Maxent
324 377
Media Center
085
Medion
511
Megapower
024 524
MTC
084 329 493 496
508
MuDan
494 512 514 516
517
MuItitech
011 035 051 508
509 511
Muttivision
Murphy
Megatron
Meile
M-Electronic
006 043 499 502
514 517
NAD
Memorex
521 528
Memphis
511
516 517
Nanshenq
National
514 517
494 522
004 005 006 029
071 082 083 309
NEC
Net-TV
329 378 493 494
495 501 502
315 377
Nicama_ic
508
Nikkai
508
Nikko
006 009 029 082
083 493 497 502
511
Newave
352 399 401 408
414 436 439 444
NobIiko
508
Mintek
455
Norcent
039 298 526
228 233 329 371
388 396 403 405
NTC
009 497
Nyon
Olevia
084
048 223 224 275
300
Onwa
011 035
Oppo
466
407 493 498 500
502 503 504
022 036 478 504
508
Optimus
520 521 528
024 025 524
Optoma
427
002
Optonica
020 032 498 519
Orion
010 023 038 210
484 503 511
Osaki
509
004 020 032 498
Version 6/2/2008
Panasonic
470 478 494 504
522 527 528
Panda
494 512 514 516
517
Pathe
Cinema
508
Pausa
511
029 030 033 042
082 083 481 482
497 498 502
014 018 019 028
030 171 494
Motorola
004 014 015 036
091 107 126 136
511
Midland
005 006 032 071
082 084 129 153
508 509 511
238 243 260 261
272 345 346 351
493 500 502
Microstar
Montgomery
Ward
Panama
508
006 022 033 501
502
New Tech
511
Monivision
508
145 182 202 229
232 234 235 237
005 006 029 071
082 083 329 481
Micrornaxx
Mivar
509
Pael
016
Nanbao
113 180 475 478
482 500 502 511
Mitsubishi
Otto Versand
508
002 005 006 013
036 038 071 084
MGA
User Manual
101
www,VlZlO.com
Penney
493 494 496 501
502
Perdio
508
004 005 006 007
008 015 029 031
071 082 083 084
180 329 493 502
PhiIco
527
PhiIips
004 007 008 015
031 093 115 125
128 131 144 149
150 160 164 165
166 169 177 178
179 189 196 199
203 205 208 236
241 242 244 268
VlZlO SV470XVT1A
Qingdao
286 291 313 329
344 350 418 437
455 489 492 493
494 497 502 527
134 144 164 175
179
Phoenix
508
PhonoIa
508
Pilot
018 029 082 083
329 493
502 521
Radio
Shack/Realis
tic
001 006 008 011
013 018 019 329
519
001 004 005 006
030 071 087 092
096 100 108 116
122 188 195 197
347 348 360 366
368 384 385 394
520
Plasmsync
378
Polaroid
Poppy
Portland
Price Club
Prima
511
005 006 009 018
071 084 329 497
017
045 216 219 462
511
308 323 329 354
359 364 393 402
454 485 493 496
497 501 502 508
509 511
Sandra
508
Saniian
517
023 038 097 210
428 450 461 479
Sansui
201 225 246 322
329 373 386 416
040 296 305 310
311 312 334 335
341 343 447 458
460 476
239 262 266 269
292 293 303 304
504
Radio Shack
006 022 089 098
226 230 240 329
Pioneer
133 137 140 159
168 174 184 207
013 029 030 035
082 083 479 493
115 125 128 131
Philips
Magnavox
512 514 517
004 014 036 126
202 414 478 494
Quasar
RCA
Realistic
013 154 163 318
329 381 481 499
Sanyo
501 508 521
Sanyuan
498 514 516
525
Sceptre
Scotch
342
006 502
013 029 035 082
083 493 502 521
508
Roadstar
511
Rowa
508 526
Runco
028 029 082 083
171 493
Princeton
024 524
Prism
014 494
Salve
514 516
Profex
511
Saisho
511
006 008 010 011
012 035 327 329
Scott
001 030 416 525
084 254 329 479
482 501 502 521
514
Prosonic
508 522
Protech
509 511
Proton
006 008 082 084
329 493 502
Protron
283 332
Proview
072 335
Pulsar
028 084 171 329
Pymi
Version
6/2/2008
006 018 019 029
082 083 211 252
Sears
Sencora
511
Serino
508
Samsung
005 006 008 017
018 019 029 042
044 051 071 080
082 083 084 121
Sharp
www,VlZlO.corn
508 509
035
Sampo
102
527
Semivox
316 329 377 493
497 498 502 524
511
502 503
001 006 012 013
030 031 033 034
SEG
Proscan
484
453 474 481 488
492 493 497 502
Rhapsody
Ruyi
User Manual
Shancha
514 517
Shanghai
514 516 517
Shaofenp
499 514
006 008 018 020
032 088 105 117
VlZlO SV470XVT1A
142 147157 191
193 198247253
257 258 259264
265 267 277281
SSS
Standard
Starlite
011 035 082 329
Studio
284 295 306 329
333 422 424 452
473 493 498 519
Technics
014 036 494 504
Techwood
006 014 082 329
494
Teco
054 494 497 498
502
509 511
011 035
Experience
Sunkai
025
511
Sunwood
511
Superla
508
User Manual
002 005 006 007
008 009 011 012
017 018 031 035
042 071 329 496
Shen Ying
Shencai
497
499 516 517
Superscan
032 073 468 471
Sheng Chia
032 498 503
SuperTech
508
Telefunken
Supra
511
Teletech
511
Teleton
509
Supre-Macy
021
Televideon
508
Tensai
511
ShengCai
518
Shenyang
Sherwood
514 516 517
516
Shogun
329
Supreme
Sutron
Signature
Silva
002
508
SVA
Silver
Simpson
082 084
Sydney
007 082 084
Skygiant
035
Skyworth
526
514517
Songbai
516
SongRi
518
Sonoko
511
Texet
508
Thomas
479
468 471 472 487
493 527
479
492 496 497 498
502 505
Syntax
275
248 255 271 282
288 355 356 357
SyntaxBrillian
254 275
Sytong
Tacico
508
497 502
Taishan
514 516
Tandy
Tashiko
020 032 498 509
497 508 509
449 479 490 492
511
Soundesign
035 084 329 502
Sowa
494 496 497 501
502
034
Version 6/2/2008
055 493
006 007 015 029
031 034 082 083
011 034 035 113
Symphonic
044 080
Tevion
Synco
006 007 011 012
Squareview
Sylvania
Tera
497 500 527
508
003 075 106 138
152 156 167 231
362 392 395 397
398 410 415 420
Sony
052 374 526
084 113 131 321
329 380 435 464
Skyworth--
RGB
003 492
511
Teknika
511
Tiane
498 514
TMK
006 082 084 329
502
TNCi
028
Tobo
516 517 526
Tokyo
508
Tongguang
517
013 017 033 042
099 102 103 104
109 110 112 118
120 123 127 135
146 155 158 170
176 206 297 302
351 378 387 391
409 413 417 428
004 047 325 383
494 496 501 509
430 431 433 434
Tatung
527
440 443469 486
TCM
511
Tec
509 511
103
www,VlZlO.com
Toshiba
496 499 501 521
VlZlO SV470XVT1A
Totevision
018
Transtec
508
Trutech
317
Tuntex
493 497
White
Westinghous
e
Xiahua
Xiangyang
038 084 094 508
514 516 517
517
TVS
038
Uttravox
508
Vector
Research
Xiangyu
Xihu
516
514 517
029 082 083 493
Xinaghai
516 517
Vexa
511
Victor
008 014 495 504
510
Xingfu
516
Yamaha
005 006 029 071
082 083 329 493
508
Yapshe
504
VideoIogique
508
Yinc_Ge
Yoko
516 518
508 509 511
VideoTechnic
508 509
Vidikron
031 527
Vidtech
005 006 071 329
502
VIDEOLOGIC
Yonggu
Youlanasi
516
514
Yousida
516
Yuhang
516
002 028 038 119
132 148 161 171
050 067 068 069
070 073 074 075
Viewsonic
324 377
Viking
021
Viore
326
Visiola
508
Vizio
Waltham
000 047 050 067
329 331 339
192 245 289 301
329 363 367 372
Zenith
375 400 419 479
484 497 502
Zhuhai
516
509
001 002 005 006
012 015 029 031
071 082 083 084
329 493 502 519
Wards
527
Warumaia
506 513
Watt Radio
508
Waycon
Weipai
Westinghous
e
033 501
516
037 050 067 273
287 294 441
Version 6/2/2008
104
www,VlZlO.com
User Manual