1
Network Guide
Please read this guide before operating this equipment.
After you finish reading this guide, store it in a safe place for future reference.
00_MFPNG.book 1 ページ 2000年4月26日 水曜日 午後5時11分
Network Guide
iR3250
00_MFPNG.book 2 ページ 2000年4月26日 水曜日 午後5時11分
Preface
Thank you for purchasing the Canon iR3250.
This manual describes the machine, its functions, and its methods of use. It also describes the
various precautions to be observed in order to ensure safe operation. Please read this manual
thoroughly before operating the machine in order to familiarise yourself with its capabilities, and to
make the most of its many functions. After reading this manual, store it in a safe place for future reference.
CAUTION:
In this manual, CAUTION MESSAGES with this
symbol indicate that neglecting the
suggested procedure or practice could result in personal injury.
NOTICE:
Considerable effort has been made to make sure that this manual is free of inaccuracies and
omissions. However, as we are constantly improving our products, some of the data contained
herein may not exactly reflect the current model of the particular product with which this manual
has been included. If you have a need for an exact specification, please contact Canon for the
current specification.
Copyright © 2000 Canon Inc. ALL RIGHTS RESERVED.
2
00_MFPNG.book 3 ページ 2000年4月26日 水曜日 午後5時11分
About Trademarks
Microsoft, MS-DOS, Windows, and Windows NT are registered trademarks of Microsoft Corporation
(US) in the U.S and other countries.
Apple, AppleTalk, EtherTalk, LocalTalk, Macintosh, and Power Macintosh are trademarks of Apple
Computer, Inc. (US).
Adobe, PostScript and PostScript 3 are trademarks of Adobe Systems Incorporated.
NetWare and Novell are registered trademarks, and IPX/SPX is a trademark of Novell Inc. (US),
©1996 Novell Inc., all rights reserved.
Ethernet is a trademark of Xerox Corporation (US).
UNIX is a registered trademark exclusively licensed to X/Open Company, Ltd. in the US and other
countries.
IBM is a trademark of International Business Machines Corporation (US).
Sun, Sun Microsystems, and SunOS are trademarks of Sun Microsystems (US) in the U.S. and
other countries.
Canon is a registered trademark and NetSpot is a trademark of Canon Inc.
Names of other companies or products appearing in this document are registered trademarks or
trademarks of the respective companies.
About Abbreviations
In this guide:
Microsoft® Windows® 95 is referred to as Windows 95.
Microsoft® Windows® 98 is referred to as Windows 98.
Microsoft® Windows NT® is referred to as Windows NT.
Microsoft® Windows® 2000 is referred to as Windows 2000.
About Trademarks
3
00_MFPNG.book 4 ページ 2000年4月26日 水曜日 午後5時11分
About the Manuals for the Machine
Printed Manual
Setup Guide
The Setup Guide gives a general overview of the machine, and also describes simple setup methods from the computer through producing printed output.
Online Manuals
User's Guide
The User’s Guide describes the principal functions and basic operations of the machine. Turn to this
User's Guide for general operating instructions.
Reference Guide
The Reference Guide describes how to set up and change various functions of the machine to suit
the user’s conditions and environment. For example, you can set the amount of time before the
machine goes into the sleep mode when unused, you can turn on and off various automatic features, and you can set up security features.
Maintenance Guide
The Maintenance Guide describes how to load paper and toner, clean the machine, remove paper
jams, and solve other hardware problems with the machine.
Remote UI User’s Guide
The Remote UI User’s Guide describes the main features of the Remote UI and how to change a
variety of settings using the Remote UI.
PostScript/PCL Reference Guide
The PostScript/PCL Reference Guide describes the basic uses of the machine’s printer functions,
as well as how to handle printing problems that may occur.
PCL Driver Guide
The PCL Driver Guide describes the main features of the printer functions, and tells you how to
change the factory print settings.
Network Guide (This Document)
This Network Guide describes settings for connecting the machine to a network for printing, as well
as e-mail/I-fax settings, and settings for sharing files sent from the machine to a network server.
Fax Reference Guide
The Fax Reference Guide describes the main features for sending and receiving faxes, and how to
change the factory settings for the fax functions.
4
About the Manuals for the Machine
00_MFPNG.book 5 ページ 2000年4月26日 水曜日 午後5時11分
How This Manual Is Organized
Chapter 1 Before You Start
Describes system and network environments required for using the machine on a network.
Chapter 2 Using a TCP/IP Network
Describes procedures for setting up the machine on a TCP/IP network.
Chapter 3 Using a NetWare Network (Windows)
Describes procedures for setting up the machine on a NetWare network.
Chapter 4 Using an AppleTalk Network
Describes procedures for setting up the machine on an AppleTalk network.
Chapter 5 Using the Network and Printer Settings with NetSpot
Describes how to use NetSpot software for network and printer management.
Chapter 6 Appendix
Describes troubleshooting procedures and methods for checking the machine's network settings,
provides lists of network menus accessed from the control panel, and lists the principal network
specifications of the machine.
How This Manual Is Organized
5
00_MFPNG.book 6 ページ 2000年4月26日 水曜日 午後5時11分
Table of Contents
About Trademarks . . . . . . . . . . . . . . . . . . . . . . . . . . . . . . . . . . . . . . . . . . . . . . . . . 3
About the Manuals for the Machine . . . . . . . . . . . . . . . . . . . . . . . . . . . . . . . . . . . 4
How This Manual Is Organized. . . . . . . . . . . . . . . . . . . . . . . . . . . . . . . . . . . . . . . 5
Table of Contents . . . . . . . . . . . . . . . . . . . . . . . . . . . . . . . . . . . . . . . . . . . . . . . . . 6
How to Use This Manual . . . . . . . . . . . . . . . . . . . . . . . . . . . . . . . . . . . . . . . . . . . . 9
Symbols Used in This Manual . . . . . . . . . . . . . . . . . . . . . . . . . . . . . . . . . . . . . 10
Chapter 1
Before You Start
System Environment Requirements . . . . . . . . . . . . . . . . . . . . . . . . . . . . . . . . .1-2
System Environment Requirements for Printing . . . . . . . . . . . . . . . . . . . . . . .1-2
System Environment Requirements for Using E-mail/I-Fax. . . . . . . . . . . . . . .1-3
System Environment Requirements for File Sharing . . . . . . . . . . . . . . . . . . . .1-3
Checking Your Network Environment . . . . . . . . . . . . . . . . . . . . . . . . . . . . . . . .1-4
Sample Windows 95/98/NT/2000 Network (With a NetWare Server) . . . . . . .1-4
Sample Windows 95/98/NT/2000 Network (Without a
NetWare Server) . . . . . . . . . . . . . . . . . . . . . . . . . . . . . . . . . . . . . . . . . . . . . . .1-5
Sample Macintosh Network . . . . . . . . . . . . . . . . . . . . . . . . . . . . . . . . . . . . . . .1-5
Sample UNIX Network . . . . . . . . . . . . . . . . . . . . . . . . . . . . . . . . . . . . . . . . . . .1-6
Using a Network With Various Types of Computers . . . . . . . . . . . . . . . . . . . .1-6
Chapter 2
Using a TCP/IP Network
TCP/IP Network Setup Operating Procedures . . . . . . . . . . . . . . . . . . . . . . . . .2-2
Setup Preparations . . . . . . . . . . . . . . . . . . . . . . . . . . . . . . . . . . . . . . . . . . . . .2-2
E-mail/I-Fax Settings . . . . . . . . . . . . . . . . . . . . . . . . . . . . . . . . . . . . . . . . . . . .2-2
Printing Settings. . . . . . . . . . . . . . . . . . . . . . . . . . . . . . . . . . . . . . . . . . . . . . . .2-3
File Sharing Settings . . . . . . . . . . . . . . . . . . . . . . . . . . . . . . . . . . . . . . . . . . . .2-3
Protocol Settings . . . . . . . . . . . . . . . . . . . . . . . . . . . . . . . . . . . . . . . . . . . . . . . . .2-5
Settings from the Control Panel . . . . . . . . . . . . . . . . . . . . . . . . . . . . . . . . . . . .2-5
Setting Up a Computer for Printing (Windows) . . . . . . . . . . . . . . . . . . . . . . .2-14
Connecting to a TCP/IP Network . . . . . . . . . . . . . . . . . . . . . . . . . . . . . . . . . .2-14
Installing the Printer Driver and Specifying the Printer
Destination Setting. . . . . . . . . . . . . . . . . . . . . . . . . . . . . . . . . . . . . . . . . . . . .2-14
Print Server Settings . . . . . . . . . . . . . . . . . . . . . . . . . . . . . . . . . . . . . . . . . . .2-22
Setting Up a Computer for Printing (UNIX) . . . . . . . . . . . . . . . . . . . . . . . . . . .2-23
File Sharing Settings . . . . . . . . . . . . . . . . . . . . . . . . . . . . . . . . . . . . . . . . . . . . .2-25
Using Windows 95/98 . . . . . . . . . . . . . . . . . . . . . . . . . . . . . . . . . . . . . . . . . .2-25
Using Windows NT 4.0 . . . . . . . . . . . . . . . . . . . . . . . . . . . . . . . . . . . . . . . . .2-28
Using Windows 2000 . . . . . . . . . . . . . . . . . . . . . . . . . . . . . . . . . . . . . . . . . . .2-36
Using UNIX . . . . . . . . . . . . . . . . . . . . . . . . . . . . . . . . . . . . . . . . . . . . . . . . . .2-43
6
Table of Contents
00_MFPNG.book 7 ページ 2000年4月26日 水曜日 午後5時11分
Chapter 3
Using a NetWare Network (Windows)
NetWare Network Setup Operating Procedures. . . . . . . . . . . . . . . . . . . . . . . . 3-2
Printing Settings . . . . . . . . . . . . . . . . . . . . . . . . . . . . . . . . . . . . . . . . . . . . . . . 3-2
File Sharing Settings . . . . . . . . . . . . . . . . . . . . . . . . . . . . . . . . . . . . . . . . . . . . 3-3
NetWare Print Service Settings . . . . . . . . . . . . . . . . . . . . . . . . . . . . . . . . . . . . . 3-4
Types of Print Service . . . . . . . . . . . . . . . . . . . . . . . . . . . . . . . . . . . . . . . . . . . 3-4
Setup Using NetWare Administrator . . . . . . . . . . . . . . . . . . . . . . . . . . . . . . . . 3-5
Setup Using PCONSOLE . . . . . . . . . . . . . . . . . . . . . . . . . . . . . . . . . . . . . . . . 3-6
Protocol Settings. . . . . . . . . . . . . . . . . . . . . . . . . . . . . . . . . . . . . . . . . . . . . . . . . 3-9
Settings from the Control Panel. . . . . . . . . . . . . . . . . . . . . . . . . . . . . . . . . . . . 3-9
Setting Up a Computer for Printing . . . . . . . . . . . . . . . . . . . . . . . . . . . . . . . . . 3-12
Connecting to a NetWare Network . . . . . . . . . . . . . . . . . . . . . . . . . . . . . . . . 3-12
Installing Printer Drivers . . . . . . . . . . . . . . . . . . . . . . . . . . . . . . . . . . . . . . . . 3-12
Setting the Printer Destination. . . . . . . . . . . . . . . . . . . . . . . . . . . . . . . . . . . . 3-12
File Sharing Settings. . . . . . . . . . . . . . . . . . . . . . . . . . . . . . . . . . . . . . . . . . . . . 3-13
Chapter 4
Using an AppleTalk Network
AppleTalk Network Setup Operating Procedures . . . . . . . . . . . . . . . . . . . . . . 4-2
Printing Setup . . . . . . . . . . . . . . . . . . . . . . . . . . . . . . . . . . . . . . . . . . . . . . . . . 4-2
Macintosh Network Settings . . . . . . . . . . . . . . . . . . . . . . . . . . . . . . . . . . . . . . . 4-3
Protocol Settings. . . . . . . . . . . . . . . . . . . . . . . . . . . . . . . . . . . . . . . . . . . . . . . . . 4-4
Settings from the Control Panel. . . . . . . . . . . . . . . . . . . . . . . . . . . . . . . . . . . . 4-4
Chapter 5
Using the Network and Printer Settings with NetSpot
Introduction . . . . . . . . . . . . . . . . . . . . . . . . . . . . . . . . . . . . . . . . . . . . . . . . . . . . . 5-2
Minimum Requirements. . . . . . . . . . . . . . . . . . . . . . . . . . . . . . . . . . . . . . . . . . 5-2
Related Documentation . . . . . . . . . . . . . . . . . . . . . . . . . . . . . . . . . . . . . . . . . . 5-3
Installing and Using NetSpot . . . . . . . . . . . . . . . . . . . . . . . . . . . . . . . . . . . . . . . 5-4
Installation (Windows 95/98/NT/2000). . . . . . . . . . . . . . . . . . . . . . . . . . . . . . . 5-4
Installation (Macintosh) . . . . . . . . . . . . . . . . . . . . . . . . . . . . . . . . . . . . . . . . . . 5-4
Installation (UNIX) . . . . . . . . . . . . . . . . . . . . . . . . . . . . . . . . . . . . . . . . . . . . . . 5-5
Configuration . . . . . . . . . . . . . . . . . . . . . . . . . . . . . . . . . . . . . . . . . . . . . . . . . . 5-6
Overview of Network Device Management . . . . . . . . . . . . . . . . . . . . . . . . . . . 5-6
Chapter 6
Appendix
Troubleshooting . . . . . . . . . . . . . . . . . . . . . . . . . . . . . . . . . . . . . . . . . . . . . . . . . 6-2
Printing Problems and Solutions . . . . . . . . . . . . . . . . . . . . . . . . . . . . . . . . . . . 6-2
File Sharing Problems and Solutions . . . . . . . . . . . . . . . . . . . . . . . . . . . . . . . 6-4
Control Panel Menu List . . . . . . . . . . . . . . . . . . . . . . . . . . . . . . . . . . . . . . . . . . . 6-7
To Confirm Settings . . . . . . . . . . . . . . . . . . . . . . . . . . . . . . . . . . . . . . . . . . . . . . 6-9
Specifications . . . . . . . . . . . . . . . . . . . . . . . . . . . . . . . . . . . . . . . . . . . . . . . . . . 6-10
Table of Contents
7
00_MFPNG.book 8 ページ 2000年4月26日 水曜日 午後5時11分
Hardware Specifications . . . . . . . . . . . . . . . . . . . . . . . . . . . . . . . . . . . . . . . .6-10
Software Specifications . . . . . . . . . . . . . . . . . . . . . . . . . . . . . . . . . . . . . . . . .6-10
Index . . . . . . . . . . . . . . . . . . . . . . . . . . . . . . . . . . . . . . . . . . . . . . . . . . . . . . . . . .6-11
8
Table of Contents
00_MFPNG.book 9 ページ 2000年4月26日 水曜日 午後5時11分
How to Use This Manual
This manual is organized as shown.
Main Heading
Numbered steps
describe how to set and
operate various
functions.
Cautionary
Information
Features (Special Features)
Operation
Instructions
Original
3 Making Copies Using Special
Chapter Heading
Copying Facing Pages onto Separate Pages (2-page Separation)
This feature enables you to copy facing pages in a book or magazine on separate sheets
of copy paper in a single step.
1
Provides supplementary
description of operations
or reference information.
Description of
Modes and
Operations
1
Making Copies of Facing Pages in a Book onto Two Separate
Copy Sheets in One Step (Two Page Separation)
Illustration provides
easy-to-understand
description of the
results of the
operation.
1 Place your original on the platen glass,
and press the [Special Features] key.
Sub-heading
IMPORTANT
¥
Two Page Separation mode cannot be combined with
the use of the Transparency Interleaving,
Image Combination, Image Separation, Two-sided
Copy, Booklet, and Multi-PG Enlarge modes.
¥
If you want to make copies in page order, begin copying
from the first pages and work your way forward.
¥
Place the original face down so that the original’s top
edge is against the back edge of the platen glass.
(See p. 2-20.)
Presents cautionary
information or warnings
related to operation.
Supplementary
Description
Copy
Illustration
NOTE
Shows key location,
status of operation, etc.
Reference
Page and chapter
numbers containing
related items are
provided.
3-2 Making Copies of Facing Pages in a Book onto Two Separate Copy Sheets in One Step (Two Page Separation)
The above page does not actually exist in this manual.
How to Use This Manual
9
00_MFPNG.book 10 ページ 2000年4月26日 水曜日 午後5時11分
Symbols Used in This Manual
IMPORTANT
NOTE
Indicates important items or prohibited actions that should always be
observed when operating the machine. These should always be read to
avoid damage to the machine or improper operation.
Indicates items for reference or supplementary information that should
be noted by users.
Key names are shown in this manual as follows:
Control panel keys..................
Start
Touch panel display keys.......... [OK]
10
How to Use This Manual
key
00_MFPNG.book 1 ページ 2000年4月26日 水曜日 午後5時11分
1
CH APTER
This chapter describes what you need to know before you start using the machine, including the
network environments the machine is compatible with, and how to check the network environment
you are using.
1
System Environment Requirements. . . . . . . . . . . . . . . . . . . . . . . . . . . . . . . . . . . . . . . . . 1-2
System Environment Requirements for Printing . . . . . . . . . . . . . . . . . . . . . . . . . . . . . 1-2
System Environment Requirements for Using E-mail/I-Fax . . . . . . . . . . . . . . . . . . . . . 1-3
System Environment Requirements for File Sharing . . . . . . . . . . . . . . . . . . . . . . . . . . 1-3
Before You Start
Before You Start
Checking Your Network Environment . . . . . . . . . . . . . . . . . . . . . . . . . . . . . . . . . . . . . . . . 1-4
Sample Windows 95/98/NT/2000 Network (With a NetWare Server) . . . . . . . . . . . . . 1-4
Sample Windows 95/98/NT/2000 Network (Without a NetWare Server) . . . . . . . . . . . 1-5
Sample Macintosh Network. . . . . . . . . . . . . . . . . . . . . . . . . . . . . . . . . . . . . . . . . . . . . 1-5
Sample UNIX Network. . . . . . . . . . . . . . . . . . . . . . . . . . . . . . . . . . . . . . . . . . . . . . . . . 1-6
Using a Network With Various Types of Computers . . . . . . . . . . . . . . . . . . . . . . . . . . 1-6
1-1
00_MFPNG.book 2 ページ 2000年4月26日 水曜日 午後5時11分
System Environment Requirements
System Environment Requirements for Printing
● Printing using a TCP/IP network:
Compatible OS:
Microsoft Windows 95/98
Microsoft Windows NT Server 4.0
Microsoft Windows NT Workstation 4.0
Microsoft Windows 2000 Server
Microsoft Windows 2000 Professional
1
Before You Start
The following network and system environments are compatible when printing with the machine.
Solaris Version 1.1x (SunOS Version 4.1x) or later
Solaris Version 2.5x (SunOS Version 5.5x) or later
Compatible computers:
Windows 95/98/NT/2000; IBM PC/compatibles
● Printing using a NetWare network:
Compatible servers:
Novell NetWare Version 3.2/4.1/4.11/4.2/5
Compatible clients:
Microsoft Windows 95/98
Microsoft Windows NT Server 4.0
Microsoft Windows NT Workstation 4.0
Microsoft Windows 2000 Server
Microsoft Windows 2000 Professional
Compatible computers:
IBM PC/compatibles
● Printing using an AppleTalk network:
Compatible AppleTalk:
EtherTalk Phase2
For more information on the OS and computers supported, see the Setup Guide.
IMPORTANT
• If you are using Windows NT 4.0, you will need to install Service Pack 5 or later.
• The machine does not support Macintosh LocalTalk networks.
1-2
System Environment Requirements
00_MFPNG.book 3 ページ 2000年4月26日 水曜日 午後5時11分
System Environment Requirements for Using E-mail/I-Fax
Sendmail 8.9.3
Microsoft Exchange Server 5.5 + SP2
Lotus Domino R5
Compatible mail receiving server software:
qpopper 2.43
Microsoft Exchange Server 5.5 + SP2
Lotus Domino R5
1
Compatible mail forwarding server software:
Before You Start
● The following system environment is required for using the e-mail/I-fax functions.
The machine sends e-mail/I-fax messages to mail servers using the SMTP protocol.
The machine can receive incoming e-mail/I-fax messages from a mail server using the POP3 protocol or directly using the machine’s own SMTP receiving function.
If the latter method is used, it is not necessary for the mail server to support the POP3 protocol.
System Environment Requirements for File Sharing
The following network and system environments apply when using the machine both to send documents to a file server and to share files, depending on the type of network used.
● Using a NetWare network:
Compatible server:
Novell NetWare Version 3.2/4.11/4.2/5
Compatible protocol:
IPX
IMPORTANT
• When using a NetWare 3.x server, it is necessary to support long file names.
● Using a NetBIOS network (File Sharing for Windows):
Compatible servers:
Microsoft Windows 95/98
Microsoft Windows NT Server 4.0
Microsoft Windows NT Workstation 4.0
Microsoft Windows 2000 Server
Microsoft Windows 2000 Professional
Compatible protocol:
NetBIOS over TCP/IP (NetBT)
● Using FTP:
Compatible servers:
Compatible protocol:
Microsoft Windows NT Server 4.0 and Internet Information Server 4.0
Microsoft Windows 2000 Server and Internet Information Server 5.0
Solaris Version 2.6 or later
TCP/IP
IMPORTANT
• If you are using Windows NT 4.0, you need to install Service Pack 5 or later.
System Environment Requirements
1-3
00_MFPNG.book 4 ページ 2000年4月26日 水曜日 午後5時11分
Checking Your Network Environment
Sample Windows 95/98/NT/2000 Network (With a NetWare
Server)
Windows 95
Windows 98
Windows NT
1
Before You Start
Refer to the following diagram example to confirm the network environment that is connected to the
machine, and then perform the necessary operations.
Protocol: NetWare, TCP/IP
NetWare Server
iR3250
In a network environment like the one above, either NetWare or TCP/IP protocol can be used for
printing or file sharing. Multiple protocols can also be used at the same time.
Depending on the protocol, see either “Using a TCP/IP Network,” on p. 2-1 or “Using a NetWare Network (Windows),” on p. 3-1.
The use of e-mail or I-fax functions require the TCP/IP protocol. (See “Using a TCP/IP Network,” on
p. 2-1.)
1-4
Checking Your Network Environment
00_MFPNG.book 5 ページ 2000年4月26日 水曜日 午後5時11分
Sample Windows 95/98/NT/2000 Network (Without a
NetWare Server)
Windows 98
Windows NT
Before You Start
Windows 95
1
Protocol: TCP/IP
iR3250
In a network environment like the one above, the TCP/IP protocol can be used. (See “Using a TCP/
IP Network,” on p. 2-1.)
Sample Macintosh Network
Macintosh
Protocol: AppleTalk
iR3250
In a network environment like the one above, the AppleTalk (EtherTalk) protocol is used for printing.
(See “Using an AppleTalk Network,” on p. 4-1.)
The use of e-mail or I-fax functions requires the TCP/IP protocol. (See “Using a TCP/IP Network,” on
p. 2-1.)
Checking Your Network Environment
1-5
00_MFPNG.book 6 ページ 2000年4月26日 水曜日 午後5時11分
Sample UNIX Network
Solaris (Sun OS)
Before You Start
Protocol: TCP/IP
1
iR3250
With UNIX computers, the TCP/IP protocol is used. (See “Using a TCP/IP Network,” on p. 2-1.)
Using a Network With Various Types of Computers
Windows
Macintosh
Protocol: TCP/IP, NetWare, AppleTalk
NetWare Server
iR3250
When there are various types of computers on the network, network operations depend on the type
of computer being used.
For example, if Windows 98 and Macintosh computers are used, you will need to enter the settings
described in both the “Sample Windows 95/98/NT/2000 Network” and “Sample Macintosh Network”
sections.
The use of e-mail or I-fax functions requires the TCP/IP protocol. (See “Using a TCP/IP Network,” on
p. 2-1.)
1-6
Checking Your Network Environment
00_MFPNG.book 1 ページ 2000年4月26日 水曜日 午後5時11分
2
Using a TCP/IP Network
CH APTER
This chapter describes the settings and procedures necessary to connect and use the machine
with a TCP/IP network.
Using a TCP/IP Network
TCP/IP Network Setup Operating Procedures. . . . . . . . . . . . . . . . . . . . . . . . . . . . . . . . . 2-2
Setup Preparations . . . . . . . . . . . . . . . . . . . . . . . . . . . . . . . . . . . . . . . . . . . . . . . . . . . 2-2
E-mail/I-Fax Settings . . . . . . . . . . . . . . . . . . . . . . . . . . . . . . . . . . . . . . . . . . . . . . . . . . 2-2
Printing Settings . . . . . . . . . . . . . . . . . . . . . . . . . . . . . . . . . . . . . . . . . . . . . . . . . . . . . 2-3
File Sharing Settings . . . . . . . . . . . . . . . . . . . . . . . . . . . . . . . . . . . . . . . . . . . . . . . . . . 2-3
Protocol Settings . . . . . . . . . . . . . . . . . . . . . . . . . . . . . . . . . . . . . . . . . . . . . . . . . . . . . . . 2-5
Settings from the Control Panel . . . . . . . . . . . . . . . . . . . . . . . . . . . . . . . . . . . . . . . . . . 2-5
2
Setting Up a Computer for Printing (Windows) . . . . . . . . . . . . . . . . . . . . . . . . . . . . . . . 2-14
Connecting to a TCP/IP Network. . . . . . . . . . . . . . . . . . . . . . . . . . . . . . . . . . . . . . . . 2-14
Installing the Printer Driver and Specifying the Printer Destination Setting . . . . . . . 2-14
Print Server Settings . . . . . . . . . . . . . . . . . . . . . . . . . . . . . . . . . . . . . . . . . . . . . . . . . 2-22
Setting Up a Computer for Printing (UNIX) . . . . . . . . . . . . . . . . . . . . . . . . . . . . . . . . . . 2-23
File Sharing Settings . . . . . . . . . . . . . . . . . . . . . . . . . . . . . . . . . . . . . . . . . . . . . . . . . . . 2-25
Using Windows 95/98 . . . . . . . . . . . . . . . . . . . . . . . . . . . . . . . . . . . . . . . . . . . . . . . . 2-25
Using Windows NT 4.0 . . . . . . . . . . . . . . . . . . . . . . . . . . . . . . . . . . . . . . . . . . . . . . . 2-28
Using Windows 2000. . . . . . . . . . . . . . . . . . . . . . . . . . . . . . . . . . . . . . . . . . . . . . . . . 2-36
Using UNIX . . . . . . . . . . . . . . . . . . . . . . . . . . . . . . . . . . . . . . . . . . . . . . . . . . . . . . . . 2-43
2-1
00_MFPNG.book 2 ページ 2000年4月26日 水曜日 午後5時11分
TCP/IP Network Setup Operating Procedures
To use a TCP/IP network, it is first necessary to enter the Ethernet driver settings and IP address
settings. You also need to enter e-mail/I-fax settings, as well as settings for printing and file sharing if
necessary.
Setup Preparations
These settings are entered from the control panel of the machine. You can also use the Remote UI
to change the values of these settings.
IMPORTANT
• It is recommended that a network manager enters Ethernet driver and IP address settings.
1
Enter the Ethernet driver settings.
(See “Setting Up the Ethernet Driver,” on p. 2-5.)
2
Using a TCP/IP Network
Ethernet driver and IP address settings.
2
Enter the IP address settings.
(See “Setting the IP Address,” on p. 2-7.)
E-mail/I-Fax Settings
The following operations are necessary to enter e-mail/I-fax settings.
E-mail/I-fax settings for the machine can be entered from the control panel or the Remote UI. Use
whichever is more convenient. (The Remote UI enables you to enter a variety of settings for the
machine from a computer with a web browser.) For instructions on using the Remote UI, see the
Remote UI User’s Guide.
IMPORTANT
• It is recommended that a network manager enters the e-mail/I-fax settings.
1
E-mail/I-Fax settings.
(See “Entering E-mail and I-Fax Settings,” on p. 2-11.)
2-2
TCP/IP Network Setup Operating Procedures
00_MFPNG.book 3 ページ 2000年4月26日 水曜日 午後5時11分
Printing Settings
The following operations are necessary to enter printing settings.
1
Computer settings for printing.
Enter settings for each computer you use for printing.
File Sharing Settings
The following settings are necessary to send files to servers, and to share files on servers over a
network.
IMPORTANT
• It is recommended that a network manager enters the e-mail/I-fax settings.
1
Computer settings (File Sharing Settings).
●
●
●
●
Using Windows 95/98 (See “Using Windows 95/98,” on p. 2-25.)
Using Windows NT (See “Using Windows NT 4.0,” on p. 2-28.)
Using Windows 2000 (See “Using Windows 2000,” on p. 2-36.)
Using UNIX (See “Using UNIX,” on p. 2-43.)
TCP/IP Network Setup Operating Procedures
2-3
2
NOTE
• The machine’s Salutation Print Functional Unit enables you to do the following:
- Manage print jobs sent to the machine from a personal computer. This enables you to view job lists, cancel jobs, etc.
- Notify a personal computer about the status of the machine. This enables the machine to send information about installed optional equipment, low paper levels, etc.
• The use of the Salutation Print Functional Unit requires Ethernet driver and IP address settings. (See
“Protocol Settings,” on p. 2-5.) The use of the Salutation Print Functional Unit also requires Salutationcompatible software such as IBM NuOffice. For the necessary Salutation software and computer settings,
see the manuals provided with the respective products. Also, this Print Functional Unit may be affected by
limitations from Salutation-compatible software. (See the related manuals.)
Using a TCP/IP Network
● Using Windows
(See “Setting Up a Computer for Printing (Windows),” on p. 2-14.)
● Using UNIX
(See “Setting Up a Computer for Printing (UNIX),” on p. 2-23.)
00_MFPNG.book 4 ページ 2000年4月26日 水曜日 午後5時11分
2
The machine’s Settings (File Recipient Address Settings).
2
Using a TCP/IP Network
Recipient address settings for the machine can be entered from the control panel or the
Remote UI. Use whichever is more convenient. (The Remote UI enables you to enter a
variety of settings for the machine from a computer with a web browser.) For instructions on
using the Remote UI, see the Remote UI User’s Guide. For instructions on using the control
panel, see the User’s Guide.
2-4
TCP/IP Network Setup Operating Procedures
00_MFPNG.book 5 ページ 2000年4月26日 水曜日 午後5時11分
Protocol Settings
This section describes how to enter Ethernet driver settings, IP address settings, and e-mail/I-fax
settings.
These settings can be entered by either of the following methods:
The machine’s control panel
The Remote UI
IMPORTANT
• Settings entered from the control panel become enabled after the machine is restarted (with the power
switches).
• For details about entering characters using the touch panel display, see the User’s Guide.
Setting Up the Ethernet Driver
1
Press the
2
Press the [System Settings] key.
Additional
Functions
key.
IMPORTANT
• If the message “Enter the System Manager ID and Password using the numeric
keys” appears in the touch panel display,
enter the System Manager ID and password. For instructions on entering the System Manager ID and password, see the
User's Guide.
Protocol Settings
2-5
2
Settings from the Control Panel
Using a TCP/IP Network
NOTE
• The Remote UI enables you to enter a variety of settings for the machine from a computer with a web
browser. For instructions on using the Remote UI, see the Remote UI User’s Guide.
• You can also specify IP address settings using NetSpot. For instructions on entering settings using
NetSpot, see Chapter 5, “Network and Printer Settings Using Netspot.”
00_MFPNG.book 6 ページ 2000年4月26日 水曜日 午後5時11分
4
Press the [Network Settings] key.
Press the [Ethernet Driver Settings]
key.
2
Using a TCP/IP Network
3
5
Select Auto Detect [On] or [Off].
● If [On] is selected
Determines the communication mode
(Half duplex/Full duplex) and Ethernet
type (10 Base-T/100 Base-TX)
automatically. Go to step 8.
● If [Off] is selected
Enables you to enter the
communication mode (Half duplex/Full
duplex), and Ethernet type (10 Base-T/
100 Base-TX) manually. Go to step 6.
NOTE
• The factory setting is [On]. Use the [Off]
setting to specify a particular Ethernet setting.
2-6
Protocol Settings
00_MFPNG.book 7 ページ 2000年4月26日 水曜日 午後5時11分
6
Select the Communication Mode.
Select the appropriate communication mode for your network environment.
● When [Half Duplex] is selected
Sending and receiving is alternated.
● When [Full Duplex] is selected
Sending and receiving is simultaneous.
7
Select the Ethernet Type.
Using a TCP/IP Network
Select the appropriate Ethernet type for your network environment.
● When [10 Base-T] is selected
The network is compatible with 10 Base-T connections.
● When [100 Base-TX] is selected
The network is compatible with 100 Base-TX connections.
8
Confirm the settings you entered and press the [OK] key.
2
The display returns to the Network Settings screen.
Continue to the next section and set the IP address.
Setting the IP Address
NOTE
• When settings are made using DHCP, BOOTP, or RARP, the setting values will appear on the TCP/IP Settings screen after the machine is restarted. (If the IP address, host name, and domain name have been
set previously, these will be overwritten by the settings made using DHCP, BOOTP, or RARP.)
1
Press the
2
Press the [System Settings] key.
Additional
Functions
key.
IMPORTANT
• If the message “Enter the System Manager ID and Password using the numeric
keys” appears in the touch panel display,
enter the System Manager ID and password. For instructions on entering the System Manager ID and password, see the
User's Guide.
Protocol Settings
2-7
3
Press the [Network Settings] key.
4
Press the [TCP/IP Settings] key.
2
Using a TCP/IP Network
00_MFPNG.book 8 ページ 2000年4月26日 水曜日 午後5時11分
2-8
Protocol Settings
00_MFPNG.book 9 ページ 2000年4月26日 水曜日 午後5時11分
Enter the address settings.
Enter the address settings using the
keypad on the control panel.
IMPORTANT
Using a TCP/IP Network
• For information on entering characters
using the touch panel display, see the
User's Guide.
• Only one of the DHCP, BOOTP, or RARP
settings can be checked at one time.
• Even when using the DHCP, BOOTP, and
RARP settings, you should enter an IP
Address, Subnet Mask, and Gateway
Address. If this information cannot be
obtained from the DHCP, BOOTP, or
RARP server, the settings entered from
the control panel are used.
• When using DHCP, it is recommended
that identical IP address be assigned to
the machine at all times. (If the identical IP
address is not assigned, the machine’s
host name cannot be related to the
machine’s IP address.)
• It takes about two minutes to check
whether the DHCP, BOOTP, or RARP settings can be used. If you do not plan to
use one of these settings, it is recommended that you turn them off.
2
5
● Using a fixed IP address
Press the [IP Address] key, and enter
the IP address using the keypad.
● Using DHCP
Press the [Enable DHCP] key. Enter
the IP Address, Subnet Mask, and
Gateway Address. (If this information
cannot be obtained by the DHCP, the
settings entered from the control panel
are used.)
● Using RARP
Press the [Enable RARP] key. Enter
the IP Address, Subnet Mask, and
Gateway Address. (If this information
cannot be obtained by the RARP, the
settings entered from the control panel
are used.)
Protocol Settings
2-9
00_MFPNG.book 10 ページ 2000年4月27日 木曜日 午前10時17分
● Using BOOTP
Press the [Enable BOOTP]. Enter the
IP Address, Subnet Mask, and
Gateway Address. (If this information
cannot be obtained by the BOOTP, the
settings entered from the control panel
are used.)
Enter the DNS Server.
If you are using a DNS server, press the [DNS Server] key and enter the address of the
DNS server.
7
Enter the Host Name and Domain Name.
For the Host Name, press the [Host Name] key and enter the name of your machine. For
the Domain Name, press the [Domain Name] key and enter the domain name of the
network to which your machine belongs. Each name can be up to 47 characters in length.
● Example
Host name: host_name
Domain name: organization.company.com
2
Using a TCP/IP Network
6
8
Confirm the settings you entered, and press the [OK] key.
The display returns to the Network Settings screen.
9
Press the [Done] key.
Repeat until the Additional Functions screen closes.
10
Restart the machine.
Turn the printer unit power switch, the scanner unit power switch, and the control panel
power switch to OFF, and then turn the power to ON after waiting at least 3 seconds.
NOTE
• If you are entering additional e-mail/I-fax settings, you do not need to restart the machine at this
point. Finish entering the e-mail/I-fax settings, and then restart the machine.
The settings are now complete.
2-10
Protocol Settings
00_MFPNG.book 11 ページ 2000年4月26日 水曜日 午後5時11分
Entering E-mail and I-Fax Settings
1
Press the
2
Press the [System Settings] key.
Additional
Functions
key.
IMPORTANT
Press the [Network Settings] key.
4
Press the [E-mail/I-Fax] key.
2
3
Using a TCP/IP Network
• If the message “Enter the System Manager ID and Password using the numeric
keys” appears in the touch panel display,
enter the System Manager ID and password. For instructions on entering the System Manager ID and password, see the
User's Guide.
Protocol Settings
2-11
00_MFPNG.book 12 ページ 2000年4月26日 水曜日 午後5時11分
5
Enter the SMTP Server settings.
Press the [SMTP Server] key to enter a
SMTP server IP address or name. Up to
48 characters can be entered.
● Example
IP address: 192.168.1.1
Name:
mail_server.organization.company.com
6
Enter the E-mail Address.
To send and receive e-mail and I-faxes, it is necessary to enter the address of your
machine. Press the [E-mail Address] key, then enter the address up to 64 characters.
Your machine supports both SMTP and POP3 functions. To receive using SMTP, you need
to register the host name of your machine with the DNS server and then enter the host
name after the “@” symbol in the e-mail address.
2
Using a TCP/IP Network
IMPORTANT
• IP Address segments of less than three
digits should not be filled with leading
zeroes (do not enter as 001, 023, etc.).
● Example
To receive e-mail/I-fax messages using POP3:
account1@pop_server.organization.company.com
(In this example the name of the POP server is “pop_server.organization.company.com”)
To receive e-mail/I-fax messages using SMTP:
account1@host_name.organization.company.com
(In this example the host name of the machine registered with the DNS server is
“host_name.organization.company.com”)
If you are receiving e-mail/I-fax messages by SMTP, go to step 11.
7
Enter the POP Server for directly receiving e-mail and I-faxes.
If you want to use a POP Server to receive e-mail and I-faxes, press the [POP Server] key
and enter a POP Server IP address or name. Up to 48 characters can be entered.
● Example
IP address: 192.168.1.1
Name: pop_server.organization.company.com
IMPORTANT
• IP Address segments of less than three digits should not be filled with leading zeroes (do not
enter as 001, 023, etc.).
2-12
Protocol Settings
00_MFPNG.book 13 ページ 2000年4月26日 水曜日 午後5時11分
8
Enter the POP Address.
If you want to use a POP Server to receive e-mail and I-faxes, press the [POP Address] key,
and enter the POP address. Up to 32 characters can be entered.
● Example
account1
9
Enter the POP Password.
10
Using a TCP/IP Network
If you want to use a POP Server to receive e-mail and I-faxes, press the [POP Password]
key, and enter the password for access to the POP Server. Up to 32 characters can be
entered.
Enter the POP interval.
If you want to use a POP Server to receive e-mail and I-faxes, enter the time interval at
which you want the POP Server to check for incoming mail. Press the [-] and [+] keys to set
the POP interval. If the interval is set to 0, the POP Server is not checked. The interval can
be set from 1 to 99 minutes.
2
IMPORTANT
• The machine cannot be used to manually check the POP Server for incoming mail. To receive
using the POP server, the interval must be set to a value other than “0.”
11
Confirm the settings you entered and press the [OK] key.
12
Press the [Done] key.
Repeat until the Additional Functions screen closes.
13
Restart the machine.
Turn the printer unit power switch, the scanner unit power switch, and the control panel
power switch to OFF, and then turn the power to ON after waiting at least 3 seconds.
The protocol settings are now complete.
Protocol Settings
2-13
00_MFPNG.book 14 ページ 2000年4月26日 水曜日 午後5時11分
Setting Up a Computer for Printing (Windows)
After you have completed the protocol settings, you are ready to set up each of the computers for
printing.
Connecting to a TCP/IP Network
Installing the Printer Driver and Specifying the Printer
Destination Setting
To print from a computer you must install a printer driver and enter a setting for the printer destination. The printer destination setting differs depending on the print application used for printing. Use
the following information as a guide to determine the print application you are using, and then perform the necessary operations.
2
Using a TCP/IP Network
All computers that use the machine for printing must have TCP/IP client software installed and
must be enabled for TCP/IP network use. For details, refer to the manuals provided with the operating system.
NOTE
• When using Windows NT or Windows 2000 over a network, you can set up the print servers to enable
more efficient management of network printers. To set up Windows NT or Windows 2000, install the
printer driver first, then setup the printer servers settings. For setting instructions, see “Print Server Settings,” on p. 2-22.
LPD
This is the print application generally used with TCP/IP. Refer to the following to install the printer
driver and to enter the printer destination setting.
Windows 95/98:
(See “LPD Settings (Windows 95/98),” on p. 2-15.)
Windows NT:
(See “LPD Settings (Windows NT),” on p. 2-16.)
Windows 2000:
(See “LPD/RAW Settings (Windows 2000),” on p. 2-18.)
RAW
This is a print application used with Windows 2000. It can print at higher speeds than LPD. Refer to
the following to install the printer driver and to enter the printer destination setting.
“LPD/RAW Settings (Windows 2000)” (See p. 2-18.)
IPP
This is a print application that can be used with Windows 95/98/2000. It uses the http protocol to
print using internet/intranet connections. Refer to the following to install the printer driver and enter
the printer destination setting.
2-14
Setting Up a Computer for Printing (Windows)
00_MFPNG.book 15 ページ 2000年4月26日 水曜日 午後5時11分
Windows95/98:
(See “IPP Settings (Windows 95/98),” on p. 2-20)
Windows 2000:
(See “IPP Settings (Windows 2000),” on p. 2-21)
IMPORTANT
• When printing on the machine using IPP, the Pause Printing and Cancel All Documents settings on the
Printer menu in the Windows print queue cannot be used. (To view the print queue, use the Start menu,
select Settings-Printers, and double-click on the machine’s icon.)
1
Install the printer driver.
If you are using PCL, refer to the PCL Driver Guide for installation instructions.
If you are using PostScript, refer to the Setup Guide for installation instructions.
When the dialog box for selecting the printer destination appears, select Local printer. (Do not
select a Network printer.)
The Port selection can be changed after installation. You can select any port, such as LPT1.
Install the LPR Port Utility from the CD-ROM supplied with the machine.
2
2
● Insert the PostScript/PCL User Software CD-ROM supplied with the machine into the CDROM drive.
● Double-click the My Computer icon.
● Double-click the CD-ROM drive icon.
● Double-click the LPRPORT folder.
● Double-click the Setup icon. (In some environments this icon will appear as Setup.exe.)
● The Install program will start. Follow the instructions to install the LPR Port Utility.
3
Open the Printer Properties dialog box.
● On the Start menu, select Settings and then Printers.
● Right-click the printer icon you want to use for printing.
● Select Properties from the pop-up menu.
Setting Up a Computer for Printing (Windows)
Using a TCP/IP Network
LPD Settings (Windows 95/98)
2-15
00_MFPNG.book 16 ページ 2000年4月26日 水曜日 午後5時11分
4
Enter the Spool settings.
● Click Details tab to open the Details
sheet.
● Click the Spool Settings button to open
the Spool Settings dialog box.
● Select the “spool print jobs so programme finishes printing faster” option.
5
Enter the Port settings.
● Click the Add Port button to open the
Add Port dialog box.
2
Using a TCP/IP Network
● Click the OK button.
● Select the Other option button.
● Under the type of port you want to add:,
select CANON LPR Port, and then click
the OK button.
● The Adding LPR printer dialog box
opens. Enter the IP address of the network printer and click the OK button.
6
Click the OK button to enable the settings.
The printer destination settings are now complete.
LPD Settings (Windows NT)
1
Check that Microsoft Windows TCP/IP Printing is installed.
● Right-click the Network Neighborhood icon on the screen, and select Properties.
● Click Services tab to open the Services sheet.
● If the Network Services list does not include Microsoft TCP/IP Printing, proceed to step 2,
otherwise skip to step 3.
2-16
Setting Up a Computer for Printing (Windows)
00_MFPNG.book 17 ページ 2000年4月26日 水曜日 午後5時11分
2
If Microsoft TCP/IP Printing is not
installed, you will need to install it.
● Click the Add... button.
● Select Microsoft TCP/IP Printing from the
Network Services list box, and then click
the OK button.
● When prompted to insert the Windows
NT setup disk, insert the disk and continue.
Using a TCP/IP Network
● After the files have been copied, the Network dialog box appears. Click the OK
button.
3
2
● Click the Restart button to restart Windows NT.
Install the printer driver.
If you are using PCL, refer to the PCL Driver Guide for installation instructions.
If you are using PostScript, refer to the Setup Guide for installation instructions.
When the dialog box for selecting the printer destination appears, select My Computer. (Do
not select a Network printer server.)
The Port selection can be changed after installation. You can select any port, such as LPT1.
4
Open the Printer Properties dialog box.
● From the Start menu, select Settings and then Printers.
● Right-click the printer icon you want to use for printing.
● Select Properties from the pop-up menu.
Setting Up a Computer for Printing (Windows)
2-17
00_MFPNG.book 18 ページ 2000年4月26日 水曜日 午後5時11分
5
Set up the printing destination.
● Click Ports tab to open the Ports sheet.
● Click the Add Port... button to open the
Printer Port dialog box.
2
Using a TCP/IP Network
● Select LPR Port and click the New Port
button.
● The Add LPR compatible printer dialog
box will open. Enter the IP address and
printer name “lp” for the network printer,
and click the OK button.
6
Click the OK button to enable the settings.
The printer destination settings are now complete.
LPD/RAW Settings (Windows 2000)
1
Install the printer driver.
If you are using PCL, refer to the PCL Driver Guide for installation instructions.
If you are using PostScript, refer to the Setup Guide for installation instructions.
When the dialog box for selecting the printer destination appears, select Local printer and
remove the check mark next to Automatically detect and install Plug and Play printer. (Do
not select a Network printer.)
The Port selection can be changed after installation. You can select any port, such as LPT1.
2
Open the Printer Properties dialog box.
● From the Start menu, select Settings and then Printers.
● Right-click the icon of the printer you want to use for printing.
● From the pop-up menu, select Properties.
2-18
Setting Up a Computer for Printing (Windows)
00_MFPNG.book 19 ページ 2000年4月26日 水曜日 午後5時11分
3
Set up the printing destination.
● Click Ports tab to open the Ports sheet.
● Click the Add Port... button to open the
Printer Ports dialog box.
● From the Available Printer Ports Types
list box, select Standard TCP/IP Port,
and click the New Port... button.
Using a TCP/IP Network
● The Add Standard TCP/IP Printer Port
Wizard will open. Click the Next button.
● In the Printer Name or IP Address
space enter the printer IP address, and
click the Next button.
● If the computer has confirmed that
there is a printer at the IP address you
entered, the Exit Add Standard TCP/IP
Printer Port Wizard window will open.
Click the Done button.
2
● If you see a window called the Additional Port Information Required, follow
the instructions on the screen to search
again or select the device type Standard-Canon Network Printing Device
with P9100, and click the Next button to
exit the Wizard.
● Click the Close button to close the
Printer Port dialog box.
4
If you are using LPD, it is necessary to
change the port configuration information.
(This is not necessary if you are using
RAW.)
● Click the Configure Port... button.
● Under Protocol, select LPR, and under
LPR Settings set Queue Name to the
printer name, “Ip”, and then click the
OK button.
Setting Up a Computer for Printing (Windows)
2-19
00_MFPNG.book 20 ページ 2000年4月26日 水曜日 午後5時11分
5
Click the OK button to enter the settings.
The printer destination settings are now complete.
IPP Settings (Windows 95/98)
Using a TCP/IP Network
2
2
1
3
Install the IPP Client software for Windows 95/98 provided by Microsoft, and restart
your computer.
Install the printer driver.
If you are using PCL, refer to the PCL Driver Guide for installation instructions.
If you are using PostScript, refer to the Setup Guide for installation instructions.
When the dialog box for selecting the printer destination appears, select Local printer. (Do
not select a Network printer.)
The Port selection can be changed after installation. You can select any port, such as LPT1.
Open the Printer Driver Properties dialog box.
● From the Start menu, select Setup-Printers.
● Right-click the icon of the printer you want to use for printing.
● From the pop-up menu, select Properties.
4
Enter the port settings.
● Click Details tab to open the Details
sheet.
● Click the Add Port... button to open the
Add Port dialog box.
● Select the Network option button.
● In the Specify the Network Path to the
Printer space, enter the following URL,
and then click the OK button.
http://<the machine’s IP address>/ipp
5
Click the OK button to enable the settings.
The printer destination settings are now complete.
2-20
Setting Up a Computer for Printing (Windows)
00_MFPNG.book 21 ページ 2000年4月26日 水曜日 午後5時11分
IPP Settings (Windows 2000)
1
Open the Add Printer Wizard.
● From the Start menu, select Settings and then Printers.
● Double-click the Add Printer icon.
2
Enter the URL of your machine.
● Click the Next button.
Using a TCP/IP Network
● A dialog box opens for selecting the
printer connection method. Select Network Printer and click the Next button.
● The Locate Your Printer dialog box
opens. Select Connect to a printer on
the Internet or on your intranet, enter
the following URL in the URL space,
and then click the Next button.
2
http://<the machine's IP address>/ipp
● A dialog box opens for selecting the
printer manufacturer and printer name.
Click the Have Disk… button and specify the folder on the CD-ROM that contains the printer driver.
3
Follow the instructions on the screen to complete the installation.
The printer destination settings are now complete.
Setting Up a Computer for Printing (Windows)
2-21
00_MFPNG.book 22 ページ 2000年4月26日 水曜日 午後5時11分
Print Server Settings
The following procedure enables you to set up Windows NT or Windows 2000 as a print server for
more efficient management of network printers. Once the print server is set up, print jobs can be
managed by the print server. Also, by setting up an alternate driver for the print server, printer drivers can be installed in each computer via the network.
1
In the Printer Driver Properties dialog
box, open the Sharing sheet.
Using a TCP/IP Network
● From the Start menu, select Settings and
then select Printers.
● Right-click the icon of the printer you
want to use for printing.
2
● From the pop-up menu, select Sharing.
2
Enter the Sharing settings.
● Select the Shared option button and
enter a share name.
● In the Alternate Drivers list box (the Additional Drivers... button if you use Windows 2000), select the printer driver
name you want to install.
● Click the OK button. When the alternate
driver is installed, a window will open to
enter the location of the file containing
the printer driver. Insert the CD-ROM
supplied with the machine and select the
folder containing the printer driver.
IMPORTANT
• When using Windows NT, the use of the alternate driver function requires the installation of
the Windows NT Service Pack 5 or later.
The shared printer settings are now complete.
To install the printer driver on another computer, use the Printer Wizard window for selecting the
printer destination, select Network printer, and then select the shared printer for the computer
selected in the print server.
2-22
Setting Up a Computer for Printing (Windows)
00_MFPNG.book 23 ページ 2000年4月26日 水曜日 午後5時11分
Setting Up a Computer for Printing (UNIX)
After you have completed the protocol settings, you are ready to set up each of the computers for
printing.
NOTE
• The machine supports the LPD print application for printing over TCP/IP networks.
1
Log on to a workstation as a superuser.
2
Set up the printer host name. Add the following line to the /etc/hosts file.
Using a TCP/IP Network
Computer Settings
<IP address> <Printer host name>
3
2
Example:
192.168.1.21 printer_host_name
Set up the spooling system.
● Example using Solaris 1.x
Add the following to the /etc/printcap file settings:
<Print queue name>|<comment>:\
lp=<device special file>:\
:sd=<spool directory>:\
:rm=<printer host name>:
Input example:
print_queue_name|comments:\
lp=/var/spool/print_queue_name/.null:\
:sd=/var/spool/print_queue_name:\
:rm=printer_host_name:
● Example using Solaris 2.x
Start the admintool utility.
Select Browse → Printers
Select Edit → Add, Select Access to Printer...
Printer Name, Print Server: enter the desired print queue name and the host name of the
printer from step 2.
Click the OK button.
NOTE
• The admintool utility belongs to the operating system. For specific operating instructions, refer to the
operating system manual.
• The above procedures are only examples. The setup procedures for your environment will differ.
Setting Up a Computer for Printing (UNIX)
2-23
00_MFPNG.book 24 ページ 2000年4月26日 水曜日 午後5時11分
The host computer settings are now complete.
Test Printing
Print a test file to check that the settings have been completed correctly.
1
Execute the following command.
2
Using a TCP/IP Network
● Using Solaris 1.x:
Ipr -P<print queue name> <print file name>
Input example: Ipr -Pprint_queue_name textfile
● Using Solaris 2.x:
lp -d<print queue name> <print file name>
Input example: Ip -dprint_queue_name textfile
2-24
Setting Up a Computer for Printing (UNIX)
00_MFPNG.book 25 ページ 2000年4月26日 水曜日 午後5時11分
File Sharing Settings
This section explains how to set up a computer on your network as a file sharing server.
These settings enable you to send files from your machine to the file sharing server.
IMPORTANT
IMPORTANT
• The machine is not compatible with the NetBIOS scope ID. Do not set up a scope ID on the file sharing
server.
NOTE
• When using Windows NT or Windows 2000 on a network, it is recommended that these settings be made
on a file server.
1
Right-click the Network Neighborhood
icon on the screen, and then select
Properties.
● In The following network components
are installed column, confirm that both
Client for Microsoft Networks and File
and printer sharing for Microsoft Networks appear in the list box. For Windows 95, confirm that Microsoft
Network Client appears. If not, click the
Add... button and install these components.
● Click the File and Print Sharing... button, select “I want to be able to give others access to my files,” and click the OK
button.
File Sharing Settings
2-25
2
Using Windows 95/98
Using a TCP/IP Network
• This section describes procedures for entering file sharing settings on the server side only. To send files
from the machine to a server on the network, you must enter an address setting from either the control
panel or the Remote UI. For instructions on using the control panel, see the User’s Guide. For instructions
on using the Remote UI, see the Remote UI User’s Guide.
00_MFPNG.book 26 ページ 2000年4月26日 水曜日 午後5時11分
● In the Network dialog box, open the
Identification sheet, and confirm the
Computer name.
2
Using a TCP/IP Network
● Click the OK button to close the Network dialog box.
2
Set up File Sharing.
● Select the folder you want to share
using Explorer, then right-click and
select Sharing... from the pop-up menu.
● On the Sharing sheet, click the Shared
As option button, and enter the Share
Name.
● For Access Type, select either Full or
Depends on Password.
● Enter a password. If Depends on Password is selected, enter the password for
Full access.
● Confirm the settings you entered, and
click the OK button.
File sharing settings are now complete.
2-26
File Sharing Settings
00_MFPNG.book 27 ページ 2000年4月26日 水曜日 午後5時11分
You are now ready to set up the recipients for files sent from the machine.
Recipient address settings for the machine can be entered from the control panel or the Remote UI.
Use whichever is more convenient. (By using the Remote UI you can set recipient addresses from
your personal computer.) For instructions on using the control panel, see the User’s Guide. For
instructions on using the Remote UI, see the Remote UI User’s Guide.
2
Using a TCP/IP Network
The following items are needed to enter a recipient address:
Sample recipient setting:
● Server side settings
Computer name: swan
Share Name: share
Create a folder called Images within Share, and specify Images as the recipient for sending.
● The machine’s recipient settings
Protocol: Windows (SMB)
Host Name: \\swan\share
File Path: \images (if no file path is specified, enter \)
User: Do not enter.
Password: Password entered in step 2.
IMPORTANT
• The machine’s Host Name must be the computer name. It is not possible to use the IP address
instead of the computer name. Also, it is not possible to use the host@domain name (example:
[email protected]) in the setting.
File Sharing Settings
2-27
00_MFPNG.book 28 ページ 2000年4月26日 水曜日 午後5時11分
Using Windows NT 4.0
You can use Windows NT 4.0 in two different ways, using file sharing on a NetBIOS network (Windows File Sharing), or using a Windows NT Server as an FTP server.
IMPORTANT
• It is recommended that Windows NT Server settings be entered by a network manager.
File Sharing Settings on a NetBIOS Network
NOTE
• A Windows NT Server can be accessed by a limited number of users or clients. Once this limit is reached,
it is not possible to send to a Windows NT Server.
1
Right-click the Network Neighborhood
icon on the screen, and select Properties.
● Click the Services tab, and confirm that
NetBIOS Interface and Server appear
in the Network Services list box. If not,
click the Add... button to install them.
2
Using a TCP/IP Network
IMPORTANT
• The machine does not recognise the NetBIOS scope ID. Do not set up the scope ID on the file sharing
server.
2-28
File Sharing Settings
00_MFPNG.book 29 ページ 2000年4月26日 水曜日 午後5時11分
● Click the Protocols tab, and confirm that
TCP/IP Protocol appears. If not, click
the Add... button and install it.
● Click the Identification tab, and confirm
the Computer Name.
2
2
Using a TCP/IP Network
● Click the OK button to close the dialog
box.
Set the users and passwords for
access to the shared folder.
● From the Start menu, select Programmes - Administrative Tools - User
Manager for Domain and start the User
Manager.
● From the Users menu, select New
User... and enter the User name and
Password, then Confirm Password.
Enter additional information as needed.
NOTE
• If the checkbox for the User Must Change
Password at Next Login feature is set to
On, any new users added must change
their password in order to send files from
the machine.
● Confirm the settings and click the Add
button.
● Exit the User Manager.
File Sharing Settings
2-29
00_MFPNG.book 30 ページ 2000年4月26日 水曜日 午後5時11分
3
Set up File Sharing.
● Select the file you want to share using
Explorer, then right-click and click the
Sharing tab.
● On the Sharing sheet, click the Shared
As option button and enter the Share
Name.
Using a TCP/IP Network
● Click the Permissions... button to open
the Access Through Share Permissions
dialog box, and enter the users you
want to have access to the shared
folder. Set the Type of Access to either
Change or Full Control.
2
● When using NTFS format, click the
Security tab to open the Security sheet.
Click the Permission... button to open
the Directory Permission dialog box.
Select or add the users or groups you
want to have access to the shared
folder, and in the Type of Access column, set each to Add or Read access.
Also set up Add or Read access to
each folder in the file.
● Confirm the settings and click the OK
button.
The file sharing settings are now complete.
You are now ready to set up the recipients for files sent from the machine.
Recipient address settings for the machine can be entered from the control panel, or from the
Remote UI. Use whichever is more convenient. (By using the Remote UI you can set recipient
addresses from your personal computer.) For instructions on using the control panel, see the User’s
Guide. For instructions on using the Remote UI, see the Remote UI User’s Guide.
2-30
File Sharing Settings
00_MFPNG.book 31 ページ 2000年4月26日 水曜日 午後5時11分
● Server side settings
Computer Name: swan
Share Name: share
Create a folder called Images within Share, and specify Images as the recipient for sending.
● The machine’s Recipient Settings
Protocol: Windows (SMB)
Host Name: \\swan\share
File Path: \images (if no file path is specified, enter \)
User: User name entered in step 2.
Password: Password of user name entered in step 2.
IMPORTANT
• For the machine host name, use the computer name confirmed in step 1 to make settings. Do not
use the host name from Windows NT.
• It is not possible to substitute the IP address for the computer name when entering the machine’s
host name, It is also not possible to substitute the host@domain name (example: [email protected]). Always use the computer name as the host name when making settings.
• When sending files to Windows NT, enter the user name in the address using only the user name
itself. Do not enter the format domainname\username.
File Sharing Settings
2-31
2
Sample recipient setting:
Using a TCP/IP Network
The following items are needed to enter a recipient address:
00_MFPNG.book 32 ページ 2000年4月26日 水曜日 午後5時11分
Settings Using an FTP Server
IMPORTANT
1
Start IIS 4.0.
2
Enter the FTP site settings.
This section describes procedures for using
the default home directory under the
Default FTP Site. To use other settings,
enter the FTP site and home directory by
referring to a source such as the IIS 4.0
Help file.
2
Using a TCP/IP Network
• The use of Windows NT Server as an FTP server requires the installation of Microsoft Internet Information
Server 4.0 (IIS 4.0). If IIS 4.0 is not installed on the computer you are using, you will need to install IIS 4.0
before entering these settings. For installation procedures, see the manuals provided with your operating
system.
• Verification of users for access to FTP servers is done by referencing the local account database of the
Windows NT 4.0 Server that is used as the FTP server. Therefore, it is not possible to use the account of
a domain user registered in a Windows NT 4.0 Server to send files directly from the machine to member
servers, Windows NT 4.0 Workstation, Windows 2000 Professional, or computers in other domains.
● Right-click on the Default FTP Site icon
and select Properties from the pop-up
menu to open the Default FTP Site Properties dialog box.
● Open the Security Account sheet, and
turn off the Allow Anonymous Connections option.
● Open the Home Directory sheet and
check both the Read and Write options.
● Click the OK button to close the Specified FTP Site Properties dialog box.
2-32
File Sharing Settings
00_MFPNG.book 33 ページ 2000年4月26日 水曜日 午後5時11分
Confirm the Host name and Domain.
● Right-click the Network Neighborhood
icon on the screen and select Properties.
● In the Network dialog box, click the Protocols tab.
● In the Network Protocol list box, doubleclick the TCP/IP Protocol.
Using a TCP/IP Network
● Click the DNS tab to open the DNS
sheet, and confirm the Host Name and
Domain settings.
● Click the Cancel button to close the Network dialog box.
2
3
File Sharing Settings
2-33
00_MFPNG.book 34 ページ 2000年4月26日 水曜日 午後5時11分
4
Set up the users and passwords for
access to the FTP server.
● From the Start menu, select ProgramsAdministrative Tools - User Manager for
Domain.
Using a TCP/IP Network
● On the Users menu select New User...
and enter the users and passwords.
Enter the User name, Password, and
Confirm Password.
Enter other items as required.
● Confirm the settings you entered, and
click the Add... button.
● Exit the User Manager.
NOTE
2
• If the checkbox for the User Must Change
Password at Next Login feature is set to On,
any new users added must change their
password in order to send files from the
machine.
The FTP server and user settings are now complete.
2-34
File Sharing Settings
00_MFPNG.book 35 ページ 2000年4月26日 水曜日 午後5時11分
Next, set up the recipients for files sent from the machine.
Recipient address settings for the machine can be entered from the control panel or the Remote UI.
Use whichever is more convenient. (By using the Remote UI you can set recipient addresses from
your personal computer.) For instructions on using the control panel, see the User’s Guide. For
instructions on using the Remote UI, see the Remote UI User’s Guide.
2
Using a TCP/IP Network
The following items are needed to enter a recipient address:
Sample recipient setting:
● Server side settings (contents set using the above procedure)
Host name: starfish
Domain: organization.company.com
Create a directory named “share” in the specified FTP server's home directory
“\lnetpub\ftproot” and set “share” as the file destination.
● The machine’s recipient settings:
Protocol: FTP
Host Name: starfish.organization.company.com
File Path: share
User: User name entered in step 4
Password: Password of the user name entered in step 4
IMPORTANT
• To use the host name confirmed in step 3 of the above example as the host name in the machine’s
address, it is necessary to use a DNS server. (This applies even when the machine and the FTP
server are in the same subnet.)
• If no DNS server is available, the host name setting should be made using the IP address of the FTP
server. IP address segments of less than three digits should not be filled with leading zeroes (do not
enter as 001, 023, etc.).
File Sharing Settings
2-35
00_MFPNG.book 36 ページ 2000年4月26日 水曜日 午後5時11分
Using Windows 2000
You can use Windows 2000 in two different ways, using file sharing on a NetBIOS network (Windows file sharing), or using a Windows 2000 Server as an FTP server.
IMPORTANT
File Sharing Settings on a NetBIOS Network
NOTE
• The number of users or clients that can access a Windows 2000 Server is limited. After this number of
users or clients is reached, it is not possible to send to a Windows 2000 Server.
1
Confirm the Windows 2000 network
configuration elements.
● Right-click the My Network Places icon
on the screen and select Properties.
The Network and Dial-up Connections
window opens.
2
Using a TCP/IP Network
• The machine is not compatible with the Windows 2000 Active Directory.
• The machine cannot send files to shared folders linked through the Windows 2000 Distributed File System
(DFS). Files should be sent directly to the file server containing the linked shared folder.
• It is recommended that Windows 2000 settings be made by the Network manager.
● Right-click on the Local Area Connection icon and select Properties. The
Local Area Connection Properties dialog box opens.
● Confirm that the Client for Microsoft
Networks, File and Printer Sharing for
Microsoft Networks, and Internet Protocol (TCP/IP) checkboxes are all On. If
any of these functions are Off, turn
them On.
● Double-click on Internet Protocol (TCP/
IP) to open the Internet Protocol (TCP/
IP) Properties dialog box. On the General sheet, click the Advanced… button.
● Click the WINS tab and on the WINS
sheet confirm that the Enable NetBIOS
over TCP/IP option button is On. If this
function is Off, turn it On.
● Click the OK button repeatedly to close
the dialog boxes.
● If necessary restart the computer.
2-36
File Sharing Settings
00_MFPNG.book 37 ページ 2000年4月26日 水曜日 午後5時11分
2
Confirm the Computer Name.
● Right-click on the My Computer icon
and select Manage. The Computer
Management window opens.
● Right-click on the Computer Management (Local) icon and select Properties. The Computer Management
(Local) Properties dialog box opens.
Using a TCP/IP Network
● Click on the Network Identification tab
to open the Network Identification
sheet, then confirm the Computer
name setting.
2
● Click the Cancel button to close the dialog box, then close the Computer Management window.
3
Set up the users and passwords for
access to the shared folder.
● Right-click on the My Computer icon
and select Manage. The Computer
Management window opens.
● Under System Tools click on Local
Users and Groups, then right-click on
the Users folder. In the pop-up menu
select New User….
● In the New User dialog box, enter the
User name and Password, and Confirm
the password.
NOTE
• If the checkbox for the User must change
password at next login feature is set to
On, any new users added must change
their passwords in order to send files from
the machine.
● Confirm the settings, then click the Create button.
● Close the Computer Management window.
File Sharing Settings
2-37
00_MFPNG.book 38 ページ 2000年4月26日 水曜日 午後5時11分
4
Set up the sharing folder.
● Use Explorer, etc. to select the folder to
be shared and right-click, then select
Sharing…. On the Sharing sheet,
select the Share this folder option button, and enter the Share name.
Using a TCP/IP Network
● Click the Permissions button and set up
the users and groups you want to have
access to the shared folder. Select or
add the users or groups you want to
have access to the shared folder, then
in the Permissions column, check both
the Change and Read checkboxes, and
click the OK button.
2
● If you are using NTFS format, go to the
Properties dialog box of the shared
folder and click the Security tab to open
the Security sheet. Select or add the
users or groups you want to have
access to the shared folder, then in the
Permissions column, check both the
Write and Read & Execute, or higher
access authority. For files in the folder,
check both the Write and Read, or
higher access authority.
● Confirm the settings and click the OK
button.
● Click the OK button and close the Properties dialog box of the shared folder.
Server file sharing settings are now complete.
Next, set up the recipients for files sent from the machine.
Recipient address settings for the machine can be entered from the control panel or the Remote UI.
Use whichever is more convenient. (By using the Remote UI you can set recipient addresses from
your personal computer.) For instructions on using the control panel, see the User’s Guide. For
instructions on using the Remote UI, see the Remote UI User’s Guide.
For sample settings, see the example of Windows NT address settings. (See p. 2-31.)
2-38
File Sharing Settings
00_MFPNG.book 39 ページ 2000年4月26日 水曜日 午後5時11分
IMPORTANT
• In the machine’s address, the Host Name must be the computer name. It is not possible to use the IP
address or full computer name instead of the computer name. Be sure that the Host Name setting uses
the computer name.
• When sending files to Windows 2000, enter the User address as the user name only. Do not enter in the
format domainname\username.
Settings Using an FTP Server
2
1
Using a TCP/IP Network
IMPORTANT
• The use of Windows 2000 Server as an FTP server requires the installation of Microsoft Internet Information Server 5.0 (IIS 5.0). If IIS is not installed on the computer you are using, you will need to install IIS
before entering these settings. For installation procedures, see the manuals provided with your operating
system.
• Verification of users for access to FTP servers is done by referencing the local account database of the
Windows 2000 server that is used as the FTP server. Therefore, it is not possible to use the account of a
domain user registered in a Windows 2000 Server to send files directly from the machine to member servers, Windows NT 4.0 Workstation, Windows 2000 Professional, or computers in other domains.
Start IIS 5.0.
● From the Start menu, select Programs – Administrative Tools – Internet Services Manager.
File Sharing Settings
2-39
00_MFPNG.book 40 ページ 2000年4月26日 水曜日 午後5時11分
2
Enter the FTP site settings.
This section describes procedures for using
the default home directory under the
Default FTP Site. To use other settings,
enter the FTP site and home directory by
referring to a source such as the IIS 5.0
Help file.
Using a TCP/IP Network
● Right-click the Default FTP Site icon, and
select Properties from the pop-up menu
to open the Default FTP Site Properties
dialog box.
● Open the Security Account sheet, and
turn off the Allow Anonymous Connections option.
● Open the Home Directory sheet and
check both the Read and Write options.
2
● Click the OK button to close the Specified FTP Site Properties dialog box.
3
Confirm the Full computer name.
● Right-click the My Computer icon on the
screen and select Properties.
● Click the Network Identification tab to
open the Network Identification sheet
and confirm the Full computer name.
● Click the Cancel button to close the System Properties dialog box.
2-40
File Sharing Settings
00_MFPNG.book 41 ページ 2000年4月26日 水曜日 午後5時11分
4
Set up the users and passwords for
access to the FTP server.
● Right-click on My Computer and select
Manage. The Computer Management
window opens.
● Under System Tools click on Local Users
and Groups, then right-click on the Users
folder. In the pop-up menu select New
User….
Using a TCP/IP Network
● In the New User dialog box, enter the
User name and Password, and Confirm
password.
NOTE
2
• If the checkbox for the User must change
password at next login feature is set to On,
any new users added must change their
passwords in order to send files from the
machine.
● Confirm the settings, then click the Create button.
● Close the Computer Management window.
FTP server and user settings are now complete.
Next, set up the recipients for files sent from the machine.
Recipient address settings for the machine can be entered from the control panel or the Remote UI.
Use whichever is more convenient. (By using the Remote UI you can set recipient addresses from
your personal computer.) For instructions on using the control panel, see the User’s Guide. For
instructions on using the Remote UI, see the Remote UI User’s Guide.
File Sharing Settings
2-41
00_MFPNG.book 42 ページ 2000年4月26日 水曜日 午後5時11分
2
Using a TCP/IP Network
The following items are needed to enter a recipient address:
Sample recipient setting:
● Server side settings
Full Computer Name: starfish.organization.company.com
Create a directory named “share” in the specified FTP server's home directory
“\lnetpub\ftproot” and set “share” as the file destination.
● The machine’s recipient settings
Protocol: FTP
Host Name: starfish.organization.company.com
File Path: share
User: User name entered in step 4
Password: Password of the user name entered in step 4
IMPORTANT
• To use the Full Computer Name confirmed in step 3 of the above example as the host name in the
machine’s address, it is necessary to use a DNS server. (This applies even when the machine and
the FTP server are in the same subnet.)
• If no DNS server is available, the host name setting should be made using the IP address of the FTP
server. IP address segments of less than three digits should not be filled with leading zeroes (do not
enter as 001, 023, etc.).
2-42
File Sharing Settings
00_MFPNG.book 43 ページ 2000年4月26日 水曜日 午後5時11分
Using UNIX
IMPORTANT
Log on to a workstation as a superuser.
2
Set up the users who send documents, and their passwords.
3
Create a shared directory to be used for recipient addresses, and enable read access
and write access by the users who will be sending files.
IMPORTANT
• In some environments, detailed settings may be required in order to use FTP. For details, consult with
your network manager.
Next, set up the recipients for files sent to the FTP server from the machine.
Recipient address settings for the machine can be entered from the control panel or the Remote UI.
Use whichever is more convenient. (By using the Remote UI you can set recipient addresses from
your personal computer.) For instructions on using the control panel, see the User’s Guide. For
instructions on using the Remote UI, see the Remote UI User’s Guide.
File Sharing Settings
2-43
2
1
Using a TCP/IP Network
• UNIX users must have Sun Solaris 2.6 or later installed in order to use the machine as an FTP server.
00_MFPNG.book 44 ページ 2000年4月26日 水曜日 午後5時11分
Sample recipient setting:
● Server side settings
Host Name: starfish
Domain: organization.company.com
The user’s home directory is /home/hsato, and /home/hsato/share is the file destination.
2
Using a TCP/IP Network
The following items are needed to enter a recipient address:
● The machine’s recipient settings
Protocol: FTP
Host Name: starfish.organization.company.com
User: User name entered in step 2
Password: Password entered in step 2
File Path: enter one of the following:
share (when using relative path)
/home/hsato/share (when using absolute path)
NOTE
• To use the host name of the above example as the host name in the machine’s address, it is necessary to use a DNS server. (This applies even when the machine and the FTP server are in the same
subnet.)
• If no DNS server is available, the host name setting should be made using the IP address of the FTP
server. IP address segments of less than three digits should not be filled with leading zeroes (do not
enter as 001, 023, etc.).
2-44
File Sharing Settings
00_MFPNG.book 1 ページ 2000年4月26日 水曜日 午後5時11分
Using a NetWare Network
(Windows)
3
CH APTER
This chapter describes settings and procedures for using the machine with a NetWare network.
NetWare Network Setup Operating Procedures . . . . . . . . . . . . . . . . . . . . . . . . . . . . . . . 3-2
Printing Settings . . . . . . . . . . . . . . . . . . . . . . . . . . . . . . . . . . . . . . . . . . . . . . . . . . . . . 3-2
File Sharing Settings . . . . . . . . . . . . . . . . . . . . . . . . . . . . . . . . . . . . . . . . . . . . . . . . . . 3-3
Using a NetWare Network
(Windows)
NetWare Print Service Settings . . . . . . . . . . . . . . . . . . . . . . . . . . . . . . . . . . . . . . . . . . . . 3-4
Types of Print Service . . . . . . . . . . . . . . . . . . . . . . . . . . . . . . . . . . . . . . . . . . . . . . . . . 3-4
Setup Using NetWare Administrator . . . . . . . . . . . . . . . . . . . . . . . . . . . . . . . . . . . . . . 3-5
Setup Using PCONSOLE . . . . . . . . . . . . . . . . . . . . . . . . . . . . . . . . . . . . . . . . . . . . . . 3-6
Protocol Settings . . . . . . . . . . . . . . . . . . . . . . . . . . . . . . . . . . . . . . . . . . . . . . . . . . . . . . . 3-9
Settings from the Control Panel . . . . . . . . . . . . . . . . . . . . . . . . . . . . . . . . . . . . . . . . . . 3-9
Setting Up a Computer for Printing . . . . . . . . . . . . . . . . . . . . . . . . . . . . . . . . . . . . . . . . 3-12
Connecting to a NetWare Network . . . . . . . . . . . . . . . . . . . . . . . . . . . . . . . . . . . . . . 3-12
Installing Printer Drivers . . . . . . . . . . . . . . . . . . . . . . . . . . . . . . . . . . . . . . . . . . . . . . 3-12
Setting the Printer Destination . . . . . . . . . . . . . . . . . . . . . . . . . . . . . . . . . . . . . . . . . . 3-12
3
File Sharing Settings . . . . . . . . . . . . . . . . . . . . . . . . . . . . . . . . . . . . . . . . . . . . . . . . . . . 3-13
3-1
00_MFPNG.book 2 ページ 2000年4月26日 水曜日 午後5時11分
NetWare Network Setup Operating Procedures
The following operating procedures are necessary to use the machine on a NetWare network. See
the pages listed for each item when entering the necessary settings.
Printing Settings
The following settings are necessary to print from the machine.
IMPORTANT
1
NetWare Print Service Settings
NetWare print service settings can be made from the NetWare Administrator or
PCONSOLE.
(See “NetWare Print Service Settings,” on p. 3-4.)
2
Protocol Settings
Protocol settings can be entered from the control panel or from NetSpot. Use whichever is
more convenient.
3
Using a NetWare Network
(Windows)
• It is recommended that a network manger enters the NetWare print service and protocol settings.
(See “Settings from the Control Panel,” on p. 3-9.)
NOTE
• For instructions on entering settings with NetSpot, See “Using the Network and Printer Settings with
NetSpot,” in Chapter 5.
• If you are able to use the TCP/IP protocol, you can enter settings using the Remote UI. (The
Remote UI enables you to enter a variety of settings for the machine from a computer with a web
browser.) For instructions on using the Remote UI, see the Remote UI User’s Guide.
3
Computer Settings
Enter settings for the computer you are printing from. (See “Setting Up a Computer for
Printing,” on p. 3-12.)
3-2
NetWare Network Setup Operating Procedures
00_MFPNG.book 3 ページ 2000年4月26日 水曜日 午後5時11分
File Sharing Settings
Enter settings for sending documents from the machine to servers over a network. The following
procedures are necessary to set up files on the server for file sharing.
IMPORTANT
• It is recommended that a network manager enters the file sharing settings.
1
Computer Settings (File Sharing Settings)
(See “File Sharing Settings,” on p. 3-13.)
The machine Settings (File Sending Settings)
Using a NetWare Network
(Windows)
Enter the recipient settings used to send files from the machine’s control panel. For setting
procedures, see the User’s Guide.
NOTE
• If you are able to use the TCP/IP protocol, you can enter settings from the Remote UI. (The
Remote UI enables you to enter a variety of settings for the machine from a computer using a web
browser). For instructions on using the Remote UI, see the Remote UI User’s Guide.
3
2
NetWare Network Setup Operating Procedures
3-3
03_MFPNG.FM 4 ページ 2000年4月27日 木曜日 午前11時54分
NetWare Print Service Settings
In order to print using a NetWare network, it is necessary to enter print service settings including
print server and queue settings.
IMPORTANT
• The following procedures illustrate a sample NetWare setup procedure. Depending on your environment,
the actual setup procedure may differ.
Types of Print Service
3
Using a NetWare Network
(Windows)
Before entering print service settings, refer to the following descriptions to determine the type of
print service you are using.
Novell Directory Service (NDS) and Bindery Mode
NetWare 3.2 uses a network database called Bindery, and NetWare 4.1 or later and NetWare 5 use
the Novell Directory Service (NDS). The machine network supports both NDS and Bindery mode.
Determine the appropriate mode according to the network environment you are using. (If you are
using NetWare 3.2, only the Bindery mode is available.)
Queue Server Mode and Remote Printer Mode
The machine supports printers in either of two operation modes, the queue server mode or remote
printer mode.
Queue Server Mode
When the machine is used in the queue server mode, all printer server functions are provided
by the machine itself, and no other print server hardware or software is required. In NDS queue
server mode (NDS PServer), the NDS print server is used for printing. In Bindery queue server
mode (Bindery PServer), the Bindery mode print server is used. In queue server mode, a separate NetWare user operating licence is required for each machine.
Remote Printer Mode
When the machine is used in the remote printer mode, it is controlled by the NetWare print
server. Therefore, the machine uses a print server in addition to the network. The machine
prints using the NDS print server in NDS remote printer mode (NPrinter), and the Bindery print
server in Bindery remote printer mode (RPrinter).
IMPORTANT
• Normally with NetWare 4.1 or later, the NDS printer service should be used, and with NetWare 3.2, the
Bindery print service should be used. This manual describes procedures for these two combinations only.
• With NetWare 5, the NDPS can be used. When using the NDPS, the gateway should be the Novell printer
gateway provided with NetWare. This manual does not describe NDPS settings. Refer to the NetWare
manual.
3-4
NetWare Print Service Settings
03_MFPNG.FM 5 ページ 2000年4月27日 木曜日 午前11時54分
Setup Using NetWare Administrator
Use NetWare Administrator when using NDS queue server mode or remote
printer mode (NetWare 4.1 or later).
1
2
Log on to NetWare with Administrator or equivalent access, and start NetWare Administrator.
Execute Quick Setup.
Enter the Print Server, Printer, and Queue settings.
● Enter the Print Server name.
To use an existing Print Server, click on the button to the right of the Printer Server name text
box and select a Printer Server from the drop-down list box.
● In the Printer column, enter the printer name under Name.
● Under Type select the printer connection method.
If you are using the queue server mode, select Other/Unknown.
If you are using the remote printer mode, select Parallel, then click the Communication button
to open the Parallel Communication dialog box. Then set the Port to LPT1, and the Connection type to Manual load. Under interrupts, enter the appropriate setting for your environment.
Click the OK button to close the Parallel Communication window.
● In the Print Queue column, enter the queue name under Name. Under Volume, enter the volume in which the queue is placed. Click on the button to the right of the Volume name text box
and select a Volume from the drop-down list box.
● Click the Create button and exit NetWare Administrator.
NOTE
• Make sure to remember the name of the print server. You need it to enter the machine’s protocol settings.
4
If you are using the remote printer mode, use the following procedure to restart the
print server.
(In the queue server mode this is not required.)
● If you are using the NetWare file server as a print server, enter Load PSERVER.NLM in the
file server and press the Enter key.
NetWare Print Service Settings
3-5
3
3
Using a NetWare Network
(Windows)
Select the container object for the printer object you want to create, and then go to the Tools
menu and select Print Services Quick Setup.
00_MFPNG.book 6 ページ 2000年4月26日 水曜日 午後5時11分
NetWare print service settings are now complete. Continue to the next section and specify the protocol settings.
Setup Using PCONSOLE
Use PCONSOLE when using the Bindery mode with either the queue server
mode or remote printer mode (NetWare 3.2).
1
Using a NetWare Network
(Windows)
2
Log on to NetWare as the Supervisor, and start PCONSOLE.
If you have not already set up a print server, use the following procedure to set up the
print server.
● From the Available Options menu, select Print Server Information, then press the Enter key.
● Press the Insert key.
● Enter the name of the print server you are setting up, and press the Enter key.
● Press the ESC key to return to the Available Options menu.
NOTE
3
• Make sure to remember the name of the print server. You need it to enter the machine’s protocol settings.
3
Set up a Queue using the following procedure, and assign it to the print server.
● From the Available Options menu, select Print Queue Information, then press the Enter key.
● Press the Insert key.
● Enter the name of the queue you are setting up, then press the Enter key.
● Select the name of the queue you entered, then press the Enter key.
● Select Queue Servers, then press the Enter key.
● Press the Insert key.
● Select the print server you set up in Step 2, then press the Enter key.
● Press the ESC key until you return to the Available Options menu.
3-6
NetWare Print Service Settings
00_MFPNG.book 7 ページ 2000年4月26日 水曜日 午後5時11分
4
Assign the printer to the print server.
● From the Available Option menu, select Print Server Information then press the Enter key.
● Select the print server you set up in Step 2, then press the Enter key.
● Select Print Server Configuration, then press the Enter key.
● Select Printer Configuration, then press the Enter key.
● From the Configured Printers list box select the number of the printer you want, then press the
Enter key.
Set up the printer name, type, etc.
● In the Name area, enter the name you want to use for the printer, and then press the Enter
key.
● Set up the Type. If you are using queue server mode, select Defined elsewhere, or if you are
using remote printer mode, select Remote Parallel and set the Port to LPT 1.
● Enter the remaining items, then press the ESC key.
● In the confirmation box that opens, select Yes, then press the Enter key.
● Press the ESC key to return to the Print Server Configuration Menu.
Assign the printer to a queue.
3
6
● Select Queues Serviced by Printer and press the Enter key.
● Select the name of the printer you set up in Step 5, then press the Enter key.
● Press the Insert key.
● Select the queue you set up in Step 3, then press the Enter key.
NOTE
• Make sure to remember the printer number. You need it to enter the machine’s protocol settings.
7
8
Press the ESC key until you return to the Exit PConsole window, then select Yes to quit
PCONSOLE.
If you are using remote printer mode, use the following procedure to restart the print
server.
(This is not required if you are using queue server mode.)
● If you are using a NetWare file server as a print server, enter “LOAD PSERVER.NLM <print
server name>” from the file server, and then press the Enter key.
● If you are using a dedicated print server, enter PSERVER.EXE and the name of the print
server from the computer, and then press the Enter key.
NetWare Print Service Settings
Using a NetWare Network
(Windows)
5
3-7
00_MFPNG.book 8 ページ 2000年4月26日 水曜日 午後5時11分
3
Using a NetWare Network
(Windows)
NetWare print service settings are now complete. Continue to the next section to enter the protocol
settings.
3-8
NetWare Print Service Settings
00_MFPNG.book 9 ページ 2000年4月26日 水曜日 午後5時11分
Protocol Settings
This section describes how to enter Ethernet driver settings, and the machine’s NetWare protocol
settings.
These settings are entered from the machine’s control panel.
NOTE
• If you are able to use the TCP/IP protocol, you can enter settings using the Remote UI. (The Remote UI
enables you to enter a variety of settings for the machine from a computer with a web browser.) For
instructions on using the Remote UI, see the Remote UI User’s Guide.
IMPORTANT
• Settings made from the control panel become enabled when the machine is restarted after the procedure.
• For details about entering characters using the touch panel display, see the User’s Guide.
Setting Up the Ethernet Driver
For Ethernet driver settings, see “Setting Up the Ethernet Driver,” on p. 2-5.
1
Press the
2
Press the [System Settings] key.
Additional
Functions
3
Setting Up NetWare
Using a NetWare Network
(Windows)
Settings from the Control Panel
key.
IMPORTANT
• If the message “Enter the System Manager
ID and Password using the numeric keys,”
appears in the touch panel display, enter the
System Manager ID and password. For
instructions on entering the System Manager ID and password, see the User's
Guide.
Protocol Settings
3-9
3
Press the [Network Settings] key.
4
Press the [NetWare Settings] key.
5
Select NetWare [On].
6
Select the Frame Type from the drop-down list box.
3
Using a NetWare Network
(Windows)
00_MFPNG.book 10 ページ 2000年4月26日 水曜日 午後5時11分
Select the Frame Type from the drop-down list box. Select [Auto Detect] to determine the
frame type automatically.
3-10
Protocol Settings
00_MFPNG.book 11 ページ 2000年4月26日 水曜日 午後5時11分
7
Select the Print Service from the drop-down list box.
Select the print service setting used in “NetWare Print Service Settings.” (See p. 3-4).
NOTE
• The following print services are available:
- Bindery PServer:
Used in the queue server mode (Bindery mode print service).
- RPrinter:
Used in the remote printer mode (Bindery mode print service).
- NDS PServer:
Used in the queue server mode (NDS print service).
- NPrinter:
Used in the remote printer mode (NDS print service).
8
Press the [Settings] key on the right side to set the print service details. Enter the
same settings entered in “NetWare Print Service Settings.” (See p. 3-4.)
Using a NetWare Network
(Windows)
Settings differ depending on the print service. For print service settings, See “Control Panel
Menu List,” on p. 6-7.
To use a NDS PServer, enter the Tree name and Context for the print server in the Tree and
Context fields as follows:
If the Tree name is A1 and the Context is TOPMAX_SYS
Tree: A1
Context: o=TOPMAX_SYS
Confirm the settings you made and press the [OK] key.
3
9
10 Press the [Done] key.
Repeat until the Additional Functions screen closes.
11
Restart the machine.
Turn the printer unit power switch, the scanner unit power switch, and the control panel
power switch to OFF; and then turn the power to ON after waiting at least 3 seconds.
The protocol settings are now complete.
Protocol Settings
3-11
00_MFPNG.book 12 ページ 2000年4月26日 水曜日 午後5時11分
Setting Up a Computer for Printing
After you have finished making the NetWare print service and protocol settings, you can enter settings for each of the computers to be used.
Connecting to a NetWare Network
Install NetWare client software on all computers that will perform printing, so that they are able to
use the NetWare network. For details, see your NetWare manuals and operating system manuals.
3
Using a NetWare Network
(Windows)
Installing Printer Drivers
Printing from a computer requires the installation of a printer driver. If you are using PCL, refer to the
PCL Driver Guide for installation instructions. If you are using PostScript, refer to the Setup Guide
for installation instructions. In the installation procedure, select the network printer as the printer
destination, and select the print queue that you created in “NetWare Print Service Settings,” on p. 34.
Setting the Printer Destination
(If you set up the printer destination when you installed the printer driver, this step is not necessary.)
On the Start menu, select Setting, Printer, then right-click the icon of the printer you will use for printing and select Properties from the pop-up menu.
Click Details tab or Port tab to display the Details sheet or the Port sheet, and set the printer destination port to the print queue you created in “NetWare Print Service Settings,” on p. 3-4. Click the
OK button to enable the settings.
3-12
Setting Up a Computer for Printing
03_MFPNG.FM 13 ページ 2000年4月27日 木曜日 午後1時2分
File Sharing Settings
This section describes how to set up a computer on your network as a file sharing server.
These settings enable you to send files from your machine to the file sharing server.
IMPORTANT
1
Log on to NetWare as Administrator or as a user of equivalent authority.
2
Set up the users and passwords for sending files from the machine.
3
Create a directory to be used for recipient addresses, and enable read access and
write access by the users who will be sending files.
IMPORTANT
3
• In some environments, additional detailed settings such as Authority settings may be required.
For details, consult the network manager of the environment you are using.
Using a NetWare Network
(Windows)
• This section describes procedures for entering file sharing settings on the server side only. To send files
from the machine to a server on the network, you must enter an address setting from either the control
panel or the Remote UI. For instructions on using the control panel, see the User’s Guide. For instructions
on using the Remote UI, see the Remote UI User’s Guide.
The settings for sharing computer files are now complete.
Next, set up the recipients for files sent from the machine.
Recipient address settings for the machine can be entered from the control panel. For instructions
on making address settings, see the User’s Guide.
NOTE
• If you are able to use the TCP/IP protocol, you can enter settings from the Remote UI. (The Remote UI
enables you to enter a variety of settings for the machine from a computer with a web browser.) For
instructions on using the Remote UI, see the Remote UI User’s Guide.
File Sharing Settings
3-13
00_MFPNG.book 14 ページ 2000年4月26日 水曜日 午後5時11分
Sample recipient settings:
●NDS Mode Example 1
Server side settings:
Context name: TOPMAX
Tree name: A1
Then set the \SHARE file in the context TOPMAX_SYS as the recipient.
The machine’s address settings:
Protocol: NetWare (IPX)
Host Name: o=TOPMAX.TREE=A1
File Path: TOPMAX_SYS\SHARE
User: cn=USER NAME (User name entered in step 2)
Password: (Password for the above user)
3
Using a NetWare Network
(Windows)
The following items are needed to enter a recipient address.
●NDS Mode Example 2
Server side settings:
Tree name: A1
User: cn=USER_NAME ou=CSG o=TOPMAX
Volume object: cn=LUNA_CSG ou=CSG o=TOPMAX
Directory path: \WORK\USER_NAME
The machine’s address settings:
Protocol: NetWare (IPX)
Host Name: CSG.TOPMAX.TREE=A1
User: cn=USER NAME (User name entered in step 2)
Password: (Password for the above user)
For the 'File Path' enter one of the following:
LUNA_CSG\\WORK\USER_NAME
LUNA_CSG.CSG.\\WORK\USER_NAME
LUNA_CSG.CSG.TOPMAX.\\WORK\USER_NAME
3-14
File Sharing Settings
00_MFPNG.book 15 ページ 2000年4月26日 水曜日 午後5時11分
IMPORTANT
• In NDS mode, for the Host Name, enter the context name registered by the user. If the user is registered under a department container object such as ou=sales, the entry is as follows.
- Host name: ou=sales. o=TOPMAX. TREE=A1.
If a country name is used, the entry is as follows.
- Host name: o=TOPMAX. c=jp. TREE=A1
• In the Host Name entry, you may omit the [xx=] portion, but the '. TREE=' portion with the tree name
may not be omitted.
• In NDS mode, the User name may not have the 'cn=' portion omitted.
• The file path is specified as a relative path from the user context. If an extension is used, it must be
preceded by a period.
Using a NetWare Network
(Windows)
●In Bindery Mode Example:
Server side settings (entered using the above procedure)
File Server Name: TOPMAX_SERVER
Set \CSG in the SYS volume as the recipient.
3
The machine address settings
Protocol: NetWare (IPX)
Host Name: TOPMAX_SERVER
File Path: SYS\CFG
User: (User name entered in step 2)
Password: (Password entered in step 2)
File Sharing Settings
3-15
00_MFPNG.book 16 ページ 2000年4月26日 水曜日 午後5時11分
00_MFPNG.book 1 ページ 2000年4月26日 水曜日 午後5時11分
4
Using an AppleTalk Network
CH APTER
This chapter describes settings and procedures for using the machine on an AppleTalk network.
AppleTalk Network Setup Operating Procedures. . . . . . . . . . . . . . . . . . . . . . . . . . . . . . . 4-2
Printing Setup . . . . . . . . . . . . . . . . . . . . . . . . . . . . . . . . . . . . . . . . . . . . . . . . . . . . . . . 4-2
Macintosh Network Settings . . . . . . . . . . . . . . . . . . . . . . . . . . . . . . . . . . . . . . . . . . . . . . 4-3
4
Using an AppleTalk Network
Protocol Settings . . . . . . . . . . . . . . . . . . . . . . . . . . . . . . . . . . . . . . . . . . . . . . . . . . . . . . . 4-4
Settings from the Control Panel . . . . . . . . . . . . . . . . . . . . . . . . . . . . . . . . . . . . . . . . . . 4-4
4-1
00_MFPNG.book 2 ページ 2000年4月26日 水曜日 午後5時11分
AppleTalk Network Setup Operating Procedures
Printing Setup
The following operating procedures are necessary to print on the machine using an AppleTalk
network. Refer to the page listed for each item and enter the necessary settings.
IMPORTANT
• It is recommended that a network manager enters the protocol settings.
1
Macintosh Network Settings
2
Protocol Settings
Protocol settings can be entered from the machine’s control panel or from NetSpot. Use
whichever is more convenient.
See “Settings from the Control Panel,” on p. 4-4
NOTE
• If you are able to use the TCP/IP protocol, and have a Windows computer connected to a TCP/IP network, you can enter settings from the Remote UI. The Remote UI enables you to enter a variety of settings for the machine from a computer with a web browser. For instructions on using the Remote UI,
see the Remote UI User’s Guide.
4
Using an AppleTalk Network
Set up the Macintosh for connection to an Ethernet network.
See “Macintosh Network Settings,” on p. 4-3.
3
Printer Driver Installation
To print, it is necessary to have installed a printer driver for your printer.
Refer to the Setup Guide for instructions on installing the printer driver. For instructions on
using the printer driver, refer to the online help.
4
Macintosh Print Settings
For printer destination settings, refer to the online help for the printer driver or your Macintosh.
4-2
AppleTalk Network Setup Operating Procedures
00_MFPNG.book 3 ページ 2000年4月26日 水曜日 午後5時11分
Macintosh Network Settings
Verify the Macintosh network settings.
1
Check that AppleTalk is active.
● Select the Chooser from the Apple menu.
● Check that the AppleTalk setting is Active. If it is Inactive, click Active option.
2
Check that the AppleTalk connection method is EtherTalk or Ethernet.
● From the Apple menu, open the control panel menu and select Network or AppleTalk.
● Set the selection to EtherTalk or Ethernet.
NOTE
• Some Mac operating systems enable you to use either Network or AppleTalk.
• In an environment connecting to Ethernet through LocalTalk, select either LocalTalk or Printer Port.
4
The Macintosh network settings are now complete. Continue to the next section to enter the protocol
settings.
Using an AppleTalk Network
● Close the Network or AppleTalk control panel to save the selection.
Macintosh Network Settings
4-3
00_MFPNG.book 4 ページ 2000年4月26日 水曜日 午後5時11分
Protocol Settings
This section describes procedures for setting up the machine’s Ethernet driver and AppleTalk protocol. These settings are entered from the machine’s control panel.
NOTE
• If you are able to use the TCP/IP protocol, and have a Windows computer connected to a TCP/IP network,
you can enter settings from the Remote UI. (The Remote UI enables you to enter a variety of settings for
the machine from a computer with a web browser.) For instructions on using the Remote UI, see the
Remote UI User’s Guide.
Settings from the Control Panel
IMPORTANT
4
Using an AppleTalk Network
• Settings from the control panel become effective when the machine is restarted (using the power
switches).
• For details about entering characters using the touch panel display, see the User’s Guide.
Setting Up the Ethernet Driver
For Ethernet driver settings, see “Setting Up the Ethernet Driver,” on p. 2-5.
Setting Up AppleTalk
1
Press the
2
Press the [System Settings] key.
Additional
Functions
key.
IMPORTANT
• If the message “Enter System Manager ID and
Password using the numeric keys,” appears in
the touch panel display, enter the System Manager ID and password. For instructions on entering the System Manager ID and password, see
the User's Guide.
4-4
Protocol Settings
00_MFPNG.book 5 ページ 2000年4月26日 水曜日 午後5時11分
Press the [Network Settings] key.
4
Press the [AppleTalk Settings] key.
5
Select AppleTalk [On].
4
Using an AppleTalk Network
3
Selecting [Off] disables AppleTalk.
Protocol Settings
4-5
00_MFPNG.book 6 ページ 2000年4月26日 水曜日 午後5時11分
6
Press the [Service Name] key and enter the name of the printer.
The name you enter here appears in the Macintosh Chooser window.
IMPORTANT
• The name of the printer can have up to 32 characters.
• If there is more than one printer in the same zone, each printer must have a unique name.
7
Press the [Zone] key to enter a zone name.
8
Confirm the settings you entered and press the [OK] key.
9
Press the [Done] key.
Repeat until the Additional Functions screen closes.
10 Restart the machine.
Turn the printer unit power switch, the scanner unit power switch, and the control panel power
switch to OFF, and then turn the power to ON after waiting at least 3 seconds.
The protocol settings are now complete.
4
Using an AppleTalk Network
If you are using a network that is set up in zones, enter the name of the zone.
4-6
Protocol Settings
00_MFPNG.book 1 ページ 2000年4月26日 水曜日 午後5時11分
Using the Network and Printer
Settings with NetSpot
5
CH APTER
This chapter describes the NetSpot utility software used for managing networks and printers.
Introduction . . . . . . . . . . . . . . . . . . . . . . . . . . . . . . . . . . . . . . . . . . . . . . . . . . . . . . . . . . . 5-2
Minimum Requirements. . . . . . . . . . . . . . . . . . . . . . . . . . . . . . . . . . . . . . . . . . . . . . . . 5-2
Related Documentation. . . . . . . . . . . . . . . . . . . . . . . . . . . . . . . . . . . . . . . . . . . . . . . . 5-3
5
Using the Network and Printer Settings with NetSpot
Installing and Using NetSpot . . . . . . . . . . . . . . . . . . . . . . . . . . . . . . . . . . . . . . . . . . . . . . 5-4
Installation (Windows 95/98/NT/2000). . . . . . . . . . . . . . . . . . . . . . . . . . . . . . . . . . . . . 5-4
Installation (Macintosh) . . . . . . . . . . . . . . . . . . . . . . . . . . . . . . . . . . . . . . . . . . . . . . . . 5-4
Installation (UNIX) . . . . . . . . . . . . . . . . . . . . . . . . . . . . . . . . . . . . . . . . . . . . . . . . . . . . 5-5
Configuration . . . . . . . . . . . . . . . . . . . . . . . . . . . . . . . . . . . . . . . . . . . . . . . . . . . . . . . . 5-6
Overview of Network Device Management . . . . . . . . . . . . . . . . . . . . . . . . . . . . . . . . . 5-6
5-1
00_MFPNG.book 2 ページ 2000年4月26日 水曜日 午後5時11分
Introduction
The Canon NetSpot utility provides easy network management of your Canon printer, copier, or fax
machine using one or more network interfaces.
Minimum Requirements
NetSpot is compatible with the most popular network operating systems and workstation software.
Following are the minimum requirements for using NetSpot on various platforms. Requirements for
printing by means of a network can be found in the documentation for the specific network. Some
devices are not supported by NetSpot on all platforms.
Microprocessor
Intel Pentium-compatible (or later)
Operating system
Windows 95/98, Windows NT 4.0, Windows 2000
Minimum RAM
16 MB
Minimum disk space
12 MB
NetSpot for Macintosh
Computer
Power Macintosh
Microprocessor
Power PC
Operating system
Macintosh OS 7.5.3 to 9.0 with Open Transport
Minimum RAM
12 MB
Minimum disk space
16 MB
NetSpot for UNIX
Computer
5-2
SPARC 5 or later (Server or Workstation)
Operating system
Sun Solaris 2.5 or later
Desktop environment
Open Windows 3.2 or later or
Common Desktop Environment (CDE) 1.0 or later
Minimum RAM
32 MB
Minimum disk space
12 MB
5
Using the Network and Printer Settings with NetSpot
NetSpot for Microsoft
Introduction
00_MFPNG.book 3 ページ 2000年4月26日 水曜日 午後5時11分
Supported Protocols
NetSpot supports the following protocols for device communication. For information about protocols,
frame types, and print applications you can use with your network, refer to the documentation for the
specific network.
Windows
IPX/SPX1, TCP/IP, NetBIOS2
Macintosh
TCP/IP, AppleTalk
UNIX
TCP/IP
(1) To use NetSpot in Novell NetWare environment, the following are required:
● Server software:
NetWare version 3.x, 4.x, or 5.x
● Workstation software: Novell NetWare Client
(2) When using NetSpot with NetBIOS on Windows 95, you must upgrade to WinSock 2, available
from the Microsoft World Wide Web site. (WinSock 2 is included in Windows 98/NT/2000.)
Related Documentation
● This Network Guide
● The NetSpot User’s Guide
This Network Guide gives an overview of NetSpot and describes installation procedures.
The online NetSpot User’s Guide in HTML format is copied to your hard disk during installation of
NetSpot. You can read the online guide with a frames-compatible browser such as Netscape Navigator 3.0 (or later) or Microsoft Internet Explorer 3.0 (or later).
To access the NetSpot User’s Guide, in NetSpot choose Contents from the Help menu (for Windows/UNIX),
or choose NetSpot Help... from the Apple menu (Macintosh).
5
The readme.txt (Windows), Read Me (Macintosh), or README (UNIX) file, is located in the directory in which NetSpot is installed. This file contains last-minute information that could not be
included in other documentation.
Using the Network and Printer Settings with NetSpot
The following documentation is available to help you use NetSpot:
Introduction
5-3
00_MFPNG.book 4 ページ 2000年4月26日 水曜日 午後5時11分
Installing and Using NetSpot
This section contains information about installing, configuring, and using NetSpot. It assumes that
the network interface has been installed in the machine, as described in the documentation provided.
Installation (Windows 95/98/NT/2000)
1
Insert the PostScript/PCL User Software CD-ROM into the CD-ROM drive.
2
Run the installation program.
Installation (Macintosh)
1
Insert the PostScript/PCL User Software CD-ROM into the CD-ROM drive.
2
Run the installation program.
Find the subdirectory for the desired language in the \netspot directory on the CD-ROM.
Double-click the Install programme icon in that subdirectory, and follow the instructions that
appear. You can install either an administrator or an end-user version of NetSpot. If you plan
to monitor devices, install the end-user version. If you plan to configure as well as monitor
devices, install the administrator version.
5
Using the Network and Printer Settings with NetSpot
Find the subdirectory for the desired language in the \netspot\Windows directory on the CDROM. Run Setup.exe in that subdirectory, and follow the instructions that appear. You can
install either an administrator or an end-user version of NetSpot. If you plan to monitor
devices, install the end-user version. If you plan to configure as well as monitor devices,
install the administrator version.
5-4
Installing and Using NetSpot
00_MFPNG.book 5 ページ 2000年4月26日 水曜日 午後5時11分
Installation (UNIX)
IMPORTANT
• Administrator functionality is available to a user who has the security privileges to operate as a supervisor
or network administrator.
1
Log in as root.
2
Insert the PostScript/PCL User Software CD-ROM into the CD-ROM drive.
3
4
Find the subdirectory for the desired language in the /netspot/ux_sol directory on the
CD-ROM.
Copy netspot-XXX.tar (XXX is a current version number) to a directory on the local
drive, such as /opt, into which you want to install NetSpot. For example:
#cd /opt
#cp /cdrom/cdrom0/netspot/ux_sol/language/netspot-vXXX-solaris.tar
where XXX is the current version number
5
Change directories to the new NetSpot directory.
6
From the # prompt, run the shell script as follows:
#./install.sh
The results are saved in install.log, which includes variables that you need later.
Edit.profile (Bourne shell), .kshrc (Korn shell), or .cshrc (C shell), and set the following
environment variables:
NETSPOT_HOME (directory in which NetSpot is installed)
NETSPOT_DB (directory in which the database of devices is to be located)
NETSPOT_HELP_BROWSER (browser for viewing NetSpot help files)
The browser’s directory must be specified in the PATH environment variable.
LANG (language, such as C for US English, UK_eng for UK English, De for German, Fr for
French, Es for Spanish, or It for Italian)
NLSPATH (directory containing netspot.cat)
Recommended paths, where %L is the value of LANG, are:
5
7
/usr/openwin/lib/msg/%L/%N.cat (for OpenWindows Desktop) and
/usr/dt/lib/nls/msg/%L/%N.cat (for CDE).
XAPPLRESDIR or XENVIRONMENT (location to which the install script copied the NetSpot
resource)
Installing and Using NetSpot
Using the Network and Printer Settings with NetSpot
#tar -xvf netspot-vXXX-solaris.tar
5-5
00_MFPNG.book 6 ページ 2000年4月26日 水曜日 午後5時11分
8
To install devices, run
#./cpinstall.sh DEVICE_ID DEVICE_NAME IP_ADDRESS
where
DEVICE_ID is the 12-digit MAC address
DEVICE_NAME is the name you want to assign to the device
IP_ADDRESS is in dotted decimal notation (xxx.xxx.xxx.xxx)
9
Follow the shell’s instructions.
Configuration
After you have installed NetSpot, you must enable communication with the network interface. For
instructions on configuring the network, refer to “Getting Started” in the online NetSpot User’s
Guide.
NetSpot enables you to set up and control most Canon devices that contain a network interface. Its
features include the following:
● Configures protocols
The Setup tool enables you to configure protocols and print applications.
● Displays device features and status
The Features tool displays features such as paper tray settings, duplexing capabilities, and
finisher options. A list of these features can help you decide which device is appropriate for
a job.
The Status tool displays the status (such as readiness and error messages) of a device.
● Manages print jobs (on some platforms and protocols)
The Jobs tool displays the document name, job status, job size, and job owner for each job.
It also enables you to manipulate jobs. For example, if a job is in the queue of a device that
becomes unavailable, you can move the job to another device’s queue. Or, if you are in a
hurry for a particular job, you can move it up in a queue.
5
Using the Network and Printer Settings with NetSpot
Overview of Network Device Management
5-6
Installing and Using NetSpot
00_MFPNG.book 1 ページ 2000年4月26日 水曜日 午後5時11分
6
Appendix
CH APTER
This chapter describes how to resolve problems during operation, how to verify network settings,
and provides lists of control panel menus as well as the machine's principal network specifications.
Troubleshooting . . . . . . . . . . . . . . . . . . . . . . . . . . . . . . . . . . . . . . . . . . . . . . . . . . . . . . . . 6-2
Printing Problems and Solutions . . . . . . . . . . . . . . . . . . . . . . . . . . . . . . . . . . . . . . . . . 6-2
File Sharing Problems and Solutions. . . . . . . . . . . . . . . . . . . . . . . . . . . . . . . . . . . . . . 6-4
Control Panel Menu List. . . . . . . . . . . . . . . . . . . . . . . . . . . . . . . . . . . . . . . . . . . . . . . . . . 6-7
To Confirm Settings . . . . . . . . . . . . . . . . . . . . . . . . . . . . . . . . . . . . . . . . . . . . . . . . . . . . . 6-9
Appendix
Specifications . . . . . . . . . . . . . . . . . . . . . . . . . . . . . . . . . . . . . . . . . . . . . . . . . . . . . . . . . 6-10
Hardware Specifications . . . . . . . . . . . . . . . . . . . . . . . . . . . . . . . . . . . . . . . . . . . . . . 6-10
Software Specifications . . . . . . . . . . . . . . . . . . . . . . . . . . . . . . . . . . . . . . . . . . . . . . . 6-10
6
Index . . . . . . . . . . . . . . . . . . . . . . . . . . . . . . . . . . . . . . . . . . . . . . . . . . . . . . . . . . . . . . . 6-11
6-1
00_MFPNG.book 2 ページ 2000年4月26日 水曜日 午後5時11分
Troubleshooting
Printing Problems and Solutions
Unable to Print from a TCP/IP Network (Windows 95/98/NT/2000)
Cause 1
Solution
Cause 2
Solution
6
Appendix
Cause 3
Solution
Cause 4
Solution
Printer and cable are not properly connected.
After checking the following connections, turn the machine’s power switches to
OFF, and then turn them to ON again.
• Check that the machine is connected to the network using the proper cable.
TCP/IP network is not properly set up.
Check the following:
• Check that the IP addresses are properly set up. If the IP addresses were set
using DHCP, BOOTP, or RARP, then confirm that they are operating.
The computer that is printing is not properly set up.
Check the following:
• Check that the proper printer driver is installed. If you are printing from
Windows95/98/NT/2000, each computer must have a printer driver installed.
For instructions on installing printer drivers, see the PCL Driver Guide or the
Setup Guide.
• Check that the correct printer is set as the output destination for the computer
that is printing. In Windows 95/98, check the output destination in the Control
Panel Printer or Print Manager.
• If you are using Windows 95/98, check that the spooling settings are made
correctly. (See “Installing the Printer Driver and Specifying the Printer Destination Setting, LPD Settings (Windows 95/98),” steps 3 to 5, on p. 2-15.)
The name of the file being printed may be too long.
Normally LPR (or the Microsoft TCP/IP Printer, if you are using Windows NT/
2000) sends jobs either under the name of the application software used for
printing, or the file name. However, a job name longer than 255 bytes cannot be
sent to the printer. To correct this problem, rename the file with a shorter name.
Unable to Print from a NetWare Network
Cause 1
Solution
Cause 2
6-2
Printer and cable are not properly connected.
After checking the following connections, turn the machine’s power switches to
OFF, and then turn them to ON again.
• Check that the machine is connected to the network using the proper cable.
The NetWare network may not be properly set up.
Troubleshooting
00_MFPNG.book 3 ページ 2000年4月26日 水曜日 午後5時11分
Solution
Check the following:
• At the MS-DOS prompt, enter the WHOAMI command, and check that the
NetWare file server is running.
• Check that there is sufficient disk space on the NetWare file server. Large
files cannot be printed if there is insufficient disk space.
• Start NetSpot, NWADMIN, or PCONSOLE, and check that the print queue is
set up properly and is active.
Cause 3
If you are using an NDS PServer or Bindery PServer and the print server has a
password setting, the machine’s password setting is incorrect.
Perform the following steps to correct the machine’s password setting:
• Confirm the password in the NetWare printer server for printing on the
machine.
• Press the
key, then press the [System Settings], [Network Settings], and
[NetWare Settings] keys, in that order, to open the NetWare Settings screen.
• Press the Print Service [Settings] key, and enter the correct password in the
[Print Server Password] space. (The setting becomes effective when the
machine is restarted.)
Solution
Additional
Functions
The machine is currently sending a file to the NetWare file server.
Appendix
Print after file sending is complete. In some cases it is not possible to print while
the machine is sending a file to a server.
Unable to Print from an AppleTalk Network
Cause 1
Solution
Printer and cable are not properly connected.
Cause 2
Solution
The AppleTalk network is not properly set up.
Cause 3
Solution
After checking the following connections, and turn the machine’s power
switches to OFF, and then turn them to ON again.
• Check that the machine is connected to the network using the proper cable.
Check the following:
• Check the AppleTalk settings by referring to “Setting Up AppleTalk,” on
p. 4-4. In particular, check the following:
Set the [Phase] to a valid phase type.
Set the [Zone] to the zone to which the printer belongs.
The computer that is printing is not properly set up.
Check the following:
• In the Chooser, check that the proper printer driver has been installed.
• In the Chooser, check that the proper printer has been selected as the destination.
• In the Chooser, check that AppleTalk is active.
• In the Network or AppleTalk control panel, check that the AppleTalk connection method is EtherTalk or Ethernet.
Troubleshooting
6-3
6
Cause 4
Solution
00_MFPNG.book 4 ページ 2000年4月26日 水曜日 午後5時11分
Unable to Print from a TCP/IP Network (UNIX)
Cause 1
Solution
Printer and cable are not properly connected.
Cause 2
Solution
The TCP/IP network may not be properly set up.
Cause 3
Solution
After checking the following connections, turn the machine’s power switches to
OFF, and then turn them to ON again:
• Check that the printer is connected to the network using the proper cable.
Check the following:
• Check that the IP addresses are properly set up. If the IP addresses were set
using DHCP, BOOTP, or RARP, then confirm that they are operating.
The name of the file being printed may be too long.
Normally LPR sends jobs either under the name of the application software
used for printing, or the file name. However, a job name longer than 256 bytes
cannot be sent to the printer. To correct this problem, rename the file with a
shorter name.
Unable to Share Files/Send Files (Windows File Sharing)
Cause 1
Solution
6
Appendix
File Sharing Problems and Solutions
6-4
File sharing settings for the shared folder are incorrect.
Check the following settings:
• On the computer you are using, go into the Explorer, double-click Entire Network, and check whether the computer you want to share is listed there.
• Or from the Explorer select Tools – Find – Computer…, enter the name of the
computer you want to share, and check whether that computer is on the network.
• If the computer you want to share is listed, double-click on its icon and see
whether the shared name of the folder you want to share is listed.
• If the shared name does not appear, See “File Sharing Settings,” on p. 2-25,
and check the shared folder settings.
Troubleshooting
00_MFPNG.book 5 ページ 2000年4月26日 水曜日 午後5時11分
Unable to Share Files/Send Files (FTP)
The FTP server is not set correctly.
U:>ftp 192.168.1.195
← Connect to server
Connected to 192.168.37.195.
220 canmfs FTP server (UNIX(r) System V Release 4.0) ready.
User (192.168.37.195:(none)): user_name
← User login
331 Password required for user_name.
Password:
← Enter password
230 User user_name logged in.
ftp> cd /export/share
← Move to file destination directory
250 CWD command successful.
ftp> bin
← Set file transfer type (binary)
200 Type set to I.
ftp> put sample.tif
← Set transfer file name for verification
ftp> by
← Cut off server connection
221 Goodbye
Cause 2
Solution
Cause 3
Solution
If the above are confirmed and file sharing still does not operate normally, consult the network administrator for the environment you are using.
The machine’s address [User] setting contains one or more spaces after the
User name.
Ensure that the machine’s address [User] setting does not contain spaces after
the User name.
The machine was turned to OFF while sending a file to the FTP server, and
when the machine was turned back to ON, it attempted to resend the file.
(When a Windows NT/2000 FTP server is being used.)
If power to the machine is turned to OFF while a file is being sent to the FTP
server, the FTP server may hold the file in a writing-in-progress state. Therefore, this file cannot be overwritten even when the machine re-connects and
sends the same file again. Stop the FTP server temporarily and delete the file
that has not finished sending, so it can be sent again.
Troubleshooting
6-5
Appendix
Perform the following steps to check the server status. (If you are using Windows, perform these steps from the MS-DOS prompt.)
• Example using UNIX, where the FTP server has the IP address
192.168.1.195
6
Cause 1
Solution
00_MFPNG.book 6 ページ 2000年4月26日 水曜日 午後5時11分
Unable to Share Files/Send Files (NetWare)
Cause 1
Solution
File sharing settings for the NetWare file server are incorrect.
Check the following settings:
In Bindery Mode
• Use your computer to log in and select NetWare client, then from the
Explorer, double-click Entire Network, and check whether the NetWare
server you want to share is listed there. Or from the Explorer select Tools –
Find – Computer…, enter the name of the NetWare server you want to share,
and check whether that NetWare server is on the network. (The name of this
server will be the Host Name when you set up the address of the machine.)
• Open the server, and open the folder for file sharing. (The path to this folder
will be the File Path when you set up the address of the machine.)
• Check that files can be written to this folder.
6
Appendix
In NDS Mode
• Log in as a user with Admin or equivalent authority, then from the Explorer,
double-click Entire Network, and check whether the NetWare server you
want to share is listed there. Or from the Explorer select Tools – Find – Computer…, enter the name of the NetWare server you want to share, and check
whether that NetWare server is on the network.
• Start the NWADMIN for this server. If Root is displayed at the upper left corner of the screen, the layer below it is the context. If Root is not displayed, go
to the View menu, and select Go Up a Level to change to the display below
Root. (The name of this context will be the value input to the right side of the
expression [o=] when you set up the address of the machine.)
• With Root appearing on the screen, go to the View menu and select Go Up a
Level, to open the Set Context dialog box. The tree name will be displayed in
the Tree space. (This tree name will be the value input to the right side of the
expression '.TREE=' when you set up the address of the machine.)
If the above are confirmed and file sharing still does not operate normally, consult the network manager for the environment you are using.
Cause 2
Solution
Cause 3
Solution
6-6
The file sharing server and print server are set up as the same NetWare server
(when the print server is an NDS PServer or Bindery PServer).
When the print server is NDS PServer or Bindery PServer, the same NetWare
server cannot be set up as both the file sharing server and the print server. The
machine cannot log in twice as the NetWare server at the same time. When the
print server is NDS PServer or Bindery PServer, set up the file sharing server
on a different NetWare server. If both the print server and file sharing server are
set up on the same NetWare server, the print service must be changed to
Remote Print mode.
There is a print job in the printing queue, and the machine is still receiving this
job.
Send the file after the print job has been completely received. The machine
cannot send files while it is receiving a print job.
Troubleshooting
00_MFPNG.book 7 ページ 2000年4月27日 木曜日 午前10時7分
Control Panel Menu List
The machine control panel provides the following configuration of menus for network settings. For
details, see the related pages in this manual. (*Indicates factory settings.)
Additional Functions
Setting Description
Remarks
System Settings
Network Settings
TCP/IP Settings
IP address 0.0.0.0*
Subnet Mask
IP address 0.0.0.0*
Gateway Address
IP address 0.0.0.0*
DNS Server
IP address 0.0.0.0*
Enable DHCP
On/Off*
Enable RARP
On/Off*
Enable BOOTP
On/Off*
Host Name
Enter device host name, max. 47 characters
Domain Name
Network domain name to which device
belongs, max. 47 characters
Appendix
IP Address
NetWare Settings
On/Off*
Frame Type
Auto Detect*/Ethernet II/802.2/802.3/SNAP
IPX External Network Number
auto set, display only
Node Number
auto set, display only
Print Service
Bindery PServer/RPrinter/NDS PServer*/
NPrinter
Setting
The following menu windows appear,
depending on the print service
6
NetWare
Bindery PServer Selected:
Print Server
47 characters
File Server
47 characters
Print Server Password
20 characters
Service Mode
Service only currently mounted form/
Change forms as needed/
Minimise form changes across print
queues/
Minimise form changes within print
queues*
Printer Number
0* to 15
Polling Interval
5 sec.* (1 to 15 sec.)
Printer Form
0* to 255
Buffer Size
1 to 20* (KB units)
Control Panel Menu List
6-7
00_MFPNG.book 8 ページ 2000年4月26日 水曜日 午後5時11分
Additional Functions
Setting Description
System Settings
RPrinter Selected:
Print Server
47 characters
File Server
47 characters
Printer Number
0* to 15
NDS Pserver selected:
Appendix
Print Server
64 characters
Tree
32 characters
Context
256 characters
Print Server Password
20 characters
Service Mode
Service only currently mounted form/
Change forms as needed/
Minimise form changes across print
queues/
Minimise form changes within print
queues*
Printer Number
0* to 254
Polling Interval
5 sec.* (1 to 255 sec.)
Printer Form
0* to 255
Buffer Size
3 to 20* (KB units)
NPrinter Selected:
6
Print Server
64 characters
Tree
32 characters
Context
256 characters
Printer Number
0* to 254
AppleTalk Settings
AppleTalk
On*/Off
Phase
Phase 2 (fixed)
Service Name
32 characters
Zone
32 characters
Ethernet Driver Settings
Auto Detect
On*/Off
Communication Mode
Half Duplex*/Full Duplex
Ethernet Type
10 Base-T*/100 Base-TX
MAC Address
display only
E-mail/I-Fax
6-8
SMTP Server
Max. 48 characters
E-mail Address
Max. 64 characters
POP Server
Max. 48 characters
POP Address
Max. 32 characters
POP Password
Max. 32 characters
POP Interval
0* (1 to 99 minutes)
Control Panel Menu List
Remarks
00_MFPNG.book 9 ページ 2000年4月26日 水曜日 午後5時11分
To Confirm Settings
You can print a user data list to confirm the network settings made from the machine’s touch panel
display.
Use the following procedures to print a user data list.
Additional
Functions
key.
On the touch panel display, press the [Report Settings] key and then press
[Print List] – [User’s Data List].
You will see a box asking “Do you wish to print list?” Press [Yes] to print the list.
NOTE
• You can select [System Settings] - [Network Settings] to check the machine’s network settings.
For information about other items, see the Reference Guide.
Appendix
2
Press the
****************************
***
USER’S DATA LIST
***
****************************
Communications Settings
Common Settings
Erase Failed TX
JPEG Compression Ratio
Photo Mode
TX Terminal ID
Retry Times
Gamma Value for Color Send Jobs
# of Received Copies
Select Cassette
Switch A
Switch B
Switch C
System Settings
Network Settings
TCP/IP Settings
IP Settings
Subnet Mask
Gateway Address
DNS Server
Host Name
Domain Name
Enable DHCP
Enable RARP
Enable BOOTP
NetWare Settings
NetWare
Frame Type
IPX External Network Number
Node Number
Print Service
NDS PServer Settings
Print Server
Tree
Context
Communications Settings
E-mail/I-Fax Settings
Maximum Data Size For Sending
Default Subject
Memory Lock
Fax Settings
Send Start Speed
Receive Start Speed
Memory Lock
Database Communications Time Out
6
1
On
Normal
Off
Outside
3 times
2.2
1
off
off
172.20.56.110
255.255.255.0
172.20.56.1
172.20.48.1
de2038
cse.canon.co.jp
Off
Off
Off
On
Auto Detect
963DC6A3
0000850D4232
NDS PServer
3 MB
Attached Image
On
33600bps
33600bps
Off
5 min.
To Confirm Settings
6-9
00_MFPNG.book 10 ページ 2000年4月26日 水曜日 午後5時11分
Specifications
Hardware Specifications
Network Interface: 10 Base-T/100 Base-TX (RJ45)
Software Specifications
Protocol Supported
IPX/SPX
Frame type: 802.2/802.3/Ethernet II/802.2 SNAP/Auto Detect
Print applications: Bindery PServer/NDS PServer/RPrinter/NPrinter
TCP/IP
Frame type: Ethernet II
Print applications: LPD/RAW/IPP
AppleTalk
Frame type: 802.2 SNAP
Appendix
Print applications: PAP (Printer Access Protocol)
NOTE
6
• Specifications are subject to change without notice.
6-10
Specifications
00_MFPNG.book 11 ページ 2000年4月26日 水曜日 午後5時11分
Index
Numerics
10 Base-T .............................................................................................................................2-6, 2-7
100 Base-TX ........................................................................................................................2-6, 2-7
A
AppleTalk .............................................................................................................. 1-2, 4-2, 4-3, 4-4
Network Setup ....................................................................................................................... 4-2
Printing Setup ........................................................................................................................ 4-2
Settings ................................................................................................................................. 4-5
AppleTalk Network Setup ............................................................................................................ 4-2
Bindery Mode .............................................................................................................................. 3-4
Bindery Mode Example ............................................................................................................. 3-15
Bindery PServer .......................................................................................................................... 3-4
BOOTP ........................................................................................................................................ 2-7
6
C
Appendix
B
Checking Your Network Environment ......................................................................................... 1-4
Communication Mode ................................................................................................................. 2-7
Computer Settings for Printing .................................................................................................... 2-3
Connecting to a TCP/IP Network .............................................................................................. 2-14
Control Panel Menu List .............................................................................................................. 6-7
D
DHCP .......................................................................................................................................... 2-7
DNS Server ............................................................................................................................... 2-10
DNS server .................................................................................................... 2-12, 2-35, 2-42, 2-44
Domain Name ........................................................................................................................... 2-10
E
E-mail/I-Fax Settings ................................................................................................................... 2-2
Entering E-mail and I-Fax Settings ........................................................................................... 2-11
Ethernet ................................................................................................................. 2-2, 2-3, 4-2, 4-3
Communication Mode ........................................................................................................... 2-7
Driver ..................................................................................................................................... 2-5
Driver Settings ....................................................................................................................... 2-6
Index
6-11
00_MFPNG.book 12 ページ 2000年4月26日 水曜日 午後5時11分
Type .......................................................................................................................................2-7
EtherTalk .....................................................................................................................................4-3
F
File Sharing
for Windows ...........................................................................................................................1-3
Settings ................................................................................................................. 2-3, 2-25, 3-3
Settings on a NetBIOS Network ................................................................................ 2-28, 2-36
Using UNIX ..........................................................................................................................2-43
File Sharing Settings ...................................................................................................................2-3
FTP Server ...................................................................................................................... 2-32, 2-39
Full Duplex ...................................................................................................................................2-7
H
6
Appendix
Half Duplex ..................................................................................................................................2-7
Hardware Specifications ............................................................................................................6-10
Host Name .................................................................................................................................2-10
I
IIS .................................................................................................................................... 2-32, 2-39
Installing NetSpot ........................................................................................................................5-4
IP Address ........................................................................................................................... 2-2, 2-5
Setting ....................................................................................................................................2-7
Settings ..................................................................................................................................2-9
IPP ................................................................................................................................... 2-14, 2-20
IPX ...............................................................................................................................................1-3
L
LDP Settings .............................................................................................................................2-16
LocalTalk .....................................................................................................................................1-2
LPD ........................................................................................................................ 2-14, 2-19, 2-23
LPD/RAW Settings ....................................................................................................................2-18
LPR ............................................................................................................... 2-15, 2-16, 2-18, 2-19
LPR Port Utility ..........................................................................................................................2-15
LPT1 ..........................................................................................................................................2-17
M
Macintosh .......................................................................................................1-5, 4-2, 4-6, 5-2, 5-3
Macintosh Network Settings ........................................................................................................4-3
Microsoft TCP/IP Printing ............................................................................................................5-3
6-12
Index
00_MFPNG.book 13 ページ 2000年4月26日 水曜日 午後5時11分
Microsoft Windows 2000 .................................................2-3, 2-18, 2-21, 2-22, 2-25, 2-36, 5-3, 5-4
Microsoft Windows 2000 Professional ........................................................................1-2, 1-3, 2-32
Microsoft Windows 2000 Server ..........................................................................................1-2, 1-3
Microsoft Windows 95/98 ..................................................1-2, 1-3, 2-3, 2-14, 2-15, 2-20, 2-25, 5-4
Microsoft Windows NT ...........................................................2-3, 2-14, 2-16, 2-22, 2-28, 2-31, 5-4
Microsoft Windows NT Server .....................................................................................1-2, 1-3, 2-32
Microsoft Windows NT Workstation .....................................................................................1-2, 1-3
Microsoft Windows TCP/IP Printing .......................................................................................... 2-16
P
Password ................................................................................................................2-13, 2-26, 2-27
PCONSOLE .........................................................................................................................3-2, 3-6
POP
Index
6-13
6
Appendix
N
NDS ..................................................................................................................................3-11, 3-14
NDS mode ................................................................................................................................. 3-15
NDS PServer ......................................................................................................................3-4, 3-11
NetBIOS .......................................................................................................... 1-3, 2-25, 2-28, 2-36
NetSpot .......................................................................................................... 2-5, 3-2, 4-2, 5-3, 5-4
for Macintosh ......................................................................................................................... 5-2
for Microsoft ........................................................................................................................... 5-2
for UNIX ................................................................................................................................. 5-2
Overview ............................................................................................................................... 5-6
Requirements ........................................................................................................................ 5-2
NetWare ....................................................................................................... 1-3, 3-5, 3-9, 3-14, 5-3
Administrator ......................................................................................................................... 3-5
File Server ............................................................................................................................. 3-5
Network .................................................................................................................1-2, 3-4, 3-12
Print Server ........................................................................................................................... 3-4
Server .................................................................................................................................... 1-5
Settings ............................................................................................................................... 3-10
NetWare 3.2 .........................................................................................................................3-4, 3-6
NetWare 4.1 ................................................................................................................................ 3-4
NetWare 4.1 or later .................................................................................................................... 3-5
NetWare 5 ................................................................................................................................... 3-4
NetWare Print Service Settings ................................................................................................... 3-4
Network Settings ......................................................................................................................... 2-8
Novell Directory Service (NDS) ................................................................................................... 3-4
Novell NetWare ........................................................................................................................... 1-2
NPrinter ..............................................................................................................................3-4, 3-11
NTFS format .....................................................................................................................2-30, 2-38
00_MFPNG.book 14 ページ 2000年4月26日 水曜日 午後5時11分
Address ................................................................................................................................2-13
Interval .................................................................................................................................2-13
Password .............................................................................................................................2-13
POP Server ...............................................................................................................................2-12
POP3 ................................................................................................................................. 1-3, 2-12
Print Functional Unit ....................................................................................................................2-3
Printing Problems and Solutions .................................................................................................6-2
Printing Settings .................................................................................................................. 2-3, 3-2
Printing Setup ..............................................................................................................................4-2
Printing Using
a NetWare Network ...............................................................................................................1-2
a TCP/IP Network ..................................................................................................................1-2
an AppleTalk Network ............................................................................................................1-2
Protocol Settings ................................................................................................................. 2-5, 3-9
Protocols that NetSpot Supports .................................................................................................5-3
Q
6
Appendix
Queue Server Mode ....................................................................................................................3-4
R
RARP ..........................................................................................................................................2-7
RAW ..........................................................................................................................................2-14
Remote Printer Mode ..................................................................................................................3-4
Requirements
for File Sharing ......................................................................................................................1-3
for Printing .............................................................................................................................1-2
for Using E-mail/I-Fax ............................................................................................................1-3
RPrinter .......................................................................................................................................3-4
S
Salutation ....................................................................................................................................2-3
Sample
Macintosh Network ................................................................................................................1-5
Recipient Settings ...................................................................................................... 2-27, 3-14
UNIX Network ........................................................................................................................1-6
Windows Network (With NetWare Server) .............................................................................1-4
Windows Network (Without NetWare Server) ........................................................................1-5
Selecting the Ethernet Type
10 Base-T ..............................................................................................................................2-7
100 Base-TX ..........................................................................................................................2-7
Service Pack 5 ........................................................................................................... 1-2, 1-3, 2-22
Setting
6-14
Index
00_MFPNG.book 15 ページ 2000年4月26日 水曜日 午後5時11分
Up AppleTalk ......................................................................................................................... 4-4
Setting Up
a Computer for Printing ....................................................................................................... 3-12
NetWare ................................................................................................................................ 3-9
the Ethernet Driver ..................................................................................................2-5, 3-9, 4-4
Settings from the Control Panel ...........................................................................................2-5, 3-9
Settings Using an FTP Server ..........................................................................................2-32, 2-39
SMTP Server Settings ............................................................................................................... 2-12
Software Specifications ............................................................................................................. 6-10
Solaris ............................................................................................................... 1-2, 1-3, 2-23, 2-24
Specifications ............................................................................................................................ 6-10
Supervisor ................................................................................................................................... 3-6
System Settings .......................................................................................................................... 2-7
6
TCP/IP ................................................................................................................................1-3, 2-36
Networks ............................................................................................................................... 2-2
Protocol ........................................................................................................................1-4, 2-29
Settings ..........................................................................................................................2-7, 2-8
Setup Procedures .................................................................................................................. 2-2
Test Printing .............................................................................................................................. 2-24
Types of Print Service ................................................................................................................. 3-4
Appendix
T
U
UNIX ............................................................................................................. 1-6, 2-3, 2-23, 5-3, 5-5
File Sharing ......................................................................................................................... 2-43
URL ........................................................................................................................................... 2-20
Using
a Fixed IP Address ................................................................................................................ 2-9
a NetBIOS Network (File Sharing for Windows) .................................................................... 1-3
a Network With Various Types of Computers ....................................................................... 1-6
BOOTP ................................................................................................................................ 2-10
DHCP .................................................................................................................................... 2-9
FTP ........................................................................................................................................ 1-3
NetSpot ................................................................................................................................. 5-4
RARP .................................................................................................................................... 2-9
W
Web Browser .................................................................................................................2-2, 2-4, 2-5
Windows ............................................................................................................ 2-3, 2-14, 2-31, 5-3
Index
6-15
6
Appendix
00_MFPNG.book 16 ページ 2000年4月26日 水曜日 午後5時11分
6-16
Index
CANON INC.
30-2, Shimomaruko 3-chome, Ohta-ku, Tokyo 146-8501, Japan
CANON U.S.A., INC.
One Canon Plaza, Lake Success, NY 11042, U.S.A.
CANON CANADA INC.
6390 Dixie Road Mississauga, Ontario L5T 1P7, Canada
CANON EUROPA N.V.
Bovenkerkerweg 59-61 P.O. Box 2262, 1180 EG Amstelveen, The Netherlands
CANON FRANCE S.A.
17,quai du President Paul Doumer 92414 Courbevoie Cedex, France
CANON (U.K.) LTD.
Woodhatch, Reigate, Surrey, RH2 8BF, United Kingdom
CANON DEUTSCHLAND GmbH
Europark Fichtenhain A10, 47807 Krefeld, Germany
CANON ITALIA S.p.A.
Palazzo L Strada 6 20089 Milanofiori Rozzano (MI) Italy
CANON LATIN AMERICA, INC.
6505 Blue Lagoon Drive Suite 325 Miami Florida 33126 U.S.A.
CANON AUSTRALIA PTY. LTD
1 Thomas Holt Drive, North Ryde, Sydney, N.S.W. 2113, Australia
CANON SINGAPORE PTE. LTD.
79 Anson Road #09-01/06, Singapore 079906
CANON HONGKONG CO., LTD
9/F, The Hong Kong Club Building, 3A Chater Road, Central, Hong Kong
FA7-2237-010
©CANON INC. 2000
MADE IN JAPAN


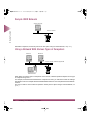


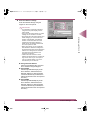

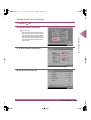


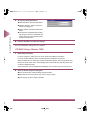
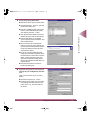

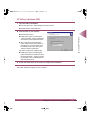
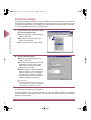

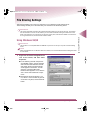
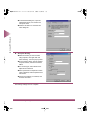
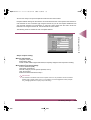

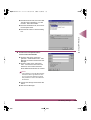
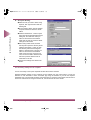
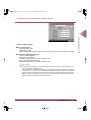
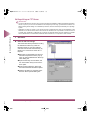


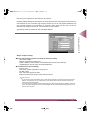
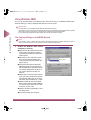

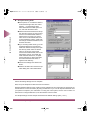


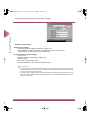
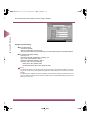


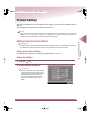
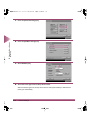


![[Impostazioni rete].](http://vs1.manualzilla.com/store/data/006126015_1-a8b230434cd1a1b69e1ac6b45a87b86d-150x150.png)