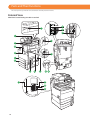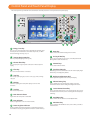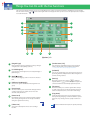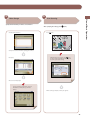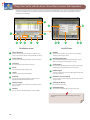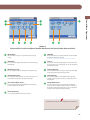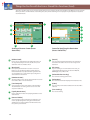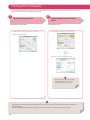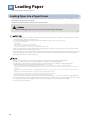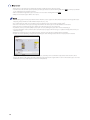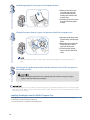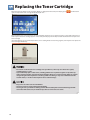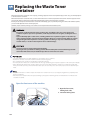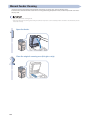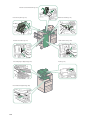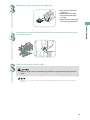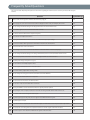
1
Basic Operation Guide After you finish reading this guide, store it in a safe place for future reference. ENG How to Use This Manual How to Use This Manual This manual describes the following functions, operations, and maintenance procedures. • • • • • Functions that can be operated from the touch panel display of the machine Remote UI functions that can operate the machine from a computer Printing from a computer Routine Maintenance Procedures Clearing paper jams/staple jams Store this manual next to the machine so it can be used when the user encounters trouble operating the machine. * Some functions explained in this manual may require optional equipment. * Screen shots used in this manual may differ from the ones you actually see. Contents ■ Before You Start Using This Machine What This Machine Can Do• • • • • • • • • • • • • • • • • • • • • • • • • • • • • • • • • • • • • • • • • • • • • • • • • • • • • • • • • • • • • • • • • • • • • • • •10 Main Power and Energy Saver Key• • • • • • • • • • • • • • • • • • • • • • • • • • • • • • • • • • • • • • • • • • • • • • • • • • • • • • • • • • • • • • • • • •12 Parts and Their Functions • • • • • • • • • • • • • • • • • • • • • • • • • • • • • • • • • • • • • • • • • • • • • • • • • • • • • • • • • • • • • • • • • • • • • • • • •14 Control Panel and Touch Panel Display • • • • • • • • • • • • • • • • • • • • • • • • • • • • • • • • • • • • • • • • • • • • • • • • • • • • • • • • • • • • • •20 Main Menu Screen Settings • • • • • • • • • • • • • • • • • • • • • • • • • • • • • • • • • • • • • • • • • • • • • • • • • • • • • • • • • • • • • • • • • • • • • • •22 Changing Settings According to Your Needs • • • • • • • • • • • • • • • • • • • • • • • • • • • • • • • • • • • • • • • • • • • • • • • • • • • • • • • • •24 ■ Flow of Basic Operations How to Make a Copy• • • • • • • • • • • • • • • • • • • • • • • • • • • • • • • • • • • • • • • • • • • • • • • • • • • • • • • • • • • • • • • • • • • • • • • • • • • • •26 Things You Can Do with the Copy Functions • • • • • • • • • • • • • • • • • • • • • • • • • • • • • • • • • • • • • • • • • • • • • • • • • • • • • • • • •28 Sending a Fax • • • • • • • • • • • • • • • • • • • • • • • • • • • • • • • • • • • • • • • • • • • • • • • • • • • • • • • • • • • • • • • • • • • • • • • • • • • • • • • • • •32 Things You Can Do with the Fax Functions • • • • • • • • • • • • • • • • • • • • • • • • • • • • • • • • • • • • • • • • • • • • • • • • • • • • • • • • • • •34 Sending Scanned Data (E-Mail/I-Fax/File Servers) • • • • • • • • • • • • • • • • • • • • • • • • • • • • • • • • • • • • • • • • • • • • • • • • • • • • •38 Things You Can Do with the Scan and Send Functions • • • • • • • • • • • • • • • • • • • • • • • • • • • • • • • • • • • • • • • • • • • • • • • • •40 Storing Scanned Data • • • • • • • • • • • • • • • • • • • • • • • • • • • • • • • • • • • • • • • • • • • • • • • • • • • • • • • • • • • • • • • • • • • • • • • • • • • •44 Things You Can Do with the Scan and Store Functions • • • • • • • • • • • • • • • • • • • • • • • • • • • • • • • • • • • • • • • • • • • • • • • • •46 Printing Stored Data • • • • • • • • • • • • • • • • • • • • • • • • • • • • • • • • • • • • • • • • • • • • • • • • • • • • • • • • • • • • • • • • • • • • • • • • • • • • •48 Sending Stored Data• • • • • • • • • • • • • • • • • • • • • • • • • • • • • • • • • • • • • • • • • • • • • • • • • • • • • • • • • • • • • • • • • • • • • • • • • • • • •50 Things You Can Do with the Access Stored Files Functions (File Operation)• • • • • • • • • • • • • • • • • • • • • • • • • • • • • • • • •52 Things You Can Do with the Access Stored Files Functions (Print) • • • • • • • • • • • • • • • • • • • • • • • • • • • • • • • • • • • • • • • •53 Things You Can Do with the Access Stored Files Functions (Send) • • • • • • • • • • • • • • • • • • • • • • • • • • • • • • • • • • • • • • • •56 Operating the Machine from a Computer (Remote UI) • • • • • • • • • • • • • • • • • • • • • • • • • • • • • • • • • • • • • • • • • • • • • • • • •58 Printing from a Computer • • • • • • • • • • • • • • • • • • • • • • • • • • • • • • • • • • • • • • • • • • • • • • • • • • • • • • • • • • • • • • • • • • • • • • • •60 ■ Routine Maintenance Loading Paper • • • • • • • • • • • • • • • • • • • • • • • • • • • • • • • • • • • • • • • • • • • • • • • • • • • • • • • • • • • • • • • • • • • • • • • • • • • • • • • • • •64 Loading Tab Paper Using the Tab Feeding Attachment Kit-B1 (Optional)• • • • • • • • • • • • • • • • • • • • • • • • • • • • • • • • • • •73 Loading Envelopes Using the Envelope Feeder Attachment-D1 (Optional) • • • • • • • • • • • • • • • • • • • • • • • • • • • • • • • • •76 Replacing the Stamp Cartridge (Feeder) • • • • • • • • • • • • • • • • • • • • • • • • • • • • • • • • • • • • • • • • • • • • • • • • • • • • • • • • • • • • •83 Replacing the Staple Cartridge (For Optional Products) • • • • • • • • • • • • • • • • • • • • • • • • • • • • • • • • • • • • • • • • • • • • • • • •87 Removing Punch Waste (External 2/3 Hole Puncher-B2) • • • • • • • • • • • • • • • • • • • • • • • • • • • • • • • • • • • • • • • • • • • • • • • •94 Replacing the Toner Cartridge • • • • • • • • • • • • • • • • • • • • • • • • • • • • • • • • • • • • • • • • • • • • • • • • • • • • • • • • • • • • • • • • • • • • •96 Replacing the Waste Toner Container • • • • • • • • • • • • • • • • • • • • • • • • • • • • • • • • • • • • • • • • • • • • • • • • • • • • • • • • • • • • • •102 Routine Cleaning • • • • • • • • • • • • • • • • • • • • • • • • • • • • • • • • • • • • • • • • • • • • • • • • • • • • • • • • • • • • • • • • • • • • • • • • • • • • • •105 Consumables• • • • • • • • • • • • • • • • • • • • • • • • • • • • • • • • • • • • • • • • • • • • • • • • • • • • • • • • • • • • • • • • • • • • • • • • • • • • • • • • • •114 2 How to Use This Manual ■ Troubleshooting Clearing Paper Jams • • • • • • • • • • • • • • • • • • • • • • • • • • • • • • • • • • • • • • • • • • • • • • • • • • • • • • • • • • • • • • • • • • • • • • • • • • • •118 Reducing the Frequency of Paper Jams • • • • • • • • • • • • • • • • • • • • • • • • • • • • • • • • • • • • • • • • • • • • • • • • • • • • • • • • • • • •150 Clearing Staple Jams (For Optional Products)• • • • • • • • • • • • • • • • • • • • • • • • • • • • • • • • • • • • • • • • • • • • • • • • • • • • • • • •151 If Memory Becomes Full During Scanning • • • • • • • • • • • • • • • • • • • • • • • • • • • • • • • • • • • • • • • • • • • • • • • • • • • • • • • • • •159 When an Error Message Is Displayed • • • • • • • • • • • • • • • • • • • • • • • • • • • • • • • • • • • • • • • • • • • • • • • • • • • • • • • • • • • • • • •161 When an Error Code Is Displayed• • • • • • • • • • • • • • • • • • • • • • • • • • • • • • • • • • • • • • • • • • • • • • • • • • • • • • • • • • • • • • • • • •162 Printer/Fax Driver Troubleshooting • • • • • • • • • • • • • • • • • • • • • • • • • • • • • • • • • • • • • • • • • • • • • • • • • • • • • • • • • • • • • • • •163 Service Call Message• • • • • • • • • • • • • • • • • • • • • • • • • • • • • • • • • • • • • • • • • • • • • • • • • • • • • • • • • • • • • • • • • • • • • • • • • • • •164 Frequently Asked Questions • • • • • • • • • • • • • • • • • • • • • • • • • • • • • • • • • • • • • • • • • • • • • • • • • • • • • • • • • • • • • • • • • • • • •170 3 How to Use This Manual Refer to the following manuals included with your machine according to your needs. ● Before Using This Machine ■ Describes precautions for using the machine. Before Using This Machine ■ Includes the specifications of the machine. Read this guide first. Please read this guide before operating this product. After you finish reading this guide, store it in a safe place for future reference. ● ENG Setup Guide ■ Describes the settings required before using functions, such as the network settings for sending e-mail. Setup Guide ■ Describes how to add applications and update the firmware. After you finish reading this guide, store it in a safe place for future reference. ● ENG Basic Operation Guide (This Manual) ■ Provides an overview of the functions and describes the basic operations. Basic Operation Guide ■ Describes the maintenance and troubleshooting procedures for the machine. After you finish reading this guide, store it in a safe place for future reference. 4 ENG How to Use This Manual ● e-Manual ■ Describes all the functions of the machine. Also provided with a search function that is useful for finding and checking information. ■ Includes “Practical Workflows,” which introduces flows of practical operations using functions of the machine. ● Driver Installation Guide ■ Provides instructions on installing the printer, fax, and other drivers. • Printer Driver Installation Guide • Mac Printer Driver Installation Guide • Fax Driver Installation Guide • Network ScanGear Installation Guide ■ Included on the same CD-ROM as each driver. Symbols Used in This Manual The following symbols are used in this manual to explain procedures, restrictions, handling precautions, and instructions that should be observed for safety. Indicates a warning concerning operations that may lead to death or injury to persons if not performed correctly. To use the machine safely, always pay attention to these warnings. Indicates a caution concerning operations that may lead to injury to persons if not performed correctly. To use the machine safely, always pay attention to these cautions. Indicates operational requirements and restrictions. Be sure to read these items carefully to operate the machine correctly, and avoid damage to the machine or property. Indicates a clarification of an operation, or contains additional explanations for a procedure. Reading these notes is highly recommended. Indicates an operation that must not be performed. Read these items carefully, and make sure not to perform the described operations. 5 How to Use This Manual (e-Manual) ● Follow the procedure below to install the e-Manual. ● Windows 1. Insert the e-Manual CD-ROM into your computer. 2. Select the language for the e-Manual. 3. Select [Install]. If you select [Display Manuals], the e-Manual is displayed without installation. 4. Read the License Agreement, and then click [Yes]. The e-Manual is saved in the [Documents]* folder on your computer. If the shortcut icon is created on the Desktop or if the [index. html] file is double-clicked, the e-Manual is displayed. * The folder name differs, depending on your operating system. The folder name is [Documents] if you are using Windows Vista/7/8 and [My Documents] if you are using Windows 2000/XP. ● Macintosh 1. Insert the e-Manual CD-ROM into your computer. 2. Drag-and-drop the [iRADV_C5255_Manual_us] folder to the location you want to save it. 3. Double-click the index.html file inside the [iRADV_C5255_Manual_us] folder to display the e-Manual. • Depending on the operating system you are using, a security protection message may appear. In this case, allow the content to be displayed. • When you start the e-Manual, the following page (the top page) appears. ■ If the e-Manual (CD-ROM) Does Not Start The CD-ROM auto run function may be disabled. In this case, perform the following procedure. • Windows 8/Server 2012 1. Show the Desktop click the File Explorer icon on the taskbar. 2. Click [Computer]. 3. Double-click the e-Manual icon. 4. Double-click [Maninst.exe]. • Windows Vista/7/Server 2008 1. Click [Start] on the Windows taskbar click [Computer]. 2. Double-click the e-Manual icon. 3. Double-click [Maninst.exe]. • Windows XP/Server 2003 1. Click [Start] on the Windows taskbar click [My Computer]. 2. Double-click the e-Manual icon. 3. Double-click [Maninst.exe]. • Windows 2000 1. Double-click [My Computer] on the desktop. 2. Double-click the e-Manual icon. 3. Double-click [Maninst.exe]. 6 1 4 5 How to Use This Manual 3 6 7 2 8 13 1 Enter keyword(s) here Enter a keyword in the search dialog box, and press search results page is displayed. 2 . The Select from functions The instructions of each function and operation method are described. 3 [Top] The top page of the e-Manual is displayed. 4 [Site map] The site map of the e-Manual is displayed. 5 [Help] The usage of the e-Manual is displayed. 6 [Glossary] The glossary is displayed. 7 12 11 10 8 Select from purpose 9 This section includes the introduction of functions of the machine for each purpose. 9 [Office Locations] Inquiries for the machine are displayed. 10 [Third Party Software] The information about the third party software is displayed. 11 [Trademarks] The trademarks are displayed. 12 [Copyright] The information of copyrights is displayed. 13 [Disclaimers] The disclaimers are displayed. First of all… This section describes the required information to use the machine, and the information of optional product and software. ■ Performing a Search Enter a keyword in the entry field which is located at the top of the “Top page” or on the search area in the “Topic page,” and then click to display the search results. ■ Printing a Topic Page • On a topic page, you can print by category or by topic. • Depending on the settings of the Web browser, the background color and images of the topic page may not be printed. 7 MEMO 8 Before You Start Using This Machine Before You Start Using This Machine 1 What This Machine Can Do . . . . . . . . . . . . . . . . . . . . . . . . . . . . . . . . . . . . . . . . 10 Main Power and Energy Saver Key . . . . . . . . . . . . . . . . . . . . . . . . . . . . . . . . . 12 Parts and Their Functions . . . . . . . . . . . . . . . . . . . . . . . . . . . . . . . . . . . . . . . . . 14 External View• • • • • • • • • • • • • • • • • • • • • • • • • • • • • • • • • • • • • • • • • • • • • • • • • • • • • • • • • • • • • • • • • • • • • • • • • • • • • • • • • • • • • • • • • • • • • • • • • • • • 14 Internal View • • • • • • • • • • • • • • • • • • • • • • • • • • • • • • • • • • • • • • • • • • • • • • • • • • • • • • • • • • • • • • • • • • • • • • • • • • • • • • • • • • • • • • • • • • • • • • • • • • • • 16 Feeder • • • • • • • • • • • • • • • • • • • • • • • • • • • • • • • • • • • • • • • • • • • • • • • • • • • • • • • • • • • • • • • • • • • • • • • • • • • • • • • • • • • • • • • • • • • • • • • • • • • • • • • • • 18 Control Panel and Touch Panel Display . . . . . . . . . . . . . . . . . . . . . . . . . . . . . 20 Main Menu Screen Settings . . . . . . . . . . . . . . . . . . . . . . . . . . . . . . . . . . . . . . . 22 Changing Settings According to Your Needs . . . . . . . . . . . . . . . . . . . . . . . . 24 9 Before You Start Using This Machine What This Machine Can Do Revolutionary Documentation Work with an Evolving Multitasking Machine Send Outside the Company Fax Original Color Scan Function Fax Function 1 2 3 4 Copy Function Send Function Telephone Line I-Fax Internet MEAP Function E-Mail Copy/Print 1 2 Print Function LAN Remote UI Function 3 4 In-Company Computer File Server E-Mail The imageRUNNER ADVANCE C5255/C5250/C5240/C5240A/C5235A incorporates a rich array of input and output features that can greatly enhance your efficiency. Equipped with features that meet the needs of document work in a digitized office, the imageRUNNER ADVANCE C5255/C5250/C5240/C5240A/ C5235A represents the ultimate in a color digital multitasking machines. ● Copy ● Fax You can make two-sided copies from one-sided originals or copy two pages onto one side of the paper to reduce printing cost. There are other modes, such as the Collate modes. (p. 26) Scanned documents as well as stored files and computer data can be sent by facsimile. You can also send documents to multiple addresses and forward received facsimile to another destination. Also, by using Remote Fax sending function, you can share the Fax function on the same network. (p. 32) 10 You can send scanned documents by e-mail or I-fax, as well as store them on a network file server. You can also store sent documents in the Mail Box. (p. 38) ● Use Memory Media You can scan and store documents in the memory media connected to the USB port. You can also print stored files directly from the memory media. (p. 44, p. 48) ● Use Mail Box (Store/Print/Send) ● Use Advanced Box You can store scanned documents or data from a computer in a mail box. You can print documents stored in a mail box, and sent them to other destinations. (p. 44, p. 48) You can set a file format to the scanned document so that it can be accessed from your computer. You can also store files in the Advanced Box with a file format that can be used on your computer. The stored data can be shared by accessing it from a computer. The Advanced Box can also be accessed from other imageRUNNER ADVANCE machines for operations, such as printing stored data. (p. 44, p. 48) ● Use Remote Scanner ● Print Secured File You can use this machine as a remote scanner by TWAIN compatible computer software. You can scan up to 11” x 17” in size at a resolution of 600 x 600 dpi. (See e-Manual > Scanner.) You can send print data protected with a PIN/password from a computer to the machine. This data can be printed only by entering the correct PIN/password on the machine. This enables you to print without unauthorized people viewing your data. (See e-Manual > Secure Print.) ● Printing a Fax/I-Fax File in the Memory RX inbox ● View Web Page If Memory RX is set, files received by Fax/I-Fax function are not printed, but stored in the Memory RX Inbox. You can print the stored files whenever necessary. This can help prevent outputs being forgotten at the machine. (See e-Manual > Fax/I-Fax Inbox.) You can use this machine to browse Web pages from the touch panel display of the machine or print PDF files on the Web pages. (See e-Manual > Web Access.) * Some functions explained in this manual may require optional equipment. 11 Before You Start Using This Machine ● Send Documents (E-Mail/Fax/I-Fax/File Server/Store in Mail Box) Main Power and Energy Saver Key This section describes how to use the main power switch and the Energy Saver key. Do not connect or disconnect the power cord with wet hands, as this may result in electrical shock. ● How to Turn ON the Main Power Make sure that the power plug is firmly inserted into the power outlet and that the Security Key is in the ON positions (turn it to the right) if it is inserted into the machine, and then turn ON the main power of the machine following the procedure below. 1. 2. 3. Open the main power switch cover. Press the main power switch to the “I” side. Close the main power switch cover. 1 3 2 • If you are using a login service, log in using the procedure for the login service you are using. • If the main power indicator on the control panel does not light even though the main power switch is ON, be sure to check the breaker to see if it is OFF. • If you want to turn OFF the main power and then back ON again, wait for at least 10 seconds after the main power indicator is turned OFF before turning ON the main power. However, when [Quick Startup Settings for Main Power] is enabled, if you don’t wait more than 20 seconds after the main power indicator is turned OFF, quick startup is not performed. 12 Before You Start Using This Machine ● Shutting Down the Machine This machine performs a procedure to protect hard disk when the machine is shut down. This enables the machine to be shut down safely, even if there are any jobs being processed, or a MEAP application is running while the machine is shutting down. 1. 2. 3. Open the main power switch cover. Press the main power switch to the “ Close taver. ” side. • Do not turn the main power OFF while using the Fax/I-Fax function. Sending or receiving I-fax or fax documents cannot be done when the main power is turned OFF. • If the message <Backing up stored data from the Remote UI...> is displayed on the touch panel display, do not turn the main power OFF. This may cause the machine to fail to back up the stored data. • Data stored in the machine may be damaged if the Advanced Box is accessed by another imageRUNNER ADVANCE machine or a computer immediately before the machine shuts down. • The machine may take some time to completely shutdown. Do not unplug the power cord until the main power indicator of the machine is OFF. • If the main power is turned OFF during scanning or printing, a paper jam may occur. • If [Quick Startup Settings for Main Power] in [Preferences] (Settings/ Registration) and [Sleep Mode Alert], which appears when you press on the control panel, are both set to ‘On’, the tone sounds when turning OFF the main power of the machine. (Depending on the situations, the machine does not startup quickly and the tone does not sound.) 1 3 2 ● Energy Saver Key If the machine is idle for a certain period of time, the machine will enter the Auto Sleep mode to minimize energy consumption. Press (Energy Saver) to cancel the Sleep mode and resume normal machine operations. 13 Parts and Their Functions This section provides you with the names and functions of all the parts of the machine. External View When the Cassette Feeding Unit-AD2 is attached 13 2 14 15 1 3 12 11 10 4 9 8 7 21 6 5 17 16 18 19 20 14 Feeder 2 USB Port (1) Use the USB port to connect a USB device. 3 Security Key (Optional) For managing the use of the machine and preventing unauthorized copies. 4 Main Power Switch Press to the “I” side to turn the power ON. 5 Main Unit’s Right Cover Open this cover when clearing a paper jam inside the main unit. 6 Multi-Purpose Tray Use the multi-purpose tray to feed paper manually, and for loading nonstandard paper stock, such as envelopes. 12 13 Paper Drawer’s Right Cover Open this cover when clearing a paper jam in Paper Drawers 1 and 2. 8 Paper Drawer 2 Holds up to 550 sheets of paper (20 lb bond (80 g/m2)). 9 Paper Drawer 1 Holds up to 550 sheets of paper (20 lb bond (80 g/m2)). 10 Output Tray Prints and copies are output to this tray. 11 Output Paper Tray Guide LAN Port Use a LAN cable to connect the machine to a network. 14 USB Port (2) Use the USB port to connect external hard disks and other devices to the machine. 15 USB Connector Use a USB cable to connect the machine to a computer. 16 Test Button Press this button to test the circuit breaker. 17 Breaker Detects excess current or leakage current. 18 7 Control Panel Includes the keys, touch panel display, and indicators required for operating the machine. LINE 4 Use this port to connect the Super G3 3rd/4th Line Fax Board to the machine. 19 LINE 3 Use this port to connect the Super G3 3rd/4th Line Fax Board to the machine. 20 LINE 2 Use this port to connect the Super G3 2nd Line Fax Board to the machine. 21 LINE 1 Use this port to connect a fax line to the machine. Tilt the output paper tray guide up to prevent output papers from falling down. 15 Before You Start Using This Machine 1 Originals placed in the feeder are fed one sheet at a time to the platen glass for scanning. Parts and Their Functions Internal View When the Cassette Feeding Unit-AD2 is attached 6 1 2 5 4 3 16 Platen Glass 4 5 2 Upper Cover of the Fixing Unit Waste Toner Container Waste toner accumulates here. Toner Replacement Cover Open this cover to replace the toner cartridge. Open this cover to clear a paper jam in the fixing unit. 6 3 Duplexing Unit Pull out the duplexing unit to clear a paper jam. Toner Cartridge When toner runs out, pull out the toner cartridge, and replace it with a new one. 17 Before You Start Using This Machine 1 Use the platen glass when scanning books, thick originals, thin originals, transparencies, etc. Parts and Their Functions Feeder Both sides of two-sided originals can be scanned simultaneously. 3 2 1 4 9 8 7 6 5 12 13 18 11 10 Feeder Cover 2 Original Set Indicator Lights when originals are placed in the original supply tray. 3 Original Supply Tray Originals placed here are automatically fed sheet by sheet into the feeder. Place originals into this tray with the surface that you want to scan face up. 7 8 Auxiliary Original Supply Tray Pull out this tray when feeding large sized paper. 5 Auxiliary Original Output Tray Pull out this tray when outputting large sized paper. You can pull out this tray up to 2 levels. 6 Original Output Tray Originals that have been scanned from the original supply tray are output into the original output tray in the order that they are fed into the feeder. Original Output Indicator Lights when originals are being output and starts blinking in a specified period after outputting originals is complete. 9 Inner Cover Open this cover to clean the document feed scanning area. 10 4 Slide Guides Adjust these guides to match the width of the original. Document Scan Cover Open this cover to replace the stamp cartridge or clean the document feed scanning area. 11 Platen Glass Use the platen glass when scanning books, thick originals, thin originals, transparencies, etc. 12 Document Feed Scanning Area Scans documents sent from the feeder. 13 Original Stopper Holds down originals to support outputting originals neatly. 19 Before You Start Using This Machine 1 Open this cover to remove jammed paper. Control Panel and Touch Panel Display This section provides you with the names and functions of all the parts of the control panel and touch panel display. 14 13 1 19 18 2 12 5 11 17 16 7 15 10 1 Settings/Registration key Press to specify settings/registration. (p. 24) 3 Counter Check key Press to display the copy and print count totals on the touch panel display. 4 Clear key Press to clear entered values or characters. 5 Stop key Press to stop a job in progress, such as a scan, copy, or fax (scanning only) job. 6 Edit Pen Use when operating the touch panel display, such as to enter characters. 7 Start key Press to start an operation. 8 Main Power Indicator Lights when the main power is turned ON. 9 Error Indicator Flashes or lights if there is an error in the machine. 10 Processing/Data Indicator Flashes or blinks green when the machine is performing operations, and maintains a steady green light when fax data is stored in memory. 20 9 6 8 Energy Saver key Press to set or cancel the Sleep mode. Lights when the machine enters the Sleep mode. For information on the Auto Sleep mode, see “Main Power and Energy Saver Key,” on p. 12. 2 3 4 11 Reset key Press to restore the standard settings of the machine. 12 ID (Log In/Out) key Press to log in/out when a login service, such as Department ID Management or SSO-H has been set. 13 Numeric keys Press to enter numerical values. 14 Touch Panel Display The settings screen for each function is shown on this display. Eight function keys are displayed by default. 15 Brightness Adjustment Dial Use to adjust the brightness of the touch panel display. 16 Volume Settings key Press to display the screen for adjusting settings such as the transmission volume and fax sending/receiving alarm volume. 17 Status Monitor/Cancel key Press to check the status of jobs or to cancel print jobs. Also, press to check status of the machine, such as checking the amount of paper remaining. 18 Quick Menu key Press to retrieve favorite functions stored in Quick Menu. 19 Main Menu key Press to return to the Main Menu screen, such as when you want to switch functions. Before You Start Using This Machine ● Use Quick Menu If functions that are frequently used are set in the Quick Menu beforehand, you can recall the function by pressing (Quick Menu). If you are using a login service, Quick Menu screen set for each user appears. To register a function in the Quick Menu, set the function and press [Register to Quick Menu] from . ● Logging In/Out If you are managing the machine with a login service, such as Department ID Management or SSO-H (Single Sign-On H), a log in screen appears. If the log in screen appears, enter the Department ID and PIN or the user name and password press (Log In/Out) or [Log In] on the screen. Press (Log In/Out) or [Log Out] after you finish using the machine to log out. ● Use Help If (Help) is displayed on the top right of the function setting screen, press (Help) to check the explanation of the function or how to specify settings. Press to check the explanation of the function or how to specify settings. 21 Main Menu Screen Settings You can specify settings for the displayed screen by pressing an administrator. on the top right of the screen. To perform this procedure, log in to the machine as • The items displayed when is pressed may differ, depending on the function. • If authentication function is used, items displayed may differ or may not be available, depending on the login user’s privileges. ● Specifying the Main Menu Settings You can set the number of buttons and the layout displayed on the Main Menu screen. 1. Press [Main Menu Button Display Settings]. 2. Press or to select the number of buttons and the layout to be displayed. 3. Select the function that appears on the list change the order in which it is displayed. 4. Press [OK]. • Select the function that appears on the list and press [Up] or [Down] to change the order in which it is displayed. • You can place or delete one blank button space by pressing [Add Blank] or [Delete Blank], respectively. Example of Customized Screen ● Top Buttons Settings You can display up to two function shortcut buttons on the top of the screen. 1. Press [Top Buttons Settings]. 2. Select the shortcut button and the function to assign to it. 3. Press [OK]. If you do not want to select a function, press [Unassigned]. Example of Registration 22 Before You Start Using This Machine ● Setting the Main Menu Wallpaper You can select the wallpaper for the Main Menu screen. 1. Press [Main Menu Wallpaper Settings]. 2. Select the wallpaper. 3. Press [OK]. Example of Customized Screen ● Other Main Menu Settings You can set whether the shortcut buttons for modes, such as changing the displayed language or changing the paper settings for copying/printing are displayed on the Main Menu screen. 1. Press [Other Main Menu Settings]. 2. Specify the other settings. 3. Press [OK]. If <Display [Language/Keyboard Switch]> is set to ‘On’, screen. appears on the Main Menu If <Display [Settings/Reg.Shortcut]> is set to ‘On’, [Settings/Reg.Shortcut] appears on the Main Menu screen. From [Settings/Reg.Shortcut], you can select shortcut buttons to the setting screens for [Auto Adjust Gradation], [Paper Settings], and [Paper Type Management Settings]. Example of Customized Screen If <Display [Show All]> is set to ‘On’, [Show All] appears on the Main Menu screen. For more information on [Language/Keyboard Switch], [Auto Adjust Gradation], [Paper Settings], and [Paper Type Management Settings], see e-Manual > Settings/Registration. 23 Changing Settings According to Your Needs The Settings/Registration screen appears when you press (Settings/Registration) on the control panel. The machine provides various settings that enable you to use it more conveniently and easily. You can register or change the settings according to your needs. For more information, see e-Manual > Settings/Registration. ● Preferences You can specify basic settings for using the machine, such as changing the paper size to load, changing the default screen to display, setting the date and time, setting the time it takes to enter the low power mode, and specifying the settings for connecting to a network. ● Adjustment/Maintenance You can specify settings for using the machine more comfortably, such as adjusting the density, adjusting the gradation, and cleaning the feeder. ● Function Settings You can specify and register settings for using each function more conveniently, such as registering shortcut buttons for the Copy function, setting automatic redialing for the Fax function, and setting the maximum data size to send via e-mail. ● Set Destination You can register fax and e-mail destinations in the address book. In addition to registering frequently used destinations, you can also register multiple destinations as a group, enabling you to send to those destinations at the same time. You can also register different types of destinations (e-mail and file server) as a group. ● Management Settings You can set the administrator settings for managing the machine. This enables you to set an ID and password for each department, manage confidential information, and count the number of pages printed for each ID. You can also register licenses and certificates. 24 Flow of Basic Operations Flow of Basic Operations 2 How to Make a Copy . . . . . . . . . . . . . . . . . . . . . . . . . . . . . . . . . . . . . . . . . . . . . . 26 Things You Can Do with the Copy Functions . . . . . . . . . . . . . . . . . . . . . . . . 28 Sending a Fax . . . . . . . . . . . . . . . . . . . . . . . . . . . . . . . . . . . . . . . . . . . . . . . . . . . . 32 Things You Can Do with the Fax Functions . . . . . . . . . . . . . . . . . . . . . . . . . . 34 Sending Scanned Data (E-Mail/I-Fax/File Servers) . . . . . . . . . . . . . . . . . . . 38 Things You Can Do with the Scan and Send Functions . . . . . . . . . . . . . . . 40 Storing Scanned Data. . . . . . . . . . . . . . . . . . . . . . . . . . . . . . . . . . . . . . . . . . . . . 44 Things You Can Do with the Scan and Store Functions . . . . . . . . . . . . . . . 46 Printing Stored Data . . . . . . . . . . . . . . . . . . . . . . . . . . . . . . . . . . . . . . . . . . . . . . 48 Sending Stored Data . . . . . . . . . . . . . . . . . . . . . . . . . . . . . . . . . . . . . . . . . . . . . 50 Things You Can Do with the Access Stored Files Functions (File Operation) . . . . . . . . . . . . . . . . . . . . . . . . . . . . . . . . . . . . . . . . . . . . . . . . . . 52 Things You Can Do with the Access Stored Files Functions (Print) . . . . 53 Things You Can Do with the Access Stored Files Functions (Send) . . . . 56 Operating the Machine from a Computer (Remote UI) . . . . . . . . . . . . . . . 58 Printing from a Computer . . . . . . . . . . . . . . . . . . . . . . . . . . . . . . . . . . . . . . . . . 60 25 How to Make a Copy This section describes the flow of basic copy operations. 1 2 Placing Originals Place the original on the feeder or the platen glass. Placing originals in the feeder Selecting Function Select [Copy] from the Main Menu screen. Press [Copy]. Adjust the slide guides to fit the size of your originals. Neatly place your originals with the side to be copied face up. Copy Basic Features Screen is displayed. Placing originals on the platen glass Open the feeder/platen cover. Place your originals face down. You can set various copying functions. For more information, see from p. 28 to p. 31 in this manual. Gently close the feeder/platen cover. • If a log in screen for Department ID Management or SSO-H appears, you must enter the applicable authentication information (ID, password/ PIN). If the Copy Card Reader-F1 is attached, first insert a control card. • If a login service, such as Department ID Management or SSO-H has been set, press (Log In/Out) to log out. 26 3 4 Enter the number of copies. Press the numeric keys to enter the desired copy quantity (1 to 999). If you make a mistake when entering values, press (Clear) enter the correct value. Start Copying After specifying the settings, press Press Flow of Basic Operations Setting the Number of Copies (Start). (Start). If the following screen appears, press (Start) to scan the next original. After all of the originals are scanned, press [Start Copying]. The specified copy quantity appears on the screen, as shown below. When copying is complete, remove your originals. 27 Things You Can Do with the Copy Functions To use Copy functions, press [Copy] on the Main Menu screen. This section describes the functions you can use on the Copy Basic Features screen and the [Options] (1/3) screen. The [Options] screen is divided into three screens. Pressing or on the bottom right of the screen displays the next or previous screen. 4 3 5 2 6 1 7 8 9 Regular Copy Basic Features Screen 1 2 3 4 [Direct]/[Copy Ratio] You can specify the copy ratio for a copy job. You can change the zoom ratio by reducing/enlarging a scanned document to a preset paper size, or by entering a value to specify a desired scan ratio. 6 [Check Settings] You can check, edit, or clear the current copy settings. [Favorite Settings] You can register frequently used copy settings. You can recall the registered frequently used settings for future use. [Select Color] You can select the color mode for copying. 7 [Select Paper] You can select the paper size/type and the paper source. You can also set the machine to automatically recognize the original size and the copy ratio, and then copy. 8 [Previous Settings] You can recall the three most recent copy jobs, and make copies using the recalled copy settings. Shortcuts to [Options] Press to select a [Options] mode. [Finishing], [2-Sided], [Density], and [Original Type] are set as default. [Copy Sample] You can check the copy result of one set before making multiple sets of copies. You can also copy a specified page. Quickly Make Settings and Copy You can set the settings on the Regular Copy Basic Features screen quickly by using the Express Copy Basic Features screen. For instructions on displaying the Express Copy Basic Features Screen, see e-Manual > Settings/Registration. 28 5 9 [Interrupt] You can temporarily stop the current copy job and give priority to a rush copy. 3 1 4 Flow of Basic Operations 2 12 11 5 6 10 9 8 7 [Options] 1/3 1 [Book 2 Pages] 7 2 3 [2-Sided] You can make one-sided copies from two-sided originals, or make two-sided copies of your originals. 8 9 [Booklet] You can layout the scanned documents to make a booklet. You can also print a cover sheet or make a saddle stitch booklet. 10 6 [Insert Sheets] Press to insert blank sheets or chapter pages between specified pages. 11 [N on 1] You can reduce multiple pages of the original to copy onto a single page. You can also change the order of the page layout. [Transparency Cover Sheets] The machine automatically interleaves a sheet of paper between each transparency when copying onto transparencies. [Job Build] You can scan originals that are too many to be placed at once, by dividing them into multiple batches. After all originals are scanned, copying is started. * To make a saddle stitch booklet, optional products are required. 5 [Different Size Originals] You can make copies of different size originals at the same time without separating the documents. If the paper setting is set to Auto, the machine automatically selects the appropriate paper size. * To staple printed sheets, optional products are required. 4 [Density] Change the exposure. You can press to make the exposure darker or to make the exposure lighter. You can set the machine to automatically adjust the exposure. [Finishing] You can collate copies in page order or into groups of the same page. You can staple the printed sheets. [Original Type] Image quality for scanning is adjusted according to the type of original, such as [Text/Photo], [Map], [Printed Image], [Photo Printout], or [Text]. You can copy facing pages in a book onto separate sheets of paper. 12 [Add Cover] You can add covers. 29 Things You Can Do with the Copy Functions This section describes the functions you can use on the [Options] (2/3 and 3/3) screen of the Copy function. The [Options] screen is divided into three screens. Pressing or on the bottom right of the screen displays the next or previous screen. 2 3 1 4 12 11 5 6 10 9 8 7 [Options] 2/3 1 [Secure Watermark] You can embed hidden text, such as “CONFIDENTIAL” in the background of copies. The embedded text appears when the copies are printed, helping prevent unauthorized copying and information leakage. 7 8 2 3 4 5 6 [Document Scan Lock] You can embed tracking information in copies. This increases security by preventing unauthorized copies. [Color Balance] This mode enables you to make color balance adjustments. [Adjust One-Touch Color] This mode enables you to make fine adjustments to the image quality on copies. [Erase Frame] [Gutter] This mode enables you to make copies with the entire original image shifted by a designated width to create a margin on the copies. You can set different width values for the each side of the paper. [Print Date] You can copy the date (day, month, and year) onto the output. You can specify the size, position, or direction of the date. [Watermark] This mode enables you to copy a watermark and user-defined text onto the output. You can specify the size, position, or direction of the watermark. 10 [Page Numbering] 11 [Copy Set Numbering] You can copy with page numbers. You can also specify the size, position, or direction of the page number. This mode enables you to print copy set numbers. You can specify the size, position, or direction of the copy set number. This mode enables you to erase shadows that appear when scanning various types of originals. You can also erase shadows of the punch holes. Functions with this mark require an optional product(s). 30 9 [Shift] This mode enables you to make copies with the entire image shifted to the center or a corner. You can use the numeric keys to specify the location. 12 [Sharpness] This mode enables you to adjust image quality for copying. You can use this mode when you want to soften and sharpen text, lines, or the outline of the image. How to Make a Copy 3 1 4 10 5 9 8 7 Flow of Basic Operations 2 6 [Options] 3/3 1 2 3 4 5 [Print & Check] This mode enables you to confirm scanned images page by page before copying when you scan originals on the platen glass. 6 7 [Nega/Posi] This mode enables you to copy the original image with the hues and gradations inverted. [Repeat Images] 8 This mode enables you to repeatedly copy the entire original image in either the vertical or horizontal direction. [Merge Job Blocks] 9 This mode enables you to scan multiple batches of originals with different copy settings and copy them as one document. [Print on Tab] This mode enables you to copy onto the tabs on tab paper. 10 [Area Designation] This mode enables you make copies of a designated area. [Superimpose Image] This mode superimposes an image (image form) previously scanned, registers it in the memory of the machine, and then places it on the image of the original. [Store in Mail Box] You can store the scanned originals in the User Inbox. The specified copy mode is also stored. [Job Done Notice] Press to have the machine notify the user through e-mail when the copy job is done. [Mirror Image] This mode enables you to copy the original image reversed, as if it were a reflection in a mirror. 31 Sending a Fax This section describes the flow of basic fax operations. An optional product is required to use the Fax function. 2 1 Placing Originals Place the original on the feeder or the platen glass. Placing originals in the feeder Selecting Function Select [Fax] from the Main Menu screen. Press [Fax]. Adjust the slide guides to fit the size of your originals. Neatly place your originals with the side to be copied face up. Fax Basic Features screen is displayed. Placing originals on the platen glass Open the feeder/platen cover. Place your originals face down. You can set various facsimile functions. For more information, see from p. 34 to p. 37 in this manual. Gently close the feeder/platen cover. • If a log in screen for Department ID Management or SSO-H appears, you must enter the applicable authentication information (ID, password/ PIN). If the Copy Card Reader-F1 is attached, first insert a control card. • If a login service, such as Department ID Management or SSO-H has been set, press (Log In/Out) to log out. • The send settings for the last send job may be retained. - To cancel the settings, press (Reset). - The specified destinations are not retained. 32 3 4 Enter the fax number. Enter the fax number using the numeric keys. If you want to enter two or more fax numbers, press [OK] enter the next destination. You can specify the destination using the one-touch buttons or [Address Book]. For more information on storing the destination, see e-Manual > Fax. Start Sending the Fax After specifying the settings, press Press Flow of Basic Operations Specify the destination. (Start). (Start). If the following screen appears, press (Start) to scan the next original. After all of the originals are scanned, press [Start Sending]. When sending is complete, remove your originals. After a job is sent, the send settings may be retained except the specified destinations. (Reset). To cancel the settings, press To send other jobs with the same settings, specify destinations for the jobs as the destination specified for the previous job is not retained. 33 Things You Can Do with the Fax Functions To use the Fax functions, press [Fax] on the Main Menu screen. This section describes the main functions on the Fax Basic Features screen. An optional product is required to use the Fax function. 4 5 3 6 2 7 1 8 13 12 11 10 9 Fax Basic Features Screen 1 2 3 4 5 6 34 [Details] You can check the detailed information for the destination selected from the Address Book. You can also change the new destination. [Delete Dest.] You can delete the displayed destination. 7 8 [Tone] Resolution If the resolution is high, you can send fine text and images clearly. If the resolution is low, the data size becomes smaller and you can reduce the time it takes to send. Scan Size You can select the original scanning size. If you press [Auto], the machine automatically recognizes the size of the original when scanning. Press when you want to directly call an extension line that is connected to a PBX (Private Branch eXchange) which accepts only tone signals. If you press [Tone], the letter <T> appears. 9 [PIN Code] 10 [Direct Send] 11 [On-Hook] 12 [Address Book] 13 One-Touch Buttons Press to enter the PIN (Personal Identification Number) code. You can press this key only if [Option] is selected for PIN code position. If [Prefix], [Suffix], or [Off ] is selected for PIN code position, this key is grayed out. [To Remote Add. Book] You can specify destinations registered in the one-touch buttons of a server machine by accessing from a client machine on the network. [Previous Settings] You can recall the three most recent destinations or fax settings. You can send a fax using the recalled destination or settings. Register One-Touch Button Press to register destinations in one-touch buttons. Check that the recipient can receive the facsimile, and then start scanning the originals. You can directly send without storing the original in the memory. When using the fax information service, you can perform operation, such as entering number while listening to the automated audio response from the speaker of the machine. Press to select a destination from the Address Book. You can also register frequently used destinations in the Address Book. Press to recall the destinations stored in a one-touch button. 1 4 3 Screen for Specifying the Fax Destination 1 2 [Pause] Press to insert a pause of several seconds in the fax number that you are dialing. If you insert a pause, the letter <p> appears between the numbers, and the letter <P> appears at the end of the number. When dialing an overseas number, insert a pause after the country code, and at the end of the telephone number. [Backspace] 3 4 [Set Details] Displayed when multiple lines are set to be used. Press to set the subaddress and password, or to select the telephone line to use for transmission. [Subaddress] You can send or receive fax documents with increased security by attaching a subaddress and a password to your fax transactions. Press when you enter an incorrect number to delete the number before the cursor. Functions with this mark require an optional product(s). 35 Flow of Basic Operations 2 Things You Can Do with the Fax Functions This section describes the functions you can use on the [Options] (1/2 and 2/2) screen of the Fax function. The [Options] screen is divided into two screens. Pressing or on the bottom right of the screen displays the next or previous screen. An optional product is required to use the Fax function. 2 3 1 4 12 11 5 6 10 9 8 7 [Options] 1/2 1 [Original Type] Image quality for scanning is adjusted according to the type of original, such as [Text], [Map], or [Photo]. 8 [Sender Name (TTI)] You can register a department name or personal name in advance, and show this on the destination fax machine. * Set the Sender Name after specifying the destination. 2 3 [2-Sided Original] Set to send two-sided originals. You can select [Book Type] or [Calendar Type]. [Book 2 Pages] You can scan facing pages, such as in a book one sheet at a time. 4 5 6 7 36 9 10 [Density] 11 [Sharpness] 12 [Copy Ratio] [Different Size Originals] You can scan originals of different size fed together in one group. [Erase Frame] This mode enables you to erase shadows that appear when scanning various types of originals. You can also erase shadows of the punch holes. [Direct Send] Check that the recipient can receive the facsimile, and then start scanning the originals. You can directly send without storing the original in the memory. [Select Line] You can select the telephone line to use for sending a facsimile. [Job Build] You can scan originals that are too many to be placed at once, by dividing them into multiple batches. After all originals are scanned, sending is started. Change the exposure. You can press to make the exposure darker or to make the exposure lighter. You can set the machine to automatically adjust the exposure. This mode enables you to scan the originals with a sharper or softer contrast. You can use this mode when you want to soften and sharpen text, lines, or the outline of the image. Specify the desired zoom ratios. You can change the zoom ratio by reducing/enlarging a scanned document to a preset paper size, or by entering a value to specify a desired scan ratio. Functions with this mark require an optional product(s). 3 1 4 Flow of Basic Operations 2 [Options] 2/2 1 2 [Delayed Send] This mode enables you to store a send job in memory, and have it sent at a later time. [Preview] This mode enables you to preview the scanned data of your originals and to check the page count before sending a fax. You can also delete a specified page. 3 4 [Finished Stamp] You can print a stamp (approximately 1/8” (3 mm) in diameter) on the front side of scanned and sent originals. [Job Done Notice] Press to have the machine notify the user through e-mail when the fax job is done. 37 Sending Scanned Data (E-Mail/I-Fax/File Servers) This section describes the flow of basic scan and send operations. 1 2 Placing Originals Place the original on the feeder or the platen glass. Placing originals in the feeder Selecting Function Select [Scan and Send] from the Main Menu screen. Press [Scan and Send]. Adjust the slide guides to fit the size of your originals. Neatly place your originals with the side to be copied face up. Scan and Send Basic Features screen is displayed. Placing originals on the platen glass Open the feeder/platen cover. Place your originals face down. You can set various send functions. For more information, see from p. 40 to p. 43 in this manual. Gently close the feeder/platen cover. • If a log in screen for Department ID Management or SSO-H appears, you must enter the applicable authentication information (ID, password/PIN). If the Copy Card Reader-F1 is attached, first insert a control card. • If a login service, such as Department ID Management or SSO-H has been set, press (Log In/Out) to log out. • The send settings for the last send job may be retained. - To cancel the settings, press (Reset). - The specified destinations are not retained. 38 3 4 Press [Address Book] select destination press [OK]. Press [Address Book]. If you are sending to only one destination, select a destination. If you are sending to multiple destinations, select the destinations press [OK]. Start Sending After specifying the settings, press Press Flow of Basic Operations Specify the Destination (Start). (Start). If the following screen appears, press (Start) to scan the next original. After all of the originals are scanned, press [Start Sending]. For more information on storing the destination in the address book, see e-Manual > Scan and Send. When sending is complete, remove your originals. You can specify the destination using the onetouch buttons or frequently used settings. Also, if you want to send to a new destination not yet stored, press [New Destination] enter the destination. After a job is sent, the send settings may be retained except the specified destinations. (Reset). To cancel the settings, press To send other jobs with the same settings, specify destinations for the jobs as the destination specified for the previous job is not retained. 39 Things You Can Do with the Scan and Send Functions To use the Send functions, press [Scan and Send] on the Main Menu screen. This section describes the main functions on the Scan and Send Basic Features screen. 2 3 1 3 6 5 4 Scan and Send Basic Features Screen 1 2 3 40 [Address Book] Press to select a destination from the Address Book. You can also register frequently used e-mail, I-fax, or file server destinations in the Local Address Book. [One-Touch] If a frequently used destination is stored in a one-touch button, you can specify the destination quickly. Press [To Remote Add. Book] to specify destinations registered in the one-touch buttons of a server machine by accessing from a client machine on the network. [New Destination] Press to specify a new destination not stored in the Address Book or one-touch buttons. 4 5 6 [Send to Myself] You can specify your own e-mail address as the destination. The administrator can restrict general users to send e-mail only to their addresses. [Specify Destinations] Press to display the methods for specifying destinations or the destination list. [Personal Folder] You can specify your personal folder as the destination. You need to specify settings before using personal folders. The administrator can restrict destination for file transmission to the operator’s personal folder. Flow of Basic Operations 1 2 3 4 5 6 9 7 8 Scan and Send Basic Features Screen (Destination Set) 1 2 3 4 5 [Previous Settings] You can recall the three most recent destinations or send settings. You can send using the recalled destination or settings. [Favorite Settings] You can register frequently used destination and settings. You can recall the registered frequently used settings for future use. [Select Color] You can select the Full Color, Grayscale, or Black-and-White mode. You can also set the machine to automatically select a color mode according to the original. [Resolution] If the resolution is high, you can send fine text and images clearly. If the resolution is low, the data size becomes smaller and you can reduce the time it takes to send. 6 7 8 9 [File Format] If you are sending to an e-mail address or file server, you can specify the file format. You can select from PDF, XPS, OOXML (pptx, docx), JPEG, or TIFF. [Cc Bcc] In addition to the destination for the documents, you can specify e-mail address destinations for the Cc and Bcc addresses. [Delete Dest.] You can delete the selected destination from the destination list. [Details] You can check the detailed information for the destination selected from the destination list. You can also change the new destination. [Scan Size] You can select the original scanning size. If you press [Auto Size], the machine automatically recognizes the size of the original when scanning. 41 Things You Can Do with the Scan and Send Functions This section describes the functions you can use on the [Options] (1/2 and 2/2) screen of the Scan and Send function. The [Options] screen is divided into two screens. Pressing or on the bottom right of the screen displays the next or previous screen. 2 3 1 4 5 9 8 7 6 [Options] 1/2 1 2 3 [Original Type] Image quality for scanning is adjusted according to the type of original, such as [Text], [Map], or [Photo]. 6 [2-Sided Original] Set to send two-sided originals. You can select [Book Type] or [Calendar Type]. [Book 7 2 Pages] You can scan facing pages, such as in a book one sheet at a time. 8 4 5 42 [Different Size Originals] You can scan originals of different size fed together in one group. [Erase Frame] This mode enables you to erase shadows that appear when scanning various types of originals. You can also erase shadows of the punch holes. 9 [Copy Ratio] Specify the desired zoom ratios. You can change the zoom ratio by reducing/enlarging a scanned document to a preset paper size, or by entering a value to specify a desired scan ratio. [Sharpness] This mode enables you to scan the originals with a sharper or softer contrast. You can use this mode when you want to soften and sharpen text, lines, or the outline of the image. [Job Build] You can scan originals that are too many to be placed at once, by dividing them into multiple batches. After all originals are scanned, sending is started. [Density] Change the exposure. You can press to make the exposure darker or to make the exposure lighter. You can set the machine to automatically adjust the exposure. Useful Send Functions (Last Page) 3 1 4 Flow of Basic Operations 2 5 8 7 6 7 [Options] 2/2 1 2 3 4 [Delayed Send] This mode enables you to store a send job in memory, and have it sent at a later time. You can specify from the current time to 23:59. 5 6 [Preview] This mode enables you to preview the scanned data of your originals and to check the page count before sending your document. You can also delete a specified page. 7 [Finished Stamp] You can print a stamp (approximately 1/8” (3 mm) in diameter) on the front side of scanned and sent originals. [Job Done Notice] Press to have the machine notify the user through e-mail when the send job is done. 8 [E-Mail Priority] You can set a priority level when sending e-mail. [Reply-to] You can specify a reply-to address when sending an e-mail or I-fax. [Subject/Message] You can specify a subject and enter a message when sending an e-mail or I-fax. If you do not specify a subject, it will be specified automatically. [File Name] If you set PDF(OCR), XPS(OCR), or OOXML(OCR) as the file format, you can set [Auto (OCR)] to ‘On’ to automatically extract the first text block in the document for use as its filename. 43 Storing Scanned Data This section describes the flow of basic Scan and Store operations. It also describes an example of how to store scanned data in a mail box. 1 2 Placing Originals Place the original on the feeder or the platen glass. Placing originals in the feeder Selecting Function Select [Scan and Store] from the Main Menu screen. Press [Scan and Store]. Adjust the slide guides to fit the size of your originals. Neatly place your originals with the side to be copied face up. Select [Mail Box] from the screen where you can select the type of storage location. Placing originals on the platen glass Open the feeder/platen cover. Place your originals face down. Gently close the feeder/platen cover. • If a log in screen for Department ID Management or SSO-H appears, you must enter the applicable authentication information (ID, password/ PIN). If the Copy Card Reader-F1 is attached, first insert a control card. • If a login service, such as Department ID Management or SSO-H has been set, press (Log In/Out) to log out. 44 3 4 Specify the mail box that you want to store the file in. Select the desired mail box. Start Scanning After specifying the settings, press Press Flow of Basic Operations Select Storage (Start). (Start). You may need to enter a PIN when specifying the mail box. Press [Scan]. If the following screen appears, press (Start) to scan the next original. After all of the originals are scanned, press [Start Storing]. The Scan screen is displayed. You can set various scan functions. For more information, see from p. 46 to p. 47 in this manual. When scanning is complete, remove your originals. 45 Things You Can Do with the Scan and Store Functions To scan the original and store it, press [Scan and Store] on the Main Menu screen. This section describes the functions you can use on the Scan and Store Basic Features screen and the [Options] screen. If you press [Scan] after selecting the storage location, the screen below appears. 3 2 4 1 5 6 11 7 10 9 8 Scan Screen 1 2 3 4 5 6 46 [Select Color] You can select the Full Color or Black mode. You can also set the machine to automatically select a color mode according to the original. [Resolution] 7 8 If the resolution is high, you can store fine text and images clearly. If the resolution is low, the data size becomes smaller. [Direct]/[Copy Ratio] 9 This mode enables you to change the copy ratio by enlarging/ reducing a copy to a preset paper size, or by entering a value to specify a desired copy ratio. [Scan Size] You can select the original scanning size. If you press [Auto], the machine automatically recognizes the size of the original when scanning. [File Format] [Restore Default Set.] This mode is useful if you want to clear all settings and reset the settings. All settings are cleared. [2-Sided Original] Set to scan two-sided originals. You can select [Book Type] or [Calendar Type]. [Density] Change the exposure. You can press to make the exposure darker or to make the exposure lighter. You can set the machine to automatically adjust the exposure. 10 [File Name] 11 [Original Type] You can specify a file name for the data to be scanned. Image quality for scanning is adjusted according to the type of original, such as [Text/Photo], [Map], [Printed Image], [Photo Printout], or [Text]. You can set a file format, such as a PDF format to the scanned document so that it can be accessed from your computer. [Favorite Settings] You can register frequently used scan settings. You can recall the registered frequently used settings for future use. The available functions may differ, depending on the storage location. 3 1 4 9 5 8 7 Flow of Basic Operations 2 6 [Options] 1 2 3 4 5 [Book 2 Pages] You can scan facing pages, such as in a book one sheet at a time. [Booklet Scan] You can scan with booklet settings. 6 7 [N on 1] You can scan multiple pages of the original and reduce the size of the images to fit onto a single page. You can also change the order of the layout. 8 [Nega/Posi] This mode enables you to scan and record the original image by inverting the hues and gradations. [Job Build] You can scan originals that are too many to be placed at once, by dividing them into multiple batches. After all originals are scanned, storing is started. [Area Designation] This mode enables you to frame areas to scan/copy, or areas to blank out in the scanned image. [Erase Frame] This mode enables you to erase shadows that appear when scanning various types of originals. You can also erase shadows of the punch holes. 9 [Different Size Originals] You can scan originals of different size fed together in one group. [Sharpness] This mode enables you to adjust image quality for copying. You can use this mode when you want to soften and sharpen text, lines, or the outline of the image. The available functions may differ, depending on the storage location. 47 Printing Stored Data This section describes the flow of basic Access Stored Files operations. The procedure for printing files stored in a mail box is used here as an example. 1 2 Selecting Function Select [Access Stored Files] from the Main Menu screen. Press [Access Stored Files]. Select Storage Specify the storage location for the file. Select [Mail Box] from the Storage Selection screen. Select the desired mail box. You may need to enter a PIN when specifying the mail box. • If a log in screen for Department ID Management or SSO-H appears, you must enter the applicable authentication information (ID, password/ PIN). If the Copy Card Reader-F1 is attached, first insert a control card. • If a login service, such as Department ID Management or SSO-H has been set, press (Log In/Out)to log out. 48 3 4 Select the file that you want to print press [Print]. Select the file to print. Start Printing Flow of Basic Operations Select File After specifying the settings, press [Start Printing]. Press [Start Printing]. Press [Print]. You can set various print settings on the screen displayed when [Change Print Settings] is pressed. For more information, see from p. 53 to p. 55 in this manual. The Print screen is displayed. When printing is complete, the display returns to the Mail Box Selection screen. 49 Sending Stored Data This section describes the flow of basic Access Stored Files operations. The procedure for sending a file stored in a mail box is used here as an example. 1 2 Selecting Function Select [Access Stored Files] from the Main Menu screen. Press [Access Stored Files]. Select Storage Select [Mail Box]. Select [Mail Box] from the Storage Selection screen. Select the desired mail box. You may need to enter a PIN when specifying the mail box. • If a log in screen for Department ID Management or SSO-H appears, you must enter the applicable authentication information (ID, password/ PIN). If the Copy Card Reader-F1 is attached, first insert a control card. (Log In/Out) to log out. • If a login service, such as Department ID Management or SSO-H has been set, press 50 3 4 Select the file that you want to send press [Send]. Select the file to send. Start Sending Flow of Basic Operations Select File Specify the destination press [Start Sending]. Press [Address Book]. Select the destinations press [OK]. Press [Send]. Press [Start Sending]. You can set various send functions. For more information, see p. 56 to p. 57 in this manual. 51 Things You Can Do with the Access Stored Files Functions (File Operation) To perform various operations on stored files, press [Access Stored Files] on the Main Menu screen. This section describes the functions you can use to edit files stored in a mail box. Select the file that you want to edit from the list of stored files, press [Edit File], and the following screen is displayed. 2 10 9 1 3 8 7 6 5 15 14 4 File Selection Screen 1 2 3 4 5 6 7 8 [Clear Selection] 9 [Delete] You can delete stored files. You can erase unnecessary files and arrange the storage location. 10 [Merge Multiple Files] 11 [Insert Pages] 12 [Delete Pages] 13 [Add Files (Scan and Store)] 14 [Change File Name] 15 [Move/Duplicate] Press to select view settings of the files stored in a mail box. [Print List] You can print a list of files stored in a mail box. 12 11 Edit File Screen Press to cancel the selection of a file. For a mail box, if you cancel a selection, this switches to [Select All (Max 100 Files)]. List/Thumbnail 13 [Print] You can combine multiple files in the mail box into one file. Then you can print the combined files as one file. You can insert a specified file from the mail box in front of the specified page of another file from the same mail box. Press to display the Print Settings screen. [Send] Press to send a file stored in the mail box. [Edit File] Press to display the menu for adding or deleting a file, or displaying the detailed information of a file. [Display Image] This mode enables you to preview the stored file and check the page count. [Details] This mode enables you to erase specified page from a file that is stored in a mail box. You can scan the original and store the new file in the selected storage location. You can change a file name. You can move or duplicate files stored in the mail box. You can check the detailed information of the stored file. The available functions may differ, depending on the storage location. 52 Things You Can Do with the Access Stored Files Functions (Print) This section describes the functions on the Print Settings screen that you can use when printing stored files. If you select the file that you want to print from the list of stored files and press [Print], the following screen is displayed. 5 2 14 6 1 7 8 13 12 11 10 9 Print Screen Print Settings Screen 1 2 3 4 5 6 7 8 [Select Color] You can select color mode for printing. [Select Paper] You can select the paper size/type and the paper source. You can also set the machine to automatically select the paper size to match the size of the stored original. [Print Sample] 9 10 [Restore Settings]/[Change Print Settings] 11 [Store Settings] Press to store the print settings. 12 [2-Sided Printing] 13 [Finishing] This mode enables you to print successive pages of a stored file on both sides of a sheet of paper. You can collate prints in page order or into groups of the same page. You can staple the printed sheets. * To staple printed sheets, optional products are required. [Merge Files and Print] Press to merge multiple files and print as one file. This key is displayed only when multiple files are selected. Press to set the number of prints when multiple files are selected. * Displayed only when using the Mail Box. Cannot be used when multiple files are selected. [Favorite Settings] This mode enables you to register frequently used print settings. You can recall the registered frequently used settings for future use. [Change No. of Copies] * Displayed only when print settings have not been changed. You can check the print result of one set before making multiple sets of prints. You can also print a specified page. You can change or restore the print settings. [Start Printing] Press to start printing. 14 Print Range You can set the print range using [All Pages] or [Specify Pages]. [Delete File After Printing] Press to have a file automatically deleted after it is printed. [Restore Default Set.] Press to cancel all settings. The available functions may differ, depending on the storage location. 53 Flow of Basic Operations 4 3 Things You Can Do with the Access Stored Files Functions (Print) This section describes the functions you can use on the [Options] (1/2 and 2/2) screen of the Access Stored Files function. The [Options] screen is divided into two screens. Pressing or on the bottom right of the screen displays the next or previous screen. 2 13 3 1 4 12 5 11 6 10 9 8 7 15 14 [Options] (Mail Box) 1 2 3 [Add Cover] You can add covers. 9 [Page Numbering] You can print with page numbers. You can also specify the size, position, or direction of the page number. [Insert Sheets]/[Job Separator] Press to insert blank sheets or chapter pages between specified pages. When multiple files are selected, job separator sheets are inserted. 10 [Secure Watermark] 11 [Document Scan Lock] 12 [Superimpose Image] 13 [Print on Tab] 14 [Adjust One-Touch Color] 15 [Color Balance] [Booklet] You can layout the files to print a booklet. You can also print a cover sheet or make a saddle stitch booklet. You can embed hidden text, such as “CONFIDENTIAL” in the background of prints. The embedded text appears when the copies are printed, helping prevent unauthorized copying and information leakage. * To make a saddle stitch booklet, optional products are required. 4 5 6 7 8 [Shift] You can shift the position of the image to print to the desired position. [Gutter] This mode enables you to print with the entire original image shifted by a designated width to create a margin on the prints. You can set different width values for the each side of the paper. [Print Date] This mode enables you to print the date onto the output. You can specify the size, position, or direction of the date. [Watermark] This mode enables you to print a watermark and user-defined text onto the output. You can specify the size, position, or direction. [Copy Set Numbering] This mode enables you to print copy set numbers. You can specify the size, position, or direction of the copy set number. Functions with this mark require an optional product(s). 54 You can embed tracking information in prints. This increases security by preventing unauthorized copies. This mode superimposes an image (image form) previously scanned, registers it in the memory of the machine, and then combines it with the file to print. Load tab paper in the multi-purpose tray or paper drawer 2, and you can print onto the tabs using the Print on Tab mode. You can make prints by selecting the look of the image with just one touch of a key. You can make fine adjustments to the color by varying the relative strength and density of yellow, magenta, cyan, and black. The color adjustments that you make can be stored and recalled for future use. 3 1 4 8 7 6 9 5 11 10 [Options] (Advanced Box, the Advanced Box of Another Machine on the Same Network, Memory Media) 1 [Resolution] If the resolution is high, you can print fine text and images clearly. 7 [Booklet] This mode enables you to print documents in such a way that the prints are made into a booklet. * To make a saddle stitch booklet, optional products are required. 2 3 4 5 6 [Halftones] You can select the adjustment methods to use when printing with halftones. [Match Paper Size] You can enlarge/reduce a file image to match the paper size. [Enlarge Print Area] You can set the blank borders at each side of the page to 0” (0 mm), and print all the way to the edges of the page. [Password to Open a Doc.] You can print password protected PDF files by entering the password required to open them. 8 9 [N on 1] You can scan a file with multiple pages and reduce the size of the pages to print onto a single page. You can also specify the order in which to print. [Enlarge/Reduce] You can set the machine to enlarge or reduce data from JPEG or TIFF image files to fit the desired paper size. 10 [Print Position] 11 [Image Orientation] You can select whether to print JPEG and TIFF image data centrally or in the top left, or specify to set the print position automatically. You can set the machine to compare the size of JPEG and TIFF image data and automatically change the orientation of the image to fit the desired paper size, or you can specify the orientation of the image manually for printing. [Print Comments] You can print the PDF file and all the comments. The available functions may differ, depending on the file format. 55 Flow of Basic Operations 2 Things You Can Do with the Access Stored Files Functions (Send) This section describes things you can do when sending a file stored in a mail box, and the modes available on the [Options] screen. Select the file that you want to send from the list of stored files, press [Send], and the following screen is displayed. An optional product is required to use the Fax function. 3 2 8 1 9 6 10 7 11 12 5 4 Send Basic Features Screen (Access Stored Files) 1 2 3 4 5 6 56 [Address Book] Press to select a destination from the Address Book. You can also register frequently used e-mail, I-fax, file server, or fax destinations in the Local Address Book. [One-Touch] If a frequently used destination is stored in a one-touch button, you can specify the destination quickly. Press [To Remote Add. Book] to specify destinations registered in the one-touch buttons of a server machine by accessing from a client machine on the network. Screen for Specifying the Destination (Access Stored Files) 7 8 9 [Details] You can check the detailed information for the destination selected from the address list. You can also change a new destination. File Format If you are sending to an e-mail address or file server, you can specify the file format. You can select from PDF, XPS, OOXML(pptx, docx), JPEG, or TIFF. [Delete File After Sending] Press to delete certain pages from a file. [New Destination] This mode enables you to specify a new destination not stored in the Address Book or one-touch buttons. 10 [Delete Dest.] [Send to Myself] 11 [Cc Bcc] 12 [Start Sending] You can specify your own e-mail address as the destination. The administrator can restrict general users to send e-mail only to their addresses. [Specify Destinations] Press to display the methods for specifying destinations or the destination list. [Personal Folder] You can specify your personal folder as the destination. You need to specify settings before using personal folders. The administrator can restrict destination for file transmission to the operator’s personal folder. Press to delete a destination displayed in the destination list. Press to specify e-mail address destinations for the Cc and Bcc addresses. Press to start sending. 3 1 4 Flow of Basic Operations 2 5 7 6 7 [Options] 1 2 3 4 [Delayed Send] This mode enables you to store a send job in memory, and have it sent at a later time. [Job Done Notice] 5 6 Press to have the machine notify the user through e-mail when the send job is done. [File Name] If you set PDF(OCR), XPS(OCR), or OOXML(OCR) as the file format, you can set [Auto (OCR)] to ‘On’ to automatically extract the first text block in the document for use as its file name. 7 [E-Mail Priority] You can set a priority level when sending e-mail. [Reply-to] You can specify a reply-to address when sending an e-mail or I-fax. [Subject/Message] You can specify a subject and enter a message when sending an e-mail or I-fax. If you do not specify a subject, it will be specified automatically. [Sender Name (TTI)] You can register a department name or personal name in advance, and show this on the destination fax machine. * Set the Sender Name after specifying the destination. 57 Operating the Machine from a Computer (Remote UI) The Remote UI (User Interface) is preinstalled software in the machine that enables you to access the machine’s functions by using your computer’s Web browser. For example, the Remote UI enables you to access the machine to check job status, execute jobs, and specify various settings. To be able to use the Remote UI, all you need is a Web browser and a network connection between your computer and the machine. The Remote UI Is Useful in the Following Situations: ● ● ● If you want to check the job status If you want to edit Address Book from your computer If you want to check the remaining amount of paper or toner from your seat ■ To enable the Remote UI: • Log in as the administrator specify the following settings. 1. Press (Settings/Registration). 2. Press [Management Settings] [License/Other] [Remote UI]. 3. Press [On] [OK]. 4. Turn OFF the main power of the machine, and then turn ON the main power again. • The [Remote UI] setting is made effective only after turning the machine’s main power OFF, and then ON. For instructions on turning ON/OFF the machine, see p.12, 13 in this manual. 58 Remote UI (Last Page) 1 2 Access the Remote UI from a Web browser. Enter the IP address of the machine in the address bar of the Web browser. Checking the Job Status and Specifying the Settings Flow of Basic Operations Accessing the Remote UI from a Web Browser. Check the job status and specify the settings. To check the job status: Click [Status Monitor/Cancel]. Press [ENTER] on the keyboard. To specify the settings: To login as the administrator, enter the System Manager ID and System PIN click [Administrator Login]. Click [Settings/Registration]. To login as a general user, click [General User Login]. If the Log In screen is displayed, enter the user name and password click [Log In]. If a login service, such as Department ID Management or SSO-H has been set, enter the appropriate login information. 59 Printing from a Computer If you install a printer driver in your computer, you can use the machine to print data created using application software. This section describes the flow of basic operations to print data from your computer. 1 2 Display Print Settings Screen Select [Print] from the [File] menu. From the [File] menu in the application software, click [Print]. Display Properties Screen of Printer Driver Select the printer to use. Select the printer to use in [Printer] click [Properties]. The print dialog box is displayed. The properties screen of the printer driver appears. The default setting for [Print Style] is [2-sided printing]. However, for some driver versions, [1-sided printing] is the default setting. • Printing methods may differ, depending on the applications you are using. For details, see the instruction manuals provided with the application software. • The screens may differ, depending on the operating system, and the type and version of the printer driver you are using. 60 * A printer driver is software required for printing from application software. 3 4 Specify the print settings. Specify the desired settings click [OK]. Start Printing Flow of Basic Operations Specify Print Settings After specifying the settings, click [OK]. Click [OK]. When printing is complete, collect the output. To display detailed descriptions for each print setting, click [Help] on the bottom right of the Properties screen. The print job status can be checked from the Remote UI. For more information, see p. 59 in this manual. 61 MEMO 62 Routine Maintenance Routine Maintenance 3 Loading Paper . . . . . . . . . . . . . . . . . . . . . . . . . . . . . . . . . . . . . . . . . . . . . . . . . . . 64 Loading Paper into a Paper Drawer • • • • • • • • • • • • • • • • • • • • • • • • • • • • • • • • • • • • • • • • • • • • • • • • • • • • • • • • • • • • • • • • • • • • • • • • • • • • • • • • • • 64 Adjusting a Paper Drawer to Hold a Different Paper Size• • • • • • • • • • • • • • • • • • • • • • • • • • • • • • • • • • • • • • • • • • • • • • • • • • • • • • • • • • • • • • • • • 67 Loading Pre-Punched Paper • • • • • • • • • • • • • • • • • • • • • • • • • • • • • • • • • • • • • • • • • • • • • • • • • • • • • • • • • • • • • • • • • • • • • • • • • • • • • • • • • • • • • • • 69 Loading Transparencies • • • • • • • • • • • • • • • • • • • • • • • • • • • • • • • • • • • • • • • • • • • • • • • • • • • • • • • • • • • • • • • • • • • • • • • • • • • • • • • • • • • • • • • • • • • 69 Loading Paper into the Paper Deck Unit-B2 (Optional) • • • • • • • • • • • • • • • • • • • • • • • • • • • • • • • • • • • • • • • • • • • • • • • • • • • • • • • • • • • • • • • • • • 70 Loading Tab Paper Using the Tab Feeding Attachment Kit-B1 (Optional). . . . . . . . . . . . . . . . . . . . . . . . . . . . . . . . . . . . . . . . . . . . . . . . . . . . . . . . 73 Loading Envelopes Using the Envelope Feeder Attachment-D1 (Optional). . . . . . . . . . . . . . . . . . . . . . . . . . . . . . . . . . . . . . . . . . . . . . . . . . . . . . . . 76 How to Use the Envelope Feeder Attachment-D1 • • • • • • • • • • • • • • • • • • • • • • • • • • • • • • • • • • • • • • • • • • • • • • • • • • • • • • • • • • • • • • • • • • • • • • 76 Preparing the Envelopes • • • • • • • • • • • • • • • • • • • • • • • • • • • • • • • • • • • • • • • • • • • • • • • • • • • • • • • • • • • • • • • • • • • • • • • • • • • • • • • • • • • • • • • • • • 77 Loading Envelopes • • • • • • • • • • • • • • • • • • • • • • • • • • • • • • • • • • • • • • • • • • • • • • • • • • • • • • • • • • • • • • • • • • • • • • • • • • • • • • • • • • • • • • • • • • • • • • • 78 Loading the Envelope after Specifying the Size • • • • • • • • • • • • • • • • • • • • • • • • • • • • • • • • • • • • • • • • • • • • • • • • • • • • • • • • • • • • • • • • • • • • • • • • 79 Replacing the Stamp Cartridge (Feeder) . . . . . . . . . . . . . . . . . . . . . . . . . . . 83 Replacing the Staple Cartridge (For Optional Products) . . . . . . . . . . . . . 87 Replacing the Staple Cartridge in the Stapler Unit (Staple Finisher-J1/Booklet Finisher-J1) • • • • • • • • • • • • • • • • • • • • • • • • • • • • • • • • • • • • • 87 Replacing the Staple Case in the Saddle Stitcher Unit (Booklet Finisher-J1) • • • • • • • • • • • • • • • • • • • • • • • • • • • • • • • • • • • • • • • • • • • • • • • • • 89 Replacing the Staple Cartridge (Inner Finisher-E1)• • • • • • • • • • • • • • • • • • • • • • • • • • • • • • • • • • • • • • • • • • • • • • • • • • • • • • • • • • • • • • • • • • • • • • 92 Removing Punch Waste (External 2/3 Hole Puncher-B2) . . . . . . . . . . . . . 94 Replacing the Toner Cartridge . . . . . . . . . . . . . . . . . . . . . . . . . . . . . . . . . . . . . 96 Replacing the Waste Toner Container . . . . . . . . . . . . . . . . . . . . . . . . . . . . . 102 Routine Cleaning . . . . . . . . . . . . . . . . . . . . . . . . . . . . . . . . . . . . . . . . . . . . . . . . 105 Platen Glass and Underside of the Feeder/Platen Cover • • • • • • • • • • • • • • • • • • • • • • • • • • • • • • • • • • • • • • • • • • • • • • • • • • • • • • • • • • • • • • • • 105 Manual Feeder Cleaning • • • • • • • • • • • • • • • • • • • • • • • • • • • • • • • • • • • • • • • • • • • • • • • • • • • • • • • • • • • • • • • • • • • • • • • • • • • • • • • • • • • • • • • • • 106 Automatic Feeder Cleaning • • • • • • • • • • • • • • • • • • • • • • • • • • • • • • • • • • • • • • • • • • • • • • • • • • • • • • • • • • • • • • • • • • • • • • • • • • • • • • • • • • • • • • • 110 Cleaning the Inside of the Main Unit• • • • • • • • • • • • • • • • • • • • • • • • • • • • • • • • • • • • • • • • • • • • • • • • • • • • • • • • • • • • • • • • • • • • • • • • • • • • • • • • 111 Cleaning the Dust Proof Glass • • • • • • • • • • • • • • • • • • • • • • • • • • • • • • • • • • • • • • • • • • • • • • • • • • • • • • • • • • • • • • • • • • • • • • • • • • • • • • • • • • • • • 112 Consumables . . . . . . . . . . . . . . . . . . . . . . . . . . . . . . . . . . . . . . . . . . . . . . . . . . . 114 63 Loading Paper This section describes how to load paper. Loading Paper into a Paper Drawer If the selected paper runs out, or the selected paper drawer runs out of paper during printing, a screen prompting you to load paper appears on the touch panel display. Follow the procedure below to load paper into the paper drawers. When handling paper, take care not to cut your hands on the edges of the paper. • A screen prompting you to load paper also appears if the selected paper drawer is not fully inserted into the machine. Make sure that the paper drawer is properly in place. • Do not load the following types of paper into the paper drawers. Doing so may cause a paper jam. • • • • • Severely curled or wrinkled paper Thin straw paper Heavy 3 (82 lb cover to 140 lb index (221 to 256 g/m2)) Paper which has been printed on using a thermal transfer printer The reverse side of paper which has been printed on using a thermal transfer printer • Make sure that you fan the sheets of paper well before placing them. Thin paper, recycled paper, pre-punched paper, heavy paper, and transparencies should be fanned ing it. • Never place paper or any other items in the empty part of the drawer next to the paper stack. Doing so may cause paper jams. • When you are printing in the Staple mode, do not remove the output sheets that are waiting to be stapled. (Printing and stapling resume after you clear the paper jam.) • • • • Register the size and type of the loaded paper in [Paper Settings] in [Preferences] (Settings/Registration). You can use custom paper sizes. For more information, see e-Manual > Settings/Registration. You can name, register, and edit custom paper types. For more information, see e-Manual > Settings/Registration. The following paper sizes can be loaded into Paper Drawers 1, 2, 3, and 4: • Paper Drawer 1: LGL, LTR, LTRR, STMTR, EXEC, and Custom size (5 1/2” x 7 1/8” to 12” x 15 3/8” (139.7 mm x 182 mm to 304.8 mm x 390 mm)) • Paper Drawer 2: 12” x 18”, 11” x 17”, LGL, LTR, LTRR, STMTR, EXEC, Tab, envelopes, and Custom size (5 1/2” x 7 1/8” to 12” x 18” (139.7 mm x 182 mm to 304.8 mm x 457.2 mm)) • Paper Drawers 3 and 4: 12” x 18”, 11” x 17”, LGL, LTR, LTRR, STMTR, EXEC, and Custom size (5 1/2” x 7 1/8” to 12” x 18” (139.7 mm x 182 mm to 304.8 mm x 457.2 mm)) • Tab paper can be loaded into Paper Drawer 2 only if the Tab Feeding Attachment Kit-B1 is attached. • Envelopes can be loaded into Paper Drawer 2 only if the Envelope Feeder Attachment-D1 is attached. • Paper Drawers 3 and 4 are available for use only if the Cassette Feeding Unit-AD2 is attached. • For more information on the paper types that can be loaded in Paper Drawers 1, 2, 3, and 4, see e-Manual > Basic Operations. • If a message prompting you to load paper appears during printing, the remaining prints are automatically made after you load the correct paper. If you select a different paper source, the remaining prints are made after you press [OK]. • Press [Cancel] to cancel printing. 64 1 Open the paper drawer. 1. Press the open button on the paper drawer in which you want to load paper. 2. Grip the handle, and pull out the paper drawer until it stops. 2 Routine Maintenance 1 2 Prepare the paper to load. Open the packaging for the paper, and remove the paper stack. • For high-quality printouts, use paper recommended by Canon. • Before loading paper, always fan the sheets several times, and align the edges to facilitate feeding. 3 Load the paper stack into the paper drawer. 1, 2 3 1. Make sure that the paper size plate of the paper drawer matches the size of the paper loaded in the paper drawer. 2. Load the paper stack against the right wall of the paper drawer. 3. Gently push the paper drawer back into the machine until it clicks into place in the closed position. When returning the paper drawer to its original position, be careful not to get your fingers caught, as this may result in personal injury. 65 • Paper which is curled must be straightened out before loading it into the paper deck unit. • You will not be able to make copies or print if you load paper that exceeds the loading limit mark ( is not completely pushed into the machine. • Make sure that the height of the paper stack does not exceed the loading limit mark ( ). • Always check that the paper drawers are in place. ), or if the paper drawer • When loading paper into the paper drawer for the first time, set the paper size dial to match the paper size being loaded. (See “Adjusting a Paper Drawer to Hold a Different Paper Size,” on p. 67.) • The number of sheets that can be loaded in the paper drawers is 550 sheets (20 lb bond (80 g/m2)). • If there are instructions on the paper package about which side of the paper to load, follow those instructions. • When the paper is loaded into the paper drawer, the side facing up is the one printed on. • If problems, such as poor print quality or paper jams occur, try turning the paper stack over and reloading it. • For more information on the print direction of preprinted paper (paper which has logos or patterns already printed on it), see e-Manual > Copy. • Rewrap any remaining paper in its original package, and store it in a dry place, away from direct sunlight. • If paper runs out and printing is stopped, load a new paper stack. Printing restarts after the new paper stack is loaded. • If you print on the paper which has absorbed moisture, steam may come out from the output area of the machine. This is because the moist on the paper evaporates when the high temperature is applied when a toner is fixed to the paper. It is not a malfunction. (This especially happens in low room temperature.) 66 Adjusting a Paper Drawer to Hold a Different Paper Size If you want to load a different size paper into a paper drawer, follow the procedure described below to adjust the paper drawer guides. When handling paper, take care not to cut your hands on the edges of the paper. Routine Maintenance Only the paper drawers can be adjusted to hold different paper sizes. Adjusting a Paper Drawer 1 Remove the paper loaded in the paper drawer. 1. Press the open button on the paper drawer for which you want to adjust the paper size. 2. Grip the handle, and pull out the paper drawer until it stops. 3. Remove all of the remaining paper. 3 2 1 2 Adjust the position of the paper drawer guides. 1 2 2 1. Slide the left guide while squeezing it on the top to align it with the mark for the desired paper size. 2. Slide the front guide while squeezing it on the top to align it with the mark for the desired paper size. Slide the guides until they click into place. If the left guide and front guide are not aligned correctly, the paper size will not correctly appear on the touch panel display. It is also necessary to adjust the guides correctly to avoid causing a paper jam, dirty prints, or making the inside of the machine dirty. 67 3 Load the appropriate size paper into the paper drawer. 4 Change the paper drawer’s paper size plate to match the new paper size. 1. Make sure that the paper size setting of the paper drawer matches the size of the paper to load in the paper drawer. 2. Load the paper stack against the right wall of the paper drawer. 1, 2 2 1 3 1. Open the inside cover of the paper drawer, and lift up the plate. 2. Rotate the plate so that the new paper size is on the right side of the plate. 3. Insert the plate straight down, and close the inside cover. The paper size that cannot be used depending on the model and settings is also listed on the paper size plate. 5 Gently push the paper drawer back into the machine until it clicks into place in the closed position. When returning the paper drawer to its original position, be careful not to get your fingers caught, as this may result in personal injury. Only LTR transparencies can be used. Make sure that the left guide is set to ‘LTR’ when loading transparencies in a paper drawer. If transparencies of a different size (other than LTR) are loaded in a paper drawer, the paper size and remaining amount of paper will not be detected correctly. Loading Envelopes into the Multi-Purpose Tray Feeding direction into the multi-purpose tray differs, depending on the type of the envelopes. Preparation is required beforehand to prevent wrinkling or paper jam. For more information, see e-Manual > Basic Operations. 68 Loading Pre-Punched Paper You can load pre-punched paper in the multi-purpose tray, paper deck, or paper drawers. When loading prepunched paper, take note of the orientation of the binding holes and the image. When the paper is loaded into the multi-purpose tray, the side facing down is the one printed on. If you want to output prints with the printed face down, select plain paper with horizontal (landscape) orientation in [Select Paper]. (See e-Manual > Copy.) You can load transparencies in the multi-purpose tray and the paper drawers. Transparencies have a front and back side. Load transparencies correctly to achieve sharp printing results. When the paper is loaded into the multi-purpose tray, the side facing down is the one printed on. • • • • • • • • You can load only LTR size transparencies. When loading transparencies, make sure to hold only the edges of the sheets and avoid touching the print surface. Do not load transparencies while the machine is printing. Doing so may cause a paper jam. Use only transparencies intended for use with this machine. If you use other transparencies, you may cause damage to the machine. It is recommended that output transparencies are immediately removed from the output tray to avoid folding of the transparencies and paper jams. Return the remaining transparencies to their original package for storage, avoiding locations subject to high temperatures and humidity. Leaving transparencies loaded for an extended period of time may cause the sheets to stick together and result in a paper jam. Leaving transparencies loaded for an extended period of time may cause the sheets to stick together and result in difficulties feeding the transparencies. In this case, fan the loaded transparency sheets, or if you have loaded 50 or more sheets, reduce the number of sheets to less than 50 or use new transparencies. When printing on transparencies, depending on the type of image, the image may become dense. When this happens, adjust the density for the output image. If a paper jam occurs, fan the loaded transparency sheets well. 69 Routine Maintenance Loading Transparencies Loading Paper into the Paper Deck Unit-B2 (Optional) If there is no paper in the paper deck unit when you select it, or the paper deck unit runs out of paper during printing, a screen prompting you to load paper appears on the touch panel display. Follow the procedure below to load paper into the paper deck unit. When handling paper, take care not to cut your hands on the edges of the paper. • The Paper Deck Unit-B2 can only accommodate paper from 14 lb bond to 60 lb cover (52 to 163 g/m2) in weight. Use the multi-purpose tray to load paper that is heavier. • If paper runs out and printing is stopped when you are printing in the Staple mode, do not remove the output sheets that are waiting to be stapled. (Printing and stapling resume after you clear the paper jam.) • Paper Deck Unit-B2 is an optional product. • Only load LTR paper into the Paper Deck Unit-B2. Paper cannot be loaded horizontally. • If a message prompting you to load paper appears during printing, the remaining prints are automatically made after you load the correct paper. If you select a different paper source, the remaining prints are made after you press [OK]. 1 Open the paper deck unit. 1 2 1. Press the open button. 2. Open the paper deck unit. The inside lifter automatically descends to the paper loading position. If the machine is in the Sleep mode (the touch panel is not displayed, and only (Energy Saver) is lit), you may be unable to open the paper deck unit. In this case, press (Energy Saver) to reactivate the machine, and then press the open button on the paper deck unit. 70 2 Prepare the paper to load. Open the packaging for the paper, and remove the paper stack. Routine Maintenance • For high-quality printouts, use paper recommended by Canon. • Before loading paper, always fan the sheets several times, and align the edges to facilitate feeding. 3 Load the paper stack into the paper deck unit. 1. Load the paper stack against the back left guide of the paper deck unit. 2. Close the paper deck unit. When the paper deck unit is closed, the inside lifter automatically ascends, and the machine becomes ready for printing. When closing the paper deck unit, be careful not to get your fingers caught, as this may result in personal injury. 71 • Do not load the following types of paper into the paper deck unit. Doing so may cause a paper jam. • • • • Severely curled or wrinkled paper Thin straw paper Transparencies Paper which has been printed on using a thermal transfer printer (Do not print on the reverse side of this paper either.) • Paper which is curled must be straightened out before loading it into the paper deck unit. • You will not be able to make copies or print if you load paper that exceeds the loading limit mark ( is not completely pushed into the paper deck unit. • Make sure that the height of the paper stack does not exceed the loading limit mark ( ). • Always check that the paper deck unit is closed. ), or if the paper drawer • The paper deck unit holds up to 2,700 sheets of paper (20 lb bond (80 g/m2)). • Load the paper stack in stages, adding approximately 500 sheets of paper at a time. If the paper deck unit can accommodate more paper, the lifter will descend. • If there are instructions on the paper package about which side of the paper to load, follow those instructions. • When the paper is loaded into the paper deck unit, the side facing down is the one printed on. • If problems, such as poor print quality or paper jams occur, try turning the paper stack over and reloading it. • For more information on the print direction of preprinted paper (paper which has logos or patterns already printed on it), see e-Manual > Copy. • Rewrap any remaining paper in its original package, and store it in a dry place, away from direct sunlight. • If paper runs out and printing is stopped, load a new paper stack. Printing restarts after the new paper stack is loaded. 72 Loading Tab Paper Using the Tab Feeding Attachment Kit-B1 (Optional) This section describes how to load tab paper in Paper Drawer 2 using the Tab Feeding Attachment Kit-B1. Routine Maintenance Only LTR Tab Paper can be used. • When you load tab paper, make sure to register the paper type. (See e-Manual > Settings/Registration.) • If you want to insert printed tab paper as a chapter page, insert a blank paper where the tab paper will be inserted. 1 Open the drawer. 1. Press and release the button on Paper Drawer 2. 2. Grip the handle, and pull out the paper drawer until it stops. 2 1 2 Attach the Tab Feeding Attachment Kit-B1 to Paper Drawer 2. 1, 2 1. Place the Tab Feeding Attachment Kit-B1 into the holes of the paper drawer. 2. Push it in as far as possible. 73 3 Load the tab paper into the paper drawer. Load the tab paper face up with the tabs to the left side, as shown in the illustration below. 4 3 2 1 • Paper which has been rolled or curled must be straightened out prior to use. • Make sure that the height of the paper stack does not exceed the limit mark ( paper drawer. 4 ) at the back of the Squeeze the lever on the front guide, as shown in the illustration. While squeezing the lever, slide the front guide until it fits the tab paper. * * Front Guide 74 5 Gently push the paper drawer back into the machine until it clicks into place in the closed position. Routine Maintenance When returning the paper drawer to its original position, be careful not to get your fingers caught, as this may result in personal injury. • Never place paper or any other items in the open part of the paper drawer next to the paper stack. Doing so may cause a paper jam. • When you are not loading tab paper, make sure to remove the Tab Feeding Attachment Kit-B1 from the paper drawer. Using the Tab Feeding Attachment Kit-B1 for storing paper other than tab paper may cause a paper jam. 75 Loading Envelopes Using the Envelope Feeder Attachment-D1 (Optional) This section explains how to use the Envelope Feeder Attachment-D1. The Envelope Feeder Attachment-D1 can only be attached to Paper Drawer 2. How to Use the Envelope Feeder Attachment-D1 The following types of envelopes can be loaded into the Envelope Feeder Attachment-D1: No. 10(COM10), Monarch, DL, and ISO-C5. The setting of the machine and guide size is set to No. 10(COM10) as the default setting. • When you attach the Envelope Feeder Attachment-D1 to the paper drawer, do not forcefully move the front guide of the paper drawer in the wrong direction. Doing so may detach the Envelope Feeder Attachment-D1 from the paper drawer. • Do not print on both sides of an envelope. Doing so may cause paper jams, dirty prints, or make the inside of the machine dirty. • Do not load the following types of envelopes inside the envelope cassette. Doing so may cause paper jams, dirty prints, or make the inside of the machine dirty. - Curled, creased, or folded envelopes - Very thick or thin envelopes - Damp or wet envelopes - Torn envelopes - Irregularly shaped envelopes - Envelopes with clasps or windows - Envelopes that have already been sealed - Envelopes with holes or perforations - Envelopes with specially coated surfaces - Envelopes made of surface treated colored paper - Envelopes that are self-sticking, which use ink, glue, or other substances that can melt, burn, vaporize, or emit smells under the heat of a fixing unit (approximately 418°F). Depending on the materials used for the seal, the glue may melt under the fixing unit’s heat, sealing the envelopes. • When the envelope cassette is attached and envelope is selected for the paper type, the envelope is ejected to the tray under the scanner unit. • If you are printing on envelopes, empty the output tray when up to 10 printed envelopes accumulate in the tray. • Envelopes should be stored in a place away from high-temperatures and humidity. • If there is a temperature difference between the location where the envelopes are stored and the location where the envelopes are being printed, leave the envelopes in the printing location at room temperature before you use them. • Correctly match the paper size dial, size switch, and [Register Envelope Drawer] in [Preferences] (Settings/Registration) with the size of the envelopes being loaded. Failure to do so may cause paper jams, dirty prints, or make the inside of the machine dirty. • If you want to adjust the width guides to load ISO-C5 envelopes, contact your local authorized Canon dealer. • For more information on envelope types that can be loaded in the Envelope Feeder Attachment-D1, see e-Manual > Basic Operations. • Sizes of the envelopes are as follows: - No.10(COM10): 4 1/8” × 9 1/2” (104.7 mm × 241.3 mm) - Monarch: 3 7/8” × 7 1/2” (98.4 mm × 190.5 mm) - DL: 4 3/8” × 8 5/8” (110 mm × 220 mm) - ISO-C5: 6 3/8” × 9” (162 mm × 229 mm) 76 Preparing the Envelopes This section explains how to prepare the envelopes before loading them into the paper drawer. Using curled, creased, or folded envelopes may cause paper jams. Load envelopes after following the procedure below. Routine Maintenance 1 Neatly align the envelopes. 1. Place the envelopes on a clean, level surface, and press all the way around the envelopes by hand, in the direction of the arrows, to remove any curls. Repeat this step five times for each set of five envelopes. 2 Hold down the four corners of the envelopes firmly, so that they and the sealed or glued portion stay flat. * * * Flap • If you use envelopes that have glue attached to their flaps, the glue may melt due to the heat and pressure of the fixing unit. • Take particular care to spread the envelopes out in the direction that they will be fed. • Do not print on the back side of the envelopes (the side with the flap). • If the envelopes become filled with air, flatten them by hand before loading them into the Envelope Feeder Attachment-D1. 77 Loading Envelopes This section explains how to load envelopes into Paper Drawer 2. 1 Open the drawer. 1. Press and release the button on Paper Drawer 2. 2. Grip the handle, and pull out the paper drawer until it stops. 2 1 2 Load the envelopes into the drawer. 1 2 1. Load 10 envelopes at a time with the side you want to print on facing up. While loading the envelopes, press down on the left side of the receptacle to lock them into place. 2. Align the leading edges of the envelopes, and make sure that they are held in place under the claws. Load the envelopes as shown below. • Envelopes which have been rolled or curled must be straightened out prior to use. • Make sure that the height of the envelope stack does not exceed the height limit mark ( ). • The maximum height (quantity) of envelopes that can be loaded into the cassette is approximately 1 1/4” (30 mm). • The maximum height (quantity) of envelopes varies, depending on the envelope type and user operating conditions, but as a reference, 1 1/4” (30 mm) is approximately 50 envelopes. 78 3 Gently push the paper drawer back into the machine until it clicks into place in the closed position. Routine Maintenance When returning the paper drawer to its original position, be careful not to get your fingers caught, as this may result in personal injury. Never place paper or any other items in the empty part of the paper drawer next to the envelopes. Doing so may cause paper jams. If output has been stopped due to an insufficient number of envelopes, load more envelopes, and follow the instructions on the touch panel display. Printing resumes. Loading the Envelope after Specifying the Size This section explains how to load the envelopes that are specified in Settings/Registration into the envelope cassette. Make sure that you change the envelope settings from the Settings/Registration screen before carrying out the following procedure. (See e-Manual > Settings/Registration.) Otherwise, the machine may not recognize the changes you have made. 1 Open the drawer. 1. Press and release the button on Paper Drawer 2. 2. Grip the handle, and pull out the paper drawer until it stops. 2 1 79 2 Remove the drawer and envelopes. 1. Pull and lift the paper drawer out of the machine by holding its left and right sides with both hands. 2. Remove the envelopes that are loaded in the paper drawer (several envelopes at a time). 2 1 3 Slide the left guide to align it with the mark for the desired envelope size. * * Left Guilde 4 Adjust the front guide. 1 3 2 1 3 80 1. Loosen the two screws fixing the front width guide of the envelope feeder attachment. 2. Press down on the envelope receptacle, and move the front width guide to align it with the mark for the desired envelope size. 3. Fix the front width guide in place with the screws. 5 Adjust the rear width guide in the same way as in step 4. 13 13 2 Routine Maintenance 6 Load the envelopes. 1 2 ib 1. Load 10 envelopes at a time with the side you want to print on facing up. While loading the envelopes, press down on the left side of the receptacle to lock them into place. 2. Align the leading edges of the envelopes, and make sure that they are held in place under the claws. Load the envelopes as shown below. • Envelopes which have been rolled or curled must be straightened out prior to use. • Make sure that the height of the envelope stack does not exceed the height limit mark ( ). • The maximum height (quantity) of envelopes that can be loaded into the cassette is approximately 1 1/4” (30 mm). • The maximum height (quantity) of envelopes varies, depending on the envelope type and user operating conditions, but as a reference, 1 1/4” (30 mm) is approximately 50 envelopes. For details on how to change the registered envelope information for the drawer, see e-Manual > Settings/ Registration. 81 7 Insert the drawer. 1. Gently push the paper drawer back into the machine until it clicks into place in the closed position. 2. Check the paper size dial, and then register the envelope size in Settings/Registration. For details on how to register envelope sizes, see e-Manual > Settings/Registration. When returning the paper drawer to its original position, be careful not to get your fingers caught, as this may result in personal injury. Never place paper or any other items in the empty part of the paper drawer next to the envelopes. Doing so may cause paper jams. If output has been stopped due to an insufficient number of envelopes, load more envelopes, and follow the instructions on the touch panel display. Printing resumes. 82 Replacing the Stamp Cartridge (Feeder) Originals sent via the feeder can be stamped to indicate that they have been sent. Replace the stamp cartridge when the stamp mark is faint or no longer visible. Routine Maintenance When replacing the stamp cartridge, take care not to allow ink to come into contact with your hands or clothing. If ink gets onto your hands or clothing, wash it off immediately with cold water. 1 Open the feeder. 2 Pull the lever above the feeder, and open the document scan cover. Open the document scan cover carefully, as not to scratch the platen glass. 83 3 Open the stamp cover. 4 Remove the old stamp cartridge. 5 Push in the new stamp cartridge until it clicks. • Insert the stamp cartridge so that it is not slanted. • Insert the stamp cartridge properly, or paper jams may occur. 84 6 Close the stamp cover. Routine Maintenance When closing the cover, be careful not to get your fingers caught, as this may result in personal injury. 7 Close the cover of the document scanning area until it clicks. When closing the cover, be careful not to get your fingers caught, as this may result in personal injury. 85 8 Close the feeder. • When closing the feeder, be careful not to get your fingers caught, as this may result in personal injury. • Be aware that the light emitted from the platen glass may be very bright when closing the feeder. 86 Replacing the Staple Cartridge (For Optional Products) This section describes how to replace the staple case and staple cartridge in the stapler unit and saddle stitcher unit. Routine Maintenance • The Staple Finisher-J1, Booklet Finisher-J1, and Inner Finisher-E1 are optional products. • We recommend that you order staple cartridges from your local authorized Canon dealer before your stock runs out. • Use only staple cartridges intended for use with this machine. Replacing the Staple Cartridge in the Stapler Unit (Staple Finisher-J1/Booklet Finisher-J1) When the Staple Finisher-J1 or Booklet Finisher-J1 is almost out of staples and the staple cartridge in the stapler unit must be replaced, a screen prompting you to replace the staple cartridge appears on the touch panel display. Follow the procedure described below to replace the staple cartridge. 1 Open the front cover of the finisher. *1 *2 *1 Booklet Finisher-J1 *2 Staple Finisher-J1 2 Pull out the staple case, holding it by the green tab. 87 3 Pull out the empty staple cartridge from the staple case. 1. Press the areas indicated by PUSH on both sides of the staple case. 2. Once you have released the spring-loaded case, pull out the staple cartridge. 1 PUS H 2 1 4 Insert a new staple cartridge into the staple case. 1. Insert a new staple cartridge. 2. Press the spring-loaded case down until it clicks into place. 3. Remove the seal holding the staples together, by pulling it straight out. 2 1 3 • Do not remove the seal that holds the staples together before you place the staple cartridge into the staple case. • Only one staple cartridge can be inserted at a time. • Make sure that you pull the seal straight out. If you pull it out at an angle, it may tear. 5 88 Gently push the staple case back into the finisher and push down firmly until it is securely in place. 6 Close the front cover of the finisher. When closing the front cover of the finisher, be careful not to get your fingers caught, as this may result in personal injury. Replacing the Staple Case in the Saddle Stitcher Unit (Booklet Finisher-J1) When the saddle stitcher unit of the Booklet Finisher-J1 is almost out of staples and the staple case must be replaced, a screen prompting you to replace the staple case appears on the touch panel display. Follow the procedure described below to replace the staple case. If necessary, remove all output paper in the booklet tray before replacing the staple cartridge of the saddle stitcher unit. • • • • This procedure is necessary only if the Booklet Finisher-J1 is attached (the Booklet Finisher-J1 is an optional product). We recommend that you order staple cases from your local authorized Canon dealer before your stock runs out. Use only staple cases intended for use with this machine. Remove the black part on the end before inserting the staple case. 89 Routine Maintenance After the cover is closed, the stapler unit may automatically perform a “dry” stapling operation to reposition the staples. 1 Open the front cover of the finisher. 2 Pull out the saddle stitcher unit, and then push the stapler unit up. *2 1. Grip the handle of the saddle stitcher unit, and pull out until it stops. 2. Pull the stapler unit of the saddle stitcher unit towards you, and then push it up. 2 1 *1 *1 Stapler Unit *2 Saddle Stitcher Unit 3 Insert the new staple case. 1 2 1 2 1 2 \ • Only one staple case can be inserted at a time. • When replacing the staple cases, replace both the front and back staple cases. 90 1. Pull out the empty staple case, holding it by its left and right sides. 2. Push the new staple case in until it clicks into place. 4 Push the saddle stitcher unit back into its original position. 1 Routine Maintenance 2 1. Pull the stapler unit of the saddle stitcher unit towards you, and then push it down into its original position. 2. Grip the handle of the saddle stitcher unit, and return it to its original position. When pushing the saddle stitcher unit back into its original position, be careful not to get your fingers caught, as this may result in personal injury. 5 Close the front cover of the finisher. When closing the front cover of the finisher, be careful not to get your fingers caught, as this may result in personal injury. When you have replaced the staple case, be sure to manually reposition the staples in the saddle stitcher unit. (See e-Manual > Settings/Registration.) 91 Replacing the Staple Cartridge (Inner Finisher-E1) When the Inner Finisher-E1 is almost out of staples and the staple cartridge must be replaced, a screen prompting you to replace the staple cartridge appears on the touch panel display. Follow the procedure described below to replace the staple cartridge. 1 Pull out the staple case from the finisher. 1. Open the front cover of the finisher. 2. Lift and pull out the staple case from the stapler unit, holding it by the green tab. 2 1 2 Pull out the empty staple cartridge from the staple case. 1. Press the areas indicated by PUSH on both sides of the staple case. 2. Once you have released the spring-loaded case, pull out the staple cartridge. 1 PUS H 2 1 3 Insert a new staple cartridge into the staple case. 1. Insert a new staple cartridge. 2. Press the spring-loaded case down until it clicks into place. 3. Remove the seal holding the staples together, by pulling it straight out. 2 1 3 • Do not remove the seal that holds the staples together before you place the staple cartridge into the staple case. • Only one staple cartridge can be inserted at a time. • Make sure that you pull the seal straight out. If you pull it out at an angle, it may tear. 92 4 Attach the staple case to the finisher. 1. Gently push the staple case back into the finisher and push down firmly until it is securely in place. 2. Close the front cover of the finisher. 2 Routine Maintenance 1 When closing the front cover of the finisher, be careful not to get your fingers caught, as this may result in personal injury. After the cover is closed, the stapler unit may automatically perform a “dry” stapling operation to reposition the staples. 93 Removing Punch Waste (External 2/3 Hole Puncher-B2) This section describes how to remove punch waste from the puncher. When the punch waste tray of the Puncher becomes full, a screen prompting you to remove the punch waste appears on the touch panel display. Follow the procedure described below to remove the punch waste. • The External 2/3 Hole Puncher-B2 is an optional product. • The External 2/3 Hole Puncher-B2 is available only when the Staple Finisher-J1 or Booklet Finisher-J1 is attached. 1 Pull out the punch waste tray. 1. Open the front cover of the puncher. 2. Pull out the punch waste tray. 2 1 2 Discard the punch waste. Make sure that the punch waste tray is completely emptied. 94 3 Return the punch waste tray to its original position. 1. Push the punch waste tray back into its original position. 2. Close the front cover of the puncher. 1 Routine Maintenance 2 When closing the cover, be careful not to get your fingers caught, as this may result in personal injury. If the punch waste tray is not securely in place, you cannot make copies or prints in the Hole Punch mode. 95 Replacing the Toner Cartridge When the message <Replace toner cartridge. (Black)> is displayed on the touch panel display, press right and replace the toner cartridge for the displayed color. on the bottom When the Black toner or all of the toners run out completely and prints can no longer be made, a screen with instructions on how to replace the toner cartridge appears on the touch panel display. Follow the procedure described below to replace the toner cartridge. If you press [Close], you can continue operations, such as setting modes and scanning originals, even if you do not replace the toner cartridge immediately. • Do not burn or throw used toner cartridges into open flames, as this may cause the toner to ignite, resulting in burns or a fire. • If you accidentally spill or scatter toner, carefully gather the toner particles together or wipe them up with a soft, damp cloth in a way that prevents inhalation. Never use a vacuum cleaner that does not have safeguards against dust explosions to clean up spilled toner. Doing so may cause a malfunction in the vacuum cleaner, or result in a dust explosion due to static discharge. • Keep toner out of the reach of small children. • If toner is ingested, consult a physician immediately. • If toner gets onto your hands or clothing, wash it off immediately with cold water. Washing it off with warm water will set the toner, and make it impossible to remove the toner stains. 96 • • • • • • Complete instructions on how to replace the toner cartridge can be accessed by pressing [Previous] or [Next] on the touch panel display. • If toner runs out during a print job, the remaining prints are made after you replace the toner cartridge. • If black toner is left, you can continue copying and printing in black-and-white. However, if a job is interrupted because cyan, magenta, or yellow toner runs out, copying and printing in black-and-white is only possible for functions other than the function being used for the interrupted job. • After replacing toner cartridges, if printed colors are different from the colors printed before you replaced the toner cartridges, perform an [Auto Adjust Gradation] in [Adjustment/Maintenance] (Settings/Registration). (See e-Manual > Settings/ Registration.) 1 Press [ ]. 2 Open the toner replacement cover holding both sides. If the Black toner or all of the toners run out, this step is not necessary. 97 Routine Maintenance Use only toner cartridges intended for use with this machine. For information on the supported Canon genuine toner, see “Consumables,” on p. 114. Do not replace toner cartridges until the message prompting you to do so appears. You can replace a toner cartridge while the machine is printing. The color of the toner to be replaced is displayed on the touch panel display. If multiple toner cartridges must be replaced, replace the toner cartridges in the following order: Black, Yellow, Magenta, Cyan. • If you continue copying or printing in black-and-white after cyan, magenta, or yellow toner runs out, do not remove the depleted toner cartridges from the machine. • You can display an error message informing the user that the remaining toner is low. For instructions on displaying the remaining toner error message, see e-Manual > Settings/Registration. For instructions on deleting the remaining toner error message, see e-Manual > Settings/Registration. 3 Select the color of the toner you want to replace from the display on the control panel press [Remove Toner Cartridges]. If the toner with content remaining is selected, the message <The selected toner can still be used. Do you want to replace it?> is displayed. If you want to continue replacement, press [Yes]. If you do not want to replace the toner, press [No]. 98 4 Wait for the internal cover to open automatically, and pull the toner cartridge out of the toner supply port. Routine Maintenance *1 *2 *1 Black Toner Cartridge *2 Cyan, Magenta, or Yellow Toner Cartridge If the internal cover does not automatically open because of reasons such as closing of the toner replacement cover, an error message is displayed. Repeat the procedure from step 1. Do not burn or throw used toner cartridges into open flames, as this may cause the toner remaining inside the cartridges to ignite resulting in burns or a fire. • Do not open the internal cover by force, as doing so may damage the machine. • Never touch the tip of the toner cartridge or subject it to shock by hitting it. Doing so may cause the toner cartridge to leak. 5 Prepare the new toner cartridge. 99 6 Hold the new toner cartridge in your hands, as shown below, and gently tilt it up and down 10 times. 7 Twist the red protective cap of the new toner cartridge in the direction of the arrow to remove it. 8 Push the new toner cartridge in as far as possible. *1 *2 *1 Black Toner Cartridge *2 Cyan, Magenta, or Yellow Toner Cartridge When replacing toner cartridges, make sure that the color of the toner cartridge matches the color of label on the internal cover. 100 9 Close the internal cover. Routine Maintenance *1 *2 *1 Black Toner Cartridge *2 Cyan, Magenta, or Yellow Toner Cartridge If the toner cartridge is not inserted, you cannot close the internal cover. When closing the internal cover, be careful not to get your fingers caught, as this may result in personal injury. Close the toner replacement cover. 10 The toner confirmation screen is displayed. When closing the toner replacement cover, be careful not to get your fingers caught, as this may result in personal injury. 101 Replacing the Waste Toner Container When the waste toner container nears capacity, a message appears on the touch panel display. In this case, you should prepare a new waste toner container. When the waste toner container is full, a screen with instructions on how to replace the waste toner container appears on the touch panel display. Follow the procedure described below to replace the waste toner container. Even if you do not replace the waste toner container immediately, you can perform printing for a while. The number of prints you can make depends on the content you print. However, if you continue printing, an error will occur and you will become unable to print. • Do not burn or throw used waste toner containers into open flames. Also, do not store waste toner containers in places exposed to open flames, as this may cause the toner to ignite, resulting in burns or a fire. • If you accidentally spill or scatter toner, carefully gather the toner particles together or wipe them up with a soft, damp cloth in a way that prevents inhalation. Never use a vacuum cleaner that does not have safeguards against dust explosions to clean up spilled toner. Doing so may cause a malfunction in the vacuum cleaner, or result in a dust explosion due to static discharge. • If toner is ingested, consult a physician immediately. • If toner gets onto your hands or clothing, wash it off immediately with cold water. Washing it off with warm water will set the toner, and make it impossible to remove the toner stains. • • • • • Your local authorized Canon dealer will dispose of used waste toner containers. Used toner cannot be reused. Do not mix new and used toner together. Use only waste toner containers intended for use with this machine. Do not replace the waste toner container before the message prompting you to replace it appears on the touch panel display. When attaching the waste toner container, make sure to push it in all the way. If the container is not pushed in all the way when you remove it, it may come out with its shutter open. Since this may cause toner to fly out, close the shutter with your hand. • Complete instructions on how to replace the waste toner container can be accessed by pressing [Previous] or [Next] on the touch panel display. • If the waste toner container must be replaced during a print job, the remaining prints are made after the new waste toner container is installed. 1 102 Open the front cover of the machine. 1. Open the front cover, holding both sides. 2. Lower the locking lever. 2 Remove the waste toner container. Routine Maintenance When removing the waste toner container, be careful not to tilt it, as the toner may spill and get onto your hands or clothing. If toner gets onto your hands or clothing, wash them immediately with cold water. Washing them with warm water will set the toner, and make it impossible to remove the toner stains. 3 Put the removed waste toner container into a bag, and then tie it up at the top to prevent the toner remaining inside the cartridge from scattering. Use a bag in the box in which the new waste toner container is stored. 4 Insert the new waste toner container. 103 5 Close the front cover of the machine. 1. Return the locking lever to its original position. 2. Close the front cover of the main unit. When closing the front cover of the machine, be careful not to get your fingers caught, as this may result in personal injury. 104 Routine Cleaning If the original is not copied clearly or streaks appear on printed output, clean the following parts of the machine. For highquality printouts, we recommend cleaning these parts once or twice a month. ● Platen glass ● Underside of the feeder/platen cover Routine Maintenance ● Feeder’s rollers ● Inside of the main unit ● Dust proof glass • When cleaning the machine, first turn OFF the main power switch, and disconnect the power cord. Failure to observe these steps may result in a fire or electrical shock. • Disconnect the power cord from the power outlet regularly, and clean the area around the base of the power plug’s metal pins and the power outlet with a dry cloth to ensure that all dust and grime is removed. If the power cord is connected for a long period of time in a damp, dusty, or smoky location, dust can build up around the power plug and become damp. This may cause a short circuit and result in a fire. • When cleaning with a cloth, do not dampen it too much, as this may damage the original or break the machine. • Do not use alcohol, benzene, paint thinner, or other solvents for cleaning. Doing so may result in damage to the plastic parts. Platen Glass and Underside of the Feeder/Platen Cover If the platen glass or the underside of the feeder/platen cover is dirty, the original may not be scanned clearly, or the size of the original may be detected incorrectly. Clean the platen glass and the underside of the feeder/platen cover by following the procedure below. 1 Clean the platen glass and the underside of the feeder/platen cover with a cloth which is wrung after being dampened in water, and then wipe them clean with a soft, dry cloth. 1. Clean the platen glass. 2. Clean the underside of the feeder/platen cover. 2 1 If stains won’t come out, use detergent instead of water. 105 Manual Feeder Cleaning If originals that have been fed through the feeder have streaks or appear dirty, clean the feeder’s rollers. Clean the rollers of the feeder with a cloth which is wrung after being dampened in water, and then wipe them clean with a soft, dry cloth. • Spin the rollers while cleaning them. • If the document feed scanning area is dirty, documents may not be scanned clearly, and the size of the document may not be detected correctly. 1 Open the feeder. 2 Clean the original scanning area (thin glass strip). 106 3 Pull the lever above the feeder, and open the document scan cover. Routine Maintenance Open the document scan cover carefully, as not to scratch the platen glass. 4 Open the inside cover. 5 Clean the feed scanning area (thin glass strip). 107 6 Close the inside cover. When closing the inside cover, be careful not to get your fingers caught, as this may result in personal injury. 7 Close the document scan cover. When closing the document scan cover, be careful not to get your fingers caught, as this may result in personal injury. 108 8 Close the feeder. Routine Maintenance • When closing the feeder, be careful not to get your fingers caught, as this may result in personal injury. • Be aware that the light emitted from the platen glass may be very bright when closing the feeder. • Do not dampen the cloth too much, as this may damage the original or break the machine. 109 Automatic Feeder Cleaning If your originals have black streaks or appear dirty after scanning them through the feeder, perform an automatic feeder cleaning for the rollers of the feeder. 1 2 3 Press (Settings/Registration). Press [Adjustment/Maintenance] [Maintenance] [Clean Feeder]. Place 10 sheets of blank paper into the feeder press [Start]. It takes approximately 20 seconds to clean the feeder. Use normal LTR size paper. When cleaning is complete, try scanning again. • Feeder Cleaning cannot be performed during printing. • To cancel feeder cleaning while it is in progress, press [Cancel]. 110 Cleaning the Inside of the Main Unit If streaks appear on printed output, or random parts of the printed image are missing, the inside of the main unit may be dirty. In this case, clean the inside of the main unit, as described below. 2 3 (Settings/Registration). Routine Maintenance 1 Press Press [Adjustment/Maintenance] [Maintenance] [Clean Inside Main Unit]. Press [Start]. When cleaning is complete, try printing again. 111 Cleaning the Dust Proof Glass If the dust proof glass is dirty, print defects may occur on the print output. Follow the procedure described below to clean the dust proof glass. 1 Open the front cover, holding both sides. 2 Remove the dust proof glass cleaner from the rear side of the front cover by sliding it to the left side. * * Dust Proof Glass Cleaner 3 112 Hold the dust proof glass cleaner so that the pad on the tip is facing down, push it back as far as it goes, and then slowly move it up and down. Clean the four locations as shown below. There are marks on the main unit that indicate the cleaning locations. Check these marks when cleaning the dust proof glass. 4 When you have finished cleaning the dust proof glass, gently push the dust proof glass cleaner back onto the rear side of the front cover. 5 Close the front cover of the main unit. Place the dust proof glass cleaner back on the rear side of the front cover with its tip facing the left direction. Routine Maintenance When closing the front cover of the main unit, be careful not to get your fingers caught, as this may result in personal injury. 113 Consumables The following consumables are available from Canon. For more information, contact your local authorized Canon dealer. We recommend that you order paper stock and toner from your local authorized Canon dealer before your stock runs out. ● Recommended Paper In addition to plain paper (11” × 17”, LGL, LTR, and STMT size), recycled paper, color paper, transparencies (recommended for this machine), tracing paper, labels, and other types of paper stock are available. Do not store paper in places exposed to open flames, as this may cause the paper to ignite, resulting in burns or a fire. • Some commercially available paper types are not suited for this machine. Contact your local authorized Canon dealer when you need to purchase paper. • To prevent moisture build-up, tightly wrap any remaining paper in its original package for storage. For high-quality printouts, use paper recommended by Canon. ● Toner If a message prompting you to replace the toner cartridge appears on the touch panel display, replace the used toner cartridge with a new one. Toner comes in four colors: black, cyan, magenta, and yellow. Check the toner color that you need to replace before ordering toner from your local authorized Canon dealer. Also, when replacing the toner cartridge, make sure that you replace toner of the correct color. Use only toner cartridges intended for use with this machine. For optimum print quality, using Canon genuine toner is recommended. Product Name Supported Canon Genuine Toner imageRUNNER ADVANCE C5255/C5250 Canon GPR-30 Black Toner Canon GPR-30 Cyan Toner Canon GPR-30 Magenta Toner Canon GPR-30 Yellow Toner imageRUNNER ADVANCE C5240/ C5240A/C5235A Canon GPR-31 Black Toner Canon GPR-31 Cyan Toner Canon GPR-31 Magenta Toner Canon GPR-31 Yellow Toner *1 *1 Black Toner Cartridge *2 Cyan, Magenta, or Yellow Toner Cartridge 114 *2 • Do not burn or throw used toner cartridges into open flames, as this may cause the toner remaining inside the cartridges to ignite, resulting in burns or a fire. • Do not store toner cartridges in places exposed to open flames, as this may cause the toner to ignite, resulting in burns or a fire. • If you accidentally spill or scatter toner, carefully gather the toner particles together or wipe them up with a soft, damp cloth in a way that prevents inhalation. Never use a vacuum cleaner that does not have safeguards against dust explosions to clean up spilled toner. Doing so may cause a malfunction in the vacuum cleaner, or result in a dust explosion due to static discharge. • Store toner cartridges in a cool location, away from direct sunlight. (The recommended storage conditions are temperatures below 86°F, and humidity below 80%.) • [Be careful of counterfeit toners] Please be aware that there are counterfeit Canon toners in the marketplace. Use of counterfeit toner may result in poor print quality or machine performance. Canon is not responsible for any malfunction, accident or damage caused by the use of counterfeit toner. For more information, see http://www.canon.com/counterfeit. ● Stamp Cartridge The stamp cartridge is used to stamp originals. Use the tweezers provided to remove and replace the stamp cartridge. Stamp Ink Cartridge-C1 115 Routine Maintenance Keep toner out of the reach of small children. If toner is ingested, consult a physician immediately. ● Staple Cartridge Staple Cartridge Finisher Name Shape Staple Cartridge-D2 Booklet Finisher-J1 Staple Cartridge-D3 Staple Finisher-J1 Booklet Finisher-J1 Inner Finisher-E1 Staple-J1 ● Genuine Supplies Canon has developed and manufactured Toner, Parts, and Supplies specifically for use in this machine. For optimal print quality and for optimal machine performance and productivity, we recommend that you use Genuine Canon Toner, Parts, and Supplies. Contact your Canon Authorized Dealer or Service Provider for Genuine Canon Supplies. 116 Troubleshooting Troubleshooting 4 Clearing Paper Jams . . . . . . . . . . . . . . . . . . . . . . . . . . . . . . . . . . . . . . . . . . . . . 118 Locations of Paper Jams • • • • • • • • • • • • • • • • • • • • • • • • • • • • • • • • • • • • • • • • • • • • • • • • • • • • • • • • • • • • • • • • • • • • • • • • • • • • • • • • • • • • • • • • • • 119 Main Unit• • • • • • • • • • • • • • • • • • • • • • • • • • • • • • • • • • • • • • • • • • • • • • • • • • • • • • • • • • • • • • • • • • • • • • • • • • • • • • • • • • • • • • • • • • • • • • • • • • • • • • 121 Paper Sources • • • • • • • • • • • • • • • • • • • • • • • • • • • • • • • • • • • • • • • • • • • • • • • • • • • • • • • • • • • • • • • • • • • • • • • • • • • • • • • • • • • • • • • • • • • • • • • • • • 125 Feeder • • • • • • • • • • • • • • • • • • • • • • • • • • • • • • • • • • • • • • • • • • • • • • • • • • • • • • • • • • • • • • • • • • • • • • • • • • • • • • • • • • • • • • • • • • • • • • • • • • • • • • • • 133 Staple Finisher-J1/Booklet Finisher-J1 (Optional)• • • • • • • • • • • • • • • • • • • • • • • • • • • • • • • • • • • • • • • • • • • • • • • • • • • • • • • • • • • • • • • • • • • • • • 136 Booklet Finisher-J1 (Optional) • • • • • • • • • • • • • • • • • • • • • • • • • • • • • • • • • • • • • • • • • • • • • • • • • • • • • • • • • • • • • • • • • • • • • • • • • • • • • • • • • • • • • 141 Inner Finisher-E1 (Optional) • • • • • • • • • • • • • • • • • • • • • • • • • • • • • • • • • • • • • • • • • • • • • • • • • • • • • • • • • • • • • • • • • • • • • • • • • • • • • • • • • • • • • • • 145 Inner 2 Way Tray-F1 (Optional)• • • • • • • • • • • • • • • • • • • • • • • • • • • • • • • • • • • • • • • • • • • • • • • • • • • • • • • • • • • • • • • • • • • • • • • • • • • • • • • • • • • • • 147 Copy Tray-J1 (Optional) • • • • • • • • • • • • • • • • • • • • • • • • • • • • • • • • • • • • • • • • • • • • • • • • • • • • • • • • • • • • • • • • • • • • • • • • • • • • • • • • • • • • • • • • • • 148 Reducing the Frequency of Paper Jams . . . . . . . . . . . . . . . . . . . . . . . . . . . 150 Clearing Staple Jams (For Optional Products). . . . . . . . . . . . . . . . . . . . . . 151 Locations of Staple Jams • • • • • • • • • • • • • • • • • • • • • • • • • • • • • • • • • • • • • • • • • • • • • • • • • • • • • • • • • • • • • • • • • • • • • • • • • • • • • • • • • • • • • • • • • 151 Staple Finisher-J1/Booklet Finisher-J1• • • • • • • • • • • • • • • • • • • • • • • • • • • • • • • • • • • • • • • • • • • • • • • • • • • • • • • • • • • • • • • • • • • • • • • • • • • • • • • 152 Saddle Stitcher Unit of the Booklet Finisher-J1• • • • • • • • • • • • • • • • • • • • • • • • • • • • • • • • • • • • • • • • • • • • • • • • • • • • • • • • • • • • • • • • • • • • • • • • 154 Inner Finisher-E1 • • • • • • • • • • • • • • • • • • • • • • • • • • • • • • • • • • • • • • • • • • • • • • • • • • • • • • • • • • • • • • • • • • • • • • • • • • • • • • • • • • • • • • • • • • • • • • • • 157 If Memory Becomes Full During Scanning . . . . . . . . . . . . . . . . . . . . . . . . . 159 For the Copy Function • • • • • • • • • • • • • • • • • • • • • • • • • • • • • • • • • • • • • • • • • • • • • • • • • • • • • • • • • • • • • • • • • • • • • • • • • • • • • • • • • • • • • • • • • • • 160 For the Fax/Scan and Send Function• • • • • • • • • • • • • • • • • • • • • • • • • • • • • • • • • • • • • • • • • • • • • • • • • • • • • • • • • • • • • • • • • • • • • • • • • • • • • • • • 160 For the Scan and Store Function • • • • • • • • • • • • • • • • • • • • • • • • • • • • • • • • • • • • • • • • • • • • • • • • • • • • • • • • • • • • • • • • • • • • • • • • • • • • • • • • • • • 160 When an Error Message Is Displayed . . . . . . . . . . . . . . . . . . . . . . . . . . . . . . 161 When an Error Code Is Displayed . . . . . . . . . . . . . . . . . . . . . . . . . . . . . . . . . 162 Printer/Fax Driver Troubleshooting . . . . . . . . . . . . . . . . . . . . . . . . . . . . . . . 163 Service Call Message . . . . . . . . . . . . . . . . . . . . . . . . . . . . . . . . . . . . . . . . . . . . 164 Contacting Your Local Authorized Canon Dealer • • • • • • • • • • • • • • • • • • • • • • • • • • • • • • • • • • • • • • • • • • • • • • • • • • • • • • • • • • • • • • • • • • • • • • 165 Setting the Limited Functions Mode from the Service Call Message Screen • • • • • • • • • • • • • • • • • • • • • • • • • • • • • • • • • • • • • • • • • • • • • • • • 166 Functions Available When the Printer/Scanner Cannot Be Used Due to an Error • • • • • • • • • • • • • • • • • • • • • • • • • • • • • • • • • • • • • • • • • • • • 168 Frequently Asked Questions . . . . . . . . . . . . . . . . . . . . . . . . . . . . . . . . . . . . . 170 117 Clearing Paper Jams If a paper jam occurs, a screen indicating the location of the paper jam and how to clear the jam appears on the touch panel display. Follow the instructions on the screen to clear the paper jam. The screen is displayed repeatedly until the paper jam is cleared. If you press [Close], you can continue operations, such as setting modes or scanning originals, even if the jammed paper is not removed immediately. Some areas inside the machine are subject to high-voltages. When removing jammed paper or when inspecting the inside of the machine, do not allow necklaces, bracelets, or other metal objects to touch the inside of the machine, as this may result in burns or electrical shock. • When removing jammed originals or paper, take care not to cut your hands on the edges of the originals or paper. If you cannot remove the paper, contact your local authorized Canon dealer. • When removing paper which has become jammed inside the machine, take care not to allow the toner on the jammed paper to come into contact with your hands or clothing, as this will dirty your hands or clothing. If they become dirty, wash them immediately with cold water. Washing them with warm water will set the toner, and make it impossible to remove the toner stains. • When removing paper which has become jammed inside the machine, remove the jammed paper gently to prevent the toner on the paper from scattering and getting into your eyes or mouth. If the toner gets into your eyes or mouth, wash them immediately with cold water and immediately consult a physician. • The fixing unit and its surroundings inside the machine may become hot during use. When removing jammed paper or when inspecting the inside of the machine, do not touch the fixing unit and its surroundings, as doing so may result in burns or electrical shock. • After clearing all paper jams, remove your hands from the machine immediately. Even if the machine is not in operation, your hands, hair, or clothing may get caught in the feed rollers, which could result in personal injury or damage if the machine suddenly starts printing. • If a paper jam occurs in the feeder, you cannot continue operating the machine. Follow the directions on the touch panel display to clear the paper jam. (See “Feeder,” on p. 133.) • Some areas that are shown to have paper jams may not actually have paper jams. However, always check all locations indicated on the touch panel display in the order that is given. • If a paper jam occurs and printing is stopped when you are printing in the Staple mode, do not remove the paper from the areas except those which are shown to have paper jams on the touch panel display. For example, if paper is jammed in the main unit, do not remove the output sheets on the finisher which does not have paper jams. (Printing and stapling resume after you clear the paper jam in the main unit.) If paper is jammed in several locations, remove the jammed paper in the order indicated on the touch panel display. 118 Locations of Paper Jams Paper jams may occur in the following parts of the machine. See the applicable section to clear the paper jam. Copy Tray-J1 (Optional) (p. 148) Paper Drawer 1 (p. 125) Paper Drawer 2 (p. 127) Main Unit (p. 121) Troubleshooting 3 1 2 3 1 2 Cassette Feeding Unit-AD2 (Optional) (p. 128) Paper Deck Unit-B2 (Optional) (p. 130) 1 2 119 External 2/3 Hole Puncher-B2 (p. 138) Inside the Top Cover (p. 136) Buffer Pass Unit-G1 (p. 137) 1 3 2 Inside the Front Cover (p. 141) Saddle Stitcher Unit (p. 143) Inner 2 Way Tray-F1 (Optional) (p. 147) Feeder (p. 133) Inner Finisher-E1 (Optional) (p. 145) 120 Main Unit Check the location of the paper jam, and follow the procedure described below, while referring to the directions that appear on the touch panel display, to remove the jammed paper. • If the Paper Deck Unit-B2 is attached, move the paper deck away from the main unit before proceeding with this procedure. • If paper is loaded in the multi-purpose tray, remove the loaded paper. • If the Copy Tray-J1 is attached to the main unit, remove all output paper from the tray. 2 Open the lower right and upper right covers of the machine. 2 Troubleshooting 1 Remove any paper jammed from the multi-purpose tray. 1. Grip the handle, and open the lower right cover of the machine. 2. Open the upper right cover of the machine. 1 121 3 Remove any jammed paper from the output unit. 1. Open the paper output unit. 2. Remove any jammed paper. 3. Push the output unit back into its original position. 1 3 2 The paper output unit can be opened up to 40 degrees. Forcefully opening the paper output unit may damage the machine. 4 Remove any jammed paper from the entrance of the duplexing unit. 1. Remove any jammed paper in the upper part of the duplexing unit. 2. Remove any jammed paper in the lower part of the duplexing unit. 1 2 5 Remove any jammed paper from the fixing unit. 1. Pull down the upper cover of the fixing unit by its tab. 2. Remove any jammed paper. 3. Close the upper cover of the fixing unit. 2 1 3 The fixing unit and its surroundings inside the machine may become hot during use. When removing jammed paper or when inspecting the inside of the machine, do not touch the fixing unit and its surroundings, as doing so may result in burns or electrical shock. If you cannot remove the jammed paper, return the upper cover of the fixing unit back to its original position, and then remove the jammed paper from the lower part of the fixing unit. 122 7 Remove any jammed paper from the multi-purpose tray. 8 Remove any jammed paper located between the main unit and lower right cover, if paper jam occurs during reversing. Troubleshooting 6 Remove any jammed paper from the duplex unit. 123 9 Close the upper right cover and then close the lower right cover. When closing the upper and lower right covers of the main unit, be careful not to get your fingers caught, as this may result in personal injury. • Gently close the covers until they click into place in the closed position. • If the Paper Deck Unit-B2 was moved away from the main unit, reconnect it to the main unit. Follow the instructions on the screen. 10 124 The screen indicating the directions on how to clear the paper jam is displayed repeatedly until the paper jam is cleared. Paper Sources Check the location of the paper jam, and follow the procedure described below, while referring to the directions that appear on the touch panel display, to remove the jammed paper. • The Cassette Feeding Unit-AD2 and Paper Deck Unit-B2 are optional products. • If paper is loaded in the multi-purpose tray, remove the loaded paper. Paper Drawer 1 Troubleshooting • If the Paper Deck Unit-B2 is attached, move the paper deck unit away from the main unit before proceeding with this procedure. • If the Copy Tray-J1 is attached to the main unit, remove all output paper from the tray. 1 Open the lower right and upper right covers of the machine. 2 1 2 1. Grip the handle, and open the lower right cover of the machine. 2. Open the upper right cover of the machine. Remove any jammed paper. 125 3 Remove any paper jammed in Paper Drawer 1. 3 2 1. Press and release the button on Paper Drawer 1. 2. Grip the handle, and pull out Paper Drawer 1 until it stops. 3. Remove any jammed paper. 1 Gently pull out the paper drawer. Jammed paper may tear, resulting in damage to the machine. 4 Gently push Paper Drawer 1 back into the machine until it clicks into place in the closed position. 5 Gently close the machine’s upper right cover followed by the lower right cover until they click into place. When returning the paper drawer to its original position, be careful not to get your fingers caught, as this may result in personal injury. When closing the right cover of the main unit, be careful not to get your fingers caught, as this may result in personal injury. • Gently close the covers until they click into place in the closed position. • If the Paper Deck Unit-B2 was moved away from the main unit, reconnect it to the main unit. 6 126 Follow the instructions on the screen. The screen indicating the directions on how to clear the paper jam is displayed repeatedly until the paper jam is cleared. Paper Drawer 2 If the Paper Deck Unit-B2 is attached, move the paper deck unit away from the main unit before proceeding with this procedure. 1 Remove any paper jammed in the paper drawer’s upper right cover. 2 Remove any paper jammed in Paper Drawer 2. 3 Gently push Paper Drawer 2 back into the machine until it clicks into place in the closed position. Troubleshooting 1. Open the paper drawer’s upper right cover, holding it by its handle. 2. Remove any jammed paper. 1. Press and release the button on Paper Drawer 2. 2. Grip the handle, and pull out paper drawer 2 until it stops. 3. Remove any jammed paper. When returning the paper drawer to its original position, be careful not to get your fingers caught, as this may result in personal injury. 127 4 Close the paper drawer’s upper right cover. When closing the right cover of the paper drawer, be careful not to get your fingers caught, as this may result in personal injury. • Gently close the covers until they click into place in the closed position. • If the Paper Deck Unit-B2 was moved away from the main unit, reconnect it to the main unit. 5 Follow the instructions on the screen. The screen indicating the directions on how to clear the paper jam is displayed repeatedly until the paper jam is cleared. Cassette Feeding Unit-AD2 (Optional) If the Paper Deck Unit-B2 is attached, move the paper deck unit away from the main unit before proceeding with this procedure. 1 Open the paper drawer’s upper right cover and lower right cover. 1 2 128 1. Open the paper drawer’s upper right cover. 2. Open the paper drawer’s lower right cover. 2 Remove any paper jammed in the paper drawer’s upper right cover and lower right cover. 1 2 Troubleshooting 3 1. Remove any paper jammed in the paper drawer’s upper right cover. 2. Remove any paper jammed in the paper drawer’s lower right cover. Close the covers. 1 1. Close the paper drawer’s upper right cover. 2. Close the paper drawer’s lower right cover. 2 When closing the covers, be careful not to get your fingers caught, as this may result in personal injury. Gently close the covers until they click into place in the closed position. 4 Remove any paper jammed in the cassette feeding unit. 3 2 1. Press the open button of the paper drawer that is feeding the paper. 2. Grip the handle, and pull out the paper drawer until it stops. 3. Remove any jammed paper. 1 129 5 Gently push the paper drawer back into the machine until it clicks into place in the closed position. When returning the paper drawer to its original position, be careful not to get your fingers caught, as this may result in personal injury. If the Paper Deck Unit-B2 was moved away from the main unit, reconnect it to the main unit. 6 Follow the instructions on the screen. The screen indicating the directions on how to clear the paper jam is displayed repeatedly until the paper jam is cleared. Paper Deck Unit-B2 (Optional) 1 Move the paper deck unit away from the main unit. 1. Press the release button. 2. Move the paper deck unit away from the main unit. 1 2 130 2 Remove any paper jammed in the side of the paper deck unit. 1 1. Hold down the green lever on the side of the paper deck unit. 2. Remove any jammed paper, while holding down the green lever. 2 Troubleshooting Paper can also be jammed in the feeding slot on the side of the main unit. Remove any jammed paper from the feeding slot. 3 Reconnect the paper deck unit to the main unit. If the paper jam message is no longer displayed when you reconnect the paper deck unit, proceed to step 7. When reconnecting the paper deck unit to main unit, be careful not to get your fingers caught, as this may result in personal injury. 131 4 Open the paper deck unit. 1 1. Press the open button. 2. Open the paper deck unit. The inside lifter automatically descends to the paper loading position. 2 If the machine is in the Sleep mode (the touch panel is not displayed, and only (Energy Saver) is lit), you may be unable to open the paper deck unit. In this case, press (Energy Saver) to reactivate the machine, and then press the open button on the paper deck unit. 5 Remove any jammed paper. 6 Close the paper deck unit. 7 Follow the instructions on the screen. 132 Look carefully, as jammed paper may be difficult to see. When closing the paper deck unit, be careful not to get your fingers caught, as this may result in personal injury. The screen indicating the directions on how to clear the paper jam is displayed repeatedly until the paper jam is cleared. Feeder Check the location of the paper jam, and follow the procedure described below, while referring to the directions that appear on the touch panel display, to remove the jammed original. 2 Pull the lever, and open the feeder cover. 3 Remove any jammed original. Troubleshooting 1 Remove originals from the original supply tray. If there is difficulty in removing jammed original, do not try to remove it forcibly, and proceed to step 4. 133 4 Turn the green tab in the direction of the arrow (counterclockwise), and remove the jammed original from the output tray. 5 Close the feeder cover. When closing the cover, be careful not to get your fingers caught, as this may result in personal injury. 6 134 Open the feeder, and remove any jammed paper. 7 Close the feeder. Troubleshooting • When closing the feeder, be careful not to get your fingers caught, as this may result in personal injury. • Be aware that the light emitted from the platen glass may be very bright when closing the feeder. 8 Follow the instructions on the screen. The screen indicating the directions on how to clear the paper jam is displayed repeatedly until the paper jam is cleared. 135 Staple Finisher-J1/Booklet Finisher-J1 (Optional) Check the location of the paper jam, and follow the procedure described below, while referring to the directions that appear on the touch panel display, to remove the jammed paper. The Staple Cartridge-D2, Booklet Finisher-J1, and Buffer Pass Unit-G1 are optional products. Inside the Top Cover 1 Remove any jammed paper protruding from the output part. 1. Lift up the output slot. 2. Remove any jammed paper that is visible. 1 If you cannot see any paper, check whether there is any jammed paper in the output area. 2 If a paper jam occurs when you are printing in the Staple mode, do not remove the output sheets that are waiting to be stapled. (Printing and stapling resume after you clear the paper jam.) 2 Open the top cover of the finisher, and remove any jammed paper. 1 1 3 3 2 2 *1 *2 *1 Booklet Finisher-J1 *2 Staple Finisher-J1 1. Open the top cover of the finisher. 2. Remove any jammed paper. 3. Close the top cover of the finisher. When closing the cover, be careful not to get your fingers caught, as this may result in personal injury. 136 3 Follow the instructions on the screen. The screen indicating the directions on how to clear the paper jam is displayed repeatedly until the paper jam is cleared. 1 Troubleshooting Buffer Pass Unit-G1 Remove any jammed paper from the buffer pass unit. 1 1. Open the buffer pass unit. 2. Remove any jammed paper. 3. Close the buffer pass unit. 3 2 When closing the buffer pass unit, be careful not to get your fingers caught, as this may result in personal injury. 2 Follow the instructions on the screen. The screen indicating the directions on how to clear the paper jam is displayed repeatedly until the paper jam is cleared. 137 External 2/3 Hole Puncher-B2 1 Open the front cover of the puncher waste tray. 2 Align the pointed notch on the knob within the shaded region ( ). 138 3 Remove any jammed paper from the top cover of the puncher. 1. Open the top cover of the puncher. 2. Remove any jammed paper. 1 2 If you cannot remove the jammed paper, remove it from below. Troubleshooting 4 Open the top cover of the finisher, and remove any jammed paper. 1 1 3 3 2 2 *1 *2 *1 Booklet Finisher-J1 *2 Staple Finisher-J1 1. Open the top cover of the finisher. 2. Remove any jammed paper. 3. Close the top cover of the finisher. When closing the cover, be careful not to get your fingers caught, as this may result in personal injury. 139 5 Close the top cover of the puncher and the front cover of the puncher waste tray. 1. Close the top cover. 2. Close the front cover. 1 2 When closing the covers, be careful not to get your fingers caught, as this may result in personal injury. 6 140 Follow the instructions on the screen. The screen indicating the directions on how to clear the paper jam is displayed repeatedly until the paper jam is cleared. Booklet Finisher-J1 (Optional) Check the location of the paper jam, and follow the procedure described below, while referring to the directions that appear on the touch panel display, to remove the jammed paper. The Booklet Finisher-J1 is an optional product. Inside the Front Cover Troubleshooting 1 Open the front cover of the finisher. 2 Remove any jammed paper from the upper delivery guide. * 1. Open the upper delivery guide. 2. Remove any jammed paper. 1 2 * Upper Delivery Guide When releasing the upper delivery guide, be careful not to get your fingers caught, as this may result in personal injury. The upper delivery guide is spring-loaded. When you release the upper delivery guide, it returns to its original position. 141 3 Remove any jammed paper from the lower delivery guide. 1. Turn the lever on the lower delivery guide to the right until it stops, and then tilt the lower delivery guide to the right. 2. Remove any jammed paper. 3. Return the delivery guide to its original position. 2 1 3 * * Lower Delivery Guide When returning the lower delivery guide to its original position, be careful not to get your fingers caught, as this may result in personal injury. 4 Close the front cover of the finisher. 5 Follow the instructions on the screen. 142 When closing the cover, be careful not to get your fingers caught, as this may result in personal injury. The screen indicating the directions on how to clear the paper jam is displayed repeatedly until the paper jam is cleared. Saddle Stitcher Unit 2 Turn the knob on the right in the direction of the arrow (counterclockwise) until it stops. 3 While pushing in the knob on the left, turn it in the direction of the arrow (clockwise). Troubleshooting 1 Open the front cover of the finisher. 143 4 Remove any jammed paper protruding from the output part. 5 Remove any jammed paper from the lower delivery guide. 1. Turn the lever on the lower delivery guide to the right until it stops, and then tilt the lower delivery guide to the right. 2. Remove any jammed paper. 3. Return the delivery guide to its original position. 2 1 3 * * Lower Delivery Guide When returning the lower delivery guide to its original position, be careful not to get your fingers caught, as this may result in personal injury. 6 Close the front cover of the finisher. 7 Follow the instructions on the screen. 144 When closing the cover, be careful not to get your fingers caught, as this may result in personal injury. The screen indicating the directions on how to clear the paper jam is displayed repeatedly until the paper jam is cleared. Inner Finisher-E1 (Optional) Check the location of the paper jam, and follow the procedure described below, while referring to the directions that appear on the touch panel display, to remove the jammed paper. • The Inner Finisher-E1 is an optional product. • If the Paper Deck Unit-B2 is attached, move the paper deck unit away from the main unit before proceeding with this procedure. • If there is paper in the output tray, remove the output paper before proceeding with this procedure. • If the Copy Tray-J1 is attached to the main unit, remove all output paper from the tray. 2 Remove any jammed paper from the inner guide. 3 Remove any jammed paper protruding from the finisher’s output tray. 1. Pull down the inner guide. 2. Remove any jammed paper. 145 Troubleshooting 1 Remove any jammed paper from the output unit in accordance with steps 2 and 3 of “Main Unit.” 4 Push the paper output unit back into its original position. 5 Close the upper right cover and then close the lower right cover. When pushing the paper output unit back into its original position, be careful not to get your fingers caught, as this may result in personal injury. When closing the upper and lower right covers of the main unit, be careful not to get your fingers caught, as this may result in personal injury. • Gently close the covers until they click into place in the closed position. • If the Paper Deck Unit-B2 was moved away from the main unit, reconnect it to the main unit. 6 146 Follow the instructions on the screen. The screen indicating the directions on how to clear the paper jam is displayed repeatedly until the paper jam is cleared. Inner 2 Way Tray-F1 (Optional) Check the location of the paper jam, and follow the procedure described below, while referring to the directions that appear on the touch panel display, to remove the jammed paper. • The Inner 2 Way Tray-F1 is an optional product. • If the Paper Deck Unit-B2 is attached, move the paper deck away from the main unit before proceeding with this procedure. • If the Copy Tray-J1 is attached to the main unit, remove all output paper from the tray. Troubleshooting 1 Open the lower right and upper right covers of the machine. 2 1. Grip the handle, and open the lower right cover of the machine. 2. Open the upper right cover of the machine. 1 2 Remove any jammed paper. 3 Close the upper right cover and then close the lower right cover. When closing the upper and lower right covers of the main unit, be careful not to get your fingers caught, as this may result in personal injury. • Gently close the covers until they click into place in the closed position. • If the Paper Deck Unit-B2 was moved away from the main unit, reconnect it to the main unit. 147 4 Follow the instructions on the screen. The screen indicating the directions on how to clear the paper jam is displayed repeatedly until the paper jam is cleared. Copy Tray-J1 (Optional) Check the location of the paper jam, and follow the procedure described below, and the procedure that appears on the touch panel display, to remove the jammed paper. • The Copy Tray-J1 is an optional product. • If the Paper Deck Unit-B2 is attached, move the paper deck away from the main unit before proceeding with this procedure. • Remove all output paper from the Copy Tray-J1 before proceeding with this procedure. 1 Open the lower right and upper right covers of the machine. 2 1. Grip the handle, and open the lower right cover of the machine. 2. Open the upper right cover of the machine. 1 2 148 Remove any jammed paper protruding from the inside slot of the copy tray. 3 Close the upper right cover and then close the lower right cover. When closing the upper and lower right covers of the main unit, be careful not to get your fingers caught, as this may result in personal injury. 4 Troubleshooting • Gently close the covers until they click into place in the closed position. • If the Paper Deck Unit-B2 was moved away from the main unit, reconnect it to the main unit. Follow the instructions on the screen. The screen indicating the directions on how to clear the paper jam is displayed repeatedly until the paper jam is cleared. 149 Reducing the Frequency of Paper Jams If paper jams occur frequently, even though there is no apparent problem with the machine, either one of the following two reasons may be the cause. Follow the instructions described below to reduce the frequency of paper jams. ● There are torn pieces of paper left inside the machine. Pulling jammed paper out of the machine by force may leave parts of the paper torn inside, leading to frequent paper jams. If paper tears while you are trying to remove jammed paper from the machine, make sure that you remove all of the torn pieces. ● The paper is not loaded correctly in the paper drawer. Make sure that the paper size plate of the paper drawer matches the size of the paper loaded in the paper drawer. 150 Clearing Staple Jams (For Optional Products) If a staple jam occurs, a screen indicating the location of the staple jam and how to clear the jam appears on the touch panel display. Follow the instructions on the screen to clear the staple jam. The screen is displayed repeatedly until the staple jam is cleared. If you press [Close], you can continue operations, such as setting modes or scanning originals, even if the jammed staple is not removed immediately. Troubleshooting Make sure to close all covers and paper drawers of the machine before clearing any staple jams. Locations of Staple Jams For information on the parts of the machine in which staple jams occur and instructions on clearing staple jams, see the following. Staple Finisher-J1/Booklet Finisher-J1 (p. 152) Saddle Stitcher Unit of the Booklet Finisher-J1 (p. 154) 1 2 1 B 2 A Inner Finisher-E1 (p. 157) 2 1 151 Staple Finisher-J1/Booklet Finisher-J1 Check the location of the staple jam, and follow the procedure described below, while referring to the directions that appear on the touch panel display, to remove the jammed staple. Make sure to close all covers and paper drawers of the machine before clearing any staple jams. The Staple Finisher-J1 and Booklet Finisher-J1 are optional products. 1 Open the front cover of the finisher. *1 *2 *1 Booklet Finisher-J1 *2 Staple Finisher-J1 2 152 Lift and pull out the staple case from the stapler unit, holding it by the green tab. 3 Remove any staples jammed in the staple case. 3 2 1 1. Push down the tab on the staple case. 2. Remove all of the staples that slide from the staple cartridge. 3. Return the tab on the staple case to its original position. 5 Close the front cover of the finisher. Troubleshooting 4 Gently push the staple case back into the finisher and push down firmly until it is securely in place. When closing the cover, be careful not to get your fingers caught, as this may result in personal injury. After the cover is closed, the stapler unit may automatically perform a “dry” stapling operation to reposition the staples. 153 Saddle Stitcher Unit of the Booklet Finisher-J1 Check the location of the staple jam, and follow the procedure described below, while referring to the directions that appear on the touch panel display, to remove the jammed staple. • Make sure to close all covers and paper drawers of the machine before clearing any staple jams. • Before clearing a staple jam in the saddle stitcher unit, remove all paper that has been output to the booklet tray. The Booklet Finisher-J1 is an optional product. 1 Open the front cover of the finisher. 2 Pull out the saddle stitcher unit. *1 1. Grip the handle of the saddle stitcher unit, and pull out until it stops. 2. Pull the stapler unit of the saddle stitcher unit towards you, and then push it up. 2 1 *2 *1 Stapler Unit of the Saddle Stitcher Unit *2 Saddle Stitcher Unit 154 3 Pull out the staple case containing the jammed staples, holding it by its left and right sides. 1 Troubleshooting 4 2 Push up the tab on the staple case. 1. Push down Part A to unlock. 2. Push up Part B. 2 1 B A 5 Remove any jammed staples. 1. Remove any jammed staples. 2. Return Part B to its original position. 2 1 B 155 6 Return the staple case to its original position. 7 Gently push the saddle stitcher unit back into its original position. Push the staple case in until it clicks into place. 1. Pull the stapler unit towards you, and then push it down into its original position. 2. Grip the handle of the saddle stitcher unit, and return it to its original position. 1 2 When returning the saddle stitcher unit to its original position, be careful not to get your fingers caught, as this may result in personal injury. 8 Close the front cover of the finisher. When closing the cover, be careful not to get your fingers caught, as this may result in personal injury. When you have cleared the staple jam, be sure to manually reposition the staples in the saddle stitcher unit. (See e-Manual > Settings/Registration.) 156 Inner Finisher-E1 Check the location of the staple jam, and follow the procedure described below, while referring to the directions that appear on the touch panel display, to remove the jammed staples. Make sure to close all covers and paper drawers of the machine before clearing any staple jams. The Inner Finisher-E1 is an optional product. 2 Pull out the staple case. Troubleshooting 1 Remove any jammed paper protruding from the output tray. 1. Open the front cover of the finisher. 2. Pull out the staple case, holding it by the green tab. 157 3 Remove any staples jammed in the staple case. 3 2 1 4 1. Push down the tab on the staple case. 2. Remove all of the staples that slide from the staple cartridge. 3. Return the tab on the staple case to its original position. Attach the staple case. 1 2 1. Gently push the staple case back into the finisher and push down firmly until it is securely in place. 2. Close the front cover of the finisher. When closing the cover, be careful not to get your fingers caught, as this may result in personal injury. After the cover is closed, the stapler unit may automatically perform a “dry” stapling operation to reposition the staples. 158 If Memory Becomes Full During Scanning The machine’s memory can store up to approximately 6,200 pages of scanned images. Approximately 6,000 pages of that total is shared by the various functions, including the Copy; Fax; Scan and Send; Scan and Store (Store in Mail Box); Fax/I-Fax Inbox; and, printing from computer functions. In addition, each function is guaranteed to be able to store the following number of pages: For example, the Copy function can store up to approximately 6,100 pages of scanned images. 6,000 + 100 = 6,100 pages (approximate figures) However, the number of pages that the machine’s memory can store may differ, depending on the amount of memory required for files stored in the Mail Box and Fax/I-Fax Inbox, and jobs that are in the print queue. If memory becomes full during the scanning of originals, a message will appear on the touch panel display. • When using Fax/Scan and Send, you can send up to 999 pages at one time. • Delete any unnecessary files in the Mail Box and Fax/I-Fax Inbox to free up memory. 159 Troubleshooting Copy: 100 pages Print From Computer: 100 pages (excluding Secure Print jobs) For the Copy Function Follow the directions below based on the message that appears on the touch panel display. ● If the message <Scanning will be canceled because the memory is full. Do you want to print the scanned pages?> appears: Select [Yes] or [No]. [Yes]: [No]: The pages scanned into memory are printed. When printing is complete, scan the remaining originals. The pages scanned into memory are not printed. ● If the message <Scanning will be canceled because the memory is full. Wait a moment, then try again.> appears: Select [OK]. [OK]: Returns to the Basic Features screen of the function you are using. Scan the job again when the current job is complete. For the Fax/Scan and Send Function Follow the directions below based on the message that appears on the touch panel display. ● If the message <Scanning will be canceled because the memory is full. Do you want to send the scanned pages?> appears: Select [Yes] or [No]. [Yes]: [No]: The pages scanned into memory are sent. When storing is complete, scan the remaining originals. The pages scanned into memory are not sent. For the Scan and Store Function Follow the directions below based on the message that appears on the touch panel display. ● If the message <Scanning will be canceled because the memory is full. Do you want to store the scanned pages?> appears: Select [Yes] or [No]. [Yes]: [No]: The pages scanned into memory are stored. When storing is complete, scan the remaining originals. The pages scanned into memory are not stored. ● If the message <Scanning will be canceled because the memory is full. Wait a moment, then try again.> appears: Select [OK]. [OK]: 160 Returns to the Basic Features screen of the function you are using. When an Error Message Is Displayed Error messages may appear on the touch panel display of the machine or the Web browser. Self-diagnostic error messages appear in the following cases: Troubleshooting ● When scanning or printing cannot be performed because of an operational error ● When you need to make a decision or take some action during scanning or printing ● When you need to make a decision or take some action while browsing the network Example of an Error Message on the Touch Panel Display Example of an Error Message on the Web Browser For information on error messages and instructions on resolving errors, see e-Manual > Problem Solving. 161 When an Error Code Is Displayed If a job or operation does not complete successfully, the error code is displayed on the Details screen for Log on the Status Monitor/Cancel screen. You can check the error code in the following locations: ● Details screen for Log on the Status Monitor/Cancel screen: When a job or operation is not completed normally: ● Results row of the Communication Management Report: If an error occurs during a send, receive, or fax job, the error code is printed. 04/12/2012 iRADVXXXX DEVICE INFORMATION COMMUNICATION LOG REPORT START TIME END TIME TYPE DELIVER DELIVER DELIVER DELIVER TO/FROM DATA DETAILS RESULT DEPT.ID ADDRESS BOOK DEPT.ID ADDRESS BOOK DEPT.ID ADDRESS BOOK DEPT.ID ADDRESS BOOK For information on error codes and instructions on resolving errors, see e-Manual > Problem Solving. 162 Printer/Fax Driver Troubleshooting See “Troubleshooting” in the driver help to resolve problems when using the printer driver or fax driver for Windows. The following screens indicate the directions on how to display “Troubleshooting” from the screen for the printer driver. The screens may differ, depending on the operating system, and the type and version of the printer driver you are using. Troubleshooting 163 Service Call Message If a malfunction occurs and the machine cannot operate normally, a screen prompting you to contact your local authorized Canon dealer is displayed. If a screen such as the one above is displayed, contact your local authorized Canon dealer. (See “Contacting Your Local Authorized Canon Dealer,” on p. 165.) ● When [Limited Functions Mode] Is Displayed: If [Limited Functions Mode] is displayed, you can temporally set the Limited Functions Mode to continue to use the machine until the cause of the malfunction is cleared. For more information, see “Setting the Limited Functions Mode from the Service Call Message Screen,” on p. 166. If a screen such as the one below is displayed and the print or scan function does not operate normally, some functions may still be available. ● When the print or scan function does not operate normally: The selected function cannot be used. Press [Main Menu] to return to the Main Menu. 164 ● When a Service Call Message Is Displayed on the Bottom of the Screen: Contacting Your Local Authorized Canon Dealer If a screen prompting you to contact your local authorized Canon dealer is displayed, follow the procedure described below. 1 Turn OFF the main power of the main unit. 1 3 2 1. Open the main power switch cover. 2. Press the main power switch to the “ ” side. 3. Close the main power switch cover. If you turn OFF the main power switch when there is a job waiting to print, that job is erased. 2 After the Main Power Indicator is turned off, and then turn the main power switch back to ON. 1 3 2 1. Open the main power switch cover. 2. Press the main power switch to the “I” side. 3. Close the main power switch cover. For instructions on turning ON/OFF the machine, see p.12, 13 in this manual . 165 Troubleshooting Even if a message prompting you to call your service representative appears on the bottom of the screen, some functions may still be available. For more information, see “Functions Available When the Printer/Scanner Cannot Be Used Due to an Error,” on p. 168. 3 If the machine still does not operate normally, follow the procedure below, and then contact your local authorized Canon dealer. 1. Turn the main power switch OFF. 2. Remove the power plug from the power outlet. Do not connect or disconnect the power cord with wet hands, as this may result in electrical shock. Always grasp the power plug when disconnecting the power cord. Pulling on the power cord may expose or snap the core wire, or otherwise damage the power cord. If the power cord is damaged, this could cause current to leak, resulting in a fire or electrical shock. When you contact your local authorized Canon dealer, have the following information available: • Product name • Details of the malfunction • The error code displayed on the touch panel display Setting the Limited Functions Mode from the Service Call Message Screen When [Limited Functions Mode] is displayed, follow the procedures below. If you turn OFF the main power switch when there is a job waiting to print, that job is erased. If you set Limited Functions Mode to ‘On’ from the Service Call Message screen, [Limited Functions Mode] in [Management Settings] (Settings/Registration) is also set to ‘On’. (See e-Manual > Security.) 1 166 Press [Limited Functions Mode] [Yes]. A message prompting you to restart the machine (turning the main power switch OFF, and then ON) appears. 2 Turn OFF the main power of the main unit. 1 3 2 1. Open the main power switch cover. 2. Press the main power switch to the “ ” side. 3. Close the main power switch cover. 3 After the Main Power Indicator is turned off, and then turn the main power switch back to ON. 1 3 2 1. Open the main power switch cover. 2. Press the main power switch to the “I” side. 3. Close the main power switch cover. The machine starts up in the Limited Functions mode. For instructions on turning ON/OFF the machine, see p.12, 13 in this manual. 167 Troubleshooting b_04_076_00_C Functions Available When the Printer/Scanner Cannot Be Used Due to an Error You can use the following functions even when the Print and Scan functions are restricted: ● Main Menu Screen : Available -: Unavailable Available Functions Copy When the Print function is restricted When the Scan function is restricted - - Fax *1 Scan and Send - Scan and Store *2 Access Stored Files - Fax/I-Fax Inbox - Secure Print - *3 Remote Scan - Web Access Shortcut to Settings/Registration - - - - Tutorial Workflow Composer Document Scan Code Analyzer for MEAP*4 - Other MEAP Applications*5 ● Control Panel : Available -: Unavailable Available Functions When the Print function is restricted When the Scan function is restricted Quick Menu*6 The Status Monitor/Cancel Screen Settings/Registration 168 *7 - - ● Operation From a Computer : Available -: Unavailable Available Functions When the Print function is restricted When the Scan function is restricted Remote UI MEAP Application*5 Sending a fax from a computer is not available. *2 [Print List] on the Mail Box Selection screen is not available. *3 [Add Files (Scan and Store)] on the Edit File screen is not available. *4 Document Scan Code Analyzer is included in the Document Scan Lock Kit. For more information, see e-Manual > Optional Products/Software. *5 Available by installing each MEAP application. May not be available, depending on the restricted functions. *6 The registered button may not be available, depending on the restricted functions. *7 [Print List] on the Job Log screen and [Register] on the Consumable screen are not available. Troubleshooting *1 • A print job is automatically canceled when the Print function is restricted. A scan job is automatically canceled when the Scan function is restricted. • The machine may not enter the Sleep mode completely when a function is restricted due to an error. • If the target function is restricted due to an error, the function is not available when you use the shortcut key on the top of the Main Menu screen or when you use the Quick Menu. • [Remove Toner Cartridges] is not available when the Print function is restricted. 169 Frequently Asked Questions This section includes frequently asked questions and answers regarding the machine. Use this section if you have trouble using the machine. Question Applicable Page Q1 I want to make a rush copy, but I cannot because of the long copy job. p. 172 Q2 When copying, the Scan screen for the next document is displayed. Is there a way to not display this screen? p. 172 Q3 How do I change the default settings for the Copy from the Color mode to the Black mode? p. 173 Q4 Can a mark be applied to the document that has been scanned? p. 173 Q5 Do I need to enter the address of the recipient every time? p. 174 Q6 Can I send a fax to multiple destinations? p. 175 Q7 Can you give me information on how to send to the SMB server and specify its settings? p. 175 Q8 Can I move the Address Book registered on another Canon machine onto this machine? p. 177 Q9 Can I forward the data received via fax/I-fax? p. 177 Q10 When sending a fax, can the machine be set so that the sender’s fax number and name be displayed? p. 178 Q11 How do I change the default settings (scan settings and file format) of the Scan and Send Basic Features screen? p. 178 Q12 Is there a way to prevent a transmission error when sending a facsimile to a new destination? p. 179 Q13 The quality of the image sent by fax is not good. p. 180 Q14 How can I make use of multiple telephone lines? p. 180 Q15 How do I register/edit destinations in a one-touch button? p. 181 Q16 Can I add an arbitrary subject when sending e-mail? p. 182 Q17 How do I change the storage period for the scanned file stored in the Mail Box? p. 182 Q18 How do I access the Advanced Box from a computer? p. 183 Q19 How do I forward received data to the Advanced Box? p. 183 Q20 How do I set to create a booklet with a file in a mail box? p. 184 Q21 I cannot print PDF files stored in the Advanced Box. Are optional products required? p. 184 Q22 When printing from the computer, booklet was not made even though saddle stitch booklet mode was set. p. 184 Q23 The content of the reverse side appears on the copies. p. 185 Q24 The printed paper appears dirty. Also, the color appears to be different from the original. p. 186 Q25 The printed paper is warped. p. 186 Q26 I had printed from the computer, but I did not find the output. I am afraid that someone may have taken it by mistake. p. 187 Q27 Can I specify the scan settings from the computer and then store for the original loaded in the machine? p. 187 Q28 Can I make copies or send a facsimile of different size originals at the same time? p. 188 170 Question Applicable Page Can I print on the reverse side of the preprinted paper? p. 189 Q30 Can I output paper to a different tray according to the function? p. 189 Q31 Can I print on envelopes? p. 190 Q32 What are the types of paper that I can use? p. 190 Q33 How do I print data received via fax/I-fax on paper specified in advance? p. 191 Q34 How can I manage documents that failed to be forwarded? p. 191 Q35 When a fax fails to be sent, both the TX Report and the Fax TX Report are output. Is there a way to not output the Fax TX Report? p. 192 Q36 How do I print the data received from specific destinations only? p. 192 Q37 What is the model number of the staple cartridge for the finisher or the stamp cartridge for the feeder? p. 193 Q38 A paper jam has occurred. How do I solve this problem? p. 193 Q39 I cannot remove the toner cartridge after the toner replacement cover is opened. p. 194 Q40 Numbers, such as #751 and #801 are displayed on the touch panel display. What do they mean? p. 194 Q41 I cannot print from the computer. Did the machine malfunction? p. 195 Q42 It seems as though turning OFF the machine is different from the previous imageRUNNER. I am afraid that this may be a wrong operation. p. 195 Q43 The touch panel display is completely black. p. 196 Q44 I have just sent an important document via facsimile. Can I check to make sure that it was sent correctly? p. 196 Q45 Can I restrict the number of copies/prints? p. 197 Q46 Can I change the language displayed on the touch panel display? p. 197 Q47 Can I change the screen or the order that the functions are displayed on the touch panel display when the power is turned ON? p. 198 Q48 I want to check the IP address for this machine to run the Remote UI, but I do not know how to check it. p. 199 Q49 Can I change the default settings of the printer driver? p. 200 Q50 Is there a way to adjust the sound heard when fax sending/receiving is complete? p. 201 Q51 What is MEAP? p. 202 Troubleshooting Q29 171 Q&A 2 1 I want to make a rush copy, but I When copying, the Scan screen for cannot because of the long copy the next document is displayed. job. Is there a way to not display this screen? You can temporarily stop the current copy job and give priority When [Job Build] is set, the Scan to a rush copy by using the screen for the next document is Interrupt mode. You can also give displayed. By canceling the [Job priority to a rush copy/print from Build] setting, the screen is not the Status Monitor/Cancel screen. displayed. ■ Interrupt Function: 1. Press [Copy] [Interrupt]. 2. Set the desired copy mode. ■ Canceling the Job Build mode 1. Press [Copy] [Options] [Job Build]. 2. Press [Close]. ■ Interrupt/Priority Print Function: 1. Press (Status Monitor/Cancel). 2. Press [Copy/Print] [Job Status] from the [Print] drop-down list. 3. Select the job press [Interrupt/Priority Print]. 4. Press [Interrupt and Print]. Additional Information You can scan the original even if the machine is waiting or printing (Reserved Copying). For more information, see e-Manual > Copy. 172 Q&A Additional Information The Job Build mode is useful if you cannot load the originals all at once. This mode enables you to divide the originals into several parts, scan them, and then print them all together. ■ Changing the Color Mode to the Black Mode: 1. Press [Copy] [Select Color] [Black]. ■ Setting the Color Mode as the Default: Troubleshooting 1. Press [Change Default Settings] [Register] [Yes]. 3 Additional Information How do I change the default You can also save paper by using the Image Combination mode or Two-sided Copy mode. For more information, see e-Manual > Copy. settings for the Copy from the Color mode to the Black mode? You can store the current settings as the default settings from [Change Default Settings] in 4 Can a mark be applied to the on document that has been scanned? the Copy Basic Features screen. If the Black mode is set as the default settings, you can reduce the The machine can print a stamp on printing cost. the scanned document by using the Stamp mode. Position at which stamp is applied Color Selection: Full Color Vertical Placement Position at which stamp is applied Horizontal Placement Color Selection: Black 173 Q&A ■ Setting procedure: 1. Press [Scan and Send] or [Fax] [Options]. 2. Press [Finished Stamp] [Close]. ■ Storing from the Touch Panel Display: 1. Press [Scan and Send] or [Fax] [Address Book] [Register/Edit]. 2. Press [Register New Dest.] enter information following the instructions on the touch panel display press [OK]. Additional Information After the original is sent, you can also send a job done notice to the specified e-mail address (Job Done Notice). For more information, see e-Manual > Scan and Send, or Fax. 5 Do I need to enter the address of the recipient every time? You can store frequently used destination in the Address Book. If the destination is stored beforehand, you do not need to enter the destination every time. ■ Storing from the Remote UI: 1. Click [Address Book] select the destination to register. 2. Click [Register New Destination] select the type of destination enter necessary items. 3. Click [OK]. 174 Additional Information You can also store frequently used destination as a one-touch button on the Scan and Send Basic Features screen or the Fax Basic Features screen. For more information, see e-Manual > Scan and Send, or Fax. Q&A 6 Can I send a fax to multiple destinations? Selecting the group destination as a destination 1. Press [Address Book] select the registered group destination press [OK]. 2. Press (Start). Troubleshooting Additional Information You can send a fax to multiple destinations at the same time using the following methods. ■ Specifying Multiple Destinations from the Fax Screen 1. Enter a fax number using (numeric keys), , or press [OK]. 2. Continue entering the other fax numbers press [OK]. 3. Press (Start). • You cannot specify destinations registered in the address book and destinations registered in a one-touch button at the same time. • You can also register a group destination in a one-touch button to send to multiple destinations at the same time. For information on registering one-touch buttons, see e-Manual > Scan and Send, or Fax. 7 Can you give me information on how to send to the SMB server and specify its settings? You can specify the settings using the following method. ■ Specifying Multiple Destinations from the Address Book 1. Press [Fax] [Address Book] select multiple destinations press [OK]. 2. Press (Start). ■ Registering Multiple Destinations from the Address Book as a Group Destination and Selecting a Group Destination Registering a group destination in the Address Book 1. Press [Address Book] [Register/Edit] [Register New Dest.]. 2. Press [Group] enter the name and register the group in the Address Book. 3. Press [Add from Address Book] select the addresses to register. 4. Press [OK] [OK]. ■ Setting the Shared Folder on the Computer-Side: Using Windows 7 1. Right-click the new folder click [Property] [Sharing]. 2. Click [Sharing] select the users you want to authorize access. 3. Click [Add] select [Read/Write] for <Permission Level> for the added users. 4. Click [Sharing] [End]. 5. Click [Advanced Sharing] select [Share this folder] click [Permission]. 6. Select the users you want to authorize access select [Allow] for [Full Control]. 7. Click [OK] [OK] [Close]. Using Windows Vista 1. Right-click the new folder click [Property] [Sharing]. 2. Click [Share] select the users you want to authorize access click [Add]. 3. Select [Co-owner] for <Permission Level> for the added users click [Share] [End]. 4. Click [Advanced Sharing] select [Share this folder] click [Permission]. 5. Add the users you want to authorize access select [Allow] for [Full Control]. 6. Click [OK] [OK] [Close]. 175 Q&A Using Windows XP 1. Right-click the new folder click [Sharing and Security] select [Share this folder]. 2. Click [Permissions] select Everyone click [Delete]. 3. Click [Add] add the users you want to authorize access select [Allow] for [Full Control]. 4. Click [OK] [OK] [Close]. Using Windows 2000 1. Right-click the new folder click [Sharing] select [Share this folder]. 2. Click [Permissions] select Everyone click [Delete]. 3. Click [Add] add the users you want to authorize access select [Allow] for [Full Control]. 4. Click [OK] [OK]. ■ Specifying the File Server on the Touch Panel Display: Specifying the File Server by Host Search: 1. Press [Scan and Send] [New Destination] [File]. 2. From the protocol drop-down list, press [Windows (SMB)] press [Search Host]. 3. On the search criteria screen, enter the IP address for the computer you are using press [Start Searching]. 4. Specify the file server confirm the settings press [OK]. The item names may differ, depending on the type of operating system you are using. For more information, check the manual documentation for the personal computer operating system you are using. ■ Specifying the File Server by Browsing: 1. Press [Scan and Send] [New Destination] [File]. 2. From the protocol drop-down list, press [Windows (SMB)] [Browse]. 3. Select the work group name and file server specify each settings press [OK]. Additional Information You can use the following procedure to check the IP address of your computer. * The procedures may differ, depending on the type of operating system you are using. 1. On the [Start] menu, click [Run] enter <cmd>. 2. Click [OK] enter <ipconfig> press [ENTER] on the keyboard. 176 Q&A 9 8 Can I move the Address Book Can I forward the data received via registered on another Canon fax/I-fax? machine onto this machine? You can use the import and export settings, you can forward received mode of the Remote UI to move documents that matches the the Address Book. previously set conditions to the ■ Exporting the Address Book from Another Canon Machine: Confidential Fax Inbox of this 1. Click [Settings/Registration] select [Data Management] for <Management Settings>. 2. Click [Address Lists] for <Import/Export Individually> [Export...]. 3. Select the Address List and the format of the file click [Start Exporting]. 4. Specify the location to store the file [Store]. Troubleshooting If you specify the forwarding machine, other machines, or the file server. Forward * The key names may differ, depending on the type of the model you are using. ■ Importing the Address Book to the Machine: 1. Click [Settings/Registration] select [Data Management] for <Management Settings>. 2. Click [Address Lists] for <Import/Export Individually> [Import...]. 3. Select the file you want to import and specify the desired settings click [Start Importing]. Confidential Fax Inbox ■ Setting procedure: 1. Press (Settings/Registration) [Function Settings] [Receive/Forward] [Common Settings]. 2. Press [Forwarding Settings] [Register] specify the forwarding conditions. 3. Press [Close]. Additional Information • To perform this procedure, you must have administrator privileges. For more information, see e-Manual > Security. • You can also export and import forwarding settings. For more information, see e-Manual > Remote UI. 177 Q&A Additional Information • To perform this procedure, you must have administrator privileges. For more information, see e-Manual > Security. • If frequently used e-mail addresses are stored in the Address Book, you can specify the address quickly. For more information, see e-Manual> Settings/ Registration. Additional Information For more information, see e-Manual > Settings/Registration. 11 How do I change the default settings (scan settings and file format) of the Scan and Send Basic 10 Features screen? When sending a fax, can the machine be set so that the sender’s fax number and name be You can store the current settings displayed? as the default settings from on the Scan and Send Basic Features screen. After registering the sender’s name, you can specify to print the TX Terminal ID when sending a fax. Date Time I-Fax Address or Fax Number 09/05/2012 TUE 15:00 FAX (404)XXX-XXXX Sender's Name (TTI) Destination Name Page Number CANON SALES Atlanta office 001/001 Sender Information ■ Registering the sender’s name: Before Change 1. Press (Settings/Registration). 2. Press [Function Settings] [Send] [Fax Settings]. 3. Press [Register Sender Name (TTI)] [Register/Edit] enter the sender’s name. 4. Press [OK]. ■ Displaying/Printing the TX Terminal ID: 1. Press [Fax] [Options] [Sender Name (TTI)]. 2. Select the sender’s name press [OK]. 178 After Change Q&A ■ To register the settings as the default settings: 1. Press [Scan and Send] specify the scan settings and the file format. [Change Default Settings] 2. Press [Yes]. 12 Is there a way to prevent a transmission error when sending a facsimile to a new destination? Troubleshooting If [Confirm Entered Fax Number] in (Settings/Registration) is set, a screen to enter the number for confirmation is displayed. By entering the number again, you can reduce the risk of transmission error. ■ Setting procedure: Additional Information For more information on each file format, see e-Manual > Scan and Send. 1. Press (Settings/Registration). 2. Press [Function Settings] [Send] [Fax Settings]. 3. Press [Confirm Entered Fax Number] [On] [OK]. Additional Information • To perform this procedure, you must have administrator privileges. For more information, see e-Manual > Security. • You can also restrict sending to a destination that is not stored in the Address Book. For more information, see e-Manual > Security. 179 Q&A Additional Information 13 The quality of the image sent by fax is not good. Change the scan type or settings If [Register Options Shortcuts] is selected from , you can register the [Options] shortcut button on the Fax Basic Features screen. 14 according to the type of original. How can I make use of multiple Press [Preview] to check the telephone lines? document before sending. ■ Setting the Original Type and Density settings: Press [Fax] [Options] specify the settings for [Original Type] or [Density]. Text/Photo Mode Photo Mode You can specify the settings using the following method. Text Mode ■ Selecting a telephone line when sending: 1. Press [Fax] [Options] [Select Line]. 2. Select the telephone line press [OK] [Close]. ■ Viewing the preview: 1. Press [Fax] specify the destination. 2. Press [Options] [Preview] [Close]. 3.Press (Start). ■ Setting the sending and receiving lines from [Select TX Line]: 1. Press (Settings/Registration). 2. Press [Function Settings] [Send] [Fax Settings]. 3. Press [Set Line] [Select TX Line] set the line to use for sending in [Priority TX] set the line to use for receiving in [Prohibit TX]. 4. Press [OK]. Preview Screen 180 Q&A ■ Setting forwarding conditions for the receiving line: 1. Press [One-Touch] [Register] select the button to register/edit. 2. Press [Register/Edit] register/edit the address press [Close]. Troubleshooting 1. Press (Settings/Registration). 2. Press [Function Settings] [Receive/ Forward] [Common Settings]. 3. Press [Forwarding Settings] select the line from the <Receive> drop-down list select [Register] set the forwarding conditions. 4. Press [Close]. ■ Registering/Editing from the Scan and Send Screen Additional Information For more information on the forwarding conditions, see e-Manual > Settings/ Registration. Additional Information 15 How do I register/edit destinations in a one-touch button? Press • For information on how to register/edit a destination in a one-touch button, see e-Manual > Scan and Send, or Fax. • When registering from the Fax screen, you can only register fax destinations or groups that include fax destinations. on the Fax screen or [One-Touch] on the Scan and Send screen. ■ Registering/Editing from the Fax Screen 1. Press select the button to register/edit press [Register/Edit]. 2. Register/edit the address press [Close]. 181 Q&A 16 17 Can I add an arbitrary subject when How do I change the storage sending e-mail? period for the scanned file stored in the Mail Box? You can enter an e-mail subject in [Subject/Message] in [Options]. You can change the time until files are automatically erased from [Set/ ■ Setting procedure: 1. Press [Scan and Send] specify the destination press [Options]. 2. Press [Subject/Message] enter the subject. 3. Press [OK] [Close]. Register Mail Boxes] in (Settings/ Registration). Change the setting, as necessary. * You can set the time until the files are automatically erased to 0 (none), 1, 2, 3, 6, 12 hours, 1, 2, 3, 7, 30 days. The default setting is ‘3’ days. ■ Setting procedure: 1. Press (Settings/Registration). 2. Press [Function Settings] [Store/ Access Files] [Mail Box Settings]. 3. Press [Set/Register Mail Boxes] select the inbox number set the time until files are automatically erased press [OK]. Additional Information • You can also enter the message for the e-mail in [Message]. • If you do not specify the subject, the string registered in [Default Subject] in (Settings/Registration) is inserted as the subject. The default setting is ‘Attached Image.’ Additional Information In the Mail Box settings, you can also register a name for the Mail Box and change the password. For more information, see e-Manual > Settings/Registration. 182 Q&A 19 How do I access the Advanced Box How do I forward received data to from a computer? the Advanced Box? If the Advanced Box is opened with Specify an Advanced Box SMB, check the following. destination registered in the ■ Checking the settings for [Open to Public]: Address Book as the forwarding 1. Press (Settings/Registration). 2. Press [Function Settings] [Store/ Access Files] [Advanced Box Settings]. 3. Press [Open to Public] check whether [By SMB] is selected. ■ Registering an Advanced Box Destination in the Advanced Box: Troubleshooting 18 destination. 1. Press (Settings/Registration). 2. Press [Set Destination] [Register Destinations] [Register New Dest.]. 3. Press [File] register the Advanced Box destination. ■ Checking the settings for [Prohibit Writing from External]: 1. Press (Settings/Registration). 2. Press [Function Settings] [Store/ Access Files] [Advanced Box Settings]. 3. Check whether [Prohibit Writing from External] is set to ‘Off’. ■ Registering an Advanced Box Destination as a Forwarding Destination: 1. Press (Settings/Registration). 2. Press [Function Settings] [Receive/ Forward] [Common Settings]. 3. Press [Forwarding Settings] [Register] specify the forwarding conditions. 4. Press [Forwarding Destination] [Address Book] specify the Advanced Box destination. Additional Information For more information, see e-Manual > Security. 183 Q&A Additional Information Additional Information • For information on registering an Advanced Box destination in the Address Book, see e-Manual > Scan and Send. • For more information on forwarding settings, see e-Manual > Settings/ Registration. • For details on the Booklet mode settings, see e-Manual > Access Stored Files. • Use a document that was stored with the [Booklet Scan] mode set. • For details on the Booklet Scan mode settings, see e-Manual > Scan and Store. 20 21 How do I set to create a booklet I cannot print PDF files stored in with a file in a mail box? the Advanced Box. Are optional products required? You can create a booklet using the Booklet mode. Specify the The following optional products following settings. are required to print PDF files: ■ Setting procedure: PS Printer Kit Direct Print Kit (for PDF/XPS) Additional Memory Type D (512MB) 1. Press [Access Stored Files] [Mail Box] select a stored document. 2. Press [Print] [Change Print Settings] [Options]. 3. Press [Booklet] [Booklet Scan] [Fold + Saddle Stitch]. 4. Specify the cover settings, orientation, and detailed settings press [OK]. Additional Information If you are using the PS Printer Kit, the Direct Print Kit (for PDF/XPS) is unnecessary. 22 When printing from the computer, booklet was not made even though saddle stitch booklet mode was set. The Saddle Stitch mode cannot be used if you exceed the maximum number of sheets that can be saddle stitched. In that case, you can use the Divided Booklet mode. 184 Q&A ■ The maximum number of sheets that can be saddle stitched is: 23 The content of the reverse side appears on the copies. If the number of sheets is more than the number stated above, the output is printed without being saddle stitched. You can erase the background Troubleshooting 16 sheets (14 lb bond to 20 lb bond (52 to 81 g/m2)) 10 sheets (22 lb bond to 28 lb bond (82 to 105 g/m2)) color of the original and prevent the original image on the reverse ■ Setting a Divided Booklet (Windows): Click [Booklet] [Divide into Sets]. side of thin originals from appearing on the copies by using [Background Density]. Original Copy ■ Setting procedure: 1. Press [Copy] [Options] [Density]. 2. Press [Background Density] [Auto] or [Adjust]. • If [Auto] is pressed, the exposure of the original image on the reverse side is automatically adjusted. • If [Adjust] is pressed, the exposure of the original image on the reverse side can be manually adjusted. Adjust Overall Additional Information • You cannot set the Divided Booklet mode from the Macintosh printer driver. • For information on the number of sheets that can be saddle stitched at one time, see e-Manual > Optional Products/ Software. Adjust by Color 185 Q&A Additional Information For more information, see e-Manual > Copy. 24 The printed paper appears dirty. ■ Automatic gradation adjustment: 1. Press (Settings/Registration). 2. Press [Adjustment/Maintenance] [Adjust Image Quality] [Auto Adjust Gradation]. 3. Select the desired paper press [Quick Adjust] [Start]. Also, the color appears to be different from the original. If streaks are printed on the paper or the image is not printed evenly, the inside of the feeder may be dirty. Follow the procedure below to clean the feeder. You can also Additional Information automatically correct the gradation of the image from [Auto Adjust Gradation]. For more information on Automatic Gradation Adjustment, see e-Manual > Settings/Registration. ■ Cleaning the feeder: 1. Press (Settings/Registration). 2. Press [Adjustment/Maintenance] [Maintenance] [Clean Feeder]. 3. Load 10 sheets of blank paper in the feeder press [Start]. 25 The printed paper is warped. If you print an original filled with an image or an original with a high image density, the paper may become warped. To reduce the warping, try the following. ■ Use heavy paper: If you are using thin paper, replace it with heavy paper with a weight of approximately 20 lb bond (80 g/m2). 186 Q&A ■ Use paper with a low moisture content: When printing from the computer, you can set a password for printing (Secured Printing). You can prevent another user from taking the output by mistake or prevent outputs from being left behind because the print job cannot be started until the password is entered on the touch panel display of the machine. For more information, see e-Manual > Practical Workflows. Troubleshooting When you remove paper from its packaging, load it into the paper source immediately. When there is paper remaining in the packaging after you have loaded the paper, store it with the packaging closed properly to prevent the paper from absorbing moisture. Additional Information Additional Information For information on loading paper, see e-Manual > Maintenance. 26 I had printed from the computer, 27 Can I specify the scan settings from the computer and then store for the original loaded in the machine? but I did not find the output. I am afraid that someone may have taken it by mistake. It is possible if you are using Windows. Install the Network ScanGear Driver in your computer, You can check the Print Logs from and then switch the network scan the touch panel display of this function to online. machine. If the job is listed as ‘OK’ on the Log and you did not find ■ To Install the Driver: the output, the print job may have Install using the UFR II User Software CDROM that comes with the machine. intermixed with another user’s output. ■ To check: 1. Press (Status Monitor/Cancel). 2. Press [Copy/Print] [Log] press the drop-down list. 3. Select the job type to display and check the log. 187 Q&A ■ To Switch the Network Scan Function to Online: 28 Press [Scanner] [Online]. Can I make copies or send a facsimile of different size originals at the same time? You can make copies or send a facsimile of different size originals at the same time by using the Different Size Originals mode. * The Different Size Originals mode enables you to copy/scan different size originals with the same widths (11” x 17” and LTR, or LTRR and STMT, etc.) or different widths (11” x 17” and LGL, or LTR and STMT, etc.) together. ■ Setting procedure: 1. Press [Copy] or [Fax] [Options] [Different Size Originals]. 2. Select the type of different size originals press [OK]. Additional Information For instructions on installing the Network ScanGear Driver, see the Network ScanGear User’s Guide on the UFR II User Software CD-ROM. Additional Information For more information, see e-Manual > Copy, or Fax. 188 Q&A 30 Can I print on the reverse side of Can I output paper to a different the preprinted paper? tray according to the function? You can use [2nd Side of 2-Sided You can set the output tray for Page] for the multi-purpose tray to each function and set priorities for print on paper already printed on. outputting paper. Troubleshooting 29 * The output trays indicated by Tray A, B, and C differ according to the optional product attached to the machine. ■ Setting procedure: ■ Setting procedure: 1. Load the paper in the multi-purpose tray with the side to print on face down. 2. Select the paper size press [Next]. 3. Select the paper type press [2nd Side of 2-Sided Page] [OK]. 4. Press [OK]. 5. Press 1. Press (Settings/Registration). 2. Press [Function Settings] [Common] [Paper Output Settings]. 3. Press [Output Tray Settings]. 4. Set the function and tray priority for Tray A, B, and C press [OK]. (Start). Additional Information A paper jam is more likely to occur with paper already printed on compared to new paper. Additional Information For more information on setting the output tray for each function, see e-Manual > Settings/Registration. 189 Q&A 31 32 Can I print on envelopes? What are the types of paper that I can use? Load the envelopes to print on in the multi-purpose tray. You can load and print on the following paper: Paper Drawer Weight 14 lb bond to 80 lb cover (52 to 220 g/m2) Size Paper Drawer 1: LGL, LTR, LTRR, STMTR, EXEC, Custom Size (5 1/2” x 7 1/8” to 12” x 15 3/8” (139.7 mm x 182 mm to 304.8 mm x 390 mm)) Paper Drawer 2: 12” x 18”, 11” x 17”, LGL, LTR, LTRR, STMTR, EXEC, Custom Size (5 1/2” x 7 1/8” to 12” x 18” (139.7 mm x 182 mm to 304.8 mm x 457.2 mm)) Type Thin, Plain 1, Plain 2, Recycled, Color, Pre-Punched, Bond, Heavy 1, Heavy 2, Transparency, Tab*, Letterhead, Envelopes* ■ Setting procedure: Take about five envelopes, fan them, and then stack them together. Place the envelopes on a level surface, and press all the way around the envelopes by hand to remove any air inside. Open the multipurpose tray, adjust the slide guides, and then load the envelopes, as shown below. 1. Load the envelopes. 2. Press [Envelope] select the desired envelope type press [OK]. 3. Press [Next] [OK] [OK]. 4. Press (Start). * Tab paper is available only when the Tab Feeding Attachment Kit-B1 is attached to Paper Drawer 2. Envelope is available only when the Envelope Feeder Attachment-D1 is attached to Paper Drawer 2. Multi-Purpose Tray Weight 14 lb bond to 140 lb index (52 to 256 g/m2) Size 12” x 18”, 12 5/8” x 17 11/16”, 11” x 17”, LGL, LTR, LTRR, STMT, STMTR, EXEC, Custom Size (3 7/8” x 5 9/16” to 12 5/8” x 18” (99 mm x 139.7 mm to 320 mm x 457.2 mm)) Type Thin, Plain 1, Plain 2, Recycled, Color, Pre-Punched, Bond, Heavy 1, Heavy 2, Heavy 3, Tracing, Coated, Labels, Transparency, Tab, Letterhead, Envelopes Nagagata 3 Kakugata 2 ISO-C5 Feeding Direction Additional Information For more information, see e-Manual > Basic Operations. If the optional Envelope Feeder Attachment-D1 is attached to the machine, you can load envelopes in the paper drawer with the Envelope Feeder Attachment-D1 attached. 190 Additional Information For more information on the available paper types, see e-Manual > Basic Operations. Q&A 33 34 How do I print data received via How can I manage documents that fax/I-fax on paper specified in failed to be forwarded? advance? Troubleshooting You can specify how to manage You can change the paper jobs that failed to be forwarded source from [Paper Drawer Auto in [Handle Files with Forwarding Selection On/Off] in Errors] in (Settings/ (Settings/Registration). Registration). ■ Setting procedure: ■ Setting procedure: 1. Press (Settings/Registration). 2. Press [Function Settings] [Common] [Paper Feed Settings]. 3. Press [Paper Drawer Auto Selection On/ Off] [Receive/Fax] set the paper source you want to use for printing received data to ‘On’ set the paper sources you do not want to use to ‘Off’. 4. Press [OK] [OK]. 1. Press (Settings/Registration). 2. Press [Function Settings] [Receive/ Forward] [Common Settings]. 3. Press [Handle Files with Forwarding Errors] select how to manage the forwarding errors press [OK]. • If you select [Always Print], jobs with forwarding errors are always printed. • If you select [Store/Print], jobs with forwarding errors are stored in Memory RX Inbox. • If Fax Memory Lock or I-Fax Memory Lock is set to ‘Off,’ jobs with forwarding errors are printed. • If you select [Off], no jobs with forwarding errors are printed. Additional Information For more information, see e-Manual > Settings/Registration. Additional Information For more information, see e-Manual > Settings/Registration. 191 Q&A 35 36 When a fax fails to be sent, both How do I print the data received the TX Report and the Fax TX from specific destinations only? Report are output. Is there a way to not output the Fax TX Report? You can set the Store/Print Received File mode in Forwarding Disable the output function for Settings to print the data received the Fax TX Report. Specify the from specific destinations only. following settings. ■ Disabling output of the Fax TX Report: 1. Press (Settings/Registration). 2. Press [Function Settings] [Send] [Fax Settings]. 3. Press [Fax TX Report] [Off] [OK]. ■ Printing for Specific Destinations Only 1. Press (Settings/Registration). 2. Press [Function Settings] [Receive/ Forward] [Common Settings]. 3. Press [Forwarding Settings] [Register] specify the destinations in [Conditions]. 4. Set <Store/Print Received File> to ‘On’ press [OK] [Close]. Additional Information For more information, see e-Manual > Settings/Registration. ■ Forwarding to the Confidential Fax Inbox for Other Destinations 1. Press (Settings/Registration). 2. Press [Function Settings] [Receive/ Forward] [Common Settings]. 3. Press [Forwarding Settings] [Forward w/o Conditions] specify the Confidential Fax Inbox as the forwarding destination. 4. Press [OK] [Close]. 192 Q&A Additional Information • If the Fax Memory Lock is being used, received data is stored in the Memory RX Inbox without being printed. • For more information, see e-Manual > Settings/Registration. ■ Fixing Unit (Inside the Main Unit) Troubleshooting 37 What is the model number of the staple cartridge for the finisher or the stamp cartridge for the feeder? The model numbers of the consumables for the feeder and finisher are as follows: ■ Stamp Ink Cartridge-C1 For the feeder ■ Staple-J1 For the Staple Finisher-J1, Booklet Finisher-J1, and Inner Finisher-E1 ■ Staple Cartridge-D2/Staple Cartridge-D3 ■ Feeder For the Booklet Finisher-J1 Additional Information For information on replacing the staple cartridges and stamp cartridges, see Chapter 3, “Routine Maintenance.” 38 A paper jam has occurred. How do I solve this problem? The procedure for clearing a paper jam is displayed on the touch panel display. Follow the instructions to clear the paper jam. 193 Q&A Additional Information If the problem is still not resolved, see Chapter 4, “Troubleshooting.” 40 Numbers, such as #751 and #801 are displayed on the touch panel display. What do they mean? 39 I cannot remove the toner cartridge after the toner replacement cover These are error codes indicating is opened. that a job or operation did not complete successfully. They are displayed on the Details screen Check the touch panel display. The from [Log] on the Status Monitor/ following screen is displayed. Cancel screen. ■ To remove the toner cartridge: Press [Remove Toner Cartridges] the inner cover for the toner to replace opens follow the instructions on the touch panel display to remove the toner cartridge. Perform the necessary procedures after referring to the causes and remedies for the error codes described in e-Manual > Problem Solving. Additional Information For instructions on using (Status Monitor/Cancel), see e-Manual > Status Monitor/Cancel. Black Toner Cartridge Additional Information For more information on replacing the toner cartridge, see Chapter 3, “Routine Maintenance.” 194 Q&A 41 42 I cannot print from the computer. It seems as though turning OFF Did the machine malfunction? the machine is different from the previous imageRUNNER. I am Troubleshooting afraid that this may be a wrong Check the following possible operation. causes: ■ Is the network cable disconnected? For the previous imageRUNNER, you needed to press and hold the control panel power switch for more than three seconds before the machine entered the Shutdown mode. Ethernet Cable Hub ■ Is it possible that there is a network problem? ■ Is the machine turned ON? However, for the imageRUNNER ADVANCE, you just need to open the main power switch cover located on the right side of the machine, and push the main power switch toward the “ ” side. ( ) ■ Is there a paper jam or a toner shortage? ■ Did you exceed the maximum number of prints set by the Department ID Management? Additional Information For more information, see Before Using This Machine. Additional Information When network trouble occurs or for information on Department ID Management settings, contact your System Manager. 195 Q&A 43 44 The touch panel display is I have just sent an important completely black. document via facsimile. Can I check to make sure that it was sent correctly? The main power has not been turned ON, or the machine may have entered the Auto Sleep You can check the send job status mode to save energy. Follow the from the Status Monitor/Cancel procedure below. screen or receive notification of the sending result via e-mail. ■ Turning the main power ON 1. Check whether the power plug is firmly inserted into the outlet. 2. Open the main power switch cover located on the right side of the machine and switch the main power switch to the “I” side to turn the power ON. ■ To check from the Status Monitor/Cancel screen: 1. Press (Status Monitor/Cancel). 2. Press [Send] [Log]. ( ) ■ To receive send result via e-mail: ■ Recovering from the Auto Sleep mode Press the (Energy Saver). 1. Press [Fax] [Options] [Job Done Notice]. 2. Specify the e-mail address where you want to receive the result notification. Additional Information • For more information on the Auto Sleep mode and Energy Saver mode, see e-Manual > Basic Operations. • Follow the procedure below to change the Auto Sleep Time. 1. Press (Settings/Registration). 2. Press [Preferences] [Timer/Energy Settings] [Auto Sleep Time]. 3. Specify the time press [OK]. Additional Information If the Fax TX Report is set, you can output and check the Fax TX Report every time. Also, if the Fax Activity Report is set, you can output and check Fax Report from the past. For more information, see e-Manual > Basic Operations. 196 Q&A Additional Information 45 Can I restrict the number of copies/ prints? Troubleshooting To perform this procedure, you must have administrator privileges. For more information, see e-Manual > Security. You can also change the default settings for the Copy screen from the Color mode to the Black mode. For more information, see e-Manual > Settings/Registration. If Department ID Management is used, you can restrict the color copy or print output within groups. 46 Can I change the language ■ Setting the Department ID Management and Registering the Password: 1. Press (Settings/Registration). 2. Press [Management Settings] [User Management] [Department ID Management]. 3. Press [On] [Register PIN] [Register]. 4. Enter the Department ID and PIN press [OK]. ■ Setting the Page Limits: displayed on the touch panel display? You can change the language displayed from [Language/ Keyboard Switch] in (Settings/ Registration). Displayed Language: English 1. Press (Settings/Registration). 2. Press [Management Settings] [User Management] [Department ID Management]. 3. Press [On] [Register PIN] [Register]. 4. Press [Turn Limits On/Off and Set Page Limits] specify the page limit settings press [OK]. Displayed Language: Other 197 Q&A ■ Setting procedure: 1. Press (Settings/Registration). 2. Press [Preferences] [Display Settings] [Language/Keyboard Switch On/Off]. 3. Press [On] [OK] [Language/ Keyboard Switch]. 4. Select the language to display press [OK]. ■ Setting the Default Display That Appears after the Machine Is Turned ON: 1. Press (Settings/Registration). 2. Press [Preferences] [Display Settings] [Default Screen after Startup/ Restoration]. 3. Select the settings press [OK]. ■ Changing the Displayed Function: 1. Press . 2. Press [Main Menu Button Display Settings]. 3. Select the layout or the order to display the function key press [OK]. Additional Information • You can follow the procedure below to display a shortcut to the language switch on the Main Menu screen. 1. Press [Other Main Menu Settings] ‘On’ for <Display [Language/Keyboard Switch]>. 2. Press [OK]. • For more information, see e-Manual > Basic Operations. 47 Can I change the screen or the order that the functions are displayed on the touch panel display when the power is turned ON? You can change the default display that appears after the machine is turned ON from [Default Screen after Startup/Restoration] in (Settings/Registration). You can also change the order that the functions are displayed or the layout from [Main Menu Button Display Settings] in 198 . Additional Information To perform this procedure, you must have administrator privileges. For more information, see e-Manual > Security. You can also recall the settings that are previously stored as settings for frequently used functions from . For more information, see e-Manual > Quick Menu. Q&A 48 I want to check the IP address for this machine to run the Remote UI, but I do not know how to check it. Additional Information • To perform this procedure, you must have administrator privileges. For more information, see e-Manual > Security. • If you cannot start the Remote UI, specify the following settings. Troubleshooting 1. Press (Settings/Registration). 2. Press [Management Settings] [License/Other] [Remote UI]. 3. Press [On] [OK]. You can check the IP address from the touch panel display of this machine. ■ Checking the IP Address of This Machine: IPv4 Address 1. Press (Settings/Registration). 2. Press [Preferences] [Network] [TCP/ IP Settings]. 3. Select [IPv4 Settings] [Use IPv4] [On]. 4. Press [IP Address Settings]. IPv6 Address 1. Press (Settings/Registration). 2. Press [Preferences] [Network] [TCP/ IP Settings]. 3. Select [IPv6 Settings] [Use IPv6] [On]. 4. Press [Manual Address Settings]. ■ Starting the Remote UI: Run the Web browser for the computer enter ‘http://<IP address of the machine>’ in the address bar. 199 Q&A 49 Can I change the default settings of the printer driver? You can change the print settings ■ Using a Macintosh: Page Settings: 1. Click [Page Setup] from the [File] menu in the application software. 2. Select each item as indicated below. Setting: [Page Attributes] Printer: The name of your printer 3. Click the <Settings> drop-down list [Save As Default] [OK]. of the printer driver from the computer you are using. ■ Using Windows: 1. On the [Start] menu, click [Control Panel] [Printer]. 2. Right-click the printer icon click [Printing Preferences] specify the printer settings. 3. Click [OK]. Print Settings: 1. Click [Print] from the [File] menu in the application software. 2. Click the <Printer> drop-down list select the name of your printer. 3. Click the <Presets> drop-down list [Save As]. 4. Specify [Save Preset As] click [OK]. 200 Q&A 5. Click the <Presets> drop-down list select the saved preset name click [Print]. 50 Is there a way to adjust the sound heard when fax sending/receiving is complete? Troubleshooting You can use (Volume Settings) on the control panel to adjust the volume. ■ Setting procedure: 1. Press (Volume Settings) on the control panel. 2. Press or to adjust the Alarm Volume and Monitor Volume press [OK]. 201 Q&A 51 What is MEAP? MEAP stands for Multifunctional Embedded Application Platform and is a software platform for the Canon multitasking machines. You can expand the functions or customize them by installing the MEAP application from the computer to the multitasking machine. ■ Workflow Composer The Workflow Composer is an application that increases the efficiency of operations that use multiple functions of the machine. By creating and registering combinations of functions that are frequently used on the machine, you can repeatedly reuse the same combination of functions. SMS Application Install Machine Additional Information For more information, see e-Manual > MEAP. 202 CANON INC. 30-2, Shimomaruko 3-chome, Ohta-ku, Tokyo 146-8501, Japan CANON U.S.A., INC. One Canon Park, Melville, NY 11747, U.S.A. CANON CANADA INC. 6390 Dixie Road Mississauga, Ontario L5T 1P7, Canada CANON EUROPA N.V. Bovenkerkerweg 59, 1185 XB Amstelveen, The Netherlands (See http://www.canon-europe.com/ for details on your regional dealer) CANON LATIN AMERICA, INC. One Canon Park, Melville, NY 11747, U.S.A. CANON AUSTRALIA PTY. LTD 1 Thomas Holt Drive, North Ryde, Sydney, N.S.W. 2113, Australia CANON CHINA CO., LTD 15F Jinbao Building No.89 Jinbao Street, Dongcheng District, Beijing 100005, China CANON SINGAPORE PTE. LTD. 1 HarbourFront Avenue #04-01 Keppel Bay Tower, Singapore 098632 CANON HONGKONG CO., LTD 19/F., The Metropolis Tower, 10 Metropolis Drive, Hunghom, Kowloon, Hong Kong FT6-0826 (000) XXXXXXXXXX © CANON INC. 2013 PRINTED IN CHINA