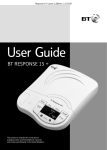
1
Diverse 1015 telephone
featuring DECT
Digital Enhanced Cordless Telecommunications
User guide
This equipment is not designed for making emergency telephone calls when the power fails.
Alternative arrangements should be made for access to emergency services.
Please open this page for an ‘at a glance’ guide to
your Diverse 1015.
Please open this page for a further ‘at a glance’
guide to your Diverse 1015.
At a glance
At a glance
Display
Displays the status of your handset.
Carrying clip
Store
Lets you store numbers on
the memory and access other
phone functions.
Speed dial
Enables quick dialling of
numbers stored in the
memory.
Keypad
STO
MEM
LNR
1
2
ABC
3
DEF
4
GHI
5
JKL
6
MNO
7
PQRS
8
TUV
9
WXYZ
✱ 0
Recall
For use with switchboards
and BT Select Services.
Phone
Used to make and answer calls.
1
RCL
INT
PWR
Last number redial
Can redial the last three
numbers you called and lets
you access other phone
functions.
Power
Lets you switch the
handset on/off and select
the operating mode.
Intercom
Enables internal
communication and call
transfer between handsets.
At a glance
Base unit
underside view
Power
cord
Telephone
line cord
.................................
.................................
.................................
........................
........................
........................
........................
2
At a glance
Base unit
top view
Play
Play back messages
and memos
Message counter
Indicates the
number of incoming
messages and
memos on your
machine.
.
.
.
.
.
.
.
.
.
.
.
.
.
.
.
.
.
.
.
.
.
.
.
.
.
.
.
.
.
.
.
.
.
.
.
.
.
.
.
.
.
.
.
.
.
.
.
.
.
.
.
.
.
.
.
.
.
.
.
.
.
.
.
.
.
.
.
.
.
.
.
.
.
.
.
.
.
.
.
.
.
.
.
.
.
.
.
.
.
.
.
.
.
.
.
.
.
.
.
.
.
.
.
.
.
.
.
.
.
.
Antenna
Volume
Adjusts the
loudspeaker volume.
Skip < >
Allows you to skip
forwards or
backwards through
your messages.
VOLUME
88
SKIP
Delete
Deletes recorded
messages and
memos.
DELETE
PLAY
STOP
+
–
MODE
Recording
indicator
Lights up during the
recording of incoming
messages, memos
and other functions.
SKIP
RECORD
ANSWER
ON/OFF
Mode
Allows you to
switch/record
between different
outgoing messages.
Answer on/off
Switches the
answering machine
on and off.
Paging button
Stop
Stops playback
and recording.
3
In-use light
Indicates an outside
call is being made.
Charging light
On when handset
battery is charging.
Record
To record messages
and memos.
Contents
In this guide
At a glance
Introducing the Diverse 1015
Setting up
Using your Diverse 1015
telephone
Using your Diverse 1015
answering machine
Remote access
Remote access quick guide
Additional features
Using your Diverse 1015
with a switchboard/PBX
Registering a new Diverse
handset with the base unit
Operating with additional
base units
Maintenance
Help
Technical information
Technical specification
Index
1
5
6
11
24
33
38
39
41
44
46
50
51
53
55
56
Hints and tips boxes
In this user guide, we’ve included helpful tips and
useful notes. They are shown in a grey box.
4
Introduction
Introducing the Diverse 1015
Your Diverse 1015 is designed for ease of use and made to the high
standards set by BT.
We thank you for making the right choice and
expect that your Diverse 1015 will give you
many years of quality service. Please read the
instructions carefully before use and retain this
user guide for future reference.
For your records
DECT
Purchase price:
For warranty purposes, proof of purchase is
required, so please keep your receipt.
By purchasing your Diverse 1015 you now own
a product which combines the advantages of
digital cordless operation with the performance
of a high quality telephone. It complies with
the Digital Enhanced Cordless
Telecommunications (DECT) standard and
offers unparalleled quality and features.
Building up a phone system
You can use up to six handsets on each
Diverse 1015 base unit and up to four base
stations with your Diverse handset to build up
a comprehensive and easy-to-use cordless
telephone system. This user guide applies to
both single and multiple handset systems.
The ‘internal’ functions described in this guide
apply only to Diverse 1015 phones with more
than one handset connected.
5
Date of purchase:
Place of purchase:
Serial number:
(on the underside of the telephone base unit)
This space is left for you to record your system
and handset PIN codes, refer to page 16 & 17.
Handset PIN code
System PIN code
Check that your Diverse 1015 is complete.
When you unpack you should have:
• Diverse 1015 base unit
• Diverse 1015 handset
• Power adaptor
• Handset carrying clip
• Two nickel cadmium (NiCad) rechargeable
batteries.
• Telephone line cord
As this product is rechargeable, it is normal that a
certain amount of heat will be produced in its dayto-day operation. Whilst this is entirely safe we would
advise against placing this product on antique,
veneered or wooden surfaces as damage may occur.
Setting up
Setting up
Follow these steps to get your Diverse 1015 ready for use.
1 For the handset use only approved nickel-cadmium
(NiCad) rechargeable batteries. Never use other
batteries or conventional alkaline batteries. They
could lead to a short circuit or destroy the battery
casing. Recommended batteries should have a power
rating of 600m Ah 1.2V. Batteries are available from
the Diverse Helpline 0345 908070. For the back-up
box use only alkaline non rechargeable unleakable
batteries.
2 Do not try to use any power supply except the one
provided, otherwise you may permanently damage
your Diverse 1015. It will also result in non-compliance
with EN41003:1993, and will invalidate the approval
given to this apparatus.
3 There is a slight chance that your phone could be
damaged by an electrical storm. We recommend that
you unplug your Diverse from the mains power and
telephone line socket during storms.
4 If you wear a hearing aid, please note that the
Diverse 1015 works by sending radio signals between
the base unit and handset. These signals can interfere
with hearing aids, causing a humming noise.
5 Diverse 1015 can interfere with other electrical
equipment such as answering machines, TV and
radio sets, clock radio/alarms and computers if
placed too close. You are recommended to place
your Diverse 1015 at least one metre away from
such appliances to avoid any risk of interference.
Plan where you will put your Diverse 1015. It
should be within two metres of a power socket
and the phone socket.
1 Connecting the telephone line
cord to the Diverse 1015 base unit
Ensure that this is fitted correctly into the right
socket.
....................
....................
....................
...............
...............
Warning
2 Plugging your Diverse 1015
into the phone socket
If you do not have a modern phone socket,
call Freefone 0800 800 150 and ask for a BT
engineer to come and fit the correct socket.
This is a chargeable service.
6 It is possible that the Diverse’s 1015 range may be
affected by being near bodies of water such as
ponds, lakes, the sea.
6
Setting up
3 Connecting the optional
back-up box
The battery back-up box is optional equipment
and may be purchased from the Diverse
helpdesk 0345 908070. Phone for prices. The
battery back-up box allows an emergency, or
other, calls to be made in the event of a mains
failure. The back-up box allows calls to be made
for up to 4 hours. The back-up box requires
6 x AA batteries which allows you to make calls
in the event of a power failure.
To connect the back-up box
The back-up box must be connected between
your Diverse 1015 and the power adaptor.
• Plug the back-up box power cord into
the socket on the underside of your
Diverse 1015 (1).
1
If you are not fitting the back-up box then
please proceed to step 5.
• To remove the cover, squeeze together the
clips on the back of the back-up box (1).
• Lift off the cover from one end (2).
• Insert the batteries into the lid as shown (3).
• Replace the cover before connecting the
Back-up box
Take care to plug the power cord and the
telephone line cord into the correct sockets.
• Plug the power adaptor into the
back-up box.
back-up box.
. . . . . . . . . . . . . . . . . . . . . .
. . . . . . . . . . . . . . . . . . . . . .
. . . . . . . . . . . . . . . . . . . . . .
. . . . . . . . . . . . . . . . . . . . . .
. . . . . . . . . . . . . . . . . . . . . .
Back-up box
F
Battery
1
3
DEF
5
JKL
6
MNO
7
PQRS
8
TUV
9
WXYZ
VOLUME
✱ 0
88
SKIP
DELETE
INT
PLAY
STOP
+
–
MODE
SKIP
RECORD
PWR
ANSWER
ON/OFF
1
3
Diverse 1015
2
7
ABC
GHI
RCL
Battery
1
2
4
Power adaptor
If you are experiencing problems, please call the
Diverse Helpline on 0345 908070.
Setting up
4 Mounting the back-up box
5 Connecting the power cable
If required, you can mount your Diverse 1015
back-up box along your skirting board.
Plug the power cable into the power socket on
the underside of your Diverse 1015. Take care
that the telephone line cord and power cable
plugs are connected to the correct sockets.
Incorrect placement could damage the unit.
• Using the template at the back of this guide,
mark then drill two holes for the two screws
and Rawlplugs (if you need them).
• Insert the screws, leaving about 5 mm
sticking out to hang the back-up box from.
Skirting board
Wall
Screws
The Diverse1015 will not operate if there is a
power failure and the optional back-up box has not
been fitted.
6 Plug the 3-pin adaptor into a
mains power socket and switch on
Wrap any loose cord belonging to the back-up
box around the base before attaching it to the
skirting board.
Attach the back-up box by hooking it
over the screws protruding from the
wall.
8
Setting up
7 Installing the rechargeable
batteries in the handset
The handset uses the two AA size nickel
cadmium (NiCad) batteries supplied. Hold the
handset with the keypad facing down and slide
up to open the battery compartment.
8 Fitting the handset carrying clip
Fit the carrying clip onto the back of the handset.
Tab
Slot
9 Charge the handset batteries
for at least 16 hours
Place the handset on the base. The handset
can be charged face up or down.
Insert the batteries as indicated on the label
inside the battery compartment and slide the
battery compartment cover shut.
Important
When replacing batteries always use good quality
nickel cadmium (NiCad) rechargeable AA types
with at least 600mAh capacity in order to achieve
the specified operating time. Never use other
batteries or conventional alkaline batteries.
They could result in a short circuit or destroy the
battery casing. Recommended batteries are
Panasonic P-50 AA, Sanyo N-3UN or N-3UC,
Philips R6NC-P, SAFT RC 6, DAIMON Accu 1000
and UCAR RC 6. Batteries are available from the
Diverse Helpline 0345 908070.
9
When the handset batteries are charging, the
green CHARGING light comes on – it goes off
when the battery is fully charged. It will come
on again occasionally to indicate that the
battery is being topped up.
When the handset battery has been charged
for 16 hours, the Diverse 1015 is ready to use.
Normal battery charging time
After charging your Diverse 1015 for the first time,
normal charging time for the handset batteries is
4-5 hours. Batteries and case become warm during
charging. This is normal and not dangerous.
Under ideal conditions, the handset batteries
should give about 6.5 hours talktime or 60 hours
standby on a single charge. However, new NiCad
batteries do not reach their full capacity until they
have been in normal use for several days.
Setting up
Battery low warning
f lashes and handset beeps to warn you
that the batteries are within 5-10 minutes of being
completely f lat.
Getting the most out of your batteries
Avoid replacing the handset on the base unit
between calls. It is best to keep the handset off the
base for a few hours at a time.
If the symbol flashes continuously, it means
the handset is either out of range or is not
registered with the base unit. To register, follow the
steps on page 44. All additional handsets you
purchase will need to be individually registered
with the base unit before they will work with the
Diverse 1015.
The symbol may also f lash after
a power failure. Provided the handset has been
registered with the base, the symbol will stop
f lashing after a while indicating the handset has
automatically re-registered to the base unit.
If it continues to f lash, re-register the handset to
the base unit - see page 44.
Please note: If you go out of range of a base unit
for a long time while your handset is switched ON,
it may take more than 20 minutes to ‘find’ the base
station again when you come back within range.
However, by simply switching the handset OFF for
a moment, then ON again, it will find the base
station within a few seconds.
10
Using your
Diverse 1015
Using your Diverse 1015
telephone
ON/OFF and PROTECTED modes
The handset can be operated in one of three
different modes.
PROTECTED
This setting stops you accidentally operating
the handset’s keypad when carrying it around.
You can still receive incoming calls but cannot
make outgoing calls.
OFF
Phone calls cannot be made and the handset
does not respond to incoming calls.
• To switch to PROTECTED when the handset
is ON, press and release the PWR button
quickly.
• To switch on, press and hold down the PWR
button until the display is activated.
ON
You can make and receive calls.
If the handset is out of range of the base unit,
the
symbol f lashes. You cannot make or receive
calls until the handset is brought back within
range. The
symbol also f lashes for a while after
power-up until the handset automatically registers
to the base.
• Flashing
• To switch off, press and hold down the PWR
button until the display goes blank.
11
can also mean that the handset
is not registered with the base. To register a
new handset, see page 44.
Using your
Diverse 1015
Making and receiving calls
To receive an external call
EXT
To make an external call
Ensure the handset is switched ON.
• Press the PHONE button. You hear the dial
tone. The ‘In Use’ light on the base unit
comes on. Display shows EXT.
• Dial the number. The phone calls the number
and the display shows the number you have
dialled.
Alternatively, you can enter the phone number
you want first and then press the PHONE button
to dial.
When the phone rings the display flashes EXT.
Press the PHONE button on the handset and
speak
or
If the handset is on the base unit or charging
unit, simply lift it up and speak. You do not
need to press the PHONE button.
At the end of the call, either press the PHONE
button or replace the handset on the base unit.
To redial the last number
LNR
If another handset is already being used to make an
external call, your handset will display ‘ –’ f lashing
and you will hear the internal ‘busy’ signal.
• Press the PHONE button.
• Press the LNR button. The last number you
If connected to a switchboard with pulse dialling, you
can switch to tone dialling during a call by pressing
the ✱ button. This enables you to use systems such
as home banking. The Diverse 1015 will return to
pulse dialling on completion of the call.
To redial any of the last three numbers
To end a call
• Press the PHONE button
or
• Place the handset back on the base unit.
called will be redialled automatically.
LNR
• Press and release the LNR button to display
the last three phone numbers in turn. Each
phone number can be up to 22 digits long.
• When the number you want to dial is
displayed, press the PHONE button.
To end the call, press the PHONE button or
replace the handset on the base.
12
Using your
Diverse 1015
Paging and internal calls
If you have multiple handsets registered with the
base, the Diverse 1015 enables two handsets to talk
to each other on an internal ‘intercom’ call, while a
third handset can be on an external call.
To page a handset from the base unit
You can alert handset users that they are
wanted.
• Press the GREEN button on the base. All
handsets registered with the base will ring
only. You cannot talk to the handset.
• To end paging, press the GREEN button.
If you have additional handsets, you can make
internal intercom calls between the handsets.
To make an intercom call to the base unit
You can make an announcement over the base
station loudspeaker. Make sure the loudspeaker
volume is set to an audible level.
INT
•
•
•
•
13
Press the INT button.
Dial 9691.
Speak your announcement.
Press the PHONE button to end.
To make an internal intercom call to another
handset
INT
• Press the INT button. Display shows your
handset number.
• Enter the number of the handset you want
to call. The called handset will ring.
• To end the call, press the PHONE button
or replace the handset on the base or
charging unit.
To receive an internal call
2
INT
• When the handset rings, the display flashes
INT plus the number of the handset that is
calling you – 2 in this example.
• To answer either press the PHONE button,
or simply lift the handset off the base unit or
charging unit.
Using your
Diverse 1015
To make an internal intercom call to
all handsets
INT
✱
• You can call all handsets registered to the
base unit.
• Press the INT button. Display shows your
handset number.
• Press the ✱ button. Display shows all
handsets registered. All these handsets will
ring. The first handset to answer will take
the call.
• To end the call, press the PHONE button or
replace the handset on the base.
If a handset is out of range of the base unit, the
symbol f lashes. You cannot make or receive calls
until the handset is brought back within range.
To transfer an external call between handsets
If you are in a conversation with an external
caller and want to transfer the call to another
handset.
INT
Quick call transfer
After calling the other handset, you can immediately
press the PHONE button, or place the handset back
on the base, and the call will be transferred straight
through. If the other handset is already engaged, or
does not answer the call within 30 seconds, the call
will be returned to your handset.
To put an external caller on hold and speak
to another internal handset
INT
RCL
• Press the INT button. You hear the internal
dial tone and your external caller is put on
hold and will hear a melodious tone.
• Press the handset number you want, 1-6.
When the handset answers, you can talk
without your external caller hearing.
• Press the RCL button to end the internal call
and speak to your external caller.
RCL
• Press the INT button. Display shows EXT and
INT. Your caller will hear a melodious tone.
• Enter the number of the handset to which
you want to transfer the call. When the caller
handset answers, you can talk without the
external caller hearing.
• To transfer the call: Press the PHONE button,
or replace the handset on the base unit
or
• To reconnect to your external caller: Press
the RCL button.
14
Using your
Diverse 1015
Using the memory to store and
dial numbers
To speed dial a number stored in the memory
Your Diverse 1015 handset can store
10 phone numbers, each up to 22 digits long,
which then can be speed dialled. Stored
numbers can include settings made with the
RCL, ✱ and # buttons. You can also enter a
‘pause’ (see page 43, ‘Using your Diverse 1015
with a PBX’).
• Press the PHONE button. You will hear the
dial tone. Display shows EXT.
• Press and release the MEM button twice;
To store a number
The handset power must be ON.
STO
MEM
• Press the STO button.
• Press the MEM button.
• Press a digit from 0-9. This selects the
memory location under which the number is
stored. Display shows the memory location
you have chosen.
• Enter the number you want stored. Display
shows the number.
• Press the STO button to confirm the
number.
Storing a new number in memory automatically
overwrites any previous number stored in that
location.
If the memory location is empty, the display shows
the memory location number and
. If there is
another number stored already, that number will be
displayed. If you do not want to change it, press the
STO button to confirm the number.
15
MEM
the number in memory 1 will be displayed.
• Continue to press and release the MEM
button to scroll through the memories.
• Press the memory location number on the
keypad and the number is dialled
automatically.
Or, to save scrolling through stored numbers:
• Press the MEM button followed by the
memory location number. Display shows the
number, which is dialled automatically.
Speed dial numbers are not included in the last
number redial function.
To clear all the numbers stored on a
handset’s memory
STO
8
TUV
2
ABC
• Press the STO button.
• Press 8 and 2 buttons on the keypad.
Display shows 8 – – – – 2.
• Enter the handset’s PIN number. (Factory
setting is 0000. To change it see page 16.)
Each digit entered erases
one dash on the display.
• Press the STO button. All stored numbers
are cleared.
If you are experiencing problems, please call the
Diverse Helpline on 0345 908070.
Using your
Diverse 1015
Using and changing the system
code and handset PIN
To change a system code for the Diverse
1015 base unit
This protects your settings and helps prevent
unauthorised handsets using your system.
As a digital phone system, your Diverse 1015
provides excellent security against others
‘listening in’ to your calls. You can also
prevent unauthorised use of the handset(s).
Each handset needs to be registered with the
base unit. To do this you need to know and use
the system code.
The factory setting for the system code is 0000.
You can change this to any 4-digit number.
Handset power must be switched to ON. And
you must be in range of the base unit.
The factory setting for both the system code
and handset PIN is 0000. If you do not wish to
change either, you can use this number for all
code and PIN - related functions.
•
•
•
•
If you want to use remote access
(i.e. call your Diverse 1015 from another
phone to play back your messages) you will
need to change the system code from 0000.
STO
8
TUV
✱
Press the STO button then the # button.
Press 8 on the keypad.
Press the ✱ button.
Enter the current system code. Factory
setting is 0000.
• Enter the 4-digit code you want.
• Confirm the code by entering it again.
• Press the STO button. The code is now
entered.
For instructions on using remote access, see
page 33.
16
Using your
Diverse 1015
To set or change the handset PIN (personal
identification number)
A PIN on your handset protects information.
A handset PIN is necessary in order to:
• reset the speed dial memory;
• reset to the original factory settings.
Optional settings
Adjusting ear piece volume
The volume of received calls can be set to three
different levels ranging from normal to loud.
To set the volume:
STO
Handset power must be switched to ON.
STO
8
TUV
9
WXYZ
• Press the STO button.
• Press 8 then 9 on the keypad.
• Enter the current PIN. Factory setting
is 0000.
• Enter the 4-digit PIN you want.
• Confirm the PIN by entering it again.
• Press the STO button. The PIN is
now entered.
Caution
Do not forget your system code or handset PIN.
Special, expert help is required if you forget the
system code. Please contact the Diverse 1015
Helpline on 0345 908070. Calls are charged at
local rates.
If you are setting call barring (page 21) from your
handset you are advised to change the handset PIN
to prevent unauthorised use.
17
0
• Press the STORE button.
• Press the 0 button the current setting is
displayed.
• Press 1 button for normal.
• Press 2 button for louder.
C
• Press 3 button for loudest.
C
C
• Press the STO button.
The new volume setting has been entered.
To adjust the ringer volume in the handset
There are six levels: 1 = low, 6 = high. Factory
setting is 6.
STO
5
JKL
• Press the STO button
• Press the 5 button. Display shows the
volume level set. Ringer sounds a sample
level.
• Press a button between 1-6 to set the new
level. Display shows the new level.
• Press the STO button to confirm the setting.
Using your
Diverse 1015
To adjust the ringer volume in the base unit
To adjust the tone of the base unit ringer
There are seven levels: 0 = off, 6 = high.
Factory setting is 6.
There are six levels: 1 = low, 6 = high. Factory
setting is 1.
✱
STO
5
JKL
Press the STO button.
Press the # button.
Press the ✱ button.
Press the 5 button. Display shows the
volume level set. Ringer sounds a sample
level.
• Press a button between 0 (OFF) and 6 to set
the new level. Display shows the new level.
• Press the STO button to confirm the setting.
•
•
•
•
✱
STO
6
MNO
Press the STO button.
Press the # button.
Press the ✱ button.
Press the 6 button. Display shows the
volume level set.
• Press a button between 1 and 6 to set the new
level. Display shows the new level.
• Press the STO button to confirm the setting.
•
•
•
•
To switch the ‘confirmation’ tone on and off
To adjust the tone of the handset ringer
There are six levels: 1 = low, 6 = high. Factory
setting is 1.
STO
6
Whenever you press a button on the phone you
can hear a confirmation beep. You can turn this
sound on and off. The factory setting is OFF.
MNO
• Press the STO button.
• Press the 6 button. Display shows the
volume level set.
• Press a button between 1 and 6 to set the new
level. Display shows the new level.
• Press the STO button to confirm the setting.
STO
3
DEF
1
• Press the STO button.
• Press 3 then 1. Display shows the current
setting: I = ON, O = OFF.
• Press 1 to switch the tone ON
or
• Press 0 to switch the tone OFF.
• Press the STO button to confirm the new
setting.
18
Using your
Diverse 1015
To switch the ‘wrong button’ tone on and off
To switch the battery warning tone on and off
When you are following a set-sequence
instruction, your Diverse handset will give a
warning if you press the wrong button in the
sequence. You can turn this sound on and off.
The factory setting is ON.
You will hear a tone when the batteries need to
be recharged. If the batteries are already fully
charged, hearing the signal means they should
be replaced. You can turn this sound on and
off. The factory setting is ON.
STO
3
DEF
4
GHI
STO
DEF
2
ABC
• Press the STO button.
• Press 3 then 4. Display shows the current
setting: I = ON, O = OFF.
• Press 1 to switch the tone ON
• Press the STO button.
• Press 3 then 2. Display shows the current
setting: I = ON, O = OFF.
• Press 1 to switch the tone ON
or
or
• Press 0 to switch the tone OFF.
• Press the STO button to confirm the new
• Press 0 to switch the tone OFF.
• Press the STO button to confirm the new
setting.
setting.
To switch the ‘settings confirmation’ tone
on and off
You will hear a confirmation tone each time
you successfully complete a setting. You can
turn this sound on and off. The factory setting
is ON.
STO
3
DEF
7
To switch the ‘range warning’ tone on and off
If you are on a call as you reach the limit of
your handset’s range, you will hear a tone to
warn you that you will lose the call if you move
further away. You can turn this sound on and
off. The factory setting is ON.
PQRS
STO
3
DEF
3
DEF
• Press the STO button.
• Press 3 then 7. Display shows the current
setting: I = ON, O = OFF.
• Press 1 to switch the tone ON
• Press the STO button.
• Press 3 then 3 again. Display shows the
current setting: I = ON, O = OFF.
• Press 1 to switch the tone ON
or
or
• Press 0 to switch the tone OFF.
• Press the STO button to confirm the new
• Press 0 to switch the tone OFF.
• Press the STO button to confirm the new
setting.
19
3
setting.
Using your
Diverse 1015
To switch the ‘in-range’ tone on and off
If you have taken the handset outside the
phone’s range – provided the handset is
switched on – you will hear a tone when you
come back within range. You can turn this
sound on and off. The factory setting is ON.
STO
3
DEF
5
JKL
• Press the STO button.
• Press 3 then 5. Display shows the current
setting: I = ON, O = OFF.
• Press 1 to switch the tone ON
or
• Press 0 to switch the tone OFF.
• Press the STO button to confirm the new
setting.
To reset your Diverse 1015 base unit to
the original factory settings
The handset must be switched ON.
Press the STO button.
Press the # button.
Press the 1 button.
Enter the system code. (Factory setting is
0000. To change it see page 16.)
• Press the LNR button.
• Enter the code 2 5 0.
• Press the STO button to confirm.
•
•
•
•
This will reset:
•
•
•
•
TONE/PULSE signalling to TONE.
Access code/pause to NONE.
Pause after the RCL button to NONE.
Ring assignment to collective ringing
(explained on page 39).
It will also delete any new settings made for:
• Connections to a switchboard.
It will NOT reset:
• The system code.
• Handset registration settings.
20
Using your
Diverse 1015
To reset your Diverse 1015 handset to
the original factory settings
The handset must be switched ON.
Press the STO button.
Press 8 on the keypad.
Press the MEM button.
Press the handset PIN code (Factory setting
is 0000. To change it see page 16.)
• Press the STO button.
•
•
•
•
This will reset:
It will delete:
•
•
•
•
•
•
Ringer volume.
Tone.
Battery warning tone.
Range warning tone.
Synchronisation tone.
Confirmation tones.
• Numbers stored in the
Call barring
You can stop all the external and internal calls
being made from all handsets or individual
handsets. Incoming calls can still be received
and answered. You can also add up to four
special numbers of your own - for example,
other emergency numbers, core business
suppliers or doctor, dentist, spouse and school.
Emergency Services 999 and 112 calls can still
be made. From PBXs you can dial access code
999, RCL button 999 or RCL button 112.
To bar all calls from all handsets registered
to the base unit
Only incoming calls can be accepted and
emergency/special numbers dialled.
speed dialling memory.
• The last number redial
memory.
It will NOT reset: • The handset PIN.
• The handset registration
settings.
If connected to a switchboard with pulse dialling:
Once you reset your handset to the original factory
settings, it will affect the way you can temporarily
switch your phone from PULSE to TONE during a
call. Instead of just pressing the ✱ button during
the call, you will have to press the STO button then
the ✱ button.
To revert back to pressing the ✱ button only, you
can reset this individual function by pressing the
STO button, then 391, then STO to confirm.
21
STO
2
ABC
4
GHI
1
Press the STO button.
Press the # button.
Press the 2 button.
Press the 4 button.
Enter the system code (Factory setting is
0000. To change it see page 16.)
• Press the 1 button.
• Press the STO button.
•
•
•
•
•
Using your
Diverse 1015
To cancel the call bar on all handsets
2
STO
ABC
4
GHI
0
Press the STO button.
Press the # button.
Press the 2 button.
Press the 4 button.
Enter the system code (Factory setting is
0000. To change it see page 16.)
• Press the 0 button.
• Press the STO button.
•
•
•
•
•
To bar all calls from an individual handset
These steps must be made at the handset you
want to bar calls on. Only incoming calls can
be accepted and emergency/special numbers
dialled.
STO
8
TUV
1
Press the STO button.
Press the 8 button.
Press the 1 button.
Enter the handset PIN code (Factory setting
is 0000. To change it see page 16.)
• Press the STO button.
•
•
•
•
To cancel call barring on an individual
handset
These steps must be made at the handset.
STO
8
TUV
0
Press the STO button.
Press the 8 button.
Press the 0 button.
Enter the handset PIN code. (Factory setting
is 0000. To change it see page 16.)
• Press the STO button.
•
•
•
•
To store your own ‘special numbers’
Before call barring has been set, you can add
up to four special numbers, each up to 16 digits
long. You can do this from any handset.
STO
2
ABC
5
JKL
LNR
Press the STO button.
Press the # button.
Press the 2 button.
Press the 5 button.
Enter the system code. (Factory setting is
0000. To change it see page 16.)
• Each time you press the LNR button, the
display shows the four memories for your
emergency number 1 –––, 2 –––, 3 –––, 4 –––, Select
the one you want.
• Enter your emergency number.
• Press the STO button to confirm. You hear
a confirmation beep.
•
•
•
•
•
You can overwrite each number by repeating
these steps.
22
Using your
Diverse 1015
To clear your own ‘special numbers’
STO
2
ABC
7
PQRS
Press the STO button.
Press the # button.
Press the 2 button.
Press the 7 button.
Enter the system code. (Factory setting is
0000. To change it see page 16.)
• Press the STO button.
•
•
•
•
•
23
Using your Diverse 1015
answering machine
Using your Diverse 1015
answering machine
When you cannot answer the phone, your
Diverse 1015 will take messages. You can also
make memo recordings.
You can skip backwards and forwards through
your messages and memos and delete one or
all messages. The answering machine can be
operated from any Diverse handset and from
any other external phone provided it is a
TouchtoneTM phone.
Important
Before you can use your Diverse 1015 answering
machine, you must first record an outgoing message.
See page 25.
Outgoing messages
You can record two different outgoing messages
after which incoming callers can leave their
message.
You can also, if desired, record a concluding
announcement. This lets you warn callers that
they have run out of time for recording their
message.
Advisory announcement
You can record an advisory announcement. This
enables you to leave a statement for callers but
does not allow them to record a message.
You can switch between your outgoing
messages and advisory announcement by
pressing the MODE button. The display on the
base shows A1 for outgoing message 1, A2 for
outgoing message 2 and A for your advisory
announcement.
Recording an outgoing message/advisory
announcement
Use the MODE button to display:
A1 – for outgoing message 1
A2 – for outgoing message 2
A – for your advisory message
You will hear the voice confirm your selection.
To stop the numeric display f lashing, the day and
time must be set, see page 28.
24
Using your Diverse 1015
answering machine
To record your first outgoing message (A1)
To play back your first outgoing message (A1)
MODE
. . . . . . . . . . . . . . . . . . . . . .
. . . . . . . . . . . . . . . . . . . . . .
. . . . . . . . . . . . . . . . . . . . . .
. . . . . . . . . . . . . . . . . . . . . .
. . . . . . . . . . . . . . . . . . . . . .
MODE
VOLUME
88
SKIP
DELETE
PLAY
STOP
+
–
PLAY
RECORD
MODE
SKIP
RECORD
ANSWER
ON/OFF
• Press the MODE button until the voice says
‘Operation Mode. Call Recording after
announcement 1’. Display shows A1.
• Press the MODE button. Voice says ‘Mode’.
• Press the RECORD button within 3 seconds.
Your handset rings.
• Press the PHONE button on your handset
(only if handset is not on the base).
The voices says ‘Recording announcement’.
• Press the PHONE button to end the recording.
• Your recording is played back.
or if
• You are including a concluding message
press the GREEN button on the base station
immediately after recording your outgoing
message.
or
• You may leave silence for approximately
4 seconds after recording your outgoing
message. The voice prompts you for the
concluding message and you may then
record your concluding message.
• Press the PHONE button to end the recording.
• Both your outgoing message and the
concluding message is played back.
25
• Press the MODE button until the voice says
‘Operation Mode. Call Recording after
announcement 1’.
• Press the MODE button. Voice says ‘Mode’.
• Press the PLAY button. Your message is
played back. Along with any concluding
message.
• Stop playback at any time by pressing the
STOP button.
To delete your first outgoing message (A1)
MODE
DELETE
• Press the MODE button until the voice says
‘Operation Mode. Call Recording after
announcement 1’. Display shows A1.
• Press the MODE button.
• Press and hold the DELETE button until the
outgoing message is deleted.
Using your Diverse 1015
answering machine
To record a second outgoing message (A2)
To play back your second outgoing
message (A2)
. . . . . . . . . . . . . . . . . . . . . .
. . . . . . . . . . . . . . . . . . . . . .
. . . . . . . . . . . . . . . . . . . . . .
. . . . . . . . . . . . . . . . . . . . . .
. . . . . . . . . . . . . . . . . . . . . .
MODE
VOLUME
88
SKIP
DELETE
PLAY
STOP
+
–
MODE
RECORD
PLAY
MODE
SKIP
RECORD
STOP
ANSWER
ON/OFF
• Press the MODE button until the voice says
• Press the MODE button until the voice says
‘Operation Mode. Call Recording after
announcement 2’. Display shows A2.
• Press the MODE button. Voice says ‘Mode’.
• Press the RECORD button within 3 seconds.
Your handset rings.
• Press the PHONE button on your handset.
The voice says ‘Recording announcement’.
• Press the PHONE button to end the
recording.
• Your recording is played back.
or if
• You are including a concluding message
press the GREEN button on the base station
immediately after recording your outgoing
message.
or
• You may leave silence for approximately
4 seconds after recording your outgoing
message. The voice prompts you for the
concluding message and you may then
record your concluding message.
• Press the PHONE button to end the recording.
• Both your outgoing message and the
concluding message is played back.
‘Operation Mode. Call Recording after
announcement 2’.
• Press the PLAY button. Your message is
played back. Along with any concluding
message.
• Stop playback at any time by pressing the
STOP button.
To delete your second outgoing message (A2)
MODE
DELETE
• Press the MODE button again. Voice says
‘Operation Mode. Call Recording after
announcement 2’. Display shows A2.
• Press the MODE button again. Voice says
‘Mode”.
• Press and hold the DELETE button until the
outgoing message is deleted.
26
Using your Diverse 1015
answering machine
To record an advisory announcement (A )
To delete your advisory announcement (A )
MODE
. . . . . . . . . . . . . . . . . . . . . .
. . . . . . . . . . . . . . . . . . . . . .
. . . . . . . . . . . . . . . . . . . . . .
. . . . . . . . . . . . . . . . . . . . . .
. . . . . . . . . . . . . . . . . . . . . .
MODE
VOLUME
88
SKIP
DELETE
PLAY
STOP
DELETE
RECORD
+
–
MODE
SKIP
RECORD
• Press the MODE button again. Voice says
ANSWER
ON/OFF
• Press the MODE button until the voice says
•
•
•
•
‘Operation Mode. Advisory announcement.
Display shows A .
Press the MODE button. Voice says ‘Mode’.
Press the RECORD button within 3 seconds.
Your handset rings.
Press the PHONE button on your handset.
The voice says ‘Recording announcement’.
Press the PHONE button to end the
recording.
To play back your advisory announcement (A )
MODE
PLAY
• Press the MODE button until the voice says
‘Operation Mode. Advisory announcement.
• Press the MODE button. Voice says ‘Mode’.
• Press the PLAY button. Your message is
played back.
• Stop playback at any time by pressing the
STOP button.
27
‘Operation Mode. Advisory announcement’.
Display shows A .
• Press the MODE button again. Voice says
‘Mode’.
• Press and hold the DELETE button until the
outgoing message is deleted.
To switch the answering machine on/off
ANSWER
ON/OFF
I
Press the ANSWER ON/OFF button. The
machine is ON when the button lights up. It is
OFF when the button is not lit up. The voice tells
you which outgoing message/announcement is
set. If you have a new message waiting, the light
flashes. Remember, the answering machine
will not take incoming messages until you have
recorded an outgoing message.
Using your Diverse 1015
answering machine
To set the correct day and time on the
answering machine
To switch the day and time announcement
off or on
If there is a mains power failure, you will need
to reset the correct day and time.
Your Diverse 1015 will automatically announce
the day and time after each message. This is
the factory setting. You can switch this setting
off and back on again.
STO
•
•
•
•
•
•
•
•
•
INT
9
WXYZ
9
WXYZ
Press the STORE button.
Press the # button.
Press the INT button.
Press the 9 button twice. The voice
announces, ‘Time setting. Please enter day of
the week using 1-7. Monday is 1, Sunday is 7.’
Press 1-7 to set the day.
1=Monday, 2 = Tuesday, 3 = Wednesday,
4 = Thursday, 5 = Friday, 6 = Saturday,
7 = Sunday.
The voice says, ‘Please enter the time using
four digits.’
Press four digits to enter the time, eg 0937
for 09:37 hours. The Diverse 1015 uses the
12-hour clock. The display shows a flashing 1
after the time. This indicates pm.
Press 0 to set am or press 1 to set pm.
Press the STORE button to confirm the
setting.
STO
INT
9
WXYZ
Press the STORE button.
Press the # button.
Press the INT button.
Press the 9 button.
either
• Enter 81 to switch the day and time on.
or
• Enter 82 to switch the day and time off.
• Press the STORE button to confirm the
setting.
•
•
•
•
To stop the numeric display f lashing, the day and
time must be set.
28
Using your Diverse 1015
answering machine
To set the duration of incoming messages
You can use the handset to select the
maximum length of time callers have to leave
their message. The factory setting is 120
seconds.
STO
INT
9
WXYZ
•
•
•
•
•
•
•
Length = 30 seconds.
Press the STO button.
Press the # button.
Press the INT button.
Press the 9 button.
Enter the code 21.
Press the STO button to confirm.
•
•
•
•
•
•
•
Length = 60 seconds.
Press the STO button.
Press the # button.
Press the INT button.
Press the 9 button.
Enter the code 22.
Press the STO button to confirm.
•
•
•
•
•
•
•
Length = 120 seconds.
Press the STO button.
Press the # button.
Press the INT button.
Press the 9 button.
Enter the code 23.
Press the STO button to confirm.
Length = unlimited.
Press the STO button.
Press the # button.
Press the INT button.
Press the 9 button.
Enter the code 24.
Press the STO button to confirm.
•
•
•
•
•
•
•
The total recording time for messages and memos is
12 minutes.
Recording memos
You can leave memo messages on your Diverse
1015. You have the same time to record a
memo as currently set for incoming messages.
The factory setting is 120 seconds.
To record a memo
RECORD
• Press the RECORD button on the base unit
and the handset rings.
29
STOP
• Answer the call at the handset. The voice
says ‘Recording message’. You hear a beep.
• Speak your memo message.
• Press the PHONE button on the handset or
the STOP button to stop recording.
The message counter logs your memo.
Using your Diverse 1015
answering machine
Displaying new and old messages
Your Diverse 1015 can tell you which messages
are new and which messages have already been
played back.
When there are new messages:
• The ANSWER ON/OFF button flashes.
• The display indicates the total number of
messages stored.
When the recording memory is full
If you have recorded an advisory announcement as
one of your outgoing messages, your Diverse 1015
will automatically play it as the outgoing message
to all new callers. If not, your Diverse 1015 will not
answer the call.
To play back new messages at the base unit
To skip forwards and backwards through
your messages
SKIP
SKIP
At the base:
• Press the SKIP © button once to skip to the
start of the next message or several times to
skip forward over a number of messages.
• Press the § SKIP button once to skip back
to the start of the current message or
several times to skip back over a number of
messages.
At any time you can:
• Press and hold the § SKIP button to skip
back to the start of your messages.
To pause a message during playback at the
base unit
PLAY
STOP
PLAY
• Press the PLAY button.
• Press the STOP button. The voice says.
To play back all messages at the base unit
‘Pause’
• Press the PLAY button to resume playback.
PLAY
• Press and hold down the PLAY button for
about a second. You can hear all new and
old messages.
To stop playback at the base unit
STOP
• Press the STOP button twice.
30
Using your Diverse 1015
answering machine
To save messages at the base unit
You can save a message so it will be played
back as though it was a new recording next
time you want to hear your messages.
RECORD
• Press the RECORD button twice during
playback. The machine skips to the end of
the message. The voice announces, ‘Message
is new’.
To delete a message at the base unit
DELETE
SKIP
• Press the DELETE button during playback
of the message you want deleted. Playback
stops. Voice announces, ‘Deleting’.
• Press the § SKIP button. Voice announces,
‘Message deleted’.
To delete all messages which have been
played back
The answering machine must not be in
playback mode.
DELETE
SKIP
• Press the DELETE button. The voice says,
‘Deleting’.
• Press the § SKIP button. The voice
announces, ‘Messages deleted’.
31
Call screening
When the answering machine is switched on,
you can hear incoming calls and decide
whether to answer them or let your Diverse
1015 take their message. If you decide to
answer the call, the answering machine will
stop when you pick up any handset from the
base or charging unit (or press the PHONE
button) and allow you to speak direct to the
caller. Please note that when your Diverse 1015
answers a call, you will not hear your outgoing
message.
To hear incoming calls. Make sure the speaker
volume is set to an audible level. The factory
setting in ON.
STO
•
•
•
•
•
INT
9
WXYZ
Press the STO button.
Press the # button.
Press the INT button.
Press the 9 button.
Enter the code 41 to switch the loudspeaker
on for incoming messages.
or
• Enter the code 42 to switch the loudspeaker
off for incoming messages.
• Press the STO button to confirm the setting.
Using your Diverse 1015
answering machine
To adjust the loudspeaker volume
+
Time saver mode
Times saver is useful if you ring in from
another phone to see if you have any new
messages.
–
At the base during playback:
• Press the + button to increase volume.
or
• Press the – button to decrease volume.
The setting is stored until adjusted again.
To intercept a call during message recording
You can interrupt a call from a handset while
your outgoing message is being played or while
a caller is leaving their message.
• Press the PHONE button or take the phone
off the base. The answering machine stops
recording and resets to Answer On and you
can take the call.
If you have new messages, your Diverse 1015
will announce after 2 rings. If you do not have
any new messages, your Diverse will not
answer until 4 rings. This enables you to end
your call before you are connected, saving you
time and money.
To set a pause before each message
play back
Normally, your Diverse 1015 will play back
messages continuously. You can set it to pause
between messages. The next message will not
be played back until you press the SKIP © button.
To adjust the number of rings before
incoming calls are answered
STO
You can select the number of rings, from 1 to 4,
before incoming calls are answered by the
machine when it is switched ON.
STO
INT
9
WXYZ
3
DEF
Press the STO button.
Press the # button.
Press the INT button.
Press the 9 button.
Press the 3 button.
Press a button between 0-4 to set the number
of rings you want. (0 = Time Saver mode,
see grey box opposite.)
• Press the STO button to confirm the setting.
•
•
•
•
•
•
INT
9
WXYZ
Press the STO button.
Press the # button.
Press the INT button.
Press the 9 button.
either
• Enter 51 to insert a pause between messages.
or
• Enter 52 for continuous message playback.
• Press the STO button to confirm the setting.
•
•
•
•
32
Remote operation of your
Diverse 1015
Remote access
You can operate your answering machine
from any registered handset and any other
external TouchtoneTM phone.
OR
EITHER
From a Diverse handset
INT
9
WXYZ
STO
MEM
1
2
ABC
3
DEF
5
JKL
6
MNO
8
TUV
9
WXYZ
4
GHI
7
PQRS
✱
RCL
LNR
0
INT
PWR
• Press the INT button
• Press the 9 button. The voice announces the
current mode of operation, the number of
messages on the memory and, if applicable,
the day and time.
If another handset is making an external call
you cannot access the answering machine from
your handset.
Please note
Once you have entered the system code correctly, you
are ready to operate your answering machine. If you
do not operate the machine for 160 seconds, the
voice says, ‘Please confirm’. You then have a further
8 seconds before the machine disconnects your call.
33
From another external
TouchtoneTM phone
• Dial your Diverse 1015 phone
number.
• When the Diverse 1015 takes your call,
enter the system code. (This must be
dif ferent from the factory setting of
0000. See page 16 on how to change
your system code.)
You hear a beep and the voice announces
the current operating mode, the number of
messages stored and, if applicable, the time
and day.
If you make a mistake entering the system code,
you hear the voice announce, ‘ Faulty PIN’. You
can try again.
After three incorrect entries, the answering
machine disconnects the call.
Remote operation of your
Diverse 1015
Remote operation
Once you have accessed the answering
machine from a Diverse handset or another
telephone, all the operating instructions are the
same.
To skip forwards or backwards during
playback
3
DEF
1
• Press the 3 button to move on to the next
message.
For help
or
• To play back the current message again,
press the 1 button.
• Press
# at any time for help. The voice takes
you through all the operating options.
or
• To move back several messages, press the
1 button repeatedly.
To play back new messages
To pause during playback
✱ 2
ABC
5
JKL
✱ button. The voice announces,
‘New ‘n’ messages available’.
• Press the 2 button. Your new messages are
played back.
or
• To cancel, press the 5 button.
• Press the
To play back all messages
2
ABC
5
JKL
5
JKL
2
ABC
• Press the 5 button. Playback is halted and
the voice announces, ‘Pause’.
• To continue playback, press the 2 button.
To stop playback
5
JKL
• Press the 5 button twice.
• Press the 2 button. All messages are
played back.
or
• To stop, press the 5 button.
34
Remote operation of your
Diverse 1015
To mark a message as new
✱
• Press the
✱
5
JKL
To select the operating mode
You can switch between the outgoing
messages.
9
✱ button twice during playback.
The playback skips to the end of the
message and the voice announces,
‘Message is new’.
WXYZ
1
2
ABC
3
DEF
• Press the 9 button.
The voice says, ‘Operating mode’.
• Press the 1 button to select A1.
or
The voice says, ‘Operation mode. Call recording
after announcement 1’.
• Press 5 to cancel.
To delete a message during playback
or
• Press the 2 button to select A2.
0
1
• Press the 0 button during playback of the
or
message to be deleted. Playback stops and
you hear the remote handset announce,
‘Deleting’.
• Press the 1 button. The voice confirms,
‘Message deleted’.
• Press the 3 button to select A .
To delete all messages you have played
back
0
1
• Press the 0 button. The voice announces,
‘Delete’.
• Press the 1 button. The voice confirms,
‘Messages deleted’.
35
The voice says, ‘Operation mode. Call recording
after announcement two’.
The voice says, ‘Operation Mode. Advisory
announcement’.
or
• To cancel, press the 5 button.
Remote operation of your
Diverse 1015
To record a new outgoing message
First select the operating mode A1 or A2 by
To record an advisory announcement
First select the operating mode A by
following the previous instructions entitled ‘ To
change the operating mode’.
following the instructions on page 33 entitled
‘ To select the operating mode’.
6
MNO
7
PQRS
5
JKL
• Press the 6 button. The voice announces,
‘Recording’.
• Press the 7 button. The voice says,
‘Recording announcement’. After the beep,
speak your message.
then either
• Press the 5 button twice. This stops the
recording. Your outgoing message is
played back.
or
• Press the 5 button once to record a
concluding announcement. The voice says,
‘Recording concluding announcement’.
After the beep, speak your concluding
announcement.
• To stop recording, press the 5 button and
your outgoing message and concluding
announcement are played back.
6
MNO
7
PQRS
5
JKL
• Press the 6 button. The voice says,
‘Recording’.
• Press the 7 button. The voice says,
‘Recording advisory message’. After the beep,
speak your message.
• Press the 5 button to stop recording. Your
outgoing message is played back.
To play back an outgoing
message/announcement
First select operating mode A1, A2 or A by
following the instructions on page 35 entitled
‘ To select the operating mode’.
7
PQRS
• Press the 7 button to play back the outgoing
message/announcement.
36
Remote operation of your
Diverse 1015
To delete an outgoing
message/announcement
First select operating mode A1, A2 or A by
following the instructions on page 33 entitled
‘ To select the operating mode’.
7
0
PQRS
5
JKL
• Press the 0 button. The voice announces,
‘Delete’.
• Press the 7 button to confirm deletion.
The voice says, ‘Announcement deleted’.
or
• Press the 5 button to cancel.
To record a memo message
Your memo messages in remote access mode
can be up to 2 minutes long. Do not pause for
longer than 8 seconds when recording a memo
or the answering machine will end the call.
6
MNO
2
ABC
5
JKL
• Press the 6 button. The voice says,
‘Recording’.
• Press the 2 button. the voice says,
‘Recording message’. After the beep, speak
your message.
or
• To cancel, press the 5 button.
37
To switch on your answering machine from
another phone
• Dial your number and let it ring. After
approximately 17 rings, your Diverse 1015
answering machine automatically switches
on. When you hear your outgoing message,
hang up. The answering machine is now set to
record incoming calls.
Remote operation of your
Diverse 1015
Remote access quick guide
From Diverse handset:
• Press the INT button.
• Press the 9 button.
From another telephone:
STO
MEM
LNR
1
2
ABC
3
DEF
4
GHI
5
JKL
6
MNO
7
PQRS
8
TUV
9
WXYZ
✱
RCL
0
INT
PWR
1
Skip backwards
2
Play back all messages
3
Skip forwards
4
No function
5
Abort action (pause)/stop
6
Recording
7
Output announcement
8
Answering machine on/off
9
Operating mode
0
Delete
✱
New
#
Status/help
• Dial your phone number.
• Enter your system code.
2
Memo
7
Announcement or advisory message
9
Intercom to base
1
Call recording announcement 1
2
Call recording announcement 2
3
Advisory message
1
Message
7
Announcement or advisory message
2
Play back new messages
✱
Mark message ‘new’
38
Additional features
Additional features
Using secrecy during an
external call
INT
RCL
• To obtain secrecy on an external call, press
the INT button. Display shows your handset’s
internal number and you hear the internal
dial tone. This allows you to talk to someone
in the same room, without your caller
hearing the conversation. Instead your caller
hears a melodious tone.
• Press the RCL button to resume your
telephone call with the external party.
Secrecy is not available for internal calls.
Call timer
Your Diverse 1015 provides an approximate
guide to the length of each external call you
make. The handset display shows the
approximate call duration both during your call
and also for a few seconds after your call is
completed.
Operating with additional
handsets
‘Ring priority’ and ‘collective ringing’
Your Diverse 1015 will ring all handsets
whenever there is an incoming call. This is
called collective ringing. Ring priority means an
incoming call will ring first at a preferred
handset. If there is no answer, the call will ring
all other handsets.
The factory setting for your Diverse 1015 is for
collective ringing.
To change between ring priority and
collective ringing
The handset must be switched ON.
•
•
•
•
•
•
•
•
Press the STO button.
Press the # button.
Press the 1 button.
Enter the system code. (Factory setting is
0000. To change it see page 16.)
Press the LNR button.
Press the ✱ button.
Press the 2 button and the 3 button. Display
shows the current setting.
Press the 2 button to select RING PRIORITY
or
• Press the 1 button to select COLLECTIVE
RINGING.
• Press the STO button to confirm.
39
Additional features
To set which handset will receive ring
priority
To clear and reinstate handsets for
collective ringing
Once you have set your Diverse 1015 to ring
priority, you can select the handset you want to
ring first.
The factory setting is for all handsets to be set
for collective ringing.
•
•
•
•
•
•
•
•
•
Press the STO button.
Press the # button.
Press the 1 button.
Enter the system code. (Factory setting is
0000. To change it see page 16.)
Press the LNR button.
Press the ✱ button.
Press the 2 button twice.
Press the handset number you want to ring
first for all incoming calls.
Press the STO button to confirm.
To set the number of rings before ring
priority calls all handsets
You can specify the number of rings your
selected handset can have before an incoming
call is sounded at all available handsets.
•
•
•
•
•
•
•
•
•
Press the STO button.
Press the # button.
Press the 1 button.
Enter the system code. (Factory setting is
0000. To change it see page 16.)
Press the LNR button.
Press the ✱ button.
Press the 2 button.
Press the 1 button. Display shows the
number for each handset currently set for
collective ringing.
Press the number for each handset you want
to add to – or press again to delete it from –
collective ringing.
Press the STO button to confirm.
•
•
•
•
•
•
•
•
•
•
If you are experiencing problems, please call the
Diverse Helpline on 0345 908070.
Press the STO button.
Press the # button.
Press the 1 button.
Enter the system code. (Factory setting is
0000. To change it see page 16.)
Press the LNR button.
Press the ✱ button.
Press the 6 button. Display shows the
number of rings currently set.
Press a number button between 2-9 to set
the number of rings you want.
Press the STO button to confirm.
40
Using your Diverse 1015
with a switchboard
Using your Diverse 1015 with
a switchboard / PBX
Your Diverse 1015 can be connected to all
compatible PBXs. For a list of suitable PBXs,
phone Diverse Helpline on 0345 908070.
Entering PBX external access codes for older
switchboards.
When you use your telephone on a
switchboard/PBX you may need to program a
delay after you have dialled the access code.
This enables the switchboard to pick up an
external line. By storing the access code your
switchboard uses, for example ‘9’, you can set
this delay to be inserted automatically. You will
still need to dial the access code each time
before calling any telephone number you want.
Setting the TONE or PULSE
mode
Your Diverse 1015 is preset to TONE dialling –
where you hear a tone beep each time you dial a
number. Tone dialling is suitable for all modern
digital exchanges and switchboards/ PBXs.
So you will only need to use this if your
switchboard uses pulse dialling. If you cannot
make a call with TONE dialling, you may need
to switch to PULSE dialling.
41
To set PULSE dialling
STO
1
LNR
• Press the STO button then the # button.
• Press the 1 button.
• Enter the current system code. (Factory
setting is 0000. To change it see page 16.)
• Press the LNR button.
• Press the buttons 0, 3, 3.
• Press the STO button to set pulse dialling.
To re-set to TONE dialling
STO
1
LNR
• Press the STO button then the # button.
• Press the 1 button.
• Enter the current system code. (Factory
setting is 0000. To change it see page 16.)
• Press the LNR button.
• Press the buttons 0, 3, 7.
• Press the STO button to set tone dialling.
Using your Diverse 1015
with a switchboard
For use with switchboards/PBXs
To put an outside call on hold and speak to
another, internal handset
To set Time Break Recall with Tone dialling
You can make a consultation call to a colleague
and return to your existing, outside caller.
STO
1
LNR
Press the STO button.
Press the # button.
Press the 1 button.
Enter the current system code. (Factory
setting is 0000. To change it see page 16.)
• Press the LNR button.
• Press the buttons 0, 3, 7.
• Press the STO button.
•
•
•
•
To set to Earth Recall with Tone dialling
STO
1
LNR
Press the STO button.
Press the # button.
Press the 1 button.
Enter the current system code. (Factory
setting is 0000. To change it see page 16.)
• Press the LNR button.
• Press the buttons 0, 3, 6.
• Press the STO button.
•
•
•
•
During the call:
RCL
• Press the RCL button. You hear a dial tone.
Your outside caller is on hold.
• Dial the phone extension number you want.
When the extension is answered you can
talk to your colleague without your outside
caller hearing.
• Press the RCL button to return to your
outside caller.
To transfer an outside call
Please note that you may also need to consult
your PBX’s user guide.
During the call:
RCL
• Press the RCL button. You hear a dial tone.
Your outside caller is on hold.
• Dial the phone extension number you want.
When the extension is answered you can
talk to your colleague without your outside
caller hearing.
• Press the PHONE button to transfer the call
or replace the handset on the base unit or
charger.
42
Using your Diverse 1015
with a switchboard
To insert an access code
Setting the access pause
The handset must be switched ON.
You can insert a pause or change the length of
a pause to suit different access codes.
STO
0
LNR
Press the STO button.
Press the # button.
Press the 0 button.
Enter the system code. (Factory setting is
0000. To change it see page 16.) Each digit
you enter erases one dash on the display.
• Press the LNR button.
–-.
–Display shows A –• Enter the access code (for example 9).
If you want to enter additional access codes,
press LNR again, followed by the next code,
and so on.
• Press the STO button to confirm.
•
•
•
•
Notes
• You can store RCL, ✱, and # as well as the
digit keys 0-9.
• You can enter up to three PBX access codes, each
one to three digits long.
• You may find it useful to enter 144 (for BT
Chargecard access) as one of the access codes,
together with an access pause of six seconds – see
‘Setting the access pause’ opposite.
Code
PAUSE
024
1 second
025
2 second
020
3 second
021
6 second
253
To clear all
access codes
The handset must be switched ON.
STO
1
LNR
Press the STO button.
Press #.
Press the 1 button
Enter the system code. (Factory setting is
0000. To change it see page 16.) Each digit
you enter erases one dash on the display.
• Press the LNR button.
• Enter one of the three-digit codes above to
set the length of pause you want.
• Press the STO button to confirm.
•
•
•
•
If you are experiencing problems, please call the
Diverse Helpline on 0345 908070.
43
Registering a new Diverse
handset with the base unit
Registering a new Diverse
handset with the base unit
Up to six handsets can be registered and
operated from the Diverse 1015 base unit. The
system allows you to make internal intercom
calls between two handsets while a third is
making an external call.
Each additional handset you purchase must be
registered at the base unit.
Diverse handsets
Diverse additional handset - Item Code: 871038.
Diverse Executive handset - Item Code: 871073.
Diverse 1000 handset. Item Code: 870915.
Please note. Diverse 1000 handsets will
not work on Diverse 1010 and 1015
base units.
At the handset:
1
PWR
• Press and hold down the 1 button together
with the PWR button until the display
shows 1– and flashing .
• Enter the 4 digit system code. (Factory
setting is 0000. To change it see page16.)
• Press the # button. The beeps stop after
about 10 seconds, and the display shows all
the available handset numbers.
• Select and enter one of these numbers.
This is now the handset’s internal number
and it is registered with the base unit.
To register a handset
The handset must be switched OFF.
At the base unit:
• Press and hold down the green paging
button until you hear the continuous beeps
(after about 10-15 seconds).
You now have up to 1 minute to register the handset,
during which the beeps will continue.
44
Registering a new Diverse
handset with the base unit
To remove a handset registered at the
base unit
These steps can be taken from any registered
handset.
STO
7
PQRS
2
ABC
Press the STO button.
Press the # button.
Press the 7 then 2.
Enter the system code. (Factory setting is
0000. To change it see page 16.)
• Display shows all handsets registered at
the base.
• Enter the internal number of the handset to
be removed. It disappears from the display.
If you enter the wrong number, press it
again to reinstate it.
• Press the STO button to confirm.
•
•
•
•
If you are experiencing problems, please call the
Diverse Helpline on 0345 908070.
45
Operating with additional
base unit
Operating with additional
base units
Diverse handsets
Diverse additional handset - Item Code: 871038.
Diverse Executive handset - Item Code: 871073.
Diverse 1000 handset. Item Code: 870915.
Please note. Diverse 1000 handsets will
not work on Diverse 1010 and 1015
base units.
Diverse Executive and additional handsets may
be used with up to four Diverse 1015 and/or
Diverse 1010 base units.
When planning to use a handset at more than
one base unit, it is recommended that you:
If, while not using your Diverse handset, you move
out of range of the displayed base unit and within
range of another base unit, your radio link will be
automatically set up. (Provided your handset has
been registered with the new base unit.)
If, however, you move out of range of the displayed
base unit and within range of another base unit
during a call, you will lose your current call.
The handset display shows you if the handset is
located within range of a registered base unit. If the
symbol flashes continuously, it means the handset
is out of range of a registered base unit. If the
symbol is not f lashing, you are in range.
• Assign a number to each base station, from
1 to 4.
• Number each handset (1 to 6) registered at
each base station.
• Register the handsets at base unit 2 (and 3
and 4 if used) using the same internal
number as on base unit 1.
• Activate the display of the base unit numbers
on each handset; see page 44.
46
Operating with additional
base unit
How to set up multiple base units
and handsets
To register additional Diverse 1015 handsets
at more than one base unit
You can use up to six handsets on each Diverse
base unit and up to four base stations with your
Diverse handset to build up a comprehensive
and easy-to-use cordless telephone system.
The handset supplied with the base unit is
already registered as handset 1.
The handset you wish to register onto
another base unit must be turned OFF, before
proceeding to register the handset.
At the base unit:
At the handset:
PWR
• Press and hold down the button number 2,
3 or 4 to specify the base unit number.
• At the same time, hold down the PWR button
until the display shows
2
• Enter the system code. (Factory setting is
0000. To change it see page 16.)
• Press the # button. The beep stops after a
few seconds. The display shows all available
handset numbers.
23456
• Enter the single digit internal number – from
2 to 6 – for the additional handset.
• It is now registered.
• Press and hold down the green paging
button until you hear the beeps (after about
10 seconds).
You now have up to 1 minute to register the handset,
during which the beeps will continue.
47
If the maximum number of handsets are already
registered with the base, three dashes will appear in
the display after you enter the system code.
Operating with additional
base unit
To set/clear the display of the base unit
number on a handset
To set your handset for automatic base
selection
The factory setting is to display the number.
This is useful if your handset is connected to
more than one base unit.
If you are moving around, and likely to lose
contact with your base unit, your handset can
be made to automatically switch to the first
available base unit. If this is set and you are in
the area where the signals of two base units
are overlapping, your handset will select the
strongest signal.
STO
7
PQRS
6
MNO
• Press the STO button.
• Press the 3 button then the 6 button.
The current setting is displayed.
• Press the 1 button to display the base unit
number.
or
• Press the 0 button if you do not want to
display the base unit number.
• Press the STO button to confirm.
The handset must be switched ON
STO
INT
0
• Press the STO button.
• Press the INT button. Display shows the
numbers of the base stations at which the
handset is registered.
• Press the 0 button to set automatic selection.
• Press the STO button to confirm. The
handset will now select the base unit offering
the strongest signal. Display will show the
base unit selected (unless de-activated – see
previous paragragh to set/clear the display
of the base unit number on a handset).
48
Operating with additional
base unit
To set your handset for manual base
selection
You can change automatic registration at a base
unit to manual registration. So if you are in an
area where the ranges of two base units overlap,
you can specify which base unit (and which
outgoing line) you prefer to use.
This setting is recommended where there is an
overlap between two or more base units.
The handset must be switched ON
STO
INT
• Press the STO button.
• Press the INT button. Display shows the
numbers of the base stations at which the
handset is registered.
• Press the number button – from 1 up to 4 –
for the base unit you want to select.
• Press the STO button to confirm.
If you move out of range of the displayed base unit,
and within range of another base unit during a call,
you will lose your current call.
If you are experiencing problems, please call the
Diverse Helpline on 0345 908070.
49
Maintenance
Maintenance
General
Simply clean the handset and base unit with
a damp cloth or an antistatic wipe. Never use
household polish as this will damage your
Diverse 1015. Never use a dry cloth as this
may cause a static shock.
If you have to return your Diverse 1015
If you have to return your Diverse 1015, pack
the base unit and handset securely, preferably
in the original packaging. (We cannot take
responsibility for goods damaged in transit.)
Service
Within the guarantee period
If you experience a problem with your Diverse
1015 base unit or handset, you should contact
the Diverse 1015 Helpline on 0345 908070.
Calls are charged at local call rates. If the
problem is not remedied, you will be advised to
contact your original point of purchase.
Some suppliers offer extended warranty
schemes for cover outside the initial 12-month
period. Please ask them for details.
Outside the guarantee period
If your Diverse 1015 needs repair after the
warranty period has ended, the repair must
meet the approval requirements for connection
to the telephone network. We recommend
that you call the Diverse 1015 Helpline on
0345 908070 and ask for details of our
recommended repair agents.
50
Help
Help
Emergency calls
The emergency services can be contacted in the
UK by dialling 999, or 112 which is valid in any
country that is a member of the European
Community.
Recommended batteries should have a power
rating of 600m Ah 1.2V. Batteries are available
from the Diverse Helpline 0345 908070.
If your Diverse 1015 is connected to a PBX, you
may have to dial an access number before 999 to
contact the emergency services. Some PBXs cannot
dial out during a power failure.
Solving problems
BT accepts no responsibility for damage
caused to your Diverse 1015 handset by the
use of non-NiCad batteries.
No handset display appears
Is the handset switched on?
The battery may be flat or dead. Recharge or
replace the battery.
Replacing handset batteries
After a time, you may find that the handset
batteries are running out of charge more
quickly. This is a standard sign of wear and the
batteries will need replacing.
51
No dial tone
Is the telephone line cord plugged into the
phone socket and the base unit?
If other handsets are registered on the base,
the outside line may already be in use. Wait
until the call is finished and try again.
Use only AA size nickel cadmium rechargeable
batteries in the handset. Any other types may cause
irreparable damage.
The
symbol is flashing or you cannot link
up with the base unit
Do not immerse batteries in water or throw them
into fire, or dispose of them with ordinary domestic
refuse. To charge the batteries, only use the plug-in
power supply unit provided.
Is the power cable connected at the base and
the power switched on at the wall socket?
Is the handset registered with the base unit?
To register the handset, see page 44.
Are you in range of the base unit?
Help
Please note: If you go out of range of a base unit
for a long time while your handset is switched ON,
it may take more than 20 minutes to ‘find’ the base
station again when you come back within range.
However, by simply switching the handset OFF for
a moment, then ON again, it will find the base
station within a few seconds.
The base unit or handset does not ring
The ringer volume may be set too low.
To adjust the ringer volume at the handset,
see page 17.
Check that the telephone is plugged into the
phone socket.
Is the Diverse 1015 set up for ring priority at
another handset? See page 40. Set the Diverse
1015 for collective ringing.
Cannot get through, even though a dialling
tone can be heard
You may be set to the wrong signalling
method. To change between TONE and
PULSE dialling, see Setting up, page 41.
If you are still experiencing difficulty, please call
the Diverse 1015 Helpline on 0345 908070.
Handset beeps
Are the handset batteries low? You will hear a
beep every 30 seconds.
Buzzing noise on my radio or TV
Your Diverse base unit or handset or both may
be too close – try moving it at least one metre
away.
The machine won’t answer calls.
Have you recorded an outgoing message?
See page 25.
Check that it is switched on.
The answering machine doesn’t record
Is the message capacity full ? If so, the machine
will not answer calls. Delete messages.
Is the machine set to advisory announcement
operating mode? If it is, change the mode to A1
or A2 see page 25.
Outgoing message will not record
Check that the speaker volume is set to an
audible level.
You can not remotely interrogate the
Diverse 1015
Ensure that you have changed the system code.
When connected to a PBX:
You can’t get a connection or you get the
wrong connection after speed dialling
Have you entered an access code? See page 43.
Check you have selected the correct recall and
dialling modes. See page 42.
If is flashing (see opposite page), you will
hear four short beeps when you press the
PHONE button. Check you are still in range of
your base unit.
52
Technical information
Technical information
Environment
How many phones can you have?
Your Diverse 1015 should be kept free of dust,
moisture, high temperature, vibration and
should not be exposed to direct sunlight. Do
not stand it on carpets or other surfaces which
generate fibres or place it in locations which
prevent the free flow of air over its surfaces.
All items of telephone equipment have a
Ringer Equivalence Number (REN), which is
used to calculate the number of items that may
be connected to any one telephone line.
The Diverse 1015 with up to 6 handsets has a
REN of 1. Any other instrument provided by
BT may be assumed to have a REN of 1 unless
stated otherwise. A total REN of 4 is allowed.
(For example: if Diverse 1015 is used in
conjunction with three extension telephones,
each with a REN of 1, the total REN is 4.)
Warning
The apparatus is only designed to be operated
in a normal office or domestic environment
where the relative humidity does not exceed
75%. It should not be used in bathrooms or
near water.
Back-up box
Back-up batteries in the back-up box will
support call functions for up to six hours on
standby or up to one hour of calls; see page 6.
53
Approval
Connection to the BT telephone network.
Diverse 1015 is fully approved for connection to
the BT network provided it is used according
to the instructions in this guide.
It may be connected to Direct Exchange Lines
and switchboards (PBXs) with new plan
(plug and socket) arrangements.
Technical information
Connecting to PBXs
Diverse 1015 is only approved for use with a
compatible PBX including those which do not
provide secondary proceed indication. If you
would like a list of suitable PBXs, contact BT
on 154. If you do have a compatible PBX, it
cannot be guaranteed that the telephone will
operate correctly under all possible conditions
of connection. If you have any difficulties,
contact BT on 154.
Generally Diverse 1015 can be connected to any
PBX where a simple modern telephone can be
used to make and receive calls. Diverse 1015 is
suitable for connection to PBXs which return
secondary proceed indication.
54
Technical information
Technical specification
Standard
Number of channels
Radio frequency range
Duplex method
Channel grid
Bit rate
Modulation
Voice coding
Transmitted power
Range
Power supply
Power consumption base station
Operating time, mobile unit
(with fully charged battery)
Permitted ambient conditions
for operation (maximum)
Permitted storage temperature
Signaling method
Signal key function
Base station dimensions
Mobile unit dimensions
Weight
55
DECT
120 duplex channels
1880 MHz to 1900 MHz
Time-division multiplexing. 10 ms frame length
1728 kHz
1152 kbit/s
GFSK
32 kbit/s
10 mW, average output per channel
up to 300 meters outdoors (uninterrupted line
of sight)
up to 50 meters in buildings
Base station 220/230 V –/ 50 Hz (AC adapter)
9.2 VA
Standby: up to 40 hours
Phone in use: Up to 6 . 5 hours
0˚C to 55˚C
20% to 75% rel. humidity
–10˚C to +60˚C
Dial pulsing/DTMF
Earth Recall/Timed Break Recall
ca. 195 x 174 x 90 (L x W x H)
Approx. 175 x 55 x 25 (L x W x H)
Base station: 350g
Handset: 185g (with batteries)
Index
Index
At a glance
1
Introducing the Diverse1015
5
Setting up
6
Base unit
Optional Settings
Adjusting ringer tone
Adjusting ringer volume
Reset original factory settings
System code
Changing
Handset
Batteries
Installing
Charging
Low warning
Carrying Clip
Optional Settings
Adjusting ear piece volume
Adjusting ringer tone
Adjusting ringer volume
Battery warning tone
Confirmation tone
In range tone
Optional Settings (cont’d)
Range warning tone
Reset original factory settings
Setting confirmation tone
Wrong button tone
PIN (Personal Identification Number)
Setting and changing
20
21
18
19
16
16-17
18
18
20
16
16
9
9
10
9
17
17
18
19
18
19
Using your Diverse 1015
telephone
Base unit functions
Intercom call to base unit
Paging a handset
Handset functions
Call barring
All handsets
All handsets - cancelling
Individual handsets
Individual handsets - cancelling
Special numbers - cancelling
Special numbers - storage
Making and receiving calls - external
Ending call
Last number redial
Redial last three numbers
13
13
21
22
22
22
23
22
12
12
12
12
56
Index
Making and receiving calls - internal
External call on hold and speak to
another handset
Intercom call to all handsets
Intercom call to another handset
Transfer external call between
handsets
Memory
Clearing
Dialling
Number storage
On/off
Protection
13
14
14
13
14
15
15
15
11
11
Using your Diverse 1015
answering machine
Base unit functions
Advisory announcement (A3)
Delete
Play back
Record
Call screening
Adjust loudspeaker volume
Messages
Delete
Delete all played messages
Displaying new and old messages
Pause during playback
Play back all messages
Play back new messages
Save
57
27
27
27
27
31
32
Messages (cont’d)
Skip forwards and backwards
Stop play back
Outgoing messages
First message (A1) - delete
First message (A1) - play back
First message (A1) - record
Second message (A2) - delete
Second message (A2) - play back
Second message (A2) - record
Recording memos
Switching on and off
Handset functions
Call screening
Adjust number of rings
Intercept call during message
Set pause before each message
play back
Time saver mode
Day and time
Setting
Switching announcement on and off
Set duration of incoming messages
30
30
24
25
25
25
26
26
26
29
27
31
32
32
32
32
28
28
29
31
31
30
30
30
30
31
Remote access
Handset functions
Operating
From external Touchtone TM phone
From handset
Quick guide
33
33
38
Index
Remote access (cont’d)
Handset functions (cont’d)
Remote operation
Delete all played messages
Delete message during play back
Help
Mark message as new
Outgoing message/announcement delete
Outgoing message/announcement play back
Pause during play back
Play back all messages
Play back new messages
Record advisory announcement
Record memo message
Record new outgoing message
Select operating mode
Skip forwards and backwards
during play back
Stop play back
Switch answering machine on from
another phone
34
35
35
34
35
37
36
34
34
34
36
37
36
35
34
34
37
39
40
40
39
Using your Diverse 1015
with a switchboard / PBX
Handset functions
Setting Tone or Pulse mode
Re-set Tone dialling
Set Pulse dialling
Use with switchboard/PBX’s
Access code - insert
Access pause - set
Outside call on hold and speak to
another handset
Transfer outside call
Set Earth Recall with Tone dialling
Set Time Break Recall with Tone
dialling
41
41
41
43
43
42
42
42
42
Registering a new Diverse
handset with the base unit
Additional features
Handset functions
Call timer
Operating with additional handsets
Clear and reinstate handsets for
collective ringing
Ring priority and collective ringing
Operating with additional handsets (cont’d)
Ring priority and collective ringing change between
Set number of rings before ring
priority calls all handsets
Set which handset will receive
ring priority
Secrecy
39
40
39
Base unit functions
Register handset
Handset functions
Register handset
Remove handset registered at base unit
44
44
45
58
Index
Operating with additional
base units
Base unit
Introduction
Register additional handsets at more
than one base unit
Handset
Introduction
Register additional handsets at more
than one base unit
Set/clear display of base unit number
on handset
Set handset for automatic base selection
Set handset for manual base selection
46
47
46
47
48
48
49
Maintainance
General
Returning Diverse 1015
Service
Within guarantee
Outside guarantee
50
50
50
50
Help
59
Replacing handset batteries
Solving problems
51-52
Technical information
53-54
51
Technical specifications
55
Mounting template
60
Mounting template
If mounting your Diverse 1015 back-up box,
use this guide to position two 5 mm drill holes
56 mm apart.
60
Offices in Europe, North America,
Japan and Asia Pacific.
The Telecommunications services described in this publication
are subject to availability and may be modified from time to time.
Services and equipment are provided subject to British
Telecommunications plc’s respective standard conditions of contract.
Nothing in this publication forms any part of any contract.
TouchtoneTM is a registered trade mark of
British Telecommunications plc in the UK.
© British Telecommunications plc 1996.
Registered Office: 81 Newgate Street, London EC1A 7AJ.
Registered in England No. 1800000.
Printed in Germany. Issue No.2 (10/97) 12.
Designed by The Art & Design Partnership Limited.
CE compliant to 89/336/EEC
(EMC Directive) & 73/23/EEC (Low
Voltage Directive)
APPROVED for connection to
telecommunication systems specified
in the instructions for use subject to
the conditions set out in them
5 0 415 8