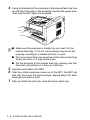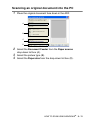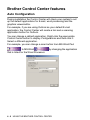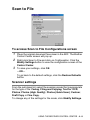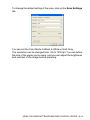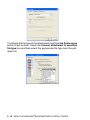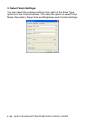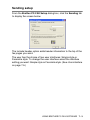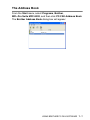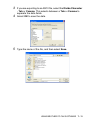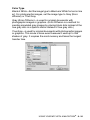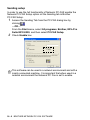
1
SOFTWARE USER’S GUIDE
MFC-8220
Table of contents
1
2
i
Using the MFC as a printer ................................................. 1-1
Using the Brother MFC printer driver................................ 1-1
How to print your original document ................................. 1-2
Manual Duplex Printing............................................... 1-2
Face-down output tray................................................ 1-3
Printing on plain paper................................................ 1-4
The manual feed tray.............................................. 1-4
Printing on thicker paper and card stock .................... 1-5
The manual feed tray.............................................. 1-5
Printing on envelopes ................................................. 1-7
Simultaneous printing and faxing.................................... 1-10
Printer operation keys..................................................... 1-10
Job Cancel................................................................ 1-10
Secure key................................................................ 1-10
Setting the Emulation Selection................................ 1-12
Printing the Internal Font List.................................... 1-13
Printing the Print Configuration List .......................... 1-13
Restoring default settings ......................................... 1-13
Printer driver settings .......................................................... 2-1
Printer driver settings........................................................ 2-1
How to access the printer driver settings.......................... 2-1
Features in the Brother Native Driver ............................... 2-2
Basic tab ..................................................................... 2-2
Paper Size .............................................................. 2-3
Multiple Page.......................................................... 2-3
Orientation .............................................................. 2-3
Copies .................................................................... 2-4
Media Type............................................................. 2-4
Advanced tab.............................................................. 2-6
Print Quality ............................................................ 2-7
Duplex .................................................................... 2-8
Watermark .............................................................. 2-9
Page Setting ......................................................... 2-11
Device Options ..................................................... 2-12
Accessories tab .................................................... 2-17
Support tab ........................................................... 2-19
Features in the PS Brother (PostScript®) printer driver
(For Windows®)............................................................ 2-20
Ports tab ................................................................... 2-21
Device Settings tab................................................... 2-21
Layout tab................................................................. 2-22
Paper / Quality tab.................................................... 2-23
Advanced Options .................................................... 2-24
3
How to scan using Windows® ............................................ 3-1
Scanning an original document ....................................... 3-1
TWAIN compliant........................................................ 3-1
How to access the Scanner........................................ 3-2
Scanning an original document into the PC ............... 3-3
Scanning a whole page .......................................... 3-3
Pre-Scanning to crop a portion you want to scan .... 3-4
Settings in the Scanner window ................................. 3-6
Image Type ............................................................ 3-6
Resolution .............................................................. 3-6
Scan Type .............................................................. 3-7
Brightness .............................................................. 3-7
Contrast .................................................................. 3-7
Document Size ....................................................... 3-8
Scanning an original document
(For Windows® XP only) .............................................. 3-10
WIA compliant .......................................................... 3-10
How to access the scanner ...................................... 3-10
Scanning an original document into the PC ............. 3-11
Brother Scanner Utility ......................................... 3-13
Using the Scan key (For USB or Parallel interface cable
users)........................................................................... 3-14
Scan to E-mail .......................................................... 3-15
Scan to Image .......................................................... 3-15
Scan to OCR ............................................................ 3-16
Scan to File............................................................... 3-16
Using ScanSoft® PaperPort® and TextBridge® OCR...... 3-17
Viewing items ........................................................... 3-18
Organizing your items in folders ............................... 3-19
Quick links to other applications ............................... 3-20
ScanSoft® TextBridge® OCR lets you convert image
text into text you can edit...................................... 3-21
You can Import items from other applications .......... 3-22
You can Export items in other formats ..................... 3-22
Exporting an image file ......................................... 3-22
How to Uninstall PaperPort® and
ScanSoft® TextBridge® ......................................... 3-23
ii
4
iii
Using the Brother Control Center ...................................... 4-1
Brother MFL-Pro Control Center................................. 4-1
AutoLoad the Brother Control Center ......................... 4-2
How to turn off AutoLoad ............................................ 4-2
Brother Control Center features........................................ 4-3
Auto Configuration ...................................................... 4-3
Scan key operations ................................................... 4-4
Copy operations.......................................................... 4-4
PC-Fax operation........................................................ 4-4
Scanner settings for Scan, Copy and PC-Fax buttons .... 4-5
Global settings............................................................ 4-5
Setting up the scanner configurations ........................ 4-6
Perform an operation from the Control Center screen..... 4-7
Scan to File....................................................................... 4-8
To access Scan to File Configurations screen ........... 4-8
Scanner settings......................................................... 4-8
Destination folder........................................................ 4-9
Scan to E-mail ................................................................ 4-10
To access Scan to E-mail Configurations screen ..... 4-10
Scanner settings....................................................... 4-11
E-mail application ..................................................... 4-11
Send to Options ........................................................4-12
Scan to OCR (Word Processor) .....................................4-13
To access Scan to OCR Configurations screen ....... 4-13
Scanner settings....................................................... 4-14
Word Processor ........................................................4-14
Scan to Image................................................................. 4-16
To access Scan to Image Configurations screen ..... 4-16
Scanner Settings ...................................................... 4-17
Target Application..................................................... 4-17
Copy ............................................................................... 4-18
To access the Copy Configurations screen .............. 4-18
Scanner settings....................................................... 4-19
Number of copies...................................................... 4-19
Send a fax....................................................................... 4-20
To access the Send a fax Configurations screen ..... 4-20
Scanner settings....................................................... 4-20
PC-FAX Settings....................................................... 4-21
5
6
7
Using the Windows®-Based Brother SmartUI Control Center ... 5-1
Brother SmartUI Control Center ....................................... 5-1
AutoLoad the Brother Control Center ......................... 5-2
How to turn off AutoLoad............................................ 5-2
Brother Control Center features ....................................... 5-3
Auto Configuration...................................................... 5-4
Hardware Section: Changing the Scan to button
configuration .................................................................. 5-5
Scan to E-mail ............................................................ 5-6
Scan to File................................................................. 5-7
Scan to Image ............................................................ 5-8
Scan to OCR ............................................................ 5-10
Software Section ............................................................ 5-12
Scan ......................................................................... 5-13
Copy ......................................................................... 5-13
Fax............................................................................ 5-14
Custom ..................................................................... 5-14
Scan to File..................................................................... 5-15
Scan to E-mail ................................................................ 5-17
File attachments ....................................................... 5-19
Scanner settings....................................................... 5-20
Scan to OCR (Word Processing program) ..................... 5-21
Scan to Graphics application
(example: Microsoft Paint)........................................... 5-23
Copy ......................................................................... 5-25
Fax setting (PC-Fax using the Brother Fax Driver) ........ 5-27
FAX settings ............................................................. 5-28
Custom: User-defined buttons........................................ 5-29
Customizing a user-defined button........................... 5-29
1. Select the Scan Action ..................................... 5-29
2. Select Configuration for the Scan Type............ 5-30
3. Select Scan Settings. ....................................... 5-34
Using MFC Remote Setup ................................................... 6-1
MFC Remote Setup.......................................................... 6-1
Using Brother PC-FAX software ......................................... 7-1
PC-FAX sending............................................................... 7-1
Setting up user information......................................... 7-2
Sending setup............................................................. 7-3
Outside line access .................................................... 7-4
Include header............................................................ 7-4
Address Book file........................................................ 7-4
iv
User interface ............................................................. 7-5
Simple style ............................................................ 7-5
Facsimile style ........................................................ 7-5
Speed-Dial setup .............................................................. 7-6
The Address Book ...................................................... 7-7
Setting up a Member in the Address Book ................. 7-8
Setting up a Group for Broadcasting .......................... 7-9
Editing Member information...................................... 7-10
Deleting a Member or Group .................................... 7-10
Exporting the Address Book .....................................7-10
Importing to the Address Book ................................. 7-12
Setting up a Cover Page........................................... 7-14
You can enter information in each field .................... 7-15
Sending a file as a PC-FAX using the Facsimile
style ......................................................................7-16
Redial ................................................................... 7-17
Sending a file as a PC-FAX using the Simple style....7-17
Setting up PC-FAX receiving
(Windows® 95/98/98SE/Me/2000 Professional and
Windows NT® WS 4.0 only) ......................................... 7-19
Running PC-FAX Receiving .....................................7-19
Setting up your PC.................................................... 7-19
Viewing new PC-FAX messages ..............................7-20
Receiving a fax into the PC
(Windows® XP only)..................................................... 7-21
How to receive a fax automatically ........................... 7-21
How to view the received faxes ................................ 7-27
8
v
Using your MFC with a Macintosh® .................................... 8-1
Setting up your USB-equipped Apple® Macintosh® .......... 8-1
Using the Brother printer driver with your Apple®
Macintosh® (Mac OS® 8.6-9.2) ...................................... 8-2
Using the Brother Printer Driver with Your Apple®
Macintosh® (Mac OS® X)............................................... 8-4
Choosing page setup options ..................................... 8-4
Specific settings.......................................................... 8-5
Using the PS driver with your Apple® Macintosh® ............ 8-6
For Mac OS® 8.6 to 9.2 users..................................... 8-7
For Mac OS® X users ............................................... 8-11
Sending a fax from your Macintosh® application ............ 8-14
For Mac OS® 8.6-9.2 users ...................................... 8-14
For Mac OS® X users ............................................... 8-16
Drag a vCard from the Mac OS® X Address Book
application ........................................................8-18
Using the Brother TWAIN scanner driver with your
Macintosh® ................................................................. 8-20
Accessing the scanner ............................................. 8-20
Scanning an image into your Macintosh® ................. 8-21
Scanning a whole page ........................................ 8-21
Pre-Scanning an image ............................................ 8-22
Settings in the Scanner window ............................... 8-23
Image ................................................................... 8-23
Scanning Area...................................................... 8-25
Adjusting the Image.............................................. 8-26
Using Presto!® PageManager® ....................................... 8-27
Highlights.................................................................. 8-27
System requirements................................................ 8-28
Technical Support..................................................... 8-28
MFC Remote Setup (Mac OS® X) .................................. 8-29
9
10
11
Network Scanning ............................................................... 9-1
Network License ......................................................... 9-1
Registering your PC with the MFC ............................. 9-2
Using the Scan key........................................................... 9-5
Scan to E-mail (PC).................................................... 9-5
Scan to E-mail (E-mail server).................................... 9-6
Scan to Image ............................................................ 9-7
Scan to OCR .............................................................. 9-8
Scan to File................................................................. 9-9
Brother Network PC-FAX software .................................. 10-1
Enable Network PC-FAX .......................................... 10-1
Sending setup ...................................................... 10-2
Extra options in Address Book ............................. 10-3
Using the Brother Network PC-FAX software........... 10-4
Quick Tips: ........................................................... 10-4
Sending a Network PC-FAX from your Macintosh®
application ............................................................ 10-5
For Mac OS® 8.6-9.2 users .................................. 10-5
For Mac OS® X 10.1/10.2.1-10.3 or greater
users................................................................. 10-5
Index ...................................................................................... I-1
vi
1
Using the MFC as a printer
Using the Brother MFC printer driver
A Printer Driver is software that translates data from the format used
by a computer into the format required by a particular printer, using
a printer command language or page description language.
The printer drivers are on the CD-ROM we have supplied. Install the
drivers first by following the Quick Setup Guide. Also, the latest
printer driver can be downloaded from the Brother Solutions Center
at:
http://solutions.brother.com
Printing
The dedicated printer driver and TrueType™ compatible fonts for
Microsoft® Windows® 95/98/98SE/Me/2000 Professional/XP and
Windows NT® workstation 4.0 are available on the CD-ROM
supplied with your MFC. You can install them easily into your
Windows® system using our installer program. The driver supports
our unique compression mode to enhance printing speed in
Windows® applications, and allows you to set various printer
settings, including economy printing mode and custom paper size.
Popular Printer Emulation Support
The MFC supports HP LaserJet (PCL level 6) and BR-Script
(PostScript® 3™ language emulation) printer emulation mode. If you
use DOS application software, you can use HP LaserJet (PCL level
6) and BR-Script (PostScript® 3™ language emulation) emulation
mode for printer operations.
Windows®
1 - 1 USING THE MFC AS A PRINTER
How to print your original document
When the MFC receives data from your computer, it begins printing
by picking up paper from the paper tray. The paper tray can feed
many types of paper and envelopes.
1
2
3
From your computer select the Print command.
If your computer is also connected to any other printers, select
MFC-8220 (USB) Printer or Brother MFC-8220 as your printer
driver from the Print or Print Settings menu in your software
application, and then click on OK to begin printing.
Your computer sends a print command and data to the MFC.
The LCD back light will change to orange and the MFC starts to
print.
You can select the paper size and orientation in your application
software.
If your application software does not support your custom paper size,
select the next largest paper size.
Then adjust the print area by changing the right and left margins in
your application software.
Manual Duplex Printing
The MFC prints all the
even-numbered pages on one
side of the paper first.
Then, the Windows® driver
instructs you (with a pop-up
message) to reinsert the paper.
Before reinserting the paper,
straighten it well, or you may get
a paper jam. Very thin or very
thick paper is not recommended.
We recommend 75 to 90 g/m2 (20 to 24 lb) paper.
USING THE MFC AS A PRINTER 1 - 2
Face-down output tray
The MFC ejects paper with printed surfaces face down into the
output tray in the front of the MFC. Unfold the support flap to support
the printed pages.
When printing transparencies, remove each one from the
support flap after it exits the MFC.
Support Flap
with Extension
1 - 3 USING THE MFC AS A PRINTER
Printing on plain paper
The manual feed tray
The MFC automatically turns on the Manual Feed mode when
you put paper in the manual feed tray.
1
2
3
Select the Paper Size, Media Type, Paper Source, and other
settings in the printer driver.
Media Type: Plain Paper
Paper Source: Manual
Open the manual feed tray. Slide the paper guides to fit the
paper size.
Using both hands put paper in the manual feed tray face up until
the front edge of the paper touches the paper feed roller and the
MFC grips the paper.
■ Make sure that the paper is straight and in the proper
position on the manual feed tray. If it is not, the paper may
not be fed properly, resulting in a skewed printout or a paper
jam.
■ Do not put more than one piece of paper in the manual feed
tray at any one time, or it may cause a jam.
4
5
Send the print data to the MFC.
After the printed page comes out of the MFC, put in the next
sheet of paper as in Step 3. Repeat for each page that you want
to print.
USING THE MFC AS A PRINTER 1 - 4
Printing on thicker paper and card stock
When the back output tray is pulled down, the MFC has a straight
paper path from the manual feed tray through to the back of the MFC.
Use this paper feed and output method when you want to print on
thicker paper or card stock.
The manual feed tray
1
2
3
4
Select the Paper Size, Media Type, Paper Source, and other
settings in the printer driver.
Media Type: Thick paper or Thicker paper
Paper Source: Manual
Open the back output tray.
Open the manual feed tray. Slide the paper guides to fit the
paper size.
Using both hands put the paper in the manual feed tray face up
until the front edge of the paper touches the paper feed roller
and the MFC grips the paper.
■ Make sure that the paper is straight and in the proper
position in the manual feed tray. If it is not, the paper may not
be fed properly, resulting in a skewed printout or a paper
jam.
■ Do not put more than one piece of paper in the manual feed
tray at any one time, or it may cause a jam.
1 - 5 USING THE MFC AS A PRINTER
5
6
7
Send the print data to the MFC.
After the printed page comes out of the MFC, put in the next
sheet of paper as in Step 4. Repeat for each page that you want
to print.
When you have finished the print job, close the back output tray.
Caution
Remove each sheet immediately after printing. Stacking the sheets
may cause a paper jam or the paper to curl.
USING THE MFC AS A PRINTER 1 - 6
Printing on envelopes
To print on envelopes use manual feed tray
■ The MFC automatically turns on the Manual Feed mode
when you put paper in the manual feed tray.
■ All sides should be properly folded without any wrinkles or
creases.
1
2
Select the Paper Size, Media Type, Paper Source, and other
settings in the printer driver.
Media Type: Envelope, Env.Thin or Env.Thick
Open the back output tray.
1 - 7 USING THE MFC AS A PRINTER
3
Open the manual feed tray. Slide the paper guides to fit the
envelope size.
If envelopes are creased after they have been printed:
At the back of the MFC, open the back output tray and push
down the blue tabs at the left and right hand sides (as shown in
the figure on the next page). When you have finished printing
your envelopes, close the back output tray to reset the two blue
tabs back to their original position.
USING THE MFC AS A PRINTER 1 - 8
4
Using both hands put the envelope in the manual feed tray face
up until the front edge of the envelope touches the paper feed
roller and the MFC grips the envelope.
■ Make sure the envelope is straight as you insert it in the
manual feed tray. If it is not, the envelope may not be fed
properly, resulting in a skewed printout or a jam.
■ Do not put more than one envelope in the manual feed tray
at any one time, or it may cause a jam.
■ Put the envelope in the manual feed tray, making sure that
the side to be printed on is face up in the tray.
5
6
7
Send the print data to the MFC.
After the printed envelope comes out of the MFC, the MFC will
wait until you put in the next envelope. Repeat Step 4 for each
envelope you want to print.
After you finish the print job, close the back output tray.
1 - 9 USING THE MFC AS A PRINTER
Simultaneous printing and faxing
Your MFC can print from your computer while sending or receiving a
fax, or while scanning an original document into the computer. Fax
sending will not be stopped during PC printing.
Printer operation keys
Job Cancel
You can clear data from the memory by
pressing the Job Cancel key.
Secure key
Secured data is password protected. Only those people that know
the password will be able to print the data. The MFC will not print
secure data until the password is entered. After the original
document is printed, the data will be cleared from the memory. To
use this menu setting, you need to set your password in the printer
driver dialog box. (See Device Options on page 2-12.)
The Secure Key setting is not available when using the Brother
BR-Script (PostScript® 3™ language emulation) driver.
1
2
Press Secure.
Press
or
to select the user
name.
Press Set. The LCD displays job
selections.
User?
MIKE
The LCD displays No Data! if there is no secured data in the
memory.
USING THE MFC AS A PRINTER 1 - 10
3
4
5
Press
or
to select the job.
Job?
Text1
Press Set. The LCD prompts you to
enter your four-digit password.
Enter your password using the
Text1
Password:XXXX
control panel.
Press Set.
Press
or
to select Print.
Press Set. The MFC prints the data.
—OR—
If you want to delete the secured data, press
or
to
select Delete and press Set.
■ If you turn the MFC power switch off, the secured data saved
in memory will be cleared.
■ After you print the secured data it will be cleared from
memory.
1 - 11 USING THE MFC AS A PRINTER
Setting the Emulation Selection
Your MFC will receive print commands in a printer job language or
Emulation. Different operating systems and applications will send the
print commands in different languages. Your MFC can receive print
commands in a variety of emulation’s. This MFC has an Automatic
Emulation Selection setting. When the MFC receives information
from the PC, it automatically chooses the emulation mode. This
setting has been set at the factory to AUTO.
You can change the default emulation mode manually by using the
control panel.
1 Press Menu, 4, 1.
Printer
1.Emulation
2 Press
or
to select Auto,
HP LaserJet or BR-Script 3.
Press Set.
3 Press Stop/Exit.
We recommend that you set the emulation setting with your
application software or network server. If the setting does not
work properly, select the required emulation mode manually
using the MFC panel buttons.
USING THE MFC AS A PRINTER 1 - 12
Printing the Internal Font List
You can print a list of the MFC’s internal (or resident) fonts to see
how each font looks before you select it.
1 Press Menu, 4, 2, 1.
Print Options
2 Press Start. The MFC prints the list. 1.Internal Font
3 Press Stop/Exit.
Printing the Print Configuration List
You can print a list of current printer settings.
1 Press Menu, 4, 2, 2.
Print Options
2.Configuration
2 Press Start. The MFC prints the
settings.
3 Press Stop/Exit.
Restoring default settings
You can return the MFC to the default settings. Fonts and macros in
the temporary settings are cleared.
1 Press Menu, 4, 3.
Printer
3.Reset Printer
2 Press 1 to restore the default
settings
—OR—
Press 2 to exit without making a change.
3 Press Stop/Exit.
Only the printer settings will be returned to the default settings.
1 - 13 USING THE MFC AS A PRINTER
2
Printer driver settings
(Windows® Only)
Printer driver settings
You can change the following printer settings when you print from
your computer:
■ Media Type
■ Multiple Page
■ Watermark*1*2
■ Scaling*2
■ Print Date & Time*1*2
■ Quick Print Setup*1*2
■ Secure Print*1
*1 These settings are not available with the BR-script (PostScript® 3™
language emulation) driver.
2
* These settings are not available with the Universal printer driver.
How to access the printer driver
settings
1
2
Select Print from the File menu in your application software.
Select Brother MFC-8220 (USB) Printer or Brother MFC-8220
as your printer and click Preferences for Windows® XP
(Properties for Windows® 95/98/98SE/Me and 2000,
Document Defaults for Windows NT® 4.0). The Printing
Preferences dialog box will appear.
The way you access the printer driver settings depends on your
operating system and software applications.
The screens shown in this section are from Windows® XP.
The screens on your computer may vary depending on your
Windows® operating system.
PRINTER DRIVER SETTINGS 2 - 1
Features in the Brother Native Driver
The Brother Native driver is a printer driver developed exclusively by
Brother. This driver includes more features than the Microsoft®
Windows® Universal printer driver.
Basic tab
1
2
3
4
1
2
3
4
Select the Paper Size, Multiple Page, Border Line (if any) and
Orientation.
Select number of Copies and Media Type.
Select Paper Source (First Page and Other Pages).
Auto Select allows the printer driver to select a suitable tray for
Paper Size automatically.
You can set the paper size for each tray in the Accessories tab.
(See Accessories tab on page 2-17.)
To return to the default settings, click the Default button.
2 - 2 PRINTER DRIVER SETTINGS
Paper Size
From the drop-down box select the Paper Size you are using.
Multiple Page
The Multiple Page selection can reduce the image size of a page
allowing multiple pages to be printed on one sheet of paper or
enlarging the image size for printing one page on multiple sheets of
paper.
Ex. 4 in 1
Ex. 1 in 2 × 2 pages
Border Line
When printing multiple pages on one sheet with the Multiple Page
feature you can select to have a solid border, dash border or no
border around each page on the sheet.
Orientation
Orientation selects the position of how your original document will be
printed (Portrait or Landscape).
Portrait
Landscape
PRINTER DRIVER SETTINGS 2 - 3
Copies
The copies selection sets the number of copies that will be printed.
Collate
With the Collate check box selected, one complete copy of your
original document will be printed and then repeated for the number
of copies you selected. If the Collate check box is not selected, then
each page will be printed for all the copies selected before the next
page of the original document is printed.
Collate box checked
Collate box not checked
Media Type
You can use the following types of media in your MFC. For the best
print quality, select the type of media that you wish to use.
Plain Paper
Thin Paper
Thick Paper
Thicker Paper
Bond Paper
Transparencies
Envelopes
Env. Thick
Env. Thin
2 - 4 PRINTER DRIVER SETTINGS
■ When using ordinary plain paper (19 to 25 lb), select Plain
Paper. When using heavier weight paper, envelopes or
rough paper select Thick Paper or Thicker Paper. For bond
paper, select Bond Paper for OHP transparencies, select
Transparencies.
■ When you use envelopes, select Envelopes. If the toner is
not fixed to the envelope correctly when Envelopes has
been selected, select Env. Thick. If the envelope is
crumpled when Envelopes has been selected, select Env.
Thin.
PRINTER DRIVER SETTINGS 2 - 5
Advanced tab
1
2
3
4
5
To return to the default settings, click the Default button.
Change the tab settings by selecting one of the following icons:
1 Print Quality
2 Duplex
3 Watermark
4 Page Setting
5 Device Options
2 - 6 PRINTER DRIVER SETTINGS
Print Quality
Choosing the Print Quality icon displays the Print Quality features
available.
Resolution
You can change the resolution as follows:
■ HQ 1200
■ 600 dpi
■ 300 dpi
Toner Save
You can save running costs by turning on the Toner Save Mode,
which reduces the print density.
Print Setting
For Windows® 95/98/98SE/Me
Print Setting is used for optimizing your print quality for the type of
original document being printed (Photos, Graphics or Scanned
Images). When you choose Auto (Recommended), the printer
automatically prints with the most suitable print settings.
With the Print Setting set to Manual, you can change the Brightness,
Contrast and Graphics Quality options manually.
For Windows® 2000/XP/NT® WS 4.0
■ Check Use Printer Halftone to print using Halftone.
■ Check Use System Halftone to print using Halftone of the
system. To change the setting, press Setting.
■ If the halftone cannot be printed correctly, check Improve gray
printing.
PRINTER DRIVER SETTINGS 2 - 7
Duplex
Duplex printing lets the print job be printed on both sides of the paper
which reduces the amount paper used for printing. Choosing the
Duplex icon displays the Duplex features available.
Manual Duplex
Check the Manual Duplex box. In this mode, the MFC prints all the
even numbered pages first. Then the printer driver stops and shows
the instructions required to re-install the paper. When you click OK
the odd numbered pages are printed.
Duplex Type
You can select Duplex Type. There are six types of duplex
directions available for each orientation.
Flip on Left Edge
Flip on Right Edge
Flip on Top Edge
Flip on Bottom Edge
Flip on Top Edge (No Reverse)
Flip on Bottom Edge (No Reverse)
2 - 8 PRINTER DRIVER SETTINGS
Binding Offset
Check the Binding Offset option, you can specify the offset value of
the binding side in inches or millimeters (0 - 8 inches) [0 - 203.2 mm].
Watermark
Choosing the Watermark icon displays the Watermark features
available.
You can place a logo or text into your original document as a
Watermark. You can select one of the preset Watermarks, or you can
use a bitmap file or text file that you have created.
Check Use Watermark, and then select the watermark you want to
use.
In background
Check In background to print the watermark image in the
background of your original document. If this feature is not checked
then the Watermark will be printed on top of your original document.
In Outline Text
(Windows® 2000 Professional/XP/NT® WS 4.0 Only)
Check In Outline Text if you only want to print an outline of the
watermark.
PRINTER DRIVER SETTINGS 2 - 9
Print Watermark
The Print Watermark feature offers the following print choices:
■ On all pages
■ On first page only
■ From second page
■ Custom
■ Apply from second copy (collate only)
(For Windows® 2000 Professional/XP/ Windows NT® 4.0)
Watermark Setting
You can change the Watermark’s size and position on the page by
selecting the Watermark, and clicking the Edit button. If you want to
add a new Watermark, click the New button, and then select Text or
Bitmap in the Watermark Style.
■ Title
You can select CONFIDENTIAL, COPY or DRAFT as the
standard title or enter a title you like in the field.
2 - 10 PRINTER DRIVER SETTINGS
■ Watermark Text
Enter your Watermark text into the Text Box, and then select the
Font, Size, Darkness and Style.
■ Watermark Bitmap
Enter the file name and location of your bitmap image in the File
box, or Browse for the file location. You can also set the scaling
size of the image.
■ Position
This setting offers you the control for where the Watermark is to
be positioned on the page.
Page Setting
Choosing the Page Setting icon displays the Page Setting features
available.
PRINTER DRIVER SETTINGS 2 - 11
Scaling
You can change the print size of your original document with the
Scaling feature.
■ Off
Print the original document as it appears on your screen.
■ Fit to Paper Size
Check here, if your original document has an unusual size, or if
you have only the standard size paper.
■ Free
You can manually reduce or enlarge the output.
Mirror Print
Reverses the data left to right and prints.
Reverse Print
Rotates the data by 180 degrees and prints.
Device Options
Lets you set the following Printer Functions:
2 - 12 PRINTER DRIVER SETTINGS
Secure Print
Secured original documents are original documents that are
password protected when they are sent to the MFC. Only the people
who know the password will be able to print them. Since the original
documents are secured at the MFC, you must use the control panel
of the MFC (with the password) to print them.
To send a secured original document:
1
Select Secure Print from Printer Function and check Secure
Print.
2 Enter your password, user name and job name and click OK.
3 You must print the secured original documents from the control
panel of the MFC. (See Secure key on page 1-10.)
To delete a secure original document:
You need to use the control panel of the MFC to delete secured
original documents. (See Secure key on page 1-10.)
You can store up to 8 MB of secured data in the MFC's memory.
PRINTER DRIVER SETTINGS 2 - 13
Quick Print Setup
The Quick Print Setup feature allows you to quickly select driver
settings. To view settings, simply click your mouse button on the task
tray
icon. This feature can be set to ON or OFF from the Device
Options section.
The default setting is OFF.
2 - 14 PRINTER DRIVER SETTINGS
Administrator (For Windows® 95/98/98SE/Me Users Only)
The administrator selection permits the Copy, Scaling and
Watermark features to be locked and password protected.
Record your password and keep it in a safe place for future
reference. If you forget your password these settings can not be
accessed.
PRINTER DRIVER SETTINGS 2 - 15
Print Date & Time
When enabled the Print Date & Time feature will automatically print
the date and time from your computers system clock on your original
documents.
Click the Setting button to change the Date and Time Format. You
can change the Font by clicking the Font button or the Position. To
include a background with the Date and Time select Opaque. When
Opaque is selected you can set the Darkness of the Date and Time
background by changing the percentage.
The Date and Time indicated in the selection box represents the
format that will be printed. The actual Date and Time printed on
your original documents is automatically retrieved from the
settings of your computer.
2 - 16 PRINTER DRIVER SETTINGS
Accessories tab
The Accessories tab includes the settings for configuring the printer
driver for the size of paper loaded in each paper source. This tab also
installs any additional options into the driver settings.
Paper Source Setting
To configure the paper size for each paper source, highlight the
source in the Paper Source Setting list. Select the Paper Size from
the pull-down box and click Update. When Auto Select (default
Paper Source) is set in the Basic tab of the printer driver (See Basic
tab on page 2-2), the printer driver will automatically use the Paper
Source setting to select a tray which matches the Paper Size
setting in the printer driver.
Default Source
The Default Source allows you to choose the paper source that will
be used when the paper size of the original documents being sent
does not match the Paper Source settings.
PRINTER DRIVER SETTINGS 2 - 17
Available Options
In order to access the optional lower tray the option must be installed
in the driver. Highlight the model number from the Available
Options list and click Add. The optional tray will then be listed in the
Installed box, Paper Source Setting list and the screen illustration
will display the optional lower tray.
2 - 18 PRINTER DRIVER SETTINGS
Support tab
The Support tab provides driver version and setting information. In
addition there are links to the Brother Solutions Center and the
Driver Update Web sites.
Click the Support tab to display the following screen:
Brother Solutions Center
The Brother Solutions Center is a Web site offering information
about your Brother product including FAQs (Frequently Asked
Questions), User’s Guides, Driver Updates and Tips for using your
MFC.
Web Update
Web Update checks the Brother web site for updated drivers, and
automatically downloads and updates the printer driver on your
computer.
Check Setting
The Check Setting selection displays a list of your current driver
settings.
PRINTER DRIVER SETTINGS 2 - 19
Features in the PS Brother
(PostScript®) printer driver
(For Windows®)
The Windows® 95/98/98SE/Me/2000 Professional/XP and Windows
NT® 4.0 utilizes BR-Script (PostScript® 3™ language emulation)
driver.
You can download the latest driver by accessing the Brother
Solutions Center at http://solutions.brother.com
To install the PS driver
If you have already installed the printer driver following the instruction
in the Quick Setup Guide, insert the CD-ROM into the CD-ROM drive
on your PC and click Install Software. Choose MFL-Pro Suite and
follow the on-screen instructions. When the Select Components
screen appears, check PS Printer Driver, and then continue
following the on-screen instructions.
If you have not previously installed the driver and software, insert the
CD-ROM into the CD-ROM drive on your PC and click Install
Software. Choose MFL-Pro Suite and follow the on-screen
instructions. When the Setup Type screen appears, select Custom
and check the PS Printer Driver. Then continue following on-screen
instructions.
The screens in this section are from Windows® XP.
The screens on your PC will vary depending on your operating
system.
2 - 20 PRINTER DRIVER SETTINGS
Ports tab
Select the port where your printer is connected or the path to the
network printer you are using.
Device Settings tab
Select the options you installed to configure any additional
accessories you have installed.
PRINTER DRIVER SETTINGS 2 - 21
Layout tab
If you are using Windows NT® 4.0, Windows® 2000 or XP, you
can access the Layout tab by clicking Printing Preferences in
the General tab of the Brother MFC-8220 BR-Script3
Properties screen.
The Layout tab enables you to change various layout settings such
as Orientation, Page Order and Page Per Sheet.
2 - 22 PRINTER DRIVER SETTINGS
Paper / Quality tab
If you are using Windows NT® 4.0, Windows® 2000 or XP, you
can access the Paper/Quality tab by clicking Printing
Preferences in the General tab of the Brother MFC-8220
BR-Script3 Properties screen.
Select the Paper Source.
PRINTER DRIVER SETTINGS 2 - 23
Advanced Options
If you are using Windows NT® 4.0, Windows® 2000 or XP, you
can access the Brother MFC-8220 BR-Script3 Advanced
Options tab by clicking the Advanced button in the Layout tab
or the Paper/Quality tab.
1
2
3
1
2
3
Select the Paper Size and Copy Count.
Set the Print Quality, Scaling and TrueType Font setting.
You can change settings by selecting the setting in the Printer
Features list:
■ Media Type
■ Toner Save
■ BR-Script Level
2 - 24 PRINTER DRIVER SETTINGS
3
How to scan using
Windows®
The scanning operations and drivers will be different depending
on your operating system.
For Windows® 95/98/98SE/Me/2000 Professional and
Windows NT® Workstation 4.0
The MFC uses a TWAIN Compliant driver for scanning original
documents from your applications. (See Scanning an original
document on page 3-1.)
For Windows® XP
The MFC uses Windows® Imaging Acquisition (WIA) for
scanning original documents. (See Scanning an original
document (For Windows® XP only) on page 3-10.)
For ScanSoft®, PaperPort® and TextBridge® OCR
Go to Using ScanSoft® PaperPort® and TextBridge® OCR on
page 3-17.
Scanning an original document
TWAIN compliant
The Brother MFL-Pro Suite software includes a TWAIN compliant
scanner driver. TWAIN drivers meet the standard universal protocol
for communicating between scanners and software applications.
This means that not only can you scan images directly into the
PaperPort® viewer that Brother included with your MFC, but you can
also scan images directly into hundreds of other software
applications that support TWAIN scanning. These applications
include popular programs like Adobe® Photoshop®, Adobe®
PageMaker®, CorelDraw® and many more.
HOW TO SCAN USING WINDOWS® 3 - 1
How to access the Scanner
1
Open the software application (ScanSoft® PaperPort®) to scan
an original document.
The instructions for scanning in this guide are for when you use
ScanSoft® PaperPort® 8.0SE.
2
3
4
Select Scan from the File drop-down menu or select the Scan
button. The Scan panel appears in the left panel.
Select Brother MFC-8220, Brother MFC-8220 USB or Brother
MFC-8220 LAN (if the optional NC-9100h is installed) from the
Scanner drop-down list box.
Click Scan.
If the MFC is connected via:
Parallel - use Brother MFC-8220
USB - use Brother MFC-8220 USB
LAN - use Brother MFC-8220 LAN (if the optional NC-9100h is
installed)
The Brother MFC-8220, Brother MFC-8220 USB or Brother
MFC-8220 LAN Scanner Setup dialog box will appear:
3 - 2 HOW TO SCAN USING WINDOWS®
Scanning an original document into the PC
You can scan a whole page
—OR—
Scan a portion of the page after pre-scanning the original document.
Scanning a whole page
1
2
Place the original document face down in the ADF.
Adjust the following settings, if required, in the Scanner window:
■ Image Type
■ Resolution
■ Scan Type
■ Brightness
■ Contrast
■ Document Size
After you select a document size, you can adjust the scanning
area further by clicking the left mouse button and dragging it.
This is required when you want to crop an image when
scanning. (See Settings in the Scanner window on page 3-6.)
3
Click the Start button in the scanner window.
When scanning is completed, click Cancel to return to the
PaperPort® window.
HOW TO SCAN USING WINDOWS® 3 - 3
Pre-Scanning to crop a portion you want to scan
The PreScan button is used to preview an image for cropping any
unwanted areas from the image. When you are satisfied with the
preview, click the Start button in the scanner window to scan the
image.
1 Place the original document face down in the ADF.
Scanning area
2
Select the settings for Image Type, Resolution, Scan Type,
Brightness and Contrast, as needed.
3 - 4 HOW TO SCAN USING WINDOWS®
3
In the Brother MFC-8220, Brother MFC-8220 USB or Brother
MFC-8220 LAN Scanner Setup dialog box, click the PreScan
button.
The entire original document will be scanned into the PC and will
appear in the Scanning Area.
Scanning area
4
Select the portion you want to scan by clicking the left mouse
button and dragging it.
You can enlarge the portion you selected by pressing
check it. If you want to select a different portion, use
the image.
5
6
7
to
to undo
Place the original document face down in the ADF again.
Click Start.
This time only the selected area of the original document will
appear in the PaperPort® window (or your software application
window).
In the PaperPort® window, use the options available to refine the
image.
HOW TO SCAN USING WINDOWS® 3 - 5
Settings in the Scanner window
Image Type
Select the image type of output from Photo, Web or Text.
Resolution and Scan Type will be altered for each default setting.
The default settings are:
Image Type
Resolution
Scan Type
Photo
Select for scanning photo images.
300 x 300 dpi
True Gray
Web
Select for attaching the scanned
image to web pages.
100 x 100 dpi
True Gray
Text
Select for scanning text original
documents.
200 x 200 dpi
Black & White
Resolution
You can change the scanning resolution from the Resolution drop
down list. Higher resolutions take more memory and transfer time,
but can achieve a finer scanned image. You can choose Black &
White/Gray (Error Diffusion) and True Gray. The following shows the
resolution you can choose.
■ 100 × 100 dpi
■ 150 × 150 dpi
■ 200 × 200 dpi
■ 300 × 300 dpi
■ 400 × 400 dpi
■ 600 × 600 dpi
■ 1200 × 1200 dpi
■ 2400 × 2400 dpi
■ 4800 × 4800 dpi
■ 9600 × 9600 dpi
3 - 6 HOW TO SCAN USING WINDOWS®
Scan Type
Black & White: Set the Scan Type to Black & White for text or
line art.
Gray Scale:
Set the Scan Type to Gray or True Gray for
photographic images.
Brightness
Adjust the settings (-50 to 50) to obtain the best image. The default
value is 0, representing an ‘average’.
You can set the level by dragging the slide bar to the right or left to
lighten or darken the image. You can also type a value in the box for
the setting.
If the scanned image is too light, set a lower brightness value and
scan the original document again. If the image is too dark, set a
higher brightness value and scan the original document again.
Contrast
This setting is adjustable only when you have selected one of the
gray scale settings. It is not available when Black & White settings
are selected as the Scan Type.
You can increase or decrease the contrast level by moving the slide
bar to the left or right. An increase emphasizes dark and light areas
of the image, while a decrease reveals more detail in gray areas. You
can also type a value in the box for the setting.
HOW TO SCAN USING WINDOWS® 3 - 7
Document Size
Set the Size to one of the following:
■ Letter (8 1/2 × 11 in.)
■ A4 (210 × 297 mm)
■ Legal (8 1/2 × 14 in.)
■ A5 (148 × 210 mm)
■ B5 (182 × 257 mm)
■ Executive (7 1/4 × 10 1/2 in.)
■ Photo 3.5 × 5 in. (9 × 13 cm)
■ Photo 5 × 7 in. (13 × 18 cm)
■ APS C 4 × 6 in. (10 × 15 cm)
■ Business Card (60 × 90 mm)
■ Custom (User adjustable from 0.35 × 0.35 in. to 8.5 × 14 in. or
8.9 × 8.9 mm to 215.9 × 355.6 mm)
When scanning photographs or other images for use in a word
processor or other graphics application. You should try different
settings for the contrast and resolution modes to see which best suits
your needs.
If you selected Custom as the size, the Custom Document Size
dialog box will appear.
Type the Name, Width and Height for the original document.
You can choose “mm” or “inch” as the unit for Width and Height.
3 - 8 HOW TO SCAN USING WINDOWS®
You can see the actual paper size you selected on the screen.
■ Width: shows the width of scanning area
■ Height: shows the height of scanning area
■ Data Size: shows the approximate data size calculated in a
Bitmap format. The size will be different for other file formats such
as JPEG.
HOW TO SCAN USING WINDOWS® 3 - 9
Scanning an original document
(For Windows® XP only)
WIA compliant
Windows® XP uses Windows Image Acquisition (WIA) for scanning
images from the MFC. You can scan images directly into the
PaperPort® viewer that Brother included with your MFC or you can
scan images directly into any other software application that
supports WIA or TWAIN scanning.
How to access the scanner
1
Open your software application to scan an original document.
The instructions for scanning in this guide are for when you use
ScanSoft® PaperPort® 8.0. The steps for scanning from another
application may vary.
2
3
4
Select Scan from the File drop-down menu or select the Scan
button.
The Scan panel appears in the left panel.
Select the scanner you are using from the Scanner drop-down
list box.
Click Scan.
The Scan dialog box will appear:
3 - 10 HOW TO SCAN USING WINDOWS®
Scanning an original document into the PC
1
Place the original document face down in the ADF.
A
B
C
D
2
3
4
Select the Document Feeder from the Paper source
drop-down list box (A).
Select the picture type (B).
Select the Paper size from the drop-down list box (D).
HOW TO SCAN USING WINDOWS® 3 - 11
5
If you require advanced settings, click Adjust the quality of the
scanned picture (C). You can select Brightness, Contrast,
Resolution and Picture Type from the Advanced Properties.
Click the OK button after you choose your settings.
■ The scanner resolution you can select is up to 1200 × 1200
dpi.
■ For resolutions greater than 1200 dpi, use the Brother
Scanner Utility. (See Brother Scanner Utility on page 3-13.)
6
To start scanning your original document, click the Scan button
in the Scan dialog box.
3 - 12 HOW TO SCAN USING WINDOWS®
Brother Scanner Utility
The Brother Scanner Utility is used for configuring the scanner driver
for resolutions greater than 1200 dpi. You must restart your PC for
the new settings to take effect.
To run the utility:
You can run the utility by selecting the Scanner Utility located in the
Start/All Programs/Brother/MFL-Pro Suite MFC-8220 menu.
Scanning at resolutions greater than 1200 dpi may cause
problems with some scanning applications.
HOW TO SCAN USING WINDOWS® 3 - 13
Using the Scan key (For USB or
Parallel interface cable users)
(Scan) on the control panel to scan original
You can use
documents into your word processing, graphics or E-mail
applications or your computer folder. The advantage of using
(Scan) is that you avoid the mouse clicks required to scan
from your computer.
For Scan to E-mail, Scan to Image, Scan to OCR and Scan
to File
Before you can use
(Scan) on the control panel, you
must have connected the MFC to your Windows® based
computer and loaded the appropriate Brother Drivers for your
version of Windows®.
When you are ready to use
(Scan), make sure the
Brother Control Center application is running on your computer.
For details about how to configure the Brother Control Center
buttons to launch the application of your choice using
(Scan), go to the appropriate chapter:
■ For Windows® 95/98/98SE/Me/2000 Professional and
Windows NT® WS 4.0, see Using the Brother Control Center
on page 4-1.
■ For Windows® XP, see Using the Windows®-Based Brother
Control Center on page 5-1.
■ If your MFC is connected with both a USB and a Parallel
cable, you need to select USB or Parallel as the destination
in each step.
3 - 14 HOW TO SCAN USING WINDOWS®
Scan to E-mail
You can scan a black and white original document into your E-mail
application as a file attachment. You can also change the
(Scan) configuration. (See Scan to E-mail on page 4-10 to 4-12.)
(For Windows® XP: See Hardware Section: Changing the Scan to
button configuration on page 5-5 to 5-11.)
1 Place the original document face down in the ADF.
2
3
Press
Select ▲▼ & Set
Scan to E-mail
(Scan).
Press
or
to select Scan to E-Mail.
Press Set.
The MFC will scan the original document, create a file
attachment, and launch your E-mail application, displaying the
new message waiting to be addressed.
Scan to Image
You can scan a picture into your graphics application for viewing and
editing. You can also change the
(Scan) configuration. (See
Scan to Image on page 4-16.) (For Windows® XP: See Hardware
Section: Changing the Scan to button configuration on page 5-5 to
5-11.)
1 Place the original document face down in the ADF.
2
3
Press
(Scan).
Select ▲▼ & Set
Scan to Image
Press
or
to select Scan to Image.
Press Set.
The MFC will start the scanning process.
HOW TO SCAN USING WINDOWS® 3 - 15
Scan to OCR
If your original document is text, you can have it converted by
ScanSoft® TextBridge® to an editable text file and then have the
result displayed in your word processing application for viewing and
editing. You can change the
(Scan) configuration. (See
Scan to OCR (Word Processor) on page 4-13 to 4-15.) (For
Windows® XP: See Hardware Section: Changing the Scan to button
configuration on page 5-5 to 5-11.)
1 Place the original document face down in the ADF.
2
3
Press
(Scan).
Select ▲▼ & Set
Scan to OCR
Press
or
to select Scan to OCR.
Press Set.
The MFC will start the scanning process.
Scan to File
You can scan a black and white original document into your
computer and save it as a file in the folder you choose. The file type
and specific folder are based on the settings you have chosen in the
Scan to File screen of the Brother MFL-Pro Control Center. (See
Scan to File on page 4-8 to 4-9.) (For Windows® XP: See Hardware
Section: Changing the Scan to button configuration on page 5-5 to
5-11.)
1 Place the original document face down in the ADF.
2
3
Press
(Scan).
Select ▲▼ & Set
Scan to File
Press
or
to select Scan to File.
Press Set.
The MFC will start the scanning process.
3 - 16 HOW TO SCAN USING WINDOWS®
Using ScanSoft® PaperPort® and
TextBridge® OCR
ScanSoft® PaperPort® for Brother is a document management
application. You will use PaperPort® to view scanned original
documents.
PaperPort® has a sophisticated, yet easy-to-use, filing system that
will help you organize your graphics and text original documents. It
allows you to combine or “stack” original documents of different
formats for printing, faxing or filing.
ScanSoft® PaperPort® can be accessed through the ScanSoft®
PaperPort® program group.
See Documentation for ScanSoft® PaperPort® on the CD-ROM.
The complete ScanSoft® PaperPort® User’s Guide, including
ScanSoft® TextBridge® OCR, is in the documentation on the
CD-ROM.
This chapter is only an introduction to the basic operations.
When you install MFL-Pro Suite, ScanSoft® PaperPort® for Brother
and ScanSoft® TextBridge® OCR are installed with it automatically.
If you are using Windows® XP, Windows NT® 4.0 or Windows®
2000 Professional, we recommend that you are logged on with
administrator rights.
HOW TO SCAN USING WINDOWS® 3 - 17
Viewing items
ScanSoft® PaperPort® provides several ways to view items:
Desktop View displays a thumbnail (a small graphic that represents
each item in a Desktop or folder).
Items in the selected folder appear on the PaperPort® Desktop. You
can see PaperPort® items (MAX files) and non-PaperPort® items
(files created using other applications).
Non-PaperPort® items include an icon that indicates the application
that was used to create the item; a non-PaperPort® item is
represented by a small rectangular thumbnail and not an actual
image.
Desktop View displays items
as thumbnails
Page View displays a close-up of a single page and you can open a
PaperPort® item by double-clicking on it.
As long as you have the appropriate application on your computer to
display it, you can also double-click a non-PaperPort® item to open it.
Page View displays each item
as a full page
3 - 18 HOW TO SCAN USING WINDOWS®
Organizing your items in folders
PaperPort® has an easy-to-use filing system for organizing your
items. The filing system consists of folders and items that you select
to view in Desktop View. An item can be a PaperPort® item or a
non-PaperPort® item:
■ Folders are arranged in a “tree” structure in the Folder View.
You use this section to select folders and view their items in
Desktop View.
■ You can simply drag and drop an item onto a folder.
When the folder is highlighted, release the mouse button and the
item is stored in that folder.
■ Folders can be “nested”—that is, stored in other folders.
■ When you double-click a folder, its items (both PaperPort® MAX
files and non paperport® files) appear on the Desktop.
■ You can also use Windows® Explorer to manage the folders
and items shown in Desktop View.
HOW TO SCAN USING WINDOWS® 3 - 19
Quick links to other applications
ScanSoft® PaperPort® automatically recognizes many other
applications on your computer and creates a “working link” to them.
The Send To Bar at the bottom of the Desktop view shows icons of
those linked applications.
To use a link, drag an item onto one of the icons to start the
application represented by the icon. A typical use of the Send To Bar
is to select an item and then fax it.
This sample Send To Bar shows several applications with links to
PaperPort®.
If PaperPort® does not automatically recognize one of the
applications on your computer, you can manually create a link using
the Add to Send To Bar... command.
(See PaperPort® in the Documentation section on the CD-ROM for
more information about creating new links.)
3 - 20 HOW TO SCAN USING WINDOWS®
ScanSoft® TextBridge® OCR lets you convert
image text into text you can edit
Software by:
ScanSoft® TextBridge® OCR is installed automatically with
PaperPort® when you install MFL-Pro Suite on your computer.
ScanSoft® PaperPort® can quickly convert the text on a ScanSoft®
PaperPort® item (which is really just a picture of the text) into text that
you can edit with a word processing application.
PaperPort® uses the optical character recognition application
ScanSoft® TextBridge®, which comes with PaperPort®
—OR—
PaperPort® can use your preferred OCR application if it is already on
your computer. You can convert the entire item, or by using the Copy
Text command, you can select only a portion of the text to convert.
Dragging an item onto a word-processing link icon starts
PaperPort® ’s built-in OCR application, or you can use your own
OCR application.
HOW TO SCAN USING WINDOWS® 3 - 21
You can Import items from other applications
In addition to scanning items, you can bring items into PaperPort® in
a variety of ways and convert them to PaperPort® (MAX) files in
several different ways:
■ Print to the Desktop View from another application, such as
Microsoft® Excel.
■ Import files saved in other file formats, such as Windows® Bitmap
(BMP) or Tagged Image File Format (TIFF).
You can Export items in other formats
You can export or save PaperPort® items in several popular file
formats, such as BMP, JPEG, TIFF, or self-viewing.
For example, to create a file for an Internet Web site, export it as a
JPEG file. Web pages often use JPEG files for displaying images.
Exporting an image file
1
2
3
4
Select the Save As command from the File pull-down menu in
the PaperPort® window. The Save ‘XXXXX’ as dialog box will be
displayed.
Select the drive and directory where you want to store the file.
Enter the new file name and choose the file type or select a
name from the File Name text box. (You can scroll through the
Directories and File Name listing for prompting.)
Select the OK button to save your file, or Cancel to return to the
PaperPort® without saving it.
3 - 22 HOW TO SCAN USING WINDOWS®
How to Uninstall PaperPort® and ScanSoft®
TextBridge®
For Windows® 95/98/98SE, and Windows NT® Workstation 4.0 and
Windows® Me:
Select Start, Settings, Control Panel, Add/Remove Programs
and the Install/Uninstall tab.
Select Brother Extensions for Paperport and click the
Add/Remove button.
Select PaperPort® 8.0 SE from the list and click the Add/Remove
button.
For Windows® 2000 Professional:
Select Start, Settings, Control Panel and Add/Remove
Programs.
Select Brother Extensions for Paperport and click the
Change/Remove button.
Select PaperPort® 8.0 SE from the list and click the Change button.
For Windows® XP:
Select Start, Control Panel, Add or Remove Programs and the
Change or Remove Programs icon.
Select PaperPort® 8.0 SE from the list and click the Change button.
HOW TO SCAN USING WINDOWS® 3 - 23
4
Using the Brother Control Center
(For Windows® 95/98/98SE/Me/2000 Professional and
Windows NT® WS 4.0)
If you are using Windows® 2000 Professional or Windows NT®
4.0, we recommend that you are logged on with administrator
rights.
Brother MFL-Pro Control Center
The Brother Control Center is a software utility that pops up on the
PC screen whenever paper is put in the ADF of the MFC. This allows
you to quickly and with very few mouse clicks, to access the most
frequently used scanning applications. Using the Control Center
stops the need to manually startup any specific applications.
The Brother Control Center provides three operations (Scan, Copy
and PC-Fax):
■ Scan directly to a file, E-mail, word processor or graphic
application of your choice
■ Copy
■ PC Faxing using the Brother PC-FAX software
4 - 1 USING THE BROTHER CONTROL CENTER
AutoLoad the Brother Control Center
The Control Center is loaded every time Windows® is started.
When the Control Center is loaded, the Control Center
icon will
appear on the task bar.
If you don’t want the Control Center to load automatically, you can
turn off AutoLoad.
If the Control Center
icon does not appear on your task
bar, you will have to launch the software.
Double-click the Control Center
icon on the desktop or
from the Start menu, select Programs, ScanSoft PaperPort
8.0, and then click Brother SmartUI POPUP.
How to turn off AutoLoad
1
2
Left-click the Control Center
icon and click Show.
When the Control Center window appears, left click the Smart
Click
Control Center button.
A dialog box will appear:
3
Uncheck the ‘AutoLoad’ Pop-Up check box.
USING THE BROTHER CONTROL CENTER 4 - 2
Brother Control Center features
Auto Configuration
During installation the Control Center will check your system to set
up the default applications for E-mail, word processing and the
graphics viewer/editor.
For example, if you are using Outlook as your default E-mail
application, the Control Center will create a link and a scanning
application button for Outlook.
You can change a default application. Right-click the appropriate
Control Center button to display Configurations and then click it.
Select a different application.
For example, you can change a scan button from MS Word Pad
to MS Word
that is listed for the Word Processor.
by changing the application
4 - 3 USING THE BROTHER CONTROL CENTER
Scan key operations
Scan to File—Lets you scan directly to a file on your computer. You
can change the file type and directory for the original document you
are scanning.
Scan to E-mail—Lets you scan a picture or text original directly into
an E-mail application as a standard attachment. You can choose the
file type and resolution for the attachment.
Scan to OCR (Word Processor)—Lets you scan a text original, run
ScanSoft TextBridge® OCR, and insert the text original (not a graphic
image) into a word processing file. You can choose the word
processing application, such as Word Pad, MS Word, and so on.
Scan to Image—Lets you scan an image directly into any graphic
viewer/editor application. You can choose the graphics application,
such as Microsoft Paint.
Copy operations
Copy—Lets you use the PC and any Windows® printer driver for
enhanced copy operations.
You can scan the page on the Brother MFC and print the copies
using any of the features of the Brother MFC printer driver.
—OR—
You can send the copy output to any standard Windows® printer
driver that is on your PC.
PC-Fax operation
Send a Fax—Lets you scan a picture or text original and send the
image as a fax from the PC using the Brother PC-FAX software.
USING THE BROTHER CONTROL CENTER 4 - 4
Scanner settings for Scan, Copy and PC-Fax
buttons
When the Pop-Up screen appears, you can access the Scanner
Settings window.
Click the Smart Click
Control Center icon at the top right of
the Brother Control Center screen.
—OR—
Click the Modify Settings button on any of the Configuration
screens.
Global settings
AutoLoad Pop-Up—Select this checkbox if you want the Brother
MFL Control Center to load when you turn on your computer.
4 - 5 USING THE BROTHER CONTROL CENTER
Setting up the scanner configurations
The Pop-Up application stores eight different scanning modes. Each
time you scan an original document, you can choose the most
appropriate scanning mode from the following:
Faxing, Filing and Copying
Text for OCR
Photos
Photos (High Quality)
Photos (Quick Scan)
Custom
Draft Copy
Fine Copy
Each mode has its own set of stored settings. You can keep the
default settings or change them at any time:
Resolution—From the pull-down list, select the scanning
resolution you most often use.
Color Mode—From the pull-down list, select the color settings
you most often use.
Scan Size—From the pull-down list, select the scan size you
most often use.
Brightness—Slide the adjuster from 0% to 100%
Contrast—Slide the adjuster from 0% to 100%
Click OK to save your changes. If you make a mistake or want the
original document default setting, just click the Restore Defaults
button when the scanning mode is displayed.
USING THE BROTHER CONTROL CENTER 4 - 6
Perform an operation from the Control Center
screen
If you see this screen it means you left-clicked a button in the Control
Center window without first placing an original document in the ADF.
Place the original document in the MFC’s ADF, and then click OK to
go to the Control Center screen.
4 - 7 USING THE BROTHER CONTROL CENTER
Scan to File
To access Scan to File Configurations screen
1
2
3
Place the original document face down in the ADF. The Brother
Control Center screen will pop up.
Right-click Scan to File and click on Configuration. Click the
Modify Settings button to view the configuration screen of the
Control Center.
To save your settings, click OK.
—OR—
To go back to the default settings, click the Restore Defaults
button.
Scanner settings
From the pull-down list, select the scanning mode that is appropriate
for the type of file: Faxing, Filing and Copying; Text for OCR;
Photos; Photos (High Quality); Photos (Quick Scan); Custom;
Draft Copy or Fine Copy.
To change any of the settings for the mode, click Modify Settings.
USING THE BROTHER CONTROL CENTER 4 - 8
Destination folder
PaperPort Folder—Select this checkbox to scan the original
document into your PaperPort folder.
Other Folder—Select this checkbox to scan the original document as
another file type or to store it in another directory/folder.
File—If you selected Other Folder from the pull-down list, select the
type of file:
PaperPort Image Item (*.max)
PaperPort Self-Viewing (*.exe)
PaperPort Browser-Viewable (*.htm)
PaperPort 5.0 Image Item (*.max)
PaperPort 4.0 Image Item (*.max)
PaperPort 3.0 Image Item (*.max)
Windows Bitmap (*.bmp)
PC Paintbrush (*.pcx)
PCX Multi-page (*.dcx)
JPEG (*.jpg)
TIFF-Uncompressed (*.tif)
TIFF-Group 4 (*.tif)
TIFF-Class F (*.tif)
TIFF Multi-page - Uncompressed (*.tif)
TIFF Multi-page - Group 4 (*.tif)
TIFF Multi-page - Class F (*.tif)
Portable Network Graphics (*.png)
FlashPix (*.fpx)
To Search your system for the directory and folder you want, click the
Browse button. Click OK to save your settings.
4 - 9 USING THE BROTHER CONTROL CENTER
Scan to E-mail
To access Scan to E-mail Configurations screen
1
2
3
Place the original document face down in the ADF. The Brother
Control Center screen will pop up.
Right-click the E-mail application button and click on
Configuration. Click the Modify Settings button to view the
configuration screen of the Control Center.
To save your settings, click OK.
—OR—
To go back to the default settings, click the Restore Defaults
button.
USING THE BROTHER CONTROL CENTER 4 - 10
Scanner settings
From the pull-down list, select the scanning mode that is appropriate
for the type of file: Faxing, Filing and Copying; Text for OCR;
Photos; Photos (High Quality); Photos (Quick Scan); Custom;
Draft Copy or Fine Copy.
To change any of the settings for this mode, click Modify Settings.
E-mail application
E-mail Application—From the pull-down list, select your E-mail
application.
E-mail Settings—Click the E-Mail Settings button to set up links.
The Send To Options window will appear:
4 - 11 USING THE BROTHER CONTROL CENTER
Send to Options
Convert attachments to specified file type—Converts items to the
type in the File Type box. Clear this check box to keep files in their
source format; for example, to keep Word documents in the .doc
format and JPEG images in the .jpg format.
All documents and image items—Converts all items regardless of
the program in which the item was created; for example, converts all
Word (doc) files and JPEG (.jpg) files to the file type.
PaperPort image items (max) only—Converts only PaperPort
image items (.max) files. PaperPort does not convert other file types,
such as JPEG images and Word documents.
File type—Identifies the format in which to convert items; for
example, JPEG or TIFF.
Combine items into single file, if possible—Combines all selected
items into a single file that contains multiple pages. This option is
available only when the file type supports multiple pages, such as
multi-page TIFF.
USING THE BROTHER CONTROL CENTER 4 - 12
Scan to OCR (Word Processor)
To access Scan to OCR Configurations screen
1
2
3
Place the original document face down in the ADF. The Brother
Control Center screen will pop up.
Right-click the word processor application button and click on
Configuration. Click the Modify Settings button to view the
configuration screen of the Control Center.
To save your settings, click OK.
—OR—
To go back to the default settings, click the Restore Defaults
button.
4 - 13 USING THE BROTHER CONTROL CENTER
Scanner settings
From the pull-down list, select the scanning mode that is appropriate
for the type of file: Faxing, Filing and Copying; Text for OCR;
Photos; Photos (High Quality); Photos (Quick Scan); Custom;
Draft Copy or Fine Copy.
To change any of the settings for this mode, click Modify Settings.
Word Processor
Word Processor—From the pull-down list, select the word processor
you want to use.
Click the Link Settings button to display the screen to set up the
original document format you want to use and identify the OCR
program:
File Type—From the pull-down list, select the file type you want to
use for your word processor or text original.
OCR—Identify the OCR program to use to convert scanned original
document images to editable original documents. This option is
available only when you have an OCR program other than the one
provided with PaperPort. (PaperPort 8.0 uses the same OCR engine
that is in ScanSoft's TextBridge® Pro Millennium product.)
USING THE BROTHER CONTROL CENTER 4 - 14
Click the Settings button to choose how the OCR application will
read the pages that you scan into your word processor application.
The OCR Settings window will appear:
Select your setting and click OK.
■ Auto orient page—Click this checkbox to automatically rotate
pages so that the text is upright.
■ Single column output—Click this checkbox if you want to
remove columns from multi-column original document so that
converted text appears in a one-column format.
4 - 15 USING THE BROTHER CONTROL CENTER
Scan to Image
To access Scan to Image Configurations screen
1
2
3
Place the original document face down in the ADF. The Brother
Control Center screen will pop up.
Right-click the graphic application button and click on
Configuration. Click the Modify Settings button to view the
configuration screen of the Control Center.
To save your settings, click OK.
—OR—
To go back to the default settings, click the Restore Defaults
button.
USING THE BROTHER CONTROL CENTER 4 - 16
Scanner Settings
From the pull-down list, select the scanning mode that is appropriate
for the type of file: Faxing, Filing and Copying; Text for OCR;
Photos; Photos (High Quality); Photos (Quick Scan); Custom;
Draft Copy or Fine Copy.
To change any of the settings for this mode, click Modify Settings.
Target Application
Application—From the pull-down list, select the application you want
to add to this Pop-Up screen.
Click the Custom Link Settings button to set up links for your
user-defined application.
4 - 17 USING THE BROTHER CONTROL CENTER
Copy
To access the Copy Configurations screen
1
2
3
Place the original document face down in the ADF. The Brother
Control Center screen will pop up.
Right-click the Copy and click on Configuration. Click the
Modify Settings button to view the configuration screen of the
Control Center.
To save your settings, click OK.
—OR—
To go back to the default settings, click the Restore Defaults
button.
USING THE BROTHER CONTROL CENTER 4 - 18
Scanner settings
From the pull-down list, select the scanning mode that is appropriate
for the type of file: Draft Copy or Fine Copy.
To change any of the settings for this mode, click Modify Settings.
Number of copies
Copies—Enter the number of copies you want to print.
To change the copy options, click the Copy Options button.
Click OK to save your Copy settings.
4 - 19 USING THE BROTHER CONTROL CENTER
Send a fax
To access the Send a fax Configurations screen
1
2
3
Place the original document face down in the ADF. The Brother
Control Center screen will pop up.
Right-click the Send a fax and click on Configuration. Click the
Modify Settings button to view the configuration screen of the
Control Center.
To save your settings, click OK.
—OR—
To go back to the default settings, click the Restore Defaults
button.
Scanner settings
From the pull-down list, select the scanning mode that is appropriate
for the type of file: Faxing, Filing and Copying; Text for OCR;
Photos; Photos (High Quality); Photos (Quick Scan); Custom;
Draft Copy or Fine Copy.
To change any of the settings for this mode, click Modify Settings.
USING THE BROTHER CONTROL CENTER 4 - 20
PC-FAX Settings
Brother PC-Fax
FAX Resolution—Fine (200 × 200)
1 To change the fax options, click the FAX Options button.
The Brother PC-FAX Properties screen appears:
For Windows® 95/98/98SE/Me
For Windows® 2000 Professional and Windows NT® WS 4.0
2
Select the Paper Size and Orientation (Portrait or Landscape)
and click OK.
To go back to the default settings, click the Restore Defaults or
Default button.
4 - 21 USING THE BROTHER CONTROL CENTER
5
Using the Windows®-Based
Brother SmartUI Control Center
(For Windows® XP)
Brother SmartUI Control Center
The Brother Control Center is a software utility that allows you to
quite easily, with very few mouse clicks, access the most frequently
used scanning applications. Using the Control Center eliminates the
need to manually launch the specific applications and allows you to
scan an original document directly to a folder on your computer. The
Brother Control Center provides four categories of operations:
1 Scan directly to a file, E-mail, word processor or graphics
application of your choice.
2 Enhanced copy functions, such as Four/Two or One-on-One
Copying.
3 PC Faxing using the Brother PC-Fax software.
4 Custom buttons allow you to configure a button to meet your
own application requirements.
In the Task Tray right-click on the SmartUI
icon and select Show
to have access to the Brother SmartUI Control Center window.
USING THE WINDOWS®-BASED BROTHER SMARTUI CONTROL CENTER 5 - 1
AutoLoad the Brother Control Center
The Control Center is initially configured to automatically load each
time Windows® is started. When the Control Center is loaded the
SmartUI
icon will appear in the task bar. If you don’t want the
Control Center to load automatically, you can turn AutoLoad off.
How to turn off AutoLoad
1
2
3
Right-click the SmartUI
icon in the Task Tray and select
Show.
The main SmartUI Control Center window appears. Please look
at the bottom of the window for a check box labeled “AutoLoad
Pop-up”.
Uncheck the AutoLoad Pop-Up option to prevent the SmartUI
from automatically loading every time Windows is started.
5 - 2 USING THE WINDOWS®-BASED BROTHER SMARTUI CONTROL CENTER
Brother Control Center features
The SmartUI control center gives you the ability to configure the
hardware Scan key on your MFC such as “Scan to File”. The “Scan
to File” feature allows you to scan an original document directly to
your hard disk and choose the file format and destination folder
without having to run any other applications. Select which section
you want by clicking on the appropriate tab.
USING THE WINDOWS®-BASED BROTHER CONTROL CENTER 5 - 3
Auto Configuration
During the installation process the Control Center checks your
system to determine the default applications for E-mail, word
processing and graphics viewer/editor.
For example, if you are using Outlook as your default E-mail
application, the Control Center automatically will create a link and a
scanning application button for Outlook.
You can change the default application by right-clicking on any of the
scan buttons in the Control Center and then clicking Configuration.
Select the Configuration tab and from the Application pull down
menu select a different application. For example, you can change the
E-mail scan button from Outlook Express to Outlook by changing the
application that is listed.
5 - 4 USING THE WINDOWS®-BASED BROTHER CONTROL CENTER
Hardware Section: Changing the Scan
to button configuration
When the Brother Control Center is displayed, you can access the
Hardware Section window to reconfigure the
(Scan) button
on your MFC. Click the Hardware Section tab at the top left of the
Brother SmartUI Control Center screen. (See Using the Scan key
(For USB or Parallel interface cable users) on page 3-14.)
USING THE WINDOWS®-BASED BROTHER SMARTUI CONTROL CENTER 5 - 5
Scan to E-mail
To configure the Scan to E-mail feature left-click on the Scan to
E-mail button and the following screen will appear. You have the
ability to change the configuration that includes the destination
E-mail application, attachment file and the scanner settings.
The destination E-mail application is changed by selecting another
compatible E-mail application installed on your system from the
Application pull down list.
If you wish to change the attachment file type click on the Link
Preferences button to display a list of file types.
5 - 6 USING THE WINDOWS®-BASED BROTHER CONTROL CENTER
Scan to File
To configure the Scan to File feature, left click on the Scan to File
button and the following screen will appear.
Select the file type for the saved image by selecting from the Format
pull down list. You can save the file to the default PaperPort folder so
the file appears in PaperPort or you can select another
folder/directory by clicking the Browse button.
USING THE WINDOWS®-BASED BROTHER CONTROL CENTER 5 - 7
Scan to Image
To configure the Scan to Image feature left-click on the Scan to
Image button and the following screen will appear. You have the
ability to change the configuration, which includes the destination
image format or document application.
5 - 8 USING THE WINDOWS®-BASED BROTHER CONTROL CENTER
To change the default setting of the scan, click on the Scan Settings
tab.
You can set the Color Mode to Black & White or 8-bit Gray.
The resolution can be changed from 100 to 1200 dpi. You can define
the size of the paper you’re using, and you can adjust the brightness
and contrast of the image before scanning.
USING THE WINDOWS®-BASED BROTHER CONTROL CENTER 5 - 9
Scan to OCR
To configure the Scan to OCR feature left-click on the Scan to OCR
button and the following screen will appear. You have the ability to
change the configuration, which includes the destination
applications.
5 - 10 USING THE WINDOWS®-BASED BROTHER CONTROL CENTER
You have the option to send your scan as a different file type. You
can select the application from the File Type window according to
your needs.
You have the option to choose your OCR setting from Single
column output to Auto orient page.
USING THE WINDOWS®-BASED BROTHER CONTROL CENTER 5 - 11
Software Section
The Software Section contains four groups of scan to buttons. Each
section has a number of different buttons which are predefined for
the most frequently used applications. The Scan section contains
four buttons for Scan to File, Scan to E-mail, Scan to Word Processor
and Scan to Image applications. The Copy section contains three
buttons for N to 1 copying. The Fax section button is for sending
faxes using the Brother PC-FAX application and the Custom section
contains three buttons to which you can assign your own function.
*1
*2
*3
*4
5 - 12 USING THE WINDOWS®-BASED BROTHER CONTROL CENTER
Scan
*1 Scan to File—enables you to scan directly to a disk file. You can
change the file type and destination directory, as needed.
*2 Scan to E-mail (Default: Outlook Express)—enables you to scan
a page or original document directly into an E-mail application as a
standard attachment. You have the option of selecting the file type
and resolution for the attachment.
*3 Scan to Word Processor (Default: MS WordPad)—enables you to
scan a page or original document, automatically run ScanSoft
TextBridge® OCR and insert the text (not graphic image) into a word
processing program. You have the option of selecting the destination
word processing program, such as WordPad, MS Word, Word
Perfect® or whichever word processing program is installed on your
computer.
*4 Scan to Graphic Application (Default: MS Paint)—enables you to
scan a page directly into any graphic viewer/editor application. You
can select the destination application, such as MS Paint, Corel®
Paint™, Adobe® PhotoShop®, or any kind of image editor application
you already have installed on your computer.
Copy
Copy (Copy one to one)—allows you to use the PC and any
Windows® printer driver for enhanced copy operations. You can scan
the page on the MFC and print the copies using any of the features
of the MFC printer driver—OR—you can direct the copy output to any
standard Windows® printer driver installed on the PC including
network printers.
Four/Two to One Copy—enables you to use the Four/Two on
One-page features of the Brother printer driver to copy four/two
original pages onto a single output page.
USING THE WINDOWS®-BASED BROTHER SMARTUI CONTROL CENTER 5 - 13
Fax
Send a Fax (Brother PC-FAX)—enables you to scan a page or
original document and automatically send the image as a fax from
the PC using the Brother PC-FAX software.
Custom
Scan to File—These buttons have been pre-programmed for the
Scan to File feature. You can change the configuration of each of
these buttons to meet your specific requirements by right-clicking on
a button and following the configuration menus.
5 - 14 USING THE WINDOWS®-BASED BROTHER CONTROL CENTER
Scan to File
The Scan to File button allows you to scan an image and save it in a
specific file type to any directory on your hard disk. This allows you
to easily archive your paper original documents. To configure the file
type and save to directory right-click on the Scan to File button and
click Configuration.
The Scan Action tab is set to File and should not be changed.
USING THE WINDOWS®-BASED BROTHER CONTROL CENTER 5 - 15
To change the configuration click on the Configuration tab.
Select the file type for the saved image by selecting from the Format
pull down list. You can save the file to the default PaperPort folder so
the file appears in PaperPort, or you can select another
folder/directory by clicking the Browse button.
You can change the default setting by selecting the Other Folder
button and then clicking Browse and selecting the folder in which
you wish to save your files.
5 - 16 USING THE WINDOWS®-BASED BROTHER CONTROL CENTER
Scan to E-mail
The Scan to E-mail is automatically configured to your default E-mail
application. To change the default E-mail application or attachment
file type, right-click on the E-mail button and select “Configuration”.
The Scan Action tab is set to E-mail and should not be changed.
To change the E-mail application click on the Configuration tab. From
the Application pull down list, select your preferred E-mail
application.
USING THE WINDOWS®-BASED BROTHER CONTROL CENTER 5 - 17
To change the file type of the attachment click the Link Preferences
button to set up links. Check the Convert attachment to specified
file type box and then select the appropriate file type from the pull
down list.
5 - 18 USING THE WINDOWS®-BASED BROTHER CONTROL CENTER
File attachments
Items are mailed as file attachments using the file type you have
selected.
Convert attachments to specified file type—Click this check box if
you want to change the file type of attachments.
All documents and image items—Click this check box if you want to
convert all scanned images to the same file type.
PaperPort image items (MAX) only—Click this check box if you want
to convert only attachments that are PaperPort MAX files.
Combine items into single file, if possible—Click this check box if you
want to combine all the attachments into one file. With this box
unchecked each scanned page will be saved in its own individual file.
File Type—Select from the pull-down list the type of file you want the
scanned images to be saved in.
PaperPort Image Item (*.max)
PaperPort Browser-Viewable (*.htm)
PaperPort Self Viewing (*.exe)
PaperPort 5.0 Image Item (*.max)
PaperPort 4.0 Image Item (*.max)
PaperPort 3.0 Image Item (*.max)
Windows Bitmap (*.bmp)
PC Paintbrush (*.pcx)
PCX Multi-page (*.dcx)
JPEG (*.jpg)
TIFF-Uncompressed (*.tif)
TIFF Group 4 (*.tif)
TIFF Multi-Page -Uncompressed (*.tif)
TIFF Multi-Page - Group 4 (*.tif)
USING THE WINDOWS®-BASED BROTHER CONTROL CENTER 5 - 19
Scanner settings
You have the ability to change the scanner settings used to create
the file attachments. Click on the Scan Settings tab and select the
appropriate settings.
5 - 20 USING THE WINDOWS®-BASED BROTHER CONTROL CENTER
Scan to OCR
(Word Processing program)
Scan to OCR converts the graphic page image data to text which can
be edited by any word processor program. You can change the
default word processor program (example: Word Pad instead of
Word) and file type. You can also choose another OCR software
package besides the TextBridge® OCR which is built into
PaperPort®.
To configure Scan to OCR right-click on the WordPad button and
select Configuration. The Scan Action tab is set to OCR and should
not be changed.
To change the word processing application click on the Configuration
Tab. You can select the destination word processing application from
the Application pull down list.
USING THE WINDOWS®-BASED BROTHER CONTROL CENTER 5 - 21
To change the program link preferences click the Link Preferences
button.
File Type—From the pull-down list, select the file format you want to
use for original documents.
OCR—Select the OCR application from the OCR pull down list.
5 - 22 USING THE WINDOWS®-BASED BROTHER CONTROL CENTER
Scan to Graphics application
(example: Microsoft Paint)
The Scan to Graphics Application allows you to scan an image so
you can edit the image. To change the default graphics application
right-click on the button and select Configuration.
The Scan Action tab is set to Application and should not be changed.
To change the configuration of the destination application click on
the Configuration Tab.
USING THE WINDOWS®-BASED BROTHER CONTROL CENTER 5 - 23
To change the destination application select the appropriate
application from the Application pull down list.
To change the other configuration options click the Link
Preferences button.
These options enable you to reduce image to screen resolution
(96dpi), show a warning if the item has annotations or update the
original if the sent item is modified.
5 - 24 USING THE WINDOWS®-BASED BROTHER CONTROL CENTER
Copy
The copy buttons can be customized to allow you to take advantage
of the features built into the Brother printer drivers to do advanced
copy functions such as n-in-1 printing.
The Copy buttons are automatically linked to the default Windows
printer driver. You can set any printer as the default printer including
non-Brother printers. Before you can use the Copy buttons you must
first configure the printer driver by right-clicking on a Copy button
and selecting Configuration.
In the Scan Settings window you can select the color mode,
resolution, paper size, brightness and contrast settings to be used.
To finish the Copy button configuration you must set the printer
driver. Click the Copy options button to display the printer driver
settings.
USING THE WINDOWS®-BASED BROTHER SMARTUI CONTROL CENTER 5 - 25
Select the number of Pages Per Sheet from the Scaling selections.
As an example, to configure the section Copy button to copy two
pages to one you must select 2 in 1.
You must configure each of the copy buttons before they can be
used.
5 - 26 USING THE WINDOWS®-BASED BROTHER CONTROL CENTER
Fax setting
(PC-Fax using the Brother Fax Driver)
The MFC includes a PC-Fax driver, which allows any Windows
Application to send a Fax as simply as printing an original document.
The Brother SmartUI Control Center automatically configures the
Fax button to use the Brother PC-FAX driver, no user configuration
is required.
The Scan Action tab is set to Application and should not be changed.
To change the PC-FAX settings click the Link Preferences button
found in the configuration tab.
USING THE WINDOWS®-BASED BROTHER SMARTUI CONTROL CENTER 5 - 27
FAX settings
Brother PC-FAX
To change the driver settings, click on the Setup button. Select the
Paper Size, Paper Source. If you need more a customized setup,
click on the Options button.
s
Select the Paper Size, Orientation (Portrait or Landscape) and
Resolution (200x200 dpi or 200x100 dpi), and click OK.
To return to the default settings, click the Default button.
5 - 28 USING THE WINDOWS®-BASED BROTHER CONTROL CENTER
Custom: User-defined buttons
There are up to three Custom buttons on the Brother SmartUI
Control Center. You can set your own preferences and configuration
to fit your required application.
To configure a Custom Button right click on the button and then click
Configuration. The configuration window will appear. You have four
function choices Application, File, OCR and E-mail.
Application: This setting will link the Control Panel button to any
button which appears on the PaperPort Send to Bar. Please see the
PaperPort help file for more information regarding PaperPort
compatible applications.
File: This setting allows you to save a scanned image to any
directory on local or network hard disk. You can also select the file
format to be used.
OCR: Scanned original documents will be converted to editable text
files. If you have a third party OCR software package installed on
your PC you can select it. The default OCR software is TextBridge®
which is built into PaperPort 8.0. You can also select the destination
word processor and file format for the editable text.
E-mail: Scanned images will be attached to an E-mail message. You
can choose which E-mail package to use if you have more than one
installed on your system. You can also select the file type for the
attachment.
Customizing a user-defined button
To configure a Custom button right-click on the button and then click
Configuration. Please follow the following guide lines for Custom
Button configuration.
1. Select the Scan Action
Select the type of scan by clicking the appropriate button.
USING THE WINDOWS®-BASED BROTHER SMARTUI CONTROL CENTER 5 - 29
2. Select Configuration for the Scan Type.
To configure the scan operation click on the Configuration Tab.
Depending upon which Scan Type button you selected you will see
a different Configuration Tab list of settings.
Application:
Select the destination application program from the pull down list.
Click on Link Preferences to set the Send to options. You can select
the application from the scroll menu on the left.
5 - 30 USING THE WINDOWS®-BASED BROTHER CONTROL CENTER
File:
Select the file format from the Format pull down list. You can either
send the file to the default PaperPort directory or select your own
destination directory by selecting Other Folder. Use the Browse
button to select the destination directory.
USING THE WINDOWS®-BASED BROTHER CONTROL CENTER 5 - 31
OCR:
Select the destination word processing application program from the
pull down list.
Click on Link Preferences and select the destination Application from
the scroll menu on the left. Select the File Type from the File Type
pull down list. You can also choose another OCR application from
the OCR pull down list if another is installed on you system.
Scansoft® TextBridge® is installed as part of the PaperPort 8.0
application.
5 - 32 USING THE WINDOWS®-BASED BROTHER CONTROL CENTER
E-mail:
Select the destination E-mail application program from the pull down
list.
Click on the Link Preferences button to configure the Send To
E-mail options. You can select the File type and Quick Send E-mail
address list.
USING THE WINDOWS®-BASED BROTHER CONTROL CENTER 5 - 33
3. Select Scan Settings.
You can select the scanner settings from each of the Scan Type
options for the Custom buttons. You have the option to select Color
Mode, Resolution, Paper Size and Brightness and Contrast settings.
5 - 34 USING THE WINDOWS®-BASED BROTHER CONTROL CENTER
6
Using MFC Remote Setup
(For Windows®)
MFC Remote Setup
The MFC Remote Setup application enables you to configure your
MFC using an intuitive graphical user interface (GUI) on your PC.
When you access this application, the settings on your MFC will be
downloaded to your PC and displayed on your computer screen. If
you change the settings, you can upload them directly to the MFC.
You can't use the MFC Remote Setup application if your MFC is
only connected to a Network with the optional Network LAN
board (NC-9100h). (See Web Based Management in the
NC-9100h User's Guide.)
OK button
When you click OK, the process of uploading the data to the MFC
begins. The MFC Remote Setup program is closed if an error
message is displayed, enter the correct data again and then click
OK.
USING MFC REMOTE SETUP 6 - 1
Cancel button
The Cancel button clears your changes and exits the MFC Remote
Setup application without uploading any data to the MFC.
Apply button
The Apply button uploads the data to the MFC, but stays in the
Remote Setup application so you can make more changes.
Print button
The Print button prints the selected items on the MFC. You cannot
print the MFC Remote Setup changes until you click the Apply
button to upload the new data to the MFC. You can then click the
Print button to get an up-to-date printout.
Export button
Click the Export button to save your current settings to a file.
Import button
Click the Import button to read the settings from your saved file into
the MFC Remote Setup screen.
You can use the Export and Import buttons to save and use
several sets of settings for your MFC.
6 - 2 USING MFC REMOTE SETUP
7
Using Brother PC-FAX
software
(For Windows®)
PC-FAX sending
The Brother PC-FAX feature allows you to use your PC to send any
application or document file as a standard fax. You can create a file
in any application on your PC, and then send it as a PC-FAX. You
can even attach a cover page note. All you have to do is set up the
receiving parties as Members or Groups in your PC-FAX Address
Book or simply enter the destination address or fax number into the
User Interface. You can use the Address Book Search feature to
quickly find members to send your fax.
■ PC-FAX is available in Black & White only.
■ If you are using Windows® XP, Windows NT® 4.0 or
Windows® 2000 Professional, we recommend that you are
logged on with administrator rights.
■ Please check Brother Solutions Center for the latest updates
available for Brother Network PC-FAX. Visit
http://solutions.brother.com/
USING BROTHER PC-FAX SOFTWARE 7 - 1
Setting up user information
You can access the User Information from the FAX Sending
dialog box by clicking
.
(See Sending a file as a PC-FAX using the Facsimile style on
page 7-16.)
1
2
3
From the Start menu, select Programs, Brother,
MFL-Pro Suite MFC-8220, and then select PC-FAX Setup.
The Brother PC-FAX Setup dialog box will appear:
You must enter this information to create the Fax Header and
Cover Page.
Click OK to save the User Information.
7 - 2 USING BROTHER PC-FAX SOFTWARE
Sending setup
From the Brother PC-FAX Setup dialog box, click the Sending tab
to display the screen below.
The include header option adds header information to the top of the
fax pages you send.
The user has the choice of two user interfaces: Simple style or
Facsimile style. To change the user interface select the interface
setting you want: Simple style or Facsimile style. (See User interface
on page 7-5.)
USING BROTHER PC-FAX SOFTWARE 7 - 3
Outside line access
If you need to enter a number to access an outside line, enter it here.
This is sometimes required by a local PBX telephone system (for
example if you must dial 9 to get an outside line in your office).
Include header
To add header information to the top of the fax pages you send,
check the Include header box.
Address Book file
You can select more than one database file to use with the Address
Book. To select you must enter the path and file name of the
database file.
—OR—
Use the Browse button to find the database to select.
7 - 4 USING BROTHER PC-FAX SOFTWARE
User interface
In the Sending tab, select user interface.
You can choose the Simple Style or the Facsimile Style.
Simple style
Facsimile style
USING BROTHER PC-FAX SOFTWARE 7 - 5
Speed-Dial setup
From the Brother PC-FAX Setup dialog box, click the Speed Dial
tab. (To use this feature you must select the Facsimile Style user
interface.)
You can register a Member or Group on each of the ten Speed-Dial
buttons.
To register an address in a Speed-Dial button:
1 Click the Speed-Dial button you want to program.
2 Click the Member or Group you want to store on the Speed-Dial
button.
3 Click Add >> to save it.
To clear a Speed-Dial button:
1 Click the Speed-Dial button you want to clear.
2 Click Clear to erase it.
7 - 6 USING BROTHER PC-FAX SOFTWARE
The Address Book
From the Start menu, select Programs, Brother,
MFL-Pro Suite MFC-8220, and then click PC-FAX Address Book.
The Brother Address Book dialog box will appear:
USING BROTHER PC-FAX SOFTWARE 7 - 7
Setting up a Member in the Address Book
In the Brother Address Book dialog box you can add, edit and
delete stored information of Members and Groups.
1 In the Address Book dialog box, click the icon to add a
Member.
The Brother Address Book Member Setup dialog box will
appear:
2
In the Member Setup dialog box, type the Member’s information.
Name is a required field. Click OK to save the information.
7 - 8 USING BROTHER PC-FAX SOFTWARE
Setting up a Group for Broadcasting
If you often send the same PC-FAX to several Members, you can
combine them in a Group.
1 In the Brother Address Book dialog box, click the icon to
create a Group.
The Group Setup dialog box appears:
2
3
4
Type the name of the new Group in the Group Name field.
In the Available Names box, select each Member to be
included in the Group, and then click Add >>.
Members you add to the Group will be added to the
Group Members box.
After all the members you want have been added, click OK.
USING BROTHER PC-FAX SOFTWARE 7 - 9
Editing Member information
1
2
3
4
Select the Member or Group you want to edit.
Click the edit
icon.
Change the Member or Group information.
Click OK to save your changes.
Deleting a Member or Group
1
2
3
Select the Member or Group you want to delete.
Click the delete
icon.
When the Confirm Item Delete dialog box appears, click OK.
Exporting the Address Book
You can export the whole Address Book to an ASCII text file (*.csv).
Or if you wish, you can select and create a Vcard that will be attached
to that Member’s outgoing E-mail. (A Vcard is an electronic business
card that contains the sender’s contact information.)
To export the whole current Address book:
If you are creating a Vcard, you must first select the member.
If you select Vcard in Step 1, Save as type: will be Vcard (*.vcf).
1
2
From the Address Book select File, point to Export, and then
click Text.
—OR—
Click Vcard and go to Step 5.
From the Available Items column, select the data fields you
wish to Export and then click Add >>.
Select the items in the order you want them listed.
7 - 10 USING BROTHER PC-FAX SOFTWARE
3
4
If you are exporting to an ASCII file, select the Divide Character
- Tab or Comma. This selects between a Tab or Comma to
separate the data fields.
Select OK to save the data.
5
Type the name of the file, and then select Save.
USING BROTHER PC-FAX SOFTWARE 7 - 11
Importing to the Address Book
You can import ASCII text files (*.csv) or Vcards (electronic business
cards) into your Address Book.
1 From the Address Book select File, point to Import, and then
click Text.
—OR—
Click Vcard and go to Step 5.
2
From the Available Items column select the data fields you
want to Import, and click Add >>.
From the Available Items list select the fields in the same order
they are listed in the Import text file.
3
4
Select the Divide Character - Tab or Comma based on the file
format you are importing.
To import the data click OK.
7 - 12 USING BROTHER PC-FAX SOFTWARE
5
Type the name of the file, and then select Open.
If you selected a text file in Step 1, the Files of type: will be
Text file (*.csv).
USING BROTHER PC-FAX SOFTWARE 7 - 13
Setting up a Cover Page
From the PC-FAX dialog box click
to access the PC-Fax Cover
page setup screen. (See Sending a file as a PC-FAX using the
Facsimile style on page 7-16.)
The Brother PC-FAX Cover Page Setup dialog box will appear:
7 - 14 USING BROTHER PC-FAX SOFTWARE
You can enter information in each field
If you are sending a fax to more than one recipient, the recipient
information will not be printed on the Cover Page.
To
From
Comment
Type the comment you want to add to the cover page.
Select Cover Page Form
Select the cover page format you want to use.
Import BMP file
You can insert a bitmap file, such as your company logo, in the cover
page.
Use the browse button to select the BMP file, and then select the
alignment style.
Count Cover Page
When the Count Cover Page box is checked, the Cover Page will be
included in the page numbering. When this box is not checked, the
Cover Page will not be included.
USING BROTHER PC-FAX SOFTWARE 7 - 15
Sending a file as a PC-FAX using the Facsimile
style
1
2
3
Create a file in Word, Excel, Paint, Draw or any other application
on your PC.
From the File menu, select Print.
The Print dialog box will appear:
Select Brother PC-FAX as your printer, and then click OK.
The Fax Sending dialog box will appear.
7 - 16 USING BROTHER PC-FAX SOFTWARE
4
Enter the fax number using any of the following methods:
■ Using the dial pad enter the number.
■ Click any of the 10 Speed-Dial buttons.
■ Click the Address Book button, and then select a Member
or Group from the Address Book.
If you make a mistake you can click Clear to delete all the
entries.
5
6
To include a Cover Page, click
Cover Page On, and then
click the Cover Page
icon to enter or edit the Cover Page
information.
Click Start to send the fax.
If you want to cancel the fax, click Stop.
Redial
If you want to redial a number, click Redial to scroll through the last
five fax numbers, and then click Start.
Sending a file as a PC-FAX using the Simple style
1
2
Create a file in Word, Excel, Paint, Draw or any other application
on your PC.
From the File menu, select Print.
The Print dialog box will appear:
USING BROTHER PC-FAX SOFTWARE 7 - 17
3
Select Brother PC-FAX as your printer, and then click OK.
The FAX Sending dialog box will appear:
4
In the To: field, type the fax number of the recipient. You can
also use the Address Book to select destination fax numbers by
clicking the To: button. If you made a mistake entering a
number, click the Clear button to delete all the entries.
To send a Cover Page and note, click the Cover Page On check
box.
5
You can also click the
6
7
icon to create or edit a cover page.
When you are ready to send your fax, click the Send
If you wish to cancel the fax, click the Cancel
icon.
7 - 18 USING BROTHER PC-FAX SOFTWARE
icon.
Setting up PC-FAX receiving
(Windows® 95/98/98SE/Me/2000
Professional and Windows NT® WS 4.0
only)
For Windows® XP
See Receiving a fax into the PC (Windows® XP only) on page
7-21.
PC-FAX receiving is only available when using the USB or
parallel connection, not the LAN connection.
Running PC-FAX Receiving
From the Start menu, select Programs, Brother, MFL- Pro Suite
MFC-8220 and then select ‘PC-FAX Receiving’.
The PC-FAX
bar for this Windows® session.
icon will appear on your PC Task
Setting up your PC
1
2
Right-click the PC-FAX
icon on your PC
Task Bar, and then click PC-Fax RX Setup.
The PC-Fax RX Setup dialog box will appear:
USING BROTHER PC-FAX SOFTWARE 7 - 19
3
4
5
6
7
In Ring Delay, select the number of rings before you want your
PC to answer incoming calls.
In Save file to, use the Browse button if you want to change the
path where PC-FAX files will be saved.
In File Format, select .tif or .max for the format the received
original document will be saved in. The default format is .tif.
If you want to, you can check the Play wave file when
receiving FAX check box, and then enter the path.
To load PC FAX receiving automatically when you start up
Windows®, select the Add to Startup folder check box.
Viewing new PC-FAX messages
Each time you start to receive a PC-FAX, the icon will flash
blue and red. Once the fax has been received the icon will remain
red. The red icon will change to green once the received fax has
been viewed.
1 Run PaperPort.
2 Open the Fax Received folder.
3 Double-click any of the new faxes to open and view them.
The title of your unread PC message will be the date and time
until you assign a file name.
For example “Fax 2-20-2002 16:40:21.tif”
7 - 20 USING BROTHER PC-FAX SOFTWARE
Receiving a fax into the PC
(Windows® XP only)
For Windows® 95/98/98SE/Me/2000 Professional and Windows
NT® WS 4.0
See Setting up PC-FAX receiving (Windows®
95/98/98SE/Me/2000 Professional and Windows NT® WS 4.0
only) on page 7-19.
PC-FAX receiving is only available when using the USB or
parallel connection, not the LAN connection.
How to receive a fax automatically
Before you can start receiving faxes, please install the appropriate
Windows XP driver (Windows XP In-box driver or Brother Windows
XP driver). After the driver is installed, refer to the following
information to configure your Windows XP PC for Fax receiving.
1 To activate Faxing receiving, click Set up faxing in the Printer
Tasks menu.
2
The FAX services will be installed on your PC.
USING BROTHER PC-FAX SOFTWARE 7 - 21
3
A Fax icon will then appear in the Printers and Faxes folder. If
the Fax icon does not appear, click Install a local fax printer in
the Printer tasks menu.
4
Select the Start, All Programs, Accessories,
Communications, Fax, Fax Console.
If you have not configured your fax connection, the following
screen will be displayed.
Enter your details, ensuring you specify the outside line access
number if necessary and click OK.
7 - 22 USING BROTHER PC-FAX SOFTWARE
Select the My location radio button if it is not selected and then
click OK.
5
The Fax Configuration Wizard starts. Click Next.
USING BROTHER PC-FAX SOFTWARE 7 - 23
6
Enter the sender information, and then click Next.
7
Select Brother MFC-8220 in the Please select the fax device
pull-down list. Click to select the Enable Receive check box.
Specify the number of rings before your MFC will attempt to
answer the fax. Click Next.
7 - 24 USING BROTHER PC-FAX SOFTWARE
8
Enter the Transmitting Subscriber Identification (TSID), and
then click Next.
9
Enter the Called Subscriber Identification (CSID), and then
click Next.
USING BROTHER PC-FAX SOFTWARE 7 - 25
10
Select if you print a received fax or save it in a folder, and then
click Next.
11
Click Finish.
When PC-FAX Receiving is active, you cannot run the Remote
Setup utility. To use Remote Setup, check off Enable Receive
in Step 7.
For information on how to use PC-FAX Sending and Receiving,
please refer to Help in the Fax Console.
The PC-FAX installation is now complete.
7 - 26 USING BROTHER PC-FAX SOFTWARE
How to view the received faxes
Faxes that are received into the PC will appear in the Fax Console.
Click Start, point to All Programs, Accessories,
Communications, Fax, and then click Fax Console to open the Fax
Console. In the left panel, expand the Fax folder (if it is not already
expanded).
The Fax folder contains the following folders:
■ The Incoming folder contains faxes that are currently being
received.
■ The Inbox folder contains faxes that have been received.
■ The Outbox folder contains faxes that are scheduled to be sent.
■ The Sent Items folder contains faxes that have been successfully
sent.
USING BROTHER PC-FAX SOFTWARE 7 - 27
8
Using your MFC with a
Macintosh®
Setting up your USB-equipped Apple®
Macintosh®
Before you can connect the MFC to your Macintosh®, you must
buy a USB cable that is not longer than 6 feet (1.8 meters).
Do not connect the MFC to a USB port on a keyboard or a
non-powered USB hub.
The features supported by the MFC will depend on the operating
system you are using. The chart below shows which features are
supported.
Mac OS®
Feature
8.6
Mac OS® X
9.X
10.1
10.2.1-10.3
or greater*1
Printing
Yes
Yes
Yes
Yes
Scanning (TWAIN)
Yes
Yes
No
Yes
PC-FAX sending
Yes
Yes
Yes
Yes
Remote Setup
No
No
Yes
Yes
*1 For Mac OS® X 10.2 users, please upgrade to Mac OS® X
10.2.1-10.3 or greater. (For the latest information for Mac OS® X,
please visit at: http://solutions.brother.com)
8 - 1 USING YOUR MFC WITH A MACINTOSH®
Using the Brother printer driver with
your Apple® Macintosh®
(Mac OS® 8.6-9.2)
To select a Printer:
1 Open the Chooser from the Apple menu.
2
Click the Brother Laser icon. On the right side of the Chooser
window, click the printer you want to print to. Close the
Chooser.
To print an original document:
1 From the application software such as Presto!® PageManager®,
click the File menu and select Page Setup. You can change the
settings for Paper Size, Orientation, and Scaling, and then
click OK.
USING YOUR MFC WITH A MACINTOSH® 8 - 2
2
From application software such as Presto!® PageManager®,
click File menu and select Print. Click Print to start printing.
If you want to change Copies, Pages, Resolution, Paper
Source and Media Type, select your settings before clicking
Print.
By clicking the option button you can select various layout options
such as pages per sheet.
8 - 3 USING YOUR MFC WITH A MACINTOSH®
Using the Brother Printer Driver with
Your Apple® Macintosh® (Mac OS® X)
Choosing page setup options
1
From application software such as Presto!® PageManager®,
click the File menu and select Page Setup. Make sure
MFC-8220 is selected in the Format for pop-up menu. You can
change the settings for Paper Size, Orientation and Scaling,
then click OK.
2
From application software such as Presto!® PageManager®,
click the File menu and select Print. Click Print to start printing.
USING YOUR MFC WITH A MACINTOSH® 8 - 4
Specific settings
You can set the Media Type, Resolution, Toner Save, and other
settings.
Press Copies & Pages dropdown to select settings you want to
change.
Printer settings
Layout
8 - 5 USING YOUR MFC WITH A MACINTOSH®
Using the PS driver with your Apple®
Macintosh®
To use the PS driver on a Network, see the NC-9100h Network
User’s Guide on CD-ROM.
To use the PS driver with a USB cable, you need to set the
Emulation to BR-Script 3 (Menu, 4, 1) before connecting
the USB cable. (See Setting the Emulation Selection on page
1-12.)
The PS driver does not support the following functions:
■ HQ 1200
■ Secure Print
■ PC-Fax Sending
USING YOUR MFC WITH A MACINTOSH® 8 - 6
For Mac OS® 8.6 to 9.2 users
1
2
For Mac OS® 8.6 to 9.04 Users:
Open the Apple Extras folder. Open the Apple LaserWriter
Software folder.
For Mac OS® 9.1 to 9.2 Users:
Open the Applications (Mac OS® 9) folder. Open the Utilities
folder*.
* The screens are based on Mac OS® 9.04.
Open the Desktop Printer Utility icon.
8 - 7 USING YOUR MFC WITH A MACINTOSH®
3
Select Printer (USB), and then click OK.
4
Click Change... in the PostScript™ Printer Description (PPD)
file.
Select Brother MFC-8220, and then click Select.
USING YOUR MFC WITH A MACINTOSH® 8 - 8
5
Click Change... in the USB Printer Selection.
Select Brother MFC-8220, and then click OK.
6
Click Create....
8 - 9 USING YOUR MFC WITH A MACINTOSH®
7
Enter your MFC name (MFC-8220), and then click Save.
8
Select Quit from the File menu.
9
Click the MFC-8220 icon on the Desktop.
10
Select Set Default Printer from the Printing menu.
USING YOUR MFC WITH A MACINTOSH® 8 - 10
For Mac OS® X users
You need to install the PS driver using the following instructions.
■ If you use a USB cable and your Macintosh® is “Mac OS® X”,
only one printer driver for an MFC can be registered in Print
Center.
■ If a Brother Native Driver (MFC-XXX) is already listed in
Printer list, you will need to delete it and then install the PS
driver.
■ To use the PS driver with a USB cable, you need to set the
Emulation to BR-Script 3 (Menu, 4, 1) before
connecting the USB cable. (See Setting the Emulation
Selection on page 1-12.)
1
Select Applications from the Go menu.
2
Open the Utilities folder.
8 - 11 USING YOUR MFC WITH A MACINTOSH®
3
Open the Print Center icon.
4
Click Add Printer….
5
Select USB.
USING YOUR MFC WITH A MACINTOSH® 8 - 12
6
Select MFC-8220, and then click Add.
7
Select Quit Printer Center from the Print Center menu.
8 - 13 USING YOUR MFC WITH A MACINTOSH®
Sending a fax from your Macintosh®
application
For Mac OS® 8.6-9.2 users
You can send a fax directly from a Macintosh® application by doing
the following:
1 Create an original document in a Macintosh® application.
2 To send a fax, select Print from the File menu.
The Printer dialog box will appear:
3
When Printer is selected, the top button shows Print and the
Address button is grayed.
From the Output pull-down menu, select Facsimile.
When Facsimile is selected, the top button changes to Send
Fax and the Address button will be available.
USING YOUR MFC WITH A MACINTOSH® 8 - 14
4
5
6
Click Send Fax.
The Send Fax dialog box appears:
The Send Fax dialog box has two list boxes. The left box shows
all the previously Stored Fax Numbers and the right box shows
the Destination Fax Numbers as you select them.
To address the fax, type a fax number in the Input Fax Number
box.
When you are finished addressing your fax, click Send Fax.
To select and only send certain pages of the original
documents, click OK to go to the Print dialog box.
If you click Send Fax without addressing your fax, the following
error message will appear:
Click OK to go to the Send Fax dialog box.
8 - 15 USING YOUR MFC WITH A MACINTOSH®
For Mac OS® X users
You can send a fax directly from a Macintosh® application by doing
the following:
1 Create an original document in a Macintosh® application.
2 To send a fax, select Print from the File menu.
The Printer dialog box will appear:
3
Select Send Fax from the pull-down menu.
USING YOUR MFC WITH A MACINTOSH® 8 - 16
4
Select Facsimile from the Output pull-down menu.
5
To address the fax, type a fax number in the Input Fax
Numbers box, and then click Print.
If you want to send a fax to more than one number, click Add
after entering the first fax number. The destination fax numbers
will be listed in the dialog box.
8 - 17 USING YOUR MFC WITH A MACINTOSH®
Drag a vCard from the Mac OS® X Address Book
application
1
2
Click Address Book button.
Drag a vCard from the Mac OS® X Address Book application
to the Destination Fax Numbers field.
When you are finished addressing your fax, click Print.
USING YOUR MFC WITH A MACINTOSH® 8 - 18
The vCard used must contain a work fax or home fax number.
When you choose work fax or home fax from the Stored Fax
Numbers pull-down list, only the fax number stored in the
Mac OS® X Address Book for the selected category will be
used. If the fax number is stored in only one of the Mac OS® X
Address Book categories, the number will be retrieved no matter
which category you have selected (work or home).
8 - 19 USING YOUR MFC WITH A MACINTOSH®
Using the Brother TWAIN scanner
driver with your Macintosh®
The Brother MFC software includes a TWAIN Scanner driver for
Macintosh®. You can use this Macintosh® TWAIN Scanner driver
with any applications that support the TWAIN specifications.
Mac OS® X Scanning is supported in Mac OS® X 10.2.1-10.3 or
greater.
Accessing the scanner
Run your Macintosh® TWAIN-compliant application software. The
first time you use the Brother TWAIN driver set it as the default by
choosing Select Source (or the other menu name to select the
device). Afterwards, for each original document you scan choose
Acquire Image or Scan. The scanner setup dialog box will appear.
The screen shown in this section are from Mac OS® 9. The
screen on your Macintosh® may vary depending on your
Operating System.
The method of selecting the source or choosing to scan may
vary depending on the application software you are using.
(Mac OS® 8.6–9.2)
USING YOUR MFC WITH A MACINTOSH® 8 - 20
Scanning an image into your Macintosh®
You can scan a whole page
—OR—
scan a portion after pre-scanning the original document.
Scanning a whole page
1
2
3
Place the original document face down in the ADF.
Adjust the following settings, if needed, in the Scanner Setup
dialog box:
Resolution
Color Type
Scanning Area
Brightness
Contrast
Click Start.
When scanning has finished, the image will appear in your
graphics application.
8 - 21 USING YOUR MFC WITH A MACINTOSH®
Pre-Scanning an image
Pre-Scanning allows you to scan an image quickly at a low
resolution. A thumbnail version will appear in the Scanning Area.
This is only a preview of the image, so you can see how it will look.
The PreScan button will allow you to crop unwanted areas from the
images. When you are satisfied with the preview, click Start to scan
the image.
1 Place the original document face down in the ADF.
2 Click PreScan.
The whole image will be scanned into your Macintosh® and will
appear in the Scanning Area of the Scanner dialog box:
3 To scan a portion of the prescanned image, click and drag the
mouse to crop it.
4
5
6
7
Place original document in the ADF again.
Make your adjustments to the settings for Resolution,
Color Type (Gray Scale), Brightness, Contrast, and Size in
the Scanner Setup dialog box.
Click Start.
This time only the cropped area of the original document will
appear in the Scanning Area.
In your editing software, you can refine the image.
USING YOUR MFC WITH A MACINTOSH® 8 - 22
Settings in the Scanner window
Image
Resolution
From the Resolution pop-up menu choose the scanning resolution.
Higher resolutions use more memory and transfer time, but produce
a finer scanned image.
8 - 23 USING YOUR MFC WITH A MACINTOSH®
Color Type
Black & White—Set the image type to Black and White for text or line
art. For photographic images, set the image type to Gray (Error
diffusion) or True Gray.
Gray (Error Diffusion)—is used for original documents with
photographic images or graphics. (Error Diffusion is a method for
creating simulated gray images by placing black dots instead of the
true gray dots in a specific matrix instead of true gray dots.)
True Gray—is used for original documents with photographic images
or graphics. This mode is more exact because it uses up to 256
shades of gray. It requires the most memory and takes the longest
transfer time.
USING YOUR MFC WITH A MACINTOSH® 8 - 24
Scanning Area
Set the Size to one of the following:
■ Letter (8.5 × 11 inches)
■ A4 (210 × 297 mm)
■ Legal (8 1/2 × 14 in.)
■ A5 (148 × 210 mm)
■ B5 (182 × 257 mm)
■ Executive (7.25 × 10.5 inches)
■ Custom (user adjustable it from 0.35 × 0.35 in. to 8.5 × 11.69 in.
or 8.9 × 8.9 mm to 216 × 356 mm)
After you choose a custom size, you can adjust the scanning area.
Click and hold the mouse button as you drag the mouse to crop the
image.
Width: Enter the width of the custom size.
Height: Enter the height of the custom size.
When you are scanning photographs or other images to use in a
word processor or other graphics application, it is a good idea to try
different settings for the Contrast, Mode and Resolution to determine
which settings look the best.
8 - 25 USING YOUR MFC WITH A MACINTOSH®
Adjusting the Image
Brightness
Adjust the Brightness setting to get the best image. The Brother
TWAIN Scanner driver offers 100 Brightness levels (-50 to 50). The
default value is 0, representing an ‘average’ setting.
You can set the Brightness level by dragging the slide bar to the
right to lighten the image or to the left to darken the image. You can
also type a value in the box to set the level. Click OK.
If the scanned image is too light, set a lower Brightness level and
scan the image again.
If the image is too dark, set a higher Brightness level and scan the
image again.
Contrast
You can only adjust the Contrast level when you have selected one
of the Gray Scale settings, it is not available when you have selected
Black & White as the selected Color Type.
Increasing the Contrast level (by dragging the slide bar to the right)
emphasizes dark and light areas of the image, while reducing the
Contrast level (by dragging the slide bar to the left) reveals more
detail in the gray areas. Instead of using the slide bar, you can type
a value in the box to set the Contrast. Click OK.
USING YOUR MFC WITH A MACINTOSH® 8 - 26
Using Presto!® PageManager®
Presto!® PageManager® is application software for managing the
original documents in your computer. Since it is compatible with most
image editors and word processing programs, Presto!®
PageManager® gives you unmatched control over your computer
files. You can easily manage your original documents, edit your
E-mail files and read original documents with the OCR software built
into Presto!® PageManager®.
If you use the MFC as a scanner, we recommend that you install
Presto!® PageManager®. To install Presto!® PageManager®, see
Quick Setup Guide on pages 46 to 53.
For more information, see online help for the NewSoft Presto!®
PageManager® 4.0.
Highlights
■ OCR: Scan an image, recognize the text, and edit it with a word
processor.
■ Scan Buttons: In one step scan original documents and open
them with a designated program.
■ Image Editing: Enhance, crop and rotate images, or open them
with an image-editing program of your choice.
■ Annotation: Add removable notes, stamps, and drawings to
images.
■ Treeview Window: View and arrange your folder hierarchy for
easy access.
■ Thumbnail Window: View files as thumbnails for easy
identification.
8 - 27 USING YOUR MFC WITH A MACINTOSH®
System requirements
■ PowerPC processor
■ System 8.6, 9, X, 10.1, or greater
■ CD-ROM drive
■ Hard disk drive with at least 120 MB of free disk space
Recommended:
■ 256 color or higher video adapter.
■ Eudora Mail, or Outlook Express electronic mail software
Technical Support
For USA
Company name: Newsoft America Inc.
Postal Address: 4113 Clipper Court Fremont
CA 94538, USA
Telephone:
510-4458600
Fax:
510-4458601
E-mail Address: [email protected]
URL:
http://www.newsoftinc.com/
For Canada
E-mail Address: [email protected]
USING YOUR MFC WITH A MACINTOSH® 8 - 28
MFC Remote Setup (Mac OS® X)
The MFC Remote Setup application enables you to configure your
MFC using an intuitive graphical user interface (GUI) on your PC.
When you access this application, the settings on your MFC will be
downloaded automatically to your Macintosh® and displayed on your
computer screen. If you change the settings, you can upload them
directly to the MFC.
The ‘MFC Remote Setup’ application icon is in Macintosh
HD/Library/Printers/Brother/Utility.
OK
This starts the process of uploading the data to the MFC and exiting
the remote setup program. If an error message is displayed enter the
correct data again. Click OK.
8 - 29 USING YOUR MFC WITH A MACINTOSH®
Cancel
This exits the remote setup application without uploading the data to
the MFC.
Apply
This uploads the data to the MFC, but does not exit the remote setup
application.
Print
This command prints the selected items on the MFC. You can not
print the data until it is uploaded to the MFC. Click Apply to upload
the new data to the MFC and click Print.
Export
This command saves the current configuration settings to a file.
Import
This command reads the settings from a file.
USING YOUR MFC WITH A MACINTOSH® 8 - 30
9
Network Scanning
(Windows® 98/98SE/Me/2000 Professional and XP only)
To use the MFC as a Network Scanner, the optional NC-9100h
Network board must be installed into the MFC and configured with
TCP/IP and mail server settings if you use Scan to E-mail (E-mail
server). You can set or change NC-9100h settings from the control
panel or with the BRAdmin Professional utility or Web Management.
(Please see the NC-9100h User's Guide on the CD-ROM.)
Network License
This product includes a single PC license. If you purchase an
optional Network LAN board NC-9100h that includes the license for
up to 4 additional Users, you can install the MFL-Pro Software Suite
including ScanSoft® PaperPort® on up to 5 PC’s for use on a
network. If you want to use more than 5 PCs with ScanSoft®
PaperPort® installed, please purchase NL-5 which is a multiple PC
license agreement pack for up to an additional 5 Users. To purchase
NL-5, please contact your Brother Sales Office.
9 - 1 NETWORK SCANNING
Registering your PC with the MFC
If you need to change the MFC that was registered to your PC during
the installation of Brother MFL-Pro Suite (see Quick Setup Guide on
page 43), follow the steps below.
1 For Windows® 98/Me/2000
From the Start menu, select Control Panel, Scanners and
Cameras, and then right-click Scanner Device icon and select
Properties to view the Network Scanner Properties dialog box.
For Windows® XP
From the Start menu, select Control panel, Printers and
Other Hardware, Scanners and Cameras (or Control Panel,
Scanners and Cameras).
Right-click Scanner Device icon and select Properties to view
the Network Scanner Properties dialog box.
NETWORK SCANNING 9 - 2
2
Click the Network Setting tab in the dialog box and select a
method to specify the MFC as a Network scanner for your PC.
<
Specify your MFC by address
Enter the actual IP address of the MFC in the IP Address field.
Click Apply and then OK.
Specify your MFC by Name
Enter the MFC Node name in the Node Name field.
Click Apply and then OK.
Search from a list of available device
Click Browse and select the appropriate device you want to use.
Click OK.
Click Apply and then OK.
9 - 3 NETWORK SCANNING
3
Click the Scan To Button tab in the dialog box and enter your
PC Name in the Display Name field. The MFC's LCD displays
the Name you enter. Default setting is your PC Name. You can
enter a name if you like.
4
You can avoid receiving unwanted original documents by
setting a 4-digit PIN Number. Enter your PIN Number in the PIN
Number and Retype PIN Number field. To send data to a PC
protected by a PIN Number, the LCD prompts you to enter the
PIN Number before the original document can be scanned and
sent to the MFC. (See Using the Scan key on page 9-5 to 9-9.)
NETWORK SCANNING 9 - 4
Using the Scan key
Scan to E-mail (PC)
When you select Scan to E-mail (PC) your original document will
be scanned and sent directly to the PC you designated on your
network. The Brother SmartUI will activate the default E-mail
application on the designated PC for addressing to the recipient. You
can scan a black and white original document and it will be sent with
the E-mail from the PC as an attachment.
For Network Scanning the Brother Control Center (SmartUI)
selections are used only for configuring the Scan button. You
will not be able to initiate a Network scan from the Brother
Control Center (SmartUI).
You can change the
(Scan) configuration. For Windows®
98/98SE/Me/2000: (See Scan to E-mail on page 4-10 to 4-12.) (For
Windows® XP: See Hardware Section: Changing the Scan to button
configuration on page 5-5 to 5-9.)
1 Place the original document face down in the ADF.
2
3
4
5
Press
(Scan).
Press
or
to select Scan
Scan to E-mail
PC
to E-mail.
Press Set.
Press
or
to select PC.
Press Set.
—OR—
If there is no other selection, go to Step 5.
Press
or
to select the destination PC you want to use
for E-mailing your original documents.
Press Set.
If the LCD prompts you to enter a PIN Number, enter the 4-digit
PIN Number for the destination PC on the control panel.
Press Set.
The MFC will start the scanning process.
9 - 5 NETWORK SCANNING
Scan to E-mail (E-mail server)
When you select Scan to E-mail (E-mail server) you can
scan a black and white original document and send it directly to an
E-mail address from the MFC. Your original document is sent as an
E-mail attachment in a TIFF or PDF format.
Scan to E-mail (E-mail Server) requires SMTP/POP3 mail
server support. (See NC-9100h User’s Guide on the CD-ROM.)
1
2
3
4
5
6
7
Place the original document face down in the ADF.
Press
(Scan).
Press
or
to select Scan to E-mail.
Press Set.
Press
or
to select E-mail
Scan to E-mail
E-mail Server
Server.
Press Set.
—OR—
If there is no other selection, go to Step 5.
Press
or
to select PDF 200×200dpi, PDF
200×100dpi, TIFF 200×200dpi or TIFF 200×100dpi and
Set.
The LCD prompts you to enter an address. Enter the destination
E-mail address from the dial pad or use the One-Touch key or
Speed-Dial key.
Press Start.
The MFC will start the scanning process.
NETWORK SCANNING 9 - 6
Scan to Image
When you select Scan to Image your original document will be
scanned and sent directly to the PC you designated on your network.
The Brother SmartUI will activate the default graphics application on
the designated PC. You can change the Scan configuration. (For
Windows® 98/Me/2000: See Scan to Image on page 4-16 to 4-17.)
(For Windows® XP: See Hardware Section: Changing the Scan to
button configuration on page 5-5 to 5-11.)
For Network Scanning the Brother Control Center (SmartUI)
selections are used only for configuring the Scan button. You
will not be able to initiate a network scan from the Brother
Control Center (SmartUI).
1
2
3
4
Place the original document face down in the ADF.
Press
(Scan).
Press
or
to select Scan
Select ▲▼ & Set
Scan to Image
to Image.
Press Set.
Press
or
to select a destination you want to send.
Press Set.
If the LCD prompts you to enter a PIN Number, enter the 4-digit
PIN Number for the destination PC on the control panel.
Press Set.
The MFC will start the scanning process.
9 - 7 NETWORK SCANNING
Scan to OCR
When you select Scan to OCR your original document will be
scanned and sent directly to the PC you designated on your network.
The Brother SmartUI will activate ScanSoft® TextBridge® and
convert your original document into text for viewing and editing from
a word processing application on the designated PC. You can
change the Scan configuration.
(For Windows® 98/Me/2000: See Scan to OCR (Word Processor) on
page 4-13 to 4-15.) (For Windows® XP: See Hardware Section:
Changing the Scan to button configuration on page 5-5 to 5-11.)
For Network Scanning the Brother Control Center (SmartUI)
selections are used only for configuring the Scan button. You
will not be able to initiate a network scan from the Brother
Control Center (SmartUI).
1
2
3
4
Place the original document face down in the ADF.
Press
(Scan).
Press
or
to select Scan
Select ▲▼ & Set
Scan to OCR
to OCR.
Press Set.
Press
or
to select a destination you want to send.
Press Set.
If the LCD prompts you to enter a PIN Number, enter the 4-digit
PIN Number for the destination PC on the control panel.
Press Set.
The MFC will start the scanning process.
NETWORK SCANNING 9 - 8
Scan to File
When you select Scan to File you can scan a black and white
original document and send it directly to a PC you designate on your
network. The file will be saved in the folder and file format that you
have configured in the Brother SmartUI on the designated PC. You
can change the Scan configuration.
(For Windows® 98/Me/2000: See Scan to File on page 4-8 to 4-9.)
(For Windows® XP: See Hardware Section: Changing the Scan to
button configuration on page 5-5 to 5-11.)
For Network Scanning the Brother Control Center (SmartUI)
selections are used only for configuring the Scan button. You
will not be able to initiate a network scan from the Brother
Control Center (SmartUI).
1
2
3
4
Place the original document face down in the ADF.
Press
(Scan).
Press
or
to select Scan
Select ▲▼ & Set
Scan to File
to File.
Press Set.
Press
or
to select a destination you want to send.
Press Set.
If the LCD prompts you to enter a PIN Number, enter the 4-digit
PIN Number for the destination PC on the control panel.
Press Set.
The MFC will start the scanning process.
Max. 25 clients can be connected to one MFC on a Network. For
example, if 30 clients try to connect at a time, 5 clients will not
be shown on the LCD.
9 - 9 NETWORK SCANNING
Network PC-FAX
10 Brother
software
To use the MFC with Network PC-FAX, the optional NC-9100h
Network board must be installed into the MFC and configured with a
TCP/IP address. If you use PC-FAX to an E-mail address, the mail
server settings must also be configured.
Enable Network PC-FAX
To use the MFC for Network PC-FAX, see Using Brother PC-FAX
software on page 7-1.
The items described in this chapter are specific items relating to
the Network version of PC-FAX software that is installed from
the Network Applications for Optional NC-9100h on the
CD-ROM supplied with your MFC.
Brother Network PC-FAX can be configured through PC-FAX Setup,
Sending tab.
BROTHER NETWORK PC-FAX SOFTWARE 10 - 1
Sending setup
In order to use the full functionality of Network PC-FAX enable the
Network PC-FAX Setup option on the Sending tab in Brother
PC-FAX Setup.
1 Access the Sending Tab from the PC-FAX dialog box by
clicking
.
—OR—
From the Start menu, select All programs, Brother, MFL-Pro
Suite MFC-8220, and then select PC-FAX Setup.
2 Check Enable box.
This software can be used in a network environment and with a
locally connected machine. It is important that when used in a
network environment the Network PC Fax is set to enable.
10 - 2 BROTHER NETWORK PC-FAX SOFTWARE
Extra options in Address Book
When the Enable Network PC-FAX option is selected, three
additional options appear in the address book contact window.
1 In the Address Book dialog box, click the icon to add a
member.
The Brother Address Book Member Setup dialog box will
appear:
2
3
4
In the Brother Address Book Member Setup dialog box, type
the member's information.
Name is required field. You can also enter an E-mail contact
address and MFC address for the address book member.
It is necessary to specify the preferred method of sending
original documents to this contact by checking the Fax, E-mail
or MFC E-mail Address box.
Click the OK button to save the member's information.
If you wish to send original documents to this contact by more
than one method you must create a second contact and select
a different option, Fax, E-Mail or MFC Address.
BROTHER NETWORK PC-FAX SOFTWARE 10 - 3
Using the Brother Network PC-FAX software
The Brother Network PC-FAX feature allows you to use your PC to
send any application or document file as a standard fax. You can
create a file in any application on your PC, and then send it as a
Network PC-FAX. You can even attach a cover page note. All you
have to do is set up the receiving parties as Members or Groups in
your PC-FAX Address Book or simply enter the destination address
or fax number into the User Interface. You can use the Address Book
Search feature to quickly find members to send your fax.
Please check Brother Solutions Center for the latest updates
available for Brother Network PC-FAX. Visit
http://solutions.brother.com/
Quick Tips:
Please see Enable Network PC-FAX on page 10-1 before using
Brother Network PC-FAX.
1 Ensure that Network PC-FAX is set to “Enable” in the Sending
tab of Setup. (See Enable Network PC-FAX on page 10-1.)
10 - 4 BROTHER NETWORK PC-FAX SOFTWARE
2
3
4
To send an E-mail from Brother Network PC-FAX you can either
enter the E-mail address in the To: field or in the display for
Facsimile Style using the PC keyboard or select the member
from the Address Book. The member must have E-mail selected
as the chosen destination for that member.
To send an Internet Fax from Brother Network PC-FAX you can
either enter the Internet Fax address in the To: field or in the
display for Facsimile style using the PC keyboard or select the
member from the Address Book. The member must have MFC
Mail Address selected as the chosen destination for that
member.
To send a Network Fax simply select a member from the
address book or enter the fax number into the User Interface
with the PC keyboard. The member must have Fax selected as
the chosen destination for that member.
Sending a Network PC-Fax to an E-mail address or sending an
Internet Fax requires SMTP/POP3 mail server support.
Sending a Network PC-FAX from your Macintosh®
application
You can send a fax directly from your Macintosh® application using
the following steps:
For Mac OS® 8.6-9.2 users
1
2
Follow the steps on pages 50 and 51 in the Quick Setup Guide.
Follow the steps on pages 8-14 and 8-15.
For Mac OS® X 10.1/10.2.1-10.3 or greater users
1
2
Follow the steps on pages 52 and 53 in the Quick Setup Guide.
Follow the steps on pages 8-16 to 8-19.
BROTHER NETWORK PC-FAX SOFTWARE 10 - 5
Index
A
Address book
PC-FAX (Macintosh®) .... 8-18
PC-FAX (Network) ......... 10-3
PC-FAX (Windows®)
...............7-7, 7-8, 7-10, 7-12
Attachments
combining files ............... 4-12
B
Brightness ................. 3-7, 8-26
Broadcasting ...................... 7-9
Brother Control Center, using
and configuring
Windows® ........................ 4-1
Envelopes ........................... 1-7
Export
Address book ................. 7-10
Files ............................... 3-22
I
Import
Address book ................. 7-12
Files ............................... 3-22
M
Manual feed tray ..........1-4, 1-5
MFL-Pro .............................. 4-1
N
Contrast ..................... 3-7, 8-26
Native Driver
Windows® ......................... 2-2
Network ......................9-1, 10-1
D
O
Drivers
Macintosh®
Brother TWAIN ........... 8-20
printer ..................... 8-2, 8-4
PS ................................. 8-6
Windows®
printer ..................... 1-1, 2-1
PS ............................... 2-20
TWAIN .......................... 3-1
WIA ............................. 3-10
Duplex Printing ............ 1-2, 2-8
OCR .................................. 5-10
OCR, changing settings .... 5-11
C
E
Emulation
Macintosh® ...................... 8-6
Windows® ...... 1-1, 1-12, 2-20
I - 1 INDEX
P
Paper
driver settings
......................2-2, 2-23, 2-24
How to load ...................... 1-4
PaperPort®
accessing ......................... 3-2
PaperPort® (Windows®)
and TextBridge® OCR ..... 3-17
exporting ........................ 3-22
importing ........................ 3-22
PC-FAX (for Network) ....... 10-1
PC-FAX (for Windows®) ...... 7-1
receiving ......................... 7-19
sending
address book ................. 7-7
cover page ................... 7-14
facsimile style .............. 7-16
Group ............................ 7-9
setting up ..................... 7-14
simple style .................. 7-17
Print
driver ................................ 2-1
Emulation
Macintosh® .................... 8-6
Windows® ....1-1, 1-12, 2-20
envelopes ......................... 1-7
manual feed tray .............. 1-4
reports and lists .............. 1-13
Secure key ..................... 1-10
thick paper ........................ 1-5
Windows®
driver settings ................ 2-1
keys on control panel ... 1-10
PS printer driver ................ 2-20
R
Resolution
scanning
Macintosh®
.......... 8-5, 8-21, 8-22, 8-23
PC-FAX ....................... 4-21
Windows®
....... 2-7, 3-3, 3-6, 3-12, 4-6
S
Scan
changing default settings ... 5-9
Macintosh® ..................... 8-20
Windows®
into PC ........................... 3-3
Resolution ..................... 3-6
ScanSoft® PaperPort®
...........................3-17, 3-21
TWAIN Compliant ..........3-1
using Scan key ............3-14
WIA Compliant .............3-10
XP only ........................3-10
Scan to E-mail
Brother Control Center
......4-4, 4-10, 5-6, 5-13, 5-17
using Scan key
............... 3-14, 3-15, 9-5, 9-6
Scan to File
Brother Control Center
.................. 4-4, 4-8, 5-3, 5-7,
5-13, 5-14, 5-15
using Scan key
...................... 3-14, 3-16, 9-9
Scan to Image
Brother Control Center
........................ 4-4, 4-16, 5-8
using Scan key
...................... 3-14, 3-15, 9-7
Scan to OCR
Brother Control Center
............. 4-4, 4-13, 5-10, 5-21
using Scan key
...................... 3-14, 3-16, 9-8
Scanning into PC .................3-3
Software
Macintosh®
MFC Remote Setup
(Mac OS® X) ..............8-29
Presto!® PageManager®
....................................8-27
Speed-Dial ...........................7-6
INDEX I - 2
®
Brother International Corporation
100 Somerset Corporate Boulevard
P.O. Box 6911
Bridgewater, NJ 08807–0911 USA
Brother International Corporation (Canada) Ltd.
1 rue Hôtel de Ville,
Dollard-des-Ormeaux, QC, CANADA H9B 3H6
Visit us on the World Wide Web
http://www.brother.com
These machines are made for use in the USA and CANADA only. We cannot recommend
using them overseas because it may violate the Telecommunications Regulations of that
country and the power requirements of your multi-function center may not be compatible
with the power available in foreign countries. Using USA or CANADA models overseas is
at your own risk and may void your warranty.
Version A