1
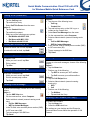
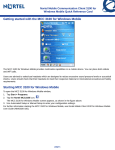
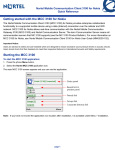
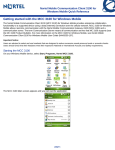
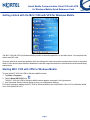
Nortel Mobile Communication Client 3100 with VPN
for Windows Mobile Quick Reference Card
Getting started with the MCC 3100 with VPN for Windows Mobile
The MCC 3100 with VPN for Windows Mobile provides multimedia capabilities on a mobile device. You can place both
cellular and WiFi calls.
Users are advised to select/use headsets which are designed to reduce excessive sound pressure levels or acoustical
shocks. Users should check that their headsets do meet their respective National or International Acoustical and Safety
requirements.
Starting MCC 3100 with VPN for Windows Mobile
To open the MCC 3100 with VPN for Windows Mobile window,
1. Tap Start > Programs.
2. Tap the Nortel MCC3100 icon.
The MCC 3100 with VPN for Windows Mobile screen appears, as shown in the figure above.
3. Use Automated Setup or Manual Setup to enter your configuration settings.
For further information starting the MCC 3100 for Windows Mobile, see Nortel Mobile Client 3100 for Windows Mobile
User Guide (NN43020-100).
page 1
Nortel Mobile Communication Client 3100 with VPN
for Windows Mobile Quick Reference Card
Installing the MCC 3100 for Windows Mobile Enabling the automatic screen lock
Your system administrator sends details on the following
instructions in an email:
1. Download and install the MCC 3100 for Windows
Mobile software.
2. Install your license key.
Start the MCC 3100 for Windows Mobile application.
Your license key validates and your configuration settings download.
The MCC 3100 for Windows Mobile is ready to place
calls and receive messages.
To enable the automatic screen lock:
1. Select Tools > Settings > Advanced.
2. To lock the screen, section On Calls for the Lock
Screen field.
3. Tap OK.
The screen lock turns off when you are in a call. To turn
the screen lock off, tap and hold the lock button.
Enabling VPN
To enable VPN:
1. Select Tools > VPN.
Selecting a network roaming mode
2. Select the Enable VPN check box.
You are prompted to set up a VPN tunnel whenever
you log on the WiFi network (manually or
automatically)
To enable automatic roaming mode:
1. Select Tools > Automatic Roaming.
The MCC 3100 for Windows Mobile automatically logs
on to the available networks and selects a dialout net
work for outgoing calls and messages, either WiFi or
cellular.
Log on to a network
To log on to a network (manual roaming mode
only):
1. Tap the Home icon.
To enable manual roaming mode:
1. Select Tools > Manual Roaming.
You can manually log on to the available networks and
select a dialout network for outgoing calls and mes
sages, either WiFi (default) or cellular.
Enabling the power management features
To enable the power management features:
1. On your mobile device, select Start > Settings >
System.
2. Tap Power.
3. Tap Advanced.
4. Select the On battery power: turn off device if not
used for check box.
5. Select a timeout period.
6. Tap OK.
7. On the MCC 3100 for Windows Mobile, select
Tools > Settings > Advanced.
8. Select Enable WiFi Standby.
The mobile device enters standby mode when you
press the power button or when the activity timer
expires. You can still receive calls and messages
while your device is in standby mode.
2. Tap a network button:
• WiFi
• Cellular Network
3. Set up a VPN tunnel, if prompted (WiFi only):
a. Tap Yes.
b. Select a VPN profile, then tap Connect.
c. Enter your ID and password, then tap OK.
4. Select Login.
If the MCC 3100 for Windows Mobile operates in
Automatic roaming mode, you log on the networks
automatically when they are available.
Placing a call
Use one of the following options to place a call:
Option 1:
1. Tap the Call Dialpad icon.
2. Select a dialout network (manual roaming
mode only)
• WiFi
• Cell
3. Dial a number with the integrated keypad,
hardware keyboard, or the soft keyboard.
4. Tap Talk.
page 2
Nortel Mobile Communication Client 3100 with VPN
for Windows Mobile Quick Reference Card
Placing a call (continued)
Sending a message (continued)
Option 2:
1. Tap the Call Log icon.
Option 2:
1. Tap the one of the following icons:
2. Tap and hold an entry.
3. Select Call This Person from the menu.
Option 3:
1. Tap the Contact List icon.
•
Call Log
• Contact List
2. Tap and hold an entry on the Call Log or a
contact on the Contact List.
3. Select Sent Text Message from the menu.
4. On the command bar, select Compose.
5. Select a dialout network (manual roaming mode
only):
• Cell for SMS Messages
• WiFi for Instant Messages
6. In the To field, enter a mobile phone number (SMS)
or SIP user name (IM).
7. Type a message in the SMS box.
8. Tap Send.
2. Tap and hold a contact.
3. Select one of the following menu options:
• Dial Mobile with MCC 3100
• Dial Home with MCC 3100
• Dial Work with MCC 3100
Holding and retrieving a call
To place an active call on hold, tap Hold.
To retrieve the call on hold, tap Hold.
Transferring a call (WiFi only)
Listening to Voice mail messages
To transfer a call:
1. While you are in a call, tap Xfer.
To listen to voice mail messages, choose of the following
options:
Option 1:
1. Tap the Home icon.
2. Dial a number.
3. Tap Xfer.
Setting up a conference call
2. Perform one of the following:
• Tap WiFi to access your WiFi mailbox.
• Tap Cell to access your cellular mailbox.
Option 2:
1. Tap the Call Dialpad icon.
To set up a conference call:
1. While you are in a call, tap Conf.
2. Dial the second party number.
3. Tap Conf.
2. Select a dialout network (manual roaming
mode only):
• WiFi
• Cell
3. Perform one of the following:
• Tap Mailbox.
• Tap and hold the 1 key.
Sending a text message
To send a text message, choose one of the following
options:
Option 1:
1. Tap the SMS View icon.
2. On the command bar, select Compose.
3. Select a dialout network (manual roaming mode
only):
• Cell for SMS Messages
• WiFi for Instant Messages
4. In the To field, enter a mobile phone number (SMS)
or SIP user name (IM)
5. Type a message in the SMS box.
6. Tap Send.
Enabling Call Forward (WiFi only)
To enable Call Forward:
1. Tap the Home icon.
2. Select the CFW check box.
The settings on your desktop and the Enterprise
Communication Server affects the operation of Call
Forward.
page 3