1
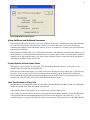
Business Communications Manager
Business Communications Manager 3.6
Documentation Update
Welcome to Business Communications Manager 3.6, the unified communications solution
that gives you an edge on your competition.
The Business Communications Manager 3.6 documentation is on the Business
Communications Manager 3.6 Documentation CD-ROM. This CD-ROM is in your Business
Communications Manager 3.6 kit.
To view the documentation:
1
Insert the Business Communications Manager 3.6 Documentation CD-ROM into the
CD-ROM drive of your computer.
2
Double click the My Computer icon.
3
Double click the CD-ROM icon.
4
Double click Start.pdf.
This document provides last-minute changes to the Business Communications Manager 3.6
documentation.
CallPilot Manager Set Up and Operation Guide
Page 94, To add a Park and Page node
Step 10, "From the Page Retries list select a number from 1 to 5 that is the number of times the
system will try to page to the paging zone. The default is 1."
should be, "select a number from 0 to 5".
IP Telephony Configuration Guide
Pages 175 and 206, Interoperability
The statement "Business Communications Manager 3.6 IP Telephony adheres to the ITU-T
H.323v2 standards."
should be, "Business Communications Manager 3.6 IP Telephony adheres to the ITU-T
H.323v4 standards."
Multimedia Call Center Set Up and Operation Guide
Page 15, Setting Multimedia Call Center parameters
If your Business Communications Manager is behind a firewall or proxy server, you must do
some additional configuration on the firewall/proxy server:
•
set TCP ports 443 and 4200 to forward inbound traffic to Business Communications
Manager.
•
set TCP port 3367 to permit outbound traffic from Business Communications Manager.
For how to set inbound and outbound filters refer to the documentation for your firewall or
proxy server, or if you use a Business Communications Manager firewall, the chapter
"Configuring IP Firewall Filters" of the Programming Operations Guide.
2
Programming Operations Guide
Page 171, Universal T1 WAN (UTWAN)
The UTWAN functionality, along with RTP Header Compression, PPP Fragmentation and Frame Relay
Fragmentation, are being made available through a controlled release process. This means that although the
UTWAN functionality is installed on the Business Communications Manager, the UTWAN headings and menu
items are not visible on Unified Manager by default.
To make the UTWAN headings and menu items visible on Unified Manager, you need to use a utility available
from Nortel Networks. To obtain this utility, call the Nortel Networks Technical Support line.
1-800-4NORTEL (1-800-466-7835)
If you already have a PIN Code, you can enter Express Routing Code (ERC) 196#.
If you do not yet have a PIN Code, or for general questions and first line support, you can enter ERC 338#.
After you use the utility to display the UTWAN heading, you can program the UTWAN features as described in
the UTWAN section of the Business Communications Manager Programming Operations Guide.
Page 196, IP Music
IP Music configuration is explained in Chapter 25, "Configuring the music source", on page 613.
Page 424, ATA Settings
In Table 91, the ATA use row should have this note:
Set the field to Onsite for all installations except devices on a long loop. Set the field to Offsite to increase the
audio level to devices that are remote to the ATA2. This field has no effect for ASM and ASM8+ devices.
Page 431, Programming telephone buttons
Note: You can change any telephone button that is initially set to Blank by selecting an option, and then pressing
the TAB key.
Page 553 Table 148, IP trunking interoperability fields
The descriptions for the Send Name Display and Remote Capability MWI fields are transposed.
They should read:
Send name display: The public or private OLI (outgoing line identification) are separately configurable for each
telephone, under Line Access. Therefore, when the VoIP trunks allow name display on outgoing calls (Send Name
Display), the system will send the appropriate OLI, based on line type (Public or Private). Default is Y.
Remote Capability MWI: If the remote voice mail system resides on a Meridian 1 system, that system should
have the MWI package to allow message waiting indicators to occur on network telephones. In this case, the IP
trunking Remote Capability MWI field should be set to Yes (the default), to indicate that the Business
Communications Manager is compatible with the M1. If the M1 does not have the MWI package, you need to set
the IP trunking Remote Capability MWI field to No, to indicate that there is no compatibility. Note: SIP trunks do
not support MWI.
3
Page 692, Table 206 WAN PPP parameters
The description for the LCP Keep Alive Interval should be the following:
Attribute
Description
LCP Keep Alive
Interval
This parameter determines the how long the Business Communications Manager waits
before determining that the WAN link is not functioning.
When there is no regular traffic on the WAN link, the Business Communications Manager
sends an echo packet out on the link. If there is no response within the LCP Keep Alive
Interval, the Business Communications Manager sends another echo packet. If there is
no response after 10 echo packets, the Business Communications Manager determines
that the link is down. If there is a response to any of the echo packets, the Business
Communications Manager determines that the WAN link is functioning.
Enter the LCP Keep Alive Interval, in seconds, that the Business Communications
Manager waits between sending echo packets.
The default value is 10 seconds.
Page 731, Configuring IPX Routing
IPX Routing is not available for Business Communications Manager 3.6.
Page 763, Table 254 Permanent WAN Connections settings
The following note applies to the description of Fast Backup Switch Over.
Note: If you enable Fast Backup Switch Over on a WAN link that is using PPP protocol, change the setting for LCP
Keep Alive Interval to 3. This reduces the time it takes for Business Communications Manager to determine that
the WAN link is not functioning to 30 seconds (3 seconds X 10 intervals). If you leave the LCP Keep Alive Interval
at its default value, the Business Communications Manager takes 100 seconds (10 seconds X 10 intervals) to
determine that the WAN link is not functioning.
Call Center Set Up and Operation Guide
Page 197, 199 & 203, System Activity Codes that Call Center records
The non-agent System Activity Code is not supported.
Page 203, Break Time
A ≤·‚‡ session ends after two minutes of inactivity. If an agent enters Activity Codes during the
≤·‚‡ session, the timer resets, so the ≤·‚‡ session can potentially be longer than two minutes.
If ≤·‚‡ is active on the agent's set when break time expires, the break time continues while the
≤·‚‡ session is active. When the ≤·‚‡ ends the break time ends as well.
While a ≤·‚‡ is active, no Call Center calls will come to the agent. The break time is extended until the
≤·‚‡ session exits.
It is the agent's responsibility to either enter an Activity Code or release the session. Otherwise ≤·‚‡
remains on the agent’s display for a maximum of 2 minutes. If the ≤·‚‡ session ends because it times out,
the break time also ends.
Page 244, Automatic Answer
We recommend you do not use Automatic Answer for i2001 telephones, or use the i2001 for supervising agents
unless you use a telephone handset. The i2001 does not support Handsfree or a headset.
4
Network Configuration Manager 3.6 Client Software User Guide
Page 98, Sending configuration and image files
Note: You must disable the ASM module before you perform restore operations in NCM.
IP Telephony Configuration Guide
Pages 143-4 Table 38, IP trunking interoperability fields
The descriptions for the Send Name Display and Remote Capability MWI fields are transposed.
They should read:
Send name display: The public or private OLI (outgoing line identification) are separately configurable for each
telephone, under Line Access. Therefore, when the VoIP trunks allow name display on outgoing calls (Send Name
Display), the system will send the appropriate OLI, based on line type (Public or Private). Default is Y.
Remote Capability MWI: If the remote voice mail system resides on a Meridian 1 system, that system should
have the MWI package to allow message waiting indicators to occur on network telephones. In this case, the IP
trunking Remote Capability MWI field should be set to Yes (the default), to indicate that the Business
Communications Manager is compatible with the M1. If the M1 does not have the MWI package, you need to set
the IP trunking Remote Capability MWI field to No, to indicate that there is no compatibility. Note: SIP trunks do
not support MWI.
UPS Installation and Configuration Guide
Page 15, UPS Overview
The text:
In a power failure situation, the UPS provides sufficient time to either correct the problem or activate a contingency
plan to sustain services. The UPS is configured to perform a graceful shutdown of the BCM two minutes before the
UPS battery power is drained. The UPS can perform a graceful shutdown of the BCM 200, 400, and 1000 models.
The ability to turn the power off after a graceful system shutdown is only provided on BCM 200 and 400 models.
In the event that the UPS battery power is drained on a BCM 1000, the UPS performs a halt after a graceful system
shutdown.
should be:
In a power failure situation, the UPS provides sufficient time to either correct the problem or activate a contingency
plan to sustain services. The UPS is configured to perform a graceful shutdown of the BCM two minutes before the
UPS battery power is drained. The PowerChute software running on the BCM monitors the UPS and sends a
signal to the operating system to perform a graceful shutdown of the BCM 200, 400, and 1000 models two
minutes before the battery is drained.
The ability to turn the power off after a graceful system shutdown is only provided on BCM 200 and 400 models.
In the event that the UPS battery power is drained on a BCM 1000, the operating system performs a halt after a
graceful system shutdown.
5
Business Communications Manager BCM 1000 and BCM200/400 Installation and
Maintenance Guides
Business Communications Manager Analog Device Specifications
The information in this table augments information currently provided in the BCM1000 and BCM 200/400
Installation Guides about the analog devices available on Business Communications Manager.
ATA2
ASM8
ASM8+
Norstar ASM
Ringing
Frequency (North
America)
20 Hz ± 1Hz
20 Hz ± 1Hz
20 Hz ± 1Hz
20 Hz ± 1Hz
Ringing
Frequency
(Europe)
25 Hz ± 1Hz
25 Hz ± 1Hz
25 Hz ± 1Hz
20 Hz ± 1Hz
Ringing Voltage
(North America)
80 V rms ± 10%
55 V rms ± 10%
65 V rms ± 10%
65 V rms ± 10%
Ringing Voltage
(Europe)
75 V rms ± 10%
na
65 V rms ± 10%
65 V rms ± 10%
Loop Current
20 mA minimum
20 mA minimum
20 mA minimum
20 mA minimum
Battery Feed
voltage
- 48 V dc ± 10%
- 48 V dc ± 10%
- 29 V dc ± 10%
- 32 V dc ± 10%
FIC code
OL13ABC
na
OL13B
na
Ringer
Equivalence
Number
3
1
2
2
ATA2 to BCM
loop resistance
(cable only)
135 ohms (800 m of 0.5 mm na
wire or 2,600 ft. of 24 AWG
wire
na
na
200 ohms (1,231 m
of 0.5 mm wire or
4,000 ft. of 24 AWG
wire
200 ohms (1,231 m of 0.5 mm
wire or 4,000 ft. of 24 AWG
wire
Analog loop
1,300 ohms (7,200 m of 0.5
resistance on
mm wire or 26,000 ft. of 24
terminal side for
AWG wire
voice applications
(cable only)
250 ohms (1,538 m of 0.5
mm wire or 5,000 ft. of
24AWG wire)
Analog loop
resistance on
terminal side for
data applications
(cable only)
200 ohms (1231 m of 0.5
mm wire or 4,000 ft. of 24
AWG wire)
Input impedance
at Tip & Ring
600 ohms
600 ohms
600 ohms
600 ohms
Return loss
> 20 dB for 200 to 3,400 Hz
(when terminated with 600
ohms)
> 20 dB for 200 to 3,400 Hz
(when terminated with 600
ohms)
> 20 dB for 200 to
3,400 Hz (when
terminated with 600
ohms)
> 20 dB for 200 to 3,400 Hz
(when terminated with 600
ohms)
Insertion loss on
an internal call
ATA2 to BCM loss 3.0 dB ±
0.5 dB
ATA2 to BCM loss 3.0 dB ±
0.5 dB
ATA2 to BCM loss
3.0 dB ± 0.5 dB
Norstar ASM to BCM loss 3.0
dB ± 0.5 dB
Insertion loss on
an external call
ATA2 to BCM loss 2.2 dB ±
1.0 dB
BCM to ATA2 loss 0.5db
±1.0dB
Norstar ASM to BCM loss
3.0 dB ± 1.0 dB
BCM to Norstar ASM loss
0.5db ±1.0dB
Norstar ASM to BCM
loss 3.0 dB ± 1.0 dB
BCM to Norstar ASM
loss 0.5db ±1.0dB
Norstar ASM to BCM loss 3.0
dB ± 1.0 dB
BCM to Norstar ASM loss
0.5db ±1.0dB
Maximum units to na
install per chassis
2
2
na
Max units per
DS30 bus
2
*4 (on double density na
bus)
* offset 02 and 03 do
not allow download of
ASM8+ firmware
na
200 ohms (1,231 m
of 0.5 mm wire or
4,000 ft. of 24 AWG
wire
6
Business Communications Manager Management User Guide
Page 420, Performing a restore using the BRU
Note: You must disable the ASM module before you do a backup and restore.
Call Detail Recording System Administration Guide
Page 45, Report logs
The procedure for downloading the report logs is incorrect. The correct procedure is below.
1
On the Unified Manager front page, click the Maintenance button.
The Product Maintenance & Support screen appears.
2
Click the Archlog Scheduler heading.
The Archlog Scheduler screen appears.
3
Schedule a new Archlog. Make sure that on the Which applications would you like Archlog to collect screen
you select the Call Detail Recording option.
For more detailed information about scheduling an Archlog, refer to the Business Communications Manager Management User Guide.
Note: You do not have to schedule a new Archlog if the Call Detail Recording logs are already being
collected by an existing Archlog schedule.
4
Click the Archlog Viewer heading.
The Archlog Viewer screen appears.
5
Click the Download Archlog Package link for the Archlog package that contains the Call Detail Recording
logs.
For more detailed information about viewing an Archlog package, refer to the Business Communications
Manager - Management User Guide.
7
Reporting for Call Center Set Up and Operation Guide
Page 22, Call Center Connection
Data Request Period: The period between the Data Requests for historical data can be set to 5 minutes, 15 minutes,
30 minutes or hourly.
Call Center Connection Data Download Message
When you click the Submit button on the Call Center Connection page you a message appears that says the data
download can take some time, and to please await further notification.
Starting Data Download Notification Message
When you click the OK button the message closes and Reporting for Call Center requests historical data from Call
Center until the database on the Web Host PC is up to date.
A window appears that shows the progress of the Call Center download.
Download Status Window
This window provides information about the status of the current download.
The Percentage Completed line indicates how near to completion the download is. When Reporting for Call Center
is installed it queries Call Center for any Call Center data it has accumulated.
The oldest data in the Call Center database defines the start point of the download, and the date of ‘today’ defines
the end point of the download. The download requests data from Call Center for each day in the download period.
The Percentage Completed line indicates how far the download period is in terms of time, not in terms of calls.
For example, if the Percentage Completed figure is 50% and the Calls Extracted from Received Data is 125, this
does not mean the download will be complete when the Calls Extracted from Received Data reaches 250. It means
that the download has processed 50% of the download period extracted 125 calls so far.
Total Call Center Calls in the Database indicates the total amount of calls stored in the Web Host PC database,
which includes the Calls Extracted from Received Data figure.
A message appears when the download is complete.
8
Note:
The time taken to download the historical data from the Call Center and to store it in the
Web Host PC database depends on the amount of time Call Center has recorded historical
data prior to being connected to the Web Host PC, and the amount of call traffic that your
Call Center handles.
As a rough guide, 30,000 calls will take between 6 and 18 hours, depending on the level of
network traffic and the speed of your Web Host PC.
You can use your PC as normal during this period, but do not reset it or power it
off.
Note:
If you change the browser webpage to something other than the Call Center Connection
page, or if you close the browser, the download complete message does not appear.
When the data download is finished, the status is shown in the Download Status Window.
If the browser page times out by the time the download finishes, this is not an error.
Microsoft Internet Information Services has a setting for how long it waits before closing a
web page. The download finishes, and the status is shown in the Download Status Window,
but a message does not appear in the browser.
Page 23, Call Center Connection Security Setting Changes
When you change the Connection Security setting on the Call Center Connection page, a message appears that tells
you to reboot your Web Host PC for the settings to take effect. You must close and restart the web host PC for the
connection security changes to take effect.
Accessing Networked Printers From the Web Host PC
For the Web Host PC to contact and use network printers, you must have a user logged onto Windows on the Web
Host PC.
This means that if you wish to run Scheduled Prints out of hours, you must have a user logged onto the Web Host
PC.
Multiple Network Cards in the Web Host PC or an Agent PC
It is recommended that the Web Host PC or Client PCs that are going to be running the ipView SoftBoard have
only one network adapter card installed.
Currently there is no way to select which network card the Web Host PC Wallboard Driver binds to. If the
wallboard driver binds to the wrong network card it will not be able to drive your wallboards and/or ipView
SoftBoards.
The workaround is to restart the Web Host PC until the wallboard driver binds to the correct network card, and then
do not power off your Web Host PC.
Currently there is no way to select which network card the ipView SoftBoard binds to. If the ipView SoftBoard
binds to the wrong network card it will not be able to receive data from the Web Host PC. The workaround is to
close down and re-start ipView until it binds to the desired network card.
Note:
If you right-click the ipView icon in the system tray, and select About ipView, the About
window shows you the IP Address that ipView has bound to, as shown below.
9
ipView Help Window (Danish ipView)
ipView SoftBoard and Wallboard Summaries
Note that the Wallboard Summaries are sent to the wallboards on the hour, according to the time of the Web Host
PC clock. The regular hourly and daily statistics that are sent to the wallboard are governed by the Business
Communications Manager clock. The hourly statistics are reset to 0 on the hour, according to the clock in Business
Communications Manager.
If the clock in the Web Host PC is set to a different time than the clock in Business Communications Manager, the
hourly Summaries are not synchronized with the hourly reset of the regular statistics. To ensure that the wallboard
summaries are in time with the hourly resets of the regular wallboard statistics, ensure that your PC and Business
Communications Manager times are the same.
Crystal Reports ActiveX Report Viewer
The first time you view reports on a client PC (a PC other than the Web Host Viewer), an ActiveX viewer is
installed on the Client PC from the Web Host PC.
If this does not automatically happen, you cannot view reports. The Report Viewer window has a red X in the top
left corner. If you see this you can start the installation process manually. On the Web Host PC in \Program
Files\Common Files\Crystal Decisions\2.0\crystalreportviewers\ActiveXViewer\en locate the npviewer.exe file.
Copy this file to the Client PC and execute it. This installs the ActiveX viewer.
Real Time Screens on Client PCs
The first time you view Real Time screens on a client PC (a PC other than the Web Host Viewer), a Java Run Time
Module is installed on the Client PC from the Web Host PC.
If this does not automatically happen, you are not able to view the Real Time screens.
If you cannot view the Real Time screens, you can start the installation process manually. On the Web Host PC in
C:\Program Files\Nortel Networks\Reporting for Call Center\Javadist locate the a file called j2re-1_4_2_03windows-i586-p.exe. Copy this file to the Client PC and execute it there. This installs the Java Run Time Module.
10
Page 117, Reports
Changing Agent Names
If an agent changes their name, for example if they marry, or they leave and their Call Center Log In ID is allocated
to another person, this affects the way Reporting for Call Center displays the agent’s information in reports.
Reports distinguish between the two identities associated with the single Call Center Log In ID as follows:
•
The Agent Activity Report lists each agent separately.
•
The Agent Audit Report shows the Call Center Log In ID to be the same person, and shows all activity that the
agent with that ID has performed, irrespective of the agent name in the User Admin screens, so that reporting
for the first agent name shows the same information as a report for the second agent name.
•
The Agent Average Report references the first agent name only.
If both Agent names refer to the same person (for example, it is the same person but they have taken a new surname
because they have married), these differences do not matter. However, if the name change is because of a change of
personnel, it is easier to isolate the activities of the two agents in the reports if you give the new agent a distinct
Call Center Log In ID, and do not use the old Log In ID.
Page 214, Slow Updates on Real Time Screen
The description of the Host file usage contains an error. It is the IP Address and the Network Name of the Business
Communications Manager which must be entered into the Host file, not the details of the Web Host PC.
The section should read:
Web Host PC Requires a Host File entry
Check with your Network Administrator to add an entry in the Web Host PC Host file. This is a Windows system
file and is usually located in the \Windows\System32\drivers\etc folder of the Web Host PC (this may be called the
\Winnt\System32\drivers\etc folder).
You must enter the IP Address and the network name (machine name) of the Business Communications Manager
to this file. Separate the two items by using the Tab key.
An example Host file is shown below.
#
#
#
#
#
#
#
#
#
#
#
#
#
#
#
#
#
Copyright (c) 1993-1999 Microsoft Corp.
This is a sample HOSTS file used by Microsoft TCP/IP for Windows.
This file contains the mappings of IP addresses to host names. Each
entry should be kept on an individual line. The IP address should
be placed in the first column followed by the corresponding host name.
The IP address and the host name should be separated by at least one
space.
Additionally, comments (such as these) may be inserted on individual
lines or following the machine name denoted by a '#' symbol.
For example:
102.54.94.97
38.25.63.10
127.0.0.1
10.1.1.105
rhino.acme.com
x.acme.com
Localhost
BCMMachineName
# source server
# x client host
11
Antivirus software causes Real Time Screens to update slowly
Some antivirus software can cause the Real Time screens to slow down. This is evident if the refresh rate is not
within 3 or 4 seconds.
If you have made an entry in the Hosts file as shown above, the most likely cause is your antivirus software. This is
usually a problem only if the Diagnostic Logging option is turned on in the Reporting for Call Center Application
(see page 34 of the Reporting for Call Center Set Up and Operations Guide).
To solve this issue either deactivate logging in Reporting for Call Center, or modify your antivirus software
settings.
Antivirus software packages vary in the settings that you can adjust. Usually the settings you can adjust that make
the Real Time Screens appear slow in updating are the realtime file scanning settings. Realtime in this context
means that the antivirus software constantly scans the files on your computer.
•
If your antivirus software lets you specify file extensions to ignore during virus scans, set it to ignore files with
.log extensions.
•
If your antivirus software lets you specify locations on your hard disk to ignore during virus scans, set it to
ignore the location of the Reporting for Call Center log files. By default this is \Program Files\Nortel
Networks\Reporting for Call Center\Logs.
•
Check whether your antivirus software lets you disable or isolate which type of files are scanned in realtime,
and what file modifications cause a re-scan, for example, creating, modifying or writing to a file.
Call Center Real Time Screen shows incorrect status of agents
If you have all of your clients going through a proxy server for web traffic, you must configure Reporting for Call
Center clients to go through a web proxy when accessing the Call Center Reporting web host. If there are delays,
inaccurate realtime results can occur.
To configure clients to go through a web proxy:
1
Open Internet Explorer
2
On the Tools menu select Internet Options.
3
Click the Connections tab.
4
Click the LAN Settings button.
5
Select the Use a proxy server is for your LAN check box and enter the information in the Address and Port
boxes.
6
Select the Bypass proxy server for local addresses check box.
7
Click the OK button.
12
Virtual folders are not created in Internet Information Services
Reporting for Call Center uses virtual folders that are created when you install Reporting for Call Center on the
Web Host PC.
If the virtual folders are removed, altered, or not created during installation, a Page Not Found error appears.
If you receive a Page Not Found error:
1
Click the Windows Start button, click Run and in the Open box type the pathway to the file called Create.bat
in the RunOnce folder. The RunOnce folder is in the Reporting for Call Center folder. If you installed
Reporting for Call Center in the default location the path to this file is \Program Files\Nortel
Networks\Reporting for Call Center\RunOnce\Create.bat on the drive on where you installed Reporting for
Call Center.
2
Double-click the Create.bat file it to launch it.
A Command Prompt DOS) window appears briefly.
3
Try accessing the http://localhost/rcc/main/login.asp page again.
Supported Windows Operating Systems
Reporting for Call Center has been tested for compatibility and correct operation on these Windows Operating
Systems:
•
Windows NT 4.00.1381
•
Windows 2000 5.00.2195
•
Windows XP Professional Version 2002
These are the ONLY supported operating systems.
Note:
Windows 2003 Server is undergoing compatibility testing but it is not currently supported.
1-800-4 NORTEL
www.nortelnetworks.com
April 26 2004 P0609618 Issue 01
Printed in Canada