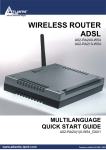
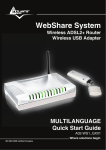
Download Atlantis Land A02-WRA2-11B User's Manual
Transcript
MULTILANGUAGE QUICK START GUIDE ITALIANO 1.1 Contenuto della confezione..................................... 5 1.2 I LED frontali.......................................................... 5 1.3 Le porte posteriori................................................... 6 1.4 Cablaggio ................................................................ 7 1.5 Settaggi di Default .................................................. 8 1.6 Configurazione di IE............................................... 8 1.7 Configurazione del PC ............................................ 8 1.8 Configurazione Router.......................................... 20 ENGLISH 1.1 Package contents ................................................... 28 1.2 The Front Panel LEDs........................................... 29 1.3 The Rear Ports....................................................... 30 1.4 Cabling .................................................................. 31 1.5 Default Settings..................................................... 31 1.6 IE Configuration ................................................... 32 1.7 TCP/IP Configuration ........................................... 33 1.8 Browser configuration........................................... 46 FRANCAIS 1.1 Contenu de la boîte ............................................... 54 1.2 Face avant ............................................................. 55 1.3 Face arrière............................................................ 56 1.4 Câblage.................................................................. 57 1.5 Configuration initiale ............................................ 57 1.6 Configuration du TCP/IP ...................................... 58 1.7 Vérification ........................................................... 71 1.8 Configuration avec le Browser ............................. 72 2 MULTILANGUAGE QUICK START GUIDE DEUTSCH 1.1 Inhalt der Verpackung........................................... 79 1.2 Die frontalen LED................................................. 79 1.3 Die Hinterturen ..................................................... 80 1.4 Verdrahtung .......................................................... 81 1.5 Einstellung des Default ......................................... 81 1.6 Die IE Konfiguration ............................................ 82 1.7 Konfiguration des PC............................................ 82 1.8 Konfiguration des Router...................................... 96 WARRANTY FAST SWAP WARRANTY CERTIFICATE .......... 104 DEMAND OF ASSISTANCE FORM ..................... 108 GARANZIA CERTIFICATO DI GARANZIA FAST SWAP....... 110 MODULO RICHIESTA ASSISTENZA .................. 114 GARANTIE CERTIFICAT DE GARANTIE FAST SWAP......... 116 FICHE DE DEMANDE D’ASSISTANCE .............. 120 A02-WRA2-11B_GX01(V1.01 March 2004) 3 MULTILANGUAGE QUICK START GUIDE 4 ITALIANO Questo manuale è inteso come una guida rapida, pertanto per ulteriori dettagli sulla configurazione fare riferimento al manuale esteso presente sul CD. 1.1 Contenuto della confezione Atlantis Land I-Fly Wireless Lan Router ADSL, CD-ROM contenente il manuale, Guida di Quick Start, cavo RJ-11 ADSL, cavo CAT-5 LAN , Cavo RS232-PS2 , Alimentatore (12V, 1A). 1.2 I LED frontali LED Informazione POWER Acceso verde quando connesso alla rete elettrica SYS Lampeggia verde in fase di caricamento del Firmware, diventa fisso quando il sistema è avviato. WLAN Lampeggiante verde LAN 1-4 Acceso quando connesso ad un dispositivo Ethernet Lampeggiante quando vi è trasmissione/ricezione ADSL Acceso quando connesso in modalità ADSL DSLAM. Lampeggiante durante la fase di allineamento. PPP Acceso quando una connessione PPPoE / PPPoA è attiva. Lampeggiante quando tenta di costruire una connessione PPP. Spento se si utilizza un protocollo diverso (RFC 1483 o 1577) Lampeggiante quando c’è una mail nall’account configurato. 5 ITALIANO 1.3 Le porte posteriori Porte LINE(RJ11) PS2 Utilizzo Connettere il cavo RJ-11 a questa porta per effettuare l’allacciamento all’ADSL. Connettere il cavo RS232 fornito alla porta seriale (9 pin) del PC. Tale connessione è opzionale. LAN (4 connettori RJ-45) RESET Connettere con un cavo UTP Dopo che il dispositivo è acceso, premere per effettuare il reset o il restore. Le operazioni sono le seguenti: 0-3 secondi: per resettare il dispositivo 3-6 secondi: nessuna azione 6 secondi o più: effettua un ritorno alle condizioni di default (utilizzare, per esempio, qin caso si perdesse la password) POWER (jack) Connettere l’alimentatore a questo jack POWER Switch Premere per accendere/spegnere il Router 6 ITALIANO 1.4 Cablaggio Anzitutto collegare il prodotto alla linea ADSL tramite il cavo RJ11 fornito in dotazione (nella porta LINE), poi collegare alle porte RJ45 i PC della Lan oppure eventuali Switch. E’ possibile accedere al Router tramite i diversi client wireless compatibili con lo standard IEEE802.11b. Infine collegare l’alimentatore al Router Wireless e poi presa elettrica. Una volta controllati tutti i collegamenti ed acceso l’I-Fly Wireless Lan Router ADSL il prodotto effettuerà immediatamente una diagnostica (circa 20 secondi). Terminata questa fase i Led POWER, SYS (eventualmente anche i Led LAN, se connessi a PC) saranno accesi verdi fissi, mentre il led WALN lampeggerà. Il Led ADSL, se opportunamente collegato, inizialmente lampeggerà, durante la fase di allineamento e poi diventerà fisso, una volta allineatosi (condizione indispensabile per la navigazione Internet). Poiché l’ADSL ed il normale servizio telefonico si dividono (spesso) lo stesso filo per trasportare i rispettivi segnali è necessario, al fine di evitare interferenze dannose, dividere tramite un apposito filtro i 2 segnali. Tale filtro passa basso permetterà di estrarre la porzione di spettro utilizzata dal servizio telefonico impedendo così che la qualità di questo sia compromessa dalle alte frequenze introdotte dal segnale dell’ADSL. E’ necessario pertanto utilizzare un filtro per ogni presa su cui è collegato un telefono analogico. Esistono opportuni filtri che dispongono di 2 uscite (una PSTN ed una ADSL) e consentono di utilizzare sulla stessa presa sia un telefono analogico che il Router ADSL. Tale filtro non è incluso nella confezione e va acquistato separatamente. Atlantis Land raccomanda di utilizzare apparati certificati per il tipo di linee e consiglia la scelta del codice A01-AF1 (filtro ADSL tripolare con omologazione Telecom Italia). 7 ITALIANO 1.5 Settaggi di Default Prima di iniziare la configurazione dell’Atlantis I-Fly Wireless Lan Router ADSL è necessario conoscere quali siano i settaggi di default. Lasciando questi settaggi e impostando i PC come client DHCP (come da istruzioni seguenti) ed infine configurando la connessione all’ISP (che avrà comunicato tutti i parametri del caso) sarà possibile utilizzare l’Atlantis I-Fly Wireless Lan Router ADSL in pochissimo tempo. Per una configurazione più dettagliata fare riferimento al manuale presente sul CD. Le configurazioni di Default dell’Atlantis I-Fly Wireless Lan Router ADSL sono: • • • • • Password:admin Username: atlantis Indirizzo IP: (192.168.1.254), Subnet Mask (255.255.255.0) DHCP Server abilitato SSSID= wlan-ap, Channel=6, WEP=disabilitato 1.6 Configurazione di IE A questo punto è necessario lanciare IE, andare nel menù strumenti, poi scegliere la sezione Connessioni e spuntare una delle seguenti voci: • non utilizzare mai connessioni remote • usa connessione remota se non è disponibile una connessione di rete 1.7 Configurazione del PC Configurazione del PC in Windows 95/98/ME 1. Andare in Start/Settings/Control Panel. Cliccare 2 volte su Network e scegliere Configuration. 8 ITALIANO 2. Selezionare TCP/IP->NE2000 Compatible, o qualsiasi Network Interface Card (NIC) del PC. 3. Cliccare su Properties. 4. Selezionare l’opzione Obtain an IP address automatically (dopo aver scelto IP Address). 5. Andare su DNS Configuration. 6. Selezionare l’opzione Disable DNS e premere su OK per terminare la configurazione. 9 ITALIANO Riavviare il PC affinché i cambiamenti abbiano effetto. 10 ITALIANO Configurazione del PC in Windows NT4.0 1. Andare su Start/Settings/ Control Panel. Cliccare per due volte su Network e poi cliccare su Protocols . 2. Selezionare TCP/IP Protocol e poi cliccare su Properties. 3. Selezionare l’opzione Obtain an IP address from a DHCP server e premere OK. 11 ITALIANO 12 ITALIANO Configurazione del PC in Windows 2000 1. Andare su Start/Settings/Control Panel. Cliccare due volte su Network and Dial-up Connections. 2. Cliccare due volte su Local Area Connection. 3. In Local Area Connection Status cliccare Properties. 13 ITALIANO 4. Selezionare Internet Protocol (TCP/IP) e cliccare su Properties. 5. Selezionare l’opzione Obtain an IP address automatically e successivamente Obtain DNS server address automatically. 6. Premere su OK per terminare la configurazione. 14 ITALIANO 15 ITALIANO Configurazione del PC in Windows XP 1. Andare su Start e poi Control Panel. Cliccare due volte su Network (in Classic View) Connections. 2. Cliccare due volte su Local Area Connection. 3. In Local Area Connection Status cliccare Properties. 16 ITALIANO 4. Selezionare Internet Protocol (TCP/IP) e cliccare su Properties. 17 ITALIANO 5. Selezionare l’opzione Obtain an IP address automatically e successivamente Obtain DNS server address automatically. 6. Premere su OK per terminare la configurazione. 18 ITALIANO 19 ITALIANO 1.8 Configurazione Router Accedere col browser web al seguente indirizzo IP che di default è: 192.168.1.254, e premere il tasto invio. Utilizzare admin (come nome utente) e atlantis (come password). Premere OK per continuare. Apparirà a questo punto, come da figura, il Main Menu: 20 ITALIANO cliccare sulla voce Wizard Setup, nella parte sinistra in alto per accedere alla configurazione assistita (Wizard Setup). PPPoE(RFC 2516)/ PPPoA (RFC 2364) PPPoE (PPP over Ethernet) è una connessione ADSL conosciuta come dial-up DSL. Al pari del PPPoA e’ stata concepita per integrare servizi a banda larga con un’attenzione particolare alla facilità di configurazione. L’utente può beneficiare di una grande velocità di accesso senza cambiare l’idea di funzionamento e condividere lo stesso account con l’ISP. Non è richiesto alcun software aggiuntivo. Questa configurazione è valida nel caso di abbonamento con 1 IP pubblico (statico) e dunque NAT (SUA) attivo (per la gestione della classe pubblica fare riferimento al manuale contenuto sul CD). Vediamo come configurare correttamente questo tipo di configurazione ADSL. Verificare che i parametri siano, nel caso di PPPoA, quelli in figura, ove non specificatamente indicato dall’ISP. Nel caso di PPPoE scegliere Encapsulation=PPPoE e Multiplex=LLC. 21 ITALIANO Cliccare su Next. Inserire Username e Password. Selezionare Obtain an IP Address Automatically o, nel caso l’abbonamento preveda un IP fisso, spuntare Static IP Address e digitare l’IP. Selezionare poi la modalità di connessione: • Connect on Demand ed il relativo Max Idle Timout (nel caso di abbonamenti a consumo) • Nailed-Up Connection (il Router è sempre connesso con l’ISP) In Network Address Translation scegliere la voce SUA Only. 22 ITALIANO Cliccare poi su Next. Nella schermata successiva verranno mostrati tutti i settagli relativi alla configurazione WAN e LAN. Cliccare su Save Settings, poi su Return Main Menu ed infine su Logout. 23 ITALIANO RFC1483/RFC1577 Questa configurazione è valida nel caso di abbonamento con 1 IP statico e dunque SUA(NAT) attivo (per la gestione della classe pubblica fare riferimento al manuale contenuto sul CD). Verificare che i parametri siano, nel caso di RFC1483, quelli in figura, ove non specificatamente indicato dall’ISP. Nel caso di RFC1577(IpoA) scegliere Encapsulation=ENET ENCAP e Multiplex=LLC. Cliccare su Next. Introdurre poi l’ indirizzo IP pubblico statico assegnato dall’ISP (nel caso di RFC 1577, introdurre anche la subnet mask ed il default gateway). In Network Address Translation scegliere la voce SUA Only. 24 ITALIANO Nella schermata successiva verranno mostrati tutti i settagli relativi alla configurazione WAN e LAN. Cliccare su Save Settings, poi su Return Main Menu ed infine su Logout. L’I-Fly Wireless Lan Router ADSL si connetterà ad Internet ed immediatamente dai vari PC (anche quelli dotati di adattatori wireless) è possibile navigare. Ogni PC avrà già ricevuto (essendo client DHCP) l’indirizzo IP, la Subnet Mask, il Default Gateway e gli indirizzi IP dei DNS. Con tali parametri i pacchetti indirizzati nella Lan saranno inviati al client opportuno, tutti gli altri saranno inviati al default Gateway, cioè l’Atlantis I-Fly Wireless Lan Router ADSL, che provvederà ad inviarli in Internet. 25 ITALIANO 26 ENGLISH For more detailed instructions on configuring and using the I-Fly Wireless Router ADSL, please refer to the online manual. Before beginning the configuration of the Router you have to know the parameters of your subscription ADSL. There are five ways ─ PPPoE, PPPoA, RFC1483 routed, IPoA, RFC1483 Bridge─ for the device to have a public IP address and then to access Internet. You have to check with your ISP about which way is adopted. VPI/VCI: Consult the telephone company to get the Virtual Path Identifier (VPI) and Virtual Channel Identifier (VCI) numbers. The valid range for the VPI is 0 to 255 and for the VCI is 32 to 65535. The default value VPI is 0 and VCI is 32. For BT (VPI=0, VCI=38) and for KC (VPI=1, VCI=50). NAT: The NAT feature allows multiple-user Internet access for the cost of a single IP account. If you need to have a public server or a public network, NAT has to be disabled. Encapsulation Method: Be sure to use the encapsulation method (LLC/SNAP or VC MUX) required by your ISP. Gather the information as illustrated in the following table and keep it for reference. PPPoE VPI and VCI VC-based / LLC-based multiplexing Username and Password Service Name PPPoA VPI and VCI VC-based / LLC-based multiplexing Username and Password 27 ENGLISH RFC1483 Bridged VPI/VCI RFC1483 Routed VPI/VCI VC-based / LLC-based multiplexing VC-based / LLC-based multiplexing IP address Subnet mask Default Gateway (IP address) IP address (DNS) IPoA VPI/VCI IP address Subnet mask Default Gateway (IP address) IP address (DNS) 1.1 Package contents Atlantis Land I-Fly Wireless Lan Router ADSL, CD-ROM with manual, Quick Start Guide, cable RJ-11 ADSL, cable CAT-5 LAN, RS232-PS2 cable, Power Adapter AC-DC (12V, 1A). 28 ENGLISH 1.2 The Front Panel LEDs LED POWER Meaning Lit green when power ON Lit green means that the apparatus has done correctly SYS the charging of the firmware and so it is ready. In case of problems is turned off. WLAN Flashing in green means data transfer. Lit green means the correct functioning of the wireless module. Lit when connected to Ethernet device LAN Blinking when data transmit/received ADSL Lit when successfully connected to an ADSL DSLAM PPP Lit when there is a PPPoA/PPPoE connection 29 ENGLISH 1.3 The Rear Ports Port 1 LINE (RJ11) 2 PS2 3 LAN (4 * RJ-45) Meaning Connect the supplied RJ-11 cable to this port when connecting to the ADSL/telephone network. Connect a RS-232 cable to this port when connecting to a PC’s RS-232 port (9-pin serial port). Connect an UTP Ethernet cable to one of the four LAN ports when connecting to a PC or an office/home network of 10Mbps or 100Mbps. 4 RESET After the device has turned on, press it to reset the device or restore to factory default settings. The operation is as below: 0-3 seconds: reset the device 3-6 seconds: no action 6 seconds or above: seconds or above: restore to factory default settings (this is used when you can not login to the router, e.g. forgot the password) 5 POWER (jack) Connect the supplied power adapter to this jack. 30 ENGLISH jack. 6 POWER Switch A Power ON/OFF switch 1.4 Cabling First you must connect the product to the ADSL line through the RJ11 cable you have in equipment (in the port LINE), then connect to the RJ45 ports the PCs of your Lan or others Switch. You can get to the Router through the different client wireless compatible with the IEEE802.11b standard. In the end connect the feeder to the Router Wireless and then to the socket. Once you’ve checked all the connections and you’ve turned on the I-Fly Wireless Lan Router ADSL the product will carry on immediately a diagnosis (20 seconds). Finished this the Led POWER, SYS and WLAN (eventually even the Led LAN, if connected to PCs) will be fixed green . The Led ADSL, if suitably connected, at first will be flashing , during the ranging process and then it will remain fixed, once it got ranged (necessary condition for using the Internet). 1.5 Default Settings I-Fly Wireless ADSL Router can be configured with your Web browser. The web browser is included as a standard application in following operation systems, UNIX, Linux, Mac OS, Windows 95/98/NT/2000/Me, etc. The product provides a very easy and user-friendly interface for configuration. Before Configuration This section describes the configuration required by LAN-attached PCs that communicate with the I-Fly Wireless ADSL Router , either to configure the device, or for network access. These PCs must have an Ethernet interface installed properly, be connected to the I-Fly Wireless ADSL Router either directly or through an 31 ENGLISH external repeater hub, and have TCP/IP installed and configured to obtain an IP address through a DHCP server or a fixed IP address that must be in the same subnet of the I-Fly Wireless ADSL Router. The default IP address of the I-Fly Wireless ADSL Router is 192.168.1.254 and subnet mask is 255.255.255.0. The best and easy way is to configure the PC to get an IP address from the I-Fly Wireless ADSL Router. Please follow the steps below for PC’s network environment installation. First of all, please check your PC’s network components. The TCP/IP protocol stack and Ethernet network adapter must be installed. If not, please refer to MS Windows relative manuals. Before you configure this I-Fly Wireless ADSL Router, you need to know the following default settings: • Password:admin • Userneme:atlantis • IP address (192.168.1.254), Subnet Mask (255.255.255.0) • DHCP Server enable • SSSID= wlan-ap, Channel=6, WEP=disable 1.6 IE Configuration Now open IE, go to Instruments menu, select the Connections tab and select one of the following options: • Never use remote connection • Use remote connection if another network connection isn’t available 32 ENGLISH 1.7 TCP/IP Configuration Configuring PC (Windows 95/98/ME) 1. Go to Start / Settings / Control Panel. In the Control Panel, double-click on Network and choose the Configuration tab. 2. Select TCP / IP -> NE2000 Compatible, or the name of any Network Interface Card (NIC) in your PC. 3. Click Properties. 4. Select the IP Address tab. In this page, click the Obtain an IP address automatically radio button. 33 ENGLISH 5. Then select the DNS Configuration tab. 6. Select the Disable DNS radio button and click “OK” to finish the configuration. 34 ENGLISH 35 ENGLISH Configuring PC (Windows NT4.0) 1. Go to Start / Settings / Control Panel. In the Control Panel, double-click on Network and choose the Protocols tab. 2. Select TCP/IP Protocol and click Properties. 3. Select the Obtain an IP address from a DHCP server radio button and click OK. 36 ENGLISH 37 ENGLISH Configuring PC (Windows 2000) 1. Go to Start / Settings / Control Panel. In the Control Panel, double-click on Network and Dial-up Connections. 2. Double-click LAN Area Connection. 3. In the LAN Area Connection Status window, click Properties. 38 ENGLISH 4. Select Internet Protocol (TCP/IP) and click Properties. 39 ENGLISH 5. Select the Obtain an IP address automatically and the Obtain DNS server address automatically radio buttons. 40 ENGLISH 6. Click OK to finish the configuration. 41 ENGLISH Configuring PC (WindowsXP) 1. Go to Start / Control Panel (in Classic View). In the Control Panel, double-click on Network Connections. 2. Double-click Local Area Connection. 3. In the LAN Area Connection Status window, click Properties. 42 ENGLISH 4. Select Internet Protocol (TCP/IP) and click Properties. 43 ENGLISH 5. Select the Obtain an IP address automatically and the Obtain DNS server address automatically radio buttons. 44 ENGLISH 6. Click OK to finish the configuration 45 ENGLISH 1.8 Browser configuration Open the web browser, enter the local port IP address of this I-Fly Wireless Lan Router ADSL, which default at 192.168.1.254, and click “Go” to get the login page. The default username is admin, password atlantis and click “OK” to continue. Now you will see ,as shown below ,the Main Menu: Click twice on Wizard Setup, up on the left to have access to the guided configuration (Wizard Setup). 46 ENGLISH PPPoE(RFC 2516)/ PPPoA (RFC 2364) PPPoE (PPP over Ethernet) is an ADSL connection known as dial-up DSL. As the PPPoA it has been created to integrate large band services paying a particular attention to an easy configuration. The user can obtain an high access speed and he can also share the same account with the ISP. No additional software are required. This configuration is valid in case of a subscription with a static IP and active NAT (SUA) (for the managing of the public class turn to the CD handbook). Let’s see how to configure correctly this kind of ADSL configuration. Make sure that the parameters are, in case of PPPoA, the ones in the picture, if not specifically shown by the ISP. In case of PPPoE choose Encapsulation=PPPoE and Multiplex=LLC. 47 ENGLISH Click on Next. Insert Username and Password. Select Obtain an IP Address Automatically or, in case the subscription has a fixed IP , choose Static IP Address and digit the IP. Select then connection modality: • Connect on Demand and its Max Idle Timeout (in case of consume subscriptions) • Nailed-Up Connection (the Router is always connected to the ISP) In Network Address Translation choose the voice SUA Only. 48 ENGLISH Click then on Next. In the next screen there will be shown all the settings related to the WAN and LAN configuration. Click on Save Settings, then on Return Main Menu and in the end on Logout. 49 ENGLISH RFC1483/RFC1577 This configuration is valid in case of a subscription with a static IP and active NAT (SUA) (for the managing of the public class turn to the CD handbook). Make sure that the parameters are, in case of RFC1483, the ones in the picture, if not specifically shown by the ISP. In case of RFC1577(IpoA) choose Encapsulation=ENET ENCAP and Multiplex=LLC. Click on Next. Insert then the public static IP Adrdress given by the ISP (in case of RFC 1577, insert also the subnet mask and the default gateway). In Network Address Translation choose the voice SUA Only. 50 ENGLISH In the next screen there will be shown all the settings related to the WAN and LAN configuration. Click on Save Settings, then on Return Main Menu and after on Logout. The I-Fly Wireless Lan Router ADSL will connect to the Internet and it is possible to navigate immediately from all the PCs(also from the ones endowed with wireless suiters). Every PC will have received (being client DHCP) the IP address, the Subnet Mask, the Default Gateway and the DNS IP addresses. With these parameters the packages sent to the Lan will be sent to the right client , all the others will be sent to the default Gateway, i.e. Atlantis I-Fly Wireless Lan Router ADSL, that will send them to the Internet. To this point approaching the section Status you will be able to check if connection is up, now you can begin navigation. For every other problem refer to manual on attached cd-rom). 51 ENGLISH 52 FRANÇAIS Ce guide d’installation rapide vous permet d’installer et de configurer l’I-Fly Wireless Lan Router ADSL suivant des paramètres standards. Pour plus de précisions, tant sur les méthodes de configuration que sur le paramétrage avancé, reportez-vous au manuel sous format électronique (PDF) disponible sur le CD Rom fourni. Avant d’installer votre I-Fly Wireless Lan Router ADSL, vous devez savoir de quel type d'accès vous disposez et vous munir d'informations précises concernant votre compte internet. Si votre fournisseur d'accès Internet (FAI) demande un Login et un Mot de Passe (c’est parce que vous avez un compte PPPoE ou PPPoA, par exemple), utilisez le protocole PPPoA(RFC2364) ou PPPoE(RFC2516). Si vous avez un adresse IP fixe utilisez le protocole RFC 1483 Routed ou RFC1577. Le FAI, dans ce cas, doit vous fournir aussi: Une Adresse IP Internet, Masque de sousréseau, Adresse IP du Default Gateway et Adresses IP du serveur DNS. Le tableau suivant récapitule les informations dont vous aurez besoin en fonction du protocole: PPPoE VPI et VCI VC-based ou LLC-based multiplexing Nom utilisateur (Username) et Mot de passe (Password) Nom du Service (Service Name) PPPoA VPI et VCI VC-based ou LLC-based multiplexing Nom utilisateur (Username) et Mot de passe (Password) 53 FRANÇAIS RFC1483 Bridged VPI/VCI RFC1483 Routed VPI/VCI VC-based ou LLC-based multiplexing VC-based ou LLC-based multiplexing Adresse IP Masque de sous-réseau Adresse IP du Default Gateway Adresses IP des serveurs DNS IPoA VPI/VCI VC-based ou LLC-based multiplexing Adresse IP Masque de sous-réseau Adresse IP du Default Gateway Adresses IP des serveur DNS 1.1 Contenu de la boîte Avant l’installation, assurez-vous de disposer des éléments suivants : I-Fly Wireless Lan Router ADSL , câble réseau (CAT5), câble console RS232-PS2, câble RJ11, adaptateur secteur (12V, 1A), CD-Rom avec manuels, guide à l'installation. 54 FRANÇAIS 1.2 Face avant LED POWER SYS WLAN LAN Signification Allumé quand l’I-Fly Wireless Router est sous tension Allumé vert fixé lorsque le dispositif a terminé correctement le chargement du firmware et il est donc près. Eteint en cas de problèmes. Clignotant vert pour indiquer transmission des données. Allumé vert fixé il indique le correct fonctionnement de module wireless. Allumé quand le LAN (réseau) est connecté Vert= connexion à 100Mbps Orange= connexion à 10Mbps Clignote lors des transferts de données ADSL Si allumé fixe vert il indique une connexion correcte, s'il clignote il est en train de se connecter. PPP Allumé fixe quand il y a une connexion PPPoE / PPPoA. Il clignote quand il est en train de opérer une connexion PPP. Éteinte si on utilise un protocole différent, (RFC 1483 ou 1577) . 55 FRANÇAIS 1.3 Face arrière Port LINE(RJ11) PS2 LAN (4 * RJ-45) RESET (remise à zéro) Usage Connectez le câble (fourni) RJ11 au filtre ADSL (optionnel) et enfin à la prise téléphonique Connectez le câble RS 232 à ce port Relier directement avec un câble Ethernet standard ou croisé aux PC ou à un port uplink (Hub/Switch). Dispositif allumé, presser pour effectuer le reset ou le restore. Les opérations sont: 0-3 secondes: reset (remise à zéro) 3-6 secondes: rien 6 secondes ou plus: il effectue un retour aux conditions initiales ( utiliser, par exemple, quand vous ne vous rappelez plus du mot de passe) POWER (jack) Connectez l’alimentation fournie à cette prise POWER SWITCH Presser pour allumer / éteindre le Router (Interupteur) 56 FRANÇAIS 1.4 Câblage Après avoir terminé le câblage, raccordez l’alimentation pour mettre l’I-Fly Wireless Lan Router ADSL sous tension. Assurezvous que les LEDs sont correctement allumés. Connectez un câble réseau standard ou croisé pour relier le Router à un Hub/Switch ou aux PC. L’interface Wireless intégrée permet aux utilisateurs dotés d’interfaces wireless d’aller sur Internet en utilisant le protocole IEEE802.11b. Une fois toutes les liaisons effectuées et l’I-Fly Wireless Lan Router ADSL allumé, le produit effectuera un diagnostique (d'une dizaine de secondes). Quand cette étape sera terminée, la Led SYS commencera à clignoter pour devenir enfin Verte et fixe, ce qui signifie que le produit fonctionne correctement. Enfin, la Led ADSL clignotera en vert pour indiquer la phase d’alignement et deviendra fixe par la suite (condition indispensable pour naviguer sur Internet). 1.5 Configuration initiale Avant de commencer la configuration de l'I-Fly Wireless Lan Router ADSL il est nécessaire de connaître la configuration initiale (paramètres par défaut). Pour pouvoir utiliser l’I-Fly Wireless Lan Router ADSL en peu de temps, il suffit de garder la configuration par défaut, de mettre les PC en client DHCP et de configurer l’accès Internet (avec les données fournies par le FAI). Pour une configuration plus détaillée faire référence au manuel complet sur le CD-Rom. La configuration initiale (paramètres par défaut) est: • User : admin • Password : atlantis • Adresse IP (192.168.1.254), Subnet Mask (Masque de sous réseau)=255.255.255.0 • DHCP (Fonction serveur DHCP) Activée • SSSID= wlan-ap, Channel=6, WEP=non activé 57 FRANÇAIS 1.6 Configuration du TCP/IP Configuration sous Windows 95/98/ME 1. Allez dans Panneau de Configuration. Double-cliquez sur Réseau.et enfin affichez l’onglet Configuration. 2. Sélectionnez le protocole TCP/IP -> NIC carte, ou quelconque carte réseau Ethernet dans le PC. 3. Cliquez sur Propriétés 4. Dans l’onglet Adresse IP Sélectionnez l’option « obtenir automatiquement une adresse IP ». 58 FRANÇAIS 59 FRANÇAIS 5. Sélectionnez l’onglet DNS. 6. Sélectionnez l’option Désactiver DNS et cliquez sur OK pour terminer la configuration. Vous devez redémarrer l’ordinateur pour que les changements prennent effet. 60 FRANÇAIS Configuration sous Windows NT4.0 1. Allez au Panneau de Configuration. Double-cliquez sur Réseau et enfin sélectionnez l’onglet Protocole . 2. Sélectionnez TCP/IP Protocol et après cliquez sur Propriétés. 3. Sélectionnez (votre carte Réseau) l’onglet Obtenir une adresse IP par un serveur DHCP et après cliquez sur OK pour terminer la configuration. 61 FRANÇAIS 62 FRANÇAIS Configuration sous Windows 2000 1. Allez au Panneau de Configuration. Double-cliquez sur Connexions Réseau et accès à distance.. 2. Double-cliquez sur connexion au réseau local. 63 FRANÇAIS 3. Dans Connexion au réseau local cliquez sur Propriétés. 64 FRANÇAIS 4. Sélectionnez Internet Protocol (TCP/IP) et cliquez sur Propriétés. 65 FRANÇAIS 5. Sous l’onglet Général, sélectionnez l’onglet Obtenir une adresse IP automatiquement et après Obtenir les adresses des serveurs DNS automatiquement 6. Cliquez sur OK pour terminer la configuration 66 FRANÇAIS Configuration sous Windows XP 1. Allez sur Panneau de Configuration. Double-cliquez sur Accès Réseau 2. Double-cliquez sur Connexion au Réseau local. 3. Cliquez Propriétés. 67 FRANÇAIS 68 FRANÇAIS 4. Sélectionnez Internet Protocol (TCP/IP) et cliquez sur Properties. 69 FRANÇAIS 5. Sélectionnez Obtenir une adresse IP automatiquement et après Obtenir les adresses des serveurs DNS automatiquement. 6. Cliquez sur OK pour terminer la configuration. 70 FRANÇAIS 1.7 Vérification Pour vérifier le succès de la configuration (après avoir redémarré le PC, opération nécessaire sous Win98, SE, ME) utiliser le PING. Dans la fenêtre Dos écrivez: PING 192.168.1.254 Si le message suivant apparaît: Pinging 192.168.1.254 with 32 bytes of date: Reply from 192.168.1.254: bytes=32 times <10ms TTL=64 Reply from 192.168.1.254: bytes=32 times <10ms TTL=64 Reply from 192.168.1.254: bytes=32 times <10ms TTL=64 Vous pouvez procéder en allant au point suivant (1.8 Configuration). Si par contre le message suivant apparaît: Pinging 192.168.1.254 with 32 bytes of date: Request timed out. Request timed out. Request timed out. Vérifiez que le Led LAN est bien allumé. Vérifiez l'adresse de votre PC en écrivant WINIPCFG (pour, Win95,98,ME) ou IPCONFIG (pour Win2000, XP) et éventuellement réinstallez le stack TCP/IP. 71 FRANÇAIS 1.8 Configuration avec le Browser Pour accéder à l’interface Web, lancez un navigateur Internet et tapez dans la barre adresse l’IP suivante : http://192.168.1.254 Un mot de passe vous est demandé, pour la première connexion. User = admin Password = atlantis et appuyez sur OK pour aller dans la configuration. Apparaîtra à ce point, comme dans l’image, le Main Menu: 72 FRANÇAIS Cliquez sur la poste Wizard Setup, dans la partie gauchère en haut pour accéder à la configuration (Wizard Setup). En suivant les indications ci-dessous il est possible de rendre opérationnel le I-Fly Wireless Lan Router ADSL en peu de temps à condition d'utiliser les PC du réseau comme client DHCP. Pour une configuration personnalisée du réseau et du Router faire référence au manuel complet dans le CD Rom. Vous trouverez dans le tableau ci-dessous les valeurs possibles de VPI/VCI. Données à configurer Valeurs Virtual Path Identifier 8 8 2 Virtual Circuit Identifier 67 35 32 Framing LLC/VC-Mux Attention si ces valeurs sont erronées le modem ne fonctionnera pas correctement ( une connexion correct peut se vérifier). En cas de doutes demandez confirmation à votre fournisseur d’accès (FAI). 73 FRANÇAIS PPPoE Routed /PPPoA Routed Le protocole PPPoE (Point to Point Protocol over Ethernet) est l’une des méthodes utilisées en France. Il a été conçu (comme le PPPoA) pour compléter le service ADSL avec une attention spéciale pour facilité la configuration. L'utilisateur peut bénéficier d'une grande vitesse d'accès sans changer la façon de fonctionnement et en même temps partager entre tous les utilisateurs de votre entreprise un compte Internet unique (avec le FAI). Ne pas utiliser de logiciels additionnels. En cas de doute demander les paramètres de configuration à votre opérateur (FAI). Vérifiez que les paramètres seraient, dans le cas de PPPoA, ceuxla dans l’image, si rien n’est spécifiquement indiqué par l’ISP. Dans le cas de PPPoE choisissez Encapsulation=PPPoE et Multiplex=LLC. 74 FRANÇAIS Cliquez sur Next. Introduisez Username et Password. Sélectionnez Obtain an IP Address Automatically ou, si l’abonnement prévoit un IP fixé, choisissez Static IP Address et introduisez l’IP. Sélectionnez puis la modalité de connexion: • Connect on Demand et le relatif Max Idle Timout (dans le cas d’abonnement à consommation) • Nailed-Up Connection (le Router est toujours connecté avec l’ISP) En Network Address Translation choisissez SUA Only. Cliquez puis sur Next. 75 FRANÇAIS Dans la prochaine image à vidéo nous pourrons voir la configuration WAN e LAN. Cliquez sur Save Settings, puis sur Return Main Menu et enfin sur Logout. RFC1483 routed / IpoA routed Cette configuration est valide seulement pour abonnements avec un IP statique et donc SUA(NAT) actif (pour la gestion de la classe publique adressez-vous au manuel contenu dans le CD). Vérifiez que les paramètres seraient, dans le cas de RFC1483, ceux dans l’image, si rien n’est spécifiquement indiqué par l’ISP. Dans le cas de RFC1577(IpoA) choisissez Encapsulation=ENET ENCAP et Multiplex=LLC. 76 FRANÇAIS Cliquez sur Next. Introduisez puis l’adresse IP publique statique donné par l’ISP (dans le cas de RFC 1577, introduisez même la subnet mask et le default gateway). En Network Address Translation choisissez SUA Only. Dans la prochaine image à vidéo nous pourrons voir la configuration WAN e LAN. Cliquez sur Save Settings, puis sur Return Main Menu et enfin sur Logout. L’I-Fly Wireless Lan Router ADSL se connectera à Internet et et selon les différents PC vous serez déjà prêts pour la navigation (même ceux doués d’adaptateurs wireless). 77 FRANÇAIS 78 DEUTSCH Das ist ein Handbuch,das wie eine kurze Anleitung ausgedacht wird, deshalb nehmen Sie Bezug auf das vollig Hanbuch, das im CD ist,wenn Sie weitere Einzelheiten uber die Konfiguration brauchen. 1.1 Inhalt der Verpackung Atlantis Land I-Fly Wireless Lan Router ADSL, CD-ROM,der das Handbuch enthalt, Quick Start Anleitung, Kabel RJ-11 ADSL, Kabel CAT-5 LAN , KabelRS232-PS2 , Speiseleitung (12V, 1A). 1.2 Die frontalen LED LED POWER SYS WLAN LAN 1-4 ADSL PPP Information Fest eingeschaltet,wenn es zum Elektrizitatsnetz verbunden ist Es ist eingeschaltet, wenn das System fertig ist Grün blitzende, um die Verlegung der Daten zu zeigen. Fest grün eingeschaltet, um die richtige Arbeiweise des wireless Modul zu zeigen. Es ist eingeschaltet,wenn es zu einer Ethernet Vorrichtung verbunden ist Grun= Verbindung zu 100Mbps Orangengelb= Verbindung zu 10Mbps Es blitzt, wenn es Ubersendung/Empfang gibt Es ist fest eingeschaltet,wenn es in ADSL DSLAM weise verbunden ist. Es blitzt wahrend des Ausrichtenzeit. Es ist fest eingeschaltet, wenn eine PPPoE/PPPoA Verbindung aktiv ist. Es blitzt, wenn es eine PPP Verbindung machen will. Es ist ausgeschaltet,wenn man ein verschiedene Protokoll (RFC 1483 o 1577) benutzt. 79 DEUTSCH 1.3 Die Hinterturen Turen 1 LINE(RJ11) 2 PS2 3 LAN 1-4 4 RESET 5 POWER (jack) Benutzung Verbinden Sie den RJ-11 Kabel zu diesem Tur,um den Anschluss zum ADSL durchzufuhren. Verbinden Sie den gegebenen Kabel RS232 zur (9 pin) Tur des PC. Diese Verbindung ist freigestellt. Verbinden Sie mit einem UTP Kabel. Nachdem die Vorrichtung eingeschaltet ist,drucken Sie auf die Taste,um der reset oder der restore zu machen. Da sind die Handlungen: 0-3 Sekunden: um die Vorrichtung zu reset 3-6 Sekunden: keine Handlung 6 Sekunden oder mehr :es macht eine Wiederkehr zu den default Konditionen (benutzen Sie , z.B., wenn Sie das Password verloren haben) Verbinden Sie den Speiser mit diesem jack. 6 POWER Switch Drucken Sie auf diesen Taste,um den Router einzugeschaltet/auszugescheltet 80 DEUTSCH 1.4 Verdrahtung Zunächst müssen Sie das Produkt dem ADSL Linie durch das gegebenen RJ11 Kabel (in die LINE Tur), verbinden, dann verbinden Sie die PC Ihrer Lan oder die Switch den Türen RJ45. Sie können den Router erreichen, durch die verschiedene client wireless, die kompatibel mit dem Standard IEEE802.11b sind. Schliesslich verbinden Sie der Speiser dem Router Wireless und dann der Steckdose. Wenn Sie alle Verbindungen kontrolliert haben und den I-Fly Wireless Lan Router ADSL eingeschaltet haben, wird das Produkt sofort eine Diagnose (etwa 20 Sekunden) machen. Wenn diese Phase beendet wird, werden die Led POWER, SYS und WLAN (eventuell auch die Led LAN, wenn sie den PC verbunden sind) fest grün sein. Der ADSL Led wird blitzen, während der Richtensphase, wenn er richtig verbunden ist, und dann wird er fest werden, nachdem er ausgerichtet ist (notwendige Bedingung, um im Internet zu surfen). 1.5 Einstellung des Default Bevor Sie die Konfiguration des Atlantis I-Fly Wireless Lan Router ADSL beginnen,ist es notwendig,dass sie die Einstellung des Default kennen. Indem Sie diese Einstellung aufheben und die PC als client DHCP (wie als die folgende Anleitungen) einstellen und endlich die Verbindung zum ISP,(das wird alle Parameter des Falls sagen) darstellen,konnen Sie schnell den Atlantis I-Fly Wireless Lan Router ADSL benutzen. Fur eine eingehende Konfiguration,nehmen Sie Bezug auf den Handbuch,das im CD findet. Die Konfigurationen des Default des Atlantis I-Fly Wireless Lan Router ADSL sind: • Password:admin • Username:atlantis 81 • • • DEUTSCH Adresse IP (192.168.1.254), Subnet Mask (255.255.255.0) DHCP Server staatlich SSSID= wlan-ap, Channel=6, WEP=unfähig 1.6 Die IE Konfiguration Jeztz ist es notwendig,IE einzufuhren, in Menu Instrument zu gehen, dann der tab Verbindungen wahlen und eine der folgende Stimmen zu wahlen: • Benutzen Sie nie remote Verbindung • Benutzen Sie remote Verbindung, wenn es keine netz Verbindung disponibel ist. 1.7 Konfiguration des PC Konfiguration des PC in Windows 95/98/ME 1. Gehen Sie in Start/Settings/Control Panel. Drucken Sie zweimal auf Networ und wahlen Sie Configuration. 2. Wahlen Sie TCP/IP -> NE2000 Compatible,oder irgendein Network Interface Card (NIC) des PC. 3. Drucken Sie auf Properties. 82 DEUTSCH 4. Wahlen Sie die Option Obtain an IP address automatically (nachdem Sie IP Address gewahlt haben). 5. Gehen Sie auf DNS Configuration. 6. Wahlen Sie die Option Disable DNS und drucken Sie auf OK, um die Konfiguration zu enden. 83 DEUTSCH 84 DEUTSCH Leiten Sie wieder den PC,damit die Anderung geschehen. 85 DEUTSCH Konfiguration des PC in Windows NT4.0 1. Gehen Sie auf Start/Settings/ Control Panel. Drucken Sie zweimal auf Network und dann auf Protocols . 2. Wahlen Sie TCP/IP Protocol dann drucken Sie auf Properties. 3. Wahlen Sie den Option Obtain an IP address from a DHCP server und drucken Sie auf OK. 86 DEUTSCH 87 DEUTSCH Konfiguration des PC in Windows 2000 1. Gehen Sie auf Start/Settings/Control Panel. Drucken Sie zweimal auf Network and Dial-up Connections. 2. Drucken Sie zweimal auf Local Area Connection. 3. In Local Area Connection Status drucken Sie auf Properties. 88 DEUTSCH 4. Wahlen Sie Internet Protocol (TCP/IP) und drucken Sie auf Properties. 89 DEUTSCH 5. Wahlen Sie die Option Obtain an IP address automaticall und spater Obtain DNS server address automatically. 6. Drucken Sie auf OK,um die Konfiguration zu enden. 90 DEUTSCH 91 DEUTSCH Konfiguration des PC in Windows XP 1. Gehen Sie auf Start dann auf Control Panel. Drucken Sie zweimal auf Network (in Classic View) Connections. 2. Drucken Sie zweimal auf Local Area Connection. 3. In Local Area Connection Status drucken Sie auf Properties. 92 DEUTSCH 4. Wahlen Sie Internet Protocol (TCP/IP) und drucken Sie auf Properties. 93 DEUTSCH 5. Wahlen Sie die Option Obtain an IP address automatically und spater Obtain DNS server address automatically . 6. Drucken Sie auf OK,um die Konfiguration zu enden.. 94 DEUTSCH 95 DEUTSCH 1.8 Konfiguration des Router Mit dem browser web, kommen Sie in den folgenden IP Adresse (wo man den URL steckt)dessen default ist: 192.168.1.254,und drucken Sie die Taste Ubersendung. Benutzen Sie admin (als user name) und atlantis (als password). Drucken Sie OK, um weiter zu gehen. Jetzt wird das Main Menu, wie im Bild, erscheinen: 96 DEUTSCH drücken Sie auf die Stimme Wizard Setup, links oben, um die betreute Konfiguration (Wizard Setup) zu erreichen. PPPoE(RFC 2516)/ PPPoA (RFC 2364) PPPoE (PPP over Ethernet) ist eine ADSL Verbindung, die als dial-up DSL bekannt ist. Wie die PPPoA, sie ist gedacht worden, um die Breitbande Dienste zu ergänzen, mit eine besondere Aufmerksam der Leichtigkeit der Konfiguration. Der Benutzer kann eine grosse Zugriffgeschwindigkeit geniessen, ohne die Arbeitsweise zu ändern und kann denselben Account mit dem ISP teilen. Man braucht kein zusätzliches Software. Diese Konfiguration ist gültig, wenn Sie ein Abonnement mit 1 staatischen haben, und also NAT (SUA) aktiv (Für die Leitung der allgemeinen Klasse, nehmen Sie auf das Handbuch in der CD Bezug). Sehen Wir, wie man richtig diese ADSL Konfiguration gestalten kann. Kontrollieren Sie, dass die Parameter, in dem Fall PPPoA, die im Bild, sein, wenn es nicht eingehend vom ISP gezeigt ist. In dem Fall PPPoE wählen Sie Encapsulation=PPPoE und Multiplex=LLC. 97 DEUTSCH Drücken Sie auf Next. Schreiben Sie Username und Password. Wählen Sie Obtain an IP Address Automatically oder, wenn das Abonnement eine feste IP vorsieht, wählen Sie Static IP Address und schreiben Sie die IP. Wählen Sie dann die Verbindungsmodalität: • Connect on Demand und den zugehörigen Max Idle Timout (in dem Fall den Verbrauchsabonnement) • Nailed-Up Connection (der Router ist immer mit dem ISP verbunden) In Network Address Translation wählen Sie die Stimme SUA Only. 98 DEUTSCH Drücken Sie dann auf Next. In den folgenden Schirm, werden alle Einstellungen der WAN und LAN Konfiguration gezeigt werden. Drücken Sie auf Save Settings, dann auf Return Main Menu und endlich auf Logout. 99 DEUTSCH RFC1483 routed / IpoA routed Diese Konfiguration ist gültig, wenn Sie ein Abonnement mit 1 staatischen haben, und also SUA (NAT) aktiv (Für die Leitung der allgemeinen Klasse, nehmen Sie auf das Handbuch in der CD Bezug). Kontrollieren Sie, dass die Parameter, in dem Fall RFC1483, die im Bild, sein, wenn es nicht eingehend vom ISP gezeigt ist. In dem Fall RFC1577(IpoA) wählen Sie Encapsulation=ENET ENCAP und Multiplex=LLC. Drücken Sie auf Next. 100 DEUTSCH Schreiben Sie dann die allgemeine staatische IP Adresse, die vom ISP gegeben Wird (in dem Fall RFC 1577, führen Sie auch die subnet mask und default gateway ein). In Network Address Translation wählen Sie die Stimme SUA Only. In den folgenden Schirm werden alle Einstellungen der WAN und LAN Konfiguration gezeigt werden. Drücken Sie auf Save Settings, dann auf Return Main Menu und endlich auf Logout. Der I-Fly Wireless Lan Router ADSL wird Internet verbinden und sofort von den verschiedenen PC (auch die PC, die wireless Adapter haben) kann man navigieren. Jede PC wird schon (da er client DHCP ist) die IP Adresse, die Subnet Mask, den Default Gateway und die IP Adresse der DNS bekommen. Mit diese Parameter werden die Pakete, die der Lan gelenkt sind, dem passenden Client gesendet werden, die andere werden dem default Gateway gesendet werden, d.h. der Atlantis I-Fly Wireless Lan Router ADSL, der sie in Internet senden wird. 101 DEUTSCH 102 WARRANTY/GARANZIA/GARANTIE WARRANTY CERTIFICATE CONDIZIONI DI GARANZIA CERTIFICAT DE GARANTIE 103 WARRANTY/GARANZIA/GARANTIE FAST SWAP WARRANTY CERTIFICATE We thank you for your decision to have bought an ATLANTIS LAND® product . This product has got a particular form of Facilitated Guarantee which lasts for 36 months. ATLANTIS LAND® believes that those products are absolutely necessary for company production and for that they must have a very fast and reliable assistance .This service will be provided for you directly by ATLANTIS LAND®, without asking you for more interventions, for example brought off by your usual retailer or by others operators. You only need to inform the Assistance Service that will send immediately a new substitutive product. However please read carefully all guarantee clauses, in order to avoid ungrateful mistakes for the future eventualities. If you will provide within 15 days from the purchase to register it on the ATLANTIS LAND® web site www.atlantisland.com ,you won’t be asked, if you will need an intervention, the original proof of purchase (see clause n° 6). Clauses 1. 2. 3. 4. The product is warranted for a period of 36 months from the date of purchase. During this period ATLANTIS LAND® will replace the apparatus which will show defects in conformity to that product’s standard. The replacement will take place without any cost for the costumer. To get the process of the Facilitated Guarantee started the costumer will have to communicate the defect (through Fax, E-Mail or Phone) to the Assistance Center, which will provide a new RMA number, after checking the out of order product. This RMA number will have to be reported, together with all the other information requested, on the appropriate form, 104 WARRANTY/GARANZIA/GARANTIE 5. 6. 7. 8. 9. 10. 11. 12. 13. 14. attached to the product or available on the web site www.atlantis-land.com (Support\Warranty page) This form must be accompanied by a valid proof of purchase (Sale receipt or Invoice ), this clause is not compulsory if the costumer had previously registered his purchase on the ATLANTIS LAND® web site. The non conformity to one of the previous points 5 and 6 makes the Guarantee irrecoverable by the costumer. The product must be returned with its original package intact and complete with all its accessories. If you return a non original or non intact package the material will travel at your own risk , and ATLANTIS LAND® doesn’t assume any kind of responsibility about eventual damages even in case of a transport by ATLANTIS LAND® itself . Every ATLANTIS LAND® product is identified by a serial number (S/N) , the cancellation, even partial, of it bring to the cancellation of the Guarantee. The Guarantee is ineffective even when the damages are due to clear fraud, negligence, the non conformity with the specifics of the product, modification or tampering. The Guarantee is ineffective also if we find out attempts, succeeded or not, of opening the apparatus. Moreover damages due to natural phenomena or to extraordinary happenings they are not included in the Guarantee. Damages due to the connections of the apparatus to tensions which are different from the ones indicated, or due to sudden changes in the tension of the net to which the apparatus is connected to, as well as the ones due to any kind of electrical discharge (lightning, overextensions, electrostatic or inductive discharges ) are not included too. At last damages due to fire or liquid infiltrations are excluded as well. 105 WARRANTY/GARANZIA/GARANTIE 15. All the elements that undergo wear and tear as accumulator’s batteries , batteries themselves , fuses and bulbs even when furnished , cables for the connection or the feeding and connectors are not included in the Guarantee. 16. Exactly only for the line of UPS products the batteries that are furnished with the product itself are in Guarantee for 12 months. 17. The external feeders, of every kind of apparatus, are covered by a 12months Guarantee. 18. Possible updating of the software or of the firmware, revisions, settaggi or upkeeps are not covered by the Guarantee too. 19. For each apparatus send for reparation and for which no defects will be found by the Assistance Service, you will have to pay for the transport (retire and return) and for a contribution of test that amount to €30. 20. In case of a return of a defective apparatus different from the one declared in the form, clearly damaged also by the transport (see clause n^9) , with some parts of accessories missing or however inscribed in the over mentioned clauses (from 10 to 19) ATLANTIS LAND® will invoice to you the cost indicated at the moment of the sending on the current price list for the substitutive product and it will add the cost for the sending and the retiring.The returned product will remain at customer’s disposal (for 6 months) and he will be permitted to give disposition for its retire, after the payment . If 20 and 21 clauses will take place and the customer won’t pay in 30 days time the sum requested, ATLANTIS LAND® will move in the way it will consider the best in order to get paid. 21. Moreover the name of the customer itself will be put in a Data Bank which is property of ATLANTIS LAND®, who from that moment won’t assure any Guarantee to that customer since he is defaulting ,but it will continue, for every other problem to assure the Standard Guarantee. 106 WARRANTY/GARANZIA/GARANTIE 22. The cancellation from this Data Bank will take place only after the payment requested. 23. The Guarantee is provided only by ATLANTIS LAND® s.p.a. to its Assistance Center .Address : Via De Gasperi, 122 – 20017 – Mazzo di Rho (MI) – Phone: 02-93907634. 24. Any controversy will be up to the Foro di Milano. Important! See the web site www.atlantis-land.com about up date of warranty clauses 107 WARRANTY/GARANZIA/GARANTIE DEMAND OF ASSISTANCE FORM Fill all the blanks, attach always a copy of the proof of purchase (Sale Receipt or Invoice), and add it all to the product for which you are asking for assistance. RMA (given by ATLANTIS LAND®):______________________ Defect:_______________________________________________ _____________________________________________________ _____________________________________________________ Type:______________ Serial Number:______________________ For more information call:________________________________ Phone:______________ Fax:__________________ E-mail:_____________________ Address for sending and retiring of the defective product: Surname:______________________________________________ Name:________________________________________________ Corporate name (obligatory for the societies)______________________________________________ Zip code__________City_________________________________ Street___________________________________________n°:___ Tax Code or VAT Number must always write it you 108 WARRANTY/GARANZIA/GARANTIE I agree with this with all the clauses of Guarantee, paying particular attention to the restrictive ones, shown by ATLANTIS LAND® for thhis product. Date____________Signature______________________________ Consent for the treatment of information according to law 675/96 art. 11and 12 PRIVACY TUTELAGE. I authorize ATLANTIS LAND® to insert my personal information into its data bank, with the only aim to apply the Guarantee to the product over mentioned and for the future administrative, commercial and statistic management. At any time I will be allowed to ask , according to law 675/96 art.13, to change or to cancell them or to oppose their use informing of that ATLANTIS LAND®, via De Gasperi, 122 – 20017 – Mazzo di Rho (MI). Date_____________Signature_____________________________ N.B.: The award of the information is facultative, but its lack will prevent ATLANTIS LAND® from starting the Guarantee process requested. 109 WARRANTY/GARANZIA/GARANTIE CERTIFICATO DI GARANZIA FAST SWAP La ringraziamo della Sua decisione di aver acquistato un prodotto ATLANTIS LAND®. Questo prodotto usufruisce di una particolare forma di Garanzia Agevolata per un periodo di 36 mesi. ATLANTIS LAND® ritiene infatti che questi prodotti siano assolutamente vitali per la produttività aziendale e quindi vadano assistiti nel minor tempo possibile. Tale servizio Le verrà fornito direttamente da ATLANTIS LAND®, senza richiederLe ulteriori interventi, da parte ad esempio del suo rivenditore di fiducia o di altri operatori del mercato. È sufficiente che Lei comunichi il malfunzionamento al Centro Assistenza ATLANTIS LAND® che provvederà immediatamente alla spedizione di un prodotto sostitutivo. La preghiamo comunque di leggere attentamente le clausole di Garanzia, onde evitare spiacevoli disguidi in caso di future necessità. Se Lei provvederà entro 15 giorni ad effettuare la registrazione del suo acquisto sul sito www.atlantis-land.com, ATLANTIS LAND® non chiederà, in caso di richiesta di intervento, la prova di acquisto (si veda la clausola n° 6). Clausole 1. 2. 3. Il prodotto è garantito per un periodo di 36 (trentasei) mesi dalla data di acquisto. In questo periodo ATLANTIS LAND® effettuerà la sostituzione dell’apparato che presenti difetti di conformità alle specifiche del prodotto. La sostituzione avverrà senza nessuna spesa a carico del Consumatore ed è effettuabile solo al Consumatore stesso. 110 WARRANTY/GARANZIA/GARANTIE 4. 5. 6. 7. 8. 9. 10. 11. 12. 13. 14. Per attivare la procedura di Garanzia Agevolata il Consumatore dovrà segnalare il difetto (tramite Fax, E-Mail o Telefono) al Centro Assistenza ATLANTIS LAND®, che provvederà a fornire un numero di RMA previa verifica dell’effettivo malfunzionamento. Tale numero di RMA dovrà essere riportato, insieme a tutti gli altri dati richiesti, sull’apposito modulo, allegato al prodotto o disponibile sul sito www.atlantis-land.com alla voce Supporto\Garanzia Il Modulo dovrà essere inoltrato tramite Fax o E-Mail al Centro Assistenza ATLANTIS LAND® accompagnato da una prova di acquisto valida (Scontrino Fiscale o Fattura). La non conformità ad uno dei precedenti punti 5 e 6 rende inesigibile la Garanzia Agevolata da parte del Consumatore Alla consegna del prodotto sostitutivo, il prodotto difettoso dovrà essere riconsegnato nell’imballo originale integro e completo di tutti gli accessori. In caso di imballo non originale o palesemente non integro il materiale viaggia a rischio e pericolo del Consumatore, ed ATLANTIS LAND® non assume nessuna responsabilità circa eventuali danneggiamenti anche in caso di trasporto a carico di ATLANTIS LAND®. Ogni prodotto ATLANTIS LAND® è identificato da un numero di riconoscimento (S/N) la cancellazione, anche parziale, dello stesso comporta l’annullamento della Garanzia. La Garanzia non si applica inoltre nei casi di danni provocati da palese dolo, incuria, installazione non conforme alle specifiche, modifiche o manomissioni apportate all’apparato. La Garanzia decade a seguito di ogni tentativo, riuscito o meno, di apertura dell’apparato. Non vengono inoltre considerati nella Garanzia i danni provocati da fenomeni naturali o da eventi eccezionali. Sono anche esclusi i danneggiamenti provocati da collegamenti dell’apparato a tensioni diverse da quelle indicate, oppure a improvvisi mutamenti di tensione della rete 111 WARRANTY/GARANZIA/GARANTIE 15. 16. 17. 18. 19. 20. 21. 22. alla quale l’apparato sia collegato, così come guasti causati da scariche elettriche di ogni tipo (fulmini, sovratensioni, scariche elettrostatiche o induttive). Sono infine esclusi dalla Garanzia i danni provocati dal fuoco o da infiltrazione di liquidi. Non si intendono coperte da Garanzia tutte le parti soggette ad usura in seguito all’utilizzo, le batterie quando vengono fornite a corredo, cavi per la connessione o l’alimentazione e connettori. Solo ed esclusivamente per la linea di prodotti UPS le batterie fornite a corredo del prodotto sono coperte da Garanzia di 12 (dodici) mesi. Anche gli alimentatori esterni, di qualunque apparato, sono coperti da Garanzia di 12 (dodici) mesi. Eventuali aggiornamenti di software o di firmware, revisioni, settaggi o manutenzioni non sono coperti da Garanzia. Per gli apparati inviati in riparazione e per i quali non verrà riscontrata alcuna difformità o malfunzionamento dal Servizio Assistenza, verranno addebitate le spese per i trasporti (ritiro e resa) ed un contributo per il collaudo pari a €30. In caso di restituzione di apparati difformi da quello dichiarato nel Modulo, palesemente danneggiati anche a motivo del trasporto (si veda clausola 9), mancanti di parti od accessori, o che comunque rientrino nelle clausole precedentemente riportate (dalla 10 alla 19) ATLANTIS LAND® provvederà alla fatturazione del prodotto sostitutivo al prezzo per il Consumatore indicato sul listino corrente all’atto dell’invio ed addebiterà inoltre le spese per la spedizione ed il ritiro. Ed il prodotto reso resterà a disposizione del Consumatore (per sei mesi) che potrà dare disposizioni per il suo ritiro, dopo l’avvenuto pagamento. Qualora si verificassero le condizioni delle clausole 20 e 21 ed il Consumatore non provvederà ad effettuare il pagamento richiesto entro un tempo massimo di 30 giorni, ATLANTIS LAND® attuerà l’azione più opportuna per potersi rivalere 112 WARRANTY/GARANZIA/GARANTIE del mancato pagamento. Inoltre il nominativo del Consumatore stesso verrà riportato in una Banca Dati di proprietà ATLANTIS LAND®, che da quel momento non riconoscerà più alcuna garanzia al Consumatore in oggetto quale soggetto moroso, ma procederà, per ogni eventuale ulteriore situazione, come da Garanzia Standard. La cancellazione da questa Banca Dati potrà avvenire solo ed esclusivamente a seguito del pagamento dovuto. 23. La Garanzia è prestata esclusivamente da ATLANTIS LAND® s.p.a. presso il suo Centro di Assistenza con sede in Via De Gasperi, 122 – 20017 – Mazzo di Rho (MI) – telefono 02-93907634. 24. Per ogni controversia sarà esclusivamente competente il Foro di Milano. N.B. Vi invitiamo a consultare il sito internet ww.atlantis -land.com per eventuali aggiornamenti delle condizioni di garanzia. 113 WARRANTY/GARANZIA/GARANTIE MODULO RICHIESTA ASSISTENZA Compilare in ogni sua parte, allegare sempre una copia della prova di acquisto valido (Scontrino Fiscale o Fattura), ed unire il tutto al prodotto per il quale si richiede l’assistenza. RMA (Numero di rientro segnalato da ATLANTIS LAND®):_______________________________ Difetto riscontrato:______________________________________ _____________________________________________________ _____________________________________________________ Modello:_____________________________ Serial Number:____________________ Per chiarimenti contattare:________________________________ Tel.:______________ Fax:________________ E-mail:_________________________ Indirizzo di spedizione e ritiro del prodotto guasto: Cognome:_____________________________________________ Nome________________________________________________ Ragione Sociale (obbligatorio per le società)_________________________________ CAP______Città_________________________________Prov___ Via__________________________________________n°.:______ 114 WARRANTY/GARANZIA/GARANTIE Codice Fiscale o Partita IVA ______________________________ da indicare sempre Accetto con la presente tutte le clausole, con particolare attenzione a quelle restrittive, di Garanzia esposte da ATLANTIS LAND® per il prodotto in oggetto. Data__________Firma per Accettazione_____________________ Consenso al trattamento dei dati ai sensi degli art. 11 e 20 L. 675/96 TUTELA DELLA PRIVACY. Autorizzo ATLANTIS LAND® ad inserire i miei dati personali nella banca dati della quale è titolare, al solo fine di applicare la Garanzia al prodotto in oggetto e per la successiva gestione amministrativa, commerciale e statistica. In ogni momento potrò chiedere, ai sensi dell’art. 13 della L. 675/96, potrò chiedere la modifica o la cancellazione, oppure oppormi al loro utilizzo, notificando la mia decisione a ATLANTIS LAND®, via De Gasperi, 122 – 20017 – Mazzo di Rho (MI). Data_________Firma per Accettazione______________________ N.B.: Si informa che il conferimento dei dati è facoltativo, ma la loro mancanza impedirà ad ATLANTIS LAND® di effettuare la procedura di Garanzia richiesta. 115 WARRANTY/GARANZIA/GARANTIE CERTIFICAT DE GARANTIE FAST SWAP Nous vous félicitons et vous remercions d’avoir acheté un produit ATLANTIS LAND. Ces produits bénéficient d’une forme particulière de Garantie “HOT SWAP”pendant 36 mois. ATLANTIS LAND pense en effet que ces produits sont absolument vitaux pour votre productivité, et qu’il faut donc les remplacer le plus rapidement possible. Ce service vous sera fourni directement par ATLANTIS LAND, sans interventions de votre part ou de la part de votre revendeur habituel ou d’autres opérateurs du marché. Il suffit que vous communiquiez le défaut de fonctionnement au Centre Assistance ATLANTIS LAND qui veillera à envoyer un nouveau produit. Nous vous demandons de lire attentivement les clauses de Garantie, afin d’éviter toute difficulté en cas de nécessité future. Si vous enregistrez votre achat dans les 15 (quinze) jours suivant son acquisition sur le site www.atlantis-land.com, ATLANTIS LAND ne vous demandera aucune preuve d’achat (voir clause n°6), en cas de demande d’intervention. Clauses 1. 2. Le produit bénéficie d’une garantie de 36 (trente-six) mois à compter de la date d’achat. Pendant cette période ATLANTIS LAND remplacera tout produit qui présentera des défauts de fonctionnement. L’utilisation du produits devant être conforme aux spécifications détaillées du produit 116 WARRANTY/GARANZIA/GARANTIE 3. 4. 5. 6. 7. 8. 9. 10. 11. 12. 13. Le remplacement sera gratuit pour le Consommateur. Pour activer la procédure de Garantie le Consommateur doit signaler le défaut (par fax, e mail ou téléphone) au Centre Assistance ATLANTIS LAND, qui lui fournira un numéro de RMA, après vérification du produit en panne. Ce numéro de RMA devra être indiqué, avec les autres renseignements nécessaires, dans la fiche jointe au produit, disponible également sur notre site internet www.atlantisland.com , sous ‘Support\Garantie’. La fiche doit être accompagnée d’une preuve d’achat, récépissé ou facture, cette preuve n’est pas nécessaire si le Consommateur à déjà enregistré son achat sur le site d’ATLANTIS LAND dans les 15 (quinze) jours suivant sont acquisition. La non conformité à l’un des points 5 et 6 rend la Garantie ineligible au Consommateur. A la livraison du produit de remplacement, le produit défectueux devrà être remis dans l’emballage d’origine avec tous les accessoires. En cas d’emballage autre, non complet sans tous les accessoires, le matériel voyagera au risque et péril du consommateur. ATLANTIS LAND n’acceptera aucune responsabilité pour les éventuels dommages, même en cas de transport aux frais d’ATLANTIS LAND. Tout produit ATLANTIS LAND est identifié par un numéro d’identification (S/N), l’effacement, même partiel, de ce numéro provoque l’annulation de la Garantie . La Garantie ne s’applique pas en cas de dommages provoqués par négligence, installation non conforme aux notes détaillées, modifications ou détérioration de l’appareil. La Garantie est considéré caduque en cas d’ouverture de l’appareil. Les dommages causés par des phénomènes naturels ou par des évènements exceptionnels ne sont pas pris en compte par la Garantie. ( foudre, inondation, etc..) 117 WARRANTY/GARANZIA/GARANTIE 14. 15. 16. 17. 18. 19. 20. Les dommages causés par un branchements de l’appareil à des tensions différentes de celles indiquées, ou à des soudains changements de tensions du réseau d’alimentation, ainsi que les dommages causées par toute décharge électrique (foudres, surtensions, décharges électrostatiques ou inductives) sont exclus de la Garantie Les dommages causés par feu ou infiltration de liquides ne bénéficient pas de la Garantie. Toute partie sujette à usure à la suite d’utilisation comme les batteries d’accumulateurs, piles, fusibles, et lampes, même fournies à l’achat, câbles de connections ou d’alimentation, ne bénéficie pas de la Garantie. Pour la gamme des produits UPS A03 les batteries fournies avec le produit bénéficient d’une Garantie de 12 (douze) mois. Les alimentations externes fournies avec le produits bénéficient d’une Garantie de 12 (douze) mois. En cas de remise d’appareils endommagés différents de ceux indiqués dans la Fiche, ou endommagés à cause du transport, non complet (accessoires, ou qui rentrent dans le clauses susdites (de 10 à 19) ATLANTIS LAND facturera le produit de remplacement au Consommateur au prix du moment indiqué dans le bulletin des prix, additionné des frais d’envoi et de retrait. Le produit remis restera à disposition du Consommateur (pendant six mois), qui pourra procéder au retrait, après payement. Au cas où, dans les conditions des clauses 20 et 21, le Consommateur n’effectue le payment dans un maximum de 30 jours, ATLANTIS LAND adoptera les mesures les plus convenables pour se dédommager du non payement. Aussi, le nom du Consommateur sera inclus dans une banque de données de propriété d’ATLANTIS LAND, qui a partir de ce moment ne reconnaitra plus aucune garantie étendue au Consommateur, , mais procèdera, selon la Garantie 118 WARRANTY/GARANZIA/GARANTIE 21. 22. Standard. L’effacement des données de cette banque de données ne pourra avoir lieu qu’après le payement dû. La Garantie est fournie exclusivement par ATLANTIS LAND s.p.a. au Centre Assistance Via De Gasperi 122 – 20017 Mazzo di Rho (MI) telefone 39-02-9390 7634. En cas de litige, Le tribunal de Milan sera seul compétent. Important : Voyez le site Web www.atlantis-land.com au sujet de la mise à jour des clauses de garantie. 119 WARRANTY/GARANZIA/GARANTIE FICHE DE DEMANDE D’ASSISTANCE Remplissez cette fiche et joignez y une copie de la preuve d’achat (ticket de caisse ou facture), du produit pour lequel vous demandez une assistance. RMA (numéro donné par le support LAND®):________________________________ ATLANTIS Défautrencontré:________________________________________ _____________________________________________________ _____________________________________________________ _____________________________________________________ Modèle:_____________________________ Numéro de Série:____________________ Pour tout renseignements contacter :_______________________________________ Tel.:______________ Email:_________________________ Fax:________________ Adresse d’envoi et retrait du produit défectueux: Nom:_________________________________________________ Prénom :______________________________________________ Nom de la société (obligatoire pour les sociétés)______________________________________________ Code postal__________Ville______________________________ 120 WARRANTY/GARANZIA/GARANTIE Rue___________________________________________n°.:____ SIRET ou numéro de TVA Obligatoire J’accepte toutes les clauses, avec une attention particulière aux clauses restrictives, de Garanties indiquées par ATLANTIS LAND pour ce produit. Date__________Signature________________________________ J’autorise ATLANTIS LAND à insérer mes données personnelles dans sa banque de données, au seul effet d’appliquer la Garantie au produit en objet et pour le suivi de la gestion administrative, commerciale et statistique. A tout moment, selon les articles de loi ,je pourrai demander le changement ou l’effacement des données, ou m’opposer à leur utilisation, en signalant ma décision à ATLANTIS LAND®, 57 rue d’Amsterdam 75008 Paris ou via De Gasperi, 122 – 20017 – Mazzo di Rho (MI). Date______________________Signature____________________ Nous vous informons que confier vos données est facultatif, mais sans elles ATLANTIS LAND ne pourra pas effectuer la procédure de Garantie que vous demandez. 121
This document in other languages
- français: Atlantis Land A02-WRA2-11B
- Deutsch: Atlantis Land A02-WRA2-11B
- italiano: Atlantis Land A02-WRA2-11B


