1
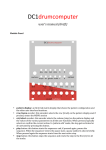
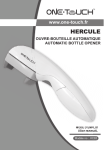
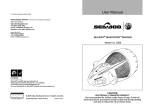
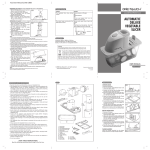
User Guide
(Educational Kit)
P E R P E T U A L
F L A S H L I G H T
IMPORTANT : FARADAY STAR must be fully charged for the first use
Modern technology and Faraday's Law of Inductance join forces to create a
virtually indestructible flashlight that has no need for batteries or bulbs.
Shaking the torch causes a high strength magnet to pass back and forth
between a wire coil giving charge to the flashlight's capacitor that can be
stored for months.
Just 30 seconds of shaking can generate up to 2 minutes of light and the super
bright LED can be seen for up to a mile and never needs to be replaced.
Fig.1
Faraday Star is an indispensable accessory.
Ideal for any outdoor activity including camping, hiking, boating as well as
general emergency situations.
Using the Faraday Star
The Faraday Star is charged by shaking, no batteries are needed, just shake
vigorously side to side for around 30 seconds. (See fig.1) Press the switch to turn
on and release to turn off. (See fig.2)
On/Off
Fig.2
Duration
The Faraday Star provides up to 2 minutes of continuous use when charged for 30 seconds.
If it is completely drained of energy or used for the first time the Faraday Star should be turned off and shaken
vigorously to fully charge the capacitor.
Cautions
1. There is a strong magnetic field surrounding the Faraday Star. DO NOT place the Faraday Star within 30cm
of cassette tapes, computer floppy disc, video tapes, credit cards, pacemakers, televisions, monitors or any
other magnetic storage device or device affected by a magnetic field.
2. Do not attempt to remove the LED or any internal part.
Care and maintenance
• Clean with damp cloth
• Clean the lens with standard glass cleaning products
• Do not use petroleum based liquids such as gasoline or kerosene or solvents such as acetone to clean any part
of the flashlight
ACDelco is a trademark of General Motors Corporation used under license to Daka Development Ltd.
Model no. : LG08
Contents
Switch Cover x 1
Magnet x 1
Rubber Bumper x 2
LED Bulb x 1
PCB x 1
Outer Housing x 1
Inner Housing x 1
End Cap x 1
Inner Housing End Cap x 1
Lens x 1
Assembly
1. Insert Rubber Bumper in Inner
Housing End Cap and pull to snap in
place.
2. Cut off excess rubber
from Rubber Bumper.
3. Insert second Rubber
Bumper into Inner
Housing and pull using
pliers to snap in place.
4. Cut off excess rubber.
5. Screw PCB onto Inner Housing
making sure wires are connected as
shown.
6. Insert L.E.D. and into
Inner Housing and make
sure L.E.D. is pushed fully
into place.
Make sure the flat side of
the L.E.D. lines up with the
flat side of the L.E.D. socket.
7. Insert Magnet into Inner Housing
and push Inner Housing End Cap into
place.
8. Locate switch in hole in
Flashlight Body.
9. Keeping Outer Housing in
same position as in step 8
carefully insert Inner Housing
and rotate until it fits fully
inside.
10. Place Lens in place with
domed side facing up and
screw shut with End Cap.
Screw x 4
Switch x 1