1
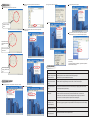
USB2.0 CAMERA MICROPHONE
User's Guide
Information Before Using
PnP (Plug & Play) is only available in Windows 2000 and XP
versions. Other operation systems (for example Novell and NT) do
not support this function.
To Avoid damage of the image sensor please do not point directly
into the sun light Please keep the camera away from heat to avoid
electronic shocks.
Please keep the camera away from rain or moisture, wipe the
camera lens with moistened soft cloth or neutral solvent.
Please do not disassemble the camera as this will invalidate the
warranty. Misuse or abuse may cause electric shock and again will
invalidate the warranty .
System Requirement
Intel ® Pentium 4 1.4G Hz,AMD Athlon® prcoessor (2.4G Hz
processor recommended)
128MB RAM (or minimum OS requirement whichever is higher)
50MB available hard drive space
16-bit colour display adaptor (thousands of colours)
Windows ® compatible sound card (full dupiex sound card
recommended)
Driver & Camera Installation
1. Place the CD diskette into your CD-ROM drive (Please do not
connect the camera at this stage).
2. The CD-driver will auto-run and then the installation menu will
come up on your screen (if it does not, please run the program
"Install.exe" from the CD-ROM drive) The menu will show the
installation buttons for the camera driver .
3. Click the button "Install camera driver" to start installation.(Please
refer to Application software Installation)
4. After finishing the installation, please reboot your computer to
restart windows.
5. Plug the camera into an available USB port on your PC or USB
hub. Your computer will detect the new device "PC camera" and
will appear in the windows task bar . (You may need to restart
your computer again once this is completed.)
6. This camera is applicable with microphone function, either via
USB cable or via additional audio cable, if it is audio cable, please
plug it into the MIC-IN of your sound card.
7. In some cases, while detecting new devices, Windows may ask
for your original Windows-CD driver. Please follow the instructions
to insert your Windows-CD and run the program
8. Once you have plugged in your camera, please open AMCAP
which can be found by going into START and then selecting
programs.
step 3
Plug your camera
into USB port
Select this to install camera driver
Operating Environment
step 4
Temperature: 5 C - 40 C (41 F - 104 F)
Relative humidity: 10% R.H. 80% R.H
Illumination: 200 lux or more
Package
Camera unit with USB cable
CD-Rom containing drivers
User's Guide
contact your dealer if anything listed above is missing
Technical Specifications
Sensor Type
300K CMOS sensor
Resolution
640* 480 pixels(Up to 1280 *1024 pixels)
Interface
USB 2.0
Frame Rate
30fps (CIF Mode); 30fps (VGA Mode)
Focus
3cm to infinity
OS Platform
Windows 2000 / XP
Microphone Sensitivity
-40db
Zoom
4X
Audio function does not support on windows 2000
Check Your Device
Please choice your device "Mic Cam 2.0" & "USB Audio",and
Preview must be selected.
Application installation
Microsoft ® Windows® 2000/XP
CD-ROM Drive
step 6
step 2
step 1
step 5
Camera Function
Then create the name for the capture file with AVI extension, i.e.
example.avi.
It is suggest to set the file size to 1Mbytes.
To stop recording select 'Stop Capture'
Please run Amcap and find options->video capture filter.
To record select capture tab and select 'Start Capture' and press "OK"
Digital zoom & Tracking
function
To select your audio device "USB camera "and enable capture audio
recording function.
To play recording , double click on the set capture file this will initialize
Windows Media Player, or go into Windows Media Player separately.
Special effect function
just based on 640*480
pixels
You can choice your favorite
effect function.
Trouble Shooting
You can adjust your image
quality by parameter setting
page.
Problem
Record Image By AMCAP
Before recording, click "file"->"Set capture file"->select a path,i.e. desktop.
To click "file->"Allocate file space "
The set capture file will be rewritten each time when you carry out
the recording.
If you want to keep the recording file, copy the file and paste to
another location for storage.
Solution
The camera shows no
imageafter being connected
toUSB port on the PC
1.Make sure the USB connectors are connected properly at both ends.
2.Exit the program, re-connect the device and start the program again.
3.Make sure that you have installed the driver properly.
The image taken and
shownon the PC screen is
blurred
1.The camera might be dropped or moved accidentally. Try to adjust the focus again.
2.Check if there is anything sticking on the camera lens, if so,clean it with soft wiper.
The pictures have black
stripes
1.When use the camera indoor, make sure the electric frequency of lighting system does match the
camera's specification (50Hz or 60Hz).
How to operate the
shutterbutton
1. The button supports TWAIN interface only, for example, only Windows format
2. Select "file" select "scanner" and select your camera model "Mic Cam 2.0",then click OK
3. Select "File", select "New Scan" and now the dialog box shows an image from yourcamera.
4. The button on the camera is equal to the capture button of the dialog box.
The images turn slow
whenviewing in VGA
mode(640x480pixels)
This is because the volume of transmission data is getting bigger under VGA mode.To improve the
performance, suggest to upgrade the computer hardware or choosethe option 'I420' in camera setting.
There are strips or
blackshadow on the images
Please re-set the display level as 24 bits or 32 bits true color.
Why no image turns up while
running the programs
Please click the"Preview" under the "Options" section.
K00-36219-MED V1.0