1
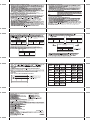
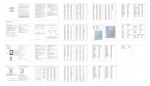
 oy an, an on hs a=
Cl Lol
Meteotime
Weather Station
with
Wireless
Thermo-Hygrometer
USER'S MANUAL
(MT02)
17
KSPO:0287-10(SAC)
cresta DV216NL & TS53 MANUAL (2 ENG)
Si
ZE: W105 X H148(mm)
BY Lai HZ 26/3/10
MUST READ BEFORE GETTING STARTED
Your Meteotime Weather Station is different to traditional weather stations which measure the
prevailing conditions only, the data of this weather station is based on the METEOTIME which
is Worked out on a daily basis by highly professional meteorologists using state-of-art
instruments.
The Meteotime Weather Station is engineered in such a way that it is able to receive the coded
METEOTIME signal containing the weather information. The information is broadcasted via
the stations for radio-controlled clocks HBG (located in Switzerland) and DCF (located in
Germany). For this reason, your Meteotime Weather Station is also a radio-controlled clock
with all the known advantages, such as always showing the exact time, and automatic change to
daylight saving time in winter and in summer.
You are able to receive weather forecasts for 60 meteorological regions within Europe for up to
4 days in advance, and offer a 2-day-advance forecasts for an additional 30 regions.
WHAT DOES IT TAKE TO GET GOOD RECEPTION?
Similar to wireless signals like the mobile phone network or Radio/TV broadcasts, it is possible
that the Meteotime Weather Stations do not receive signals all the time and everywhere. The
following are some tips you should follow by all means to make sure that your device works
properly:
The location for Meteotime Weather Station is very important. For this reason we have
equipped all of them with an innovation test function (the TEST button) which enables you test
the quality of reception in your environment and to place the device where the best conditions
prevail.
Try your reception by testing your Meteotime Weather Station as stated in the manual. To do
this, in the room you want to install the device, please turn on all the potential sources of
interference (for example, a TV set). Then put the Meteotime Weather Station in the place and
direction you want it to be, but always at least in one meter from the potential source of
interference.
Watch the symbol GOOD RECEPTION or BAD RECEPTION on the display. Once you
have found the right location for GOOD RECEPTION, you may leave the Meteotime
Weather Station there, it will collect its data by radio controlled signal. Within a few
minutes time and the date will appear. However, the transfer of the very large amount of
data (forecast for all regions and days) will take much longer.
To completely receive all data will take up to 24 hours from the time of the initial setup.
POTENTIAL SOURCES of INTERFERENCE
With all Meteotime Weather Stations, we should take measures to provide best possible radio
reception. HBG and DCF are long wave stations with a broad reach (for example, approximate
1500km for the DCF station). However, as with a long wave radio station, interference may
occur which is often caused by the following influences:
In buildings with lots of concrete, metal parts, and the electrical equipment you may get
reception problems (for example, in shopping centers and at exhibitions).
Electronic equipment such as TVs, computers, household machines, etc., or transformers,
power lines, radio transmitters, and trains are potential sources of interference.
Atmospheric influences might affect the radio waves.
The distance from the station, and also the geographic conditions (mountains, etc.) also
affect the reception. Due to their great distance from the station, areas like Southern Italy
or Northern Scandinavia are critical.
So-called (dead-spots) which make reception impossible can appear everywhere
There is less interference in rural area than in heavily built-up urban ones.
On principle at night the sources of interference are less active, consequently reception is
better than during the day.
Weak batteries in the device will lower the quality of reception.
DATA TRANSFER
METEOTIME sends the data during precisely defined time slots in accordance with UTC.
(
UTC, i.e. for Central Europe during the winter UTC+1, during the summer UTC+2; for Great
Britain and Portugal during the winter UTC, during the summer UTC+1)
Transmission times (UTC)
10:00 p.m. - 03:39 a.m.
04:00 a.m. - 09:59 a.m.
10:00 a.m. - 03:59 p.m.
04:00 p.m. - 06:59 p.m.
07:00 p.m. - 09:59 p.m.
Forecast for
the actual (new) day (TODAY)
the next day (TOMORROW)
the following day (the day after TOMORROW)
the day following this (Two days after TOMORROW)
the 30 additional regions
In the even that the reception during the above time slots is completely or at times interfered
with or has broken down, these forecasts, or parts of them, will be missing.
19
This package comes with a main unit which is Meteotime Weather Station, and a remote
outdoor Thermo-hygrometer sensor.
This Meteotime Weather Station has equipped the thermo-hygrometer sensor to measure the
indoor temperature and humidity, and also has a wireless outdoor thermo-hygrometer sensor to
measure the outdoor temperature and humidity.
Key Features:
* Weather Status for today and coming three days for 470 cities
» Rain/Snow/Hail Probability for Today
* Wind Speed and Wind Direction for Today
* Single channel outdoor 433Mhz wireless Thermo-hygrometer
* Indoor Thermo-hygrometer
* Sunrise and sunset display
* Regional Day-time temperature and Night-time Temperature information. The night
temperature for the 4th day will not be displayed.
* Critical Weather Alert
* Radio-controlled Clock and Calendar
* Time-Zone setting
* Powered by 2 AA batteries for main unit, and 2 AA batteries for the outdoor sensor
20
INTRODUCTION
The Meteotime Weather Station LCD display shows:
* Today Weather Information Window
* In/Outdoor Temperature & Humidity
* Tomorrow, One-day-after, and Two-day-after Weather Information
* Information Window which shows Time & Date, Sunrise & Sunset, Cities, and Critical
Weather Information Description.
7 N Today Weather Information
including Wind Speed, Wind
Direction, and the probability of
Mar Ye NN Rain/Snow/Hail, Day & Night
nu + x Lam и” Temperature, Day & Night
P ACC > > 382 A Weather Status.
CE
1 Lin
E (С. PT Wo, Je == Outdoor Temperature & )
TU"
( Tomorrow, One-day-after, and
, pe TWo-Day-after Weather
! Information including Day &
Night Temperature, Day & Night
г. | 0 Hi M | NN \_ Weather Status.
| | | | | | foma Window. )
ET mem er SET У A net
a „
Main Unit
1
—" Y METEOTIME
XVII
Remote Thermo-Hygrometer
21
There are total 8 buttons on the Main Unit, namely:
SET
* Selected City «=> Time + Date <==» Sunrise + Sunset
* Each press of [SET] will display the selected City, Time + Date or Sunrise + Sunset
* Press and HOLD [SET] for 3 second to select your <1> Country, <2> Time Zone,
<3> Language, <4> Contrast of the LCD display
DAY
MIGHT
* Critical Weather Information <> Time + Date <> Day/Night Weather Status Change
A
* increasing the value during setting
* Chose one of the pre-selected cities
У
* decreasing the value during setting
* Chose one of the pre-selected cities
MEM
* display the maximum and minimum measured Temperature in record
* Press and Hold for 3 second to clear all the Max. and Min. record
TEST V
* Find the place for the device which has a good reception
* Add the city into the list of your desired cities
OR
Remove the city out of the list of desired Cities
* Edit your home town
In
OUT
* Switch to read Indoor Thermo-hygrometer 4=% Outdoor Thermo-hygrometer
* Press and Hold for 3 second to force the main unit to search for the outdoor sensor
22
GETTING START
* Insert 2 pcs AA batteries for remote sensor, and then insert 2 pcs AA batteries for the
main unit.
* The main unit will automatically scan for the radio-controlled clock signal and the
Meteotime Weather signal.
1 N
MU DAY УХ р C ; > Do
? ACC D7 зв;
+ ct
7
7 _
Sn WCT
* The time and date will appear in a few minutes. Since there is a large amount of Weather
information for all regions and days, the unit needs about 24 hours from the time of the
initial setup to complete the reception of all data.
* After the time and the date signal is being received successfully, the display shows "SELECT
COUNTRY" and then "FRANKFURT" as default city in the information window.
To change the Country and the City please see the information below.
* Tf the unit is able to receive the Meteotime signal successfully, the Meteotime icon EH is
appeared in the second row of display. Otherwise, the Meteotime will be [] .
€} means it successfully receives today's
weather information. Otherwise, it will be
means it is able to receive the Meteotime
weather signal. Otherwise, it will be []
(] means it successfully receives tomorrow
weather information. Otherwise, it will be
information of one-day-after. Otherwise,
it will be (J
information of two-day-after. Otherwise,
| [+] means it successfully receives weather
means it successfully receives weather
it will be [)
23
In the event the Meteotime icon change to [ ) , that means there are potential sources of
interference on the unit. The sources of interference may come from the electronics equipment
such as TV-set, computers, household machines etc. It may also be due to lots of concrete,
metal parts and electrical equipment in the building. It may also be due to your living area if it
is very far away from the Radio-controlled clock tower.
By the first time you power up this product, the language default setting is in German
Language. In order to change it into another language such as English, Spanish, French,
Italian, Dutch or Swedish, please follow the setup as below.
*** METHOD #1 ***
When you put in the batteries for the first time, wait until the Main unit receives
* SUCHE SIG. (Meaning in English SEARCH SIGNAL); It is shown in the INFORMATION
WINDOW
* After several second, " LAND EINST " (meaning in English COUNTRY) is shown in the
Information Window.
* Press [ SET ] and "ZONE +00 H " is shown in the Information Window
* Now press [ SET ] again and the language will be shown in the Information Window. Press
[ À ] or [ W ] key to select your desired language. There are total of seven Languages to
select, namely German, English, Spanish, French, Italian, Dutch, Swedish
* Press [ SET ] again two times to exit the setup
*** METHOD #2 ***
If you skip the above-mentioned step, the INFORMATION WINDOW will show the default
city FRANKFURT.M. You can change than the language it in the follow step.
* Press and Hold [ SET ] for 3 seconds, " LAND EINST " (meaning in English COUNTRY)
is shown in the Information Window.
* Press [ SET ] again and "ZONE +00 H " is shown in the Information Window,
* Press [ SET ] again and language will be shown in the Information Window. Press [ A] or
[ W ] key to select your desired language. There are total of seven Languages to select,
namely German, English, Spanish, French, Italian, Dutch, Swedish.
e Press [ SET ] again two times to exit the setup
24
You are able to use the TEST function to look for a better location
e Press TEST button, SCAN is shown in the Information Window.
... DAY e UN --
| - 7%
--t
O4. LIMA
m CIT 11%
flo [ow
TT TS TS
--t “TT --t
CI CIN!
AT UN
* Pick the unit to find a good location.
* +] flashing : The test is running and the Meteotime signal reception is good.
You are able to leave the device in this position.
(J flashing : The test is running and the Meteotime signal reception is poor.
You need to keep on looking for a better location.
* The test lasted for around 1 minute. You can restart the test with the [ TEST ] key
at any time, and also discontinue the test by press the TEST key.
SWITCH CITY <--> SUNRISE & SUNSET TIME <- -> TIME & DATE
* After inserting the batteries, the weather station searches for the Radio controlled Time signal
as well as the MeteoTime signal. After it has successfully received the MeteoTime signal, the
display shows in the information window “Select Country”. After a few more minutes, the
information windows the default city “ FRANKFURTM ”.
* You are able to press [ SET ] to switch from the display of the City to Sunrise & Sunset time
OR Time & Date for Frankfurt am Main.
[SET] “=
FRANKFURTM ES 6:09 938 5 423 266
25
SELECT THE COUNTRY AND CITY / CITIES
* Press and Hold [ SET ] for 3 second, in the information window, COUN TRY is shown, and
then press [ À ] or [ W ] key to select the country. For example, you have selected the
country name such as 1/6 A means Germany will be shown in the information window.
* Press [ SET ] key to confirm the Country (let's said we select Germany right now), and then
the information window will show [ | T y.
* Then, press [ A ] or [ W ] key to select the city, and the city name will be shown in the
information window such as F-RANKEFURTM means the city Frankfurt am Main'
* Tf the city Frankfurt am Main' is your selection, then press [ TEST a key to confirm.
A V will be shown on top of your selected city, and it will be FRANKFURTM and
‘Frankfurt am Main' will store into your personal memory list.
* Then, you are able to press [ À ] or [ W ] key to select more cities, and then press [ TEST У ]
key to confirm. You are able to select maximum FIVE cities to display. If you want to add
more cities, then MEMF JILL. will show in the Information Window.
OR
press [ SET ] KEY to quit, and E | T will shown at the information window.
REMARK: If you have skipped the city selection in the first time you power up the unit,
the product will default select Frankfurt am Main as your selected city.
DISPLAY MORE CITIES INFORMATION.
If you have selected more than one city, lets say you have select Frankfurt am Main, Kóln and
Münster in your desired city list, then you are able to press [ A ] or [ W ] key when the
Information Window shows the CITY NAME (Press SET until it displays the City Name).
FRANKFURTM =[L4/YI> KÓLN E L4/Y1>> MUNSTER
REMOVE YOUR SELECTED THE CITY / CITIES OUT OF MEMORY LIST
* Press and Hold [ SET ] for 3 second, C OUN TRY is shown in the Information Window,
then press [ À ] or [ W ] key to select the country. For example, you have selected
The country name such as ]/ GE [? means Germany.
* Press [ SET ] key to confirm the Country (let's said we select Germany right now), and then
the information window will show [| TY .
° Then, press [ A ] or [ Y ] key to go to your selected city, lets said 'Frankfurt am Main', and
the FRANKFURTM will show in the information window.
* Press [ TEST Y] key to remove the Vv, and this city is successful to remove out of your list
of preference cities you have selected.
* Then, you are able to press [ A] or [ Y ] key to select more cities, and then press [ TEST Vv ]
key to remove your selected cities. OR
Press [ SET ] KEY to quit, and E Y | T will shown at the information window.
After 4 second, it will go to the City-Date-Time Mode.
26
PERSONALIZED A PLACE NAME
* Press and Hold [ SET ] for 3 second. In the information window, COUNT RY is shown,
and then press [ A ] or [ W ] key to select the country. Let's said you have selected the
country Germany which is represented in J} / E A.
* Press [ SET ] key to confirm the Country (let's said we select Germany right now), and then
the information window will show [| TY.
* Then, press [ A ] or [ Y ] key to select the city, and the city name will be shown in the
information window such as FRANH FR TM means the city 'Frankfurt am Main', and
you would like to enter a new city which is near the region of Frankfurt am Main.
* Press the 'MEM ' key ; a cursor flashes on the first position of the Information Window
Then following input commands then apply:
KEY Function
'A'o'y' Selection of a letter
SET <1> Accept the selected letter and jumps to the next position. OR
<2> If you have not entered any letter (in other words, if only the
cursor is flashing at the last position), confirm the entry with this key
and your place will also be included in the memory with immediate
effect
TEST One position back in the data entry process
** The place that you have selected to enter your own description will still exist under its
own name.
* Press [ SET ] key to confirm and exit
SET THE TIME ZONE, LANGUAGE and CONTRAST
* Press and Hold [ SET ] for 3 second, COUNTR Y is shown in the Information Window.
* Press [ SET ] again, then ZONE + [JOHMR is shown in the Information Window, press
[Alor[ Y ] key to adjust the time zone.
* Press [ SET ] again, then the language will be shown in the Information Window, press
[ А ] ог [ Y ] key to select your desired language. There are total seven language Гог
selection, namely German, English, Spanish, French, Italiano, Dutch, Swedish.
* Press [ SET ] again, then CONTRAST, Э is shown in the Information Window, press
[ À ] or [ W ] key to adjust the LCD contrast Level.
* Press [ SET ] again and Е X | T will be shown at the information window. After 4 seconds,
it will change to the City-Date-Time Mode.
REMARK: If you do not have any selection into the Setup mode up to 60 seconds, it will
automatically exit the setup mode. The Information Window will show City / Sunrise &
Sunset Time / Time & Date.
27
SWITCH DAY WEATHER INFORMATION <- -> NIGHT WEATHER INFORMATION
The device is able to base on the SUNRISE time and SUNSET time to automatically switch
to DAY-WEATHER and NIGHT-WEATHER respectively. The unit is preset to show
DAY-WEATHER after sunrise time, and NIGHT-WEATHER after SUNSET time. The user
can press the A button to see the DAY-Weather (for 10-second period) if currently show the
NIGHT-WEATHER, or vice verse.
DAY e +, +
ON NIGHT +. + +
——" + *+ +
CO
DAY 1 DAY
<> La 9
DAY
MIGHT
CRITICAL WEATHER INFORMATION
Meteotime Weather signal contains the Critical Weather Information such as Gust,
Frozen Rain, Heavy Snow, Thunder, Strong UV, Dense Fog, Bise, Mistral, etc. for today
and coming three days. A critical weather alert signal /\ will be turned on in case that day
has critical weather that the user must know.
A
Sometimes there are more than one critical weather information in the 4-days.
Press ger key to read the critical weather information one by one.
The special icon of the day will be flashed when you read the Information.
flashing A
A day
с: пл теме CAR
y EL LILA. LIL IVAR 7 LILA
DAY
FIGHT
+ +
NIGHT ++ 4, +
NIGHT NIGHT NIGHT
CD = CD DAY <> NIGHT
teste Weather status
* Press [ SET ] key to go back to the display of CITY <== SUNRISE & SUNSET
TIME <> TIME ¿ DATE. If you would like to read the Weather Information in the
information window, then press Key to display DAY <> NIGHT Weather
information and also the Critical Weather Information.
HH B = V Y - | ! N If no key is pressed, the critical weather information will be toggle to display,
— so as to make sure you are aware of the critical weather details.
28 29
INDOOR / OUTDOOR TEMPERATURE AND HUMITIDY READING
Significance Day Night Significance Day Night
° Press [ IN/OUT |] keys to switch the reading of indoor or outdoor temperature and humidity Sunny (Clear i, , + Heavy Rain — —
reading fu MI [IN/OUT] = AIH at night) IN +44 +, ++
UA "Ut, <«— IT 1% A - A A
TT ТРИ MATT
* Press [ MEM ] key to read the record of the maximum and minimum temperature
* Press and Hold [ MEM ] key to CLEAR the record of the maximum and minimum
temperature
LINKING THE OUTDOOR THERMO-HYGROMETER SENSOR WITH
MAIN UNIT IF SIGNAL LOSS.
If the Main unit cannot receive the outdoor sensor signal, the outdoor signal icon will change
ю №.
* Press and Hold [ IN/OUT ] button for 3 second, and then the wave icon À will be flashed.
If the signal has been received again, the outdoor signal icon will be a .
BACKLIGHT
* Press [ Light ] key to turn on the LCD backlight for 8 seconds.
Low-battery indicator icon for
1 < main unit
= low- indicator icon for
A < ow-battery dicato con fo
OUT outdoor-transmitter
30
Light Cloudy Ух Lt Frontal
= + a Storms
Mostly + Heat Storms JA +
Cloudy УХ FIR Raf д
SES SAS
1 +
Overcast — — Sleet Showers Ух 24 004
CD CD + CD к CD
€ I x 2 F + ad *
x fF KT xd FO xx
EIA FIFA
Stratus Snow vv +
De a tae
o | | SES
* Fy Ta * x Ky Fa *
* a a * + #4 *4 *
Fog ' + Sleet — —
_ a Y
=== === So? SIT
Showers y Snow
Light Rain — —
LI
1, PA +, ‘er,
31
SPECIFICATION ON IN/OUTDOOR TEMPERATURE AND HUMIDITY
MEASUREMENT
Temperature Display Range : -40 degree C to 70 degree C
Temperature Resolution : 0.1 degree C
Temperature Operating Range (Main Unit) : -5 degree C to +50 degree C
Temperature Operating Range (Sensor Unit) : -20 degree C to +60 degree C
Temperature Accuracy : +/- 1 degree C
Humidity Display Range : К.Н. 1% 10 99%
Humidity Resolution : 1%
Humidity Accuracy : +/- 5% (within 25% - 80% at 25 C)
RF Transmission Frequency : 433 Mhz
RF Transmission range : Maximum 30 meters (Open Area)
Main Unit is powered by AA batteries x 2 pcs.
Outdoor Thermo-hygrometer is powered by AA batteries x 2 pcs.
EC-DECLARATION OF CONFORMITY
Product : MTO2
This product contains the approved transmitter and complies with the essential requirements of
Article 3 of the R&TTE 1999/5/EC Directives, if used for its intended use and that the following
standard(s) has/have been applied:
Efficient use of radio frequency spectrum
(Article 3.2 of the R&TTE Directive)
EN 300 220-2,V2.1.1:2006
EN 300 330-2,V1.3.1:2006
Electromagnetic compatibility
(Article 3.1.b of the R&TTE Directive)
EN 301 489-03,V1.4.1:2002
EN 301 489-1,V1.6.1:2005
Electromagnetic compatibility
(Article 3.1.a of the R&TTE Directive)
EN 50371:2002
Low voltage directive
applied standard(s) EN 60950-1:2006
Additional information:
The product is therefore conform with the Low Voltage Directive 73/23/EC, the EMC Directive
89/336/EC and R&TTE Directive 1999/5/EC (appendix II) and carries the respective CE
CE
RTTE Compliant Countries :
All EU countries, Switzerland CD
Aud Novway
32