1
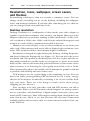
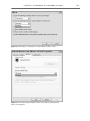
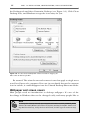
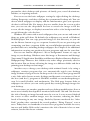
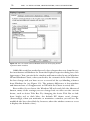
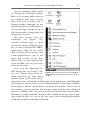
TE RI AL Managing the Windows Desktop Chapter 3 GET THE SCOOP ON... Configuring the basic desktop ■ Making the Start menu and taskbar work for you ■ Enhancing Windows with PowerToys ■ Managing applications ■ Improving performance “Y CO PY RI GH TE D MA ou don’t get a second chance to make a good first impression.” This saying has never been truer than with an operating system. People make snap judgments about an OS based on how it looks — are the colors crisp and clean, with enough variation to be pleasing to the eye? Does it look comfortable to work with? And is it flexible, so that it can be changed if boredom sets in? Out of the box, Windows XP is the most flexible and colorful version that Microsoft has released to date. It has mixed together a new design, an upgrade to some old components, and some much-needed tweaking to give the Windows desktop a fresh new look. It’s an improvement over the Windows 9x and Me series, and not as industrial as the Windows NT or Windows 2000 flavors. The graphical parts of the XP desktop include the overall screen resolution (which determines how much information you can pack onto a monitor’s real estate), icons, desktop wallpaper, graphical schemes (a collection of settings that determines how windows, menu text, and other items appear), and themes or global changes that create order out of configuration chaos — hopefully in a pleasant and useful way. 59 60 PART I ■ INSTALLATION, CONFIGURATION, AND CUSTOMIZATION Resolution, icons, wallpaper, screen savers, and themes Personalizing a desktop is a fun way to make a computer “yours.” You can change nearly everything you see on the desktop, including the wallpaper, icons, and desktop resolution. If you don’t like something you see, odds are you can change it with a few judicious clicks. Desktop resolution Desktop resolution is a combination of what modes your video adapter is capable of and what resolutions your monitor can display. Most new video adapters today have no problem running at 1600 (horizontal) × 1200 (vertical) resolution at 32-bit color. Older cards lack the onboard horsepower and memory to render all the computations needed at that rate. Monitors vary and will play a role in what resolutions to use from your video card. Older monitors will not be able to display high resolutions; even newer LCD monitors will not clearly display higher resolutions. Resolution is changed by right-clicking the desktop, clicking Properties, and then clicking the Settings tab (see Figure 3.1). You can select the screen resolution and color quality in this dialog box; feel free to play with the settings until you find one you like. If the screen appears to “paint” more slowly than you like, such as with noticeably jerky movements of your mouse cursor when you move it, try lowering the color quality from 32-bit to 24- or 16-bit. This exponentially reduces the number of calculations the graphics card has to perform and will help with slow redraw rates. LCD monitors are the coolest thing to hit computing in years. You can ditch your bulky, power-gobbling CRT and switch over to a svelte, energyefficient LCD monitor, incidentally reclaiming a lot of your real-life desktop’s real estate. There are a few things to watch out for when you go shopping for one, however. First, you have to be sure your video card and LCD monitor can talk to each another. Either your LCD monitor should support an analog connection or your video card should have a digital output connection (most commonly a DVI connector). Most LCDs support analog input, though there are some that do not. Check to see that you have the necessary connections available and buy the necessary cable to connect them if you don’t have one in the LCD box. CHAPTER 3 ■ MANAGING THE WINDOWS DESKTOP 61 Figure 3.1. The most common desktop resolution settings are readily accessible in the Display Properties dialog box. Next, your LCD will look its best at its native resolution which should be listed on the box or at the manufacturer’s Web site. Though your LCD monitor can perform scaling (taking an input at one resolution and changing it to another), you’re better off passing it a signal that doesn’t require additional calculations and incur dithering and jaggies in the process. Third, pixel response time is typically slower than CRTs. If you plan on playing high-speed games with intense graphical changes, LCDs will blur and look messy, because the crystals can’t change as fast as CRT pixels in response to the video signal. There are some expensive LCD monitors with response times of approximately 8 milliseconds, but most are in the 18–25ms range. Finally, Windows XP has a feature made initially for laptops called ClearType. This is a font dithering algorithm that can make screen fonts look cleaner. You can try using it on your LCD monitor to see if it helps with 62 PART I ■ INSTALLATION, CONFIGURATION, AND CUSTOMIZATION Video cards, drivers, and management applications Most new video cards come with comprehensive drivers and management programs that can adjust nearly every aspect of a card’s performance. Frequently, they install tabs in place of the standard Windows ones that change desktop resolution, color quality, and monitor refresh rates for you. If you have one of these programs installed you should use it to fiddle with your adapter’s settings. Although you can still use the default Windows dialog boxes, you’re better off playing the game the way the video card manufacturer intended. Because the interfaces vary dramatically among adapters, an in-depth discussion of specifics is beyond this chapter. But here are a few tips on getting the best out of your card: ■ Make sure your drivers and management applications are up-todate. Even though the screamingly newest drivers may have bugs, any drivers that are more than a couple weeks old are probably safe to use. And, as with many things in software, the older the hardware, the more likely the bugs have been pretty well squashed. ■ Most video card help files and user guides are hopelessly obscure. Find an official or unofficial forum or message board for your video card, lurk there for a while, and learn from the mistakes of others. ■ If you work in a profession such as graphics design or video editing, hang out on profession-specific forums. You will find a lot of advice about specific adapter settings for particular projects, including tweaks to make the card faster. visibility. From the Display Properties dialog box, click the Appearance tab and then click Effects. Select the Use the following method to smooth screen fonts check box, and then select ClearType from the drop-down list (see Figure 3.2). The other setting that affects your viewing quality is off the beaten path, for reasons known only to Microsoft. From the Settings tab, click Advanced and then click the Monitor tab (see Figure 3.3). From here you can change the screen refresh rate. Set the screen resolution and color quality first, and then set the refresh rate to the highest your monitor supports. CHAPTER 3 ■ MANAGING THE WINDOWS DESKTOP Figure 3.2. ClearType can help you see text better on LCD screens. Figure 3.3. Increasing your monitor refresh rate reduces eyestrain and fuzzy screen objects. 63 64 PART I ■ INSTALLATION, CONFIGURATION, AND CUSTOMIZATION Icons The Windows XP icon set is colorful and sometimes fun to watch. Most people will never change the icons that are applied to any application, file, or shortcut on the desktop. However, like many things in software, the default icons are ones that a developer thought would look good with an application, not necessarily what is informative or helpful to you. Windows and Windows applications use four sizes of icons. Two of these are used on the desktop, while the other two are used by the system in Windows Explorer folder views and window title bars. For desktop tweaking, there are two icon sizes (see Figure 3.4) to know about: large (32 × 32 pixels) and extra large (48 × 48 pixels). Large is displayed by default; extra large requires changing a setting. From the Display Properties dialog box, click the Appearance tab and then Effects. Select the option to use large icons, click OK, and then click Apply. Size isn’t all that you can change with your desktop icons. There is nothing that requires you to use the default icon for an application shortcut. If you are an inveterate tweaker, you can change around the icons themselves to suit your pleasure. Icons can be found in three primary places: Windows system files, such as shell32.dll, application executables, and icon files with the extension .ico. The cheap although not easy way to switch your desktop icons is by changing every program’s shortcut from its default to another one more to your liking. From the Start menu or the desktop icon, right-click an icon, click Properties, and then click Change Icon. A dialog box appears, listing the currently available icons for the shortcut. These icons are the ones embedded within the application’s executable; some programs have only one icon; others offer several or even dozens of icons to choose Large Extra large from. Select an icon and then click OK twice. Your icon changes to Figure 3.4. You can switch to larger icons when your selection. you use higher desktop resolutions. Bright Idea If you are using the large icon set, you can also switch to using larger fonts. From the Display Properties dialog box, click the Appearance tab. From the Font size drop-down list, select Normal (10 pt.), Large (14 pt.), or Extra large (17 pt.) and then click OK. CHAPTER 3 Inside Scoop ■ MANAGING THE WINDOWS DESKTOP 65 Inside Scoop Some system icons can be changed only through Display Properties. Click the Desktop tab and then click Customize Desktop. You can also choose which of these icons you want displayed (or not) on the desktop from this dialog box. If you don’t like the limited selection of icons, you can browse to other applications or even Windows system libraries. From the Change Icon dialog box, click Browse and then go hunt down icons that are more to your liking. Shell32.dll holds many of the Windows system icons, some of which you may have never seen (see Figure 3.5). Take a look in other executables, too; you may find something that is more appealing. The Internet also has icon libraries available if you want to add some pizzazz without having to do the heavy lifting yourself. Do a search for “free XP icons” in your favorite search engine and start browsing! The easier way to change your icons is to use a program designed to collect all icon files from your computer, create icon libraries, and then point your shortcut to a library. There are a number of freeware and shareware programs available to extract icons, create static or animated icons, and do just about anything you could ever want with icons. Popular icon manager choices include Microangelo (www.microangelo.us), IconCool Manager (www.iconcool.com), and AZ Icon Editor (www.hermancompute.com). After a while your desktop may get cluttered with icons, especially when programs install lots of links to affiliate Web sites or trial software that shipped on the CD. Some people like the casual disorder that comes with acres of icons; other people get tired of dragging icons to the Recycle Bin in an attempt to clear some space on the desktop. Windows XP has the Desktop Cleanup Wizard that cleans up unused icons and puts them into a folder on your desktop. By default it runs every 60 days, but you can run it on demand. From the Figure 3.5. Shell32.dll contains most of the standard Windows system icons found in menus, Display Properties dialog box, click windows, and on the desktop. 66 PART I ■ INSTALLATION, CONFIGURATION, AND CUSTOMIZATION the Desktop tab and then Customize Desktop (see Figure 3.6). Click Clean Desktop Now, and Windows sweeps the icons away for you. Figure 3.6. Use the Clean Desktop Now feature instead of dragging all those icons to the Recycle Bin. Be warned: The wizard scans and removes icons that apply to single users as well as all users of a computer. If no one in your family has used a common icon in a while, it could disappear into the Unused Desktop Shortcuts folder. Wallpaper and screen savers Most people need no introduction to desktop wallpaper. It’s one of the few things in Windows that can be changed easily, and many people like to Hack To change the cleanup interval, open Regedit and browse to HKEY_CURRENT_USER\ Software\Microsoft\Windows\CurrentVersion\Explorer\Desktop\CleanupWiz. Double-click Days Between Clean Up, change the base to Decimal, and then type the number of days you prefer. CHAPTER 3 ■ MANAGING THE WINDOWS DESKTOP 67 personalize their desktop with pictures of family, pets, travel destinations, hobbies, or inspiring artwork. You can access the basic wallpaper settings by right-clicking the desktop, clicking Properties, and then clicking the eponymous Desktop tab. You can choose which wallpaper to display, and the mini-monitor gives you a preview of what it will look like. For images that are smaller than the screen resolution, you can use the drop-down list box to stretch the image to fill the screen, tile the images, or display it normal size with a color background that you pick from the color list box. Windows XP comes with several wallpapers that you can use and some of them are quite well done. By default, the wallpapers are stored at Windows\ Web\Wallpaper. You can copy personal images to this directory, or you can use the Browse button to go to a separate location. If you are practicing safe computing, you have a separate folder on a non-Windows partition with your personal data on it, including desktop wallpaper. See Chapter 2 for additional information on using one partition for your programs and one for your data. You can use Internet Explorer’s “Set as background” feature to copy an image to your desktop. Windows saves this image at Documents and Settings\ %username%\Application Data\Microsoft\Internet Explorer\Internet Explorer Wallpaper.bmp. However, this clobbers any other image previously saved at this location. You are better off saving the image to a different folder and then pointing your desktop to that image. Another way to change your desktop with minimal hassle is by using a wallpaper rotation program that can automatically switch your desktop image without relying on Active Desktop to do it for you. These programs fill a nice little niche between static desktops and dynamic screensavers. One of the best (and free!) programs is WinWall, available at www.desktopchanger. com. It is small, flexible, and unobtrusive. The Web page features links to wallpaper sites where you can easily spend days sorting through images for your desktop. Screen savers are another popular and easy desktop modification. Screen savers were initially developed for monitors built in the ’80s and ’90s that ran the risk of having an image burned onto the screen. A screen saver blanked the screen or drew random images over the monitor, reducing the likelihood of burning in any one image. Berkeley Systems marketed the “After Dark” product that contained the near-legendary “Flying Toasters” screen saver. Today there are hundreds of screen saver programs available for every interest and hobby. With today’s monitors the risk of burn-in is low to nonexistent, but the fun factor remains. 68 PART I ■ INSTALLATION, CONFIGURATION, AND CUSTOMIZATION (In)Active Desktop When Windows 95 first shipped, someone had the bright idea of creating the “Active Desktop.” The concept was to bring Internet content directly to the desktop so that users could have an ever-changing stream of information that connected people with things that were useful or helpful to them. The concept didn’t work, in part because people wanted images and information from multiple sources aggregated into a single location, in part because other applications and services did a better job, and in part because Active Desktop was inflexible. Web content could be synchronized to the desktop only once per day, so other than connecting to “Picture of the Day” sites, Active Desktop was not useful for pulling down news sites or frequently-changing information. Despite these drawbacks Active Desktop is still lurking in the background and you must have it enabled in order to use themes or to view the new Windows XP interface. If you want to explore its settings, open the Display Properties dialog box, click the Desktop tab, click Customize Desktop, and then click the Web tab. The Windows XP screen saver has 11 built-in effects you can use. It will also lock your desktop so that no one can access your computer — you must log on again to clear the screen saver. You can access these settings on the Screen Saver tab on the Display Properties dialog box. When you select a screen saver and then click the Settings button, you can change things like transitions, effects, colors, and other options depending on the specific saver chosen (see Figure 3.7). If you want a free screensaver rotation program, choose the My Pictures Slideshow option from the drop-down list box. You can point it at any folder with pictures or images and display them after a certain amount of desktop inactivity. Watch Out! Sometimes the nastiest things are contained in the most innocent-looking packages. Screen saver programs are notorious for containing adware, spyware, and viruses. Before downloading one, do a search to see if it’s been reported as a malicious program. Also, scan the program with antivirus software before clicking “setup.” CHAPTER 3 ■ MANAGING THE WINDOWS DESKTOP 69 Figure 3.7. The “Mystify” screen saver uses few computer cycles but still looks good. Themes Themes affect nearly every aspect of the desktop, including wallpaper, icons, audio events, transitions, effects, and other glitz and sizzle that give you the feeling of looking at a completely different version of Windows. Themes are where artistry and creativity can truly soar; there are thousands of themes available on the Internet and new ones are being created every day. Most first-run blockbuster movies have desktop themes available, and of course there are plenty of fan-built themes for everything from aardvarks to zeppelins (air and Led). Unfortunately Windows comes with only two themes in the box: the Windows XP theme and the Windows 2000 theme. You can experience the raw excitement of changing between these two by right-clicking the desktop and then clicking Properties. The Display Properties dialog box defaults to opening on the Themes tab. The drop-down list includes Windows XP and Windows Classic (see Figure 3.8); if you have installed other themes you will find them listed here. The mini-monitor shows you what your new theme will look like; click OK if you want to keep the new theme. You can also save your current settings as a theme so that you can switch between themes without losing your custom settings. Click the Save as button. Windows defaults to saving a .theme file in the My Documents folder, which is normally a great place to save personalized information. However, the themes listed in the drop-down list box are found in the Windows\Resources\Themes folder, so you should browse to that folder and save your .theme files there. 70 PART I ■ INSTALLATION, CONFIGURATION, AND CUSTOMIZATION Figure 3.8. You can switch between Windows themes or third-party themes if you have them installed. Oddly, Microsoft has stashed several color schemes that were found in earlier incarnations of Windows 9x. From the Display Properties dialog box, click Appearance. You can switch the window and button styles between Windows XP and Windows Classic; when you do this, the contents of the Color Scheme list box change and you have access to several of the eye-blinding schemes from Windows 9x (see Figure 3.9). The primary difference is that windows and buttons have a 3-D appearance in XP while the Classic is strictly 2-D. Even odder, if you choose the Windows XP style and click the Advanced button, many of the settings you can change have no effect on the current theme, such as Active Title Bar. Try changing the Active Title Bar to fade from bright red to dark blue; the default XP theme won’t change. (Interestingly, when you minimize or maximize a window, you will see the modified title bar colors flash by; however, when the window comes to a rest it displays the default colors.) CHAPTER 3 ■ MANAGING THE WINDOWS DESKTOP 71 Themes, schemes, and styles Someone at Microsoft was aiming for job security when the design specifications for themes, schemes, and styles were created. The technologies are interrelated, affect each other, and cause customer confusion rather than clarity. Quick — where do you change title bar colors? Answer: any or all three will do the trick. Here is an attempt to explain the difference. ■ Themes cover the most desktop territory, affecting anything that generates a common look and feel. When you create or install new themes, you are affecting nearly every aspect of the desktop. Theme information is stored in a text file with a .theme suffix. ■ Schemes are collections of settings that affect specific sets of operating system components. For the desktop, this means such elements as title bar colors and text, window background color, and icon spacing, among other window-specific elements. Scheme information is stored in the Registry. ■ Styles are a middle ground, specifying the look and feel of common Windows controls, such as windows, buttons, and title bar colors and shading effects. Styles are accessed using APIs, and specific style information is stored either in the Registry or in a custom configuration file read by a program’s library. If you must dive into the wild world of the Windows desktop, stick to working with Themes. Your life will be simpler and happier for it. Because of the maddening design choices built into Windows XP, if you are into themes you are better off not wasting your time wrestling with obscure and undocumented quirks. Your best bets are either to download themes from the Web or to invest in a theme management program. For the first option, visit www.themexp.org or www.wincustomize.com or any theme site that grabs your interest after a quick Google search. Inside Scoop Inside Scoop If you install a theme and it doesn’t work, you need to enable the Themes service. Click Start, Run, and then type services.msc. Scroll down to Themes, double-click it, change the startup type to Automatic, click Start, and then click OK. 72 PART I ■ INSTALLATION, CONFIGURATION, AND CUSTOMIZATION Figure 3.9. Switch to the Windows Classic style and you unlock Windows color schemes that can charitably be described as “blinding.” Themes, schemes, and skins Microsoft uses the terms themes and schemes to mean different subsets of technology, though to most end users the difference is academic. In the rest of the software world, anything that changes the look and feel of an application is called a skin. Many programs are “skinnable,” including MSN Messenger and Windows Media Player. Although you’d think that skins apply to applications, and themes apply to entire operating systems, it doesn’t always work that way — WindowBlinds applies skins to Windows, according to the Web site. Rather than get wound up about proper use of terminology, just pretend that it all means the same thing: the changing of the interface to look the way you want it to. CHAPTER 3 ■ MANAGING THE WINDOWS DESKTOP 73 Highly regarded theme management programs include WindowBlinds at www.stardock.com and StyleXP at www.tgtsoft.com. Both are shareware, cost $19.95, and occasionally have the odd operational discontinuity (bug) to work around; but the sites also have libraries of themes that you can browse and download for free. Finally, if you want additional themes, Microsoft encourages you to give them more money for the privilege. You can purchase the Microsoft Plus! SuperPack for Windows XP. For only $29.95, you can get four “astounding” new themes and eight “stunning” screen savers, according to the Microsoft Web site. There are also some additional games and multimedia add-ons, some of which may be useful to you, others that are available elsewhere (Movie Maker 2 is a free download, so you don’t need to buy the SuperPack to get it). The hidden powers of the Start button The Start button is the place where everything can be done to your computer. By clicking Start, you can work your way through stacks of menus in order to launch applications, run system programs, and access frequentlyused documents. The Start button was introduced in Windows 95 and ever since then has undergone modification. The latest version separates the menu into four areas: the pinned applications area, the most-recently-used area, an area for common Windows-related functions, and a menu structure for everything else (see Figure 3.10). Like many things with Microsoft software, there are numerous access points that lead you to settings you can change, and some of the more important settings are hidden where you wouldn’t expect them. The Start button is a prime example. It contains a number of settings that change how it behaves and how your desktop looks. You can access the hidden powers of the Start button by right-click- Figure 3.10. The four Start button areas present ing it and then clicking Properties. you with different ways to launch applications or open documents. 74 PART I ■ INSTALLATION, CONFIGURATION, AND CUSTOMIZATION The Taskbar and Start Menu Properties dialog box appears, with the Start Menu tab selected (see Figure 3.11). Figure 3.11. The Start menu can display the new look or the classic look. New look or old look? Your first choice available is to switch between the Windows XP menu system and the Windows 2000 menu system. Some people find the Windows XP look a real mess; others find it useful. If you prefer the pre-XP menu structure, without a lot of distractions, you can switch between the two by clicking the appropriate button. The mini-monitor shows you what the two will look like. Notice also that several icons are added to the desktop with the Classic look (see Figure 3.12) — My Documents, My Computer, My Network Places, and Internet Explorer. These can be added to the Windows XP desktop by using the PowerToy Tweak UI covered later in this chapter. CHAPTER 3 ■ MANAGING THE WINDOWS DESKTOP 75 You can customize either menu by clicking the Customize button. Most of the settings differ between the standard and classic menus; those that occur on both, such as Display the Run command, are not persistent between the dialog boxes, so if you change a setting in one it will “mysteriously” change when you switch between them. The Start menu’s basic customization (see Figure 3.13) includes viewing large or small icons in the menu, setting the number of most-recently-used (MRU) applications visible in the menu, and choosing which Internet and e-mail applications to “pin” to the upper left section of the Start menu. There is also a button that clears the MRU area so you can get rid of menu clutter. Now click the Advanced tab. This dialog box (see Figure 3.14) Figure 3.12. If you long for the days of Windows lets you change what items are 2000, Windows XP lets you quickly switch back to visible and how the Start menu its look. behaves. Some of the more annoying features you can turn off, including the “Open submenus” and “Highlight new programs” options. You can also configure whether some of the common menu options, like the Control Panel, open up a new window (link) or list all the window’s contents (menu). If you want to work with the more advanced options of Windows XP, you need to make the Administrator Tools visible. Although it’s understandable why Microsoft wouldn’t want just anyone poking around in there, it’s one of the rare cases where something should be enabled by default, not hidden by default. 76 PART I ■ INSTALLATION, CONFIGURATION, AND CUSTOMIZATION Figure 3.13. Use the Customize Start Menu dialog box to change your basic menu options, such as icon size and number of most-recently-used items. Figure 3.14. Save yourself some clicks and enable the Administrative Tools menu items. CHAPTER 3 ■ MANAGING THE WINDOWS DESKTOP 77 Bright Idea You can pin any program to the top-left part of the Start menu by dragging it onto the Start button, or by right-clicking a shortcut and clicking Pin to Start menu. Right-click the icon and click Unpin from Start menu or right-click it in the menu and click Remove from this list. The Classic Start menu’s Customize button has fewer options than the Windows XP one (see Figure 3.15), and some of the options are not as clear as to what they do. The option to “expand” a menu option such as Control Panel means to display its contents as menu items rather than open up a window displaying the contents. Figure 3.15. The Classic Menu is a bit more confusing to work with but it performs the same functions as the one for the new Start menu. 78 PART I ■ INSTALLATION, CONFIGURATION, AND CUSTOMIZATION Minimalist at work As a writer I make my living writing books about software. I launch and close applications, flip between windows, and in general put the desktop through a solid workout every day. Anything that gets in the way or slows down a train of thought is dispensed with. So nearly all of the ooh-ahh things that Microsoft built into the operating system are banished immediately. I turn off all animations and video effects except dropped shadows on the cursor and desktop icons (see the section “Windows, applications, and performance,” later in this chapter). Sound effects are turned off (click Start, Control Panel, Sounds, Speech, and Audio Devices, and then Change the sound scheme). Any applications I use on a regular basis are placed on the Quick Start toolbar — no need to have them on the desktop, too (see the section “Customize your toolbars,” later in this chapter). I get rid of all “helper” applications in the notification area, except for a few key ones like antivirus and firewall (see the section “Improve startup with MSCONFIG,” later in this chapter). The net result is a faster, cleaner desktop that doesn’t get in my way or slow me down when I work. One annoying feature of the Classic view is the Personalized Menus command. This feature changes the contents of the Programs window depending on how often you use the various programs. The rest are hidden, waiting to be rediscovered behind a downward-facing arrow. Unless you like interfaces that hide themselves from you, you’re better off deselecting this option. Mucking about with menus One of the big annoyances with Windows is that it quickly becomes cluttered with programs, icons, shortcuts, and other debris. Start menu items are found in the Documents and Settings folder and come from two primary places: the All Users folder and the logged-on user’s folder. Windows looks in both places to see which icons should be displayed and then creates a Start menu from those items. When software is installed it may end up in one or the other folder depending on how the software’s designers intended it to be used. CHAPTER 3 ■ MANAGING THE WINDOWS DESKTOP 79 Hack The best way to clean up clutter is to prevent it. When asked for a folder for the program icons during Setup you can type in any location, such as \Programs\Fun Stuff\. This makes it easier to categorize your applications to match the way you work. Some menu items can be turned off or disabled as shown in the previous section, but most of the annoyances can be resolved only through judicious pruning of the Start menu. There are two main ways to do this: dragging items around the Start menu one at a time, or using Windows Explorer to work with multiple items at the same time. Click and drag an icon to a different location on the Start menu. Windows displays a black horizontal bar showing you where the item will land when you release the mouse button. Using this method, you can quickly pin a frequently-used application to the Start menu. If you are using the standard Windows XP menus and want an easier way to reorganize your menus, you have to do a little digging with Windows Explorer. Click Start, All Programs, Accessories, and then Windows Explorer. By default it opens to My Documents. In the folders pane, browse to Documents and Settings\All Users\Start Menu\Programs (see Figure 3.16). From this point you can follow the rest of the Start menu hierarchy and use the multiple-selection and drag-and-drop capabilities of Windows Explorer to create and delete folders, move icons and folders around, and in general make the organization more to your liking. For applications that install to a specific user’s directory, browse to Documents and Settings\%username%\Start Menu\Programs. One incomprehensible Windows design decision is the non-alphabetization of menus by default. In other words, when you move menu items around, they are tacked on at the end of the current menu structure, rather than put in alphabetical order automatically like in any other folder. To remedy this decision Microsoft included a sorting option that you must invoke each time you want the menu structure cleaned up. Right-click anywhere in the All Programs menu and then click Sort by name. Folders are moved to the top of the menu and sorted, followed by individual menu items. You need to do this for each subsequent level of the Start menu; sadly the sort feature isn’t recursive, so it won’t work its way through the levels of the Start menu organizing your icons for you. 80 PART I ■ INSTALLATION, CONFIGURATION, AND CUSTOMIZATION Figure 3.16. Windows Explorer is the fastest, easiest way to rearrange or delete Start menu items. With the Classic view, you are given a wizard to create or remove new folders and shortcuts. In the Classic view, right-click Start, click Properties, and then click the Customize button. At the top of the Customize dialog box are the Add and Remove buttons that walk you through the steps needed to, well, add or remove items in the Start menu. This wizard works its magic only on the logged-on user’s own folders, not the All Users folder. To do that, or to move things around, click the Advanced button. This launches Windows Explorer, focused on the user’s folders, but you can browse up and down the folder list and work with menu items normally. Note that Windows places the Sort function on this menu, rather than as a right-click menu option (see Figure 3.17). This button also sorts the Start menu recursively. There’s probably a reason Microsoft flip-flopped the sorting behavior between the menu versions, but it seems counterintuitive to take away functionality that was perfectly decent in a previous release. Watch Out! If you shuffle icons around, you may make some programs go “invisible” to other users. Feel free to move icons within a particular user’s directory, including the All Users one, but be careful moving icons from a user to All Users and from All Users to a specific user. CHAPTER 3 ■ MANAGING THE WINDOWS DESKTOP 81 It’s our policy to say no Group policies are used by Windows-centric environments to define and control just about every aspect of the operating system and related software. The Group Policy Editor (GPE) is the tool used to define and apply policies to computers and users and is especially helpful in locking down unneeded services or restricting the damage that end users can accidentally do. These settings override those created by users, which makes it a powerful tool to help keep a computer Figure 3.17. The Classic menu lets you alphabetistable and running. To read more cally sort your menu with only a single button click. about the GPE and user settings, see Chapter 4; to find out how to create and apply security profiles, see Chapter 6. Although the GPE is most often used in larger businesses, you can still use it to configure settings related to the Start menu, rather than manually adjusting the settings. Launch the GPE by clicking Start and then Run, typing gpedit.msc, and then clicking OK. Browse to User Configuration\ Administrative Templates\Start Menu and Taskbar (see Figure 3.18). The far right pane lists a number of settings that can be applied to all users that log onto the computer, including the removal of various Start menu items, locking the taskbar, and clearing out any “tracking” items such as Recent Documents. When you have the Extended View tab selected, you can click an item and see an explanation of what the item does and the operating system requirements, if any. To change one of these settings, double-click the item. Select the appropriate radio button and then click OK. Hack The GPE isn’t available in Windows XP Home Edition, because it creates policy files that apply registry keys at startup, rather than edit the registry directly. You can still edit the appropriate registry values in XP Home Edition, but it would be simpler (and less error-prone) to purchase XP Pro. 82 PART I ■ INSTALLATION, CONFIGURATION, AND CUSTOMIZATION Figure 3.18. The Group Policy Editor is the industrial-strength Windows settings editor. A cautionary note to the casual hacker: Sometimes the language in the GPE uses double negatives, which means that “enabling” a setting doesn’t always do what you think it might. For example, when you enable a Remove option, it means you remove the object. If you select disable, that means the Remove item will be present on the menu. Yes, it’s counterintuitive. Just get into the habit of reading the GPE items and the explanations closely before making changes. But you’re not done yet. The GPE has written the changes to the necessary files but Windows hasn’t been told to apply them yet. You can do this in two ways. You can log off and log back on again, or click Start, Run, type cmd, and then click OK. In the command window, type gpupdate and press Enter. This instructs Windows to read the local policies file and apply any changes that have been made. Additionally, if you browse around the Administrative Templates folder, you will see that you can change a lot of settings related to Windows XP’s basic operation. Browse to Control Panel\Display and you can hide many of the options that have been covered in this chapter. Feel free to experiment, but remember that it’s possible to lock down Windows so tightly that you cannot gain access to any administrator tools, the GPE, or Regedit. There are ways around this but they can be painful and complicated. The moral of the story: Change only a few things at a time, and don’t be in a rush to make your system impenetrable. You just may lock yourself out of your own house. CHAPTER 3 ■ MANAGING THE WINDOWS DESKTOP 83 Run! Run! Unless you have really good reasons to hide the Run command from users (pesky inquisitive children, for example), you should think twice before disabling it with either the Group Policy Editor or Tweak UI. The Run command is like a bridge between the GUI world and the command line, capable not only of saving you time but opening up powers you didn’t know you had. Any application that is in Windows’ application path can be launched by typing the executable name, such as winword. Most Windows-specific applications, such as Regedit, are in this path and can be launched in this manner. Many management functions can be launched directly from the Run command, such as the Group Policy Editor (gpedit.msc) and the Local User Manager (lusrmgr.msc). For some of these, such as mscorcfg.msc (.NET configuration), using the Run command is the only way to gain access to them. You can also open shares across the network without browsing through My Network Places. Type \\computername\sharename and then click OK. The share opens up in a new window. Finally, you can open up Control Panel components without the seemingly endless drill-down. To open the Add or Remove Programs component, type appwiz.cpl, or open the Network Connections component with ncpa.cpl. So keep the Run command around. You will find yourself using it with increasing frequency. The antitrust icon The United States Department of Justice filed an antitrust lawsuit against Microsoft, saying that Microsoft was using unfair business practices to prevent competition. They presented evidence that Microsoft ignored or clobbered other programs’ settings when those programs were installed, specifically Web browsers, e-mail clients, instant messaging clients, media players, and Java interpreters. The courts agreed and ordered Microsoft to play well with others. Microsoft’s response was to create the Set Program Access and Defaults option in the Add or Remove Programs dialog box (see Figure 3.19); this option appears in Service Pack 1 and Service Pack 2. Shortcut icons are added directly beneath the Control Panel icon in the Start menu and at the 84 PART I ■ INSTALLATION, CONFIGURATION, AND CUSTOMIZATION top of the All Programs menu. Click one of these icons or open the Control Panel and click the icon in the left-hand column. Figure 3.19. The Set Program Access and Defaults dialog box lets you specify non-Microsoft programs to use for key Internet functions. There are three configuration radio buttons listed. The first is the nothingbut-Microsoft option. In essence, you tell Windows that, no matter what else is installed on your machine, you want to use only Microsoft products. Your other programs are still available, but the related program associations remain with Microsoft applications, and the pinned applications on the Start menu belong to Microsoft. The second option is the anything-but-Microsoft option, where you tell Windows that you want to use your non-Microsoft browsers, media players, and instant messengers. However, this is a “scorched earth” option; all references to Microsoft applications in the Start menu (and program associations) are removed. The applications are still on disk, and can be restored by coming back to this dialog box, but otherwise it’s as if they were never on your system. The Custom option lets you mix and match between the two. For example, you can choose a non-Microsoft browser as your default but still allow access to Internet Explorer. If you choose not to allow access to a program, it may not work, even if you click on the program’s executable. Be careful if CHAPTER 3 ■ MANAGING THE WINDOWS DESKTOP 85 you decide to lock out a program using this method. Besides, if it’s a nonMicrosoft program and you don’t want access to it, why not just uninstall it? One interesting behavior is that the Start menu icons reappear every time you install or reinstall a service pack. If it bothers you, use Tweak UI or the Group Policy Editor to get rid of them. All about the taskbar and the notification area Along with the Start menu, the taskbar and the System Tray are two areas you can optimize for the way you work. They present a limited area to work with, and so you need to determine the best balance between having plenty of information and preserving screen real estate. Taming the taskbar By default the taskbar appears at the bottom of the screen, but you can move it to any edge. Right-click the taskbar and deselect the option to lock the taskbar. Click and drag the taskbar to any edge of the screen you prefer (see Figure 3.20). One benefit of moving the taskbar to the sides is that you can reduce “button crunch,” the condition where you have many windows open and the buttons get smaller, making it impossible to tell what a particular button’s content is. Figure 3.20. You can see more buttons, and more of the text, when the taskbar is to either side of the desktop. 86 PART I ■ INSTALLATION, CONFIGURATION, AND CUSTOMIZATION With the taskbar unlocked, you can also resize it. Click and drag the edge to resize it to show as much or as little information as you like. This tends to have better results when the taskbar is at the sides of your screen, rather than the top or bottom, but it’s a matter of personal preference. When you have it resized, you can re-lock the taskbar so that it keeps its size and location. There are several other behavior and appearance settings you can change for the taskbar. Right-click the taskbar and then click Properties, or right-click the Start button, click Properties, and then click the taskbar tab (see Figure 3.21). Figure 3.21. Change key taskbar behavior using the Taskbar Properties dialog box. Most of the settings are self-explanatory, but the two that you may want to change are Group similar taskbar buttons and Show Quick Launch. The grouping feature is an attempt to save button space in the taskbar. When you open more than one window using the same application, such as Word or Internet Explorer, Windows will collect the windows into a single taskbar button. The button is then modified to show the number of collected windows CHAPTER 3 ■ MANAGING THE WINDOWS DESKTOP 87 and a down-pointing arrowhead. When you click the button, a document list appears, and you can click on the necessary document to jump to it. Turn this option off and you go back to the Windows 2000 default behavior, where “button crunch” is the normal state of being. The other setting is to show the Quick Launch toolbar (see Figure 3.22). The next section covers custom toolbars in depth, but the Quick Launch toolbar was turned on by default in Windows 2000, and then turned off in Windows XP. I find the Quick Launch toolbar to be one of the most helpful features of the desktop and I rely on it extensively; I don’t need to sort through multiple layers of menus on the Start Menu in order to launch a commonly-used application. And, because I prefer not to have my desktop cluttered with icons, the Quick Launch is where I put shortFigure 3.22. The Quick Launch toolbar, shown cuts to my most frequently used undocked, is the perfect place to launch frequentlyapplications. used programs. Customize your toolbars Windows XP comes with a few toolbars that you may find useful. When you first activate them, the toolbars appear on the existing taskbar; you can click and drag them onto your existing desktop, creating separate windows. You may also need to increase the taskbar’s size to accommodate the additional toolbars. To display the new toolbars, right-click the taskbar and then click Toolbars. The menu (see Figure 3.23) shows four toolbars that you can add to your desktop: ■ Address. The Address toolbar is, next to Quick Launch, the most useful of the bunch. It displays a dockable toolbar that lets you type in or copy and paste a URL. This will launch your default browser and navigate to the link. It’s very handy and saves you a click or two. ■ Links. The Links toolbar shows you the contents of Internet Explorer’s Favorites\Links folder. This is only partially useful — you may not put all your favorites into this folder, and you may not even use Internet Explorer as your browser. ■ Desktop. This toolbar may be useful to someone, but it’s not clear whom it’s meant for. It contains a subset of buttons that you can reach in other and better ways. Maybe you’ll discover the use that Microsoft thought of when they included it in Windows XP. 88 ■ PART I ■ INSTALLATION, CONFIGURATION, AND CUSTOMIZATION Quick Launch. The single most useful toolbar in the bunch. This lets you add any program, document, or URL onto it that you want. If you are always opening budget.xls, for example, you can put a shortcut to it here so that you are never more than one click away. Figure 3.23. Revealed at last: the “hidden” toolbars of Windows XP. If you have installed Windows Media Player 10, you will have a Windows Media Player toolbar listed. When WMP is launched and then minimized, a control toolbar appears in the taskbar with the necessary media controls. This is handy for when you are listening to music but don’t need the screen real estate consumed with the player’s interface. Inside Scoop Inside Scoop Microsoft applications such as Windows Media Player and Outlook have an annoying habit of installing shortcuts onto the Quick Launch toolbar for you without asking first. Don’t hesitate to delete these shortcuts if you find them annoying. CHAPTER 3 ■ MANAGING THE WINDOWS DESKTOP 89 You add items to all toolbars but the Address toolbar by dragging and dropping an icon onto them. The easiest way is to open the toolbar, click Start, browse to the icon you want to add, and then drag the icon onto the appropriate toolbar. Left-clicking and dragging automatically creates a shortcut; if you right-click and drag, a menu appears, giving you the option to move the icon to the toolbar rather than just copying it. Drag-and-drop is also used to re-order items in a toolbar. Leftclick and drag the icons to new locations. Windows displays a black vertical bar showing you where the icon will land when you release the mouse button. If you get tired of any of these toolbars, you can get rid of them by right-clicking the toolbar and then clicking Close Toolbar (see Figure 3.24), or you can right-click the taskbar, click Toolbars, and then deselect the specific toolbar. If you have the toolbar visible as a window, just click the Close button. All systems are go: The notification area Figure 3.24. To get rid of a toolbar, right-click it and then click Close. The notification area is at the far right of the taskbar (see Figure 3.25). This area is also known as the system tray, because it is where many Figure 3.25. The system-related icons appear. Microsoft calls it the noti- Notification Area can fication area on the theory that when something hap- contain many icons, only some of which actually pens with your system that you should know about, a notify you of important events. widget will notify you about it. The reality is that many applications, system-related or user-related, put icons here. Many of them are spawned by applets loaded at startup; others are here instead of minimizing to the taskbar, which helps save real estate. Whether you prefer lots of notification icons or few, there are two basic settings you can control regarding overall appearance. You can manage the settings by right-clicking the taskbar and then clicking Properties. The two settings are to display the clock (or not), and to hide inactive icons. 90 PART I ■ INSTALLATION, CONFIGURATION, AND CUSTOMIZATION To hide or unhide icons, or to hide only inactive icons, click the Customize button. You are presented with a list of icons that have made an appearance at one time or another in the notification area. Click an entry and then click the drop-down list and change its status to whichever one suits your needs (see Figure 3.26). Figure 3.26. You can change the way icons appear in the notification area. A few words about the Hide when inactive option: When this box is selected, any icons that have not been active for a while will “disappear” and be replaced by a left-facing chevron in the notification area. You can see the chevron in the preview box above the check boxes. Your inactive icons can be briefly redisplayed by clicking the chevron, which scoots to the left and shows you all the icons again. If you want to click an icon, click quick; the chevron gives you only a few seconds’ time before concealing the icons again. CHAPTER 3 ■ MANAGING THE WINDOWS DESKTOP 91 Hack Want to get rid of the notification area completely? Open gpedit.msc and browse to User Configuration\Administrative Templates\Start Menu and Taskbar. Change the policy in the Hide the notification area to Enabled and reboot. Two other ways of reducing the number of icons are to tell applications not to use the notification area (either when minimizing or when just plain running), and to reduce the number of applets that load at startup. Some programs like media players let you choose whether to minimize to the notification area or to minimize to the taskbar; others, like MSN Messenger, don’t give you an option. For the latter applications you can change the visibility status as recommended above. For dealing with applets that load at startup, see the section “Improve startup with MSCONFIG,” later in this chapter. Edit desktop settings with Tweak UI Despite all the improvements in the Windows interface, and new usability enhancements, there are many aspects of Windows that are odd, get in the way, or just plain don’t work the way you expect them to. Microsoft developers found this was true for them as well, so some unsung geniuses developed the PowerToys. The PowerToys collection started out as only an interface configuration application, using checkboxes and tabbed dialog boxes to make changes to obscure Registry settings. The changes would turn off animated menus, for example, or clear all search dialog boxes at logoff. The recent batch of PowerToys has been expanded to include useful utilities, not just for the user interface, but for other Windows applications including the command line. Not everyone will need all of them, but if you find that Windows out of the box is a little too inflexible, the PowerToys are a good first place to look for opening up Windows. Tweak UI configures many of the Windows behaviors that are otherwise difficult to control. If you are acting as the system administrator and you want the changes to be global, use the Group Policy Editor to make the necessary edits. Otherwise, if you are changing things on a per-user basis only, Tweak UI is the PowerToy of choice. Once you have installed Tweak UI, click Start, click All Programs, click PowerToys for Windows XP, and then click Tweak UI. The window (see 92 PART I ■ INSTALLATION, CONFIGURATION, AND CUSTOMIZATION Watch Out! Although PowerToys are written by Microsoft and available from Microsoft, Microsoft lets you know in no uncertain terms that all PowerToys are unofficial and unsupported. If you install one and Windows breaks, you’re on your own. Figure 3.27) displays a tree in the left pane, a collection of settings related to tree items in the upper right, and the lower right contains explanations — sometimes very brief — of what each setting accomplishes. Most settings are per user, some are global, and some require a log off and a log on to change the desktop. Figure 3.27. You can turn off desktop animation settings in the General category. You can spend quite a bit of time exploring all the settings that Tweak UI makes available to you; here are a few favorites. ■ General. This collection of settings configures many of the animation “features” of Windows XP. With the exception of the cursor shadow, all of these get turned off. ■ Explorer. Use this section to show or hide various Windows XP folders, such as ones labeled “My” or options you never use such as Links. ■ Taskbar and Start menu\Start menu. This section allows you to choose which applications will stick around in the most-recently-used section of CHAPTER 3 ■ MANAGING THE WINDOWS DESKTOP 93 the Start menu. You can eliminate little-used applications and keep the clutter minimized. Double-check this section every now and again, as new options are added as you install and use additional programs. ■ Logon. You can choose which accounts are visible in the workgroup’s logon screen. This is nice for those occasions when you don’t want your kids attempting to hack the Administrator account (hidden by default). One setting you should be careful with is the Logon\Autologon setting. In general you should always log on with a user name and password, even if you’re the only person in your home. To save time, you can have Windows log on with any user’s account automatically, but because this setting bypasses the normal log on process, anyone can get access to your personal information or masquerade as you online. This setting is most useful for testing and troubleshooting, when you never leave the computer. It is a high security risk and should be disabled once you have finished your testing. Lastly, there is another setting that can be a huge help. Occasionally Windows gets confused about resource information and mixes up icons on the desktop and in Windows Explorer. In the Repair section (see Figure 3.28), the first item in the drop-down list allows you to rebuild icon resource information, and nine times out of ten it will restore the mixed-up icons to their normal programs and files. Figure 3.28. One of Tweak UI’s Repair options reset icons to their default appearance. 94 PART I ■ INSTALLATION, CONFIGURATION, AND CUSTOMIZATION A grab bag of PowerToys PowerToys are additional programs that Microsoft developers worked on after Windows XP was released to manufacturing. They add missing functionality to Windows, and even make Windows fun in some cases. The PowerToys collection is updated from time to time as new applets are built, or as existing PowerToys gain some features or bug fixes. Here is a list of PowerToys currently available: ■ RAW Image Thumbnailer and Viewer. The RAW format is considered the most flexible and true-to-life file format (unlike lossy formats such as JPG). With this PowerToy, you can organize and work with digital RAW files in Windows Explorer (much as you can with JPEG images). It also provides thumbnails, previews, printing, and metadata display for RAW images. ■ ClearType Tuner. This PowerToy lets you use ClearType technology to make it easier to read text on your screen, and installs in the Control Panel for easy access. It is a definite boon for LCD or laptop users, since ClearType was initially either on or off, with no easy means of control. ■ HTML Slide Show Wizard. This wizard helps you create an HTML slide show of your digital pictures, ready to place on your Web site. ■ Open Command Window Here. This PowerToy adds an Open Command Window Here context menu option on file system folders, giving you a quick way to open a command window (cmd.exe) pointing at the selected folder. Incredibly handy for users who enjoy a command-line interface. ■ Alt-Tab Replacement. With this PowerToy, in addition to seeing the icon of the application window you are switching to, you will also see a preview of the page. This helps particularly when multiple sessions of an application are open. The page preview size is configurable, which is a big help for people with limited vision. ■ Power Calculator. With this PowerToy you can graph and evaluate functions as well as perform many different types of conversions. It won’t replace your HP scientific calculator but it’s handy nonetheless. Bright Idea You can download all the PowerToys for Windows XP at www.microsoft.com/ windowsxp/downloads/powertoys/xppowertoys.mspx. CHAPTER 3 ■ MANAGING THE WINDOWS DESKTOP 95 ■ Image Resizer. This PowerToy enables you to resize one or many image files with a right-click. This is a fast and easy way to resize images for Web pages, or to reduce the size of image attachments in e-mail (such as when you send your newest pictures of the kids to the grandparents). ■ CD Slide Show Generator. With this PowerToy you can view images burned to a CD as a slide show. Doing a proper job of mastering a slide show produces better results (and requires more effort), but if you just want a quick and dirty way to display images from a disk, this is it. ■ Virtual Desktop Manager. Manage up to four desktops from the Windows taskbar with this PowerToy. Microsoft attempts to do what Linux has done for years — increase the size of the virtual desktop. You can switch between desktops and have each desktop focused on a particular task or application. ■ Taskbar Magnifier. Use this PowerToy to magnify part of the screen from the taskbar. Similar to the Magnifier function in the Accessibility folder, but more focused (pun intended). ■ Webcam Timershot. This PowerToy lets you take pictures at specified time intervals from a Webcam connected to your computer and save them to a location that you designate. You may have a feature like this already in your Webcam software; if so, use the software that came with your Webcam instead. If you decide you don’t like a PowerToy, you can uninstall it from the Add or Remove Programs window in Control Panel. Add, remove, and change Windows components You can add, remove, and change most of the components that are available in Windows. These run the gamut from accessibility tools, to applets like Calc and WordPad, to services like Internet Information Server (IIS) or Distributed Transaction Coordinator. Some components, such as additional mouse pointers, are just for fun or add to the things you can do with Windows. Others, like IIS, are meant for heavy duty use or more extensive use of Windows than as an ordinary desktop PC. Because many of these components and services are really meant for development usage there are limits on what you can do with some of them. For example, the version of IIS that ships with Windows XP has a limit of ten concurrent connections. So, although you can run a Web server on your 96 PART I ■ INSTALLATION, CONFIGURATION, AND CUSTOMIZATION desktop, it’s more for development efforts than for actual serving of content on the Internet. It all starts with the Add or Remove Programs dialog box. Click Start, click Control Panel, and then click Add or Remove Programs (see Figure 3.29). The default view shows you which applications and software updates you have installed on your computer. You can remove (or change the program’s installation, if that option is available) by clicking a program and then clicking Remove. Figure 3.29. You can add or remove just about anything on your computer using this option. To remove Windows components, click the Add/Remove Windows Components button on the left side of the dialog box. The Windows Components Wizard appears (see Figure 3.30), showing you a list of Windows components that you can install or remove. Scroll through the list to find the components you want to add or remove; you can click Details to get a list of subcomponents that can be added or removed. Select a component to add or remove and then click Next. Windows adds or removes the selected component. Close the wizard by clicking Finish. Depending on the component, you may need to reboot your system. CHAPTER 3 ■ MANAGING THE WINDOWS DESKTOP 97 Figure 3.30. The wizard shows you a list of Windows components to install or remove. Removing hidden Windows components Older versions of Windows allowed you to select components such as games, the Briefcase, and WinTV (remember that one?) at installation time. Windows XP sped up the installation process by removing the component selection process. Instead, it installs many components without asking you for permission, some of which look like they can’t be uninstalled. You won’t find a way to uninstall Pinball, for example, even though it takes up a lot of space on your hard drive. But there is a way to list those hidden components in the Add/Remove Components dialog box. Using Windows Explorer, browse to the Windows\inf folder and use Notepad to open the file SYSOC.INF. (If you can’t see the folder, change Explorer’s settings to show you hidden and system files.) You will see a number of line entries like this one: Games=ocgen.dll,OcEntry,games.inf,HIDE,7 Delete the word HIDE from the component you want to appear in Add/Remove Components and then save the file. Go to the Add/ Remove Components dialog box, and you will see the components, ready to be deleted. 98 PART I ■ INSTALLATION, CONFIGURATION, AND CUSTOMIZATION Manage applications with Task Manager Task Manager is a jack-of-all-trades application that provides a wealth of information about the overall health of Windows. Most frequently it is used to kill applications and processes that have crashed and are no longer responding. You can launch Task Manager (see Figure 3.31) in three different ways: Right-click on the taskbar and then click Task Manager; press Ctrl+Shift+Esc; or press Ctrl+Alt+Del. The latter will either bring up Task Manager, if you are in a workgroup, or bring up the Windows Security dialog box if you are in a domain, where you can then click the Task Manager button. Figure 3.31. Task Manager displays a list of what is running on your computer. Click the Applications tab and you will see a list of all running applications on your system and each application’s status. If the program has crashed and has stopped responding — your mouse cursor moves but you cannot open menus or click the close button — Task Manager shows you the helpful message “Not Responding.” Click the unresponsive application in CHAPTER 3 Inside Scoop ■ MANAGING THE WINDOWS DESKTOP 99 Inside Scoop Because Task Manager displays CPU usage and helps identify misbehaving applications, I put a shortcut to taskmgr.exe in my Startup folder. That way information about my system and misbehaving applications is just one click away. Task Manager and then click End Task. The application may close right away, or you may receive a system notification that “This program is not responding.” Click End Now, or wait for Windows to lose patience and close the application for you. Sometimes it’s not an application that goes awry but a system process. This often happens with poorly-written device drivers or services related to hardware that are running around, listening for a response, but not smart enough to figure out that the hardware isn’t responding. Usually when this happens, the CPU usage (found on the Performance tab) rockets up to 100%. Click the Processes tab and find the process that is consuming all or nearly all of the CPU cycles. Click the process and then click End Process; most of the time, this is sufficient to put down the misbehaving process. There are times, however, when the process won’t be or can’t be killed. Unlike UNIX-based systems, there is no way to log on as root and have ultimate control over what happens with the system; Windows protects some processes even if you think they should be ended. A third-party program called Process Explorer works much like Task Manager but provides far more detail about running processes (such as file system handles) than average users would ever need. But it does one thing that Task Manager doesn’t: It lets you end processes, any processes, even ones that Windows thinks you shouldn’t. For this reason it’s a great tool to have in your toolbox, and is a worthy replacement for, or addition to, Task Manager. Best of all, it’s freeware. You can find Process Explorer at www.sysinternals.com. Improve startup with MSCONFIG When Windows XP boots it starts a number of services and applications so that the Windows environment is configured for your use. These services and applets may or may not be needed; many of them are enabled out of the box, while others are added by applications or device managers you install. Microsoft provides a program called the System Configuration Utility, or MSCONFIG that lets you determine which services and applications run at startup. You can see which programs are starting, where they reside on your system, and enable or disable them by clicking a check box. This makes it 100 PART I ■ INSTALLATION, CONFIGURATION, AND CUSTOMIZATION easy to determine if a particular service or application is needed, and lets you undo any changes if you find your system is less stable or less functional without the applets. You can also control these services and applets using the Services Manager and RegEdit (see Chapter 11 for more information on these applications). However, if you are experimenting with the boot time and application startup, MSCONFIG is easier to use than the other applications. Click Start, click Run, type MSCONFIG, and then click OK. Click the Startup tab (see Figure 3.32). You will see a list of the applets that are loaded at boot time: the name of the applet, the applet’s location and any command-line options, and the registry key that contains the information. Figure 3.32. MSCONFIG lets you select which applets to load at boot time. From this dialog box you can select and deselect which applets you want loaded at boot time. This is a great way to determine which applets are needed and which are just consuming CPU cycles. For example, I never used my video card’s control panel, which was so generously installed into the notification area for me. Using MSCONFIG, I determined that my system worked just fine without it, so I launched Regedit and removed the registry key that loaded the applet. CHAPTER 3 ■ MANAGING THE WINDOWS DESKTOP 101 Hack Want a fast way to bypass loading all those applets at boot time? Hold down the Shift key when your computer is booting. MSCONFIG’s other tabs go into detail on legacy startup files, services, and boot configurations. It is best to leave these alone unless you have some experience with legacy applications, hacking boot files, and working with startup diagnostics. Services are covered in more detail in Chapter 11, and it’s better to use the Services management panel (services.msc) to control how services are launched. Windows, applications, and performance There are other ways to tune Windows XP for optimal performance, ones that do not require diving deeply into the registry or hacking away at applications. Surprisingly for Windows some of these settings are accessible and understandable. The first two settings are usually set for you, but depending on your needs you can change them around. They tell Windows, on a macro scale, how to allocate its cycles: best performance for applications, or best performance for services. Click Start, right-click My Computer, and then click Properties. (You can also right-click the My Computer icon if it is on your desktop, click Start, Run, and then type sysdm.cpl, or access the dialog box through Control Panel System.) The System Properties dialog box appears; click the Advanced tab and then in the Performance section click Settings. The Performance Option dialog box appears. Click the Advanced tab. This tab contains two primary settings: one for processor scheduling and one for memory usage (see Figure 3.33). By default, on a Windows XP desktop, both are set to optimize for Programs, so you should not have to change these options. If you are doing development or testing Web server programs, you can change these settings so that background services and the system cache receive the majority of the available computer cycles. 102 PART I ■ INSTALLATION, CONFIGURATION, AND CUSTOMIZATION Figure 3.33. You can instruct Windows how to optimize its performance: for applications or for services. The next group of settings is in the same general area but pertain to video performance. From the Performance Options dialog box, click the Visual Effects tab (see Figure 3.34). Here you can fine-tune the amount of eye candy you want when you use Windows. The first two radio button options are all-or-nothing switches; they select all or none of the items listed in the Custom list box. The Custom radio button lets you pick and choose which animation elements you want Windows to spend time computing and displaying for you. CHAPTER 3 ■ MANAGING THE WINDOWS DESKTOP 103 Figure 3.34. Select the visual effects you want displayed. If you play computer games, there are two additional changes you can make that will help with performance, especially if your system is on the borderline for the game’s hardware requirements. Most games suggest turning off anti-aliasing and anisotropic filtering, both of which ask your video card to spend precious cycles calculating features that probably won’t be missed in fast-action, first-person-shooter games. Watch Out! The last item in the list, Use visual styles on windows and buttons, turns on and off the Windows XP style. If you deselect this item, the interface reverts to the Windows 2000 style, though it keeps the Windows XP Start menu structure. 104 PART I ■ INSTALLATION, CONFIGURATION, AND CUSTOMIZATION These settings are found in your video card’s management applet or on a special tab in the Display Properties dialog box. Deselect these options and you will gain some additional cycles without drastically reducing image quality. Running old DOS or Windows applications With Windows 2000, Microsoft removed the support for older DOS and 16bit Windows applications that was in Windows 9x and Windows Me. This code, though well-written, allowed applications and device drivers to write directly to hardware, causing hard locks, system-level crashes, and the infamous “blue screen of death.” Removing this code drastically reduced the number of crashes, but also made backwards compatibility trickier, especially for custom software that relied on legacy applications or gamers with several years of older games they wanted to play. However, with Windows 2000 and Windows XP, Microsoft included Compatibility Mode, a set of software services and database collection of application information that provides limited DOS emulation for these older applications. For example, some Windows 16-bit applications query Windows to find out what version it is, and the application will not run if the answer is not recognized. Compatibility mode provides the necessary information to the application, allowing it to run. Compatibility mode also includes re-creating registry structures and other OS-specific variables found in Windows 9x, which differed in significant ways from the structure currently used by Windows XP. Compatibility mode isn’t an instant cure-all. There are numerous applications that should not be run using compatibility mode. These include ones that interact directly with hardware, such as older antivirus software, disk defragmentation programs, registry editors, and rescue utilities like Norton Utilities. If you try to run an application that directly manages hardware or the operating system using compatibility mode, you stand an excellent chance of corrupting your system and making it unbootable. The easiest way to configure compatibility mode is by using a wizard. 1. Click Start, click All Programs, click Accessories, and then click Program Compatibility Wizard. Click Next. The Program Compatibility Wizard appears. Click Next. 2. The Program Compatibility Wizard offers you a choice of how to locate your program: choosing from a list, running a program on CD, or manually browsing to a location. If you select the first option, the wizard searches the Program Files and Windows folders for applications that CHAPTER 3 ■ MANAGING THE WINDOWS DESKTOP 105 you have already installed. This option is best for older Windows applications. The second option is for programs on a CD that are not yet installed, whether Windows or older DOS applications. The third option is for programs not installed but present on your hard drive; this is the best option for all older DOS applications. Assuming you’re working with an older Windows application, choose the first option and then click Next. 3. A list of programs is presented (see Figure 3.35). Select the program you want to configure from the list and then click Next. Figure 3.35. Select the compatibility mode you want to use for your program. 4. Select the operating system compatibility mode and then click Next. Select optional display modes for your application if needed, and then click Next. 5. To test the compatibility settings, click Next. 6. Click which result applies to your compatibility tests, and then click Next. The wizard collects Windows system information based on your responses, and you can voluntarily choose whether to send your custom configuration information to Microsoft. Click Yes or No, and then click Next. Click Finish to exit the wizard. 106 PART I ■ INSTALLATION, CONFIGURATION, AND CUSTOMIZATION You can configure compatibility for any application without using the wizard. Right-click on an executable or a shortcut that launches it and then click Properties. Click the Compatibility tab (see Figure 3.36) to show the compatibility mode options on a single dialog box page, make the necessary selections, and then click OK. Clicking the executable or the shortcut will launch your application using the compatibility mode settings. Figure 3.36. Select the compatibility mode you want to use for your program. CHAPTER 3 ■ MANAGING THE WINDOWS DESKTOP 107 Application Compatibility Toolkit If you don’t want to spend your time adjusting settings repeatedly in order to find what works, there may be an easier way to create a compatible environment for your older applications. Microsoft offers an advanced set of tools, intended for system administrators, called the Application Compatibility Toolkit. Its core application, the Compatibility Administrator, contains a number of settings and fixes for many applications. They are settings that have worked in other environments and may in yours. You can download the toolkit at http://msdn.microsoft.com/library/default.asp?url=/downloads/list/ appcomp.asp. If you want to run MS-DOS applications on Windows XP, your course of action is a little trickier. You can run applications in the standard commandline virtual machine, cmd.exe. Or you can run your application in a DOS emulation environment, command.com. Both are managed by NTVDM, or NT Virtual DOS Machine, which sets environment variables needed by DOS programs when you run them. Environment variables can be set by modifying or creating custom AUTOEXEC.NT and CONFIG.NT files that are run when the virtual machine starts. The AUTOEXEC.NT and CONFIG.NT files can be found in the Windows\system32 directory. If you were comfortable modifying their analogues in DOS, you can do the same in Windows XP. Very old MS-DOS applications relied on the CPU clock speed to determine how fast the application ran. Even if you configure the environment correctly, there’s no easy way under Windows XP to slow down the emulation environment. Your best bet is to download a third-party “slowdown” applet that you can run prior to launching your older application. This can provide some relief for impossibly fast applications. However, this is not guaranteed, and the environment may not be stable, so use slowdown applications at your own risk. Mo’slo is a popular slowdown utility available in several different versions at www.hpaa.com/moslo. 108 PART I ■ INSTALLATION, CONFIGURATION, AND CUSTOMIZATION Just the facts ■ Nearly every aspect of the Windows basic look and feel can be configured. ■ Additional wallpapers, themes, and icons can be added to further customize Windows. ■ With the addition of a few PowerToys you can tweak the last 10 percent of the Windows settings. ■ It is easy to take control of applications and system applets so that Windows works the way you want it to. ■ With a little luck, older applications can run on XP.