1
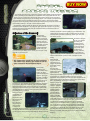
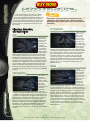
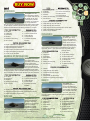
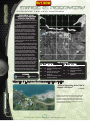
Protected by copyright. Unauthorized or unlawful copying or downloading expressly prohibited.
CONTENTS
Special Forces Training .............4
Miracles of the Nanosuit .......................... 4
Mission Plans ........................................... 5
Basic Techniques...................................... 6
Advanced Techniques .............................. 6
Weapons Detail ...............................8
Firearms, Grenades, and Explosives ................ 8
Weapon Augmentations ................................. 11
Along for the Ride ...........................12
Land ................................................................. 13
Sea .................................................................. 14
Air .................................................................... 15
Objective 02. Find the Hostage in the
Village: Part 02—KPA Takedowns................. 58
Objective 03. Find an Access Point for
the NK Tactical Network ................................ 62
Objective 04. Find the Hostage in
the School Building....................................... 64
Part 01: Village Perimeter Routes ................... 64
Part 02: Village Infiltration Points ................... 66
Part 03: Village Combat Hotspots ................... 69
Objective 05. Destroy the KPA Tanks ............... 85
Objective 06. Proceed to the
Rendezvous Point.......................................... 86
Objective 07. Meet with Prophet .................... 87
Objective 08. Proceed to the Cave System ..... 88
Profiles in Courage and Corruption ...16 Stage 03: Relic ...............................90
Character Profiles ............................................ 16
Enemy Forces: KPA Army ................................. 18
Enemy Forces: Alien ........................................ 18
PRIMA Official Game Guide
Stage 01: Contact ...........................20
Objective 01. Land at the
Predesignated Point...................................... 20
Objective 02. Get to the Beach ....................... 21
Objective 03. Rendezvous with Jester ............ 22
Objective 04. Assist Aztec............................... 26
Objective 05. Rendezvous with Your
Squad at the Landing Zone ............................ 27
Objective 06. Locate and Disable the GPS
Jamming Device ............................................ 28
Objective 07. Regroup at the Signal Location:
Section 01 of 02............................................ 31
Objective 07. Regroup at the Signal Location:
Section 02 of 02............................................ 35
Objective 08. Investigate North Korean
Command Post: Section 01 of 03.................. 41
Objective 08. Investigate North Korean
Command Post: Section 02 of 03.................. 43
Objective 08. Investigate North Korean
Command Post: Section 03 of 03.................. 46
Objective 09. Access North Korean
Tactical Network ........................................... 47
Objective 10. Rendezvous with Your
Squad at Anomaly ........................................ 50
Objective 01. Locate and Disable North
Korean GPS Jamming Station......................... 90
Part 01. Banana Plantation
Shack Takedown ........................................... 91
Part 02. Banana Farm Infiltration ..................... 92
Objective 02. Infiltrate the KPA
Military Base Outpost ................................... 95
Part 01: Clearing the Surrounding
Area First ....................................................... 95
Part 02: Military Base Outpost
Infiltration Points and Combat ...................... 97
Objective 03. Investigate the
Western Road ............................................. 103
Objective 04. Proceed to the Excavation
Site and Rescue Dr. Rosenthal ................... 105
Part 01. Negotiating the Rice Paddies ........... 106
Part 02. Fishing Shack and
Forest Infiltration ........................................ 107
Part 03. Excavation Site: A Terrifying
Discovery—A Relic Revealed ..................... 110
Objective 05. Proceed to the
Extraction Point ........................................... 112
Part 01. Reaching the Bridge Checkpoint ...... 113
Part 02. Reaching the LZ................................. 115
Objective 06. Secure the Extraction
Point So the VTOL Can Land .......................... 116
Objective 07. Climb into the VTOL .................. 116
Stage 2: Recovery ..........................54 Stage 04: Assault .........................117
Objective 01. Capture the
Communications Trailer ................................ 54
Objective 02. Find the Hostage in the Village:
Part 01—Coastal Recon ............................... 56
Objective 01. Coordinate with Lieutenant
Bradley at the Overlook .............................. 117
Objective 02. Destroy the
Anti-Aircraft Units ........................................ 119
Part 1: Heading to the Main Road .................. 119
2
Protected by copyright. Unauthorized or unlawful copying or downloading expressly prohibited.
Part 2: AA Battery Takedown:
Bridge Area.................................................. 127
Part 3: AA Battery Takedown:
Peninsula .................................................... 129
Objective 03. Gather Intel from
KPA Comm. Trailer........................................ 131
Objective 04: Destroy the Anti-Aircraft
Units (Continued) ........................................ 133
Objective 05: Sabotage the Jammer
on the North Korean Cruiser ....................... 138
Objective 06: Paint Target for Air Strike ......... 140
Objective 07: Secure the Harbor.................... 141
Objective 08: Rendezvous with
Major Strickland at the Rail Tunnel ............. 141
Stage 05:Onslaught ......................142
Objective 02. Secure the Train Station .......... 149
Objective 03. Push Ahead to the
KPA Munitions Dump ................................... 152
Objective 04. Destroy the Anti-Aircraft
Artillery ....................................................... 155
Objective 05. Part 1: Sabotage the
North Korean Munitions Dump .................... 161
Objective 05. Part 2: Paint the Munitions
Dump in Preparation for the Air Strike ......... 161
Objective 07. Proceed to the Mine ................ 166
Stage 06: Awakening ...................168
Objective 01. Proceed to the Landing
Zone next to the Crusher Building ............... 168
Objective 02. Infiltrate Office and
Retrieve Intelligence Data .......................... 171
Objective 01. Get to the Landing Zone
at the Crusher Building (Continued) ............ 177
Objective 03. Secure the
Landing Zone ............................................... 179
Objective 04. Infiltrate the
Mining Complex .......................................... 183
Objective 05. Locate the Hostages ............... 190
Objective 06. Eliminate General Kyong.......... 191
Objective 07. Evacuate the Hostage ............. 192
Stage 07: Core ..............................193
Objective 01: Find a Way
out of the Cave ........................................... 193
Objective 02. Assist
Strickland’s Recon Team ......... 206
Objective 03. Get into
the LTV ...................................... 207
Objective 04: Proceed to
the VTOL Crash Site ................... 208
Objective 05: Defend
Contents
the Crash Site .......................... 209
Objective 06: Rendezvous
with Major Strickland ...............................209
Objective 07: Defend the
Evacuation Point .......................................210
Stage 10: Ascension ..................211
Objective 01. Escape to the
Aircraft Carrier ...........................................211
Objective 02. Defend the Plateau................212
Objective 03. Investigate the Camp ............213
Objective 04. Defend the VTOLs ...................213
Objective 05. Assist the Convoy .................214
Objective 06. Escape to the
Aircraft Carrier (Continued) ........................214
Stage 11: Reckoning ..................215
Objective 01: Proceed to CDC ......................215
Objective 02: Proceed to
the Armory ................................................215
Objective 03: Proceed to
the Bridge .................................................216
Objective 04: Defend the
Flight Deck ................................................216
Objective 05: Locate the
Chief Engineer ...........................................217
Objective 06: Disable the
Circuit Breakers.........................................218
Objective 07: Shut Down
the Reactor ...............................................218
Objective 08: Lower Control Rods................219
Objective 09: Return to the
Flight Deck ................................................219
Objective 10: Go to the Armory ...................220
Objective 11: Destroy the
Alien Exoskeleton .....................................221
Objective 12: Get to the VTOL .......................222
Objective 13: Defeat the
Alien Warship ............................................223
Stage 08: Paradise Lost ................197 Multiplayer .................................224
Objective 01. Find the
Missing Marines ......................................... 197
Objective 02. Escort Prophet out
of the Sphere .............................................. 202
Stage 09: Exodus ..........................205
Objective 01. Meet with Keegan ................... 205
Instant Action and Power Struggle .............224
Weapons, Vehicles and Equipment.............225
Suit Variations .............................................228
Tactics and Tips ..........................................228
Power Struggle Maps ..................................229
Instant Action Maps ...................................238
3
primagames.com
Protected by copyright. Unauthorized or unlawful copying or downloading expressly prohibited.
Special
Forces Training
Even within Special Forces, where the average soldier might parachute through
enemy artillery fire and infiltrate an installation with just a knife between his
teeth, you are a super man. You hear the awe in their voices as you walk by in
your Nanosuit. They know you can do things others can’t: absorb a Shotgun blast
as if someone tossed a handful of gravel at you, finish a 100-yard dash while
Olympians have only barely made it out of the starting blocks, leap over tanks and
onto building rooftops—oh yeah, and become invisible.
The following pages present the basics of your Nanosuit and how to operate in
standard combat situations. The suit gives you superhuman powers so you may
compete with the island perils, but you’ll need the brain to match the brawn to
have any hope of survival.
Miracles of the Nanosuit
The Nanosuit
absorbs damage
(Armor), increases
your running ability
(Speed), amps up
your muscle power
(Strength) and turns
you invisible for
a limited duration
(Cloak). Use V or
K3 to access your ability menu, where you can spin to any
upgrade in a split second.
POINTER
This chapter notes certain keys for basic maneuvers
and combat tricks. However, you should consult the
game’s manual for the full keyboard layout.
PRIMA Official Game Guide
Armor mode
toughens your
suit’s exterior and
keeps you alive
against unexpected
attacks. Since you
can take a handful
more shots to the
gut with Armor on
rather than off,
leave it on as your default suit setting whenever you aren’t
engaged in a particular maneuver. Your suit flashes white
when hit in Armor mode, which can give you an indication
that you’re being fired upon if you don’t notice your health
dropping right away. Always switch to Armor mode when
recovering energy or health.
Switch to Speed
mode when you
need to cover
ground in a hurry.
The Speed burst
lasts only a
few seconds—
long enough to
dash through
a dangerous
minefield without triggering a single detonation or escape
an ambush with half a dozen rifles pointing at your head. You
can also use it when you know the territory ahead is clear of
enemies and want to travel quickly to your destination. You
should rely on Speed (or Cloak) to confuse foes in combat
and keep their gun barrels trained on where you were and
not where you are.
Maximum Strength
gives you superior
punching and
leaping powers.
In Strength mode,
a Strength Punch
can smash open
locked doors,
destroy vehicles,
and pulverize an
opponent’s skull. In close combat, it’s an effective backup
attack method when you don’t have a Shotgun or SMG
handy.
With Strength
on, you can also
Strength Jump to
heights impossible
for normal human
legs. Most
low roofs are
accessible with a
single leap, while
high roofs may
take several smaller leaps as you hop up exterior obstacles
to reach the top. Strength redefines how you view the
battlefield. Don’t feel like you must take the straightforward
ground path. Look for alternative attack routes up the rocks,
hills, and buildings around you at all times.
Perhaps your most
impressive power
comes in the form
of your Cloak. The
Cloaking ability
literally makes
you invisible so
long as you have
energy available.
And that’s the key.
Stand still and you can remain invisible for a few minutes.
At a full run, however, you have less than 10 seconds
of sustained invisibility. Play around with the Cloaking
ability so you get a feel for when it’s going to give out on
you. If you aren’t in cover when you hear the warning that
you’re running out of energy, drop prone and crawl to your
cover spot. Your Cloak will last a lot longer this way, and
it’s more difficult for enemies to spot you when you’re
moving horizontally along the ground if you should suddenly
reappear.
4
Protected by copyright. Unauthorized or unlawful copying or downloading expressly prohibited.
Weapons Detail
POINTER
The weapons issued to you by the U.S. Special
Forces and the armaments you secure during
your island expedition have specific strengths and
weaknesses against the variety of foes you face.
The following information details the main weapons,
augmentations, and explosive devices, along with
general tactics on advantageous moments to use
this arsenal.
The statistics and tactics for each weapon differ in the
single-player and multiplayer games. Please consult the
Multiplayer Training chapter later in this book for additional
information.
Firearms, Grenades,
and Explosives
Pistol
FY71 Assault Rifle
This generic,
but functional
Pistol is used
by both U.S.
and KPA forces.
It features
semiautomatic
or two-round
burst modes.
Targets struck
by the bullets
suffer moderate initial damage. As the bullets are small,
their damage is lessened over distance, so the weapon
therefore is most effective over short ranges: less than
50 meters (165 feet). When found, a second Pistol can be
employed, allowing dual use with one Pistol in each hand.
However, only a single Pistol can be used with Iron Sight.
You can mount a Silencer and Laser Pointer on the Pistol
(these are automatically mounted on each Pistol when
selected), and use Iron Sight (one Pistol only). The Pistol is
available from your initial sortie, at the start of the Contact
Mission.
PRIMA Official Game Guide
SCAR Assault Rifle
This is the
standard
Assault Rifle
that is issued
to U.S. American
forces in
the combat
theaters across
the world.
It features
both semiautomatic and fully automatic modes of fire. The rate of fire
is moderate: slightly faster than the FY71, but slower than
the SMG. It has strong initial damage at close quarters and
loses almost no damage over distance due to advanced
cartridge design. Otherwise, this weapon is similar to
the FY71 in terms of damage and range. On this Rifle, you
can mount a Silencer, Laser Sight, Flashlight, Under-Barrel
Grenade Launcher, Tranquilizer Attachment, Reflex Sight,
Assault Scope, and Precision Scope. This weapon is
available from your initial sortie, at the start of the Contact
Mission.
This is a rather
old Assault
Rifle, used
primarily in
the late 20th
century, and it
cheaply arms
the majority of
the North Korean
infantry army.
This weapon
features semi- and fully automatic modes, with the fully
automatic firing mode employed in most situations. Unlike
the Submachine Gun, it fires at a slower rate, but doesn’t
lose as much damage over distance, and is therefore
a capable weapon at most ranges. You can equip the
Silencer, Laser Sight, Flashlight, Under-Barrel Grenade
Launcher, Tranquilizer Attachment, Incendiary Ammunition,
Reflex Sight, Assault Scope, and Precision Scope on this
weapon. The FY71 is available at the beginning of the
Contact Mission.
Shotgun
This is
operated by a
pump action.
The operator
can switch the
radius of the
shell spreads
between
normal and
narrow fire
modes. Use
the narrow spread and combine it with the Iron Sight or
a scope to fire precise shots up to a medium distance.
Use the normal fire mode to blast foes with devastating
damage at close range. This weapon has strong initial
damage, however, it loses a great deal of damage over
distance. Thus its effectiveness is restricted to a very
short range (10 to 20 meters, or 33 to 66 feet). You can
mount the Laser Sight, Flashlight, Reflex Sight, Assault
Scope, and Precision Scope on this weapon. However,
the latter is only useful for observing enemy movements
or environments from a distance; it is detrimental in
combat. The Shotgun is available near the end of the
Contact Mission.
8
Protected by copyright. Unauthorized or unlawful copying or downloading expressly prohibited.
Land
Anti-Air Vehicle
Full
Vulnerabilities
Description: The AntiAircraft Battery vehicle
is a mobile unit that can
be driven to any area
where enemy aircraft
incursion is suspected
to set up defensive
fire. The guns on a single AA Battery can down several VTOLs
or Helicopters. In order to receive air support, you may be
required to eliminate the AA Battery vehicles in a region.
Full Vulnerabilities
Damage Limits
•
•
•
•
•
•
AV Mines
Claymores
Explosions
Missiles
MOAR (can be frozen)
TAC Cannons
•
•
•
•
•
•
Engine vulnerable to explosions
Slight damage from AA Vehicles
Slight damage from collision
Slight engine and track damage from Gauss Rifle
Slight vulnerability to Grenades
Tracks can be disabled
•
•
•
•
•
1x Explosive Charges
1x Gauss Tank rounds
1x Missile hits
1x Tank rounds
1x Vehicle-Mounted
Missiles
Partial Vulnerabilities
Amphibious APC (Multiplayer Only)
Description: Sometimes
your target does
something inconvenient,
such as going for a
swim when your treads
can’t leave the beach.
Now you can track them
down no matter where they flee. The Amphibious APC works
on land and water, and its versatile design actually makes it
less susceptible to tactics that damage most other vehicles.
Full Vulnerabilities
•
•
•
•
•
AV Mines
Explosions
Missiles
MOAR (can be frozen)
TAC Cannons
Damage Limits
•
•
•
•
•
1x Explosive Charges
1x Gauss Tank rounds
2x Missile hits
x Tank rounds
2x Vehicle-Mounted
Missiles
Partial Vulnerabilities
• Wheels strongly resist damage (try Gauss Rifle)
• Slight damage from AA Cannon and Automatic Cannon
• Slight vulnerability to Grenades
Battle Tank
Description: The big
boys of the armored
division. The Battle
Tank sucks up damage
like no tomorrow—
it’s able to eat four
Missile hits before
going down—and fires back powerful projectiles, depending
on what cannon has been mounted atop it. Think of it as a
mobile fort.
•
•
•
•
•
•
AV Mines
•
Explosions
•
Missiles
•
MOAR (can be frozen) •
TAC Cannons
Damage Limits
1x Explosive Charges
2x Gauss Tank rounds
4x Missile hits
4x Tank rounds
4x Vehicle-Mounted
Missiles
Partial Vulnerabilities
•
•
•
•
•
•
Engine vulnerable to explosions
Slight damage from AA Vehicle
Slight damage from collision
Slight engine and track damage from Gauss Rifle
Slight vulnerability to Grenades
Tracks can be disabled
Civilian Vehicle
Description: It’s the kind
of vehicle you could
see in your neighbor’s
garage. A Civilian Car or
Pickup Truck can haul
a few passengers and
some cargo in the back;
it’s not going to survive long in a battlefield. If you want a
quick ride, hop in—just don’t drive over any land mines.
Full Vulnerabilities
Damage Limits
1x AV Mines
1x Explosive Charges
1x Gauss Rifle hits
1x Gauss Tank rounds
1x Missile hits
1x Tank rounds
1x Vehicle-Mounted
Missiles
•
•
•
•
•
•
•
AV Mines
Claymores
Explosions
Gauss Rifles
Missiles
MOAR (can be frozen)
TAC Cannons
•
•
•
•
•
•
Collisio
Slight damage from MOAC
Tank shells and ICV rounds
Tire damage
Vulnerability to small arms
Vulnerable to infantry Gauss Rifles
•
•
•
•
•
•
•
Partial Vulnerabilities
Heavy LTV
Description: The
upgraded version of
the LTV can withstand
several more shots from
a Gauss Rifle. Everything
else performs basically
the same, though you
may find a higher caliber gun mounted topside than on its
counterpart.
Full Vulnerabilities
•
•
•
•
•
•
•
AV Mines
Claymores
Explosions
Gauss Rifles
Missiles
MOAR (can be frozen)
TAC Cannons
13
Damage Limits
•
•
•
•
•
•
1x AV Mines
1x Explosive Charges
1x Gauss Tank rounds
1x Missile hits
1x Tank rounds
1x Vehicle-Mounted
Missiles
• 3x Gauss Rifle hits
primagames.com
Protected by copyright. Unauthorized or unlawful copying or downloading expressly prohibited.
Along for
the Ride
Stage 2: RECOVERY
Strategic Map and Overview
Available Intel:
Locate and Extract
Civilian Hostages
We have discovered the approximate
location of the excavation site. There are
still five hostages out there. Move out to
investigate.
With Aztec and Jester wrenched apart
by airborne abominations, it falls to
the remaining three men to locate the
hostages. Venturing out into a small
communications area, they encounter
light resistance, and Prophet learns of
a nearby friendly holed up in a village
four clicks to the south—it’s one of the
hostages! On the way, roving patrols
of KPA must be met and neutralized.
Additionally, learning the location of a
Missile Launcher and DSG1 Sniper Rifle is
recommended.
After optionally obtaining the hostage’s
precise location from a radar station, and
taking out a roadblock, you should pore
over the necessary maps of a sprawling
coastal village. There are dozens of routes
to take, and 50 KPA dotted throughout
the settlement to be eliminated. After
you locate the hostage in a school room,
she reveals some mission-sensitive
information, and is escorted from the
fray by Psycho, who’s been more than
helpful backing you up. However, part of a
KPA armored division is arriving, and you
need to destroy two Tanks! Then Prophet
locates a cave entrance that leads to a
KPA military base where the remaining
scientists are being held. Venture along
a stream, engaging increasingly large
numbers of KPA recon teams, before
avoiding an all-out North Korean ambush!
1
Objectives
4
5
6
7
8
B
C
01
D
02 04
05
03
06
E
07
F
G
08
H
Objectives
Grid
D2
D5
Legend
#
3
A
D4
Deploy Point
2
D5
Ob #. Description
01 Capture the Communications Trailer
02 Find the Hostage in the
Village
03 Find an Access Point
for the NK Tactical
Network
04 Find the Hostage in the
School Building
Grid
D5
E6
F5
G7
Ob #. Description
05 Destroy the KPA Tanks
06 Proceed to the
Rendezvous Point
07 Proceed to Prophet’s
Location
08 Head Upriver to the Cave
System
Objective 01. Capture the Communications Trailer
“What’s happening, boss? We’re
droppin’ like flies!”
PRIMA Official Game Guide
—Psycho
B1
A1
Raptor team finds Jester’s remains crumpled
against some rocks. As Psycho swears like
a trooper, Prophet vaporizes the corpse and
Nanosuit, and pays his respects. The mission
must continue: Prophet informs you of a KPA
Command Post up ahead.
B2
A2
54
Protected by copyright. Unauthorized or unlawful copying or downloading expressly prohibited.
Optimal Path
Armor
Speed
Strength
Cloak
Object
Gun
Add-On
Grenades Explosives
POINTER
Vehicle
01A. Clearing the Comm. Trailer
Plan 01.1:
Move along
the jungle gully,
following Psycho
and Prophet, until
you reach the
clearing where KPA
Special Forces can
be seen lying on
the ground. Prophet
orders you to cover him, so stay behind or to the side, hiding
in cover, while he descends to the trailer.
Walkthrough
ADVISORY
While Prophet eavesdrops on the KPA, search the
pallets on either side for batches of ammunition
for your Rifle.
In this area, it is wise to keep stocked with
ammo for both Rifles (the SCAR and the FY71) as
these offer long-range precision that’s needed in
this area.
ADVISORY
Plan 01.2:
Outside the
communications
trailer, Prophet
attempts to listen
in on the KPA
secure channel.
He reports that
there’s sporadic
combat, and the
Koreans are spooked, too. Move around the outbuildings
A2 toward the low metal fencing. Hop over the fence
and proceed down the hill to an LTV ahead.
If you haven’t figured this out yet, remember that
double-tapping and holding s automatically
engages Speed. You revert back to your previous
Nanosuit function when you release this key.
Optional Path
Armor
Speed
Strength
Cloak
Object
Gun
Add-On
Grenades Explosives
Vehicle
01B. Cabbage Patch Carnage
Plan 01: The
numerous
objects in the
area make future
takedowns
extremely
satisfying. Simply
grab an object,
head down the
road, then Strength
Throw at the first foe you see. Here are some of the best
objects to utilize:
The barrels in and around the shacks.
The long wooden boards propped up near the boat
B1 ; these can level all three foes if they are grouped
together.
The outboard motor by the garage.
The green plastic trash crates; one is behind the garage,
the other is to the left of the white shack steps.
The wheel barrow on the right side of the white shack.
The rusting oven by the first metal fence overlooking the
cabbage patch.
The black trash bin on the left side of the white shack.
55
primagames.com
Protected by copyright. Unauthorized or unlawful copying or downloading expressly prohibited.
recovery
Objective 01
Plan 02: Your
foes are
already dead.
Something else
has gotten to
them first. Save
your ammo for
later. This is the
easiest leg of the
mission so far.
After Prophet accesses the KPA radio
communication, you receive your next
Objective: there are hostages to be rescued
in a village a few miles from here. Get to it!
The two gas cans inside the garage; lob them
and then blast them with your weapon, creating a
Grenade-like explosion.
The pile of bound wooden beams. Strength Punch the
pile to release them, then grab individual beams to
lob.
Plan 02: You can also use the garage, white shack,
or boat house roofs as cover or a vantage point from
which to fire or lob Grenades or objects.
Plan 03: Or, you can quickly run to the machine gun
emplacement B2 and start some rapid fire on foes in
the road.
Objective 02. Find the Hostage in the Village: Part 01—Coastal Recon
“You guys aren’t going to believe
this, but it sounds like General Ri
Chan Kyong is in charge of this
entire operation!”
—Prophet
ADVISORY
A4
A1
B3
B1
If your turret fire is less than competent
and the two foes escape, disembark and
begin a Cloaked search in the undergrowth
using your Binoculars. Slay them with your
preferred weapon.
A2
A3
B2
Optimal Path
Armor
Speed
Strength
Cloak
Object
Gun
Add-On
Grenades Explosives
Vehicle
02A. Patrolling the Road (by Vehicle)
POINTER
This objective takes some time to reach and
complete, and is split up into various parts, each
with a different set of routes you can take.
PRIMA Official Game Guide
Plan 01.1: At
the end of
the cabbage patch
is an LTV with an
unhooked trailer.
Climb inside and
begin to drive along
the coastal road in
front of you. There’s
an immediate gap
in the barrier that allows you to drive down onto the beach
A1 , but this is a Discretionary path.
Instead, drive
around the bend
in the road and
continue on. If you
didn’t waste any
time after Prophet’s
instructions, you
can stop the LTV at
the start of a long
left bend, by a foot
trail leading down to the beach A2 . Park just to the right of
the restaurant and surf school sign. Here, you spot two foes
sitting on the beach. Strafe them until they fall.
Round the left
bend and listen for
Prophet’s advice
on snipers. Notice
the rocks and
woodland to your
right A3 . You can
disembark and
maneuver through
here toward a KPA
Scout company that is patrolling this area up ahead at the
next corner.
Or, you can
continue to drive
along this road,
looking at the gap
in the tree line on
the promontory
above and to the
right of you. There’s
a sniper here! You
can bring him down
from your LTV using the turret if you’re a crack shot.
However, you
should think about
slowing your
vehicle down and
parking before
you round this
bend. Park across
the road and wait
for another LTV to
arrive. If you didn’t
hurry to reach this point, you meet the LTV on the road you
drove along. Strafe the gunner with turret fire, then slay the
driver and passenger without leaving your vehicle.
56
Protected by copyright. Unauthorized or unlawful copying or downloading expressly prohibited.
Plan 02: Or, you can park your vehicle in the road,
hop out, move into cover, wait for the enemy LTV
to arrive, then shoot out the gas canister on the rear of
the vehicle, and finally, step out to slay the confused and
burning foes.
Plan 03: Or, you can Boost in your vehicle, charge at
the LTV, and crash into it. Be sure you hit the LTV and
shunt it over the edge of the road and onto the beach, then
mop up the survivors. This is messy, but spectacular!
Plan 01.2: When you’ve finished removing the KPA forces
from this area, head along the road to the next corner A4
while listening for an update from Prophet, and plan to
tackle either the forest recon foes or a roadblock.
Plan 04.1: A Beach Drive: Another idea is to drive
down the initial opening by the LTV’s starting
position A1 and onto the beach. Slow down to avoid tipping
over your vehicle and drive along the beach adjacent to the
road.
Optional Path
Armor
Speed
Strength
Cloak
Object
Gun
Add-On
Grenades Explosives
Vehicle
02B. Patrolling the Road or Beach (on Foot)
ADVISORY
Plan 03:
By Beach:
You can ignore
the LTV and head
along the beach,
moving to the
location of the
two beach guards
and slaying them,
then using Speed
to romp around the dotted rocks and engage a three-man
boat team near Waypoint A4 (moving from Waypoint D1 to
D2 ). You can use Cloak and cover, as object-hurling is much
more dangerous.
From here, you can either steal the Small Patrol Boat
moored on the small wooden jetty, or move up a ramped
trail to the road B3 near a path up to a radar station (to the
southwest) and a KPA roadblock (to the southeast).
Plan 04: Beware of a Small Patrol Boat offshore
during any beach activities you undertake; they can
strafe you easily, so use cover and well-aimed shots to
take them down, or else retreat to the road. If you manage
to blast the gunner and pilot, swim to the Small Patrol Boat,
or use the moored one at the jetty.
It is far better to use the LTV and disembark from it
a few times to tackle foes than to maneuver up the
beach or road by foot.
Plan 01: By
Road: Your
task is to reach
the area around
Waypoint A4 . You
can follow the
road itself, but this
is essentially a
laborious process:
Hide behind
cover, tackle the stopping LTV, move to the restaurant sign,
engage the two beach foes A2 , then head to the woodland
on your right A3 to engage the sniper.
WARNING
During this exploration, you may spot three KPA
Helicopters skimming the water to the south. Do
not engage them! You don’t have the firepower to
stop them: It takes at least 400 bullets to blow one
up, and that’s without having to dodge the Rockets
these birds fire at you and the foes swarming your
location!
57
primagames.com
Protected by copyright. Unauthorized or unlawful copying or downloading expressly prohibited.
recovery
Objective 02
Plan 04.2:
Ignore the
enemy LTV, or get
out, scale the
rocks to the road,
and begin taking it
down from the foot
trail. Drive to this
trail area and slay
the two guards
sitting on the beach before attacking the LTV. You can then
continue along the beach in the LTV, or move along the road
on foot.
Plan 04.3: At the right turn A4 , you can carefully
drive through the shallow water and turn to strafe a
three-man boat team heading your way. Cut through them,
and quickly move to the moored Small Patrol Boat. You can
now attack the village by sea!
Plan
02: A
preferred
plan is
to move
up the
Walkthrough
rocky hill to
the south of the
parked LTV B1 and halt at the top. Watch as the enemy LTV
drives along the road below you (you can view it all the
way from the bend in the road near Waypoint A4 ). Then
snipe the gas can with a Reflex-Sight shot, or lob Grenades,
and dispatch the vehicle from this height advantage. Or,
snipe the foes inside and claim the vehicle for yourself.
Then skid down the rock wall and stay in the undergrowth
to the right while following the road to the south. Step into
cover and Speed Sprint along the stony scrub. Halt at the
bend; there’s a gap B2 , so you can spot the two beach
foes, then drop down to the restaurant sign and kill them
from here.
Multiplayer
An explosion rocks the bunker behind
you. Bullets zing by and pelt the dirt
wall of the trench as you crawl for a
discarded SMG. You can hear the roar of
enemy tanks crowding around you.
Are you smack-dab in the middle of
another island mission? Not exactly.
Welcome to multiplayer Crysis, where
you feel the adrenaline rush of combat
against other human players, not just
against AIs and Aliens. In multiplayer action, you still get to test the limits of your Nanosuit—you just get to test it against
dozens of other Nanosuits fighting back. Forget about your “solo” missions for now. It’s time for a whole new way to
experience the battlefield.
Instant Action and Power Struggle
When you join a multiplayer game, you have the choice of
Instant Action Maps
Power Struggle Maps
entering the “Instant Action” arena or a “Power Struggle”
• Steel Mill
• Shore
game. Instant Action drops you into a map designed for
• Quarry
• Beach
one-on-one play, where you can blast away at opponents to
• Armada
• Refinery
your finger’s content, then wipe the slate clean and start all
• Plantation
over again on a new map if you like. You’ll enjoy Instant Action • Outpost
if you want to run-and-gun for a little bit, and then change it up
• Mesa
on another map as soon as the game ends.
If you choose Power Struggle mode, expect longer games that rely on team tactics. Power Struggle requires a lot of team
coordination, as you work as a unit to overtake objectives and ultimately destroy the enemy’s home base.
PRIMA Official Game Guide
In Power Struggle
games, killing
other players
and completing
objectives earns
you prestige points.
You spend prestige
on weapons,
add-ons, equipment
or kit setups. The
more prestige, the more armament you carry into battle.
You begin with 100 prestige points as a Private, and the
standard setup that gives you the best chance at survival
is the SMG and one Frag Grenade. You can also opt for the
Shotgun, extra ammo and a Frag Grenade (or two Frags and
no extra ammo); however, this requires that you get into
point-blank range with your opponents, which means a lot of
stealth on your part.
Advance to
Corporal to begin
with 200 prestige
each spawn. At
Sergeant and 300
prestige points per
spawn, you can
really arm yourself
to tackle players
and vehicles.
Plunk down 200 prestige for a Missile Launcher, and you
still have 100 left to equip as you would a Private. You’ll be
very happy the first time you stumble into an enemy tank.
Review the charts on this page for your starting rank values
and how your actions can earn the greatest amount of
contribution and prestige points.
224
Starting Rank Values
Spawn
Bonus
100
200
300
400
500
600
750
1,000
Rank
Private
Corporal
Sergeant
Lieutenant
Captain
Major
Colonel
General
Contribution
Points to Qualify
0
15
40
120
220
320
475
650
Server
Limit
0
16
8
6
4
3
2
1
Action Rewards
Action
Repair (per tick)
Pick Lock
Standard Kill
Auto Turret Kill
Tag Enemy
Defending
Disarm
Melee
Headshot
Suicide
Team Kill
Contribution
Points Gained
5
5
5
10
—
—
—
—
—
—
—
Prestige
Points Gained
5
50
100
100
5
5–10
20
50
50
0
-200
Objective Rewards
Structure
Reinforcement Bunker
Small Energy Site
Large Energy Site
Small Prototype Factory
Large Prototype Factory
Naval Facility
Small Vehicle Factory
War Factory
Aviation Facility
Protected by copyright. Unauthorized or unlawful copying or downloading expressly prohibited.
Prestige Points
(Capture)
100
100
250
250
250
250
250
250
250
Prestige Points
(Defend)
5
5
10
10
10
10
10
10
10
Suit Variations
Everyone in multiplayer action has
the same Nanosuit as your solo
missions with certain exceptions.
Learn these exceptions or you’ll find
yourself on the unfortunate end of a rifle
muzzle before you know it.
The biggest change is your regeneration
rate. The regen rate for your suit’s power is
much slower in multiplayer than in singleplayer. Plan accordingly. You can only use
Cloaking for short bursts and only in key locations (such as exiting a building so no
one can draw a bead on you or infiltrating an enemy complex). To compensate, you
may want to rely on Speed more often. You can trigger short Speed bursts that drain
only a fraction of the power that Cloaking does, and these Speed bursts make it
more difficult for enemies to lock on.
Also, certain augmentations that you had on your single-player suit—namely
Binoculars and Night Vision—must now be bought with prestige points. Early on in
your career, prestige points will be precious and you must spend them on weaponry
over add-ons. Learn to live without them until you have the luxury of purchasing
them.
Tactics and Tips
Unless you love the spawning queue, prepare to alter your tactics from single-player action. Go ahead and jump right into
“Instant Action” or “Power Struggle” games, so long as you remember that there’s a small learning curve as you gain
command of the new maps and playing styles.
PRIMA Official Game Guide
Always on the Move
In single-player
mode you can
usually move
through an area
methodically.
Depending on your
mission, you can
leisurely recon the
place, set up your
battle tactics, and
then call the shots
when the time is
right. In multiplayer,
you won’t have
that time.
Keep moving
at all times: The
enemy will have a
harder time painting
a bull’s-eye on you.
If the enemy is alert to your presence, even if you want to
line up the perfect shot, it’s better to fire on the run rather
than risk a counterattack that could blast you to smithereens. And don’t forget about your Strength Jump—a single
big leap can throw you up and out of enemy fire, over a wall
or onto a roof where you can escape gunfire.
Against a group
of enemies or
one particularly
troublesome foe,
circle and flank as
you fire. Dancing
around increases
your survival odds
and can set you up
for a better angle
on potential future foes.
In cases where you’re attacking a guarded enemy
position, teamwork prevails. Rather than go it alone, team
up with one or a few allies and attack as an organized unit. A
Cloaked ally with a Shotgun, for example, might flush a foe
from cover as you take him out with a Precision Rifle. Cover
fire can also distract the enemy while multiple allies swarm
a position. If you have to strike alone and you know the map
well, try for an alternate angle that attacks from a side or
rear facing position.
Cloak and Dagger (or Fists)
As previously
mentioned, your
energy recharges
slowly in multiplayer, so you
won’t be able to
stay in stealth
mode long.
Whenever you exit
a doorway into an
open area where
enemies could be
lurking, it is a good
idea to Cloak. Even
if it’s only for a few
seconds, it can
prevent a foe from
picking you up right
away. On the flip
side, your Cloak
can slip you into an enemy building unseen for the best
possible attack angle.
If you’re surrounded and need a breather, stand still
Cloaked. You won’t drain energy quickly, and you can check
your options. If you get fired upon, switch to Speed and
make a dash for the nearest cover spot.
228
Protected by copyright. Unauthorized or unlawful copying or downloading expressly prohibited.
Refinery
US HQ
Reinforcement Bunker
US Barracks
Alien Energy Site
NK Barracks
NK HQ
In the maze of industrial
Multiplayer
buildings and gloomy rain,
you’ll be tasked with securing the
prototype factory at the city center,
whether you start out to the south
(U.S. HQ) or the north (North Korean
HQ). This urban setting provides much
more cover and interior battles for
close-combat lovers.
Alien Energy Site
Prototype Factory
Heavy Vehicle Factory
Reinforcement Bunker
US REFINERY
NK REFINERY
A
A
E
F
E
E
E
G
C
C D
B
C
D
B
D B
C
B
D
A
A
United States Tactics
For your primary
route (blue), send
two large forces
northeast and
northwest. The
northeast group
navigates through
the streets and
captures the
nearby Alien energy
site (B). The northwest group swings wide and runs for the
first reinforcement bunker (C).
While the bunker
falls, the northeast
group continues
on to hammer
the second
reinforcement
bunker (E), with one
or two members
converting the
heavy vehicle
factory (D) to the cause. The northeast team can hold the
bunker if they come under a lot of enemy fire, or they can
opt to cross the streets and aid the northwest team as it
gains a second Alien energy site (F), and then goes after the
prototype factory (G). Secure all that and you’ve got it made.
235
primagames.com
Protected by copyright. Unauthorized or unlawful copying or downloading expressly prohibited.
®
PRIMA Official Game Guide
Written by
David S. J. Hodgson
Michael Searle
The Prima Games logo is a registered trademark of
Random House, Inc., registered in the United States and
other countries. Primagames.com is a registered trademark
of Random House, Inc., registered in the United States.
Prima Games is a division of Random House, Inc.
© 2007 Crytek GmbH. All Rights Reserved. Crytek, Crysis and
CryENGINE are trademarks or registered trademarks of Crytek
GmbH in the U.S. and/or other countries. EA and the EA logo are
trademarks or registered trademarks of Electronic Arts Inc. in the
U.S. and/or other countries. All other trademarks are the property of
their respective owners.
No part of this book may be reproduced or transmitted in any form
or by any means, electronic or mechanical, including photocopying,
recording, or by any information storage or retrieval system without
written permission from Electronic Arts Inc.
Product Manager: Mario De Govia
Editor: Shaida Boroumand
Deisgn & Layout: Calibre Grafix, LLC
Please be advised that the ESRB Ratings icons, “EC”, “E”,
“E10+”, “T”, “M”, “AO”, and “RP” are trademarks owned by the
Entertainment Software Association, and may only be used with
their permission and authority. For information regarding whether
a product has been rated by the ESRB, please visit www.esrb.org.
For permission to use the Ratings icons, please contact the ESA at
esrblicenseinfo.com.
Important:
Prima Games has made every effort to determine that the information
contained in this book is accurate. However, the publisher makes no
warranty, either expressed or implied, as to the accuracy, effectiveness,
or completeness of the material in this book; nor does the publisher
assume liability for damages, either incidental or consequential, that
may result from using the information in this book. The publisher
cannot provide information regarding game play, hints and strategies,
or problems with hardware or software. Questions should be
directed to the support numbers provided by the game and device
manufacturers in their documentation. Some game tricks require
precise timing and may require repeated attempts before the desired
result is achieved.
ISBN: 9780-7615-5740-1
Library of Congress Catalog Card Number: 2007931829
Prima Games
A Division of Random House, Inc.
3000 Lava Ridge Court, Suite 100
Roseville, CA 95661
1-800-733-3000
www.primagames.com
Author Bios
David S. J. Hodgson
Originally hailing from Manchester in the United Kingdom, David
left his role as a writer of numerous British video game magazines
(including Mean Machines, Computer & Video Games, and the Official
Nintendo and Sega Saturn magazines) and a bohemian lifestyle on a
rusting, condemned, dry-docked German fishing trawler to work on the
part-fraternity, part-sanitarium known as GameFan magazine in 1996.
David helped to launch the fledgling GameFan Books and form Gamers’ Republic in
1998, authoring many strategy guides for Millennium Publications, including The Official
Metal Gear Solid Mission Handbook. After launching the wildly unsuccessful incite Video
Gaming and Gamers.com, David began authoring guides for Prima Games in 2000. He has
written over 60 strategy guides; including The Legend of Zelda: Twilight Princess, Knights of
the Old Republic, Crysis, Half-Life: Orange Box, and even Panzer Dragoon Orta. He lives in
the Pacific Northwest with his wife, Melanie, and an eight-foot statue of Great Cthulhu.
David S. J. Hodgson would like to thank all at Crytek and Electronic Arts, especially
Dennis Schwarz, Mike Ress, and Ben O’Donnell for their tireless help and support during
the insanity of this project. “Big ups” to Mario and Shaida at Prima for all their help and
saint-like patience during the project. Many thanks also to Laibach, Ladytron, The Knife,
and The Moon Wiring Club. All my love to my wife, Melanie.
And “X” for Xerxes, devoured by mice.
We want to hear from you! E-mail comments and feedback to
[email protected].
Mike Searle remembers the days of Atari Adventure, where your square
hero could end up in a hollow dragon stomach, or the simple, yet addictive,
Missile Command. His desire to play computer games into the wee hours
of the morning really took hold when his parents made him play outside
instead of on the console, so the first chance he got he bought a PC to play
the Ultima series, Doom and countless others since. Mike started with
Prima Games back in 2002 and has written more than 30 strategy guides, including The
Lord of the Rings Online: Shadows of Angmar, Tom Clancy’s Ghost Recon and Splinter
Cell series, Dark Messiah: Might and Magic, and Sims 2 Castaway. He can’t wait for
thought technology, so game controls can catch up with his brain and stop all that needless
in-game dying. At least, that’s what he keeps telling himself about his FPS kill ratio!
We want to hear from you! E-mail comments and feedback to
[email protected].
Protected by copyright. Unauthorized or unlawful copying or downloading expressly prohibited.