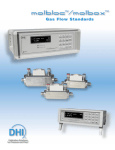
1
molbox™ Analog Circuit
Calibration Software
User’s Manual
© 2002 DH Instruments, Inc.
High pressure liquids and gases are potentially hazardous. Energy stored in these liquids and gases
can be released unexpectedly and with extreme force. High pressure systems should be assembled
and operated only by personnel who have been instructed in proper safety practices.
© 1997-2002 DH Instruments, Inc. All rights reserved.
Information in this document is subject to change without notice. No part of this document may be reproduced or transmitted in any
form or by any means, electronic or mechanical, for any purpose, without the express written permission of DH Instruments, Inc.
4765 East Beautiful Lane Phoenix AZ 85044-5318 USA.
DH Instruments makes sincere efforts to ensure accuracy and quality of its’ published materials; however, no warranty, expressed
or implied, is provided. DH Instruments disclaims any responsibility or liability for any direct or indirect damages resulting from the
use of the information in this manual or products described in it. Mention of any product or brand does not constitute an
endorsement by DH Instruments of that product or brand. This manual was originally composed in English and was subsequently
translated into other languages. The fidelity of the translation cannot be guaranteed. In case of conflict between the English version
and other language versions, the English version predominates.
Products described in this manual are manufactured under international patents and one or more of the following U.S. patents:
5,142,483, 5,257,640, 5,331,838, 5,445,035. Other U.S. and international patents pending.
DH Instruments, DH, DHI, molbox, molbox1 are trademarks, registered and otherwise, of DH Instruments, Inc.
Document No. 5500093b-04
020604
Printed in the USA.
© 1997-2002 DH Instruments, Inc.
TABLE OF CONTENTS
TABLE OF CONTENTS
TABLE OF CONTENTS ............................................................... I
FIGURES................................................................................. II
ABOUT THIS MANUAL .............................................................. 2
1.
2.
3.
4.
MOLBOX ANALOG CIRCUIT CALIBRATION SOFTWARE .......... 1
1.1
PRODUCT OVERVIEW ...........................................................................................................................1
1.2
GETTING STARTED................................................................................................................................1
RUNNING A CALIBRATION .................................................. 3
2.1
OVERVIEW ..............................................................................................................................................3
2.2
CHECK CALIBRATION ...........................................................................................................................3
2.3
RECALIBRATE........................................................................................................................................4
MENU OPTIONS ................................................................. 5
3.1
FILE: SAVE DATA (SHORTCUT: CTRL+S)..........................................................................................5
3.2
FILE: PRINT FILE...................................................................................................................................5
3.3
FILE: PRINT CURRENT DATA (SHORTCUT: CTRL+P) ......................................................................5
3.4
FILE: VIEW FILE (SHORTCUT: CTRL+F) ............................................................................................5
3.5
TEST: CHECK MOLBOX CALIBRATION ..............................................................................................5
3.6
TEST: RECALIBRATE MOLBOX...........................................................................................................5
3.7
TEST: TEST SET VALUE (SHORTCUT: CTRL+T)...............................................................................6
3.8
TEST: RESTORE PREVIOUS CALIBRATION.......................................................................................6
TROUBLESHOOTING .......................................................... 7
4.1
5.
6.
GENERAL PROCEDURES......................................................................................................................7
FORMS / DIAGRAMS ........................................................... 9
5.1
SERIAL COMMUNICATIONS FORM ......................................................................................................9
5.2
ANALOG CALIBRATION FORM .............................................................................................................9
5.3
SET POINT TEST FORM.........................................................................................................................9
5.4
EXAMPLE .CFG FILE............................................................................................................................10
5.5
CABLES.................................................................................................................................................11
WARRANTY STATEMENT .................................................. 13
Page I
© 1997-2002 DH Instruments, Inc.
MFC SWITCHBOX USER’S MANUAL
TABLES
Table 1. DHI Authorized Service Providers ............................................................................................... 13
FI G U R E S
Figure 1 Communications Setup Screen ...................................................................................................... 9
Figure 2 molbox Analog Calibration Software ver 1.2b DH Instruments 1995 Screen ............................... 9
Figure 3 Set Point Test Screen.................................................................................................................... 9
Figure 4 molbox Analog Calibration Cable ................................................................................................ 11
Figure 5 Old Style molbox Analog Calibration Cable................................................................................. 11
ABOUT THIS MANUAL
Manual Conventions
(CAUTION) is used in throughout the manual to identify user warnings and cautions.
(NOTE) is used throughout the manual to identify operating and applications advice and
additional explanations.
[ ] indicates direct function keys (e.g., [RANGE]).
< > indicates PG7000 screen displays (e.g., <1yes>).
© 1997-2002 DH Instruments, Inc.
Page II
1. INTRODUCTION
1.
MOLBOX ANALOG CIRCUIT
CALIBRATION SOFTWARE
1.1
PRODUCT OVERVIEW
The purpose of this software is to calibrate the MFC analog control circuit in molbox1™. There are three
separate lines that are individually calibrated by the software. First there is the set line that is used to set
MFC set points. Then there are two input lines, the sense and the measure. The sense line is used
to readjust the set value to match itself and the measure line is used to read the output of the MFC.
The measure line is the most important of the three, even if the set point and sense point are out of
tolerance, the measure line will still allow an accurate calibration if it is within tolerance. In current (mA)
mode there is no sense line so N/A appears in all sense fields while in current mode.
1.2
GETTING STARTED
Make sure that your PC has the following minimum requirements: Windows® 3.0, 4 MB of RAM and 1 MB of
hard disk space. To install the software, insert the moltools installation disk and run the setup utility. This can
be done in Windows by going to the File Menu, selecting Run and typing “A:\SETUP”, or in Windows 95
by pressing Start and choosing Run then typing “A:\SETUP” (where ‘A’ represents the drive that the
installation disk is located). This utility will install the molbox Analog Calibration program and all of its
associated files into the moltools directory and create a program group in Windows named molbox
moltools.
Before attempting to run the Analog Calibration program, be sure that the molbox COM1 port is
connected to one of the communications ports of the host PC with a standard RS232 cable. This allows
the program to auto-detect molbox and the serial communications setup is skipped. To run the program
double click the Analog Calibration Icon. In most cases, if everything is properly attached, the software
will auto-detect molbox and the calibration form will follow. The exceptions are when the current settings
of the molbox COM1 port are not Even parity, 1 Stop bit, 7 Data bits, and Baud rates of 2 400 or above.
In these cases, you will have to manually set up the communications. It is also possible that a general
communications error will occur or some other unexpected problem that has not been mentioned. If so,
choose the Communications menu option and select the proper settings from the Serial Communications
Form shown at the end of this document in the Forms/Diagrams section. If you cannot determine the
current settings of molbox, use the following procedure from the molbox keypad:
Press [ESC] until you return to the main menu if you are NOT already there.
Select <0 Special>, followed by <5 Internal> and <2 Remote>. Old style molbox1 users should
select: <3 Special>, <8 Internal>, <2 Remote>, <1 com1>.
If the molbox has an IEEE 488 option, select COM1 after selecting Remote in the previous step.
Either change the baud rate with the number keys and select [ENTER], or bypass it to view the next
parameter by pressing enter.
Repeat Step
for Parity, Word Length and Stop Bits, and terminating characters.
Select the proper configuration on the Serial Communications Form and press [OK].
Page 1
© 1997-2002 DH Instruments, Inc.
MFC SWITCHBOX USER’S MANUAL
NOT E S
© 1997-2002 DH Instruments, Inc.
Page 2
2. RUNNING A CALIBRATION
2.
RUNNING A CALIBRATION
2.1
OVERVIEW
Before running a calibration, connect the 25 pin connector end of the calibration cable to the MFC port and the
other end to the voltage or current measuring channel of the multimeter. The red plug is positive voltage,
the black plug is negative voltage, the blue plug is positive current and the white plug negative current.
When performing a Voltage mode calibration only connect the Red and Black connectors to the
multimeter. Current (mA) calibrations should only have the blue and white connectors attached.
Leaving different mode connectors attached or letting any connectors come in contact during a
calibration could damage the molbox circuit.
2.2
CHECK CALIBRATION
The first step is to check to see if the calibration is out of specification. This is accomplished by selecting
a Voltage or Current mode Calibration Check from the Test menu (see Section 3.5). The software will set
two points, 5 and 0.5 V or 20 and 5 mA, without correcting with the molbox sense line. After each setting
a prompt on the status bar to enter the current multimeter reading displays. The area of input will
highlight and you must type in the multimeter reading and press return. The multimeter will only display
the proper value when you are prompted; so wait for the prompt before entering the reading.
It is important to make sure that the value is properly input into the text box as this will directly
affect the results of the calibration.
The agreement between the multimeter readings and those read back from the molbox must be less than
± 0.1 % full scale for set values and ± 0.05 % full scale for the measure values for molbox1. If this is the
case, the molbox1 is in tolerance and there are no other necessary steps. However, if the molbox is out
of tolerance then a recalibration is necessary.
Page 3
© 1997-2002 DH Instruments, Inc.
MFC SWITCHBOX USER’S MANUAL
2.3
RECALIBRATE
A recalibration determines new calibration coefficients for the set, measure and sense lines based on the
supplied multimeter readings. To perform a recalibration, choose either a Voltage or Current mode
Recalibration from the Test Menu (see Section 3.6). The software will set 5 and 0.5 V or 20 and 5 mA
depending on the type of calibration selected. After each set point the multimeter readings must be
entered when prompted in the same manner as a calibration check, except it will do it twice. The first
time the software will calculate new adders and multipliers and write them to molbox1. The second time,
the software is attempting to verify that the new calibration was successful. Therefore, the second set of
data input by the user should be within the molbox specification. Once the calibration passes, the save
calibration option displays (see Section 3.1). If for some reason the calibration fails, the original
calibration values are restored.
While the calibration is running it is not necessary to do anything except wait for the software to inform
you when to input information or if there is a problem. To stop any calibration early just press ESC. If
early, the original calibration values are written back to the molbox.
There is a file named (molbox serial number (+_mA)).cfg that resides in the installation directory of the
Analog program. The file name will have ‘_mA’ after the serial number for current (mA) configuration files
only. In this file the current, previous, former and initial molbox calibration values and their dates are
maintained. In this case former refers to the value prior to previous.
Data for this file is used to restore previous calibration values in order to maintain metrological continuity
(see Section 3.6). At the beginning and end of each calibration, the molbox calibration values are
compared to the file data. If they do not match the file is updated. See Section 5.4 for an example .cfg file.
© 1997-2002 DH Instruments, Inc.
Page 4
3. MENU OPTIONS
3.
MENU OPTIONS
3.1
FILE: SAVE DATA (SHORTCUT: CTRL+S)
When save is invoked, the contents of the display box are saved into a text based data file. If this option
is selected after a calibration check or recalibration, a default file name is created based on the
Year + Julian Day + V (or I based on last mode) and a run increment. The default extension depends on
the information being saved. If a calibration check was performed and the user selects save,
the extension is “.chk” but if a recalibration is saved, the extension is “.cal”. Files that are viewed and
re-saved default to their original filename. The increment will always start at 1 and increase if multiple
files are saved on the same day. The final name and destination of the file can always be modified.
The option to save the file always automatically occurs at the end of a successful calibration.
However, you may save the contents of the display at any time.
3.2
FILE: PRINT FILE
This option allows the printing of a selected calibration file to the default Windows printer.
3.3
FILE: PRINT CURRENT DATA (SHORTCUT: CTRL+P)
Print Current Data will print the current contents of the display box without saving it to a file.
3.4
FILE: VIEW FILE (SHORTCUT: CTRL+F)
Any text based file can be viewed in the main display box with this option. Its purpose is to view previous
calibration files and configuration (.cfg) files.
3.5
TEST: CHECK MOLBOX CALIBRATION
A Calibration Check should be performed anytime the circuit is in question. It is a means of verifying the
circuit in its current state. The procedure for checking a calibration is described in Section 2.2. The Current
mode option is unsupported in the old style molbox1. As a result, it is disabled when calibrating one of
these units.
3.6
TEST: RECALIBRATE MOLBOX
This option should be selected to update the calibration coefficients of molbox1. The procedure for verifying
the calibration is described in more detain in Section 2.3. As with the previous option, the Current (mA)
mode option is unsupported in the old style molbox1 therefore the Current mode option is disabled when
calibrating one of these units.
Page 5
© 1997-2002 DH Instruments, Inc.
MFC SWITCHBOX USER’S MANUAL
3.7
TEST: TEST SET VALUE (SHORTCUT: CTRL+T)
The purpose of the Test Set Value option is to allow a user to insure that the values between the
calibration points are within the molbox1 specifications. Values set with this option are corrected by the
molbox1 sense line, while the set values of a Calibration Check are not. When selected, a form is
activated that allows users to select the mode and enter a desired set point and read the circuit output
(see Section 5.3). To set a value, choose the desired set mode and enter the desired value and press
either enter or send, then enter the multimeter reading when prompted. The percentage of full scale error
of the sense and measure outputs display next to their corresponding values. The status bar at the
bottom of the screen will display “Out of spec…” or “In spec…” after each set point.
3.8
TEST: RESTORE PREVIOUS CALIBRATION
To restore the previous calibration data, select this option. If the .CFG file for the molbox exists,
the previous value in it is used to update the analog circuit’s slope and offset values. If the file does not
exist, the file is created. An example .CFG file is included (see Section 5.4).
© 1997-2002 DH Instruments, Inc.
Page 6
4. TROUBLESHOOTING
4.
TROUBLESHOOTING
4.1
GENERAL PROCEDURES
If the calibration continues to fail due to excessive errors (out of spec), make sure that a molbloc is
properly connected to the molbloc port A and/or B on the molbox and restart the calibration from the
beginning by selecting Check Calibration.
If molbox1 is not auto-detected for whatever reason, the test option is disabled on the main form. Use the
communications menu option to select the proper molbox I/O settings. Before attempting to select any
options, check to make sure that everything is still plugged in properly. To change the settings either
click the settings that you want or tab to the field and use the arrow keys to change the desired item.
Select OK after choosing the proper settings. If you do not know the current configuration, use the
procedure outlined under the Getting Started section (see Section 1.2).
If current (mA) mode calibrations are inappropriately disabled for the molbox1 under calibration, use the
communications menu option to re-establish communications. It is possible the molbox1 style was not
properly detected.
A diagram of the MFC interface cable is included to aid in the reconstruction or modification of the
calibration cable if necessary (see Section 5.5).
Page 7
© 1997-2002 DH Instruments, Inc.
MFC SWITCHBOX USER’S MANUAL
NOT E S
© 1997-2002 DH Instruments, Inc.
Page 8
5. FORMS / DIAGRAMS
5.
FORMS / DIAGRAMS
5.1
SERIAL COMMUNICATIONS FORM
Figure 1 Communications Setup Screen
5.2
ANALOG CALIBRATION FORM
Figure 2 molbox Analog Calibration Software ver 1.2b DH Instruments 1995 Screen
5.3
SET POINT TEST FORM
Figure 3 Set Point Test Screen
Page 9
© 1997-2002 DH Instruments, Inc.
MFC SWITCHBOX USER’S MANUAL
5.4
EXAMPLE .CFG FILE
This file keeps a history of the current and previous analog calibration values. The name of the file is
based on the molbox sn #.
The UPDATE line represents the last time the particular value was updated.
The order of the values is: set adder, set mult, sense adder, sense mult, measure adder, and measure mult.
This file should not exceed 25 lines including help text, nor should there be any other colons other than
those below, Analog uses them as a delimiter. The order and spacing of the following lines should also
be the same.
Current Update:
Current Value:
Previous Update:
Dec. 28, 1995 at 7:44:34 AM
0.001, 0.970246, 0.002, 1.019117, 0.004, 1.015546
Nov. 28, 1995 at 7:41:44 AM
Previous Value:
0.001, 0.971293, 0.002, 1.018018, 0.005, 1.013785
Former Update:
Oct. 28, 1995 at 7:36:41 AM
Former Values:
0.002, 0.973394, 0.001, 1.016267, 0.003, 1.011819
Initial Creation:
Sept. 28, 1995 at 7:33:18 AM (file creation date)
Initial Values:
© 1997-2002 DH Instruments, Inc.
0.002, 1.023425, 0.003, 0.965949, 0.005, 0.961934
Page 10
5. FORMS / DIAGRAMS
5.5
CABLES
Figure 4 molbox Analog Calibration Cable
Figure 5 Old Style molbox Analog Calibration Cable
Page 11
© 1997-2002 DH Instruments, Inc.
MFC SWITCHBOX USER’S MANUAL
NOT E S
© 1997-2002 DH Instruments, Inc.
Page 12
6. WARRANTY STATEMENT
6.
WARRANTY STATEMENT
Except to the extent limited or otherwise provided herein, DH Instruments, Inc. (DHI) warrants for one
year from purchase, each new product sold by it or one of its authorized distributors, only against defects
in workmanship and/or materials under normal service and use. Products which have been changed or
altered in any manner from their original design, or which are improperly or defectively installed, serviced
or used are not covered by this warranty.
DHI and any of its authorized service providers’ obligations with respect to this warranty are limited to the
repair or replacement of defective products after their inspection and verification of such defects. All products
to be considered for repair or replacement are to be returned to DHI, or its authorized service provider,
freight prepaid, after receiving authorization from DHI or its authorized service provider. The buyer
assumes all liability vis-à-vis third parties in respect of its acts or omissions involving use of the products.
In no event shall DHI be liable to purchaser for any unforeseeable or indirect damage, it being expressly
stated that, for the purpose of this warranty, such indirect damage includes, but is not limited to, loss of
production, profits, revenue, or goodwill, even if DHI has been advised of the possibility thereof, and
regardless of whether such products are used individually or as components in other products.
Items returned to DHI under warranty claim but determined to not have a defect covered under warranty
or to not have a defect at all are subject to an evaluation and shipping charge as well as applicable repair
and/or calibration costs.
The provisions of this warranty and limitation may not be modified in any respect except in writing signed
by a duly authorized officer of DHI.
The above warranty and the obligations and liability of DHI and its authorized service providers exclude
any other warranties or liabilities of any kind.
Table 1. DHI Authorized Service Providers
DH INSTRUMENTS, INC.
AUTHORIZED SERVICE PROVIDERS
COMPANY
TELEPHONE,
FAX & EMAIL
ADDRESS
NORMAL SUPPORT
REGION
DH Instruments, Inc.
4765 East Beautiful Lane
Phoenix AZ 85044-5318
USA
Tel 602.431.9100
Fax 602.431.9559
[email protected]
Worldwide
Minerva I.P.&M. B.V.
Handelsweg 13
Postbus 76-1270
AB Huizen
NETHERLANDS
Tel 31/35.52.54.997
Fax 31/35.52.64.560
[email protected]
European Union
Nippon CalService, Inc.
2-9-1 Sengen, Tsukuba-Shi
Ibaraki Prefecture 305
JAPAN
Tel 0298-55-8778
Fax 0298-55-8700
[email protected]
Japan/Asia
DH Products Technical
Service Division
National Institute of Metrology
Heat Division
Pressure & Vacuum Lab
NO. 18, Bei San Huan Donglu
Beijing 100013
PR CHINA
Tel 010-64291994 ext 5
Tel 010-64218637 ext 5
Fax 010-64218703
[email protected]
Peoples Republic of
China
Page 13
© 1997-2002 DH Instruments, Inc.
MFC SWITCHBOX USER’S MANUAL
NOT E S
© 1997-2002 DH Instruments, Inc.
Page 14