1
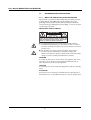
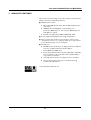
Philips
Business
Solutions
EN
User Manual
TYPE Nr.
BDS4622V
BDS4622R
BDS4624R
User Manual BDS4622V/R and BDS4624R
TABLE OF CONTENTS
1
SAFETY . . . . . . . . . . . . . . . . . . . . . . . . . . . . . . . . . . . . . . . . . . . . . . . . . . . . . . . . . . . . . . . . . . . . .3
1.1
Safety Instructions . . . . . . . . . . . . . . . . . . . . . . . . . . . . . . . . . . . . . . . . . . . . . . . . . . . . . . . . . . . . . . . . . . . 3
1.2
Warnings and Precautions . . . . . . . . . . . . . . . . . . . . . . . . . . . . . . . . . . . . . . . . . . . . . . . . . . . . . . . . . . . . . 6
1.2.1 Note to the CATV System Installer. . . . . . . . . . . . . . . . . . . . . . . . . . . . . . . . . . . . . . . . . . . . . . . . 6
1.3
Cleaning & Care . . . . . . . . . . . . . . . . . . . . . . . . . . . . . . . . . . . . . . . . . . . . . . . . . . . . . . . . . . . . . . . . . . . . . 7
1.4
End-of-Life Disposal . . . . . . . . . . . . . . . . . . . . . . . . . . . . . . . . . . . . . . . . . . . . . . . . . . . . . . . . . . . . . . . . . . 7
2
REGULATORY NOTICE (FOR USA AND CANADA ONLY) . . . . . . . . . . . . . . . . . . . . . . . .9
3
PRODUCT FEATURES . . . . . . . . . . . . . . . . . . . . . . . . . . . . . . . . . . . . . . . . . . . . . . . . . . . . . . .11
4
UNPACKING AND INSTALLATION . . . . . . . . . . . . . . . . . . . . . . . . . . . . . . . . . . . . . . . . . . .13
Unpacking . . . . . . . . . . . . . . . . . . . . . . . . . . . . . . . . . . . . . . . . . . . . . . . . . . . . . . . . . . . . . . . . . . . . . . . . . 13
Package Contents . . . . . . . . . . . . . . . . . . . . . . . . . . . . . . . . . . . . . . . . . . . . . . . . . . . . . . . . . . . . . . . . . . . 14
Installation Notes . . . . . . . . . . . . . . . . . . . . . . . . . . . . . . . . . . . . . . . . . . . . . . . . . . . . . . . . . . . . . . . . . . . 15
4.1
4.2
4.3
5
PARTS & FUNCTIONS . . . . . . . . . . . . . . . . . . . . . . . . . . . . . . . . . . . . . . . . . . . . . . . . . . . . . . .17
Front View . . . . . . . . . . . . . . . . . . . . . . . . . . . . . . . . . . . . . . . . . . . . . . . . . . . . . . . . . . . . . . . . . . . . . . . . 17
Rear View (FOR BOTH BDS4622V/R AND BDS4624R) . . . . . . . . . . . . . . . . . . . . . . . . . . . . . . . . . . . . 18
Remote Control . . . . . . . . . . . . . . . . . . . . . . . . . . . . . . . . . . . . . . . . . . . . . . . . . . . . . . . . . . . . . . . . . . . . 20
Battery Installation . . . . . . . . . . . . . . . . . . . . . . . . . . . . . . . . . . . . . . . . . . . . . . . . . . . . . . . . . . . . . . . . . . 22
Effective range of Remote Controll . . . . . . . . . . . . . . . . . . . . . . . . . . . . . . . . . . . . . . . . . . . . . . . . . . . . . 22
5.1
5.2
5.3
5.4
5.5
6
CONNECTION TO EXTERNAL EQUIPMENT . . . . . . . . . . . . . . . . . . . . . . . . . . . . . . . . . . .23
PC Module . . . . . . . . . . . . . . . . . . . . . . . . . . . . . . . . . . . . . . . . . . . . . . . . . . . . . . . . . . . . . . . . . . . . . . . . 23
Video Module . . . . . . . . . . . . . . . . . . . . . . . . . . . . . . . . . . . . . . . . . . . . . . . . . . . . . . . . . . . . . . . . . . . . . . 24
External Speakers (optional) . . . . . . . . . . . . . . . . . . . . . . . . . . . . . . . . . . . . . . . . . . . . . . . . . . . . . . . . . . 25
6.1
6.2
6.3
7
BASIC FUNCTIONS . . . . . . . . . . . . . . . . . . . . . . . . . . . . . . . . . . . . . . . . . . . . . . . . . . . . . . . . .27
7.1
Powering On/Off . . . . . . . . . . . . . . . . . . . . . . . . . . . . . . . . . . . . . . . . . . . . . . . . . . . . . . . . . . . . . . . . . . . 27
7.2
Selecting an input mode . . . . . . . . . . . . . . . . . . . . . . . . . . . . . . . . . . . . . . . . . . . . . . . . . . . . . . . . . . . . . . 28
7.3
On-screen Display menu . . . . . . . . . . . . . . . . . . . . . . . . . . . . . . . . . . . . . . . . . . . . . . . . . . . . . . . . . . . . . 29
7.4
Volume Adjustment . . . . . . . . . . . . . . . . . . . . . . . . . . . . . . . . . . . . . . . . . . . . . . . . . . . . . . . . . . . . . . . . . 30
7.5
Zooming in/out of pictures . . . . . . . . . . . . . . . . . . . . . . . . . . . . . . . . . . . . . . . . . . . . . . . . . . . . . . . . . . . 31
7.6
Miscellaneous functions . . . . . . . . . . . . . . . . . . . . . . . . . . . . . . . . . . . . . . . . . . . . . . . . . . . . . . . . . . . . . . 31
8
ADVANCED FUNCTIONS . . . . . . . . . . . . . . . . . . . . . . . . . . . . . . . . . . . . . . . . . . . . . . . . . . . .33
8.1
OSD Menus . . . . . . . . . . . . . . . . . . . . . . . . . . . . . . . . . . . . . . . . . . . . . . . . . . . . . . . . . . . . . . . . . . . . . . . 33
8.1.1 Picture Menu. . . . . . . . . . . . . . . . . . . . . . . . . . . . . . . . . . . . . . . . . . . . . . . . . . . . . . . . . . . . . . . . . 33
8.1.2 Display Menu . . . . . . . . . . . . . . . . . . . . . . . . . . . . . . . . . . . . . . . . . . . . . . . . . . . . . . . . . . . . . . . . 34
8.1.3 TV Settings Menu (For BDS4622R and BDS4624R only) . . . . . . . . . . . . . . . . . . . . . . . . . . . . . . 35
8.1.4 Audio Menu . . . . . . . . . . . . . . . . . . . . . . . . . . . . . . . . . . . . . . . . . . . . . . . . . . . . . . . . . . . . . . . . . 36
8.1.5 Miscellaneous . . . . . . . . . . . . . . . . . . . . . . . . . . . . . . . . . . . . . . . . . . . . . . . . . . . . . . . . . . . . . . . . 37
8.1.6 Information . . . . . . . . . . . . . . . . . . . . . . . . . . . . . . . . . . . . . . . . . . . . . . . . . . . . . . . . . . . . . . . . . . 38
8.2
TV options (For BDS4622R and BDS4624R only) . . . . . . . . . . . . . . . . . . . . . . . . . . . . . . . . . . . . . . . . . 39
8.2.1 Tuner function . . . . . . . . . . . . . . . . . . . . . . . . . . . . . . . . . . . . . . . . . . . . . . . . . . . . . . . . . . . . . . . 39
8.2.2 Installation. . . . . . . . . . . . . . . . . . . . . . . . . . . . . . . . . . . . . . . . . . . . . . . . . . . . . . . . . . . . . . . . . . . 40
8.2.3 Basic Operation . . . . . . . . . . . . . . . . . . . . . . . . . . . . . . . . . . . . . . . . . . . . . . . . . . . . . . . . . . . . . . 40
8.2.4 OSD Functions . . . . . . . . . . . . . . . . . . . . . . . . . . . . . . . . . . . . . . . . . . . . . . . . . . . . . . . . . . . . . . . 41
9
OPTIONAL ACCESSORIES . . . . . . . . . . . . . . . . . . . . . . . . . . . . . . . . . . . . . . . . . . . . . . . . . . .47
10
TECHNICAL SPECIFICATIONS . . . . . . . . . . . . . . . . . . . . . . . . . . . . . . . . . . . . . . . . . . . . . . .49
11
CLEANING AND TROUBLESHOOTING . . . . . . . . . . . . . . . . . . . . . . . . . . . . . . . . . . . . . . . .51
1
User Manual BDS4622V/R and BDS4624R
11.1
11.2
Cleaning . . . . . . . . . . . . . . . . . . . . . . . . . . . . . . . . . . . . . . . . . . . . . . . . . . . . . . . . . . . . . . . . . . . . . . . . . . 51
Troubleshooting . . . . . . . . . . . . . . . . . . . . . . . . . . . . . . . . . . . . . . . . . . . . . . . . . . . . . . . . . . . . . . . . . . . . 52
12
LIMITED WARRANTY (USA). . . . . . . . . . . . . . . . . . . . . . . . . . . . . . . . . . . . . . . . . . . . . . . . . .53
13
LIMITED WARRANTY (EUR). . . . . . . . . . . . . . . . . . . . . . . . . . . . . . . . . . . . . . . . . . . . . . . . . .55
14
APPENDIX . . . . . . . . . . . . . . . . . . . . . . . . . . . . . . . . . . . . . . . . . . . . . . . . . . . . . . . . . . . . . . . . . .1
14.1 Wall-mount Installation Guide . . . . . . . . . . . . . . . . . . . . . . . . . . . . . . . . . . . . . . . . . . . . . . . . . . . . . . . . . . 1
2
User Manual BDS4622V/R and BDS4624R
1. SAFETY
1.1
SAFETY INSTRUCTIONS
■
Read and keep these instructions.
■
Heed all warnings.
■
Follow all instructions.
■
Do not use this apparatus near water.
■
Disconnect from the electric outlet before cleaning. Do not use
liquid or aerosol cleaners. Clean only with a slightly damp cloth.
■
Do not block any of the ventilation openings. Install in accordance
with the manufacturers instructions.
■
Do not install in direct sunlight, near any heat sources such as
radiators, heat registers, stoves, or other apparatus (including
amplifiers) that produce heat.
■
Do not defeat the safety purpose of the polarized or grounding type
plug. A polarized plug has two blades with one wider than the other.
A grounding type plug has two blades and a third grounding prong.
The wide blade or third prong are provided for your safety. When
the provided plug does not fit into your outlet, consult an electrician
for replacement of the obsolete outlet.
■
Do not remove cover, to prevent electric shock. Refer servicing to
qualified service personel only.
■
Unauthorized modification of this equipment or usage of an
unshielded connecting cable may cause excessive interference.
■
Adjust only those controls that are covered by the operating
instructions. Improper adjustment of other controls can result in
damage which often requires extensive work by a qualified technician
to restore the unit to normal operation.
■
Use in well-ventilated area and do not block any of the ventilation
openings. Install in accordance with the manufacturer’s instructions.
■
The unit must be operated from the type of power source indicated
on the label. If the type of available power is unknown, consult your
dealer or local power company.
■
Protect the power cord from being walked on or pinched
particularly at plugs, convenience receptacles, and the point where
they exit from the apparatus power outlet. This is a safety feature.
If you are unable to insert the plug into the outlet, contact your
electrician. Do not alter the plug; this will defeat the safety feature.
■
Do not overload wall outlets and extension cords as this can result
in a risk of fire or electric shock.
■
If the picture displayed looks abnormal, turn off the unit and
disconnect it from the electric outlet. Verify your signal wire
connections and reconnect the display to the electric outlet.
■
Only use attachments/accessories specified by the manufacturer.
3
User Manual BDS4622V/R and BDS4624R
■
Use only with a cart, stand, tripod, bracket, or table specified by the
manufacturer, or sold with apparatus. When a cart is used, use
caution when moving the cart/apparatus combination to avoid injury
from tip-over.
■
Unplug this apparatus during lightning storms or when unused for
long periods of time.
■
Refer all servicing to qualified service personnel. Servicing is required
when the apparatus has been damaged in any way, such as
power-supply cord or plug is damaged, liquid has been spilled or
objects have fallen into apparatus, the apparatus has been exposed to
rain or moisture, does not operate normally, or has been dropped.
■
This product may contain lead and mercury. Disposal of these
materials may be regulated due to environmental considerations.
For disposal or recycling information, please contact your local
authorities or the Electronic Industries Alliance: www.eiae.org
■
Damage Requiring Service:
The appliance should be serviced by qualified service personnel
when:
■
●
The power supply cord or the plug has been damaged or frayed.
●
Objects have fallen, or liquid has been spilled into the appliance.
●
The appliance has been exposed to rain.
●
The appliance does not appear to operate normally or exhibits a
marked change in perfomance.
●
The appliance has been dropped, or the enclosure damaged.
●
Unit does not operate normally when the operating instructions
are followed.
Tilt/Stability:
●
All displays must comply with recommended international global
safety standards for tilt and stability properties of its cabinet
design.
●
Do not compromise these design standards by applying excessive
pull force to the front, or top, of the cabinet which could
ultimately overturn the product.
●
Do not endanger yourself, or children, by placing electronic
equipment/toys on the top of the set and cause product damage
and/or personal injury.
●
Do not place the unit on an unstable cart, stand or table. Or the
product may fall, causing serious damage.
■
Do not place the unit on a bed, soffa, rug, or similar surfaces.
■
Wall or Ceiling Mounting:
The appliance should be mounted to a wall or ceiling only as
recommended by the manufacturer.
■
Power Lines:
An outdoor antenna should be located away from power lines.
4
User Manual BDS4622V/R and BDS4624R
■
Outdoor Antenna Grounding:
●
If an outside antenna is connected to the receiver, be sure the
antenna system is grounded so as to provide some protection
against voltage surges and built up static charges.
●
Section 810 of the National Electric Code, ANSI/NFPA
No. 70-1984, provides information with respect to proper
grounding of the mast and supporting structure, grounding of the
lead-in wire to an antenna discharge unit, size of grounding
connectors, location of antenna-discharge unit, connection
grounding electrodes, and requirements for the grounding
electrode.
■
Object and Liquid Entry:
Care should be taken so that objects do not fall and liquids are not
spilled into the enclosure through openings.
■
Battery Usage:
CAUTION: To prevent battery leakage that may result in bodily
injury, property damage, or damage to the unit.
●
Install all batteries correctly, with + and - aligned as marked on
the unit.
●
Do not mix batteries (old and new or carbon and alkaline, etc.).
●
Remove batteries when the unit is not used for a long time.
5
User Manual BDS4622V/R and BDS4624R
1.2
WARNINGS AND PRECAUTIONS
1.2.1
NOTE TO THE CATV SYSTEM INSTALLER
This reminder is provided to call the CATV system installer’s attention
to Article 820-40 of the NEC that provides guidelines for proper
grounding and, in particular, specifies that the cable ground must be
connected to the grounding system of the building, as close to the point
of cable entry as practical.
KNOW THESE SAFETY SYMBOLS
CAUTION
RISK OF ELECTRIC SHOCK
DO NOT OPEN
CAUTION: TO REDUCE THE RISK OF ELECTRIC
SHOCK, DO NOT REMOVE COVER (OR BACK). NO
USER SERVICEABLE PARTS INSIDE. REFER SERVICING TO QUALIFIED SERVICE PERSONEL.
a
■
This lightning flash with arrow-head within a triangle indicates
uninsulated material within your unit, which can cause an electric
shock. For the safety of everyone in your household, do not remove
product cover.
■
For the safety of everyone in your household, do not remove
product cover. The exclamation point within a triangle calls
attention to features for which you mustread the enclosed literature
closely to prevent operating and maintenance problems.
WARNING
To reduce the risk of fire or electric shock, this appliance must not be
exposed to rain or moisture, and objects filled with liquids, such as
vases, must not be placed upon this apparatus.
CAUTION
To prevent electric shock, match wide plug blade to wide slot, and fully
insert.
ATTENTION
Pour éviter les chocs électriques, introduire la lame la plus large de la
fiche dans la bome correspondante de la prise et pousser jusqu’au fond.
6
User Manual BDS4622V/R and BDS4624R
1.3
CLEANING & CARE
■
To avoid possible shock hazard, please be sure that the television is
unplugged from the electrical outlet before cleaning.
■
When cleaning the television screen, take care not to scratch or
damage the screen surface (avoid wearing jewelry or using anything
abrasive).
■
Wipe the front of the screen with a clean cloth dampened with
water. Use even, easy, vertical strokes when cleaning.
■
Gently wipe the cabinet surfaces with a clean cloth or sponge
dampened in a solution of cool clear water. Use a clean dry cloth to
dry the wiped surfaces.
■
Occasionally vacuum the ventilation holes or slots in the cabinet
back.
■
Never use thinners, insecticide sprays, or other chemicals on or near
the cabinet, as they might cause permanent marring of the cabinet
finish.
■
Do not allow a still image to be displayed for an extended period of
time as this can cause a permanent after-image to remain.
1.4
END-OF-LIFE DISPOSAL
■
This Philips product and its packaging contain materials that can be
recycled and re-used. Specialized companies can recycle your
product to increase the amount of reusable materials and minimize
the amounts which need to be properly disposed.
■
This product might also use batteries, which should not be thrown
away when depleted, but should be handed in and disposed of as
small chemical waste.
■
Please find out about the local regulations regarding the disposal of
the television, batteries, and packaging materials whenever you
replace existing equipment.
7
User Manual BDS4622V/R and BDS4624R
8
User Manual BDS4622V/R and BDS4624R
2. REGULATORY NOTICE (FOR USA AND CANADA ONLY)
FCC Statement
The Federal Communications Commission Radio Frequency
Interference Statement includes the following warning:
This equipment has been tested and found to comply with the limits for
a Class B digital device, pursuant to Part 15 of the FCC Rules.
These limits are designed to provide reasonable protection against
harmful interference in a residential installation. This equipment
generates, uses, and can radiate radio frequency energy and, if not
installed and used in accordance with the instructions, may cause
harmful interference to radio communications. However, there is no
guarantee that interference will not occur in a particular installation.
If this equipment does cause harmful interference to radio or television
receptions, which can be determined by turning the equipment off and
on, the user is encouraged to try to correct the interference by one or
more of the following measures:
■
Reorient or relocate the receiving antenna.
■
Increase the separation between the equipment and receiver.
■
Connect the equipment into an outlet on a circuit different from that
to which the receiver is connected.
■
Consult the dealer or an experienced radio/TV technician for help.
Warning
User must use shielded signal interface cables to maintain FCC
compliance for the product. Provided with this display is a detachable
power supply cord with IEC320 style terminations. It may be suitable for
connection to any UL Listed personal computer with similar
configuration. Before making the connection, make sure the voltage
rating of the computer convenience outlet is the same as the monitor
and that the ampere rating of the computer convenience outlet is equal
to or exceeds the monitor voltage rating. For 120 Volt applications,
use only UL Listed detachable power cord with NEMA configuration
5-15P type (parallel blades) plug cap. For 240 Volt applications use only
UL Listed Detachable power supply cord with NEMA configuration
6015P type (tandem blades) plug cap.
IC Compliance Notice
This Class B digital apparatus meets all requirements of the Canadian
Interference-Causing Equipment Regulations of ICES-003.
Cet appareil Numerique de classe B respecte toutes les exigences du
Reglemont NMB-03 sur les equipements produisant des interferences au
Canada.
Notice de Conformit IC
Cet appareil numerique de classe B respecte toutes les exigences du
Reglement ICES-003 sur les equipements produisant des interferences
au Canada.
9
User Manual BDS4622V/R and BDS4624R
10
User Manual BDS4622V/R and BDS4624R
3. PRODUCT FEATURES
This monitor uses a slim design at only 9.8cm thick. Its excellent picture
quality is perfect for multimedia applications.
■
Multiple inputs modules :
●
PC module: RGB (D-sub 15-pin), DVI, and RS-232 (D-sub 9-pin
male) inputs.
●
VIDEO module: Scart(CVBS) x 1, Scart(S-Video ) x1,
Component (RCA) input x 1, and composite (RCA) inputs x 1;
audio (R/L) x 1 outputs.
●
Resolution for PC module: SXGA (1280X1024), 60Hz.
■
Power management: Equipped with energy saving function.
■
Fan-free design: This monitor has been design to reduce energy
consumption, so there is no cooling fan inside. As a result, you will
not be disturbed by the noise of cooling fans.
■
Miscellaneous:
●
PIP/POP function: It allows you to display pictures from different
sources in six different Picture-In-Picture (PIP) or
Picture-Of-Picture (POP) mode.
●
A pair of high-definition built-in speakers (5W+5W or 7W+7W).
You can purchase a pair of external speakers (15W+15W) to
enjoy a better sound effect.
●
Three EQ options allows you to adjust the best sound effect.
●
This product has been licensed to use the SRS technology
product by the SRS Labs, Inc.
Is the trademark of SRS Labs, Inc
11
User Manual BDS4622V/R and BDS4624R
12
User Manual BDS4622V/R and BDS4624R
4. UNPACKING AND INSTALLATION
4.1
UNPACKING
■
The monitor is packed in a carton, together with the standard
accessories. Any other optional accessories will be packed
separately.
■
The weight of the monitor is approx 37 kg. Due to the size and
weight it is recommended to move it by 2 people.
■
The protective glass and the glass substrate are installed on the front
of the product. Since both glasses can be broken and scraped easily
the product has to be handled with care. Never place the monitor
with the glass faced down unless it is protected with pads.
■
After opening the carton ensure that the content is in good
condition and complete.
■
When possible use the handles on the back of the monitor for
transport.
13
User Manual BDS4622V/R and BDS4624R
4.2
PACKAGE CONTENTS
Please verify that you received the following items with your package
content:
1 Monitor
2 Remote Control
3 CD-ROM with User Manual (For BDS 4624R printed version only)
4 Power cable
5 Batteries
6 AV cable
7 D-sub cable
14
User Manual BDS4622V/R and BDS4624R
4.3
INSTALLATION NOTES
■
Read this manual carefully before you start to install this monitor.
■
Due to the high power consumption, always use the plug exclusively
designed for this product. If an extended line is required, please
consult your service agent.
■
Installed on a flat surface to avoid tipping.
Keep a distance of at least 10 cm between the back of the product
and the wall or any funiture for a good ventilation.
■
Do not install this monitor in the kitchen, bathroom or any other
places with high humidity, to avoid shorter service life of the
electronic components.
■
Please ensure the monitor is installed horizontally.
Any 90 degrees clockwise or counter-clockwise installation may
induce poor ventilation and subsequent component damage.
■
To protect the screen and avoid screen damage, do not display a still
picture for a long time.
15
User Manual BDS4622V/R and BDS4624R
16
User Manual BDS4622V/R and BDS4624R
5. PARTS & FUNCTIONS
5.1
FRONT VIEW
BDS4622R/V
BDS4624R
1. Status LED
Indicates the status of the monitor
●
Not Illumated = No AC Power detected
If the main power switch (rear of panel) is turned off, this LED
will not illuminate.
●
Red = Standby (Power OFF) with AC power detected
The LED will illuminate in red color if the monitor is shut off but
the main power cord is plugged into the back of the unit.
●
Green = Power ON
●
Blinking = Sleep mode
2. Power (Standby) Button
Turns power on/off from standby mode. There is a wait period
between on/off cycles.
3. Volume Adjustment Buttons
Use these buttons to adjust volume up and down. These keys also
serve as navigation and adjustment keys when On Screen Display
(OSD)-menu is engaged.
4. Select Buttons
Use these buttons to navigate through the On Screen Display
(OSD)-menu. If an optional TV tuner is installed, these buttons also
function as Channel Up/Down.
5. Menu Button
Use this button to engage the On Screen Display (OSD)-menu.
6. Input Button
Use this button to switch between the available inputs.
17
User Manual BDS4622V/R and BDS4624R
5.2
REAR VIEW
(FOR BOTH BDS4622V/R AND BDS4624R)
3
3
2
4
1
2
1. Speaker Terminals
Can be used to connect external speakers (optional accessories) to
the product. Maximum power output 10W + 10W.
2. Wall Mount fixing holes
Use the standard screws to fix the wall mount (optional accessory).
3. Loud speaker fixing holes
Use the fixings and screws supplied with the (optional) loud speakers
to attach them to the product.
4. Signal input terminals
PC module
●
RGB Video In:
Allows to connect to the D-sub 15-pin port (analog output) on
the VGA card and use this product as a PC monitor.
●
DVI Video In:
Allows to connect to the DVI-I port (digital output) on the VGA
card and use this product as a PC monitor.
●
RS-232C:
D-sub 9-pin male port for firmware update.
18
User Manual BDS4622V/R and BDS4624R
VIDEO module
●
Scart 2:
Composite S-Video input terminal (SCART connector)
connecting to the Composite S-Video output terminal of the
video output device.
●
Scart 1:
Composite video & RGB input terminal (SCART connector)
connecting to the Composite video or RGB output terminal of
the video output device.
●
Video In:
Composite video input terminal (RCA connector) connecting to
the video output terminal of the video output device.
●
Audio In:
Audio input terminals for connecting the audio output of a video
system. They shared with audio input of YCbPb/CrPr and
Composite.
●
Y/CbPb/CrPr:
Component input terminals (RCA) for connecting video systems
with component outputs.
●
Audio Out:
Audio output terminals for connecting the audio input of any
audio or audiovisual device.
●
PC Audio In:
Stereo input terminal for connecting output signals of a sound
card of the PC (VGA/DVI).
19
User Manual BDS4622V/R and BDS4624R
5.3
REMOTE CONTROL
1. Standby Power On/Off
Press this button to turn on the monitor from Standby mode.
Press it again to turn it off to Standby mode.
2. PIP/POP
Swaps the main and sub picture windows under PIP or POP modes.
3. PR+
Press this button to select a higher TV-channel for the sub-frame.
(Only applicable for BDS4622R and BDS4624R).
4. PRPress this button to select a lower TV-channel for the sub-frame.
(Only applicable for BDS4622R and BDS4624R).
5. INPUT
Press this button to select an input source for the sub-frame.
6. SWAP
Press this button to swap between the main frame and sub-frame.
7. ASPECT RATIO
Press this button to select the favorite screen size.
Pixel to Pixel, 4:3, Output, Panoramic, Letter Box or Full screen.
8. ZOOM
Press this button to zoom in an image
9. FREEZE
Press this button to freeze the display on the screen (not the input
source). Press again to resume display. (It can take some time before
display reacts.)
10. REVERSE
Press this button after a static image has been on the screen for a
longer period of time. This prevents a burn-in protection of the
screen.
11. S/M/D
Press this button to select the audio channel of SAP programs.
Note:
(Only applicable for BDS4622R and BDS4624R).
12. SRS
Surround sound.
13. White
Press this button to set back color of the screen to white.
This to remove the residue image on the screen after displaying a
static image for a longer period of time.
14. FAV.
Press this button to call out your favorite channels.
(Only applicable for BDS4622R and BDS4624R).
15. FAV.
Press this button to add or delete a channel of the favorite channel
list.
(Only applicable for BDS4622R and BDS4624R).
20
User Manual BDS4622V/R and BDS4624R
16. PC AUTO
Press this button to activate auto adjustment (phase, V-sync and Hsync), if there is a display problem in PC mode after timing change.
17. VIDEO
Press this button to select a Video input source.
Scart 1 => Scart 2 => AV => Component (cyclical).
The sequence of the inputs varies for different input modules.
18. PC
Press this button to select an PC-input source.
VGA=>DVI (cyclical)
19. SLEEP
Press this button to set timer off.
20. INPUT
Press this button to select an input source.
21. INFO
Press this button to display the current input source and display
mode.
22.
/
Use these buttons to select an OSD item up and down.
23. +/ Use these buttons to select an OSD item left and right.
24. ENTER
Press the , , + or - button to move the highlight bar to the
desired menu and adjust settings.
Press the ENTER button to save the settings.
25. MENU/EXIT
Press the MRENU button activate the OSD menu.
Press the , , + or - button to move the highlight bar to the
desired menu and adjust settings.
Press the EXIT button to exit the OSD menu.
26. MUTE
Press this button to switch off the speakers.
Press again to switch on.
27. PR
/
Press this button to select a TV channel.
(Only applicable for BDS4622R and BDS4624R)
28. Input
Change input signal selection.
29. Number Keypad
Use number keypad to select the TV channel you want to watch.
(Only applicable for BDS4622R and BDS4624R).
21
User Manual BDS4622V/R and BDS4624R
5.4
BATTERY INSTALLATION
1 Slide out the battery cover.
2 Insert the two batteries (UM4).
Note:
Ensure that the polarity is as indicated by (+) and (-) inside the
battery compartment.
3 Install the battery cover back to the remote control.
5.5
Upper
20?
20?
EFFECTIVE RANGE OF REMOTE CONTROLL
■
Point the remove controller at the signal receiver (power indicator)
on the front panel of your plasma display.
■
Do not block the signal receiver (power indicator) on the front panel
of your plasma display.
■
The effective range of remote controller is 10M, 30° left and right
and 20° up and down, as shown above.
Notes for remote controller maintenance:
● Avoid impact, falling or dropping of remote controller. Keep remote
controller dry and out of heat source.
● Do not clean remote controller with volatile solvents (e.g. benzene
or thinner).
● Check battery level when remote controller does not work
properly.
Lower
22
User Manual BDS4622V/R and BDS4624R
6. CONNECTION TO EXTERNAL EQUIPMENT
6.1
PC MODULE
The PC module is designed for connecting this monitor to a VGA card
on PC to make it a PC monitor.
■
D-SUB (15-pin): Connect to the analog RGB output interface on the
VGA card. (Select VGA from INPUT)
■
DVI: Connect to the DVI-I digital RGB output interface on the VGA
card. (Select DVI from INPUT)
Notes:
● The DVI port on your plasma display is for connecting to the DVI-I
port on the VGA card. No analog signal is available from this port.
● The RS-232 port on your plasma display is for firmware update by
professionals. It should not be used for communication purpose.
23
User Manual BDS4622V/R and BDS4624R
6.2
VIDEO MODULE
Functions of the D-SUB, DVI and RS-232 ports are the same as that of
the PC module.
■
Component (Y/PbCb/PrCr) terminals
For connecting video systems with component outputs (e.g. DVD
players and HDTV tuners).
Connect the audio out of device to Audio In. (Select Component
from INPUT)
■
Video In
For connecting video systems with video outputs (e.g. VCR's, VCD
players and DVD players).
Connect the audio out of device to Audio In. (Select AV from
INPUT)
■
Scart terminal
For connecting to the composite or RGB output of a video output
device (such as a DVD or VHS) with Scart terminal output. (INPUT
Option Scart 1 or Scart 2 from INPUT)
24
User Manual BDS4622V/R and BDS4624R
6.3
EXTERNAL SPEAKERS (OPTIONAL)
1 Press and hold the clip on the terminal and plug the speaker cable
(remove the jacket) into the terminal. Release the clip.
2 Pull the cable gently to make sure that it will come out or not.
Notes:
● The connections of both channels (L+R) are the same.
● Set the option Speaker from the OSD menu to External Speaker
when a pair of external speakers is connected.
25
User Manual BDS4622V/R and BDS4624R
26
User Manual BDS4622V/R and BDS4624R
7. BASIC FUNCTIONS
7.1
POWERING ON/OFF
Make sure the monitor is plugged into the wall outlet and the main AC
switch located in the rear of the monitor is switched to ON position.
If the power is plugged in and the AC switch is on, the STATUS LED will
blink for a few seconds in green before it illuminate in red color
(STAND BY).
Using Front Panel or Remote Control
1 Press the POWER button on the front panel or the remote control.
The monitor will now turn on after a brief pause.
The STATUS LED will now turn green to indicate power on status.
2 Turn off the power by pressing the POWER button on the monitor
panel or remote control again.
Status LED:
■
Not Illumated = No AC Power detected
If the main power switch (rear of panel) is turned off, this LED will
not illuminate.
■
Red = Standby (Power OFF) with AC power detected
The LED will illuminate in red color if the monitor is in standby
mode.
■
Solid Green = Power ON
■
Blinking = Sleep mode
27
User Manual BDS4622V/R and BDS4624R
7.2
SELECTING AN INPUT MODE
Using Front Panel or Remote Control
1 Press the INPUT key on the monitor panel or the INPUT key on the
remote control.
2 Pressing the INPUT key will cycle the monitor through all available
input signal sources.
TV
DVI
AV3 S-VIDEO
AV2
AVI
VGA
COMPONENT
The sequence of input sources (may be different with different input
modules):
VGA: D-SUB analog input from the PC module.
DVI: DVI digital input from the PC module.
1 PC module: VGA --> DVI
2 PC + Video modules:-->Scart 1 - >Scart 2 ->AV ->Component >VGA ->DVI
Using Direct Input Selection Keys
If you prefer not to cycle through all available inputs, you can use the
Direct Input Selection keys on the remote control.
1 Simply select the input PC or VIDEO and press the Direct Input
Selection key for that input.
28
User Manual BDS4622V/R and BDS4624R
7.3
ON-SCREEN DISPLAY MENU
Accessing OSD Menu via Remote Control or Front Panel
The On-Screen Display (OSD) menu allows access to setup various
parameters equipped with this display.
You can adjust an OSD item with the following seven buttons:
MENU, EXIT,
,
, +, - and ENTER.
1. Press the MENU button to call out the OSD menu.
2. Use the + / - buttons to select the following submenus:
Picture->Display->TV Settings->Audio->
Miscellaneous->Information
3. Use the
/
buttons to select an OSD item up and down.
4. Use the + / - buttons to select an OSD item left and right and to
adjust the setting of an item.
5. Press the EXIT button to exit OSD menu.
Notes:
● You can adjust the OSD time out from the Miscellaneous menu.
● The OSD menu will turn off automatically if there is no button action
before timeout.
29
User Manual BDS4622V/R and BDS4624R
7.4
VOLUME ADJUSTMENT
Using Front Panel or Remote Control
■
Press and hold the VOL+ button to increase volume.
■
Press and hold the VOL- button to reduce volume.
Using MUTE
■ Press the MUTE button to mute (turn speakers off).
■
Press the MUTE button again to resume speaker output.
Note
● When the monitor’s volume is muted, the monitor will display
MUTE on the upper right corner of the screen.
● Miscellaneous audio settings (e.g. treble, bass and balance) must be
done from the OSD menu or front panel controls.
30
User Manual BDS4622V/R and BDS4624R
7.5
ZOOMING IN/OUT OF PICTURES
You can adjust the screen size with the following two buttons:
ASPECT RATIO and ZOOM.
■
ASPECT RATIO
Press the ASPECT RATIO button to change the screen size. You can
select "Fit to Screen" or "Original Size" (1:1) in PC mode.
You can select Pixel to Pixel, 4:3 Output, Panoramic, Letter Box or
Full Screen in Video mode.
■
ZOOM
Press and hold the ZOOM button to zoom in and resume screen.
7.6
MISCELLANEOUS FUNCTIONS
■
PC AUTO
Press the PC AUTO button to activate auto adjustment (phase, Vsync and H-sync) if there is a display problem in PC mode after
timing change.
■
FREEZE
Press the FREEZE button to freeze display on the screen (not the
input source). Press the FREEZE button again to resume display.
Note:
FREEZE will only freeze the display on the screen, and the playback
system will continue playing.
1 Press and hold the PIP/POP button to switch from and to:
PIP (Small) -> PIP (Medium) -> PIP (Large) -> POP (full screen) à>POP (16:9) -> Multi PIP -> Off
31
User Manual BDS4622V/R and BDS4624R
32
User Manual BDS4622V/R and BDS4624R
8. ADVANCED FUNCTIONS
8.1
OSD MENUS
8.1.1
PICTURE MENU
PC Module
In the PC Module you can adjust picture settings for:
■
Brightness
■
Contrast
■
Saturation
■
Tint
■
Reset
■
Picture Mode
■
Color Temperature
Video Module
In the Video Module you can adjust picture settings for:
■
Brightness
■
Contrast
■
Saturation
■
Tint
■
Sharpness
■
Reset
■
Picture Mode
■
Color Temperature
Note:
● You can reset the Brightness, Contrast, Saturation and Tint setting
to the factory default.
● If you select the option "User" in the Color Temperature setting,
you can adjust the brightness of Red, Green and Blue separately.
33
User Manual BDS4622V/R and BDS4624R
8.1.2
DISPLAY MENU
PC Module
In the PC Module you can adjust display settings for:
■
Aspect Ratio
■
PIP Size
■
PIP Position
■
Clock
■
Phase
■
Position
Video Module
In the Video Module you can adjust display settings for:
■
Aspect Ratio
■
PIP Size
■
PIP Position
Display format
To select the best suitable display format:
1 Press the ASPECT RATIO button on the remote controller.
2 Select one of the options.
34
User Manual BDS4622V/R and BDS4624R
8.1.3
TV SETTINGS MENU
(FOR BDS4622R AND BDS4624R ONLY)
When a TV module is installed on your monitor you can adjust an set he
items:
■
Program
■
Label
■
Auto Install
■
Manual Search
■
Fine Tune
■
Skip
■
Audio Format
■
Preview
■
Auto Sort
■
Reset Channel
■
Channel Edit
35
User Manual BDS4622V/R and BDS4624R
8.1.4
AUDIO MENU
In the Audio Menu you can set and adjust in both the PC module and
Video module:
■
Treble
■
Bass
■
Balance
■
SRS
■
Speakers
■
Audio Line Out
36
User Manual BDS4622V/R and BDS4624R
8.1.5
MISCELLANEOUS
Language and Screensaver Menu
In both PC module and Video module you can set the options:
■
OSD Time Out
■
ODS Position
■
OSD Language
■
OSD Transparency
■
DPMS (PC only)
■
Image Reverse
■
Color Space
■
Factory Default
■
Scart 2 Source
■
Image Move
■
Move Time
Notes:
● You can select the OSD language from the option Language.
● Image Reverse is a screen saver to protect the screen from damage,
after a still picture is displayed for a long period of time.
● When a static image is being displayed on the screen for a long
period of time, use the "Image Reverse" or "Image Move" features to
prevent screen burn and protect your screen.
The "Move Time" function allows you to adjust the length of time
between the stages of the "Image Move" feature.
37
User Manual BDS4622V/R and BDS4624R
8.1.6
INFORMATION
PC module
When the PC module is active, you can adjust:
■
Resolution
■
H-Sync
■
V-Sync
Video module
When the Video module is active, the input and video system will be
displayed.
Note:
If the PIP function is on, the input and system of sub-frame will be
displayed.
38
User Manual BDS4622V/R and BDS4624R
8.2
TV OPTIONS
(FOR BDS4622R AND BDS4624R ONLY)
The contents of this manual are to assist you on installation and
operation of the tuner function into your PDP Monitor. And enable your
PDP Monitor to receive TV signal from antenna or CATV (Cable TV).
8.2.1
TUNER FUNCTION
Features
This tuner shall be used in Europe for receiving TV signal from antenna
or CATV.
The features are:
1 Apply the general Europe country and not Europe country but the
TV system include the SCART and Teletext application area.
2 TV System: PAL B/G/;PAL D/K; PAL I; PAL L.
3 Audio Format: FM Mono; AM Mono; FM BG(A2); NICAM DK;
NICAM BG; NICAM I; NICAM L.
4 Teletext systems: Support Teletext B systems
(Note: not support Teletext A system).
5 Program Number: 01 to 99 program.
6 The main features of Teletext are as following:
●
World System Teletext (WST) level 1.5 teletext decoding with
200-page memory.
●
Support Latin (Western & Eastern Europe), Cyrillic and Arabic
(Farsi) languages.
●
Support Table Of Pages (TOP) and Full Level One Features
(FLOF) page navigation.
●
Support Favorite page mode.
7 SCART application:
●
●
Support SCART RGB Input;
SCART CVBS Input (Auto detect RGB/CVBS).
39
User Manual BDS4622V/R and BDS4624R
8.2.2
INSTALLATION
Connect to antenna
When using 75 Ohm coaxial cable: Connect directly to the VHF/UHF
terminal of the tuner.
Insert
VHF/UHF terminal
Input and Output Connection
VHF/UHF: Connect antenna or CATV 75 Ohm coaxial cable to receive
TV/CATV signal.
8.2.3
BASIC OPERATION
Channel Scan and Memory
When the hardware installation is completed, you must proceed the
channels scan first. The operation procedure is as below:
1. Select TV input (2 options)
●
Press the INPUT button on the remote controller continuously,
and select in sequence.
Scart 1--> Scart 2--> AV--> Component--> DVI--> TV.
●
Press the VIDEO button on the remote control repeatedly,
the system will detect and switch the input signals sequentially by
the cycle : Scart 1--> Scart 2--> AV--> Component-->TV.
2. Channel scan and memory
1 Press the MENU on the remote control or the front panel of the
monitor.
2 Select TV Settings.
3 Press the PR
or PR
button to select.
4 Press the VOL- or VOL+ button to execute.
5 Press the PR
or PR
button to move to the Auto Install icon.
6 Press the VOL- or VOL+ button for channel scanning
(figure as beside).
The system will automatically scan the whole frequency range (band
VHF L; VHF H; UHF) and memorize the valid channels.
Note:
During this procedure, other functions will be inactive.
1 Press the EXIT button to stop scanning.
2 After scanning use the PR
or PR
button at the font panel, or
number keys on the remote control, to select your favorite
program.
40
User Manual BDS4622V/R and BDS4624R
8.2.4
OSD FUNCTIONS
A)TV Settings
1 Press MENU.
2 Press the PR
or PR
button to Select.
3 Press the VOL- or VOL+ button to Execute, then the TV Settings
will come out as the left figure below.
Auto Install
There are 3 systems: Europe; France and All Region.
1 Select Auto Install row.
2 Press the VOL+ button to enter the select system.
3 Press the ENTER button to start the channel scanning.
The OSD menu will change into Channel Search.
Upon completion of the channel scan it will stay on the channel where
the auto process started.
The active channels are stored into the channel memory.
4 Press the PR
or PR
button to select channel in sequence.
5 Press the EXIT button to stop searching.
Manual Search
1 Press the VOL+ button to set up TV Channels manually.
Fine Tune
1 Fine tune range cover -5 ~ +5 MHz of the currently displayed
program channel, 62.5 khz per step.
2 Press the VOL- or VOL+ button to adjust the frequency.
Skip
Processing channel adding and erasing from tuner memory.
Select the channel first, then press the VOL- or VOL+ button to select
"On" for channel erasing or "Off" for channel adding.
Note:
To erase a channel from the memory you must select a channel with the
numeric keys only, not by the PR
or PR
button.
41
User Manual BDS4622V/R and BDS4624R
Audio Format
1 Press the VOL+ and the Enter button to select "I", "BG", "L", "DK"
sound system, depending on your local broadcasting system.
Preview
1 Press the VOL+ and the Enter button to preview all memorized
channel sequentially, each channel displays for 2 seconds.
2 Press the EXIT button to stop preview.
Auto Sort
1 Select Auto Sort Selection.
2 Press the VOL+ and the Enter button to change the sequence of the
preset TV Channel.
Reset Channel
Remove currently selected channels from Memory Channel.
Channel Edit
Input the channel number which is to be swapped by press digits (0~9),
also the channel name will be changed simultaneously.
42
User Manual BDS4622V/R and BDS4624R
B) PIP / POP Settings
1 Press the PIP/POP button of the remote controller to enter the
PIP/POP mode.
2 Press the PIP/POP button repeatedly to cycle through the following
options:
PIP(Small)--> PIP(Medium)--> PIP(Large)--> POP-->
POP(16:9) --> Multi POP--> Off
Change source of input signal for PIP screen (Input)
1 Press the INPUT button of the PIP/POP area to change the input
signal for PIP
2 Press this button repeatedly and PIP will cycle according to the signal
to be displayed.
3 Press the Input button of the PIP/POP area to change the POP input
signal directly.
PIP TV Channel Select (PR+ / PR-)
1 When the PIP screen is ON, press the PR+ button of the PIP area to
adjust PIP to number-up channel.
2 Press the PR- button for adjusting to a smaller-number channel.
PIP/POP Exchange (SWAP)
When the PIP/POP screen is ON, press the SWAP button for exchange
of PIP/POP screens.
Change PIP size under PIP Mode
When PIP/POP is ON and under PIP Mode, press MENU button to
enter the PIP Size Selection on Display page, and select the PIP size such
as Large, Medium, Small, or directly press PIP/POP Key on remote
controller to change PIP size.
Change PIP position under PIP Mode
When PIP/POP is ON and under PIP Mode, press the MENU button to
enter the PIP Position Selection on Display page, press Up, Down, Right,
Left to change PIP position, or under status of OSD not actuated.
43
User Manual BDS4622V/R and BDS4624R
C) Favorite Channels Setting:
Add/Delete Favorite Programmers
Switch TV channel to personal frequently watching or personal favorite
group programmers, at this moment,
Press the FAV. ADD/DEL button on the remote controller, if that
channel has not be covered under favorite channels, then System will list
it into that corresponding channel sequence to that group according to
the number of channel, on the contrary if that channel has been
attributed to personal favorite group setting, then press that Key will
delete it from Favorite Group.
Call Favorite Channels
When Favorite Channel Group contain personal favorite channel setting,
continuously press the FAV button on remote controller and Channel
No. will appear according to channel number setting, just like the
function of TV PR? Key.
Other
When you want to switch to a favorite channel in the FAV Group, when
it is intended to switch to that channel, add "F" before the Channel No.,
such as Channel 8 to become F 8; during regular operation of the PR
or PR
button, that "F" note will appear on the screen.
44
User Manual BDS4622V/R and BDS4624R
D) TELETEXT Application
For Scart2 / AV / TV, not support SCART1 and component.
(1) Teletext application only support Teletext B, not support Teletext A.
(2) TELETEXT Hot Key as following:
■
■
Text Switch: On-->Off for AV1/TV
●
Text mode: When start this function, the Menu Right /Left,
Quick Menu, Input, PC, Video keys are no action.
●
Program up/down: Page up/down
Digit keys: Page number
Sync Loss: Return Normal Mode.
●
Auto key: Return Normal Mode.
Reveal
This function can be used on certain pages to reveal the solution of
riddles.
●
Press the REVEAL button to reveal a hidden answer.
●
Call Sub Page
Display page number
Press again to hide it.
■
Teletext Timer (Call Sub Pages)
In TV mode this command display clock at right-top corner.
In TEXT mode this command activates the sub page mode, i.e. any
sub-page of the current basic display chapter can be assessed by
specifying 4 digits. The sub page mode is terminated if this command
is issued again, or if any other page select method (index) is used.
Use the red and green buttons to select the next and the previous
sub code.
If any basic page is requested in sub-page 'don't care' mode and in
sub page 'do care' mode with a special sub code (i.e. by use of a LIST
page), this sub page is stored in the chapter with the 'don't care'
mode.
When sub page mode command is given, the sub page start value is
'0001'. Sub-page digit inputs are valid from 0000 to 3979 (no hex
numbers).
■
Cancel (Updating)
This key is used to cancel TEXT display but it will still be in the
TEXT Mode.
45
User Manual BDS4622V/R and BDS4624R
■
Size
This command switches between three possible display size in the
following order:
●
Normal size: Row 0..24 are displayed on screen with normal
height.
●
Double size upper half: Row 0 …11 are displayed on screen with
double height.
●
Double size lower half: Row 12…23 are displayed on screen with
double height.
The function is cancelled if any page selection (digit, page +/-, color
keys, index…) related command is received.
■ Hold
In the Hold mode, the update of the current display page is halted so
that the content will not be changed. When hold mode is active, the
user-request page number display field on the top left hand corner is
replaced by Hold mode icon. This command toggles the hold mode on /
off and is enabled only in text / mix mode.
The hold mode is automatically cleared when a new page is selected,
display cancel mode is activated or if TEXT mode is existed.
■ Index
This command selects the index page as defined by the broadcaster. By
default, if the index page number is not defined by the broadcaster, page
100 will be selected. Usually page 100 default index page.
●
In FLOF mode there will be a change to the index page of FLOF
broadcaster.
●
If there is no index page linked the selected page by this
command will be page 100 if no packet 8/30 index page is
available.
●
In TOP or normal mode the index page requested will be page
100 if no packet 8/30 is available.
●
If packet 8/30 is available the index page will be the index page of
this packet.
■
Mix
Press the MIX button in teletext mode to see the program content
also in the back ground.
Press again and the program content will disappear.
■
Red, Green, Yellow, Blue Key
In the TOP / FLOF automatic navigation mode, this key selects and
displays the page linked to the yellow color display prompt in row
24.
46
User Manual BDS4622V/R and BDS4624R
9. OPTIONAL ACCESSORIES
The following accessories are available and may be purchased from your
local sales representative:
■
Composite Video Cable (RCA)
■
S-Video Cable (Mini-DIN)
■
Component Video Cable (RCA to RCA)
■
Audio Cable (RCA Cable)
■
RGB Cable
■
Stand
■
Speakers
■
Wall Mount Rack 0-20, adjustable
Stand Installation
SpeakersⅡ
SpeakersⅠ
Wall-mount rack
0°-20°, adjustable
47
User Manual BDS4622V/R and BDS4624R
48
User Manual BDS4622V/R and BDS4624R
10. TECHNICAL SPECIFICATIONS
Display Panel
Screen Size
Display Area
Aspect Ratio
Resolution
Pixel Pitch
Viewable Angle
46"
1007 mm (width) x 567 mm (height)
16:9
852 (Horizontal) x 480 (Vertical) pixels
(Each pixel includes R/G/B dots)
VGA 1182mm (Horizontal) x 1.182 mm(Vertical)
XGA 1182mm (Horizontal) x 1.182 mm(Vertical)
Over 160°both horizontal and vertical
Operating Conditionsl
0°C to +40°C
20% to 80%, no condensation condition
800 to 100hPa
Temperature
Relative Humidity
Pressure
Power Source
Input Voltage
100 ~ 120Vac/220~240Vac; 50/60 Hz
Power Consumption VGA 330Watts (general)
XGA 390Watts (general)
Colors
Colors
Gray tone
16,7 Mega (256 grade for each R/G/B)
256 (R/G/B@8bit)
Sound
Sound effect
Gray tone
SRS
256 (R/G/B@8bit)
Connections
PC module
Sub-D 9-pin (for RS-232 signal)
Sub-D 15-pin (for analog RGB input)
DVI 24-pin (for digital TMDS input)
Video module
SCART !
SCART 2
CVBS IN: RCA
Component Y/Pb(Cb)/Pr(Cr): RCA
Audio Out: RCA L/R
Phone jack 3,5 mm for Audio in
Safety
Safety Standards
CE, FCC, UL, C-UL, TUV and CCC
Standard Accessories
Remote controller
2 Batteries UM4
User Manual on CD-Rom
Power cord
AV cable
D-Sub cable
49
User Manual BDS4622V/R and BDS4624R
RGB/DVI for VESA Standard
This monitor supports many kind of input signals.
These Factory default signals (RGB mode) are shown in the table below:
N0
Dot x Line
Horizontal
Frequency
(KHz)
Vertical
Frequency
(KHz)
Dot Clock
Frequency
(MHz)
Remark
1
720 x 400
31.47
70.08
28.32
DOS
2
640 x 400
37.90
85.00
31.50
VESA
3
640 x 480
31.50
60.00
25.18
DOS
4
640 x 480
35.00
67.00
30.24
Mac.(SOG)
5
640 x 480
37.50
75.00
31.50
VESA
6
640 x 480
37.86
72.81
31.50
VESA
7
640 x 480
43.30
85.00
36.00
VESA
8
800 x 600
35.16
56.25
36.00
VESA
9
800 x 600
37.90
60.32
40.00
VESA
10
800 x 600
46.90
75.000
49.50
VESA
11
800 x 600
48.08
72.19
50.00
VESA
12
800 x 600
53.70
85.00
56.25
VESA
13
832 x 624
49.00
74.00
57.27
Mac.(H+V)
14
1024 x 768
48.40
60.00
65.00
VESA
15
1024 x 768
56.50
70.00
75.00
VESA
16
1024 x 768
60.00
75.00
78.75
VESA
17
1024 x 768
68.70
85.00
94.50
VESA
18
1280 x 1024
64.00
60.00
108.00
VESA
Notes:
● If the signal source is out of range of the monitor,
the message "Signal Out of Range" will be displayed on the screen.
● You can confirm the format of signals from the Information Menu
under the OSD menu
50
User Manual BDS4622V/R and BDS4624R
11. CLEANING AND TROUBLESHOOTING
11.1
CLEANING
Cautions When Using the Plasma Display
■ Do not bring your hands, face or objects close to the ventilation
holes of the plasma display. Top of plasma display is usually very hot
due to the high temperature of exhaust air being released through
the ventilation holes. Burns or personal injuries may occur if any
body parts are brought too close. Placing any object near the top of
the display could also result in heat related damages to the object as
well as the display itself.
■
Be sure to disconnect all cables before moving the plasma display.
Moving the display with its cables attached may damage the cables
and thus case fire or electric shock danger.
■
Disconnect the power plug from the wall outlet as a safety
precaution before carrying out any type of cleaning or maintenance
procedure.
Front Panel Cleaning Instructions
■ The front of the display has been specially treated. Wipe the surface
gently using only a cleaning cloth or a soft, lint-free cloth.
■
If the surface is particular dirty, soak a soft, lint-free cloth in a mild
detergent solution. Wring the cloth to remove excess liquid. Wipe
the surface of the display to remove dirt. Then use a dry cloth of the
same type to dry.
■
Do not scratch or hit the surface of the panel with fingers or hard
objects of any kind.
■
Do not use volatile substances such as insect sprays, solvents and
thinners.
Cabinet Cleaning Instructions
■ If the cabinet becomes dirty, wipe the cabinet with a soft, dry cloth.
■
If the cabinet is extremely dirty, soak a lint-free cloth in a mild
detergent solution. Wring the cloth to remove as much moisture
possible. Wipe the cabinet. Use another dry cloth to wipe over until
the surface is dry.
■
Do not allow any water or detergent to come into contact with the
surface of the display. If water or moisture gets inside the unit,
operating problems, electrical and shock hazards may result.
■
Do not scratch or hit the cabinet with fingers or hard objects of any
kind.
■
Do not use volatile substances such as insect sprays, solvents and
thinners on the cabinet.
■
Do not place anything made from rubber or PVC near the cabinet
for any extended periods of time.
51
User Manual BDS4622V/R and BDS4624R
11.2
TROUBLESHOOTING
Symptom
Possible Cause
Remedy
No picture is displayed
1 The power cord is disconnected.
2 The main power switch on the back of the
monitor is not switched on.
3 The selected input has no connection.
4 The monitor is in standby mode in RGB mode.
1
2
3
4
Interference displayed on the
monitor or audible noise is
heard
Caused by surrounding electrical appliances, cars/
motorcycles or fluorescent lights.
Move the monitor to another location to see if the
interference is reduced.
Color is abnormal
The signal cable is not connected properly.
Make sure that the signal cable is
attached firmly to the back of the
monitor.
Picture is distorted with
abnormal patterns
1 The signal cable is not connected properly.
2 The input signal is beyond the capabilities of the
monitor.
1 Make sure that the signal cable is attached firmly.
2 Check the video signal source to see if it is
beyond the range of the monitor. Please verify
its specifications with this monitor’s specification
section
Display image doesn’t fill up
the full size of the screen
1 If under RGB mode, the H-Size and V-Size is
incorrectly set.
2 If under AV1, AV2, or Component with 480i
input, the 4:3 WIDE mode is switched on.
1 Use H-Size and V-Size to adjust the size of the
video.
2 Use the WIDE key to scroll through various full
screen modes.
Can hear sound, but no
picture
Improperly connected source signal cable. 1.
Make sure that both video inputs and sound inputs
are correctly connected.
Can see picture but no sound
is heard
1 Improperly connected source signal cable.
2 Volume is turned all the way down.
3 MUTE is turned on.
1 Make sure that both video inputs and sound
inputs are correctly connected.
2 Use VOLUME +/- to hear sound.
3 Switch MUTE off by using the MUTE button.
Some picture elements do not
light up
Some pixels of the plasma display may not turn on
This monitor is manufactured using an extremely
high level of precision technology; however,
sometimes some pixels of the monitor may not
display.
This is not a malfuction. Please see the enclosed
warranty card for more information.
After-Images can still be seen
on the monitor after the
monitor is powered off.
(Examples of still pictures
include logos, video games,
computer images, and images
displayed in 4:3 normal mode)
A still picture is displayed for an over extended
period of time.
Do not allow a still image to be displayed for an
extended period of time as this can cause a
permanent after-image to remain on the monitor.
52
Plug in the power cord.
Make sure the power switch is switched on.
Connect a signal connection to the monitor.
Press any key on your keyboard.
User Manual BDS4622V/R and BDS4624R
12. LIMITED WARRANTY (USA)
Two Year Free Labor
Two Year Free Parts
WHO IS COVERED?
You must have proof of the date purchased to receive warranty service.
A sales receipt or other document showing the date that you purchased
the product is considered proof of purchase.
WHAT IS COVERED?
Warranty coverage begins the day you buy your product. For two years
thereafter, all defective parts will be repaired or replaced and labor is
free. After two years from the day of purchase, you pay for the
replacement or repair of all parts, and for all labor charges. All parts,
including repaired and replaced parts, are covered only for the original
warranty period. When the warranty on the product expires, the
warranty on all replaced and repaired parts also expires.
WHAT IS EXCLUDED?
Your warranty does not cover:
■
labor charges for removal, installation or setup of the product,
adjustment of customer controls on the product, and installation or
repair of antenna systems outside of the product.
■
product repair and/or part replacement because of misuse, accident,
unauthorized repair or other cause not within the control of Philips
Consumer Electronics North America.
■
reception problems caused by signal conditions or cable or antenna
systems outside the unit.
■
a product that requires modification or adaptation to enable it to
operate in any country other than the country for which it was
designed, manufactured, approved and/or authorized, or repair of
products damaged by these modifications.
■
incidental or consequential damages resulting from the product.
(Some states do not allow the exclusion of incidental or
consequential damages, so the above exclusion may not apply to you.
This includes, but is not limited to, prerecorded material, whether
copyrighted or not copyrighted.)
■
modifications or adaptations to enable the product to operate in any
country other than the country for which it was designed,
manufactured, approved and/or authorized, or the repair of products
damaged by these modifications.
■
normal wear and tear (decreased light output of PDP module) over
the product's lifetime.
■
phosphor burn. Do not display static images for prolonged periods,
otherwise phosphor burn might appear on part of the panel.
■
limited quantity of cells (fine pixel elements) that do not produce
light, or that remain lit after they should have turned off.
53
User Manual BDS4622V/R and BDS4624R
WHERE IS SERVICE AVAILABLE?
Warranty service is available in all countries where the product is
officially distributed by Philips Consumers Electronics North America. In
countries where Philips Consumers Electronics North America does not
distribute the product, the local Philips service organization will attempt
to provide service (although there may be a delay if the appropriate
spare parts and technical manual(s) are not readily available).
MAKE SURE YOU KEEP ...
Please keep your sales receipt or other document showing proof of
purchase. Attach it to this owner's manual and keep both nearby. Also
keep the original box and packing material in case you need to return
your product.
BEFORE REQUESTING SERVICE ...
Please check your owner's manual before requesting service.
Adjustments of the controls discussed there may save you a service call.
TO GET WARRANTY SERVICE U.S.A.,
PUERTO RICO OR US VIRGIN ISLANDS ...
Please contact Philips at:
1-877-835-1838
or an authorized service center to arrange repair. (In U.S.A., Puerto Rico
and U.S.Virgin Islands, all implied warranties, including implied warranties
of merchantability and fitness for a particular purpose, are limited in
duration to the duration of this express warranty. But, because some
states do not allow limitations on how long an implied warranty may last,
this limitation may not apply to you.)
TO GET WARRANTY SERVICE IN CANADA ...
Please contact Philips at:
800-661-6162 (French Speaking) (within Canada only)
800-531-0039 (English Speaking)
(In Canada, this warranty is given in lieu of all other warranties.
No other warranties are expressed or implied, including any implied
warranties of merchantability or fitness for a particular purpose. Philips
is not liable under any circumstances for any direct, indirect, special,
incidental or consequential damages, howsoever incurred, even if
notified of the possibility of such damages.)
REMEMBER ...
Please record the model and serial numbers found on the product
below. .Also, please fill out and
mail your warranty registration card promptly. It will be easier for us to
notify you if necessary.
MODEL # _ _ _ _ _ _ _ _ _ _ _ _ _ _ _ _ _ _ _
SERIAL # _ _ _ _ _ _ _ _ _ _ _ _ _ _ _wo_ _ _
54
User Manual BDS4622V/R and BDS4624R
13. LIMITED WARRANTY (EUR)
Two Year Free Labor
Two Year Free Parts
WHO IS COVERED?
You must have proof of the date purchased to receive warranty service.
A sales receipt or other document showing the date that you purchased
the product is considered proof of purchase.
WHAT IS COVERED?
Warranty coverage begins the day you buy your product. For two years
thereafter, all defective parts will be repaired or replaced and labor is
free. After two years from the day of purchase, you pay for the
replacement or repair of all parts, and for all labor charges. All parts,
including repaired and replaced parts, are covered only for the original
warranty period. When the warranty on the product expires, the
warranty on all replaced and repaired parts also expires.
WHAT IS EXCLUDED?
Your warranty does not cover:
■
labor charges for removal, installation or setup of the product,
adjustment of customer controls on the product, and installation or
repair of antenna systems outside of the product.
■
product repair and/or part replacement because of misuse, accident,
unauthorized repair or other cause not within the control of Philips
Consumer Electronics Europe.
■
reception problems caused by signal conditions or cable or antenna
systems outside the unit.
■
a product that requires modification or adaptation to enable it to
operate in any country other than the country for which it was
designed, manufactured, approved and/or authorized, or repair of
products damaged by these modifications.
■
incidental or consequential damages resulting from the product.
(Some states do not allow the exclusion of incidental or
consequential damages, so the above exclusion may not apply to you.
This includes, but is not limited to, prerecorded material, whether
copyrighted or not copyrighted.)
■
modifications or adaptations to enable the product to operate in any
country other than the country for which it was designed,
manufactured, approved and/or authorized, or the repair of products
damaged by these modifications.
■
normal wear and tear (decreased light output of PDP module) over
the product's lifetime.
■
phosphor burn. Do not display static images for prolonged periods,
otherwise phosphor burn might appear on part of the panel.
■
limited quantity of cells (fine pixel elements) that do not produce
light, or that remain lit after they should have turned off.
55
User Manual BDS4622V/R and BDS4624R
WHERE IS SERVICE AVAILABLE?
Warranty service is available in all countries where the product is
officially distributed by Philips Consumers Electronics Europe. In
countries where Philips Consumers Electronics Europe does not
distribute the product, the local Philips service organization will attempt
to provide service (although there may be a delay if the appropriate
spare parts and technical manual(s) are not readily available).
MAKE SURE YOU KEEP ...
Please keep your sales receipt or other document showing proof of
purchase. Attach it to this owner's manual and keep both nearby. Also
keep the original box and packing material in case you need to return
your product.
BEFORE REQUESTING SERVICE ...
Please check your owner's manual before requesting service.
Adjustments of the controls discussed there may save you a service call.
TO GET WARRANTY SERVICE,
OR IF YOU HAVE QUESTIONS …
Please contact Philips at one of the telephone numbers below:
Austria .................................................................... 0820 901115
Belgium .................................................................... 070 253 010
Denmark ..................................................................... 3525 8761
Finland ................................................................... 09 2290 1908
France ..................................................................... 08 9165 0006
Germany .............................................................0180 5 007 532
Greece .......................................................... 0 0800 3122 1223
Ireland ........................................................................ 1 601 1161
Italy .............................................................................199 404 042
Luxembourg ............................................................ 26 84 30 00
Netherlands ....................................................... 0900 0400 063
Norway ...................................................................... 2270 8250
Portugal .................................................................. 2 1359 1440
Spain ......................................................................... 902 888 785
Sweden .................................................................... 08 632 0016
Switzerland ........................................................... 02 2310 2116
United Kingdom ................................................. 0906 1010 017
Repair must be performed by an authorized service center or a factory
service center. If you do not live near a factory service center, contact
your dealer. If your dealer is an authorized service center, he will
arrange repair.
56
User Manual BDS4622V/R and BDS4624R
REMEMBER ...
Please record the model and serial numbers found on the product
below. Also, please fill out and mail your warranty registration card
promptly.
It will be easier for us to notify you if necessary.
MODEL # _ _ _ _ _ _ _ _ _ _ _ _ _ _ _ _ _ _ _
SERIAL # _ _ _ _ _ _ _ _ _ _ _ _ _ _ _wo_ _ _
57
User Manual BDS4622V/R and BDS4624R
58
User Manual BDS4622V/R and BDS4624R
14. APPENDIX
14.1
WALL-MOUNT INSTALLATION GUIDE
1 Empty contents of the package. Make sure the following items are
present;
●
Left Wall Angle Module (A)
●
Right WallAngle Module (B)
●
Horizontal Support (C)
●
Horizontal Support (D)
●
Screws for Fix Angle x 8 (E)
●
Screws for Wooden Wall Mounting x 8 (F)
●
Screws for Cement Wall Mounting x 8 (G)
●
Screws and Pegs for monitor x 4 (H)
●
Rubber Covers x 2 (I)
●
Screw x 4 (J)
2 Attach Horizontal Supports (C and D) to the Left and Right Wall
Angle Module (A and B) using eight screws (E).
3 Install the Wall Mount Bracket onto the wall.
Notes:
The screws in this package are for mounting on a wooden or a brick
wall. Different kind of wall needs different type of screws.
Please consult with a qualified installer to make sure your wall is capable
of supporting this bracket and the monitor.
4 Adjust the mounting direction and inclination angle (0, 5, 10, 15
degrees) by adjusting the screws position on the Wall Mounting
AngleModule.
5 Insert the two Rubber Covers to the holes at the bottom of the
monitor after removing the table-top stand from the monitor.
Note:
Actual rear cabinet may vary from the drawing.
6 Remove the table-top stand from the monitor. Screw in the four
pegs at the rear of the monitor.
7 Install the monitor onto the Wall Mount Bracket by placing the four
pegs, located on the rear of the monitor, inside the mounting holes
of the Wall Angle Modules. Make the four pegs firmly seated in the
holes.
8 Put the monitor on the Wall Mount, by matching the 4 pegs to the
holes on Wall Mount.
Use accessary J and the screws to secure the monitor to the Wall
Mount by tightening the screws through the holes from both sides of
the Wall Mount.
1
User Manual BDS4622V/R and BDS4624R
Notes:
● Wall mount bracket is an optional accessary, please contact your
local sales agent for more information.
● This type of equipment is to be installed by qualified installers, please
contact with authorized dealer for installation.
● Please make sure that your wall is capable of supporting this wall
mount and the monitor which can easily weigh over 60 kg.
2