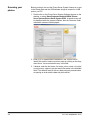
1
This product contains portions of imaging code owned and copyrighted by Pegasus Imaging Corp., Tampa, FL,
(www.pegasustools.com). ALL RIGHTS RESERVED.
Safety
User Precautions
• Place the scanner on a sturdy, level work surface capable of supporting 5.5 kg (12 lbs).
• Do not install the scanner in a location subject to dust, humidity or steam. This may cause electrical shock or a fire. Only use
the scanner and power supply indoors in a dry location.
• Make sure the electrical power outlet is located within 1.52 meters (5 feet) of the scanner and is easily accessible.
• Use only the power cord that was provided with the scanner. Using any other power cord may cause electrical shock and/or
damage the product.
• Be sure the power cord is securely plugged into the wall outlet. Failure to do so may cause electrical shock or fire.
• Do not damage, knot, cut or modify the power cord. This may cause electrical shock or fire.
• The scanner requires a dedicated power outlet. Do not use an extension cord or power strip with the scanner.
• Use only the AC adapter that is supplied with the scanner. Do not use the scanner’s AC adapter with any other product.
• Leave sufficient space around the power outlet so it can be easily unplugged in case of an emergency.
• Do not use the scanner if it becomes inordinately hot, has a strange odor, emits smoke, or makes unfamiliar noises.
Immediately stop the scanner and disconnect the power cord from the power outlet. Contact Kodak Service.
• Do not disassemble or modify the scanner or the AC power adapter.
• Do not move the scanner with the power cord and interface cable attached. This may cause damage to the cord/cable.
Remove the power cord from the wall outlet before moving the scanner.
• Follow the Kodak recommended cleaning procedures. Do not use air, liquid or gas spray cleaners. These cleaners displace
dust, dirt and debris to another location within the scanner, which may cause the scanner to malfunction.
• Material Safety Data Sheets (MSDS) for chemical products are available on the Kodak website at: www.kodak.com/go/msds.
When accessing the MSDSs from the website, you will be required to provide the catalog number of the consumable you
want the Material Safety Data Sheet for. See the section entitled, “Supplies and consumables” later in this guide for supplies
and catalog numbers.
Environmental information
• The Kodak PS50 Scanner is designed to meet worldwide environmental requirements.
• Guidelines are available for the disposal of consumable items that are replaced during maintenance or service; follow local
regulations or contact Kodak locally for more information.
• For recycling or reuse information, contact your local authorities, or in the USA, go to www.kodak.com/go/recycle.
• The product packaging is recyclable.
• Parts are designed for reuse and recycling.
European Union
This symbol indicates that when the last user wishes to discard this product, it must be sent to appropriate
facilities for recovery and recycling. Please contact your local Kodak representative or refer to www.kodak.com/
go/recycle for additional information on the collection and recovery programs available for this product.
Please consult www.kodak.com/go/REACH for information about the presence of substances included on the
candidate list according to article 59(1) of Regulation (EC) No. 1907/2006 (REACH).
Acoustic emission
Maschinenlärminformationsverordnung – 3, GSGV
Der arbeitsplatzbezogene Emissionswert beträgt <70 dB(A).
[Machine Noise Information Ordinance — 3, GSGV
The operator-position noise emission value is <70 dB(A).]
EMC statements
United States: This equipment has been tested and found to comply with the limits for a Class B digital device pursuant to Part
15 of the FCC rules. These limits are designed to provide reasonable protection against harmful interference in a residential
installation. This equipment generates, uses, and can radiate radio frequency energy and, if not installed and used in
accordance with the instruction manual, may cause harmful interference to radio communications. However, there is no
guarantee that interference will not occur in a particular installation. If this equipment does cause harmful interference to radio or
television reception, which can be determined by turning the equipment off and on, the user is encouraged to try to correct the
interference by one or more of these measures:
• Reorient or relocate the receiving antenna.
• Increase the separation between the equipment and receiver.
• Connect the equipment into an outlet on a circuit different from that to which the receiver is connected.
• Consult the dealer or an experienced radio/TV technician for additional suggestions.
Any changes or modifications not expressly approved by the party responsible for compliance could void the user’s authority to
operate the equipment. Where shielded interface cables have been provided with the product or specified additional
components or accessories elsewhere defined to be used with the installation of the product, they must be used in order to
ensure compliance with FCC regulation.
INTRODUCTION
1-1
INSTALLATION
2-1
SCREEN DESCRIPTIONS
3-1
SCANNING PHOTOS
4-1
MAINTENANCE
5-1
ACHIEVING GOOD QUALITY IMAGES
6-1
TROUBLESHOOTING
7-1
APPENDICES
A-C
1 Introduction
Contents
Supporting documentation .............................................................. 1-2
Accessories..................................................................................... 1-2
What’s in the box ........................................................................... 1-3
Scanner components ...................................................................... 1-4
Thank you for purchasing a Kodak Picture Saver Scanning System
PS50.
The Kodak Picture Saver Scanning System
allows you to easily digitize and enhance
photos and can also be used as a general
office document scanner. The Kodak Picture
Saver System Software combined with the
Kodak Picture Saver System Scanner allows
you to scan photos, remove red eye, retouch
and rotate images and apply image
sharpening. Once the photos are scanned,
the images can be used in a variety of ways;
e.g., printed, emailed, written to a CD/DVD/
Kodak Picture CD or copied to a USB or
network drive, or uploaded to a photo management system for sharing
and various creative uses such as calendars, photo books or slide
shows. Smart Touch software, included with the system, also supports
general document scanning on the Kodak Picture Saver Scanning
System.
NOTE: The Kodak Picture Saver Scanning System PS50 is not
intended for public environments where access to previous
orders cannot be controlled.
This User’s Guide provides information and procedures for using and
maintaining the PS50 Scanner which holds up to 20 mixed-size photos
per batch.
A-61760 September 2012
1-1
Supporting
documentation
In addition to this User’s Guide the following documentation is also
available.
• Installation Guide — provides a step-by-step procedure for installing
the scanner.
• Reference Guide — provides easy visual steps for cleaning your
scanner. Keep this guide close to the scanner so you can use it as an
easy reference.
The following guide is for advanced users:
• Smart Touch User’s Guide — provides information and procedures
on how to use Smart Touch functionality. This guide is available by
right-clicking on the Scanner icon in the system tray and selecting
Help.
Accessories
• Kodak Photo Selector Accessory / for Kodak Picture Saver
Scanning Systems PS50/PS55/PS80 — allows you to scan pages
from your photo albums or scrapbooks without removing the photos
from the page or removing the page protector. When using the Kodak
Legal Flatbed Accessory or the Kodak A3 Flatbed Accessory the
software will identify and select separate images within the original
flatbed scanned image. CAT No. 188 4618
• Kodak Legal Flatbed Accessory — the Kodak Legal Flatbed adds
scanning capability for exception photos (e.g., badly torn or very
fragile photos, severely curled photos, etc.), bound albums,
scrapbooks and documents up to 216 x 356 mm (8.5 x 14 inches).
CAT No. 119 9470
• Kodak A3 Flatbed Accessory — the Kodak A3 Flatbed adds
scanning capability for exception photos (e.g., badly torn or very
fragile photos, severely curled photos, etc.), bound albums,
scrapbooks and documents up to 302 x 420 mm
(11.92 x 18.15 inches). CAT No. 818 2271
1-2
A-61760 September 2012
What’s in the box
Before you begin open the box and check the contents:
•
•
•
•
•
•
•
•
•
•
A-61760 September 2012
Kodak Picture Saver System Scanner
Pre-separation pad, for use in document scanning
Kodak Picture Saver Standard Separation Module
USB 2.0 cable
Power supply
AC power cord bundles
USB software dongle
Sample Cleaning Kit
Dust cover
Welcome Folio which includes:
- Installation CD with the following software that is installed on the
PC during installation:
• Kodak Picture Saver System Software
• Smart Touch software for use in document scanning
• Picture Saver System Scanner driver software
- Printed Reference Guide, English
- Installation Guide
- Read Me First
- Service & Support Contact Information sheets
- Miscellaneous flyers
1-3
Scanner components
Front view
The illustration below shows the PS50 Scanner.
Input
tray
Scanner
cover
Function
window
Start
button
Output tray
Scroll buttons
Scanner cover — provides access to internal components; such as,
the imaging area and the feed and separation modules.
Input tray — holds photos or documents.
Function window — displays numbers 1 through 9 indicating Smart
Touch tasks (i.e., Color PDF, Black and White PDF, etc.). For more
information about Smart Touch functionality, see the Smart Touch
User’s Guide.
Start button — illuminates or flashes indicating scanner status.
• Steady green: ready to scan
• Flashing green: preparing to scan
• Steady red: scanner not communicating with the PC
• Flashing red: error indication such as, Scanner Cover Open, in
conjunction with the Function window displaying an “E”.
See Chapter 7, Troubleshooting for error code descriptions.
Scroll buttons — press the Up or Down scroll buttons to select a
Smart Touch task.
Output tray — collects the scanned photos or documents.
1-4
A-61760 September 2012
Inside view
Side guides
Paper path
sensor
Feed module
cover
Closed imaging area
Feed module
Open imaging area
Paper present
sensor
Separation
module
Rollers
Separation module
release lever
Gap release
lever
Scanner cover release lever
Side guides — slide the guides back and forth to accommodate the
size of photos you are scanning.
Paper path sensor — tracks the movement of paper and photos
through the scanner.
Feed module cover — this cover needs to be removed when cleaning
or replacing the feed module or feed module tires.
Feed module, rollers and separation module — provides smooth
feeding and separation of various sizes, thicknesses and textures of
photos.
Open imaging area — for optimum image quality, keep the imaging
area clean. Do not blow air into the camera. See Chapter 7,
Troubleshooting.
Closed imaging area — for optimum image quality, keep the imaging
area clean. This area can be cleaned using the Kodak-approved
cleaning supplies. See Chapter 5, Maintenance.
Separation module release lever — push this lever down to release
the separation module for cleaning or replacement.
Gap release lever — allows you to manually adjust the space between
the feed module and separation module for photos that require special
handling, e.g., photos that are badly torn.
Scanner cover release lever — opens the scanner to allow access to
the paper path for cleaning or clearing a jam.
Paper present sensor — detects the presence of photos or
documents in the input tray.
A-61760 September 2012
1-5
Rear view
Power port
USB port
Routing
channel
Security
lock port
Power switch
Power port — connects the power to the scanner.
USB port — connects the scanner to the PC.
Routing channel — allows you to secure the USB cable and power
cord to protect them when the scanner is moved.
Security lock port — connects a security lock to the scanner (similar
to the security lock port used for a laptop). You can purchase a
standard security lock at an office supply store. Refer to the instructions
provided with the security lock for installation procedures.
Power switch — turns the scanner on and off.
1-6
A-61760 September 2012
2 Installation
Contents
Installing the scanner ...................................................................... 2-1
Installation notes ......................................................................... 2-2
Installing the Kodak Picture Saver System Software.................. 2-2
Connecting the power cord and USB cable ................................ 2-4
Turning on the scanner ................................................................... 2-5
Starting the application software ..................................................... 2-6
Exiting the application software ...................................................... 2-6
Installing the scanner
This section provides detailed information of the Installation Guide that
is provided with your scanner. Follow these steps in the order they are
provided to install your scanner. For additional information about
installation and use of the system, go to www.kodak.com/go/
picturescanning, and select the Kodak Picture Saver Scanning
System PS50. Select Video Resources on the Support tab.
NOTE: If you have already performed all of the steps in the Installation
Guide, skip this section.
• Power down any scanners attached to the PC before installing the
Picture Saver System Software application.
• Install the software before connecting the scanner to the PC.
• Be sure you have administrator rights. The Picture Saver Scanning
System application must be installed under Administrator and run
under Administrator or Standard groups.
• Close any currently running applications.
• Close any currently running applications that use a USB software
dongle before starting the Picture Saver Scanning System
installation.
• Close any scanning applications including the Scan Validation Tool
and Smart Touch.
• Remove any USB software dongle connected to the PC.
• An Internet connection is necessary to complete Product
Registration.
NOTE: If an Internet connection is not available, contact Kodak
Support (refer to Chapter 7, “Contact Information”).
A-61760 September 2012
2-1
Installation notes
Windows 7
If you are installing on Windows 7, the following message may be
displayed after installing the software and turning on the scanner.
• Click on the Skip obtaining driver software from Windows Update
link.
Installing and/or upgrading the Kodak All In One Home Center Software
on the same PC with the Kodak Picture Saver System Application may
remove the PS50 registry entries. This will prevent the Kodak Picture
Saver System Application software from running. The product
registration screens may be displayed instead of the application splash
screen. If this happens, re-install and re-register your Kodak Picture
Saver Application.
Installing the Kodak Picture
Saver System Software
1. Insert the Kodak Picture Saver System Software Installation CD in
the CD-ROM drive. The installation program starts automatically.
NOTE: If the installation does not auto start, access the drive
where the CD is inserted and browse to the
INSTALLSTW.exe file on the root directory of the CD.
2. Select Install Language.
3. Click Next when the Welcome screen is displayed.
4. Click Next after you have read and agreed with the terms of the
Software License Agreement.
5. If you want to store the scanned images in the c:\Scanned_Pictures
default directory, click OK. Otherwise, use the Browse panel to
select the desired directory, or type the full pathname of the
directory. When finished, click OK.
2-2
A-61760 September 2012
Several progress messages will be displayed.
NOTES:
• When installing on Windows Vista or Windows 7, you may be
prompted to allow sections of the installer to run. Select Run to
install.
• If the correct version of .NET Framework is not installed, a
message box will be displayed stating that it is being installed.
This installation can take several minutes.
• If the correct version of Microsoft C++ redistributable runtime
library is not installed, a message will be displayed to install the
software. Do not cancel the installation process.
6. Windows XP users may be asked to install Microsoft Feature Pack
for Storage. Select Yes to install. The Picture Saver Scanning
System installation includes a required Product Registration step.
Product Registration must be completed to use the Picture Saver
Scanning System Software application.
An Internet connection is required to complete Product Registration.
Make sure that the following Internet address is not blocked: https://
www.onlineregister.com. If you do not have an Internet connection,
contact Kodak Support (refer to Chapter 7, “Contact Information”).
NOTE: You will need the scanner serial number for product
registration. The scanner serial number is located on the
bottom of the scanner and on the shipping carton.
7. Click Finish when the installation is complete.
8. Remove the Installation CD from the CD-ROM drive. The Picture
Saver System application shortcut will be placed on your desktop.
9. Restart the PC.
10. The Kodak Picture Saver Scanning System has a fixed screen size
of 1024 x 768. You may want to change the taskbar properties by
unselecting "Keep the taskbar on top of other windows." This will
keep the taskbar from covering the lower portion of the application
when the screen resolution is set at 1024 x 768. You can also
alternatively set the display properties to a higher screen resolution
than 1024 x 768, such as 1280 x 1024 so the application does not
cover the entire desktop.
A-61760 September 2012
2-3
Connecting the power cord
and USB cable
When the Picture Saver System Software has been installed, connect
the power supply, power cord and USB cable to the scanner. Refer to
the illustration below for making proper connections. Make sure the
power outlet is located within 1.52 metres (5 feet) of the scanner and is
easily accessible.
1. Select the appropriate AC power cord for your region from the
supply of power cords packed with your scanner.
2. Attach the power cord you selected to the power supply.
NOTE: Be sure that the power cord is securely attached to the
power supply.
3. Plug the output power cord from the power supply into the power
port on the scanner.
4. Plug the other end of the power cord into the wall outlet.
NOTE: The green LED on the power supply indicates the power is
on.
5. Attach the USB cable to the scanner USB port, located on the back
of the scanner.
6. Attach the other end of the USB cable to the proper USB 2.0 port on
your PC.
2-4
A-61760 September 2012
7. Secure the power cord and USB cable into the routing channel on
the back of the scanner.
Turning on the
scanner
1. Press the button on the back of the scanner to the On (|) position.
When you turn on the scanner, the LED indicator on the front of the
scanner will flash as the scanner goes through a series of self tests.
Please wait while the operating system synchronizes the scanner
with the installed software.
When the installation process is complete and ready to scan, the
LED indicator will stop flashing and stay green.
2. When scanner setup is complete and you are ready to scan photos,
insert the USB software dongle in a USB port on your PC. Wait for
the USB software dongle to be recognized by your PC.
NOTE: DO NOT LOSE THE USB SOFTWARE DONGLE! THERE IS A
FEE TO REPLACE THE DONGLE. IT IS RECOMMENDED
THAT YOU ATTACH THE DONGLE TO THE SCANNER USB
CABLE.
A-61760 September 2012
2-5
Starting the
application software
1. Turn on any Kodak flatbed accessories before starting the
application.
2. Double-click on the application shortcut on your desktop or select
Start>Programs>Kodak>KODAK Picture Saver System>Picture
Saver System PS50. The Customer Information screen will be
displayed.
Exiting the
application software
2-6
• Click the Exit icon in the lower right-hand corner on most screens or
click the Close box in the upper right-hand corner.
A-61760 September 2012
3 Screen Descriptions
Contents
Customer Order Information screen ............................................... 3-2
Scan Images screen ....................................................................... 3-3
Photo Selector screen..................................................................... 3-7
Scan Viewer screen ........................................................................ 3-9
Scan Settings screen .................................................................... 3-10
Enhance Picture screen................................................................ 3-12
Order Preview screen ................................................................... 3-14
Preview Details screen ................................................................. 3-15
Order Summary & Creation screen............................................... 3-17
Burn CD or Burn DVD .............................................................. 3-18
Burn Kodak Picture CD ............................................................ 3-20
Copy to ..................................................................................... 3-21
This chapter describes the screens and icons that are available when
using the Kodak Picture Saver Scanning System.
NOTE: Some of the screens and options described in this chapter are
only available if you have the Kodak Photo Selector Accessory
installed and enabled.
All screens within the Kodak Picture Saver Scanning System provide
the following icons:
About: displays the software version and copyright information.
Exit: closes the Kodak Picture Saver System Software.
A message area is provided on all screens below the title bar.
Messages are displayed in this area
A-61760 September 2012
3-1
Customer Order
Information screen
When you launch the Picture Saver System Software, the Customer
Order Information screen will be displayed.
Customer Information
Order # (required) — enter any text you want to add for your own
reference or select a previous order by clicking on the drop-down arrow.
This text is appended with the date and time for new orders. This is a
required field. Up to 51 alphanumeric characters are allowed in this
field.
Name and Address — optionally enter the customer name, address
and email address information. These are not required fields.
NOTE: These fields will auto-fill with any saved values when opening a
previous order and the data may be modified.
• Up to 58 characters are allowed in the Last, First, Street, and City
fields.
• Up to 42 characters are allowed in the State/County/Country and
Phone fields.
• Up to 58 characters are allowed in the E-Mail field. If you enter an
email address, it must be a valid email address format.
• Up to 24 characters are allowed in the Zip/Post Code field.
NOTE: This information is saved in a .xml file format in the same
directory where the images are saved.
Continue — displays the Scan Images screen.
3-2
A-61760 September 2012
Scan Images screen
When you click Continue on the Customer Order Information screen,
the Scan Images screen will be displayed.
Scan Settings — at the top of the Scan Images screen, the current
Scan Settings are displayed. If these settings are not acceptable, you
can change them by clicking the Settings button. For more information
regarding these settings, see the section entitled, “Scan Settings
screen”.
16-Up Display window — displays up to 16 images at a time within the
active folder.
Moves to the previous set of 16 images
Moves to the next set of 16 images
Previous — goes back to the Customer Order Information screen.
Start Over — goes back to the Customer Order Information screen and
clears the system of all data for the current order. The confirmation
message Do you want to start over? will be displayed.
Batch Scan — scans batches of photos using the Picture Saver
System Scanner and displays the Scan Viewer screen.
Flatbed Scan — if an optional Kodak A3 or Legal Flatbed is attached,
this button will be displayed. Photos will be scanned from the flatbed
and the Scan Viewer screen or the Photo Selector screen (if installed
and enabled) will be displayed.
A-61760 September 2012
3-3
Image Cleaner Tool — when checked, the Picture Saver System will
make every attempt to eliminate any streaks in the image during the
scanning process. Applying the Image Cleaner Tool does not slow
down the scanning process. Frequently streaks in images are caused
because the scanner has accumulated dust and dirt. Be sure your
scanner is clean to help prevent streaks in images.
NOTE: The Image Cleaner Tool is not applied to flatbed scans and front
side scans.
Settings — when selected, the Scan Settings screen is displayed
which allows you to change the following settings: the batch scan
mode, sharpen images, resolution and other settings. For more
information regarding these settings see the section entitled, “Scan
Settings screen”.
This Batch
• Image: displays the number of the first image shown in the 16-Up
Display window.
• To: displays the number of the last image shown in the 16-Up Display
window.
• Of: displays the total number of images scanned in this batch.
Total Images — displays the total number of images in the order.
3-4
A-61760 September 2012
Scan Images screen
(continued)
When you click Batch Scan or Flatbed Scan on the Scan Images
screen, full size 1-up images will be displayed in the Scan Viewer
screen as the photos are being scanned. After the batch is scanned,
the Scan Viewer screen will close and the photos will be rearranged
and displayed in the order they were scanned. You can edit all images
in the batch or individual images or scan another batch and continue
scanning.
NOTE: To edit an individual image, click on the thumbnail. The Enhance
Picture screen will be displayed.
16-Up Display window — displays up to 16 images at a time. The last
images scanned will be displayed initially.
Scanning Completed — displays the Order Preview screen.
Moves to the previous set of 16 images
Moves to the next set of 16 images
Rotates the image 90 degrees counter-clockwise (left).
Rotates the image 90 degrees clockwise (right).
Previous — goes back to the Customer Order Information screen.
Start Over — goes back to the Customer Order Information screen and
clears the system of all data for the current order. The confirmation
message Do you want to start over? will be displayed.
A-61760 September 2012
3-5
Batch Scan — allows you to scan another batch of photos into the
same order # from the Kodak Picture Saver System Scanner.
Flatbed Scan — allows you to scan another photo from an attached
Kodak A3 or Legal Flatbed Accessory.
Image Cleaner Tool — when checked, the Picture Saver Scanning
System will make every attempt to eliminate any streaks in the image
during the scanning process. Applying the Image Cleaner Tool does not
slow down the scanning process. Frequently streaks in images are
caused because the scanner has accumulated dust and dirt. Be sure
your scanner is clean to help prevent streaks in images.
NOTE: The Image Cleaner Tool is not applied to flatbed scans and front
side scans.
Settings — when selected, the Scan Settings screen is displayed
which allows you to change the settings from batch to batch. For more
information regarding these settings see the section entitled, “Scan
Settings screen”.
Redo Batch Scan/Redo Flatbed scan — allows you to rescan and
replace the last batch of scanned images and displays the Scan Viewer
screen.
Auto Rotate— when selected, the Picture Saver Scanning System will
make every attempt to automatically rotate images to the correct
orientation. This option works most effectively for photos with faces;
therefore some photos may still need to be rotated manually.
• For two-sided scans, the back side image is automatically rotated
with the same orientation as the detected orientation for the front side
image.
• Auto rotation is lossless.
• Auto Rotate is applied to all images in the current batch.
KODAK Perfect Touch — automatically enhances (e.g., color,
contrast, brightness, etc.) images scanned as color in a batch. When
this option is selected, a KODAK Perfect Touch progress bar is
displayed at the top of the screen.
• KODAK Perfect Touch is applied to all images in the current batch.
This Batch
• Image: displays the number of the first image shown in the 16-Up
Display window.
• To: displays the number of the last image shown in the 16-Up Display
window.
• Of: displays the total number of images in the batch.
Total Images — displays the total number of images in this order.
3-6
A-61760 September 2012
Photo Selector
screen
If you have the Kodak Photo Selector Accessory, when you click
Flatbed Scan or Redo Flatbed Scan the Photo Selector screen will be
displayed.
NOTE: This option must be enabled on the Scan Settings screen. See
the section “Scan Settings screen” later in this chapter for more
information.
If you do not have this accessory, skip this section and go to the next
section entitled, “Scan Viewer screen”.
The Kodak Photo Selector Accessory allows you to scan pages from
your photo albums or scrapbooks without removing the photos from the
page or removing the page protector. Using the Kodak Legal Flatbed
Accessory or the Kodak A3 Flatbed Accessory, the software will identify
and select separate images within the original flatbed scanned image.
These are collectively referred to as separated images and the
individual image selections as selection frames.
After the images are separated and saved, you can use the photo
editing options to enhance your image, remove red eye, etc.
Original Images pane — displays the original image of the album
page scanned from the flatbed. The photos are automatically identified
and marked with a blue selection frame.
Selected Images pane — displays the individual images that have
been separated from the original scanned image along with the total
image count. Any selection frame changes that you make on the
original image will be displayed in this pane. For example, if you delete
an image selection frame from the Original Image pane, the image will
be deleted from the Selected Images pane.
A-61760 September 2012
3-7
Blue selection frame — outlines the borders of a photo after scanning.
When you click on an individual image selection, the blue selection
frame will turn yellow and the Delete button will become active.
Yellow selection frame — when you click on an individual image
selection, the blue selection frame will turn yellow and the Delete button
will become active. You can use the yellow selection frame to straighten
an image after scanning and resize or crop an image. When you make
a change using the yellow selection frame the resultant image will be
displayed immediately in the Selected Images pane.
Zoom in — magnifies the image in the Original Image pane.
Zoom out — reduces the image in the Original Image pane.
Fit to window — reduces or magnifies the image in the Original Image
pane to fit the entire window.
Add — when selected, allows an image selection frame to be drawn to
add an image to the Selected Images pane.
Delete — when an image is selected and you click Delete, that image
will be removed from the Selected Images pane.
Reset All — when selected, reverts back to the original automatically
separated images. This option is available if any changes have been
made.
Return — when clicked, returns you to the Scan Images screen. If you
made any changes to any images, the message, Do you want to save
the selected images? will be displayed.
3-8
A-61760 September 2012
Scan Viewer screen
When you click Batch Scan, Flatbed Scan, Redo Batch or Redo
Flatbed Scan or Redo Scan, the Scan Viewer screen will be
displayed.
The screen will display images one at a time while scanning, then close
automatically when scanning is completed.
Pause Display/Continue Display — when selected, will hold the
currently displayed image. When selected again, will refresh to the
most recently scanned image.
Stop Scanner — when selected, scanning will stop. The Scan Images
or Enhance Picture screen will be displayed.
NOTE: If there are no photos in the feeder at the time Stop Scanner
was clicked, the scanner will continue to run until the transport
time out is reached and the Scan Images or Enhance Picture
screen will be displayed. To bypass long transport time outs,
place a photo in the scanner to transport it through the scanner,
the transport will then stop when the photo exits. This photo will
not be part of your batch of scanned images.
Return — returns to the Scan Images or Enhance Picture screen.
The Scan Viewer refresh rate may be adjusted to show every image or
to sample the scanned images from every image up to every tenth
image. The Scan Viewer screen may also be disabled. Refer to section
Application Configuration in Chapter 7 for more information.
A-61760 September 2012
3-9
Scan Settings screen
The Scan Settings screen allows you to change the default settings (as
shown) that are used in the scanning process.
Scan as — select either Color or Grayscale.
NOTE: Color scanning is recommended for most photos, including
black and white and grayscale photos, so KODAK Perfect
Touch and Sharpen processing may be applied to the scanned
images. Use Grayscale scanning for exception processing if
color scan results are not what you desired.
Batch Scan Mode — select one of the following batch scan modes:
• Front Side — captures the front side of the photo that is in the input
tray. This is the recommended mode for photos.
• Back Side — captures the back side of the photo that is in the input
tray.
• Two Sided — captures both sides of the photo as two separate
image files labeled A and B.
NOTE: Photos should always be scanned face up, with the tops
pointing down into the scanner.
Transport Timeout — allows you to set the amount of time the scanner
will wait after the last photo enters the transport before the transport
timeout action is taken. You can specify a time delay setting from 1 to
20 seconds to allow more time to insert the next photo or document into
the current batch.
Flatbed Scan Mode — this option is only visible if you have the Kodak
Photo Selector Accessory.
• Enable Photo Selector — check this option to enable the Photo
Selector Accessory. For more information, see the section entitled,
“Photo Selector screen” earlier in this chapter.
3-10
A-61760 September 2012
Resolution — allows you to select the dots per inch (dpi), which affects
the size of the image. The options are: 300, 600 and 1200 dpi. The
default is 300 dpi. In most cases, 300 dpi is sufficient. Selecting 600 dpi
or 1200 dpi increases scanning and processing time.
Compression — select one of the compressions settings. Best is the
default.
• Best — optimum compression, best image quality. Creates a smaller
file size than Superior. Select Best if you want standard size reprints
of scanned image files.
• Superior — minimum compression, superior image quality. Creates
a file that is 5 to 10 times larger than Best compression, which will
impact performance. Select Superior if you want to reprint
enlargements of scanned image files.
Sharpen Images — sharpens the focus and edges of the scanned
image. If this option is selected, all photos within the batch (the stack of
photos to be scanned) will be sharpened unless the setting is changed
again.
The options are:
• None: no sharpening will be done. This is the default.
• Low: low amount of sharpening applied after the batch scan has
been completed.
• High: high amount of sharpening applied after the batch scan has
been completed.
NOTE: Low is the recommended sharpening setting in most cases
where sharpening is desired. This option is not recommended
for grayscale images.
Output Media — determines whether files are partitioned to fit onto a
CD or DVD based on file size.
• Prompt for Media: if selected, you will be asked to select KODAK
Picture CD, CD or DVD output after scanning is complete.
A-61760 September 2012
3-11
Enhance Picture
screen
When you click on a thumbnail on the Scan Images screen, the image
will be displayed in the Enhance Picture screen.
Original Image/Enhanced Image — the Original Image window
displays the image as it was scanned. When you select one of the
Enhanced Image icons (e.g., Red Eye), the changes will be displayed
in the Enhanced Image window. When you are finished with the current
image, a message will be displayed asking if you want to save the
changes.
Return — goes back to the Scan Images screen.
Start Over — goes back to the Customer Order Information screen and
clears the system of all data for the current order. The confirmation
message Do you want to start over? will be displayed.
Moves to the previous image
3-12
Moves to the next image
A-61760 September 2012
Enhance Image icons
Delete — deletes the selected image.
Redo Scan — replaces the current image with the rescanned
images. If multiple photos are rescanned, the current image is
replaced and the rescanned images are inserted in place into
the correct order. If reverse scan order is turned on, then the
image order will be reversed the same as a batch scan. When
rescanning multiple images, you may save all of the rescanned
images or none of the images. You may select to rescan the
photos Front Side, Back Side or Both Sides or from the
flatbed, if a flatbed is attached.
Rescanned images will be displayed in the Scan Viewer screen.
Kodak Perfect Touch — enhances the colors, contrast,
brightness, etc. in the scanned image. This option applies to
black and white and color images scanned as color.
Photo Selector — if you have the Kodak Photo Selector
Accessory, this option will be available. When selected, displays
the Photo Selector screen.
Red Eye — removes the red eye in the scanned image. This
option applies to color images scanned as color.
Rotate 90 degrees — rotates the image 90 degrees to the left
(counter-clockwise).
Rotate 90 degrees — rotates the image 90 degrees to the right
(clockwise).
A-61760 September 2012
3-13
Order Preview screen
When you click Continue on the Scan Images screen, the Order
Preview screen is displayed. This screen allows you to preview and
modify your images before completing this customer order.
By default, the maximum folder size is 550 MB for KODAK Picture CD,
650 MB for CDs and 4.4 GB for DVDs. If a customer order contains
more images than can fit on the CD or DVD, multiple folders will
automatically be created while scanning. For more information on
setting folder sizes, see the section entitled, “Application configuration”
in Chapter 7.
Display window — displays the folder(s) of scanned photos. You can
click on a folder to view the contents.
Moves to the previous set of
folders
Moves to the next set of folders
Continue — displays the Order Summary and Creation screen.
Previous — goes back to the Customer Order Information screen.
Start Over — goes back to the Customer Order Information screen and
clears the system of all data for the current order. The confirmation
message Do you want to start over? This will delete all the files
that were scanned will be displayed.
This Order — provides a summary of the folders within this customer
order.
• Folder: displays the number of the first folder shown in the Order
Preview window.
• To: displays the number of the last folder shown in the Order Preview
window.
• Of: displays the total number of folders in this customer order.
3-14
A-61760 September 2012
Preview Details
screen
When you click Next on the Scan Images screen, the Preview Details
screen is displayed. The customer can manually rotate an image from
this screen or click on a individual image to display the Enhance Picture
screen. The Enhance Picture screen allows image editing. See the next
section for more information.
16-Up Display window — displays up to 16 images at a time.
Rotates the image 90 degrees counter-clockwise (left).
Rotates the image 90 degrees clockwise (right).
Next — displays the Order Summary & Creation screen.
Previous — goes to the Scan Images screen.
View Price List — displays the Order Price List screen, which shows
the price of each service available to the customer.
Total Price — displays a cumulative total cost of the customer order.
Media — displays the percentage of media used. If this reaches 100%,
the system will not allow the customer to scan additional images as part
of this order.
Edit Picture — displays the Enhance Picture screen for the first image.
Images may be edited in a group of 16 at a time. Use the scroll bars to
scroll forward or backward through the scanned images then select
Edit Picture.
Auto Rotate — when selected, the Picture Saver Scanning System will
make every attempt to properly automatically rotate images to the
correct orientation. This option works effectively for photos with faces,
therefore some photos may still need to be rotated manually.
For two-sided scans, the back side image is automatically rotated to the
same orientation as the front side image.
A-61760 September 2012
3-15
NOTE: Auto rotate is slower for grayscale images. Therefore, it is
recommended that you scan black and white photos as color
images and use grayscale scanning for exception processing if
color scan results are not what you desired.
This Order — provides a summary of the images within this order.
• Image: displays the number of the first image shown in the 16-Up
Display window.
• To: displays the number of the last image shown in the 16-Up Display
window.
• Of: displays the total number of images in the folder.
• Total Images: displays the total number of scanned images in this
customer order.
Cancel Order — displays the message, Do you want to Cancel this
Order? This will delete all the pictures that were scanned! Click
Yes to cancel the order and return to the Welcome screen.
3-16
A-61760 September 2012
Order Summary &
Creation screen
When you click Continue on the Order Preview screen, the Order
Summary and Creation screen is displayed. This screen allows you to
finalize your order.
Order Information — displays the information previously entered on
the Customer Order Information screen. If desired, you can change any
customer information except the Order #.
Pictures Scanned — displays the total number of photos scanned.
Total Size — displays the total size of the image files.
Finalize Order — completes this order. You can optionally print the
Order Summary as part of order completion.
Previous — displays the Order Preview screen.
Start Over — goes back to the Customer Order Information screen and
starts a new order. The confirmation message Do you want to start
over? will be displayed.
Print Order Details:
• if selected, allows you to print the order summary using the operating
system’s Print dialog box. A message will be displayed asking if you
want to start another scan session.
• if not selected, a message will be displayed asking if you want to start
another scan session. If you do not start another scan session, the
application will close. If you do start another scan session, the
Customer Order Information screen will be displayed.
You can output the order by selecting Burn CD/DVD, Burn KODAK
Picture CD or Copy To.
NOTE: Some of these buttons may be disabled if you do not have
permission to burn CDs and DVDs. Refer to the section entitled,
“Application configuration” in Chapter 7 for more information.
A-61760 September 2012
3-17
Burn CD or Burn DVD
The Burn CD/DVD dialog box will be displayed allowing you to burn this
order to a CD or DVD. You can also add other files or folders to the
same CD or DVD. The folder for each order will remain on the hard
drive in the order directory, by default C:\Scanned_Pictures.
NOTE: If the order is too large to fit on a single CD/DVD, the system will
partition the order to fit on multiple media, labeled FD_01,
FD_02, etc.
Burn Files tab
• Destination drive: allows you to select the CD/DVD drive where you
want to write your images to media.
• Files to burn: defaults to the customer order folder when the
customer order fits on one of the selected media (CD, DVD). If more
than one CD/DVD is needed, then each folder is the order will be
invoked separately for burning (FD-01, FD-02, etc.). If more than one
CD/DVD is needed, you will be prompted to insert additional media
as required.
• Add Files: use to add files to the list of files and folders to burn.
• Add Folder: use to add one folder at a time to the list of files and
folders to burn.
• Remove Items: allows you to select files or folders to remove from
the list of files and folders to burn.
• Disc Label: defaults to the order number. You can change the
default. Up to 32 characters are allowed in this field.
• Close media: defaults to checked, which will finalize the CD/DVD to
play in other PCs.
• Eject when finished: if checked, will automatically eject the CD/DVD
when burning is complete.
3-18
A-61760 September 2012
• Verification after burning is complete: you can select None (no
verification will take place) or select a Quick or Full verification
process that the data was burned successfully.
• Burn/Cancel — click this button to start or cancel a burn. Cancelling
a burn in progress may result in an unusable CD/DVD. There may be
a delay after selecting Burn while the media spins up, before burning
starts.
• Return — click this button to return to the Order Summary and
Creation screen.
Format Disc tab
The Burn CD or Burn DVD screen also has a Format Disc tab which
allows a previously used CD-RW/DVD-RW to be formatted (cleared) so
it may be reused. This tab has the following options:
• Eject when finished: if checked, will automatically eject the CD-RW/
DVD-RW when formatting is complete.
• Quick Format: if checked, will perform a quick formatting process;
otherwise a full formatting will be performed.
• Format Disc: click this button to start formatting a rewritable disc.
When the disc formatting has completed, click the Burn Files tab to
write to disc.
A-61760 September 2012
3-19
Burn Kodak Picture CD
The Burn CD\DVD dialog box will be displayed allowing you to burn this
order to a Kodak Picture CD. The folders for each order will remain on
the hard drive in the order directory, by default C:\Scanned_Pictures.
NOTE: If the order is too large to fit on a single Kodak Picture CD, the
system will partition the order to fit on multiple media, labeled
FD_01, FD_02.
Burn Files tab
• Destination drive: allows you to select the CD/DVD drive where you
want to write your images to media. The media for the Burn KODAK
Picture CD must be a Kodak Picture CD.
• Files to burn: defaults to the folder FD-01 when the completed order
fits on one KODAK Picture CD. If more than one media is needed,
then each folder is the order will be invoked separately for burning
(FD-01, FD-02, etc.). The folders will be burned to the KODAK
Picture CD in \PICTURES.
If more than one Kodak Picture CD is needed, you will be prompted
to insert additional media as required.
• Disc Label: defaults to Kodak Picture CD and should not be
changed.
3-20
A-61760 September 2012
• Close media: is checked and may not be unchecked. This will
finalize the Kodak Picture CD to play in other PCs and supported
DVD players.
• Eject when finished: if checked, will automatically eject the Kodak
Picture CD when burning is complete.
• Verification after burning is complete: is always set to Full
Verification for Kodak Picture CD.
• Burn/Cancel — click this button to start or cancel a burn. Cancelling
a burn in progress may result in an unusable Kodak Picture CD.
There may be a delay after selecting Burn while the media spins up,
before burning starts.
• Return — click this button to return to the Order Summary and
Creation screen.
Copy to
The Copy To dialog box will be displayed allowing you to copy your
order to another location such as a USB drive or network drive. The
folders for each order will remain on the hard drive in the order
directory, by default C:\Scanned_Pictures.
NOTES:
• To optionally create a new folder, click the Create New Folder
button, then enter the name of the folder in the text box below New
Folder Name.
• Only alphanumeric characters, dashes, underscores and spaces are
allowed.
A-61760 September 2012
3-21
4 Scanning Photos
Contents
Getting your scanner ready to scan ................................................ 4-1
Getting your photos ready to scan .................................................. 4-3
Handling guidelines......................................................................... 4-5
Scanning your photos ..................................................................... 4-6
Getting your scanner
ready to scan
Even though your scanner can be tilted to an upward and downward
position, it is strongly recommended that you scan your photos in the
downward position.
1. Be sure the scanner is on and ready to scan (green LED/Start
button will be on and constant).
2. Tilt and rotate the scanner away from you to place your scanner in
the downward position.
IMPORTANT: When using the tilt feature, be sure the scanner cover
is closed.
A-61760 September 2012
4-1
3. Adjust the side guides (by sliding them in or out) to accommodate
the size of the photos you are scanning.
4. Adjust the input tray. Adjust the output tray to accommodate your
scanning needs.
• The output tray can be extended to accommodate photos up to
14 inches in length.
4-2
A-61760 September 2012
Getting your photos
ready to scan
1. When organizing your photos for scanning, stack the photos so the
edges are aligned and centered in the input tray. This allows the
feeder to introduce photos into the scanner one at a time.
2. Remove all staples and paper clips before scanning. Staples and
paper clips on photos may damage the scanner and photos.
3. Any inks and correction fluids on the photos must be dry before
scanning is started.
4. Place the photos you want to scan in the input tray of the scanner.
Be sure the photo(s) you want to scan are face up (see below).
• If you encounter problems feeding large stacks of photos, place
the first 25 photos in the tray and start scanning; then place the
rest of the stack in the tray on top of the small stack of photos.
• You may have to tap the bottom of the stack into the feeder
periodically to ensure the photos feed properly.
A-61760 September 2012
4-3
NOTE: If you want to keep your photos in a specific order, do the
following:
Take your photos and place them face up on the table. Take the
first batch from the top of this stack and place them face up in
the scanner. Select Batch Scan. When the stack is completely
scanned and the scanner has stopped, place another stack in
the scanner and select Batch Scan. When you are using this
method, the scanner should be allowed to stop after each batch
is scanned, otherwise the photos will not be in the desired order.
Photo
File name
1
XXXX_01.jpg
9
XXXX_09.jpg
Alternatively, take your photos and place them face down on the
table. Take your first batch from the top of this stack and place
them face up in the scanner.
For example, if your stack has 9 photos, you would place them
face down on the table so that photo 1 is facing the table, and
the back of photo 9 is on the top of the stack. If you take the first
5 photos on the top of this stack (9,8,7,6,5) and place them face
up in the scanner and scan them, as the scanner empties, place
the rest of the photos (4,3,2,1) in the scanner face up.
When the stack is completely scanned, the software will reorder
the image files so that photo 1 will be image 1 and photo 9 will
be image 9, etc. When you are using this method, do not stop
the scanner during scanning, otherwise the photos will not be in
the desired order. You may want to increase the transport
timeout using this method.
4-4
A-61760 September 2012
Handling guidelines
Before scanning a batch of photos, review the following guidelines to
save time and improve efficiency. Refer to Chapter 6, Achieving Good
Quality Images for detailed information regarding photo handling and
the importance of scanner cleanliness.
• Handle photos with care! Be sure your hands are clean or wear
clean white cotton gloves. Avoid touching the photographic surface.
• Fragile or precious photos should be scanned using the Kodak A3
Flatbed Accessory or Kodak Legal Flatbed Accessory to eliminate
the risk of damage from automated handling.
• Use the scanner in a clean, dust-free environment.
• Cover the scanner when it is not in use.
• Avoid unnecessary bending and flexing of photos.
• Due to copyright laws, any professionally taken photos that are
copyrighted cannot be scanned without written permission from the
owner.
• Two-sided photo scanning:
- If you have a batch of photos where both sides of some photos
need to be scanned, group these photos together and scan them
in a separate batch. This will save time deleting unwanted blank
images.
- If you need to rescan one side of a two-sided photo, select the
side you want to rescan, otherwise select Two-sided to rescan
both sides.
• If you have a batch of photos that need color enhancement,
brightness adjustment, etc., group these photos together. When you
select KODAK Perfect Touch after scanning, the application
software enhances the entire folder of images at the same time.
• When you delete an image in a display of 16 on the Enhance Picture
screen, the display will shift to include the first image from the next
group of 16 images to be displayed.
• If you use Sharpen Image at 600 or 1200 dpi, the processing time will
be significantly increased. This option is not recommended for
grayscale images.
A-61760 September 2012
4-5
Scanning your
photos
Before you begin, be sure the Picture Saver System Scanner is on and
in the Ready state and the USB software dongle is inserted in a USB
port on your PC.
1. Double-click on the Picture Saver System Software shortcut on the
desktop, or select Start>Programs>Kodak>KODAK Picture
Saver System>Picture Saver System PS50. A splash screen will
be displayed while the system initializes; then the Customer Order
Information screen will be displayed.
2. Enter up to 51 alphanumeric characters in the Order # field to
identify this order or select a previous order by clicking on the dropdown arrow. You must make an entry in this field.
3. If desired, enter the last name, first name, phone, street, city, state/
county/country, zip/post code and email information in the available
fields. This data will auto fill with any data previously entered when
re-opening an order and the data may be modified.
4-6
A-61760 September 2012
4. Select Continue.The Scan Images screen will be displayed. The
Scanning Completed button will be active if the order already
contains photos to allow you to proceed to the following screens.
5. Place a batch of photos in the scanner’s input tray (for a Batch
Scan) or as a single photo on the flatbed platen (for a Flatbed
Scan). Be sure the photos you want to scan are facing up properly.
NOTES:
• For best feeding performance always scan the photos with the
scanner body tilted to the downward position and with photos
face up and oriented as shown below.
• Photos will be fed into the scanner from the bottom of the stack.
Therefore, if you want your photos scanned in a specific
sequence, feed your photos as described in the section entitled,
“Getting your photos ready to scan” earlier in this chapter.
A-61760 September 2012
4-7
6. Select the Image Cleaner Tool if you want the Picture Saver
Scanning System to attempt to eliminate any streaks in the back
side image after scanning.
7. Click Settings if you want to change any of the default scan settings
(i.e., mode, resolution, sharpen images, etc.).
NOTE: Within an order you can change the settings anytime before
starting a Batch or Flatbed scan.
8. Click Batch Scan or Flatbed Scan. The message Scanner lamps
are warming may be displayed. Scanning will start when the lamps
are ready (usually within a few seconds).
NOTES:
• If you are using an optional Kodak Legal Flatbed or Kodak A3
Flatbed, the photo must always be placed face down on the
platen.
• When Batch Scan is selected, you have 1 to 20 seconds to
place photos into the Picture Saver System Scanner depending
on the transport timeout value.
As photos are being scanned, the scanned images will be displayed
1-up in the Scan Viewer screen.
Pause the Scan Viewer display for an extended review of the image
currently displayed. The scanner will not stop.
To stop the scanner, pull the rest of the photos out of the feeder.
You will be returned to the Scan Images screen.
4-8
A-61760 September 2012
When the Scan Viewer screen is closed, the Scan Images screen
will be displayed.
NOTE: If you are using the Kodak Photo Selector Accessory and
are scanning photos using the flatbed, the Photo Selection
screen will be displayed.
Proceed to the next step if you are using the Photo
Selector Accessory, if not proceed to Step 10.
A-61760 September 2012
4-9
9. Select any images that you want to make changes to (i.e,
straighten, delete, etc.). When finished, click Return.
• You can use the following shortcut keys:
- Insert key: to add a photo to the Selected Images pane.
- Delete key: to delete a photo from the Selected Images pane.
- Page Up: to zoom out.
- Page Down: to zoom in.
- Home: to fit to window.
- Tab: to scroll through the images
• You can drag and drop an image to reorder images in the
Selected Images screen.
10. If you do not need to make any changes and are finished scanning
all photos in this order, click Scanning Completed.
11. If you want to scan more photos, make enhancements, etc. these
options are available:
• If you want to scan another batch of photos to this order, place
more photos in the input tray and click Batch Scan.
• If you want to scan a single photo using the A3 or Legal Flatbed
Accessory, place the photo on the flatbed and click Flatbed
Scan.
• Use the rotate arrows on each displayed image to rotate as
desired, or select Auto Rotate for the Picture Saver System
Software to make every attempt to automatically rotate images to
the correct orientation. This option works effectively for photos
with faces; therefore, some photos may still need to be rotated
manually.
• If you want to enhance the colors, contrast, brightness, etc. of all
of the images scanned as color in the scanned batch, click
KODAK Perfect Touch.
• If you want to rescan and replace the last flatbed image or batch
of scanned images, place the desired photos back in the input
tray or flatbed and click Redo Batch Scan or Redo Flatbed
Scan. The rescanned images will be displayed on the screen in
place of the previous batch.
• If you want to edit an individual image (e.g., rotate, delete,
KODAK Perfect Touch, etc.), click on the image you want to
enhance. The Enhance Picture screen will be displayed.
4-10
A-61760 September 2012
• Redo scan may be used to replace a multi-feed image with
images from multiple photos.
12. Make any desired changes, then click Scanning Completed. The
message Are you done scanning this order? will be displayed.
13. Click Yes. The Order Preview screen will be displayed.
14. Select the folder that you want to preview.
A-61760 September 2012
4-11
The Preview Details screen will be displayed.
15. From the Preview Details screen you can make any final changes.
When finished, click Continue.
The Order Preview screen will be displayed.
16. If you want to review the contents of the folder one more time before
finishing your order, select the desired folder, otherwise, click
Continue.
4-12
A-61760 September 2012
The Order Summary & Creation screen will be displayed.
17. Verify that all the information in the order summary is complete. Edit
customer information if desired.
18. Output your image files to the desired media.
• If you want to burn a data CD or DVD, click Burn CD/DVD and
make your selections on the Burn CD/DVD screen.
• If you want to burn a Kodak Picture CD, click Burn KODAK
Picture CD and make your selections on the Burn CD/DVD
screen.
• If you want to copy your order to another location, click Copy to
to select the desired destination.
A-61760 September 2012
4-13
19. When you click Finalize Order, if you want to print the order
summary, check the Print Order Details check box. The Print
dialog box will be displayed allowing you to print the order summary.
When you are finished, the message Do you want to start a new
Kodak Picture Saver System Scan Session? will be displayed.
If you want to start a new scan session, click Yes. Otherwise, click No
to close the Kodak Picture Saver System Software.
Unless you changed the default at installation, the folders for each
order can be found at C:\Scanned_Pictures. These images can be
handled in a variety of ways: uploaded to a photo management system,
burned to CD/DVD, printed, emailed, etc.
When the order is finalized, an .xml file will also be created that
contains information about your order. The .xml file can be found within
the order folder in the scanned images directory.
4-14
A-61760 September 2012
5 Maintenance
Contents
Opening the scanner cover............................................................. 5-1
Cleaning procedures....................................................................... 5-2
Cleaning the rollers ................................................................... 5-2
Cleaning the separation module................................................. 5-3
Cleaning the feed module .......................................................... 5-4
Vacuuming the scanner.............................................................. 5-5
Cleaning the imaging area ......................................................... 5-6
Running a transport cleaning sheet............................................ 5-6
Replacement procedures ............................................................... 5-7
Replacing the separation module and tires ................................ 5-7
Replacing the pre-separation pad .............................................. 5-9
Replacing the feed module and tires ........................................ 5-10
Adjusting the pre-separation roller tension ................................... 5-12
Supplies and consumables .......................................................... 5-12
Opening the scanner
cover
1. Before opening the scanner cover, be sure the input tray is in the
open position.
2. Press and hold the scanner cover release lever and pull the scanner
cover down.
3. When you finish cleaning the scanner or replacing a part, close the
scanner cover with both hands.
A-61760 September 2012
5-1
Cleaning procedures
Your scanner needs to be cleaned periodically. If your photos do not
feed easily, if several photos feed at the same time or if streaks appear
on your images, it is time to clean your scanner. The section entitled,
“Supplies and consumables” at the end of this chapter provides a listing
of the supplies required to clean your scanner.
IMPORTANT: Use only non-flammable cleaners such as those provided
through Kodak Parts Services. Do not use household
cleaners.
Allow surfaces to cool to ambient temperature before
use. Do not use cleaners on hot surfaces.
Use adequate ventilation. Do not use cleaners in
confined areas.
NOTES:
• Before beginning cleaning procedures, disconnect the electrical
power.
• Wash your hands with soap and water after performing maintenance
procedures.
Cleaning the rollers
1. Open the scanner cover.
2. With a roller cleaning pad, wipe the feed rollers from side to side.
Rotate the feed rollers to clean the entire surface.
IMPORTANT: The roller cleaning pad contains sodium lauryl ether
sulfate which can cause eye irritation. Refer to the MSDS
for more information.
3. Dry the rollers with a lint-free cloth.
5-2
A-61760 September 2012
Cleaning the separation
module
The separation module should be removed from the scanner for best
cleaning results.
1. Push the separation module up to snap out and lift it out of position.
2. Manually rotate and wipe the separation module tires with a roller
cleaning pad.
3. Inspect the separation module.
If the separation module tires show signs of wear or damage,
replace the tires or the separation module. See “Replacement
procedures” for more information.
4. Insert the separation module by aligning the tabs with the slots and
snapping it into position.
A-61760 September 2012
5-3
Cleaning the feed module
• When removing or cleaning the feed module, it may be easier to
access the feed module if you remove the input tray. To remove the
input tray, gently push the input tray to the left or right to release the
pin from the slot, and lift it out of position.
1. Pull against the raised edge of the feed module cover and lift it up
and out of position.
NOTE: Be careful not to damage the paper present sensor when
removing or cleaning around the feed module.
2. Rotate the feed module forward and push it to the left to lift it out of
position.
3. Manually rotate and wipe the feed module tires with a roller cleaning
pad.
4. Inspect the feed module.
If the feed module tires show signs of wear or damage, replace the
tires or the feed module. See the “Replacement procedures” for
more information.
5-4
A-61760 September 2012
5. Using a vacuum or cleaning pad, remove dust and debris from the
feed module area.
6. Reinstall the feed module by aligning the pins and pushing it toward
the left to fit it into position. Be sure the gears are aligned and it
snaps into place. Roll the feed module back into place.
7. Reinstall the feed module cover by aligning the tabs with the slots
and pushing it back into position until it snaps into place.
Vacuuming the scanner
A-61760 September 2012
Before cleaning the imaging area, it is suggested that you vacuum the
inside of the scanner to remove any dust and debris.
5-5
Cleaning the imaging area
1. Wipe the upper and lower imaging area using a “Step 1” Brillianize
Detailer wipe. Be careful not to scratch the imaging area when
cleaning.
2. Wipe the upper and lower imaging area again using the “Step 2”
Brillianize Detailer wipe to remove any debris and polish the
surface.
3. When finished, close the scanner cover with both hands.
NOTE: Do not blow any air into the open imaging area. A static whisk
brush can be used to gently clean the mirrors inside the camera.
Running a transport
cleaning sheet
1. Remove the wrapping from the Transport Cleaning Sheet.
2. Adjust the side guides to fit the cleaning sheet.
3. Place a transport cleaning sheet in the input tray (adhesive side
facing you) in portrait orientation.
4. Using your scanning application, scan the transport scanning sheet.
5. After the transport cleaning sheet is scanned, turn it over (adhesive
side facing the input tray) and scan it again.
6. Open the scanner cover and wipe the imaging area with a lint-free
cloth included with the Brillianize Detailer wipes.
7. Close the scanner cover with both hands.
8. Check your image quality.
9. If necessary, repeat this procedure until all residue is removed from
the rollers.
NOTE: When a transport cleaning sheet gets very dirty, discard it and
use a new one.
5-6
A-61760 September 2012
Replacement
procedures
Kodak Scanners use replaceable tires that can feed a wide range of
document types, sizes and thicknesses. Tire life and performance will
vary based on the customer’s document set, the frequency of cleaning
the paper path and tires, and following the recommended schedule for
changing tires. Nominal tire life is approximately 60,000 to 125,000
photos/pages. Usage figures are not guaranteed. Customer-operating
environments, document type, the condition of photos being scanned,
and not following the recommended cleaning and replacement
procedures, can cause the life of the consumables to vary. You should
change the tires if you notice an increase in multiple feeds, stoppages,
or a decrease in feeder performance that is not resolved by following
the cleaning procedures.
NOTES:
• Before beginning replacement procedures, disconnect the electrical
power.
• Certain paper types (such as carbonless paper or newsprint), failure
to clean regularly, and/or use of non-recommended cleaning solvents
can shorten roller life.
Replacing the separation
module and tires
A-61760 September 2012
1. Push the separation module up to snap out and lift it out of position.
•
If you are replacing the separation module, insert the new
separation module by aligning the tabs with the slots and
snapping it into position.
•
If you are replacing the tires, continue with Step 2.
5-7
2. Holding onto the separation module, rotate the release lever back
so you can access the separation roller.
CAUTION: Use caution as the release lever is spring-loaded and
will snap back if you do not hold it in place.
3. Remove the separation roller from the separation module housing.
4. Remove each tire by sliding the tire off the core.
5. Install each new tire by gently pulling it over the core.
IMPORTANT: Do not overstretch the tire, it may tear.
6. Reinstall the separation roller in the separation roller housing. Be
sure the separation roller snaps into place.
7. Reinstall the separation module by aligning the tabs with the slots
and snapping it into position.
5-8
A-61760 September 2012
Replacing the preseparation pad
If you have the optional document separation module for the Kodak
Picture Saver System Scanner and if you need to install or replace the
pre-separation pad, follow these steps.
1. Remove the separation module from the scanner by following the
steps previously described in “Replacing the separation module and
tires”.
2. Hold the separation module in both hands and locate the two side
tabs which protrude slightly from the back of the separation module.
3. Push down on the side tabs until the pre-separation pad protrudes
slightly from the front of the separation module.
4. Grasp the pre-separation pad and pull it out of the separation
module.
5. Discard the worn pre-separation pad.
6. Align the side tabs of a new pre-separation pad with the slots on the
separation module.
7. Push the pre-separation pad firmly in the slots until the preseparation pad flap rests lightly against the separation module tires.
8. Reinstall the separation module by aligning the tabs with the slots
and snapping it into position.
A-61760 September 2012
5-9
Replacing the feed module
and tires
1. Push against the raised edge of the feed module cover and lift it up
and out of position
NOTE: The paper present sensor is located to the left of the feed
module. Be careful not to damage the paper present sensor
when removing or cleaning around the feed module.
2. Rotate the feed module forward and push it to the left to lift it out of
position.
5-10
•
If you are replacing the feed module, insert the new feed module
by aligning the pins and pushing it toward the left to fit it into
position. Be sure the gears are aligned and it snaps into place,
then go to Step 5.
•
If you are replacing the tires, continue with Step 3.
A-61760 September 2012
3. Remove each core assembly by lifting up and out of position and
slide each tire off of the core.
4. Install each new tire by gently pulling it over the core and replace
the core assembly in the feed module.
NOTE: You may need to slide the shaft to the right or left so the
core fits properly within the feed module housing
IMPORTANT:Do not overstretch the tire; it may tear.
5. Reinstall the feed module by aligning the pins and pushing it toward
the left to fit it into position. Be sure the gears are aligned and it
snaps into place. Roll the feed module back into place.
6. Reinstall the feed module cover by aligning the tabs with the slots
and pushing it back into position until it snaps into place.
A-61760 September 2012
5-11
Adjusting the preseparation roller
tension
If you are experiencing multi-feeds or document jams, it may be
necessary to adjust the pre-separation roller tension.
1. Remove the separation module from the scanner by following the
steps described previously in “Replacing the separation module and
tires”.
2. Locate the spring on the separation module.
3. Lift the spring from the holder and move it to the left or right as
desired to adjust the tension.
4. When finished, reinsert the separation module by aligning the tabs
with the slots and snapping it into position.
Supplies and
consumables
Contact your scanner supplier to order supplies.
Description
CAT No.
Kodak Feed Rollers (qty 12)
148 4864
Kodak Gentle Photo Separation Module
169 5097
Kodak Picture Saver Standard Separation Module
196 0426
Kodak Digital Science Roller Cleaning Pads (qty 24)
853 5981
Kodak Digital Science Transport Cleaning Sheets (qty 50)
169 0783
Brillianize Detailer Wipes / for Kodak Scanners
826 6488
Kodak Legal Flatbed Accessory
119 9470
Kodak A3 Flatbed Accessory
818 2271
NOTE: Items and catalog numbers are subject to change.
5-12
A-61760 September 2012
6 Achieving Good Quality Images
Contents
Scanning environment .................................................................... 6-1
Handling photographs..................................................................... 6-1
Keeping your scanner clean ........................................................... 6-3
Photo scanning ............................................................................... 6-4
Reducing streaks ............................................................................ 6-4
Banding........................................................................................... 6-5
Scanning
environment
Dirt and dust can hinder photo scanning operations by adding streaks
to digital images. Dirt and dust can also promote scratching of photos,
both during and after scanning.
Follow these recommendations to keep your scanning environment as
clean as possible:
• Vacuum the scanner and the surrounding area frequently.
• Keep your scanning environment as free from dirt and dust as
possible. Use care when dusting surfaces around the scanner.
Dusting quickly and carelessly just redistributes dust in other
surrounding areas.
• Use the dust cover when the scanner is not in use. When removing
the dust cover from the scanner, if the dust cover has accumulated
dust, carefully remove the dust cover and shake it free of dust in a
location away from the scanner.
• Use the scanner in an area where the relative humidity is at least
50%. Dry environments leads to static which promotes the
accumulation of dust.
Handling
photographs
Be sure your photos are clean before scanning them. Scanning dirty
photos may cause more dirt and dust to accumulate in the scanner. To
minimize dirt and dust build-up in the scanner and prevent possible
streaking, consider the following:
• Wear gloves — wearing cotton gloves while handling photographs
may reduce the oils from your hands getting on the photos and
minimize the amount of dirt and dust that collects in the scanner.
• Cleaning photos — gently vacuum older prints that appear to be
dusty. An alternative approach to cleaning photos is to use a
microfiber cloth (included with the Brillianze Detailer wipes) or similar
wipes available from a photo retailer, which are lint-free, ultra-soft
disposable non-abrasive wipes. They are safe to use on emulsions,
optics, scanners and CD’s. Dust should always be removed in a way
that will not harm the original photo.
A-61760 September 2012
6-1
• Adhesives — sticky substances such as glue and other albumrelated adhesives on photos, can be transferred to the imaging area
of the scanner. Remove the adhesive with appropriate cleaners.
Photos with adhesive substances can also be scanned from the
Kodak A3 or Legal Flatbed Accessory thus preventing these
substances from gathering in the scanner.
• Uncurling photos — photos that have significant curl may not
transport effectively through the scanner. If possible, stacks of photos
may be safely uncurled before scanning.
NOTE: Photos that are severely curled can either be rotated 90
degrees so the curl is not in the direction of the transport or
scanned from the Kodak A3 or Legal Flatbed Accessory.
• Fanning photos — for reliable feeding, fan the photos before
scanning.
• Always place a blank placeholder top sheet on top of the stack of
photos being scanned. This top sheet protects the top photo from tire
marks as the last photo before the top sheet is fed into the scanner.
This top sheet is a good place to record customer information since it
will be scanned with the photos.
• Curled or folded edges on the end of photos being scanned may
cause a jam and/or a tear in the photo. It is recommended that you
scan these types of photos facedown or on one of the Kodak Flatbed
accessories.
6-2
A-61760 September 2012
Keeping your
scanner clean
For best scanning results it is suggested that you frequently perform a
quick cleaning sequence in between your routine, thorough cleaning
procedures. This level of cleaning can be done frequently, perhaps as
often as every 100 prints or when streaks appear on an image(s). Refer
to Chapter 5, Maintenance for detailed cleaning procedures.
To do a quick cleaning:
1. Open the scanner cover and look at the imaging area for any
noticeable dust particles.
2. Wipe the imaging area with a microfiber cloth to remove any loose
dust particles.
3. After wiping the glass, re-inspect for any visible dust particles.
4. Close the scanner cover and evaluate the subsequent scans. If
streaking or other problems remain, it may be necessary to do a
more thorough cleaning. You can:
• Wipe the imaging area with Brillianize Detailer wipes. These
wipes provide an excellent, alcohol-free cleaning process. This
two-step process includes a wet de-static wipe and a dry siliconbased polish that leaves the scanner with a clean, clear, antistatic finish.
• Run a transport cleaning sheet through the scanner to pick up
loose dust particles, especially on the rollers. Depending on how
dirty the scanner is, these sheets can be used several times.
Discard the cleaning sheet when it is very dirty.
• For more extensive cleaning, see Chapter 5.
A-61760 September 2012
6-3
Photo scanning
For the best scanning results the following is suggested:
• Place your photos face-up in the input tray. This orientation
minimizes scratching of the print emulsion.
• The Kodak Picture Saver System Scanner is shipped with the Kodak
Picture Saver Standard Separation Module and with the preseparation pad un-installed. If you encounter problems when feeding
photos through the scanner, especially curled photos, you can install
the pre-separation pad and/or install the Kodak Picture Saver
Standard Separation Module. For pre-separation pad installation
procedures, see “Replacing the pre-separation pad” in Chapter 5,
Maintenance. For instructions on replacing the separation module,
see “Replacing the separation module and tires” also in Chapter 5.
IMPORTANT: Use caution when scanning photos with the preseparation pad installed. Internal testing has shown a
higher risk of scratching on the prints.
Reducing streaks
The Kodak Picture Saver Scanning System software has been
enhanced to reduce the occurrence of streaks in your images. The
Kodak Picture Saver Scanner has been designed with an open imaging
area for the front images. The Picture Saver Scanning System software
provides an option called Image Cleaner tool for the back sides of the
images. When this option is checked, the software will attempt to
remove any streaks that may occur in a scanned image from the dust in
the scanner. In most cases, corrections are either undetectable or very
hard to detect. However, based on the size of the streak and the image
content where the streak exists, there may be a slightly observable
correction artifact remaining. In almost all cases, this correction artifact
is preferable to the actual streak.
Monitoring Streaks — review images on the Scan Viewer screen and
if streaks are detected, pull the rest of the photos from the feeder to
stop the scanner. It is best to scan photos in smaller batches
(approximately 50) then rescan these images as necessary.
6-4
A-61760 September 2012
If streaking is still apparent in your images, clean the open imaging
guide area in your scanner.
Using an anti-static brush (similar to the brush shown in the illustration
below), gently brush the imaging guide area to remove dust and debris.
Use a Brillianize Detailer Wipe to clean the closed imaging guide.
Banding
Banding can occur when photos are curled in landscape orientation
and fed through the scanner. If you experience an issue with curled
photos that generate horizontal bands on images, it is suggested that
you rotate the photos by 90 degrees and feed the photos in the scanner
so the curl is not in the direction of the transport. This may eliminate or
minimize the banding.
NOTE: It is suggested that you feed photos top first to minimize
banding in light areas at the top of photos.
Top
Place a blank placeholder top sheet on top of the stack of photos being
scanned. This top sheet can reduce banding and also protects the top
photo from tire marks as the last photo before the top sheet is fed into
the scanner. This top sheet is a good place to record customer
information since it will be scanned with the photos.
A-61760 September 2012
6-5
7 Troubleshooting
Contents
Problem solving .............................................................................. 7-1
Installation issues............................................................................ 7-3
Application issues ........................................................................... 7-3
Conflicts with other applications...................................................... 7-3
Application configuration................................................................. 7-4
Data removal................................................................................... 7-5
Error codes ..................................................................................... 7-6
LED codes ...................................................................................... 7-9
Log files......................................................................................... 7-10
Contacting Service........................................................................ 7-10
Problem solving
Occasionally you may encounter a situation with your scanner where it
may not function properly. Use the chart below as a guide to check
possible solutions to help you resolve the situation before calling
Technical Support.
Problem
Possible Solution
Photos are jamming or multiple photos Make sure that:
are feeding
• the side guides are adjusted for the width of the photos you are
scanning.
• the output tray is adjusted for the length of the photos you are
scanning.
• all photos meet the specifications for size, weight and type as outlined
in Appendix A, Specifications.
• the scanner and tires are clean.
• the spring on the pre-separation module is adjusted to the proper
tension. See the procedures in Chapter 5, Maintenance.
• the feed module and pre-separation module are installed properly and
securely in place. See the procedures in Chapter 5, Maintenance.
• Photos sometimes stick due to static electricity. Fan the photos and
make sure the ambient humidity is sufficient.
To remove a photo jam:
IMPORTANT: Be sure the input tray is up before opening the cover. Do
not pull the jammed photo out of the scanner; open the
scanner cover first.
• Open the scanner cover.
• Remove any jammed photo(s) from inside the scanner.
• Close the scanner cover and resume scanning.
A-61760 September 2012
7-1
Problem
Possible Solution
Scanner will not scan/feed photos
Make sure that:
• the power cord is plugged securely into the back of scanner and the
wall outlet.
• the power supply, green LED is lit.
• the power switch is on.
• the wall outlet is not defective (call a licensed electrician).
• the PC was restarted after installing the software.
• photo(s) is making contact with the feed rollers.
If you are feeding several photos in the upright position, and the
transport will not start, it may be necessary to fan the bottom photos so
the feed rollers can grasp the first photo and start the feeding process, or
use the tilt button to rotate the scanner in the downward position.
Application display windows and
screens are distorted
Check the dpi settings in the Display Properties. The settings should be
set to Normal size, 96 dpi with 32-bit color.
No images are being displayed
• Be sure the side you want to scan is facing forward (not facing the input
tray). For more information, see the section entitled, “Getting your
photos ready to scan” in Chapter 4, Scanning Photos.
Images are not being cropped correctly • Images are not being cropped correctly from the batch scanner.
Rescan and adjust the side guides for the width of the photos you are
scanning.
• Images are not being cropped correctly from the flatbed. Try placing a
contrasting background behind the photograph and rescan.
Roller marks appear on the photo after Clean the rollers. See the procedures in Chapter 5, Maintenance.
scanning
Streaks are running through a color
photo
• The scanner is dirty and needs to be cleaned. Refer to the “Cleaning
procedures” in Chapter 5, Maintenance.
• Select the Image Cleaner tool option on the Scan Images screen to
eliminate or minimize streaks.
• Clean the imaging guide area with an anti-static brush.
• Also see the section entitled, “Keeping your scanner clean” in Chapter
6 to do a “quick cleaning” procedure.
Scanner is running slow
• Your PC may not meet the minimum requirements for the scanner.
• The scanner is rated and designed to operate with USB 2.0, but will
function in a USB 1.1 port. If you are using a USB 1.1 connection,
update your connection to USB 2.0.
• Scanning photos at 600 or 1200 dpi or in TIFF format will scan slower.
Cannot scan after Standby or Hibernate • Upgrade to Service Pack 2.
with Microsoft Windows Vista
• Disable USB power management settings on your PC for this scanner.
7-2
A-61760 September 2012
Installation issues
• Unless you changed the default at installation, scanned images can
be found at C:\Scanned_Pictures. These images can now be
handled in a variety of ways: uploaded to a photo management
system, burned to CD/DVD, printed, emailed, etc.
• The Picture Saver Scanning System uses Microsoft .NET Framework
2.0. If .NET Framework 4.0 is not installed on the PC, it will be
installed during installation.
• If a security software application is installed on the PC, you may be
asked whether you want to allow or deny installation of the Picture
Saver Scanning System. Select Allow or Yes. If you inadvertently
select Deny or No, open the security software application and set the
permission to Allow the installation of the Picture Saver Scanning
System.
• Close any currently running scanner applications or applications that
use a USB software dongle before starting the Picture Saver
Scanning System installation and power down any attached
scanners.
• The USB software dongle should be plugged into a USB 2.0 port
directly on the PC, not into a USB hub that is then plugged into a PC
USB port. Plugging a USB 2.0 hub into a USB 1.1 port can cause the
WIBU software (driver software for the USB software dongle) to not
load automatically (see the next issue).
• If after installation of the application and plug-in of the USB software
dongle, the WIBU software does not automatically load, a message
may be displayed asking for the WIBU installation disk. Select that
you have the software disk and choose the CD drive with the Picture
Saver Scanning System Installation CD. This will complete the WIBU
software installation.
• Product Registration requires an internet connection. Make sure that
the following internet address is not blocked:
https://www.onlineregister.com.
If registration fails, check your internet connection and retry. Only 5
attempts are allowed for Product Registration. If you need to register
more than five times, contact Kodak Service.
Application issues
• If the scanner encounters E9 Document Jams when scanning at
higher resolutions (600 or 1200 dpi) and the PC’s RAM is less than
3GB, then the memory should be increased to the required 3GB
RAM for high resolution scanning.
Conflicts with other
applications
Some image viewers and backup programs that monitor the hard drive
for new image files may access files in the output folder while in use by
the Picture Saver Scanning System. This may cause functions (Kodak
Perfect Touch, Rotate and Auto-Rotate) to not work properly. Turn off
watched folder and backup synchronization functionality for other
image products when scanning photos or uninstall the products. The
HP TouchSmart Cyberlink Media Library Service (CLMLSvc.exe) and
Western Digital SmartWare and Memeo Sync backup software are
known to cause problems.
A-61760 September 2012
7-3
Application
configuration
The Picture Saver Scanning System may be configured by modifying
the PrintScan.ini file in the directory specified below for your particular
Windows operating system. You can change the location for the output
JPG files (Target_Path) and adjust the folder size for burning CDs,
Kodak Picture CDs or DVDs. The maximum folder size can be changed
by specifying a new value for the CDFolderSize, PCDFolderSize and
DVDFolderSize parameters in the PrintScan.ini file.
A3 and Legal Flatbed scanner rotation may be set using the
FlatbedRotation parameter.
Reversing the order of the photo faceup scans may be enabled/
disabled using the ReverseFaceUp parameter.
The Scan Viewer may be enabled/disabled using the ShowViewer
parameter. The Scan Viewer refresh rate may be slowed down using
the ViewerDelay parameter. This will cause each image to remain
displayed on the screen longer, therefore not all of the images scanned
are displayed.
The default values for other parameters are preset to optimal values or
set by the Scan Settings screen and generally do not need to be
modified.
Additional guidance for changing specific parameters may be found in
the PrintScan.ini file.
PrintScan.ini folder location
Windows XP:
C:\Documents and Settings\All Users\Application
Data\kds_kodak\Picture Saver System PS50
Windows Vista and Windows 7:
C:\ProgramData\kds_kodak\Picture Saver System PS50
NOTE: These folders may be hidden. If so, you may need to go into the
Windows operating system to display them.
7-4
A-61760 September 2012
CD/DVD burning
An administrator may provide CD/DVD burning permissions for limited
user rights on Windows Professional and Ultimate versions.
To reach appropriate group permissions panel in Windows:
1. Click Start.
2. On Windows XP, click Run.
3. Type gpedit.msc in the dialog box.
4. Click OK.
5. In the Group policy interface, expand Computer Configuration,
expand Windows Settings, expand Security Settings, expand
Local Policies and double-click Security Options.
6. Set Devices: Restrict CD-ROM access to locally logged-on user
only to Enabled.
7. Set Devices: Allowed to format and eject removable media to
Administrators and Power Users or to Administrators and
Interactive Users.
Data removal
A-61760 September 2012
It is the responsibility of the operators of the Kodak Picture Saver
Scanning System to backup or delete customer orders and files from
the hard drive as needed. Deleting files using the delete options on the
Administrator System Setup screen or Windows Explorer and then
emptying the recycle bin performs a standard Windows file delete and
does not completely remove the files from the PC. A file shredder or
eraser should be used to completely remove files and folders so they
may not be recovered or restored from the hard drive.
7-5
Error codes
Use the table below as a guide to check possible solutions to problems
you may encounter when using the Kodak Picture Saver Scanning
System.
Error Code Message
Description
Access to destination folder XXXX could not Verify that there is a valid Target_Path for the scanned
be set exiting the application.
photos in the PrintScan.ini file.
Burn CD/DVD and Burn Picture CD buttons Run as Administrator or have the administrator give
are disabled.
limited rights users permission to burn CD/DVDs. Refer
to Chapter 7, Application Configuration.
10, 11, 12,
23
Failure to communicate with the scanner.
Please retry. If this error persists, please
contact Support with error code XX.
105, 106,
107, 108,
109
Failure to communicate with the flatbed
Verify that the flatbed is attached properly to the batch
scanner. Please retry. If this error persists,
scanner. If the error persists, contact Kodak Service.
please contact support with error code 10X.
110, 111,
112, 113,
114
Image Cleaner Tool failure. Please retry. If
this error persists, please contact support
with error code 11X.
Contact Kodak Service.
186
System configuration error. Please contact
Kodak support. Exiting....
If the problem persists, contact Kodak Service.
200
Error Code: 200. Invalid folder name.
The Kodak Picture Saver Scanning System PS50
cannot open orders created using the Kodak Picture
Saver Scanning System PS80 as they contain subfolders.
1001
Error Code: 1001. Installation error. Could
Verify that a valid PrintScan.ini file exists. Reinstall the
not fetch image processing defaults. Please Kodak Picture Saver Scanning System. Refer to
Chapter 2, Installation.
check PrintScan.ini. Exiting...
1002
Error Code: 1002. Could not read image
processing defaults from scannerprofile.
Continuing with default settings.
Verify that a valid scannerprofile file exists. Reinstall the
Kodak Picture Saver Scanning System. Refer to
Chapter 2, Installation.
1003
Error Code: 1003. Scanner driver version
incorrect. Refer to Kodak Picture Saver
Scanning System User’s Guide, Chapter 7
for more information.
The Picture Saver Scanning System software does not
support the installed Scanner drivers. Do not install
other drivers for the Picture Saver Scanning System. To
re-install the scanner drivers, turn off the scanner and
uninstall the scanner driver, then reinstall the Kodak
Picture Saver Scanning System Software CD. Reboot
the PC then power on the Picture Saver System
Scanner. This will re-install the correct version of the
Scanner drivers.
1004
Error Code: 1004. Product Registration was Verify that you have a good internet connection.
not completed successfully. Refer to the
Retry Product Registration. If the problem persists,
Kodak Picture Saver Scanning System
contact Kodak Service.
User’s Guide, Chapter 7 for more
information.
1005
Error code: 1005. Error writing to file
PrintScan.ini.
1006
Error code: 1006. There was a printer error. Make sure that your printer is properly installed and
connected.
7-6
Verify that the Picture Saver System Scanner is
attached, turned on and the green LED is on and steady.
If the error persists, contact Kodak Service.
Verify that a valid PrintScan.ini file exists. Reinstall the
Kodak Picture Saver Scanning System. Refer to the
section entitled “Application configuration” in this
chapter.
A-61760 September 2012
Error Code Message
Description
1007
Error code: 1007. Photo Selector
Verify that you have a good internet connection. Retry
Registration was not completed successfully. Photo Selector Accessory Registration. If the problem
Refer to the Kodak Picture Saver Scanning persists, contact Kodak Service.
System User Guide Chapter 7 for more
information.
1120
Image Cleaner Tool failure. Please retry. If
this error persists, please contact support
with error code XXXX.
If the problem persists, contact Kodak Service.
251085:
PS50
Start error. Kodak Picture Saver Scanning
System copy protection error. No license
found.
Verify that the supplied USB software dongle is plugged
into a USB 2.0 port on the PC.
4000
CD/DVD burning is not supported
• Run as Administrator or have the administrator give
limited rights users permission to burn CD/DVDs.
Refer to Chapter 7, Application Configuration.
• Verify a CD/DVD burner is installed on the PC.
4001
Please install Windows Feature Pack for
Storage.
Reinstall the Kodak Picture Saver Scanning System.
Refer to Chapter 2, Installation.
4002
Delegate Function error.
Reinstall the Kodak Picture Saver Scanning System.
Refer to Chapter 2, Installation.
4003
Recorder not supported.
Not all brands of CD/DVD burners are supported by the
Kodak Picture Saver Scanning System. Try using
another burner such as an external USB CD/DVD
burner. If you are using XP, upgrade to Vista or Windows
7 or use the software application that came with the CD/
DVD burner to burn the CD/DVD.
4004
Error getting supported recorder types.
Not all brands of CD/DVD burners are supported by the
Kodak Picture Saver Scanning System. Try using
another burner such as an external USB CD/DVD
burner. If you are using XP, upgrade to Vista or Windows
7 or use the software application that came with the CD/
DVD burner to burn the CD/DVD.
4005
Write failed.
Not all brands of CD/DVD burners are supported by the
Kodak Picture Saver Scanning System. Try using
another burner such as an external USB CD/DVD
burner. If you are using XP, upgrade to Vista or Windows
7 or use the software application that came with the CD/
DVD burner to burn the CD/DVD.
4006
Media Detection Error.
Verify that appropriate media has been inserted into the
CD/DVD burner, the burner has had time to spin up, and
the media is writable and has not been closed / finalized.
4007
File or Folder Does Not Fit on Disc.
Verify that appropriate media has been inserted into the
CD/DVD burner, the burner has had time to spin up, and
the media is writable and has not been closed / finalized.
4008
Create File System Error.
Verify the selected files and folders will fit on the CD/
DVD media.
4009
Error adding file.
Verify a file with that name does not already exist on the
CD/DVD media and that the media has sufficient free
space for the files.
4010
Error adding folder.
Verify a folder with that name does not already exist on
the CD/DVD media and the media has sufficient free
space for the folder.
A-61760 September 2012
7-7
Error Code Message
Description
4011
Erase Media failed.
Verify that appropriate media has been inserted into the
CD/DVD burner, the burner has had time to spin up, and
the media is re-writable.
4012
Error Burning Disc!
Verify that appropriate media has been inserted into the
CD/DVD burner, the burner has had time to spin up, and
the media is writable and has not been closed / finalized.
4013
Error Formatting Disc!
Verify that appropriate media has been inserted into the
CD/DVD burner, the burner has had time to spin up, and
the media is re-writable.
5001
Unhandled exception
Contact Kodak Service.
5002
Argument error
Reinstall the Kodak Picture Saver Scanning System and
Photo Selector Accessory. If the problem persists,
contact Kodak Service.
5003
Unable to segment images
If the problem persists, contact Kodak Service.
5004
Unable to create directory
Verify there is sufficient free disk space to save the files.
If the problem persists, contact Kodak Service.
5005
Unable to export image
Verify there is sufficient free disk space to save the files.
If the problem persists, contact Kodak Service.
5006
Unable to save file
Verify there is sufficient free disk space to save the files.
If the problem persists, contact Kodak Service.
5007
Unable to resize bitmap
If the problem persists, contact Kodak Service
5008
Unable to resize image
If the problem persists, contact Kodak Service
5009
Unable to open image file
If the problem persists, contact Kodak Service
5010
Unable to construct image list
If the problem persists, contact Kodak Service
6017
Please check if the correct USB license
dongle has been inserted in your PCs USB
port. If this error persists, please contact
support with error code 6017.
Verify that the supplied USB software dongle is plugged
into a USB 2.0 port on the PC.
6XXX
Verify that the supplied USB software dongle is plugged
Please check if the correct USB License
dongle has been inserted into your PCs USB into a USB 2.0 port on the PC
port. If this error persists, please contact
support with error code 6XXX.
7000
Please check if WIBU runtime has been
installed. WIBU runtime (WkRuntime.exe)
can be found on the CD provided with the
Kodak scanner.
Contact Kodak Service.
7001
License .dat file not found. Please contact
support with error code 7001.
Contact Kodak Service.
8001
Profile error. Please verify that scanner
default profile settings have not been
altered. If this error persists, please contact
support with error code 8001.
Reinstall the Kodak Picture Saver Scanning System.
Refer to Chapter 2, Installation.
8002
Scanner name not found. Please verify that
scanner default profile settings have not
been altered. If this error persists, please
contact support with error code 8002.
Reinstall the Kodak Picture Saver Scanning System.
Refer to Chapter 2, Installation.
7-8
A-61760 September 2012
Error Code Message
Description
9001, 9002, TWAIN drivers could not be started. Please
9003
retry. If this error persists, please contact
support with error code 900X.
Reinstall the Kodak Picture Saver Scanning System.
Refer to the section entitled, “Installing the Kodak driver
software” in Chapter 2.
9004
Could not find a Kodak scanner.
Be sure that the Picture Saver System Scanner is
attached, turned on and the green LED is on and steady.
If the error persists, contact Kodak Service.
9005
Please check if scanner is available to
Kodak Picture Saver System.
Verify that the Picture Saver System Scanner is
connected and powered on. If the error persists, contact
Kodak Service.
9006, 9007, Could not connect to the scanner. Please
9008, 9010 retry. If this error persists, please contact
support with error code 900X.
Reinstall the Kodak Picture Saver Scanning System.
Refer to Chapter 2, Installation.
9009
Could not get the image from the scanner.
Please retry. If this error persists, please
contact support with error code 9009.
Contact Kodak Service.
9011
Could not run the scanner. Please retry. If
this error persists, please contact support
with error code 9011.
Reinstall the Kodak Picture Saver Scanning System.
Refer to Chapter 2, Installation.
9XXX
Could not connect to scanner. Please retry. If Verify that the supplied USB software dongle is plugged
this error persists, please contact support
into a USB 2.0 port on the PC.
with error code XXXX.
LED codes
Following is a listing of the codes that may be displayed in the Function
window. When an error occurs, the red indicator will blink and a number
is displayed in the Function window.
Code
0
Power saver mode
Scanning....
The scanner is scanning documents.
U5,
E3
U6
Rescan documents
U8
Multifeed
U9
Paper jam
USB cable has been disconnected while
the scanner was running.
Open the scanner cover and verify that all
documents are removed from the paper
path. Then close the scanner cover.
• A multifeed document has been
detected. Clear the multifeed condition.
• The document you are trying to scan is
too long.
Document jam or the paper path is
blocked. Clear the documents from the
paper path.
• Be sure all cables are connected
properly.
• Turn power off and then on again. If the
problem persists, call Service.
• Turn power off and then on again. If the
problem persists, call Service.
E2,
E4,
E7
Check USB cable
Remedy
Indicates that there is no USB connection
or the USB cable is not securely attached.
No action required.
E1,
E2
A-61760 September 2012
Message
Clear paper path and
close cover
7-9
Log files
The Kodak Picture Saver Scanning System PS50 creates an error log
file in the scan output folder (c:/Scanned_Pictures):
• Error log — PS50ErrorLog.txt contains a running list of any error
conditions and may be used to diagnose problems with the system.
Contact information
1. Visit www.Kodak.com/go/disupport to obtain the most current phone
number for your country.
2. When calling, please have the following information ready:
•
•
•
•
7-10
A description of your problem.
The scanner serial number.
Computer configuration.
Software application you are using.
A-61760 September 2012
Appendix A
Specifications
This appendix provides scanner specifications and system
requirements.
Scanner Type/Speed
The Kodak PS50 Scanner is a duplex scanner which provides scanning at up to
50 4x6 photos per minute in color at 300 dpi in landscape mode.
Scanning Technology
CCD type
Grayscale output bit depth is 256 levels (8-bit)
Color capture bit depth is 48 bits (16 x 3)
Color output bit depth is 24 bits (8 x 3)
Output Resolutions
300, 600 and 1200 dpi
File Format Output
Single-page JPEG photo scanning
Minimum Photo Size
63.5 x 50 mm (2.5 x 2 in.)
Maximum Photo Size
Scanner — 215 x 863 mm (8.5 x 34 in.)
Legal Flatbed — 216 x 356 mm (8.5 x 14 in.)
A3 Flatbed — 302 x 461 mm (11.92 x 18.15 in.)
Paper Weight
34 g/m2 to 413 g/m2 (9 to 110 lbs.)
ADF Capacity
Up to 25 mixed-size photos per batch; ADF capacity: 75 sheets
Continuous feeding of photos is supported
Weights up to 34-413 g/m² (9-110 lb.) paper; ID card thickness: up to 1.25 mm
(0.05 in.)
Recommended Daily
Volume
1,500 photos
Illumination
Dual LED
Electrical requirements
100 - 240 V (international), 50/60 Hz
Electric rating
24 Vdc; 1.875 A
Scanner Dimensions
Height: 246 mm / 9.7 in. (not including input tray)
Width: 330 mm / 13 in.
Depth: 162 mm / 6.3 in. (not including input tray and output tray)
Scanner Weight
5.5 kg (12 lbs)
Host Connection
USB 2.0
Operating Temperature
10°C to 35°C
Humidity
15 to 76%
Power Consumption Scanner
Off mode: <0.35 watts
Sleep mode: <4 watts
Running: <32 watts
Acoustic Noise
(Sound Pressure level)
Operating: less than 58 dB(A)
Off mode: less than 30 dB(A)
Bundled Software
Kodak Picture Saver System Software
SmartTouch Functionality
A-61760 September 2012
A-1
System requirements
Following is the minimum recommended system configuration to run
the Kodak Picture Saver Scanning System:
• Intel Core 2, 2 GHz Duo processor or equivalent, 250 MB free hard
disk space, 1 GB RAM for 300 dpi (3 GB for Windows 7) or 4 GB
RAM for 600 and 1200 dpi (4 GB for Windows 7)
• Two USB 2.0 ports
(1 for the scanner, 1 for the USB software dongle)
NOTE: If the Kodak Photo Selector Accessory is installed, two
additional USB 2.0 ports are required.
• Supported operating systems. All operating systems must support
USB 2.0 with administrator privileges for installation:
- Microsoft Windows XP, Service Pack 3
- Windows XP 64, Service Pack 2
- Windows Vista, Service Pack 2
- Windows Vista, 64-bit, Service Pack 2
- Windows 7, 32-bit, Service Pack 1
- Windows 7, 64-bit, Service Pack 1
• The Kodak Picture Saver Scanning System is not officially supported
on non-native Windows PCs including running Windows operating
system in a virtual machine or dual boot. Only limited technical
support is available for these environments with no guarantees.
• Microsoft .NET Framework 2.0 and 4.0 (included on the Installation
CD).
• Internet connection for Product Registration.
NOTE: Depending on how you want to manage the images after
scanning, you will need supporting devices such as; CD/DVD
Writer, photo printer, etc
A-2
A-61760 September 2012
Appendix B Warranty - US and Canada only
Congratulations on the purchase of a Kodak Scanner. Kodak Scanners are designed to provide end users with the highest
performance and reliability. All Kodak Scanners are covered by the following Limited Warranty.
Limited Warranty for Kodak Scanners
Eastman Kodak Company provides the following Limited Warranty on Kodak Scanners (excluding spare parts and
consumables) distributed by Kodak or through Kodak’s authorized distribution channels:
Kodak warrants that a Kodak Scanner, from the time of sale through the Limited Warranty period applicable to the Product, will
be free of defects in materials or workmanship and will conform to the performance specifications applicable for the particular
Kodak Scanner.
All Kodak Scanners are subject to the Warranty Exclusions described below. A Kodak Scanner found to be defective or which
does not conform to the product specifications will be repaired or replaced with new or refurbished product at Kodak’s option.
Purchasers may determine the applicable Limited Warranty period for the Kodak Scanners purchased by calling (800) 8221414, or by visiting www.Kodak.com/go/disupport or by reviewing the Limited Warranty Summary Card enclosed with the Kodak
Scanner.
Proof of purchase is required to demonstrate eligibility for warranty service.
Warranty exclusions
Kodak’s Limited Warranty does not apply to a Kodak Scanner that has been subjected to physical damage after purchase,
caused, for example, by casualty, accident, acts of God or transportation, including (a) by a failure to properly package and ship
the Scanner back to Kodak for warranty service in accordance with Kodak’s then current Packaging and Shipping Guidelines,
including failure to replace the shipping restraint prior to shipping, or by a failure to remove the shipping restraint prior to use; (b)
resulting from the user’s installation, system integration, programming, re-installation of user operating systems or applications
software, systems engineering, relocation, reconstruction of data, or removal of the product or any component (including
breakage of a connector, cover, glass, pins, or seal); (c) from service, modification or repair not performed by Kodak or a service
provider authorized by Kodak or by tampering, use of counterfeit or other non-Kodak components, assemblies, accessories, or
modules; (d) by misuse, unreasonable handling or maintenance, mistreatment, operator error, failure to provide proper
supervision or maintenance, including use of cleaning products or other accessories not approved by Kodak or use in
contravention of recommended procedures or specifications; (e) by environmental conditions (such as excessive heat or other
unsuitable physical operating environment), corrosion, staining, electrical work external to the product or failure to provide
electro-static discharge (ESD) protection; (f) by failure to install firmware updates or releases available for the product and (g) by
such other supplemental exclusions published from time to time online at www.Kodak.com/go/disupport or by calling (800) 8221414.
Kodak provides no Limited Warranty for products purchased from countries other than the United States. Purchasers of
products from foreign distribution channels must seek warranty coverage, if any, through the original source of purchase.
Kodak provides no Limited Warranty for products that are purchased as part of a third party manufacturer’s product, computer
system or other electronic device.
Any warranty for these products is provided by the OEM (Original Equipment Manufacturer) as part of that manufacturer’s
product or system.
The replacement product assumes the remainder of the Limited Warranty period applicable to the defective product or thirty
(30) days, whichever is longer.
Installation Warning and Disclaimer
KODAK WILL NOT BE RESPONSIBLE FOR ANY CONSEQUENTIAL OR INCIDENTAL DAMAGES RESULTING FROM THE
SALE, INSTALLATION, USE, SERVICING OR IMPROPER FUNCTIONING OF THIS PRODUCT, REGARDLESS OF THE
CAUSE. SUCH DAMAGES FOR WHICH KODAK WILL NOT BE RESPONSIBLE, INCLUDE, BUT ARE NOT LIMITED TO,
LOSS OF REVENUE OR PROFIT, LOSS OF DATA, DOWNTIME COSTS, LOSS OF USE OF THE PRODUCT, COST OF ANY
SUBSTITUTE PRODUCT, FACILITIES OR SERVICES OR CLAIMS OF CUSTOMERS FOR SUCH DAMAGES.
If there is any conflict between other sections of this appendix and the Limited Warranty, the terms of the Limited Warranty
prevail.
A-61760 September 2012
B-1
How to obtain Limited Warranty service
Kodak Scanners are supplied with information on unpacking, setup, installation and operation. Careful reading of the User’s
Guide will answer most of the technical questions the end user might have regarding proper installation, operation and
maintenance of the product. However, should additional technical support be required, you may visit our website at:
www.Kodak.com/go/disupport or contact:
Kodak’s Response Center: (800) 822-1414
The Response Center is available Monday – Friday (excluding Kodak holidays) 8 a.m. to 5 p.m. local time.
Before placing the call, the eligible purchaser should have the Kodak Scanner model number, part number, serial number and
proof of purchase available. The eligible purchaser should also be prepared to provide a description of the problem.
Response Center personnel will assist the end user in resolving the problem over the phone. The end user may be asked to run
some simple, self-diagnostic tests and report the resulting status and error code messages. This will assist the Response
Center in determining if the problem is the Kodak Scanner or another component and if the problem can be resolved over the
phone. If the Response Center determines a hardware problem exists that is covered either under the Limited Warranty or a
purchased Maintenance Agreement, a Return Material Authorization Number (RMA) will be assigned as needed, a service
request will be initiated and repair or replacement procedures will follow.
Packaging and shipping guidelines
Purchaser must ship all warranty returns in a method that guarantees full protection of the product from shipping damage.
Failure to do so will void the Kodak Scanner warranty. Kodak advises the purchaser to keep the original box and packing
materials for storing or shipping. Kodak is not responsible for issues related to shipping damage. The purchaser must return
only the Kodak Scanner. Prior to shipment, purchaser must remove and retain all “add-on” items, (i.e. adapters, cables,
software, manuals, etc.). Kodak accepts no responsibility for these items and they will not be returned with the repaired or
replacement Kodak Scanner. All products should be returned to Kodak in the original shipping container, or an authorized
packaging box for the units being returned. Purchaser must install the shipping restraint before the Kodak Scanner is shipped.
When the original packaging is not available, contact Kodak’s Response Center at (800) 822-1414 for part numbers and
replacement packaging ordering information.
Return procedure
Eligible purchasers seeking services for Kodak Scanners covered under this Limited Warranty must obtain a Return Material
Authorization number (“RMA”) by calling (800) 822-1414 and within ten (10) business days from the date of issuance of the
RMA must return the Kodak Scanner to the address designated in the RMA at the end user’s own expense and risk, in
compliance with Kodak’s current Packaging and Shipping Guidelines.
Any defective products or parts replaced by Kodak become the property of Kodak.
Customer responsibility
BY REQUESTING SERVICE, THE ELIGIBLE PURCHASER ACKNOWLEDGES THE TERMS OF THE LIMITED WARRANTY,
INCLUDING THE DISCLAIMER AND LIMITATION OF LIABILITY PROVISIONS. PRIOR TO SEEKING SERVICE, THE END
USER MUST BACK-UP ANY DATA OR FILES THAT MAY BECOME DAMAGED OR LOST. KODAK IS, WITHOUT
LIMITATION, NOT RESPONSIBLE FOR LOST OR DAMAGED DATA OR FILES.
Warranty Service descriptions
Eastman Kodak Company (Kodak) offers a range of service programs to support its Limited Warranty and to assist with the use
and care of the Kodak Scanner (“Service Methods”). A Kodak Scanner represents an important investment. Kodak Scanners
provide the productivity needed to stay competitive. The sudden loss of this productivity, even temporarily, could seriously affect
the ability to meet commitments. Downtime can be very expensive, not just in the cost of the repair but also in time lost. To help
alleviate these problems, Kodak may use one of the service methods listed below, depending upon product type, in providing
service under its Limited Warranty.
Included with selected Kodak Scanners is a Limited Warranty Registration card and a Limited Warranty Summary card. The
Limited Warranty Summary card is specific by model. The Limited Warranty Summary card contains important warranty
information, including the model number and the Limited Warranty. Refer to the Limited Warranty Summary card to determine
the available Service Methods applicable to the particular Kodak Scanner.
If the Limited Warranty Registration card or Limited Warranty Summary card cannot be located, additional information may be
obtained about the product, including updated warranty and service program information and restrictions, online at
www.Kodak.com/go/disupport or by phone at (800) 822-1414.
To avoid service delays, Kodak urges end users to complete and return the enclosed Limited Warranty Registration Card at the
first opportunity. If you cannot locate the Limited Warranty Registration card, you may register online at www.Kodak.com/go/
disupport or by phone at (800) 822-1414.
Kodak also provides a variety of service programs that may be purchased to assist with the use and care of the Kodak Scanner.
Kodak is committed to providing its customers with quality, performance, reliability and service under the Limited Warranty.
B-2
A-61760 September 2012
On-site service
For the selected Kodak Scanner, and after the Response Center verifies a hardware problem, a service call will be opened and
logged. An Kodak Field Engineer will be dispatched to the product location to perform repair service if the product is located
within the contiguous forty-eight (48) United States, in certain areas of Alaska and Hawaii, and if there are no security, safety or
physical requirements that would restrict the Field Engineer’s access to the scanner. For additional information on service
areas, visit our website at: www.Kodak.com/go/docimaging. On-Site Service will be provided between the hours of 8 a.m. and 5
p.m. local time, Monday through Friday (excluding Kodak holidays).
AUR
AUR may be one of the easiest and most comprehensive service offerings in the industry. In the unlikely event of a product
defect, for eligible purchasers of certain Kodak Scanners, Kodak will replace that product within two business days.
The AUR provides advance replacement on specific failed or broken Kodak Scanner. To be eligible to take advantage of the
AUR, the eligible purchaser must obtain an RMA number, sign an Advance Replacement Agreement and provide a credit card
deposit to secure the replacement product. The RMA number should be kept in the event that the status of the replacement
product needs to be checked. The eligible purchaser will be asked for the address where the replacement product is to be
shipped. The eligible purchaser will also be faxed packing and shipping instructions for the malfunctioning product. The eligible
purchaser will then receive a replacement product within 2 business days after the service call initiation and Kodak’s receipt of
the signed agreement. The malfunctioning product must be received by Kodak within ten (10) days of the end user’s receipt of
the replacement product or the end user’s credit card will be charged the list price of the replacement product. Shipment of
replacement Imaging Product will be made at Kodak’s expense and choice of freight carrier. Shipments not made under
Kodak’s directions and choice of freight carrier may void the Limited Warranty.
Before the product is returned to Kodak, be sure to remove all options and accessories (which include power cord,
documentation, etc.) that are not covered by the Limited Warranty. The box and packaging in which the replacement product
was shipped must be used to return the malfunctioning product. If the malfunctioning product is not returned in the box and
packaging in which the replacement product was shipped the Limited Warranty may be voided. The Return Material
Authorization Number (“RMA”) must be clearly marked on the outside of the box to ensure proper receipt and credit of the
defective product.
Depot service
If the Kodak Scanner is not eligible for Advance Exchange or On-Site Service, an eligible purchaser may utilize our Depot
Repair Service. The eligible purchaser will be instructed to ship the product to the nearest authorized Depot Repair Center.
Product must be shipped at the eligible purchaser’s risk and expense to the repair center. Before the product is returned to the
repair center, be sure to remove all options and accessories (which include power cord, documentation, etc.) not covered by the
Limited Warranty. All products should be returned to Kodak in the original shipping container, or in a recommended packing box.
The Kodak Scanner must have the shipping restraint installed before it is shipped. When the original packaging is not available,
contact Kodak’s Response Center at (800) 822-1414, for ordering information. Eligible purchasers seeking services for Kodak
Scanners must obtain a Return Material Authorization number (“RMA”) by calling (800) 822-1414, and within ten (10) business
days from the date of issuance of the RMA must return the Kodak Scanner to the address designated in the RMA at the end
user’s own expense and risk. The Return Material Authorization Number (“RMA”) must be clearly marked on the outside of the
box to ensure proper receipt and credit of the defective product.
Upon receipt of the product, the repair center will repair product within ten (10) business days. The repaired product will be
shipped back two-day express mail at no expense to the eligible purchaser.
Important restrictions
Eligibility: The Advance Exchange Program and the Depot Service are available to eligible purchasers in the fifty (50) United
States, and On-Site Service is available in the contiguous forty-eight (48) states and in certain areas of Alaska and Hawaii for
products purchased from authorized distributors of Kodak. The Kodak Scanner will be ineligible for any service under warranty
if the product falls under any of Kodak’s then-current Warranty Exclusions, including a purchaser’s failure to return defective
products to Kodak in compliance with Kodak’s then current Packaging and Shipping Guidelines. Persons are only considered
“eligible purchasers” or “end users” if they originally purchased the Kodak Scanner for their own personal or business use, and
not for resale.
Consumables: Consumables are items that wear out under normal use and must be replaced by the end user as needed.
Consumables, supplies, other expendable items and those items identified as being the user’s responsibility in the User’s Guide
are not covered under the Limited Warranty.
If any of the above excluded parts or services are required, they may be available through an authorized service provider at
their hourly rates and at terms then in effect.
Any defective products or parts replaced by Kodak become the property of Kodak.
A-61760 September 2012
B-3
Contacting Kodak
For Information on Kodak Scanners:
Website: www.Kodak.com/go/docimaging
For U.S. Service, Repair and Technical Assistance by Telephone:
Telephone technical support is available Monday-Friday between the hours of 8 a.m. to 5 p.m. (local time) excluding Kodak
holidays. Phone: (800) 822-1414
For Technical Documentation and FAQ’s available 24 hours a day:
Website: www.Kodak.com/go/docimaging
For Service Program Information
Website: www.Kodak.com
Phone: (800) 822-1414
B-4
A-61760 September 2012
Appendix C Software License Agreement
EASTMAN KODAK COMPANY
KODAK Picture Saver Scanning System
SOFTWARE LICENSE AGREEMENT
Read the following terms and conditions carefully before using this Software. Use of this Software indicates your acceptance of
these terms and conditions. If you do not agree with them, you should promptly return the package in its entirety for a full refund.
LICENSE
Grant of License. Eastman Kodak Company (“Kodak”) grants you a license to use one copy of the enclosed software
program(s) (the “Software”) subject to the license restrictions set forth below.
Restrictions on Use. You may use the software only on one computer. For each additional computer on which the Software is
run, you will need an additional licensed copy of the Software.
Transfer of the Software. You may permanently transfer the Software to another party if the other party agrees to accept the
terms and conditions of this license and you retain no copies of the Software.
Copyright. The Software is owned by Kodak or its suppliers and protected by copyright laws and International treaties. You may
not reverse engineer, decompile, or disassemble the Software. If this Software is used within a country of the European Union,
nothing in this Agreement shall be construed as restricting any rights available under the European Community Software
Directive (91/250/EEC).
Term. This license is effective until terminated. You may terminate it at any time by destroying the Software. It will also terminate
if you fail to comply with any term or condition of this Agreement. You agree upon such termination to destroy the Software.
For a period of 90 days after the date of delivery of the Software and photo scanning system to you, as evidenced by a copy of
your purchase receipt, Kodak warrants (i) the Software will perform substantially in accordance with the accompanying
documentation, and (ii) the media on which the Software is furnished will be free from defects in materials and workmanship
under normal use.
Kodak does not warrant that the functions contained in the Software will meet your requirements or that the operation of the
Software will be uninterrupted or error free. You assume responsibility for operation of the Software to achieve your intended
results, and for the installation, use, and results obtained from the Software.
Hardware Key: Kodak will replace damaged hardware keys upon the return of a damaged hardware key while the photo
scanning system is under warranty or a service maintenance agreement. Lost or stolen keys can be replaced at a reduced price
while the photo scanning system is under warranty or a service maintenance agreement.
Subject to any applicable legislation which prohibits the following exclusions, KODAK MAKES NO OTHER WARRANTIES OF
ANY KIND, EITHER EXPRESS OR IMPLIED, INCLUDING THE IMPLIED WARRANTIES OF MERCHANTABILITY AND
FITNESS FOR A PARTICULAR PURPOSE. Some states and countries, including Australia, do not allow the exclusion of
implied warranties, or have legislation that imposes certain statutory warranties that cannot be excluded, so the above exclusion
may not apply to you. This warranty gives you specific legal rights and you may also have other rights.
LIMITATIONS OF REMEDIES
Subject to any applicable legislation which prohibits the following limitations, Kodak's entire liability and your exclusive remedy
shall be, at Kodak's option either (a) the repair or replacement of the Software or any media not meeting Kodak's "Limited
Warranty" that is returned to Kodak or your dealer with a copy of your receipt, or (b) the return of the price you paid for the
Software, provided you have proof of the purchase price you paid. These remedies are not available if failure of the Software or
media is the result of misuse, abuse, or a failure to follow the operating instructions in the accompanying written materials.
IN NO EVENT WILL KODAK OR ITS SUPPLIERS OR DEALERS BE LIABLE TO YOU FOR ANY INCIDENTAL OR
CONSEQUENTIAL DAMAGES, INCLUDING ANY LOST PROFITS, LOST SAVINGS, OR OTHER DAMAGES ARISING OUT
OF THE USE OR INABILITY TO USE THE SOFTWARE EVEN IF ADVISED OF THE POSSIBILITY OF SUCH DAMAGES.
Some states and countries, including Australia, do not allow the limitation or exclusion of liability for incidental or consequential
damages, or have legislation which restricts the limitation or exclusion of liability, so the above limitation may not apply to you.
A-61760 September 2012
C-1
GENERAL
If the Software was purchased in the United States, this Agreement is governed by the laws of the State of New York. If
purchased outside the United States, this Agreement is governed by the laws of the country in which it was purchased.
U.S. GOVERNMENT RESTRICTED RIGHTS
The SOFTWARE and documentation are provided with RESTRICTED RIGHTS. Use, duplication, or disclosure by the
Government is subject to restrictions as set forth in subdivision (c)(1)(ii) of The Rights in Technical Data and Computer Software
clause DFAR 252.227-7013 or such other applicable government or agency regulation providing equivalent protection.
Contractor / manufacturer is Eastman Kodak Company, 343 State Street, Rochester, New York, 14650.
C-2
A-61760 September 2012