1
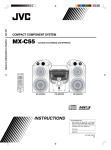
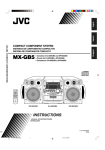
COMPACT HI-FI COMPONENT SYSTEM
K-531
INSTRUCTION MANUAL
GVT0353-002A (E, X)
K-531[E_X].indb 1
12.8.1 11:40:02 AM
Safety precautions
Caution: Read this page carefully to ensure safe operation.
THE LIGHTNING FLASH WITH ARROWHEAD SYMBOL, WITHIN AN EQUILATERAL
TRIANGLE, IS INTENDED TO ALERT THE USER TO THE PRESENCE OF UNINSULATED
“DANGEROUS VOLTAGE” WITHIN THE PRODUCT’S ENCLOSURE THAT MAY BE OF
SUFFICIENT MAGNITUDE TO CONSTITUTE A RISK OF ELECTRIC SHOCK TO PERSONS.
THE EXCLAMATION POINT WITHIN AN EQUILATERAL TRIANGLE IS INTENDED TO
ALERT THE USER TO THE PRESENCE OF IMPORTANT OPERATING AND MAINTENANCE
(SERVICING) INSTRUCTIONS IN THE LITERATURE ACCOMPANYING THE APPLIANCE.
Before Applying Power
Units are designed for operation as follows.
Australia: AC 240 V only
Europe: AC 230 V only
WARNING : TO PREVENT FIRE OR ELECTRIC SHOCK, DO NOT EXPOSE
THIS APPLIANCE TO RAIN OR MOISTURE.
CAUTION: TO REDUCE THE RISK OF ELECTRIC SHOCK, DO NOT REMOVE
COVER (OR BACK). NO USER-SERVICEABLE PARTS INSIDE. REFER
SERVICING TO QUALIFIED SERVICE PERSONNEL.
2
K-531
K-531[E_X].indb 2
12.8.1 11:40:03 AM
Safety precautions
IMPORTANT FOR LASER PRODUCTS
1. CLASS 1 LASER PRODUCT
2. CAUTION: Do not open the top cover or cabinet. There are no user serviceable parts inside the unit;
leave all servicing to qualified service personnel.
CAUTION
z Do not block the ventilation openings or
holes. (If the ventilation openings or holes
are blocked by a newspaper or cloth, etc.,
the heat may not be able to get out.)
z Do not place any naked flame sources, such
as lighted candles, on the apparatus.
z When discarding batteries, environmental
problems must be considered and local
rules or laws governing the disposal of these
batteries must be followed strictly.
z Do not expose this apparatus to rain,
moisture, dripping or splashing and that no
objects filled with liquids, such as vases, shall
be placed on the apparatus.
Information on Disposal of Old Electrical
and Electronic Equipment and Batteries
(applicable for EU countries that have
adopted separate waste collection
systems)
Products and batteries with the
symbol (crossed-out wheeled bin)
cannot be disposed as household
waste.
Old electrical and electronic
equipment and batteries should
be recycled at a facility capable
of handling these items and their
waste by products.
Contact your local authority for
details in locating a recycle facility
nearest to you.
Proper recycling and waste disposal
will help conserve resources whilst
preventing detrimental effects on
our health and the environment.
Notice: The sign “Pb” below
the symbol for batteries
indicates that this battery
contains lead.
English
K-531[E_X].indb 3
3
12.8.1 11:40:03 AM
Safety precautions
z Declaration of Conformity with regard to the
EMC Directive 2004/108/EC
z Declaration of Conformity with regard to the
R&TTE Directive 1999/5/EC
Manufacturer:
JVC KENWOOD Corporation
3-12, Moriya-cho, Kanagawa-ku, Yokohama-shi,
Kanagawa 221-0022, Japan
EU Representative's:
Kenwood Electronics Europe BV
Amsterdamseweg 37, 1422 AC UITHOORN, The
Netherlands
4
English
Hereby, KENWOOD declares that this System R-K531 is in compliance
with the essential requirements and other relevant provision of
Directive 1999/5/EC.
Français
Par la présente, KENWOOD déclare que cet appareil R-K531 est
conforme aux exigences essentielles et aux autres dispositions
pertinentes de la Directive 1999/5/CE.
Deutsch
KENWOOD erklärt hiermit, dass dieses Gerät R-K531 den wesentlichen
Anforderungen und anderen relevanten Bestimmungen der Richtlinie
1999/5/EG entspricht.
Nederlands
Hierbij verklaart KENWOOD dat dit apparaat R-K531 voldoet aan de
essentiële vereisten en andere relevante bepalingen van richtlijn
1999/5/EG.
Italiano
Con la presente KENWOOD dichiara che questa unità R-K531 è
conforme ai requisiti essenziali ed alle altre disposizioni pertinenti
stabilite dalla direttiva 1999/5/CE.
Español
Por medio de la presente Kenwood declara que el R-K531 cumple con
los requisitos esenciales y cualesquiera otras disposiciones aplicables
o exigibles de la Directiva 1999/5/CE.
K-531
K-531[E_X].indb 4
12.8.1 11:40:03 AM
Safety Precautions
Contents
To ensure safety, read the items by this mark carefully.
Safety precautions.................... 2
Introduction .................................... 6
Connection ...................................... 8
Part names and functions .............. 10
Important information ................... 14
Starts playback ................................................. 32
Adjusting the input level for AUX
source ............................................................. 32
Digital audio players, etc.
Starts playback ................................................. 33
Adjusting the input level .............................. 33
CD
Starts playback .................................................
Other operations during playback ............
Random play .....................................................
Repeat play ........................................................
Program play.....................................................
External components
18
19
20
20
21
Radio
Listening to FM/AM radio............................. 22
Presetting stations automatically
(AUTO MEMORY) ........................................ 23
Presetting stations manually....................... 23
Radio Data System
Displaying Program Service (PS) name ... 24
Searching for a desired Program Type
(PTY Search).................................................. 24
BLUETOOTH
Pairing this System with a BLUETOOTH
device ............................................................. 25
Listening to a BLUETOOTH device ............ 26
Other operations during playback ............ 26
To improve the sound of the BLUETOOTH
device (BLUETOOTH sound
enhancer) ...................................................... 26
Other BLUETOOTH settings ......................... 27
iPod/iPhone
Starts playback ................................................. 28
Other operations during playback ............ 29
USB recording
Recording all tracks of a CD .........................
Recording a single track of a CD ................
Recording desired tracks in desired
order ...............................................................
Recording from TUNER, AUDIO IN, AUX
source .............................................................
Selecting the recording sound quality ....
Dividing the recorded file automatically ...
34
34
34
34
35
35
Audio settings
Adjusting super-bass tones (D-BASS) ...... 36
Adjusting the range levels (TONE) ............ 36
Matching the acoustic effect to the
listening environment (CONEQ) ........... 37
Setting Supreme EX........................................ 37
Adjusting the volume balance of the left
and right speakers ..................................... 37
Timer settings
Setting the sleep timer (SLEEP) .................. 38
Setting the program timer (TIMER SET)... 39
Other settings
Setting the display brightness
(DIMMER).......................................................
Setting the display saver
(DISP. SAVER) ...............................................
Setting the System clock ..............................
Setting the Auto Power Save (A.P.S) ........
41
41
41
42
USB playback
Starts playback ................................................. 30
Deleting the audio files from the USB
device ............................................................. 30
Other operations during playback ............ 31
Troubleshooting ............................. 43
Specifications.................................. 46
English
K-531[E_X].indb 5
5
12.8.1 11:40:04 AM
Introduction
How to read this manual
z The explanations in this manual primarily describe operation procedures using the remote control. If the
main unit has the same or similar button names, they can also be used for the operations.
z The displays shown in this instruction manual may differ from the actual displays.
Accessories
If any accessories are missing, or if the unit is damaged or fails to operate, notify your dealer (or shipper)
immediately. We recommend that you retain the original carton and packing materials in case you need to
move or ship the unit in the future.
AM loop antenna (×1)
Remote control (×1)
Speaker cords (2 m) (×2)
RC-RP0503E
FM indoor antenna (×1)
Batteries for remote control
(R03/AAA) (×2)
Transporting or moving the System
Before transporting or moving the System....
1 Remove any disc from the main unit. (P.18)
Press [CD £¥8] to make sure that “NO DISC” appears on the display.
2 Turn off the System.
3 Make sure any other components connected to the System are turned off.
4 Disconnect all the cords and cables.
6
K-531
K-531[E_X].indb 6
12.8.1 11:40:04 AM
Introduction
Installing the System
z Always install the System on a flat, stable surface. When installing the System on a stand of some sort, be
sure to check the strength of the stand.
z The speakers are not magnetically shielded. The magnets used in the speakers may cause color
irregularities on CRT TVs or CRT monitors. Do not set up the speakers too close to a TV or a monitor.
Left speaker
CAUTION
Main unit
Right speaker
Proper ventilation
z Do not place any object on the System that may hinder heat radiation.
z Do not place the System upside-down or lay it on its side.
z Do not cover the System with a cloth or place it on a carpet or blanket.
z Do not place the System in a narrow space that hinders the ventilation.
z Leave the spaces specified below around the cabinets of the main unit.
Top panel: 50 cm or more
Side panel: 10 cm or more
Back panel: 10 cm or more
Power supply
z Install the System so the power outlet is easily accessible, and unplug the power
cord from the power outlet immediately in case of any trouble.
z The power supply to the System is not shut down completely by simply setting the
power switch to “OFF.”
To shut down the power supply completely, unplug the power cord.
Installing the speakers
The sound will vary depending on the positioning of the speakers. To get the best possible sound quality or
the best acoustic effect, note the guidelines below.
z Ensure that the areas around the left and right speakers are as identical as possible. Set up the left and right
speakers away from the wall and hang thick curtains on any windows to minimize echoes or reverberation.
z Place the left and right speakers as far apart as possible.
z Position the speakers at the same height as your ears when you are using the System.
English
K-531[E_X].indb 7
7
12.8.1 11:40:04 AM
Connection
CAUTION
z Do not plug the AC power cord into an AC wall outlet until all the connections are
completed.
z Before disconnecting any cords or cables, always turn the System off and unplug
the power cord from AC wall outlet.
z Since antenna installation requires skill and experience, always consult your dealer
before installation. The antenna should be located away from power lines. If the
antenna falls over, contact with a power line creates the risk of electric shock.
Main connections
Speakers*
Preparing the ends of the speaker cords
* Both left and right speakers are
the same type.
Loose cords may short-circuit and
cause damage to the System.
Twist
Connecting the speaker cords to the speaker
Connecting the speaker cords to the main unit
Speaker cord
(supplied)
Striped
AM loop antenna
(supplied)
Without
stripe
Rear view
White
To AC wall outlet
Connecting the FM antenna cord
Use some force to insert the FM antenna cord
into the terminal if it is hard to connect.
Point in the direction that gives
the best reception, and fix using
tape, etc.
8
Black
Keep the AM loop
antenna cable
wrapped around
the AM loop
antenna frame,
otherwise the
effectiveness and
sensitivity of the
AM loop antenna
may be reduced.
Insert by pushing
until a clicking
sound is heard.
Connecting the AM antenna cord
FM indoor antenna
(supplied)
K-531
K-531[E_X].indb 8
12.8.1 11:40:05 AM
Connection
Ensure that all the cords are securely connected. Loose or incomplete connections may result in noise
interference or no sound at all.
Other connections (commercially available accessories)
Subwoofer with
built-in amplifier
Cassette deck, etc.
Digital audio
component
Analog audio input
Analog audio input
Optical digital input
(PCM signal)
Audio cord
(commercially
available)
Digital optical cable
(commercially
available)
To SUB WOOFER
PRE OUT
To AUX REC OUT
To DIGITAL OUT
To AUDIO IN
To AUX PLAY IN
To DIGITAL IN
Audio cord
(commercially
available)
Digital optical cable
(commercially
available)
Audio cord
(commercially available)
Rear view
3.5 mm stereo mini-plug cable
(commercially available)
Digital audio player,
etc.
Cassette deck, etc.
TV or BD recorder, etc.
Output from the
headphones
Analog audio output
Optical digital output
(PCM signal)
z Microcomputer malfunctions: If the System is connected correctly and still does not operate
normally or shows display errors, reset the microcomputer. (P.45)
z Refer also to the instruction manual that comes with the component connected to the System.
z AUDIO IN terminal: When you are not using the component, unplug the mini-plug cable from the
main unit.
z DIGITAL IN (optical) terminal: Select “PCM” for output signal setting of the connected component.
z DIGITAL OUT (optical) terminal: The audio signals from an Audio CD or a CD-R/CD-RW recorded
with CD-DA format are output as digital signals. The audio signals from audio files (MP3/WMA)
recorded on a CD-R/-CD-RW, or “iPod”, “USB”, “BLUETOOTH”, “TUNER”, “AUDIO IN”, “AUX” or “D-IN”
cannot be output.
z AUX REC OUT terminals: The audio signals from the souce played are output as analog signals.
English
K-531[E_X].indb 9
9
12.8.1 11:40:05 AM
Part names and functions
Main unit
Top view
terminal (P.30)
Connector for iPod/
iPhone (P.28)
Red: Lights in normal
standby mode
Orange: Lights in timer
standby mode (P.40)
Turns the System on
or off (standby)
Opens/closes the CD
tray (P.18)
Records to a USB device (P.34)
Selects track or radio station /
Fast-forwards/reverses track if
pressed and held (P.19, 22, 26, 29,
31)
Switches to
“BLUETOOTH” / Enters
BLUETOOTH pairing
mode if pressed and
held / Disconnects if
pressed and held when
BLUETOOTH connection
is established
Selects input source
(P.18, 22, 28, 30, 32,
33)
Starts playback / Pauses /
Selects the tuner band (P.18,
19, 22, 28 – 31)
Stops playback / Selects automatic/
manual tuning (P.19, 22, 26, 31)
Flashes during pairing
process of BLUETOOTH
device / Lights when
BLUETOOTH connection
is established (P.25)
Front view
CD tray (P.18)
Display
Adjusts the volume level
Plug headphones with
3.5 mm stereo miniplug
Remote sensor (P.13)
Lights in recording
mode (p.34)
CAUTION
Excessive sound pressure from headphones can cause hearing loss.
z While the STANDBY/TIMER LED on the main unit lights up, the System is using very weak current to
maintain the built-in memory (Standby mode). While in Standby mode you can turn the System on
using the remote control.
z When the headphones are connected, no sound is emitted from the speakers.
10
K-531
K-531[E_X].indb 10
12.8.1 11:40:05 AM
Part names and functions
Display
1
2
3
4
Lights during USB connection. (P.30)
Lights while the sleep timer is set. (P.38)
Lights while the program timer is set. (P.39, 40)
AUTO
Lights during automatic tuning. Goes off
during manual tuning. (P.22)
TUNED
Lights when you are tuned to the radio station.
(P.22)
ST.
5
6
7
8
9
p
q
w
Lights when you are receiving the stereo
broadcast. (P.22)
Lights in folder playback mode. (P.31)
Lights in program playback mode. (P.21)
Lights in random playback mode. (P.20, 31)
Lights during CD/USB repeat playback. (P.20,
31)
: Lights during all-track repeat playback
: Lights during single-track repeat
playback
Lights when the audio file folder is displayed.
Lights in the PTY search mode. (P.24)
Lights when a track is displayed.
Lights during stop of CD-DA disc playback
while the total time is displayed.
e
r
t
y
u
Lights while iPod/iPhone is connected. (P.28)
Lights when there is a disc in the CD tray. (P.18)
Lights during playback. (P.18, 26, 28, 30)
Flashes when the sound is muted.
Lights when playback is paused. (P.19, 26, 29,
31)
i Shows numbers and text.
o kHz
Lights when the AM reception frequency is
displayed. (P.22)
Lights when the sampling frequency is
displayed.
MHz
Lights when the FM reception frequency is
displayed. (P.22)
; Lights when audio settings, such as the sound
quality, are completed.
A.P.S.
Lights when Auto Power Save (A.P.S.) is set.
(P.42)
TONE
Lights when a TONE is set. (P.36)
D-BASS
Lights when a super-bass (D-BASS) level is set.
(P.36)
SPRM EX
Lights when Supreme EX is on. (P.37)
English
K-531[E_X].indb 11
11
12.8.1 11:40:06 AM
Part names and functions
Remote control (RC-RP0503E)
Sets the timer (P.38 – 40)
Turns the System on or off
(Standby)
Opens/closes the CD tray
(P.18)
Enters BLUETOOTH setup
mode or sound enhancer
(P.25, 26)
Selects tracks or radio stations
(P.19, 23)
Selects folders (P.19, 31)
Adjusts the display brightness
(P.41)
Sets the shuffle of iPod (P.29)
Selects the playback mode
(P.20, 21, 29, 31)
Clears settings (P.21) / Deletes
audio files from the USB device
(P.30) / Performs PTY search
(P.24)
Sets the sound quality (P.36)
Enters a setting mode
Mutes / Cancels muting
Switches the information
shown on the display (P.18, 22,
24, 26, 28, 30, 32, 33)
Fixes a setting
Selects a setting
Starts USB recording (P.34)
Selects input source / Starts
playback / Pauses (P.18, 19, 28
– 31)
Selects tracks or radio stations
(P.19, 22, 26, 29, 31)
Selects input source / Starts
playback (P.22, 32, 33)
Adjusts volume
Starts/pauses BLUETOOTH
playback / Enters BLUETOOTH
pairing mode if pressed and
held (P.25, 26)
Stops playback / Searches for
the radio frequency manually
(P.19, 22, 26, 31, 34)
Fast-forwards/reverses tracks
and selects radio stations (P.19,
22, 26, 31)
One-Touch Operation: While in Standby mode, pressing [BLUETOOTH £¥8], [CD £¥8], [iPod £¥8],
[USB £¥8], [TUNER/BAND], [AUDIO IN], [AUX], or [D-IN] also turns on the power, and switches the input
source.
12
K-531
K-531[E_X].indb 12
12.8.1 11:40:06 AM
Part names and functions
Using the remote control
Loading the batteries
Remote sensor
R03/AAA (supplied)
Approx. 6 m
Approx. 30°
Approx. 30°
z The batteries supplied with the System are for
operational testing and may last only for a short
time.
z When replacing the batteries, always load 2 new
batteries.
z The remote control may not operate correctly
if direct sunlight or light from a high-frequency
fluorescent lamp (such as an inverter type) is
shining on the remote sensor. If this happens,
move the System to a different location to avoid
this type of malfunction.
CAUTION
Do not leave the batteries
near fire or under direct
sunlight. A fire, explosion or
excessive heat generation
may result.
How to use the number buttons on the remote control
Use the number buttons to select tracks on a disc/preset stations.
To select 3rd item, press [3].
To select 17th item, press [ 10], [1], and then [7].
To select 20th item, press [ 10], [2], and then [0].
To select 123rd item, press [ 10], [ 10], [1], [2], and then [3].
English
K-531[E_X].indb 13
13
12.8.1 11:40:06 AM
Important information
Supported media
Media
USB
CD
Explanation
USB mass storage class compliant
digital audio player
z Never connect any other device besides USB flash memory
or a USB mass storage class compliant digital audio player
to the
terminal. Note that we will not be held liable
for any losses related to malfunction, damage, or data loss
due to connection of any other type of device.
Commercially available music
CDs
z You may not be able to play discs that do not conform to
the CD standard, such as Copy Control CDs.
CD-R/CD-RW discs recorded in
CD-DA format
z Discs must be finalized after recording.
z Depending on the equipment or recording mode used for
recording onto a CD-R or CD-RW, and depending on the
type of CD-R or CD-RW used, you may not be able to play
the disc on this System.
USB flash memory
MP3/WMA files recorded on
CD-R/CD-RW discs
Compatible device with this unit
About compatible iPod/iPhone
Made for
z
z
z
z
z
z
z
*
iPod classic
iPod nano (2nd, 3rd, 4th, 5th, and 6th generation)
iPod touch (1st*, 2nd, 3rd, and 4th generation)
iPhone 4S
iPhone 4
iPhone 3GS
iPhone 3G
Compatible with software newer than version 3.1.3.
z If iPod/iPhone does not play correctly, update iPod software to the
latest version.
z For details about updating iPod/iPhone, check on the Apple web site
<http://www.apple.com>.
About compatible USB device
z USB flash memory
z USB mass storage class compliant digital audio player
About BLUETOOTH function
BLUETOOTH is a short-range wireless radio communication technology for the mobile device such as mobile
phones, digital audio players, and other devices. The BLUETOOTH devices can be connected without cables
and communicate with each other.
This System supports the following BLUETOOTH profiles
z A2DP (Advanced Audio Distribution Profile)
z AVRCP (Audio/Video Remote Control Profile)
If a BLUETOOTH device compatible with AVRCP is connected, the BLUETOOTH device can be operated
from the System. (P.26)
14
K-531
K-531[E_X].indb 14
12.8.1 11:40:07 AM
Important information
Supported audio files
On this System, you can play the audio file types listed below.
z MP3, WMA and WAV files are referred to collectively as “audio files”.
Media
CD
USB
Audio file type
Extension
Sampling frequency
Bit rate
MP3
.mp3
32 kHz – 48 kHz
32 kbps – 320 kbps
WMA
.wma
32 kHz – 48 kHz
32 kbps – 320 kbps
MP3
.mp3
32 kHz – 48 kHz
32 kbps – 320 kbps
WMA
.wma
32 kHz – 48 kHz
32 kbps – 320 kbps
WAV
.wav
32 kHz – 96 kHz*, 16/24 bit
—
* When playing a wav file whose sampling frequency is 88.2 kHz or 96 kHz while an iPod/iPhone is connected,
the playback sound may be interrupted. In this case, disconnect the iPod/iPhone from the System.
Disc formats
Other notes
ISO 9660 Level 1, ISO 9660 Level 2, Joliet, Romeo
z Note that even where audio files comply with
the above standards, playback may fail due
to factors such as the disc characteristics or
recording conditions.
z Playback also may fail depending on the
specifications of the encoding software or the
settings used for encoding.
z DRM (Digital Rights Management) files cannot
be played.
z WMA Pro, WMA Lossless, WMA Voice files cannot
be played.
z Audio files encoded using VBR (Variable Bit Rate)
may use bit rates that fall outside the supported
range. Audio files with bit rates outside the
supported range cannot be played.
z Be aware to back up audio files to be used in the
System. Certain conditions while using a USB
device can cause contents stored on the USB
device to be lost. Please note that we will not be
held liable for any losses caused by loss of stored
data.
Number of file limits
CD
Max. files/folders: 512 in total
Max. folders: 255
Files per folder: 511
USB
Max. files: 2000
Max. folders: 999
Files per folder: 999
Max. folder layers: 16
Maximum number of displayable
characters
CD
File names: 28
Folder names: 28
Tag display (Title/Album name/Artist
name): 31
Available ID3 tags: 1.0/1.1/2.2/2.3
USB
File names: 64
Folder names: 64
Tag display (Title/Album name/Artist
name): 64
Available ID3 tags: 1.0/1.1/ 2.2/ 2.3/ 2.4
This System is capable of displaying alphanumeric
characters. Other characters are displayed as
asterisks (*).
English
K-531[E_X].indb 15
15
12.8.1 11:40:07 AM
Important information
Precautions when writing data to media
z Discs recorded in Packet Write mode or UDF (Universal Disc Format) cannot be played.
z When writing data to a disc, always close the session or finalize the disc. The disc may not play properly if
you do not close the session or finalize the disc.
z Depending on the specifications of the writing software used, the recorded folder names and file names
may not be displayed correctly.
z Playback for multi-session discs or discs that contain large numbers of folders may take longer to begin
than for normal discs.
z If you write audio files and music CD tracks (CD-DA format) to the same disc, the disc may not play
correctly.
z Before writing audio files to a disc, check that the files play back correctly on the PC being used to write the
files.
After you finish writing, check that the written files are played back correctly.
z Use the correct file extensions (mp3, wma, wav) in the names of audio files. Files without file extensions
will not play. Also, do not use audio file extensions (mp3, wma, wav) for files that are not audio files.
For more information on file extensions, see “Supported audio files.” (P.15)
Playback sequence for folders and files (MP3/WMA/WAV)
When you play a disc containing recorded audio files, the track files on the disc are played sequentially
beginning with the files in the ROOT folder, as shown in the figure.
Sample folder configuration
File playback sequence
Track 1
Track 2
Track 3
Track 4
Track 5
Track 6
Track 7
Track 8
Track 9
Track 10
Track 11
Track 12
Track 13
......... F0_1.mp3
......... F0_2.mp3
......... F0_3.mp3
......... F2_1.mp3
......... F2_2.mp3
......... F3_1.mp3
......... F4_1.mp3
......... F4_2.mp3
......... F6_1.mp3
......... F6_2.mp3
......... F7_1.mp3
......... F7_2.mp3
......... F7_3.mp3
z A folder that does not contain any tracks cannot
be selected.
z Audio files are played back in accordance with
the sequence where these files are recorded into
the disc. You can specify the playback sequence
by adding a number from “01” to “99” at the
beginning of each folder and file name before
you record the files onto the disc.
16
K-531
K-531[E_X].indb 16
12.8.1 11:40:07 AM
Important information
Handling discs
z Handling precautions
When holding a disc, take care not to touch the played surface.
z Discs playable on the System
This System can play back a CD (12 cm, 8 cm), CD-ROM, CD-R, CD-RW or the audio part of a CD-EXTRA.
z Notes on CD-ROM/CD-R/CD-RW
If the CD-ROM, CD-R or CD-RW being used has a printable label surface, the label surface may cause
sticking that makes it impossible to remove the disc from the System. To prevent malfunction of the
System, do not use such a disc.
z Cautions on discs
Always use a disc carrying the
marking. (A disc without this marking may be unable to be play
back correctly.)
z The disc rotates at a high speed during playback. Never use a cracked, chipped or greatly warped disc.
Otherwise, damage or malfunction of the player may result.
z Also, do not use a disc with a non-circular shape as this may result in malfunction.
Care and storage
Main unit
z Keep the System out of the following locations
– Areas exposed to direct sunlight.
– Areas subjected to excessive humidity or dust.
– Areas exposed to direct heat from heating equipment.
z Be careful against condensation
Extreme differences between System temperature and air temperature can cause water droplets
(condensation) to form on the System. The System will not operate properly while condensation is present.
If condensation forms, do not use the System for a few hours to allow the condensation to dry.
Take special care against condensation when the System is moved between two locations of very different
temperatures, or into a room where high humidity is present.
z When a main unit becomes dirty
When the front panel or case gets dirty, wipe it with a soft dry cloth. Never use lacquer, thinner, benzine,
alcohol or contact revitalizer, which will cause discoloration or deformation.
Discs
z Storing a disc
If you do not plan to use a disc for a long time, remove it from the main unit and store it in its case.
z Cleaning a disc
– When a disc is contaminated with fingerprints or other stains, wipe gently in the radial direction using a
soft dry cloth.
– Do not use a phonograph record cleaner, lacquer thinner, benzine or alcohol to clean discs.
– Do not use any disc accessory (stabilizer, protective sheet, protective ring, etc.) or lens cleaner.
z Other cautions
– Do not write on a disc with a pencil or ballpoint pen.
– Do not use a disc if its sticker or label is peeling or if any adhesive is coming out from under the sticker
or label.
– Do not affix paper, stickers or labels to discs.
English
K-531[E_X].indb 17
17
12.8.1 11:40:07 AM
CD
The explanations in this manual primarily describe operation procedures using
the remote control. If the main unit has the same or similar button names, they
can also be used for the operations.
Starts playback
1
Press [0] to open the CD tray and then insert the disc.
Label side
2
3
Press [0] again to close the CD tray.
“READING” flashes on the display while the System is reading the
information on the disc.
Press [CD £¥8] to start playback.
z You can also start playback on the main unit by pressing [INPUT] to
change the input source to “CD”, and then pressing [£¥8].
To change the display information
Press [ DISPLAY ] repeatedly.
Each time you press the button, the display changes as....
z Audio CD or CD-R/CD-RW recorded in the CD-DA format:
Elapsed playing time = Day/Clock = (back to the beginning)
z CD-R/CD-RW containing MP3/WMA files:
Track number/Elapsed playing time = File format (“MP3” or “WMA”)/
Folder number/Track number = File name = Folder name = Title (TAG)
= Artist name (TAG) = Album name (TAG) = Day/Clock = (back to the
beginning)
Track numbers may not be displayed correctly for the following types of discs.
z Discs recorded in Mix mode *
z Discs recorded in multiple sessions
z Discs recorded in mixed formats of CD-DA format and formats that are not music data
* Mix mode combines the CD-DA format with audio files, such as MP3 and WMA.
18
K-531
K-531[E_X].indb 18
12.8.1 11:40:07 AM
CD
Other operations during playback
To pause playback
Press [CD £¥8].
To stop playback
Press [ 7 ].
To playback a specified track number
Press [3] to play the 3rd track.
Press [ 10], [1], and then [7] to play the 17th track.
Press [ 10], [2], and then [0] to play the 20th track.
Press [ 10], [ 10], [1], [2], and then [3] to play the 123rd track.
To fast-forward or reverse
Press and hold [ ¡ ] to fast-forward.
Press and hold [ 1 ] to reverse.
To skip tracks
Press [ ¢ ] to skip to the next track.
Press [ 4 ] to skip to the beginning of a track.
Press [ 4 ] repeatedly to skip to a previous track.
To skip folders (MP3/WMA)
Press [ NEXT ] to skip to a track in the next folder.
Press [ PREV. ] to skip to a track in the previous folder.
About Resume function (for MP3/WMA only)
z When you stop playback by pressing [ 7 ], the track being played is stored. Pressing the [CD £¥8]
restarts playback from the beginning of that track. (Resume function)
z The Resume function is canceled if you change the input source or turn off the power.
English
K-531[E_X].indb 19
19
12.8.1 11:40:07 AM
CD
Random play
You can play all tracks in the disc in random order.
z If a disc is already playing, press [ 7 ] to stop playback.
1
Press [P.MODE] repeatedly until “
2
Press [CD £¥8] to start playback.
” indicator lights up.
To cancel random play
Press [ 7 ] to stop playback, then press [P.MODE] repeatedly until “
indicator goes off.
”
Repeat play
You can play desired track(s) repeatedly.
1
Press [CD £¥8] to play the track you want to repeat.
2
Press [REPEAT] repeatedly to select repeat play.
Each time you press the button, the mode changes as....
Single-track repeat playback (“
” indicator lights up) = For MP3/
WMA only: Folder repeat playback (“
” indicators light up) = Alltrack repeat playback (“ ” indicator lights up) = Normal playback
= (back to the beginning)
To cancel repeat play
Press [REPEAT] repeatedly until “
”, “
” or “
” indicator goes off.
z If you press [REPEAT] during program play, “ ” and “PGM” indicators light up and repeat playback
begins for the selected tracks.
z If you press [REPEAT] during random play to activate all-track repeat playback, “ ” and “ ”
indicators light up and random playback begins with different sequence once the current random
sequence ends.
20
K-531
K-531[E_X].indb 20
12.8.1 11:40:08 AM
CD
Program play
You can select up to 50 tracks and play them in the order you like.
z Press [CD £¥8] to switch the input source to “CD”. Playback begins when
you switch the input source, so press [ 7 ] to stop playback.
z If the disc is already playing, press [ 7 ] to stop playback.
1
Press [P.MODE] repeatedly until “ PGM ” indicator lights
up.
2
For MP3/WMA:
1 Press the number buttons to select the folder (P.13),
then press [ENTER].
2 Press the number buttons to select the file you want
to listen to.
For Audio CD:
Press the number buttons to select the track you want to
listen to (P.13).
3
Repeat step 2 to select more tracks.
4
Press [CD £¥8] to start the program playback.
If you attempt to select more than 50 tracks, “PGM FULL” appears on
the display.
To cancel program playback
Press [ 7 ] to stop playback, then press [P.MODE] repeatedly until “PGM”
indicator goes off.
To delete a track from a program
Press [ 7 ] to stop playback, then press [CLEAR/DELETE] to delete the last
programmed track.
Holding [CLEAR/DELETE] clears all the tracks in the program.
To add a track to the end of a program
Press [ 7 ] to stop playback, then perform step 2 above.
The specified program is deleted if....
z You change the input source or turn off the System.
z You remove the disc for which program playback is set.
English
K-531[E_X].indb 21
21
12.8.1 11:40:08 AM
Radio
Preparation:
Connect the antenna cords. (P.8)
Listening to FM/AM radio
1
2
Press [TUNER/BAND] to select “FM” or “AM”.
z You can also select “FM” or “AM” on the main unit by pressing [INPUT]
to change the input source to “TUNER”, and then pressing [BAND] to
select “FM” or “AM”.
Press [AUTO/MONO] to select the tuning mode (automatic
search or manual search).
z You can also select the tuning mode on the main unit by pressing
[TUNING MODE].
z If the reception is good, select automatic search. (”AUTO” indicator
lights up.)
z If the reception is poor, select manual search.
3
Press [TUNING 1] / [TUNING ¡] to tune into a station.
z You can also tune into a station on the main unit by pressing [4]
or [¢].
z If automatic search is selected in step 2, the System automatically
tunes in to the next station. Repeat this procedure until you are
tuned in to your preferred station.
z If manual search is selected in step 2, press and hold the button until
you reach your desired frequency.
When a station is tuned in, “TUNED” indicator lights up. “ST.” indicator
also lights up when receiving a stereo signal (only for FM stations).
To select a preset station
Store preset stations beforehand (P.23).
z Press [P.CALL 4] or [P.CALL ¢] to select the previous/next stored
station. To browse through the stored stations, press and hold the button.
z Press the number buttons to select the desired preset station. (P.13)
To change the display information
Press [ DISPLAY ] repeatedly.
Each time you press the button, the display changes as....
z FM:
Program service name* = Frequency = Day/Clock = (back to the
beginning)
z AM:
Frequency = Day/Clock = (back to the beginning)
* “NO PS” appears if the program service name is not received.
z There is no sound while tuning (automatic/manual) is in progress.
z Automatic tuning provides stereo reception while manual tuning provides monaural reception.
22
K-531
K-531[E_X].indb 22
12.8.1 11:40:08 AM
Radio
Presetting stations automatically (AUTO MEMORY)
You can preset up to 40 FM stations.
Preparation:
Press [TUNER/BAND] to select “FM”
1
2
Press [MODE].
Press [2] or [3] to select “AUTO MEMORY”, then press
[ENTER].
“AUTO MEMORY” flashes on the display and the receivable stations
are preset automatically.
Presetting stations manually
You can preset up to 40 (in total) FM/AM stations.
1
Tune in to a station you want to preset (P.22), then press
[ENTER].
2
Press [5] or [∞] or use the number buttons (P.13) to
select the desired preset number (P01 to P40), then press
[ENTER] to store.
Selected preset number
z Radio Data System stations are given priority during automatic presetting. If there is memory left
after presetting, this unit continues presetting regular FM and AM stations.
z Preset stations cannot be received if the reception is poor.
z If the selected preset number is already assigned to a station, the existing station is overwritten
by the new station.
English
K-531[E_X].indb 23
23
12.8.1 11:40:09 AM
Radio Data System
Preparation:
z Press [TUNER/BAND] to select “FM”.
z Preset Radio Data System stations with AUTO MEMORY function. (P.23)
Displaying Program Service (PS) name
When an Radio Data System broadcast is received, the station
name is displayed automatically.
To change the display information
Press [ DISPLAY ] repeatedly.
Each time you press the button, the display changes as....
Program service name = Frequency = Day/Clock = (back to the
beginning)
Searching for a desired Program Type (PTY Search)
1
2
Press [PTY].
z “PTY” indicator lights up.
z When a Radio Data System broadcast is received, the program type is
shown on the display.
If no PTY data is available or if the station is not a Radio Data System
station, “None” appears on the display.
Press [5] or [∞] to select the desired program type, then
press [ENTER].
z “PTY” indicator flashes.
z If a program of the desired type is found, that program is received
and the program type name display changes to the station name
display.
If a program of the desired type cannot be found, “NO PROGRAM”
flashes, then after several seconds the display returns to the original
display.
z Program type (genre): Pop M (music), Rock M (music), Easy M (music),
Light M (music), Classics, Other M (music), News, Affairs, Info, Sport,
Educate, Drama, Culture, Science, Varied, Weather, Finance, Children,
Social, Religion, Phone In, Travel, Leisure, Jazz, Country, Nation M
(music), Oldies, Folk M (music), Document
To cancel PTY Search
Press [PTY].
z There is no sound while searching is in progress.
z Some stations may not be provided or may be given different names depending on countries or
areas.
24
K-531
K-531[E_X].indb 24
12.8.1 11:40:09 AM
BLUETOOTH
Safety Precautions
You can listen to music from your BLUETOOTH mobile phone or BLUETOOTH
device over a wireless connection.
Pairing this System with a BLUETOOTH device
When you connect a BLUETOOTH device to the System for the first time,
make pairing between the System and the device.
z Once the pairing operation is complete, the BLUETOOTH device is
registered on the System.
z You can register up to five devices*, but only one device can be connected
at a time.
* When a sixth BLUETOOH device is registered, the registration of the first
connected device is deleted.
[ 7 PAIRING]
BLUETOOH LED
Main unit
1
2
3
4
Turn on the BLUETOOTH device.
5
Operate the BLUETOOTH device to perform the pairing
operation.
Press [BLUETOOTH £¥8] to select “BLUETOOTH” source.
Press [BLUETOOH SETUP].
Press [2] or [3] to select “PAIRING?”, then press [ENTER].
The System enters pairing mode.
z If no operation is done for about 5 minutes, pairing mode is
cancelled.
“SUCCESS” appears on the display when pairing is completed.
z When searching for this System with the BLUETOOTH device, this
System appears as “K-531”.
z BLUETOOTH LED on the main unit flashes during the pairing
process.
z If you are required to enter PIN code during pairing operation,
input “0000”.
z After pairing is successful, the System will establish connection
with the BLUETOOTH device. (The BLUETOOTH LED on the main
unit lights up while the BLUETOOTH device is connected.)
You can also enter the pairing mode by holding [BLUETOOTH £¥8] or
[ 7 PAIRING] on the main unit while the BLUETOOTH device is turned
on.
Refer also to the instruction manual that comes with your BLUETOOTH device.
English
K-531[E_X].indb 25
25
12.8.1 11:40:09 AM
BLUETOOTH
Listening to a BLUETOOTH device
Once the BLUETOOTH device is registered with the System, connect the
BLUETOOTH device and start playing music.
1
Press [BLUETOOTH £¥8] to start playback of the
BLUETOOTH device.
z You can also start playback on the main unit by pressing [INPUT] to
change the input source to “BLUETOOTH”, and then pressing [£¥8].
To change the display information
Press [ DISPLAY ] repeatedly.
Each time you press the button, the display changes as....
“BLUETOOTH” = Day/Clock = (back to the beginning)
Other operations during playback
To pause and resume playback
Press [BLUETOOTH £¥8].
To stop playback
Press [ 7 ].
To fast-forward or reverse
Press and hold [ ¡ ] to fast-forward.
Press and hold [ 1 ] to reverse.
To skip tracks
Press [ ¢ ] to skip to the next track.
Press [ 4 ] to skip to the beginning of a track.
Press [ 4 ] repeatedly to skip to a previous track.
To improve the sound of the BLUETOOTH device
(BLUETOOH sound enhancer)
BLUETOOTH sound enhancer function allows natural listening of the music
from the BLUETOOTH device by correcting the unnatural sound range.
1
Press [BLUETOOTH SOUND ENHANCER].
Each time you press the button, BLUETOOTH sound enhancer is
switched between “ENHANCE ON” (activated) and “ENHANCE OFF”
(deactivated).
z For some BLUETOOTH devices, fast-forward/fast-reverse does not work.
z The BLUETOOTH device will be disconnected automatically if...
– you turn off the BLUETOOTH device or the System.
– you change the input source.
– you press and hold [ 7 PAIRING] until “CANCEL” appears on the display.
26
K-531
K-531[E_X].indb 26
12.8.1 11:40:10 AM
BLUETOOTH
Other BLUETOOTH settings
1
Press [BLUETOOTH SETUP].
2
Press [2] or [3] to select an item, then press [ENTER].
1
z PAIRING? * :
1
z RECEIVE? * :
z
z
z
z
3
Enters pairing process. (P.25)
Establishes the connection with the last
connected BLUETOOTH device.
CANCEL? *2:
Disconnects the BLUETOOTH device.
SEL DEVICE? *1: Selects the registered BLUETOOTH device you
want to connect.
DEL DEVICE? *1: Deletes the registered BLUETOOTH device.
SYS INFO?:
Shows the System name (“K-531”) and the
BLUETOOTH address.
Use [2], [3], [5], [∞] or [ENTER] to change the setting if
necessary.
*1 You can select the item when no BLUETOOTH device is connected (when
the BLUETOOTH LED on the main unit is turned off).
*2 You can select the item when a BLUETOOTH device is connected (when the
BLUETOOTH LED on the main unit lights up).
BLUETOOH LED
Main unit
English
K-531[E_X].indb 27
27
12.8.1 11:40:10 AM
iPod/iPhone
Starts playback
1
Connect an iPod/iPhone.
Dock adapter (supplied with your
iPod/iPhone or commercially available)
2
iPod/iPhone
(commercially available)
Press [iPod £¥8] to start playback.
z You can also start playback on the main unit by pressing [INPUT] to
change the input source to “iPod”, and then pressing [£¥8].
To change the display information
Press [ DISPLAY ] repeatedly.
Each time you press the button, the display changes as....
Elapsed playing time = Title (TAG) = Artist name (TAG) = Album name
(TAG) = Day/Clock = (back to the beginning)
To remove the dock adapter
When detaching the dock adaptor from the dock,
pull up the dock adaptor with your fingernail or a
sharp pointed tool using the slot.
Be careful not to injure your fingertips or damage
the terminal of the dock.
z You cannot connect an iPod/iPhone to the System if it is in a cover, case, or with other accessories.
Always remove it.
z Connecting an iPod/iPhone to the System without using the dock adapter may deteriorate or
damage the connector. Always use the dock adapter. (For some iPod models such as iPod nano 6th
generation, dock adapter is not necessary.)
z Keep the iPod/iPhone on a straight position while connecting/disconnecting it.
z Once the iPod/iPhone is connected, it can be charged.
28
K-531
K-531[E_X].indb 28
12.8.1 11:40:10 AM
iPod/iPhone
Other operations during playback
To pause and resume playback
Press [iPod £¥8].
To fast-forward or reverse
Press and hold [ ¢ ] to fast-forward.
Press and hold [ 4 ] to reverse.
To skip tracks
Press [ ¢ ] to skip to the next track.
Press [ 4 ] to skip to the beginning of a track.
Press [ 4 ] repeatedly to skip to a previous track.
To select the shuffle mode
Press [ SHUFFLE ] repeatedly.
Each time you press the button, the shuffle setting changes.
To select repeat play
Press [ REPEAT ] repeatedly.
Each time you press the button, the repeat setting changes.
To select an item from the menu
Press [ 2 ] to go back to the previous layer.
Press [ 5 ] or [ ∞ ] to select an item.
Press [ENTER] to confirm the selection.
Press [ 3 ] to play currently selected item.
To put the iPod/iPhone in sleep mode
Press and hold [iPod £¥8].
z
z
z
z
z
You cannot record tracks onto iPod/iPhone from the System.
Refer also to the instruction manual that comes with the iPod/iPhone.
Update the software for iPod/iPhone to the latest version.
You can also perform operation from your iPod/iPhone.
To select the other Album, perform the “To select an item from the menu” operation above. You
cannot skip to the previous/next Album directly.
English
K-531[E_X].indb 29
29
12.8.1 11:40:11 AM
USB playback
Starts playback
1
Connect a USB device to the
terminal.
USB flash memory or USB mass
storage class compliant digital audio
player, etc. (commercially available)
terminal
2
Press [USB £¥8] to start playback.
z You can also start playback on the main unit by pressing [INPUT] to
change the input source to “USB”, and then pressing [£¥8].
To change the display information
Press [ DISPLAY ] repeatedly.
Each time you press the button, the display changes as....
Elapsed playing time = Folder number/Track number = File name =
Folder name = Title (TAG) = Artist name (TAG) = Album name (TAG) =
Day/Clock = (back to the beginning)
Deleting the audio files from the USB device
Be aware that you cannot restore the deleted files.
1
Start or pause the playback of an audio file you want to
delete.
Refer to P.31 for selecting a file.
2
3
Press [CLEAR/DELETE].
Press [5] or [ ∞] to select “DEL.OK”, then press [ENTER].
“DELETED” appears on the display and the selected file is deleted.
z To cancel deleting, select “DEL CANCEL”, then press [ENTER].
z
z
z
z
Refer also to the instruction manual that comes with the USB device.
You cannot use an iPod/iPhone by connecting to the
terminal on the System.
When connecting using a USB cable, use a USB cable whose length is less than 1 m.
Depending on the USB device being connected, it may take some time for the System to recognize
it.
z If no playable files are found, playback does not start.
z When playback resumes on a digital HDD audio player, sound may jump due to the mechanism
specific to HDD.
z You cannot delete folders from the System.
30
K-531
K-531[E_X].indb 30
12.8.1 11:40:11 AM
USB playback
Other operations during playback
To pause and resume playback
Press [USB £¥8].
To stop playback
Press [ 7 ].
To skip folders
Press [ NEXT ] to skip to a track in the next folder.
Press [ PREV. ] to skip to a track in the previous folder.
To fast-forward or reverse
Press and hold [ ¡ ] to fast-forward.
Press and hold [ 1 ] to reverse.
To skip tracks
Press [ ¢ ] to skip to the next track.
Press [ 4 ] to skip to the beginning of a track.
Press [ 4 ] repeatedly to skip to a previous track.
To play the files in the selected folder (Folder playback)
Press [ 7 ] to stop playback, then press [ P.MODE ] repeatedly until “ ”
indicator lights up.
To select random play
Press [ 7 ] to stop playback, press [ P.MODE ] repeatedly until “ ”
indicator lights up, then press [USB £¥8] to start playback.
Each time you press [ P.MODE ], the mode changes as....
Folder playback (“ ” indicator lights up) = Random playback
(“ ” indicator lights up) = Folder Random playback (“
”
indicators light up) = Normal playback = (back to the beginning)
To select repeat play
Press [ REPEAT ] repeatedly.
Each time you press the button, the mode changes as....
Single-track repeat playback (“
” indicator lights up) = Alltrack repeat playback (“ ” indicator lights up) = Normal
playback = (back to the beginning)
To disconnect the USB device
Press [ 7 ] to stop playback, press [B] to turn off the power, then
disconnect the USB device.
z When you stop playback by pressing [ 7 ], the track being played is stored (“3” indicator flashes).
Pressing the [USB £¥8] restarts playback from the beginning of that track. (Resume function)
z The Resume function is canceled if you press [ 7 ] again or turn off the power.
z Skip folder may not work with some USB devices.
z Program play is not available for USB playback.
z It is recommended to use a USB device whose capacity is less than 16 GB.
English
K-531[E_X].indb 31
31
12.8.1 11:40:11 AM
External components
Preparation:
Connect an external component to the AUX PLAY IN or DIGITAL IN terminals
on the rear panel. Refer to “Other connections (commercially available
accessories)” for connection (P.9).
Starts playback
1
For playing a component connected to the AUX PLAY IN terminals:
Press [AUX].
z You can also start playback on the main unit by pressing [INPUT] to
change the input source to “AUX”.
For playing a component connected to the DIGITAL IN terminal:
Press [D-IN].
z You can also start playback on the main unit by pressing [INPUT] to
change the input source to “D-IN”.
z When [D-IN] is selected, the input signal sampling frequency is
displayed.
2
Operate the connected external component to start
playback.
Adjusting the input level for AUX source
z Use this adjustment when the volume from an external component is
noticeably higher or lower than other input sources at the same volume
setting.
1
Press [AUX].
z You can also start playback on the main unit by pressing [INPUT] to
change the input source to “AUX”.
2
Operate the component connected to AUX PLAY IN
terminals to start playback.
3
4
5
Press [MODE].
Press [2] or [3] to select “INPUT LEVEL”, then press [ENTER].
Press [5] or [∞] to adjust the input level (–3 to +5), then
press [ENTER].
To change the display information
Press [ DISPLAY ] repeatedly.
Each time you press the button, the display changes as....
“AUX” or “D-IN” = Day/Clock = (back to the beginning)
z Refer also to the instruction manual that comes with the external component.
z This System can play PCM (32 kHz, 44.1 kHz, 48 kHz, 88.2 kHz, 96 kHz) digital signals.
32
K-531
K-531[E_X].indb 32
12.8.1 11:40:12 AM
Digital audio players, etc.
Safety Precautions
Preparation:
Connect a component (such as a digital audio player) to the AUDIO IN
terminal on the rear panel. Refer to “Other connections (commercially
available accessories)” for connection (P.9).
Starts playback
1
2
Press [AUDIO IN].
z You can also start playback on the main unit by pressing [INPUT]
to change the input source to “AUDIO IN”.
Operate the component (such as a digital audio player) to
start playback.
Adjusting the input level
z Use this adjustment when the volume from a component (such as a digital
audio player) is noticeably higher or lower than other input sources at the
same volume setting.
1
Press [AUDIO IN].
z You can also start playback by pressing [INPUT] to change the
input source to “AUDIO IN” on the main unit.
2
Operate the component (such as a digital audio player) to
start playback.
3
Press [MODE].
4
Press [2] or [ 3] to select “INPUT LEVEL”, then press
[ENTER].
5
Press [5] or [∞] to adjust the input level (–3 to +5), then
press [ENTER].
To change the display information
Press [ DISPLAY ] repeatedly.
Each time you press the button, the display changes as....
“AUDIO IN” = Day/Clock = (back to the beginning)
Refer also to the instruction manual that comes with the component connected to the System.
English
K-531[E_X].indb 33
33
12.8.1 11:40:12 AM
USB recording
You can record the sound from an Audio CD, FM/AM radio broadcast, or an
external component to the USB device in MP3 format.
Preparation:
Connect a USB device (with sufficient free space) for recording to the
terminal. (P.30)
Recording all tracks of a CD
1
2
Press [CD £¥8] to select “CD” source, then press [7].
Press [USB REC] to start recording.
Playback and recording stop automatically when all tracks have been
recorded.
Recording a single track of a CD
1
2
Start or pause playback of the track you want to record.
Press [USB REC] to start recording.
Playback starts from the beginning of the selected track, and playback
and recording stop automatically when the selected track has been
recorded.
Recording desired tracks in desired order
1
Program the tracks and playback order for recording.
(Step 1 to 3, P. 21)
2
Press [USB REC] to start recording.
Playback and recording stops when all the programmed tracks have
been recorded.
Recording from TUNER, AUDIO IN, AUX source
Main unit
REC LED
(Lights up during
recording)
1
Press [TUNER/BAND], [AUDIO IN], or [ AUX] to select the
desired source you want to record.
2
For “TUNER”: Tune in to the station you want to record. (P.22)
For “AUDIO IN” and “AUX”: Start playback of the
component you want to record.
3
Press [USB REC] to enter the recording standby mode.
4
Press [USB REC] to start recording.
The REC LED on the main unit flashes while recording standby mode.
To stop recording
Press [7].
z Do not disconnect the USB device during recording process.
z You cannot record MP3/WMA files recorded on a CD-R/CD-RW.
z USB recording does not function while the sleep timer is activated.
34
K-531
K-531[E_X].indb 34
12.8.1 11:40:12 AM
USB recording
Selecting the recording sound quality
1
Press [CD £¥8], [TUNER/BAND ], [AUDIO IN], or [ AUX] to
select an input source.
2
3
Press [MODE].
4
Press [5] or [∞] to select the recording sound quality,
then press [ENTER].
Press [2] or [3] to select “REC FORMAT”, then press
[ENTER].
z SQ
z HQ
Records with normal quality (bit rate: 128 kbps)
Records with high quality (bit rate: 192 kbps)
Dividing the recorded file automatically
You can divide the file during recording from a tuner or an external
component, etc. automatically with 15 or 30 minute intervals.
z You can select the dividing time for each input source.
1
Press [TUNER/BAND ], [AUDIO IN], or [ AUX] to select the
input source.
2
3
Press [MODE].
4
Press [5] or [∞] to select the interval for dividing the file,
then press [ENTER].
Press [2] or [3] to select “AUTO DIVIDE”, then press
[ENTER].
z OFF
Divide the file manually. The file is divided at the point
you press [ENTER].
z 15 min. The file is divided every 15 minutes.
z 30 min. The file is divided every 30 minutes.
You can divide the file manually by pressing [ENTER] even though
“15 min.” or “30 min.” is selected.
z Recording sound quality setting affects all input sources.
z Recording stops automatically if...
– you turn off the System.
– the USB device run out of space.
– the number of files/folders on the USB device reaches the limit for the number that the System
can recognize.
z When you divide the file, short silence is inserted between tracks during playback.
z The recorded files are saved in the “KWD” folder which is created automatically on the root of the
USB device.
English
K-531[E_X].indb 35
35
12.8.1 11:40:12 AM
Audio settings
Adjusting super-bass tones (D-BASS)
The System has a digital signal processor (DSP), which allows you to adjust the
impact of super-bass tones.
1
Press [D-BASS].
2
Press [5] or [∞] to adjust the level (0 to 10), then press
[ENTER].
z Higher numbers give more pronounced super-bass tones.
z “D-BASS” indicator lights up (except if the level is set at 0).
Adjusting the range levels (TONE)
With the built-in digital signal processor (DSP), you can adjust also the levels of
low-, mid-, and high-range tones.
1
Press [TONE] to select the range tones.
2
Press [2] or [3] to select the frequency.
3
Press [5] or [∞] to adjust the level (–8 to +8).
4
Repeat steps 1 to 3 to adjust the other range tones (if
acquired).
5
Press [ENTER] to confirm.
Each time you press the button, the range tone changes as....
BASS (low-range tones) = MID (mid-range tones) = TREBLE (highrange tones) = Canceled = (back to the beginning)
z BASS 100 Hz, 150 Hz, 200 Hz
1 kHz, 2 kHz, 3 kHz
z MID
z TREBLE 5 kHz, 7 kHz, 10 kHz
You can adjust 1 frequency for each range tone.
z “TONE” indicator lights up (except if the level is set to 0).
To cancel super-bass tones or range levels
Press [FLAT].
All level values are set to “0”.
Variable frequencies
Adjusted level
LEVEL (dB)
LEVEL (dB)
Frequency
Variability
Frequency
Variability
Variability
Frequency
Variability
Frequency
Frequency
Audio setting adjustments do not affect the sound from components connected to the DIGITAL
OUT terminal or AUX REC OUT terminals, or the sound during recording.
36
K-531
K-531[E_X].indb 36
12.8.1 11:40:13 AM
Audio settings
Matching the acoustic effect to the listening
environment (CONEQ)
The CONEQ (Convolution Equalizer) digital sound correction technology
allows you to select the suitable acoustic effect to your room.
1
2
Press [MODE].
3
Press [5] or [∞] to select a mode suitable to the room
environment, then press [ENTER].
Press [2 ] or [ 3] to select “CONEQ SET”, then press
[ENTER].
z CONEQ MODE1: For a room with an average acoustic environment
z CONEQ MODE2: For a room where sound is not echoed easily—
having a lot of sound-absorbing materials, e.g.
curtains
z CONEQ MODE3: For a room where sound is echoed easily—having
a lot of hard materials, e.g. cement or floor boards
Setting Supreme EX
Supreme EX is our original sound quality enhancement technology and
is used for playing CDs and audio files or for playback using components
connected to the DIGITAL IN terminal.
z Supreme EX works when “CD”, “D-IN”, “iPod”, or “USB” is selected.
Supreme EX does not work when the sampling frequency of the wav file
is more than 48 kHz or when the input frequency for “D-IN” is 96 kHz,
88.2 kHz or 48 kHz (“SPRM EX” indicator goes off).
1
2
3
Press [MODE].
Press [2] or [ 3] to select “SPRM SET”, then press [ENTER].
Press [5] or [∞] to select “SPRM ON” or “SPRM OFF”, then
press [ENTER].
z “SPRM EX” indicator lights up when “SPRM ON” is selected.
Adjusting the volume balance of the left and right
speakers
This function is not available while headphones are connected.
1
2
3
Press [MODE].
Press [2] or [ 3] to select “BALANCE”, then press [ENTER].
Press [5] or [∞] to adjust the volume balance for the left
and right speakers, then press [ENTER].
English
K-531[E_X].indb 37
37
12.8.1 11:40:13 AM
Timer settings
Setting the sleep timer (SLEEP)
This function automatically turns the System off after a set interval. You can set
an interval from 10 to 90 minutes (in 10-minute increments).
1
Press [SLEEP] repeatedly to select the time interval to turn
off the System.
Each time you press the button, the timer (minutes) changes as....
10 = 20 = 30 = 40 = 50 = 60 = 70 = 80 = 90 =
Canceled (“ ” indicator goes off) = (back to the beginning)
To check the remaining time (when sleep timer is activated)
Press [SLEEP].
To cancel the sleep timer
Press [B] to turn off the System (Standby), or press [SLEEP] repeatedly until “ ”
indicator goes off.
38
K-531
K-531[E_X].indb 38
12.8.1 11:40:13 AM
Timer settings
Setting the program timer (TIMER SET)
This function allows you to use the timer to start playback or recording
automatically at a specified time. You can set two timers (“PROG. 1” and
“PROG. 2”).
The available sources for program timer are as follows:
– For playback: TUNER, CD, iPod, USB, D-IN, AUX or AUDIO-IN
– For recording: TUNER
z Set the System clock to the correct time before performing this procedure.
(P.41)
z Prepare the input source and check whether it works.
z For recording with a timer, connect a USB device (with sufficient free
space) to the
terminal. (P.30)
z To go back to the previous step, press [2 ].
1
Press [MODE].
2
Press [2 ] or [ 3] to select “TIMER SET”, then press [ENTER].
z For “AUX” or “AUDIO-IN”, connect a component equipped with a timer function. You cannot
activate or deactivate the timer function of the connected component by operating on the System.
z When recording with a timer, the System is turned on and paused 2 minutes before the start time
of the recording.
z When you activate two programs, make sure the times for each program are different by at least 3
minutes to ensure that their operations do not overlap.
z If you select "PLAY" or "AI PLAY", turn off the System more than 1 minute before the start time.
z If you select "REC", turn off the System more than 3 minutes before the start time.
z When the System is in Standby mode, you can display the timer setting (on or off) and the current
time for 5 seconds by pressing [7].
Continued to next page
English
K-531[E_X].indb 39
39
12.8.1 11:40:13 AM
Timer settings
3
Press [5] or [∞] to make selection, then press [ENTER].
4
Press [B] to turn off the power (in order to activate the
program timer).
~ Select “PROG. 1” or “PROG. 2”.
Ÿ Select “ON” or “OFF”.
Selecting “OFF” ends the procedure and restores the original display.
! Select the day(s) to activate the timer.
EVERYDAY, SUNDAY, MONDAY, TUESDAY, WEDNESDAY, THURSDAY,
FRIDAY, SATURDAY, MON-FRI, TUE-SAT, SAT-SUN
⁄ Select “EVERY WEEK” or “ONETIME”.
@ Set the “ON” time (start time).
¤ Set the “OFF” time (end time).
# Select “PLAY”, “AI PLAY” or “REC”.
Timer playback with the volume set for program timer
z PLAY :
z AI PLAY : Timer playback with the volume gradually increased to
the level set for program timer
Timer recording
z REC :
‹ Set the volume level (0 to 80) for program timer.
You cannot use the [VOLUME 5] or [VOLUME ∞] to make this setting.
$ Select the input source (TUNER, CD, iPod, USB, D-IN, AUX or AUDIOIN).
– If you select an input source other than “TUNER”, press [ENTER] to
complete the settings.
– If you select “TUNER”, press [5] or [∞] to select a preset number,
then press [ENTER] to complete the settings.
– If you select “REC” in step #, “TUNER” source is automatically
selected. Press [5] or [∞] to select a preset number, press [ENTER],
then press [5] or [∞] to select the recording sound quality (“SQ”
or “HQ”) and press [ENTER] to complete the settings.
When the settings are completed, “COMPLETE” appears and restores
the original display.
z The STANDBY/TIMER LED on the main unit lights orange.
To turn the timer off and on
Press [TIMER] repeatedly (when the System is turned on).
Each time you press the button, the mode changes as....
PROG. 1 turns on (“ ” indicator lights up) = PROG. 2 turns on (“
”
indicator lights up) = PROG. 1 and 2 turn on (“
” indicator lights up)
= Timer off (“
” indicator goes off)
To modify the program settings
Reconfigure the program timer from the beginning.
40
K-531
K-531[E_X].indb 40
12.8.1 11:40:14 AM
Other settings
Safety Precautions
Setting the display brightness (DIMMER)
Adjust the display brightness according to your preferences and the
conditions in the room.
1
Press [DIMMER] repeatedly.
Each time you press the button, the mode changes as....
DIMMER OFF (normal brightness) = DIMMER 1 (reduces the
display brightness) = DIMMER 2 (reduces the display brightness
and turn off the dial lighting) = DIMMER 3 (restores the normal
display brightness and turn off the dial lighting) = (back to the
beginning)
Setting the display saver (DISP. SAVER)
Turn on the display saver if the System is not used at all for a set period. The
display information scrolls to prevent burn-in of the text on the display and
uneven display brightness.
1
2
Press [MODE].
3
Press [5] or [∞] to select “ON” or “OFF”, then press
[ENTER].
Press [2] or [ 3] to select “DISP. SAVER”, then press
[ENTER].
z ON
Activates the display saver if the System is not in used at
all for about 10 minutes after playback stops or a button is
pressed.
z OFF Deactivates the display saver.
Setting the System clock
1
2
Press [MODE].
3
Press [5] or [∞] to set the day (of the week), then press
[ENTER].
4
5
Press [5] or [∞] to set the hour, then press [ENTER].
Press [2 ] or [ 3] to select “TIME ADJUST”, then press
[ENTER].
Press [5] or [∞] to set the minute, then press [ENTER].
z If a power failure occurs or the System is unplugged then plugged in again, set the System clock to
the correct time again.
z When the System is in Standby mode, you can display the clock time for 5 seconds by pressing [7].
English
K-531[E_X].indb 41
41
12.8.1 11:40:14 AM
Other settings
Setting the Auto Power Save (A.P.S.)
1
Press [MODE].
2
Press [2 ] or [ 3] to select “A.P.S. SET”, then press [ENTER].
3
Press [5] or [∞] to select “ON” or “OFF”, then press [ENTER].
ON :
OFF :
Activates the auto power save if no operation is performed for
15 minutes in the following conditions.
z The volume is set to 0 (“VOLUME 0”) or sound is muted.
z Disc or USB device is not played with the target input source
(“CD” or “USB”) selected.
z BLUETOOTH device is not connected with “BLUETOOTH”
source selected.
z iPod/iPhone is not connected with “iPod” source selected.
z No audio signals come in and “UNLOCK” appears on the
display with “D-IN” source selected.
Deactivates the auto power save.
z Auto Power Save does not work while recording on the USB device.
z When recording audio signals from the AUX REC OUT terminals to the other component, Auto
Power Save activates. To avoid the interruption of the recording due to Auto Power Save activating,
deactivate Auto Power Save (select “OFF”) or set the volume anything other than “0”.
42
K-531
K-531[E_X].indb 42
12.8.1 11:40:14 AM
Safety Precautions
Troubleshooting
Whenever the System is not operating as expected, check the following tables to see if you can resolve the
problem yourself before requesting service.
Symptoms
CD
Amplifier / Speakers
No sound comes out from
the speakers.
Solution
z
z
z
z
Check all connections as described in “Connection.” (P.8, 9)
Increase the volume. (P.10, 12)
Cancel muting. (P.12)
Unplug any headphones plugged into the main unit. (P.10)
No sound can be heard when z Check all connections as described in “Connection.” (P.9)
“D-IN” source is selected.
z Check whether “PCM” is selected for the digital audio output setting
on the connected component.
No sound comes out from
one of the speakers.
z Check all connections as described in “Connection.” (P.8)
z Check the volume balance for the left and right speakers. (P.37)
The clock display is flashing.
z Set the clock as described in “Setting the System clock.” (P.41)
The timer does not work.
z Set the clock as described in “Setting the System clock.” (P.41)
z Set a start time and end time for the program timer. (P.39)
A disc does not play back
when loaded.
z Load the disc correctly with the label side facing upward. (P.18)
z Clean the disc. (See “Care and storage.”) (P.17)
z Allow any condensation to evaporate. (See “Care and storage.”) (P.17)
No sound can be heard.
z Press the [CD £¥8].
z Clean the disc. (See “Care and storage.”) (P.17)
Playback skips.
z Clean the disc. (See “Care and storage.”) (P.17)
Some audio files are not
played.
z The System will not play audio files that are corrupted.
z Make sure the audio file is supported for playback on the System. (P.15)
It takes time to start
playback.
z There may be a delay prior to playback if there are large numbers of
folders. (P.16)
Tag information is not
displayed correctly.
z Refer to “Supported audio files” to check which tag information can be
displayed on this System. (P.15)
English
K-531[E_X].indb 43
43
12.8.1 11:40:14 AM
Symptoms
Solution
A radio broadcast cannot be
received.
z Connect the antennas. (P.8)
z Connect the black and white cords of the AM loop antenna correctly.
(P.8)
z Select the broadcast band (AM or FM). (P.22)
z Tune the radio to the frequency of the desired station. (P.22)
A radio broadcast has
interference from noise.
z Install an outdoor antenna away from roads.
z Turn off any electrical appliances that may be causing interference.
z Move the System away from the TV.
Automatic presetting does
not work.
z Perform automatic presetting again. (P.23)
z Manually preset stations with frequencies that you can receive. (P.23)
Pairing cannot be done.
z Reduce the distance between the System and the BLUETOOTH device.
z Pairing may not be possible if there are other BLUETOOTH devices
around the System. In this case, turn off the other BLUETOOTH devices.
Connection failed.
z Check whether the connected audio player supports A2DP (Advanced
Audio Distribution Profile) or AVRCP (Audio/Video Remote Control
Profile). (P.14)
z Disconnect and connect again. (P.25)
z Delete the registered information and pair the device again. (P.25, 27)
BLUETOOTH
Tuner
Troubleshooting
The sound skips or
z Reduce the distance between the System and the BLUETOOTH device.
fluctuates, or the connection z Make sure there is no obstacle between the System and the
is lost.
BLUETOOTH device.
z Turn down the volume of the connected BLUETOOTH device.
iPod/iPhone
The iPod/iPhone cannot be
attached firmly.
44
z Check to see whether the correct dock adapter is used. Then check to
see whether the connector between the iPod/iPhone and the System
is not damaged, and reconnect them. (P.28)
No sound can be heard from z The iPod/iPhone is not properly connected. Remove the iPod/iPhone
the iPod/iPhone.
from the System, and then connect it again. (P.28)
The iPod/iPhone cannot be
charged.
z The iPod/iPhone is not properly connected. Disconnect the iPod/
iPhone from the System, and then connect it again. (P.28)
The iPod/iPhone does not
play, or the iPod/iPhone
cannot be recognized.
z Reset the iPod/iPhone while disconnected from the System, then
unplug and plug the power cord. (For reset of iPod/iPhone, refer to the
Apple web site.)
terminal. The
terminal
z The iPod/iPhone is connected to the
of the System does not support the iPod/iPhone connection.
K-531
K-531[E_X].indb 44
12.8.1 11:40:15 AM
Troubleshooting
Recording
USB
Symptoms
Solution
No sound can be heard when z Plug in the USB flash memory correctly. (P.30)
USB flash memory or a USB z Connect the USB cable correctly. (P.30)
audio player is connected.
z Check to make sure the USB audio player is turned on.
z Format the USB flash memory with the FAT32 format on a PC. (Be
aware that the all recorded data on the USB flash memory is deleted if
formatted.)
z Use other USB flash memory.
The iPod/iPhone does not
play, or the iPod/iPhone
cannot be recognized.
terminal. The
terminal
z The iPod/iPhone is connected to the
of the System does not support the iPod/iPhone connection.
Unable to record to the USB
device.
z Make sure the USB device is not full.
z Make sure the USB device is not copy-protected.
z Make sure the connected USB device is compatible with this System.
(P.14)
z The number of files/folders on the USB device reaches the limit for the
number that the System can recognize. Erase unwanted files/folders.
Others
The remote control does not z Load new batteries. (P.13)
work.
z Use the remote control within its effective range. (P.13)
Microcomputer malfunction. z Malfunctions may occur due to an external cause or because a
connection cord was unplugged while the System was turned on.
Follow the procedure below to reset the microcomputer.
~ Unplug the power cord from the AC wall outlet.
Ÿ Plug the power cord back in while holding down [B] on the main
unit. Press and hold the button until the display below is shown.
Resetting of the microcomputer starts.
! When resetting is complete, the main unit returns to Standby Mode.
Bear in mind that resetting will erase any stored information and
will restore the System’s default settings.
z Manufactured under license from Real Sound Lab, SIA.
z CONEQ is a trademark of Real Sound Lab, SIA.
z “Made for iPod” and “Made for iPhone” mean that an electronic accessory has been designed to connect
specifically to iPod, or iPhone, respectively, and has been certified by the developer to meet Apple
performance standards. Apple is not responsible for the operation of this device or its compliance with
safety and regulatory standards. Please note that the use of this accessory with iPod, or iPhone may
affect wireless performance.
z iPhone, iPod, iPod classic, iPod nano, and iPod touch are trademarks of Apple Inc., registered in the U.S.
and other countries.
z Windows Media is a trademark of Microsoft Corporation registered in the U.S. and other countries.
z The Bluetooth® word mark and logos are owned by the Bluetooth SIG, Inc. and any use of such marks by
JVC KENWOOD Corporation is under license.
English
K-531[E_X].indb 45
45
12.8.1 11:40:15 AM
Specifications
Amplifier
Effective output power during STEREO operation
40 W + 40 W, RMS (1 kHz, 10% T.H.D., 4 Ω)
Total harmonic distortion
0.03% (1 kHz, 1 W, 4 Ω)
Tone control
characteristics
BASS
MID
TREBLE
(TURN OVER 100 Hz)
±4.0 dB (at 100 Hz)
(TURN OVER 150 Hz)
±6.6 dB (at 100 Hz)
(TURN OVER 200 Hz)
±7.5 dB (at 100 Hz)
(TURN OVER 1 kHz)
±8.0 dB (at 1 kHz)
(TURN OVER 2 kHz)
±8.0 dB (at 2 kHz)
(TURN OVER 3 kHz)
±8.0 dB (at 3 kHz)
(TURN OVER 5 kHz)
±7.6 dB (at 10 kHz)
(TURN OVER 7 kHz)
±6.7 dB (at 10 kHz)
(TURN OVER 10 kHz)
D-Bass (+10)
±4.0 dB (at 10 kHz)
+15.9 dB (60 Hz, Vol. 60)
Input terminals (Sensitivity/Impedance)
Output terminals (Level/Impedance)
AUX PLAY IN
500 mV / 47 kΩ
AUDIO IN
250 mV / 47 kΩ
SUB WOOFER PRE OUT
2 V / 160 Ω
AUX REC OUT
500 mV / 160 Ω
Digital unit
Sampling frequencies
32 kHz, 44.1 kHz, 48 kHz, 88.2 kHz, 96 kHz
Supreme EX (CD, D-IN, iPod, USB)
Playable
frequencies
1 Hz to 24 kHz
Input terminals (Sensitivity/Wave length)
Optical
–15 dBm to –24 dBm, 660 nm ±30 nm
Output terminals (Level/Wave length)
Optical
–21 dBm to –15 dBm, 660 nm
USB
Usable USB device
USB Mass storage class device
Interface
USB2.0 (Full speed) USB1.1 compatible
File system
FAT 16/FAT 32
Output
DC 5 V
500 mA
DC 5 V
1A
iPod/iPhone
Output
Tuner
FM tuner
AM tuner
46
Reception frequency range
87.5 MHz to 108 MHz
Antenna impedance
75 Ω unbalanced
Reception frequency range
531 kHz to 1,602 kHz
K-531
K-531[E_X].indb 46
12.8.1 11:40:15 AM
Specifications
CD player
Scanning method
Semiconductor laser
BLUETOOTH
Version
BLUETOOTH ver. 2.1 +EDR Class 2
Compatible BLUETOOTH profile
A2DP (Advanced Audio Distribution Profile)*
AVRCP (Audio Video Remote Control Profile)
Communication format
2.4 GHz FHSS
Maximum communication range
Line of sight approx. 10 m
* For reception only, compatible with SCMS-T.
Power supply, etc.
Power supply
Europe
AC 230 V, 50 Hz
Australia
AC 240 V, 50 Hz
Standby power consumption
0.5 W or less
Power consumption
45 W
Dimensions (Width × Height × Depth)
200 mm × 95 mm × 299 mm
Weight (net)
2.3 kg
Speaker
Enclosure
Speaker unit
Rated impedance
Bass-reflex
Woofer
110 mm Cone type
Tweeter
25 mm Dome type
4Ω
Max input power
40 W
Dimensions (Width × Height × Depth)
140 mm × 237 mm × 236 mm
Weight (net)
3.4 kg (each)
Notes:
z JVC KENWOOD follows a policy of continuous advancements in development. For this reason specifications
may be changed without notice.
z Sufficient performance may not be exhibited at extremely cold locations (where water freezes).
English
K-531[E_X].indb 47
47
12.8.1 11:40:15 AM
For your records
Record the serial number, found on the back of the unit,
in the spaces designated on the warranty card, and
in the space provided below. Refer to the model and
serial numbers whenever you call upon your dealer for
information or service on this product.
Model
Serial Number
K-531[E_X].indb 48
12.8.1 11:40:15 AM