1
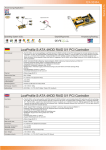
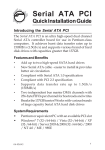
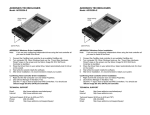
MANL-SIL3114-EN-240604
SERIAL ATA
HOST CONTROLLER CARD
USER MANUAL
SA3114-4I
SA3114-4IR
SA3114-2E2I
SA3114-2E2IR
WARNING
Before installing and activating RAID function, please
make sure you have a complete backup of your existing
data from hard drives. Manufacturer is not responsible for
data loss due to abuse, misuse, or neglect. Should you
have any installation problem, please contact your dealer
for assistance.
All contents and specification mentioned in this manual are subject to change without prior notice
All brand names and trademarks referenced and mentioned in this manual are property of their respective owners.
Features
This Serial ATA host controller card is designed to offer a high performance, cost effective and reliability
solution to user who needs to accommodate storage peripherals with the new Serial ATA interface. It can
control four independent Serial ATA channel, each channel has its own Serial ATA bus and will support one
Serial ATA device. This card supports the Serial ATA (Generation 1) transfer rate of 1.5Gb/s (150MB/s).
Specifications
•
•
•
•
•
•
•
•
Silicon Image SIL3114 Serial ATA (SATA) host controller chipset
Compliant with Serial ATA Specification Revision 1.0
Supports Serial ATA Generation 1 transfer rate of 1.5Gb/s (150MB/s)
Compliant with PCI Specification Revision 2.2
Compliant with PCI IDE Controller Specification Revision 1.0
Compliant with Programming Interface for Bus Master IDE Controller Revision 1.0
Supports four independent Serial ATA channel
Independent 256-byte FIFOs per Serial ATA channel for host reads and writes
RAID Functions (Optional)
•
•
•
Supports RAID functions 0, 1 or 0+1
Supports co-exist RAID set and Non-RAID HDD
Allow HDDs with different sizes to be configured in a RAID set
Accessories
•
•
•
•
One User Manual
One Serial ATA host controller card
Two Serial ATA cables
One Driver CD
How to install the Serial ATA host controller card into your computer
1.
2.
3.
4.
5.
Turn off your computer and all external devices connect to it.
Disconnect your computer from the power sources.
Open the computer case. Refer to your computer user manual for more details.
Find an available PCI slot and remove the slot bracket. Save the bracket screw for later use.
Align the Serial ATA host controller card horizontally with respect to the PCI slot and insert it into the slot
firmly and evenly. Take care not to force it into the slot. Once you have properly positioned the Serial ATA
host controller card into the slot, fasten it to the computer case with the bracket screw you have saved.
6. Connect the HDD LED connector from the computer case to the HDD Busy LED connector (JP4) on the
Serial ATA host controller card.
7. Connect any Serial ATA device to the connector(s) of the Serial ATA host controller card with the provided
Serial ATA cable.
8. Close the computer case. Make sure to reconnect all the external devices to your computer.
1
Driver Installation
Note: Current drivers can only support Windows 98/98SE, ME, NT, 2000 and XP.
Driver Locations
This Serial ATA host controller card has two sets of drivers.
a) SIL3114RAID
b) SIL3114
: Serial ATA host controller card (BIOS with RAID function).
: Serial ATA host controller card (BIOS without RAID function).
These two sets of drivers can be located in these two directories respectively of the Driver CD.
1. SIL3114RAID
2. SIL3114
: /Silicon_Image/SIL3114RAID/
: /Silicon_Image/SIL3114/
Windows 98/98SE or Windows ME
Step 1:
Start Windows 98/98SE or Windows ME.
Step 2:
The “Update Device Driver Wizard” will appear, informing you that it has found a “PCI RAID
Controller”, click the “Next” button.
Step 3:
(a) Windows 98/98SE user - Select “Specify a location”.
(b) Windows ME user - Select “Specify the location of the driver (Advanced)” and then select
“Specify a location”.
Step 4:
Insert the Driver CD in the CDROM drive and click on the “Browse” button.
Step 5:
At the “Browse” option:
(1) Select CDROM drive.
(2) Select folder “Silicon_Image”.
(3a) BIOS with RAID function: Select folder “SIL3114RAID” or
(3b) BIOS without RAID function: Select folder “SIL3114”.
(4) Select folder “Win_Drv”.
Step 6:
The “Update Device Driver Wizard” will appear, informing you that it has found:
(1a) BIOS with RAID function: “Silicon Image SIL 3114 SATARaid Controller” driver or
(1b) BIOS without RAID function: “Silicon Image SIL 3114 SATALink Controller” driver.
(2) Click the “Next” button.
Step 7:
Follow the instructions to finish up the driver installation.
Windows NT 4.0 and Windows 2000/XP Fresh Installation
If you are performing a new Windows NT 4.0, 2000 or XP installation to a SATA hard drive attached to the
Serial ATA host controller card.
Step 1: Make sure to copy the Windows driver from the Driver CD on to a 1.44MB floppy diskette. You will
need the driver in the 1.44MB floppy diskette during the installation.
2
(a) BIOS with RAID function: Copy the /Silicon_Image/SIL3114RAID/Win_Drv driver from the
Driver CD to the diskette.
(b) BIOS without RAID function: Copy the /Silicon_Image/SIL3114/Win_drv driver from the
Driver CD to the diskette.
Step 2:
Make sure the SATA hard drive is properly connected to the Serial ATA host controller card and the
card is properly installed into a PCI slot.
Step 3:
If your Windows NT/2000/XP Installation CD is bootable, simply put the CD into the CDROM
drive and startup your system to begin installation. If your Windows NT/2000/XP Installation CD is
not bootable, you must use the Windows NT/2000/XP bootable diskette to boot up first before
commencing installation.
Step 4:
Press “F6” for third party SCSI or driver installation at the beginning of the text mode installation.
Insert the 1.44MB floppy diskette into the floppy drive. Press “s” when setup asks if you want to
specify an additional device.
(a) BIOS with RAID function: Select “Silicon Image SIL3114 SATARaid Controller”.
(b) BIOS without RAID function: Select “Silicon Image SIL3114 SATALink Controller”.
Step 5:
Press “Enter” to continue on with text mode setup.
Step 6:
Follow the setup instructions to complete installing Windows NT/2000/XP.
Installing drivers to an existing SATA hard drive with Windows NT 4.0:
If you are already using a SATA hard drive with Windows N.T in your system and you want to connect this
SATA hard drive to the Serial ATA host controller card as the default bootable drive, you must follow these
procedures.
Step 1:
Make sure the SATA hard drive is still connected to the default SATA controller. Make sure the
Serial ATA host controller card is properly installed into your system and there is no SATA device
connected to the card.
Step 2:
Start Windows NT.
Step 3:
After Windows NT boot up, open “Control Panel”, and then enter “SCSI Adapters”.
Step 4:
Insert the Driver CD into the CDROM drive and select “Drivers” tab and click “Add”.
Step 5:
Select “Have Disk” and click on “Browse” button.
(1) Select CDROM drive.
(2) Select folder “Silicon_Image”.
(3a) BIOS with RAID function: Select folder “SIL3114RAID” or
(3b) BIOS without RAID function: Select folder “SIL3114.
(4) Select folder “Win_Drv”.
Step 6:
(1a) BIOS with RAID function: Select “Silicon Image SIL3114 SATARaid Controller”
(1b) BIOS without RAID function: Select “Silicon Image SIL3114 SATALink Controller”
3
(2) Click “OK” to continue.
Step 7:
Click “Yes” to restart your computer to complete driver installation.
Step 8:
Finally, switch off your system. Connect the SATA hard disk from the mainboard’s SATA controller
to the Serial ATA host controller card and start Windows NT.
Installing drivers to an existing SATA hard drive with Windows 2000/XP:
If you are already using a SATA hard drive with Windows N.T in your system and you want to connect this
SATA hard drive to the Serial ATA host controller card as the default bootable drive, you must follow these
procedures.
Step 1:
Make sure the SATA hard drive is still connected to the default SATA controller. Make sure the
Serial ATA host controller card is properly installed into your system and there is no SATA device
connected to the card.
Step 2:
Start Windows 2000/XP.
Step 3:
Windows 2000/XP will inform you that it has found a “PCI RAID Controller”. Click the “Next”
button to continue.
Step 4:
Select “Search for a suitable driver for your device (Recommended)” and click on the “Next”
button.
Step 5:
Insert Driver CD into the CDROM drive. Select “Specify a location” and click the “Next” button to
continue.
(1)
(2)
(3a)
(3b)
(4)
Step 6:
Select CDROM drive.
Select folder “Silicon_Image”
BIOS with RAID function: select folder “SIL3114RAID” or
BIOS without RAID function: select folder “SIL3114”.
Select folder “Win_Drv”.
The “Update Device Driver Wizard” will appear, informing you that it has found
(1a) BIOS with RAID function: “Silicon Image SIL3114 SATARaid Controller” driver.
(1b) BIOS without RAID function: “Silicon Image SIL3114 SATALink Controller” driver.
(2) Click “OK” button and then the “Next” button.
Step 7:
If the “Digital Signature Not Found” dialog appears, click “Yes” to continue installing the driver.
Step 8:
Follow the instructions to finish up the driver installation.
Step 9:
Finally, switch off your system. Connect the SATA hard disk from the mainboard’s SATA controller
to the Serial ATA host controller card and start Windows 2000/XP.
4
Installing RAID Management Software
This software is use to monitor and manage the RAID set under Windows environment. To install this RAID
Management software, please follow these steps:
Step 1:
Start Windows.
Step 2:
Click “Start”, and then “Run”.
Step 3:
Insert the Driver CD into the CDROM drive and select “Browse” button.
• Select CDROM drive
• Select folder “Silicon_Image”
• Select folder “SIL3114RAID”
• Select folder “Utility”
• Select “JAVA_RUNTIME_ENVIRO.EXE”
• Click the “Open” button and then the “OK” button.
Step 4:
Follow the instructions to complete installation.
Step 5:
Once you have installed the “JAVA_RUNTIME_ENVIRO” program, you need to install the RAID
Management software.
•
•
•
•
•
•
Select CDROM drive
Select folder “Silicon_Image”
Select folder “SIL3114RAID”
Select folder “Utility”
Select “JAVA_SATARAID.EXE”
Click the “Open” button and then the “OK” button.
Step 6:
Follow the instructions to complete installation.
Step 7:
For more information on the RAID Management software, please refer to the “SATARAID User’s
Manual” located in the \Silicon_Image\SIL3114RAID\UTILITY directory.
BIOS Setup
If you already have a bootable hard disk connected to the mainboard’s IDE controller and you want to use the
SATA hard disk connected to the Serial ATA host controller card as default bootable drive (Drive C), you need
to set the mainboard‘s BIOS to boot SCSI first. Please refer to the mainboard’s user manual for more details.
5