Transcript
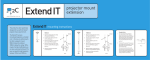
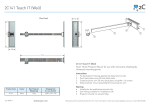
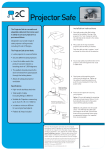
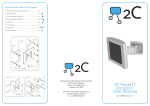
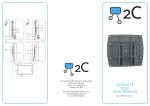
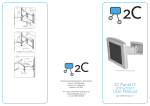
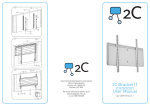
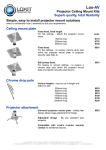
Universal Projector Mount
Hang IT
1. Each box contains 4 x M4, M5 & M6 mounting bolts, 4 springs
and 4 adjustable arms. Determine which mounting bolts to use,
and set others aside. See Pic 1.
Pic 1
2. Attach the arms to the U bracket as shown in Pic 2. Make sure
to use the larger washer under the head of the M8 bolt, and the
smaller washer directly under the M8 nut. Do not fully tighten
the nut yet.
3. Connect the projector mount to projector. Fit the springs
under the arms and adjust the bolts to ensure the U bracket is
horizontal. Do not tighten any bolts yet. See Pic 3.
Pic 2
4. Move the position of the U bracket to the centre of gravity of the
projector. In some cases, you may wish to move the bracket to
one side, to ensure the lens is on the centre line of the mount
and possibly screen. Pick up the projector by the U bracket to
ensure it hangs horizontally under the bracket.
5. Secure the mounting bolts into the projector, and lock the
central M8 locking bolt.
Pic 3
6. Fit ceiling plate to ceiling. See Pic 4. Ensure that it is aligned
squarely with the projection direction. This will allow yaw and tilt
adjustments to be made independently of each other.
7. Bolt the centre pivot onto the ceiling plate using the supplied M6
bolts and washers.
Pic 4
8. Hang the projector onto the centre pivot and secure using the
supplied M6 bolts & washers.
9. Adjust each of the projector settings (pan/tilt/yaw). Once you are
happy with the setting, lock it off using the supplied allen keys on
the M6 bolt & M4 grub screw. See Pic 5.
10.You are now ready to enjoy the show!
Pic 5
Need more drop?
The 2C Extend IT will give you a 500mm or 1000mm drop.
Product Code 2C111 (Black) or 2C110 (White)
www.2cdisplays.com.au
March 2009 v1