Transcript
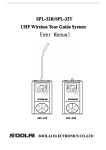
Thank you for purchasing the iGlow controller for
Nintendo Wii. Your iGlow controller is designed
for playing Nintendo GameCube games on your
Nintendo Wii or Nintendo GameCube console.
Controller Set-up:
1. Open the battery compartment and install 3 "AAA"
batteries. Replace battery lid.
iGlow Wireless
CAUTION: DO NOT use/mix rechargeable batteries,
never mix old and new alkaline batteries.
2. Connect the included receiver to control port 1 of
your Nintendo Wii or GameCube console. Note: if using
multiple controllers, connect each receiver to a different
control port.
3. Power your Nintendo Wii or GameCube system “ON”.
4. Using your Nintendo Wii remote select the Nintendo
GameCube disc channel. Note: the iGlow controller will
not function until the Nintendo GameCube has been
selected from the channel menu.
5. Power “ON” your iGlow controller by sliding the power
switch to the “ON” position.
6. The iGlow controller features a auto-sync function
that will automatically connect your iGlow controller to
the receiver.
Note: if the controller does not automatically sync
to the receiver:
• press the “CONNECT” button located on the receiver,
the LED will flash rapidly.
• press the “CONNECT” button on the iGlow controller
and the receivers LED will become solid.
• your iGlow controller is now properly connected.
Connecting multiple controllers:
To connect multiple controllers, connect and sync each
controller separately.
Compatibility:
Nintendo Wii
The iGlow controller is only compatible when playing
Nintendo GameCube games on your Nintendo Wii.
The iGlow controller is NOT COMPATIBLE when
playing Nintendo Wii games. To restart your game while
playing GameCube games on your Nintendo Wii, press
the reset button located on the Wii game console.
Nintendo Gamecube
The iGlow controller is fully compatible with the
Nintendo GameCube console. iGlow will work with
all Nintendo GameCube games when played on the
GameCube system.
Start/Pause
Turbo
L Button
Y
Left Analog stick
B
C
Directional pad
A
x
Connect
R button
Z button
Y button
X button
A button
B button
C button/
right analog
stick
On/Off
FCC NOTE: This equipment has been tested and found to comply with the limits
for a class B digital devursuant to Part 15 of the FCC rules. These limits are
designed to provide reasonable protection against harmful interference in a
residential installation. This equipment generates, uses and can radiate radio
frequency energy and, if not installed and used in accordance with the
instructions, may cause harmful interference to radio communications.
However, there is no guarantee that interference will not occur in a particular
installation. If this equipment does cause harmful interference to radio or
television reception, which can be determined by turning the equipment off
and on, the user is encouraged to try the interference by one of the following
measures.
· Reorient or relocate the receiving antenna.
· Increase the separation between the equipment and receiver.
· Connect the equipment into an outlet on a circuit different from that to which
the receiver is connected.
· Consult the dealer or an experienced radio/TV technician for help.
Any changes or modifications made on the system not expressly approved by
the manufacturer could void the user’s authority to operate equipment.
This device complies with Part 15 of the FCC rules. Operation is subject to the
following two conditions: (1) This device may not cause harmful interfence, and
(2) this device must accept any interference received, including interference that
may cause undesired operation.
®
USER’S GUIDE
FOR TECHNICAL SUPPORT
PLEASE CONTACT: 1-877-999-DREAM
or e-mail [email protected]
P.O. BOX 478
Torrance, CA 90508