1
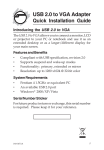
Digital Photo Keychain-1.5"
Quick Installation Guide
Introducing the Digital Photo Keychain
The Digital Photo Keychain-1.5" will let you share your
favorite digital photos with family and friends.
Features and Benefits
•
•
•
•
•
•
Single or slide show display modes
8MB memory built-in
1.5", 128 x 128 pixel screen
Supports JPG, BMP and GIF formats
Up to 2.5 hr battery life via built-in rechargeable
Li-Polymer battery
Includes USB cable for easy charging and photo
transfer
Serial Number Sticker
For future product return or exchange, this serial number
is required. Please keep it for your reference.
04-0474B
1
System Requirements
•
•
Desktop or notebook PC with an available USB port
Windows® 2000/XP (32-/64-bit)/Vista (32-/64-bit)
Package Contents
•
•
•
Digital Photo Keychain-1.5"
USB cable
Quick Installation Guide
Layout
LCD
USB Port
Charging Indicator
Clock
On/Off
Next
Previous
Figure 1: Layout
2
Hardware Installation
In order for the Digital Photo Keychain-1.5" to work
properly, the existing USB host adapter must be working
properly. Simply plug the keychain into a USB port and
it is ready for use, no driver installation is needed.
1.
2.
3.
4.
5.
6.
7.
Connect the Digital Photo Keychain-1.5" to your PC
using the included USB cable.
The ImageViewer application will launch
automatically when connected. If the software
does not launch automatically, open My Computer,
double click the keychain drive, then double click
the ImageViewer icon. For Windows Vista the user
must have administrator rights.
With the software open, click on Load to view all
images stored on the keychain. If the screen is
empty, no photos are stored in memory.
Click Add Image as to add a new image into the
keychain. Locate the image from your computer
hard drive. Note: images must be .jpg, .bmp or .gif
format.
After selecting all the images you want to add to the
keychain, click the Save button.
Use the ImageViewer software to configure the
keychain. See page 4-5 for more information.
Unplug the USB cable and you are ready to share
your photos with family or friends.
3
ImageViewer
•
4
Settings: Light Off, adjusts backlight turn off time;
Advance Show, slideshow enable/disable;
Brightness, Foreground and Background color
•
•
•
•
•
•
•
•
•
•
•
•
Set Logo Image: allows you to choose what image
is shown when powering on
Rotate: highlight an image and click Rotate to
rotate image 90, 180, 270 or 360 degrees
Edit: changes the size of the selected image as it
appears on the screen
Advance Show (slideshow): this feature is disabled.
Add Image as: adds a new image into the keychain
Move up: moves the selected image up
Move down: moves the selected image down
Delete: deletes the highlighted image
Clear: clears the entire image list
Load: press to view all of the images stored on the
keychain
Save: saves any changes to the ImageViewer
software
Exit: press to exit the ImageViewer software
Advance Show (slideshow)
This section configures your slideshow setting.
1.
2.
3.
At ImageViewer window click Setting.
At the Setting window, in Advance Show box,
change the number to 10 or above, then click OK.
Click Save, wait a few moments as the changes are
saved, then click Exit.
5
How to Operate the Digital Photo Keychain
Power On/Off
Press and hold the On/Off button for 5 seconds. If there
are any images saved on the photo viewer they will be
displayed on the LCD screen when powered on.
View Images
Press the Next or Previous button to view a different
image.
Charging the Battery
The Digital Photo Keychain-1.5" has a built-in rechargeable
battery. When the battery is in need of charge, Low
Battery will appear at the top of the LCD screen. Use the
included USB cable to charge the battery. Connect the USB
cable to the keychain, then to your PC. During charge the
red light will be on. The light will go off when the battery
is fully charged.
Clock
Press to display the time. The time will adjust according
to your computer clock.
Slideshow (On/Off)
Press and hold down the Next or Previous button, when
Power OFF - On displays release. To turn off the slideshow,
press and hold the button again, when Power Off-Off
displays release the button.
6
Technical Support and Warranty
QUESTIONS? SIIG’s Online Support has answers! Simply visit our web site at
www.siig.com and click Support. Our online support database is updated daily
with new drivers and solutions. Answers to your questions could be just a few
clicks away. You can also submit questions online and a technical support
analysts will promptly respond.
SIIG offers a 90-day manufacturer warranty with this product. Please see our
web site for more warranty details. If you encounter any problems with this
product, please follow the procedures below.
If it is within the store's return policy period, please return the
product to the store where you purchased from. If your purchase has passed the
store's return policy period, please follow these steps to have the product repaired
or replaced.
Step 1: Submit your RMA request.
Go to www.siig.com, click Support, then RMA to submit a
request to SIIG RMA. If the product is determined to be
defective, an RMA number will be issued. SIIG RMA department can also be
reached at (510) 413-5333.
Step 2: After obtaining an RMA number, ship the product.
• Properly pack the product for shipping. All accessories that came with
the original package must be included.
• Clearly write your RMA number on the top of the returned package. SIIG
will refuse to accept any shipping package, and will not be responsible
for a product returned without an RMA number posted on the outside of
the shipping carton.
• You are responsible for the cost of shipping. Ship the product to the
following address:
SIIG, Inc.
6078 Stewart Avenue
Fremont, CA 94538-3152, USA
RMA #: ________________
•
SIIG will ship the repaired or replaced product via Ground
in the U.S. and International Economy outside of the U.S. at
no cost to the customer.
7
About SIIG, Inc.
Founded in 1985, SIIG, Inc. is a leading computer upgrade manufacturer of I/O
connectivity products, including PCI & ISA serial and parallel ports, USB, Serial
ATA & UltraATA controllers, FireWire (1394a/b), networking, sound cards,
and other accessories. SIIG is the premier one-stop source of upgrades.
SIIG products offer comprehensive user manuals, many user-friendly features,
and are backed by an extensive manufacturer warranty. High-quality control
standards are evident by the overall ease of installation and compatibility of
our products, as well as one of the lowest defective return rates in the industry.
SIIG products can be found in computer retail stores, mail order catalogs,
through major distributors, system integrators, and VARs in the Americas and
the UK, and through e-commerce sites.
PRODUCT NAME
Digital Photo Keychain-1.5"
FCC RULES: TESTED TO COMPLY WITH FCC PART 15, CLASS B
OPERATING ENVIRONMENT: FOR HOME OR OFFICE USE
FCC COMPLIANCE STATEMENT:
This device complies with part 15 of the FCC Rules. Operation is subject
to the following two conditions: (1) This device may not cause harmful
interference, and (2) this device must accept any interference received,
including interference that may cause undesired operation.
THE PARTY RESPONSIBLE FOR PRODUCT COMPLIANCE
SIIG, Inc.
6078 Stewart Avenue
Fremont, CA 94538-3152, USA
Digital Photo Keychain-1.5" is a trademark of SIIG, Inc. SIIG and the SIIG logo are registered
trademarks of SIIG, Inc. Microsoft, Windows and Windows Vista are either registered
trademarks or trademarks of Microsoft Corporation in the United States and/or other
countries. Other names used in this publication are for identification only and may be
trademarks of their respective companies.
February, 2008
Copyright © 2008 by SIIG, Inc. All rights reserved.