1
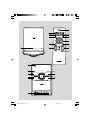
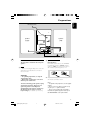
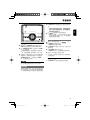
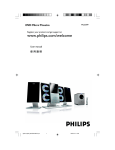
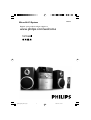
MC147
Micro Hi-Fi System
Register your product and get support at
www.philips.com/welcome
pg001-pg020_MC147_98
1
2007.8.27, 17:04
1
3
$
#
%
¡
^
&
*
!
PULL TO OPEN
9
5
0
4
(
)
1
STANDBY-ON
2
iR
3
4
5
M I C RO S Y S T E M M C 1 4 7
6
CD/CD-R/CD-RW COMPATIBLE
SOURCE
VOL
TUNING
REPEAT
PROG
PRESET
VOL
DBB
7
8
9
0
PULL TO OPEN
@
2
pg001-pg020_MC147_98
2
2007.8.27, 17:04
English
Index
English ------------------------------------------------ 7
-------------------------------------------------------- 21
CAUTION
Use of controls or adjustments or
performance of procedures other than
herein may result in hazardous
radiation exposure or other unsafe
operation.
3
pg001-pg020_MC147_98
3
2007.8.27, 17:04
Contents
English
General Information
Tape Operation / Recording
Supplied accessories ............................................
Environmental Information ................................
Safety Information ................................................
Hearing Safety .......................................................
5
5
5
6
Tape playback ...................................................... 14
General information on recording ................. 14
Synchro start CD recording ............................ 14
Recording from the radio ................................. 15
Preparations
Other Connection
Rear connections ................................................. 7
Inserting batteries into the Remote Control ...
.................................................................................. 8
Using the Remote Control to operate the
system ..................................................................... 8
Listening to an external source ...................... 15
Controls
Controls on the system and remote control ...
.................................................................................. 9
Controls available on the remote control only
.................................................................................. 9
Basic Functions
Switching the system on ................................... 10
Power-saving automatic standby ..................... 10
Adjusting volume and sound ............................ 10
Maintenance .............................................. 16
Clock/Timer
Setting the clock ................................................. 17
Setting the timer ................................................. 17
Activating and deactivating TIMER ................. 17
Activating and deactivating SLEEP .................. 17
Specifications ........................................... 18
Troubleshooting ............................. 19~20
CD Operation
Loading a disc ...................................................... 11
Basic playback controls ..................................... 11
Different play modes: SHUFFLE and REPEAT ...
................................................................................ 12
Programming track numbers ........................... 12
Reviewing the programme ............................... 12
Erasing the programme ..................................... 12
Radio Reception
Tuning to radio stations .................................... 13
Programming radio stations ............................. 13
Automatic programming ......................................... 13
Manual programming ............................................... 13
Tuning to preset radio stations ....................... 13
4
pg001-pg020_MC147_98
4
2007.8.27, 17:04
Congratulations on your purchase and welcome
to Philips!
● Install the unit near the AC outlet and where the
AC power plug can be easily reached.
To fully benefit from the support that Philips
offers, register your product at www.philips.com/
welcome.
● Place the system in a location with adequate
ventilation to prevent internal heat build-up in
your system. Allow at least 10 cm (4 inches)
clearance from the rear and the top of the unit
and 5 cm (2 inches) from each side.
The voltage selector located at the rear
of this system is preset at
220V-240V from the factory. For
countries that operate at 110V-127V,
please adjust to 110V-127V before you
switch on the system.
Supplied accessories
● The ventilation should not be impeded by
covering the ventilation openings with items,
such as newspapers, table-cloths, cur tains, etc.
● Do not expose the system, batteries or discs to
excessive moisture, rain, sand or heat sources
caused by heating equipment or direct sunlight.
● No naked flame sources, such as lighted candles,
should be placed on the apparatus.
– 2 speaker boxes
– remote control
● No objects filled with liquids, such as vases, shall
be placed on the apparatus.
Environmental Information
All unnecessary packaging has been omitted. We
have tried to make the packaging easy to
separate into three materials: cardboard (box),
polystyrene foam (buffer) and polyethylene (bags,
protective foam sheet).
Your system consists of materials which can be
recycled and reused if disassembled by a
specialized company. Please observe the local
regulations regarding the disposal of packaging
materials, exhausted batteries and old
equipment.
Safety Information
● Before operating the system, check that the
operating voltage indicated on the typeplate (or
the voltage indication beside the voltage
selector) of your system is identical with the
voltage of your local power supply. If not, please
consult your dealer.
● If the system is brought directly from a cold to a
warm location, or is placed in a very damp room,
moisture may condense on the lens of the disc
unit inside the system. Should this occur, the CD
player would not operate normally. Leave the
power on for about one hour with no disc in the
system until normal playback is possible.
● The mechanical parts of the set contain selflubricating bearings and must not be oiled or
lubricated.
● When the system is switched to Standby
mode, it is still consuming some power.
To disconnect the system from the
power supply completely, remove the AC
power plug from the wall socket.
● Place the system on a flat, hard and stable
surface.
● Where the MAINS plug or an appliance coupler
is used as the disconnet device, the disconnet
device shall remain readily operable.
● The apparatus shall not be exposed to
dripping or splashing.
5
pg001-pg020_MC147_98
5
2007.8.27, 17:04
English
General Information
General Information
English
Hearing Safety
Listen at a moderate volume.
● Using headphones at a high volume can impair
your hearing. This product can produce sounds
in decibel ranges that may cause hearing loss for
a normal person, even for exposure less than a
minute. The higher decibel ranges are offered
for those that may have already experienced
some hearing loss.
● Sound can be deceiving. Over time your hearing
"comfort level" adapts to higher volumes of
sound. So after prolonged listening, what sounds
"normal" can actually be loud and harmful to
your hearing. To guard against this, set your
volume to a safe level before your hearing
adapts and leave it there.
To establish a safe volume level:
● Set your volume control at a low setting.
● Slowly increase the sound until you can hear it
comfortably and clearly, without distortion.
Listen for reasonable periods of time:
● Prolonged exposure to sound, even at normally
"safe" levels, can also cause hearing loss.
● Be sure to use your equipment reasonably and
take appropriate breaks.
Be sure to observe the following
guidelines when using your headphones.
● Listen at reasonable volumes for reasonable
periods of time.
● Be careful not to adjust the volume as your
hearing adapts.
● Do not turn up the volume so high that you
can't hear what's around you.
● You should use caution or temporarily
discontinue use in potentially hazardous
situations.
● Do not use headphones while operating a
motorized vehicle, cycling, skateboarding, etc.; it
may create a traffic hazard and is illegal in many
areas.
6
pg001-pg020_MC147_98
6
2007.8.27, 17:04
English
Preparations
FM wire antenna
speaker
(left)
speaker
(right)
AC power cord
B Speakers Connection
Rear connections
The type plate is located at the rear of the
system.
A Power
– Before connecting the AC power cord to the
wall outlet, ensure that all other connections
have been made.
WARNING!
– For optimal performance, use only the
original power cable.
– Never make or change any connections
with the power switched on.
To avoid overheating of the system, a safety
circuit has been built in. Therefore, your
system may switch to Standby mode
automatically under extreme conditions. If
this happens, let the system cool down
before reusing it (not available for all versions).
Front Speakers
Connect the speaker wires to the SPEAKERS
terminals, right speaker to "RIGHT" and left
speaker to "LEFT", coloured (marked) wire to
"+" and black (unmarked) wire to "-".
2
1
● Fully insert the stripped portion of the speaker
wire into the terminal as shown.
Notes:
– For optimal sound performance, use the supplied
speakers.
– Do not connect more than one speaker to any
one pair of +/- speaker terminals.
– Do not connect speakers with an impedance
lower than the speakers supplied. Please refer to
the SPECIFICATIONS section of this manual.
7
pg001-pg020_MC147_98
7
2007.8.27, 17:04
Preparations
English
Inserting batteries into the
Remote Control
1
2
3
Open the battery compartment.
Insert two R03 or AAA batteries following the
indications (+/-) inside the compartment.
Close the cover.
1
3
2
Using the Remote Control to
operate the system
1
2
Aim the Remote Control directly at the remote
sensor (IR) on the front panel.
Do not put any objects between the Remote
Control and the system while operating the
system.
CAUTION!
– Remove batteries if they are
exhausted or if the Remote Control is
not being used for a long time.
– Do not use old and new or different
types of batteries in combination.
– Batteries contain chemical substances,
so they should be disposed of properly.
8
pg001-pg020_MC147_98
8
2007.8.27, 17:04
Controls on the system and
remote control
1 STANDBY-ON2 (POWER)
–
–
AUX jack (located on the back panel)
connects an external source (3.5 mm socket)
–
HEADPHONE (located on the back panel)
connects headphones
switches the system to standby or on.
2 iR SENSOR
–
3 SOURCE
–
–
Controls available on the remote
control only
infrared sensor for remote control.
selects the respective sound source for CD/
TUNER/TAPE/AUX.
switches on the system.
4 PRESET +/-
# REP ALL
–
–
for radio .............. selects a preset radio station.
repeats a track/disc/ all programmed tracks.
$ SHUF
plays CD tracks in random order..
% SLEEP
5 DBB
–
–
^ TIMER ON/OFF
(Dynamic Bass Boost)
enhances the bass.
6 TUNING 4
¢
for Tuner ............. tunes to radio stations.
for CD ................. skips to the beginning of the
current/previous/subsequent
track.
................................. fast searches back and forward
within a track/CD.
for clock/timer adjusts the hours and minutes
for the clock/timer function
–
–
–
–
starts or interrupts CD playback.
à/á
for CD ................. fast searches back and forward
within a track/CD.
for Tuner ............. tunes to radio stations.
for clock/timer adjusts the hours and minutes
for the clock/timer function
¡/™
for CD ................. skips to the beginning of the
current/previous/subsequent
track.
(
VOL +/adjusts the volume level.
VOL +/adjusts the volume level.
starts or interrupts CD playback.
repeats a track/ disc/ all programmed tracks.
9 PROG
for CD ................. programmes tracks and reviews
the programme.
for Tuner ............. programmes tuner stations
manually or automatically.
09
–
stops CD playback or erases a CD programme.
sets the timer function.
* 2;
8 REPEAT
–
Turns on or off timer
& TIMER
7 2;
–
activates/deactivates or selects the sleeper time.
–
) MUTE
–
interrupts and resumes sound reproduction.
¡ CLOCK/DISPLAY
for clock .............. sets the clock function.
................................. views clock.
! PULL TO OPEN
–
opens/closes the CD door.
@ Tape Deck Operation
RECORD● ... starts recording.
PLAY 2 ............ starts playback.
SEARCHà / á fast rewinds/winds the tape.
STOP•OPENÇ0
................................. stops the tape; opens the tape
compartment.
PAUSEÅ ....... interrupts recording or playback.
9
pg001-pg020_MC147_98
9
2007.8.27, 17:04
English
Controls (illustrations on page 3)
Basic Functions
English
STANDBY-ON
Adjusting volume and sound
M I C RO S Y S T E M M C 1 4 7
iR
1
CD/CD-R/CD-RW COMPATIBLE
SOURCE
VOL
TUNING
REPEAT
PROG
PRESET
VOL
DBB
IMPORTANT:
Before you operate the system, complete
the preparation procedures.
Press VOL +/- to adjust volume.
➜ Display shows the volume level VOL and a
number from 0-32.
2 Press DBB to switch bass enhancement on or
off.
➜ Display shows:
if the DBB is activated.
3 Press MUTE on the remote control to
interrupt sound reproduction instantly.
➜ Playback will continue without sound.
● To activate sound reproduction you can:
– press MUTE again;
– adjust the volume controls;
– change source.
Switching the system on
● Press STANDBY-ON 2 or SOURCE
(POWER on the remote control).
➜ The system will switch to the last selected
source.
● Press DISC, TUN, TAPE or AUX on the
remote control.
➜ The system will switch to the selected source.
To switch the system to standby mode
● Press STANDBY-ON 2 on the system (or
POWER on the remote control).
Power-saving automatic standby
The power-saving feature automatically switches
to standby 15 minutes after a CD playback has
ended and no control is operated.
10
pg001-pg020_MC147_98
10
2007.8.27, 17:04
English
CD Operation
Basic playback controls
STANDBY-ON
To play a disc
M I C RO S Y S T E M M C 1 4 7
● Press 2; to star t playback.
➜ The current track number and the PLAY icon
are displayed during disc playback.
iR
CD/CD-R/CD-RW COMPATIBLE
To select a different track
SOURCE
● Press TUNING 4 ¢ (on the remote
control ¡ / ™) once or repeatedly until the
desired track number appears in the display.
VOL
TUNING
REPEAT
PROG
PRESET
VOL
DBB
To find a passage within a track
IMPORTANT:
The lens of the CD player should never be
touched.
1
2
Loading a disc
● CD-ROM, CD-I, CDV, MP3 CD, VCD, DVD or
computer CDs, however, are not possible.
3
When you recognise the passage you want,
release TUNING 4 ¢ (on the remote
control à / á).
➜ Normal playback continues.
To interrupt playback
This CD player plays Audio Discs including CDRecordables and CD-Rewritables.
1
2
Press and hold down on TUNING 4 ¢
(on the remote control à / á).
➜ The disc is played at high speed and low
volume.
● Press 2; during playback.
➜ The display freezes and the PLAY icon flashes
when playback is interrupted.
➜ To resume, press 2; again.
To stop playback
● Press 9.
Select CD source.
Lift the CD door on the top of
the system to open the CD
compartment.
➜ “OPEn” is displayed when
you open the CD
compartment.
PULL TO OPEN
Insert a disc with the printed side facing up and
press down on PULL TO OPEN to close the
CD door.
➜ “rEAd” is displayed as the CD player scans
the contents of a disc, and then the total number
of tracks is shown.
Notes: CD play will also stop when;
– the CD door is opened.
– the disc has reached the end.
– you select another source: TUNER, TAPE or AUX.
– you select standby.
– you press the tape deck PLAY 2 key.
11
pg001-pg020_MC147_98
11
2007.8.27, 17:04
CD Operation
English
Different play modes: SHUFFLE
and REPEAT
You can select and change the various play
modes before or during playback. The play
modes cannot be combined with
PROGRAMME.
SHUF ................ tracks of the entire disc are
played in random order.
REP ALL ........... repeats the entire disc/
programme.
REP ................... plays the current track
continuously.
4
To start playback of your disc programme, press
2;.
Reviewing the programme
● Stop playback and press PROG.
Erasing the programme
You can erase the programme by:
● pressing 9 once in the STOP mode;
● pressing 9 twice during playback;
● opening the CD compartment;
➜ PROG disappears from the display.
1
To select Repeat play mode, press REPEAT on
the main unit or REP ALL on the remote
control.
● To select Shuffle play mode, press SHUF on the
remote control.
2
3
Press 2; to start playback if in the STOP
position.
To return to normal playback, press the
respective REPEAT (on the main unit), REP
ALL or SHUF (on the remote control) button
until the various SHUFFLE/ REPEAT modes are
no longer displayed.
● Press 9 once during playback to stop repeat/
shuffle playback.
● Press 9 again to cancel repeat/shuffle play mode.
Note:
– The SHUFFLE and REPEAT functions can be used
simultaneously.
Programming track numbers
Programme in the STOP position to select and
store your disc tracks in the desired sequence. If
you like, store any track more than once. Up to
20 tracks can be stored in the memory.
1
In the stop position, use the TUNING 4
¢ (on the remote control ¡ / ™) to select
your desired track number.
2
Press PROG to store.
➜ Display: PROG flashes, and 01 is displayed
briefly, then the selected track number.
3
Repeat steps 1-2 to select and store all desired
tracks.
12
pg001-pg020_MC147_98
12
2007.8.27, 17:04
1
STANDBY-ON
M I C RO S Y S T E M M C 1 4 7
English
Radio Reception
- to select the preset
Press PRESET +/number where programming should start.
Note:
– If no preset number is selected, default is preset
(1) and all your presets will be overridden.
iR
2
CD/CD-R/CD-RW COMPATIBLE
SOURCE
VOL
TUNING
REPEAT
PROG
PRESET
VOL
DBB
Press PROG. for more than 2 seconds to
activate programming.
➜ “AUtO” is displayed and available stations are
programmed in order of waveband reception
strength. The first preset automatically stored will
then be played.
Manual programming
1
2
3
Tuning to radio stations
1
Press SOURCE on the set repeatedly or press
TUN on the remote control repeatedly until
the desired waveband (FM or MW) is displayed.
2
Press PROG to activate programming.
➜ PROG flashes in the display.
Press down on TUNING 4 ¢ (à / á
on the remote control) and release the button.
➜ The radio automatically tunes to a station
with sufficient reception. Display indication during
automatic tuning: SrcH.
3
- to allocate a number
Press PRESET +/from 1 to 40 to this station.
4
Press PROG again to confirm the setting.
➜ PROG disappears, the preset number and the
frequency of the preset station are shown.
Repeat step 2 if necessary until you find the
desired station.
5
● To tune to a weak station, press TUNING 4
¢ (à / á on the remote control) briefly
and repeatedly until you have found optimal
reception.
Programming radio stations
Tune to your desired station (see Tuning to radio
stations).
Repeat the above four steps to store other
stations.
● You can override a preset station by storing
another frequency in its place.
Tuning to preset radio stations
- until the desired preset
● Press PRESET +/station is displayed.
You can store up to a total of 40 radio stations
in the memory.
Automatic programming
Automatic programming will start with a chosen
preset number. From this preset number
upwards, former programmed radio stations will
be overridden. The system will only programme
stations which are not in the memory already.
13
pg001-pg020_MC147_98
13
2007.8.27, 17:04
Tape Operation / Recording
English
PULL TO OPEN
● The best recording level is set automatically.
Altering the VOLUME or DBB controls will not
affect the recording in progress.
● The recording sound quality might differ
depending on the quality of your recording
source and the recording tape.
● At the very beginning and end of the tape, no
recording will take place during the 7 seconds
when the leader tape passes the recorder heads.
● To protect a tape from accidental erasure, have
the tape in front of you and break out the left
tab. Recording on this side is no longer possible.
If, however, you wish to record over this side
again, cover the tabs with a piece of adhesive
tape.
Tape playback
1
Synchro start CD recording
Select TAPE source.
➜ Display: shows “tAPE” throughout tape
operation.
1
2
Select CD source.
2
Open the tape key flap marked “PULL TO
OPEN” on the front panel.
3
3
Press STOP•OPENÇ0 to open the tape
door.
Press STOP•OPENÇ0 to open the tape
door.
4
Insert a recorded tape and close the tape door.
● Load the tape with the open side downward and
the full spool to the left.
5
4
5
Press PLAY 2 to start playback.
● The key is automatically released at the end of a
tape, except if PAUSE; has been activated.
6
7
8
To pause, press PAUSE;. Press again to resume.
By pressing à or á on the system fast winding
of tape is possible in both directions.
To stop the tape, press STOP•OPENÇ0.
Note:
– The source cannot be changed while playing or
recording a tape.
General information on
recording
Insert a disc and if desired, programme track
numbers.
Insert a suitable tape into the deck and close the
tape door.
Press RECORD to start recording.
➜ Playing of the CD programme starts
automatically from the beginning of the CD
after 7 seconds. It is not necessary to start the
CD player separately.
To select and record a particular passage
within a CD track:
● Press and hold down on 4 ¢. Release the
control when you recognize the passage you
want.
● To pause CD playback, press 2; .
● Recording starts from this exact point in the
track when you press RECORD●.
6
To pause, press PAUSE;. Press again to resume.
7
To stop recording, press STOP•OPENÇ0.
● Recording is permissible insofar as copyright or
other rights of third par ties are not infringed.
● For recording, use only NORMAL (IEC type I)
tapes on which the tabs have not yet been
broken. This deck is not suited for recording on
METAL (IEC IV) type tapes.
14
pg001-pg020_MC147_98
14
2007.8.27, 17:04
1
2
3
Other Connection
Recording from the radio
Listening to an external source
Tune to the desired radio station (see Tuning to
radio stations).
You can listen to the sound of the connected
external device through your system’s speakers.
Press STOP•OPENÇ0 to open the tape
door.
Insert a suitable tape into the deck and close the
tape door.
4
Press RECORD● to start recording.
5
To interrupt playback press PAUSE;. To resume,
press this key again.
6
To stop recording, press STOP•OPENÇ0.
1
2
Select AUX source by pressing SOURCE (or
AUX on the remote control).
Use a cinch cable (not supplied) to connect MC
147’s AUX jack (3.5 mm, located on the back
panel) to an AUDIO OUT or headphone jack
on an external equipment (such as CD player, or
VCR).
The making of unauthorized copies of
copy-protected material, including
computer programmes, files, broadcasts and
sound recordings, may be an infringement
of copyrights and constitute a criminal
offence. This equipment should not be used
for such purposes.
15
pg001-pg020_MC147_98
15
2007.8.27, 17:04
English
Tape Operation / Recording
Maintenance
English
Cleaning the Cabinet
● Use a soft cloth slightly moistened with a mild
detergent solution. Do not use a solution
containing alcohol, spirits, ammonia or abrasives.
Cleaning Discs
● When a disc becomes dirty,
clean it with a cleaning cloth.
Wipe the disc from the centre
out.
● Do not use solvents such as
benzene, thinner, commercially
available cleaners, or antistatic
spray intended for analogue records.
Cleaning the disc lens
● After prolonged use, dir t or dust may
accumulate at the disc lens. To ensure good
playback quality, clean the disc lens with Philips
CD Lens Cleaner or any commercially available
cleaner. Follow the instructions supplied with
cleaner.
Cleaning the Heads and the Tape Paths
● To ensure good recording and playback quality,
clean the heads A, the capstan(s) B, and
pressure roller(s) C after every 50 hours of
tape operation.
● Use a cotton swab slightly moistened with
cleaning fluid or alcohol.
● You can also clean the heads by playing a
cleaning tape once.
A
A B C
Demagnetising the heads
● Use a demagnetising tape available at your
dealer.
16
pg001-pg020_MC147_98
16
2007.8.27, 17:04
STANDBY-ON
6
Press TUNING 4 ¢ (à / á on the
remote control) to set the minutes.
7
Press TIMER to confirm the time.
➜ The timer is now set and activated.
M I C RO S Y S T E M M C 1 4 7
iR
CD/CD-R/CD-RW COMPATIBLE
SOURCE
VOL
TUNING
REPEAT
PROG
English
Clock/Timer
Notes: .
– If CD source is selected and no disc is in the CD
tray or the disc has an error, TUNER will be
selected automatically.
PRESET
VOL
DBB
Activating and deactivating
TIMER
Setting the clock
1
In standby mode, press and hold CLOCK/
DISPLAY on the remote control set for 2
seconds.
2
Press PROG to select 12-hour or 24-hour
display.
3
Press CLOCK/DISPLAY to confirm.
➜ The clock digits for the hours flash.
4
Press TUNING 4 ¢ (à / á on the
remote control) to set the hours.
5
Press CLOCK/DISPLAY again.
➜ The clock digits for the minutes flash.
6
Press TUNING 4 ¢ (à / á on the
remote control) to set the minutes.
7
Press CLOCK/DISPLAY to confirm the time.
Setting the timer
● In standby or during playback, press TIMER
ON/OFF once.
➜ Display shows if activated, and disappears if
deactivated.
Activating and deactivating
SLEEP
The sleep timer enables the system to switch off
by itself after a set period of time.
● Press SLEEP on the remote
control once or more.
➜ Display shows
and one
of the sleep time options in
sequence: 60, 45, 30,15, 0,
60... if you have selected a time.
● To deactivate, press SLEEP on the remote
control once or more until “ 0“ is shown, or
press STANDBY ON 2on the system (or
POWER on the remote control).
disappears from the display.
➜
● The system can be used as an alarm clock,
whereby the CD or TUNER is switched on at a
set time. The clock time needs to be set first
before the timer can be used.
1
In standby mode, press and hold TIMER about
2 seconds on the remote control.
2
Press SOURCE (or DISC/TUN on the
remote control) to select sound source.
3
Press TIMER to confirm your desired mode.
➜ The clock digits for the hours flash.
4
Press TUNING 4 ¢ (à / á on the
remote control) to set the hours.
5
Press TIMER again.
➜ The clock digits for the minutes flash.
17
pg001-pg020_MC147_98
17
2007.8.27, 17:04
Specifications
English
AMPLIFIER
Output power ........................................... 2 x 2W RMS
Signal-to-noise ratio .......................... ≥ 60 dBA (IEC)
Frequency response ....................... 125 – 16000 Hz
Impedance loudspeakers ........................................... 8Ω
CD PLAYER
Frequency range ............................... 125 – 16000 Hz
Signal-to-noise ratio ............................................ 65 dBA
TUNER
FM wave range ................................... 87.5 – 108 MHz
MW wave range ................................ 531 – 1602 kHz
Sensitivity
– FM 26 dB sensitivity .......................................... 20 µV
– MW 26 dB sensitivity ................................... 5 mV/m
Total harmonic distortion ..................................... ≤ 5%
SPEAKERS
Bass reflex system
Dimensions (w x h x d) . 134 x 230 x 152 (mm)
GENERAL INFORMATION
AC Power ........................... 110 – 127 / 220 – 240 V;
....................................................... 50/60 Hz Switchable
Dimensions (w x h x d) .. 148 x 233 x 216 (mm)
Weight (with/without speakers) ..................................
......................................................... approx. 3.65 / 1.53 kg
Power consumption
Active .......................................................................... 15 W
Standby .................................................................... < 4 W
Specifications and external appearance are
subject to change without notice.
TAPE DECK
Frequency response
Normal tape (type I) ...... 125 – 8000 Hz (8 dB)
Signal-to-noise ratio
Normal tape (type I) .................................... 40 dBA
Wow and flutter .............................................. ≤ 0.4% JIS
18
pg001-pg020_MC147_98
18
2007.8.27, 17:04
WARNING
Under no circumstances should you try to repair the system yourself, as this will invalidate the
warranty. Do not open the system as there is a risk of electric shock.
If a fault occurs, first check the points listed below before taking the system for repair. If you
are unable to remedy a problem by following these hints, consult your dealer or Philips for
help.
Solution
Problem
✔ Insert a disc.
✔ Check if the disc is inserted upside down.
✔ Wait until the moisture condensation at the lens
“NO CD” is displayed.
has cleared.
✔ Replace or clean the disc, see “Maintenance”.
✔ Use a finalized CD-RW or CD-R.
✔ If the signal is too weak, adjust the antenna or
Radio reception is poor.
connect an external antenna for better
reception.
✔ Increase the distance between the Mini HiFi
System and your TV or VCR.
Recording or playback cannot be made.
✔ Clean deck parts, see “Maintenance”.
✔ Use only NORMAL (IEC I) tape.
✔ Apply a piece of adhesive tape over the missing
tab space.
The system does not react when buttons
are pressed.
Sound cannot be heard or is of poor
quality.
✔ Remove and reconnect the AC power plug and
switch on the system again.
✔ Adjust the volume.
✔ Disconnect the headphones.
✔ Check that the speakers are connec ted
correctly.
✔ Check if the stripped speaker wire is clamped.
The left and right sound outputs are
reversed.
✔ Check the speaker connections and location.
19
pg001-pg020_MC147_98
19
2007.8.27, 17:04
English
Troubleshooting
Troubleshooting
English
Solution
Problem
The remote control does not function
properly.
✔ Select the source (CD or TUNER, for example)
before pressing the function button (É,í,ë).
✔ Reduce the distance between the remote
control and the system.
✔ Insert the batteries with their polarities
(+/– signs) aligned as indicated.
✔ Replace the batteries.
✔ Point the remote control directly towards the IR
sensor.
✔ Set the clock correctly.
✔ Press TIMER to switch on the timer.
✔ If recording or tape dubbing is in progress, stop
The time is not working.
recording.
The Clock/Timer setting is erased.
✔ Power has been interrupted or the power cord
has been disconnected. Reset the clock/timer.
20
pg001-pg020_MC147_98
20
2007.8.27, 17:04
一般事项
磁带操作/录音
随机配件 ............................................................. 22
环保资讯 ............................................................. 22
安全须知 ............................................................. 22
安全收听 ............................................................. 22
磁带播放 ............................................................. 30
关于录音的一般说明 .......................................... 30
CD 同步播放及录音.......................................... 30
从收音机中录音.................................................. 31
准备工作
其他连接
背面的连接 ......................................................... 23
装入遥控器电池.................................................. 24
使用遥控器操作本机 .......................................... 24
聆听外部声源 ..................................................... 31
控制键
中文
目录
维护保养 ........................................................ 31
时钟/计时器
主机和遥控器上的控制键................................... 25
仅出现在遥控器上的控制键 ............................... 25
基本功能
开机 .................................................................... 26
省电自动待机 ..................................................... 26
调节音量和音效.................................................. 26
CD 光碟操作
设定时钟 ............................................................. 32
设定计时器 ......................................................... 32
开启与关闭计时器 .............................................. 32
开启与关闭关机计时器 ...................................... 32
技术规格 ........................................................ 33
故障排除 ........................................................ 34
装入光碟 ............................................................. 27
基本的播放控制.................................................. 27
不同的播放模式:乱序 (SHUFFLE)和重复
(REPEAT) 播放 ................................................. 28
编辑曲目播放清单 .............................................. 28
查看曲目播放清单 .............................................. 28
删除曲目播放清单 .............................................. 28
电台接收
调谐选台 ............................................................. 29
预设电台 ............................................................. 29
自动预设电台 ................................................. 29
手动预设电台 ................................................. 29
选择预设电台 ..................................................... 29
21
MC147_IFU_F.indd
21
2008-07-10
11:51:45 AM
一般事项
感谢您购买本产品。欢迎来到飞利浦的世界!
为充分享受飞利浦为您提供的好处,请至下列位
置注册产品:
●
如果直接将本机从较冷的环境搬移到较暖的环境
或放置在一个十分潮湿的房间,机内的激光头可
能蒙上水汽,这时将不能正常播放光碟。如果出
现这种情况,可取出光碟并将本机接通电源约一
小时,直至能正常播放为止。
●
本机的机械部件使用自润滑式轴承,不可任意使
用润滑油或油脂。
●
当本机处于待机状态时仍会消耗能量。若要完全
切断本机的电源,必须将交流电源插头从墙上插
座中拔出。
www.philips.com/welcome!
中文
重要事项!
– 请注意位于本机背部的电压选择器已被厂家预
设为 220V 。若你的国家使用 110V-127V
电压,请在开启本机前将电压选择器的电压设
定为 110V-127V 。
随机配件
安全收听
– 扬声器音箱一对
– 遥控器
环保资讯
我们已把多余的包装材料省掉。并尽量使包装 物
容易地分为如下三种材料:纸板(纸箱)、聚苯
乙烯泡沫塑料(减震)和聚乙烯(包装袋和保护
性泡沫胶纸)。
若由专业公司进行拆卸,你这台产品中含有某些材
料可再循环使用。在处理这些废弃的包装材料、耗
尽电池及旧设备时,请遵守当地的有关法规。
收听时音量要适中。
●
耳机音量过高会损坏您的听力。此产品可以产生
分贝强度足以损坏正常人听觉的声音,即使暴露
在此音量下的时间不超过一分钟。较高的分贝范
围是为听力已经受损的人士准备的。
●
声音有时会给您错觉。听了一段时间,听觉“舒适
度”就会适应更高的音量。因此,听得太久,“正
常”的音量实际上已经很大声,并且会损害您的听
力。为了预防这个问题,请在听觉适应一定的音量
前先将音量调至安全水平并保持该音量。
设定安全的音量:
安全须知
●
在操作本机之前,应先确定本机铭牌上的操作电压
(或者电压选择器旁所注明的电压)与你当地的电
源电压相同。若不相同,请向你的经销商咨询。
●
电源插头用作中断连接装置之处,中断连接装置
仍可随时进行操作。
●
将本机放置在坚稳的平面上。
●
勿让本机受到水滴或水溅。
●
降本机安装在交流电源插座附近,以便于拔插电
源插头。
●
●
将本机放置在通风良好的地方,以防止热量积聚
在机内。确保机身的后部和顶部最少留有
10 厘米(4 英寸)的空隙,左右两边最少有留有
5 厘米(2 英寸)的空隙。
●
通风孔不应覆盖诸如报纸、桌布和窗帘等物品而
妨碍通风。
●
勿让本系统、电池或光碟暴露在潮湿、雨淋和多
尘的环境,也不要将它们放置在加热设备附近或
阳光直射的场所,以免过度受热。
●
在本机上不应放置裸露的火焰源,如点燃的蜡烛。
●
在本机上不应放置诸如花瓶一类的装满液体的物品。
●
先将音量控制设定在一个低水平。
●
然后慢慢提高,直到您听起来舒服清晰且完全没
有失真。
收听时间应有所节制:
●
即使在“安全”水平下,长时间收听也会损害听力。
●
请务必适度使用您的设备,并适时暂停休息。
使用耳机时务必遵守以下规范。
●
收听的音量和时间应适度。
●
注意不要根据您听力的适应程度调节音量。
●
请勿将音量调节得过高而使您无法听到周围的声音。
●
身处有潜在危险的场所时,请小心或暂停使用耳机。
●
开车、骑自行车、溜冰时请勿使用耳机;否则会
造成交通危险,这在许多国家都属违法行为。
22
MC147_IFU_F.indd
22
2008-07-10
11:51:58 AM
准备工作
中文
FM拖尾天线
FM
AERIAL
扬声器
(右)
扬声器
(左)
AUX
HEADPHONE
交流电源线
背面的连接
B 连接扬声器
前置扬声器
将扬声器导线连接至 SPEAKERS 端子,右边扬
声器接 "RIGHT" 端子,左边扬声器接 "LEFT"
端子。颜色线(有标记)接 "+" 极,黑色线(无
标记)接 "-" 极。
铭牌位于本机背面。
A
交流电源
– 在把交流电源线连接至墙上的交流电源插座之
前,必须确保所有其他连接事项已经完成。
– 如果机上装有电压选择器,必须调节该选择器
使它与你当地的电源电压相符。
1
警告!
– 为获得最佳的操作状态,应使用原本的电源线。
– 开启电源后,切勿进行或更换任何连接事项。
为避免过热起见,本机设有安全电路。因此当本
机出现极限状况时,它将会自动切换至待机状
态。这时,应让本机冷却后再使用(仅限于某些
型号)。
●
2
如图所示,将扬声器导线的裸露部分充分插入扬
声器端子并夹紧。
注:
– 为确保最佳音效,请使用随附的扬声器。
– 切勿把一对以上的扬声器连接至任何一对扬声
器的 +/- 端子。
– 所连接扬声器的阻抗不能低于随附扬声器的额
定阻抗。请参阅本使用说明书内的“技术规
格”一节。
23
MC147_IFU_F.indd
23
2008-07-10
11:51:59 AM
准备工作
装入遥控器电池
1
2
3
打开电池盒。
根据电池盒的
+/- 标示装入两节 AAA 型号电池。
关上电池盒盖。
中文
3
1
2
使用遥控器操作本机
1
装遥控器直接对准前面板上的
接收器。
2
操作本 DVD 播放机时,请不要在遥控和本机之
间放置任何障碍物。
IR 红外线遥控讯号
注意!
– 如果电池电量耗尽或长期不使用,应将电池取出。
– 切勿将新电池与旧电池或不同类型的电池混合
使用。
– 电池含有化学物质,因此用后请予以妥善的弃
置处理。
24
MC147_IFU_F.indd
24
2008-07-10
11:52:01 AM
控制键(说明图见第三页)
仅出现在遥控器上的控制键
主机和遥控器上的控制键
# REP ALL
1 STANDBY ON 2
开启系统或将其切换为备用模式。
–
接收遥控器红外线讯号的传感器。
–
–
选择下列声源:CD(光碟)/ TUNER(收音机)
/ TAPE(磁带)/ AUX(外部声源)。
–
开机。
–
4 PRESET +/-
用于收音机 .......... 选择一个预设电台。
5 DBB(动态低音增强)
–
重复播放一首曲目/一张光碟/所有已编辑的曲目。
乱序播放
增强低音。
6 TUNING OA
开启/关闭关机计时器或设定其功能。
^ TIMER ON/OFF
开关定时功能。
& TIMER
–
开启/关闭计时器或设定其功能。
*
2;
–
开始或暂停
用于
CD ............. 在一首曲目/CD 中向后或向
前搜索。
用于收音机 .......... 调谐选台。
用于时钟/计时器
................................... 调整时钟/计时器的小时和分钟。
O P
用于
VOLUME (VOL -/+ )
CD ............. 跳至当前曲目、前一首或后一
首曲目的开头。
–
调节音量。
( VOL -/+
7
模式选择
2; ........................ 开始或暂停
–
CD 播放。
8 REPEAT
重复播放一首曲目/一张光碟/所有已编辑的曲目。
9 PROG
用于 CD ............ 编辑及查看曲目播放清单。
用于收音机 .......... 以手动或自动方式预设电台。
0
CD 播放。
5/6
BP
用于收音机 .......... 调谐选台。
用于 CD ............ 跳至当前曲目、前一首或后一
首曲目的开头。
............................. 在一首曲目/CD 中向后或向
前搜索。
用于时钟/计时器
............................. 调整时钟/计时器的小时和分钟。
–
CD 曲目。
% SLEEP
3 SOURCE
–
–
$ SHUF
2 iR 红外线讯号传感器
中文
–
调节音量。
) MUTE
–
暂停或恢复声音播放。
¡ CLOCK/DISPLAY
用于时钟 .............. 设置时钟功能。
............................. 查看时钟。
9
– 停止 CD 播放或者清除一个 CD 曲目播放清单。
! PULL TO OPEN
–
打开/关闭
@
磁带座操作
CD 门盖。
RECORD ● .... 开始录音。
PLAY 2 ............ 开始播放。
SEARCH 5 / 6
............................. 快速倒带/进带。
STOP•OPEN 9 /
............................. 停止磁带操作;打开磁带室。
PAUSE ; ........... 暂停录音或暂停播放。
AUX 插口(位于背面板)
–
连接外部声源(3.5
mm 插口)
HEADPHONE(位于背面板)
–
连接耳机
25
MC147_IFU_F.indd
25
2008-07-10
11:52:01 AM
基本功能
调节音量和音效
STANDBY-ON
1
M I C RO S Y S T E M M C 1 4 7
中文
iR
CD/CD-R/CD-RW COMPATIBLE
SOURCE
VOL
TUNING
REPEAT
PROG
PRESET
VOL
DBB
按 VOL +/- 可调校音量。
➜ 显示屏显示 " VOL" 字样(代表音量电平)以
及一个 0-32 之间的数字(代表音量大小)。
2
按 DBB 键开启或关闭低音增强功能。
➜ 如果 DBB 功能开启,显示屏显示:
3
按遥控器上的 MUTE 键立即暂停声音重放。
➜ 播放将继续,但没有声音。
●
要启动声音重放,你可以:
– 再按 MUTE 键;
– 调节音量控制器;
– 改变音源。
。
重要事项!
开始操作本机之前,必须完成全部的准备工作。
开机
●
按 STANDBY ON 2 或 SOURCE 键(或遥
控器上的 POWER 键)。
➜ 本机将切换到上次所选的声源。
●
按遥控器上的 DISC, TUN, TAPE 或 AUX 键。
➜ 本机将切换到所选的声源。
将本机将切换到待机模式
●
按主机 STANDBY ON 键(或遥控器上的
POWER 键)。
省电自动待机
在 CD 播放结束且未进行其他操作的 15 分钟后
该省电特功能会自动将本机切换至待机模式。
26
MC147_IFU_F.indd
26
2008-07-10
11:52:03 AM
CD 光碟操作
基本的播放控制
STANDBY-ON
M I C RO S Y S T E M M C 1 4 7
播放光碟
iR
CD/CD-R/CD-RW COMPATIBLE
按 2; 键开始播放。
➜ 播放光碟期间会显示目前的曲目编号以及
PLAY 图示。
中文
●
选择一首不同曲目
SOURCE
VOL
TUNING
REPEAT
●
按一次或重复按 TUNING OA BP(遥控器上
的O P)键,直至该想要的曲目序号出现在显示
屏上。
1
按住 TUNING OA BP(遥控器上的5 6)
键。
➜ 光碟以高速度低音量播放。
2
当找到你想要的段落时,立刻放开 TUNING
OA BP(遥控器上的5 6)键。
➜ 正常播放继续进行。
PROG
PRESET
VOL
DBB
在一首曲目中寻找一个段落
重要事项!
切勿触摸雷射唱机的激光头!
暂停播放
●
装入光碟
本机可播放各种音频光碟 (Audio Disc),包括可
刻录光碟 (CD-R) 及可重刻录光碟 (CD-RW)。
●
然而, 本机不能播放
1
2
选择 CD 声源。
提起系统顶部的 CD 盖,打开 CD 格。
➜ 当光碟舱门盖打开时,"OPEn"
(打开)字样显示。
3
CD-ROM, CD-I, CDV,
MP3 CD, VCD, DVD 或电脑 CD 光碟。
PULL TO OPEN
放入一张光碟(印刷商标面朝
上),并按下 PULL TO OPEN 键关上 CD 门
盖。
➜ 当雷射唱机扫描光碟内容时,显示屏显示
"rEAd"(读取)字样,然后显示曲目总数。
播放期间,按 2; 键。
➜ 播放中断时,荧幕会定格并闪烁显示 PLAY 图示。
➜ 要恢复播放,再按 2; 键。
停止播放
●
按 9 键。
注:在下列情况下 CD 播放也将停止:
– CD 门盖被打开;
– 光碟已播放完毕;
– 你选择另一个声源:TUNER, TAPE 或 AUX;
– 你选择待机 (standby );
– 你按下磁带座的 2 键。
27
MC147_IFU_F.indd
27
2008-07-10
11:52:04 AM
CD 光碟操作
不同的播放模式:乱序 (SHUFFLE)
和重复 (REPEAT) 播放
中文
你可以在播放前或播放期间选择和改变不同的播
放模式。播放模式不可与 PROGRAMME 结合
使用。
SHUF ................. 以乱序方式播放整张光碟中的
曲目。
REP ALL .......... 重复播放整张光碟 / 曲目播放
清单。
REP .................... 重复播放当前的曲目。
1
要选择“重复”播放模式,请在机身上按
REPEAT 或在遥控上按 REP ALL 。
●
要选择“随机”播放模式,请在遥控上按
SHUF。
2
3
如果在停止位置,按 2; 键开始播放。
要回复正常播放,按相应的 REPEAT (主机
上),REP ALL 或SHUF键(遥控器上)直至
各种 SHUFFLE/ REPEAT 模式 字样不再显示为
止。
●
在播放期间按下 9 可停止重复
●
再次按下 9 可取消重复
查看曲目播放清单
●
停止播放并按 PROG 键。
删除曲目播放清单
你可用下列方法删除曲目播放清单:
●
在停止位置,按 9 键一次;
●
在播放期间,按 9 键两次;
●
打开 CD 门盖;
➜ PROG 标志从显示屏中消失。
/ 随机播放。
/ 随机播放模式。
注:
– 你可同时使用“随机”与“重复”功能。
编辑曲目播放清单
在播放停止时可以编辑光碟曲目播放清单。你可
以按任何次序将多达 20 首曲目储存在记忆中。
如果你喜欢,可以把任一首曲目储存多次。
1
在停止模式下,使用 TUNING OA BP(遥控器上
的 O P )键选择你想要编辑的曲目序号。
2
按 PROG 键储存这个要被储存的曲目序号。
➜ 已编辑的曲目序号和 PRO1 字样短暂显示,然
后是所选择的曲目序号。
3
4
重复步骤 1-2 选择和储存所有你想要的曲目序号。
要开始播放你的光碟曲目播放清单,按 2; 键。
28
MC147_IFU_F.indd
28
2008-07-10
11:52:06 AM
电台接收
1 按 PRESET +/- 键选择开始进行预设的电台序号。
STANDBY-ON
iR
注:
– 如果你不选择预设电台序号,本机将从默认的
序号 (1) 开始自动预设电台,而以前编辑的所
有预设电台都将被取代。
CD/CD-R/CD-RW COMPATIBLE
2
SOURCE
VOL
TUNING
REPEAT
PROG
PRESET
按 PROG 键超过两秒以启动编辑功能。
➜ "AUTo"字样显示,可接收到的电台将以波段接
收的强弱顺序进行编辑。然后,第一个自动储
存的预设电台将会播放。
中文
M I C RO S Y S T E M M C 1 4 7
VOL
DBB
手动预设电台
1
2
调谐选台
1
重复按机上的 SOURCE 键或重复按遥控器上的
TUN 键直至想要的波段(FM 或 MW)显示。
2
按下 TUNING OA BP(或遥控器上的 5 6 )
键,然后放开该键。
➜ 收音机自动调谐到一个讯号强度令人满意的电
台。 自动调谐期间,显示屏显示 "SrcH" 字样。
3
如果需要,可重复步骤 2,直至找到你想要的电台。
●
按 PRESET +/- 键从
电台的序号。
4
再按 PROG 键确认所作的设定。
➜ PROG 标志消失,该预设电台序号和频率显示。
5
重复以上四个步骤以储存其他电台。
●
TUNING
OA BP (或遥控器上的 5 6 )
键,直至获得最佳的接收。
你可在本机的记忆体中储存多达
按 PROG 键启动编辑功能。
➜ PROG 标志在显示屏闪动。
3
要调谐到另一个频率较弱的电台,可重复快按
1 到 20 指定一个数字为该
你可在某一预设电台的位置储存另一个频率而取
代该预设电台。
选择预设电台
●
预设电台
调谐到一个你想要的电台(见“调谐选台”一节)。
按 PRESET +/- 键直至想要的预设电台显示。
40 个电台。
自动预设电台
自动预设电台会自动从一个自选的序号开始以递
增方式预设电台。任何先前预设的电台都将被取
代。本机将祗会预设尚未储存在记忆体中的电台。
29
MC147_IFU_F.indd
29
2008-07-10
11:52:07 AM
磁带操作/录音
中文
●
录音电平自动设定,调节 VOLUME 或
制器都不会影响录音。
●
取决于你所用的录音声源和录音磁带,录音质素
可能有所不同。
●
磁带两端各有一段引带。因此在其开端和结尾部
分各有七秒时间不能用于录音。
●
为了防止意外录音,可将你想保护的磁带面左边
的防抹保护片剔除。这样就不能在该磁带面录
音。如想再在该磁带面录音,使用一片胶带将开
口处盖住即可。
PULL TO OPEN
DBB 控
CD 同步播放及录音
磁带播放
1
选择 TAPE(磁带)声源。
➜ 磁带操作期间,显示屏一直显示
样。
2
打开前面板上标有“PULL TO OPEN”字样的
磁带机按键盖板。
3
4
按 STOP•OPEN 9 / 键打开磁带座门盖。
放入一盒预录的磁带并关上磁带座门盖。
"tAPE" 字
●
放入磁带时,应把露出带子的一端朝下,卷满带
子的一端朝左。
5
按 PLAY 2 键开始播放。
1
2
3
4
5
选择
CD 声源。
放入一张光碟,如果需要,可以编辑曲目播放清单。
按 STOP•OPEN 9 / 键打开磁带座门盖。
将一盒适合的磁带放入磁带座并关上磁带座门盖。
按 RECORD 键开始录音。
➜ 7 秒后,CD 曲目播放清单会自动从 CD 始端
开始播放。你不必另行启动雷射唱机。
在一首
CD 曲目中选录一个段落:
●
按住 OA BP 键。当找到你想要的段落时,立刻放
开该键。
●
要暂停
●
当你按 RECORD ● 键时,本机便会准确地从曲
目中的这一点开始录音。
CD 播放,按 2; 键。
●
当磁带转到末端时 PLAY 2 键会自动跳回原位,
除非 PAUSE ; 键已被按下。
6
要暂停播放,按 PAUSE ; 键。要恢复播放,再
按该键。
6
7
8
按机上的 5 或 6 键可以快速倒带或快速进带。
要停止磁带操作,按 STOP•OPEN 9 / 键。
要暂停播放,按 PAUSE ; 键。要恢复播放,再
按该键。
7
要停止录音,按 STOP•OPEN 9 / 键。
注:
– 在磁带播放或录音时,不能改变声源。
关于录音的一般说明
●
袛有在不侵犯第三方版权或其它权益的情况下,
才可进行录音工作。
●
要进行录音时,祗可使用防抹保护片未被剔除的
NORMAL (IEC 型) 普通磁带。本机不适宜使用
METAL(IEC IV ) 型金属带录音。
30
MC147_IFU_F.indd
30
2008-07-10
11:52:08 AM
磁带操作/录音
其他连接
聆听外部声源
从收音机中录音
6
选择一个想要的的电台 (见“调谐选台”一节)。
按 STOP•OPEN 9 / 键打开磁带座门盖。
将一盒适合的磁带放入磁带座并关上磁带座门盖。
按 RECORD ● 键开始录音。
要暂停播放,按 PAUSE ; 键。要恢复播放,再
按该键。
您可透过本机的扬声器聆听外部声源的声音。
1
按主机上的SOURCE(或遥控器上的 AUX )
键选择 AUX 声源。
2
使用线将 MC147 的 AUX 插口连接到外部设备
的 AUDIO OUT 插口或耳机插口。
中文
1
2
3
4
5
要停止录音,按 STOP•OPEN 9 / 键。
维护保养
清洁机壳
●
清洁磁头和走带部件
使用一块稍微蘸有中性清洁剂的软布抹擦。请勿
使用带有酒精、氨水或磨砂物质的清洁剂。
●
为确保良好的录音及放音品质,每使用 50 小时
后,应清洁磁头 A,主动轴 B 和橡胶压轮 C。
清洁光碟
●
●
当光碟比较肮脏时,应该用一块不起毛的清洁布
来抹擦。抹擦时应从中央向外抹擦,而不要沿圆
周方向抹擦。
使用一支蘸有少量酒精或磁头清洁剂的棉花棒清
洁磁头。
●
你也可以使用磁头清洁带,像播放普通磁带一样
播放一次,以清洁磁头。
●
切勿在光碟上使用苯、稀释剂和市面上售卖的清洁
剂等溶剂,也不可使用模拟唱片用的抗静电喷剂。
清洁光碟机的激光头
●
光碟机使用一段时间后,一些脏物或尘土便会聚
集在机内的激光头上。为了确保获得良好的播放
效果,请使用飞利浦公司的 CD 激光头清洁剂或
其它市售的清洁剂来清洁激光头。清洁时请按照
清洁剂的使用说明进行。
A
A B C
对磁头消磁
●
使用从你的代理商获得的消磁带对磁头进行消磁。
31
MC147_IFU_F.indd
31
2008-07-10
11:52:10 AM
时钟/计时器
STANDBY-ON
M I C RO S Y S T E M M C 1 4 7
中文
iR
5
再按 TIMER 键。
➜ 代表分钟的时钟数字闪动。
6
按 TUNING OA BP(或遥控器上的 5 6 )
键设定分钟。
7
按 TIMER 键确认所设定的时间。
➜ 这时,计时器即已被设定并启动。
CD/CD-R/CD-RW COMPATIBLE
SOURCE
注:
– 如果选择了CD 声源,而CD 舱里没有光碟或
光碟出错,则会自动选择收音机声源。
VOL
TUNING
REPEAT
PROG
PRESET
VOL
DBB
开启与关闭计时器
●
设定时钟
1
2
3
在待机模式,按 CLOCK/DISPLAY 键 2 秒。
按 PROG 可选择 12 小时或 24 小时显示模式。
按 CLOCK/DISPLAY 以确认。
➜ 代表小时的时钟数字闪动。
4
按 TUNING OA BP(或遥控器上的 5 6 )
键设定小时。
5
再按 CLOCK/DISPLAY 键。
➜ 代表分钟的时钟数字闪动。
6
按 TUNING OA BP(或遥控器上的 5 6 )
键设定分钟。
7
按 CLOCK/DISPLAY 键确认所设定的时间。
设定计时器
●
本机能作为闹钟使用,在预定的时间自动播放CD
或收音机把你唤醒。在设定计时器之前,必须首
先设定好时钟。
1
2
在待机模式,按 TIMER 键约两秒。
按 SOURCE 键(或遥控器上的 DISC/TUN
键)选择声源。
3
按 TIMER 键确认你想要的模式。
➜ 代表小时的时钟数字闪动。
4
按 TUNING OA BP(或遥控器上的 5 6 )
键设定小时。
在待机模式或播放期间,按 TIMER ON/OFF
键一次。
标志;如果计
➜ 如果计时器开启,显示屏显示
时器关闭,标志消失。
开启与关闭关机计时器
关机计时器能使本机在一个预设的时间长度后自
动关闭。
●
按遥控器上的 SLEEP 键一次或多次。
图标,而且,如果
➜ 显示屏显示
你已选择了一个时间,显示屏会依
次序显示下列其中一个关机计时器
选项:60, 45, 30,15, 0, 60...
。
●
要关闭关机计时器,按遥控器上的 SLEEP 键
一或多次,直至“0”字样显示,或按主机上的
STANDBY ON 2 键或遥控器上的 POWER 键。
图标从显示屏中消失。
➜
32
MC147_IFU_F.indd
32
2008-07-10
11:52:11 AM
技术规格
CD 光碟机
频率响应 .....................................125 – 16000 赫
讯噪比.......................................................65 dBA
收音机
FM 波段范围 ..............................87.5 – 108 兆赫
MW 波段范围 ........................ 531 – 1602 千赫
阻抗为 75 欧姆时的灵敏度
– FM 26 分贝灵敏度................................20 微伏
– MW 26 分贝灵敏度 ..........................5 毫伏/米
总谐波失真 .................................................. ≤ 5%
扬声器
低音反射系统
外形尺寸 ( 宽x高x 深)
134 x 230 x 152 (毫米)
一般资料
交流电源 .................. 110
– 127 / 220 – 240 伏;
...................................................50 /60 赫;可转换
外形尺寸 ( 宽x高x 深) ..........................................
....................................148 x 233 x 216 (毫米)
重量 (含/不含扬声器) ......... 约. 3.65 / 1.53 公斤
中文
扩音机
输出功率 .........................................2 x 2 瓦 RMS
讯噪比....................................... ≥ 60 dBA (IEC)
频率响应 .....................................125 – 16000 赫
扬声器阻抗 ..................................................8 欧姆
功率消耗
工作时....................................................... 15 瓦
待机时......................................................< 4 瓦
规格和外观如有改变,恕不另行通知。
磁带座
频率响应
普通磁带 (I 型).......... 125 – 8000 赫(8 分贝)
讯噪比
普通磁带 (I 型) ...................................48 dBA
抖晃率..................................................≤ 0.4% JIS
33
MC147_IFU_F.indd
33
2008-07-10
11:52:12 AM
故障排除
警告
无论任何情况你都不应自己动手修理本机,因为这将会令你无法获得保修服务。切勿打开机件,慎防触电。
如果本机出现故障,在送去修理之前请先检查下表所列各项。如果这些方法仍未能解决问题,请向你的经销
商或飞利浦求助。
中文
问题
解决方法
“NO CD”字样显示。
✔
✔
✔
✔
✔
收音效果差。
✔ 如果天线讯号太微弱,可调整天线或连接户外天
线以取得最佳接收效果。
✔ 增加本机与电视机或 VCR 录象机之间的距离。
无法录音或播放。
✔ 清洁磁带机的有关部分,请参阅“维护保养”一节。
✔ 只可使用普通 (NORMAL) 磁带录音。
✔ 用一块胶带盖住磁带防抹保护片被剔除的开口部分。
按下按键时本机播放机无反应。
✔ 将交流电源插头从墙上插座拔出,然后再插入并
重新开机。
没有声音或音质差
✔
✔
✔
✔
左右声频输出颠倒。
✔ 检查扬声器的连接及位置。
遥控器不能正常工作。
✔
✔
✔
✔
✔
计时器不工作。
✔ 正确设定时钟。
✔ 如果正在进行录音,中止录音。
时钟/计时器设定被删除。
✔ 如果电源中断或电源插头被拔出,应重新设定时
钟/计时器。
载入光碟。
检查光碟是否颠倒放置。
静待激光头上的水汽蒸发至激光头完全清晰为止。
更换或清洁该光碟,请参阅“维护保养”一节。
使用确定的 CD-RW 或 CD-R。
调节音量。
拔出耳筒。
检查扬声器的连接是否正确。
确定扬声器接线裸露部分已被夹紧。
按下功能键(2, O, P)之前先造好声源。
将遥控器对准主机前面的红外线传感应器操作。
缩短遥控器至本机的距离。
换入新电池。
检查电池是否放置正确。
34
MC147_IFU_F.indd
34
2008-07-10
11:52:13 AM
Meet Philips at the Internet
http://www.philips.com
English
MC147
CLASS 1
LASER PRODUCT
Printed in China
PageBack_MC147_93
94
PDCC-JS-JW-0733
2007.8.22, 11:53