1
Sun Installation Assistant 2.2
User's Guide for the Sun Fire
X4640 Server
Sun Microsystems, Inc.
4150 Network Circle
Santa Clara, CA 95054
U.S.A.
Part No: 821–0551–10
October 2009, Rev. A
Copyright 2009 Sun Microsystems, Inc.
4150 Network Circle, Santa Clara, CA 95054 U.S.A.
All rights reserved.
Sun Microsystems, Inc. has intellectual property rights relating to technology embodied in the product that is described in this document. In particular, and without
limitation, these intellectual property rights may include one or more U.S. patents or pending patent applications in the U.S. and in other countries.
U.S. Government Rights – Commercial software. Government users are subject to the Sun Microsystems, Inc. standard license agreement and applicable provisions
of the FAR and its supplements.
This distribution may include materials developed by third parties.
Parts of the product may be derived from Berkeley BSD systems, licensed from the University of California. UNIX is a registered trademark in the U.S. and other
countries, exclusively licensed through X/Open Company, Ltd.
Sun, Sun Microsystems, the Sun logo, the Solaris logo, the Java Coffee Cup logo, docs.sun.com, Java, and Solaris are trademarks or registered trademarks of Sun
Microsystems, Inc. or its subsidiaries in the U.S. and other countries. All SPARC trademarks are used under license and are trademarks or registered trademarks of
SPARC International, Inc. in the U.S. and other countries. Products bearing SPARC trademarks are based upon an architecture developed by Sun Microsystems, Inc.
The OPEN LOOK and SunTM Graphical User Interface was developed by Sun Microsystems, Inc. for its users and licensees. Sun acknowledges the pioneering efforts
of Xerox in researching and developing the concept of visual or graphical user interfaces for the computer industry. Sun holds a non-exclusive license from Xerox to
the Xerox Graphical User Interface, which license also covers Sun's licensees who implement OPEN LOOK GUIs and otherwise comply with Sun's written license
agreements.
Products covered by and information contained in this publication are controlled by U.S. Export Control laws and may be subject to the export or import laws in
other countries. Nuclear, missile, chemical or biological weapons or nuclear maritime end uses or end users, whether direct or indirect, are strictly prohibited. Export
or reexport to countries subject to U.S. embargo or to entities identified on U.S. export exclusion lists, including, but not limited to, the denied persons and specially
designated nationals lists is strictly prohibited.
DOCUMENTATION IS PROVIDED “AS IS” AND ALL EXPRESS OR IMPLIED CONDITIONS, REPRESENTATIONS AND WARRANTIES, INCLUDING ANY
IMPLIED WARRANTY OF MERCHANTABILITY, FITNESS FOR A PARTICULAR PURPOSE OR NON-INFRINGEMENT, ARE DISCLAIMED, EXCEPT TO
THE EXTENT THAT SUCH DISCLAIMERS ARE HELD TO BE LEGALLY INVALID.
Copyright 2009 Sun Microsystems, Inc.
4150 Network Circle, Santa Clara, CA 95054 U.S.A.
Tous droits réservés.
Sun Microsystems, Inc. détient les droits de propriété intellectuelle relatifs à la technologie incorporée dans le produit qui est décrit dans ce document. En particulier,
et ce sans limitation, ces droits de propriété intellectuelle peuvent inclure un ou plusieurs brevets américains ou des applications de brevet en attente aux Etats-Unis
et dans d'autres pays.
Cette distribution peut comprendre des composants développés par des tierces personnes.
Certaines composants de ce produit peuvent être dérivées du logiciel Berkeley BSD, licenciés par l'Université de Californie. UNIX est une marque déposée aux
Etats-Unis et dans d'autres pays; elle est licenciée exclusivement par X/Open Company, Ltd.
Sun, Sun Microsystems, le logo Sun, le logo Solaris, le logo Java Coffee Cup, docs.sun.com, Java et Solaris sont des marques de fabrique ou des marques déposées de
Sun Microsystems, Inc., ou ses filiales, aux Etats-Unis et dans d'autres pays. Toutes les marques SPARC sont utilisées sous licence et sont des marques de fabrique ou
des marques déposées de SPARC International, Inc. aux Etats-Unis et dans d'autres pays. Les produits portant les marques SPARC sont basés sur une architecture
développée par Sun Microsystems, Inc.
L'interface d'utilisation graphique OPEN LOOK et Sun a été développée par Sun Microsystems, Inc. pour ses utilisateurs et licenciés. Sun reconnaît les efforts de
pionniers de Xerox pour la recherche et le développement du concept des interfaces d'utilisation visuelle ou graphique pour l'industrie de l'informatique. Sun détient
une licence non exclusive de Xerox sur l'interface d'utilisation graphique Xerox, cette licence couvrant également les licenciés de Sun qui mettent en place l'interface
d'utilisation graphique OPEN LOOK et qui, en outre, se conforment aux licences écrites de Sun.
Les produits qui font l'objet de cette publication et les informations qu'il contient sont régis par la legislation américaine en matière de contrôle des exportations et
peuvent être soumis au droit d'autres pays dans le domaine des exportations et importations. Les utilisations finales, ou utilisateurs finaux, pour des armes nucléaires,
des missiles, des armes chimiques ou biologiques ou pour le nucléaire maritime, directement ou indirectement, sont strictement interdites. Les exportations ou
réexportations vers des pays sous embargo des Etats-Unis, ou vers des entités figurant sur les listes d'exclusion d'exportation américaines, y compris, mais de manière
non exclusive, la liste de personnes qui font objet d'un ordre de ne pas participer, d'une façon directe ou indirecte, aux exportations des produits ou des services qui
sont régis par la legislation américaine en matière de contrôle des exportations et la liste de ressortissants spécifiquement designés, sont rigoureusement interdites.
LA DOCUMENTATION EST FOURNIE "EN L'ETAT" ET TOUTES AUTRES CONDITIONS, DECLARATIONS ET GARANTIES EXPRESSES OU TACITES
SONT FORMELLEMENT EXCLUES, DANS LA MESURE AUTORISEE PAR LA LOI APPLICABLE, Y COMPRIS NOTAMMENT TOUTE GARANTIE
IMPLICITE RELATIVE A LA QUALITE MARCHANDE, A L'APTITUDE A UNE UTILISATION PARTICULIERE OU A L'ABSENCE DE CONTREFACON.
091211@23031
Contents
Preface ......................................................................................................................................................5
Related Books ..................................................................................................................................5
About This Documentation (PDF and HTML) ..........................................................................6
Related Third-Party Web Site References ....................................................................................6
Sun Welcomes Your Comments ...................................................................................................7
Change History ...............................................................................................................................7
Introduction to Sun Installation Assistant ..........................................................................................9
Getting Started With Sun Installation Assistant 2.2 ........................................................................ 11
SIA Version 2.2 Features and Benefits ....................................................................................... 12
SIA Task List ................................................................................................................................. 12
Server Support and SIA Media Availability ............................................................................... 13
Supported Operating Systems .................................................................................................... 13
Starting SIA and Preparing for Deployment or Recovery Tasks ................................................... 15
Local and Remote Media Options .............................................................................................. 15
Mouse Settings When Using SIA with ILOM Remote Console ............................................. 16
How to Start SIA and Prepare for Tasks Using Local or Remote Media ................................ 16
Installing Linux With SIA ................................................................................................................... 25
How to Install Linux With SIA Using Local or Remote Media ............................................... 25
Using SIA to Upgrade System Firmware .......................................................................................... 33
How to Upgrade the System BIOS and ILOM Firmware ........................................................ 33
How to Upgrade HBA Firmware ............................................................................................... 35
Performing an SIA PXE-Based Attended Installation .................................................................... 39
How to Create the SIA Image and Prepare for PXE Boot ........................................................ 39
How to Boot SIA From a PXE Server for an Attended Installation ........................................ 40
Performing an SIA PXE-Based Unattended Installation ................................................................ 43
Contents of the SIA State File ..................................................................................................... 44
Preparing for an Unattended SIA Installation of Linux .......................................................... 48
Preparing for an Unattended SIA Firmware Upgrade ............................................................ 49
3
Contents
How to Create the SIA Image and Prepare for PXE Boot ........................................................ 51
How to Boot SIA From a PXE Server and Perform an Unattended Installation .................. 52
Observing an SIA PXE-Based Unattended Installation .................................................................. 55
Set Up Passwords for Root and Virtual Access ......................................................................... 55
Using a System Console .............................................................................................................. 56
Using a Virtual Console or Secure Shell (SSH) Connection ................................................... 56
Using a VNC Viewer ................................................................................................................... 57
Using a Serial Console ................................................................................................................. 57
Troubleshooting SIA ........................................................................................................................... 59
SIA Error Messages ...................................................................................................................... 59
SIA Installation Log File .............................................................................................................. 60
ILOM Remote Console Mouse Issue With SIA ........................................................................ 60
Debugging Unattended Installation Problems ......................................................................... 60
Creating a Bootable SIA USB Flash Drive ........................................................................................ 63
Requirements ............................................................................................................................... 63
Getting the Software .................................................................................................................... 63
Preparing the USB Flash Drive ................................................................................................... 64
Setting BIOS Parameters and Booting Off the SIA USB Flash Drive ..................................... 69
Index ......................................................................................................................................................71
4
Sun Installation Assistant 2.2 User's Guide for the Sun Fire X4640 Server • October 2009, Rev. A
Preface
This preface describes related documentation, submitting feedback to Sun, and a document
change history.
■
■
■
■
■
“Related Books” on page 5
“About This Documentation (PDF and HTML)” on page 6
“Related Third-Party Web Site References” on page 6
“Sun Welcomes Your Comments” on page 7
“Change History” on page 7
Related Books
The following is a list of documents related to your Sun FireTM X4640 server. These and
additional support documents are available on the web at:
http://docs.sun.com/app/docs/prod/server.x64#hic
Document
Description
Sun Fire X4640 Server Getting Started Guide
Pictorial setup quick reference.
Sun Fire X4640 Server Installation Guide
How to install, rack, and configure the server up to
initial power-on.
Sun Fire X4640 Server Product Notes
Important late-breaking information about the Sun
Fire X4640 server.
Sun Installation Assistant 2.2 User's Guide for the Sun
Fire X4640 Server
A Sun tool used to perform an assisted installation of a
supported Windows or Linux OS, upgrade firmware
(regardless of OS), and other tasks.
Sun Fire X4640 Server Solaris OS Installation Guide
How to install the Solaris OS on your server.
Sun Fire X4640 Server Linux OS Installation Guide
How to install a supported Linux OS on your server.
Sun Fire X4640 Server Windows OS Installation Guide
How to install supported versions of Microsoft
Windows on your server.
5
About This Documentation (PDF and HTML)
Document
Description
Sun Fire X4640 Server ESX OS Installation Guide
How to install supported versions of the ESX OS on
your server.
Sun Fire X4640 Server Diagnostics Guide
How to diagnose problems with your server.
Sun Fire X4640 Server Service Manual
How to service and maintain your server.
Sun Fire X4640 Server Safety and Compliance Guide
Safety and compliance information about your server.
Sun ILOM 3.0 Supplement for the Sun Fire X4640
Server
Version-specific supplemental information for your
server's Integrated Lights Out Manager.
Sun x64 Server Utilities Reference Manual
How to use the available utilities included with your
server.
Sun x64 Server Disk Management Overview
Information about managing your server's storage.
Translated versions of some of these documents are available at the web site described
previously in Simplified Chinese, Japanese, and French. English documentation is revised more
frequently and might be more up-to-date than the translated documentation.
About This Documentation (PDF and HTML)
This documentation set is available in both PDF and HTML. The information is presented in
topic-based format (similar to online help) and therefore does not include chapters, appendices
or section numbering.
Related Third-Party Web Site References
Third-party URLs are referenced in this document and provide additional, related information.
Note – Sun is not responsible for the availability of third-party web sites mentioned in this
document. Sun does not endorse and is not responsible or liable for any content, advertising,
products, or other materials that are available on or through such sites or resources. Sun will not
be responsible or liable for any actual or alleged damage or loss caused or alleged to be caused by
or in connection with use of or reliance on any such content, goods, or services that are available
on or through such sites or resources.
6
Sun Installation Assistant 2.2 User's Guide for the Sun Fire X4640 Server • October 2009, Rev. A
Change History
Sun Welcomes Your Comments
Sun is interested in improving its documentation and welcomes your comments and
suggestions. To share your comments, go to http://docs.sun.com and click Feedback.
Change History
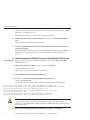
The following changes have been made to the documentation set.
■
October 2009, initial publication.
7
8
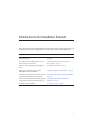
Introduction to Sun Installation Assistant
This section introduces the Sun Installation Assistant (SIA) version 2.2 and describes how to get
started using SIA to perform deployment or recovery tasks on your Sun Fire X4640 server.
Description
Link
Learn about requirements and tasks that can be
performed using SIA.
“Getting Started With Sun Installation Assistant 2.2”
on page 11
Start and prepare SIA for deployment or recovery
tasks from local or remote media.
“Starting SIA and Preparing for Deployment or
Recovery Tasks” on page 15
Perform an assisted operating system installation of
Linux.
“Installing Linux With SIA” on page 25
Perform a system firmware upgrade (system
BIOS/ILOM or disk controller HBA).
“Using SIA to Upgrade System Firmware” on page 33
Perform an SIA task (OS install or firmware upgrade)
using a PXE-based SIA image in attended mode.
“Performing an SIA PXE-Based Attended Installation”
on page 39
Perform an SIA task (OS install or firmware upgrade)
using a PXE-based SIA image in unattended mode.
“Performing an SIA PXE-Based Unattended
Installation” on page 43
Troubleshoot an SIA installation.
“Troubleshooting SIA” on page 59
9
10
Getting Started With Sun Installation Assistant
2.2
The Sun Installation Assistant (SIA) is a tool designed to be used with x64 Sun Fire and Sun
Blade servers to assist in the deployment of supported Linux operating systems (OS), as well as
system firmware upgrades. With SIA, your deployment tasks can be completed using the
graphical wizard-based interface or in unattended mode.
Note – As of the release of this document, SIA can not be used to install Windows Server 2008
R2. You will need to perform a manual installation of Windows. For more information on
performing a manual installation of Windows, see the Sun Fire X4640 Server Windows
Installation Guide.
■
For operating system installation, when used in interactive mode by booting the SIA
interface, SIA assists in the OS installation process. You will need to provide a retail version
of OS distribution media and SIA will hand you off to the OS native installer as required. SIA
will automatically inventory your system hardware and download the latest device drivers
supported by Sun. This means you will not need to create a separate drivers disk. SIA does
that work for you.
■
For system firmware upgrades, SIA can be used to upgrade the system BIOS, service
processor, and optional HBA (host bus adapter used for disk control) firmware with the
latest fixes and enhancements.
■
For automated deployment, SIA can be used in unattended mode to automate the process of
OS installation or system firmware upgrades. A special text-based SIA state file is used to
automatically answer prompts you would have answered in interactive (attended) mode.
Note – As of the release of this document, SIA can not be used to install Red Hat Enterprise
Linux versions 4.8 or 5.3 in unattended mode. You can use a normal PXE-based installation
of these operating systems that does not use SIA. For more information on performing a
PXE installation of RHEL, see the Sun Fire X4640 Server Linux Installation Guide.
For more information about SIA, see:
■
■
■
■
“SIA Version 2.2 Features and Benefits” on page 12
“SIA Task List” on page 12
“Server Support and SIA Media Availability” on page 13
“Supported Operating Systems” on page 13
11
SIA Version 2.2 Features and Benefits
SIA Version 2.2 Features and Benefits
SIA version 2.2 provides the following features and benefits:
■
Multiple media options. SIA is available on a variety of bootable media. You can boot SIA
from either a local drive attached to the server (CD/DVD or USB flash drive), a remote
redirected network drive (virtual CD-ROM or ISO image), or from an image available on
your PXE network environment.
■
Remote update option that updates the SIA software from the Sun download site to ensure
your SIA session has the latest drivers and firmware.
■
Assisted installation for supported Linux operating systems. This includes the most recent
Sun-supported device drivers required for your system. Supports OS installation on hard
disk, solid state disk, or compact flash.
Note – SIA does not provide the operating system software. You must have a licensed retail
version of the operating system software available during the SIA installation.
■
System BIOS and device firmware upgrade capabilities. Upgrade options are server-specific.
■
Attended or unattended installations (including OS installation and firmware upgrades)
using PXE-based SIA.
■
An SIA session event log is created for troubleshooting issues. The log file located at the
/root for Linux.
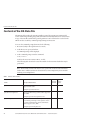
SIA Task List
SIA can perform the following server-specific deployment and recovery tasks. The table below
provides a list of tasks that may be performed in SIA from the Task Selection dialog screen,
however the list of tasks is server-dependant and not all tasks are available for all servers.
12
Task
Description
Operating System Installation
Assisted operating system installation of supported versions of Linux.
System BIOS and ILOM Upgrade
Upgrades the system BIOS and ILOM Service Processor firmware.
Displays the installed version and what version is available for an
upgrade. These components are upgraded together so that tested
version levels are matched Requires a server reboot to use the new
version.
Sun Installation Assistant 2.2 User's Guide for the Sun Fire X4640 Server • October 2009, Rev. A
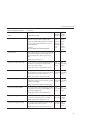
Supported Operating Systems
Task
Description
HBA Firmware Upgrade
Upgrades the firmware of the server’s integrated HBA (Host Bus
Adapter). Displays the installed version and what version is available
for an upgrade. Requires a server reboot to use the new version.
Server Support and SIA Media Availability
The SIA CD/DVD is available for Sun servers that support the x64 processor architecture
(might come with the server or be available as an X-option). For a complete list of supported
Sun server platforms, refer to the SIA information page at:
http://www.sun.com/systemmanagement/sia.jsp
An ISO CD-ROM image or a USB flash drive image of SIA is also available for download from
the Sun download page (select “View by Category” and then “x64 Servers & Workstations”):
http://www.sun.com/download/index.jsp
Updates to the SIA program can be obtained easily during the SIA installation by using the
Remote Update option in the SIA.
Supported Operating Systems
SIA is available for supported Linux installations. A list of supported operating systems is
available on the SIA information page:
http://www.sun.com/systemmanagement/sia.jsp
13
14
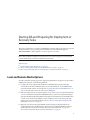
Starting SIA and Preparing for Deployment or
Recovery Tasks
This section explains how to start the Sun Installation Assistant (SIA) and prepare it to perform
deployment tasks, such as operating system installation or system firmware upgrades
(BIOS/ILOM, HBA or disk expander), or a service processor recovery.
Note – SIA has a Remote Update feature that allows you to remotely update your current SIA
session with the latest server drivers and firmware from Sun.
Choose a topic.
■
■
■
“Local and Remote Media Options” on page 15
“Mouse Settings When Using SIA with ILOM Remote Console” on page 16
“How to Start SIA and Prepare for Tasks Using Local or Remote Media” on page 16
Local and Remote Media Options
Use SIA to install an operating system or upgrade system firmware on supported your Sun Fire
X4640 server using one of the following methods:
■
Locally at the server using the SIA CD/DVD or a USB flash drive prepared with SIA
software. Boot SIA from a CD/DVD in the server’s CD/DVD drive, or via USB flash drive
prepared with SIA software (as described in “Creating a Bootable SIA USB Flash Drive” on
page 63) directly connected to one of the server’s USB ports.
■
Remotely using a remote console through the server’s service processor. This method allows
you to boot SIA from a virtual CD/DVD-ROM. Refer to your server’s Lights Out Manager
(Integrated LOM or Embedded LOM) documentation for information on the LOM remote
console. (Note that there are multiple versions of LOM, be sure to refer to the guide that
matches your server’s installed version). Also see “Mouse Settings When Using SIA with
ILOM Remote Console” on page 16.
■
Remotely over the network using a PXE network boot image. Using this method can
significantly reduce the installation time. Instructions for configuring PXE network boot
can be found in “Performing an SIA PXE-Based Attended Installation” on page 39 or
“Performing an SIA PXE-Based Unattended Installation” on page 43.
15
Mouse Settings When Using SIA with ILOM Remote Console
Mouse Settings When Using SIA with ILOM Remote Console
The ILOM Remote Console feature allows an administrator to redirect a server’s keyboard,
video, and mouse to their management system. This feature is very convenient when the server
and management system are not at the same location.
The ILOM Remote Console has a mouse mode setting that configures ILOM to send mouse
events to the remote system using either “absolute” or “relative” mode. For the ILOM Remote
Console to work properly with SIA, you must configure the mouse setting to relative mode. If
your mouse is set to absolute mode, your mouse will not work when using SIA.
After using SIA, you may consider switching your ILOM Remote Console mouse setting to
absolute mode; it provides a smoother mouse experience when using a Solaris or Windows host
OS. However, if you are using a Linux host OS, absolute mode may not work properly and you
should use the relative mode setting.
Your mouse mode settings can be set using the ILOM web interface in the Mouse Mode settings
tab under the Remote Control tab. Note that some versions of ILOM require the service
processor (SP) to be reset before the change will take effect. You will be prompted by an ILOM
message if your SP needs to be reset.
▼ How to Start SIA and Prepare for Tasks Using Local or Remote Media
This section guides you through the initial steps of identifying the system hardware, setting up
network access, updating SIA software, and preparing you for a deployment task (such as
assisted operating system installation or system firmware upgrade) or recovery task (such as
service processor recovery).
Note – In the instructions that follow, example dialog screen shots have been provided as a
reference. Information displayed in each dialog may differ depending on your server model.
1
16
Start SIA using one of the supported methods:
■
Locally using a CD/DVD: Insert the SIA CD/DVD into the server’s CD/DVD drive and
power on or reboot the server.
■
Locally using a USB flash drive: Plug the USB flash drive prepared with SIA software
directly into one of the server’s USB ports. Redirect the server to boot from the USB flash
drive as described in “Creating a Bootable SIA USB Flash Drive” on page 63.
■
Remotely from a CD/DVD or image file: Log in to the server’s service processor from a
remote console (or KVMS) using its LOM (Lights Out Manager) interface and use the
Remote Control Launch Redirection feature to redirect the server to the virtual
CD/DVD-ROM that contains the SIA CD/DVD image. Then, reboot the server and direct it
to boot from your virtual CD/DVD-ROM (typically done using the F8 menu available
during server boot).
Sun Installation Assistant 2.2 User's Guide for the Sun Fire X4640 Server • October 2009, Rev. A
Mouse Settings When Using SIA with ILOM Remote Console
■
Remotely using a PXE-based image: If you are using PXE network booting to load the Sun
Installation Assistant image from a Linux-based PXE server, proceed to “Performing an SIA
PXE-Based Attended Installation” on page 39 or “Performing an SIA PXE-Based
Unattended Installation” on page 43.
Note – The instructions below assume local CD/DVD drive access. Be sure to modify the
instructions accordingly if you are using a local USB flash drive prepared with SIA software,
or if you are running SIA from a remote console (or KVMS) with CD-ROM redirection.
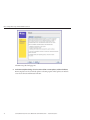
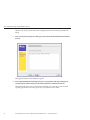
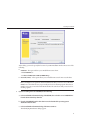
As SIA starts, you will see various start up messages and then the Software License Agreement
dialog will be displayed.
2
In the Software License Agreement dialog, click Accept to accept the license agreement, and
then click Next.
The SIA Welcome dialog appears identifying the tasks that the Sun Installation Assistant
performs.
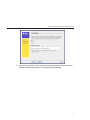
3
In the SIA Welcome dialog, click Next to proceed with the installation.
17
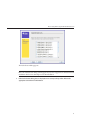
Mouse Settings When Using SIA with ILOM Remote Console
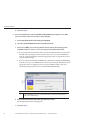
The Remote Update dialog appears.
4
In the Remote Update dialog, select Yes or No to allow a remote update, and then click Next.
Remote Update is used to download updates to the SIA program. These updates can include
server device drivers and firmware from Sun.
18
Sun Installation Assistant 2.2 User's Guide for the Sun Fire X4640 Server • October 2009, Rev. A
Mouse Settings When Using SIA with ILOM Remote Console
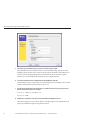
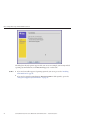
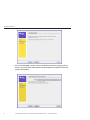
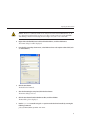
5
If you select Yes to perform a remote update of the current SIA session to obtain the latest SIA
software, the Gathering Information screen is displayed. Do the following:
19
Mouse Settings When Using SIA with ILOM Remote Console
a. Select the active network interface on your server (for example: eth0).
This will enable the network interface used to access the update image. If your server has
multiple network cards, be sure to use the network-connected interface that enables access
to the host where the update image files reside (whether this is the Sun remote update
Internet site, or an internally mounted image on your company intranet).
b. Select the network interface configuration method (DHCP or Static IP).
If static method is selected, provide the necessary information (for example, your server’s IP
address, netmask address, gateway address, and so on).
c. Provide proxy information if an HTTP proxy is needed for Internet access (proxy host and
port for client connections), for example:
Proxy Host: webproxy.mycompany.com
Proxy Port: 8088
d. Click Next to establish a connection to the Sun SIA Remote Update web site.
The remote update process checks for updates to the SIA program (see example below). If
updates are available the update components are listed.
20
Sun Installation Assistant 2.2 User's Guide for the Sun Fire X4640 Server • October 2009, Rev. A
Mouse Settings When Using SIA with ILOM Remote Console
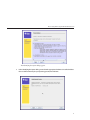
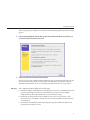
The Identifying the System dialog appears.
6
In the Identifying the System dialog, ensure that the appropriate hardware is installed and that
there is sufficient memory for your operating system, then click Next.
21
Mouse Settings When Using SIA with ILOM Remote Console
SIA then scans the systems for disk drives and displays a list at the Scanning for SCSI Devices
dialog.
7
In the Scanning for Storage Devices dialog, you will see the disks identified by SIA. Click Next to
proceed.
The Supported Option Cards dialog then appears.
8
In the Supported Option Cards dialog, if you plan on using SIA to install an operating system
select the option cards for which you want SIA to install drivers. Click Next when done.
SIA automatically selects option cards it finds installed in your system. If you want to install
operating system drivers for other option cards, you will need to select them.
22
Sun Installation Assistant 2.2 User's Guide for the Sun Fire X4640 Server • October 2009, Rev. A
Mouse Settings When Using SIA with ILOM Remote Console
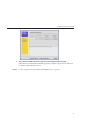
The Task Selection dialog appears.
Note – The Task Selection dialog will only appear if your server supports more SIA tasks than OS
installation. If it does not, SIA will proceed to OS installation.
9
In the Task Selection dialog, choose a deployment or recovery task to perform. Refer to the
appropriate section for more information.
23
Mouse Settings When Using SIA with ILOM Remote Console
The dialog lists only task options supported for your server. For example, your list may include
operating system installation, server BIOS/ILOM upgrade, or other tasks.
See Also
24
■
If you need to install a supported operating system for your server, proceed to “Installing
Linux With SIA” on page 25.
■
If you need to upgrade system firmware (BIOS/ILOM, HBA or disk expander), proceed to
“Using SIA to Upgrade System Firmware” on page 33.
Sun Installation Assistant 2.2 User's Guide for the Sun Fire X4640 Server • October 2009, Rev. A
Installing Linux With SIA
This section explains how to install a supported Linux operating system using the Sun
Installation Assistant (SIA). SIA assists in the installation of supported operating systems and
requires a licensed retail version of the operating system distribution media to be available
locally or remotely to complete the task.
SIA provides OS-level device drivers that are certified by Sun for optional accessory cards and
other system hardware. Using SIA eliminates the need to obtain and prepare OS-level device
drivers on separate media before installing the operating system.
Note – For a complete list of system and OS-level device drivers that are provided and installed
by SIA, refer to the SIA CD/DVD README.html file and the Product Notes for your server.
■
“How to Install Linux With SIA Using Local or Remote Media” on page 25
▼ How to Install Linux With SIA Using Local or Remote Media
Before You Begin
■
If your server ships with an integrated RAID controller (LSI-based) and you want to include
your boot drive as part of a RAID configuration, you will need to configure a RAID volume
on it using the controller’s setup utility (accessible by pressing Ctrl-C when prompted
during server boot) before you install the operating system. Consult your platform
installation guide for instructions on how to do this.
■
If you have a Sun StorageTek RAID disk controller (Adaptec-based), you must configure an
array volume through the Adaptec RAID Configuration Utility (accessible by pressing
Ctrl-A when prompted during server boot) before it can be accessed by SIA. This must be
done whether you intend to use RAID or not. Consult your platform installation guide for
instructions on how to do this.
■
The instructions below assume local CD/DVD drive access. Be sure to modify the
instructions accordingly if you are using a local USB flash drive prepared with SIA software,
or if you are running SIA from a remote console (or KVMS) with CD-ROM redirection.
25
Installing Linux With SIA
1
You should have already started SIA and prepared it for tasks as described in “Starting SIA and
Preparing for Deployment or Recovery Tasks”on page 15. At the Task Selection dialog, select
Operating System Installation, and then click Next.
This dialog will only appear if your server supports more tasks than OS installation. The dialog
lists only task options supported for your server. For example, your list may include operating
system installation, server BIOS/SP firmware upgrade, or other tasks.
2
26
As the Operating System installation process begins, you see the Install Media Information
dialog.
Sun Installation Assistant 2.2 User's Guide for the Sun Fire X4640 Server • October 2009, Rev. A
Installing Linux With SIA
At this dialog, you need to specify the location of your OS installation media. Choose one of the
following:
■
CD/DVD—This option allows you to install the OS source from:
- a local CD/DVD, or
- a redirected CD/DVD or ISO CD-ROM image
■
Network (Linux)—This option allows you to install the OS source from a network share.
Note – SIA might not recognize the Linux installation media if you chose to use a CD/DVD
ROM device other than the one you previously used to boot the SIA program. Therefore, it
might be necessary to insert the Linux OS media into the same device that you used to boot
the SIA program.
3
If you are installing from a local CD/DVD, do the following:
a. In the Install Media Information dialog, click CD/DVD, then select the server’s CD/DVD drive
from the CD Location drop-down list.
b. Eject the SIA CD/DVD from this drive then insert the first CD of the operating system
distribution into the drive.
c. In the Install Media Information dialog, click Next to continue.
The Identifying Distribution dialog appears.
27
Installing Linux With SIA
d. Proceed to Step 6.
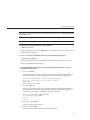
4
If you are installing from a redirected CD/DVD or ISO CD-ROM image using the server’s LOM
(Lights Out Manager remote console feature, do the following:
a. In the SIA Install Media Information dialog, click CD/DVD.
b. Select the virtual CD-ROM from the CD Location drop-down list.
c. In the server’s LOM (Lights Out Manager) Remote Console, redirect the operating system
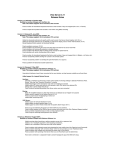
installation media (CD-ROM or CD-ROM Image) using one of the following methods.
■
If you booted SIA from a CD/DVD drive, eject the SIA CD from this drive and insert the
first disk of the operating system into the drive. In the service processor LOM Remote
Console, select the CD-ROM option from the appropriate menu (see graphic below for an
integrated LOM example).
■
If you booted SIA from an ISO CD-ROM image, unmount the SIA ISO CD-ROM image
from the service processor LOM Remote Console by deselecting CD-ROM Image from the
appropriate menu (see graphic below for an integrated LOM example), then select
CD-ROM Image and specify the location of the ISO OS CD-ROM image.
Figure Legend
1
From an ILOM Remote Console, use the Devices menu to mount and unmount devices
such as a CD or ISO CD image.
d. In the SIA Install Media Information dialog, click Next to continue.
The Identifying Distribution dialog appears.
e. Proceed to Step 6.
28
Sun Installation Assistant 2.2 User's Guide for the Sun Fire X4640 Server • October 2009, Rev. A
Installing Linux With SIA
5
If you are installing from a Network share, do the following in the Install Media Information
page:
a. Click Network.
b. In the address bar, specify the nfs, ftp, or http accessible network address to the Linux ISO
image media. See table below for examples and restrictions.
For OSes requiring multiple images (CD1, CD2, etc.), multiple address fields are available.
Note – The URL address can not contain spaces.
OS Source
Transfer Method
What to Type
Content extracted from
an ISO image to a
directory
HTTP
Path to directory containing the extracted OS install files.
Example:
http://hostname_or_IPaddress/extractedISOdirectory
FTP
Path to directory containing the extracted OS install files.
Example:
ftp://hostname_or_IPaddress/extractedISOdirectory
NFS
Path to directory containing the extracted OS install files.
Example:
nfs://hostname_or_IPaddress/extractedISOdirectory
Single ISO image file in a NFS
directory
Path to directory containing the OS install ISO image file.
Example:
http://hostname_or_IPaddress/ISOimagedirectory
Note – The directory can not contain more than one ISO
image file.
Where hostname_or_IPaddress is either the hostname or the IP address of the server
containing the ISO image, extractedISOdirectory is the directory containing the extracted
Linux OS installation ISO image files, and ISOimagedirectory the directory containing the
Linux OS installation ISO image file. For Linux, only the path to the directory containing the
ISO image source should be used; individual files (including .iso) cannot be part of the URL
path.
c. Click Next.
6
In the Identifying Distribution dialog, review the information presented in the dialog then click
Next to start the OS installer.
29
Installing Linux With SIA
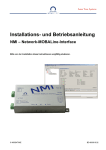
7
30
If you are installing RHEL, you will see the Pre–installation Environment setup page (shown
below). Select a boot disk on which SIA will create the Red Hat pre–installation environment
partition and click Next.
Sun Installation Assistant 2.2 User's Guide for the Sun Fire X4640 Server • October 2009, Rev. A
Installing Linux With SIA
After setting up the pre-installation environment, the SIA Installing Additional Software dialog
appears.
8
In the Installing Additional Software dialog, SIA installs additional platform-specific drivers, as
needed. Review the information presented.
9
Remove the SIA media and click the Reboot button.
The server reboots and continues with the installation of the operating system. If remote update
was selected, SIA retrieves the latest files from the web. Otherwise it uses the files on the OS
distribution media. Follow the on-screen instructions and perform reboot(s) as prompted.
Next Steps
After completing the OS installation, do the following:
■
Install and configure additional drivers and utilities for your server not installed by SIA. This
provides you the supported feature set for installed server components (for example,
additional drivers may include ACPI, video, network and mass storage).
■
Install Sun-specific optional software available on your server’s Tools and Drivers (also
known as Resource) CD/DVD as described in your server OS installation and Product Notes
documentation.
■
Download and install the latest Linux operating system updates and fixes from the Linux
operating system vendor’s web site.
31
32
Using SIA to Upgrade System Firmware
This section explains how to upgrade system firmware (including system BIOS, ILOM service
processor, disk controller HBA and disk expander) from local or remote SIA.
SIA provides system BIOS and firmware certified by Sun for your Sun x64 server. Using SIA
eliminates the need to obtain and run separate packages and programs to keep your system
firmware up-to-date.
Note – For a complete list of systems that support the firmware upgrade capabilities of SIA, refer
to the SIA CD/DVD README.html file and the Product Notes for your server.
■
■
“How to Upgrade the System BIOS and ILOM Firmware” on page 33
“How to Upgrade HBA Firmware” on page 35
▼ How to Upgrade the System BIOS and ILOM Firmware
Note – In the instructions that follow, example dialog screen shots have been provided as a
reference. Information displayed in each dialog may differ depending on your server model.
1
You should have already started SIA and prepared it for tasks as described in “Starting SIA and
Preparing for Deployment or Recovery Tasks”on page 15 and the Task Selection dialog should
be displayed.
Note – The instructions below assume local CD/DVD drive access. Be sure to modify the
instructions accordingly if you are using a local USB flash drive prepared with SIA software, or
if you are running SIA from a remote console (or KVMS) with CD-ROM redirection.
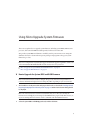
2
Select the System BIOS and ILOM Upgrade task, and then click Next.
33
Using SIA to Upgrade System Firmware
SIA compares the system BIOS and ILOM versions on the server against the available BIOS and
ILOM versions in the current SIA session.
3
34
If there is a later version of code available, click Next to begin the upgrade.
Sun Installation Assistant 2.2 User's Guide for the Sun Fire X4640 Server • October 2009, Rev. A
Using SIA to Upgrade System Firmware
Follow the on-screen instructions until the upgrade has completed. Upgraded code will not be
used by the system until after a reboot.
See Also
■
“How to Upgrade HBA Firmware” on page 35
▼ How to Upgrade HBA Firmware
Host bus adapters control internal or external disks connected to the server. SIA has the
capability to upgrade supported HBAs to allow for fixes and enhancements to HBA firmware
code.
Caution – Though the upgrade of HBA firmware should not be destructive to connected storage,
Sun recommends doing a full backup of HBA connected storage before performing the
upgrade.
Note – SIA can perform firmware upgrades only. It cannot downgrade firmware.
1
You should have already started SIA and prepared it for tasks as described in “Starting SIA and
Preparing for Deployment or Recovery Tasks”on page 15 and the Task Selection dialog should
be displayed.
Note – The instructions below assume local CD/DVD drive access. Be sure to modify the
instructions accordingly if you are using a local USB flash drive prepared with SIA software, or
if you are running SIA from a remote console (or KVMS) with CD-ROM redirection.
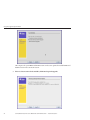
2
Select the HBA Firmware Upgrade task, and then click Next.
35
Using SIA to Upgrade System Firmware
SIA displays the current version(s) and the available upgrade version for discovered HBAs.
Note – If you selected the Remote Update feature (described in “How to Start SIA and Prepare
for Tasks Using Local or Remote Media” on page 16), SIA will have obtained the latest code
from the Sun software download site.
3
Select the identified controller(s)/HBAs to upgrade by placing a check mark in the Upgrade box.
Note – Sun recommends that in a multi-controller system, all controllers should be at the same
firmware level.
36
Sun Installation Assistant 2.2 User's Guide for the Sun Fire X4640 Server • October 2009, Rev. A
Using SIA to Upgrade System Firmware
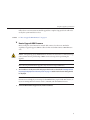
4
See Also
After selecting the HBA/controllers to upgrade, click the Upgrade Firmware button.
Follow the on-screen instructions until the upgrade has completed. Upgraded code will not be
used by the system until after a reboot.
■
“How to Upgrade the System BIOS and ILOM Firmware” on page 33
37
38
Performing an SIA PXE-Based Attended
Installation
This section explains how to boot the Sun Installation Assistant (SIA) from a Preboot Execution
Environment (PXE) and run it in attended (interactive) mode.
SIA is a Linux-based program that can be booted from a Linux-based PXE server. You can
create an SIA image on your Linux-based PXE server, boot from it, and use SIA to perform
deployment tasks in attended or unattended mode. In attended mode, you use SIA as you
normally would to perform tasks using the interactive graphical interface. In unattended mode,
SIA will automatically perform server installation tasks, such as operating system installation or
firmware upgrades, without user intervention.
Note – As of the release of this document, SIA can not be used to install an image of Windows
Server 2008 R2. You will need to perform a Windows Deployment Services–based installation
of Windows. For more information on creating a WIM image and doing a remote WDS
installation of Windows, see the Sun Fire X4640 Server Windows Installation Guide.
■
■
“How to Create the SIA Image and Prepare for PXE Boot” on page 39
“How to Boot SIA From a PXE Server for an Attended Installation” on page 40
▼ How to Create the SIA Image and Prepare for PXE Boot
1
Preconfigure your network to support a Linux-based PXE server network installation.
You may refer to the Linux distribution documentation for more information on configuring a
PXE server.
2
In the PXE Linux directory, create a new subdirectory for the SIA image(s).
On a Linux system, for example, the following command line creates a subdirectory for
suninstall images:
# mkdir /home/pxeboot/suninstall
3
Insert the SIA CD/DVD into a CD/DVD drive of a Linux-based PXE server and mount the CD/DVD.
39
Performing an SIA PXE-Based Attended Installation
4
Copy the vmlinuz (the bootable Linux kernel) and initrd (initial ram disk) files from the SIA
CD/DVD to the suninstall subdirectory that you created.
Use the correct path to the mounted CD image. This example uses /mnt/cdrom:
# cp /mnt/cdrom/boot/isolinux/vmlinuz /home/pxeboot/suninstall
# cp /mnt/cdrom/boot/isolinux/initrd.img /home/pxeboot/suninstall
5
Use an editor to add the following SIA references to the pxelinux.cfg/default file that is
stored in the /home/pxeboot directory.
default suninstall
label suninstall
kernel suninstall/vmlinuz
append initrd=suninstall/initrd.img vga=0x314 ramdisk_size=900000 root=/dev/ram netboot
Type the append command line from append initrd= to netboot as one continuous string
with no returns.
6
Save the file, and then unmount and remove the SIA CD/DVD from the CD/DVD drive.
You image is now ready to be booted from.
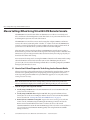
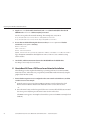
▼ How to Boot SIA From a PXE Server for an Attended Installation
The following procedure explains the initial steps you must perform to boot SIA from a PXE
Linux-based server. After SIA boots, you perform your installation tasks interactively using the
graphical user interface (GUI).
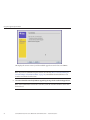
1
Ensure that the target Sun server is configured on the same network as the PXE server, and then
reset the Sun server. For example:
■
From the service processor (Lights Out Manager) Remote Console web interface, click
Remote Control->Remote Power Control then select Reset to reset the host server.
-or-
■
Press the Power button on the front panel of the server to turn it off (hold the button in until
the server powers off), then press the Power button to turn on the server.
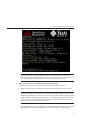
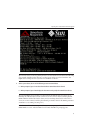
The BIOS screen appears. An example is shown below (your server’s BIOS screen might look
different).
40
Sun Installation Assistant 2.2 User's Guide for the Sun Fire X4640 Server • October 2009, Rev. A
Performing an SIA PXE-Based Attended Installation
Tip – The next events occur very quickly; therefore, focused attention is needed for the
following steps. Watch carefully for these messages, as they appear on the screen for a brief
time. You might want to enlarge the size of your screen to eliminate scroll bars.
2
As the system boots, do one of the following to start a network boot:
■
When prompted, press F12 to boot from the first network boot device found.
■
When prompted, press F8 to display the boot menu and specify the network boot device.
Tip – On a Sun Blade server module, you can determine the PXE interface boot device by (1)
matching the PXE:Slot# (listed on the Please Select Boot Device menu) with the physical
NEM or EM slot number label on the chassis, and (2) matching the F# (listed on the Please
Select Boot Device menu) with the physical NIC port number label on the NEM (ports
0.0 to 9.0 and 0.1 to 9.1) or EM (ports 0 or port 1).
After the network boot device is specified, the system attempts to get the IP address from the
DHCP PXE boot server. After the PXE server is found, the PXE boot prompt appears.
41
Performing an SIA PXE-Based Attended Installation
42
3
At the PXE boot prompt, press Enter or type: suninstall
The SIA installation image downloads to the server and the dialog for “Launching the Sun
Installation Assistant” appears.
4
For further instructions about how to continue an attended installation after booting SIA from a
PXE server, follow the steps (beginning at Step 2) in the procedure “How to Start SIA and Prepare
for Tasks Using Local or Remote Media”on page 16.
Sun Installation Assistant 2.2 User's Guide for the Sun Fire X4640 Server • October 2009, Rev. A
Performing an SIA PXE-Based Unattended
Installation
This section describes how to perform unattended (no user interaction required) installation
tasks, such as firmware upgrades or operating system installations, utilizing a PXE-based image
of SIA.
SIA is a Linux-based program that can be booted from a Linux-based PXE server. You can
create an SIA image on your Linux-based PXE server, boot from it, and use SIA to perform
deployment tasks in attended or unattended mode. In attended mode, you use SIA as you
normally would to perform tasks using the interactive graphical interface. In unattended mode,
SIA will automatically perform server installation tasks, such as operating system installation or
firmware upgrades, without user intervention.
Note – As of the release of this document, SIA can not be used to install an image of Windows
Server 2008 R2. You will need to perform a Windows Deployment Services–based installation
of Windows. For more information on creating a WIM image and doing a remote WDS
installation of Windows, see the Sun Fire X4640 Server Windows Installation Guide.
Note – As of the release of this document, SIA can not be used to install Red Hat Enterprise
Linux versions 4.8 or 5.3 in unattended mode. You can use a normal PXE-based installation of
these operating systems that does not use SIA. For more information on performing a PXE
installation of RHEL, see the Sun Fire X4640 Server Linux Installation Guide.
Support for PXE-based installations are available as follows:
■
SIA v2.0.1 (and later versions) added the ability to do an SIA PXE-based unattended
installation of a supported Linux operating system.
This section contains the following topics. Refer to the topics that apply to your installation.
■
■
■
■
■
“Contents of the SIA State File” on page 44
“Preparing for an Unattended SIA Installation of Linux” on page 48
“Preparing for an Unattended SIA Firmware Upgrade” on page 49
“ How to Create the SIA Image and Prepare for PXE Boot” on page 51
“How to Boot SIA From a PXE Server and Perform an Unattended Installation” on page 52
43
Contents of the SIA State File
Contents of the SIA State File
The SIA state file provides the scripting variables required for carrying out an unattended
session of SIA and performing the specified SIA tasks automatically without user intervention.
A copy of the state file with all of the possible parameters can be found at the root level on the
SIA CD and is accessible by command prompt during an SIA session.
To access the command prompt from SIA, do the following:
1. Boot SIA (locally or through the remote console).
2. At the first screen, press Ctrl-Alt-F2.
A command prompt will be displayed.
3. At the command prompt enter the command:
# cd /root# ls
Look for the externalStateVariables.txt file.
The following table describes the state file variables for the automated tasks that may be
performed.
Note – Each variable with its value must be on a separate line in the state file without line
breaks. Due to width restrictions in the table below, some examples may show variables
breaking across multiple lines.
TABLE 1
SIA State File Variables
Required for
Linux Install
Required
for
Firmware
Upgrade
X
X
Accepts the SIA license agreement. Values supported: X
true | false
X
Variable
Description (Defaults in Bold)
apit.unattended
Tells SIA to run in unattended mode. Values
supported: true | false
Example: apit.unattended=true
apit.welcome.acceptlicense
Example: apit.welcome.acceptlicense=true
apit.remoteUpdate
Tells SIA to look for SIA software updates. Sun highly X
recommends performing a remote update to ensure
you always install the latest software and firmware.
Values supported: true | false
Example: apit.remoteUpdate=true
44
Sun Installation Assistant 2.2 User's Guide for the Sun Fire X4640 Server • October 2009, Rev. A
X
Contents of the SIA State File
TABLE 1
SIA State File Variables
(Continued)
Variable
Description (Defaults in Bold)
apit.remoteUpdateURL
If you specified “true” for remoteUpdate, tells SIA
where to look for SIA software updates. Values
supported: Any URL with updated SIA content files.
You only need to specify this variable if you are not
using the default url.
Default url:
http://sia-updates.sun.com/remoteUpdate
apit.networking
Tells SIA it has permission to work over the network.
If true, SIA will configure network settings based on
networkconfig variables. Values supported: true |
false
Required for
Linux Install
Required
for
Firmware
Upgrade
X (if
remote
Update is
true and
default url
is not
used)
X (if
remote
Update
is true
and
default
url is not
used)
X
X
Example: apit.networking=true
apit.networkconfig.needNetwork
If you specified “true” for network, tells SIA whether
network access is required for a particular task.
Values supported: true | false
X (if
X (if
networking networking
is true)
is true)
Example: apit.networkconfig.needNetwork=true
apit.networkconfig.activeNic
If you specified “true” for network, tells SIA which
network interface is connected to the active network.
Values supported: eth0 | eth1 | eth2 | eth3 ... etc.
X (if
X (if
networking networking
is true)
is true)
Example: apit.networkconfig.activeNic=eth0
apit.networkconfig.NetworkType
If you specified “true” for network, tells SIA the
configuration of the active network interface. Values
supported: static | dhcp
X (if
X (if
networking networking
is true)
is true)
Example: apit.networkconfig.NetworkType=dhcp
apit.networkconfig.useDHCP
If you selected “dhcp” as the NetworkType, tells SIA
to obtain the server’s address from the DHCP server.
Values supported: true | false
X (if
X (if
networking networking
is true)
is true)
Example: apit.networkconfig.useDHCP=true
apit.networkconfig.ipfield
If you selected “static” as the NetworkType, tells SIA
to use the server’s IP address value you provide.
Example: apit.networkconfig.ipfield=n.n.n.n
apit.networkconfig.gatewayField
If you selected “static” as the NetworkType, tells SIA
to use the IP address value you provide.
Example: apit.networkconfig.gatewayfield=n.n.n.n
X (if static X (if
IP is used) static IP
is used)
X (if static X (if
IP is used) static IP
is used)
45
Contents of the SIA State File
TABLE 1
SIA State File Variables
(Continued)
Variable
Description (Defaults in Bold)
apit.networkconfig.netmaskedField
If you selected “static” as the NetworkType, tells SIA
to use the IP address value you provide.
Example: apit.networkconfig.ipfield=n.n.n.n
apit.http_proxy
If, for example, you specified “true” for
remoteUpdate, tells SIA to use a proxy server for
internet access.
Required for
Linux Install
Required
for
Firmware
Upgrade
X (if static X (if
IP is used) static IP
is used)
X (if proxy X (if
used)
proxy
used)
Examples:
apit.http_proxy=n.n.n.n (IP address)
apit.http_proxy=file://web-proxy-configfile
apit.http_proxy=http://web-proxy-server
apit.http_proxy=http://internal-host:portnumber
apit.taskList.selectedTask
Tells SIA which task to perform (only one task can be X
run per unattended session). This variable is required
in the state file. Values supported: SP/Bios Firmware
Upgrade | Operating System Installation | HBA
Firmware Upgrade | Expander Firmware Upgrade |
SP Recovery
Example: apit.taskList.selectedTask=Operating
System Installation
apit.osid.installLoc
Tells SIA where the network image of the Linux
X
operating system to be installed is located. The path is
to the directory containing the image (ISO or
extracted ISO), not the image itself. The directory
cannot contain more than one image.
Example:
apit.osid.installLoc=http://path_to_imagedirectory
apit.osid.installMedia
Tells SIA where the CD or .iso file for the OS
installation software is located. Values supported:
cdrom | networkLinux
X
Example: apit.osid.installMedia=cdrom
apit.osid.installMethod
Tells SIA which file transfer protocol to use during
the installation. Values supported: http | ftp | nfs
X
Example: apit.osid.installMethod=http
46
Sun Installation Assistant 2.2 User's Guide for the Sun Fire X4640 Server • October 2009, Rev. A
X
Contents of the SIA State File
TABLE 1
SIA State File Variables
(Continued)
Required for
Linux Install
Variable
Description (Defaults in Bold)
apit.osid.kickstart
Tells SIA where the kickstart file is located for a Linux X
installation. This could be the URL to the Red Hat
kickstart file or the SUSE autoyast file.
Required
for
Firmware
Upgrade
Examples:
apit.osid.kickstart=http://url_to_kickstart
apit.osid.kickstart=ftp://url_to_kickstart
apit.osid.kickstart=nfs://url_to_kickstart
apit.enclosureID.oldEnclosureID
Used as part of a two-step process that allows you to
replace a Sun Blade 6000 disk module. The value for
this variable must be the old enclosure ID number
(also called WWN) that can be found on the circuit
board of the blade being replaced.
apit.enclosureID.newEnclosureID
Used as part of a two-step process that allows you to
replace a Sun Blade 6000 disk module. This value for
this variable must be the new enclosure ID number
(also called WWN) that can be found on the circuit
board of the replacement blade.
apit.firmware.enabled
Tells SIA to enable or disable its firmware update
function. Values supported: true | false
Typically used in a test environment, this variable is
not required to upgrade firmware.
apit.firmware.spIP
Part of a firmware upgrade task. Tells SIA the IP
address of the server’s service processor.
X
Example: apit.firmware.spIP=n.n.n.n
apit.firmware.spPasswd
Part of a firmware upgrade task. Tells SIA the
password of the server’s service processor.
X
Example: apit.firmware.spIP=changeme
apit.done.notifyUrl
Tells SIA to access the specified URL following the
completion of enabled SIA tasks. This is currently
only supported for Sun N1 System Manager.
Example:
apit.done.notifyUrl=http://my_destination_url
47
Preparing for an Unattended SIA Installation of Linux
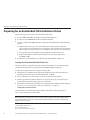
Preparing for an Unattended SIA Installation of Linux
The procedures presented in this section assumes the following:
■
You are familiar with RHEL or SLES Linux unattended installations.
■
You have created a RHEL Kickstart file or SLES AutoYaST file.
■
You have configured the RHEL Kickstart or SLES AutoYaST PXE image with the following
options:
■
■
Additional drivers for your server not installed by SIA. This provides you the full
supported feature set for installed server components (such as ACPI, video, network and
mass storage) as described in your server installation and Product Notes documentation.
■
Latest operating system installation patches available from the Linux vendor.
■
Required SIA display resolution. SIA should always boot with vga=0x314 from
CD-ROM or PXE.
The Kickstart or AutoYaST file is accessible through an FTP, HTTP, or NFS server.
Creating the SIA Unattended State File for Linux
The SIA state file is a text file that directs the unattended installation of your Linux operating
system and other SIA tasks to be performed (such as BIOS/SP firmware upgrade).
Consider these requirements when creating an SIA state file:
■
When SIA boots from PXE, the state file must identify the location of the OS media to be
installed and the transfer protocol method (FTP, NFS, or HTTP).
■
The state file must not contain extraneous spaces or punctuation of any kind.
■
The lines specified in the SIA state file must correspond to the steps you would see if you
were interactively using the SIA program to perform tasks.
■
The install location must be specified as a boot argument in the configuration file (described
in“ How to Create the SIA Image and Prepare for PXE Boot” on page 51).
Sample SIA State File for Linux
An SIA state file for an unattended Linux installation looks like the following sample, see
Table 1 for an explanation of each variable.
Note – Not all servers support the taskList and firmware options in the SIA state file. Refer to
the SIA feature list for your server found on the Sun download site if you are in doubt about
support for these options.
[STATE_BEGIN noname apit]
apit.unattended=true
apit.welcome.acceptlicense=true
48
Sun Installation Assistant 2.2 User's Guide for the Sun Fire X4640 Server • October 2009, Rev. A
Preparing for an Unattended SIA Firmware Upgrade
apit.networking=true
apit.networkconfig.needNetwork=true
apit.networkconfig.useDHCP=true
apit.networkconfig.needProxy=false
apit.remoteUpdate=true
apit.remoteupdateURL=http://sia-updates.sun.com/remoteUpdate
apit.http_proxy=path_to_my_http_proxy
apit.taskList.selectedTask=Operating System Installation
apit.osid.installMedia=networkLinux
apit.osid.installMethod=http, ftp or nfs
apit.osid.installLoc=path_to_PXE_file
apit.osid.kickstart=path_to_configuration file
[STATE_DONE noname apit]
Setting Up an Unattended Configuration File and PXE OS Install Image for Linux
To set up an unattended configuration file and PXE install image of the OS, refer to the
following OS documentation for creating an unattended configuration file and PXE install
image, for example:
■
Novell AutoYaST unattended installation documentation at http://www.novell.com
■
Red Hat’s Kickstart unattended installation documentation at http://www.redhat.com/docs
When done, proceed to “ How to Create the SIA Image and Prepare for PXE Boot” on page 51.
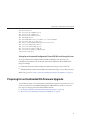
Preparing for an Unattended SIA Firmware Upgrade
You can PXE-boot SIA to do an unattended system firmware upgrade on your Sun server. You
can choose tasks such as system BIOS/ILOM upgrade, HBA firmware, and SP recovery. The
basic steps for setting up an unattended installation include:
■
■
“Creating the SIA Unattended State File for Firmware Upgrade” on page 50
“ How to Create the SIA Image and Prepare for PXE Boot” on page 51
49
Preparing for an Unattended SIA Firmware Upgrade
Note – Your server must support firmware upgrades through SIA to use the firmware upgrade
option. If you enable an unattended firmware upgrade and an upgrade is not required on the
target server (because the upgrade firmware image is either the same or earlier than what’s on
the server being upgraded), the unattended install will stop at that point, prompting user
intervention to continue. To avoid this, confirm that the firmware image you are using for the
upgrade is later than what is already on the target server(s). The firmware version (build
number) of the upgrade image is included in the README file. The firmware version (build
number) on a target server can be viewed by logging into the server’s service processor and
viewing the information through the LOM web interface, or by entering the version command
through the CLI.
Creating the SIA Unattended State File for Firmware Upgrade
The SIA state file is a text file that directs the unattended installation of your upgraded firmware.
Consider these requirements when creating an SIA state file:
■
An SIA PXE boot image must exist on a Linux-based PXE server, see “ How to Create the
SIA Image and Prepare for PXE Boot” on page 51.
■
The state file must not contain extraneous spaces or punctuation of any kind.
■
The lines specified in the SIA state file must correspond to the steps you would see if you
were interactively using the SIA program to perform tasks.
Sample SIA State File for Firmware Upgrade
An SIA state file for an unattended firmware upgrade looks like the following sample, see
Table 1 for an explanation of each variable.
Note – Not all servers support the taskList and firmware options in the SIA state file. Refer to
the SIA feature list for your server found on the Sun download site if you are in doubt about
support for these options.
[STATE_BEGIN noname apit]
apit.unattended=true
apit.networking=true
apit.welcome.acceptlicense=true
apit.networkconfig.needNetwork=true
apit.networkconfig.useDHCP=true
apit.networkconfig.needProxy=false
apit.taskList.selectedTask=SP/Bios Firmware Upgrade
apit.remoteUpdate=true
apit.remoteupdateURL=http://sia-updates.sun.com/remoteUpdate
apit.http_proxy=path_to_my_http_proxy
50
Sun Installation Assistant 2.2 User's Guide for the Sun Fire X4640 Server • October 2009, Rev. A
Preparing for an Unattended SIA Firmware Upgrade
apit.firmware.spIP=n.n.n.n
apit.firmware.spPasswd=password_for_sp
[STATE_DONE noname apit]
▼
How to Create the SIA Image and Prepare for PXE Boot
After you have prepared for an unattended installation as described in the previous sections,
follow the steps below to set up a PXE image to boot SIA and perform an unattended
installation.
Tip – For additional information about setting up an SIA PXE boot image, consult the PXE
sample target in the /boot/isolinux/isolinux.cfg file on the SIA CD/DVD.
1
Preconfigure your network to support a Linux-based PXE server network installation.
You may refer to the Linux distribution documentation for more information on configuring a
PXE server.
2
In the PXE Linux directory, create a new subdirectory for the SIA image(s).
On a Linux system, for example, the following command line creates a subdirectory for
suninstall images:
# mkdir /home/pxeboot/suninstall
3
Insert the SIA CD/DVD into a CD/DVD drive of a Linux-based PXE server and mount the CD/DVD.
4
Copy the vmlinuz (the bootable Linux kernel) and initrd (initial ram disk) files from the SIA
CD/DVD to the suninstall subdirectory that you created.
Use the correct path to the mounted CD image. This example uses /mnt/cdrom:
# cp /mnt/cdrom/boot/isolinux/vmlinuz /home/pxeboot/suninstall
# cp /mnt/cdrom/boot/isolinux/initrd.img /home/pxeboot/suninstall
5
Post your modified SIA state file (externalStateVariables.txt) on a web server that the PXE
server can access (or on the PXE server itself, if it is configured as a web server).
6
Use an editor to include the following SIA references in the pxelinux.cfg/default file that is
stored in the /home/pxeboot directory:
default suninstall
label suninstall
kernel suninstall/vmlinuz
append initrd=suninstall/initrd.img vga=0x314 ramdisk_size=900000 root=/dev/ram0
splash=silent siaurl=http://URL_to_ externalStateVariables.txt
51
Preparing for an Unattended SIA Firmware Upgrade
Note – Type the append command line from append initrd= to siaurl= as one continuous
string with no returns. initrd= must point to the location of the initrd.img on your PXE
server that you copied from the SIA CD/DVD and siaurl= must point to the URL for the state
file.
You can also boot the installer from the network and perform a manual (attended) installation
by removing the siaurl= argument from the PXE target.
7
Save the file, and then unmount and remove the SIA CD/DVD from the CD/DVD drive.
You image is now ready to be booted from.
8
To boot the SIA PXE image from the PXE server and begin the unattended installation, follow the
steps presented in “How to Boot SIA From a PXE Server and Perform an Unattended Installation”
on page 52.
▼ How to Boot SIA From a PXE Server and Perform an Unattended
Installation
1
Ensure that the target Sun server is configured on the same network as the PXE server, and then
reset the target Sun server. For example:
■
From the service processor (Lights Out Manager) Remote Console web interface, click Remote
Control->Remote Power Control then select Reset to reset the host server.
—Or—
■
Press the Power button on the front panel of the server to turn it off (hold the button in until
the server powers off), then press the Power button to turn on the server.
The BIOS screen appears. An example is shown below (your server’s BIOS screen might look
different).
52
Sun Installation Assistant 2.2 User's Guide for the Sun Fire X4640 Server • October 2009, Rev. A
Preparing for an Unattended SIA Firmware Upgrade
Tip – The next events occur very quickly; therefore, focused attention is needed for the following
steps. Watch carefully for these messages, as they appear on the screen for a brief time. You
might want to enlarge the size of your screen to eliminate scroll bars.
2
As the system boots, do one of the following to start a network boot:
■
When prompted, press F12 to boot from the first network boot device found.
■
When prompted, press F8 to display the boot menu and specify the network boot device.
Tip – On a Sun Blade server module, you can determine the PXE interface boot device by (1)
matching the PXE:Slot# (listed on the Please Select Boot Device menu) with the physical
NEM or EM slot number label on the chassis, and (2) matching the F# (listed on the Please
Select Boot Device menu) with the physical NIC port number label on the NEM (ports 0.0 to
9.0 and 0.1 to 9.1) or EM (ports 0 or port 1).
After the network boot device is specified, the system attempts to get the IP address from the
DHCP PXE boot server. After the PXE server is found, the PXE boot prompt appears.
53
Preparing for an Unattended SIA Firmware Upgrade
3
See Also
54
At the PXE boot prompt, press Enter or type: suninstall
The SIA installation image downloads to the server and the dialog for “Launching the Sun
Installation Assistant” appears.
For information on observing an unattended installation, proceed to the section “Observing an
SIA PXE-Based Unattended Installation” on page 55.
Sun Installation Assistant 2.2 User's Guide for the Sun Fire X4640 Server • October 2009, Rev. A
Observing an SIA PXE-Based Unattended
Installation
Observing an unattended network installation enables you to view the progress of the
installation, as well as any diagnostic messages that might appear if problems are encountered
during the installation.
The four ways of observing an unattended network installation include:
■
■
■
■
Viewing messages from a system console
Viewing messages from a virtual console or secure shell connection
Viewing messages from a virtual network computing (VNC) viewer
Viewing messages from a serial console
If you plan to use a virtual console or VNC viewer to observe the unattended network
installation, you must establish passwords for root and VNC.
■
■
■
■
■
“Set Up Passwords for Root and Virtual Access” on page 55
“Using a System Console” on page 56
“Using a Virtual Console or Secure Shell (SSH) Connection” on page 56
“Using a VNC Viewer” on page 57
“Using a Serial Console” on page 57
Set Up Passwords for Root and Virtual Access
Passwords are provided as boot arguments to the installer, either manually when booting from
CD or through PXE, or in the PXE boot target:
/home/pxeboot/pxelinux.cfg/default
You will need to set passwords to observe the installation using a virtual console or virtual
network computing (VNC) viewer.
Note – When booting from CD, watch for the boot: prompt, as it is displayed for only five
seconds. Press any key when the boot: prompt is displayed to allow time to enter the password
arguments.
For maximum security, use the following password arguments at the CD boot: prompt:
55
Using a System Console
■
rootpw=des-crypted-password
The rootpw=des-crypted-password argument enables SSH remote access on a PXE boot
without passing a plain text password across the network.
Create des-crypted-password using the following perl script:
# perl -e ’print crypt("password","42"). "\n"’
The string output is what to supply after the rootpw=argument.
■
vncauth=hex-string
This argument enables a password for VNC access.
The remote VNC authorization file is eight binary bytes. You create those eight bytes with
vncpasswd and then convert them to a hex-string to be entered here.
Create the hex-string using the following commands:
# vncpasswd /tmp/vncauth
# od -t x1 /tmp/vncauth | awk ’/0000000/ \
{print $2 $3 $4 $5 $6 $7 $8 $9}’
The string output is what to supply after the vncauth=argument.
■
ptextpass=password
The ptextpass=password argument provides a way of passing a plain text password that is
to be used for both the root password and the VNC password.
Using a System Console
Typically the system console displays a splash screen during an unattended network installation
that prevents you from viewing the console messages. To dismiss the splash screen and view the
console messages, press the Esc key.
Using a Virtual Console or Secure Shell (SSH) Connection
The installation interface runs a Linux kernel and provides virtual console access. To access the
virtual console, press Ctrl-Alt-F2. You can also use Ctrl-Alt-F3 and Ctrl-Alt-F4 for additional
console screens.
Before logging into a virtual console, you must set a root password as a boot argument to the
installer. For more information see “Set Up Passwords for Root and Virtual Access” on page 55.
After you have established a connection to a virtual console, you can determine the VNC server
IP address and view the standard log files. Alternatively, you can also establish a SSH
connection through a serial console using the VNC IP address.
56
Sun Installation Assistant 2.2 User's Guide for the Sun Fire X4640 Server • October 2009, Rev. A
Using a Serial Console
Using a VNC Viewer
When you perform an unattended network installation, virtual network computing (VNC) is
enabled by default. If you perform an unattended network installation, you can enable VNC by
adding display=vnc as a boot argument.
▼ To Establish Connection Using a VNC Viewer
Follow these steps to establish a connection using a VNC viewer.
1
Set a password as shown in “Set Up Passwords for Root and Virtual Access”on page 55.
2
Press the Esc key shortly after the SIA splash screen appears.
Console messages appear. After the VNC server has started, a message appears providing the IP
address to connect using VNC.
3
Connect to the VNC viewer using the IP address displayed in Step 2.
For example:
# vncviewer IP_address:1.0
4
When prompted, enter the password that you set in Step 1 and VNC starts.
The installer interface appears when performing a manual installation. The screens
automatically move forward as the installation progresses. The VNC screens are active for input
and you will disrupt the installation if you do anything in the VNC window.
Using a Serial Console
You can redirect the system console to a workstation or laptop to connected to the server's serial
management port to view an unattended installation.
■
“To Establish a Connection Using a Serial Console” on page 57
▼ To Establish a Connection Using a Serial Console
Follow these steps to establish a connection using a serial console.
1
Use the boot argument console=ttyS0,9600 to have console output redirected to the serial
console.
This is helpful when debugging and you want to be able to scroll back to see messages. This will
disable output to the VGA console.
57
Using a Serial Console
2
Set up the serial console through the serial port.
For more information about using a serial console, see the service processor (Lights Out
Manager) documentation. The default setup is for the service processor to be available through
the serial port.
3
Log in to the service processor and enter the following command to start the console:
# start /SP/console
4
Reboot the system.
5
Select the Network Boot option.
6
Select your SIA target, and then observe the progress of the unattended network installation.
After booting SIA, the serial console is sometimes left in a state where it is writing black text on a
black background. If this occurs, reset your terminal to view the text.
See Also
58
For additional information about debugging an unattended network installation, see
“Debugging Unattended Installation Problems” on page 60.
Sun Installation Assistant 2.2 User's Guide for the Sun Fire X4640 Server • October 2009, Rev. A
Troubleshooting SIA
This section provides information about Sun Installation Assistant (SIA) error messages, the
SIA installation log file, as well as procedures for debugging an unattended PXE-based network
installation.
Topics in this section include:
■
■
■
■
“SIA Error Messages” on page 59
“SIA Installation Log File” on page 60
“ILOM Remote Console Mouse Issue With SIA” on page 60
“Debugging Unattended Installation Problems” on page 60
SIA Error Messages
If SIA encounters an error or an unexpected condition, it generates an error message. You
might encounter a number of straightforward error messages such as the following:
You have inserted Disc 3 but the system requires Disc 2. Please insert Disc 2.
You might also attempt to use SIA with versions of Linux or Microsoft Windows that are not
supported. In that case you might see error messages such as the following:
The media you have provided is not a release that is supported by Sun
Microsystems, Inc. on this platform. You cannot use the Sun Installation
Assistant to install this product and associated software.
In this case, choose one of the following options:
■
To install a supported product, click Back and then insert the appropriate media.
■
To install a product not supported by SIA, click Exit to exit the Sun Installation Assistant
and reboot the system. You can now install the unsupported product as you normally would
without SIA.
For a list of supported operating systems, see “Supported Operating Systems” on page 13.
59
SIA Installation Log File
SIA Installation Log File
An SIA log file is written to the root directory of the newly installed system.
To review this log file, refer to the file SunInstallationAssistant.log (located at /root for
Linux.
ILOM Remote Console Mouse Issue With SIA
The ILOM Remote Console has a mouse mode setting that configures ILOM to send mouse
events to the remote system using either “absolute” or “relative” mode. For the ILOM Remote
Console to work properly with SIA, you must configure the mouse setting to relative mode. If
your mouse is set to absolute mode, your mouse will not work when using SIA. For more
information, see “Mouse Settings When Using SIA with ILOM Remote Console” on page 16.
Debugging Unattended Installation Problems
This section includes procedures for debugging common problems that might occur when
setting up an unattended network installation:
■
■
■
“How to Debug a PXE Image That Does Not Boot” on page 60
“SIA Boot Starts, Then Stops” on page 61
“VNC Password Does Not Get Set” on page 61
▼ How to Debug a PXE Image That Does Not Boot
1
Check the DHCP and TFTP server areas and the integrity of the initrd.img and vmlinuz files.
2
Verify that the kernel boot arguments are correct by consulting the PXE-example configuration
(boot/isolinux/isolinux.cfg) provided on the SIA CD/DVD.
3
Verify that the URLs in the SIA state file, Kickstart file, or AutoYaST file are correct. To determine
whether the URLs are correct:
a. Test the URL with the command wget URL.
b. Verify that the DNS is working or use IP addresses instead of host names.
c. Check the following table for URL errors that you might encounter.
60
Sun Installation Assistant 2.2 User's Guide for the Sun Fire X4640 Server • October 2009, Rev. A
Debugging Unattended Installation Problems
Problem
What you will see
The state file URL (siaurl) is incorrect.
If the state file URL (siaurl) is incorrect, the
installation appears to hang.
Check the console for the following error message
that appears after the VNC information:
Unable to fetch unattended statefile: URL
The InstallLoc in the state file URL (siaurl) is
incorrect.
The system reboots without an error message and
the console displays messages such as the following
message before rebooting:
Can’t MD5 ...
The Kickstart entry in state file URL (siaurl) is
incorrect.
The installation appears to hang and the console
displays the following message:
apit-magic: run: /installer/..."
A parameter in the URL file is incorrect.
When connecting to VNC, you will see that the
unattended network installation stopped and is
waiting for input.
SIA Boot Starts, Then Stops
The initrd.img file used by SIA is over 100 megabytes. The Solaris TFTP daemon is unable to
support the size of the image.
If the SIA starts to boot, then stops with a blank screen and displays a time-out error message,
switch to a TFTP server with a different operating system.
VNC Password Does Not Get Set
If the VNC password was not set, the following message displays on the console:
mv /dev/tty /dev/tty-node
ln -s /proc/self/fd/0 /dev/tty
echo password
/usr/X11R6/bin/vncpasswd.real /installer/vncpasswd
echo password
They don’t match. Try again.
This issue is a timing problem. To resolve this problem, reboot the system and restart the
installation.
61
62
Creating a Bootable SIA USB Flash Drive
This section describes how to prepare a USB flash drive (also known as USB thumb drive, USB
key drive, etc.) for booting SIA and how to boot the SIA USB flash drive to perform SIA
deployment and recovery tasks.
Preparing and booting an SIA USB flash drive is described in the following sections:
■
■
■
■
“Requirements” on page 63
“Getting the Software” on page 63
“Preparing the USB Flash Drive” on page 64
“Setting BIOS Parameters and Booting Off the SIA USB Flash Drive” on page 69
Requirements
■
SIA version 2.0.144 or later (USB flash drive support is not available on earlier versions of
SIA)
■
Syslinux utility version 3.52 or later
■
1 GB or larger USB 2.0 flash drive
■
A system running Windows XP or Linux with a USB 2.0 compatible port
■
Internet access (to download the necessary software)
■
Sun server that you will be using SIA on must have USB 2.0 compatible ports
Getting the Software
This section describes where to get the syslinux and SIA software. You must have the syslinux
software to prepare the USB flash drive in order to boot SIA. You can use either a Windows or
Linux machine to download the syslinux and SIA software and prepare the USB flash drive for
booting.
■
“How to Get the Syslinux and SIA Software” on page 64
63
Preparing the USB Flash Drive
▼ How to Get the Syslinux and SIA Software
Note – Support for creating a USB flash drive version of SIA was introduced with SIA version
2.0.144 and is provided as a downloadable package from the Sun download site. Earlier versions
of SIA will not support running SIA from USB flash drive media.
1
Go to the SIA main page on the Sun web site:
http://www.sun.com/systemmanagement/sia.jsp
2
Navigate to your server’s download page.
3
Select and download the following files to a convenient file folder on a Windows XP or Linux
(Red Hat or SUSE) system.
■
syslinux-version.zip (where version is 3.52 or later)
■
sia-version.zip (where version is 2.0.144 or later)
Note – These files may be available separately or bundled in a single package.
Preparing the USB Flash Drive
This section describes how to prepare the USB flash drive in order to use it to run the SIA
software on your server. You can use either a Windows or a Linux system to prepare the USB
flash drive. The procedure is different for Windows and Linux systems; both procedures are
described below.
■
■
“How to Prepare the USB Flash Drive on a Windows XP System” on page 64
“How to Prepare the USB Flash Drive on a Linux (Red Hat/SUSE) System” on page 66
▼ How to Prepare the USB Flash Drive on a Windows XP System
1
Extract (unzip) the contents of the downloaded syslinux-version.zip archive file.
Where version represents the Syslinux version number.
64
2
Insert the USB flash drive into a USB 2.0 port.
3
After Windows has found the new hardware, double-click on My Computer from the desktop.
Sun Installation Assistant 2.2 User's Guide for the Sun Fire X4640 Server • October 2009, Rev. A
Preparing the USB Flash Drive
Caution – Be sure to confirm and make a note of the device name of the USB flash drive (A:, B:,
etc.). The instructions listed here require you to delete existing partition(s) on the USB flash
disk. Making a mistake in identifying the device might cause you to erase a hard disk.
4
Right-click on the flashdisk icon in the list of hard disk drives, and then click Format.
The format dialog box will be displayed.
5
From the File system drop-down menu, select FAT32 and enter a descriptive volume label (such
as“SIA FlashDisk”).
6
Click the Start button.
The flash disk is formatted.
7
After the formatting has completed, click the Close button.
The Format dialog box closes.
8
Click the Start button from the Windows taskbar, and then click Run.
The Run dialog box is displayed.
9
Run the syslinux executable using the -ma option to make the drive bootable by entering the
following command:
path\syslinux\win32\syslinux.exe -ma X:
65
Preparing the USB Flash Drive
Where path is the folder to which you extracted syslinux and X is the drive letter for your USB
flash drive (for example, A:, B:, etc.)
This creates a file ldlinux.sys onto the drive and make it bootable.
10
Extract (unzip) the contents of the downloaded SIA-version.zip archive file to the USB flash
drive.
Where version represents the SIA version number.
11
To remove the USB flash drive, click the Safe to Remove Hardware icon and remove the flash
drive from the system.
The USB flash drive is now ready to boot SIA. To begin the OS installation using the SIA USB
flash drive, see “Setting BIOS Parameters and Booting Off the SIA USB Flash Drive” on
page 69.
▼ How to Prepare the USB Flash Drive on a Linux (Red Hat/SUSE) System
Before You Begin
1
This procedure requires the use of parted utility version 1.8.6 or later. Do not use earlier
versions of parted.
Extract (unzip) the contents of the syslinux-version.zip archive file.
# unzip syslinux-version.zip
Where version represents the Syslinux version number.
2
Insert the USB flash drive into a working USB 2.0 port.
3
Use the tail command to identify the USB flash drive’s device name.
# tail /var/log/messages
You should see the device name (such as, sda or sdb). Example output is shown below:
Nov
Nov
Nov
Nov
Nov
Nov
Nov
12
12
12
12
12
12
12
13:19:29
13:19:29
13:19:29
13:19:29
13:19:29
13:19:29
13:19:29
server
server
server
server
server
server
server
kernel:
kernel:
kernel:
kernel:
kernel:
kernel:
kernel:
scsi 4:0:0:0: Lexar, Inc. USBdisk PQ: 0 ANSI: 0 CCS
sd 4:0:0:0: [sdb] 1030750208 512-byte hardware sectors (1030 MB)
sd 4:0:0:0: [sdb] Write Protect is off
sd 4:0:0:0: [sdb] Assuming drive cache: write through
sdb:
sd 4:0:0:0: [sdb] Attached SCSI removable disk
sd 4:0:0:0: Attached scsi generic sg2 type 0
Caution – Be sure to confirm and make a note of the device name of the USB flash drive
(/dev/sda, /dev/sdb, etc.). The instructions listed here require you to delete existing
partition(s) on the USB flash disk. Making a mistake in identifying the device might cause you
to erase a hard disk.
4
66
Create a single bootable partition on the USB flash drive using parted, as follows:
Sun Installation Assistant 2.2 User's Guide for the Sun Fire X4640 Server • October 2009, Rev. A
Preparing the USB Flash Drive
Note – This procedure requires the use of parted utility version 1.8.6 or later. Do not use earlier
versions of parted.
Note – These steps require superuser (su - root) access.
a. If Linux has automounted the device, unmount it first.
# umount /dev/sdX1
Where X is the drive letter for the USB flash drive (for example, /dev/sda or /dev/sdb), and
1 indicates the first partition.
b. Use parted to delete all partitions and create a new bootable FAT32 partition:
# /sbin/parted /dev/sdX
Where X is the drive letter for the USB flash drive (for example, /dev/sda or /dev/sdb).
The parted command prompt displays.
c. Enter the following commands in the order listed and follow the prompts to create your
bootable primary partition:
■
(parted): mklabel
You will be prompted to create a disk label type. If msdos is not listed as the default, you
will need to enter msdos at the appropriate prompt, as shown in the example below:
Warning: The existing label on sdx will be destroyed and all
data on this disk will be lost. Do you want to continue?
Yes/No: yes
New disk label type? msdos
■
(parted): mkpartfs
Creates a new partition on the disk. Answer the prompts to confirm that this will be the
primary partition, fat32 format, spanning the entire disk minus the last megabyte
(starting at 1, and ending at -1). Example output is shown below:
Partition type? primary/extended? primary
File system type? [ext2] fat32
Start? 1
End? -1
■
(parted): set 1 boot on
Sets the boot flag for this partition.
■
(parted): set 1 lba on
Sets the lba (Linear Block Addressing) flag for this partition.
67
Preparing the USB Flash Drive
■
(parted): print
Displays the current settings for the new partition. Example output is shown below:
Model: Lexar, Inc. USBdisk (scsi)
Disk /dev/sdb: 1031MB
Sector size (logical/physical): 512B/512B
Partition Table: msdos
Minor Start End
1
16.4kB 931MB
(parted)
■
Size
Type
Filesystem Flags
1031MB primary fat32
boot, lba
(parted): quit
Quits the parted utility.
5
Navigate to the Syslinux mbr directory:
# cd path/mbr
Where path is the folder to which you extracted Syslinux.
6
Locate the Syslinux master boot record file mbr.bin in the mbr directory and write it to the disk
using the following command:
# cat mbr.bin > /dev/sdX
Where X is the drive letter for the USB flash drive (for example, /dev/sda or /dev/sdb).
7
Navigate to the Syslinux unix directory:
# cd path/unix
Where path is the folder to which you extracted Syslinux.
Note – For later versions of Syslinux, the unix directory might be replaced with a linux
directory. If so, replace the unix directory name with linux.
8
From the Syslinux unix directory, enter the following command:
# ./syslinux /dev/sdX1
Where X is the drive letter for the USB flash drive (for example, /dev/sda or /dev/sdb), and 1
indicates the first partition.
68
Sun Installation Assistant 2.2 User's Guide for the Sun Fire X4640 Server • October 2009, Rev. A
Setting BIOS Parameters and Booting Off the SIA USB Flash Drive
Note – In the next step you will need to specify the mount point. If autofs is running, it might
have auto–mounted the drive partition to some other mount point. If this happens, unmount it
by entering the command:
umount /dev/sdX1
9
Mount the drive to a mount point by entering the command:
# mount -t vfat /dev/sdX1 /mnt
Where X is the drive letter for the USB flash drive (for example, /dev/sda or /dev/sdb), and 1
indicates the first partition. For this example, the mount point is /mnt.
10
Extract the contents of the SIA-version.zip archive file to the USB flash drive by entering the
following command:
# unzip -q -d /mnt ~/path/SIA-version.zip -x “source/*”
Where path represents the path to the directory where the .zip file is located, and version
represents the SIA version number. The “source/*” parameter excludes the source files from
the extraction to save time and disk space.
11
Unmount the USB flash drive:
# umount /mnt
12
Remove the flash drive from client machine.
The USB flash drive is now ready to boot SIA. To begin the OS installation using the SIA USB
flash drive, see “Setting BIOS Parameters and Booting Off the SIA USB Flash Drive” on
page 69.
Setting BIOS Parameters and Booting Off the SIA USB Flash
Drive
This section describes how to set the BIOS parameters on your server and boot SIA off the USB
flash drive. The procedures in this section refer to the server upon which you are installing an
OS.
Note – You must be set up to view the system console boot messages.
■
“How to Set the BIOS Parameters and Boot Off the SIA USB Flash Drive” on page 70
69
Setting BIOS Parameters and Booting Off the SIA USB Flash Drive
▼ How to Set the BIOS Parameters and Boot Off the SIA USB Flash Drive
Before You Begin
1
Check the Sun Fire X4640 Server Product Notes for any issues related to USB support. Note any
restrictions before attempting this procedure.
Insert the SIA USB flash drive into an available USB 2.0 port.
Note – Some servers might not have USB 2.0 support on all of their USB ports. To ensure the best
performance, check your server documentation to make sure you use a port that supports USB
2.0.
2
Reboot the system, watch the display for the BIOS prompt, and when prompted enter the BIOS
setup.
The BIOS Setup screen appears.
3
Navigate to the Advanced -> USB Configuration -> USB controller setup screen, and configure
the controller for USB 2.0 (high speed) mode.
4
Navigate to the Boot -> Hard Disk setup screen, and make your USB flash drive the first boot
device.
The USB flash drive must be the first listed boot device.
5
To save your changes and boot SIA, select Save and Exit.
The system exits the BIOS setup and will then boot from the SIA USB flash drive.
Note – If you use the SIA USB flash drive for operating system installation, once the OS is
initially installed from OS distribution media on the server hard disk, a reboot is required to
finish the installation. At that point, the USB flash drive must be either unplugged or its boot
priority lowered in the BIOS settings to ensure the server boots from the hard disk to finish the
installation.
6
70
Proceed to “Starting SIA and Preparing for Deployment or Recovery Tasks”on page 15 for
instructions on how to use SIA.
Sun Installation Assistant 2.2 User's Guide for the Sun Fire X4640 Server • October 2009, Rev. A
Index
B
BIOS upgrade, 33-35
installation CD/DVD, 13
installation methods, SIA, 15
C
L
compact flash, OS installation on, 12
configuring SIA to use the network, 19
Linux installation, 25-31
logfile for SIA, 60
D
M
device driver updates, 13
media, local or remote, 16-24
mouse issue when using ILOM with SIA, 60
E
error messages, 59
N
network configuration screen, 19
F
flash drive support for SIA, 63
O
operating system installation using SIA, Linux, 25-31
operating systems, supported with SIA, 13
G
gathering network information, 19
P
I
ILOM firmware upgrade, 33-35
PXE installation
RHEL or SLES Linux
procedure, 40-42
71
Index
R
U
Red Hat Enterprise Linux, installation
using remote media from a PXE-based network
procedure, 40-42
unattended firmware upgrade using PXE-based
SIA, 43-54
unattended install, observing using a serial console, 57
unattended installation troubleshooting, 60
unattended OS installation using PXE-based
SIA, 43-54
updates
for drivers, 13, 22
for SIA, 13, 18
upgrades
expander firmware, 33-37
HBA firmware, 33-37
system BIOS, 33-37
system ILOM firmware, 33-37
S
servers supported with SIA, 13
SIA
configuring network information, 19
description, 11-13
features and benefits, 12
Linux installation prerequisites, 25-31
media and updates, 13
obtaining the latest version, 13
starting and preparing for tasks, 16-24
supported OSes, 13
supported servers, 13
tasks, 12
USB flash drive support, 63
SIA local media installation, 15
SIA media installation options (remote or local), 15
SIA remote installation, 15
SUSE Enterprise Linux Server, installation
using remote media from a PXE-based network
procedure, 40-42
T
task list for SIA, 12
tasks
installing Linux using SIA, 25-31
preparing for SIA tasks, 16-24
troubleshooting, 59-61
debugging unattended installs, 60
error messages in SIA, 59
mouse problems when using SIA and ILOM remote
console, 60
SIA logfile, 60
72
Sun Installation Assistant 2.2 User's Guide for the Sun Fire X4640 Server • October 2009, Rev. A