1
Sun GlassFish Web Space Server
10.0 Administration Guide
Sun Microsystems, Inc.
4150 Network Circle
Santa Clara, CA 95054
U.S.A.
Part No: 820–7054
July 2009
Copyright 2009 Sun Microsystems, Inc.
4150 Network Circle, Santa Clara, CA 95054 U.S.A.
All rights reserved.
Sun Microsystems, Inc. has intellectual property rights relating to technology embodied in the product that is described in this document. In particular, and without
limitation, these intellectual property rights may include one or more U.S. patents or pending patent applications in the U.S. and in other countries.
U.S. Government Rights – Commercial software. Government users are subject to the Sun Microsystems, Inc. standard license agreement and applicable provisions
of the FAR and its supplements.
This distribution may include materials developed by third parties.
Parts of the product may be derived from Berkeley BSD systems, licensed from the University of California. UNIX is a registered trademark in the U.S. and other
countries, exclusively licensed through X/Open Company, Ltd.
Sun, Sun Microsystems, the Sun logo, the Solaris logo, the Java Coffee Cup logo, docs.sun.com, Java, and Solaris are trademarks or registered trademarks of Sun
Microsystems, Inc. or its subsidiaries in the U.S. and other countries. All SPARC trademarks are used under license and are trademarks or registered trademarks of
SPARC International, Inc. in the U.S. and other countries. Products bearing SPARC trademarks are based upon an architecture developed by Sun Microsystems, Inc.
The OPEN LOOK and SunTM Graphical User Interface was developed by Sun Microsystems, Inc. for its users and licensees. Sun acknowledges the pioneering efforts
of Xerox in researching and developing the concept of visual or graphical user interfaces for the computer industry. Sun holds a non-exclusive license from Xerox to
the Xerox Graphical User Interface, which license also covers Sun's licensees who implement OPEN LOOK GUIs and otherwise comply with Sun's written license
agreements.
Products covered by and information contained in this publication are controlled by U.S. Export Control laws and may be subject to the export or import laws in
other countries. Nuclear, missile, chemical or biological weapons or nuclear maritime end uses or end users, whether direct or indirect, are strictly prohibited. Export
or reexport to countries subject to U.S. embargo or to entities identified on U.S. export exclusion lists, including, but not limited to, the denied persons and specially
designated nationals lists is strictly prohibited.
DOCUMENTATION IS PROVIDED “AS IS” AND ALL EXPRESS OR IMPLIED CONDITIONS, REPRESENTATIONS AND WARRANTIES, INCLUDING ANY
IMPLIED WARRANTY OF MERCHANTABILITY, FITNESS FOR A PARTICULAR PURPOSE OR NON-INFRINGEMENT, ARE DISCLAIMED, EXCEPT TO
THE EXTENT THAT SUCH DISCLAIMERS ARE HELD TO BE LEGALLY INVALID.
Copyright 2009 Sun Microsystems, Inc.
4150 Network Circle, Santa Clara, CA 95054 U.S.A.
Tous droits réservés.
Sun Microsystems, Inc. détient les droits de propriété intellectuelle relatifs à la technologie incorporée dans le produit qui est décrit dans ce document. En particulier,
et ce sans limitation, ces droits de propriété intellectuelle peuvent inclure un ou plusieurs brevets américains ou des applications de brevet en attente aux Etats-Unis
et dans d'autres pays.
Cette distribution peut comprendre des composants développés par des tierces personnes.
Certaines composants de ce produit peuvent être dérivées du logiciel Berkeley BSD, licenciés par l'Université de Californie. UNIX est une marque déposée aux
Etats-Unis et dans d'autres pays; elle est licenciée exclusivement par X/Open Company, Ltd.
Sun, Sun Microsystems, le logo Sun, le logo Solaris, le logo Java Coffee Cup, docs.sun.com, Java et Solaris sont des marques de fabrique ou des marques déposées de
Sun Microsystems, Inc., ou ses filiales, aux Etats-Unis et dans d'autres pays. Toutes les marques SPARC sont utilisées sous licence et sont des marques de fabrique ou
des marques déposées de SPARC International, Inc. aux Etats-Unis et dans d'autres pays. Les produits portant les marques SPARC sont basés sur une architecture
développée par Sun Microsystems, Inc.
L'interface d'utilisation graphique OPEN LOOK et Sun a été développée par Sun Microsystems, Inc. pour ses utilisateurs et licenciés. Sun reconnaît les efforts de
pionniers de Xerox pour la recherche et le développement du concept des interfaces d'utilisation visuelle ou graphique pour l'industrie de l'informatique. Sun détient
une licence non exclusive de Xerox sur l'interface d'utilisation graphique Xerox, cette licence couvrant également les licenciés de Sun qui mettent en place l'interface
d'utilisation graphique OPEN LOOK et qui, en outre, se conforment aux licences écrites de Sun.
Les produits qui font l'objet de cette publication et les informations qu'il contient sont régis par la legislation américaine en matière de contrôle des exportations et
peuvent être soumis au droit d'autres pays dans le domaine des exportations et importations. Les utilisations finales, ou utilisateurs finaux, pour des armes nucléaires,
des missiles, des armes chimiques ou biologiques ou pour le nucléaire maritime, directement ou indirectement, sont strictement interdites. Les exportations ou
réexportations vers des pays sous embargo des Etats-Unis, ou vers des entités figurant sur les listes d'exclusion d'exportation américaines, y compris, mais de manière
non exclusive, la liste de personnes qui font objet d'un ordre de ne pas participer, d'une façon directe ou indirecte, aux exportations des produits ou des services qui
sont régis par la legislation américaine en matière de contrôle des exportations et la liste de ressortissants spécifiquement designés, sont rigoureusement interdites.
LA DOCUMENTATION EST FOURNIE "EN L'ETAT" ET TOUTES AUTRES CONDITIONS, DECLARATIONS ET GARANTIES EXPRESSES OU TACITES
SONT FORMELLEMENT EXCLUES, DANS LA MESURE AUTORISEE PAR LA LOI APPLICABLE, Y COMPRIS NOTAMMENT TOUTE GARANTIE
IMPLICITE RELATIVE A LA QUALITE MARCHANDE, A L'APTITUDE A UNE UTILISATION PARTICULIERE OU A L'ABSENCE DE CONTREFACON.
090818@22749
Contents
Preface ...................................................................................................................................................15
1
Administration Overview ...................................................................................................................21
About Sun GlassFish Web Space Server ........................................................................................... 21
Sun GlassFish Web Space Server Features ........................................................................................ 22
Web Space Server Terminology ......................................................................................................... 23
Using the Evaluation Bundle .............................................................................................................. 24
Creating an User Account on Web Space Server ............................................................................. 25
▼ To Log in to Web Space Server Using an OpenID ................................................................... 25
Defining Password Policies for Users ................................................................................................ 26
▼ To Define a Password Policy ....................................................................................................... 26
Welcome Menu for the Admin User ................................................................................................. 26
▼ To use the Welcome Menu ......................................................................................................... 27
Control Panel ................................................................................................................................ 27
My Account .................................................................................................................................. 28
Add Application ........................................................................................................................... 29
Layout Template .......................................................................................................................... 29
Manage Pages ............................................................................................................................... 29
Toggle Edit Controls ................................................................................................................... 29
My Places ....................................................................................................................................... 29
Setting up a Development Environment for Web Space Server .................................................... 30
Developing With Apache Ant .................................................................................................... 30
2
Web Space Server Installation Instructions .................................................................................... 33
Installing the Database, Application Server, and Web Space Server ............................................. 34
Before You Begin ......................................................................................................................... 34
▼ To Install and Configure MySQL ............................................................................................... 34
3
Contents
▼ To Install the GlassFish JAR Based Installer ............................................................................. 35
▼ To Install Web Space Server ....................................................................................................... 36
▼ To Connect to a Database Other Than HSQL .......................................................................... 38
UTF-8 Support for Oracle 10g or Later ..................................................................................... 39
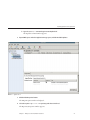
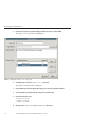
Installing Updates from the Update Tool ......................................................................................... 40
▼ To Download the Updates Using Update Tool ........................................................................ 40
▼ To Download the Updates Using the CLI-Based pkg Tool ..................................................... 43
▼ To Use updatetool in a Proxy That Requires Authentication ............................................... 44
Installing Samples ................................................................................................................................ 44
▼ To Install Samples ........................................................................................................................ 45
Configuring Web Space Server for Other Databases ...................................................................... 46
Configuring Web Space Server for Microsoft SQL .................................................................. 46
Updating WAR or Property Files ...................................................................................................... 49
▼ To Update the portal-ext.properties File and a WAR File .............................................. 49
Installing Web Space Server on Sun GlassFish Enterprise Server 2.1 ........................................... 50
▼ To Install Web Space Server on Sun GlassFish Enterprise Server 2.1 .................................... 50
3
Customizing Sun GlassFish Web Space Server ............................................................................... 53
Branding and Site Identity .................................................................................................................. 53
▼ To Change the Banner Logo ....................................................................................................... 53
▼ To Change the Address Bar and Browser Tab Icons ................................................................ 54
Friendly URLs ...................................................................................................................................... 54
▼ To Change the Friendly URL of a Page ...................................................................................... 54
Site Layout and Navigation ................................................................................................................ 55
▼ To Change the Site Layout .......................................................................................................... 56
Changing the Page Theme .......................................................................................................... 56
Using Bundled Web Space Server Portlets ....................................................................................... 57
▼ To Add Bundled Web Space Server Portlets ............................................................................. 57
Look and Feel and Configuration of Portlets ................................................................................... 57
Changing the Name of a Portlet ................................................................................................. 57
Customizing the Look and Feel and Configuration of a Portlet ............................................. 58
Localization Support ........................................................................................................................... 60
Setting the User-Preferred Language in Web Space Server .................................................... 61
Adding a New Language Support .............................................................................................. 61
Removing Localization Support for Unwanted Languages .................................................... 64
4
Sun GlassFish Web Space Server 10.0 Administration Guide • July 2009
Contents
Enabling the Guest Users to Select a Browser Language ......................................................... 65
Precedence Hierarchy for Language.properties Files .......................................................... 66
Changing the Existing Language Entries .................................................................................. 67
Customizing Portlet Names While Localizing ......................................................................... 67
4
Use Cases for Sun GlassFish Web Space Server .............................................................................. 69
Use Case for Enterprise Social Networking ...................................................................................... 70
▼ To Add a Friend ............................................................................................................................ 70
Using the Expense Report Portlet ...................................................................................................... 70
▼ To Submit an Expense Report .................................................................................................... 71
▼ To Approve an Expense Report .................................................................................................. 75
Working With Communities and Organizations ........................................................................... 78
Adding Public and Private Pages to Communities and Organizations ................................. 78
Enabling Crawling of Page URLs by Search Engines ............................................................... 79
Virtual Hosting of Portal Pages .......................................................................................................... 80
▼ To Virtual Host a Page on a Community .................................................................................. 80
Using the Mail Portlet ......................................................................................................................... 82
▼ To Install the Mail Portlet ............................................................................................................ 82
▼ To Configure Email Accounts .................................................................................................... 82
Exporting and Importing of Portal Data .......................................................................................... 83
▼ To Export and Import Data of a Portlet .................................................................................... 83
▼ To Export and Import Data from a Community or Organization ......................................... 83
Enabling Sharing of a Portlet .............................................................................................................. 85
▼ To Share a Portlet With Other Web sites .................................................................................. 85
▼ To Share a Portlet With Facebook .............................................................................................. 88
▼ To Allow Sharing of a Portlet With Friends .............................................................................. 88
Using Document Library Plugins on OpenOffice ........................................................................... 89
▼ To Store a Document to CMS ..................................................................................................... 89
Using the Widget Consumer Portlet ................................................................................................. 90
▼ To Configure the Widget Consumer Portlet ............................................................................ 91
Workflow Portlet ................................................................................................................................. 92
Creating a Workflow ................................................................................................................... 92
Configuring Workflow for MySQL ........................................................................................... 98
Tagging in Web Space Server ............................................................................................................. 99
5
Contents
5
Roles and Permissions ......................................................................................................................101
Administering Roles and Permissions ............................................................................................ 101
Using the Control Panel to Administer Roles and Permissions ........................................... 101
Definition and Classification of Portal Resources ......................................................................... 102
User Groups ....................................................................................................................................... 103
▼ To Create a User Group ............................................................................................................ 104
▼ To Assign Users to User Groups .............................................................................................. 104
Communities ..................................................................................................................................... 104
▼ To add a Community ................................................................................................................. 105
▼ To Assign Users to a Community ............................................................................................ 105
Organizations .................................................................................................................................... 106
▼ To Create an Organization ....................................................................................................... 106
▼ To Create a Suborganization .................................................................................................... 107
▼ To Create Users under an Organization ................................................................................. 107
Users and User Roles ......................................................................................................................... 108
Regular Roles .............................................................................................................................. 108
Organization Roles .................................................................................................................... 108
Community Roles ...................................................................................................................... 109
▼ To Define User Roles ................................................................................................................. 109
Plugins ................................................................................................................................................ 109
▼ To Access Plugins ....................................................................................................................... 110
▼ To Change Plugin Permissions ................................................................................................ 110
6
Content Management System .........................................................................................................111
Portlet Overview ................................................................................................................................ 111
Document Management Portlets ............................................................................................. 112
Image Management Portlets ..................................................................................................... 112
Web Content Management Portlets ........................................................................................ 113
Other Content Management portlets ...................................................................................... 113
Document Library Portlet ................................................................................................................ 113
▼ To Add Folders and Documents .............................................................................................. 114
▼ To Create a Reference to a Document ..................................................................................... 115
Document Library Data Migration ................................................................................................. 115
▼ To Start Document Library Data Migration ........................................................................... 117
Document Library Display Portlet .................................................................................................. 118
6
Sun GlassFish Web Space Server 10.0 Administration Guide • July 2009
Contents
Image Gallery Portlet ........................................................................................................................ 119
▼ To add an Image to the Image Gallery ..................................................................................... 119
▼ To create Reference to an Image in the Image Gallery .......................................................... 120
▼ To View an Image Slide Show ................................................................................................... 120
Web Content Portlets ........................................................................................................................ 121
Overview of Web Content Portlets .......................................................................................... 121
Structures .................................................................................................................................... 122
Templates .................................................................................................................................... 125
Articles ........................................................................................................................................ 127
Web Content Display Portlet ........................................................................................................... 130
▼ To Select an Article for Display ................................................................................................ 130
Web Content List Portlet .................................................................................................................. 131
▼ To Configure the Web Content List Portlet ............................................................................ 131
Web Content Search Portlet ............................................................................................................. 132
▼ To Customize the Search Behavior .......................................................................................... 132
Configuring Search for a Web Content Display Portlet ........................................................ 133
Asset Publisher Portlet ...................................................................................................................... 134
▼ To add the Asset Publisher Portlet to a Page ........................................................................... 134
Configuring the Asset Publisher Portlet .................................................................................. 134
▼ To add a Blogs Entry .................................................................................................................. 136
▼ To add a Bookmarks Entry ....................................................................................................... 137
▼ To Delete a Bookmarks Entry ................................................................................................... 138
▼ To add a Document Library Document .................................................................................. 138
▼ To Delete a Document Library Document ............................................................................. 139
▼ To add an Image Gallery Image ................................................................................................ 139
▼ To Delete an Image Gallery Image ........................................................................................... 140
▼ To add Web Content ................................................................................................................. 141
Other Content Portlets ..................................................................................................................... 141
Tags and Categories .......................................................................................................................... 142
▼ To Add a Tag Set ........................................................................................................................ 142
▼ To Add a Tag Entry .................................................................................................................... 142
XSL Content Portlet .......................................................................................................................... 143
7
Web Services for Remote Portlets .................................................................................................. 145
About WSRP ...................................................................................................................................... 145
7
Contents
WSRP for Sun GlassFish Web Space Server ................................................................................... 146
Accessing WSRP on Sun GlassFish Web Space Server .......................................................... 146
WSRP Administration .............................................................................................................. 146
8
8
Advanced Web Space Server Configuration ................................................................................. 155
Deploying Applications to Web Space Server ................................................................................ 155
Deploying Applications Using process.xml ............................................................................ 156
Promoting a Portal to Production Environment ........................................................................... 157
Moving From Development to Production ............................................................................ 157
Deploying Content From Staging to Production ................................................................... 158
Activating Staging, Activating Workflow, and Publishing Pages to Live ............................ 159
Clustering of Web Space Server ....................................................................................................... 161
Jackrabbit Sharing ...................................................................................................................... 161
Lucene Configuration ................................................................................................................ 163
Hot Deploy .................................................................................................................................. 163
Configuring Jackrabbit With MySQL ............................................................................................. 164
▼ To Configure Jackrabbit With MySQL .................................................................................... 164
Installing Plugins ............................................................................................................................... 167
Creating a Custom Plugin Repository ............................................................................................ 168
Using the Software Catalog Portlet .......................................................................................... 168
9
Configuring Portal Properties .........................................................................................................175
Customizing Web Space Server Using the portal-ext.properties File ......................................... 175
Properties Override ................................................................................................................... 176
Portal Context ............................................................................................................................ 176
Resource Repositories Root ...................................................................................................... 177
Schema ........................................................................................................................................ 177
Upgrade ....................................................................................................................................... 177
Verify ........................................................................................................................................... 178
Auto Deploy ................................................................................................................................ 178
Hot Deploy .................................................................................................................................. 181
Hot Undeploy ............................................................................................................................. 181
Plugin .......................................................................................................................................... 182
Portlet .......................................................................................................................................... 182
Theme .......................................................................................................................................... 183
Sun GlassFish Web Space Server 10.0 Administration Guide • July 2009
Contents
Resource Actions ........................................................................................................................ 183
Model Hints ................................................................................................................................ 184
Spring .......................................................................................................................................... 184
Hibernate .................................................................................................................................... 185
Ehcache ....................................................................................................................................... 186
Commons Pool ........................................................................................................................... 187
JavaScript .................................................................................................................................... 187
SQL Data ..................................................................................................................................... 191
Company ..................................................................................................................................... 191
Users ............................................................................................................................................ 192
Groups and Roles ....................................................................................................................... 193
Organizations ............................................................................................................................. 195
Languages and Time Zones ...................................................................................................... 196
Look and Feel .............................................................................................................................. 197
Request ........................................................................................................................................ 198
Session ......................................................................................................................................... 198
JASS .............................................................................................................................................. 200
LDAP ........................................................................................................................................... 201
CAS .............................................................................................................................................. 204
NTLM .......................................................................................................................................... 204
OpenID ....................................................................................................................................... 205
OpenSSO ..................................................................................................................................... 205
Authentication Pipeline ............................................................................................................ 206
Auto Login .................................................................................................................................. 209
SSO With MAC .......................................................................................................................... 210
Passwords .................................................................................................................................... 210
Permissions ................................................................................................................................. 212
Captcha ....................................................................................................................................... 213
Startup Events ............................................................................................................................. 214
Shutdown Events ........................................................................................................................ 214
Portal Events ............................................................................................................................... 215
Login Event ................................................................................................................................. 215
Logout Event ............................................................................................................................... 216
Default Landing Page ................................................................................................................ 216
Default Logout Page .................................................................................................................. 216
Default Guest Public Layout ..................................................................................................... 217
9
Contents
Default User Private Layouts .................................................................................................... 218
Default User Public Layouts ..................................................................................................... 219
Default Admin ............................................................................................................................ 220
Layouts ........................................................................................................................................ 221
Default Settings Layout ............................................................................................................. 222
Portlet URL ................................................................................................................................. 226
Preferences .................................................................................................................................. 227
Struts ............................................................................................................................................ 227
Images .......................................................................................................................................... 227
Editors ......................................................................................................................................... 228
Fields ............................................................................................................................................ 228
MIME Types ............................................................................................................................... 229
Amazon Licence Keys ................................................................................................................ 229
Instant Messenger ...................................................................................................................... 229
Lucene Search ............................................................................................................................. 230
SourceForge ................................................................................................................................ 232
Value Object ............................................................................................................................... 233
Last Modified .............................................................................................................................. 234
XSS ............................................................................................................................................... 234
Communication Link ................................................................................................................ 235
Content Delivery Network ........................................................................................................ 235
Counter ....................................................................................................................................... 235
Lock ............................................................................................................................................. 236
JBI ................................................................................................................................................. 236
JCR ............................................................................................................................................... 236
OpenOffice .................................................................................................................................. 237
POP .............................................................................................................................................. 237
Quartz .......................................................................................................................................... 238
Scheduler ..................................................................................................................................... 238
Social Bookmarks ....................................................................................................................... 238
Velocity Engine .......................................................................................................................... 239
Virtual Hosts ............................................................................................................................... 240
HTTP ........................................................................................................................................... 241
Servlet Filters .............................................................................................................................. 241
Upload Servlet Request ............................................................................................................. 242
Web Server .................................................................................................................................. 243
10
Sun GlassFish Web Space Server 10.0 Administration Guide • July 2009
Contents
WebDAV ..................................................................................................................................... 243
Main Servlet ................................................................................................................................ 244
Axis Servlet ................................................................................................................................. 244
JSON Tunnel Servlet .................................................................................................................. 245
Liferay Tunnel Servlet ............................................................................................................... 245
Spring Remoting Servlet ........................................................................................................... 245
WebDAV Servlet ........................................................................................................................ 245
Admin Portlet ............................................................................................................................. 246
Announcements Portlet ............................................................................................................ 246
Blogs Portlet ................................................................................................................................ 247
Calendar Portlet ......................................................................................................................... 247
Communities Portlet ................................................................................................................. 248
Document Library Portlet ......................................................................................................... 249
FileSystemHook ......................................................................................................................... 249
S3Hook ........................................................................................................................................ 249
Image Gallery Portlet ................................................................................................................. 250
Invitation Portlet ........................................................................................................................ 251
Journal Portlet ............................................................................................................................ 251
Journal Articles Portlet .............................................................................................................. 254
Mail Portlet ................................................................................................................................. 254
CyrusHook .................................................................................................................................. 254
FuseMailHook ............................................................................................................................ 255
SendmailHook ............................................................................................................................ 255
ShellHook .................................................................................................................................... 256
Message Boards Portlet ............................................................................................................. 256
My Places Portlet ........................................................................................................................ 257
Navigation Portlet ...................................................................................................................... 258
Nested Portlets Portlet ............................................................................................................... 258
Portlet CSS Portlet ...................................................................................................................... 258
Shopping Portlet ........................................................................................................................ 259
Software Catalog Portlet ............................................................................................................ 260
Tags Compiler Portlet ............................................................................................................... 260
Tags Portlet ................................................................................................................................. 260
Tasks Portlet ............................................................................................................................... 261
Translator Portlet ....................................................................................................................... 261
Web Form Portlet ....................................................................................................................... 261
11
Contents
Wiki Portlet ................................................................................................................................. 261
12
10
System Maintenance .........................................................................................................................265
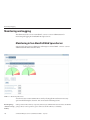
Web Space Server Monitoring using Google Analytics ................................................................ 265
Backing Up a Web Space Server Installation .................................................................................. 266
Source Code ................................................................................................................................ 267
Web Space Server's File System ................................................................................................ 267
Database ...................................................................................................................................... 267
Monitoring and Logging .................................................................................................................. 268
Monitoring in Sun GlassFish Web Space Server .................................................................... 268
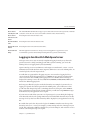
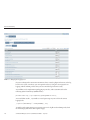
Logging in Sun GlassFish Web Space Server .......................................................................... 269
11
Performance Tuning ..........................................................................................................................273
Database ............................................................................................................................................. 273
Application Server ............................................................................................................................. 275
Thread Pools ............................................................................................................................... 275
MySQL Database Connections ................................................................................................ 275
Clustering ........................................................................................................................................... 275
Memory .............................................................................................................................................. 275
Properties File Changes .................................................................................................................... 276
Servlet Filters ...................................................................................................................................... 277
Portlets ................................................................................................................................................ 277
Java Environment .............................................................................................................................. 278
Portal Extensions ............................................................................................................................... 278
12
Troubleshooting ............................................................................................................................... 279
Troubleshooting for Installation Issues .......................................................................................... 279
▼ To Reset the JAVA_HOME Variable to the User Directory ....................................................... 280
▼ To Set the JAVA_HOME Environment Variable to the User Directory on Non Solaris
Operating Systems ..................................................................................................................... 280
Troubleshooting for Issues Related With Accessing the HTTP Instance ................................... 280
Troubleshooting for Issues Related With User Activities ............................................................. 280
▼ To Create a Private Page ............................................................................................................ 280
Troubleshooting for Issues Related With Installing Plugins ........................................................ 281
Troubleshooting for the Issues in Choosing the Logo Size .......................................................... 282
Sun GlassFish Web Space Server 10.0 Administration Guide • July 2009
Contents
Common Questions .......................................................................................................................... 282
Index ................................................................................................................................................... 285
13
14
Preface
Sun GlassFish Web Space Server launched as part of Sun's GlassFish Portfolio is a
next-generation Web 2.0 application aggregation and presentation platform.
Who Uses Sun GlassFish Web Space Server?
Sun GlassFish Web Space Server offers features for general users, system administrators, and
application and portal developers.
■
For General Users, Web Space Server makes it easy to communicate, collaborate, and
customize the applications shared by your organization. Social networking components,
like blogs, wikis, bookmarks, and messaging can be presented side-by-side with proprietary
and third-party business and productivity applications. Different user communities can
have their own portals, layouts, and customizations, and Web Space Server can be scaled
down or up to suit organizations from the very small up to the enterprise level.
■
For System Administrators, Web Space Server makes it easy to manage users, groups,
communities, permissions, and highly specific levels of security. A browser-based GUI
makes managing portals, portlets, plugins, and applications as simple as dragging and
dropping. Web Space Server runs on top of the enterprise-class, open source GlassFish
Application Server, which means that Web Space Server can be optimized according to your
needs for performance, reliability, security, load balancing, and clustering, among other
server characteristics.
■
For Application and Portal Developers, Web Space Server makes it easy to develop
portlets, portals, plugins, services, content management, workflows, and themes using your
own tools, including NetBeansTM, Eclipse, and Dreamweaver. Web Space Server is based on
the open source OpenPortal and Liferay 5.2 code bases, which means what you develop in
Web Space Server will be standards-based, portable, and maintainable. You can combine
familiar Ajax, Jmaki, Ruby, PHP, and Java technologies and techniques with Web Space
Server's powerful presentation capabilities to deliver the kind of rich, dynamic, interactive
user experience previously available only in complex custom-built Web applications.
15
Preface
Before You Read This Book
Readers should be familiar with the following products and concepts:
■
Sun Java System Directory Server
■
Sun Java System Access Manager
■
Your web container
■
Sun GlassFish Enterprise Server v2/v3
■
Your operating system
■
Basic UNIX administrative procedures
■
LDAP (lightweight directory access protocol)
■
Web Services for Remote Portlets (WSRP)
How This Book Is Organized
This book contains the following chapters:
1. Chapter 1, “Administration Overview,” discusses some general administration topics which
are helpful for an administrator to begin with.
2. Chapter 2, “Web Space Server Installation Instructions,” contains the installation
instructions for Web Space Server and the database and the application server that you want
to configure with it.
3. Chapter 3, “Customizing Sun GlassFish Web Space Server,” discusses the topics on changing
the look and feel of the product as desired by the customer.
4. Chapter 4, “Use Cases for Sun GlassFish Web Space Server,” discusses some of the use cases
for working with some of the commonly available portlets shipped as part of the core and
the samples for Sun GlassFish Web Space Server.
5. Chapter 5, “Roles and Permissions,” has the details of how you can define roles and
permissions on various portal resources such as, users, communities, and organizations.
6. Chapter 6, “Content Management System,” discusses the administration tasks related with
content management.
7. Chapter 6, “Content Management System,” discusses the administration tasks related with
content management.
8. Chapter 8, “Advanced Web Space Server Configuration,” discusses the topics on advanced
customization to match the unique needs of a customer.
9. Chapter 9, “Configuring Portal Properties,” discusses how you can override properties in the
portal.properties file.
10. Chapter 10, “System Maintenance,” discusses the different aspects of monitoring and
backup.
16
Sun GlassFish Web Space Server 10.0 Administration Guide • July 2009
Preface
11. Chapter 11, “Performance Tuning,” discusses the topics related with improving the
performance of the system.
12. Chapter 12, “Troubleshooting,” discusses the troubleshooting information for some of the
issue that you may face when you are working with Sun GlassFish Web Space Server.
Related Sun GlassFish Web Space Server Documentation
The Sun GlassFish Web Space Server documentation set is available on the Sun GlassFish Web
Space Server Core and Samples Documentation Collection and the Sun GlassFish Web Space
Server Add-Ons Documentation Collection.
Additional documentation is also available on the Liferay wiki, Liferay Community
Documentation, and OpenPortal Documentation sites.
Related blog, forum, and website links:
■
http://blogs.sun.com/main/tags/webspace
This blog link lists all the blog postings with the tag “webspace”.
■
http://blogs.sun.com/portal/
This is a blog link named Portal Post and is exclusively meant for posting on portal products
from SunTM Microsystems.
■
http://forums.sun.com/category.jspa?categoryID=111
This is the common discussion forum for all portal products from Sun Microsystems.
■
https://webspace.dev.java.net/
This is the community website for Sun GlassFish Web Space Server.
■
https://ruon.dev.java.net/
This is the developer community site for ruon-web.
■
https://saw.dev.java.net/
This is the developer community site for saw-web.
Related Third-Party Web Site References
Third-party URLs are referenced in this document and provide additional, related information.
17
Preface
Note – Sun is not responsible for the availability of third-party web sites mentioned in this
document. Sun does not endorse and is not responsible or liable for any content, advertising,
products, or other materials that are available on or through such sites or resources. Sun will not
be responsible or liable for any actual or alleged damage or loss caused or alleged to be caused by
or in connection with use of or reliance on any such content, goods, or services that are available
on or through such sites or resources.
Documentation, Support, and Training
The Sun web site provides information about the following additional resources:
■
■
■
Documentation (http://www.sun.com/documentation/)
Support (http://www.sun.com/support/)
Training (http://www.sun.com/training/)
Sun Welcomes Your Comments
Sun is interested in improving its documentation and welcomes your comments and
suggestions. To share your comments, go to http://docs.sun.com and click Feedback.
Typographic Conventions
The following table describes the typographic conventions that are used in this book.
TABLE P–1
Typographic Conventions
Typeface
Meaning
Example
AaBbCc123
The names of commands, files, and directories,
and onscreen computer output
Edit your .login file.
Use ls -a to list all files.
machine_name% you have mail.
AaBbCc123
aabbcc123
18
What you type, contrasted with onscreen
computer output
machine_name% su
Placeholder: replace with a real name or value
The command to remove a file is rm
filename.
Sun GlassFish Web Space Server 10.0 Administration Guide • July 2009
Password:
Preface
TABLE P–1
Typographic Conventions
(Continued)
Typeface
Meaning
Example
AaBbCc123
Book titles, new terms, and terms to be
emphasized
Read Chapter 6 in the User's Guide.
A cache is a copy that is stored
locally.
Do not save the file.
Note: Some emphasized items
appear bold online.
Shell Prompts in Command Examples
The following table shows the default UNIX® system prompt and superuser prompt for the C
shell, Bourne shell, and Korn shell.
TABLE P–2
Shell Prompts
Shell
Prompt
C shell
machine_name%
C shell for superuser
machine_name#
Bourne shell and Korn shell
$
Bourne shell and Korn shell for superuser
#
19
20
1
C H A P T E R
1
Administration Overview
This chapter provides a basic understanding of Sun GlassFish Web Space Server(Web Space
Server).
■
■
■
■
■
■
■
■
“About Sun GlassFish Web Space Server” on page 21
“Sun GlassFish Web Space Server Features” on page 22
“Web Space Server Terminology” on page 23
“Using the Evaluation Bundle” on page 24
“Creating an User Account on Web Space Server” on page 25
“Defining Password Policies for Users” on page 26
“Welcome Menu for the Admin User” on page 26
“Setting up a Development Environment for Web Space Server” on page 30
About Sun GlassFish Web Space Server
Sun GlassFish Web Space Server launched as part of Sun's GlassFish Portfolio is a
next-generation Web 2.0 application aggregation and presentation platform. It is a suite of
integrated software products that enables businesses large and small to pull together
applications and content from a variety of Web-based and internal sources and present them as
a unified, customizable portal on Web browsers, kiosks, and mobile devices. Web Space Server
makes it easier for users to find and use the tools and information they need.
Sun GlassFish Web Space Server is a collaborative effort between Sun Microsystem's Portal
Server team, the Liferay Community, and the OpenPortal community. Web Space Server
integrates technologies from these three products to enable enterprise-class portals that are easy
to use for end users, system administrators, and developers alike.
21
Sun GlassFish Web Space Server Features
Sun GlassFish Web Space Server enables:
■
Social Networking for the Enterprise
Find people with the answers across organizations, silos, and hierarchies, and boost
productivity in distributed teams.
■
Enterprise Widgets for Collaboration Work
Bundled Productivity Widget Suites to get work done (CMS, Workflow), and Information
Widget Suite for Effective Collaboration (blogs, wikis).
■
Internet Widgets on the Enterprise Extranet
Build stickiness into your intranet with Google Gadgets, YouTube, and Facebook widgets.
Sun GlassFish Web Space Server Features
Sun GlassFish Web Space Server provides a new class of portal functionality by which users can
define their own Web spaces. With built-in content and document management, human
workflow development tools, enterprise identity integration, and social networking features,
system administrators and application developers can now deploy a platform that allows for
rapid rollout of next generation Web capabilities for their users.
Key Web Space Server features include:
22
■
Identity-based content delivery
■
User-managed Web spaces, including user self-Web publishing and user access controls
■
Rapid and simple Web site design tools make it possible to quickly set up Web sites for
content, collaboration, and interactivity, with out of the box templates
■
Built-in collaboration, with bundled wiki, blog, task management, calendaring, document
sharing, polls, IM, and email applications
■
Document and Web content management system with workflow, staging, and publication
tools
■
Syndicate portlets and widgets with REST
■
Develop widgets using the JSR 286 portlet standard as well as scripting standards such as
Ruby, PHP, and JMaki
■
Add-Ons features available for paid Sun GlassFish Web Space Server users. See, Sun
GlassFish Web Space Server 10.0 Add-On Collection.
Sun GlassFish Web Space Server 10.0 Administration Guide • July 2009
Widget
Web Space Server Terminology
The following are some common terms relevant to Web Space Server.
Community
A collection of users sharing common interests or goals. Community members typically share a common
set of portlets and pages. For example, a community might have a wiki that is not available to users outside
the community. Multiple user groups can coexist within a given community.
Friendly URL
The modifiable part of the URL for the private page of an user account.
Guest
A user who does not have an account on a given Web Space Server site. Typically, guest users have limited
ability to view or modify content on a Web Space Server site.
Instanceable
Portlet
If you can add many instances of a portlet to your page, the portlet is called an instanceable portlet.
Layout Template
A scheme that defines the general layout of portlets and widgets on a portal page. As with themes, layout
templates can be applied by site administrators and registered users.
Non-instanceable
Portlet
If you can add just one instance of a portlet to your page, the portlet is called a it is a non-instanceable
portlet.
Organization
A hierarchical collection of users, user groups, and communities. Multiple communities can coexist
within a given organization.
Portlet
Portlets are pluggable user interface software components that are managed and displayed in a web portal.
Typically, a portal page is displays as a collection of non-overlapping portlet windows, where each portlet
window displays a portlet. Web Space Server portlets confirm to JSR286 standards.
Public Page and
Private Page
Every individual user account in a Web Space Server site contains public pages and private pages. Pages
that can be accessed by a guest user are public pages. Pages that can only be accessed by logging in to a user
account are private pages.
Theme
The “look and feel” settings that are applied to a portal page. Themes can be applied sitewide by a Web
Space Server site administrator or on a page-by-page basis by registered users.
User
A person who is registered on a Web Space Server site.
User Group
A grouping of users. Members of a user group typically share common sets of access permissions.
User Role
Permissions and access rights defined for a given user; typically maps to rights within groups,
communities, and organizations.
Widget
Widgets are similar to portlets except that unlike portlets, widgets are created using a programming
language other than the Java , such as PHP or Ruby.
Chapter 1 • Administration Overview
23
Using the Evaluation Bundle
Using the Evaluation Bundle
Sun GlassFish Web Space Server is part of the GlassFish Portfolio. You can use the Web Space
Server evaluation bundle for a quick evaluation of the product.
You can download Sun GlassFish Web Space Server from the following sites:
https://webspace.dev.java.net/
http://www.sun.com/software/products/webspace/get.jsp
Evaluation bundles use the naming pattern Webspace version-gfv2–OS.zip. To install the
evaluation bundle, you just need JDK 1.5 or above installed on your machine. When you install
the evaluation bundle; GlassFish v2, the HSQL database, and samples are installed along with it.
You can use the evaluation bundle, which has the HSQL database embedded with it, for quick
evaluation. It is a good method to have it up and running fast for reviewing or developing, it has
several drawbacks:
■
Only one user can access the database at a time. The data is stored on a file on disk and
HSQL locks it when doing changes.
■
The data is stored inside the application server and might be lost on redeployment.
■
This configuration does not scale well and will have performance problems when multiple
users access the system.
The Sun GlassFish Web Space Server10.0 Getting Started Guide provides detailed instructions
about how to get the evaluation bundle up and running.
For a production environment, install the core bundle of Web Space Server. It can be installed
on an existing instance of GlassFish v2, and can be configured to use MySQL (preferred) or
Oracle 10g (or later) databases. You can update the installation with samples and other add-ons.
The core bundle naming pattern is Webspace version-for-gfv2.zip
The Add-on bundle naming pattern isWebspace version-addon-addon-name.zip
The evaluation bundle is not recommended for a production environment. Samples which are
bundled with the evaluation bundle are not tested and certified by Sun. Also, the updatetool
utility is not available for the evaluation bundle.
24
Sun GlassFish Web Space Server 10.0 Administration Guide • July 2009
Creating an User Account on Web Space Server
Creating an User Account on Web Space Server
Any user who can accesses the HTTP instance of Web Space Server can create a user account.
You can sign in by selecting Sign In from the Welcome menu. If you are an existing user, sign in
by using your user name and password. To create a new account click on the Create Account
link and follow the instructions to create an account. When you add an user account, the user is
added to the list of Users in the Enterprise Admin Portlet. The admin user can monitor all the
user accounts.
Also, you can log in to Web Space Server by using an OpenID. You can get an OpenID from any
of the popular OpenID providers such as claimID, myOpenID, VeriSign's Personal Identity
Provider, myID.net, and myVidoop. For more information, see http://openid.net/.
When you create an OpenID with a OpenID provider such as myOpenID, a message is sent to
the email address that you provide. Your OpenID will be authenticated when you respond to
the message. You can use the OpenID to log in to any of the web sites that support OpenIDs.
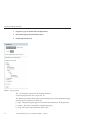
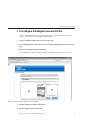
▼
To Log in to Web Space Server Using an OpenID
1
Access the HTTP instance for Web Space Server using http://<machine-name>:8080.
2
Choose Sign In from the Welcome menu.
3
Click on the OpenID link.
4
Type the OpenID URL and click Sign In.
5
Select the Skip This Step Next Time I Sign In to http://machine-name:8080 option, and click
Continue.
This accesses to the OpenID site.
6
Authenticate your OpenID and click Save.
Note – For the OpenIDs provided by Yahoo and many other OpenID providers, you need to
register the OpenID by selecting My Account → Identification → OpenID.
Chapter 1 • Administration Overview
25
Defining Password Policies for Users
Defining Password Policies for Users
The admin user can define password policies for Users and Organizations. You can change the
default password policy or create a new password policy. You can apply different password
policies to different sets of users and organizations.
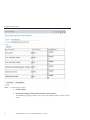
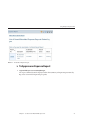
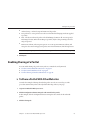
▼
To Define a Password Policy
1
Log in to Web Space Server as the admin user.
2
Choose Control Panel → Portal → Password Policies from the Welcome menu.
3
Click the Add button to add a new password policy.
4
Type the name and description for the password policy.
You can enable the desired options for the password policy. To display information about an
option, place the cursor on the help button next to the option. You can enable:
■
■
■
■
■
Changeable option to enable users to change the password
Password Syntax Checking
Password History
Password Expiration
Lockout
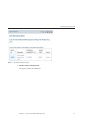
5
Click Save.
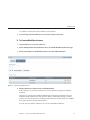
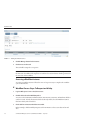
6
To assign users or organizations to the password policy, click the Actions button corresponding
to the password policy and select Assign Members from the menu.
Welcome Menu for the Admin User
Welcome menu for the admin user provides a convenient user interface for various
administration tasks. You can access the Welcome menu from any public or private page.
26
Sun GlassFish Web Space Server 10.0 Administration Guide • July 2009
Welcome Menu for the Admin User
▼
To use the Welcome Menu
1
Log in to Web Space Server as the Admin User.
2
Navigate to the Welcome menu, and click on the menu item that you need to access.
Home, Control Panel, My Account, Sign Out, Add Application, Layout Template, Manage
Pages, Toggle Edit Controls, and My Places are the items which can be accessed from the
Welcome menu for the admin user.
To apply control settings:
“Control Panel” on page 27
To apply account settings:
“My Account” on page 28
To add portlets and widgets to your page:
“Add Application” on page 29
To change the layout template:
“Layout Template” on page 29
To specify a friendly URL to your public and private pages:
“Manage Pages” on page 29
To toggle edit controls of the portlets on your page:
“Toggle Edit Controls” on page 29
To navigate to public and private pages associated with your account:
“My Places” on page 29
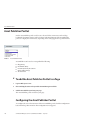
Control Panel
You can use the Control Panel to configure the User, Content, Portal, and Server settings.
Select Control Panel from the Welcome menu. You can use the tools available on the left menu
to perform various administrative tasks.
The tools available to the admin user provide the privileges to perform content management,
portal resource administration, server administration, portal administration, WSRP
administration, and general administration tasks.
Chapter 1 • Administration Overview
27
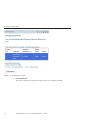
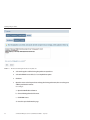
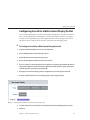
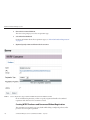
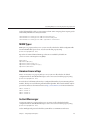
Welcome Menu for the Admin User
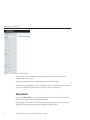
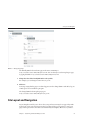
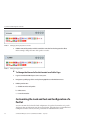
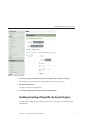
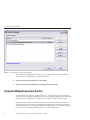
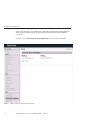
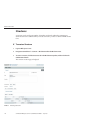
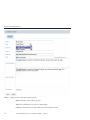
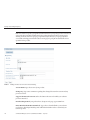
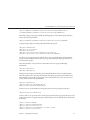
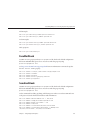
FIGURE 1–1
Tools available on the Control Panel
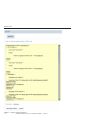
You can select a tool from the left menu to apply settings to it. For example, click 'Server
Administration' under 'Server'.
You can perform a number of server maintenance activities from this page.
Similarly, you can apply different kind of settings by using the Control Panel. Click the “Back to
Community” link in the top right corner of the page to return to the main page.
My Account
To access the My Account page, click the My Account tool from the left menu in the Control
Panel or select “My Account” from the Welcome menu.
From this page, you can view the user information, can apply identification settings, and can
apply some miscellaneous settings such as, language and display settings.
28
Sun GlassFish Web Space Server 10.0 Administration Guide • July 2009
Welcome Menu for the Admin User
Add Application
You can add a portlet or a widget to your page by choosing Add Application from the Welcome
menu.
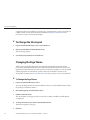
Layout Template
Choose Layout Template from the Welcome Menu. The Layout window appears. The 2
Column (30/70) is the default layout. You can select the radio button for the Layout of your
choice and click Save to apply the layout for your account.
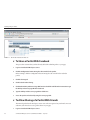
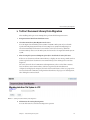
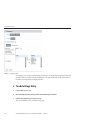
Manage Pages
You can use Manage Pages from the Welcome Menu to specify a Friendly URL and apply other
settings to a Public Page or a Private Page associated with your account.
For more details on Friendly URLs, refer Friendly URLs.
Toggle Edit Controls
You can use the Welcome menu to toggle edit controls for portlets. Portlets generally have edit
control options such as close, maximize, minimize, look and feel, and configuration. You can
toggle edit controls on or off by using the Toggle Edit Controls option.
My Places
You can select My Places from the Welcome menu to navigate to all the public and private
pages of the communities associated with your account. When you click My Places, the page
you are on is highlighted in the menu appearing.
Note – A public pageis a page which can be viewed by the Guest user i.e., the public page is
accessible without the need to log in. Private pages can be viewed only after you log in.
Chapter 1 • Administration Overview
29
Setting up a Development Environment for Web Space Server
Setting up a Development Environment for Web Space Server
If you are beginning a Web Space Server-based project, you will probably need to get your
developers up and running before your production systems are ready. In order for a developer
to do his or her work, an instance of Web Space Server needs to be running on his or her
machines. Additionally, to prevent file-locking issues, a developer's version of Web Space
Server should not use the embedded database, so a separate database will need to be installed.
Web Space Server uses many open source tools for development which means there are no
expensive tools to purchase. Also, developers can choose the tools they are most comfortable
with to write code on Web Space Server platform.
Some tools are required in order to develop with Web Space Server:
■
Apache Ant 1.7.0 or later.
■
A Java Development Kit.
■
A Web Space Server-supported database. (MySQL is recommended for a developer
machine.)
■
The IDE or development environment of your choice.
If you are customizing Web Space Server through the extension environment, you might need a
subversion client, or you can also download the Web Space Server source from the web site. See
the Web Space Server Developer's Guide for further details
Developing With Apache Ant
Apache Ant is a build tool that is used extensively by both the Web Space Server source and the
extension environment. You can download the latest version of Ant from
http://ant.apache.org. After downloading, uncompress the archive into a folder. You then
need to set the ANT_HOME environment variable to add binaries to your PATH.
▼ To Set the ANT_HOME Variable on Windows
30
1
Choose Start → Control Panel, and double-click the System icon.
2
Click the Advanced tab, and then click the Environment Variables button.
3
Under System Variables, select New to create the ANT_HOME environment variable.
4
Set the variable name to ANT_HOME and the variable value to
apache-install-dir\apache-ant-version and click OK.
For example, the installation directory might be C:\Java\apache-ant-1.7.0.
5
Select New again to create the ANT_OPTS environment variable.
Sun GlassFish Web Space Server 10.0 Administration Guide • July 2009
Setting up a Development Environment for Web Space Server
6
Set the variable name to ANT_OPTS and the variable value to -Xms256M -Xmx512M and click OK.
7
Select the PATH environment variable and select Edit.
8
Add %ANT_HOME%\bin to the end or beginning of the PATH.
9
Click OK and then click OK again.
10
To test the setting, type ant at a command prompt and press Return.
■
If a Build not found error message appears, you have correctly installed Ant.
■
If you do not see an error message, check the environment variable settings and make sure
they are pointing to the correct directory locations.
▼ To Set the ANT_HOME Variable on a Linux or Macintosh System
1
In your home folder, open the .bash_profile file in the root directory.
2
Add the following lines to the file, substituting the directory where you installed Ant:
ANT_HOME=/apache-install-dir/apache-ant-version
ANT_OPTS="-Xms256M -Xmx512M"
PATH=$PATH:$HOME/bin:$ANT_HOME/bin
export ANT_HOME ANT_OPTS PATH
3
To test the setting, type ant at a command prompt and press Return.
■
If a Build not found error message appears, you have correctly installed Ant.
■
If you do not see an error message, check the environment variable settings and make sure
they are pointing to the correct directory locations.
Chapter 1 • Administration Overview
31
32
2
C H A P T E R
2
Web Space Server Installation Instructions
To install Web Space Server, download the single component installer (production bundle) for
Sun GlassFish Web Space Server. The single component installer for Web Space Server is the
version that is not bundled with Sun GlassFish Web Space Server and samples looks similar to
webspace-10-fcs-for-gfv2.zip. You can configure it to a database installed on your disk.
MySQL and Oracle 10g are the databases supported by Web Space Server. If your organization
doesn't have a standard for local development databases, you can use MySQL.
Web Space Server is best suited to work on GlassFish v2, but it can also be installed on other
versions of Sun GlassFish Web Space Server and also on other application servers. It is a part of
the GlassFish Portfolio.
Unlike the evaluation bundle, which includes theGlassFish software and HSQL, the production
bundle of Web Space Server can be installed only on an existing installation of an application
server such as GlassFish.
The following sections provide instructions for using the production bundle for Web Space
Server:
■
■
■
■
■
■
“Installing the Database, Application Server, and Web Space Server” on page 34
“Installing Updates from the Update Tool” on page 40
“Installing Samples” on page 44
“Configuring Web Space Server for Other Databases” on page 46
“Updating WAR or Property Files” on page 49
“Installing Web Space Server on Sun GlassFish Enterprise Server 2.1” on page 50
33
Installing the Database, Application Server, and Web Space Server
Installing the Database, Application Server, and Web Space
Server
Perform the following procedure to configure Web Space Server on a Solaris system with UTF-8
support. For instructions about how to install MySQL on various other operating systems, see
http://dev.mysql.com/doc/refman/5.1/en/installing.html.
Before You Begin
This section explains some basic requirements and concepts you should review before
proceeding with Sun GlassFish Web Space Server 10.0 software installation.
System Requirements
See “Software and Hardware Requirements” in Sun GlassFish Web Space Server 10.0 Installation
Guide for system requirements.
Installation Directories
Throughout these installation instructions, the root Web Space Server installation directory is
referred to as <webspace_dir>.
When you unzip a core Web Space Server bundle (which looks similar to
webspace-<version>-for-glassfish.zip), you get webspace-for-glassfish directory. You
can install and configure Web Space Server from this directory. This directory is denoted by
<webspace_dir>.
Platform-Specific Path Separators
The instructions and examples in this document use UNIX-style forward slash (/) path
separators in file and command names. If Web Space Server and Sun GlassFish Enterprise
Server are installed on a Windows system, be sure to use backslashes (\) instead of forward
slashes; for example:
■
■
▼
1
UNIX systems or Linux systems — glassfish/bin/asadmin
Windows systems — glassfish\bin\asadmin
To Install and Configure MySQL
Install MySQL by typing the following commands as superuser.
# groupadd mysql
# useradd -g mysql mysql
# cd /usr/local
34
Sun GlassFish Web Space Server 10.0 Administration Guide • July 2009
Installing the Database, Application Server, and Web Space Server
#
#
#
#
#
#
#
#
#
gunzip install-dir/mysql-version-os.tar.gz | tar xvf ln -s install-dir/mysql-version-os mysql
cd mysql
chown -R mysql .
chgrp -R mysql .
scripts/mysql_install_db --user=mysql
chown -R root .
chown -R mysql data
bin/mysqld_safe --user=mysql & *
2
Log in to the MySQL installation by going to the MySQL installation directory and typing the
following command:
mysql -u root
3
Create the UTF-8 database by typing the following commands:
mysql>
mysql>
mysql>
mysql>
mysql>
4
▼
create database lportal default character set utf8
use lportal;
create user lportal;
grant all privileges on *.* to ’lportal’@’localhost’ identified by ’lportal’;
set password for ’lportal’@’localhost’ = password(’lportal’);
Enable UTF-8 support for MySQL.
See, “To Connect to a Database Other Than HSQL” on page 38
To Install the GlassFish JAR Based Installer
Installing and starting GlassFish is a prerequisite for installing Web Space Server. The following
procedure explains how to install the JAR based installer for GlassFish. The JAR based installer
can be downloaded freely from the GlassFish server web site. You can use GlassFish V2 version
and also the JAR based installer for GlassFish in case of desktop deployments of Web Space
Server, which is used for development and testing of Web Space Server.
You can use the enterprise version of Web Space Server when you deploy Web Space Server in
production environment. See, “Installing Web Space Server on Sun GlassFish Enterprise Server
2.1” on page 50.
1
Download the GlassFish v2 distribution at
https://glassfish.dev.java.net/downloads/v2.1-b60e.html
2
Set the environment variable JAVA_HOME to point to the directory in which JDK 1.6 is
installed.
3
Run the following command:
#java -Xmx256m -jar filename.jar
Chapter 2 • Web Space Server Installation Instructions
35
Installing the Database, Application Server, and Web Space Server
4
Set ANT_HOME to point to the installation of Ant 1.7 or above.
Note – Ant 1.6.5 is the default Ant version for GlassFish. Make sure that ANT_HOME is not
pointing to GlassFish Ant.
5
Navigate to the GlassFish directory:
cd glassfish
6
Run the following command:
ant -f setup.xml
7
Start GlassFish.
cd bin
<downloaded-dir>/glassfish/bin>/asadmin start-domain
▼
To Install Web Space Server
1
Download the stand-alone version of Web Space Server.
2
Extract the Web Space Server bundle.
unzip webspace-for-gfv2.zip
3
Navigate to the Application folder.
cd webspace-for-gfv2/webspace/application
4
Run ant -f install-gfv2.xml.
ant -f install-gfv2.xml
Buildfile: install-gfv2.xml
check-ant:
check-last-install:
set-last-install:
show-user-warning:
[input] JAVA_HOME must be set to JDK 1.5 or greater and java must be availab
le in the execution path. GlassFish must be running. [RETURN to continue or CONT
ROL-C to stop]
36
Sun GlassFish Web Space Server 10.0 Administration Guide • July 2009
Installing the Database, Application Server, and Web Space Server
set-glassfish-properties:
[input] Enter GlassFish Directory [\opt\glassfish]
<install-dir>\glassfish
[input] Enter GlassFish Domain (include full path to domain) [<install-dir>\glassfish\domains\domain1]
[input] Enter GlassFish Target [server]
[input] Enter GlassFish Administrator [admin]
[input] Enter GlassFish Administrator Password File (include full path to fi
le) [full-path\gfpass.txt]
[input] Enter GlassFish Administration Port [4848]
[input] Can installer deploy wars? [true]
set-database-properties:
[input] Use builtin HSQL or mySQL database [HSQL]
mysql
set-hsql-properties:
set-mssql-properties:
set-mysql-properties:
[input] Enter Database User Name [root]
[input] Enter Database User Password File (include full path to file) [full-path\dbpass.txt]
//Place GlassFish admin password in a clear text file, and specify full path to it
[input] Enter Database Host [localhost]
[input] Enter Database Port [3306]
[input] Enter Database Name [lportal]
You need to set the application server and database properties in the process of running
install-gfv2.xml. You have to specify path for a password file (a text file containing the
password) for GlassFish. If MySQL is installed on your machine, stop GlassFish and choose
MySQL instead of the HSQL database, and make changes to the portal-ext.properties file as
described in the “To Connect to a Database Other Than HSQL” on page 38 section. Provide a
password file, and restart GlassFish. Provide properties such as hostname, port number, and
database name. Make sure that Ant version is 1.7 or greater and JDK is 1.6 or greater. GlassFish
need to be running if you are installing on HSQL.
Chapter 2 • Web Space Server Installation Instructions
37
Installing the Database, Application Server, and Web Space Server
▼
To Connect to a Database Other Than HSQL
You need to make changes to the JDBC property in portal-ext.properties only when you are
installing Web Space Server on GlassFish Enterprise Edition. It is not necessary to make these
changes, when you are installing Web Space Server on the GlassFish JAR based installer.
1
Create a temporary folder. In this example, the folder is named test.
mkdir /tmp/test
2
Copy the portal-impl.jar file to the tmp folder.
The portal-impl.jar file contains resource bundles for Web Space Server.
cd GlassFish-install-dir/domains/domain1/application/j2ee-modules
cp webspace/WEB-INF/lib/portal-impl.jar /tmp/test
3
Change to the tmp directory.
cd /tmp/test
4
Extract the portal-impl.jar file.
jar -xvf portal-impl.jar
The portal.properties file will be placed in the tmp directory.
5
Open the portal.properties file and copy the JDBC property.
6
Create a text file named portal-ext.properties, and paste the JDBCproperty into it.
The Hypersonic (HSQL) and MySQL part of the JDBC property looks as below:
#
# Hypersonic
#
jdbc.default.driverClassName=org.hsqldb.jdbcDriver
jdbc.default.url=jdbc:hsqldb:lportal
jdbc.default.username=sa
jdbc.default.password=
#
# MySQL
#
#jdbc.default.driverClassName=com.mysql.jdbc.Driver
#jdbc.default.url=jdbc:mysql://localhost/lportal?useUnicode=true&characterEncoding=
UTF-8&useFastDateParsing=false
#jdbc.default.username=
#jdbc.default.password=
7
38
Comment Hypersonic (HSQL) and uncomment MySQL.
Sun GlassFish Web Space Server 10.0 Administration Guide • July 2009
Installing the Database, Application Server, and Web Space Server
Note – Properties in the portal properties file are commented using the hash (#) symbol. A
property can be commented by placing a hash symbol in front of it.
8
Save the portal-ext.properties file.
9
Create a directory structure webspace/WEB-INF/classes/ under
ZIP_ROOT/webspace-for-gfv2/var/webspace/war-workspace/customs, and copy
portal-ext.properties file to it.
10
Change directory to ZIP_ROOT/webspace-for-gfv2/var/webspace/war-workspace.
cd ZIP_ROOT/webspace-for-gfv2/var/webspace/war-workspace
11
Run ant -f synchronize.xml.
12
Restart the GlassFish server.
The server will redeploy websynergy.war and update portal-ext.properties under
applications/j2ee-modules/webspace/WEB-INF/classes.
UTF-8 Support for Oracle 10g or Later
When you configure Web Space Server for Oracle, the lportal database needs to be created
with UTF-8 support.
CREATE DATABASE lportal
CHARACTER SET [AL32UTF8|UTF8]
NATIONAL CHARACTER SET AL16UTF16
CHARACTER SET Clause
Type the character set, the database uses to store data. The supported character sets and default
value of this parameter depends on your operating system.
Restriction on the CHARACTER SET
Note – Do not specify the AL16UTF16 character set as the database character set.
Specify the national character set used to store data in columns specifically defined as NCHAR,
NCLOB, or NVARCHAR2. Values allowed are AL16UTF16 and UTF8. The default value is AL16UTF16.
Also, refer to the Oracle Database Globalization Support Guide for information on Unicode
data-type support. You can access this document at
Chapter 2 • Web Space Server Installation Instructions
39
Installing Updates from the Update Tool
http://download.oracle.com/docs/cd/B12037_01/server.101/b10749/toc.htm
Installing Updates from the Update Tool
Web Space Server updates and add-ons can be downloaded using the Sun GlassFish Update
Tool.
Caution – If the user is behind a proxy, and is upgrading from a early version of Web Space
Server ( a version of Web Space Server which is earlier to Web Space Server 10.0 Update 5), the
user need to use a workaround. For the instructions for using this workaround, see “To Use
updatetool in a Proxy That Requires Authentication” on page 44.
First release of the product (Web Space Server 10.0) was bundled with Update Center 2.0 which
was not supporting authenticated proxy setup. Sun GlassFish Web Space Server 10.0 Update 5
and later versions of Web Space Server are bundled with Update Center 2.2, with supports
proxy authentication, and hence the workaround is not required.
Note – The version of Update Tool included with some versions of GlassFish Enterprise Server is
not compatible with the Web Space Server Add-On package repositories. You must use the
version of Update Tool that comes with Web Space Server 10.0 software.
Update Tool also includes a command-line (CLI) Image Packaging System (IPS) utility, called
pkg, which provides the same core functionality as its GUI-based counterpart. This IPS tool is
started with the webspace_dir/bin/pkg command. See the Update Center wiki for complete
information about Update Tool and the pkg command.
▼
1
To Download the Updates Using Update Tool
Start Update Tool by changing to the webspace-dir/bin directory and typing updatetool.
■
If the Update Tool main window appears, proceed to Step 2.
■
If a prompt appears asking whether to allow the installation of Update Tool to proceed:
a. Type y to proceed.
The installer downloads and installs Update Tool and then exits. This process takes
approximately 10 - 15 minutes.
40
Sun GlassFish Web Space Server 10.0 Administration Guide • July 2009
Installing Updates from the Update Tool
b. Type the updatetool command again to start Update Tool.
The Update Tool main window appears.
2
FIGURE 2–1
Expand Web Space under the Application Images pane, and click Available Updates.
Update Tool
3
Click the Edit Properties button.
The Image Properties window is displayed.
4
Select the option support.sun.com repository, and choose Preferred.
The Repository Properties window appears.
Chapter 2 • Web Space Server Installation Instructions
41
Installing Updates from the Update Tool
5
Provide the appropriate repository URL provided by Sun support, and click OK.
The support.sun.com repository is highlighted.
FIGURE 2–2
Selecting the support.sun.com repository
6
Click OK again to enable the support.sun.com repository.
The Update Tool main window is displayed.
7
Expand Web Space under the Application Images pane, and select Available Add-ons.
8
Select the Web Space for GlassFish V2 component, and click install.
9
Restart the GlassFish server.
cd <glassfish_dir>/bin
./asadmin stop-domain
./asadmin start-domain
10
42
Change to the webspace_dir/webspace/application directory.
Sun GlassFish Web Space Server 10.0 Administration Guide • July 2009
Installing Updates from the Update Tool
11
Run the ant install-gfv2.xml script to regenerate and redeploy the Web Space Server WAR
files.
ant -f install-gfv2.xml
12
Restart the GlassFish server.
cd <glassfish_dir>/bin
./asadmin start-domain
▼
To Download the Updates Using the CLI-Based pkg
Tool
1
Start Update Tool by changing to the webspace-dir/bin directory and typing updatetool.
■
If the Update Tool main window appears, proceed to Step 2.
■
If a prompt appears asking whether to allow the installation of Update Tool to proceed:
a. Type y to proceed.
The installer downloads and installs Update Tool and then exits. This process takes
approximately 10 - 15 minutes.
b. Type the updatetool command again to start Update Tool.
The Update Tool main window appears.
2
Change to the webspace_dir/pkg/bin directory.
3
Type the following command to download updates:
pkg set-authority -P --enable -O http://pkg.sun.com/webspace/10/ repository-name
Ask your SunSolve service representative for the correct repository name to use.
4
Type the following commands to install the Update components.
pkg image-update
5
Restart the GlassFish server.
cd <glassfish_dir>/bin
./asadmin stop-domain
./asadmin start-domain
6
Change to the webspace_dir/webspace/application directory.
Chapter 2 • Web Space Server Installation Instructions
43
Installing Samples
7
Run the ant install-gfv2.xml script to regenerate and redeploy the Web Space Server WAR
files.
ant -f install-gfv2.xml
8
Restart the GlassFish server.
cd <glassfish_dir>/bin
./asadmin start-domain
▼
To Use updatetool in a Proxy That Requires
Authentication
This is a workaround to install Web Space Server from behind a proxy, when you are updating
from a early version of Web Space Server. Sun GlassFish Web Space Server 10.0 Update 5 and
later versions of Web Space Server are bundled with Update Center 2.2 which supports proxy
authentication, and this workaround is not required.
1
Download Update Center 2.2 suitable for your platform from Update Center Wiki.
2
Unzip the Update Center 2.2 to a temporary directory (i.e. /tmp/uc2.2)
3
Copy the files pkg-bootstrap.jar and pkg-client.jar from
/tmp/uc2.2/pkg-toolkit-sunos-i386/pkg/lib to
<webspace_dir>/webspace-for-gfv2/pkg/lib.
4
Navigate to <webspace_dir>/webspace-for-gfv2/bin, and run updatetool.
You are prompted to type the proxy info and proxy port.
5
Type the proxy info and proxy port information.
The latest version of the updatetool and pkg files is downloaded.
6
Run updatetool again to download Web Space Server packages.
Installing Samples
This section provides the instructions to install samples, which is a bundle of sample
communities, users, and some portlets which are not yet officially supported by Sun. Customers
can use samples, depending upon their need and interest.
44
Sun GlassFish Web Space Server 10.0 Administration Guide • July 2009
Installing Samples
▼
1
To Install Samples
Download the zip file for add-ons and copy it to the Web Space Server installation directory.
cp webspace-10-fcs-addon-samples.zip webspace-for-gfv2/
cd webspace-for-gfv2/
2
Extract the zipped folder for samples.
unzip webspace-10-fcs-addon-samples.zip
3
Change to the /webspace/samples directory.
cd /webspace/samples
4
Install the samples.
■
To install a single sample (for example, socialspace.psar), type
ant -f install-gfv2.xml
Buildfile: install-gfv2.xml
show-user-warning:
[input] Ant must be 1.7 or greater. JAVA_HOME must be set to JDK 1.5 or greater.
[RETURN to continue or CONTROL-C to stop]
set-glassfish-properties:
[input] Enter GlassFish Directory [/opt/webspace-gfv2-sunos/glassfish2]
/<install-dir>/glassfish
[input] Enter GlassFish Domain (include full path to domain) [/<install-dir>/glassfish/domains/domain1]
set-psar-properties:
[input] Enter psar file (include full path) [samples/sample.psar]
/<install-dir>/webspace-for-gfv2/webspace/samples/samples/socialspace.psar
■
To install all samples, type
ant -f install-all-gfv2.xml
Buildfile: install-all-gfv2.xml
show-user-warning:
[input] Ant must be 1.7 or greater. JAVA_HOME must be set to JDK 1.5 or greater.
[RETURN to continue or CONTROL-C to stop]
set-glassfish-properties:
[input] Enter GlassFish Directory [/opt/webspace-gfv2-sunos/glassfish2]
Chapter 2 • Web Space Server Installation Instructions
45
Configuring Web Space Server for Other Databases
/<install-dir>/glassfish
[input] Enter GlassFish Domain (include full path to domain) [/<install-dir>/glassfish/domains/domain1]
install:
[echo] Stopping GlassFish...
[echo] Execute /477/glassfish/bin/asadmin stop-domain if install hangs.
5
Restart theGlassFish server.
Configuring Web Space Server for Other Databases
MySQL 5.x (or later versions) or Oracle 10g (or later versions) are officially supported for a
production environment. MySQL is the default database for the production environment but
you can install and configure Web Space Server for other databases as well.
Configuring Web Space Server for Microsoft SQL
You must have the following software installed:
■
■
■
.NetFramework 3.0 and above
Windows Installer 4.5 and above
Windows Power Shell
▼ To Install SQL Server Express 2008 With Management Tools
1
Download SQL Server 2008 Express with Tools/SQL Server 2008 Express Advanced Series.
2
Run the SQLEXPRADV_x86_ENU.exe file.
3
Click the System Configuration Checker in the SQL Server Installation Center to see if all the
prerequisites are installed.
4
Choose Installation.
5
46
■
If you are doing a fresh installation, select the New SQL Server standalone installation.
■
If you are upgrading an existing installation, select the Add Features to an Existing
Installation option.
Type the product key and click Next.
The product key setting page appears.
Sun GlassFish Web Space Server 10.0 Administration Guide • July 2009
Configuring Web Space Server for Other Databases
6
Accept the licence terms and click Next.
The licence terms page appears.
7
Click Install in the Set Up Support Files screen. Click Next on completing the setup.
8
In the Features Selection screen that appears, select the Database Engine Services and
ManagementTools-Basic features.
9
Type MSSQLSERVER in the Named instance and Instance ID boxes for Instance configuration.
Click Next.
See http://msdn.microsoft.com/en-us/library/ms165614.aspxfor more information
about configuration.
10
Make the following changes in the Server Configuration page
a. Use NT AUTHORITY\SYSTEM as the account name for SQL Server Database engine.
b. Change the SQL Server browser startup to Automatic.
Other settings remain the same.
11
Do the following changes in the Database Engine Configuration screen:
a. Select Mixed Node so that the built in admin user sa can be user for authorization in addition
to Windows authorization.
b. Provide a password for the account sa.
c. Click Next and wait till the installation is complete.
▼ To Start Microsoft SQL Server
1
Run MSSQL Server Configuration Manager.
2
Navigate to SQL Server Network Configuration → Protocols for SQL SERVER. Enable TCP/IP and
Named Pipes. SQL server uses port 1433 by default.
3
Right-click SQL Server Services and choose SQL Server from the pop-up menu. Click Start.
4
Verify that Microsoft SQL is running.
You can verify this on the Solaris platform by running the netstat -an | grep 1433 command
in a terminal window.
Chapter 2 • Web Space Server Installation Instructions
47
Configuring Web Space Server for Other Databases
▼ To Connect to Microsoft SQL Using the Management Studio tool
1
Run SQL Server Management Studio.
2
Navigate to File → Connect Object Explorer.
3
Apply the following settings:
■
Server Type: Database Engine
■
Server Name: Name of the computer
■
Authentication : SQL Server Authentication.
In order to use SQL Server authentication, you need to select the Mixed Mode (Windows
authentication + SQL Server authentication) option while installing Microsoft SQL.
■
■
Login : sa
Password : MSSQL administrator password assigned during installation
4
Click Connect.
5
Select New Query in the Management Studio tool.
6
Type create database lportal and click Execute.
The message “Query executed successfully” is displayed on successful creation of the database
named lportal.
▼ To Configure Web Space Server to Use Microsoft SQL
1
Add the following text to theportal-ext.properties file in
theRoot-Dir/webspace-for-gfv2/var/webspace/war-workspace/customs/webspace/WEB-INF/classes
directory.
# SQL Server
#
jdbc.default.driverClassName=net.sourceforge.jtds.jdbc.Driver
jdbc.default.url=jdbc:jtds:sqlserver://localhost:1433/lportal
jdbc.default.username=sa
jdbc.default.password=<admin password set for MsSQL>
48
2
Download the jTDS JDBC driver from http://jtds.sourceforge.net/.
3
Copy the JAR file to the GlassFish-install-dir/domains/domain1/lib directory.
4
Restart the GlassFish server.
Sun GlassFish Web Space Server 10.0 Administration Guide • July 2009
Updating WAR or Property Files
Updating WAR or Property Files
The process for updating a deployed WARor property file in Sun GlassFish Web Space Server is
complex.
The following procedure describes how to update the portal-ext.properties file. Similarly,
you can update a deployed WAR file.
▼
To Update the portal-ext.properties File and a WAR
File
1
Install the Web Space Server core zip file.
2
Create the directory structure webspace/WEB-INF/classes under
install-dir/webspace-for-gfv2/var/webspace/war-workspace/customs.
3
Create a dummy portal-ext.properties file with the following entry in it:
dummy.property=true
4
Change to the install-dir/webspace-for-gfv2/var/webspace/war-workspace directory.
5
Run ant -f synchronize.xml.
6
Restart the GlassFish server.
The server will redeploy webspace.war and update portal-ext.properties in the directory
GlassFish
install-dir/domains/domain1/application/j2ee-modules/webspace/WEB-INF/classes.
7
Now add the OpenSSO add-on. Make sure to update the AMConfig.properties and
portal-ext.properties files.
8
Restart the GlassFish server.
9
The portal-ext.properties file now contains the property dummy.property=true and OpenSSO
related properties.
You can use the same process for any other WAR file.
Chapter 2 • Web Space Server Installation Instructions
49
Installing Web Space Server on Sun GlassFish Enterprise Server 2.1
Installing Web Space Server on Sun GlassFish Enterprise
Server 2.1
Upgrade versions of Web Space Server can only be installed on GlassFish Enterprise Server 2.1
because only the enterprise version can be upgraded to GlassFish 2.1 patch 01. GlassFish 2.1 can
be patched to GlassFish 2.1 patch 01 only if GlassFish 2.1 is an Enterprise Edition server (EE
version) and not the open source version which uses a JAR based installer.
You can find the instructions to install Web Space Server on a cluster of Sun GlassFish
Enterprise Server in the Web Space Server Deployment Guide.
▼
To Install Web Space Server on Sun GlassFish
Enterprise Server 2.1
1
Install Sun GlassFish Enterprise Server 2.1 on your machine.
2
Install Web Space Server 10.0.
a. Download webspace-for-gfv2.zip and unzip it.
b. Stop the Sun GlassFish Enterprise Server 2.1.
c. Add the following code to the server.policy file in the glassfish/domains/domain1
folder.
grant codeBase "file:${com.sun.aas.instanceRoot}/lib/-" {
permission java.security.AllPermission;
};
// permissions for Webspace
grant codeBase "file:${com.sun.aas.instanceRoot}/applications/j2ee-modules/webspace/-" {
permission java.security.AllPermission;
};
grant codeBase "file:${com.sun.aas.instanceRoot}/applications/j2ee-modules/saw-web/-" {
permission java.security.AllPermission;
}; // Basic set of required permissions granted to all remaining code
grant {
...............
...............
permission java.lang.reflect.ReflectPermission "suppressAccessChecks";
};
grant codeBase "file:${com.sun.aas.instanceRoot}/applications/j2ee-modules/ruon-web/-" {
50
Sun GlassFish Web Space Server 10.0 Administration Guide • July 2009
Installing Web Space Server on Sun GlassFish Enterprise Server 2.1
permission java.security.AllPermission;
};
grant codeBase "file:${com.sun.aas.instanceRoot}/applications/j2ee-modules/wsrp-portlet/-" {
permission java.security.AllPermission;
};
Note – You need to grant permissions for any web-app that tries to create database tables. For
example, you will have to add the permission blocks for CommunityMapper and opensso-web
also, in the same way as you added permission blocks for webspace and saw-web.
3
Update the portal-ext.properties file with
auto.deploy.glassfish-tomcat.jee.dm.id=deployer:Sun:AppServer::localhost:4848:https
The portal-ext.properties file is located in
ws_install_dir/var/webspace/war-workspace/customs/webspace/war-workspace/customs/webspace/WEB-INF/class
4
Change to the ws_install_dir/webspace/application directory and run ant -f
install.xml.
Chapter 2 • Web Space Server Installation Instructions
51
52
3
C H A P T E R
3
Customizing Sun GlassFish Web Space Server
This chapter describes some simple customization tasks, most of which can be done from the
user interface of Web Space Server. For more serious changes to the product configuration, you
need to make changes to the portal-ext.properties file. A simple example for making
changes to the portal-ext.properties file, see “Localization Support” on page 60. For details
of properties in the portal-ext.properties file, see “Customizing Web Space Server Using
the portal-ext.properties File” on page 175. The following sections describes how to customize
Web Space Server
■
■
■
■
■
■
Branding and Site Identity
Friendly URLs
Site Layout and Navigation
Using Bundled Web Space Server Portlets
“Look and Feel and Configuration of Portlets” on page 57
“Localization Support” on page 60
Branding and Site Identity
You can use Web Space Server on your web site to customize the branding to establish your site
identity.
▼
To Change the Banner Logo
1
Log in to Sun GlassFish Web Space Server as the admin user.
2
Choose Control Panel → Portal → Settings from the Welcome menu.
3
Click the Change link.
You are prompted to browse and select a new banner logo.
53
Friendly URLs
4
▼
Select the file to use for the logo.
To Change the Address Bar and Browser Tab Icons
1
Navigate to the directory that contains the Web Space Server installation.
2
Change to the var/webspace/war-workspacedirectory.
cd ZIP_ROOT/webspace-for-gfv2/var/webspace/war-workspace.
3
Change to the customs/webspace/html/themes/classic/images directory, and place
liferay.ico image in the folder.
Note – The default icon for the address bar and browser tabs is named liferay.ico. You can
override the icon with an image with the same name.
4
After any customization you need to run ant -f synchronize.xml at the root of the customs
folder.
a. Change to the ZIP_ROOT/webspace-for-gfv2/var/webspace/war-workspace directory.
cd ZIP_ROOT/webspace-for-gfv2/var/webspace/war-workspace
b. Run ant -f synchronize.xml
This will prompt for the war to synchronize, choose the default (which is webspace).
5
Restart the GlassFish server.
6
Clear the browser cache and reload the page.
Friendly URLs
Friendly URL is the part of the URL for a page on Web Space Server that can be customized as
desired.
▼
54
To Change the Friendly URL of a Page
1
Log in to Sun GlassFish Web Space Server as the admin user.
2
Choose Manage Pages from the Welcome menu.
Sun GlassFish Web Space Server 10.0 Administration Guide • July 2009
Site Layout and Navigation
FIGURE 3–1
Manage Pages Page
The Friendly URL for the Welcome page in the Guest community is
http://machine-name:8080/web/guest/home. You can directly access the PeopleSpace page
by typing this URL. http://machine-name:8080/web/guest/home.
3
Change the value of the Friendly URL to the value you like.
For example, you can change it from home to my_home.
4
Click Save.
A message saying that the page is not found appears. For the changed URL to take effect, log out
of Web Space Server and then log in again.
The changed URL for the PeopleSpace page is
http://machine-name:8080/web/guest/my_home.
Site Layout and Navigation
Layout Templates enables you to choose how your portlets are arranged on a page. They make
up the body of your page, the large area where you drag and drop your portlets to create your
pages. Web Space Server comes with several built-in layout templates. However, if you have a
Chapter 3 • Customizing Sun GlassFish Web Space Server
55
Site Layout and Navigation
complex page layout (especially for your home page), you might want to create a custom layout
template of your own. See the development document in Liferay Documentation for the
procedure to create a custom Layout Template.
▼
To Change the Site Layout
1
Log in to Sun GlassFish Web Space Server as the admin user.
2
Choose Layout Template from the Welcome menu.
The Layout page appears.
3
Select the layout you want to use and click Save.
Changing the Page Theme
Themes are hot deployable plugins that can completely transform the look and feel of the
portal. Most organizations have their own look and feel standards for all the web sites and web
applications in their infrastructure. Web Space Server enables site designers to create and install
a theme plugin that can transform the portal to whatever look and feel is needed. See the
development document in Liferay Documentation for the procedure to create a custom theme.
▼ To Change the Page Theme
1
Log in to Sun GlassFish Web Space Server.
Any user can change themes, but only the admin user has access to all available themes, and has
the privilege to install more themes.
2
Choose Manage Pages from the Welcome menu.
3
Click the Look and Feel tab.
The current theme for the page and its associated color schemes, and all the available themes,
are displayed.
4
To change the theme, choose a theme from Available Themes.
The theme is applied to your page.
5
56
Click Save.
Sun GlassFish Web Space Server 10.0 Administration Guide • July 2009
Look and Feel and Configuration of Portlets
Using Bundled Web Space Server Portlets
A wide array of portlets is bundled with Web Space Server as part of its core and samples.
▼
To Add Bundled Web Space Server Portlets
1
Log in to Sun GlassFish Web Space Server.
2
Choose Add Applications from the Welcome menu.
3
Locate the desired portlet.
You can search for a portlet by providing a search string for it or by expanding the portlet folder
and clicking Add next to a selected portlet. For example, to add some social networking portlets
to your page, expand the Social folder. You can add Activities and Requests portlets to your
page by clicking the Add button corresponding to the portlet.
4
Add the required portlet to your page by clicking the Add button next to the portlet.
Look and Feel and Configuration of Portlets
You can customize the display name and look and feel of a portlet.
Changing the Name of a Portlet
You can change the display name of a portlet.
▼ To Change the Name of a Portlet Located on a Private Page
1
Log in to Sun GlassFish Web Space Server.
2
Click the menu bar of a portlet.
For example, click the menu bar of the Languages portlet.
Chapter 3 • Customizing Sun GlassFish Web Space Server
57
Look and Feel and Configuration of Portlets
FIGURE 3–2
Changing the Display Name of a Portlet
3
FIGURE 3–3
Edit the name of the portlet, and click outside the name box for the change to take effect.
In this example, change the name of the portlet to Locales.
Changed Display Name
▼ To Change the Name of a Portlet Located on a Public Page
1
Log in to Sun GlassFish Web Space Server as any user.
2
Navigate to a public page of the user by choosing My Places on the Welcome menu.
3
Edit the portlet name.
a. Click the menu bar of a portlet
b. Edit its name.
c. Leave the menu bar
Customizing the Look and Feel and Configuration of a
Portlet
You can customize the look and feel and configuration of a portlet. The menu bar of a portlet
displays its name and the menu controls associated with it. All portlets have Look and Feel and
Configuration menu controls, and some portlets have an additional menu control.
58
Sun GlassFish Web Space Server 10.0 Administration Guide • July 2009
Look and Feel and Configuration of Portlets
Note – In order to access the menu controls of a portlet, Toggle Edit Controls must be set on.
You can set Toggle Edit Controls from the Welcome menu.
FIGURE 3–4
Look and Feel and Configuration Menu Controls of a Portlet
Look and Feel Menu Control of a Portlet
Clicking the Look and Feel menu control button displays a window that provides options to
customize the look and feel of the portlet.
FIGURE 3–5
Customizing the Look and Feel
This section describes the options in the Look and Feel window tabs.
Portlet Configuration Tab
The Use Custom Title option enables you to change the title of the Portlet. The Show Borders
option enables or disables the display of borders.
Chapter 3 • Customizing Sun GlassFish Web Space Server
59
Localization Support
Text Styles Tab
Using this tab, you can change the default settings for text such as font, size, color, alignment,
bold, and italic.
Background Styles Tab
Using this tab, you can change the default background color for the portlet.
Border Styles Tab
Using this tab, you can change the border styles for the portlet. You can change the default
settings for the border width, border style, and border color. You can set different width, style,
and colors for different borders by disabling the Same for All option.
Margin and Padding Tab
Using this tab, you can change the default margin and padding settings. Be careful when
changing the default margin and padding settings.
Advanced Styling Tab
Using this tab, you can define CSS rules for the portlet and all similar portlets.
WAP Styling tab
Using this tab, you can define the styling for mobile handsets.
Configuration Menu Control of a Portlet
Clicking the Customization button displays a window through which you can configure
permissions for the portlet, can export or import the portlet data, and can enable sharing on the
portlet or widget.
For a detailed example of using the Configuration button to enable sharing of portlets, see
“Enabling Sharing of a Portlet” on page 85
Localization Support
Web Space Server is localized out-of-box in 22 languages. Sun provides localization support for
Japanese (ja) and Simplified Chinese (zh_CN) but support for others is community driven.
60
Sun GlassFish Web Space Server 10.0 Administration Guide • July 2009
Localization Support
The following sections describe how to perform localization:
■
■
■
■
■
■
■
“Setting the User-Preferred Language in Web Space Server” on page 61
“Adding a New Language Support” on page 61
“Removing Localization Support for Unwanted Languages” on page 64
“Enabling the Guest Users to Select a Browser Language” on page 65
“Precedence Hierarchy for Language.properties Files” on page 66
“Changing the Existing Language Entries” on page 67
“To Customize the Name of a Portlet While Localizing the User Interface” on page 68
Setting the User-Preferred Language in Web Space
Server
Users can use Web Space Server in any of the supported languages.
▼ To Set a User-Preferred Language
1
Log in to Web Space Server.
2
Choose My Account from the Welcome menu.
The Control Panel is displayed.
3
Choose Display Settings under Miscellaneous in the menu on the right.
4
Select a language from the Language drop-down list.
5
Click Save.
The user interface changes to the language selected.
Note – You can use the same page to change the time zone and the greeting message.
Adding a New Language Support
You can add localization support for a language that is not supported by Web Space Server by
default. This section describes how you can add localization support for a new language.
▼ To Add New Language Support
This task describes how to create a portal-ext.properties file, and make changes to it to
support localization.
Chapter 3 • Customizing Sun GlassFish Web Space Server
61
Localization Support
1
Create a temporary folder. In this example, name the folder as test.
mkdir /tmp/test
2
Copy portal-impl.jar to the tmp folder.
The portal-impl.jar file contains resource bundles for Web Space Server. This JAR file is
located in the GlassFish
install-dir/domains/domain1/application/j2ee-modules/webspace/WEB-INF/lib/
directory.
cd GlassFish-install-dir/domains/domain1/application/j2ee-modules
cp webspace/WEB-INF/lib/portal-impl.jar /tmp/test
3
Change to the tmp directory.
cd /tmp/test
4
Extract the portal-impl.jar file.
jar -xvf portal-impl.jar
The portal.properties file will be placed in the current directory.
5
Open portal.properties and copy the locales property from the Languages and Time
Zones section.
6
If a portal-ext.properties file does not already exist, create a text file with that name.
The default location of portal-ext.properties is GlassFish
home/applications/j2ee-modules/webspace/WEB-INF/classes/portal-ext.properties.
7
Paste the locales property into the portal-ext.properties file.
8
Add the new locale at the end of the locales property in the format
LanguageCode_CountryCode.
See the following links to find language and country codes:
■
■
http://ftp.ics.uci.edu/pub/ietf/http/related/iso639.txt for language codes.
http://userpage.chemie.fu-berlin.de/diverse/doc/ISO_3166.html for country
codes.
For example, if you are adding support for Hindi, you need to add hi_IN at the end of locales
property as follows:
locales=ar_SA,ca_AD,ca_ES,zh_CN,zh_TW,cs_CZ,nl_NL,en_US,fi_FI,fr_FR,de_DE,el_GR,hu_HU,
it_IT,ja_JP,ko_KR,nb_NO,fa_IR,pt_BR,ru_RU,es_ES,sv_SE,tr_TR,vi_VN,hi_IN
9
62
Save the portal-ext.properties file.
Sun GlassFish Web Space Server 10.0 Administration Guide • July 2009
Localization Support
10
Navigate to the content folder and open the Language.properties file.
Note – A folder named content was created when you extracted the portal-impl.jar file.
11
Translate all the strings you want to localize from temp/test/content/Language.properties
to the new language.
12
Rename the translated Language.properties file to
Language-ext_LanguageCode.properties.native.
13
Run the following command on the directories that contains the
Language-ext_LanguageCode.properties.native file:
native2ascii -encoding UTF-8 Language-ext_LanguageCode.properties.native
Language-ext_LanguageCode.properties
14
Create a directory structure webspace/WEB-INF/classes/ under
ZIP_ROOT/webspace-for-gfv2/var/webspace/war-workspace/customs, and copy
portal-ext.properties file to it.
15
Create a directory structure webspace/WEB-INF/classes/content under
ZIP_ROOT/webspace-for-gfv2/var/webspace/war-workspace/customs, and copy
Language-ext_LanguageCode.properties.native file to it.
16
Change to the ZIP_ROOT/webspace-for-gfv2/var/webspace/war-workspace directory.
cd ZIP_ROOT/webspace-for-gfv2/var/webspace/war-workspace
17
Run ant -f synchronize.xml.
18
Restart theGlassFish server.
▼ To Verify the Localization of the Interface
1
Log in to Web Space Server as the admin user.
2
Choose My Account from the Welcome menu.
The Control Panel is displayed.
3
Choose Display Settings under Miscellaneous.
The new language setting is reflected in the Language drop-down menu.
4
Select the language for the user and click Save.
The user interface is changed to the new language.
Chapter 3 • Customizing Sun GlassFish Web Space Server
63
Localization Support
Removing Localization Support for Unwanted
Languages
Generally, users don't require localization support for all languages that are supported by Web
Space Server. This section describes how you can remove localization support for the languages
that are not required.
▼ To Remove Localization Support for Unwanted Languages
1
Create a temporary folder. In this example, name the folder as test.
mkdir /tmp/test
2
Copy portal-impl.jar to the tmp folder.
portal-impl.jar contains language resource bundles for Web Space Server. This JAR file is
located in the GlassFish
install-dir/domains/domain1/application/j2ee-modules/webspace/WEB-INF/lib/
directory.
cd GlassFish-install-dir/domains/domain1/application/j2ee-modules
cp webspace/WEB-INF/lib/portal-impl.jar /tmp/test
3
Change to the tmp directory.
cd /tmp/test
4
Extract the portal-impl.jar file.
jar -xvf portal-impl.jar
5
Open portal.properties and copy the locales property from the Languages and Time
Zones section.
6
If portal-ext.properties does exist in Web Space Server then paste the locales property
into it. Otherwise, create a text file (using any text editor) and name it as
portal-ext.properties, and paste the locales property into it.
Default location of portal-ext.properties is GlassFish
home/applications/j2ee-modules/webspace/WEB-INF/classes/portal-ext.properties.
7
Edit the locales property to include only the languages that are needed.
For example, if you want to support only English, German and Spanish, remove all the
unwanted locales so that the locales value looks as follows:
locales=en_US,de_DE,es_ES
8
64
Save the portal-ext.properties file.
Sun GlassFish Web Space Server 10.0 Administration Guide • July 2009
Localization Support
9
Create a directory structure webspace/WEB-INF/classes/ under
ZIP_ROOT/webspace-for-gfv2/var/webspace/war-workspace/customs, and copy the
portal-ext.properties file to it.
10
Change to the ZIP_ROOT/webspace-for-gfv2/var/webspace/war-workspace directory.
cd ZIP_ROOT/webspace-for-gfv2/var/webspace/war-workspace
11
Run ant -f synchronize.xml.
12
Restart the GlassFish server.
The server will redeploy websynergy.war and update portal-ext.properties under
applications/j2ee-modules/webspace/WEB-INF/classes.
Enabling the Guest Users to Select a Browser
Language
Guest users can select their preferred browser language.
▼ To Enable Guest Users to Select a Browser Language
1
Create a temporary folder, named test.
mkdir /tmp/test
2
Copy portal-impl.jar to the tmp folder.
portal-impl.jar contains language resource bundles for Web Space Server. This JAR file is
located in the GlassFish
install-dir/domains/domain1/application/j2ee-modules/webspace/WEB-INF/lib/
directory.
cd GlassFish-install-dir/domains/domain1/application/j2ee-modules
cp webspace/WEB-INF/lib/portal-impl.jar /tmp/test
3
Change to the tmpdirectory.
cd /tmp/test
4
Extract the portal-impl.jar file.
jar -xvf portal-impl.jar
The portal.properties file will be placed in the current directory.
5
Open portal.properties and copy the locale.default.request property from the
Languages and Time Zones section.
Chapter 3 • Customizing Sun GlassFish Web Space Server
65
Localization Support
6
If portal-ext.properties does exist in Web Space Server then paste the
locale.default.request property into it. Otherwise, create a text file (using any text editor)
and name it as portal-ext.properties, and paste the locale.default.request property
into it.
Default location of portal-ext.properties is GlassFish
home/applications/j2ee-modules/webspace/WEB-INF/classes/portal-ext.properties.
7
Set the property to locale.default.request=true.
8
Save the portal-ext.properties file.
9
Create a directory structure webspace/WEB-INF/classes/ under
ZIP_ROOT/webspace-for-gfv2/var/webspace/war-workspace/customs, and copy the
portal-ext.properties file to it.
10
Change to the ZIP_ROOT/webspace-for-gfv2/var/webspace/war-workspacedirectory.
cd ZIP_ROOT/webspace-for-gfv2/var/webspace/war-workspace
11
Run ant -f synchronize.xml.
12
Restart the GlassFish server.
It will redeploy websynergy.war and update portal-ext.properties under
applications/j2ee-modules/webspace/WEB-INF/classes. Clear browser cookies before
accessing Web Space Server interface to allow the changes to take effect.
Precedence Hierarchy for Language.properties Files
Language and display information is defined in the Language.properties, as well as various
other Language_LanguageCode.properties files for foreign languages. When you extract the
portal-impl.jar file, these files are placed in the content folder. Language.properties is the
primary and default language definition file, but definitions in that file may be overridden by
language-specific definitions. For example, the file Language_en.properties contains the
English versions of most of the definitions, the file Language_fr.properties contains the
French version, and so on.
Language files can further have locale-specific definitions. The Language_en_US.properties
file contains English phrase variations further defined for the United States. Other languages
can also have locale-specific definitions.
66
Sun GlassFish Web Space Server 10.0 Administration Guide • July 2009
Localization Support
Rules of Precedence
The hierarchy of precedence for different Language.properties files is:
1. Language-ext.properties takes precedence over Language.properties.
2. Language-specific versions take precedence over the non language-specific versions. For
example, Language_en.properties takes precedence over Language.properties.
3. Location-specific versions take precedence over the non location-specific versions. For
example, Language_en_US.properties takes precedence over Language_en.properties.
For the Language.properties file for English, Language-ext_en_US.properties has the
highest precedence and the Language.properties file has the least precedence. The hierarchy
is:
1.
2.
3.
4.
5.
6.
Language-ext_en_US.properties
Language_en_US.properties
Language-ext_en.properties
Language_en.properties
Language-ext.properties
Language.properties
Changing the Existing Language Entries
You can easily change existing English and foreign languages entries in Web Space Server.
Consider the example of changing the name of a portlet from Message Boards to Forums. To do
this when English is the default language, you would create the Language-ext_en.properties
to override the Language_en.properties file. In Language-ext_en.properties, duplicate the
content in the Language_en.properties file, and replace the entry
javax.portlet.title.19=Message Boards with javax.portlet.title.19=Forums. The
portlet Message Boards is renamed to Forums.
You can also add new language entries for customization or for new portlets. For example, you
can create an entry similar to javax.portlet.title.EXT_1=Reports to add the name of a new
portlet named Reports.
Customizing Portlet Names While Localizing
You can customize the name of a ported for any language by using the Look and Feel button on
the portlet. Consider the example of localizing Web Space Server to French. In this case, the
name of the Admin portlet translates as Administration du portail. You might prefer to
have a customized name for the Admin portlet when Web Space Server is localized to French.
Chapter 3 • Customizing Sun GlassFish Web Space Server
67
Localization Support
▼ To Customize the Name of a Portlet While Localizing the User Interface
1
Log in to the Web Space Server as the admin user.
2
Click the Look and Feel button on a portlet.
In this example, click the Look and Feel button on the Admin portlet.
3
Select the Use Custom Title option.
4
Select a language from the language list.
In this example, select French.
5
Type a title for the portlet in the selected language in the Portlet Title box.
In this example, type the name Administration.
6
Click Save.
Note – For the changes to take effect, you may have to save twice: once with the Use Custom Title
option deselected and again with selected. Some times the portlet name in the default language
too may have changed. You need to verify this.
7
Choose My Account from the Welcome menu.
8
Choose Display Settings under Miscellaneous.
9
Select a language from the Language list that is the same as the language selected previously.
For example, select French.
10
68
Click Save and navigate back to the community page.
You can see the changed name of the portlet in the localized version. In this example, the name
of the Admin portlet localized to French is changed from Administration du portail to
Administration.
Sun GlassFish Web Space Server 10.0 Administration Guide • July 2009
4
C H A P T E R
4
Use Cases for Sun GlassFish Web Space Server
The following are some of the use cases for working with portlets that are generally available as
part of the core and the samples for Sun GlassFish Web Space Server.
■
“Use Case for Enterprise Social Networking” on page 70 - Introduces some of the portlets
which are helpful for Enterprise Social Networking.
■
“Using the Expense Report Portlet” on page 70 - Introduces the Expense Report portlet that
enables expenses reclaim using Sun GlassFish Web Space Server.
■
“Working With Communities and Organizations” on page 78 - Introduces some of the
important tasks that an administrator can perform on Communities and Organizations:
■
■
“Adding Public and Private Pages to Communities and Organizations” on page 78
“Enabling Crawling of Page URLs by Search Engines” on page 79
■
“Virtual Hosting of Portal Pages” on page 80 - Explains the procedure for virtual hosting of
portal pages.
■
“Using the Mail Portlet” on page 82 - Explains how you can configure your mail client on
Web Space Server using the Mail portlet.
■
“Exporting and Importing of Portal Data” on page 83 - Explains how to export and import
data that is on a portlet, a Community, or an Organization.
■
“Enabling Sharing of a Portlet” on page 85 - Explains how you can share portlets with an
external web sites and Facebook.
■
“Using Document Library Plugins on OpenOffice” on page 89 - Explains how you can use
Document Library plugins on OpenOffice to interface with Content Management feature of
Web Space Server.
■
“Using the Widget Consumer Portlet” on page 90 - Explains how you can use the Widget
Consumer Portlet to display the information from external widgets.
■
“Workflow Portlet” on page 92 - Explains how an admin user can define a workflow that can
be used by other users.
■
“Tagging in Web Space Server” on page 99 - Explains how you can use the tagging system.
69
Use Case for Enterprise Social Networking
Use Case for Enterprise Social Networking
Sun GlassFish Web Space Server supports Enterprise Social Networking. This section
introduces some of the portlets that are helpful for Enterprise Social Networking. These portlets
are bundled as part of samples.
You can view the list of your friends and their profiles on the Friends widget.
▼
To Add a Friend
This procedure uses the Search and Invite Friends widget and the Requests widget to add a
friend to the Friends widget.
1
Log in to Web Space Server.
Select Social Networking Sample Users from the Sample Users portlet and click the Admin User
link.
2
Add the Search and Invite Friends and Requests widgets to a private page.
3
Click the Search Users button in the Search and Invite Friends widget.
4
Select a user and click the Add as Friend link corresponding to the user.
In this example, click the Add as Friend link corresponding to the user Chris Editor.
5
Log out and log in again as the user you selected as friend.
In this example, select Social Networking Sample Users from Sample Users portlet and click the
Chris Editor link.
6
Click the Confirm link in the Requests portlet.
The admin user and Chris Editor are now friends and can chat with each other. The Online
Friends and Settings options in the menu bar on the right-bottom of the page are helpful in
chatting and in displaying the online status of friends.
Using the Expense Report Portlet
The Expense Report widget models the expense reports process that is typical in any large
organization. An Expense Report is a report comprising details of the expenses (such as
business travel, relocation, broadband bills claim) incurred by an employee that can be
reclaimed from the organization.
70
Sun GlassFish Web Space Server 10.0 Administration Guide • July 2009
Using the Expense Report Portlet
An Expense Report created by employees can be approved by their superior. Users available to
the system are mapped to either the Employee role or the Manager role. Consider the following
example:
Paul Tester (Employee) submits an Expense Report for a business trip. Mary Manager
(Manager) verifies and approves the Expense Report.
The following is the process involved:
1. Paul Tester submits an Expense Report. Paul performs the following steps to submit his
report:
a. Paul selects the expense category, and types an expense amount and description and
saves the report. The system assigns a unique expense ID to the report.
b. Paul reviews the report summary.
c. Paul submits the saved report for approval by his manager.
2. Mary Manager verifies the details of the Expense Report. She can either approve or reject the
report.
The following procedures explain how to submit and approve an expense report:
■
■
▼
“To Submit an Expense Report” on page 71
“To Approve an Expense Report” on page 75
To Submit an Expense Report
To access the Expense Report portlet, you need to select the Edit Preferences button from the
menu controls and enable the JavaCAPS Workflow engine. The Workflow engine service needs
to be available in order to use the Expense Report portlet.
1
Log in to Web Space Server as Paul Tester.
2
Click the Add a New Expense Report link.
3
Type a description for the Expense Report.
Type the values for Item Description, Amount, and Date fields. Click Add Item to add a new
row.
Chapter 4 • Use Cases for Sun GlassFish Web Space Server
71
Using the Expense Report Portlet
FIGURE 4–1
To Submit an Expense Report
4
Click Save Report.
5
Click the Go back to Report Summary link to view the report summary.
The summary page displays the Report No., Description, Submission Date, Amount, and the
Status.
72
Sun GlassFish Web Space Server 10.0 Administration Guide • July 2009
Using the Expense Report Portlet
FIGURE 4–2
To Submit an Expense Report
6
Click the number under Report No.
The report is enabled for submission.
Chapter 4 • Use Cases for Sun GlassFish Web Space Server
73
Using the Expense Report Portlet
FIGURE 4–3
To Submit an Expense Report
7
Click Submit Report.
The report is submitted for approval. The Status of the report changes to Pending.
74
Sun GlassFish Web Space Server 10.0 Administration Guide • July 2009
Using the Expense Report Portlet
FIGURE 4–4
To Submit an Expense Report
▼
1
To Approve an Expense Report
Log in to Web Space Server as Mary Manager.
The report submitted by Paul is displayed under the List/History of Expense Reports Raised by
Reportees section in the Expense Report portlet.
Chapter 4 • Use Cases for Sun GlassFish Web Space Server
75
Using the Expense Report Portlet
FIGURE 4–5
To Approve an Expense Report
2
Click the report ID.
Details of the submitter are displayed. Also, the Approve Report and Reject Report buttons
become active.
76
Sun GlassFish Web Space Server 10.0 Administration Guide • July 2009
Using the Expense Report Portlet
FIGURE 4–6
To Approve an Expense Report
3
Click the Approve Report button to approve the report.
Chapter 4 • Use Cases for Sun GlassFish Web Space Server
77
Working With Communities and Organizations
Working With Communities and Organizations
The following topics describe some of the tasks that you can perform on Communities and
Organizations in Web Space Server.
■
■
“Adding Public and Private Pages to Communities and Organizations” on page 78
“Enabling Crawling of Page URLs by Search Engines” on page 79
Adding Public and Private Pages to Communities and
Organizations
The following procedure explains how you can add a public page and a private page to an
Organization. You can add public page and private pages to a Community by following the
similar procedure.
For the procedure to create an Organization, see “To Create an Organization” on page 106.
▼ To Add a Public Page and a Private Page to an Organization
1
Log in to Web Space Server as the admin user.
2
Navigate to Control Panel → Portal → Organizations from the Welcome menu.
All existing Organizations are listed.
3
To add a page, click the Actions button corresponding to an Organization and choose Manage
Pages from the menu.
For example, you can add pages to an Organization called Test Organization.
4
To add a public page, click the Public Pages tab and type a name and type for the page.
For example, you can create a public page named Public with the type portlet.
5
Click the Add Page button.
The page is added to the Organization.
78
Sun GlassFish Web Space Server 10.0 Administration Guide • July 2009
Working With Communities and Organizations
FIGURE 4–7
Adding a Public Page
6
To add a private page, click the Private Pages tab and type a name and type for the page.
For example, you can create a private page named Private with the type portlet.
7
Click the Add Page button.
The page is added to the Organization.
8
To change the display order for pages, click the Display Order tab.
Enabling Crawling of Page URLs by Search Engines
You can enable crawling of a page URL by a search engine for the pages on Communities and
Organizations.
Chapter 4 • Use Cases for Sun GlassFish Web Space Server
79
Virtual Hosting of Portal Pages
▼ To Enable Crawling of Page URLs by Search Engines
This procedure describes how to enable the crawling of a page URL on the CMS Community.
You can enable crawling for the pages on any other Community or Organization.
1
Log in to Sun GlassFish Web Space Server as the admin user.
2
Choose Add Application from the Welcome menu, and add the My Communities portlet to your
page.
3
Click the Communities I Own tab on the My Communities portlet.
4
Click the Actions button corresponding to the CMS community and choose Manage Pages from
the menu.
5
Navigate to Settings → Sitemap.
6
Click the desired server engine link.
Clicking the Google or Yahoo link, adds your sitemap to the sitemaps to crawl on that search
engine
7
Click the preview link to view the XML file that is sent to the webmaster at the selected search
engine.
Virtual Hosting of Portal Pages
Web Space Server supports virtual hosting of Communities and Organizations. Public and
Private pages in a Community or an Organization have a unique common friendly URL. You
have to provide separate host names for public and private pages for virtual hosting of public
and private pages on separate machines.
▼
80
To Virtual Host a Page on a Community
1
Log in to Sun GlassFish Web Space Server as the admin user.
2
Navigate to Control Panel → Portal → Communities from the Welcome menu.
All existing Communities are listed.
3
Click the Actions button corresponding to a selected Community and choose Manage Pages
from the menu.
In this example, click the actions button corresponding to the Guest community.
Sun GlassFish Web Space Server 10.0 Administration Guide • July 2009
Virtual Hosting of Portal Pages
FIGURE 4–8
4
Click the Settings tab.
5
Click the Virtual Host tab.
6
Specify a Friendly URL.
In this example, guest is the default friendly URL. You can change it to something else, say
friendly-guest.
Virtual Hosting Using the Friendly URL
7
Click Save.
8
To view the public page, click the Public Pages tab.
9
Click the View Pages button.
The public page for the Community opens in a separate browser with its virtual hosting URL.
Similarly, you can view the virtually hosted private pages of the Community.
Chapter 4 • Use Cases for Sun GlassFish Web Space Server
81
Using the Mail Portlet
Using the Mail Portlet
Use the Mail portlet to configure your email account on Sun GlassFish Web Space Server.
▼
To Install the Mail Portlet
1
Choose Control Panel → Server → Plugin Installations.
2
Click Install More Portlets under Portlet Plugins tab.
3
Type mail as the search keyword and click Search Plugins.
4
Select the portlet link, and click Install to install the portlet.
▼
To Configure Email Accounts
This procedure describes how to configure an email account and also illustrates the steps to add
an IMAP Gmail account..
1
Log in to Web Space Server as the admin user.
2
Choose Add Applications from the Welcome menu and add the Mail portlet to your page.
3
Click the Configure Email Accounts link.
You are prompted to add mail accounts.
In order to add a Gmail account, you must first enable IMAP for the account.
a. Sign in to Gmail.
b. Click Settings at the top of any Gmail page.
c. Click the Forwarding and POP/IMAP category.
d. Select the Enable IMAP option.
e. Click Save Changes.
82
4
Click Add a Gmail Account.
5
Type your Gmail user name and password and click Save.
Your email account is added.
Sun GlassFish Web Space Server 10.0 Administration Guide • July 2009
Exporting and Importing of Portal Data
6
Click the Check Your Email link.
You can read the mails and folders in your Gmail account and can compose new messages.
Exporting and Importing of Portal Data
You can back up a portlet, Community, or Organization by exporting their data to the disk.
When you upgrade the Web Space Server installation on your machine, or when you reinstall
Web Space Server due to some other reason, you can import the data back to your portlet.
▼
To Export and Import Data of a Portlet
This procedure uses an example of exporting a Calendar portlet event.
1
Log in to Sun GlassFish Web Space Server as the admin user.
2
Click Add Application from the Welcome menu and add a portlet to your page.
In this example, add the Calendar portlet.
3
Click the Add Event button.
In this example, add a weekly event called Project Meeting. You can modify permissions for the
guest user by clicking the Permissions link.
4
Click Save.
5
Click the Export/Import button from the menu controls for the portlet.
6
Click Export and save the file to the disk.
A .lar file is exported to your disk. The file includes the event description.
7
To import the event information, import the file to the Calendar portlet of a Web Space Server
installation.
▼
To Export and Import Data from a Community or
Organization
You can export the data residing on a Community or an Organization. When you import the
data to a Community or Organization on another Web Space Server installation, all pages
related to the Community or Organization are imported.
1
Log in to Sun GlassFish Web Space Server as the admin user.
Chapter 4 • Use Cases for Sun GlassFish Web Space Server
83
Exporting and Importing of Portal Data
FIGURE 4–9
2
Navigate to a page on a Community or an Organization.
3
Choose Manage Pages from the Welcome menu.
4
Click the Export/Import tab.
Exporting a Page
The .lar file that gets exported uses the naming convention
Community/Organization-name-unique-#id..lar
The default export includes all the options that are initially selected. At the minimum, all pages
and all portlets are exported. The options are:
84
■
Pages - All private and public pages associated with the Community or the Organization.
■
Portlets - All portlets on Community or Organization pages.
■
Setup - The current setup information of the portlets.
Sun GlassFish Web Space Server 10.0 Administration Guide • July 2009
Enabling Sharing of a Portlet
■
Archived Setup - Archived setup information of the portlets.
■
User preferences - User preferences such as Look and Feel and language attributes applied
to portlets.
■
Data - The data reside inside portlets. The default Range for Data is All. You can specify a
Date Range for Data. When a Date Range is specified, only the data pertaining to the date
range is exported.
■
Permissions, Theme, and Categories options - You can export Permissions, Theme, and
Categories associated with pages and portlets. For more information, click the help button.
Note – When you import, you need to select the same options that were selected while exporting.
5
Click Export.
Enabling Sharing of a Portlet
You can enable sharing of a portlet on any web site, on Facebook, and by Friends.
■
■
■
▼
“To Share a Portlet With Other Web sites” on page 85
“To Share a Portlet With Facebook” on page 88
“To Allow Sharing of a Portlet With Friends” on page 88
To Share a Portlet With Other Web sites
Consider the example of sharing the Calendar portlet on a web site created by you. This
procedure assumes that you have already added Calendar portlet to your page.
1
Log in to Sun GlassFish Web Space Server.
2
Click the Configuration button among the edit controls for the portlet.
In this example, click the Configuration button among the edit controls for the Calendar
portlet.
3
Click the Sharing tab.
Chapter 4 • Use Cases for Sun GlassFish Web Space Server
85
Enabling Sharing of a Portlet
FIGURE 4–10
The Code for Sharing the Portlet on Any Web site
4
Select and copy the code for sharing the portlet on any web site.
5
Select the Allow Users to add Calendar to Any Web site option.
6
Click Save.
7
Open the source code of any web site and copy the sharing code into it, then save changes to
add the portlet to the web site.
For example:
a. Open the Mozilla Classic browser
b. Choose Edit Page from the File menu.
c. Click HTML Source.
d. Paste the copied code into the page.
86
Sun GlassFish Web Space Server 10.0 Administration Guide • July 2009
Enabling Sharing of a Portlet
FIGURE 4–11
Adding the Sharing Code to the Source code of a Web site
e. Click Save.
f. In the dialog box that appears, type a title and click OK.
g. Save the page on your desktop.
In this example, you can name the page as Calendar Sharing.
h. Open the page in a web browser.
Note that the Calendar portlet is added to the page.
Chapter 4 • Use Cases for Sun GlassFish Web Space Server
87
Enabling Sharing of a Portlet
FIGURE 4–12
The Portlet Added to the Web site
▼
To Share a Portlet With Facebook
This procedure assumes that you have already added the Calendar portlet to your page.
1
Log in to Sun GlassFish Web Space Server.
2
Click the Configuration button among the edit controls for the portlet.
In this example, click the Configuration button among the edit controls for the Calendar
portlet.
3
Click the Sharing tab.
4
Click Facebook under Sharing.
5
Click Get the API Key and Canvas Page URL from Facebook link and follow the instructions to get
the API key and canvas page URL from Facebook.
6
Type the API key and the canvas page URL and click Save.
7
Access the portlet on Facebook by using the canvas page URL.
▼
To Allow Sharing of a Portlet With Friends
The Friends portlet lists the Web Space Server users who are registered as your friends. You can
authorize your friends to access a portlet that is on your page.
1
88
Log in to Sun GlassFish Web Space Server.
Sun GlassFish Web Space Server 10.0 Administration Guide • July 2009
Using Document Library Plugins on OpenOffice
2
Click the Configuration button among the edit controls for a portlet.
3
Click the Sharing tab.
4
Click Friends under Sharing.
5
Select the Allow Users to Share portlet With Friends option and click Save.
Using Document Library Plugins on OpenOffice
Document Library Plugins are helpful to establish an interface with Web Space Server from
OpenOffice. Document Library Plugins are shipped along with the standard product. When
you install the plugins on OpenOffice, you will be able to interface with the CMS feature of Web
Space Server. This feature enables you to use OpenOffice to edit the documents you have in the
Document Library. Also, you can add documents to the Document Library.
Note – You can download OpenOffice freely from http://www.openoffice.org/.
▼
To Store a Document to CMS
1
Open OpenOffice – Writer.
2
Choose Tools → Extension Manager.
3
Click the Add button and navigate to ShareSpaceDocumentLibraryPlugin.oxt.
Chapter 4 • Use Cases for Sun GlassFish Web Space Server
89
Using the Widget Consumer Portlet
FIGURE 4–13
Installing the Document Library Plugins
The Document Library plugins are added to your page. The Load Document from CMS and
Store Document to CMS buttons are added to the toolbar.
4
Type some content that you want to store on the CMS.
5
Click the Store Document to CMS button to upload the document to CMS.
Using the Widget Consumer Portlet
You can embed a web widget by copying a JavaScriptTM or flash code snippet and pasting it in
the text box after clicking the Configuration button on the Widget Consumer portlet. On saving
the changes to the configuration, you will be able to view the web widget from the portlet.
Widget Consumer portlet is an instanceable portlet. You can add any number of instances of
the portlet to your page with each portlet instance embedding a separate widget. For example,
YouTube links provide a code snippet named Embed at the right top corner. You can copy and
paste this code to the Widget Consumer portlet to view the YouTube link.
90
Sun GlassFish Web Space Server 10.0 Administration Guide • July 2009
Using the Widget Consumer Portlet
▼
To Configure the Widget Consumer Portlet
This procedure describes how to copy the code snippet for a web widget from the web site
cricinfo.com and use it on the Widget Consumer portlet.
1
Log in to Sun GlassFish Web Space Server as the admin user.
2
Choose Add Application from the Welcome menu and add the Widget Consumer portlet to your
page.
3
Copy the code snippet to embed a web widget.
In this example, copy the code snippet to embed a web widget from the site cricinfo.com.
FIGURE 4–14
Copying the Code Snippet to Embed a Widget
4
Click the Configuration button on the portlet.
5
Paste the widget code into the text box.
Chapter 4 • Use Cases for Sun GlassFish Web Space Server
91
Workflow Portlet
6
Click Save.
You can view the widget from the Widget Consumer portlet.
Workflow Portlet
Admin users can define a workflow and upload the workflow definition file through the
Workflow Portlet UI. They can also initiate a workflow instance. To create a workflow, you
need a workflow definition file that contains workflow definition.
The following topics explains how to create and configure a workflow:
■
■
“Creating a Workflow” on page 92
“Configuring Workflow for MySQL” on page 98
Creating a Workflow
To create a workflow, you need to create a workflow definition file in XML format that
conforms to the jBPM Process Definition Language (JPDL) standard.
For example, say that you are creating a workflow for a leave application and approval process.
The following is the scenario involved:
1. The admin user creates a workflow definition called LeaveApproval.
2. The admin user creates a workflow instance (Workflow State 1).
3. The test user uses the workflow instance to apply for leave (Workflow State 2).
4. The manager receives the holiday request. The manager can approve or reject the request, or
can send the request for reconsideration (Workflow State 2).
5. The test user can verify to see whether the process has ended.
The following procedures provide the detailed process steps:
1.
2.
3.
4.
5.
“To Add a Workflow Definition” on page 92
“To Create a Workflow Instance” on page 95
“Workflow Process Steps: To Request an Holiday” on page 96
“Workflow Process Steps: To Evaluate Holiday Request” on page 97
“Workflow Process Steps: To Ascertain the Request Status” on page 97
▼ To Add a Workflow Definition
92
1
Log in to Web Space Server as the admin user.
2
Create a new page by clicking Add Page.
Sun GlassFish Web Space Server 10.0 Administration Guide • July 2009
Workflow Portlet
3
Type a name for the page and click Save.
For example, name it Workflow.
4
Click the tab for the page.
The page opens.
5
Choose Add Applications from the Welcome menu, and add the Workflow portlet to the page.
6
Click the Add Definition button.
7
Add the workflow definition in XML format and click the Save New Version button.
You can copy and paste a workflow definition. In this example, LeaveApproval version 1.0 is the
name of the workflow definition.
Chapter 4 • Use Cases for Sun GlassFish Web Space Server
93
Workflow Portlet
FIGURE 4–15
94
Adding a Workflow Definition
Sun GlassFish Web Space Server 10.0 Administration Guide • July 2009
Workflow Portlet
A workflow is created with a version number associated with it.
8
Log out and log in back in to Web Space Server for the changes to take effect.
▼ To Create a Workflow Instance
FIGURE 4–16
1
Log in to Web Space Server as the admin user.
2
Choose Add Applications from the Welcome menu, and add the Workflow portlet to the page.
3
Click Search Definitions on the Workflow portlet to view all workflow definitions.
Creating a Workflow Instance
4
Click the Add Instances button next to a workflow definition.
In this example, you can create an instance for version 1.0 of the LeaveApproval workflow
definition.
An instance is created for the Workflow Definition. Provide values for the fields such as the
Definition Name, Definition Version, Start Date (Range), and End Date (Range), and click
Search to search for the instance. To hide the instances that have already ended, select the Hide
the instances that have already ended checkbox.
You can create any number of instances for a version of Workflow Definition.
Chapter 4 • Use Cases for Sun GlassFish Web Space Server
95
Workflow Portlet
FIGURE 4–17
Adding Workflow Instances
5
Click the Manage button for the instance.
6
Click Save to save the task.
The task will be assigned to a requester.
Note – If the admin user clicks the Signal button next to an Instance, the instance is promoted to
the next state of workflow. The requester is not allowed to use an instance which is promoted to
the next state of the workflow.
Accessing a Workflow Instance
Accessing a workflow instance follows the series of steps necessary to complete the workflow
cycle for the instance.
▼ Workflow Process Steps: To Request an Holiday
96
1
Log in to Web Space Server as Paul, the test user.
2
Click the Tasks tab on the Workflow portlet.
You can use the Task Name, Definition Name, Current Date, Start Date, and End Date fields to
search for a task. To hide the instances that have already ended, select the Hide the instances
that have already ended checkbox.
3
Click a Task for an Instance which have not ended.
In this example, click the Holiday Request task for an Instance. Select a start date and an end
date.
Sun GlassFish Web Space Server 10.0 Administration Guide • July 2009
Workflow Portlet
FIGURE 4–18
Workflow Process Steps: To Request an Holiday
4
Click Save.
▼ Workflow Process Steps: To Evaluate Holiday Request
1
Log in to Sun GlassFish Web Space Server as Mary Manager.
2
Click the Tasks tab on the Workflow portlet.
3
Click a Task for an Instance which have not ended.
In this example, click the Evaluate Holiday Request task for an Instance.
The manager can place comments against the request. The manager can exercise Approve,
Reject, and Send Back for Review options.
The Instance ends on clicking the Approve or Reject button.
▼ Workflow Process Steps: To Ascertain the Request Status
1
Log in to Sun GlassFish Web Space Server as Paul, the test user.
2
Click the Tasks tab on the Workflow portlet.
The End Date field next to the task name has the date and time of approval on it.
Chapter 4 • Use Cases for Sun GlassFish Web Space Server
97
Workflow Portlet
Configuring Workflow for MySQL
You need to make some configuration changes, if you have installed Sun GlassFish Web Space
Server on MySQL database. If you are installing the Web Space Server evaluation bundle, no
changes are required, as the workflow is configured for HSQL by default.
▼ To Configure Workflow for MySQL
1
Copy the saw-impl-jbpm.jar file from <Web Space Server install
dir>\glassfish2\domains\domain1\applications\j2ee-modules\saw-web\WEB-INF\lib.
2
Paste the saw-impl-jbpm.jar file to a temp folder.
3
Extract the saw-impl-jbpm.jar file.
unjar saw-impl-jbpm.jar
4
Remove the commenting for the following section in the hibernate-cfg.xml file and change
the appropriate values to point to the MySQL database.
<!-- JDBC connection properties (begin) -->
<property name="hibernate.connection.driver_class">com.mysql.jdbc.Driver</property>
<property name="hibernate.connection.url">jdbc:mysql://localhost:3306/lportal</property>
<property name="hibernate.connection.username">lportal</property>
<property name="hibernate.connection.password">lportal</property>
<!-- JDBC connection properties (end) -->
98
5
jar the saw-impl-jbpm.jar file again.
6
Create a directory structure sources/saw-web-5.2.0.1/WEB-INF/lib/ under
<root-dir>/webspace-for-gfv2/var/webspace/war-workspace, and paste the
saw-impl-jbpm.jar file into it.
7
Change directory to <root-dir>/webspace-for-gfv2/var/webspace/war-workspace.
cd <root-dir>/webspace-for-gfv2/var/webspace/war-workspace
8
Run ant -f synchronize.xml for saw-web-5.2.0.1.
9
Restart GlassFish server.
Sun GlassFish Web Space Server 10.0 Administration Guide • July 2009
Tagging in Web Space Server
Tagging in Web Space Server
The tagging system in Web Space Server helps to group blogs, wikis, and articles. Admin user
can create tag sets and tags, and can define permissions to use tags by using the Tags and
Categories portlet. Tags follows a kind of taxonomy and classification, as the admin user can
define tag sets and tags within them. Users will have the freedom to create their own tags or to
use the existing tags.
The basic process of using the tagging system is:
■
The admin user creates tags and tag sets, and defines permissions for usage.
■
The user applies tags for his blogs, wikis, or articles. The users can select the tags that they
want to apply, or can define their own tags.
■
Any content that is tagged is grouped or aggregated.
Chapter 4 • Use Cases for Sun GlassFish Web Space Server
99
100
5
C H A P T E R
5
Roles and Permissions
The admin user administers roles and permissions for the resources that needs to be managed
to build a site. This chapter covers the following topics:
■
■
■
■
■
■
■
Administering Roles and Permissions
“Definition and Classification of Portal Resources” on page 102
User Groups
Communities
Organizations
Users and User Roles
Plugins
Administering Roles and Permissions
Use the Control Panel to set roles and permissions for users, user groups, communities, and
organizations.
Using the Control Panel to Administer Roles and
Permissions
The Control Panel provides an interface for creating and maintaining the following:
■
■
■
■
Users
Organizations
User Groups
Roles
Additionally, you can configure many server settings, including:
■
■
Information about the site
Authentication options, including Single Sign-On and LDAP integration
101
Definition and Classification of Portal Resources
■
■
■
■
Default user associations
Reserved screen names
Mail host names
Email notifications
Use the Control Panel to create the portal structure, implement security, and administer users.
▼ To use the Control Panel to Administer Roles and Permissions
1
Log in to Sun GlassFish Web Space Server as the admin user.
2
Choose Control Panel from the Welcome menu.
The Control Panel page appears.
3
To view and make changes to an item, choose an item from the left menu.
For example, click Users under Portal. From this page, you can set roles and permissions for
users. Similarly, you can set roles and permissions for Organizations, Communities, and User
Groups.
Definition and Classification of Portal Resources
Web Space Server organizes portals and user resources as follows:
1. Portals are accessed by Users.
2. Users can be collected into User Groups.
3. Users can belong to Organizations.
4. Organizations can be grouped into hierarchies.
5. Users, Groups, and Organizations can belong to Communities that have a common interest.
The simplest way to think about this is that you have users and various ways those users can be
grouped together. Some of these groupings follow an administratively organized hierarchy, and
other groupings might be done by the users themselves, such as different users from multiple
organizations that have a common interest in dogs, starting a community called Dog Lovers.
Other groupings can be done administratively through user groups or roles for other functions
that might apply throughout the portal, such as a Message Board Administrators group made
up of users from multiple communities and organizations who can administer any message
board in the portal.
This way of organizing portal concepts is shown in the following figure.
102
Sun GlassFish Web Space Server 10.0 Administration Guide • July 2009
User Groups
Pages
Organizations
Organization Roles
Roles
Users
User Groups
Pages
FIGURE 5–1
Communities
Community Roles
Sun GlassFish Web Space Server Portal Resources
In the figure, each arrow may be read as “can be a member of”. This means that Organizations
can be members of Communities, Communities can be members of Roles, Users can be
members of anything, and so on. This flexibility provides a powerful mechanism for portal
administrators to configure portal resources and security.
User Groups
User groups are arbitrary groupings of users. These groups are created by portal administrators
to group users who do not have an obvious organizational or community-based attribute or
aspect that brings them together. Groups can have permissions, much like roles. You could
therefore use a user froup to grant permissions to any arbitrary list of users.
For example, You could create a user group called “People Who Have Access to My Stuff” and
grant permission to that user group to access a particular Document Library folder . This list of
users could be members of separate Organizations, Communities, or Roleswhom you want to
also have access to this Document Library folder. The folder could be some personal,
community, or organization page that is accessible to them in the portal.
Chapter 5 • Roles and Permissions
103
Communities
▼
To Create a User Group
1
Log in to Web Space Server as the admin user.
2
Navigate to Control Panel → Portal → User Groups from the Welcome menu.
3
Click Add.
4
Specify a name and a description for the user group and click Save.
▼
To Assign Users to User Groups
1
Log in to Web Space Server as the admin user.
2
Navigate to Control Panel → Portal → User Groups from the Welcome menu.
3
Click the Actions button corresponding to a user group and choose Assign Members from the
menu.
The assign members page enables you to make assignments to the user group.
4
Click the Available tab to view the list of all available members.
5
Select the users you want to add to the user group and click Update Associations.
6
Click the Current tab to verify updated associations to the user group.
Communities
Communities are collections of users who have a common interest. Web Space Server's default
pages are in the Guest community, because everyone, whether they are anonymous or members
of the portal, has common interest in the default public pages of your site.
The three types of Communities:
■
■
■
Open
Restricted
Private
An Open Community (the default) allows portal users to join and leave the Community
whenever they want to, provided they have access to a Communities portlet. A Restricted
104
Sun GlassFish Web Space Server 10.0 Administration Guide • July 2009
Communities
Community requires that users be added to the Community by a community administrator.
Users may use the Communities portlet to request membership. A Private community does not
allow users to join and to leave the community.
▼
To add a Community
You can add communities by navigating to Control Panel → Portal → Communities or by
using the My Communities portlet.
1
Log in to Web Space Server as the admin user.
2
Navigate to Control Panel → Portal → Communities from the Welcome menu.
3
Click Add.
4
Specify the name and a description for the community.
5
Specify the type and active attributes for the community.
A community can be Open, Restricted, or Private, with Open being the default type. By default,
the community is Active.
6
▼
Click Save.
To Assign Users to a Community
You can assign members to communities by navigating to Control Panel → Portal →
Communities or by using the My Communities portlet.
1
Log in to Web Space Server as the admin user.
2
Click Add Applications from the Welcome menu.
3
Expand the Community folder.
4
Click Add next to the My Communities portlet.
5
Click Available Communities to list all available communities.
6
Click the Actions button for the community, and choose Assign Members from the menu.
All the current Users, Organizations, and User Groups are listed in their respective tabs.
7
Click the Available tab under Users tab to list all available users.
Chapter 5 • Roles and Permissions
105
Organizations
8
Select each of the users whom you want to assign as members.
9
Click the Update Associations button to assign selected users as members.
10
Click the Current tab to view the current members, which include the members you just
assigned to the community.
Organizations
Organizations are hierarchical collections of Users. They are one of the two types of portal
resources that can have pages. A special type of Organization called Location defines where
users are specifically located.
The two kinds of Organizations are:
■
■
Regular - Can have suborganizations
Location - Is not allowed to have suborganizations.
Let us consider the example of creating an organization called Admin Organization and a
Suborganization called Admin Location. This section explains the method of defining an
organization and creating users under organization.
▼
To Create an Organization
1
Log in to Web Space Server as the admin user.
2
Navigate to Control Panel → Portal → Organizations from the Welcome menu.
All the existing organizations are listed.
3
Click Add.
4
Provide a name and type for the organization.
For an organization of type Location, also specify the Country and Region.
5
Click Save.
You can specify other attributes such as, address, phone number, email ID, and web site.
106
Sun GlassFish Web Space Server 10.0 Administration Guide • July 2009
Organizations
▼
To Create a Suborganization
1
Log in to Web Space Server as the admin user.
2
Navigate to Control Panel → Portal → Organizations from the Welcome menu.
All the existing organizations are listed.
3
Click Add.
4
Provide a name and type for the organization.
For an organization of type Location, also specify the Country and Region.
5
Click Select to select a parent organization.
The window that appears lists all the Organizations of type Regular.
Note – You cannot create a Location Organization without assigning a parent Organization to it.
6
Select an organization to as the parent organization.
The Organization being created becomes the suborganization of the parent Organization.
7
Click Save.
Note – An alternative method for selecting a parent organization for an organization is by
clicking the Actions button corresponding to an organization and choosing Add Regular
Organization or Add Location from the menu. To select a Regular Organization as the parent
organization, choose Add Regular Organization from the menu. If you want to select an
organization of type Location as the parent organization, choose Add Location from the menu.
▼
To Create Users under an Organization
Users can have “member of” association with an organization.
1
Log in to Web Space Server as the admin user.
2
Navigate to Control Panel → Portal → Organizations from the Welcome menu.
All the existing organizations are listed.
3
Click Actions button corresponding to an organization.
4
Choose Add User from the menu.
Chapter 5 • Roles and Permissions
107
Users and User Roles
5
Type the name and other details for the user.
By default, the user is assigned to the same organization. To change the organization for the
user, or to assign the user to more organizations, click the Organizations link under User
Information.
■
Click Select to select another organization for the user.
■
Click Remove corresponding to an organization to remove user from the organization.
6
Click Save.
The user is created.
7
Update the User Information, Identification, and other details of the organization.
8
Click Save.
Users and User Roles
The three kinds of User Roles are:
■
■
■
Regular
Organization
Community
To view user roles, navigate to Control Panel → Portal → Users from the Welcome menu, click
the link for any user, and choose Roles under User Information.
Regular Roles
Guest, User, Power User, Owner, and Administrator are the different Regular roles. All the user
with login access to Web Space Server are assigned the User role. This role differentiates
between a Guest and a person who has a user ID in the portal. By default, all users are also
assigned the Power User role. This role by default gives users their own personal pages (both
public and private) where they can place portlets.
Organization Roles
You can assign Organization Administrator, Organization Member, and Organization Owner
roles to users who are members of a organization.
108
Sun GlassFish Web Space Server 10.0 Administration Guide • July 2009
Plugins
Community Roles
You can assign Community Administrator, Community Member, Community Owner,
Content Designer, Content Editor, and Content Publisher roles to users who are members of a
community.
▼
To Define User Roles
1
Log in to Web Space Server as the admin user.
2
Navigate to Control Panel → Portal → Users from the Welcome menu.
3
Select a user from the list.
Use the Regular Role, Community Roles, and Organization Roles tabs to assign Regular,
Community, and Organization roles to the users.
4
Choose Roles under User Information.
You can assign Regular roles for all users in addition to the default Regular roles. To be eligible
for Organization or Community roles, the user need to be a member of a Web Space Server
Organization or Community. You can also remove the roles assigned to a user here.
5
Choose Select under Regular Roles, Organization Roles, or Community Roles to assign more
Regular, Organization, or Community roles respectively.
6
To remove an assigned role select Remove corresponding to the role.
7
Click Save.
Plugins
Plugins help in extending the functionality of an application. You can activate or deactivate
plugins. You can also extend or restrict the accessibility of a plugin to different users by adding
or removing roles to the plugin.
The admin user may access plugins and set permissions to allow or to restrict other users to
access those plugins. For example, the Admin portlet has the Administrator role associated with
it. This tole means that a user registered as an administrator can access the portlet.
Chapter 5 • Roles and Permissions
109
Plugins
▼
To Access Plugins
1
Log in to Web Space Server as the admin user.
2
Navigate to Control Panel → Portal → Plugins Configuration from the Welcome menu.
Five tabs list different portlet categories: Portlet Plugins, Theme Plugins, Layout Template
Plugins, Hook Plugins, and Web Plugins.
▼
To Change Plugin Permissions
1
Log in to Web Space Server as the admin user.
2
Navigate to Control Panel → Portal → Plugins Configuration from the Welcome menu.
Five tabs list portlets of four different categories: Portlet Plugins, Theme Plugins, Layout
Template Plugins, Hook Plugins, and Web Plugins.
3
Click the link for any portlet.
For example, click the Activities portlet.
110
4
To change the user access permissions for the portlet, or remove roles.
For example, If the portlet has Power User role, all the users who have this role can access the
portlet.
5
Activate or deactivate the portlet with the Active option.
6
Click Save.
Sun GlassFish Web Space Server 10.0 Administration Guide • July 2009
6
C H A P T E R
6
Content Management System
The Content Management System (CMS) feature enables you to create, edit, and publish
documents and articles online. You can maintain online repositories for storing, controlling,
versioning, and publishing of information.
Sun GlassFish Web Space Server provides out-of-the-box content management (CMS)
functionality in two major areas: document management and publishing web content. This
chapter covers the following topics.
■
■
■
■
■
■
■
■
■
■
■
■
■
“Portlet Overview” on page 111
“Document Library Portlet” on page 113
“Document Library Data Migration” on page 115
“Document Library Display Portlet” on page 118
“Image Gallery Portlet” on page 119
“Web Content Portlets” on page 121
“Web Content Display Portlet” on page 130
“Web Content List Portlet” on page 131
“Web Content Search Portlet” on page 132
“Asset Publisher Portlet” on page 134
“Other Content Portlets” on page 141
“Tags and Categories” on page 142
“XSL Content Portlet” on page 143
Portlet Overview
Document management is provided through Web Space Server's Document Library and Image
Gallery portlets. These portlets provide intuitive management of documents, PDF files, text
files, and images.
Publishing in Web Space Server is accomplished through the Web Content portlet. It features a
clean separation between content (data entry) and presentation (layout design), which enables
the content to conform to a consistent "look and feel." Additionally, the Web Content portlet
111
Portlet Overview
provides a content versioning and approval paradigm (workflow). This system allows for users
involved in publishing to fall naturally into three different roles:
1. Writers create, edit, and enter content comprised of text and images.
2. Designers create layouts that display content.
3. Editors edit and approve final output and release it for publication to the portal.
All of the static content is managed and published by the Web Content portlet. We can
authorize other members of the Web Space Server community to write documentation, but we
retain final editorial authority and security. This capability enables a mixture of portlets and
Journal articles to coexist, enabling the designer to be more creative with what is displayed.
Designers can integrate static content using the Web Content Display portlet with a number of
other function-rich portlets such as Navigation and Breadcrumb.
Document Management Portlets
Document management in Web Space Server is provided through the Document Library,
Document Library Data Migration, and Document Library Display portlets.
The Document Library portlet provides a centralized repository for all documents. Using
Document Library, you can organize documents into folders and sub-folders. It is analogous
with the file system on your hard-disk. It also enables locking, tagging, and versioning of
documents. You can convert the documents in the Document Library to other file formats.
Document Library can be configured to store the documents either in a JSR-170 based
repository (Jackrabbit), Amazon S3 account, or the file system on your server. Each uploaded
document in the Document Library is assigned a unique URL though which it can be accessed
from anywhere on the portal. You can set permissions at the folder level and the document level
as well. For more information, see “Document Library Portlet” on page 113.
The Document Library Data Migration portlet enables you to migrate Document Library data
from File System to JCR and conversely. For information, see “Document Library Data
Migration” on page 115
The Document Library Display portlet allows only viewing of the available folders and uploaded
documents. It does not allow the users to add, edit or delete folders and documents. For more
information, see “Document Library Display Portlet” on page 118.
Image Management Portlets
Image management in Web Space Server is provided through the Image Gallery portlet. The
Image Gallery provides a centralized repository for images that are used throughout the portal
and assigns a unique URL to each image. Images can be organized into different folders and
sub-folders. The Image Gallery also provides a slide show feature to view the images in a folder.
For more information, see “Image Gallery Portlet” on page 119.
112
Sun GlassFish Web Space Server 10.0 Administration Guide • July 2009
Document Library Portlet
Web Content Management Portlets
Generally, most of the content on a web site is static. The Web Content Management feature
enables you to create the web content on the fly and publish it to a portal. Web Content
Management consists of the following portlets:
■
The Web Content portlet forms the main interface for the web publishing system in Web
Space Server. The portlet enables users to create, edit, and publish content. Using the
portlet, you can create structures and templates through which you can apply the desired
layout for an article in one click. It also has built in workflow, versioning, search, and
meta-data features. For more information, see “Web Content Portlets” on page 121.
■
The Web Content Display portlet displays one content at a time on a page, manually
selected from the list of all available contents. Web Content Display portlets are responsible
for displaying most of the content on the web sites based on Web Space Server. You can use
the drag-and-drop feature of Web Space Server for arranging the content displayed on a
page. For more information, “Web Content Display Portlet” on page 130.
■
The Web Content List Portlet displays a list of contents that satisfy a set of conditions
configured through the portlet preferences such as content type and community. The list
will automatically update when new articles are added to the CMS. For more information,
see “Web Content List Portlet” on page 131
■
Web Content Search portlet allows users to search for web content. You can configure the
Web Content Search portlet to search the content within a Web Content Display by using
its portlet-ID. For more information, see “Web Content Search Portlet” on page 132.
Web Content Search portlet is powered by Apache Lucene search engine.
Other Content Management portlets
Other content management portlets are described in the following sections:
■
■
■
■
“Asset Publisher Portlet” on page 134
“Other Content Portlets” on page 141
“Tags and Categories” on page 142
“XSL Content Portlet” on page 143
Document Library Portlet
The Document Library provides a centralized repository for various document types to be
stored and assigns a unique URL to each of them. A company's intranet running Sun GlassFish
Web Space Server portal can be used to post internal documentation such as reimbursement
forms and charitable donations policies for access by its employees. Alternatively, because each
document has its own URL, the Asset Publisher portlet on your company's public web site
could for example, list the PDF files of quarterly newsletters and their download links.
Chapter 6 • Content Management System
113
Document Library Portlet
The Document Library supports multiple repositories that can be set with different access roles.
The documents in the repository are version-controlled, allowing users to retrieve any
particular revision that has been stored on the system.
Note – There are two alternate ways for accessing the Document Library. You can add the
Document Library portlet to your page, or you can navigate to Control Panel → Content →
Document Library from the Welcome menu.
■
■
▼
1
“To Add Folders and Documents” on page 114
“To Create a Reference to a Document” on page 115
To Add Folders and Documents
To add the Document Library portlet to you page
a. Log in to Web Space Server.
b. Choose Add Applications from the Welcome menu.
c. Expand the Content Management folder.
d. Click Add next to the Document Library Portlet.
The Document Library Portlet is added to your page.
The user interface of the portlet contains Folders, My Documents, and Recent Documents
tabs. You can search documents using the Search File Entries button in the Folders tab. The
Add Folder button in the Folders tab allows you to add folders. My Documents and Recent
Document tabs list all the documents and the most recently accessed documents
respectively.
2
To add a new folder, click the Add Folder button.
3
Type a name and description for the folder. The permissions for the folder determine what users
can do.
A folder is created.
114
4
Click Save.
5
To add a document to that folder, click on the folder name.
6
Click Add Document.
Sun GlassFish Web Space Server 10.0 Administration Guide • July 2009
Document Library Data Migration
7
You can either add more folders to further divide your documents into more specific categories
or you can add a document to the current folder.
8
Browse and upload a document.
Documents can be uploaded using the classic uploader or the multiple uploader. The multiple
uploader enables you to upload multiple documents at a time whereas the classic uploader
enables you to upload only one document at a time. The default size limit for documents is
3000K bytes. To change the upload size limit, override the dl.file.max.size property in the
portal-ext.properties file.
9
Type a title and description for the document.
10
Click Save when finished.
The document is added to the Document Library.
▼
To Create a Reference to a Document
1
Log in to Web Space Server.
2
Click Add Applications from the Welcome menu.
3
Expand the Content Management folder.
4
Click Add next to the Document Library Portlet.
The Document Library Portlet is added to your page.
5
Select a document in the Document Library.
6
Click the Actions button corresponding to the document. Select Edit and copy the URL.
You can use the URL as a reference to the document and paste the URL in the URL field of a
browser to access the document.
Document Library Data Migration
Document Library Data Migration is a new feature added with Sun GlassFish Web Space Server
10.0 Update 5. You get this feature by default, as you install Web Space Server 10.0 Update 5
from the Update Tool. For the instructions to install updates from the Update Tool, see
“Installing Updates from the Update Tool” on page 40.
By default, Web Space Server stores Document Library data in File System, which is not a
standard repository. Generally, Java Content Repository (JCR) is preferred in a production
Chapter 6 • Content Management System
115
Document Library Data Migration
environment. Web Space Server 10.0 Update 5 offers the Document Library Data Migration,
which makes it possible to migrate Document Library data from File System to JCR and
conversely.
You can access the Document Library Data Migration feature from the Control Panel.
FIGURE 6–1
116
The Document Library Data Migration Feature
Sun GlassFish Web Space Server 10.0 Administration Guide • July 2009
Document Library Data Migration
▼
To Start Document Library Data Migration
After installing Web Space Server 10.0 Update 5 perform the following instructions.
1
Navigate to Control Panel from the Welcome menu.
2
Select Document Library Data Migration under Server.
You can migrate data from File System to JCR or from JCR to File System. If you select File
System under Migrating From then Java Content Repository (JCR) under Migrating To is
selected automatically and the same is true with the order reversed. Since by default the
Document Library data is stored in File System, the data needs to be migrated from File System
to JCR.
3
After selecting File System under Migrating From (this is the default selection), click Start.
If there are no documents in the Document Library, it displays an error message. Make sure that
you have uploaded some documents to Document Library, before clicking Start to start data
migration.
The screen shows the list of Communities and Organizations, where each of them contain at
least one folder in its Document Library. The list is organized by the Portal Instances
configured, and displays the Company Id of each of the Portal instances. There is a progress bar
associated with each Community or Organization that indicates the progress of data migration,
after clicking the Continue button.
FIGURE 6–2
Starting Document Library Data migration
4
Click Continue for starting data migration.
You can click Cancel to cancel the data migration operation.
Chapter 6 • Content Management System
117
Document Library Display Portlet
FIGURE 6–3
Migrating Document Library Data
After the data migration is complete, a message is displayed. You can see from which
Community or Organization the data is migrated, and the number of folders and files migrated.
5
Click Start New Migration to start a new data migration.
Document Library Display Portlet
The Document Library Display Portlet provides the display functionality for Document
Library. You can navigate to the folders and document in the Document Library by accessing
the Document Library Display Portlet.
You can add Document Library Display Portlet to your page by selecting it from the Content
Management portlets in the Add Applications window.
118
Sun GlassFish Web Space Server 10.0 Administration Guide • July 2009
Image Gallery Portlet
FIGURE 6–4
Document Library Display Portlet
Image Gallery Portlet
Like the Document Library, the Image Gallery provides a centralized repository for images used
throughout the Sun GlassFish Web Space ServerPortal. It assigns a unique URL to each image.
▼
To add an Image to the Image Gallery
1
Log in to Web Space Server.
2
Navigate to Control Panel → Content → Image Gallery from the Welcome menu.
3
Click the Add Folder button.
4
Type a name and description and click Save.
The folder is added to the portlet.
5
Click the folder name.
You can add a subfolder or an image within the folder. In our example we are adding an image
for the folder we have already created.
6
Click the Add Image button.
Chapter 6 • Content Management System
119
Image Gallery Portlet
7
Browse and upload a document.
You can upload images using the classic uploader or the multiple uploader. The multiple
uploader enables you to upload multiple images at a time whereas the classic uploader allows
only one image at a time. The default maximum image size is 3000 Kbytes. To change the
upload size limit, modify the ig.image.max.size property in the portal-ext.properties file.
8
▼
Type a title and description for the image.
To create Reference to an Image in the Image Gallery
1
Log in to Web Space Server.
2
Navigate to Control Panel → Content → Image Gallery from the Welcome menu.
3
Navigate to a folder with images.
4
Select an image.
5
Click Edit, and copy the URL.
You can use the URL as a reference to the image.
6
▼
Paste the URL in the URL field of a browser to access the image.
To View an Image Slide Show
1
Log in to Web Space Server.
2
Navigate to Control Panel → Content → Image Gallery from the Welcome menu.
3
Click a folder containing images.
4
Click the View Slide Show button to display a slide show of the images contained in the folder.
A new window appears. In the new window, images are displayed in a sequence, one after the
other. The slide show window has buttons that enable you to play and pause the slide show, and
to view next and previous image for an image. You can set a time interval for displaying images,
by using the Speed list. You can set a time interval between 1 to 10 seconds, with 3 seconds being
the default time interval for the slide show.
120
Sun GlassFish Web Space Server 10.0 Administration Guide • July 2009
Web Content Portlets
Web Content Portlets
The Web Content application consists of Web Content, Web Content Display, Web Content
List, and Web Content Search portlets.
■
Web Content - An administration portlet that enable you to create, update, search, and
manage content.
■
Web Content Display - Displays one content piece at a time, manually selected from the list
of available content pieces.
■
Web Content List - Displays set of content piecess that satisfy a set of conditions configured
through the portlet preferences, such as content type and community.
■
Web Content Search - Enables search for web content.
The Web Content portlet is used to create all CMS content. The Web Content Display and Web
Content List portlets are used to display those contents. This portlet enables writers to easily
edit content displayed on web pages without having to sort through complex code.
Overview of Web Content Portlets
Structures, templates, and articles are the backbone of the Web Content portlet functionality.
■
Structures define the type and number of content pieces, for example, text, text area,
images, selection lists, and so on.
■
Templates determine how content pieces will be arranged or laid out.
■
Articles are where each content piece is populated with actual text and images.
The point of a structure is to unify journal articles with the same numbers and types of items.
For example, a Management Bio section of a web site might have ten biographies, each
requiring an image for the executive headshot, a text for the headline, and a text area for the
main biography. A structure could be created with one image, one text, and one text area, each
named accordingly. This structure enables writers to create the individual biographies and
other texts without needing to re-create the page structure for each biography.
Designers can create several templates for one structure to allow for a variety of presentations or
give writers discretion in deciding the best layout.
All specific text and images are entered when a user adds or edits an article. The user chooses
the layout based on the templates affiliated with a structure. Because multiple templates can be
associated to a structure, the user can select the most suitable template.
Chapter 6 • Content Management System
121
Web Content Portlets
Structures
A structure can be used by any number of templates and articles within the community in
which the structure is defined. When you create a structure, you have to define an XML schema
for it.
▼ To create a Structure
1
Log in to Web Space Server.
2
Navigate to Control Panel → Content → Web Content from the Welcome menu.
3
To create a structure, click the Structures tab in the Web Content portlet, and then click on the
Add Structure button.
The structure creation page is displayed.
FIGURE 6–5
122
Creating a Structure
Sun GlassFish Web Space Server 10.0 Administration Guide • July 2009
Web Content Portlets
4
Type an ID, or select the Autogenerate ID option for the system to generate an ID.
Choosing your own ID means that the structure will be easier to identify when associating it
with templates and articles. The convention is to separate words in the ID with a hyphen,
NEWS-LETTER-STRUCTURE. The structure ID cannot be changed once your structure has
been saved, so be sure you provide the ID exactly how you want it to appear.
5
Type a name and a description for the structure.
6
Design your XML Schema Definition.
a. Click Add Row button to add the XML scheme from the user interface.
b. In the new field, type a name and a content type for the field image, text, Boolean flag, and
so on.
Tip – If you are comfortable with XML or HTML you can edit the XSL directly by clicking
Launch Editor. One simple approach is to add a few elements using the GUI. Then edit the
XML directly by copying the syntax for the already added elements.
Empty spaces are not allowed within a field name. Rows can be moved up or down by
clicking on Arrow buttons. You can use the Plus button to add multiple levels of rows nested
inside one another. A field can be repeatable or non-repeatable. Selecting the Repeatable
option makes a field repeatable. If a field is repeatable, you can repeat the field in an article
using the structure. You will be able to add the field as many times as it is desired, by clicking
a plus sign.
7
Click Save.
The Structure is created and the system generates a WebDAV URL for the structure. WebDAV
(Web-based distributed authoring and versioning) enables remote access of the structure. To
determine the WebDAV URL for the structure, open the structure in edit mode after creating it.
For details about WebDAV, go to:
http://en.wikipedia.org/wiki/WebDAV
http://www.webdav.org/.
▼ To Edit a Structure
1
Log in to Web Space Server.
2
Navigate to Control Panel → Content → Web Content from the Welcome menu.
3
Click the Structures tab.
Chapter 6 • Content Management System
123
Web Content Portlets
4
Click the Actions button corresponding to a structure, and choose Edit from the menu.
The Structure opens in Edit mode.
You can edit anything in the structure except for the structure ID, which can not be changed
once the structure has been created.
5
Backup the current XML file by clicking the Download button so you can easily revert to your old
structure if necessary.
6
Edit the structure.
Editing the name and description will not affect other features of the Web Content portlet, but
adding, deleting, and modifying fields will affect the templates and articles that are associated
with the structure.
If you add fields, the articles associated will have extra fields for additional content. If you delete
fields, associated content in associated articles will be deleted.
7
Click Save to save changes.
▼ To Delete a Structure
1
Log in to Web Space Server.
2
Navigate to Control Panel → Content → Web Content from the Welcome menu.
3
Click the Structures tab.
To delete a structure, you must first delete all the articles and disassociate or delete all the
templates associated with that structure.
4
To delete all articles,
a. Click the Actions button and choose View Articles from the menu.
All the articles associated with the Structure are listed.
b. Select all articles, and click on the Delete button.
5
Click the Structure tab again.
6
Click the Actions button corresponding to a Structure, and select View Templates from the
menu.
All the templates associated with the structure are listed.
124
Sun GlassFish Web Space Server 10.0 Administration Guide • July 2009
Web Content Portlets
7
To delete all the remplates associated with the structure, select all templates and then click the
Delete button.
8
Select the structure and click the Delete button to delete the structure.
Alternatively, click the Actions button and choose Delete from the menu.
Templates
This section describes how to create, edit, and delete a template.
▼ To Create a Template
1
Log in to Web Space Server.
2
Navigate to Control Panel → Content → Web Content from the Welcome menu.
3
Click the Templates tab and click the Add Template button to create a template.
The Template page appears.
4
Type an ID, Name and Description for the template. Click the Select button to select a Structure
for the template.
The Select and Remove buttons corresponding to the Structure field can be used to associate or
to disassociate a structure from the Template.
A window for selecting Structures is launched.
5
Select a structure.
6
To edit the template layout content, you can use one of two methods.
■
To create a new template:
a. Click the Launch Editor button.
An Editor appears.
b. Select an Editor Type: Plain or Rich. Plain is the default.
c. Click Update after making changes to the template.
Chapter 6 • Content Management System
125
Web Content Portlets
■
To use an existing template:
a. Select a language from the Language Type list: VM, SXL, CSS.
VM, SXL, and CSS are the available language options.
b. Click the Browse button to upload the script for an existing template.
c. Select the Format Script option.
d. Click Launch Editor to open the browsed script.
e. Modify the template.
f. Click Update after making changes to the script.
7
If desired, add a small image to represent the template in the description fields by selecting the
Use Small Image option.
You can type the URL path for an image in the Small Image URL field, or you can browse an
image using the Browse button.
8
Click Save.
The template is created successfully and the system generates a WebDAV URL for the template.
WebDAV (web-based distributed authoring and versioning) enables remote access of the
template. To determine the WebDAV URL for the template, open the template in edit mode.
For details about WebDAV go to:
http://en.wikipedia.org/wiki/WebDAV
http://www.webdav.org/
▼ To Edit a Template
Before editing the actual template, you might want to view the associated articles whoselayout
will be affected by any changes made to your template. Click View Articles from the Action
menu to view associated articles.
126
1
Log in to Web Space Server.
2
Navigate to Control Panel → Content → Web Content from the Welcome menu.
3
Click the Templates tab.
4
Click the Actions button corresponding to a template, and choose Edit from the menu.
Sun GlassFish Web Space Server 10.0 Administration Guide • July 2009
Web Content Portlets
5
Edit the template as desired.
In the edit screen, you can edit anything in the template except for the template ID, which
cannot be changed once the template has been created.
6
Click Save.
7
If desired, click View Articles to see the articles with the new template layout.
▼ To Delete a Template
1
Log in to Web Space Server.
2
Navigate to Control Panel → Content → Web Content from the Welcome menu.
3
Click the Templates tab.
To delete a template, you must first delete all the articles associated with that template.
4
To delete all articles, click the Actions button and choose View Articles from the menu.
All the articles associated with the Template are listed.
5
Select all articles, and click Delete.
A dialog box with the message “Are you sure you want to delete the selected articles?” appears.
Click OK to delete all articles.
6
Click the Templates tab once again.
7
Select the template and click Delete.
Click OK on the dialog box to confirm deleting the template.
Articles
This section describes how to create, edit, and delete an article.
▼ To Create an Article
1
Log in to Web Space Server.
2
Navigate to Control Panel → Content → Web Content from the Welcome menu.
3
Click the Web Content tab.
All articles are listed.
Chapter 6 • Content Management System
127
Web Content Portlets
4
To create a new article, click the Add Web Content button.
You can create a basic or an advanced article.
■
To create a basic article:
A basic article does not make use of a template, workflow, or other advanced articles.
a. Click Basic in the top-right corner of the portlet window.
Skip this step if you are already on this page.
b. Provide a name, abstract, and the body of content for the article.
c. Click Save.
■
To create an advanced article:
You can apply additional options for an advanced article.
a. Click Advanced in the top-right corner of the portlet window.
b. To select a Structure and a Template for the article, click the Select button besides the
Template field under Form and Presentation.
A dialog box appears with the message “Selecting a new template will change the
structure, available input fields, and available templates? Do you want to proceed?”
appears.
c. Click OK.
The Templates window appears.
d. To select a template, click on the name of the template. In this example, click
NEWS-LETTER-TEMPLATE to select it as the template for the article.
The structure used by the template is added to the article. Note that the structure of the
article has changed.
Note – If you want to remove the template or the structure applied to an article, click
Remove corresponding to the structure.
e. Type a name for the article.
f. Select the Type for Categorization for the article.
These details help users to search an article and help organize articles.
128
Sun GlassFish Web Space Server 10.0 Administration Guide • July 2009
Web Content Portlets
g. Set the Schedule details.
Set values for Display Date, Expiration Date, and Review Date fields. The default setting
does not set an expiration date and review date.
h. Click Save to create the article.
▼ To Edit an Article
1
Log in to Web Space Server.
2
Navigate to Control Panel → Content → Web Content from the Welcome menu.
3
Click the Web Content tab.
All articles are listed.
4
Click on the Actions button for an article and select Edit from the menu.
The article appears in edit mode. You can edit anything in the article except for the article ID,
which can not be changed once the article has been created.
You can choose to increment the version every time you edit the article to help all users see how
often the article has been changed. If you feel that the changes you are making are very minor,
you can choose not to increment it.
Note that if you set the expiration date to a date earlier to the current date, you will no longer be
able to select that article for use in the Web Content Display portlet.
5
Make the desired changes and click Save.
▼ To Delete an Article
1
Log in to Web Space Server.
2
Navigate to Control Panel → Content → Web Content from the Welcome menu.
3
Click the Web Content tab.
All articles are listed.
4
Click the Actions button for an article and choose Delete from the menu.
Alternatively, select the article ID and click the Delete button.
Chapter 6 • Content Management System
129
Web Content Display Portlet
Web Content Display Portlet
You can create, configure, and display articles using the Web Content Display portlet. You can
have more than one instance of this portlet on a page. The portlet displays all approved articles.
The portlet embeds Edit Web Content, Select Web Content, and Add Web Content icons.
■
Edit Web Content — Provides the interface to edit the article displayed using the portlet.
The Edit Web Content icon is displayed only when an article is selected for display.
■
Select Web Content — Provides the interface to select an article for display.
You can enable a number of settings on the articles that are displayed, printing, comments,
and comment ratings.
■
Add Web Content — Provides the interface to create a new article for display.
When you add web content using the Web Content Display portlet, you need to click Save
and Approve for the web content (article) to be displayed by the Web Content Display
portlet. If you just click Save or Save and Continue, you see a message on the portlet which
reads, <Content-ID> is expired, is not approved, does not have any content, or no longer
exists. For the web content to display, you need to edit the article by selecting it from the
Web Content portlet, and do Save and Approve for the article.
Web Content Display portlet displays an article, when the article is approved.
▼
130
To Select an Article for Display
1
Log in to Sun GlassFish Web Space Server as the admin User.
2
Choose Add Applications from the Welcome menu.
3
Add the Web Content Display portlet to your page.
4
Click the Select Article icon which is the same as the Configuration button.
5
Click Search Articles button.
All available articles are displayed.
6
Select an article for display.
7
Determine the Setup configuration.
The Setup tab provides the following options:
■
Show Available Locales - Displays all the locales that are available for the article.
■
Convert To - Supports converting the article to different document formats.
Sun GlassFish Web Space Server 10.0 Administration Guide • July 2009
Web Content List Portlet
8
■
Enable Print - Enables printing of the article.
■
Enable Ratings - Enables rating of the article.
■
Enable Comments - Enables adding comments for the article.
■
Enable Comment Ratings - Enables rating the comments received for the article.
Determine display support for mobile devices:
a. Open the Supported Clients tab.
b. Enable or disable the Mobile Devices option.
The default is enabled. Disable the option, if you do not provide display support for mobile
devices.
c. Click Save.
9
Click the Return to Full Screen link.
Web Content List Portlet
Admin users can configure the Web Content List portlet to display the articles associated with a
community and content type. You can have more than one instance of this portlet on a page.
▼
To Configure the Web Content List Portlet
1
Log in to Sun GlassFish Web Space Server as the admin User.
2
Click Add Applications from the Welcome menu.
3
Add the Web Content List portlet to your page.
4
Choose the Configuration option from the menu controls for the portlet.
5
Click the Current tab under the Setup tab.
6
Select values for Community, Article Type, and other attributes.
If you are using Web Space Server samples, you can select My Community and General for
Community and Article Type respectively.
Chapter 6 • Content Management System
131
Web Content Search Portlet
Note – My Community is the default Community if you are using Web Space Server samples.
7
Click Save.
8
Click the Return to Full Page link.
The portlet lists the articles available on My Community.
Web Content Search Portlet
Use the Web Content Search portlet to search for a word or phrase within the content of an
article. You can define the search behavior by making changes to the search configuration.
▼
To Customize the Search Behavior
1
Log in to Sun GlassFish Web Space Server as the admin User.
2
Click Add Applications from the Welcome menu.
3
Add the Web Content Search portlet to your page.
4
Click the Configuration button from the menu controls.
5
Define the search behavior.
6
132
■
Article Type - Select the article type which need to be included in the search. The default
search includes all types of articles. When you select an article type, the search includes only
the articles of that type.
■
Only show results for articles listed in a Web Content Display portlet - By default, search
includes all the articles that are listed in any of the instances of the Web Content Display
portlet.
■
Target Portlet ID - Type the instance ID of the Web Content Display portlet to conduct the
search only inside that particular instance of the portlet. Disable the“Only show results for
articles listed in a Web Content Display portlet”option before you specify the target portlet
instance ID.
Click Save.
Sun GlassFish Web Space Server 10.0 Administration Guide • July 2009
Web Content Search Portlet
Configuring Search for a Web Content Display Portlet
Web Content Display portlet is an instanceable portlet meaning that you can have a number of
Web Content Display portlets displaying the content from a number of articles on your page.
To improve the search efficiency you can configure the Web Content Search portlet so that it
crawls the content of only the selected instance of the Web Content Display portlet.
▼ To Configure Search for a Web Content Display Portlet
FIGURE 6–6
1
Log in to Sun GlassFish Web Space Server as the admin User.
2
Choose Add Applications from the Welcome menu.
3
Add the Web Content Search portlet to your page.
4
Choose the Configuration option from the menu controls.
5
If you are pasting a new target portlet ID or overwriting an existing target portlet ID, disable the
“Only show results for web content listed in a Web Content Display portlet.”option and must be
enabled again after pasting the target portlet ID.
6
Navigate to a web content display portlet's configuration screen and copy the portlet ID.
7
Paste the portlet ID of the web content display portlet as the target portlet ID.
Copying the Portlet ID from a Web Content Display portlet
8
Select the“Only show results for web content listed in a Web Content Display portlet.”option.
9
Click Save.
Chapter 6 • Content Management System
133
Asset Publisher Portlet
Asset Publisher Portlet
Use the Asset Publisher portlet to add, create, edit, and delete content assets such as blogs,
bookmarks, documents, images, and web content. The main function of the Asset Publisher
portlet is to display the content assets, depending on the settings applied for a portlet instance.
FIGURE 6–7
Asset Publisher Portlet
Asset Publisher can be used to create/publish the following:
■
■
■
■
■
▼
Blogs Entry
Bookmarks Entry
Document Library Document
Image Gallery Image
Web Content
To add the Asset Publisher Portlet to a Page
1
Log in to Web Space Server.
2
Choose Add Applications and expand the Content Management folder.
3
Add the Asset Publisher portlet to your page.
The Asset Publisher portlet is added to your page.
Configuring the Asset Publisher Portlet
To configure the asset selection criteria of the Asset Publisher portlet, click the Configuration
button from the portlet menu bar. The Configuration screen appears.
134
Sun GlassFish Web Space Server 10.0 Administration Guide • July 2009
Asset Publisher Portlet
FIGURE 6–8
Configuring the Asset Publisher Portlet
You can set different asset selection criteria for different instances of the Asset Publisher portlet,
so that you display only the selected asset type on each instance of the portlet. For example, if
you select Blogs Entry from the Asset Type list and click Save, that particular instance of the
Asset Publisher portlet displays only the blog entries, and allows you to add only blogs.
Asset selection criteria can be Dynamic or Manual, with “Dynamic” being the default value.
When you select Manual, you have to select existing entries for an asset type, or create new
entries for a selected asset type. You can add new content assets only for the type selected in
Asset Type.
You can apply various display settings by clicking the Display Settings tab.
Chapter 6 • Content Management System
135
Asset Publisher Portlet
FIGURE 6–9
Display Settings
For example, you can apply some metadata for the assets on display by moving some items such
as Author and Create Date from the Available list to the Current list. The items on the Current
list will be used as metadata for displayed items.
▼
To add a Blogs Entry
1
Log in to Web Space Server.
2
Choose Add Applications and expand the Content Management folder.
3
Add the Asset Publisher portlet to your page.
The Asset Publisher portlet is added to your page.
136
Sun GlassFish Web Space Server 10.0 Administration Guide • July 2009
Asset Publisher Portlet
4
Select Blogs Entry from the list on the Asset Publisher portlet.
The Blogs Entry page has many advanced options. You can apply styles and formatting on your
blog entry. You can add Tags and Suggestions to your blog.
a. To add the blog to of social bookmarking sites such as BlinkList, Digg, and Furl, click the
Entries link on the top right corner of the page. Click the Add this to link on the page that
appears.
b. Click Edit to continue working on the blog entry.
5
Complete your blog entry and click Publish.
You are displayed on the Asset Publisher portlet.
6
To view the blog entry, click on the blog title or click Read More.
7
To edit the blog entry, click the Edit button.
▼
To add a Bookmarks Entry
1
Log in to Web Space Server.
2
Choose Add Applications and expand the Content Management folder.
3
Add the Asset Publisher portlet to your page.
The Asset Publisher portlet is added to your page.
4
Select Bookmarks Entry from the list on the Asset Publisher portlet.
5
Type the Name, URL, and Description for a bookmark.
6
Indicate a folder in which to store the bookmarks,
■
■
To select a folder from the available folders click Select.
To create a new folder:
a. Click the Add Folder button.
b. Type a name and a description for the folder and click Save.
If you want to create a subfolder for the folder, click on the link for the folder and click the
Add Folder button again.
7
Click the Choose button corresponding to a folder to choose the folder.
Chapter 6 • Content Management System
137
Asset Publisher Portlet
8
Click Save.
The bookmark is added to the selected folder, and the saved bookmark appears on the Asset
Publisher portlet.
9
Click the Go link to view the bookmarked page.
▼
To Delete a Bookmarks Entry
1
Log in to Web Space Server.
2
Choose Add Applications and expand the Content Management folder.
3
Add the Asset Publisher portlet to your page.
The Asset Publisher portlet is added to your page. You can see the bookmarks already on the
page.
4
Click the Edit Bookmark button.
5
Select the folder containing the bookmark.
6
Delete the folder.
All the bookmarks contained in the folder are deleted.
▼
To add a Document Library Document
1
Log in to Web Space Server.
2
Choose Add Applications and expand the Content Management folder.
3
Add the Asset Publisher portlet to your page.
The Asset Publisher portlet is added to your page.
4
Select Document Library Document from the list on the Asset Publisher portlet.
5
Click the Browse button to browse a document.
6
Type a name and description for the document.
7
Indicate a folder in which to store the document library document,
■
138
To select a folder from the available folders click Select.
Sun GlassFish Web Space Server 10.0 Administration Guide • July 2009
Asset Publisher Portlet
■
To create a new folder:
a. Click the Add Folder button.
b. Type a name and a description for the folder and click Save.
If you want to create a subfolder for the folder, click on the link for the folder and click the
Add Folder button again.
8
Click the Choose button corresponding to a folder to choose the folder.
9
Click Save.
The document is added to the selected folder, and the saved document appears on the Asset
Publisher portlet.
10
Click the Download link to download the document.
▼
To Delete a Document Library Document
1
Log in to Web Space Server.
2
Choose Add Applications and expand the Content Management folder.
3
Add the Asset Publisher portlet to your page.
The Asset Publisher portlet is added to your page. You can see the documents published on the
page.
4
Click the Edit Document button.
5
Select the folder containing the document.
6
Delete the folder.
All the documents contained in the folder are deleted.
▼
To add an Image Gallery Image
1
Log in to Web Space Server.
2
Choose Add Applications and expand the Content Management folder.
Chapter 6 • Content Management System
139
Asset Publisher Portlet
3
Add the Asset Publisher portlet to your page.
The Asset Publisher portlet is added to your page.
4
Select Image Gallery Image from the list on the Asset Publisher portlet.
5
Click the Browse button to browse an image.
6
Type a name and description for the image.
7
Indicate a folder in which to store the image gallery image,
■
■
To select a folder from the available folders click Select.
To create a new folder:
a. Click the Add Folder button.
b. Type a name and a description for the folder and click Save.
If you want to create a subfolder for the folder, click on the link for the folder and click the
Add Folder button again.
8
Click the Choose button corresponding to a folder to choose the folder.
9
Click Save.
The image is added to the selected folder, and the saved image appears on the Asset Publisher
portlet.
10
Click the View link to see the image.
▼
To Delete an Image Gallery Image
1
Log in to Web Space Server.
2
Choose Add Applications and expand the Content Management folder.
3
Add the Asset Publisher portlet to your page.
The Asset Publisher portlet is added to your page. You can see the images published on the
page.
140
4
Click the Edit Image button.
5
Select the folder containing the document.
Sun GlassFish Web Space Server 10.0 Administration Guide • July 2009
Other Content Portlets
6
▼
Delete the folder.
All the images contained in the folder are deleted.
To add Web Content
1
Log in to Web Space Server.
2
Choose Add Applications and expand the Content Management folder.
3
Add the Asset Publisher portlet to your page.
4
Select Web Content from the list on the Asset Publisher portlet.
Write an article using the options available on the screen. You can set an Expiration Date and
Review Date for the journal article.
5
Click Save and Approve.
The Web Content article is displayed on the Asset Publisher portlet.
6
Click the Read More link to read the article.
Note – Make sure that you click Save and Approve after creating the article. If the article is not
approved, you get an error message appears saying “The requested resource is not found” when
you click the Read More link for the article.
7
Click the edit button to make changes to the article.
The default version number of the Web Content is set to 1.0. You can select the Increment
Version on Save option to increment the version number of the article each time you update the
article. You can use the Expire button to make the article expire immediately. You can use the
Delete button to delete the article.
Other Content Portlets
Other portlets provide content management features.
■
Breadcrumb Portlet - Displays the path for the page that you are on.
■
Categories Navigation Portlet - Provides category-based navigation.
■
Navigation Portlet - Displays the navigation structure. You can customize the navigation
structure using the Configuration menu control.
■
Nested Portlets Portlet - To drag and nest portlets using the Nested Portlets Portlet.
Chapter 6 • Content Management System
141
Tags and Categories
■
Recent Documents Portlet - Displays the most recently accessed documents.
■
Site Map Portlet - Provides the site mapping of your page.
Tags and Categories
You can create tag sets and tag entries, and categories and category entries for using them on
wikis, blogs, and articles within a Community.
Tags improve the searchability of wikis, blogs, and articles.
Procedures to create tag sets and tag entries are discussed below. You can create Vocabulary and
Categories by following the similar procedure. To create Vocabulary and Categories, choose
Control Panel → Content → Tags and Categories, and select Categories. The rest of the
procedure is similar to that of creating tag sets and tag entries.
▼
To Add a Tag Set
1
Log in to Web Space Server as the admin user.
2
Navigate to Control Panel → Content → Tags and Categories from the Welcome menu.
3
Click Tag Sets.
4
Click Add Tag Set button.
5
Type a name for the tag set.
6
Click Save.
You can add Vocabulary by following the similar procedure.
▼
To Add a Tag Entry
After creating a tag set, you can create tag entries under it.
142
1
Log in to Web Space Server as the admin user.
2
Navigate to Control Panel → Content → Tags and Categories from the Welcome menu.
3
Click Tag Sets.
4
Click the Add Tag button.
Sun GlassFish Web Space Server 10.0 Administration Guide • July 2009
XSL Content Portlet
5
Type a name for the tag.
6
Select a tag set for the tag from the To Vocabulary list.
7
Click Save.
To complete creating the tag, you are required to add a property for the tag entry. properties
form key value pairs. If deemed necessary, you can add more than one pair of properties for a
tag entry. You can also add and delete properties.
8
Add a property for the tag.
9
Click Save.
You can add Categories by following the similar procedure.
XSL Content Portlet
You can configure the XSL Content Portlet to display the content of an XML file using an XSL
stylesheet. You can import an XSL-Content<content-ID>.portlet.lar file and configure the
XSL Content Portlet to display the content in the file. Use the Export/Import and Configuration
buttons in the menu controls for the portlet to import the lar file and to configure it for display.
You can also make a backup for the lar file.
Chapter 6 • Content Management System
143
144
7
C H A P T E R
7
Web Services for Remote Portlets
The implementation of the WSRP 2.0 standard inSun GlassFish Web Space Server includes
both the WSRP consumer and the WSRP producer. The WSRP producer implementation
supports publishing JSR286 portlets for use by a remote WSRP consumer. The JSR286 portlets
are deployed locally on a portal server. These portlets can be published by an instance of the
WSRP producer.
About WSRP
WSRP 2.0 is an OASIS standard that simplifies integration of remote applications and content
into portals. The WSRP standard defines presentation-oriented, interactive web services with a
common, well-defined interface and protocol for processing user interactions and for providing
presentation fragments suited for mediation and aggregation by portals, as well as conventions
for publishing, finding, and binding such services.
Because the WSRP interfaces are common and well-defined, all web services that implement the
WSRP standard plug in to all WSRP compliant portals. A single, service-independent adapter
on the portal side is sufficient to integrate any WSRP service. As a result, WSRP is the means for
content and application providers to provide their services to organizations running portals
with no programming effort required.
See the WSRP 2.0 standard for more information:
http://www.oasis-open.org/committees/tc_home.php?wg_abbrev=wsrp
145
WSRP for Sun GlassFish Web Space Server
WSRP for Sun GlassFish Web Space Server
The following topics describe WSRP and WSRP administration:
■
■
“Accessing WSRP on Sun GlassFish Web Space Server” on page 146
“WSRP Administration” on page 146
Accessing WSRP on Sun GlassFish Web Space Server
The WSRP Producer and the WSRP Consumer hold the WSRP functionality.
▼ To Access WSRP on Web Space Server
1
Log in to Web Space Server as the admin user.
2
Navigate to Control Panel from the Welcome menu.
You can find the WSRP Consumer and WSRP Producer under Server control options on the
left pane.
WSRP Administration
The WSRP Producer Admin and WSRP Consumer Admin portlets provide WSRP
Administration functionality. Generally, in any real life scenario, WSRP Producer and WSRP
Consumer are on different machines, with WSRP Consumer running on a remote machine. To
keep it simple, you can use the WSRP Producer and the WSRP Consumer from a single Web
Space Server installation. The following topics cover different functions of WSRP
administration.
■
■
■
■
“Creating a WSRP Producer” on page 146
“Creating a WSRP Consumer” on page 149
“Creating WSRP Producers and Consumers Without Registration” on page 150
“Installing Remote/WSRP Portlets” on page 153
Creating a WSRP Producer
You use the WSRP producer to create and manage WSRP Producers.
What Is a WSRP Producer?
A WSRP producer offers locally deployed portlets for remote deployment. A remotely deployed
WSRP consumer can connect to the producer, and can use the portlets offered by the producer.
146
Sun GlassFish Web Space Server 10.0 Administration Guide • July 2009
WSRP for Sun GlassFish Web Space Server
A portal can host multiple producers. The consumer can import remote portlets offered by a
producer. You can create one or more producers. A producer can optionally require
registration. If a producer supports registration, then consumers must register to work with the
producer.
Inband and Outband Registration
Registration is used to build a technical or business relationship between the consumer and the
producer. While creating a producer, you can define any one of the following registration
mechanisms: Inband registration or Outband registration.
If the producer requires registration and enabled for Inband registration, the consumer can
provide the details through WSRP interface and register with the producer. The consumer also
has an option to provide the registration handle obtained through Outband communication.
If the producer requires registration and is enabled for Outband registration, the consumer
should obtain the registration handle through Outband communication and provide the
registration handle during registration. Outband registration happens with manual
intervention such as phone calls, email, and so on. For a producer that supports Outband
registration, the producer gets the details about the consumer through Outband
communication, and it creates a registration handle for the consumer. The registration handle
is communicated to the consumer through Outband communication.
Producers Without Registration
For a producer that does not require registration, the consumer is not required to type any
information or get any information through Outband communication. In this case, the
consumer cannot customize or edit the portlets offered by the producer. The producer that does
not support registration provides read-only portals to the consumers.
▼ To Create and Enable a WSRP Producer
1
Log in to Web Space Server as the admin user.
2
Navigate to Control Panel → Server → WSRP Producer from the Welcome menu.
3
Click the Add Producer button.
4
Type a name for the Producer.
For example, you can create a Producer called NewProducer. This screen also provides option
to export a version of WSRP service (choose both 1.0 and 2.0) for exporting both version 1.0
and version 2.0 service.
Chapter 7 • Web Services for Remote Portlets
147
WSRP for Sun GlassFish Web Space Server
Note – The name of the producer or a consumer must not contain empty spaces or any special
characters.
FIGURE 7–1
Creating a New WSRP Producer
5
Click Save.
The Producer is created, but is disabled by default.
6
To enable the WSRP Producer:
a. Click the link for a selected producer.
In this example, click the NewProducer link. The producer is displayed.
b. Move some portlets from the Unpublished list to the Published list.
c. Click Save.
The producer is saved.
d. Click the Disabled link.
The producer is displayed again.
148
Sun GlassFish Web Space Server 10.0 Administration Guide • July 2009
WSRP for Sun GlassFish Web Space Server
e. Select Enabled from the Status list and click Save.
The producer is enabled.
Note – By default, the newly created WSRP producer exports both WSRP version 1.0 and WSRP
version 2.0 services in the exported WSDL. On checking the WSDL URL, you should see both
version 1.0 and version 2.0 services.
Creating a WSRP Consumer
To communicate with the portlets offered by the producer, a consumer needs to add a
configured producer.
▼ To Create a WSRP Consumer
To create a consumer, a producer WSDL URL is required. You can copy the WSDL URL from
the NewProducer created in the above step.
FIGURE 7–2
1
Log in to Web Space Server as the admin user.
2
Navigate to Control Panel → Server → WSRP Consumer from the Welcome menu.
3
Click the Connect to Producer button.
4
Provide the WSRP Producer WSDL URL and click Next.
Providing the WSRP Producer URL for Creating a WSRP Consumer.
The next screen prompts you to choose the WSRP version.
Chapter 7 • Web Services for Remote Portlets
149
WSRP for Sun GlassFish Web Space Server
FIGURE 7–3
5
Choose Version 2.0 and click Next.
The next screen prompts you to select a registration type.
6
Select Inband and Outband.
For more information about these registration types, see “Inband and Outband Registration”
on page 147
7
(Optional) Specify a Name and Lifetime for the consumer.
Version, Registration Type, Lifetime and Other Details for the WSRP Consumer
In case of Outband registration, you have to specify a registration handle. Select Inband
registration and click Save. The consumer is created.
Creating WSRP Producers and Consumers Without Registration
The consumer is not required to type any details while adding a configured producer, if the
producer does not require registration.
150
Sun GlassFish Web Space Server 10.0 Administration Guide • July 2009
WSRP for Sun GlassFish Web Space Server
▼ To Create a Producer Without Registration
1
Log in to Web Space Server as the admin user.
2
Navigate to Control Panel → Server → WSRP Producer from the Welcome menu.
3
Click the Add Producer button.
Specify a name for the producer. Select Not Required for Registration.
FIGURE 7–4
Creating a Producer Without Registration
4
Click Save.
The producer is created, but is disabled by default. Enable the Producer.
5
To enable the WSRP Producer:
a. Click the link for a selected producer.
In this example, click the NewProducer link. The producer is displayed.
b. Move some portlets from the Unpublished list to the Published list.
c. Click Save.
The producer is saved.
Chapter 7 • Web Services for Remote Portlets
151
WSRP for Sun GlassFish Web Space Server
d. Click the Disabled link.
The producer is displayed again.
e. Select Enabled from the Status list and click Save.
The producer is enabled.
Note – By default, the newly created WSRP producer exports both WSRP version 1.0 and WSRP
version 2.0 services in the exported WSDL. On checking the WSDL URL, you should see both
version 1.0 and version 2.0 services.
▼ To Create a Consumer Without Registration
152
1
Log in to Web Space Server as the admin user.
2
Navigate to Control Panel → Server → WSRP Consumer from the Welcome menu.
3
Click the Connect to Producer button.
4
Provide the WSDL URL of a producer without registration and click Next.
5
The next screen prompts you to choose the WSRP version.
6
Select Version 2.0 and click Next.
7
Type a name for the Consumer and click Save.
Sun GlassFish Web Space Server 10.0 Administration Guide • July 2009
WSRP for Sun GlassFish Web Space Server
FIGURE 7–5
Creating a Consumer Without Registration
Installing Remote/WSRP Portlets
This section describes the process to install Remote/WSRP portlets on Sun GlassFish Web
Space Server.
▼ To Install a Remote/WSRP Portlet
1
Log in to Web Space Server as the admin user.
2
Navigate to Control Panel → Server → WSRP Consumer from the Welcome menu.
3
Click the Actions button corresponding to a consumer and choose Install Portlets from the
menu.
The Available Portlets list displays all the portlets available with the producer.
4
Select a portlet from the list, and type a name for the portlet.
Note – Make sure to specify a name for the portlet. If no name is displayed for the portlet,
identifying it will be difficult.
5
Click Save.
6
Click the Portlet tab to view the portlet.
Chapter 7 • Web Services for Remote Portlets
153
154
8
C H A P T E R
8
Advanced Web Space Server Configuration
There are also some lower level settings that you may want to further customize. They include
changing certain out-of-box defaults, security configuration, and adding features to Web Space
Server through plugin management. The following sections are explained in this chapter:
■
■
■
■
■
■
“Deploying Applications to Web Space Server” on page 155
“Promoting a Portal to Production Environment” on page 157
“Clustering of Web Space Server” on page 161
“Configuring Jackrabbit With MySQL” on page 164
“Installing Plugins” on page 167
“Creating a Custom Plugin Repository” on page 168
Deploying Applications to Web Space Server
Sun GlassFish Web Space Server server provides an extensible platform where custom
applications which includes portlets, web plugins, hook plugins and theme plugins can be
developed (using Netbeans Portal Pack) and deployed to augment the functionality of Web
Space Server. The artifacts can be copied into the Hot Deploy directory of Web Space Server.
The Hot Deploy listener injects the necessary libraries into the WAR file and deploys them to the
GlassFish Enterprise Server by taking advantage of JSR-88 feature or the auto deploy directory
feature GlassFish Enterprise Server.
In many production deployments it is possible that the auto deploy is disabled for security
reasons or the server is deployed to the GlassFish cluster where the applications should always
be deployed to the DAS (Domain Administration Server). In these two cases, copying the WAR
files to the Hot Deploy directory for deploying the applications is not possible. To address this
scenario of deployment Web Space Server provides a command line tool process.xml that
which generate a "massaged" WAR (with all required injections that are otherwise performed by
the Hot Deploy listener) that can be manually deployed to the server using asadmin tool.
155
Deploying Applications to Web Space Server
Deploying Applications Using process.xml
Consider the example of deploying a custom portlet solr-web-5.2.0.1.war to Web Space
Server using process.xml.
▼ To Deploy Applications Using process.xml
1
Copy the custom portlet (solr-web-5.2.0.1.war) into the unprocessed directory located
inside the root directory for Web Space Server (the directory to which Web Space Server is
unzipped).
cp solr-web-5.2.0.1 /Webspace_install_root/var/webspace/war-workspace/unprocessed
2
Navigate to Webspace_install_root/var/webspace/war-workspace folder.
cd /Webspace_install_root/var/webspace/war-workspace
3
Run ant -f process.xml.
Provide the required inputs where necessary. The below screen illustrates the process.
$ cp solr-web-5.2.0.1 /Webspace_install_dir/var/webspace/war-workspace/unprocessed
$ cd /Webspace_install_dir/var/webspace/war-workspace
$ ant -f process.xml
Buildfile: process.xml
check-ant:
show-user-warning:
[input] JAVA_HOME must be set to JDK 1.5 or greater and java must be available for execution. Webcontainer must be stopped. [RETURN
set-war-properties:
[input] Enter war file (include full path) [/Webspace_install_dir/var/webspace/war-workspace/my.war]
/Webspace_install_dir/var/webspace/war-workspace/unprocessed/solr-web-5.2.0.1.war
[input] Is war a portlet, web, theme, hook or layouttemplate? [portlet]
web
[input] Enter deployed war name [solr-web-5.2.0.1]
process:
[java]
[java]
[java]
[java]
[java]
[java]
[java]
[java]
156
Loading jar:file:/Webspace_install_dir/var/webspace/war-workspace/sources/webspace/WEB-INF/lib/portal-impl.jar!/system.proper
Loading jar:file:/Webspace_install_dir/var/webspace/war-workspace/sources/webspace/WEB-INF/lib/portal-impl.jar!/portal.proper
Loading jar:file:/Webspace_install_dir/var/webspace/war-workspace/sources/webspace/WEB-INF/lib/enterprise.jar!/portal-sun.pro
Loading jar:file:/Webspace_install_dir/var/webspace/war-workspace/sources/webspace/WEB-INF/lib/enterprise.jar!/portal-sun-too
Loading jar:file:/Webspace_install_dir/var/webspace/war-workspace/sources/webspace/WEB-INF/lib/portal-impl.jar!/captcha.prope
2009-04-28 23:39:02,177 [main] INFO com.liferay.portal.util.PortalImpl - Portal lib directory /opt/wsynergy/ws-root/var/we
Expanding: /Webspace_install_dir/webspace/war-workspace/unprocessed/solr-web-5.2.0.1.war into /var/tmp/20090428233902276
Copying 1 file to /var/tmp/20090428233902276/WEB-INF/classes
Sun GlassFish Web Space Server 10.0 Administration Guide • July 2009
Promoting a Portal to Production Environment
[java] Copying 1 file to /var/tmp/20090428233902276/WEB-INF/classes
[java] Building war: /var/tmp/20090428233903352
[java] 2009-04-28 23:39:03,944 [main] INFO com.liferay.portal.kernel.util.ServerDetector - Detected server tomcat
[java] Deleting directory /var/tmp/20090428233902276
[echo]
[echo] Processed war is in /Webspace_install_dir/var/webspace/war-workspace/finals.
BUILD SUCCESSFUL
Total time: 33 seconds
Promoting a Portal to Production Environment
You can create a custom portal using Sun GlassFish Web Space Server. The following are the
two scenarios for migrating to the production environment:
■
Moving from development to production
The development team working on customization of Web Space Server want to go live with
the product after deploying it to the production server.
■
Deploying content from staging to production
After the production server is successfully commissioned, further enhancements to the
content of the production system can be realized using Staging and Workflow.
Moving From Development to Production
During the development phase a team of developers would collaborate and work on
customization of Web Space Server. Customization might include creating or modifying
portlets, hooks, themes, layouts and pages. Out of all these artifacts, the pages are stored in the
database while others can be deployed in WAR file format. For the first time production
cut-over, the database from the development environment can be exported and imported into
the production environment.
The following is the process involved:
1. Generate the WAR files for custom portlets, themes, layouts and hooks and deploy them to the
production Web Space Server. These WAR files need to be placed in the hot deploy area.
2. Export the database from the development environment.
3. Import the database that has been exported in the previous step into the production
environment.
Chapter 8 • Advanced Web Space Server Configuration
157
Promoting a Portal to Production Environment
Deploying Content From Staging to Production
In this scenario, the content can be developed in the staging environment and can be published
to the production server. The WebSpace server provides a “Staging” feature for Community
and Organization pages to address this requirement.
Essentially, the community and organization "staging" feature provides an option to deploy
pages to the same server. Meaning, an administrator can review the page changes before
publishing them and the publishing can be scheduled. In addition, a workflow can be attached
to the process so the changes can be approved by an authority.
In the "Manage Pages" there is an option for "Publish to Remote" which would actually deploy
the pages to a remote server. This can be the process for promoting the content that is
developed in the "staging/development" environment to the production system.
Staging
You can “Stage” pages on the production server before they are published to live. This can also
include the "approval process" of different levels of authority.
Here is how it works:
▼ To Do Staging Without Workflow
1
Log in to Web Space Server as admin user.
2
Administrator or the owner of a community or an organization can enable Activate Staging via
Manage Pages from the Control Panel.
3
Once staging is enabled, a user with appropriate privileges can add/modify pages and the
content to pages and publish them when they are finalized. During the development of the
pages while in the staging, live pages are not affected, and no changes are visible on live pages.
▼ To Do Staging With Workflow
158
1
Log in to Web Space Server as admin user.
2
Administrator or the owner of a community or organization can enable Activate Staging and
Activate Workflow via Manage Pages from the Control Panel.
3
Choose the number of stages for the Workflow. Default is 3.
4
Specify the roles for each stage of approval process. Administrator can create the roles with
scope and permissions on the My Community portlet. For Content Creator Community Role
assign the Manage Pages role from the Define Permissions option.
Sun GlassFish Web Space Server 10.0 Administration Guide • July 2009
Promoting a Portal to Production Environment
5
A Content Creator can create pages and submit the proposal. Once the pages are approved
through the approval chain, the final approver can publish the page to live system.
Publishing to a Remote Server
Remote publishing allows publishing pages from a staging server (a staging server where the
pages are approved and published locally) to production server. When using the remote
publishing, the user who is publishing remotely must have a user account on both servers with
the same email address and password.
The production server (where the pages are published to) must be configured to accept
connections from the staging server.
For example, the following entry in portal-ext.properties would allow the remote
publishing from IP address 192.18.123.38.
tunnel.servlet.hosts.allowed=127.0.0.1,SERVER_IP,192.18.123.38
If you have deployed the OpenSSO add-on, web.xml for the tunnel-web application should be
configured in such a way that "Liferay Servlet Filter" and "Secure Liferay Servlet Filter" are using
the default filter which is com.liferay.portal.servlet.filters.secure.SecureFilter
instead of the filter that ships with the add-on which is
com.sun.portal.servlet.filters.soo.accessmanager.BasicAuthFilter.
Offline Promotion of Content to Production
The remote publishing feature is very useful when staging and production environments are
"connected". In case, they are not connected, meaning the network firewall prevents any
connections from staging to production due to the company's security policy then the remote
publishing will not be an option. In this event, the pages can be promoted to the production
"offline".
After the pages and its content are finalized, an administrator can "export" the pages from
staging environment which will generate a lar file. The same can be copied over to the
production server and imported into its corresponding community/organization. The "Manage
Pages" option for a community/organization contains a tab for "Export/Import" which allows
an administrator to export or import the page including its content, permissions and the like.
Activating Staging, Activating Workflow, and
Publishing Pages to Live
This section discusses the procedure for activating staging and workflow for Communities and
Organizations, and publishing their pages to live.
Chapter 8 • Advanced Web Space Server Configuration
159
Promoting a Portal to Production Environment
Admin user can activate staging for Communities and Organizations. When you activate
staging for Communities or Organizations, you can preview their pages and make changes to
them before publishing them to live production environment.
For the procedure to create a new Community, see To add a Community. The following
procedure explains how you can stage Communities. You can stage Organizations by following
the similar procedure.
▼ To Stage a Community and to Publish a Page to Live
1
Log in to Sun GlassFish Web Space Server as admin user.
2
Choose Add Application from the Welcome menu, and add My Communities portlet to your
page.
3
Click the Communities I Own tab on the My Communities portlet.
4
To stage a Community, click the Actions button corresponding to a Community and choose
Manage Pages from the menu.
In this example, choose the 'cms' Community.
5
Click the Settings tab, and enable the Activate Staging option.
The community is staged to the production environment.
6
Choose My Places from the Welcome menu and navigate to a page on the community.
A live page for 'cms' is displayed.
7
To view the staged page, choose Staging → View Staged Page from the Welcome menu.
8
To publish the page to live, choose Staging → Publish to Live from the Welcome menu.
9
To view the live page, choose Staging → View Live Page from the Welcome menu.
The Publish To Live window appears.
160
10
Select the pages you want to publish and click Publish.
A dialog box with the message “Are you sure you want to publish these pages?” appears.
11
Click OK to publish the selected pages.
Sun GlassFish Web Space Server 10.0 Administration Guide • July 2009
Clustering of Web Space Server
Clustering of Web Space Server
Once you have Web Space Server installed in more than one node on your application server,
there are several optimizations that need to be made. At a minimum, Web Space Server should
be configured in the following way for a clustered environment:
Note – The default HSQL database can't be used in a clustered environment. You can configure
MySQL or any other compatible database to use in a clustered environment.
A cluster setup need to use the enterprise version of GlassFish 2.1 patch 2 or later.
■
All nodes should be pointing to the same Web Space Server database.
■
Jackrabbit, the JSR-170 content repository, should be on a shared file system (not
recommended) or in a database that is shared by all nodes.
■
■
Similarly, Lucene, the full text search indexer, should be:
■
On a shared file system available to all the nodes (not really recommended, though), or
■
In a database that is shared by all the nodes, or
■
On separate file systems for all of the nodes, or
■
Disabled, and a separate pluggable enterprise search server configured.
If you have not configured your application server to use farms for deployment, the hot
deploy folder should be a separate folder for all the nodes, and plugins will have to be
deployed to all of the nodes individually. This can be done via a script.
Many of these configuration changes can be made by adding or modifying properties in your
portal-ext.properties file. Remember that this file overrides the defaults that are in the
portal.properties file. The original version of this file can be found in the Liferay source code
or can be extracted from the portal-impl.jar file in your Liferay installation. It is a best
practice to copy the relevant section that you want to modify from portal.properties into
your portal-ext.properties file, and then modify the values there.
■
■
■
“Jackrabbit Sharing” on page 161
“Lucene Configuration” on page 163
“Hot Deploy” on page 163
Jackrabbit Sharing
Web Space Server uses Jackrabbit from Apache as its JSR-170 compliant document repository.
By default, Jackrabbit is configured to store the documents on the local file system upon which
Liferay is installed, in the Glassfish home/domains/domain1/webspace/jackrabbit folder.
Inside this folder is Jackrabbit's configuration file, called repository.xml.
Chapter 8 • Advanced Web Space Server Configuration
161
Clustering of Web Space Server
To simply move the default repository location to a shared folder, you do not need to edit
Jackrabbit's configuration file. Instead, find the section in portal.properties labeled JCR and
copy/paste that section into your portal-ext.properties file. One of the properties, by
default, is the following:
jcr.jackrabbit.repository.root=${resource.repositories.root}/jackrabbit
Change this property to point to a shared folder that all of the nodes can see. A new Jackrabbit
configuration file is generated in that location.
Note that because of file locking issues, this is not the best way to share Jackrabbit resources. If
two people have logged in at the same time uploading content, you could encounter data
corruption using this method, and therefore it is not used for a production system. Instead, to
enable better data protection, you should redirect Jackrabbit into your database of choice. You
can use a database for this purpose. This requires editing Jackrabbit's configuration file.
The default Jackrabbit configuration file has sections commented out for moving the Jackrabbit
configuration into the database. This has been done to make it as easy as possible to enable this
configuration. To move the Jackrabbit configuration into the database, simply comment out the
sections relating to the file system and comment in the sections relating to the database. These
by default are configured for a MySQL database. If you are using another database, you will
likely need to modify the configuration, as there are changes to the configuration file that are
necessary for specific databases. For example, the default configuration uses Jackrabbit's
DbFileSystem class to mimic a file system in the database. While this works well in MySQL, it
does not work for all databases. For example, if you are using an Oracle database, you will need
to modify this to use OracleFileSystem. Please see the Jackrabbit documentation at
http://jackrabbit.apache.org for further information.
You will also likely need to modify the JDBC database URLs so that they point to your database.
Don't forget to create the database first, and grant the user ID you are specifying in the
configuration file access to create, modify, and drop tables.
Once you have configured Jackrabbit to store its repository in a database, the next time you
bring up Liferay, the necessary database tables will be created automatically. Jackrabbit,
however, does not create indexes on these tables, and so over time this can be a performance
penalty. To fix this, you will need to manually go into your database and index the primary key
columns for all of the Jackrabbit tables.
All of your Liferay nodes should be configured to use the same Jackrabbit repository in the
database. Once that is working, you can create a Jackrabbit cluster (please see the following
section).
162
Sun GlassFish Web Space Server 10.0 Administration Guide • July 2009
Clustering of Web Space Server
Lucene Configuration
Lucene, the search indexer which Web Space Server uses, can be in a shared configuration for a
clustered environment, or an index can be created on each node of the cluster. If you wish to
have a shared index, you will need to either share the index on the file system or in the database.
The Lucene configuration can be changed by modifying values in your
portal-ext.properties file. Open your portal.properties file and search for the text
Lucene. Copy that section and then paste it into your portal-ext.properties file.
If you wish to store the Lucene search index on a file system that is shared by all of the Web
Space Server nodes, you can modify the location of the search index by changing the
lucene.dir property. By default, this property points to the /webspace/lucene folder inside
the home folder of the user running Web Space Server:
lucene.dir=${resource.repositories.root}/lucene/
Change this to the folder of your choice. To make the change take effect, you will need to restart
Web Space Server. You can point all of the nodes to this folder, and they will use the same index.
Like Jackrabbit, however, this is not the best way to share the search index, as it could result in
file corruption if different nodes try reindexing at the same time. A better way is to share the
index via a database, where the database can enforce data integrity on the index. This is very
easy to do; it is a simple change to your portal-ext.properties file.
There is a single property called lucene.store.type. By default this is set to go to the file
system. You can change this so that the index is stored in the database by making it the
following:
lucene.store.type=jdbc
The next time Web Space Server is started, new tables will be created in the Web Space Server
database, and the index will be stored there. If all the Web Space Server nodes point to the same
database tables, they will be able to share the index.
Alternatively, you leave the configuration alone, and each node will then have its own index.
This ensures that there are no collisions when multiple nodes update the index, because they all
will have separate indexes.
Hot Deploy
Plugins which are hot deployed will need to be deployed separately to all of the Web Space
Server nodes. Each node should, therefore, have its own hot deploy folder. This folder needs to
be writable by the user under which Web Space Server is running, because plugins are moved
from this folder to a temporary folder when they are deployed. This is to prevent the system
from entering an endless loop, because the presence of a plugin in the folder is what triggers the
hot deploy process.
Chapter 8 • Advanced Web Space Server Configuration
163
Configuring Jackrabbit With MySQL
When you want to deploy a plugin, copy that plugin to the hot deploy folders of all of the Web
Space Server nodes. The hot deploy directory for Web Space Server when running on GlassFish
is Glassfish home/domains/domain1/webspace/deploy. Depending on the number of nodes, it
may be best to create a script to do this. Once the plugin has been deployed to all of the nodes,
you can then make use of it (by adding the portlet to a page or choosing the theme as the look
and feel for a page or page hierarchy).
Some containers contain a facility which allows the end user to deploy an application to one
node, after which it will get copied to all of the other nodes. If you have configured your
application server to support this, you won't need to hot deploy a plugin to all of the nodes, as
your application server will handle it transparently. Make sure, however, that you use hot
deploy mechanism to deploy plugins, as in many cases Web Space Server slightly modifies
plugin.war files when hot deploying them.
Configuring Jackrabbit With MySQL
Liferay includes Jackrabbit by default as its JSR-170 Java Content Repository.
Image Gallery and Document Library portlets use jackrabbit to store data. Jackrabbit stores
CMS (Content Management System) data in a file system. The following procedure explains
how to configure Jackrabit to use MySQL database to store the data from Image Gallery and
Document Library portlets.
▼
1
To Configure Jackrabbit With MySQL
Add the following properties to the portal-ext.properties file.
jcr.initialize.on.startup=true
jcr.jackrabbit.repository.root=/jackrabbit
jcr.jackrabbit.config.file.path=/jackrabbit/repository.xml
dl.hook.impl=com.liferay.documentlibrary.util.JCRHook
The Web Space Server evaluation bundle has a portal-ext.properties file in the GlassFish
install-dir/domains/domain1/applications/j2ee-modules/webspace/WEB-INF/classes.
When you are using a Web Space Server bundle not including samples, you have to create a
portal-ext.properties file under
ROOT-DIR/webspace-for-gfv2/var/webspace/war-workspace/customs/webspace/WEB-INF/classes.
2
164
Make changes to the repository.xml file residing under GlassFish
install-dir/webspace-gfv2-OS/var/webspace/data/jackrabbit.
Most generally, when you are configuring Jackrabbit for MySQL, you will have to remove the
commenting for all the markup related with MySQL. For other databases, For other databases,
you will have to change the connection credentials and schema settings.
Sun GlassFish Web Space Server 10.0 Administration Guide • July 2009
Configuring Jackrabbit With MySQL
Modified repository.xml may look like this:
<?xml version="1.0"?>
<Repository>
<!--<FileSystem class="org.apache.jackrabbit.core.fs.local.LocalFileSystem">
<param name="path" value="${rep.home}/repository" />
</FileSystem>-->
<!-Database File System (Cluster Configuration)
This is sample configuration for mysql persistence that can be used for
clustering Jackrabbit. For other databases, change the connection,
credentials, and schema settings.
-->
<FileSystem class="org.apache.jackrabbit.core.fs.db.DbFileSystem">
<param name="driver" value="com.mysql.jdbc.jdbc2.optional.MysqlDataSource"/>
<param name="url" value="jdbc:mysql://nicp239.india.sun.com:3306/lportal?useUnicode=true&amp;characterEncoding=U
<param name="user" value="root" />
<param name="password" value="password" />
<param name="schema" value="mysql"/>
<param name="schemaObjectPrefix" value="J_R_FS_"/>
</FileSystem>
<Security appName="Jackrabbit">
<AccessManager class="org.apache.jackrabbit.core.security.SimpleAccessManager" />
<LoginModule class="org.apache.jackrabbit.core.security.SimpleLoginModule">
<param name="anonymousId" value="anonymous" />
</LoginModule>
</Security>
<Workspaces rootPath="${rep.home}/workspaces" defaultWorkspace="default" />
<Workspace name="${wsp.name}">
<!--<FileSystem class="org.apache.jackrabbit.core.fs.local.LocalFileSystem">
<param name="path" value="${wsp.home}" />
</FileSystem>
<PersistenceManager class="org.apache.jackrabbit.core.persistence.bundle.BundleFsPersistenceManager" />-->
<!-Database File System and Persistence (Cluster Configuration)
This is sample configuration for mysql persistence that can be used for
clustering Jackrabbit. For other databases, change the connection,
credentials, and schema settings.
-->
<PersistenceManager class="org.apache.jackrabbit.core.state.db.SimpleDbPersistenceManager">
<param name="driver" value="com.mysql.jdbc.jdbc2.optional.MysqlDataSource"/>
Chapter 8 • Advanced Web Space Server Configuration
165
Configuring Jackrabbit With MySQL
<param name="url" value="jdbc:mysql://nicp239.india.sun.com:3306/lportal?useUnicode=true&amp;characterEnco
<param name="user" value="root" />
<param name="password" value="password" />
<param name="schema" value="mysql" />
<param name="schemaObjectPrefix" value="J_PM_${wsp.name}_" />
<param name="externalBLOBs" value="false" />
</PersistenceManager>
<FileSystem class="org.apache.jackrabbit.core.fs.db.DbFileSystem">
<param name="driver" value="com.mysql.jdbc.jdbc2.optional.MysqlDataSource"/>
<param name="url" value="jdbc:mysql://nicp239.india.sun.com:3306/lportal?useUnicode=true&amp;characterEnco
<param name="user" value="root" />
<param name="password" value="password" />
<param name="schema" value="mysql"/>
<param name="schemaObjectPrefix" value="J_FS_${wsp.name}_"/>
</FileSystem>
</Workspace>
<Versioning rootPath="${rep.home}/version">
<!--<FileSystem class="org.apache.jackrabbit.core.fs.local.LocalFileSystem">
<param name="path" value="${rep.home}/version" />
</FileSystem>
<PersistenceManager class="org.apache.jackrabbit.core.persistence.bundle.BundleFsPersistenceManager" />-->
<!-Database File System and Persistence (Cluster Configuration)
This is sample configuration for mysql persistence that can be used for
clustering Jackrabbit. For other databases, change the connection,
credentials, and schema settings.
-->
<FileSystem class="org.apache.jackrabbit.core.fs.db.DbFileSystem">
<param name="driver" value="com.mysql.jdbc.jdbc2.optional.MysqlDataSource"/>
<param name="url" value="jdbc:mysql://nicp239.india.sun.com:3306/lportal?useUnicode=true&amp;character
<param name="user" value="root" />
<param name="password" value="password" />
<param name="schema" value="mysql"/>
<param name="schemaObjectPrefix" value="J_V_FS_"/>
</FileSystem>
<PersistenceManager class="org.apache.jackrabbit.core.state.db.SimpleDbPersistenceManager">
<param name="driver" value="com.mysql.jdbc.jdbc2.optional.MysqlDataSource"/>
<param name="url" value="jdbc:mysql://nicp239.india.sun.com:3306/lportal?useUnicode=true&amp;character
<param name="user" value="root" />
<param name="password" value="password" />
<param name="schema" value="mysql" />
<param name="schemaObjectPrefix" value="J_V_PM_" />
<param name="externalBLOBs" value="false" />
</PersistenceManager>
</Versioning>
166
Sun GlassFish Web Space Server 10.0 Administration Guide • July 2009
Installing Plugins
<!-Cluster Configuration
This is sample configuration for mysql persistence that can be used for
clustering Jackrabbit. For other databases, change the connection,
credentials, and schema settings.
-->
<!--<Cluster id="node_1" syncDelay="5">
<Journal class="org.apache.jackrabbit.core.journal.DatabaseJournal">
<param name="revision" value="${rep.home}/revision"/>
<param name="driver" value="com.mysql.jdbc.Driver"/>
<param name="url" value="jdbc:mysql://localhost/jcr"/>
<param name="user" value=""/>
<param name="password" value=""/>
<param name="schema" value="mysql"/>
<param name="schemaObjectPrefix" value="J_C_"/>
</Journal>
</Cluster>-->
</Repository>
3
Deploy webspace.war.
To deploy webspace.war, place it under GlassFish install-dir/domains/domain1/autodeploy
and restart GlassFish.
4
Add some documents through the Document Library portlet. If you see the lportal database,
the Document Library data is stored in the following tables:
■
■
■
■
J_V_PM_BINVAL
J_V_PM_NODE
J_V_PM_PROP
J_V_PM_REFS
Installing Plugins
Web Space Server comes with two portlets which can handle plugin installation: the Plugin
Installer and the Update Manager. The Update Manager helps to determine if you are running
the most recent version of a plugin.
You can add the Update Manager portlet to your page by clicking Add Application from the
welcome dock. The Update Manager displays which plugins are already installed on the system,
what their version numbers are, and whether an update is available.
To install a plugin from the Update Manager, click the Install More Plugins button. It invokes
the Plugin Installer portlet, and by default you are on the Portlet Plugins tab. You can install or
uninstall the portlets available in the repository. If your server is firewalled, you may not see any
Chapter 8 • Advanced Web Space Server Configuration
167
Creating a Custom Plugin Repository
plugins in the repository, and you need to install plugins manually. To install plugins manually,
clickthe Upload File tab. You can browse the WAR file for a layout template, portlet, or a theme
that you want to install. You can specify the deployment context in a text box for easy
identification of the portlet. Click the Install button to install the portlet.
If you do not wish to use the Update Manager or Plugin Installer to deploy plugins, you can also
deploy them at the operating system level. The first time Web Space Server starts, it creates a hot
deploy folder which is by default created inside the home folder of the user who launched Web
Space Server. For example, say that on a Linux system, the user lportal was created in order to
run Web Space Server. The first time Web Space Server is launched, it will create a folder
structure in /home/lportal/webspace to house various configuration and administrative data.
One of the folders it creates is called deploy. If you copy a portlet or theme plugin into this
folder, Liferay will deploy it and make it available for use just as though you'd installed it via the
Update Manager or Plugin Installer. In fact, this is what the Update Manager and Plugin
Installer portlets are doing behind the scenes.
You can change the defaults for this directory structure so that it is stored anywhere you like by
modifying the appropriate properties in your portal-ext.properties file.
Creating a Custom Plugin Repository
As your enterprise builds its own library of portlets for internal use, you can create your own
plugin repository to make it easy to install and upgrade portlets. This will allow different
departments running different instances of Web Space Server to share portlets and install them
as needed. If you are a software development house, you may wish to create a plugin repository
for your own products. Web Space Server makes it easy for you to create your own plugin
repository and make it available to others.
You can create your plugin repository using the Software Catalog portlet. This method allows
users to upload their plugins to an HTTP server to which they have access. They can then
register their plugins with the repository by adding a link to it via the portlet's graphical user
interface. Web Space Server will then generate the XML necessary to connect the repository to a
Plugin Installer portlet running another instance of Web Space Server. This XML file can then
be placed on an HTTP server, and the URL to it can be added to the Plugin Installer, making the
portlets in this repository available to the server running Web Space Server.
Using the Software Catalog Portlet
The Software Catalog portlet is not an instanceable portlet, which means that each community
can have only one instance of the portlet. If you add the portlet to another page in the
community, it will hold the same data as the portlet that was first added. Different communities,
however, can have different software repositories, so you can host several software repositories
on the same instance of Web Space Server if you wish they just have to be in different
communities.
168
Sun GlassFish Web Space Server 10.0 Administration Guide • July 2009
Creating a Custom Plugin Repository
The Software Catalog portlet has several tabs. The first tab is labeled Products. The default view
of the portlet, when populated with software, displays what plugins are available for install or
download. This can be seen in the version on Web Space Server's home page.
The first step in adding a plugin to your software repository is to add a license for your product.
A license communicates to users the terms upon which you are allowing them to download and
use your software. Click the Licenses tab and then click the Add License button that appears.
You will then see a form which allows you to type the title of your license, a URL pointing to the
actual license document, and check boxes denoting whether the license is open source, active,
or recommended.
When you have finished filling out the form, click the Save button. Your license will be saved.
Once you have at least one license in the system, you can begin adding software products to
your software catalog. Your next step will be to create the product record in the software catalog
portlet. This will register the product in the software catalog and allow you to start adding
versions of your software for users to download and/or install directly from their instances of
Web Space Server. You will first need to put the .war file containing your software on a web
server that is accessible without authentication to the users who will be installing your software.
If you are creating a software catalog for an internal Intranet, you would place the file on a web
server that is available to anyone inside your organization's firewall.
To create the product record in the Software Catalog portlet, click the Products tab, and then
click the Add Product button. Fill out the form with information about your product.
Chapter 8 • Advanced Web Space Server Configuration
169
Creating a Custom Plugin Repository
FIGURE 8–1
Adding a Product to the Software Catalog (partial)
Name: The name of your software product.
Type: Select whether this is a portlet or a theme plugin.
Licenses: Select the license(s) under which you are releasing this software.
170
Sun GlassFish Web Space Server 10.0 Administration Guide • July 2009
Creating a Custom Plugin Repository
Author: Type the name of the author of the software.
Page URL: If the software has a home page, type its url here.
Tags: Type any tags you would like added to this software.
Short Description: Type a short description. This will be displayed in the summary table of
your software catalog.
Long Description: Type a longer description. This will be displayed on the details page for this
software product.
Permissions: Click the Configure link to set permissions for this software product.
Group ID: Type a group ID. A group ID is a name space which usually identifies the company
or organization that made the software. For example, use old-computers.
Artifact ID: Type an Artifact ID. The artifact ID is a unique name within the name space for
your product. For example, use my-summary-portlet.
Screenshot: Click the Add Screenshot button to add a screenshot of your product for users to
view.
When you have finished filling out the form, click the Save button. You will be brought back to
the product summary page, and you will see that your product has been added to the repository.
Notice that in the version column, N/A is being displayed. This is because there are not yet any
released versions of your product. To make your product downloadable, you need to create a
version of your product and point it to the file you uploaded to your HTTP server earlier.
Before you do that, however, you need to add a Framework Version to your software catalog. A
Framework version denotes what version of Web Space Server your plugin is designed for and
works on. You cannot add a version of your product without linking it to a version of the
framework for which it is designed.
Why is this so important? Because as Web Space Server gains more and more features, you may
wish to take advantage of those features in future versions of your product, while still keeping
older versions of your product available for those who are using older versions of Web Space
Server.
So click the Framework Versions tab and then click the Add Framework Version button. Give
the framework a name, a URL, and leave the Active check box checked.
Now go back to the Products tab and click your product. You will notice that a message is
displayed stating that the product does not have any released versions. Click the Add Product
Version button.
Chapter 8 • Advanced Web Space Server Configuration
171
Creating a Custom Plugin Repository
Note – It is a must to specify a group ID and artifact ID before you specify a product version. You
can specify the group ID and artifact ID for the product from the Product Version page by
clicking on the It is a must to specify a group ID and artifact ID before you specify a product
version link, which appears in the Product Version page if a group ID and artifact ID are not
specified for the product.
FIGURE 8–2
Adding a Product Version to the Software Catalog
Version Name: Type the version of your product.
Change Log: Type some comments regarding what changed between this version and any
previous versions.
Supported Framework Versions: Select the framework version for which your software
product is intended.
Download Page URL: If your product has a descriptive web page, type its URL here.
Direct Download URL (Recommended) : Type a direct download link to your software
product here. The Plugin Installer portlet will follow this link in order to download your
software product.
172
Sun GlassFish Web Space Server 10.0 Administration Guide • July 2009
Creating a Custom Plugin Repository
Include Artifact in Repository: To enable others to use the Plugin Installer portlet to connect
to your repository and download your plugin, select Yes here.
When you are finished filling out the form, click the Save button. Your product version will be
saved, and your product will now be available in the software repository.
Chapter 8 • Advanced Web Space Server Configuration
173
174
9
C H A P T E R
9
Configuring Portal Properties
You can configure Web Space Server using a combination of settings which are stored in the
database (configured by the use of the various administration portlets) and settings which are
stored in properties (text) files. You can modify these files to change the portal's behavior in
certain ways. There are a large number of configuration options that can be set, and so this
section will have a wide-ranging set of topics. You can first go over the main configuration file,
which is stored in <root-dir>/webspace-for-gfv2/var/webspace/war-workspace/customs,
and is called portal-ext.properties.
Customizing Web Space Server Using the
portal-ext.properties File
Web Space Server's properties files differ from the configuration files of most other products in
that changing the default configuration file is discouraged. In fact, the file that contains all of the
defaults is stored inside a .jar file, making it more difficult to customize. Why is it set up this
way? Because Web Space Server uses the concept of overriding the defaults in a separate file,
rather than going in and customizing the default configuration file. You can just put the settings
you want to customize in your own configuration file, and then the configuration file for your
portal is uncluttered and contains only the settings you need. This makes it far easier to
determine whether a particular setting has been customized, and it makes the settings more
portable across different instances of Web Space Server.
The default configuration file is called portal.properties, and it resides inside the
portal-impl.jar file. This file is readily accessible inside the <GlassFish
home>/domains/domain1/application/j2ee-modules/webspace/WEB-INF/lib folder in
Web Space Server. You can see all the files in the portal-impl.jar file by unjaring a copy of the
file to an external directory. What follows is a brief description of the properties which can go
into the portal-ext.properties file, thus overriding the corresponding properties in the
portal.properties file. These are presented in a logical order, not an alphabetical one, as
many properties relate to other properties in the system.
175
Customizing Web Space Server Using the portal-ext.properties File
Create the portal-ext.properties file by placing the properties that you want to override and
place it in the
<root-dir>/webspace-for-gfv2/var/webspace/war-workspace/customs/webspace/WEB-INF/classes
folder to override that option in portal.properties.
Note – If you are using the evaluation bundle, Web Space Server's installed location is "Glassfish
Dir"/domains/domain1/application/j2ee-modules/webspace/.
Properties Override
Properties Override is a property in the portal.properties file, which is the default
configuration file for Sun GlassFish Web Space Server. You can override this property using
portal-ext.properties file.
This property specifies where to get the overridden properties. By default, it is
portal-ext.properties. Updates should not be made on the original file
(portal.properties) but on the overridden version of this file. Furthermore, each portal
instance can have its own overridden property file following the convention
portal-companyid.properties.
For example, one read order may be: portal.properties, then portal-ext.properties, and
then portal-test.properties.
Examples:
include-and-override=portal-ext.properties
include-and-override=portal-${easyconf:companyId}.properties
include-and-override=portal-test.properties
You can add additional property files that overwrite the default values by using the
external-properties system property.
A common example is to keep legacy property values when upgrading to newer versions of Web
Space Server.
java ... -Dexternal-properties=portal-legacy-4.4.properties
include-and-override=${external-properties}
Portal Context
Portal Context is a property in the portal.properties file, which is the default configuration
file for Sun GlassFish Web Space Server. You can override this property using
portal-ext.properties file.
176
Sun GlassFish Web Space Server 10.0 Administration Guide • July 2009
Customizing Web Space Server Using the portal-ext.properties File
This specifies the path of the portal servlet context.
Set this property if you deploy the portal to another path besides root.
Examples:
portal.ctx=/
portal.ctx=/portal
Resource Repositories Root
Resource Repositories Root is a property in the portal.properties file, which is the default
configuration file for Sun GlassFish Web Space Server. You can override this property using
portal-ext.properties file.
Specifies the default root path for various repository and resource paths. Under this path several
directories are created for the hot deploy feature, JCR, and so on.
Examples:
resource.repositories.root=<root-dir>/webspace-for-gfv2/var/webspace/war-workspace
Schema
Schema is a property in the portal.properties file, which is the default configuration file for
Sun GlassFish Web Space Server. You can override this property using
portal-ext.properties file.
Set this to true to automatically create tables and populate with default data if the database is
empty.
schema.run.enabled=true
Set this to true to populate with the minimal amount of data. Set this to false to populate with a
larger amount of sample data.
schema.run.minimal=true
Upgrade
Upgrade is a property in the portal.properties file, which is the default configuration file for
Sun GlassFish Web Space Server. You can override this property using
portal-ext.properties file.
Chapter 9 • Configuring Portal Properties
177
Customizing Web Space Server Using the portal-ext.properties File
Input a list of comma-delimited class names that implement
com.liferay.portal.upgrade.UpgradeProcess. These classes runs on startup to upgrade
older data to match with the latest version.
upgrade.processes=\
com.liferay.portal.upgrade.UpgradeProcess_4_3_0,\
com.liferay.portal.upgrade.UpgradeProcess_4_3_1,\
com.liferay.portal.upgrade.UpgradeProcess_4_3_2,\
com.liferay.portal.upgrade.UpgradeProcess_4_3_3,\
com.liferay.portal.upgrade.UpgradeProcess_4_3_4,\
com.liferay.portal.upgrade.UpgradeProcess_4_3_5,\
com.liferay.portal.upgrade.UpgradeProcess_4_4_0,\
com.liferay.portal.upgrade.UpgradeProcess_5_0_0,\
com.liferay.portal.upgrade.UpgradeProcess_5_1_0
Verify
Verify is a property in the portal.properties file, which is the default configuration file for
Sun GlassFish Web Space Server. You can override this property using
portal-ext.properties file.
Input a list of comma-delimited class names that implement
com.liferay.portal.integrity.VerifyProcess. These classes runs on startup to verify and
fix any integrity problems found in the database.
verify.processes=com.liferay.portal.verify.VerifyProcessSuite
Specify the frequency for verifying the integrity of the database.
Constants in VerifyProcess:
public static final int ALWAYS = -1;
public static final int NEVER = 0;
public static final int ONCE = 1;
verify.frequency=1
Auto Deploy
Auto Deploy is a property in the portal.properties file, which is the default configuration file
for Sun GlassFish Web Space Server. You can override this property using
portal-ext.properties file.
178
Sun GlassFish Web Space Server 10.0 Administration Guide • July 2009
Customizing Web Space Server Using the portal-ext.properties File
Input a list of comma-delimited class names that implement
com.liferay.portal.kernel.deploy.auto.AutoDeployListener. These classes are used to
process the auto deployment of WARs.
auto.deploy.listeners=\
com.liferay.portal.deploy.auto.LayoutTemplateAutoDeployListener,\
com.liferay.portal.deploy.auto.PortletAutoDeployListener,\
com.liferay.portal.deploy.auto.ThemeAutoDeployListener,\
com.liferay.portal.deploy.auto.WebAutoDeployListener,\
com.liferay.portal.deploy.auto.exploded.tomcat.LayoutTemplateExplodedTomcatListener,\
com.liferay.portal.deploy.auto.exploded.tomcat.PortletExplodedTomcatListener,\
com.liferay.portal.deploy.auto.exploded.tomcat.ThemeExplodedTomcatListener
Set the following to true to enable auto deploy of layout templates, portlets, and themes.
auto.deploy.enabled=true
Set the directory to scan for layout templates, portlets, and themes to auto deploy.
auto.deploy.deploy.dir=${resource.repositories.root}/deploy
Set the directory where auto deployed WARs are copied to. The application server or servlet
container must know to listen on that directory.
Different containers have different hot deploy paths. For example, Tomcat listens on
${catalina.base}/webapps whereas JBoss listens on ${jboss.server.home.dir}/deploy.
Set a blank directory to automatically use the application server specific directory.
Examples:
auto.deploy.dest.dir=
auto.deploy.default.dest.dir=../webapps
auto.deploy.geronimo.dest.dir=${org.apache.geronimo.base.dir}/deploy
auto.deploy.geronimo-jetty.dest.dir=${org.apache.geronimo.base.dir}/deploy
auto.deploy.geronimo-tomcat.dest.dir=${org.apache.geronimo.base.dir}/deploy
auto.deploy.glassfish.dest.dir=${com.sun.aas.instanceRoot}/autodeploy
auto.deploy.glassfish-tomcat.dest.dir=${com.sun.aas.instanceRoot}/autodeploy
auto.deploy.jboss-jetty.dest.dir=${jboss.server.home.dir}/deploy
auto.deploy.jboss-tomcat.dest.dir=${jboss.server.home.dir}/deploy
auto.deploy.jetty.dest.dir=${jetty.home}/webapps
auto.deploy.jonas-jetty.dest.dir=${jonas.base}/webapps/autoload
auto.deploy.jonas-tomcat.dest.dir=${jonas.base}/webapps/autoload
auto.deploy.tomcat.dest.dir=${catalina.base}/webapps
auto.deploy.weblogic.dest.dir=${env.DOMAIN_HOME}/autodeploy
Set the interval in milliseconds on how often to scan the directory for changes.
auto.deploy.interval=10000
Chapter 9 • Configuring Portal Properties
179
Customizing Web Space Server Using the portal-ext.properties File
Set the number of attempts to deploy a file before blacklisting it.
auto.deploy.blacklist.threshold=10
Set the following to true if deployed WARs are unpacked. Set this to false if your application
server has concurrency issues with deploying large WARs.
auto.deploy.unpack.war=true
Set the following to true if you want the deployer to rename portlet.xml to portletcustom.xml. This is only needed when deploying the portal on WebSphere 6.1.x with a version
before 6.1.0.7 because WebSphere's portlet container tries to process a portlet at the same time
that Web Space Server is trying to process a portlet.
Note that according to IBM, on versions after 6.1.0.9, you need to add a context parameter to
the web.xml descriptor in your portlet application called
com.ibm.websphere.portletcontainer.PortletDeploymentEnabled and set it to false. This
parameter causes WebSphere's built-in portlet container to ignore your portlet application
when it is deployed, enabling Web Space Server to pick it up.
auto.deploy.custom.portlet.xml=false
Set this to 1 if you are using JBoss' PrefixDeploymentSorter. This appends a 1 in front of your
WAR name. For example, if you are deploying a portlet called testportlet.war, it will deploy
it to 1test-portlet.war. JBoss now knows to load this portlet after the other WARs have
loaded; however, it will remove the 1 from the context path.
Modify /server/default/conf/jboss-service.xml.
See org.jboss.deployment.scanner.PrefixDeploymentSorter.
auto.deploy.jboss.prefix=1
Set the path to Tomcat's configuration directory. This property is used to auto deploy exploded
WARs. Tomcat context XML files found in the auto deploy directory are copied to Tomcat's
configuration directory. The context XML file must have a docBase attribute that points to a
valid WAR directory.
auto.deploy.tomcat.conf.dir=../conf/Catalina/localhost
Set the path to Tomcat's global class loader. This property is only used by Tomcat in a
standalone environment.
auto.deploy.tomcat.lib.dir=../common/lib/ext
Set the URLs of Libraries that might be needed to download during the auto deploy process.
180
Sun GlassFish Web Space Server 10.0 Administration Guide • July 2009
Customizing Web Space Server Using the portal-ext.properties File
library.download.url.quercus.jar=http://lportal.svn.sourceforge.net/viewvc/*
checkout*/lportal/portal/trunk/lib/development/quercus.jar
library.download.url.resin-util.jar=http://lportal.
svn.sourceforge.net/viewvc/*checkout*/lportal/portal/trunk/lib/development/
resin-util.jar
library.download.url.script-10.jar=http://lportal.svn.sourceforge.net/viewvc
/*checkout*/lportal/portal/trunk/lib/development/script-10.jar
Hot Deploy
Hot Deploy is a property in the portal.properties file, which is the default configuration file
for Sun GlassFish Web Space Server. You can override this property using
portal-ext.properties file.
Input a list of comma-delimited class names that implement
com.liferay.portal.kernel.deploy.hot.HotDeployListener. These classes are used to
process the deployment and undeployment of WARs at runtime.
Note – PluginPackageHotDeployListener must always be first.
hot.deploy.listeners=\
com.liferay.portal.deploy.hot.PluginPackageHotDeployListener,\
com.liferay.portal.deploy.hot.HookHotDeployListener,\
com.liferay.portal.deploy.hot.LayoutTemplateHotDeployListener,\
com.liferay.portal.deploy.hot.PortletHotDeployListener,\
com.liferay.portal.deploy.hot.ThemeHotDeployListener,\
com.liferay.portal.deploy.hot.ThemeLoaderHotDeployListener
Hot Undeploy
Hot Undeploy is a property in the portal.properties file, which is the default configuration
file for Sun GlassFish Web Space Server. You can override this property using
portal-ext.properties file.
Set the following to true to enable undeploying plugins.
hot.undeploy.enabled=true
Set the undeploy interval to the number of milliseconds the system should wait for the undeploy
process to finish.
hot.undeploy.interval=0
Set the following to true to undeploy a plugin before deploying a new version. This property is
only used if the property hot.undeploy.enabled is set to true.
Chapter 9 • Configuring Portal Properties
181
Customizing Web Space Server Using the portal-ext.properties File
hot.undeploy.on.redeploy=false
Plugin
Plugin is a property in the portal.properties file, which is the default configuration file for
Sun GlassFish Web Space Server. You can override this property using
portal-ext.properties file.
Input a list of comma-delimited supported plugin types.
plugin.types=portlet,theme,layout-template,web
Input a list of Liferay plugin repositories separated by \n characters.
plugin.repositories.trusted=http://plugins.liferay.com/official
plugin.repositories.untrusted=http://plugins.liferay.com/community
Set this property to false to avoid receiving on screen notifications when there is a new version
of an installed plugin.
plugin.notifications.enabled=true
Input a list of plugin packages IDs separated by \n characters. Administrators won't be notified
when a new version of these plugins are available. The IDs are of the form groupID/artifactID.
You can also end the ID with an asterisk to match any ID that start with the previous character.
plugin.notifications.packages.ignored=liferay/sample-jsp-portlet
Portlet
Portlet is a property in the portal.properties file, which is the default configuration file for
Sun GlassFish Web Space Server. You can override this property using
portal-ext.properties file.
Set this property for the portlet container implementation to use. The default implementation is
the internal implementation and provides for the best backwards compatibility. The Sun
implementation provides more features and will be the recommended implementation in the
future.
portlet.container.impl=internal
#portlet.container.impl=sun
Set this property to define the default virtual path for all hot deployed portlets. See
liferay-portlet-app_4_3_0.dtd and the virtual-path element for more information.
182
Sun GlassFish Web Space Server 10.0 Administration Guide • July 2009
Customizing Web Space Server Using the portal-ext.properties File
portlet.virtual.path=
Theme
Theme is a property in the portal.properties file, which is the default configuration file for
Sun GlassFish Web Space Server. You can override this property using
portal-ext.properties file.
Set this property to true to load the theme's merged CSS files for faster loading for production.
Set this property to false for easier debugging for development. You can also disable fast loading
by setting the URL parameter css_fast_load to 0.
theme.css.fast.load=true
Set the theme's shorcut icon.
theme.shortcut.icon=liferay.ico
Set this property to set the default virtual path for all hot deployed themes. See
liferay-look-and-feel_4_3_0.dtd and the virtual-path element for more information.
theme.virtual.path=
Set this with an absolute path to specify where imported theme files from a LAR will be stored.
This path will override the file-storage path specified in liferay-themeloader. xml.
theme.loader.storage.path=
Themes can be imported via LAR files. Set this to true if imported themes should use a new
theme ID on every import. This will ensure that a copy of the old theme is preserved in the
theme loader storage path. However, this also means that a lot of themes that are no longer used
remain in the file system. It is recommended that you set this to false.
theme.loader.new.theme.id.on.import=false
Set this to true to decorate portlets by default.
theme.portlet.decorate.default=true
Resource Actions
Resource Actions is a property in the portal.properties file, which is the default
configuration file for Sun GlassFish Web Space Server. You can override this property using
portal-ext.properties file.
Chapter 9 • Configuring Portal Properties
183
Customizing Web Space Server Using the portal-ext.properties File
Input a list of comma-delimited resource action configurations that will be read from the class
path.
resource.actions.configs=resource-actions/default.xml
Model Hints
Model Hints is a property in the portal.properties file, which is the default configuration file
for Sun GlassFish Web Space Server. You can override this property using
portal-ext.properties file.
Input a list of comma-delimited model hints configurations.
model.hints.configs=\
META-INF/portal-model-hints.xml,\
META-INF/workflow-model-hints.xml,\
META-INF/ext-model-hints.xml,\
META-INF/portlet-model-hints.xml
Spring
Spring is a property in the portal.properties file, which is the default configuration file for
Sun GlassFish Web Space Server. You can override this property using
portal-ext.properties file.
Input a list of comma-delimited Spring configurations. These will be loaded after the bean
definitions specified in the contextConfigLocation parameter in web.xml.
spring.configs=\
META-INF/data-source-spring.xml,\
META-INF/misc-spring.xml,\
META-INF/counter-spring.xml,\
META-INF/documentlibrary-spring.xml,\
META-INF/lock-spring.xml,\
META-INF/mail-spring.xml,\
META-INF/portal-spring.xml,\
META-INF/portal-spring-jcr.xml,\
META-INF/ext-spring.xml
Set the bean name for the Liferay data source.
spring.hibernate.data.source=liferayDataSource
Set the bean name for the Liferay session factory.
spring.hibernate.session.factory=&liferaySessionFactory
184
Sun GlassFish Web Space Server 10.0 Administration Guide • July 2009
Customizing Web Space Server Using the portal-ext.properties File
Hibernate
Hibernate is a property in the portal.properties file, which is the default configuration file
for Sun GlassFish Web Space Server. You can override this property using
portal-ext.properties file.
Many of the following properties should only be customized if you have advanced knowledge of
Hibernate. They map to various Hibernate configuration options which themselves have
detailed documentation. Please see http://www.hibernate.org for more information.
Input a list of comma-delimited Hibernate configurations.
hibernate.configs=\
META-INF/counter-hbm.xml,\
META-INF/mail-hbm.xml,\
META-INF/portal-hbm.xml,\
META-INF/ext-hbm.xml
Use the Liferay SQL dialect because it will automatically detect the proper SQL dialect based on
your connection URL.
hibernate.dialect=com.liferay.portal.dao.orm.hibernate.DynamicDialect
Set the Hibernate connection release mode. You should not modify this unless you know what
you're doing. The default setting works best for Spring managed transactions. See the method
buildSessionFactory in class
org.springframework.orm.hibernate3.LocalSessionFactoryBean and search for the
phrase "on_close" to understand how this works.
hibernate.connection.release_mode=on_close
Set the Hibernate cache provider. Ehcache is recommended in a clustered environment. See the
property net.sf.ehcache.configurationResourceName for detailed configuration.
Examples:
hibernate.cache.provider_class=com.liferay.portal.dao.orm.hibernate.EhCacheProvider
hibernate.cache.provider_class=net.sf.hibernate.cache.HashtableCacheProvider
hibernate.cache.provider_class=com.liferay.portal.dao.orm.hibernate.OSCacheProvider
This property is used if Hibernate is configured to use Ehcache's cache provider.
net.sf.ehcache.configurationResourceName=/ehcache/hibernate.xml
Use the following ehcache configuration in a clustered environment.
net.sf.ehcache.configurationResourceName=/ehcache/hibernate-clustered.xml
Chapter 9 • Configuring Portal Properties
185
Customizing Web Space Server Using the portal-ext.properties File
Set other Hibernate cache settings.
hibernate.cache.use_query_cache=true
hibernate.cache.use_second_level_cache=true
hibernate.cache.use_minimal_puts=true
hibernate.cache.use_structured_entries=false
Use these properties to disable Hibernate caching. This may be a performance hit; you may only
want to use these properties for diagnostic purposes.
hibernate.cache.provider_class=org.hibernate.cache.NoCacheProvider
hibernate.cache.use_query_cache=false
hibernate.cache.use_second_level_cache=false
Set the JDBC batch size to improve performance. If you're using Oracle 9i, however, you must
set the batch size to 0 as a workaround for a hanging bug in the Oracle driver. See
http://support.liferay.com/browse/LEP-1234 for more information.
Examples:
hibernate.jdbc.batch_size=20
hibernate.jdbc.batch_size=0
Set other miscellaneous Hibernate properties.
hibernate.jdbc.use_scrollable_resultset=true
hibernate.bytecode.use_reflection_optimizer=true
hibernate.show_sql=false
Use the classic query factory until WebLogic and Hibernate 3 can get along. See http://www .
hibernate .org/250 . html #A23 for more information.
hibernate.query.factory_class=org.hibernate.hql.classic.ClassicQueryTranslatorFactory
Ehcache
Ehcache is a property in the portal.properties file, which is the default configuration file for
Sun GlassFish Web Space Server. You can override this property using
portal-ext.properties file.
Set the classpath to the location of the Ehcache config file for internal caches. Edit the file
specified in the property ehcache.multi-vm.config.location to enable clustered cache.
ehcache.single.vm.config.location=/ehcache/liferay-single-vm.xml
ehcache.multi.vm.config.location=/ehcache/liferay-multi-vm.xml
Use the following in a clustered environment.
186
Sun GlassFish Web Space Server 10.0 Administration Guide • July 2009
Customizing Web Space Server Using the portal-ext.properties File
ehcache.multi.vm.config.location=/ehcache/liferay-multi-vm-clustered.xml
Commons Pool
Commons Pool is a property in the portal.properties file, which is the default configuration
file for Sun GlassFish Web Space Server. You can override this property using
portal-ext.properties file.
Commons Pool is used to pool and recycle objects that are used very often. This can help lower
memory usage. There is some debate over the synchronization issues related to Commons Pool.
Set this to false to disable object pooling.
commons.pool.enabled=false
JavaScript
JavaScript is a property in the portal.properties file, which is the default configuration file
for Sun GlassFish Web Space Server. You can override this property using
portal-ext.properties file.
Set a list of JavaScript files that will be loaded programmatically in /html/common/
themes/top_js.jsp.
There are two lists of files specified in the properties javascript.barebone.files and
javascript.everything.files.
As the name suggests, the barebone list is a trimmed down version of the everything list whereas
the everything list is a list of all loaded JavaScript files.
The two lists of files exist for performance reasons because unauthenticated users usually do not
utilize all the JavaScript that is available. See the property javascript.barebone.enabled for
more information on the logic of when the barebone list is used and when the everything list is
used and how to customize that logic.
The list of files are also merged and packed for further performance improvements. See the
property javascript.fast.load for more details.
Specify the list of barebone files.
The ordering of the JavaScript files is important. Specifically, all JQuery scripts should go first.
The Liferay scripts are grouped in such a way that the first grouping denotes utility scripts that
are used by the second and third groups. The second grouping denotes utility classes that rely
on the first group, but does not rely on the second or third group. The third grouping denotes
modules that rely on the first and second group.
Chapter 9 • Configuring Portal Properties
187
Customizing Web Space Server Using the portal-ext.properties File
javascript.barebone.files=\
\
#
# JQuery scripts
#
\
jquery/jquery.js,\
jquery/cookie.js,\
jquery/hover_intent.js,\
jquery/j2browse.js,\
jquery/livequery.js,\
jquery/ui.core.js,\
jquery/ui.datepicker.js,\
jquery/ui.dialog.js,\
\
#
# Miscellaneous scripts
#
\
misc/class.js,\
misc/swfobject.js,\
\
#
# Liferay base utility scripts
#
\
liferay/liferay.js,\
liferay/browser.js,\
liferay/util.js,\
\
#
# Liferay utility scripts
#
\
liferay/events.js,\
liferay/popup.js,\
liferay/portal.js,\
liferay/portlet.js,\
\
#
# Liferay modules
#
\
liferay/dock.js,\
liferay/menu.js
#
# Specify the list of everything files.
#
188
Sun GlassFish Web Space Server 10.0 Administration Guide • July 2009
Customizing Web Space Server Using the portal-ext.properties File
javascript.everything.files=\
\
#
# JQuery scripts
#
\
jquery/jquery.js,\
jquery/cookie.js,\
jquery/form.js,\
jquery/hover_intent.js,\
jquery/j2browse.js,\
jquery/jeditable.js,\
jquery/json.js,\
jquery/livequery.js,\
jquery/media.js,\
jquery/ui.core.js,\
jquery/ui.accordion.js,\
jquery/ui.dialog.js,\
jquery/ui.draggable.js,\
jquery/ui.droppable.js,\
jquery/ui.resizable.js,\
jquery/ui.selectable.js,\
jquery/ui.slider.js,\
jquery/ui.sortable.js,\
jquery/ui.tabs.js,\
jquery/effects.core.js,\
jquery/effects.blind.js,\
jquery/effects.bounce.js,\
jquery/effects.clip.js,\
jquery/effects.drop.js,\
jquery/effects.explode.js,\
jquery/effects.fold.js,\
jquery/effects.highlight.js,\
jquery/effects.pulsate.js,\
jquery/effects.scale.js,\
jquery/effects.shake.js,\
jquery/effects.slide.js,\
jquery/effects.transfer.js,\
jquery/ui.color_picker.js,\
jquery/ui.autocomplete.js,\
\
#
# Miscellaneous scripts
#
\
misc/class.js,\
misc/swfobject.js,\
\
Chapter 9 • Configuring Portal Properties
189
Customizing Web Space Server Using the portal-ext.properties File
Advanced Liferay Configuration
#
# Liferay base utility scripts
#
\
liferay/liferay.js,\
liferay/browser.js,\
liferay/util.js,\
liferay/language.js,\
liferay/layout.js,\
\
#
# Liferay utility scripts
#
\
liferay/events.js,\
liferay/popup.js,\
liferay/portal.js,\
liferay/portlet.js,\
\
#
# Liferay modules
#
\
liferay/auto_fields.js,\
liferay/color_picker.js,\
liferay/dock.js,\
liferay/dynamic_select.js,\
liferay/layout_configuration.js,\
liferay/layout_exporter.js,\
liferay/menu.js,\
liferay/notice.js,\
liferay/navigation.js,\
liferay/session.js,\
liferay/tags_selector.js,\
liferay/upload.js
Set this property to false to always load JavaScript files listed in the property
javascript.everything.files. Set this to true to sometimes load
javascript.barebone.files and sometimes load javascript.everything.files.
The default logic is coded in com.liferay.portal.events.ServicePreAction in such a way
that unauthenticated users get the barebone list of JavaScript files whereas authenticated users
get the everything list of JavaScript files.
javascript.barebone.enabled=true
Set this property to true to load the packed version of files listed in the properties
javascript.barebone.files or javascript.everything.files.
190
Sun GlassFish Web Space Server 10.0 Administration Guide • July 2009
Customizing Web Space Server Using the portal-ext.properties File
Set this property to false for easier debugging for development. You can also disable fast loading
by setting the URL parameter js_fast_load to 0.
javascript.fast.load=true
Set the following to true to enable the display of JavaScript logging.
javascript.log.enabled=false
SQL Data
SQL Data is a property in the portal.properties file, which is the default configuration file for
Sun GlassFish Web Space Server. You can override this property using
portal-ext.properties file.
Set the default SQL IDs for common objects.
sql.data.com.liferay.portal.model.Country.country.id=19
sql.data.com.liferay.portal.model.Region.region.id=5
sql.data.com.liferay.portal.model.ListType.account.address=10000
sql.data.com.liferay.portal.model.ListType.account.email.address=10004
sql.data.com.liferay.portal.model.ListType.contact.email.address=11003
sql.data.com.liferay.portal.model.ListType.organization.status=12017
Company
Company is a property in the portal.properties file, which is the default configuration file for
Sun GlassFish Web Space Server. You can override this property using
portal-ext.properties file.
This sets the default web ID. Omni admin users must belong to the company with this web ID.
company.default.web.id=liferay.com
The portal can authenticate users based on their email address, screen name, or user ID.
company.security.auth.type=emailAddress
company.security.auth.type=screenName
company.security.auth.type=userId
Set this to true to ensure users log in with https.
company.security.auth.requires.https=false
Set the following to true to allow users to select the remember me feature to automatically log in
to the portal.
Chapter 9 • Configuring Portal Properties
191
Customizing Web Space Server Using the portal-ext.properties File
company.security.auto.login=true
Set the following to the maximum age (in number of seconds) of the browser cookie that
enables the remember me feature. A value of 31536000 signifies a lifespan of one year. A value
of -1 signifies a lifespan of a browser session.
Rather than setting this to 0, set the property company.security.auto.login to false to disable
the remember me feature.
company.security.auto.login.max.age=31536000
Set the following to true to allow users to ask the portal to send them their password.
company.security.send.password=true
Set the following to true to allow strangers to create accounts and register themselves on the
portal.
company.security.strangers=true
Set the following to true if strangers can create accounts with email addresses that match the
company mail suffix. This property is not used unless company.security.strangers is also set
to true.
company.security.strangers.with.mx=true
Set the following to true if strangers who create accounts need to be verified via email.
company.security.strangers.verify=false
Set the following to true to allow community administrators to use their own logo instead of the
enterprise logo.
company.security.community.logo=true
Users
Users is a property in the portal.properties file, which is the default configuration file for
Sun GlassFish Web Space Server. You can override this property using
portal-ext.properties file.
Set the following to false if users cannot be deleted.
users.delete=true
Set the following to true to always autogenerate user screen names even if the user gives a
specific user screen name.
192
Sun GlassFish Web Space Server 10.0 Administration Guide • July 2009
Customizing Web Space Server Using the portal-ext.properties File
users.screen.name.always.autogenerate=false
Input a class name that extends com.liferay.portal.security.auth.ScreenNameGenerator.
This class will be called to generate user screen names.
users.screen.name.generator=com.liferay.portal.security.auth.ScreenNameGenerator
Input a class name that extends com.liferay.portal.security.auth.ScreenNameValidator.
This class will be called to validate user IDs.
Examples:
users.screen.name.validator=com.liferay.portal.security.auth.ScreenNameValidator
users.screen.name.validator=com.liferay.portal.security.auth.LiberalScreenNameValidator
Set the maximum file size for user portraits. A value of 0 for the maximum file size can be used
to indicate unlimited file size. However, the maximum file size allowed is set in property
com.liferay.portal.upload.UploadServletRequestImpl.max.size found in
system.properties.
users.image.max.size=307200
Groups and Roles
Groups and Roles is a property in the portal.properties file, which is the default
configuration file for Sun GlassFish Web Space Server. You can override this property using
portal-ext.properties file.
Input a list of comma-delimited system group names that will exist in addition to the standard
system groups. When the server starts, the portal checks to ensure all system groups exist. Any
missing system group will be created by the portal.
system.groups=
Input a list of comma-delimited system role names that will exist in addition to the standard
system roles. When the server starts, the portal checks to ensure all system roles exist. Any
missing system role will be created by the portal.
The standard system roles are: Administrator, Guest, Power User, and User. These roles cannot
be removed or renamed.
system.roles=
Set the description of the Administrator system role.
system.role.Administrator.description=Administrators are super users who can
do anything.
Chapter 9 • Configuring Portal Properties
193
Customizing Web Space Server Using the portal-ext.properties File
Set the description of the Guest system role.
system.role.Guest.description=Unauthenticated users always have this role.
Set the description of the Power User system role.
system.role.Power.User.description=Power Users have their own public and
private pages.
Set the description of the User system role.
system.role.User.description=Authenticated users should be assigned this
role.
Input a list of comma-delimited system community role names that will exist in addition to the
standard system community roles. When the server starts, the portal checks to ensure all system
community roles exist. Any missing system community role will be created by the portal.
The standard system community roles are: Community Administrator, Community Member,
and Community Owner. These roles cannot be removed or renamed.
system.community.roles=
Set the description of the Community Administrator system community role.
system.community.role.Community.Administrator.description=Community Administrators
are super users of their community but cannot make other users into
Community Administrators.
Set the description of the Community Member system community role.
system.community.role.Community.Member.description=All users who belong to a
community have this role within that community.
Set the description of the Community Owner system community role.
system.community.role.Community.Owner.description=Community Owners are super
users of their community and can assign community roles to users.
Input a list of comma-delimited system organization role names that will exist in addition to the
standard system organization roles. When the server starts, the portal checks to ensure all
system organization roles exist. Any missing system organization role will be created by the
portal.
The standard system organization roles are: Organization Administrator, Organization
Member, and Organization Owner. These roles cannot be removed or renamed.
system.organization.roles=
194
Sun GlassFish Web Space Server 10.0 Administration Guide • July 2009
Customizing Web Space Server Using the portal-ext.properties File
Set the description of the Organization Administrator system organization role.
system.organization.role.Organization.Administrator.description=Organization
Administrators are super users of their organization but cannot make other
users into Organization Administrators.
Set the description of the Organization Member system organization role.
system.organization.role.Organization.Member.description=All users who belong
to a organization have this role within that organization.
Set the description of the Organization Owner system organization role.
system.organization.role.Organization.Owner.description=Organization Owners
are super users of their organization and can assign organization roles to
users.
Omni admin users can administer the portal's core functionality: gc, shutdown, and so on.
Omni admin users must belong to the default company.
Multiple portal instances might be deployed on one application server, and not all of the
administrators should have access to this core functionality. Input the IDs of users who are
omniadmin users.
Leave this field blank if users who belong to the right company and have the Administrator role
are allowed to administer the portal's core functionality.
omniadmin.users=
Set the following to true if all users are required to agree to the terms of use.
terms.of.use.required=true
Organizations
Organizations is a property in the portal.properties file, which is the default configuration
file for Sun GlassFish Web Space Server. You can override this property using
portal-ext.properties file.
Set the following to true if organizations must have an associated country.
organizations.country.required=true
Chapter 9 • Configuring Portal Properties
195
Customizing Web Space Server Using the portal-ext.properties File
Languages and Time Zones
Languages and Time Zones is a property in the portal.properties file, which is the default
configuration file for Sun GlassFish Web Space Server. You can override this property using
portal-ext.properties file.
Specify the available locales. Messages corresponding to a specific language are specified in
properties files with file names matching that of content/Language_*.properties. These
values can also be overridden in properties files with file names matching that of
content/Language-ext_*.properties. Use a comma to separate each entry.
All locales must use UTF-8 encoding.
See the following links to specify language and country codes:
http://ftp.ics.uci.edu/pub/ietf/http/related/iso639.txt
http://userpage.chemie.fu-berlin.de/diverse/doc/ISO_3166.html
locales=ar_SA,ca_AD,ca_ES,zh_CN,zh_TW,cs_CZ,nl_NL,en_US,fi_FI,fr_FR,de_DE,el
_GR,hu_HU,it_IT,ja_JP,ko_KR,fa_IR,pt_BR,ru_RU,es_ES,sv_SE,tr_TR,vi_VN
Set the following to true if unauthenticated users get their preferred language from the
Accept-Language header. Set the following to false if unauthenticated users get their preferred
language from their company.
locale.default.request=false
Specify the available time zones. The specified IDs must match those from the class
java.util.TimeZone.
time.zones=\
Pacific/Midway,\
Pacific/Honolulu,\
America/Anchorage,\
America/Los_Angeles,\
America/Denver,\
America/Chicago,\
America/New_York,\
America/Puerto_Rico,\
America/St_Johns,\
America/Sao_Paulo,\
America/Noronha,\
Atlantic/Azores,\
UTC,\
Europe/Lisbon,\
Europe/Paris,\
Europe/Istanbul,\
196
Sun GlassFish Web Space Server 10.0 Administration Guide • July 2009
Customizing Web Space Server Using the portal-ext.properties File
Asia/Jerusalem,\
Asia/Baghdad,\
Asia/Tehran,\
Asia/Dubai,\
Asia/Kabul,\
Asia/Karachi,\
Asia/Calcutta,\
Asia/Katmandu,\
Asia/Dhaka,\
Asia/Rangoon,\
Asia/Saigon,\
Asia/Shanghai,\
Asia/Tokyo,\
Asia/Seoul,\
Australia/Darwin,\
Australia/Sydney,\
Pacific/Guadalcanal,\
Pacific/Auckland,\
Pacific/Enderbury,\
Pacific/Kiritimati
Look and Feel
Look and Feel is a property in the portal.properties file, which is the default configuration
file for Sun GlassFish Web Space Server. You can override this property using
portal-ext.properties file.
Set the following to false if the system does not allow users to modify the look and feel.
look.and.feel.modifiable=true
Set the default layout template ID.
default.layout.template.id=2_columns_ii
Set the default theme ID for regular themes.
default.regular.theme.id=classic
Set the default color scheme ID for regular themes.
default.regular.color.scheme.id=01
Set the default theme ID for wap themes.
default.wap.theme.id=mobile
Set the default color scheme ID for wap themes.
Chapter 9 • Configuring Portal Properties
197
Customizing Web Space Server Using the portal-ext.properties File
default.wap.color.scheme.id=01
Set the following to true if you want a change in the theme selection of the public or private
group to automatically be applied to the other (that is, if public and private group themes
should always be the same).
theme.sync.on.group=false
Request
Request is a property in the portal.properties file, which is the default configuration file for
Sun GlassFish Web Space Server. You can override this property using
portal-ext.properties file.
Portlets that have been configured to use private request attributes in liferayportlet.xml
may still want to share some request attributes. This property allows you to configure which
request attributes will be shared.
Set a comma-delimited list of attribute names that will be shared when the attribute name starts
with one of the specified attribute names. For example, if you set the value to hello_, world_,
then all attribute names that start with hello_ or world_ will be shared.
request.shared.attributes=LIFERAY_SHARED_
Session
Session is a property in the portal.properties file, which is the default configuration file for
Sun GlassFish Web Space Server. You can override this property using
portal-ext.properties file.
Specify the number of minutes before a session expires. This value is always overridden by the
value set in web.xml.
session.timeout=30
Specify the number of minutes before a warning is sent to the user informing the user of the
session expiration. Specify 0 to disable any warnings.
session.timeout.warning=1
Set the auto-extend mode to true to avoid having to ask the user whether to extend the session
or not. Instead it will be automatically extended. The purpose of this mode is to keep the session
open as long as the user browser is open and with a portal page loaded. It is recommended to use
this setting along with a smaller session.timeout, such as 5 minutes for better performance.
198
Sun GlassFish Web Space Server 10.0 Administration Guide • July 2009
Customizing Web Space Server Using the portal-ext.properties File
session.timeout.auto.extend=false
Set this to true if the user is redirected to the default page when the session expires.
session.timeout.redirect.on.expire=false
Portlets that have been configured to use private session attributes in liferay-portlet.xml
may still want to share some session attributes. This property allows you to configure which
session attributes will be shared. Set a comma-delimited list of attribute names that will be
shared when the attribute name starts with one of the specified attribute names. For example, if
you set the value to hello_, world_, then all attribute names that start with hello_ or world_ will
be shared.
Note that this property is used to specify the sharing of session attributes from the portal to the
portlet. This is not used to specify session sharing between portlet WARs or from the portlet to
the portal.
session.shared.attributes=org.apache.struts.action.LOCALE,COMPANY_,USER_,LIF
ERAY_SHARED_
Set this to false to disable all persistent cookies. Features like automatically logging in will not
work.
session.enable.persistent.cookies=true
The login process sets several cookies if persistent cookies are enabled. Set this property to set
the domain of those cookies.
session.cookie.domain=
Set the following to true to invalidate the session when a user logs into the portal. This helps
prevents phishing. Set this to false if you need the guest user and the authenticated user to have
the same session.
session.enable.phishing.protection=true
Set the following to true to test whether users have cookie support before allowing them to sign
in. This test will always fail if tck.url is set to true because that property disables session cookies.
session.test.cookie.support=true
Set the following to true to disable sessions. Doing this will use cookies to remember the user
across requests. This is useful if you want to scale very large sites where the user may be sent to a
different server for each request. The drawback to this approach is that you must not rely on the
API for sessions provided by the servlet and portlet specs.
This feature is only available for Tomcat and requires that you set Tomcat's Manager class to
com.liferay.support.tomcat.session.SessionLessManagerBase.
Chapter 9 • Configuring Portal Properties
199
Customizing Web Space Server Using the portal-ext.properties File
session.disabled=false
Input a list of comma-delimited class names that extend
com.liferay.portal.struts.SessionAction. These classes will run at the specified event.
#
# Servlet session create event
#
servlet.session.create.events=com.liferay.portal.events.SessionCreateAction
#
# Servlet session destroy event
#
servlet.session.destroy.events=com.liferay.portal.events.SessionDestroyAction
Set the following to true to track user clicks in memory for the duration of a user's session.
Setting this to true allows you to view all live sessions in the Admin portlet.
session.tracker.memory.enabled=true
Set the following to true to track user clicks in the database after a user's session is invalidated.
Setting this to true allows you to generate usage reports from the database. Use this cautiously
because this will store a lot of usage data.
session.tracker.persistence.enabled=false
Set the following to true to convert the tracked paths to friendly URLs.
session.tracker.friendly.paths.enabled=false
Provide a list of comma-delimited paths that should not be tracked.
session.tracker.ignore.paths=\
/portal/css_cached,\
/portal/javascript_cached,\
/portal/render_portlet,\
\
/document_library/get_file
JASS
JASS is a property in the portal.properties file, which is the default configuration file for Sun
GlassFish Web Space Server. You can override this property using portal-ext.properties
file.
Set the following to false to disable JAAS security checks. Disabling JAAS speeds up login. JAAS
must be disabled if administrators are to be able to impersonate other users.
200
Sun GlassFish Web Space Server 10.0 Administration Guide • July 2009
Customizing Web Space Server Using the portal-ext.properties File
portal.jaas.enable=false
By default, com.liferay.portal.security.jaas.PortalLoginModule loads the correct JAAS
login module based on what application server or servlet container the portal is deployed on.
Set a JAAS implementation class to override this behavior.
portal.jaas.impl=
The JAAS process may pass in an encrypted password and the authentication will only succeed
if there is an exact match. Set this property to false to relax that behavior so the user can input an
unencrypted password.
portal.jaas.strict.password=false
Set the following to true to enable administrators to impersonate other users. JAAS must also be
disabled for this feature to work.
portal.impersonation.enable=true
LDAP
LDAP is a property in the portal.properties file, which is the default configuration file for Sun
GlassFish Web Space Server. You can override this property using portal-ext.properties
file.
Set the values used to connect to a LDAP store.
ldap.factory.initial=com.sun.jndi.ldap.LdapCtxFactory
ldap.base.provider.url=ldap://localhost:10389
ldap.base.dn=dc=example,dc=com
ldap.security.principal=uid=admin,ou=system
ldap.security.credentials=secret
ldap.referral=follow
Settings for com.liferay.portal.security.auth.LDAPAuth can be configured from the
Admin portlet. It provides out of the box support for Apache Directory Server, Microsoft Active
Directory Server, Novell eDirectory, and OpenLDAP. The default settings are for Apache
Directory Server.
The LDAPAuth class must be specified in the property auth.pipeline.pre to be executed.
Encryption is implemented by com.liferay.util.Encryptor.provider.class in system.
properties.
ldap.auth.enabled=false
ldap.auth.required=false
Chapter 9 • Configuring Portal Properties
201
Customizing Web Space Server Using the portal-ext.properties File
Set either bind or password-compare for the LDAP authentication method. Bind is preferred by
most vendors so that you don't have to worry about encryption strategies.
ldap.auth.method=bind
ldap.auth.method=password-compare
Set the password encryption to used to compare passwords if the property ldap.auth.method is
set to password-compare.
ldap.auth.password.encryption.algorithm=
ldap.auth.password.encryption.algorithm.types=MD5,SHA
Active Directory stores information about the user account as a series of bit fields in the
UserAccountControl attribute.
If you want to prevent disabled accounts from logging into the portal you need to use a search
filter similar to the following:
(&(objectclass=person)(userprincipalname=@email_address@)(!(UserAccountControl:
1.2.840.113556.1.4.803:=2)))
See the following links:
http://support.microsoft.com/kb/305144/
http://support.microsoft.com/?kbid=269181
ldap.auth.search.filter=(mail=@email_address@)
You can write your own class that extends
com.liferay.portal.security.ldap.AttributesTransformer to transform the LDAP
attributes before a user or group is imported to the LDAP store.
ldap.attrs.transformer.impl=com.liferay.portal.security.ldap.AttributesTransformer
You can write your own class that extends com.liferay.portal.security.ldap.LDAPUser to
customize the behavior for exporting portal users to the LDAP store.
ldap.user.impl=com.liferay.portal.security.ldap.LDAPUser
When a user is exported to LDAP and the user does not exist, the user will be created with the
following default object classes.
ldap.user.default.object.classes=top,person,inetOrgPerson,organizationalPerson
When importing and exporting users, the portal will use this mapping to connect LDAP user
attributes and portal user variables.
202
Sun GlassFish Web Space Server 10.0 Administration Guide • July 2009
Customizing Web Space Server Using the portal-ext.properties File
ldap.user.mappings=screenName=cn\npassword=userPassword\nemailAddress=mail\n
firstName=givenName\nlastName=sn\njobTitle=title\ngroup=groupMembership
When importing groups, the portal will use this mapping to connect LDAP group attributes
and portal user group variables.
ldap.group.mappings=groupName=cn\ndescription=description\nuser=uniqueMember
Settings for importing users and groups from LDAP to the portal.
ldap.import.enabled=false
ldap.import.on.startup=false
ldap.import.interval=10
ldap.import.user.search.filter=(objectClass=inetOrgPerson)
ldap.import.group.search.filter=(objectClass=groupOfUniqueNames)
Set either user or group for import method. If set to user, portal will import all users and the
groups associated with those users. If set to group, the portal import all groups and the users
associated those groups.
This value should be set based on how your LDAP server stores group membership
information.
ldap.import.method=user
ldap.import.method=group
Settings for exporting users from the portal to LDAP. This allows users to modify their first
name, last name, and so on in the portal and have that change get pushed to the LDAP server.
This will only be active if the property ldap.auth.enabled is also set to true. New users and
groups will be created at the specified DN.
ldap.export.enabled=true
ldap.users.dn=ou=users,dc=example,dc=com
ldap.groups.dn=ou=groups,dc=example,dc=com
Set this to true to use the LDAP's password policy instead of the portal password policy.
ldap.password.policy.enabled=false
Set these values to be a portion of the error message returned by the appropriate directory server
to allow the portal to recognize messages from the LDAP server. The default values will work for
Fedora DS.
ldap.error.password.age=age
ldap.error.password.expired=expired
ldap.error.password.history=history
ldap.error.password.not.changeable=not allowed to change
ldap.error.password.syntax=syntax
Chapter 9 • Configuring Portal Properties
203
Customizing Web Space Server Using the portal-ext.properties File
ldap.error.password.trivial=trivial
ldap.error.user.lockout=retry limit
CAS
CAS is a property in the portal.properties file, which is the default configuration file for Sun
GlassFish Web Space Server. You can override this property using portal-ext.properties
file.
Set this to true to enable CAS single sign on. NTLM will work only if LDAP authentication is
also enabled and the authentication is made by screen name. If set to true, then the property
auto.login.hooks must contain a reference to the class
com.liferay.portal.security.auth.CASAutoLogin and the filter
com.liferay.portal.servlet.filters.sso.cas.CASFilter must be referenced in web.xml.
cas.auth.enabled=false
A user may be authenticated from CAS and not yet exist in the portal. Set this to true to
automatically import users from LDAP if they do not exist in the portal.
cas.import.from.ldap=false
Set the default values for the required CAS URLs. Set either cas.server.name or
cas.service.url. Setting cas.server.name allows deep linking. See LEP-4423.
cas.login.url=https://localhost:8443/cas-web/login
cas.logout.url=https://localhost:8443/cas-web/logout
cas.server.name=localhost:8080
cas.service.url=
#cas.service.url=http://localhost:8080/c/portal/login
cas.service.url=http://localhost:8080/c/portal/login
cas.validate.url=https://localhost:8443/cas-web/proxyValidate
NTLM
NTLM is a property in the portal.properties file, which is the default configuration file for Sun
GlassFish Web Space Server. You can override this property using portal-ext.properties
file.
Set this to true to enable NTLM single sign on. NTLM will work only if LDAP authentication is
also enabled and the authentication is made by screen name. If set to true, then the property
"auto.login.hooks" must contain a reference to the class
com.liferay.portal.security.auth.NtlmAutoLogin and the filter
com.liferay.portal.servlet.filters.sso.ntlm.NtlmFilter must be referenced in
web.xml.
204
Sun GlassFish Web Space Server 10.0 Administration Guide • July 2009
Customizing Web Space Server Using the portal-ext.properties File
ntlm.auth.enabled=false
ntlm.auth.domain.controller=127.0.0.1
ntlm.auth.domain=EXAMPLE
OpenID
OpenID is a property in the portal.properties file, which is the default configuration file for
Sun GlassFish Web Space Server. You can override this property using
portal-ext.properties file.
Set this to true to enable OpenID authentication. If set to true, then the property
auto.login.hooks must contain a reference to the class
com.liferay.portal.security.auth.OpenIdAutoLogin.
open.id.auth.enabled=true
OpenSSO
OpenSSO is a property in the portal.properties file, which is the default configuration file for
Sun GlassFish Web Space Server. You can override this property using
portal-ext.properties file.
These properties controls Liferay's integration with OpenSSO.
Set this to true to enable OpenSSO authentication.
open.sso.auth.enabled=false
Set the log in URL and log out URL. The first URL is the link to your OpenSSO server (which
can be the same server as the one running Liferay); the second URL is the link to your Liferay
Portal.
open.sso.login.url=http://openssohost.example.com:8080/opensso/UI/Login?
goto=http://portalhost.example.com:8080/c/portal/login
open.sso.logout.url=http://openssohost.example.com:8080/opensso/UI/Logout?
goto=http://portalhost.example.com:8080/web/guest/home
Set the URL to the OpenSSO service.
open.sso.service.url=http://openssohost.example.com:8080/opensso
Set the HTTP attribute name for the user's screen name.
open.sso.screen.name.attr=uid
Set the HTTP attribute name for the user's email address.
Chapter 9 • Configuring Portal Properties
205
Customizing Web Space Server Using the portal-ext.properties File
open.sso.email.address.attr=mail
Set the HTTP attribute name for the user's Common Name.
open.sso.first.name.attr=cn
Set the HTTP attribute name for the user's Surname.
open.sso.last.name.attr=sn
Authentication Pipeline
Authentication Pipeline is a property in the portal.properties file, which is the default
configuration file for Sun GlassFish Web Space Server. You can override this property using
portal-ext.properties file.
Input a list of comma-delimited class names that implement
com.liferay.portal.security.auth.Authenticator. These classes will run before or after
the portal authentication begins.
The Authenticator class defines the constant values that should be used as return codes from the
classes implementing the interface. If# authentication is successful, return SUCCESS; if the user
exists but the passwords do not match, return FAILURE; and if the user does not exist on the
system, return DNE.
Constants in Authenticator:
public static final int SUCCESS = 1;
public static final int FAILURE = -1;
public static final int DNE = 0;
In case you have several classes in the authentication pipeline, all of them have to return
SUCCESS if you want the user to be able to login. If one of the authenticators returns FAILURE
or DNE, the login fails.
Under certain circumstances, you might want to keep the information in the portal database in
sync with an external database or an LDAP server. This can easily be achieved by implementing
a class via LDAPAuth that updates the information stored in the portal user database whenever
a user signs in.
Each portal instance can be configured at run time to either authenticate based on user IDs or
email addresses. See the Admin portlet for more information.
Available authenticators are:
com.liferay.portal.security.auth.LDAPAuth
206
Sun GlassFish Web Space Server 10.0 Administration Guide • July 2009
Customizing Web Space Server Using the portal-ext.properties File
See the LDAP properties to configure the behavior of the LDAPAuth class.
auth.pipeline.pre=com.liferay.portal.security.auth.LDAPAuth
auth.pipeline.post=
Set this to true to enable password checking by the internal portal authentication. If set to false,
you're essentially delegating password checking is delegated to the authenticators configured in
auth.pipeline.pre and auth.pipeline.post settings.
auth.pipeline.enable.liferay.check=true
Input a list of comma-delimited class names that implement
com.liferay.portal.security.auth.AuthFailure. These classes will run when a user has a
failed login or when a user has reached the maximum number of failed logins.
auth.failure=com.liferay.portal.security.auth.LoginFailure
auth.max.failures=com.liferay.portal.security.auth.LoginMaxFailures
auth.max.failures.limit=5
Set the following to true if users are forwarded to the last visited path upon successful login. If
set to false, users will be forwarded to their default layout page.
auth.forward.by.last.path=true
The login page reads a redirect by a parameter named redirect. If this property is set to true,
then users will be redirected to the given redirect path upon successful login. If the user does not
have permission to view that page, then the rule set by the property
auth.forward.by.last.path will apply.
You can set the redirect manually from another application, by appending the redirect
parameter in a url that looks like this:
/c/portal/login?redirect=%2Fgroup%2Femployees%2Fcalendar. This url will redirect the
user to the path /group/employees/calendar upon successful login.
auth.forward.by.redirect=true
Provide a list of comma-delimited paths that can be considered part of the last visited path.
auth.forward.last.paths=/document_library/get_file
Type a URL that will be used to login portal users whenever needed. By default, the portal's
login page is used.
#auth.login.url=/web/guest/home
Type a friendly URL of a page that will be used to login portal users whenever the user is
navigating a community and authentication is needed. By default, the portal's login page or the
URL set in the property auth.login.url is used.
Chapter 9 • Configuring Portal Properties
207
Customizing Web Space Server Using the portal-ext.properties File
auth.login.community.url=/login
Type the name of the login portlet used in a page identified by the URL of the previous property
(if one has been set). This will allow the portlet to have access to the redirect parameter and thus
forward the users to the page where they were trying to access when necessary. You should leave
the default value unless you have your own custom login portlet.
auth.login.portlet.name=58
Provide a list of comma-delimited paths that do not require authentication.
auth.public.paths=\
/blogs/find_entry,\
/blogs/rss,\
/blogs/trackback,\
\
/bookmarks/open_entry,\
\
/document_library/get_file,\
\
/journal/get_article,\
/journal/get_articles,\
/journal/get_latest_article_content,\
/journal/get_structure,\
/journal/get_template,\
/journal/view_article_content,\
/journal_articles/view_article_content,\
\
/layout_management/sitemap,\
\
/message_boards/find_category,\
/message_boards/find_message,\
/message_boards/find_thread,\
/message_boards/get_message_attachment,\
/message_boards/rss,\
\
/my_places/view,\
\
/polls/view_chart,\
\
/portal/expire_session,\
/portal/extend_session,\
/portal/extend_session_confirm,\
/portal/json_service,\
/portal/logout,\
/portal/open_id_request,\
/portal/open_id_response,\
/portal/session_click,\
208
Sun GlassFish Web Space Server 10.0 Administration Guide • July 2009
Customizing Web Space Server Using the portal-ext.properties File
/portal/session_tree_js_click,\
/portal/status,\
\
/search/open_search,\
/search/open_search_description.xml,\
\
/shopping/notify,\
\
/tags/rss,\
\
/wiki/get_page_attachment,\
/wiki/rss
Auto Login
Auto Login is a property in the portal.properties file, which is the default configuration file
for Sun GlassFish Web Space Server. You can override this property using
portal-ext.properties file.
Input a list of comma-delimited class names that implement
com.liferay.portal.security.auth.AutoLogin. These classes will run in consecutive order
for all unauthenticated users until one of them return a valid user ID and password
combination. If no valid combination is returned, then the request continues to process
normally. If a valid combination is returned, then the portal will automatically login that user
with the returned user ID and password combination.
For example, com.liferay.portal.security.auth.RememberMeAutoLogin reads from a cookie to
automatically log in a user who had previously logged in while selecting the Remember Me box.
This interface allows deployers to easily configure the portal to work with other SSO servers. See
com.liferay.portal.security.auth.CASAutoLogin for an example of how to configure the
portal with Yale's SSO server.
auto.login.hooks=com.liferay.portal.security.auth.CASAutoLogin,com.liferay.portal.security.auth.NtlmAutoLogin,com.liferay.portal.security.
auth.OpenIdAutoLogin,com.liferay.portal.security.auth.OpenSSOAutoLogin,co
m.liferay.portal.security.auth.RememberMeAutoLogin
Set the hosts that will be ignored for auto login.
auto.login.ignore.hosts=
Set the paths that will be ignored for auto login.
auto.login.ignore.paths=
Chapter 9 • Configuring Portal Properties
209
Customizing Web Space Server Using the portal-ext.properties File
SSO With MAC
SSO With MAC (Message Authentication Code) is a property in the portal.properties file,
which is the default configuration file for Sun GlassFish Web Space Server. You can override
this property using portal-ext.properties file.
To use SSO with MAC, post to an URL like:
http://localhost:8080/c/portal/login?cmd=already-registered&login=<userId|emailAddress>&
password=<MAC>
Pass the MAC in the password field. Make sure the MAC gets URL encoded because it might
contain characters not allowed in a URL.
SSO with MAC also requires that you set the following property in system.properties:
com.liferay.util.servlet.SessionParameters=false
See the following links:
http://support.liferay.com/browse/LEP-1288
http://en.wikipedia.org/wiki/Message_authentication_code
Set the following to true to enable SSO with MAC.
auth.mac.allow=false
Set the algorithm to use for MAC encryption.
auth.mac.algorithm=MD5
Set the shared key used to generate the MAC.
auth.mac.shared.key=
Passwords
Passwords is a property in the portal.properties file, which is the default configuration file
for Sun GlassFish Web Space Server. You can override this property using
portal-ext.properties file.
Set the following encryption algorithm to encrypt passwords. The default algorithm is SHA
(SHA-1). If set to NONE, passwords are stored in the database as plain text. The SHA-512
algorithm is currently unsupported.
Examples:
210
Sun GlassFish Web Space Server 10.0 Administration Guide • July 2009
Customizing Web Space Server Using the portal-ext.properties File
passwords.encryption.algorithm=CRYPT
passwords.encryption.algorithm=MD2
passwords.encryption.algorithm=MD5
passwords.encryption.algorithm=NONE
passwords.encryption.algorithm=SHA
passwords.encryption.algorithm=SHA-256
passwords.encryption.algorithm=SHA-384
passwords.encryption.algorithm=SSHA
Digested passwords are encoded via base64 or hex encoding. The default is base64.
passwords.digest.encoding=base64
#passwords.digest.encoding=hex
Input a class name that extends com.liferay.portal.security.pwd.BasicToolkit. This
class will be called to generate and validate passwords.
Examples:
passwords.toolkit=com.liferay.portal.security.pwd.PasswordPolicyToolkit
passwords.toolkit=com.liferay.portal.security.pwd.RegExpToolkit
If you choose to use com.liferay.portal.security.pwd.PasswordPolicyToolkit as your
password toolkit, you can choose either static or dynamic password generation. Static is set
through the property passwords.passwordpolicytoolkit.static and dynamic uses the class
com.liferay.util.PwdGenerator to generate the password. If you are using LDAP password
syntax checking, you will also have to use the static generator so that you can guarantee that
passwords obey its rules.
Examples:
passwords.passwordpolicytoolkit.generator=static
passwords.passwordpolicytoolkit.generator=dynamic
passwords.passwordpolicytoolkit.static=iheartliferay
If you choose to use com.liferay.portal.security.pwd.RegExpToolkit as your password
toolkit, set the regular expression pattern that will be used to generate and validate passwords.
Note that \ is replaced with \\ to work in Java.
The second pattern ensures that passwords must have at least 8 valid characters consisting of
digits or letters.
Examples:
passwords.regexptoolkit.pattern=(?=.{4})(?:[a-zA-Z0-9]*)
passwords.regexptoolkit.pattern=(?=.{8})(?:[a-zA-Z0-9]*)
Set the length and key for generating passwords.
Chapter 9 • Configuring Portal Properties
211
Customizing Web Space Server Using the portal-ext.properties File
Examples:
passwords.regexptoolkit.charset=0123456789
passwords.regexptoolkit.charset=0123456789ABCDEFGHIJKLMNOPQRSTUVWXYZabcdefghijklmnopqrstuvwxyz
Examples:
passwords.regexptoolkit.length=4
passwords.regexptoolkit.length=8
Set the name of the default password policy.
passwords.default.policy.name=Default Password Policy
Permissions
Permissions is a property in the portal.properties file, which is the default configuration file
for Sun GlassFish Web Space Server. You can override this property using
portal-ext.properties file.
Set the default permission checker class used by
com.liferay.portal.security.permission.PermissionCheckerFactory to check
permissions for actions on objects. This class can be overridden with a custom class that extends
com.liferay.portal.security.permission.PermissionCheckerImpl.
permissions.checker=com.liferay.portal.security.permission.PermissionCheckerImpl
Set the algorithm used to check permissions for a user. This is useful so that you can optimize
the search for different databases. See
com.liferay.portal.service.impl.PermissionLocalServiceImpl. The default is method
two.
The first algorithm uses several if statements to query the database for these five things in order.
If it finds any one of them, it returns true:
■
Is the user connected to one of the permissions via group or organization roles?
■
Is the user associated with groups or organizations that are directly connected to one of the
permissions?
■
Is the user connected to one of the permissions via user roles?
■
Is the user connected to one of the permissions via user group roles?
■
Is the user directly connected to one of the permissions?
permissions.user.check.algorithm=1
212
Sun GlassFish Web Space Server 10.0 Administration Guide • July 2009
Customizing Web Space Server Using the portal-ext.properties File
The second algorithm (the default) does a database join and checks the permissions in one step,
by calling countByGroupsRoles, countByGroupsPermissions, countByUsersRoles,
countByUserGroupRole, and countByUsersPermissions in one method.
permissions.user.check.algorithm=2
The third algorithm checks the permissions by checking for three things. It combines the role
check into one step. If it finds any of the following items, it returns true:
■
Is the user associated with groups or organizations that are directly connected to one of the
permissions?
■
Is the user associated with a role that is directly connected to one of the permissions?
■
Is the user directly connected to one of the permissions?
permissions.user.check.algorithm=3
The fourth algorithm does a database join and checks the permissions that algorithm three
checks in one step, by calling countByGroupsPermissions, countByRolesPermissions, and
countByUsersPermissions in one method.
permissions.user.check.algorithm=4
Set the default permissions list filter class. This class must implement
com.liferay.portal.kernel.security.permission.PermissionsListFilter. This is used
if you want to filter the list of permissions before it is actually persisted. For example, if you want
to make sure that all users who create objects never have the UPDATE action, then you can filter
that list and remove any permissions that have the UPDATE action before it is persisted.
permissions.list.filter=com.liferay.portal.security.permission.PermissionsListFilterImpl
Captcha
Captcha is a property in the portal.properties file, which is the default configuration file for
Sun GlassFish Web Space Server. You can override this property using
portal-ext.properties file.
Set the maximum number of captcha checks per portlet session. Set this value to zero to always
check. Set this value to a number less than zero to never check. Unauthenticated users will
always be checked on every request if captcha checks is enabled.
captcha.max.challenges=1
Set whether or not to use captcha checks for the following actions.
Chapter 9 • Configuring Portal Properties
213
Customizing Web Space Server Using the portal-ext.properties File
captcha.check.portal.create_account=true
captcha.check.portal.send_password=true
captcha.check.portlet.message_boards.edit_category=false
captcha.check.portlet.message_boards.edit_message=false
Startup Events
Startup Events is a property in the portal.properties file, which is the default configuration
file for Sun GlassFish Web Space Server. You can override this property using
portal-ext.properties file.
Input a list of comma-delimited class names that extend
com.liferay.portal.struts.SimpleAction. These classes will run at the specified event.
The following is a global startup event that runs once when the portal initializes.
global.startup.events=com.liferay.portal.events.GlobalStartupAction
The following is an application startup event that runs once for every web site instance of the
portal that initializes.
application.startup.events=com.liferay.portal.events.AppStartupAction
#application.startup.events=com.liferay.portal.events.AppStartupAction,com.l
iferay.portal.events.SampleAppStartupAction
Shutdown Events
Shutdown Events is a property in the portal.properties file, which is the default
configuration file for Sun GlassFish Web Space Server. You can override this property using
portal-ext.properties file.
Input a list of comma-delimited class names that extend
com.liferay.portal.struts.SimpleAction. These classes will run at the specified event.
Global shutdown event that runs once when the portal shuts down.
global.shutdown.events=com.liferay.portal.events.GlobalShutdownAction
Application shutdown event that runs once for every web site instance of the portal that shuts
down.
application.shutdown.events=com.liferay.portal.events.AppShutdownAction
Programmatically kill the Java process on shutdown. This is a workaround for a bug in Tomcat
and Linux where the process hangs on forever.
214
Sun GlassFish Web Space Server 10.0 Administration Guide • July 2009
Customizing Web Space Server Using the portal-ext.properties File
See http://support.liferay.com/browse/LEP-2048 for more information.
shutdown.programmatically.exit=false
Portal Events
Portal Events is a property in the portal.properties file, which is the default configuration
file for Sun GlassFish Web Space Server. You can override this property using
portal-ext.properties file.
Input a list of comma-delimited class names that extend
com.liferay.portal.struts.Action. These classes will run before or after the specified event.
Servlet service event: The pre-service events have an associated error page and will forward to
that page if an exception is thrown during execution of the events. The pre-service events
process before Struts processes the request.
Examples:
servlet.service.events.pre=com.liferay.portal.events.ServicePreAction
servlet.service.events.pre=com.liferay.portal.events.LogMemoryUsageAction,co
m.liferay.portal.events.LogThreadCountAction,com.liferay.portal.events.ServicePreAction
servlet.service.events.pre=com.liferay.portal.events.LogSessionIdAction,com.
liferay.portal.events.ServicePreAction
servlet.service.events.pre=com.liferay.portal.events.ServicePreAction,com.li
feray.portal.events.RandomLayoutAction
servlet.service.events.pre=com.liferay.portal.events.ServicePreAction,com.li
feray.portal.events.RandomLookAndFeelAction
Use the following to define the error page.
servlet.service.events.pre.error.page=/common/error.jsp
The post-service events process after Struts processes the request.
servlet.service.events.post=com.liferay.portal.events.ServicePostAction
Login Event
Login Event is a property in the portal.properties file, which is the default configuration file
for Sun GlassFish Web Space Server. You can override this property using
portal-ext.properties file.
Define events that can occur pre-login and post-login.
Chapter 9 • Configuring Portal Properties
215
Customizing Web Space Server Using the portal-ext.properties File
login.events.pre=com.liferay.portal.events.LoginPreAction
login.events.post=com.liferay.portal.events.LoginPostAction,com.liferay.portal.
events.DefaultLandingPageAction
Logout Event
Logout Event is a property in the portal.properties file, which is the default configuration
file for Sun GlassFish Web Space Server. You can override this property using
portal-ext.properties file.
Similarly, events can be defined for the log out event.
logout.events.pre=com.liferay.portal.events.LogoutPreAction
Example post events:
logout.events.post=com.liferay.portal.events.LogoutPostAction
logout.events.post=com.liferay.portal.events.LogoutPostAction,com.liferay.portal.events.GarbageCollectorAction
Default Landing Page
Default Landing Page is a property in the portal.properties file, which is the default
configuration file for Sun GlassFish Web Space Server. You can override this property using
portal-ext.properties file.
Set the default landing page path for logged in users relative to the server path. This is the page
users are automatically redirected to after logging in. For example, if you want the default
landing page to be http://localhost:8080/web/guest/login, set this to /web/guest/login.
To activate this feature, set auth.forward.by.last.path to true. To customize the behavior,
see com.liferay.portal.events.DefaultLandingPageAction in the login.events.post
property above.
#default.landing.page.path=/web/guest/login
Default Logout Page
Default Logout Page is a property in the portal.properties file, which is the default
configuration file for Sun GlassFish Web Space Server. You can override this property using
portal-ext.properties file.
Set the default logout page path for users relative to the server path. This is the page users are
automatically redirected to after logging out. For example, if you want the default logout page to
216
Sun GlassFish Web Space Server 10.0 Administration Guide • July 2009
Customizing Web Space Server Using the portal-ext.properties File
be http://localhost:8080/web/guest/logout, set this to /web/guest/logout. To activate
this feature, set auth.forward.by.last.path to true. To customize the behavior, see
com.liferay.portal.events.DefaultLogoutPageAction in the logout.events.post
property above.
#default.logout.page.path=/web/guest/logout
Default Guest Public Layout
Default Guest Public Layout is a property in the portal.properties file, which is the
default configuration file for Sun GlassFish Web Space Server. You can override this property
using portal-ext.properties file.
The Guest group must have at least one public page. The settings for the initial public page are
specified in the following properties.
If you need to add more than one page, set the property default.guest.public.layout.lar to
specify a LAR file instead.
For even more complex behavior, override the addDefaultGuestPublicLayouts method in
com.liferay.portal.service.impl.GroupLocalServiceImpl.
Set the name of the public layout.
default.guest.public.layout.name=Welcome
Set the layout template ID of the public layout.
default.guest.public.layout.template.id=2_columns_ii
Set the portlet IDs for the columns specified in the layout template.
default.guest.public.layout.column-1=58
default.guest.public.layout.column-2=47
default.guest.public.layout.column-3=
default.guest.public.layout.column-4=
Set the friendly url of the public layout.
default.guest.public.layout.friendly.url=/home
Set the regular theme ID for the public layout.
#default.guest.public.layout.regular.theme.id=classic
Set the regular color scheme ID for the public layout.
Chapter 9 • Configuring Portal Properties
217
Customizing Web Space Server Using the portal-ext.properties File
#default.guest.public.layout.regular.color.scheme.id=01
Set the wap theme ID for the public layout.
#default.guest.public.layout.wap.theme.id=mobile
Set the wap color scheme for the public layout.
#default.guest.public.layout.wap.color.scheme.id=01
Specify a LAR file that can be used to create the guest public layouts. If this property is set, the
previous layout properties will be ignored.
#default.guest.public.layouts.lar=${resource.repositories.root}/deploy/default_
guest_public.lar
Default User Private Layouts
Degault User Private Layouts is a property in the portal.properties file, which is the
default configuration file for Sun GlassFish Web Space Server. You can override this property
using portal-ext.properties file.
If the properties layout.user.private.layouts.enabled and
layout.user.private.layouts.auto.create are both set to true, then users will have private
layouts and they will be automatically created. The following settings are used for the creation
of for the initial private pages.
If you need to add more than one page, set the property default.user.private.layout.lar to
specify a LAR file instead.
For even more complex behavior, override the addDefaultUserPrivateLayouts method in
com.liferay.portal.events.ServicePreAction.
Set the name of the private layout.
default.user.private.layout.name=Welcome
Set the layout template ID of the private layout.
default.user.private.layout.template.id=2_columns_ii
Set the portlet IDs for the columns specified in the layout template.
default.user.private.layout.column-1=71_INSTANCE_OY0d,82,23,61
default.user.private.layout.column-2=11,29,8,19
default.user.private.layout.column-3=
default.user.private.layout.column-4=
218
Sun GlassFish Web Space Server 10.0 Administration Guide • July 2009
Customizing Web Space Server Using the portal-ext.properties File
Set the friendly url of the private layout.
default.user.private.layout.friendly.url=/home
Set the regular theme ID for the private layout.
#default.user.private.layout.regular.theme.id=classic
Set the regular color scheme ID for the private layout.
#default.user.private.layout.regular.color.scheme.id=01
Set the wap theme ID for the private layout.
#default.user.private.layout.wap.theme.id=mobile
Set the wap color scheme for the private layout.
#default.user.private.layout.wap.color.scheme.id=01
Specify a LAR file that can be used to create the user private layouts. If this property is set, the
previous layout properties will be ignored.
#default.user.private.layouts.lar=${resource.repositories.root}/deploy/default_
user_private.lar
Default User Public Layouts
Default User Public Layouts is a property in the portal.properties file, which is the
default configuration file for Sun GlassFish Web Space Server. You can override this property
using portal-ext.properties file.
If the properties layout.user.public.layouts.enabled and
layout.user.public.layouts.auto.create are both set to true, then users will have public
layouts and they will be automatically created. The following settings are used for the creation
of the initial public pages.
If you need to add more than one page, set the property default.user.public.layout.lar to
specify a LAR file instead.
For even more complex behavior, override the addDefaultUserPublicLayouts method in
com.liferay.portal.events.ServicePreAction.
Set the name of the public layout.
default.user.public.layout.name=Welcome
Chapter 9 • Configuring Portal Properties
219
Customizing Web Space Server Using the portal-ext.properties File
Set the layout template ID of the public layout.
default.user.public.layout.template.id=2_columns_ii
Set the portlet IDs for the columns specified in the layout template.
default.user.public.layout.column-1=82,23
default.user.public.layout.column-2=8,19
default.user.public.layout.column-3=
default.user.public.layout.column-4=
Set the friendly url of the public layout.
default.user.public.layout.friendly.url=/home
Set the regular theme ID for the public layout.
#default.user.public.layout.regular.theme.id=classic
Set the regular color scheme ID for the public layout.
#default.user.public.layout.regular.color.scheme.id=01
Set the wap theme ID for the public layout.
#default.user.public.layout.wap.theme.id=mobile
Set the wap color scheme for the public layout.
#default.user.public.layout.wap.color.scheme.id=01
Specify a LAR file that can be used to create the user public layouts. If this property is set, the
previous layout properties will be ignored.
#default.user.public.layouts.lar=${resource.repositories.root}/deploy/default_
user_public.lar
Default Admin
Default Admin is a property in the portal.properties file, which is the default configuration
file for Sun GlassFish Web Space Server. You can override this property using
portal-ext.properties file.
Set the default admin password.
default.admin.password=test
220
Sun GlassFish Web Space Server 10.0 Administration Guide • July 2009
Customizing Web Space Server Using the portal-ext.properties File
Set the default admin screen name prefix.
default.admin.screen.name=test
Set the default admin email address prefix.
default.admin.email.address.prefix=test
Set the default admin first name.
default.admin.first.name=Test
Set the default admin middle name.
default.admin.middle.name=
Set the default admin last name.
default.admin.last.name=Test
Layouts
Layouts is a property in the portal.properties file, which is the default configuration file for
Sun GlassFish Web Space Server. You can override this property using
portal-ext.properties file.
Set the list of layout types. The display text of each of the layout types is set in
Content/Language.properties and prefixed with layout.types. You can create new layout types
and specify custom settings for each layout type. End users input dynamic values as designed in
the edit page. End users see the layout as designed in the view page. The generated URL can
reference properties set in the edit page. Parentable layouts can contain child layouts. You can
also specify a comma-delimited list of configuration actions that will be called for your layout
when it is updated or deleted.
layout.types=portlet,panel,embedded,article,url,link_to_layout
Set whether or not private layouts are enabled. Set whether or not private layouts are
modifiable. Set whether or not private layouts should be auto created if a user has no private
layouts. If private layouts are not enabled, the other two properties are assumed to be false.
layout.user.private.layouts.enabled=true
layout.user.private.layouts.modifiable=true
layout.user.private.layouts.auto.create=true
Set whether or not public layouts are enabled. Set whether or not public layouts are modifiable.
Set whether or not public layouts should be auto created if a user has no public layouts. If public
layouts are not enabled, the other two properties are assumed to be false.
Chapter 9 • Configuring Portal Properties
221
Customizing Web Space Server Using the portal-ext.properties File
layout.user.public.layouts.enabled=true
layout.user.public.layouts.modifiable=true
layout.user.public.layouts.auto.create=true
Default Settings Layout
Default Settings Layout is a property in the portal.properties file, which is the default
configuration file for Sun GlassFish Web Space Server. You can override this property using
portal-ext.properties file.
layout.edit.page=/portal/layout/edit/portlet.jsp
layout.view.page=/portal/layout/view/portlet.jsp
layout.url=${liferay:mainPath}/portal/layout?p_l_id=${liferay:plid}
layout.url.friendliable=true
layout.parentable=true
layout.sitemapable=true
layout.configuration.action.update=
layout.configuration.action.delete=
Settings for portlet layouts are inherited from the default settings.
layout.edit.page[portlet]=/portal/layout/edit/portlet.jsp
layout.view.page[portlet]=/portal/layout/view/portlet.jsp
layout.url[portlet]=${liferay:mainPath}/portal/layout?p_l_id=${liferay:plid}
layout.url.friendliable[portlet]=true
layout.parentable[portlet]=true
layout.configuration.action.update[portlet]=
layout.configuration.action.delete[portlet]=
Settings for panel layouts.
layout.edit.page[panel]=/portal/layout/edit/panel.jsp
layout.view.page[panel]=/portal/layout/view/panel.jsp
layout.url[panel]=${liferay:mainPath}/portal/layout?p_l_id=${liferay:plid}
layout.url.friendliable[panel]=true
layout.parentable[panel]=true
Settings for embedded layouts.
layout.edit.page[embedded]=/portal/layout/edit/embedded.jsp
layout.view.page[embedded]=/portal/layout/view/embedded.jsp
layout.url[embedded]=${liferay:mainPath}/portal/layout?p_l_id=${liferay:
plid}
layout.url.friendliable[embedded]=true
layout.parentable[embedded]=false
layout.sitemapable[embedded]=true
layout.configuration.action.update[embedded]=
layout.configuration.action.delete[embedded]=
222
Sun GlassFish Web Space Server 10.0 Administration Guide • July 2009
Customizing Web Space Server Using the portal-ext.properties File
Settings for article layouts.
layout.edit.page[article]=/portal/layout/edit/article.jsp
layout.view.page[article]=/portal/layout/view/article.jsp
layout.url.friendliable[article]=true
layout.url[article]=${liferay:mainPath}/portal/layout?p_l_id=${liferay:plid}
layout.parentable[article]=false
layout.sitemapable[article]=true
layout.configuration.action.update[article]=com.liferay.portal.model.LayoutTypeArticleConfigurationUpdateAction
layout.configuration.action.delete[article]=com.liferay.portal.model.LayoutTypeArticleConfigurationDeleteAction
Settings for URL layouts.
layout.edit.page[url]=/portal/layout/edit/url.jsp
layout.view.page[url]=
layout.url[url]=${url}
layout.url.friendliable[url]=true
layout.parentable[url]=false
layout.sitemapable[url]=false
layout.configuration.action.update[url]=
layout.configuration.action.delete[url]=
Settings for page layouts.
layout.edit.page[link_to_layout]=/portal/layout/edit/link_to_layout.jsp
layout.view.page[link_to_layout]=
layout.url[link_to_layout]=${liferay:mainPath}/portal/layout?p_l_id=${linkToPlid}
layout.url.friendliable[link_to_layout]=true
layout.parentable[link_to_layout]=true
layout.sitemapable[link_to_layout]=false
layout.configuration.action.update[link_to_layout]=
layout.configuration.action.delete[link_to_layout]=
Specify static portlets that cannot be moved and will always appear on every layout. Static
portlets will take precedence over portlets that may have been dynamically configured for the
layout.
For example, if you want the Hello World portlet to always appear at the start of the iteration of
the first column for user layouts, set the property layout.static.portlets.
start.column-1[user] to 47. If you want the Hello World portlet to always appear at the end
of the second column for user layouts, set the property
layout.static.portlets.end.column-2[user] to 47. You can input a list of
comma-delimited portletIDs to specify more than one portlet. If the portlet is instanceable, add
the suffix _INSTANCE_abcd to the portletID, where abcd is any random alphanumeric string.
Chapter 9 • Configuring Portal Properties
223
Customizing Web Space Server Using the portal-ext.properties File
The static portlets are fetched based on the properties controlled by custom filters using
EasyConf. By default, the available filters are user, community, and organization.
layout.static.portlets.start.column-1[user]=3,6
layout.static.portlets.end.column-1[user]=14
layout.static.portlets.start.column-2[user]=71_INSTANCE_abcd,7
layout.static.portlets.end.column-2[user]=34,70
layout.static.portlets.start.column-3[user]=
layout.static.portlets.end.column-3[user]=
It is also possible to set static portlets based on the layout's friendly URL.
layout.static.portlets.start.column-1[user][/home]=3,6
layout.static.portlets.end.column-2[community][/home]=14
Set the static layouts for community layouts.
layout.static.portlets.start.column-1[community]=
layout.static.portlets.end.column-1[community]=
layout.static.portlets.start.column-2[community]=
layout.static.portlets.end.column-2[community]=
layout.static.portlets.start.column-3[community]=
layout.static.portlets.end.column-3[community]=
Set the static layouts for organization layouts.
layout.static.portlets.start.column-1[organization]=
layout.static.portlets.end.column-1[organization]=
layout.static.portlets.start.column-2[organization]=
layout.static.portlets.end.column-2[organization]=
layout.static.portlets.start.column-3[organization]=
layout.static.portlets.end.column-3[organization]=
Set the private group, private user, and public servlet mapping for
com.liferay.portal.servlet.FriendlyURLServlet. This value must match the servlet
mapping set in web.xml.
For example, if the private group pages are mapped to /group and the group's friendly URL is set
to /guest and the layout's friendly URL is set to /company/community, then the friendly URL for
the page will be http://www.liferay.com/group/guest/company/community. Private group
pages map to a community's private pages and are only available to authenticated users with the
proper permissions.
For example, if the public pages are mapped to /web and the group or user's friendly URL is set
to /guest and the layout's friendly URL is set to /company/community, then the friendly URL for
the page will be http://www.liferay.com/web/guest/company/ community. Public pages are
available to unauthenticated users.
The friendly URLs for users, groups, and layouts can be set during runtime.
224
Sun GlassFish Web Space Server 10.0 Administration Guide • July 2009
Customizing Web Space Server Using the portal-ext.properties File
layout.friendly.url.private.group.servlet.mapping=/group
layout.friendly.url.private.user.servlet.mapping=/user
layout.friendly.url.public.servlet.mapping=/web
Redirect to this resource if the user requested a friendly URL that does not exist. Leave it blank
to display nothing.
Note – For backward compatibility, this overrides the property layout.show.http.status for the
404 status code.
layout.friendly.url.page.not.found=/html/portal/404.html
Set the reserved keywords that cannot be used in a friendly URL.
layout.friendly.url.keywords=c,group,web,image,wsrp,page,public,private,rss,
tags
Set the following to true if layouts should remember (across requests) that a window state was
set to maximized.
layout.remember.request.window.state.maximized=false
Set the following to true if guest users should see the maximize window icon.
layout.guest.show.max.icon=false
Set the following to true if guest users should see the minimize window icon.
layout.guest.show.min.icon=false
Set the following to true if users are shown that they do not have access to a portlet. The portlet
init parameter show-portlet-access-denied will override this setting.
layout.show.portlet.access.denied=true
Set the following to true if users are shown that a portlet is inactive. The portlet init parameter
show-portlet-inactive will override this setting.
layout.show.portlet.inactive=true
Set the following to true if the portal should show HTTP status codes like 404 if the requested
page is not found.
layout.show.http.status=true
Set the default layout templateID used when creating layouts.
Chapter 9 • Configuring Portal Properties
225
Customizing Web Space Server Using the portal-ext.properties File
layout.default.template.id=2_columns_ii
Set the following to false to disable parallel rendering. You can also disable it on a per request
basis by setting the attribute key com.liferay.portal.util.WebKeys.PORTLET_
PARALLEL_RENDER to the Boolean.FALSE in a pre service event or by setting the URL parameter
p_p_parallel to 0.
layout.parallel.render.enable=true
Set the name of a class that implements com.liferay.portal.util.LayoutClone. This class is
used to remember maximized and minimized states on shared pages. The default
implementation persists the state in the browser session.
layout.clone.impl=com.liferay.portal.util.SessionLayoutClone
Set the following to true to cache the content of layout templates. This is recommended because
it improves performance for production servers. Setting it to false is useful during development
if you need to make a lot of changes.
layout.template.cache.enabled=true
Set the default value for the p_l_reset parameter. If set to true, then render parameters are
cleared when different pages are hit. This is not the behavior promoted by the portlet
specification, but is the one that most end users seem to prefer.
layout.default.p_l_reset=true
Portlet URL
Portlet URL is a property in the portal.properties file, which is the default configuration file
for Sun GlassFish Web Space Server. You can override this property using
portal-ext.properties file.
Set the following to true if calling setParameter on a portlet URL appends the parameter value
versus replacing it. There is some disagreement in the interpretation of the JSR 168 spec among
portlet developers over this specific behavior. Liferay Portal successfully passes the portlet TCK
tests whether this value is set to true or false.
See http://support.liferay.com/browse/LEP-426 for more information.
portlet.url.append.parameters=false
Set the following to true to allow portlet URLs to generate with an anchor tag.
portlet.url.anchor.enable=false
226
Sun GlassFish Web Space Server 10.0 Administration Guide • July 2009
Customizing Web Space Server Using the portal-ext.properties File
JSR 286 specifies that portlet URLs are escaped by default. Set this to false to provide for better
backwards compatibility.
If this is set to true, but a specific portlet application requires that its portlet URLs not be
escaped by default, then modify portlet.xml and set the container run-time option
javax.portlet.escapeXml to false.
portlet.url.escape.xml=false
Preferences
Preferences is a property in the portal.properties file, which is the default configuration file
for Sun GlassFish Web Space Server. You can override this property using
portal-ext.properties file.
Set the following to true to validate portlet preferences on startup.
preference.validate.on.startup=false
Struts
Struts is a property in the portal.properties file, which is the default configuration file for
Sun GlassFish Web Space Server. You can override this property using
portal-ext.properties file.
Input the custom Struts request processor that will be used by Struts based portlets. The custom
class must extend com.liferay.portal.struts.PortletRequestProcessor and have the
same constructor.
struts.portlet.request.processor=com.liferay.portal.struts.PortletRequestProcessor
Images
Images is a property in the portal.properties file, which is the default configuration file for
Sun GlassFish Web Space Server. You can override this property using
portal-ext.properties file.
Set the location of the default spacer image that is used for missing images. This image must be
found in the class path.
image.default.spacer=com/liferay/portal/dependencies/spacer.gif
Set the location of the default company logo image that is used for missing company logo
images. This image must be found in the class path.
Chapter 9 • Configuring Portal Properties
227
Customizing Web Space Server Using the portal-ext.properties File
image.default.company.logo=com/liferay/portal/dependencies/company_logo.png
Set the locations of the default user portrait images that are used for missing user portrait
images. This image must be found in the class path.
image.default.user.female.portrait=com/liferay/portal/dependencies/user_female_
portrait.gif
image.default.user.male.portrait=com/liferay/portal/dependencies/user_male_p
ortrait.gif
Editors
Editors is a property in the portal.properties file, which is the default configuration file for
Sun GlassFish Web Space Server. You can override this property using
portal-ext.properties file.
You can configure individual JSP pages to use a specific implementation of the available
WYSIWYG editors: liferay, fckeditor, simple, tinymce, or tinymcesimple.
editor.wysiwyg.default=fckeditor
editor.wysiwyg.portal-web.docroot.html.portlet.blogs.edit_entry.jsp=fckeditor
editor.wysiwyg.portal-web.docroot.html.portlet.calendar.edit_configuration.
jsp=fckeditor
editor.wysiwyg.portal-web.docroot.html.portlet.enterprise_admin.
view.jsp=fckeditor
editor.wysiwyg.portal-web.docroot.html.portlet.invitation.edit_configuration.
jsp=fckeditor
editor.wysiwyg.portal-web.docroot.html.portlet.journal.edit_article_content.
jsp=fckeditor
editor.wysiwyg.portal-web.docroot.html.portlet.journal.
edit_article_content_xsd_el.jsp=fckeditor
editor.wysiwyg.portal-web.docroot.html.portlet.journal.edit_configuration.
jsp=fckeditor
editor.wysiwyg.portal-web.docroot.html.portlet.mail.edit.jsp=fckeditor
editor.wysiwyg.portal-web.docroot.html.portlet.mail.edit_message.jsp=fckeditor
editor.wysiwyg.portal-web.docroot.html.portlet.message_boards.edit_configuration.
jsp=fckeditor
editor.wysiwyg.portal-web.docroot.html.portlet.shopping.edit_configuration.
jsp=fckeditor
editor.wysiwyg.portal-web.docroot.html.portlet.wiki.edit_html.jsp=fckeditor
Fields
Fields is a property in the portal.properties file, which is the default configuration file for
Sun GlassFish Web Space Server. You can override this property using
portal-ext.properties file.
228
Sun GlassFish Web Space Server 10.0 Administration Guide • July 2009
Customizing Web Space Server Using the portal-ext.properties File
Set the following fields to false so users cannot see them. Some company policies require gender
and birthday information to always be hidden.
field.enable.com.liferay.portal.model.Contact.male=true
field.enable.com.liferay.portal.model.Contact.birthday=true
field.enable.com.liferay.portal.model.Organization.status=false
MIME Types
MIME Types is a property in the portal.properties file, which is the default configuration file
for Sun GlassFish Web Space Server. You can override this property using
portal-ext.properties file.
Input a list of comma-delimited mime types that are not available by default from
javax.activation.MimetypesFileTypeMap.
mime.types=\
application/pdf pdf,\
application/vnd.ms-excel xls,\
application/vnd.ms-powerpoint ppt,\
application/msword doc
Amazon Licence Keys
Amazon Licence Keys is a property in the portal.properties file, which is the default
configuration file for Sun GlassFish Web Space Server. You can override this property using
portal-ext.properties file.
Provide a list of valid Amazon license keys. Configure additional keys by incrementing the last
number. The keys are used following a Round-Robin algorithm. This is made available only for
personal use. Please see the Amazon license at http://www.amazon.com for more information.
amazon.license.0=
amazon.license.1=
amazon.license.2=
amazon.license.3=
Instant Messenger
Instant Messenger is a property in the portal.properties file, which is the default
configuration file for Sun GlassFish Web Space Server. You can override this property using
portal-ext.properties file.
Set the AIM login and password which the system will use to communicate with users.
Chapter 9 • Configuring Portal Properties
229
Customizing Web Space Server Using the portal-ext.properties File
aim.login=
aim.password=
Due to a bug in JOscarLib 0.3b1, you must set the full path to the ICQ jar.
See the following posts:
http://sourceforge.net/forum/message.php?msg_id=1972697
http://sourceforge.net/forum/message.php?msg_id=1990487
icq.jar=C:/Java/orion-2.0.7/lib/icq.jar
Set the ICQ login and password which the system will use to communicate with users.
icq.login=
icq.password=
Set the MSN login and password which the system will use to communicate with users.
msn.login=
msn.password=
Set the YM login and password which the system will use to communicate with users.
ym.login=
ym.password=
Lucene Search
Lucene Search is a property in the portal.properties file, which is the default configuration
file for Sun GlassFish Web Space Server. You can override this property using
portal-ext.properties file.
Set the following to true if you want to avoid any writes to the index. This is useful in some
clustering environments where there is a shared index and only one node of the cluster updates
it.
index.read.only=false
Set the following to true if you want to index your entire library of files on startup.
index.on.startup=false
Set the following to true if you want the indexing on startup to be executed on a separate thread
to speed up execution.
index.with.thread=true
230
Sun GlassFish Web Space Server 10.0 Administration Guide • July 2009
Customizing Web Space Server Using the portal-ext.properties File
Designate whether Lucene stores indexes in a database via JDBC, file system, or in RAM.
Examples:
lucene.store.type=jdbc
lucene.store.type=file
lucene.store.type=ram
Lucene's storage of indexes via JDBC has a bug where temp files are not removed. This can eat
up disk space over time. Set the following property to true to automatically clean up the
temporary files once a day. See LEP-2180.
lucene.store.jdbc.auto.clean.up=true
Set the JDBC dialect that Lucene uses to store indexes in the database. This is only referenced if
Lucene stores indexes in the database. Liferay will attempt to load the proper dialect based on
the URL of the JDBC connection. For example, the property
lucene.store.jdbc.dialect.mysql is read for the JDBC connection URL
jdbc:mysql://localhost/lportal.
lucene.store.jdbc.dialect.db2=org.apache.lucene.store.jdbc.dialect.DB2Dialect
lucene.store.jdbc.dialect.derby=org.apache.lucene.store.jdbc.dialect.DerbyDialect
lucene.store.jdbc.dialect.hsqldb=org.apache.lucene.store.jdbc.dialect.HSQLDialect
lucene.store.jdbc.dialect.jtds=org.apache.lucene.store.jdbc.dialect.
SQLServerDialect
lucene.store.jdbc.dialect.microsoft=org.apache.lucene.store.jdbc.dialect.
SQLServerDialect
lucene.store.jdbc.dialect.mysql=org.apache.lucene.store.jdbc.dialect.MySQLDialect
#lucene.store.jdbc.dialect.mysql=org.apache.lucene.store.jdbc.dialect.
MySQLInnoDBDialect
#lucene.store.jdbc.dialect.mysql=org.apache.lucene.store.jdbc.dialect.
MySQLMyISAMDialect
lucene.store.jdbc.dialect.oracle=org.apache.lucene.store.jdbc.dialect.OracleDialect
lucene.store.jdbc.dialect.postgresql=org.apache.lucene.store.jdbc.dialect.PostgreSQLDialect
Set the directory where Lucene indexes are stored. This is only referenced if Lucene stores
indexes in the file system.
lucene.dir=${resource.repositories.root}/lucene/
Input a class name that extends com.liferay.portal.search.lucene.LuceneFileExtractor.
This class is called by Lucene to extract text from complex files so that they can be properly
indexed.
lucene.file.extractor=com.liferay.portal.search.lucene.LuceneFileExtractor
Chapter 9 • Configuring Portal Properties
231
Customizing Web Space Server Using the portal-ext.properties File
The file extractor can sometimes return text that is not valid for Lucene. This property expects a
regular expression. Any character that does not match the regular expression will be replaced
with a blank space. Set an empty regular expression to disable this feature.
Examples:
lucene.file.extractor.regexp.strip=
lucene.file.extractor.regexp.strip=[\\d\\w]
Set the default analyzer used for indexing and retrieval.
Examples:
lucene.analyzer=org.apache.lucene.analysis.br.BrazilianAnalyzer
lucene.analyzer=org.apache.lucene.analysis.cn.ChineseAnalyzer
lucene.analyzer=org.apache.lucene.analysis.cjk.CJKAnalyzer
lucene.analyzer=org.apache.lucene.analysis.cz.CzechAnalyzer
lucene.analyzer=org.apache.lucene.analysis.nl.DutchAnalyzer
lucene.analyzer=org.apache.lucene.analysis.fr.FrenchAnalyzer
lucene.analyzer=org.apache.lucene.analysis.de.GermanAnalyzer
lucene.analyzer=org.apache.lucene.analysis.KeywordAnalyzer
lucene.analyzer=org.apache.lucene.index.memory.PatternAnalyzer
lucene.analyzer=org.apache.lucene.analysis.PerFieldAnalyzerWrapper
lucene.analyzer=org.apache.lucene.analysis.ru.RussianAnalyzer
lucene.analyzer=org.apache.lucene.analysis.SimpleAnalyzer
lucene.analyzer=org.apache.lucene.analysis.snowball.SnowballAnalyzer
lucene.analyzer=org.apache.lucene.analysis.standard.StandardAnalyzer
lucene.analyzer=org.apache.lucene.analysis.StopAnalyzer
lucene.analyzer=org.apache.lucene.analysis.WhitespaceAnalyzer
Set Lucene's merge factor. Higher numbers mean indexing goes faster but uses more memory.
The default value from Lucene is 10. This should never be set to a number lower than 2.
lucene.merge.factor=10
Set how often to run Lucene's optimize method. Optimization speeds up searching but slows
down writing. Set this property to 0 to always optimize. Set this property to an integer greater
than 0 to optimize every X writes.
lucene.optimize.interval=1
SourceForge
SourceForge is a property in the portal.properties file, which is the default configuration file
for Sun GlassFish Web Space Server. You can override this property using
portal-ext.properties file.
232
Sun GlassFish Web Space Server 10.0 Administration Guide • July 2009
Customizing Web Space Server Using the portal-ext.properties File
source.forge.mirrors=\
http://downloads.sourceforge.net,\ # Redirect
http://internap.dl.sourceforge.net,\ # San Jose, CA
http://superb-east.dl.sourceforge.net,\ # McLean, Virginia
http://superb-west.dl.sourceforge.net,\ # Seattle, Washington
http://easynews.dl.sourceforge.net,\ # Phoenix, AZ
http://kent.dl.sourceforge.net,\ # Kent, UK
http://ufpr.dl.sourceforge.net,\ # Curitiba, Brazil
http://belnet.dl.sourceforge.net,\ # Brussels, Belgium
http://switch.dl.sourceforge.net,\ # Lausanne, Switzerland
http://mesh.dl.sourceforge.net,\ # Duesseldorf, Germany
http://ovh.dl.sourceforge.net,\ # Paris, France
http://dfn.dl.sourceforge.net,\ # Berlin, Germany
http://heanet.dl.sourceforge.net,\ # Dublin, Ireland
http://garr.dl.sourceforge.net,\ # Bologna, Italy
http://surfnet.dl.sourceforge.net # Amsterdam, The Netherlands
http://jaist.dl.sourceforge.net,\ # Ishikawa, Japan
http://nchc.dl.sourceforge.net,\ # Tainan, Taiwan
http://optusnet.dl.sourceforge.net # Sydney, Australia
Value Object
Value Object is a property in the portal.properties file, which is the default configuration
file for Sun GlassFish Web Space Server. You can override this property using
portal-ext.properties file.
You can add a listener for a specific class by setting the property value.object.listener with
a list of comma-delimited class names that implement
com.liferay.portal.model.ModelListener. These classes are pooled and reused and must be
thread safe.
value.object.listener.com.liferay.portal.model.Contact=com.liferay.portal.model.ContactListener
value.object.listener.com.liferay.portal.model.Layout=com.liferay.portal.model.LayoutListener
value.object.listener.com.liferay.portal.model.LayoutSet=com.liferay.portal.
model.LayoutSetListener
value.object.listener.com.liferay.portal.model.PortletPreferences=com.liferay.
portal.model.PortletPreferencesListener
value.object.listener.com.liferay.portal.model.User=com.liferay.portal.model.
UserListener
value.object.listener.com.liferay.portlet.journal.model.JournalArticle=com.l
iferay.portlet.journal.model.JournalArticleListener
value.object.listener.com.liferay.portlet.journal.model.JournalTemplate=com.
liferay.portlet.journal.model.JournalTemplateListener
Value objects are cached by default. You can disable caching for all objects or per object.
Chapter 9 • Configuring Portal Properties
233
Customizing Web Space Server Using the portal-ext.properties File
For mapping tables, the key is the mapping table itself.
value.object.finder.cache.enabled=true
value.object.finder.cache.enabled.com.liferay.portal.model.Layout=true
value.object.finder.cache.enabled.com.liferay.portal.model.User=true
value.object.finder.cache.enabled.Users_Roles=true
Last Modified
Last Modified is a property in the portal.properties file, which is the default configuration
file for Sun GlassFish Web Space Server. You can override this property using
portal-ext.properties file.
Set the following to true to check last modified date on server side CSS and JavaScript.
last.modified.check=true
Provide a list of comma-delimited paths that will only be executed when newer than the last
modified date. These paths must extend
com.liferay.portal.lastmodified.LastModifiedAction.
last.modified.paths=\
/portal/css_cached,\
/portal/javascript_cached
XSS
XSS (Cross Site Scripting) is a property in the portal.properties file, which is the default
configuration file for Sun GlassFish Web Space Server. You can override this property using
portal-ext.properties file.
Set the following to false to ensure that all persisted data is stripped of XSS hacks.
xss.allow=false
You can override the xss.allow setting for a specific class by setting the property xss.allow plus
the class name.
xss.allow.com.liferay.portal.model.Portlet=true
xss.allow.com.liferay.portal.model.PortletPreferences=true
You can override the xss.allow setting for a specific field in a class by setting the property
xss.allow plus the class and field name.
234
Sun GlassFish Web Space Server 10.0 Administration Guide • July 2009
Customizing Web Space Server Using the portal-ext.properties File
xss.allow.com.liferay.portlet.journal.model.JournalArticle.content=true
xss.allow.com.liferay.portlet.journal.model.JournalStructure.xsd=true
xss.allow.com.liferay.portlet.journal.model.JournalTemplate.xsl=true
Communication Link
Communication Link is a property in the portal.properties file, which is the default
configuration file for Sun GlassFish Web Space Server. You can override this property using
portal-ext.properties file.
Set the JGroups properties used by the portal to communicate with other instances of the portal.
This is only needed if the portal is running in a clustered environment. The JGroups settings
provide a mechanism for the portal to broadcast messages to the other instances of the portal.
The specified multi-cast address should be unique for internal portal messaging only. You will
still need to set the Hibernate and Ehcache settings for database clustering.
comm.link.properties=UDP(bind_addr=127.0.0.1;mcast_addr=231.12.21.102;mcast_
port=45566;ip_ttl=32;mcast_send_buf_size=150000;mcast_recv_buf_size=80000):P
ING(timeout=2000;num_initial_members=3):MERGE2(min_interval=5000;max_interval=
10000):FD_SOCK:VERIFY_SUSPECT(timeout=1500):pbcast.NAKACK(gc_lag=50;retransmit_
timeout=300,600,1200,2400,4800;max_xmit_size=8192):UNICAST(timeout=
300,600,1200,2400):pbcast.STABLE(desired_avg_gossip=20000):FRAG(frag_size=80
96;down_thread=false;up_thread=false):pbcast.GMS(join_timeout=5000;join_retr
y_timeout=2000;shun=false;print_local_addr=true)
Content Delivery Network
Content Delivery Network is a property in the portal.properties file, which is the default
configuration file for Sun GlassFish Web Space Server. You can override this property using
portal-ext.properties file.
Set the hostname that will be used to serve static content via a CDN. This property can be
overridden dynamically at runtime by setting the HTTP parameter cdn_host.
cdn.host=
Counter
Counter is a property in the portal.properties file, which is the default configuration file for
Sun GlassFish Web Space Server. You can override this property using
portal-ext.properties file.
Set the number of increments between database updates to the Counter table. Set this value to a
higher number for better performance.
Chapter 9 • Configuring Portal Properties
235
Customizing Web Space Server Using the portal-ext.properties File
counter.increment=100
Lock
Lock is a property in the portal.properties file, which is the default configuration file for Sun
GlassFish Web Space Server. You can override this property using portal-ext.properties
file.
Set the lock expiration time for each class.
Example: 1 Day
lock.expiration.time.com.liferay.portlet.documentlibrary.model.DLFileEntry=8
6400000
Example: 20 Minutes
lock.expiration.time.com.liferay.portlet.wiki.model.WikiPage=1200000
JBI
JBI is a property in the portal.properties file, which is the default configuration file for Sun
GlassFish Web Space Server. You can override this property using portal-ext.properties
file.
Connect to either Mule or ServiceMix as your ESB.
Examples:
jbi.workflow.url=http://localhost:8080/mule-web/workflow
jbi.workflow.url=http://localhost:8080/servicemix-web/workflow
JCR
JCR is a property in the portal.properties file, which is the default configuration file for Sun
GlassFish Web Space Server. You can override this property using portal-ext.properties
file.
Liferay includes Jackrabbit (http://jackrabbit.apache.org) by default as its JSR-170 Java Content
Repository.
jcr.initialize.on.startup=false
jcr.workspace.name=liferay
jcr.node.documentlibrary=documentlibrary
236
Sun GlassFish Web Space Server 10.0 Administration Guide • July 2009
Customizing Web Space Server Using the portal-ext.properties File
jcr.jackrabbit.repository.root=${resource.repositories.root}/jackrabbit
jcr.jackrabbit.config.file.path=${jcr.jackrabbit.repository.root}/repository.
xml
jcr.jackrabbit.repository.home=${jcr.jackrabbit.repository.root}/home
jcr.jackrabbit.credentials.username=none
jcr.jackrabbit.credentials.password=none
OpenOffice
OpenOffice is a property in the portal.properties file, which is the default configuration file
for Sun GlassFish Web Space Server. You can override this property using
portal-ext.properties file.
Enabling OpenOffice integration allows the Document Library portlet to provide document
conversion functionality. To start OpenOffice as a service, run the command:
soffice -headless -accept="socket,host=127.0.0.1,port=8100;urp;" -nofirststartwizard
This is tested with OpenOffice 2.3.x.
openoffice.server.enabled=false
openoffice.server.host=127.0.0.1
openoffice.server.port=8100
POP
POP is a property in the portal.properties file, which is the default configuration file for Sun
GlassFish Web Space Server. You can override this property using portal-ext.properties
file.
Set this to true to enable polling of email notifications from a POP server. The user credentials
are the same used for SMTP authentication and is specified in the mail/MailSession
configuration for each application server.
pop.server.notifications.enabled=false
Set the interval on which the POPNotificationsJob will run. The value is set in one minute
increments.
pop.server.notifications.interval=1
pop.server.subdomain=events
Chapter 9 • Configuring Portal Properties
237
Customizing Web Space Server Using the portal-ext.properties File
Quartz
Quartz is a property in the portal.properties file, which is the default configuration file for
Sun GlassFish Web Space Server. You can override this property using
portal-ext.properties file.
These properties define the connection to the built-in Quartz job scheduling engine.
org.quartz.dataSource.ds.connectionProvider.class=com.liferay.portal.scheduler.
quartz.QuartzConnectionProviderImpl
org.quartz.jobStore.class=org.quartz.impl.jdbcjobstore.JobStoreTX
org.quartz.jobStore.dataSource=ds
org.quartz.jobStore.driverDelegateClass=com.liferay.portal.scheduler.
quartz.DynamicDriverDelegate
org.quartz.jobStore.isClustered=false
org.quartz.jobStore.misfireThreshold=60000
org.quartz.jobStore.tablePrefix=QUARTZ_
org.quartz.jobStore.useProperties=true
org.quartz.scheduler.instanceId=AUTO
org.quartz.threadPool.class=org.quartz.simpl.SimpleThreadPool
org.quartz.threadPool.threadCount=5
org.quartz.threadPool.threadPriority=5
Scheduler
Scheduler is a property in the portal.properties file, which is the default configuration file
for Sun GlassFish Web Space Server. You can override this property using
portal-ext.properties file.
Set this to false to disable all scheduler classes defined in liferay-portlet.xml and in the
property scheduler.classes.
scheduler.enabled=true
Input a list of comma-delimited class names that implement
com.liferay.portal.kernel.job.Scheduler. These classes allow jobs to be scheduled on
startup. These classes are not associated to any one portlet.
scheduler.classes=
Social Bookmarks
Social Bookmarks is a property in the portal.properties file, which is the default
configuration file for Sun GlassFish Web Space Server. You can override this property using
portal-ext.properties file.
238
Sun GlassFish Web Space Server 10.0 Administration Guide • July 2009
Customizing Web Space Server Using the portal-ext.properties File
The Blogs portlet allows for the posting of entries to various popular social bookmarking sites.
The example ones are the defaults; to configure more, just add the site in the following format.
social.bookmark.types=blinklist,delicious,digg,furl,newsvine,reddit,technorati
social.bookmark.post.url[blinklist]=http://blinklist.com/index.php?
Action=Blink/addblink.php&url=${liferay:social-bookmark:url}&Title=${liferay:
social-bookmark:title}
social.bookmark.post.url[delicious]=http://del.icio.us/post?url=${liferay:
social-bookmark:url}&title=${liferay:social-bookmark:title}
social.bookmark.post.url[digg]=http://digg.com/submit?phase=2&url=${liferay:
social-bookmark:url}
social.bookmark.post.url[furl]=http://furl.net/storeIt.jsp?u=${liferay:socialbookmark:url}&t=${liferay:social-bookmark:title}
social.bookmark.post.url[newsvine]=http://www.newsvine.com/_tools/seed&save?
u=${liferay:social-bookmark:url}&h=${liferay:social-bookmark:title}
social.bookmark.post.url[reddit]=http://reddit.com/submit?url=${liferay:socialbookmark:url}&title=${liferay:social-bookmark:title}
social.bookmark.post.url[technorati]=http://technorati.com/cosmos/search.htm
l?url=${liferay:social-bookmark:url}
Velocity Engine
Velocity Engine is a property in the portal.properties file, which is the default
configuration file for Sun GlassFish Web Space Server. You can override this property using
portal-ext.properties file.
Input a list of comma-delimited class names that extend
com.liferay.util.velocity.VelocityResourceListener. These classes will run in sequence
to allow you to find the applicable ResourceLoader to load a Velocity template.
velocity.engine.resource.listeners=com.liferay.portal.velocity.ServletVelocityResourceListener,
com.liferay.portal.velocity.JournalTemplateVelocityResourceListener,
com.liferay.portal.velocity.ThemeLoaderVelocityResourceListener,
com.liferay.portal.velocity.ClassLoaderVelocityResourceListener
Set the Velocity resource managers. You can extend the Velocity's default resource managers
for better scalability.
Note that the modification check interval is not respected because the resource loader
implementation does not know the last modified date of a resource. This means you will need to
turn off caching if you want to be able to modify VM templates in themes and see the changes
right away.
velocity.engine.resource.manager=com.liferay.portal.velocity.LiferayResourceManager
velocity.engine.resource.manager.cache=com.liferay.portal.velocity.LiferayResourceCache
velocity.engine.resource.manager.cache.enabled=true
#velocity.engine.resource.manager.modification.check.interval=0
Chapter 9 • Configuring Portal Properties
239
Customizing Web Space Server Using the portal-ext.properties File
Input a list of comma-delimited macros that will be loaded. These files must exist in the class
path.
velocity.engine.velocimacro.library=VM_global_library.vm,VM_liferay.vm
Set the Velocity logging configuration.
velocity.engine.logger=org.apache.velocity.runtime.log.SimpleLog4JLogSystem
velocity.engine.logger.category=org.apache.velocity
Virtual Hosts
Virtual Hosts is a property in the portal.properties file, which is the default configuration
file for Sun GlassFish Web Space Server. You can override this property using
portal-ext.properties file.
Set the hosts that will be ignored for virtual hosts.
virtual.hosts.ignore.hosts=\
127.0.0.1,\
localhost
Set the paths that will be ignored for virtual hosts.
virtual.hosts.ignore.paths=\
/c,\
\
/c/portal/change_password,\
/c/portal/css_cached,\
/c/portal/extend_session,\
/c/portal/extend_session_confirm,\
/c/portal/javascript_cached,\
/c/portal/json_service,\
/c/portal/layout,\
/c/portal/login,\
/c/portal/logout,\
/c/portal/render_portlet,\
/c/portal/reverse_ajax,\
/c/portal/session_tree_js_click,\
/c/portal/status,\
/c/portal/update_layout,\
/c/portal/update_terms_of_use,\
/c/portal/upload_progress_poller,\
\
/c/layout_configuration/templates,\
/c/layout_management/update_page
240
Sun GlassFish Web Space Server 10.0 Administration Guide • July 2009
Customizing Web Space Server Using the portal-ext.properties File
HTTP
HTTP is a property in the portal.properties file, which is the default configuration file for Sun
GlassFish Web Space Server. You can override this property using portal-ext.properties
file.
See system.properties for more HTTP settings.
Set the maximum number of connections.
#com.liferay.portal.util.HttpImpl.max.connections.per.host=2
#com.liferay.portal.util.HttpImpl.max.total.connections=20
Set the proxy authentication type.
#com.liferay.portal.util.HttpImpl.proxy.auth.type=username-password
#com.liferay.portal.util.HttpImpl.proxy.auth.type=ntlm
Set user name and password used for HTTP proxy authentication.
#com.liferay.portal.util.HttpImpl.proxy.username=
#com.liferay.portal.util.HttpImpl.proxy.password=
Set additional properties for NTLM authentication.
#com.liferay.portal.util.HttpImpl.proxy.ntlm.domain=
#com.liferay.portal.util.HttpImpl.proxy.ntlm.host=
Set the connection timeout when fetching HTTP content.
com.liferay.portal.util.HttpImpl.timeout=10000
Servlet Filters
Servlet Filters is a property in the portal.properties file, which is the default
configuration file for Sun GlassFish Web Space Server. You can override this property using
portal-ext.properties file.
If the user can unzip compressed HTTP content, the compression filter will zip up the HTTP
content before sending it to the user. This will speed up page rendering for users that are on dial
up.
com.liferay.portal.servlet.filters.compression.CompressionFilter=true
This double click filter will prevent double clicks at the server side. Prevention of double clicks is
already in place on the client side. However, some sites require a more robust solution. This is
turned off by default since most sites will not need it.
Chapter 9 • Configuring Portal Properties
241
Customizing Web Space Server Using the portal-ext.properties File
com.liferay.portal.servlet.filters.doubleclick.DoubleClickFilter=false
The header filter is used to set request headers.
com.liferay.portal.servlet.filters.header.HeaderFilter=true
The strip filter will remove blank lines from the outputted content. This will speed up page
rendering for users that are on dial up.
com.liferay.portal.servlet.filters.strip.StripFilter=true
The layout cache filter will cache pages to speed up page rendering for guest users. See
ehcache.xml to modify the cache expiration time to live.
com.liferay.portal.servlet.filters.layoutcache.LayoutCacheFilter=true
The sessionID filter ensure that only one session is created between http and https sessions. This
is useful if you want users to login via https but have them view the rest of the site via http. This
is disabled by default. Do not enable this unless you thoroughly understand how cookies, http,
and https work.
com.liferay.portal.servlet.filters.sessionid.SessionIdFilter=false
The Velocity filter will process */css/main.css as a Velocity template.
com.liferay.portal.servlet.filters.velocity.VelocityFilter=false
The virtual host filter maps hosts to public and private pages. For example, if the public virtual
host is www.helloworld.com and the friendly URL is /helloworld, then
http://www.helloworld.com is mapped to http://localhost:8080/web/helloworld.
com.liferay.portal.servlet.filters.virtualhost.VirtualHostFilter=true
Upload Servlet Request
Upload Servlet Request is a property in the portal.properties file, which is the default
configuration file for Sun GlassFish Web Space Server. You can override this property using
portal-ext.properties file.
Set the maximum file size. Default is 1024 * 1024 * 100.
com.liferay.portal.upload.UploadServletRequestImpl.max.size=104857600
Set the temp directory for uploaded files.
#com.liferay.portal.upload.UploadServletRequestImpl.temp.dir=C:/Temp
242
Sun GlassFish Web Space Server 10.0 Administration Guide • July 2009
Customizing Web Space Server Using the portal-ext.properties File
Set the threshold size to prevent extraneous serialization of uploaded data.
com.liferay.portal.upload.LiferayFileItem.threshold.size=262144
Set the threshold size to prevent out of memory exceptions caused by caching excessively large
uploaded data. Default is 1024 * 1024 * 10.
com.liferay.portal.upload.LiferayInputStream.threshold.size=10485760
Web Server
Web Server is a property in the portal.properties file, which is the default configuration file
for Sun GlassFish Web Space Server. You can override this property using
portal-ext.properties file.
Set the HTTP and HTTPs ports when running the portal in a J2EE server that is sitting behind
another web server like Apache. Set the values to -1 if the portal is not running behind another
web server like Apache.
web.server.http.port=-1
web.server.https.port=-1
Set the hostname that will be used when the portlet generates URLs. Leaving this blank will
mean the host is derived from the servlet container.
web.server.host=
Set the preferred protocol.
web.server.protocol=https
Set this to true to display the server name at the bottom of every page. This is useful when
testing clustering configurations so that you can know which node you are accessing.
web.server.display.node=false
WebDAV
WebDAV is a property in the portal.properties file, which is the default configuration file for
Sun GlassFish Web Space Server. You can override this property using
portal-ext.properties file.
Set the following to true to enable programmatic configuration to let the Web- DAV be
configured for litmus testing. This should never be set to true unless you are running the litmus
tests.
Chapter 9 • Configuring Portal Properties
243
Customizing Web Space Server Using the portal-ext.properties File
webdav.litmus=false
Set a list of files for the WebDAV servlet to ignore processing.
webdav.ignore=.DS_Store,.metadata_index_homes_only,.metadata_never_index,.Sp
otlight-V100,.TemporaryItems,.Trashes
Set the tokens for supported WebDAV storage paths.
webdav.storage.tokens=document_library,image_gallery,journal
Set the class names for supported WebDAV storage classes.
webdav.storage.class[document_library]=com.liferay.portlet.documentlibrary.
webdav.DLWebDAVStorageImpl
webdav.storage.class[image_gallery]=com.liferay.portlet.imagegallery.webdav.
IGWebDAVStorageImpl
webdav.storage.class[journal]=com.liferay.portlet.journal.webdav.JournalWebDAVStorageImpl
Main Servlet
Main Servlet is a property in the portal.properties file, which is the default configuration
file for Sun GlassFish Web Space Server. You can override this property using
portal-ext.properties file.
Servlets can be protected by com.liferay.portal.servlet.filters.secure.SecureFilter.
Input a list of comma-delimited IPs that can access this servlet. Input a blank list to allow any IP
to access this servlet. SERVER_IP will be replaced with the IP of the host server.
main.servlet.hosts.allowed=
Set the following to true if this servlet can only be accessed via https.
main.servlet.https.required=false
Axis Servlet
Axis Servlet is a property in the portal.properties file, which is the default configuration
file for Sun GlassFish Web Space Server. You can override this property using
portal-ext.properties file.
See Main Servlet on how to protect this servlet.
axis.servlet.hosts.allowed=127.0.0.1,SERVER_IP
axis.servlet.https.required=false
244
Sun GlassFish Web Space Server 10.0 Administration Guide • July 2009
Customizing Web Space Server Using the portal-ext.properties File
JSON Tunnel Servlet
JSON Tunnel Servlet is a property in the portal.properties file, which is the default
configuration file for Sun GlassFish Web Space Server. You can override this property using
portal-ext.properties file.
See Main Servlet on how to protect this servlet.
json.servlet.hosts.allowed=
json.servlet.https.required=false
Liferay Tunnel Servlet
Liferay Tunnel Servlet is a property in the portal.properties file, which is the default
configuration file for Sun GlassFish Web Space Server. You can override this property using
portal-ext.properties file.
See Main Servlet on how to protect this servlet.
tunnel.servlet.hosts.allowed=127.0.0.1,SERVER_IP
tunnel.servlet.https.required=false
Spring Remoting Servlet
Spring Remoting Servlet is a property in the portal.properties file, which is the default
configuration file for Sun GlassFish Web Space Server. You can override this property using
portal-ext.properties file.
See Main Servlet on how to protect this servlet.
spring.remoting.servlet.hosts.allowed=127.0.0.1,SERVER_IP
spring.remoting.servlet.https.required=false
WebDAV Servlet
WebDAV Servlet is a property in the portal.properties file, which is the default configuration
file for Sun GlassFish Web Space Server. You can override this property using
portal-ext.properties file.
See Main Servlet on how to protect this servlet.
webdav.servlet.hosts.allowed=
webdav.servlet.https.required=false
Chapter 9 • Configuring Portal Properties
245
Customizing Web Space Server Using the portal-ext.properties File
Admin Portlet
Admin Portlet is a property in the portal.properties file, which is the default configuration
file for Sun GlassFish Web Space Server. You can override this property using
portal-ext.properties file.
You can set some administrative defaults by using these properties. The first time you bring up
your portal, these values will then already be set in the Admin portlet. All values should be
separated by \n characters.
Set up default group names.
admin.default.group.names=
Set up default role names.
admin.default.role.names=Power User\nUser
Set up default user group names.
admin.default.user.group.names=
The rest of these properties map to their values in the Admin portlet.
admin.mail.host.names=
admin.reserved.screen.names=
admin.reserved.email.addresses=
admin.email.from.name=Joe Bloggs
[email protected]
admin.email.user.added.enabled=true
admin.email.user.added.subject=com/liferay/portlet/admin/dependencies/email_
user_added_subject.tmpl
admin.email.user.added.body=com/liferay/portlet/admin/dependencies/email_use
r_added_body.tmpl
admin.email.password.sent.enabled=true
admin.email.password.sent.subject=com/liferay/portlet/admin/dependencies/ema
il_password_sent_subject.tmpl
admin.email.password.sent.body=com/liferay/portlet/admin/dependencies/email_
password_sent_body.tmpl
Announcements Portlet
Announcements Portlet is a property in the portal.properties file, which is the default
configuration file for Sun GlassFish Web Space Server. You can override this property using
portal-ext.properties file.
Configure email notification settings.
246
Sun GlassFish Web Space Server 10.0 Administration Guide • July 2009
Customizing Web Space Server Using the portal-ext.properties File
announcements.email.from.name=Joe Bloggs
[email protected]
announcements.email.to.name=
[email protected]
announcements.email.subject=com/liferay/portlet/announcements/dependencies/e
mail_subject.tmpl
announcements.email.body=com/liferay/portlet/announcements/dependencies/emai
l_body.tmpl
Set the list of announcement types. The display text of each of the announcement types is set in
content/Language.properties.
announcements.entry.types=general,news,test
Set the interval on which the CheckEntryJob will run. The value is set in one minute increments.
announcements.entry.check.interval=15
Blogs Portlet
Blogs Portlet is a property in the portal.properties file, which is the default configuration
file for Sun GlassFish Web Space Server. You can override this property using
portal-ext.properties file.
The following properties affect the Blogs portlet.
blogs.email.comments.added.enabled=true
blogs.email.comments.added.subject=com/liferay/portlet/blogs/dependencies/em
ail_comments_added_subject.tmpl
blogs.email.comments.added.body=com/liferay/portlet/blogs/dependencies/email
_comments_added_body.tmpl
blogs.page.abstract.length=400
blogs.rss.abstract.length=200
blogs.trackback.excerpt.length=50
Set the interval on which the TrackbackVerifierJob will run. The value is set in one minute
increments.
blogs.trackback.verifier.job.interval=5
Calendar Portlet
Calendar Portlet is a property in the portal.properties file, which is the default
configuration file for Sun GlassFish Web Space Server. You can override this property using
portal-ext.properties file.
Chapter 9 • Configuring Portal Properties
247
Customizing Web Space Server Using the portal-ext.properties File
Set the list of event types. The display text of each of the event types is set in
content/Language.properties.
calendar.event.types=anniversary,appointment,bill-payment,birthday,breakfast,
call,chat,class,club-event,concert,dinner,event,graduation,happyhour,
holiday,interview,lunch,meeting,movie,net-event,other,party,performance,
press-release,reunion,sports-event,training,travel,tvshow,
vacation,wedding
Set the interval on which the CheckEventJob will run. The value is set in one minute
increments.
calendar.event.check.interval=15
Configure email notification settings.
calendar.email.from.name=Joe Bloggs
[email protected]
calendar.email.event.reminder.enabled=true
calendar.email.event.reminder.subject=com/liferay/portlet/calendar/dependencies/
email_event_reminder_subject.tmpl
calendar.email.event.reminder.body=com/liferay/portlet/calendar/dependencies/
email_event_reminder_body.tmpl
Communities Portlet
Communities Portlet is a property in the portal.properties file, which is the default
configuration file for Sun GlassFish Web Space Server. You can override this property using
portal-ext.properties file.
Configure email notification settings.
communities.email.from.name=Joe Bloggs
[email protected]
communities.email.membership.reply.subject=com/liferay/portlet/communities/d
ependencies/email_membership_reply_subject.tmpl
communities.email.membership.reply.body=com/liferay/portlet/communities/dependencies/
email_membership_reply_body.tmpl
communities.email.membership.request.subject=com/liferay/portlet/communities
/dependencies/email_membership_request_subject.tmpl
communities.email.membership.request.body=com/liferay/portlet/communities/de
pendencies/email_membership_request_body.tmpl
248
Sun GlassFish Web Space Server 10.0 Administration Guide • July 2009
Customizing Web Space Server Using the portal-ext.properties File
Document Library Portlet
Document Library Portlet is a property in the portal.properties file, which is the default
configuration file for Sun GlassFish Web Space Server. You can override this property using
portal-ext.properties file.
Set the name of a class that implements com.liferay.documentlibrary.util.Hook. The
document library server will use this to persist documents.
Available hooks are:
■
■
■
com.liferay.documentlibrary.util.FileSystemHook
com.liferay.documentlibrary.util.JCRHook
com.liferay.documentlibrary.util.S3Hook
Examples:
dl.hook.impl=com.liferay.documentlibrary.util.FileSystemHook
dl.hook.impl=com.liferay.documentlibrary.util.JCRHook
dl.hook.impl=com.liferay.documentlibrary.util.S3Hook
FileSystemHook
FileSystemHook is a property in the portal.properties file, which is the default configuration
file for Sun GlassFish Web Space Server. You can override this property using
portal-ext.properties file.
dl.hook.file.system.root.dir=${resource.repositories.root}/document_library
S3Hook
S3Hook is a property in the portal.properties file, which is the default configuration file for
Sun GlassFish Web Space Server. You can override this property using
portal-ext.properties file.
dl.hook.s3.access.key=
dl.hook.s3.secret.key=
dl.hook.s3.bucket.name=
Set the maximum file size and valid file extensions for documents. A value of 0 for the
maximum file size can be used to indicate unlimited file size. However, the maximum file size
allowed is set in the property
com.liferay.portal.upload.UploadServletRequestImpl.max.size.
Examples:
Chapter 9 • Configuring Portal Properties
249
Customizing Web Space Server Using the portal-ext.properties File
#dl.file.max.size=307200
#dl.file.max.size=1024000
dl.file.max.size=3072000
A file extension of * will permit all file extensions.
You can map a GIF for the extension by adding the image to the theme's image display and
document library folder. The wildcard extension of * will be ignored. For example, the default
image for the DOC extension would be found in:
/html/themes/_unstyled/images/document_library/doc.gif.
Example File Extensions:
dl.file.extensions=.bmp,.css,.doc,.dot,.gif,.gz,.htm,.html,.jpg,.js,.lar,.od
b,.odf,.odg,.odp,.ods,.odt,.pdf,.png,.ppt,.rtf,.swf,.sxc,.sxi,.sxw,.tar,.tif
f,.tgz,.txt,.vsd,.xls,.xml,.zip
Set which files extensions are comparable by the diff tool. If OpenOffice integration is enabled,
then it is also possible to compare some binary files that are can be converted to text.
dl.comparable.file.extensions=.css,.js,.htm,.html,.txt,.xml
#dl.comparable.file.extensions=.css,.doc,.js,.htm,.html,.odt,.rtf,.sxw,.txt,
.xml
Set folder names that will be used to synchronize with a community's set of private and public
layouts. This will allow users to manage layouts using the Document Library portlet, and
ultimately, via WebDAV. This feature is experimental.
dl.layouts.sync.enabled=false
dl.layouts.sync.private.folder=Pages - Private
dl.layouts.sync.public.folder=Pages - Public
Image Gallery Portlet
Image Gallery Portlet is a property in the portal.properties file, which is the default
configuration file for Sun GlassFish Web Space Server. You can override this property using
portal-ext.properties file.
Set the maximum file size and valid file extensions for images. A value of 0 for the maximum file
size can be used to indicate unlimited file size. However, the maximum file size allowed is set in
the property com.liferay.portal.upload.UploadServletRequestImpl.max.size.
ig.image.max.size=10240000
A file extension of * will permit all file extensions.
ig.image.extensions=.bmp,.gif,.jpeg,.jpg,.png,.tif,.tiff
250
Sun GlassFish Web Space Server 10.0 Administration Guide • July 2009
Customizing Web Space Server Using the portal-ext.properties File
Set the maximum thumbnail height and width in pixels. Set dimension of the custom images to
0 to disable creating a scaled image of that size.
ig.image.thumbnail.max.dimension=150
#ig.image.custom1.max.dimension=100
#ig.image.custom2.max.dimension=0
Invitation Portlet
Invitation Portlet is a property in the portal.properties file, which is the default
configuration file for Sun GlassFish Web Space Server. You can override this property using
portal-ext.properties file.
invitation.email.max.recipients=20
invitation.email.message.body=com/liferay/portlet/invitation/dependencies/em
ail_message_body.tmpl
invitation.email.message.subject=com/liferay/portlet/invitation/dependencies/
email_message_subject.tmpl
Journal Portlet
Journal Portlet is a property in the portal.properties file, which is the default
configuration file for Sun GlassFish Web Space Server. You can override this property using
portal-ext.properties file.
Set this to true if articleIDs should always be autogenerated.
journal.article.force.autogenerate.id=true
Set this to true so that only the latest version of an article that is also not approved can be saved
without incrementing version.
journal.article.force.increment.version=false
Set the list of article types. The display text of each of the article types is set in
content/Language.properties.
journal.article.types=announcements,blogs,general,news,press-release,test
Set the token used when inserting simple page breaks in articles.
journal.article.token.page.break=@page_break@
Set the interval on which the CheckArticleJob will run. The value is set in one minute
increments.
Chapter 9 • Configuring Portal Properties
251
Customizing Web Space Server Using the portal-ext.properties File
journal.article.check.interval=15
Set this to true if feedIDs should always be autogenerated.
journal.feed.force.autogenerate.id=false
Set this to true if structureIDs should always be autogenerated.
journal.structure.force.autogenerate.id=false
Set this to true if templateIDs should always be autogenerated.
journal.template.force.autogenerate.id=false
Input a comma-delimited list of variables which are restricted from the context in Velocity
based Journal templates.
journal.template.velocity.restricted.variables=serviceLocator
Set the maximum file size and valid file extensions for images. A value of 0 for the maximum file
size can be used to indicate unlimited file size. However, the maximum file size allowed is set in
the property com.liferay.portal.upload.UploadServletRequestImpl.max.size.
journal.image.small.max.size=51200
A file extension of * will permit all file extensions.
journal.image.extensions=.gif,.jpeg,.jpg,.png
Input a list of comma-delimited class names that extend com.liferay.portlet.journal.
util.TransformerListener. These classes will run in sequence to allow you to modify the
XML and XSL before it's transformed and allow you to modify the final output.
journal.transformer.listener=\
com.liferay.portlet.journal.util.TokensTransformerListener,\
#com.liferay.portlet.journal.util.PropertiesTransformerListener,\
com.liferay.portlet.journal.util.ContentTransformerListener,\
com.liferay.portlet.journal.util.LocaleTransformerListener,\
com.liferay.portlet.journal.util.RegexTransformerListener,\
com.liferay.portlet.journal.util.ViewCounterTransformerListener
Provide a list of regular expression patterns and replacements that will be applied to outputted
Journal content. The list of properties must end with a subsequent integer (0, 1, and so on) and
it is assumed that the list has reached an end when the pattern or replacement is not set. See
com.liferay.portlet.journal.util.RegexTransformerListener for implementation
details.
252
Sun GlassFish Web Space Server 10.0 Administration Guide • July 2009
Customizing Web Space Server Using the portal-ext.properties File
#journal.transformer.regex.pattern.0=beta.sample.com
#journal.transformer.regex.replacement.0=production.sample.com
#journal.transformer.regex.pattern.1=staging.sample.com
#journal.transformer.regex.replacement.1=production.sample.com
Set whether to synchronize content searches when server starts.
journal.sync.content.search.on.startup=false
Configure mail notification settings.
journal.email.from.name=Joe Bloggs
[email protected]
journal.email.article.approval.denied.enabled=false
journal.email.article.approval.denied.subject=com/liferay/portlet/journal/de
pendencies/email_article_approval_denied_subject.tmpl
journal.email.article.approval.denied.body=com/liferay/portlet/journal/dependencies/
email_article_approval_denied_body.tmpl
journal.email.article.approval.granted.enabled=false
journal.email.article.approval.granted.subject=com/liferay/portlet/journal/d
ependencies/email_article_approval_granted_subject.tmpl
journal.email.article.approval.granted.body=com/liferay/portlet/journal/dependencies/
email_article_approval_granted_body.tmpl
journal.email.article.approval.requested.enabled=false
journal.email.article.approval.requested.subject=com/liferay/portlet/journal
/dependencies/email_article_approval_requested_subject.tmpl
journal.email.article.approval.requested.body=com/liferay/portlet/journal/de
pendencies/email_article_approval_requested_body.tmpl
journal.email.article.review.enabled=false
journal.email.article.review.subject=com/liferay/portlet/journal/dependencies/
email_article_review_subject.tmpl
journal.email.article.review.body=com/liferay/portlet/journal/dependencies/e
mail_article_review_body.tmpl
Specify the strategy used when Journal content is imported using the LAR system.
journal.lar.creation.strategy=com.liferay.portlet.journal.lar.JournalCreationStrategyImpl
Specify the path to the template used for providing error messages on Journal templates.
journal.error.template.velocity=com/liferay/portlet/journal/dependencies/error.
vm
journal.error.template.xsl=com/liferay/portlet/journal/dependencies/error.
xsl
Chapter 9 • Configuring Portal Properties
253
Customizing Web Space Server Using the portal-ext.properties File
Journal Articles Portlet
Journal Articles Portlet is a property in the portal.properties file, which is the default
configuration file for Sun GlassFish Web Space Server. You can override this property using
portal-ext.properties file.
Set the available values for the number of articles to display per page.
journal.articles.page.delta.values=5,10,25,50,100
Mail Portlet
Mail Portlet is a property in the portal.properties file, which is the default configuration
file for Sun GlassFish Web Space Server. You can override this property using
portal-ext.properties file.
Set the following to false if administrator should not be allowed to change the mail domain via
the Admin portlet.
mail.mx.update=true
Set the name of a class that implements com.liferay.mail.util.Hook. The mail server will use
this class to ensure that the mail and portal servers are synchronized on user information. The
portal will not know how to add, update, or delete users from the mail server except through
this hook.
Available hooks are:
■
■
■
■
■
com.liferay.mail.util.CyrusHook
com.liferay.mail.util.DummyHook
com.liferay.mail.util.FuseMailHook
com.liferay.mail.util.SendmailHook
com.liferay.mail.util.ShellHook
Example:
mail.hook.impl=com.liferay.mail.util.DummyHook
CyrusHook
CyrusHook is a property in the portal.properties file, which is the default configuration file
for Sun GlassFish Web Space Server. You can override this property using
portal-ext.properties file.
Set the commands for adding, updating, and deleting a user where %1% is the userID. Replace
the password with the password for the cyrus user.
254
Sun GlassFish Web Space Server 10.0 Administration Guide • July 2009
Customizing Web Space Server Using the portal-ext.properties File
Add Examples:
mail.hook.cyrus.add.user=cyrusadmin password create %1%
mail.hook.cyrus.add.user=cyrus_adduser password %1%
Delete Examples:
mail.hook.cyrus.delete.user=cyrusadmin password delete %1%
mail.hook.cyrus.delete.user=cyrus_userdel password %1%
Other properties:
mail.hook.cyrus.home=/home/cyrus
FuseMailHook
FuseMailHook is a property in the portal.properties file, which is the default configuration
file for Sun GlassFish Web Space Server. You can override this property using
portal-ext.properties file.
See http://www.fusemail.com/support/api.html for more information. You must also update
the mail.account.finder property.
mail.hook.fusemail.url=https://www.fusemail.com/api/request.html
mail.hook.fusemail.username=
mail.hook.fusemail.password=
mail.hook.fusemail.account.type=group_subaccount
mail.hook.fusemail.group.parent=
SendmailHook
SendmailHook is a property in the portal.properties file, which is the default configuration
file for Sun GlassFish Web Space Server. You can override this property using
portal-ext.properties file.
Set the commands for adding, updating, and deleting a user where %1% is the userID and %2%
is the password. Set the home and virtual user table information.
mail.hook.sendmail.add.user=adduser %1% -s /bin/false
mail.hook.sendmail.change.password=autopasswd %1% %2%
mail.hook.sendmail.delete.user=userdel -r %1%
mail.hook.sendmail.home=/home
mail.hook.sendmail.virtusertable=/etc/mail/virtusertable
mail.hook.sendmail.virtusertable.refresh=bash -c "makemap hash
/etc/mail/virtusertable < /etc/mail/virtusertable"
Chapter 9 • Configuring Portal Properties
255
Customizing Web Space Server Using the portal-ext.properties File
ShellHook
ShellHook is a property in the portal.properties file, which is the default configuration file
for Sun GlassFish Web Space Server. You can override this property using
portal-ext.properties file.
Set the location of the shell script that will interface with any mail server.
mail.hook.shell.script=/usr/sbin/mailadmin.ksh
Set to true to enable SMTP debugging.
mail.smtp.debug=false
Input a list of comma-delimited email addresses that will receive a BCC of every email sent
through the mail server.
mail.audit.trail=
Message Boards Portlet
Message Boards Portlet is a property in the portal.properties file, which is the default
configuration file for Sun GlassFish Web Space Server. You can override this property using
portal-ext.properties file.
Configure mail notification settings.
message.boards.email.from.name=Joe Bloggs
[email protected]
message.boards.email.html.format=true
message.boards.email.message.added.enabled=true
message.boards.email.message.added.subject.prefix=com/liferay/portlet/messageboards/
dependencies/email_message_added_subject_prefix.tmpl
message.boards.email.message.added.body=com/liferay/portlet/messageboards/de
pendencies/email_message_added_body.tmpl
message.boards.email.message.added.signature=com/liferay/portlet/messageboards/
dependencies/email_message_added_signature.tmpl
message.boards.email.message.updated.enabled=true
message.boards.email.message.updated.subject.prefix=com/liferay/portlet/messageboards/
dependencies/email_message_updated_subject_prefix.tmpl
message.boards.email.message.updated.body=com/liferay/portlet/messageboards/
dependencies/email_message_updated_body.tmpl
message.boards.email.message.updated.signature=com/liferay/portlet/messageboards/
dependencies/email_message_updated_signature.tmpl
Set this to true to allow anonymous posting.
256
Sun GlassFish Web Space Server 10.0 Administration Guide • July 2009
Customizing Web Space Server Using the portal-ext.properties File
message.boards.anonymous.posting.enabled=true
Type the time in minutes on how often this job is run. If a user's ban is set to expire at 12:05 PM
and the job runs at 2 PM, the expire will occur during the 2 PM run.
message.boards.expire.ban.job.interval=120
Type the time in days to automatically expire bans on users. Set to 0 to disable auto expire.
Examples:
message.boards.expire.ban.interval=10
message.boards.expire.ban.interval=0
Type the rss feed abstract length. This value limits what goes in the RSS feed from the beginning
of the message board post. The default is the first 200 characters.
message.boards.rss.abstract.length=200
My Places Portlet
My Places Portlet is a property in the portal.properties file, which is the default
configuration file for Sun GlassFish Web Space Server. You can override this property using
portal-ext.properties file.
Set this to true to show user public sites with no layouts.
my.places.show.user.public.sites.with.no.layouts=true
Set this to true to show user private sites with no layouts.
my.places.show.user.private.sites.with.no.layouts=true
Set this to true to show organization public sites with no layouts.
my.places.show.organization.public.sites.with.no.layouts=true
Set this to true to show organization private sites with no layouts.
my.places.show.organization.private.sites.with.no.layouts=true
Set this to true to show community public sites with no layouts.
my.places.show.community.public.sites.with.no.layouts=true
Set this to true to show community private sites with no layouts.
my.places.show.community.private.sites.with.no.layouts=true
Chapter 9 • Configuring Portal Properties
257
Customizing Web Space Server Using the portal-ext.properties File
Navigation Portlet
Navigation Portlet is a property in the portal.properties file, which is the default
configuration file for Sun GlassFish Web Space Server. You can override this property using
portal-ext.properties file.
Specify the options that will be provided to the user in the edit configuration mode of the
portlet.
navigation.display.style.options=1,2,3,4,5,6
Define each mode with four comma-delimited strings that represent the form: header- Type,
rootLayoutType, rootLayoutLevel, and includedLayouts.
navigation.display.style[1]=breadcrumb,relative,0,auto
navigation.display.style[2]=root-layout,absolute,2,auto
navigation.display.style[3]=root-layout,absolute,1,auto
navigation.display.style[4]=none,absolute,1,auto
navigation.display.style[5]=none,absolute,1,all
navigation.display.style[6]=none,absolute,0,auto
Nested Portlets Portlet
Nested Portlets Portlet is a property in the portal.properties file, which is the default
configuration file for Sun GlassFish Web Space Server. You can override this property using
portal-ext.properties file.
nested.portlets.layout.template.default=2_columns_i
Add a comma separated list of layout templateIDs that should not be allowed in the Nested
Portlets Portlet.
nested.portlets.layout.template.unsupported=freeform,1_column
Portlet CSS Portlet
Portlet CSS Portlet is a property in the portal.properties file, which is the default
configuration file for Sun GlassFish Web Space Server. You can override this property using
portal-ext.properties file.
Set this to true to enable the ability to modify portlet CSS at runtime via the Look and Feel icon.
Disabling it can speed up performance.
portlet.css.enabled=true
258
Sun GlassFish Web Space Server 10.0 Administration Guide • July 2009
Customizing Web Space Server Using the portal-ext.properties File
Shopping Portlet
Shopping Portlet is a property in the portal.properties file, which is the default
configuration file for Sun GlassFish Web Space Server. You can override this property using
portal-ext.properties file.
Set the following to true if cart quantities must be a multiple of the item's minimum quantity.
shopping.cart.min.qty.multiple=true
Set the following to true to forward to the cart page when adding an item from the category
page. The item must not have dynamic fields. All items with dynamic fields will forward to the
item's details page regardless of the following setting.
shopping.category.forward.to.cart=false
Set the following to true to show special items when browsing a category.
shopping.category.show.special.items=false
Set the following to true to show availability when viewing an item.
shopping.item.show.availability=true
Set the maximum file size and valid file extensions for images. A value of 0 for the maximum file
size can be used to indicate unlimited file size. However, the maximum file size allowed is set in
the property com.liferay.portal.upload.UploadServletRequestImpl.max.size.
shopping.image.small.max.size=51200
shopping.image.medium.max.size=153600
shopping.image.large.max.size=307200
A file extension of * will permit all file extensions.
shopping.image.extensions=.gif,.jpeg,.jpg,.png
Configure email notification settings.
shopping.email.from.name=Joe Bloggs
[email protected]
shopping.email.order.confirmation.enabled=true
shopping.email.order.confirmation.subject=com/liferay/portlet/shopping/dependencies/
email_order_confirmation_subject.tmpl
shopping.email.order.confirmation.body=com/liferay/portlet/shopping/dependencies/
email_order_confirmation_body.tmpl
shopping.email.order.shipping.enabled=true
shopping.email.order.shipping.subject=com/liferay/portlet/shopping/dependencies/
Chapter 9 • Configuring Portal Properties
259
Customizing Web Space Server Using the portal-ext.properties File
email_order_shipping_subject.tmpl
shopping.email.order.shipping.body=com/liferay/portlet/shopping/dependencies/
email_order_shipping_body.tmpl
Software Catalog Portlet
Software Catalog Portlet is a property in the portal.properties file, which is the default
configuration file for Sun GlassFish Web Space Server. You can override this property using
portal-ext.properties file.
Set the maximum file size and max file dimensions for thumbnnails. A value of 0 for the
maximum file size can be used to indicate unlimited file size. However, the maximum file size
allowed is set in the property
com.liferay.portal.upload.UploadServletRequestImpl.max.size.
sc.image.max.size=307200
sc.image.thumbnail.max.height=200
sc.image.thumbnail.max.width=160
Tags Compiler Portlet
Tags Compiler Portlet is a property in the portal.properties file, which is the default
configuration file for Sun GlassFish Web Space Server. You can override this property using
portal-ext.properties file.
Set this to true to enable the ability to compile tags from the URL. Disabling it can speed up
performance.
tags.compiler.enabled=true
Tags Portlet
Tags Portlet is a property in the portal.properties file, which is the default configuration
file for Sun GlassFish Web Space Server. You can override this property using
portal-ext.properties file.
Input a class name that implements com.liferay.portlet.tags.util.TagsAssetValidator.
This class will be called to validate assets. The DefaultTagsAssetValidator class is just an
empty class that doesn't actually do any validation.
The MinimalTagsAssetValidator requires all assets to have at least one tag entry.
Examples:
260
Sun GlassFish Web Space Server 10.0 Administration Guide • July 2009
Customizing Web Space Server Using the portal-ext.properties File
tags.asset.validator=com.liferay.portlet.tags.util.DefaultTagsAssetValidator
#tags.asset.validator=com.liferay.portlet.tags.util.MinimalTagsAssetValidator
Tasks Portlet
Tasks Portlet is a property in the portal.properties file, which is the default configuration
file for Sun GlassFish Web Space Server. You can override this property using
portal-ext.properties file.
Specify the default number of approval stages.
tasks.default.stages=2
Specify the default role name for each stage of approval ordered from lowest level of approval to
highest. These Roles must have the APPROVE_PROPOSAL permission.
tasks.default.role.names=Community Administrator,Community Owner
Translator Portlet
Translator Portlet is a property in the portal.properties file, which is the default
configuration file for Sun GlassFish Web Space Server. You can override this property using
portal-ext.properties file.
Set the default languages to translate a given text.
translator.default.languages=en_es
Web Form Portlet
Web Form Portlet is a property in the portal.properties file, which is the default
configuration file for Sun GlassFish Web Space Server. You can override this property using
portal-ext.properties file.
Set the maximum number of dynamic fields to process.
web.form.portlet.max.fields=50
Wiki Portlet
Wiki Portlet is a property in the portal.properties file, which is the default configuration
file for Sun GlassFish Web Space Server. You can override this property using
portal-ext.properties file.
Chapter 9 • Configuring Portal Properties
261
Customizing Web Space Server Using the portal-ext.properties File
Set the URL of a page that contains more information about the classic syntax of the wiki. It will
be shown to the user when editing a page.
wiki.classic.syntax.help.url=http://wiki.liferay.com/index.php/Wiki_Portlet
Set the name of the default page for a wiki node. The name for the default page must be a valid
wiki word. A wiki word follows the format of having an upper case letter followed by a series of
lower case letters followed by another upper case letter and another series of lower case letters.
See http://www.use mod.com/cgi-bin/wiki.pl?WhatIsaWiki for more information on wiki
naming conventions.
wiki.front.page.name=FrontPage
Set the name of the default node that will be automatically created when the Wiki portlet is first
used in a community.
wiki.initial.node.name=Main
Set the following property to specify the requirements for the names of wiki pages. By default
only a few characters are forbidden. Uncomment the following regular expression to allow only
CamelCase titles.
wiki.page.titles.regexp=([^/\\[\\]%&?@]+)
#wiki.page.titles.regexp=(((\\p{Lu}\\p{Ll}+)_?)+)
Set the following property to specify the characters that will be automatically removed from the
titles when importing wiki pages. This regexp should remove any characters that are forbidden
in the regexp specified in wiki.page.titles.regexp.
wiki.page.titles.remove.regexp=([/\\[\\]%&?@]+)
Set the list of supported wiki formats and the default wiki format.
wiki.formats=creole,html
wiki.formats.default=creole
Configure settings for each of the wiki formats.
wiki.formats.engine[classic_wiki]=com.liferay.portlet.wiki.engines.friki.
FrikiEngine
wiki.formats.configuration.main[classic_wiki]=wiki.transform
wiki.formats.configuration.interwiki[classic_wiki]=intermap.txt
wiki.formats.edit.page[classic_wiki]=/html/portlet/wiki/edit/wiki.jsp
wiki.formats.help.page[classic_wiki]=/html/portlet/wiki/help/classic_wiki.
jsp
wiki.formats.help.url[classic_wiki]=http://wiki.liferay.com/index.php/Wiki_P
ortlet
262
Sun GlassFish Web Space Server 10.0 Administration Guide • July 2009
Customizing Web Space Server Using the portal-ext.properties File
wiki.formats.engine[creole]=com.liferay.portlet.wiki.engines.jspwiki.JSPWikiEngine
wiki.formats.configuration.main[creole]=jspwiki.properties
wiki.formats.edit.page[creole]=/html/portlet/wiki/edit/wiki.jsp
wiki.formats.help.page[creole]=/html/portlet/wiki/help/creole.jsp
wiki.formats.help.url[creole]=http://www.wikicreole.org/wiki/Creole1.0
wiki.formats.engine[html]=com.liferay.portlet.wiki.engines.HtmlEngine
wiki.formats.edit.page[html]=/html/portlet/wiki/edit/html.jsp
wiki.formats.engine[plain_text]=com.liferay.portlet.wiki.engines.TextEngine
wiki.formats.edit.page[plain_text]=/html/portlet/wiki/edit/plain_text.jsp
Set the list of supported wiki importers.
wiki.importers=MediaWiki
Configure settings for each of the wiki importers.
wiki.importers.page[MediaWiki]=/html/portlet/wiki/import/mediawiki.jsp
wiki.importers.class[MediaWiki]=com.liferay.portlet.wiki.importers.mediawiki.
MediaWikiImporter
Configure email notification settings.
wiki.email.from.name=Joe Bloggs
[email protected]
wiki.email.page.added.enabled=true
wiki.email.page.added.subject.prefix=com/liferay/portlet/wiki/dependencies/e
mail_page_added_subject_prefix.tmpl
wiki.email.page.added.body=com/liferay/portlet/wiki/dependencies/email_page_
added_body.tmpl
wiki.email.page.added.signature=com/liferay/portlet/wiki/dependencies/email_
page_added_signature.tmpl
wiki.email.page.updated.enabled=true
wiki.email.page.updated.subject.prefix=com/liferay/portlet/wiki/dependencies/
email_page_updated_subject_prefix.tmpl
wiki.email.page.updated.body=com/liferay/portlet/wiki/dependencies/email_pag
e_updated_body.tmpl
wiki.email.page.updated.signature=com/liferay/portlet/wiki/dependencies/emai
l_page_updated_signature.tmpl
wiki.rss.abstract.length=200
Chapter 9 • Configuring Portal Properties
263
264
10
C H A P T E R
1 0
System Maintenance
Maintaining a running implementation of Web Space Server Portal is not much different from
maintaining the application server environment upon which it is running. There are, however,
several factors which administrators should be aware of when they are responsible for a running
instance of Web Space Server. This chapter covers these issues, outlining for system
administrators some specifics about keeping a running Web Space Server instance stable and
secure.
Following are the sections explained in this chapter:
■
■
■
“Web Space Server Monitoring using Google Analytics” on page 265
“Backing Up a Web Space Server Installation” on page 266
“Monitoring and Logging” on page 268
The discussion on back up will cover what parts of Web Space Server should be backed up.
Specific backup software or procedures are not covered because generally, most organizations
have standards for doing backups of their systems, and Web Space Server as a Java EE
application fits well into these standards.
Web Space Server Monitoring using Google Analytics
Web Space Server includes built-in support for Google Analytics, allowing administrators to
make use of Google's tool set for analyzing site traffic data. When you sign up for Google
Analytics, a snippet of code is provided which needs to be added to your web pages in order to
allow Google's system to register the page hit. It can be a tedious process to add this code to
every page on a site, especially if it is a large site and there is a lot of user-generated content.
This problem can be solved in Liferay by putting Google's code into a custom theme written
especially for the site on which the portal is running. Doing this, however, requires that a theme
developer make specific changes to the theme, and it prevents users from using the many freely
available themes that are available for Web Space Server 'out of the box'.
265
Backing Up a Web Space Server Installation
Because of this, support for Google Analytics has been built into Web Space Server, and can be
turned on through a simple user interface. This allows Web Space Server Administrators to
make use of Google Analytics on a community by community basis and turn it on and off when
needed.
To enable Google Analytics support, go to the Manage Pages screen for the community for
which you want to enable support. You can do this through the Communities portlet or by
choosing the Manage Pages from the Welcome menuwhile you are on a page in the community.
Select Monitoring under Settings.
FIGURE 10–1
Monitoring Using Google Analytics
To enable Google Analytics support, go to the Manage Pages screen for the community for
which you want to enable support. You can do this through the Communities portlet or by
clicking the Manage Pages link in the Dock while you are on a page in the community.
Backing Up a Web Space Server Installation
Once you have an installation of Web Space Server Portal running, you will want to have proper
backup procedures in place in case of a catastrophic failure of some kind. Web Space Server is
not very different from any other application that may be running in your application server,
but there are some specific components that need to be backed up in addition to your regular
backup procedures for your application server.
266
Sun GlassFish Web Space Server 10.0 Administration Guide • July 2009
Backing Up a Web Space Server Installation
Source Code
If you have extended Web Space Server or have written portlet or theme plugins, they should be
stored in a source code repository such as Subversion, CVS, or Git. This repository should be
backed up on a regular basis to preserve your ongoing work.
If you are extending Web Space Server with the Extension Environment, you will want to make
sure that you also store the version of the Web Space Server source on which your extension
environment is based. This allows your developers convenient access to all of the tools they
need to build your extension and deploy it to a server.
Web Space Server's File System
Web Space Server's configuration file, portal-ext.properties, gets stored in the
WEB-INF/classes folder in the location to which your application server deployed Web Space
Server. At a minimum, this file should be backed up, but it is generally best to back up your
whole application server.
Web Space Server also stores configuration files, search indexes, cache information, and the
default Jackrabbit document repository in a folder called webspace in the domain directory of
the application server. You need to backup this folder.
Database
Web Space Server's database is the central repository for all of the Portal's information and is
the most important component which needs to be backed up. You can do this by either backing
up the database live (if your database allows this) or by exporting the database and then backing
up the exported file. For example, MySQL ships with a mysqldump utility which allows you to
export the entire database and data into a large SQL file. This file can then be backed up. In case
of a database failure, it can be used to recreate the state of the database at the time the dump was
created.
You can use the Oracle dump feature for backup and restore of Oracle database. See,
http://www.orafaq.com/wiki/Import_Export_FAQ.
If you are using Web Space Server's Document Library extensively, it is likely that you have
configured Jackrabbit to store documents in a database rather than the file system. In this case,
the Jackrabbit database should be backed up also.
Chapter 10 • System Maintenance
267
Monitoring and Logging
Monitoring and Logging
The admin user need to access Control Panel → Server → Server Administration for
monitoring and logging in Sun GlassFish Web Space Server.
Monitoring in Sun GlassFish Web Space Server
Sign in to Web Space Server as admin user, and navigate to Control Panel → Server → Server
Administration from the Welcome menu.
FIGURE 10–2
Monitoring of Resources
You can execute a resource maintenance action by selecting the Execute button next to any
option in the following list of actions. You can execute the following actions:
Run the garbage
Garbage collection frees memory occupied by unused objects. Click the Execute buttonnext to the Run the
collector to free up garbage collector to free up memory option. It increases the 'Free Memory' considerably.
memory
268
Sun GlassFish Web Space Server 10.0 Administration Guide • July 2009
Generate thread dump
Clear content
cached by this VM
The Virtual Machine identifies the web page responses that are the same for each request and to remember
(cache) the content. In some cases it can be useful to clear this cache to free the memory.
Clear content
cached across the
cluster
Executing this action clears the cluster cache.
Clear the database
cache
Executing this action clears the database cache.
Reindex all search
indexes
Executing this action removes all old search entries.
Generate thread
dump
When the application server freezes or hangs or becomes sluggish for no apparent reason, it is
recommended to generate a thread dump. Executing this action generates a thread dump.
Logging in Sun GlassFish Web Space Server
Web Space Server uses Log4j extensively to implement logging for nearly every class in the
portal. If you need to debug something specific while a system is running, you can use the
Admin portlet to set logging levels by class dynamically.
Sign in to Web Space Server as admin user, and navigate to Control Panel → Server → Server
Administration from the Welcome menu. Sign in as admin user to access the Admin portlet. To
view the log levels, select the Log Levels tab.
You will then see a paginated list of logging categories. You can select a logging level for a
category from the list. If the logging level is set to ERROR, an error message is displayed if an
error occurs in the class. Similarly, if the logging level is set to WARN, an error message is
displayed if a warning occurs in the class. OFF, FATAL, ERROR, WARN, INFO, DEBUG, and
ALL are the different logging levels.
Each category is filtered by its place in the class hierarchy. For example, if you wanted to see
logging for a specific class that is registered in the Admin portlet, you would browse to that
specific class and change its log level to something that is more descriptive, such as DEBUG.
Once you click the Save button at the bottom of the list, you will start seeing DEBUG messages
from that class in your application server's log file.
If you are not sure which class you want to see log messages for, you can find a place higher up
in the hierarchy and select the package name instead of an individual class name. If you do this,
messages for every class lower in the hierarchy will be displayed in your application server's log
file.
Be careful when you do this. If you set the log level to DEBUG somewhere near the top of the
hierarchy (such as com.liferay, for example), you may wind up with a lot of messages in your
log file. This could make it difficult to find the one you were looking for, and causes the server to
do more work writing messages to its log file.
Chapter 10 • System Maintenance
269
Generate thread dump
FIGURE 10–3
Changing the Logging Level
If you are working in the extension environment or have created a plugin and want to set the log
level for one of your own classes, you can register that class (so long as it uses Log4J to do its
logging) with the Admin portlet so that you can control the log levels more easily.
You will first need to implement Log4J logging in your class, with a statement such as the
following (taken from Liferay's JCRHook class):
private static Log _log = LogFactory.getLog(JCRHook.class);
You would then use this _log variable to create log messages in your code for the various
logging levels:
_log.error("Reindexing " + node.getName(), e1);
To enable your logging messages to appear in your server's log file via the Admin portlet, click
the Add Category tab on the same Log Levels page.
270
Sun GlassFish Web Space Server 10.0 Administration Guide • July 2009
Generate thread dump
FIGURE 10–4
Adding a Logging Category
You will see that you can add a logging category to the Admin portlet. Simply put in the fully
qualified name of your class or of the package that contains the classes whose log messages you
want to view, choose a log level, and then click the Save button. You will now start to see log
messages from your own class or classes in the server's log file.
Chapter 10 • System Maintenance
271
272
11
C H A P T E R
1 1
Performance Tuning
You can address any of currently faced or anticipated performance issues by doing performance
tuning for the following:
■
■
■
■
■
■
■
■
■
■
■
“Database” on page 273
“Application Server” on page 275
“Thread Pools” on page 275
“MySQL Database Connections” on page 275
“Clustering” on page 275
“Memory” on page 275
“Properties File Changes” on page 276
“Servlet Filters” on page 277
“Portlets” on page 277
“Java Environment” on page 278
“Portal Extensions” on page 278
Database
If you are using the MySQL database, you need to configure the my.cnf file. The following are
some of the important variables in the my.cnf file.
■
query_cache_size
In a situation where the database has to repeatedly run the same queries on the same data
set, returning the same results each time, MySQL can cache the result set, avoiding the
overhead of running through the data over and over and is extremely helpful on busy
servers.
■
key_buffer_size
273
Database
The value of key_buffer_size is the size of the buffer used with indexes. The larger the
buffer, the faster the SQL command finishes and a result is returned. The rule-of-thumb is to
set the key_buffer_size to at least a quarter, but no more than half, of the total amount of
memory on the server. Ideally, it will be large enough to contain all the indexes (the total size
of all .MYI files on the server).
A simple way to check the actual performance of the buffer is to examine four additional
variables: key_read_requests, key_reads, key_write_requests, and key_writes.
■
■
If you divide the value of key_read by the value of key_reads_requests, the result
should be less than 0.01. Also, if you divide the value of key_write by the value of
key_writes_requests, the result should be less than 1.
table_cache
The default is 64. Each time MySQL accesses a table, it places it in the cache. If the system
accesses many tables, it is faster to have these in the cache. MySQL, being multi-threaded,
may be running many queries on a table at a time, and each of these opens a table. Examine
the value of open_tables at peak times. If you find that it stays at the same value as your
table_cache value, and then the number of opened_tables starts increasing rapidly, you
should increase the table_cache if you have enough memory.
■
sort_buffer
The sort_buffer is very useful for speeding up myisamchk operations (which is why it is set
much higher for that purpose in the default configuration files), but it can also be useful
everyday when performing large numbers of sorts.
■
read_rnd_buffer_size
The read_rnd_buffer_size is used after a sort, when reading rows in sorted order. If you
use many queries with ORDER BY, upping this can improve performance. Remember that,
unlike key_buffer_size and table_cache, this buffer is allocated for each thread. This
variable was renamed from record_rnd_buffer in MySQL 4.0.3. It defaults to the same size
as the read_buffer_size. A rule-of-thumb is to allocate 1KB, for each 1MB of memory on
the server, for example 1MB on a machine with 1GB memory.
■
thread_cache
If you have a busy server getting a lot of quick connections, set your thread cache high
enough that the Threads_created value in SHOW STATUS stops increasing. This should
take some of the load off of the CPU.
■
tmp_table_size
"Created_tmp_disk_tables" are the number of implicit temporary tables on disk created
while executing statements and "created_tmp_tables" are memory-based. Obviously it is
bad if you have to go to disk instead of memory all the time.
274
Sun GlassFish Web Space Server 10.0 Administration Guide • July 2009
Memory
Application Server
Tuning the Application Server is most important to see 'real' performance improvement.
For tuning GlassFish see, Sun GlassFish Enterprise Server 2.1 Performance Tuning Guide.
Thread Pools
For the details of thread pooling in GlassFish, see the chapter on Thread Pooling in Sun
GlassFish Enterprise Server 2.1 Administration Guide.
MySQL Database Connections
For tuning MySQL database connections, you can refer MySQL Documentation.
Clustering
Clustering is needed for scalability, increased availability, and load balancing.
If you are using Sun GlassFish Enterprise Server as the application server, you can refer to the
following links for the information on clustering:
■
■
■
■
http://developers.sun.com/appserver/reference/techart/glassfishcluster/
https://glassfish.dev.java.net/javaee5/build/GlassFish_LB_Cluster.html
http://wiki.glassfish.java.net/Wiki.jsp?page=GlassFishV2Architecture
http://docs.sun.com/app/docs/prod/gf.entsvr.v3pre?l=en[amp ]a=view
Memory
Memory is one of the first things to look at when you want to optimize performance. If you have
any disk swapping, that will have a serious impact on performance. Make sure that your server
has an optimal amount of memory and that your JVM is tuned to use it.
There are three JVM command switches that control the amount of memory it uses.
Java heap size:
-Xms
VM heap size:
-Xmx
Chapter 11 • Performance Tuning
275
Properties File Changes
PermGen space:
-XX:MaxPermSize
These three settings control the amount of memory available to the JVM initially, the maximum
amount of memory into which the JVM can grow, and the separate area of the heap called
Permanent Generation space.
For example, the default settings can be:
-Xms128m -Xmx1024m -XX:MaxPermSize=128m
This is perfectly reasonable for a moderately sized machine or a developer machine. These
settings allow the JVM to initially take 128MB of RAM, grow up to 1024MB of RAM, and have a
PermGen space of 128MB. If, however, you have Web Space Server on a server with 4GB of
RAM and you are having performance problems, the first thing you might want to look at is
increasing the memory available to the JVM. You will be able to tell if memory is a problem by
running a profiler (such as Jprobe or YourKit) on the server. If you see Garbage Collection
(GC) running frequently, you will definitely want to increase the amount of memory available
to the JVM.
Issues with PermGen space can also affect performance. PermGen space contains long-lived
classes, anonymous classes and interned Strings. Hibernate, in particular-which Web Space
Server uses extensively has been known to make use of PermGen space. If you increase the
amount of memory available to the JVM, you may want to increase the amount of PermGen
space accordingly.
Properties File Changes
There are also some changes you can make to your portal-ext.properties file once you are in
a production environment.
Set the following to false to disable checking the last modified date on server side CSS and
JavaScript:
last.modified.check=false
Set this property to true to load the theme's merged CSS files for faster loading for production.
By default, it is set to false for easier debugging for development. You can also disable fast
loading by setting the URL parameter css_fast_load to 0.
theme.css.fast.load=true
Set this property to true to load the combined JavaScript files from the property javascript.files
into one compacted file for faster loading for production. By default, it is set to false for easier
debugging for development. You can also disable fast loading by setting the URL parameter
js_fast_load to 0.
276
Sun GlassFish Web Space Server 10.0 Administration Guide • July 2009
Portlets
javascript.fast.load=true
Also, set the following parameters:
portlet.css.enabled=false
velocity.engine.resource.manager.cache.enabled=true
com.liferay.portal.servlet.filters.layoutcache.LayoutCacheFilter=true
Servlet Filters
Web Space Server comes by default with a number of servlet filters enabled and running. It is
likely that for your installation, you don't need them all. Two filters that you can disable without
any impact are the Compression Filter and the Strip Filter. These filters are responsible for
shrinking the size of the response (to save bandwidth). The Strip Filter removes whitespace
from the response object, and the Compression Filter compresses it. This obviously requires
some processing, and so disabling these two filters can enhance performance.
To disable a servlet filter, simply comment it out of your web.xml file.
If there is a feature supported by a servlet filter that you know you are not using, you can
comment it out as well to achieve some performance gains. For example, if you are not using
CAS for single sign-on, comment out the CAS Filter. If you are not using NTLM for single
sign-ons, comment out the Ntlm Filter. If you are not using the Virtual Hosting for
Communities feature, comment out the Virtual Host Filter. The fewer servlet filters you are
running, the less processing power is needed for each request.
Portlets
Web Space Server comes pre-bundled with many portlets which contain a lot of functionality,
but not every web site that is running on Web Space Server needs to use them all. In
portlet.xml and liferay-portlet.xml, comment out the ones you are not using. While
having a loan calculator, analog clock, or game of hangman available for your users to add to
pages is nice, those portlets may be taking up resources that are needed by custom portlets you
have written for your site. If you are having performance problems, commenting out some of
the unused portlets may give you the performance boost you need.
Chapter 11 • Performance Tuning
277
Java Environment
Java Environment
The following are the links for articles and white papers on tuning Java Runtime Environment.
■
■
http://java.sun.com/performance/reference/whitepapers/tuning.html
http://www.javaperformancetuning.com/
Portal Extensions
Some changes to the portal-ext.properties file can boost the performance of Sun GlassFish
Web Space Server.
278
Sun GlassFish Web Space Server 10.0 Administration Guide • July 2009
12
C H A P T E R
1 2
Troubleshooting
This chapter contains troubleshooting information for some of the following issues that you
may face when you are working with Web Space Server.
■
■
■
■
■
■
“Troubleshooting for Installation Issues ” on page 279
“Troubleshooting for Issues Related With Accessing the HTTP Instance” on page 280
“Troubleshooting for Issues Related With User Activities” on page 280
“Troubleshooting for Issues Related With Installing Plugins” on page 281
“Troubleshooting for the Issues in Choosing the Logo Size” on page 282
“Common Questions” on page 282
Troubleshooting for Installation Issues
If you are deploying Web Space Server on an existing installation of GlassFish, you need to
determine the install location of GlassFish. If GlassFish is installed at the root directory, you can
deploy Web Space Server either at the root directory or at the user directory. If GlassFish is
installed at your user directory, you must install Web Space Server at the same user directory.
If the JDK, GlassFish, and Web Space Serversoftware are all installed,Web Space Server is at the
top layer, GlassFish is in the middle layer, and JDK is in the bottom layer. When you are using
the GlassFish Web Space Server bundle, you need to determine the install location of JDK. If
JDK is at the root directory, you can install the bundle either at the root directory or at your user
directory. If JDK is installed at the user directory, you need to install the bundle at the same
directory.
Note – It is a good practice to have your GlassFish installation dedicated only for running Web
Space Server.
Suppose you have JDK 1.5 installed in the root directory and you have installed JDK 1.6 in your
user directory. Because Web Space Server often works better on a more recent JDK version, you
might want to override the installation at the root directory.
279
Troubleshooting for Issues Related With Accessing the HTTP Instance
▼
1
To Reset the JAVA_HOME Variable to the User Directory
Type the following commands in a terminal window:
export JAVA_HOME JDK-install-dir
export PATH=$JAVA_HOME/bin:$PATH
2
To verify the change, type the following command:
echo $JAVA_HOME
The new directory should be listed.
▼
To Set the JAVA_HOME Environment Variable to the User
Directory on Non Solaris Operating Systems
1
Open the GlassFish-install-dir/config/asenv.conf/asenv.bat file.
2
Set the AS_JAVA variable to the JDK 1.6 user installation.
3
Reinstall the Web Space Server bundle and start the domain.
Troubleshooting for Issues Related With Accessing the HTTP
Instance
You can access the HTTP instance for the Web Space Server installation on your machine at
http://localhost:8080/. In case you are installing Web Space Server on a remote machine,
you access the HTTP instance at http://<machine-name>:8080/.
Troubleshooting for Issues Related With User Activities
Users may face some issues when they are working with Web Space Server. Workaround for
those issues are discussed in this section.
▼
To Create a Private Page
If your user account has only public pages and you want to add a private page to it, perform the
following procedure.
1
280
Choose Control Panel from the Welcome menu.
Sun GlassFish Web Space Server 10.0 Administration Guide • July 2009
Troubleshooting for Issues Related With Installing Plugins
2
Click My Pages under My Account.
3
Click the Private Pages tab.
4
Type a name for the page and click the Add Page button.
Troubleshooting for Issues Related With Installing Plugins
The property called auto.deploy.dest.dir is essential for installing plugins. If you are failing
to install plugins, the reason can be that the property is not defined properly. GlassFish defines
the hot deploy folder as a folder called autodeploy inside of the domain folder in which your
server is running. By default, this is in <Glassfish Home>/domains/domain1/autodeploy. JBoss
defines the hot deploy folder as a root folder inside of the particular server configuration you are
using. By default, this is in <JBoss Home>/server/default/deploy. WebLogic defines this
folder inside of the domain directory. By default, this is in <Bea
Home>/user_projects/domains/<domain name>/ autodeploy.
You need to first determine where the hot deploy folder is for the container you are running.
Consult your product documentation for this. Once you have this value, there are two places in
which you can set it: the portal-ext.properties file and in the Plugin Installer portlet.
To change this setting in the portal-ext.properties file, browse to
<ROOT>/webspace-for-gfv2/var/webspace/war-workspace/customs/webspace/WEB-INF/classes
folder. Here you will find the portal-ext.properties file. Open this file in a text editor and
look for the property auto.deploy.dest.dir. If it does not appear in the file, you can add it.
After this, navigate to <ROOT>/webspace-for-gfv2/var/webspace/war-workspace, and run
ant -f synchronize.xml. The safest way to set this property is to define the property using an
absolute path from the root of your file system to your application server's hot deploy folder.
For example, if you are using GlassFish, and you have the server installed in /java/glassfish,
your auto.deploy.dest.dir property would look like the following:
auto.deploy.dest.dir=/java/glassfish/domains/domain1/autodeploy
Remember, if you are on a Windows system, use forward slashes instead of back slashes, like so:
auto.deploy.dest.dir=C:/java/glassfish/domains/domain1/autodeploy
Save the file and then restart your container. Now plugins should install correctly.
Chapter 12 • Troubleshooting
281
Troubleshooting for the Issues in Choosing the Logo Size
Troubleshooting for the Issues in Choosing the Logo Size
You can change the logo for the Community from Control Panel → Portal → Settings. You
need to be cautious about the size of the logo image. A logo of big size, for example, a logo with
the size 600*600 pixels can adversely affect the functioning of the portal.
Try to use a logo with minimal size.
Common Questions
The following are some commonly asked questions about Web Space Server software.
Question: What databases does Web Space Server support?
Answer: HSQL, MySQL, Microsoft SQL, and Oracle 10g.
Question: What is the recommended JDK version to use with Web Space Server?
Answer: JDK 1.6.0_07 or later. Also make sure that Ant 1.7.0 is installed on the machine on
which you are installing Web Space Server.
Question: What size image should I use for my site logo?
Answer: Your site logo should not be larger than 50 x 50 pixels.
Question: What is the recommended amount of memory (RAM) to use with Web Space Server?
Answer: The machine on which a Web Space Server server is running should have a minimum of
2GB RAM. Client machines connecting to a Web Space Server site should have a minimum of
1GB RAM.
Question: Which are the most recommended web browsers for Web Space Server?
Answer: Sun GlassFish Web Space Server is best suited for running on Firefox 2.x and Firefox 3.x
(on all platforms), any of the recent versions of Internet Explorer (on Windows) and Safari (on
MacOS), and all other popular web browsers.
Question: On what port does Web Space Server run?
Answer: By default, Web Space Server runs on port 8080. The port can be changed later, but the
Web Space Server installation program runs on port 8080, so this port must be free before you
start the installation process. If you are upgrading from a previous Web Space Server
installation, be sure to stop any running GlassFish domains before proceeding.
Question: How to create a custom portlet bundle?
Answer: You can use Add Application to add portlets and widgets to a page. You can add portlets
and widgets to the public pages and private pages of Communities and Organizations and
282
Sun GlassFish Web Space Server 10.0 Administration Guide • July 2009
Common Questions
propagate those Communities and organizations to production environment. the portlets and
widgets thus bundled with a Community or an Organization can be considered as custom
portlet bundles.
Question: How the Delegated Administration feature works in Sun GlassFish Web Space Server?
Answer: Admin users can delegate portlets to other users by adding portlets to their public page.
The admin users can add portlets by selecting Add Application from the Welcome menu. All
users can access a portlet which is on the public page of the admin user.
Question: How you can chat and make calls using the Web Space Server?
Answer: You can chat and make calls using Sun GlassFish Web Space Server. Chat feature is
readily integrated with the product. You can make calls using Web Space Server by installing
the CALL-WEB add-on. See, Sun GlassFish Web Space Server 10.0 CALL-WEB Add-On Guide.
Chapter 12 • Troubleshooting
283
284
Index
A
address bar and browser tab icons, changing, 54
administration overview, 21-31
about Sun GlassFish Web Space Server, 21-22
creating an user account, 25
login using OpenID, 25
defining password policies, 26
development environment, 30-31
Apache Ant, 30-31
Sun GlassFish Web Space Server features, 22
using the evaluation bundle, 24
Web Space Server terminology, 23
welcome menu, 26-29
Add Application, 29
Control Panel, 27-28
Layout Template, 29
Manage Pages, 29
My Account, 28
My Places, 29
Toggle Edit Controls, 29
advanced configuration, 155-173
clustering, 161-164
custom plugin repository, 168-173
software catalog portlet, 168-173
deploying applications, 155-157
process.xml, 156-157
deploying content from staging to production
offline promotion of content to production, 159
publishing to a remote server, 159
installing plugins, 167-168
Jackrabbit with MySQL, 164-167
advanced configuration (Continued)
promoting a portal to production
environment, 157-160
activating staging, activating workflow, and
publishing pages to live, 159-160
deploying content from staging to
production, 158-159
moving from development to production, 157
advanced styling tab, 60
application server, performance tuning, 275
Asset Publisher portlet, 134-141
add, 134
blog entry, 136-137
bookmarks entry, 137-138
Document Library document, 138-139
Image Gallery image, 139-140
Web Content, 141
blog entry
add, 136-137
bookmarks entry
add, 137-138
delete, 138
configure, 134-136
delete
bookmarks entry, 138
Document Library document, 139
Image Gallery image, 140-141
Document Library document
add, 138-139
delete, 139
Image Gallery image
add, 139-140
285
Index
Asset Publisher portlet, Image Gallery image
(Continued)
delete, 140-141
Web Content
add, 141
B
background styles tab, 60
backing up
database, 267
installation, 266-267
source code, 267
banner logo, customizing, 53-54
border styles tab, 60
bundled Web Space Serverportlets, using, 57
C
clustering, 161-164
hot deploy, 163-164
Jackrabbit sharing, 161-162
Lucene configuration, 163
performance tuning, 275
communities and organizations, 78-80
adding public and private pages, 78-79
enabling crawling by search engines, 79-80
connecting to MS SQL, 48
content management system, 111-143
Asset Publisher portlet, 134-141
Document Library Data Migration, 115-118
Document Library Display portlet, 118
Document Library portlet, 113-115
Image Gallery portlet, 119-120
other content portlets, 141-142
portlet overview, 111-113
Tags and Categories, 142-143
add Categories, 142-143
add Tag Entry, 142-143
add Tag Sets, 142
add Vocabulary, 142
Web Content portlets, 121-129
Web Content Display portlet, 130-131
286
content management system, Web Content portlets
(Continued)
Web Content List portlet, 131-132
Web Content Search portlet, 132-133
XSL Content portlet, 143
custom plugin repository, using software catalog
portlet, 168-173
customizing Sun GlassFish Web Space Server, 53-68
changing banner logo, 53-54
changing friendly URL, 54-55
changing site layout, 56
changing the name of a portlet
private page, 57-58
public page, 58
configuration button, 60
localization, 60-68
adding a new language support, 61-63
changing existing language entries, 67
customizing while localizing, 67-68
enabling guest users to select a browser
language, 65-66
precedence hierarchy for
Language.propertiesfiles, 66-67
removing localization support for unwanted
languages, 64-65
setting user preferred language, 61
look and feel and configuration
portlets, 57-60
look and feel button
advanced styling tab, 60
WAP styling tab, 60
using bundled Web Space Server portlets, 57
customizingSun GlassFish Web Space Server
changing address bar and browser tab icons, 54
changing page theme, 56
D
database, performance tuning, 273-274
deploying applications, process.xml, 156-157
deploying content from staging to production
offline promotion of content to production, 159
publishing to a remote server, 159
Document Library Data Migration, 115-118
Sun GlassFish Web Space Server 10.0 Administration Guide • July 2009
Index
Document Library Data Migration (Continued)
document library data migration
start, 117-118
start
document library data migration, 117-118
Document Library Display portlet, 118
document library plugins, OpenOffice, 89-90
Document Library portlet, 113-115
add
folders and documents, 114-115
create reference
document, 115
document
create reference, 115
folders and documents
add, 114-115
E
enterprise social networking, use case, 70
expense report portlet, 70-77
approving an expense report, 75-77
submitting expense report, 71-74
export/import, portal data, 83-85
F
friendly URL, customizing, 54-55
friends portlet, 70
adding a friend, 70
G
GlassFish, installing, 35-36
H
hot deploy, clustering, 163-164
HTTP instance, troubleshooting, 280
I
Image Gallery portlet, 119-120
add
image, 119-120
create
reference to an image, 120
image
add, 119-120
image slide show
view, 120
reference to an image
create, 120
view
image slide show, 120
installation, troubleshooting, 279-280
installation instructions, 33-51
configuring
Microsoft SQL, 46-48
connect to a database other than HSQL, 38-39
Installation Instructions
GlassFish
installing, 35-36
installing
MySQL, 34-35
installation instructions
installing
Web Space Server, 36-37
installing Add-Ons, 44-46
installing the application server, 34-40
installing the database, 34-40
installing Web Space Server, 34-40
installing Web Space Server on GlassFish EE, 50-51
Microsoft SQL
configuring to use MS SQL, 48
connecting to MS SQL using management
studio, 48
installing SQL Server Express 2008, 46-47
starting MS SQL Server, 47
Update Tool, 40-44
CLI-Based pkg Tool, 43-44
GUI-Based Update Tool, 40-43
updating WAR/property files, 49
using Update Tool in a proxy, 44
287
Index
installation instructions (Continued)
UTF-8 support
Oracle 10g, 39-40
J
Jackrabbit sharing, clustering, 161-162
Jackrabbit with MySQL, configuring, 164-167
Java environment, performance tuning, 278
Microsoft SQL
configuring, 46-48
configuring to use MS SQL, 48
connecting to MS SQL using management
studio, 48
install SQL Server Express 2008, 46-47
starting MS SQL Server, 47
monitoring and logging, 268-271
MySQL, installing, 34-35
MySQL database connections, performance
tuning, 275
L
localization, 60-68
adding a new language support, 61-63
changing existing language entries, 67
customizing while localizing, 67-68
enabling guest users to select a browser
language, 65-66
precedence hierarchy for
Language.propertiesfiles, 66-67
removing localization support for unwanted
languages, 64-65
setting user preferred language, 61
look and feel and configuration, customizing, 58-60
look and feel and configuration of portlets,
changing, 57-60
look and feel menu control
background styles tab, 60
border styles tab, 60
margin and padding tab, 60
portlet configuration tab, 59
text styles tab, 60
Lucene configuration, clustering, 163
M
mail portlet, 82-83
configuring email accounts, 82-83
margin and padding tab, 60
memory, performance tuning, 275-276
menu control of a portlet, configuring, 60
288
O
OpenOffice, document library plugins, 89-90
Oracle 10g, UTF-8 support, 39-40
overview
Articles, 127-129
create, 127-129
delete, 129
edit, 129
create
Articles, 127-129
Structures, 122-123
Templates, 125-126
delete
Articles, 129
Structures, 124-125
Templates, 127
edit
Articles, 129
Structures, 123-124
Templates, 126-127
Structures, 122-125
create, 122-123
delete, 124-125
edit, 123-124
Templates, 125-127
create, 125-126
delete, 127
edit, 126-127
Sun GlassFish Web Space Server 10.0 Administration Guide • July 2009
Index
P
page theme, customizing, 56
performance tuning, 273-278
application server, 275
clustering, 275
database, 273-274
Java environment, 278
memory, 275-276
MySQL database connections, 275
portal extensions, 278
portlets, 277
properties file changes, 276-277
servlet filters, 277
thread pools, 275
plugin repository, creating custom plugin
repository, 168-173
plugins, installing, 167-168
portal data, export/import, 83-85
portal extensions, performance tuning, 278
portal properties, 175-263
admin portlet, 246
amazon licence keys, 229
announcements portlet, 246-247
authentication pipeline, 206-209
auto deploy, 178-181
auto login, 209
axis servlet, 244
blogs portlet, 247
calendar portlet, 247-248
captcha, 213-214
CAS, 204
commons pool, 187
communication link, 235
communities portlet, 248
company, 191-192
content delivery network, 235
counter, 235-236
CyrusHook, 254-255
default admin, 220-221
default guest public layout, 217-218
default landing page, 216
default logout page, 216-217
default settings layout, 222-226
default user private layouts, 218-219
portal properties (Continued)
default user public layouts, 219-220
document library portlet, 249
editors, 228
ehcache, 186-187
fields, 228-229
FileSystemHook, 249
FuseMailHook, 255
groups and roles, 193-195
hibernate, 185-186
hot deploy, 181
hot undeploy, 181-182
HTTP, 241
image gallery portlet, 250-251
images, 227-228
instant messenger, 229-230
invitation portlet, 251
JASS, 200-201
JavaScript, 187-191
JBI, 236
JCR, 236-237
journal articles portlet, 254
journal portlet, 251-253
JSON tunnel servlet, 245
languages and time zones, 196-197
last modified, 234
layouts, 221-222
LDAP, 201-204
liferay tunnel servlet, 245
lock, 236
login event, 215-216
logout event, 216
look and feel, 197-198
lucene search, 230-232
mail portlet, 254
main servlet, 244
message boards portlet, 256-257
MIME types, 229
model hints, 184
my places portlet, 257
navigation portlet, 258
nested portlets portlet, 258
NTLM, 204-205
OpenID, 205
289
Index
portal properties (Continued)
OpenOffice, 237
OpenSSO, 205-206
organizations, 195
passwords, 210-212
permissions, 212-213
plugin, 182
POP, 237
portal context, 176-177
portal events, 215
portal-ext.properties, 175-263
portlet, 182-183
portlet CSS portlet, 258
portlet URL, 226-227
preferences, 227
properties override, 176
quartz, 238
request, 198
resource actions, 183-184
resource repositories root, 177
S3Hook, 249-250
scheduler, 238
schema, 177
SendmailHook, 255
servlet filters, 241-242
session, 198-200
ShellHook, 256
shopping portlet, 259-260
shutdown events, 214-215
social bookmarks, 238-239
software catalog portlet, 260
SourceForge, 232-233
spring, 184
spring remoting servlet, 245
SQL data, 191
SSO with MAC, 210
startup events, 214
struts, 227
tags compiler portlet, 260
tags portlet, 260-261
tasks portlet, 261
theme, 183
translator portlet, 261
upgrade, 177-178
290
portal properties (Continued)
upload servlet request, 242-243
users, 192-193
value object, 233-234
velocity engine, 239-240
verify, 178
virtual hosts, 240
web form portlet, 261
web server, 243
WebDAV, 243-244
WebDAV servlet, 245
wiki portlet, 261-263
XSS, 234-235
portal resources
add
Communities, 105
assigning users
Communities, 105-106
Communities, 104-106
add, 105
assigning users, 105-106
create
Organizations, 106
Suborganizations, 107
User Groups, 104
create users for
Organizations, 107-108
define
user roles, 109
Organizations
create, 106
create users for, 107-108
Suborganizations
create, 107
User Groups, 103-104
create, 104
user roles
Community roles, 109
define, 109
Organization roles, 108
Regular roles, 108
users and user roles, 108-109
portlet
sharing, 85-89
Sun GlassFish Web Space Server 10.0 Administration Guide • July 2009
Index
portlet, sharing (Continued)
with Facebook, 88
with friends, 88-89
with other web sites, 85-87
portlet configuration tab, 59
portlet overview, 111-113
document management portlets, 112
image management portlets, 112
other content management portlets, 113
Web Content management portlets, 113
portlets, performance tuning, 277
private page, changing the name of a portlet, 57-58
promoting a portal to production environment
activating staging, activating workflow, and
publishing pages to live, 159-160
deploying content from staging to
production, 158-159
moving from development to production, 157
properties file changes, performance file
changes, 276-277
public page, changing the name of a portlet, 58
sharing
portlet, 85-89
with Facebook, 88
with friends, 88-89
with other web sites, 85-87
site layout, changing, 56
store a document to CMS, 89-90
Sun GlassFish Web Space Server, use cases, 69-99
system maintenance, 265-271
database
backup, 267
Google analytics
monitoring, 265-266
installation
backup, 266-267
monitoring
using Google analytics, 265-266
monitoring and logging, 268-271
source code
bckup, 267
T
R
roles and permissions, 101-110
access
plugins, 110
change permissions
plugins, 110
plugins, 109-110
access, 110
change permissions, 110
portal resources, 102-103
Communities, 104-106
Organizations, 106-108
User Groups, 103-104
users and user roles, 108-109
using the Control Panel, 101-102
S
servlet filters, performing tuning, 277
tagging, 99
text styles tab, 60
thread pools, performance tuning, 275
troubleshooting, 279-283
choosing the logo size, 282
common questions, 282-283
HTTP instance, 280
installation, 279-280
installing plugins
issues, 281
user activities, 280-281
U
use cases
Sun GlassFish Web Space Server, 69-99
tagging, 99
user activities, creating a private page, 280-281
UTF-8 support, Oracle 10g, 39-40
291
Index
V
virtual hosting
communities, 80
organizations, 80
W
WAP styling tab, 60
Web Content Display portlet, 130-131
article
display, 130-131
display
article, 130-131
Web Content List portlet, 131-132
configure, 131-132
Web Content portlets, 121-129
overview, 121
Articles, 127-129
Structures, 122-125
Templates, 125-127
Web Content Display portlet, 130-131
Web Content List portlet, 131-132
Web Content Search portlet, 132-133
Web Content Search portlet, 132-133
configuring search for a Web Content Display
portlet, 133
customize search behavior, 132
web services for remote portlets, 145-153
Web Space Server, installing, 36-37
widget consumer portlet, 90-92
workflow portlet, 92-98
configuring workflow for MySQL, 98
creating a workflow
accessing a workflow instance, 96-97
adding a workflow definition, 92-95
creating a workflow instance, 95-96
creating workflow, 92-97
WSRP, 145-153
administration, 146-153
WSRP Consumer, 149-150
WSRP producer, 146-149
creating
WSRP Producers and Consumers without
registration, 150-152
292
WSRP (Continued)
creating a consumer without registration, 152
creating a producer without registration, 151-152
for Sun GlassFish Web Space Server, 146-153
installing
remote/WSRP portlets, 153
remote/WSRP portlets
installing, 153
WSRP Producers and Consumers without
registration
creating, 150-152
WSRP Consumer, creating, 149-150
WSRP producer, creating and enabling, 147-149
Sun GlassFish Web Space Server 10.0 Administration Guide • July 2009