1
Storageflex
3945N NAS RAID Manual
Version 5.3
www.Storageflex.com
©2004, Storageflex Inc.
All Rights Reserved
Administrator Guide
TABLE OF CONTENTS
PREFACE ......................................................................................................................... 4
ABOUT THIS GUIDE ..................................................................................................... 4
WHO SHOULD USE THIS GUIDE............................................................................... 4
WHERE TO FIND INFORMATION ............................................................................ 4
WARRANTY & LIABILITY LIMITATIONS ............................................................. 4
ABOUT STORAGEFLEX 3945N NAS RAID............................................................... 8
CONNECTING APPLIANCES TO THE NETWORK.............................................. 10
CONNECTING THE APPLIANCE TO YOUR NETWORK ................................... 10
CONFIGURING THE APPLIANCE FOR YOUR NETWORK............................... 10
LOCATING THE APPLIANCE ON YOUR NETWORK......................................... 11
CONFIGURING NEW APPLIANCES........................................................................ 13
SEARCHING YOUR NETWORK FOR LOCAL APPLIANCES ............................ 14
SEARCHING FOR REMOTE APPLIANCES ........................................................... 15
LOGGING ON TO A NEWLY INSTALLED APPLIANCE..................................... 16
ENTERING THE SERIAL NUMBER......................................................................... 17
NAMING THE APPLIANCE ....................................................................................... 18
CONFIGURING NETWORK (OPTIONAL).............................................................. 19
VERIFYING THE DATE AND TIME ........................................................................ 20
ASSIGNING A PASSWORD ........................................................................................ 21
MANAGING APPLIANCE SETTINGS...................................................................... 23
MANAGING GROUPS LOCALLY............................................................................. 27
MANAGING SHARES.................................................................................................. 29
MANAGING FOLDERS ............................................................................................... 32
CHECKING THE STATUS OF THE APPLIANCE.................................................. 34
CHECKING USER CONNECTIONS TO THE APPLIANCE ................................. 35
VIEWING SETTINGS OF THE APPLIANCE .......................................................... 36
VIEWING LOGS OF THE APPLIANCE .................................................................. 37
MONITORING HARDWARE STATUS OF THE APPLIANCE............................. 38
CHANGING ADMINISTRATIVE PASSWORD FOR THE APPLIANCE ........... 40
CHANGING THE DATE AND TIME......................................................................... 41
SHUTTING DOWN APPLIANCE .............................................................................. 42
CONFIGURING ADVANCED SETTINGS ................................................................ 43
APPLIANCE NAME ..................................................................................................... 44
NETWORK DOMAIN................................................................................................... 44
DNS SEARCH ORDER................................................................................................. 44
2
Administrator Guide
OBTAINING AN IP ADDRESS FROM A DHCP SERVER..................................... 45
SETTING A STATIC IP ADDRESS............................................................................ 46
CONFIGURING NIC TEAMING................................................................................ 47
THE WAYS TO AUTHENTICATE USERS AND GROUPS ................................... 48
AUTHENTICATE USERS AND GROUPS AGAINST LDAP SERVER ................ 52
MANAGE USERS AND GROUPS WITH APPLIANCEVIEW ............................... 53
ENABLING MACINTOSH SUPPORT....................................................................... 55
ENABLING UNIX SUPPORT...................................................................................... 56
LARGE NETWORK SETTINGS ................................................................................ 57
CONFIGURING LDAP SERVER ............................................................................... 58
CONFIGURING NIS ................................................................................................... 59
POLICY MANAGEMENT ........................................................................................... 61
UPDATING APPLIANCE VIA WEB.......................................................................... 69
TROUBLESHOOTING THE APPLIANCE............................................................... 72
CONFIGURING STORAGE SETTINGS ................................................................... 75
AVAILABLE RAID LEVELS IN STORAGEFLEX.................................................. 75
VOLUME MANAGEMENT......................................................................................... 76
CLUSTERING ............................................................................................................... 83
USING THE APPLIANCE ........................................................................................... 86
FINDING APPLIANCES IN NETWORK NEIGHBORHOOD ............................... 86
FINDING APPLIANCES WITH FIND COMPUTER............................................... 87
SAVING FILES TO THE APPLIANCE (WINDOWS) ............................................. 87
ASSIGNING A DRIVE LETTER TO THE APPLIANCE ........................................ 87
CONNECTING THROUGH THE NETWORK BROWSER OR CHOOSER........ 88
CONNECTING THROUGH THE FINDER (MAC OS X)........................................ 88
SAVING FILES TO THE APPLIANCE (MACINTOSH)......................................... 89
MOUNTING A SHARE ON THE APPLIANCE (LINUX AND UNIX)................... 90
************************************************************************
APPENDIX A: USING THE ONLINE HELP .............................................................. 92
APPENDIX B: GLOSSARY ........................................................................................... 93
APPENDIX C: FREQUENTLY ASKED QUESTIONS (FAQ).................................. 104
3
Administrator Guide
Preface
About this Guide
This Administrator Guide, with respect to the user interface, is focused on the
JAVA based management tool, ApplianceView.
Who should use this guide
This Administrator Guide is written for the Administrator of a Storageflex-enabled
NAS Appliance. This guide assumes that you have some knowledge about basic
computer networking. The guide outlines:
•
•
•
Proper installation of a new Appliance on a network.
Management of the Appliance through the Java-based application.
Using the Appliance in Microsoft Windows, Macintosh, and UNIX
Networks.
Where to find information
•
Information relevant for the Administrator of an Storageflex appliance is
located in chapters 1 through 6
•
Information relevant for network users of an Storageflex appliance is located
in chapter 7
Warranty & Liability Limitations
ATTENTION: USE OF THE SOFTWARE IS SUBJECT TO THE
STORAGEFLEX SOFTWARE LICENSE TERMS SET FORTH BELOW.
USING THE SOFTWARE INDICATES YOUR ACCEPTANCE OF THESE
LICENSE TERMS. IF YOU DO NOT ACCEPT THESE LICENSE TERMS,
YOU MUST RETURN THE SOFTWARE FOR A FULL REFUND.
The following terms govern your use of the enclosed Software unless you
have a separate written agreement with Storageflex Inc.
License Grant
Storageflex Inc. grants you a license to use one copy of the Software. "Use"
means storing, loading, installing, executing or displaying the Software. You
may not modify the Software or disable any licensing or control features of
the Software. If the Software is licensed for "concurrent use", you may not
allow more than the maximum number of authorized users to use the
Software concurrently.
4
Administrator Guide
Ownership
The Software is owned and copyrighted by Storageflex Inc. or its third party
suppliers. Your license confers no title or ownership in the Software and is
not a sale of any rights in the Software. Storageflex Inc.'s third party
suppliers may protect their rights in the event of any violation of these
License Terms.
Copies and Adaptations
You may only make copies or adaptations of the Software for archival
purposes or when copying or adaptation is an essential step in the authorized
use of the Software. You must reproduce all copyright notices in the original
Software on all copies or adaptations. You may not copy the Software onto
any bulletin board or similar system.
No Disassembly or Decryption
You may not disassemble or decompile the Software without obtaining prior
written consent from Storageflex Inc. In some jurisdictions, Storageflex
Inc.'s consent may not be required for disassembly or decompilation. Upon
request, you will provide Storageflex Inc. with reasonably detailed
information regarding any disassembly or decompilation. You may not
decrypt the Software unless decryption is a necessary part of the operation of
the Software.
Transfer
Your license will automatically terminate upon any transfer of the Software.
Therefore, you must delete all copies of the Software installed on your system
prior to transfer. Upon transfer, you must deliver the Software, including any
copies and related documentation, to the transferee. The transferee must
accept all License Terms set forth in the present document as a condition of
the transfer.
Termination
Storageflex Inc. may terminate your license upon notice for failure to comply
with any of the License Terms set forth in this agreement. Upon termination
of your license, you must immediately destroy the Software, together with all
copies, adaptations and merged portions in any form.
5
Administrator Guide
Export Requirements
You acknowledge that the licensed Software is subject to the export control
laws and regulations of the U.S.A., and any amendments thereof. You
confirm that you may not export or re-export the Software or any copy or
adaptation to any countries that are subject to U.S.A. export restrictions. To
do so would be in violation of any applicable laws or regulations.
U.S. Government Restricted Rights
The Software and documentation have been developed entirely at private
expense and are provided as "commercial computer software" or "restricted
computer software". They are delivered and licensed as "commercial
computer software" as defined in DFARS 252.227-7013 (Oct 1988), DFARS
252.211-7015 (May 1991) or DFARS 252.227-7014 (Jun 1995), as a
"commercial item" as defined in FAR 2.101 (a), or as "restricted computer
software" as defined in FAR 52.227-19 (Jun 1987) (or any equivalent agency
regulation or contract clause), whichever is applicable. You have only those
rights provided for such Software and Documentation by the applicable FAR
or DFARS clause or Storageflex Inc. Standard Software Agreement for the
product.
STORAGEFLEX 3945N NAS RAID LIMITED WARRANTY
STATEMENT
1. Storageflex Inc. warrants to you that Storageflex Inc. software will not fail
to execute its programming instructions after the date of purchase, for the
period specified above, due to defects in material and workmanship when
properly installed and used. If Storageflex Inc. receives notice of such defects
during the warranty period, Storageflex Inc. will replace software media that
does not execute its programming instructions due to such defects.
2. Storageflex Inc. does not warrant that the operation of Storageflex Inc.
products will be uninterrupted or error free.
3. Warranty does not apply to defects resulting from (a) improper or
inadequate maintenance or calibration, (b) software, interfacing, parts or
supplies not supplied by Storageflex Inc., (c) unauthorized specification
changes for the product, or (d) improper site preparation or maintenance.
4. ANY IMPLIED WARRANTY OF MERCHANTABILITY OR FITNESS
FOR A PARTICULAR PURPOSE IS LIMITED TO THE DURATION OF
THE EXPRESSED WARRANTY SET FORTH ABOVE. Some states or
provinces do not allow limitations on the duration of an implied warranty, so
the above limitation or exclusion might not apply to you. This warranty gives
you specific legal rights and you might also have other rights that vary from
state to state, or province to province.
6
Administrator Guide
5. THE REMEDIES IN THIS WARRANTY STATEMENT ARE YOUR
SOLE AND EXCLUSIVE REMEDIES. EXCEPT AS INDICATED ABOVE,
IN NO EVENT WILL STORAGEFLEX INC.BE LIABLE FOR LOSS OF
DATA OR FOR DIRECT, SPECIAL, INCIDENTAL, CONSEQUENTIAL
(INCLUDING LOST PROFIT), OR OTHER DAMAGE, WHETHER
BASED IN CONTRACT, TORT, OR OTHERWISE. Some states or
provinces do not allow the exclusion or limitation of incidental or
consequential damages, so the above limitation or exclusion may not apply to
you.
7
Administrator Guide
1 About Storageflex 3945N NAS RAID
Overview
Storageflex Software
A Storageflex NAS Appliance enables cross-platform file sharing for Windows,
Macintosh and UNIX users. Storageflex server software is the engine that drives
your network attached storage appliance. Setup, configuration, and management
are accomplished through ApplianceView, the Java management tool.
Integrated Management
Storageflex provides simple management tools for locating and configuring
appliances. The management interface is available in a Java-based version that
installs directly on client computers from the ApplianceView CD-ROM.
ApplianceView, the Java user interface unifies access to all Storageflex enabled
appliances on a network. The ApplianceView management software installs on
the administrator's hard drive, and automatically detects new appliances as they
are added. The administrator configures basic network settings for each appliance
with a simple first-time setup wizard. Then, ApplianceView lets them view and
manage all Appliances on the Local Area Network (LAN). In addition,
ApplianceView can be configured to view and manage Appliances outside of the
LAN. ApplianceView is featured in this software release.
Appliance Management Software Compatibility
The ApplianceView management software installs on any computer running
Microsoft Windows 98, Windows 2000, Windows NT, or Windows XP.
Someone with Administrator rights must complete installation on Windows NT,
2000, or XP in some cases. Linux (x86 and PowerPC) and Mac OS X (10.1.2,
10.1.5, 10.2, 10.2.6, and 10.3) are supported as well.
8
Administrator Guide
Storageflex 3945N NAS RAID Software Features
• XFS Journaling File System
• The Linux 2.4.21 kernel
• Supports the following network protocols: NFS (Unix), SMB/CIFS (Windows) and
AFP (Apple), and FTP
•
•
Available in English, Japanese, French, Traditional Chinese, and German versions
•
•
•
•
•
•
Hot spare assignment for Hardware RAID
•
•
•
•
•
•
•
•
NFS dynamic UID/GID mapping
Hardware and Software RAID levels 0, 1 and 5 available, with RAID management
tools
ApplianceView, the Java based Management Tool
UPS automatic server shutdown available
Support for up to five Ethernet cards in a single appliance
Network card load balancing to equalize the traffic between up to five Ethernet cards
User & Group management in Local (with ApplianceView) or Native (against Active
Directory Services) or Mixed (against Primary Domain Controller) security modes, as
well as support for NIS and LDAP client and server
Folders & Sharing management by Access Control Lists
Large Network Support
WINS Server service available
Support for NAS clustering
SNMP and SMTP notifications are available
ISCSI protocol support
Automatic & wizard based installer for easy server setup.
ApplianceView Minimum Hardware Requirements
To install ApplianceView, the Java based configuration tool, you must have at least the
following hardware configuration.
•
•
128 MB RAM
•
•
55 MB of free hard drive space
A computer running Windows 98, NT, 2000, or XP, Linux (x86 or PowerPC) or Mac
OS X 10.1.2, and better.
Pentium-II processor or greater
9
Administrator Guide
2 Connecting Appliances to the Network
Installation
This section explains how to add new Appliances to your network. The Appliance
installs in three simple steps.
1. Connect the appliance to your network and to power
2. Configure the appliance for your network
3. Locate the appliance on your network
Connecting the Appliance to your network
To connect the appliance:
1.
Connect an Ethernet cable from the Appliance to an active port on a network
hub or switch.
2.
Connect the power cord to the Appliance, and then plug it into an
uninterruptible power supply (UPS) or a standard power outlet on the wall.
3.
Turn the Appliance on.
Configuring the Appliance for your network
In most cases, the Appliance automatically configures itself. If the appliance does
not receive an IP address from a DHCP server, it may assign itself an IP address.
The Appliance tests for available addresses, starting at 169.254.0.1, and takes the
first available address.
Note
Storageflex recommends that you give the Appliance a static IP address
or a non-expiring DHCP lease time. If no DHCP server is available on
your network for initial setup, please add a route to the 169.254.*
network to configure the appliance with a static IP address (please see
the Complete FAQ in Appendix C).
10
Administrator Guide
Locating the Appliance on your network
The default name of a new Appliance is AWxxxxxx, where xxxxxx is the last six
digits of the MAC (Media Access Control) address of the network card installed
in the appliance.
Note
DHCP server may assign other names to a newly-installed Appliance.
To locate the appliance, try one of the following methods:
•
Use the Find Computer command on the Windows Start menu.
Search for the appliance by its default name.
•
Look for the appliance in Network Neighborhood (called My Network Places
in Windows 2000), under Workgroup.
Note
The appliance may take 15 minutes or more to show up in Workgroup.
If you locate the appliance by one of these methods, it is ready for use. You can
use the Appliance the same as you would any other network-attached resource.
If you do not locate the appliance by one of these methods, add a route to
169.254.* networks to locate an Appliance (please see ApplianceView Complete
FAQ document on client CD for specific details). Below are general steps on
how to do that.
•
Windows
From the Start Menu, the ApplianceView program group, click Route
Helper.
•
Linux
-
Start new terminal session.
-
Change to ApplianceView installation directory:
cd ~/ApplianceView
-
Run the linrouter.sh script:
./linrouter.sh
-
Type in your user password if prompted.
Please note that you should be in ”sudoers” group in order to perform
changes in route tables. Please ask your administrator to configure sudo
for you if you are not able to do this.
•
Mac OS X
-
Launch Terminal which is located under Applications/Utilities
in Finder.
11
Administrator Guide
-
From Terminal console, change directory to the place where
ApplianceView is installed:
cd ~/Applications/ApplianceView
-
Launch the macrouter.sh script:
./macrouter.sh
-
Type in your OS X password (the same one that you use to log
onto your Mac), if prompted.
Please note that you should have the right to administer your Mac in
order to perform changes in route tables. Ask your administrator for help
if you cannot change this setting of your user account on Macintosh.
12
Administrator Guide
3 Configuring New Appliances
About ApplianceView
With ApplianceView, you can access all the Storageflex NAS Appliances on your
network through a single management tool. ApplianceView installs on any
Windows, Linux, or Mac OS X based computer.
Installing ApplianceView on Client PCs
Install ApplianceView on any Windows 98/2000/NT/XP, Linux or Mac OS X PCs
that you will use to configure and manage Appliances. If you are running
Windows NT, 2000, or XP, you may probably need to log in as a user with
administrative privileges before installing the software.
To install ApplianceView on a client PC:
1.
Insert the ApplianceView CD-ROM in the CD drive of the client PC.
2.
For Linux/Power PC installation, please use the Java Runtime Environment 1.3.1
package provided by your Linux distribution vendor. Do not forget to check (and
add if required) a path to your installation of Java Runtime Environment within
the system PATH variable on Windows or Linux.
3.
-
On Windows systems, run the setup.exe file from CD.
-
On Linux (x86) systems, run the setup.bin file from CD.
-
On Linux (PowerPC) systems, run the setup.bin file from the “novm” folder
of client CD. Please make sure that you have JRE 1.3.1 for PowerPC installed
before running ApplianceView installer.
-
On Mac OS X, drag the setup.zip file from CD onto your desktop, and
double-click it; the StuffIt! Expander will start. After it quits, the Setup icon
on your Desktop appears; please double-click it.
4.
Follow the onscreen instructions in the ApplianceView setup program. The
ApplianceView configuration manager installs on your computer.
13
Administrator Guide
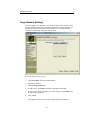
Launching ApplianceView
Launch ApplianceView whenever you want to change the configuration or check
the status of an Appliance on your network.
To launch ApplianceView:
•
On Linux, launch the X terminal console, change directory to the one where
ApplianceView is installed, and type ./ApplianceView.
•
On Mac OS X, please use the shortcuts on your Desktop, or browse to
ApplianceView installation folder, and double-click the ApplianceView icon.
•
On Windows, please use the ApplianceView shortcuts from the Start Menu,
or browse to ApplianceView installation folder, and launch ApplianceView
application.
Descriptions of problems that you may face during installation are included
into Storageflex Complete FAQ document that you may find on CDROM in
the “docs/faq” folder.
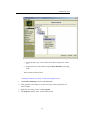
The ApplianceView configuration manager opens.
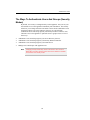
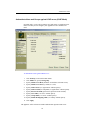
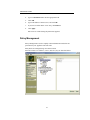
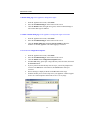
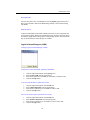
Searching your network for local appliances
Storageflex devices available on your local network show up under Local
Appliances in the left column.
To search the network for local appliances:
1.
Launch ApplianceView.
2.
Local appliances are auto-detected.
Note
If your Appliance is located on the other subnet, you should use the
Search for Remote function which is described below.
Additional appliances available on your network will show up under Local
Appliances in the left column.
•
If the appliance displays using this method, it is ready for immediate
administration.
•
If your newly installed appliance does not show up initially, please refer
to “Locating your appliances on the network” topic of chapter 2, as
well as to “Storageflex Complete FAQ” document from client CD. The
FAQ may contain last-minute issues and questions that are not covered
by this document.
14
Administrator Guide
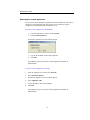
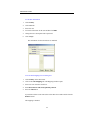
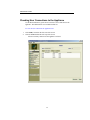
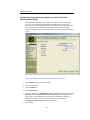
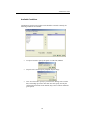
Searching for remote appliances
You can locate remote Storageflex appliances by their IP address or their URL. A
search for a remote appliance will succeed only if your network is properly
configured to reach the subnet that the appliance is on.
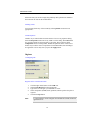
To locate a remote appliance by the IP address:
1.
From the ApplianceView menu, select Network.
2.
Select Search for Remote.
The Remote Appliance Location window appears.
3.
4.
Type in the IP address of the remote appliance.
Click OK.
The appliance shows up in the list of remote appliances available for
administration.
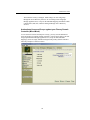
To locate a remote appliance by the URL:
1.
From the ApplianceView menu, select Network.
2.
Select Search for Remote.
3.
The Remote Appliance Location window appears.
4.
Select Appliance URL.
5.
Type in the URL of the remote appliance.
6.
Click OK.
The appliance shows up in the list of remote appliances available for
administration.
15
Administrator Guide
Locating Appliances that do not show up initially
On Windows systems, route addition is done by Route Helper application located
under the same program group in Start Menu as the NAS Manager itself.
On Linux and Mac OS X, you will be prompted for your password in order to
perform changes in route tables. Please note that on Linux you should be in
`sudoers` group in order to perform changes in route tables. On Macintosh, you
should have administrator access level in order to do this. For route addition,
please use linrouter.sh script on Linux, and macrouter.sh script on Mac OS X.
These scripts are located in the ApplianceView installation directory. They must
be launched from Terminal session. If you are not familiar with terminal and
sudo, you can ask your system administrator to configure them for you.
You may also refer to “Locating your appliances on the network” topic in
chapter 2, as well as to “Storageflex Complete FAQ” document from client CD.
It may contain last-minute issues and questions that are not covered by this
document.
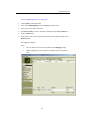
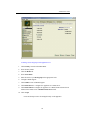
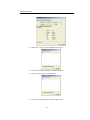
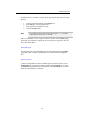
Logging on to a newly installed appliance
Initially, the Appliance has an administrative password set to “ADMIN”. To
protect the appliance from unauthorized access, set an administrative password in
Step 3 of the Setup Wizard.
To log on to an Appliance using ApplianceView:
1.
Double-click the name of the appliance you want to connect.
2.
Enter a password at the Appliance Logon prompt. Default password is
“ADMIN”.
3.
Click OK.
16
Administrator Guide
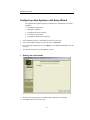
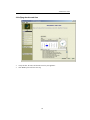
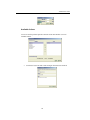
Configuring a New Appliance with Setup Wizard
The Appliance Setup Wizard guides you through five configuration steps for the
Appliance:
1.
2.
3.
4.
5.
•
•
•
Serial number registration
Naming the Appliance
Configuring Network (optional)
Verifying the date and time
Assigning an administrative password
After completing each step, click Next to proceed to the next step.
If you need to modify settings in a previous step, click Previous.
If you need help completing a step, click Help to access additional information for that
setup step.
•
To cancel the setup wizard, click Cancel at any time.
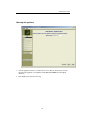
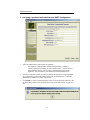
1
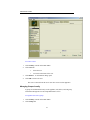
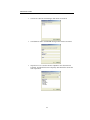
Entering the serial number
•
•
Enter the serial number that was included with the ApplianceView package.
Click Next to proceed to the next step.
17
Administrator Guide
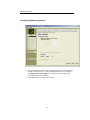
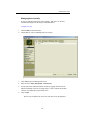
2 Naming the appliance
•
Give the appliance a name of 15 characters or less so that all clients on the network
can locate the appliance. The appliance name may not contain any non-English
characters.
•
Click Next to proceed to the next step.
18
Administrator Guide
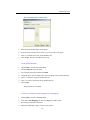
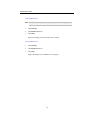
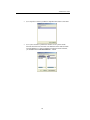
3 Configuring Network (optional)
•
Specify an IP address, subnet mask, and default gateway for your Appliance
if needed, otherwise leave everything unchanged. Please refer to chapter 5,
“Configuring Network Settings” for details on how to configure other
network settings of your Appliance.
•
Click Next button to proceed to the next step.
19
Administrator Guide
4 Verifying the date and time
•
•
Verify the date, the time, and the time zone for your appliance.
Click Next to proceed to the next step.
20
Administrator Guide
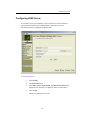
5 Assigning a password and Administrative SMTP Configuration
•
Assign an administrative password for the appliance.
The appliance is shipped with a default password setting (“ADMIN”).
Choose a secure password that you will remember easily. You will use this
password in the future to view or change configuration settings for this
Appliance. The password may not contain any non-English characters.
•
Enter the e-mail address of the person who manages this appliance, along with SMTP
server that will be used to send e-mail messages into the Administrative e-mail and
Administrative SMTP server fields, respectively.
•
Click Finish. If you have changed appliance name, it will be rebooted. Otherwise, only
its management engine will be restarted. Both cases require that you log on again a bit
later.
21
Administrator Guide
Logging On a Configured Appliance
Log on an appliance to check its status or change its configuration. Your
connection is automatically terminated after 15 minutes of inactivity.
To log on to an appliance using ApplianceView:
1.
Launch ApplianceView. ApplianceView Starts.
2.
Double-click the appliance you want to connect to on the left side of the
screen.
3.
Type in the administrative password for the appliance.
4.
Click OK.
You are logged in to the appliance.
Logging Off an Appliance
When you have finished administrative tasks you should log off the appliance.
Logging off terminates your connection to the appliance.
To log off an Appliance:
1.
Click Logoff Appliance, located on the left.
2.
Confirm logoff (select Yes from the popup window)
You are logged off the appliance. You may now log back on to another
appliance, or close the management tool.
22
Administrator Guide
4 Managing Appliance Settings
Configuring the Appliance to Use a UPS
If a supported UPS is connected to the server via serial cable, UPS monitoring can
be turned on. When UPS monitoring is on, the server will automatically perform a
safe shutdown in case the UPS battery level becomes critical in a power outage.
To enable UPS monitoring:
1.
If using ApplianceView click Maintenance.
2.
Click UPS tab.
3.
Select the appropriate UPS model from Supported Models
4.
Click Apply.
5.
Click the Start button.
After several seconds, UPS monitoring starts. If there is a power outage, and
the UPS battery level reaches critical the server will safely shutdown.
Managing Users and Groups on the Appliance
By default, everyone on your network has access to the Appliance immediately
after it is installed. The authentication for users can be changed from local (on the
appliance) to either Primary Domain Controller or Active Directory Services (on
the network). You can make this change in the Security tab under Advanced
Settings in ApplianceView.
Note
The choice of security mode should be made early. Later changes
to the security mode may cause some users to lose access to files
stored on the appliance.
If either the Primary Domain Controller or Active Directory Services authenticate
users and groups for the Appliance, user and group information must be added,
modified and deleted on the Primary Domain Controller or Active Directory
Services, respectively, not through ApplianceView.
23
Administrator Guide
Managing Users Locally
If users are authenticated locally on the appliance, add, delete, or edit user
information through Users & Groups on the Main Menu.
To add a new user:
1.
Click Security on the main menu.
2.
Click Users tab. The User Management screen opens.
3.
Click Add on the User Management screen.
4.
Enter the user's Name, Description, and Password.
5.
Use the same name and password the user has for logging into the network.
Adjust membership of an user in groups using >> and << buttons. By default,
each user is included into group called “users”.
6.
Click Accept.
The new user is added to the list of users who can access this appliance.
24
Administrator Guide
To edit user information:
1.
Click Security.
2.
Click Users tab.
3.
Select the user:
4.
Left click on the name of the user and then click Edit.
5.
Change the user's description and/or password.
6.
Click Accept.
The information for the selected user is modified.
To create NFS mappings for an existing user
1.
Click Security on the main menu.
2.
Click on the NFS Mappings tab. The Mappings window opens.
3.
Select user icon from the combo box.
4.
Enter Host, Remote UID, and (optionally) charset.
5.
Press the Add button.
If you'd like to delete some entries then select them from a table and click on the
Remove button.
The mapping is finished.
25
Administrator Guide
To create SMB mappings for an existing user
1.
Click Security on the main menu.
2.
Click on the SMB Mappings tab. The Mappings window opens.
3.
Select user icon from the combo box.
4.
Pick Local or NIS user from a combo box, and then corresponding Samba user.
5.
Press the Add button.
6.
If you'd like to delete some entries then select them from a table and click on the
Remove button.
The mapping is finished.
Notes:
•
If a user doesn't exist create it first and then enter Mapping settings.
•
Samba mappings are only essential in case Mixed or Native modes are
active.
26
Administrator Guide
To remove a user:
1.
Click Security, located on the Main Menu.
2.
Click Users tab.
•
Select the user
•
Left click on the name of the user.
3.
Click Remove . A confirmation dialog opens.
4.
Click OK to remove the user.
The user is removed from the list of users who can access this appliance.
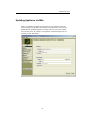
Managing Groups Locally
If groups are authenticated locally on the appliance, add, delete, and edit group
information through the User & Group Maintenance screen.
To organize users into a group:
1.
Click Security, located on the Main Menu.
2.
Click Groups tab.
27
Administrator Guide
The Group Maintenance window opens.
3.
Enter the name and description for the group.
4.
In the Network Users list, select each user you want to add to the group.
5.
Click >> to add the users to the Group Members list.
6.
Click Accept. The users are added to the group.
To edit group information:
1.
Click Security, located on the Main Menu.
2.
Click Groups tab. Select the group:
3.
Left-click the group name and then click Edit.
4.
Change the users who are authorized to access the group or the group description.
5.
Click >> to add users to the Group Members list.
6.
Click << to remove users from the Group Members list
7.
Click Accept.
The group has been modified.
To create or to modify NFS GID mapping for an existing group:
1.
Click Security, located on the Main Menu.
2.
Click on the NFS Mappings tab. The NFS Mappings window opens.
3.
Pick Group icon from the combobox.
4.
Enter Host and Remote GID, as well as remote charset.
28
Administrator Guide
5.
Press the Add button.
If you'd like to delete host entries then select them and click on the Remove
button. The mapping is finished.
To remove a group:
1.
Click Security, located on the Main Menu.
2.
Click Groups tab.
3.
Select the group
4.
Left click on the name of the group.
5.
Click Remove. A confirmation dialog opens.
6.
Click OK to remove the group.
The group is removed from the list of groups that can access this appliance.
Note
Removing a group does not remove the users that were assembled in
that group. The users will still have their individual permissions to
access folders and shares.
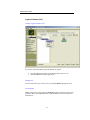
Managing Access to Folders and Shares
The administrator manages access to files on the Appliance by controlling how the
folders are shared. For each shared folder, or "share", the administrator can define
which users and groups are permitted access.
Managing Shares
A share is a folder that has been shared for private or public use on the Network.
Shares names must be 12 characters or less (in order to provide compatibility
between different systems; for Windows 2000 and higher, you can use more
characters), and cannot contain any of the following characters \ / : * ? “ < > | # .
% @. By default, a new share created on the Appliance is accessible to everyone
on the network until the administrator changes the permissions.
To create a new share using ApplianceView:
1.
Click Folders & Sharing, located on the Main Menu.
2.
Browse through the directory tree, then right click on desired drive or folder.
3.
A menu appears.
4.
Select Create new folder.
29
Administrator Guide
5.
Delete the name, type in a new name for the share, and press the <Enter>
key.
6.
Right-click newly-created folder, and pick Share this folder from popup
menu.
The new share has been created.
To change permissions for a share or folder using ApplianceView:
1.
Click Folders & Sharing, located on the Main Menu.
2.
In the ApplianceView folder tree, browse to the share whose permissions you
want to change.
3.
Right click on a folder or share. Click Properties.
4.
The Properties window opens. Click Permissions tab.
30
Administrator Guide
5.
6.
Modify the permissions for the share as desired.
To add users and groups to the Authorized Users list click Add
button. Select Users or Croups window opens.
At the screenshot above, the term “OTHERS” means all other
users and groups on Appliance. Thus, permitting full access to
OTHERS, you are actually permitting access to any user on the
system.
Note
7.
8.
9.
Select Users or Groups you want to add and press Select button.
Then set the selected user or group permissions as desired.
To remove users and groups from the Authorized Users list select
user or group you want to remove and click Remove button.
Click Accept.
Access to the share is limited to the users and groups you have authorized.
31
Administrator Guide
To rename a share using ApplianceView:
1.
Click Folders & Sharing, located on the Main Menu.\
2.
Right click on the name of the share you want to change.
3.
Select Rename current folder.
4.
A cursor appears at the end of the current share name.
5.
Delete the current name, type in the new name and press <Enter>.
The share is renamed.
To delete a share using ApplianceView:
1.
Click Folders & Sharing, located on the Main Menu.
2.
Click the red criss-cross sign in the Delete column, located to the right of the share
you want to delete.
3.
Select Delete current folder.
The share is deleted from the Appliance.
Managing Folders
A folder is a subdirectory of a share. Folder names can be up to 31 characters,
and cannot contain any of the following characters \ / : * ? “ < > | # . %. This is a
good practice to follow in order to avoid incompatibilities between different
systems, for example, between Linux and older versions of Mac OS. The
administrator may want to create several folders so that the files in a share can be
organized. It is important to understand that all of the folders inherit permissions
of the share that they are under unless set otherwise.
To create a new folder using ApplianceView:
1.
Click Folders & Sharing, located on the Main Menu.
2.
Browse to the share that you want to create a folder under.
3.
Right click on the share that you want to create a folder under.
4.
Select Create new folder.
5.
A folder named new folder appears.
6.
Delete the name, type in a new name for the folder, and press <Enter>.
The new folder has been created.
32
Administrator Guide
To rename a folder using ApplianceView:
1.
Click Folders & Sharing, located on the Main Menu.
2.
Browse to the desired folder.
3.
Right click on the share that you want to create a folder under.
4.
Select Rename current folder.
5.
A cursor appears at the end of the current folder name.
6.
Delete the current name, type in the new name, and press <Enter>.
The folder is renamed.
To delete a folder using ApplianceView:
1.
Click Folders & Sharing on the Main Menu.
2.
Browse to the folder that you want to delete.
3.
Right click the folder you want to delete.
4.
Select Delete current folder.
The folder is deleted from the Appliance.
33
Administrator Guide
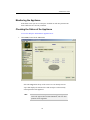
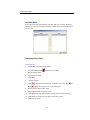
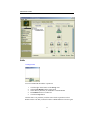
Monitoring the Appliance
In the Status screen you can view the space available on each drive partition and
check which users are currently connected.
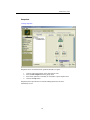
Checking the Status of the Appliance
To view the disk space information in ApplianceView:
1.
Click Status, located on the Main Menu.
Select the Usage tab at the top of the screen if it is not already selected.
A pie chart displays the amount of free and used space on the currently
selected partition of the appliance.
Note
If there is more than one partition on the Appliance, you can
click to the right of the box labeled Partition, and view other
partitions on the Appliance
34
Administrator Guide
Checking User Connections to the Appliance
Use the Refresh button to get the most recent list of user connections to the
appliance. The administrator is not included in this list.
To view the user connections in ApplianceView:
1.
Click Status, located on the left side of the screen.
2.
Click the Active Users tab at the top of the screen.
All users currently connected to the appliance are listed.
35
Administrator Guide
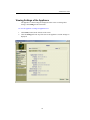
Viewing Settings of the Appliance
The appliance’s current settings are displayed on this screen. To change these
settings, click Settings on the main menu.
To view the appliance’s settings in ApplianceView:
1.
Click Status, located on the left side of the screen.
2.
Click the Settings tab at the top of the screen. The appliance’s current settings are
displayed.
36
Administrator Guide
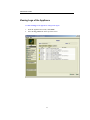
Viewing Logs of the Appliance
To view event logs of the appliance's management engine:
1.
2.
From the ApplianceView menu, click Status.
Select the Log Viewer tab at the top of the screen.
37
Administrator Guide
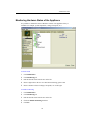
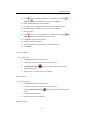
Monitoring Hardware Status of the Appliance
It is possible to monitor the status of hardware sensors of an Appliance if they’re
available (for example, system temperature, voltage, fan speed, etc.).
To check status
1. Click Maintenance.
2. Click Monitoring tab.
3. Pick the desired sensor from the tree on the left.
4. Observe light color in the tree view. Red means warning; green is OK.
5. Observe numeric values of voltages, fan speeds, etc. on the right.
To enable monitoring
1. Click Maintenance.
2. Click Monitoring tab.
3. Pick the desired sensor from the tree on the left.
4. Check the Enable monitoring checkbox.
5. Click Set.
38
Administrator Guide
Monitoring for the appropriate sensor is turned on.
To disable monitoring
1. Click Maintenance.
2. Click Monitoring tab.
3. Pick the desired sensor from the tree on the left.
4. Uncheck the Enable monitoring checkbox.
5. Click Set.
Monitoring for the appropriate sensor is turned off.
To set specific description label for any sensor
1.
Click Maintenance.
2.
Click Monitoring tab.
3.
Pick the desired sensor from the tree.
4.
Type description into the appropriate field on the right.
5.
Click Set.
To fix the status of newly-inserted disk
1.
Click Maintenance.
2.
Click Monitoring tab.
3.
Pick the desired disk sensor from the tree.
4.
Click Fix on the right.
The status of a disk should change to Ok.
39
Administrator Guide
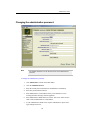
Changing the administrative password
Note
Non-English characters are not allowed as part of an administrative
password
To change the administrative password:
1.
Click Maintenance, located on the Main Menu.
2.
Click the Administration tab.
3.
Enter the current password and the new administrative information:
4.
Enter new password and confirm it.
5.
Enter administrative e-mail address where you would like to receive
warnings and other messages from an appliance.
6.
Enter administrative SMTP mail server name. This server will be used to
send e-mails to administrative e-mail address.
7.
If your administrative SMTP server requires authentication, please enter
login and password for it.
40
Administrator Guide
8.
Enter a name of administrative SNMP server to send SNMP messages
through it.
9.
Click Accept to commit the changes.
Note
If you want to keep your administrator and root passwords in sync,
check the Synchronize with root password checkbox before applying
changes.
Note
You may test if your SMTP/SNMP servers setup is correct. Just click
Send test e-mail or Send test SNMP alert buttons after filling in
appropriate text fields, respectively.
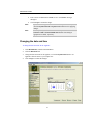
Changing the date and time
To change the date and time for the Appliance:
1.
Click Maintenance, located on the Main Menu.
2.
Сlick the Date/Time tab.
3.
Change the date and time for the appliance, or click the Synchronize button to set
appliance clock the same as your computer one.
4.
Click Accept to commit the changes.
41
Administrator Guide
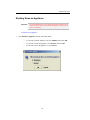
Shutting Down an Appliance
Important
You are administering a server that is designed to remain on most
of the time. If you really want to turn the appliance off, be sure no
users are connected.
To shut down an appliance:
•
Click Shutdown Appliance, located on the Main Menu.
•
If you want to turn the appliance off, select Shutdown, and click OK.
•
If you want to restart the appliance, select Restart, and click OK.
•
If you want to leave the appliance on, click Cancel.
42
Administrator Guide
5 Configuring Advanced Settings
Changes to Advanced Settings
Incorrectly changing advanced settings described below may negatively affect the
performance of your appliance or may compromise the security of your network.
Be sure you know how to properly change these settings before proceeding.
Name and DNS
You can change the name of your Appliance and the settings for your domain
name server. Your network administrator or Internet service provider can furnish
this information.
43
Administrator Guide
Appliance Name
To change the name of the Appliance:
1.
Click Networking, located on the Main Menu.
2.
Click the Name/DNS tab.
3.
Change the Appliance Name as desired. Give the appliance a name of 15
characters or less.
4.
Click Accept to update the configuration.
Network Domain
If your network uses domain mode, enter the correct domain for your network. If
the appliance obtains its address information from a DHCP server however, the
network domain information is obtained automatically, and is grayed out.
To change the Network Domain:
1.
Click Networking, located on the Main Menu.
2.
Select Name/DNS: Click the Name/DNS tab.
3.
Change the Network Domain as desired.
4.
Click Accept.
The domain for your appliance is changed.
DNS Search Order
The DNS search order specifies one or more Domain Name Servers for the
Appliance to use. DNS servers are used in the order they are listed. If the
appliance obtains its IP address from a DHCP server, DNS fields are
automatically filled with the correct information, and are grayed out.
To change the DNS Search Order using ApplianceView:
1.
Click Networking, located on the Main Menu.
2.
Click the Name/DNS tab.
3.
Click the DNS Search Order field.
4.
Use Add and Edit and the up and down arrows to arrange DNS addresses.
5.
Click Accept.
The order the appliance uses to search for a DNS server is changed.
44
Administrator Guide
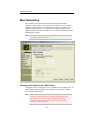
More Networking
Each Appliance on the network needs an IP (Internet Protocol) address.
Appliances containing two or more NICs (network interfaces cards), can have
multiple IP addresses There are two methods of assigning an IP address to an
appliance: using a DHCP server to automatically assign the appliance an IP
address and specifying a static IP address. See your network administrator before
modifying these settings.
Note
It is recommended that you give the Appliance a static IP address or
a non-expiring DHCP lease time.
Obtaining an IP Address from a DHCP Server
The appliance can be configured to receive an IP address from a DHCP server. To
automatically assign an IP address to the Appliance, you must have a DHCP
server attached to the network.
Note
To enable load balancing in a multi-NIC server, at least two network
cards must be both connected to, and properly configured on the
same subnet. If you want to connect the appliance to multiple
networks, the NICs should be both connected to, and properly
configured on different subnets.
45
Administrator Guide
To have the Appliance automatically obtain an IP address:
1.
Click Networking, located on the Main Menu.
2.
Click the NICs tab.
3.
Select the interface eth0:
4.
Click the eth0 tab.
5.
Select Obtain an IP address from a DHCP server.
6.
Click Accept.
Your appliance is now configured to receive its IP address automatically.
Setting a Static IP Address
The appliance can be configured to use a static IP address. Before setting a static
IP address, ensure that the address you are trying to assign is not already in use by
another computer on the network. If you are using a multi NIC server, and want to
enable load balancing, multiple NICs must be both connected to, and given IP
addresses on the same subnet.
To specify a static IP address:
1.
Click Networking, located on the Main Menu.
2.
Select Networking:
3.
Click the NICs tab.
4.
Select the NIC that you want to configure:
5.
Click on tab of the NIC you want to configure.
6.
Select Specify an IP address.
7.
Enter the IP Address, Subnet Mask, and Default Gateway in the appropriate
fields. Your network administrator can provide you with this information.
8.
Click Accept.
The appliance now uses a fixed IP address to access the network. To
configure additional NICs in a multi NIC server, repeat this procedure.
46
Administrator Guide
Configuring NIC Teaming (IP Failover)
You can include several network interface cards into one with NIC Teaming (the
so-called IP Failover). This should increase network connection stability since the
idea of IP Failover is to have an array of network interface cards with the same IP
address, and when one card fails, others continue working.
Note: There is no sense to include only one card into IP Failover. Configuration
tabs for the corresponding network interface cards that are included into IP
Failover are marked red.
To set up IP Failover:
1.
From the ApplianceView menu, click Networking.
2.
Click the NICs tab.
3.
Select the tab of the NIC you want to include.
4.
Check the Include in IP Failover checkbox. The tabs of the cards selected
are marked red.
5.
If you want to configure additional NICs, repeat steps 3 - 4.
6.
At the NIC teaming tab, please click the Specify an IP address radio button,
then enter the IP address, Subnet Mask, and Default Gateway. Alternatively,
you can click the Obtain an IP address from DHCP server radio button in
order to configure failover parameters automatically from DHCP server.
Your network administrator can provide this information.
If you want to make IP Failover your default gateway interface, please click an appropriate
checkbox at the bottom of the screen.
In addition, the Load balancing for IP Failover is supported. Check the appropriate
checkbox to enable it.
7.
After you are finished configuring NICs, click Accept.
8.
Click OK.
The appliance begins rebooting. After the appliance reboots it uses the parameters
you have just set up to access the network.
47
Administrator Guide
The Ways To Authenticate Users And Groups (Security
Modes)
By default, user security is managed locally on the Appliance. Everyone on your
network has access to the appliance immediately after installation. The Security
tab allows you to change from this local mode to native mode (authenticate Users
and Groups against your Active Directory Services) or to mixed mode
(authenticate Users and Groups against your Primary Domain Controller). You
can limit access to the appliance to particular users or groups of users in one of
three ways:
•
•
•
•
Authenticate Users and Groups against your Active Directory Services.
Authenticate Users and Groups against your Primary Domain Controller.
Authenticate Users and Groups against your LDAP Server.
Manage Users and Groups with ApplianceView.
Note
Changing security modes may cause some users to lose access to
shared files. You may need to restore user access rights by granting
access in the new security mode.
48
Administrator Guide
Authenticate Users and Groups against your Active Directory
Services (Native Mode)
If the Appliance authenticates users and groups against your Active Directory
Services, users and groups must be added, modified, and deleted on Active
Directory server, not through ApplianceView. In addition, you will not be able to
view user and group information through ApplianceView; users are simply
authenticated against the Active Directory server when they attempt to connect to
a share.
To authenticate users and groups against Active Directory Services:
1.
Click Security, located on the Main Menu.
2.
Select Security Mode:
3.
Click the Modes tab.
4.
Select Native mode.
5.
Enter the names of your ADS Domain name (but not DNS domain name), Active
Directory Services, Realm, KDC and your WINS Server in the appropriate
fields. Your network administrator can provide this information. Additional
information and answers for the recent ADS questions can be found in
Storageflex Complete FAQ document in Appendix C.
6.
Click Accept.
49
Administrator Guide
The method of security is changed. Make changes to users and groups
through the Active Directory Services. Do not manage users and groups
through ApplianceView, except for the UID/GID mapping information which
is NFS-related, and, thus, cannot be managed through Active Directory
Services.
Authenticate Users and Groups against your Primary Domain
Controller (Mixed Mode)
To save network resources and improve security, you may want to authenticate
users and groups on a primary domain controller. You will not be able to edit user
and group information through ApplianceView (except for NFS UID/GID
mappings); users are simply authenticated against the primary domain controller
when they attempt to connect to a share.
50
Administrator Guide
To authenticate users and groups against primary domain controller:
1.
Click Security, located on the Main Menu.
2.
Select Security Mode:
3.
Click the Modes tab.
4.
Select Mixed mode.
5.
Enter the names of your NT Domain Name (but not DNS domain name),
Primary Domain Controller and your WINS Server in the appropriate fields.
Your network administrator can provide this information. . Additional information
and answers for the recent ADS questions can be found in Storageflex Complete
FAQ document in Appendix C.
6.
Click Accept.
7.
Make changes to users and groups on the Primary Domain Controller. Do not
manage users and groups through ApplianceView, except for the UID/GID
mapping information which is NFS-related, and, thus, cannot be managed through
Active Directory Services.
51
Administrator Guide
Authenticate Users and Groups against LDAP server (LDAP Mode)
In LDAP mode, you are able to manage users and groups via ApplianceView.
Please note that you can configure your Appliance to act as LDAP server
itself.
To authenticate users against LDAP server:
1.
2.
3.
4.
5.
6.
7.
8.
9.
10.
11.
Click Security, located on the Main Menu.
Click Modes tab, specify Workgroup.
Specify LDAP Server Host (hostname or IP address of LDAP server).
Specify LDAP Server Port (by default, it is 389).
Specify Name of base ("o=organization" without quotes).
Specify Name to bind ("cn=ldapadmin,o=organization" without quotes).
Specify Password to bind (password of superuser LDAP account).
Specify User suffix ("ou=users" without quotes).
Specify Group suffix ("ou=users" without quotes).
Specify Samba ID mapping suffix ("ou=idmap" without quotes).
Click Apply.
The appliance will be rebooted to enable authentication against LDAP server.
52
Administrator Guide
If you are using external LDAP server, you should create Samba schema for it
first. In case you’re using the Appliance itself to act as LDAP server, this schema
will be created automatically after you enable LDAP server function of the
Appliance (please see “Configuring LDAP server” below).
Schema files for various LDAP servers may be found here:
http://samba.org/ftp/unpacked/samba_3_0/examples/LDAP/
However, the only approved (in given case) LDAP server is OpenLDAP
( http://www.openldap.org/ ). Samba schema for OpenLDAP can be found in
Samba distribution ( http://samba.org/ ) or here:
http://samba.org/ftp/unpacked/samba_3_0/examples/LDAP/samba.schema
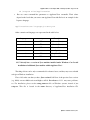
Initial tree should be created on LDAP server as follows:
dn: o=organization
objectClass: organization
o: organization
dn: ou=users,o=organization
objectClass: organizationalUnit
ou: users
dn: ou=groups,o=organization
objectClass: organizationalUnit
ou: groups
dn: ou=idmap,o=organization
objectClass: organizationalUnit
ou: idmap
Superuser account should be created as follows:
cn=ldapadmin,o=organization
Manage Users and Groups with ApplianceView (Local Mode)
If the Appliance maintains User and Group information, users and groups must be
added, modified, and deleted through ApplianceView.
53
Administrator Guide
To manage users and groups with ApplianceView:
1.
Click Security, located on the Main Menu.
2.
Select Security Mode:
3.
Click the Modes tab.
4.
Select Local mode.
5.
Enter the name of your Workgroup in the appropriate field.
6.
Configure WINS Support:
7.
Click Neither to turn off WINS support
8.
Click WINS Server to configure the Appliance as a WINS server
9.
Click WINS Client to configure the Appliance as a WINS client and enter the IP
address of the WINS server in Remote WINS Server field.
10. Click Accept
Users and Groups can now be managed locally on the appliance.
54
Administrator Guide
Macintosh/UNIX/FTP Support
The Appliance can be configured to support file sharing with Macintosh and
UNIX/Linux users on your network. Macintosh and UNIX/Linux users share files
on the appliance through AFP (AppleTalk Filing Protocol), NFS (Network File
System), and FTP, (File Transfer Protocol) respectively.
Enabling Macintosh Support
To enable Macintosh support:
1.
Click Networking, located on the Main Menu.
2.
Select Mac/Unix.
3.
Click the Mac/Unix tab.
4.
Select Enable Macintosh Networking (AppleTalk).
5.
Click Accept.
Macintosh users can now connect to the appliance.
55
Administrator Guide
Enabling UNIX Support
To enable UNIX support:
1.
Click Networking, located on the Main Menu.
2.
Select Mac/Unix.
3.
Click the Mac/Unix tab.
4.
Select Enable UNIX Networking (NFS).
5.
Click Accept.
Unix users and other NFS users can now connect to the appliance.
Enabling FTP Support
To enable FTP support:
1.
Click Networking, located on the Main Menu.
2.
Select Mac/Unix/FTP.
3.
Click the Mac/Unix/FTP tab.
4.
Select Enable Anonymous FTP.
5.
Click Accept.
FTP clients can now connect to the appliance in order to download files from
public shares.
56
Administrator Guide
Large Network Settings
You can configure your Appliance to access other subnets of the network. Large
Network settings can only be used when the appliance has a static IP address. If
the appliance obtains its IP address from a DHCP server, the Large Network
settings are automatically configured with no entries.
To edit the large network settings
1.
Click Networking, located on the Main Menu.
2.
Select Large Network.
3.
Click the Large Network tab.
4.
To add an entry, click Add, and enter the appropriate information.
5.
To edit an entry: Select the subnet you wish to change, and click Edit. Enter
the appropriate information.
6.
Click Accept.
The appliance can now be seen from the other subnets of the network.
57
Administrator Guide
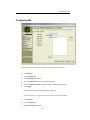
Configuring LDAP Server
It is possible to set up your Appliance to act as LDAP server. This will allow to
store information about users in a LDAP database and connect to it from
miscellaneous clients, including the Appliance itself.
To set up LDAP server
1.
Click Security.
2.
Click LDAP Server tab.
3.
Enter Name of base, Name to bind, and Password to bind into the
appropriate text fileds like it is displayed on the screenshot above.
4.
Click Accept.
LDAP server parameters are set up.
58
Administrator Guide
To start LDAP server
Note
You should configure LDAP server properly before starting it up.
1.
Click Security.
2.
Click LDAP Server tab.
3.
Click Start.
Light color changes to green. LDAP server is started.
To stop LDAP server
1.
Click Security.
2.
Click LDAP Server tab.
3.
Click Stop.
Light color changes to red. LDAP server is stopped.
59
Administrator Guide
Configuring NIS
To start NIS service on Appliance and locate master servers automatically
1.
Click Security.
2.
Click the Modes tab.
3.
Click NIS mode radio button.
4.
Type in NIS Domain name into the appropriate field.
5.
Check the Broadcast mode checkbox in order to enable broadcast mode.
6.
Click Apply.
NIS service is restarted using the parameters supplied.
To start NIS service on Appliance and locate master servers by IP address
1.
Click Security.
2.
Click the Modes tab.
3.
Click NIS mode radio button.
60
Administrator Guide
4.
Type in NIS Domain name into the appropriate field.
5.
Click Add.
6.
Type in IP address of master server, and click OK.
7.
If you need to delete master server entry, click Remove.
8.
Click Apply.
NIS service is restarted using the parameters supplied.
Policy Management
Policy Management is used to simplify routine administration tasks that are
performed on your Appliance time after time.
Policy Rules are managed using convenient wizards.
Each rule consists of conditions, actions, and roles; they are described below.
61
Administrator Guide
Available Conditions
Conditions are used to specify when a rule should be executed. Currently, the
following conditions are available.
•
Fan Speed is used to specify the speed of a CPU fan, in RPM.
•
Snapshot Fill is used to specify snapshot fill percentage.
•
Time Period is used to specify a period of time, starting from a certain
date, and ending up on some other date. One can specify not only the
solid period of time but certain months, days, and even hours within the
given period.
62
Administrator Guide
•
RAID Status is used to specify a RAID which may fail.
•
Disk Inserted is used to specify the new HDD insertion.
•
Disk Lost is used to specify the disk crash.
•
Voltage is used to specify CPU and I/O Voltage values.
63
Administrator Guide
Available Actions
Actions are used to perform specific actions at certain time. Below is a list of
available actions.
•
Send Email is used to send e-mail messages when action is activated.
64
Administrator Guide
•
Send Event is used to send messages when action is activated.
•
Send SNMP is used to send SNMP messages when action is activated.
•
Snapshot Increase is used to increase snapshot in size when action is
activated. You should also select temporary disk that will be used at the
time of operation.
65
Administrator Guide
•
Sync Snapshot is used to synchronize snapshot when action is activated.
•
Sync System is used to synchronize volumes of two systems on the
network when action is activated. You should select the desired volume
on each appliance. To specify Appliances located on remote network,
you should click the Search for Remote… button.
66
Administrator Guide
Available Roles
Role is like some kind of description. Currently, there are two roles: Monitoring
and Storage. They are used only to describe to which class one would like a new
rule to assign.
Managing Policy Rules
To add new rule:
1.
Click Policy, located on the main menu.
2.
Click New rule wizard
3.
Wizard window opens.
4.
Type in new rule name.
5.
Click Next.
6.
Actions list opens.
7.
Click
to move actions from the list of available ones. Click up
down
buttons to arrange the list of selected actions.
button at the top toolbar.
8.
Specific action setup window opens.
9.
Fill in required fields for specific action.
and
10. Click appropriate radio button to select preferred rule execution strategy.
11. Click Next to proceed to the next step, or pick more actions.
12. Conditions list opens.
67
Administrator Guide
13. Click
to move conditions from the list of available ones. Click up
buttons to arrange the list of selected conditions.
and down
14. Fill in required fields for specific condition.
15. Select rule list type using appropriate radio button at bottom of the list.
16. Click Next to proceed to the next step, or pick more conditions.
17. Roles list opens.
18. Click
down
to move role types from the list of available ones. Click up
and
buttons to arrange the list of selected roles.
19. Click Next to proceed to the final step.
20. Final step window is displayed.
21. Edit rule name here if required, and type in rule description.
22. Click Finish.
New rule is added.
To edit existing rule:
1.
Click Policy, located on the main menu.
2.
Click desired policy rule from the tree view on the right.
3.
Click Edit selected rule
4.
Wizard window opens.
5.
See steps 4-22, “To create new rule”, for details.
button from toolbar at the top of the screen.
The rule is edited.
To delete existing rule:
1.
Click Policy, located on the main menu.
2.
Click desired policy rule from the tree view on the right.
3.
Click the Remove selected rule
screen.
4.
Confirmation window opens.
5.
Click OK to delete the selected rule.
The rule is deleted.
68
button from the toolbar at the top of the
Administrator Guide
To edit existing condition:
1.
Click Policy, located on the main menu.
2.
Click desired condition from the tree view on the right.
3.
Click Edit condition wizard
4.
Wizard window opens.
5.
Adjust conditions list.
6.
Click Ok.
button from toolbar at the top of the screen.
Condition is edited.
To edit existing action:
1.
Click Policy, located on the main menu.
2.
Click desired role from the tree view on the right.
3.
Click Edit action wizard
4.
Wizard window opens.
5.
Adjust actions list.
6.
Click Ok.
button from toolbar at the top of the screen.
Action is edited.
To edit existing role:
1.
Click Policy, located on the main menu.
2.
Click desired role from the tree view on the right.
3.
Click Edit roles wizard
4.
Wizard window opens.
5.
Adjust roles list.
6.
Click Ok.
button from toolbar at the top of the screen.
Role is edited.
Note
If you unable to see the newly-created rule on the list, please click
the Refresh
button on a toolbar.
69
Administrator Guide
Updating Appliance via Web
There is a possibility to update server software of your Appliance using the
remote repository on the Web. This should work in most cases even if you are
behind firewall. Updating Appliance via Web is the most easy way to install
recent security fixes, for example. Your appliance vendor should provide you
repository access information.
70
Administrator Guide
To update your Appliance using direct Internet connection:
1.
Click Maintenance.
2.
Click Update tab.
3.
Type in Repository address on the web.
4.
Type in repository Login and Password.
5.
Click Update.
Update was started.
To update your Appliance using Proxy server:
1.
Click Maintenance.
2.
Click Update tab.
3.
Check Use proxy checkbox.
4.
Type in Repository address on the web.
5.
Type in repository Login and Password.
6.
Type in Proxy server address.
7.
Type in Login and Password for Proxy server (optional).
8.
Type in Proxy server Port value (optional).
9.
Click Update.
Update via proxy server was started.
71
Administrator Guide
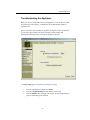
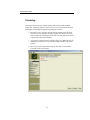
Troubleshooting the Appliance
When you observe strange behaviour of your appliance, or you see that some addon cards do not work properly, you should use the Troubleshooting feature of
ApplianceView.
Note: If you believe that e-mailing any appliance configuration files compromises
your security, please read the text below carefully in order to learn what
information is obtained, how it is encrypted, and make a decision.
To enable debug logs of the appliance's management engine:
1.
2.
3.
From the ApplianceView menu, click Status.
Select the Troubleshooting tab at the bottom of the screen.
Click the Enable button, the light color (red) on the left should change to
green. It means that logs are enabled.
72
Administrator Guide
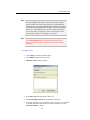
To disable debug logs of the appliance's management engine:
1.
2.
3.
From the ApplianceView menu, click Status.
Select the Troubleshooting tab at the bottom of the screen.
Click the Disable button, the light color (green) on the left should change to
red. It means that logs are disabled.
To enable or disable debug logs of the appliance's management engine at boot time:
1.
2.
3.
From the ApplianceView menu, click Status.
Select the Troubleshooting tab at the bottom of the screen.
Click the Enable debug logs at server start-up checkbox. When the
checkbox is checked, appliance will enable logging at each boot.
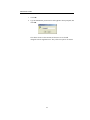
To obtain server configuration snapshot:
1.
2.
3.
4.
5.
6.
7.
From the ApplianceView menu, click Status.
Select the Troubleshooting tab at the bottom of the screen.
Click the Obtain server configuration snapshot button.
In a Save File dialog, please pick a target directory and a file name, then click
the Save File button.
If you've picked a file that already exists at step 4, you will be prompted for
overwrite. The Ok button will confirm it, the Cancel button will reject
overwrite.
Success message is displayed. Please click Ok button at this stage.
Send the file that you've saved at steps 4-6 to your appliance vendor's support
service via e-mail or upload it to the FTP server if it is very huge.
73
Administrator Guide
What is inside the configuration snapshot:
1.
2.
3.
4.
5.
Note
Network configuration (host and domain names, gateway, gateway
device and IP addresses of an appliance).
Information about appliance shares and UID/GID mappings.
Management engine status and debug log files.
Kernel modules configuration file.
A list of hardware devices present in the system, and their specific
features.
1 Configuration snapshot itself is a compressed file which is encrypted
with the PGP key. It means that only an owner of the key can decrypt
the data retrieved from your appliance.
2 No passwords are included into the snapshot.
74
Administrator Guide
6 Configuring Storage Settings
Managing RAID
Through ApplianceView, you can create, edit, deconstruct, and view a RAID.
Available RAID levels
Three types of RAID configurations are available for the data partition. These
RAID levels can be used on a multi-drive appliance, whether or not a hardware
RAID card is installed. If there is no hardware RAID card installed, you can use
software RAID. It is important to note that for a two-drive appliance, the only
RAID levels available are 0 and 1. For an appliance with three or more drives,
RAID levels 0, 1, and 5 are available.
RAID 0: Single Large Volume
This type of RAID is also referred to as striping. RAID 0 interleaves
blocks of data between several drives. Even though multiple drives
exist in the array, to the user a RAID 0 appears as a single large
volume. It is important to understand however, that there is no form of
data backup when using a RAID 0. If a single drive fails, you will lose
the entire array. This type of RAID should not be used for mission
critical data. RAID 0 is available for any system with two or more
drives.
RAID 1: Mirroring
This type of RAID is used to create a mirror copy of the information
contained on one or more of the disks. In this method, a mirror is
created for each drive containing data. For example, in a two drive
RAID 1 setup, both drives contain the exact same data. Since there is
100% redundancy, there is no risk of losing data if one drive fails.
RAID 1 is available for any system with two or more drives.
RAID 5: Disk Striping with Distributed Parity
This type of RAID features both striping and redundancy. This type of
RAID uses a technique called distributed parity, which allows data to
be recovered if one drive in the RAID fails. In addition, data blocks
are interleaved evenly across the drives in parity bits. RAID 5 is only
available for systems that have three or more drives.
75
Administrator Guide
Volume Management
This chapter explains how to control your Appliance Volume settings. As you can
see above, there are several RAID levels possible to use. But Volume
Management is not limited to RAID creation only. Below you may learn about
other ways to configure storage settings of your Appliance.
Click Storage on the main menu, then Volume Management tab. On the left side
of this tab, you will see a list of drives and partitions.
On the right side, you will see visual representation of your storage structure.
Feel free to drag any objects here. In order to arrange the objects automatically,
you should click the Arrange button.
If the structure of your storage is complicated, you can use the Zoom In/Zoom
Out buttons to change the zoom ratio.
In case the structure of your storage does not fit the program window, you can
maximize window and/or use scrollbars.
Each object, except for the storage, drives, and partitions, can be deleted. In order
to perform deletion, please right-click desired object, and pick Delete from popup
menu.
Each object has properties that you can view. Just right-click desired object, and
pick Properties from the popup menu.
If you performed some action by mistake, you can easily Undo or Redo it using
the corresponding buttons. Please note that undo and redo operations are multilevel.
Please note that Macintosh users should use CTRL+mouse click to call the popup
menu instead of right mouse button click.
Caution!
No operations are performed on Appliance, unless and until you press
the Accept button at the bottom of the screen! It means that your
storage structure (and, thus, your data) remains unchanged until you
accept the changes you have made. Please be very careful while
configuring volumes. Improper configuration may lead to data loss.
76
Administrator Guide
RAIDs
Creating RAIDs
You can create RAIDs from disks or partitions.
1.
2.
3.
4.
5.
Click the right mouse button on the Storage icon.
Select Create RAID from the popup menu.
Select disks or partitions you would like to add into RAID.
Pick RAID level from a combo box.
Click the Accept button.
Note that there is no possibility to add or remove disks or partitions to/from
RAID. In order to do that you must first delete a RAID and then recreate it again.
77
Administrator Guide
Deleting RAIDs
You can easily delete any of the RAIDs by selecting Delete popup menu item. If
there is an LVM that is built on the RAID being deleted, it will be deleted along
with RAID.
RAID Properties
To find out what partitions and disks a RAID is based on see the Components tab
of its properties dialog. Double-click the RAID icon or select the Properties menu
item from its popup menu to bring up the corresponding window. The General tab
lets you know about free and used space of a RAID.
Logical Volume Managers (LVMs)
Creating Logical Volume Managers (LVMs)
LVMs can be created from disks, partitions, and RAIDs.
1.
2.
3.
4.
Click the right mouse button on the Storage icon.
Select Create LVM from the popup menu.
Select disks, partitions, or RAIDs you would like to add into LVM.
Click the Accept button.
You can easily add disks or partitions to LVM.
1.
2.
3.
4.
Click the right mouse button on the LVM icon.
Select Add Components from the popup menu.
Select disks or partitions you would like to add to LVM.
Click the Accept button.
You can also remove disks or partitions from LVM.
1.
2.
3.
4.
Click the right mouse button on the LVM icon.
Select Delete Components from the popup menu.
Select disks or partitions you would like to remove from LVM.
Click the Accept button.
78
Administrator Guide
Please note that you can also simply drag and drop disks, partitions or RAIDs to
the LVM icon in order to edit LVM contents.
Deleting LVMs
You can easily delete any of the LVMS by selecting Delete menu item in its
popup menu.
LVMs Properties
Another way to control what an LVM consists of is to use its properties dialog.
Select the Properties menu item of any LVM to see the dialog. The General tab
lets you know about free and used space of an LVM. The second one called
Components allows to manage disks, RAIDs and partitions of the LVM. This is
another way to add or remove components of LVM. Remember, that all changes
are applied on a server only after you press the Apply button.
Regions
Creating Regions
Regions can be created from LVMs.
1.
2.
3.
4.
5.
Note
Click the right mouse button on the LVM icon.
Select Create Region from the popup menu.
Type in the size of region you would like to create.
Select components (RAIDs, disks, partitions) that are preferred to place a
region at.
Click the Accept button.
It is not possible to create a Region on LVM until its (LVMs) creation is
applied to server.
79
Administrator Guide
In addition, there is an ability to merge regions (just drag & drop regions to merge
them) or:
1.
2.
3.
4.
Note
Click the right mouse button on the Region icon.
Select Merge... from the popup menu.
Pick regions you would like to merge.
Click the Accept button.
It is possible to merge only non-occupied regions, i. e. you cannot
merge regions if there are LVs on them.
There is a possibility to resize a region. In order to do this, select a Resize popup
menu item. You should see a dialog where you can type new region size (the old
size is also shown there).
Deleting Regions
Any of the Regions except 'shapshotted' can be deleted through selecting Delete
popup menu item. To delete a 'snapshotted' one, delete an associated snapshot
first.
Region Properties
To find out what partitions, disks or RAID a Region is based on, please see the
Components tab of its properties dialog. Double-click the Region icon or select
the Properties popup menu item to perform this. The General tab lets you know
about free and used space of a Region.
80
Administrator Guide
Logical Volumes (LVs)
Creating Logical Volumes (LVs)
LVs can be created from disks, partitions, RAIDs, or regions.
1.
2.
Click the right mouse button on the desired object name or icon.
Select Create LV from the popup menu.
Deleting LVs
You can easily delete any of the LVs by selecting the Delete popup menu item.
LVs Properties
Double-click an LV icon or select the Properties popup menu item to bring up its
properties dialog. The General tab lets you know about free and used space of a
particular LV.
81
Administrator Guide
Snapshots
Creating Snapshots
Snapshots can be created from disks, partitions, RAIDs, or regions.
1.
2.
3.
4.
Click the right mouse button on the desired object icon.
Select Create Snapshot from the popup menu.
Select disks, partitions, or RAIDs you would like to place snapshot onto.
Click the Accept button.
Snapshots (their representation in a Volume Management) have the same
functionality as LVs.
82
Administrator Guide
Clustering
Clustering is used to increase storage stability and/or increase total available
storage size. Clustering requires at least two servers to be present on the network.
Three types of clustering are supported in Storageflex software.
•
Multihost Failover is used to increase storage stability on the network.
The idea is to use computers in cluster as spare ones. When one system
fails, the others are continuing to work with very short period of network
connection loss (less than a minute).
•
Aggregation is used to increase available storage size. When this type of
clustering is used, all the servers in cluster will be visible as one virtual
storage.
•
Mirroring is used to protect data integrity. The idea is to mirror data
across the servers in the cluster.
83
Administrator Guide
Note
For clustering, it is required to have at least two NICs in each server
that is participating in the cluster. One NIC will be used for data
transfer, another one will be used for inter-server communication
(“heartbeating”). It is required that data NICs should be connected to
one subnet while heartbeating NICs should be connected to another
subnet. Do not mix different types of NICs on the same subnet
since it may lead to an improper cluster operation and could
result into an inability to reconfigure your cluster.
Note
Please make sure that all of the appliances participating in cluster
have static IP addresses before setting up clustering. With IP
addresses obtained via DHCP, cluster setup may fail or function
improperly.
To configure cluster
1.
Click Storage, located on the main menu.
2.
Click Build at the bottom of the screen.
3.
Build new cluster window appears.
4.
Pick cluster type from appropriate combo box.
5.
Pick heartbeating interface from appropriate combo box.
6.
Pick other Appliances (also called slave servers or nodes) you would like
to include into cluster from the list. For remote Appliances, use the
Search for Remote… button.
84
Administrator Guide
7.
Click OK.
8.
Type in administrator passwords for each Appliance when prompted, and
click OK.
The cluster is built. At this moment, all the slave servers should
disappear from the ApplianceView. They all are now part of one cluster.
85
Administrator Guide
7 Using the Appliance
Naming Folders
Use the following conventions when naming folders that will be shared with users
of Windows 95/98/NT/2000/XP or Macintosh:
• Use any combination of numbers, letters, spaces, dashes, underscores, and
apostrophes.
• Limit folder names to 255 characters or less for Windows, 31 characters or less
for Macintosh.
If folders will be shared with users running Windows for Workgroups or DOS,
name the folders with eight or fewer alphanumeric characters and without
symbols such as spaces, dashes, underscores, or apostrophes.
Working from a Windows Computer
The Appliance is ready for use as soon as it is installed on your network. If
necessary, the administrator may limit access to files to particular users or groups.
Otherwise, files on the appliance are available to everyone who has access to your
network. Use the Appliance as you would any other drive or server on the
network:
• Browse for the appliance in Network Neighborhood (it is called My Network
Places in Windows 2000) or Windows Explorer.
• Create and save shared files in folders and shares on the appliance.
• Back up files stored on the appliance.
• Create shortcuts to folders and shares that you use often.
Finding appliances in Network Neighborhood (My Network Places)
To locate the Appliance in Network Neighborhood:
1.
From your computer desktop, double-click on Network Neighborhood (it is called
My Network places in the latest Windows versions).
2.
Double-click on Entire Network.
3.
Browse to the appliance.
4.
By default, appliances initially appear in Workgroup. The administrator may
reassign the appliance to another workgroup using ApplianceView.
The default name of an appliance is AWxxxxxx, where xxxxxx represents the
last six numbers of the appliance's MAC address. The administrator may
rename the appliance using the administration tools.
5.
Double-click the appliance icon to view shares and folders.
86
Administrator Guide
Finding appliances with Find Computer
To locate the Appliance using Find Computer:
1.
From the Windows Start menu, choose Find, and then click Computer.
The Find Computer dialog box opens:
2.
Type the name or IP address of the Appliance in the entry field.
The default name of an appliance is AWxxxxxx, where xxxxxx is the last six
digits of the appliance's MAC address.
3.
Click Find Now.
4.
Locate the correct Appliance and double-click on it to connect.
Saving files to the appliance (Windows)
You can save files on the Appliance by using the Save As command on the File
menu. You can also drag files to Appliance folders in Network Neighborhood or
Windows Explorer.
Assigning a drive letter to the appliance
You can assign, or "map" a drive letter to the Appliance. Assigning a drive letter
to the Public share or a frequently accessed folder on the appliance gives you a
convenient, direct path to your data.
To map to a shared folder:
1.
Double-click on Network Neighborhood.
2.
Browse to the appliance or folder you want to map to.
3.
Right click on the folder you want to map to.
4.
From the menu, choose Map Network Drive.
The Map Network Drive box opens with the path to the folder you selected.
5.
In the Drive field, select the drive letter you want to use for this folder.
6.
Check Reconnect at Logon to automatically connect to this folder the next time
you start Windows.
7.
Click OK.
You can now locate the appliance in My Computer under the drive letter you
assigned.
87
Administrator Guide
Working from a Macintosh Computer
Note
This version of Storageflex software supports Mac OS X 10.1.2, 10.1.5,
and better based computers, as well as Mac OS 9 ones.
The Appliance is ready for use as soon as it is installed on your network. If
necessary, the administrator may limit access to files to particular users or groups.
Otherwise, files on the appliance are available to everyone who has access to your
network. Use the Appliance as you would any other drive or server on the
network:
• Browse to the appliance through Network Browser or Chooser (Mac OS 9).
• Connect
to the appliance shares over AFP or Samba (CIFS) protocol using
Finder (Mac OS X).
• Create and save shared files in folders and shares on the appliance.
• Back up files stored on the appliance.
• Make an alias for folders and shares that you use often.
Connecting through the Network Browser or Chooser (Mac OS 9)
To connect to the Appliance:
1.
Open the Apple menu by clicking on the apple in the menu bar.
2.
Select the Network Browser or Chooser.
If connecting through the Chooser, select AppleShare.
The available network resources are listed.
3.
Select the Appliance you want to connect to and click OK.
4.
Log on the appliance, either as a guest or with your user name and password.
5.
Select the folder you want and click OK.
6.
The Appliance folder is now on the Macintosh desktop.
88
Administrator Guide
Connecting through the Finder (Mac OS X)
To connect to the Appliance:
1.
Select Go, and then Connect to server… from the Finder menu, or press the
Apple+K on the keyboard.
2.
Pick Appliance from the list.
3.
Log on the appliance, either as a guest (without password) or with your user name
and password.
4.
Select the folder you want and click OK.
5.
The Appliance folder is now on the Macintosh desktop.
Saving files to the appliance (Macintosh)
You can save files on the Appliance by dragging the files onto Appliance folders
on your desktop. Appliance folders remain mounted on the Macintosh desktop
until you drag them to the trash.
89
Administrator Guide
Working from a Linux Computer
The Appliance is ready for use from clients using NFS as soon as it is installed on
your network. Use the Appliance as you would any other drive or server on the
network:
• Connect to the appliance by IP address and directory path to a local mount point.
• Create and save shared files in folders and shares on the appliance.
• Backup files stored on the appliance.
• Create KDE/GNOME desktop icons and symbolic links for convenience and
faster access.
• To handle Samba (Windows) connections, you can also use the
LinNeighborhood utility with a convenient GUI.
Mounting a share on the appliance (Linux and UNIX)
You must know the appliance IP address and public mount point in order to
connect to the appliance. Once the IP address and target mount point are
established, the appliance is accessed using a mount command with the target IP
address, target mount point, and local mount point, in the form of ‘mount ipaddress:/target-directory-path /local-mount-point’. The target directory path
depends on how the appliance disks are configured. If the appliance has been
configured with a static IP address, ask the administrator for this address to
connect to the server. If the appliance is set to obtain a DHCP IP address
automatically, either get the IP address from the DHCP manager application, or
ask the system administrator.
Note
NFS mounts only succeed with public shares on the server. Private shares
should be accessed through Windows or Macintosh clients.
To create a local mount
1.
From a Linux console, type: mkdir [directory name] <Enter>
For example, if you want to create a directory named testdir, you would type:
mkdir testdir
And then press <Enter>
Type: ls [directory name] <Enter>
The contents of the directory display; it is empty.
90
Administrator Guide
To view the shares available for NFS mounting
1.
From a Linux console, type: showmount [appliance IP address] –-exports
<Enter>
For example, if the appliance’s IP address is 192.168.0.230, you would type:
showmount 192.168.0.230 –-exports
And then press <Enter>
Decide which share path you want to mount from the list displayed on the screen.
To mount an available share on the appliance to a local mount point
1.
From a Linux console type: mount [appliance IP address]:/[path on appliance]
[local mount point] <Enter>
For example, if the appliance’s IP address is 192.168.0.230, the path on the
appliance is /drives/RaidVolume2/public, and the local mount point is /testdir,
you would type:
mount 192.168.0.230:/drives/RaidVolume2/public /testdir
And then press <Enter>
Type: ls [directory name] <Enter>
The contents of the directory -- now containing files on the appliance, are
displayed. This directory can now be used as if it were a local directory on the
client.
To disconnect a share mounted on the Linux client
1.
Type: umount [directory name] <Enter>
For example, if path on the local Linux client is /testdir, you would type:
umount /testdir
And then press <Enter>.
Type: ls [directory name] <Enter>
The contents of the directory display; it is empty.
91
Administrator Guide
Appendix A: Using the Online Help
Online Help
The online users guide is included with this release of Storageflex. Additionally,
the online help is installed locally to all computers with ApplianceView.
Viewing Online Help
There are two ways of accessing online help in ApplianceView
• Context sensitive help: The context sensitive help can be accessed on each
screen by clicking Help, at the bottom of the screen in ApplianceView. Help for
the specific screen you are viewing will be displayed in the default Internet
browser. When you are finished viewing the help, click on either Help Index to
view a list of help topics, or Close Help to close the browser.
• Help Index: The help index is available in the Help menu in ApplianceView.
Click the Help menu, and select Online Help. Help topics will be displayed on the
left window of your default Internet browser. Click the help topic you would like
to view, and it will appear in the right window. When you are finished viewing the
help, click on either Help Index to return to the index, or Close Help to close the
browser.
Printing Online Help Screens
If you would like to print an online help screen, and have a printer connected to
the computer that has ApplianceView installed, you may do so from the Internet
browser.
To print an online help screen
• Click File and select Print to begin the printing process.
The help screen is printed.
92
Administrator Guide
Appendix B: Glossary
A
Active Directory Services
Active Directory, which is an essential component of the Windows 2000
architecture, presents organizations with a directory services designed for
distributed computer environments. Active Directory allows organizations to
centrally manage and share information on network resources and users while acting
as the central authority for network security.
Administrative Password
Setting an administrative password ensures the administrator that unauthorized
users do not have access to ApplianceView, the appliance management software.
The administrator can set the administrative password by using the Setup Wizard in
ApplianceView.
AppleTalk Filing Protocol (AFP)
The AppleTalk Filing Protocol is the file sharing protocol that is used in a
Macintosh (AppleTalk) network. Storageflex supports AFP connections.
Appliance Name
The Appliance Name is the name that the Appliance uses for identification on the
network. When the Appliance is first setup, its Appliance Name will be AW plus
the last six digits of the MAC address for its network interface card (NIC). For
example if the MAC address of the Network Interface Card in the Appliance is
00:E0:18:5f:54:75, its Appliance Name will be AW5f5475. In the Setup Wizard
packaged with ApplianceView, you may change the Appliance Name. However,
the new name must be 15 characters or less, all of which must be alphanumeric.
Authentication
Authentication is the process by which a computer allows a client to connect if a
valid username and password are supplied. Based upon how the administrator
configures ApplianceView, the Storageflex server can be set up to authenticate users
in ApplianceView, on the NT domain server, or on the Primary Domain Controller
(PDC).
Authentication Types
See User Authentication Types
C
Client PC
A client PC is a computer that can connect to a server by using communication
protocols. For example, in Storageflex a client is a computer that connects to the
appliance.
93
Administrator Guide
D
Default Gateway
See Gateway Address
Disk Segment
The analogy for a disk segment is to a traditional disk partition, such as DOS,
Windows, etc.
Domain Name Service (DNS) Server
Since the Internet, as well as most Local Area Networks use TCP/IP, they do not
understand domain names. Rather, these networks only understand Internet
Protocol (IP) addresses. The DNS server runs software that allows domain names
to be converted into IP addresses. So if a user were to type www.storageflex.com in
the address field of an Internet browser, a DNS server would convert it to the proper
IP address, which in this case is 168.144.128.216. In the same manner in which
DNS servers are used for the Internet, they can also be used for Local Area
Networks, so that computer names, rather than IP addresses can be used to share
files. However, in a windows only network, a Windows Internet Naming Service
(WINS) Server is used to convert computer names to IP addresses.
94
Administrator Guide
Domain
A Domain is a group of computers that are connected by both hardware and
software so that files can easily be shared between users. The key difference
between a workgroup and a domain is that in the latter, the Primary Domain
Controller (PDC) maintains database regarding which users and groups have access
to the files and shares that exist on the computers that belong to the domain. This is
contrast to a Microsoft Windows Workgroup, where each computer that belongs to
the workgroup maintains a database of which users can access its files and shares.
The diagram below is a representation of a typical domain; notice how the PDC
maintains a list of the users who have access to the files and shares for each
computer.
Dynamic Host Configuration Protocol (DHCP) Server
A DHCP server automatically assigns IP (Internet Protocol) addresses to client
machines on a TCP/IP network. Typically, the System Administrator provides the
DHCP manager software a range of available IP addresses, and then the DHCP
Server assigns available IP addresses to client PCs as needed.
E
Ethernet
See LAN
95
Administrator Guide
EVMS
EVMS stands for Enterprise Volume Management System.
F
Folder Tree
The Folder Tree is a list of all of the folders and shares on the Appliance that is
displayed in ApplianceView. The Administrator may have to double click the icon
of the drive, share, or folder to view other shares and folders that are lower in the
tree.
G
Gateway address
In a Local Area Network (LAN), the Gateway Address (Default Gateway) is the
Internet Protocol (IP) address of the router that allows requests for Internet data to
get out of the local network. If the Server Appliance has a static IP address, the
Default Gateway address needs to be entered in ApplianceView.
H
Hardware RAID Appliance
A Hardware RAID Appliance is an Storageflex enabled Appliance that uses a
hardware controlled Redundant Array of Independent Disks. In order to create a
Hardware RAID Appliance, a RAID controller card must be installed inside the
Appliance.
Hub
See Network Hub
I
Integrated Drive Electronics (IDE)
IDE is the most widely used interface for connecting peripherals such as hard drives
and CD-ROM drives to a workstation. Without using an additional controller, only
two IDE devices can be plugged into the motherboard. Storageflex supports both
the IDE and the SCSI interfaces.
Internet Protocol (IP) address
Each computer in the network, including the Appliance has a unique IP address.
This address is either automatically assigned from a Dynamic Host Configuration
Protocol (DHCP) server, or manually assigned by a system administrator. The IP
address allows the computer to communicate with other computers as part of a
TCP/IP network.
ApplianceView
ApplianceView is the Java based management software that allows an administrator
to view and modify the configuration of all Storageflex Appliances in a network.
ApplianceView, a Windows application, installs on the administrator's hard drive,
96
Administrator Guide
and automatically detects new Appliances as they are added to the Local Area
Network (LAN). In addition, ApplianceView can be configured to view and
manage Appliances outside of the LAN, provided that they have domain names or
Internet Protocol (IP) addresses.
K
Kernel
The kernel is the low level fundamental part of Linux that resides in memory at all
times, and provides basic services for all other parts of the operating system.
Storageflex uses the 2.4 kernel, one of the most recent versions available.
L
LDAP
LDAP stands for Lightweight Directory Access Protocol. LDAP is an industry
standard for organizing data of all kinds for easy and flexible retrieval.
LAN cable
A LAN cable is used to connect devices in a Local Area Network. This is also
referred to as a Patch Cable or an Ethernet Cable.
Linux
Linux is an open source, freely distributable version of the UNIX operating system.
The Storageflex server is based on the Linux operating system.
Local Appliances
A Local Appliance is an Storageflex Appliance that is attached to the Local Area
Network by an Ethernet cable. Local appliances are automatically recognized, and
added to the list of Local Appliances by ApplianceView.
Local Area Network (LAN)
A LAN consists of several computers that are networked together using physical
connections. Although there are several types of LAN, Ethernet is by far the most
popular, and is the only type of LAN that Storageflex supports.
Logical Drive
In the context of a partitioned disk drive or a RAID, a logical drive refers to the
users perception of a disk drive. This is in contrast to a physical drive, which is the
actual disk drive, irrespective of how the user may view it. For example, a
workstation could have one 80 GB hard drive (one physical drive), but the drive
may be setup in four partitions of 20GB each (four logical drives). In this case, the
user will view the one single physical drive as four distinct drives since Microsoft
Windows displays each partition as a separate drive. In the case of a Redundant
Array of Independent Disks (RAID), several physical drives actually appear as one
logical drive.
Logical Volume
A mountable storage object.
97
Administrator Guide
Logical Volume Manager (LVM)
It is a group of multiple physical volumes that are pooled into logical volume.
M
Media Access Control (MAC) Address
The unique 12-digit alphanumeric identification number assigned to the Network
Interface Card (NIC) in the Appliance. MAC addresses are written as six sets of
two numbers separated by colons. When you first configure the Appliance, its
name on the network will be AW plus the last six digits of its MAC address. For
example if the MAC address of the Network Interface Card in Appliance is
00:E0:18:5f:54:75, its name on the network will be AW5f5475.
N
Name
See Appliance Name
Network Attached Storage (NAS)
A Network Attached Storage device is a specialized file server that connects to a
network via an Ethernet cable. The Storageflex software package allows an OEM
to create a robust NAS device.
Network Domain
See Domain
Network Hub
A Network Hub is a device, which allows several computers to be connected to a
Local Area Network (LAN) via Ethernet cables.
Network File System (NFS)
Network File System is the file sharing protocol that most UNIX computers use.
Through NFS, users who have access may manipulate the shared files and folders
on a remote server as if it was their local computer. Storageflex supports NFS
connections.
Network Interface Card (NIC)
A Network Interface Card is a piece of hardware that is either built into the
motherboard, or is a card that plugs into the motherboard. The function of the NIC
is to allow communication from one computer to another. In order to access the
Local Area Network, a computer must have a NIC installed. Each NIC has a unique
Media Access Control (MAC) address that allows computers to be distinguished
from each other on a network. While there are several types of NICs, the most
common is Ethernet. Therefore, Storageflex was designed to support most Ethernet
NICs.
98
Administrator Guide
NIS
NIS stands for the Network Information Service. It allows multiple computers in a
local area network to share administrative data. The data itself is stored in a central
database, and then it is distributed over the network.
P
Patch Cable
See LAN cable
Partition
A partition is a subdivision of the physical hard drive that has been segmented into
logical drives for some purpose. The user will view each of the partitions as a
separate physical drive, even though in actuality each partition is a logical drive.
In any single physical drive the total disk space is equal to sum of the total disk
space in all of the partitions (logical drives). For example, a workstation could
have one 80 GB hard drive (one physical drive), but the drive may be setup in four
partitions of 20GB each (four logical drives). In this case, the user will view the
one single physical drive as four distinct drives since Microsoft Windows displays
each partition as a separate drive.
Physical Volume (PV)
A PV is just a physical medium.
Primary Domain Controller (PDC)
The Primary Domain Controller is the server that authenticates a user when
attempting to connect to a share in a domain. In a large Local Area Network, where
there are hundreds or thousands of users, there may be several domain controllers.
In this case, one or several Backup Domain Controllers (BDC) would also
authenticate users.
Physical Drive
In the context of a partitioned disk drive or a RAID, a physical drive refers to the
actual hard disk drive. This is usually compared to a logical drive, which is how a
user perceives the drive. For example, a workstation could have one 80 GB hard
drive (one physical drive), but the drive may be setup in four partitions of 20GB
each (four logical drives). In this case, the user will view the one single physical
drive as four distinct drives since Microsoft Windows displays each partition as a
separate drive. In the case of a Redundant Array of Independent Disks (RAID),
several physical drives actually appear as one logical drive.
R
Redundant Array of Independent Disks (RAID)
A Redundant Array of Independent Disks is a series of multiple physical drives that
have been made into a single logical drive either through hardware or software.
While Storageflex supports both hardware and software RAID, hardware RAID is
outside the control of ApplianceView and must be configured and maintained
99
Administrator Guide
through the hardware RAID controller. There are several different levels of RAID,
each offering a different set of advantages and disadvantages.
Region
An ordered set of logically contiguous sectors. (Note that in general they are not
supposed to be physically contiguous).
Reiser File System
Reiser File System is a new journaling file system that is included with this release
of Storageflex . Since Reiser is a journaling file system, following a system crash or
power failure, the administrator does not have to wait long periods of time before
the appliance becomes available. Instead, a record of file operations is written to a
journal that can be checked in the background after the appliance becomes
available. In addition, Reiser File System is faster, and supports larger file sizes than
many traditional file systems.
Remote Appliance
A Remote Appliance is an Storageflex Appliance that is outside of the Local Area
Network (LAN). If your LAN has a router that is able access to the network you are
trying to reach, ApplianceView can be configured to view and manage remote
appliances.
S
Security
See User Authentication Types
Server Message Block (SMB)
Server Message Block is a file sharing protocol used for Microsoft DOS and
Windows computers. Through SMB, users on the Local Area Network who have
been given access may manipulate the shared files and folders on another computer
as if it was their local computer. Storageflex supports SMB connections.
Share
A share is a folder that has been shared for use on the Network. Shares must be 12
characters or less, and may not contain any of the following characters \ / : * ? “ < >
| # . %. Shares on the Appliance can be created either in ApplianceView, Microsoft
Windows, or Macintosh’s OS.
Single Drive Appliance
An appliance that uses a single hard drive as the storage medium. All information
that is stored on the appliance will be contained on the single hard drive.
Small Computer Systems Interface (SCSI)
The Small Computer Systems Interface (SCSI) is a hardware interface for
connecting peripherals, such as hard drives, CD-ROM drives, and printers. In order
to utilize SCSI, a SCSI controller is required, as well as SCSI cables and SCSI
compatible peripherals. While the majority of desktops PCs use the Integrated
Drive Electronics (IDE) interface, servers often utilize SCSI since it offers many
100
Administrator Guide
advantages when several peripherals need to be connected to the bus. One
advantage is that SCSI allows for up to 15 peripherals to be connected to each
channel, and since most SCSI controllers have two channels, up to 30 peripherals
can be attached. Conversely, with most motherboards, IDE only supports up to two
peripherals. In addition, SCSI is quite a bit faster than IDE, especially when
multiple peripherals are attached. Storageflex supports both the IDE and the SCSI
interfaces.
Snapshot
It is a "frozen" image of a volume and it represents the status of a volume at some
given instance. It remains unchanged in case you're changing the original image.
This image can be used for backups.
Storage object
Any memory structure in EVMS that is capable of being a block device. See also:
EVMS.
Status
An administrator can view status information about the Appliance through
ApplianceView. The administrator can view available and used space on each
partition of the appliance, user connections to the appliance, appliance status, and
appliance name.
Software RAID Appliance
An Appliance that uses a Redundant Array of Independent Disks (RAID) as the
storage medium. In a Software RAID appliance the disk array is controlled and
maintained by Storageflex software, so that no RAID controller card is necessary.
All information that is stored on the appliance will be contained in the RAID.
Storageflex offers Software RAID levels 0, 1, and 5.
Subnet Mask
The subnet mask is the number (formatted similar to an IP address) that is used to
define a sub-network so that IP addresses can be shared on a Local Area Network.
If the Server Appliance has a static IP address, the Subnet Mask needs to be entered
in ApplianceView.
T
TCP/IP Setup Wizard
The TCP/IP Setup Wizard is a program that configures an Storageflex enabled
Server Appliance to use a static IP address. The TCP/IP Setup Wizard program is
included in this version of Storageflex . To use the TCP/IP Setup Wizard, click Find
Device, located on the Network menu in ApplianceView.
Transmission Control Protocol/ Internet Protocol (TCP/IP)
101
Administrator Guide
TCP/IP is the protocol that most computers use for communication on the Internet
and Local Area Networks (LANs). TCP/IP is comprised of two distinct parts. The
Transmission Control Protocol (TCP) establishes a connection with both the server
and client ends, and passes data to the connectionless Internet Protocol (IP). TCP is
responsible for correct delivery of data from one computer to another. If data is lost
en route to the destination, TCP retransmits until the data is either received
successfully, or a timeout occurs. The Internet Protocol is responsible for actually
moving data from one node of the network to another. Therefore, each packet of
data is forwarded to the correct IP address using the Internet Protocol.
U
UNIX
UNIX is an operating system that is widely used on servers in a variety of contexts,
including the Internet. Since UNIX is multi-user (multiple users can access a UNIX
based system at the same time), it is used for running a server. Clients who wish to
log on to a UNIX server need to either be running a UNIX based operating system
or have a program that allows their workstation to use NFS. The Storageflex server
is based on the Linux operating system, a free, open source version of UNIX.
Uninterruptible Power Supply (UPS)
A UPS is an AC powered battery that computers are plugged into. The purpose of a
UPS is to allow computer to shut down safely when the power goes out. Storageflex
server software has UPS support built in so that when the power cord and a serial
cable is plugged in to a supported UPS, the appliance has the ability to safely
shutdown when the battery level becomes critical in a power outage. This ensures
that no data is lost during power outages.
User Authentication Types
Storageflex offers three different methods for authenticating users.
1
Users Authenticated on the Appliance (Storageflex Server
Mode)
In this method of authentication, all user and group information is
created and maintained on the hard drive of the appliance.
Therefore, each time a user attempts to connect to a private share
on the appliance, Storageflex verifies that the user is allowed to
access the share.
2
Users Authenticated on the Primary Domain Controller – PDC
(Mixed Mode)
In this method authentication, all user and group information is
created and maintained on the NT server. When using PDC
authentication, user and group information cannot be viewed or
modified in ApplianceView. A user connects to a private share on
the appliance then the PDC verifies that the user is allowed to
access the share.
3
Users Authenticated on the Active Directory Services (Native
Mode)
In this method of authentication, all user and group information is
102
Administrator Guide
created and maintained through the Active Directory Services.
User and group information cannot be changed with
ApplianceView, as well as in the Mixed Mode. User access rights
are verified by Active Directory Services. See also: Active
Directory Services.
4
Users Authenticated on the LDAP Server (LDAP Mode)
In this method of authentication, all user and group information is
stored on LDAP server but can be edited via ApplianceView.
W
Windows Internet Naming Service (WINS) Server
In a Microsoft Windows only network a WINS server converts computer names to
IP addresses. Essentially, it operates exactly like a DNS Server, but the WINS
server is used exclusively on Microsoft Windows only networks.
Workgroup
A Workgroup is a group of computers that are connected by both hardware and
software, so that files can easily be shared between users. The key difference
between a Microsoft Windows workgroup and a Microsoft Windows domain is that
in the former, each computer maintains a database regarding which users and
groups have access to the files and shares on the computers that comprise the
workgroup. This is in contrast to a Microsoft Windows domain, where a Domain
Controller authenticates each user attempting to access the shares and files of
another computer.
The diagram below is a representation of a typical workgroup; notice how each
computer maintains a list of the users who have access to its files and shares.
103
Administrator Guide
Appendix C
Frequently Asked Questions (FAQ)
104
ApplianceWare v.5.3 Complete FAQ – February 24, 2004 – Page 1 of 30
ApplianceWare 5.3
Complete FAQ
Optifacio Software Services, Inc.
ApplianceWare v.5.3 Complete FAQ – February 24, 2004 – Page 2 of 30
TABLE OF CONTENTS
What's In This Document
Changes Since Previous FAQ Version
5
6
1 Questions and Answers
8
1.1 General Questions
1.1.1 What operating systems are supported by ApplianceView?
1.1.2 Installer reports that I cannot install ApplianceView. What happened?
1.1.3 What locales are supported by ApplianceView?
1.1.4 I have configured my Appliance, rebooted it, and now it does not appear on the
list of appliances anymore. What should I do?
1.1.5 I have configured my Appliance, and rebooted it. However, Appliance had not
disappeared from the list of Appliances, and subsequent logins do not work for it. What
should I do?
1.1.6 I've tried to change quota settings but I've received error message telling that I
cannot save configuration file. How can it be avoided?
1.1.7 I want to synchronize administrator password of an Appliance with root one
but the appropriate checkbox is disabled. What happened?
8
8
8
8
1.2 ApplianceView for Windows
1.2.1 I have a Windows-based client computer. How do I proceed with
ApplianceView installation?
1.2.2 ApplianceView fails to run on Windows with a DirectDraw error message.
What's wrong?
1.2.3 I have launched ApplianceView for the first time, and I cannot see my newlyinstalled ApplianceWare server on the list. What should I do?
1.2.4 How can I launch ApplianceView with locale other than system default?
1.2.5 I already have a version of Java machine installed under Windows. Can I avoid
installation of additional Java machine within ApplianceView?
10
1.3 ApplianceView for Linux (x86/PPC)
1.3.1 I have a Linux-based client computer. How do I proceed with ApplianceView
installation?
1.3.2 Can I install and run ApplianceView without an X-Window system? If not,
what are minimal video subsystem requirements for ApplianceView?
1.3.3 ApplianceView crashes at startup with exit code 139 or segmentation fault.
What's wrong with it?
1.3.4 I have launched ApplianceView for the first time, and I cannot see my newlyinstalled ApplianceWare server on the list. What should I do?
1.3.5 Route addition does not work. What should I do?
1.3.6 How can I launch ApplianceView with locale other than system default?
1.3.7 I am running Linux at PowerPC-based Macintosh, and I cannot launch
ApplianceView installer. Is there any workaround for this?
8
9
9
9
10
10
11
11
12
13
13
13
14
14
15
15
16
Optifacio Software Services, Inc.
ApplianceWare v.5.3 Complete FAQ – February 24, 2004 – Page 3 of 30
1.3.8 I already have a version of Java machine installed under Linux. Can I avoid
installation of additional Java machine within ApplianceView?
1.3.9 I cannot view online help files using the ApplianceView. Browser just never
starts. What’s wrong?
17
17
1.4 ApplianceView for Mac OS X
1.4.1 I have a Macintosh with Mac OS X installed. How do I proceed with
ApplianceView installation?
1.4.2 I have launched ApplianceView for the first time, and I cannot see my newlyinstalled ApplianceWare server on the list. What should I do?
1.4.3 Route addition does not work. What should I do?
18
1.5 ApplianceWare Settings
21
1.5.1 ApplianceWare and Active Directory
1.5.1.1 How can I join my Appliance into the Active Directory?
1.5.1.2 How will I know that Appliance is already joined into ADS?
1.5.1.3 In what cases Appliance would not join into ADS?
1.5.1.4 My Appliance was joined into ADS. I see it on the Network Neighborhood
but cannot connect to one. What's wrong?
21
21
22
22
1.5.2 Accessing ApplianceWare-based Appliance Over Network
1.5.2.1 What NFS protocol versions are supported by ApplianceWare?
1.5.2.2 I would like to view what NFS shares are available on Appliance. What
should I do?
1.5.2.3 I am trying to mount public share but mount fails with the “Permission
denied” message. What should I do?
1.5.2.4 I am trying to mount a NFS share from AIX-based machine but mount fails.
What should I do?
1.5.2.5 I am trying to access public shares via Network Neighborhood in Windows
or over Samba. My client PC is not in the domain, while Appliance is in the domain. The
problem is that I cannot access any shares. What should I do?
1.5.2.6 I have renamed shares on Folders and Sharing screen in ApplianceView but
Windows explorer is still displaying old ones, and I cannot connect to that old shares, of
course. What's wrong?
1.5.2.7 Can I access my Appliance over FTP?
1.5.2.8 I cannot connect to a share over Samba or Windows networking although I
can see its name on the list. Why that happens?
1.5.2.9 I would like to connect to an Appliance share over AFP protocol but using
domain user name since this user owns a share. Is this possible?
1.5.2.10 ApplianceWare-enabled server is actually Linux-based appliance. Is there
any mapping between POSIX and Windows Access Control Lists (ACLs)?
1.5.2.11 I have switched my Appliance to NIS security mode but I cannot see any
primary groups on the groups list in ApplianceView. Is that correct?
23
23
1.5.3 ApplianceWare Network Settings
1.5.3.1 What is the meaning of Large Network Settings option?
1.5.3.2 Are there any peculiarities when an Appliance is configured to act as DHCP
18
18
20
22
23
23
24
24
24
24
25
25
25
28
29
29
29
Optifacio Software Services, Inc.
ApplianceWare v.5.3 Complete FAQ – February 24, 2004 – Page 4 of 30
client?
1.5.3.3 My Appliance had static IP address, and then I have changed it to DHCP
setting. After reboot, an Appliance obtained other host name. What is the reason for this?
1.5.3.4 What ranges of IP addresses cannot be used when setting up ApplianceWare
network settings?
1.5.4 ApplianceWare Volume Management
1.5.4.1 I have created a logical volume of 5Gb in size, and an associated snapshot of
1Gb in size. I've tried to copy some 2Gb of data to a volume, and copying stopped with an
error. What's the reason for this behaviour?
30
30
30
30
Optifacio Software Services, Inc.
ApplianceWare v.5.3 Complete FAQ – February 24, 2004 – Page 5 of 30
What's In This Document?
This document contains answers on ApplianceWare 5.3 frequently asked questions. Here you
can find information on how to run ApplianceView 5.3, and locate and manage your Appliances.
This document is just a supplement to the other ApplianceWare documentation, and it covers most
frequently asked questions. It may also contain the last-minute information, including requests that
are being processed by support service, and, thus, not included within other documents.
Optifacio Software Services, Inc.
ApplianceWare v.5.3 Complete FAQ – February 24, 2004 – Page 6 of 30
Changes Since Previous FAQ Version
February 24, 2004
•
•
•
New item, 1.5.2.11, is added (Displaying primary groups in NIS security mode).
Item 1.1.3 (The list of supported locales) is updated.
New item, 1.5.3.4, is added (Ranges of IP addresses that are prohibited to use).
February 18, 2004
•
New item, 1.1.7, is added (Synchronization of root and admin passwords).
February 04, 2004
•
•
Item 1.1.1 (Supported operating systems list) was updated with newer versions of Mac OS X.
New item, 1.5.2.10 (Mapping between POSIX and Windows ACLs) is added.
October 24, 2003
•
New item, 1.3.9, (Online help is not displayed on Linux) is added.
October 17, 2003
•
New item, 1.5.2.8, (Error connecting to shares using Windows or Linux) is added.
October 14, 2003
• Answers to questions 1.2.4 and 1.3.6 (running ApplianceView on locales other than default) are
updated.
• New item, that is 1.5.2.7, (anonymous FTP access) is introduced.
July 07, 2003
•
Some answers are corrected; the ApplianceView for Windows section is updated with new
question.
May 16, 2003
•
Linux/PPC-related questions are introduced.
Optifacio Software Services, Inc.
ApplianceWare v.5.3 Complete FAQ – February 24, 2004 – Page 7 of 30
April 11, 2003
•
A complete re-design of FAQ structure.
•
New questions and answers are included, and some obsolete ones are removed due to changes
done to ApplianceView installer.
•
ApplianceView questions are now organized in sections according to the operating system
where ApplianceView runs.
Optifacio Software Services, Inc.
ApplianceWare v.5.3 Complete FAQ – February 24, 2004 – Page 8 of 30
1 Questions and Answers
1.1 General Questions
1.1.1 What operating systems are supported by ApplianceView?
Windows 98 and 98SE, ME, NT4.0SP5 and SP6, 2000, and XP should be fine for
ApplianceView. It also can be launched on various Linux x86 and PPC distributions, as well as on
Mac OS X v. 10.1.2, 10.1.5, 10.2, 10.2.6, and 10.3.x.
1.1.2 Installer reports that I cannot install ApplianceView. What happened?
Please check if you have enough free space or enough rights to write to a particular directory.
If you're using Macintosh, please refer to the chapter 1.4, “ApplianceView for Mac OS X”, and
follow the installation steps carefully.
1.1.3 What locales are supported by ApplianceView?
Currently ApplianceView has complete support for English, Japanese, French, German, and
Traditional Chinese locales. On unsupported locales, ApplianceView runs with English interface.
1.1.4 I have configured my Appliance, rebooted it, and now it does not appear on the list
of appliances anymore. What should I do?
•
Please restart ApplianceView, and your appliance will appear on the list.
•
If it is still fails to appear, then you have probably entered incorrect network settings, e.g.
incorrect or absent default gateway value, or incorrect IP address. Please consult your
appliance vendor in this case.
Optifacio Software Services, Inc.
ApplianceWare v.5.3 Complete FAQ – February 24, 2004 – Page 9 of 30
1.1.5 I have configured my Appliance, and rebooted it. However, Appliance had not
disappeared from the list of Appliances, and subsequent logins do not work for it.
What should I do?
•
Please restart ApplianceView, and you will be able to log in again.
•
If it is still fails to appear, then you have probably entered incorrect network settings, e.g.
incorrect or absent default gateway value, or incorrect IP address. Please consult your
appliance vendor in this case.
1.1.6 I've tried to change quota settings but I've received error message telling that I
cannot save configuration file. How can it be avoided?
ApplianceView tries to save default quota values on your client machine. The problem is that
you have no rights to write to a particular directory. Either change access permissions (please note
that it is insecure), or install ApplianceView to your home directory.
1.1.7 I want to synchronize administrator password of an Appliance with root one but
the appropriate checkbox is disabled. What happened?
Synchronization with root password works only when your appliance is in Local security
mode. It is not available in other security modes.
Optifacio Software Services, Inc.
ApplianceWare v.5.3 Complete FAQ – February 24, 2004 – Page 10 of 30
1.2 ApplianceView for Windows
1.2.1 I have a Windows-based client computer. How do I proceed with ApplianceView
installation?
Below are the steps you should walk through in order to install ApplianceView under
Windows.
•
Double-click My Computer icon, then double-click CD-ROM icon in order to open the
corresponding explorer window.
•
From the CD-ROM, launch the setup.exe file, and follow the on-screen instructions.
•
After installation is complete, you will be able to launch ApplianceView via double-clicking
the corresponding shortcut in the Start Menu, Desktop, or any other place where you have
selected to create shortcuts at the previous step.
NOTES
a) A copy of Java Runtime Environment is included within the ApplianceView installation.
It will not intersect with any other Java Runtime Environment version that you may have on your
machine.
b) Please uninstall ApplianceView only via the Control Panel's Add/Remove Programs
shortcut, or the Uninstall ApplianceView shortcut which is normally created at install time.
c) In some cases, system-wide installation (for all users) may lead to misc. access
problems, which are described in question 1.1.6.
1.2.2 ApplianceView fails to run on Windows with a DirectDraw error message. What's
wrong?
Please switch your display color depth to at least 8 bits (256 colors). ApplianceView will not
run in 4-bit (16-color) mode.
Optifacio Software Services, Inc.
ApplianceWare v.5.3 Complete FAQ – February 24, 2004 – Page 11 of 30
1.2.3 I have launched ApplianceView for the first time, and I cannot see my newlyinstalled ApplianceWare server on the list. What should I do?
There can be two reasons for this behaviour.
•
You have no DHCP server on the net. In this case, please run the Route Helper application
from the Start menu during ApplianceView installation (typically, it is Start Menu, the
ApplianceView program group), and only then proceed with ApplianceView startup. Your
server should appear on the list of local appliances in ApplianceView in this case. The
server name will be “HOSTxxxxxx” (without quotes), where “xxxxxx” (without quotes)
stands for first six digits from MAC address of the NAS unit.
•
Your server is on the other subnet. Please use the Search for Remote function of
ApplianceView in this case, and supply IP address or the name of the unit. Your Appliance
should appear on the list of remote appliances then.
NOTES
a) If you have no DHCP server on the net, your Appliance must be physically plugged into
the same subnet as your client PC at the time of initial discovery. Otherwise, you will not be able
to locate and set up your newly-installed Appliance.
b) If you have DHCP server on the net, please check its configuration. Misconfigured DHCP
server may not return network settings (gateway, in particular) correctly. It can lead to the situation
when Appliance can be “pinged” on the network, and it is visible in the Network Neighborhood but
it cannot be located by ApplianceView. Please do not forget to reboot Appliance after changing
DHCP server settings.
1.2.4 How can I launch ApplianceView with locale other than system default?
Please follow the steps below.
•
Open Command Prompt window.
•
Change directory to the one where ApplianceView is installed, for example:
Optifacio Software Services, Inc.
ApplianceWare v.5.3 Complete FAQ – February 24, 2004 – Page 12 of 30
cd \Program Files\ApplianceView
•
Pass two extra command-line parameters to ApplianceView executable. Their values
depend on the locale that you want to run ApplianceView with. Below is an example for the
Japanese language.
ApplianceView.exe language=ja country=JP
Other countries and languages are represented in the table below.
language=
country=
Description
ko
KR
Korean (Korea)
fr
FR
French (France)
de
DE
German (Germany)
es
Spanish
zh
CN
Simplified Chinese
zh
TW
Traditional Chinese
1.2.5 I already have a version of Java machine installed under Windows. Can I avoid
installation of additional Java machine within ApplianceView?
The things below can be only recommended for advanced users, and they may not work with
each given Windows installation.
First of all, make sure that you have Java version 1.3.1. None of the previous Java versions
(e.g. 1.3.0) or newer 1.4.0 version and higher, will fit. Pre-releases of 1.3.1 may cause problems,
too. For installation, please use the setup_novm.exe file on Windows systems, instead of just
setup.exe. This file is located in the novm directory of ApplianceView installation CD.
Optifacio Software Services, Inc.
ApplianceWare v.5.3 Complete FAQ – February 24, 2004 – Page 13 of 30
1.3 ApplianceView for Linux (x86/PPC)
1.3.1 Can I install and run ApplianceView without an X-Window system? If not, what
are minimal video subsystem requirements for ApplianceView?
Unfortunately, ApplianceView as well as its installer, require an X-Window system. You
should configure it to run at least with 256-color (i.e. 8-bit) depth.
1.3.2 I have a Linux-based client computer. How do I proceed with ApplianceView
installation?
Please follow the steps below.
NOTE
If you're running Linux on a PowerPC-based machine, please refer to question 1.3.7 before
proceeding.
•
Assuming that you have mounted client installation CD, please change directory to it using a
terminal, then launch the setup.bin file:
./setup.bin
If you cannot launch setup directly from CD, please copy setup.bin to your temporary directory,
and then launch setup again.
•
Now please follow the on-screen instructions of installer.
•
After installation is complete, you can lauch ApplianceView from its installation folder, or
using the symbolic links that you may have been created at setup time. Please note that if
you have a subdirectory named “ApplianceView” (without quotes) in the same directory as
symbolic links, then you should use a runApplianceView link instead of just
ApplianceView in order to run ApplianceView.
Optifacio Software Services, Inc.
ApplianceWare v.5.3 Complete FAQ – February 24, 2004 – Page 14 of 30
NOTES
a) System-wide installation (i.e. performed from root user) is not recommended since it may
cause misc. access problems which are described in question 1.1.6.
b) A copy of Java Runtime Environment is included within the ApplianceView installation. It
will not intersect with any other Java Runtime Environment version that you may have on your
machine.
c) Please use Uninstall_ApplianceView symbolic link (or run Uninstaller directly from
installation folder) in order to remove ApplianceView from your computer. It ensures that all the
files are removed correctly.
1.3.3 ApplianceView crashes at startup with exit code 139 or segmentation fault. What's
wrong with it?
The problem may be in Java machine configuration. You should edit JVM configuration file,
and place the classic Java machine onto the top of the list of available machines. Assuming that you
have installed ApplianceView into ~/ApplianceView, the configuration file can be located at the
following path: ~/ApplianceView/jre/lib/jvm.cfg.
1.3.4 I have launched ApplianceView for the first time, and I cannot see my newlyinstalled ApplianceWare server on the list. What should I do?
There can be several reasons for this behaviour.
•
You have no DHCP server on the net. In this case, please run the linrouter.sh script from
the place where you have selected to create shortcuts during ApplianceView installation
(typically, it is your home directory when performing a per-user installation), type in your
user password at the password prompt (if any), and only then proceed with ApplianceView
startup. Your server should appear on the list of local appliances in ApplianceView in this
case. The server name will be “HOSTxxxxxx” (without quotes), where “xxxxxx” (without
quotes) stands for first six digits from MAC address of the NAS unit. Please note that you
should be included into the sudoers group in order to run the linrouter.sh script and
Optifacio Software Services, Inc.
ApplianceWare v.5.3 Complete FAQ – February 24, 2004 – Page 15 of 30
perform changes in route tables.
•
Your server is on the other subnet. Please use the Search for Remote function of
ApplianceView in this case, and supply IP address or the name of the unit. Your Appliance
should appear on the list of remote appliances then.
•
Your client machine is running Linux kernel 2.4.19. In some cases it can lead to the
situation when discovery of Appliances does not work. Please use kernel 2.4.18 or 2.4.20
and better in this case.
NOTE
a) If you have no DHCP server on the net, your Appliance must be physically plugged into
the same subnet as your client PC at the time of initial discovery. Otherwise, you will not be able
to locate and set up your newly-installed Appliance.
b) If you have DHCP server on the net, please check its configuration. Misconfigured DHCP
server may not return network settings (gateway, in particular) correctly. It can lead to the situation
when Appliance can be “pinged” on the network, and its shares are visible on the network but it
cannot be located by ApplianceView. Please do not forget to reboot Appliance after changing
DHCP server settings.
1.3.5 Route addition does not work. What should I do?
First of all, please check if you're in the sudoers group. If not, or you don't know it, please
refer to the manual page of sudo, or ask an administrator to set it up for you. If that does not help,
please open the linrouter.sh script with any text editor, and examine the route add line. Please
check if the gateway device is set up correctly there. By default, it is eth0. Change it to any other if
required.
You should also check if there is already added network with similar name. You can obtain
the list with the netstat -r command, and then delete the corresponding network:
sudo route del -net 169.254.0.0 netmask 255.255.0.0 dev eth0
1.3.6 How can I launch ApplianceView with locale other than system default?
Please follow the steps below.
Optifacio Software Services, Inc.
ApplianceWare v.5.3 Complete FAQ – February 24, 2004 – Page 16 of 30
•
Open terminal window.
•
Change directory to the one where ApplianceView is installed, for example:
cd ~/ApplianceView
•
Pass two extra command-line parameters to ApplianceView executable. Their values
depend on the locale that you want to run ApplianceView with. Below is an example for the
Japanese language.
./ApplianceView language=ja country=JP
Other countries and languages are represented in the table below.
language=
country=
Description
ko
KR
Korean (Korea)
fr
FR
French (France)
de
DE
German (Germany)
es
Spanish
zh
CN
Simplified Chinese
zh
TW
Traditional Chinese
1.3.7 I am running Linux at PowerPC-based Macintosh, and I cannot launch
ApplianceView installer. Is there any workaround for this?
The problem is that standard Linux installer is built with x86 version of Java machine. For
PowerPC-based Macintosh computers with Linux, please use the JRE 1.3.1 package provided by
your Linux distribution vendor, and run ApplianceView installer from the setup_novm.bin file
instead of just setup.bin. This file is located in the novm directory of ApplianceView installation
CD. Please also refer to the question 1.3.8 below for more information.
Optifacio Software Services, Inc.
ApplianceWare v.5.3 Complete FAQ – February 24, 2004 – Page 17 of 30
1.3.8 I already have a version of Java machine installed under Linux. Can I avoid
installation of additional Java machine within ApplianceView?
The things below can be only recommended for advanced users, and they may not work with
each given Linux distribution.
First of all, make sure that you have Java version 1.3.1. None of the previous Java versions
(e.g. 1.3.0) or newer 1.4.0 version and higher, will fit. Pre-releases of 1.3.1 may cause problems,
too. For installation, please use the setup_novm.bin file on Linux systems, instead of just
setup.bin. This file is located in the novm directory of ApplianceView installation CD.
1.3.9 I cannot view online help files using the ApplianceView. Browser just never starts.
What’s wrong?
ApplianceView tries to detect your browser via the environment variable BROWSER. If it is
not set up correctly, it may be not possible to launch your default web browser. In order to fix the
problem, open terminal session, change to ApplianceView installation directory, and then type the
following (below is an example for Opera browser):
export BROWSER=opera; ./ApplianceView
Alternatively, you can add export BROWSER=opera string into your ~/.bash_profile (if
your default shell is bash), so the environment variable will be automatically set up at the time
you’re logging in.
Optifacio Software Services, Inc.
ApplianceWare v.5.3 Complete FAQ – February 24, 2004 – Page 18 of 30
1.4 ApplianceView for Mac OS X
1.4.1 I have a Macintosh with Mac OS X installed. How do I proceed with
ApplianceView installation?
Please follow the steps below.
•
Open CD-ROM using the Finder.
•
Drag the setup.zip file onto your Desktop, and double-click it. The StuffIt! Expander will
start at this point.
•
After expanding is complete, you will see a setup icon on the Desktop. Please double-click
it. ApplianceView Setup launches. Now please follow the on-screen instructions of the
installer.
•
After installation is complete, you can safely move both setup.zip and setup from your
Desktop into the Trash.
NOTE
a) Please always use the Uninstall ApplianceView icon that you've set up at install time in
order to remove ApplianceView from your machine if needed.
b) System-wide installation (i.e. for all users, using the administrator account) of
ApplianceView is not recommended since it may cause misc. access problems that are described in
question 1.1.6.
1.4.2 I have launched ApplianceView for the first time, and I cannot see my newlyinstalled ApplianceWare server on the list. What should I do?
There can be several reasons for this behaviour.
•
You have no DHCP server on the net. Please follow the steps below in this case.
First of all, please check if you have permissions to administer you Mac. This can be done
under System Preferences/Users. If you have no such premissions, please log in as
administrator and set the appropriate checkbox in your user account properties.
Optifacio Software Services, Inc.
ApplianceWare v.5.3 Complete FAQ – February 24, 2004 – Page 19 of 30
Being logged in as user, open the Terminal which is located under Applications/Utilities
in Finder. Assuming that you have installed ApplianceView into your home Applications
directory, please launch the macrouter.sh script:
cd ~/Applications/ApplianceView/
./macrouter.sh
At this stage, you will be prompted for your OS X password (the same one that you use to
log onto your Mac). Please type it in and press Enter.
Now please launch (or restart) ApplianceView. Your server should appear on the list of local
appliances in this case. The server name will be “HOSTxxxxxx” (without quotes), where
“xxxxxx” (without quotes) stands for the first six digits from MAC address of the NAS unit.
•
Your server is on the other subnet. Please use the Search for Remote function of
ApplianceView in this case, and supply IP address or the name of the unit. Your Appliance
should appear on the list of remote appliances then.
NOTES
a) If you have no DHCP server on the net, your Appliance must be physically plugged into
the same subnet as your client PC at the time of initial discovery. Otherwise, you will not be able
to locate and set up your newly-installed Appliance.
b) If you have DHCP server on the net, please check its configuration. Misconfigured DHCP
server may not return network settings (gateway, in particular) correctly. It can lead to the situation
when Appliance can be “pinged” on the network, and its shares are visible on the network but it
cannot be located by ApplianceView. Please do not forget to reboot Appliance after changing
DHCP server settings.
c) Please check if your proxy server settings are disabled, otherwise Appliance discovery may
fail. You may see how it is configured in the System Preferences/Network. On the Network page,
please select your network card, and then disable the usage of proxies at the Proxies tab. Do not
forget to restart ApplianceView in this case.
Optifacio Software Services, Inc.
ApplianceWare v.5.3 Complete FAQ – February 24, 2004 – Page 20 of 30
1.4.3 Route addition does not work. What should I do?
First of all, please check if you can administer your computer. This can be done through the
System Preferences, the Users icon, on Password tab. If that does not help, please open the
macrouter.sh script in Text Editor, and examine the route add line. Please check if gateway
device is set up correctly.By default, it is en0. Please change it to any other if required.
You should also check if there is already added network with similar name. You can obtain
the list with netstat -r command, and then delete the corresponding network using the Terminal:
sudo route delete -net 169.254.0.0
Please note that you may need to type in your OS X password in order to perform changes
in route tables.
Optifacio Software Services, Inc.
ApplianceWare v.5.3 Complete FAQ – February 24, 2004 – Page 21 of 30
1.5 ApplianceWare Settings
1.5.1 ApplianceWare and Active Directory
1.5.1.1 How can I join my Appliance into the Active Directory?
First of all, you should examine your ADS server settings. On ADS server, find Active
Directory Domains and Trusts, and then right-click the domain where you would like to add your
Appliance to. Now please select Properties from the popup menu. On the Properties window,
please write down both your domain name and pre-Windows 2000 domain name.
NOTE
You should have at least Windows 2000 Service Pack 2 installed on your ADS server in order to
join an Appliance into the ADS.
•
Launch ApplianceView, log onto the desired Appliance, click the Advanced Settings
button, and switch to the Name/DNS tab in order to make sure that Appliance name on this
tab matches the one that you have in your DNS records. If domain name on this tab does
not match the pre-Windows 2000 domain name discussed above, please change it, and click
the Apply button. Your Appliance will be rebooted in this case.
NOTE
You can change domain name only if your Appliance has static IP address.
•
Before you proceed with Security mode setting, please do the following things.
a) Synchronize clock of your Appliance and ADS server, with maximum time skew of
two minutes.
b) Create a separate user account on your ADS server. This user should be at least the
member of Domain Admins group. Please check that “Password never expires” and “Use
DES encryption for this account” options are turned on for this account, and the non-empty
password is set. Other options should be left “as is”. This user account should never be used to
open a session on ADS server directly or through terminal service.
•
After your Appliance reboot (in case you've changed its domain name settings), please log
Optifacio Software Services, Inc.
ApplianceWare v.5.3 Complete FAQ – February 24, 2004 – Page 22 of 30
in again, click the Advanced Settings, and switch to the Security tab. Choose Native
mode.
a) Enter the pre-Windows 2000 domain name into the Domain name field, just like you
did it before at the Name/DNS tab.
b) Enter the Active Directory Services name or IP address (it should be your ADS server).
c) Enter the Realm name, which is just a domain name that you have written down at the
very beginning of your setup. Please use only upper-case characters in this case.
d) Enter the KDC name, which is usually the same as your ADS server.
e) WINS Server IP address is an optional value, so you can leave it set to 0.0.0.0.
f) Click the Accept button, and enter the username and password for the user account that
you have created on your ADS server at the previous step.
1.5.1.2 How will I know that Appliance is already joined into ADS?
You can see it using MMC or looking at Network Neighborhood ( or My Network Places
in recent versions of Windows.
1.5.1.3 In what cases Appliance wouldn't join to ADS domain?
The reasons to get troubles during joining into domain may be as follows:
•
wrong DNS configuration both for Appliance and ADS server; the best condition is when
ADS server could be resolved by DNS server in current domain or ADS server itself is DNS
server for the controlled domain; be sure that one is available via DNS;
•
user that is used to join Appliance into ADS is connected directly or through terminal
service to ADS server; you should log this user off and re-join Appliance into ADS.
1.5.1.4 My Appliance was joined into ADS. I see it at my Network Neighborhood but
cannot connect to one. What's wrong?
When you can observe Appliance account on ADS server but you are not able to get access to
its shares you should:
Optifacio Software Services, Inc.
ApplianceWare v.5.3 Complete FAQ – February 24, 2004 – Page 23 of 30
•
examine your DNS configuration (both for Appliance and ADS server);
•
be sure that Appliance administrator is not connected to ADS directly or through terminal
service.
1.5.2 Accessing ApplianceWare-based Appliance Over Network
1.5.2.1 What NFS protocol versions are supported by ApplianceWare?
NFS protocol v.2 and v.3 are supported.
1.5.2.2 I would like to view what NFS shares are available on the Appliance. What
should I do?
Try the `showmount -e NAS` command, where “NAS” stands for Appliance name or its
IP address.
1.5.2.3 I am trying to mount a public share but mount fails with the “Permission
denied” message. What should I do?
There can be several reasons for this. The most frequently met problem is incorrect paths that
are used. Unlike Samba shares which can be accessed simply by share name, NFS shares are
accessible only via the full path to share, for example:
mount -t nfs NAS:/drives/Volume1/public /mnt/my_nfs_dir
“NAS” stands here for Appliance name or its IP address. On Solaris systems, please use “-F
nfs” instead of “-t nfs” parameter.
Please also read question 1.5.2.2 if you are unsure about how full path to a NFS share should
look like.
Optifacio Software Services, Inc.
ApplianceWare v.5.3 Complete FAQ – February 24, 2004 – Page 24 of 30
1.5.2.4 I am trying to mount a NFS share from AIX-based machine but mount fails.
What should I do?
The link below may help you to solve the problem:
http://nfs.sourceforge.net/nfs-howto/interop.html#AIX
1.5.2.5 I am trying to access public Appliance shares via Network Neighborhood in
Windows or over Samba. My client PC is not in the domain, while Appliance is in the
domain. The problem is that I cannot access any shares. What should I do?
The easiest way to solve this problem is to join your client PC into the domain. Alternatively,
you can try accessing Appliance over NFS (on Linux-based client systems).
1.5.2.6 I have renamed shares on Folders and Sharing in ApplianceView but Windows
explorer is still displaying old ones, and I cannot connect to those old shares, of
course. What's wrong?
This is an issue with Windows. You should close Network Neighborhood window, and the reopen it again in a few minutes.
1.5.2.7 Can I access my Appliance via FTP?
Yes, you can, but with some restrictions. Only anonymous read-only access to public shares is
possible. Please follow the steps below in order to enable FTP access.
•
Launch ApplianceView
•
Log onto your Appliance
•
Click Networking on the left
•
Click Mac/UNIX/FTP tab
•
Check the Enable Anonymous FTP checkbox
•
Click Apply
Now you can use any FTP client to browse through Appliance’s public folders and download
files.
Optifacio Software Services, Inc.
ApplianceWare v.5.3 Complete FAQ – February 24, 2004 – Page 25 of 30
1.5.2.8 I cannot connect to a share over Samba or Windows networking although I can
see its name on the list. Why that happens?
There can be several reasons for that. For example, you cannot connect to a non-public share
without appropriate access rights. In this case, you should set up them using ApplianceView client
software.
This may also be due to the fact that Windows 95, 98, and Millennium Edition (Me), as well
as smbclient version prior to 3.0, are not able to display share names longer than 12 characters.
That is why you should use either Windows NT4.0, 2000, XP, 2003-based client machines, or
ApplianceView client software in order to learn exact share path and name, and then type this name
into the Explorer window (on Windows) or smbmount command line (on Linux).
1.5.2.9 I would like to connect to an Appliance share over AFP protocol but using
domain user name since this user owns a share. Is this possible?
You can do that. But you should use a mixed\ prefix before user name, e.g. mixed\user1 for
connection.
1.5.2.10 ApplianceWare-enabled server is actually Linux-based appliance. Is there any
mapping between POSIX and Windows Access Control Lists (ACLs)?
Answer on this question is based on an excerpt from the following document:
http://www.suse.de/~agruen/acl/linux-acls/online/
Microsoft Windows supports ACLs on its NTFS file system, and in its Common Internet File
System (CIFS) protocol, which formerly has been known as the Server Message Block (SMB)
protocol. CIFS is used to offer file and print services over a network. Samba is an Open Source
implementation of CIFS. It is used to offer UNIX file and print services to Windows users. Samba
allows POSIX ACLs to be manipulated from Windows. This feature adds a new quality of
interoperability between UNIX and Windows.
The ACL model of Windows differs from the POSIX ACL model in a number of ways, so it
Optifacio Software Services, Inc.
ApplianceWare v.5.3 Complete FAQ – February 24, 2004 – Page 26 of 30
is not possible to offer entirely seamless integration. The most significant differences between these
two kinds of ACLs are:
• Windows ACLs support over ten different permissions for each entry in an ACL, including
things such as append and delete, change permissions, take ownership, and change ownership.
Current implementations of POSIX.1 ACLs only support read, write, and execute permissions.
• In the POSIX permission check algorithm, the most significant ACL entry defines the
permissions a process is granted, so more detailed permissions are constructed by adding more
closely matching ACL entries when needed. In the Windows ACL model, permissions are
cumulative, so permissions that would otherwise be granted can only be restricted by DENY ACL
entries.
• POSIX ACLs do not support ACL entries that deny permissions. A user can be denied
permissions be creating an ACL entry that specifically matches the user.
• Windows ACLs have had an inheritance model that was similar to the POSIX ACL model. Since
Windows 2000, Microsoft uses a dynamic inheritance model that allows permissions to propagate
down the directory hierarchy when permissions of parent directories are modified. POSIX ACLs
are inherited at file create time only.
• In the POSIX ACL model, access and default ACLs are orthogonal concepts. In the Windows
ACL model, several different flags in each ACL entry control when and how this entry is inherited
by container and non-container objects.
• Windows ACLs have different concepts of how permissions are defined for the file owner and
owning group. The owning group concept has only been added with Windows 2000. This leads to
different results if file ownership changes.
• POSIX ACLs have entries for the owner and the owning group both in the access ACL and in
the default ACL. At the time of checking access to an object, these entries are associated with the
current owner and the owning group of that object. Windows ACLs support two pseudo groups
called Creator Owner and Creator Group that serve a similar purpose for inheritable permissions,
Optifacio Software Services, Inc.
ApplianceWare v.5.3 Complete FAQ – February 24, 2004 – Page 27 of 30
but do not allow these pseudo groups for entries that define access. When an object inherits
permissions, those abstract entries are converted to entries for a specific user and group.
Despite the semantic mismatch between these two ACL systems, POSIX ACLs are presented
in the Windows ACL editor dialog box so that they resemble native Windows ACLs pretty closely.
Occasional users are unlikely to realize the differences. Experienced administrators will
nevertheless be able to detect a few differences. The mapping between POSIX and Windows ACLs
described here is found in this form in ApplianceWare products:
• The permissions in the POSIX access ACL are mapped to Windows access permissions. The
permissions in the POSIX default ACL are mapped to Windows inheritable permissions.
• Minimal POSIX ACLs consist of three ACL entries defining the permissions for the owner,
owning group, and others. These entries are required. Windows ACLs may contain any number of
entries including zero. If one of the POSIX ACL entries contains no permissions and omitting the
entry does not result in a loss of information, the entry is hidden from Windows clients. If a
Windows client sets an ACL in which required entries are missing, the permissions of that entry are
cleared in the corresponding POSIX ACL.
• The mask entry in POSIX ACLs has no correspondence in Windows ACLs. If permissions in a
POSIX ACL are ineffective because they are masked and such an ACL is modified via CIFS, those
masked permissions are removed from the ACL.
• Because Windows ACLs only support the Creator Owner and Creator Group pseudo groups for
inheritable permissions, owner and owning group entries in a default ACL are mapped to those
pseudo groups. For access ACLs, these entries are mapped to named entries for the current owner
and the current owning group (e.g., the POSIX ACL entry ``u::rw'' of a file owned by Joe is treated
as ``u:joe:rw'').
If an access ACL contains named ACL entries for the owner or owning group (e.g., if one of
Joe's files also has a ``u:joe:...'' entry), the permissions defined in such entries are not effective
unless file ownership changes, so such named entries are ignored. When an ACL is set by Samba
that contains Creator Owner or Creator Group entries, these entries are given precedence over
Optifacio Software Services, Inc.
ApplianceWare v.5.3 Complete FAQ – February 24, 2004 – Page 28 of 30
named entries for the current owner and owning group, respectively.
• POSIX access ACL and default ACL entries that define the same permissions are mapped to a
Windows ACL entry that is flagged as defining both access and inheritable permissions.
1.5.2.11 I have switched my Appliance to NIS security mode but I cannot see any
primary groups on the groups list in ApplianceView. Is that correct?
When Appliance is in NIS security mode, primary groups are not displayed on the list in
ApplianceView. It is a “by-design” behaviour of ApplianceWare software.
Optifacio Software Services, Inc.
ApplianceWare v.5.3 Complete FAQ – February 24, 2004 – Page 29 of 30
1.5.3 ApplianceWare Network Settings
1.5.3.1 What is the meaning of the Large Network Settings option?
This option allows you to set up an Appliance to periodically announce itself to arbitrary IP
addresses with an arbitrary workgroup name.
This is useful if you want your Appliance to appear in a remote workgroup for which the
normal browse propagation rules don't work. The remote workgroup can be anywhere that you can
send IP packets to.
The IP addresses you choose would normally be the broadcast addresses
of the remote
networks, but can also be the IP addresses of known browse masters if your network config is that
stable.
For example:
IP : 192.168.2.255 Workgroup : SERVERS
IP : 192.168.4.255 Workgroup : STAFF
As a default, the current workgroup name is used.
Please note that you are not able to configure large network if an Appliance acts as a DHCP
client. Please turn DHCP client option off before proceeding. Large Network settings can only be
used when the appliance has a static IP address. If the appliance obtains its address from a DHCP
server, then the Large Network settings are automatically configured with no entries.
1.5.3.2 Are there any peculiarities when an Appliance is configured to act as DHCP
client?
In general, when you have NICs that are configured to obtain IP addresses and other
information from a DHCP server, an Appliance acts in the following way.
All the information obtained from DHCP server will be set up. With multiple NICs that are set
up to receive information from a DHCP server, each NIC will get individual IP, subnet mask
settings, and gateway address. Other system-wide parameters, such as an Appliance name, will be
set as follows. The system determines which NIC is default gateway, and obtains system-wide
settings for this card. Thus, they're becoming default ones for the whole Appliance. Please note that,
Optifacio Software Services, Inc.
ApplianceWare v.5.3 Complete FAQ – February 24, 2004 – Page 30 of 30
except for the case that is described below, you cannot set Appliance name manually in this case.
If DHCP server does not return a name, the standard “HOSTxxxxxx” (without quotes) name
will be generated, and it can be changed manually. The “xxxxxx” stands here for first six digits
from the MAC address of the Appliance network interface card.
1.5.3.3 My Appliance had static IP address, and then I have changed it to DHCP setting.
After reboot, an Appliance obtained other host name. What is the reason for this?
The reason is that a DHCP server has assigned that new name. If DHCP server is configured
not to assign host names, your Appliance name should remain unchanged.
1.5.3.4 What ranges of IP addresses cannot be used when setting up ApplianceWare
network settings?
According to RFC3330, (please see ftp://ftp.rfc-editor.org/in-notes/rfc3330.txt for more
information) the following ranges of IP addresses are not permitted to be used when setting up
network settings of ApplianceWare: 0.0.0.0/8, 127.0.0.0/8, 224.0.0.0/4, and 240.0.0.0/4.
1.5.4 ApplianceWare Volume Management
1.5.4.1 I have created a logical volume of 5Gb in size, and an associated snapshot of 1Gb
in size. I've tried to copy some 2Gb of data to a volume, and copying stopped with an
error. What's the reason for this behaviour?
The problem is in snapshot size. The snapshot size should be at least equal to the associated
volume size, plus extra 16Mb to avoid overflow. When a snapshot overflows, it becomes
inaccessible. If you do need a snapshot that is less in size than the original volume, you should look
after the free space percentage on snapshot via the Volume Management section of ApplianceView
in order to avoid overflow.
Optifacio Software Services, Inc.