1
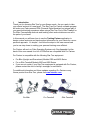
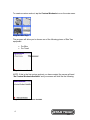
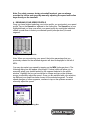
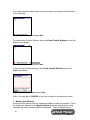
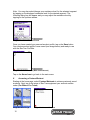
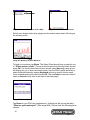
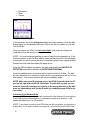
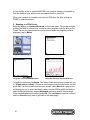
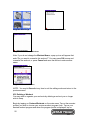
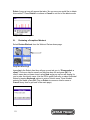
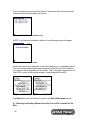
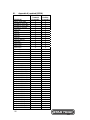
Star Trac Pro Partner – Training Partner Operations Manual Table of Contents I. II. III. IV. V. VI. VII. VIII. IX. X. XI. 1 Introduction Selecting Workout Partner a. Creating a Custom Workout Creating a Pro or Elite Treadmill Custom Workout a. Naming Your Workout b. Entering Weight/Time c. Designing Your Incline Profile d. Designing Your Speed Profile Creating a Pro Bike Custom Workout a. Naming Your Workout b. Entering Weight/Time c. Designing Your Resistance Profile Accessing a Custom Workout Beaming a Custom Workout a. Beaming to a Pro or Elite Treadmill b. Beaming to a Pro Bike c. Beaming to a PDA Device Editing a Custom Workout Deleting a Custom Workout Reviewing a Completed Workout Collecting an Existing Workout from a Pro or Elite Treadmill or Pro Bike Appendix A: List of PDAs Compatible with Pro Partner I. Introduction Thank you for choosing Star Trac for your fitness needs. Are you ready to take your clients’ workout to a new level? The Star Trac Pro Partner software program will make your Palm-powered PDA (Personal Digital Assistant) an integral part of your personal training experience when using a Star Trac Pro or Elite Treadmill or Pro Bike. Personalized workouts and tracking client workout data are now all in the palm of your hand! In this manual you will learn how to use the Training Partner application to design custom workouts and track workout information for your clients for a more personal approach. It’s simple! Just follow the steps in this user manual and you’re one step closer to making your personal training more efficient. Pro Partner will work on Palm Operating Systems only. See Appendix A at the back of this user manual for a list of PDAs that are compatible with Pro Partner. Pro Partner is compatible with the following Star Trac equipment: • • • Pro Bike (Upright and Recumbent) Models 6300 and 6400 Series Pro or Elite Treadmill Models 6500 and 6600 Series If you are not certain if your Star Trac equipment is equipped with Pro Partner, please contact the club or facility’s manager for verification For additional information and future updates regarding Pro Partner or any fitness product from Star Trac, please visit www.startrac.com. Pro Bike 2 Pro Treadmill Elite Treadmill II. Selecting Workout Partner To enter the Workout Partner Program, tap on the Pro-TP (Training Partner) icon on the main menu of your PDA. Image #1: Palm OS Main Menu Once the Pro-WP icon is selected, the Workout Partner home page will be displayed on your PDA. It will look like one of the following screen(s): Image #2: Home Page (high resolution) Image #3: Home Page (low resolution) a. Creating a Custom Workout Creating a custom workout will allow you to enjoy a more personal experience on your chosen piece of Star Trac equipment. Creating a custom workout allows you to specify the following information for the Star Trac product(s) listed below. Pro or Elite Treadmill (referred to as Pro Tread): • Duration/Time • Speed • Incline • Weight Pro Bike (Upright and Recumbent): • Duration/Time • Resistance Level • Weight 3 To create a custom workout, tap the Custom Workouts icon on the main menu. Image #4: Home Page The program will allow you to choose one of the following pieces of Star Trac equipment. • • Pro Bike Pro Tread Image #5: Custom Workouts NOTE: If this is the first custom workout you have created, the screen will read “No Custom Workouts Available” and your screen will look like the following. Image #6: No Custom Workouts Available 4 III. Creating a Pro or Elite Treadmill Custom Workout In order to create a workout on the Pro or Elite Treadmill, tap on Pro Tread. Image #7: Custom Workouts Note: If you have already created other custom workouts, your screen will look similar to the following: Image #8: Pro Tread Custom Workout List To create a new Custom Workout, tap on the New Custom Workout icon at the bottom of the screen. Once the icon has been selected, the Create Custom Workout screen will appear as follows: Image #9: Create Custom Workout Note: You may tap Cancel at any time to return to the previous screen. It is now time to design your personal workout. In order to create your personal program, follow these easy steps: 5 1. NAMING YOUR WORKOUT At the top of the screen, there is a space provided to name your workout. Tap in the blank area adjacent to Workout Name and name your workout using standard text entry methods (graffiti or keyboard). This is illustrated below. Image #10: Custom Workout (Naming) 2. ENTERING WEIGHT AND TIME Once you are finished naming your workout you then must enter your Weight in the blank field adjacent to weight using standard text entry methods (graffiti or keyboard). You may enter your weight using the default English method in pounds (lbs) or in metric by tapping on the Metric symbol. You must also enter your desired length of your workout next to Time (in minutes) in the blank field adjacent to time using standard text entry methods. This is illustrated below. Image #11: Custom Workout (Weight and Time) 3. DESIGNING YOUR INCLINE PROFILE To create your customized incline profile, tap on the Incline box on the bottom left side of the profile display. Simply create your incline profile by tapping on the grid representing the segment you want to adjust. Dots will appear on the screen to signify the incline profile. As you tap on the dots to create your profile, the displayed percentage for that specific segment will be displayed next to the incline/speed box. Each dot represents one percent of an incline. Tapping in between the dots allows you to select 0.5% increments. A sample profile is demonstrated below. 6 Image #12: Custom Workout (Incline) Note: You may also select your incline by tapping on the % symbol (start by clicking on the segment you want to adjust). A dialog box (see image #9 below) will appear which will allow you to manually select your desired incline % for the segment selected in the profile window. Highlight the box you would like to change and tap on the up/down arrows to manually adjust the incline. Once you are satisfied with your selection, tap OK and your incline has been chosen for the selected segment. Image #13: Adjust Incline Dialog Box HINT: The profile window for both speed and incline has been divided into 21 segments (columns of dots across the profile window on the PDA) to match the profile window on the Star Trac treadmill. Remember this when you are selecting your overall workout time. To figure out how much time each segment represents, divide the overall workout time you have chosen by 21. (Example: If your desired workout time is 30 minutes, divide 30/21 and each segment represents 1 minute and 43 seconds). NOTE: There will always be a 2-minute Cool Down period following the end of your desired workout time on Star Trac Treadmills. To make it easier to create your custom workout, here are some guidelines for programming your overall workout: 21 minute workout = 1 minute segment time + 2 minute Cool Down 30 minute workout = 1 minute 43 seconds segment time + 2 minute Cool Down 42 minute workout = 2 minute segment time + 2 minute Cool Down 7 Note: For safety reasons, during a treadmill workout, you can always override the incline and speed by manually adjusting the speed and incline keys directly on the treadmill. 4. DESIGNING YOUR SPEED PROFILE Once you have finished selecting your incline profile, you must select your speed profile. Tap on the Speed box adjacent to the incline box. The Speed box is now highlighted and you may now select your speed profile by moving the individual sliders up and down to select your desired speed (miles per hour) for each segment. Image #14: Custom Speed Profile Note: When you are selecting your speed, the incline percentage that you previously created for the selected segment will also be displayed to the left of MPH. You may also select your speed by tapping on the MPH (miles per hour). The following dialog box will appear (see image 11 below) which will allow you to manually select your desired speed for the segment selected in the profile window. Highlight the box you would like to change and tap on the up/down arrows to manually adjust the speed. Once you are satisfied with your selection, tap OK and your speed has been chosen for the selected segment. To select speed changes on other segments, continue to tap on the up/down arrows to manually adjust the speed. Image #15: Adjust Speed Dialog Box 8 Now that you have finished creating your own custom workout, tap on the SAVE box. Your custom workout is now saved and ready to use with the Pro or Elite Treadmill! Image #16: List of Custom Workouts IV. Creating a Pro Bike Custom Workout Starting from the home page, tap on the Custom Workouts image. In order to create custom workouts for the Pro Bike Series (Upright or Recumbent), tap on Pro Bike. Image #17: Home Page Image #18: Custom Workouts NOTE: If this is the first custom workout you have created, the screen will display “No Custom Workouts Available” as follows: Image #19: No Custom Workouts Available 9 If you have already created other custom workouts, your screen will look similar to the following: Image #20: Custom Workout List (Pro Bike) To create a new Custom Workout, tap on the New Custom Workout icon at the bottom of the screen. Image #21: Custom Workout List (Pro Bike) Once the icon has been selected, the Create Custom Workout screen will appear as follows: Image #22: Create Custom Workout (Pro Bike) Note: You may tap on CANCEL at any time to return to the previous screen. 1. Naming Your Workout At the top of the screen, there is a space provided to name your workout. Tap in the blank area adjacent to the Workout Name and name your workout using standard text entry methods (graffiti or keyboard). This is illustrated below. 10 Image #23: Pro Bike Custom Workout 2. Entering Weight/Time Once you are finished naming your workout you then must enter your Weight in the field provided using standard text entry methods (graffiti or keyboard). You may enter your weight using the default English method in pounds (lbs) or in metric by tapping on the Metric symbol. You must also enter your desired length of your workout next to Time (in minutes). This is illustrated below in Image #16. Image #24: Custom Workout 3. Designing Your Resistance Profile To create your customized resistance profile, tap on the provided grid. Dots will appear on the screen to signify the resistance profile. As you tap on the dots to create your profile, the displayed resistance level for that specific segment will be displayed next to the resistance level text. Each dot represents one resistance level. A sample profile is demonstrated below. Image #25: Custom Resistance Profile 11 Note: You may also select/change your resistance level for the selected segment by tapping on the displayed resistance level for the desired segment. The following dialog box will appear and you may adjust the resistance level by tapping on the up/down arrows. Image #26: Custom Resistance Level Once you have created your personal workout profile, tap on the Save button. Your custom workout profile is now saved (see image below) and ready to use with the Star Trac Pro Bike. Image #27: Custom Workout (With Saved Records) Tap on the Home Icon to go back to the main menu. V. Accessing a Custom Workout Starting at the home page, select Custom Workouts to retrieve previously saved workouts. Next, tap on the piece of Star Trac equipment your workout resides under (Pro Bike or Pro Tread). Image #28: Home Page 12 Image #29: Custom Workouts Previously saved workouts will now appear. Now tap on the workout you wish to access. Image #30: List of Custom Workouts Once you have retrieved a custom workout, there are four options to choose from: (1) Beam a workout to a Star Trac Pro or Elite Treadmill or Pro Bike to begin using a customized workout (2) Beam the workout to another PDA (3) Edit the workout (4) Delete the workout Follow one of the four steps below for the option you wish to utilize. VI. To Beam a Custom Workout 1. Beaming to a Pro or Elite Treadmill Select your workout by tapping on the Star Trac exercise product you wish to perform your workout on. In the example below we will select the Pro Tread. The screen will list previously saved workout profiles created for the Pro or Elite Treadmill. Image #31: Custom Workouts Image #32: List of Custom Workouts Select your desired workout by tapping on its name and it will bring up the customized workout profile. 13 To begin your workout, tap Beam. The Select Client box will pop up and ask you to “Please select a client.” Choose a client’s name from the drop down list and press OK. If a client’s name has not been stored, select New and a pop up box will display for you to enter the client’s name. Use the PDA’s graffiti text entry or select individual letters by tapping Keyboard to enter a client’s name. Once finished entering the name, press OK. (Tap on Delete to remove a client’s name or Cancel at any time to get back to the main page). See image #33 below. Image #33: Select Client Next, the Receiver Selection dialog box will immediately pop up and ask, “What are you beaming to?” (See image #34). Choose from the following three options: Equipment Palm Cancel Image #34: Enter Pop-Up Dialog Box Tap the Equipment button, then immediately place your PDA in the left cup holder of your Star Trac Pro or Elite Treadmill. NOTE: Make sure your IR beaming port on the PDA is facing the IR port (up). The treadmill will not pick up your workout if your IR beaming port is facing in the wrong direction. Once you place your PDA in the cup holder, look at the treadmill display for confirmation that the workout is being received. When the PDA is recognized, 14 the top treadmill display screen will read, PALM PC IR DETECTED immediately followed by PALM PC PROFILE. At this point, you will have the option to press START/ENTER on the treadmill display. If you press START/ENTER, you may be asked to step on the weight scales (on Elite model treadmills only) or confirm your weight entry. The programmed time will be displayed. Press ENTER to confirm your program profile and your workout will begin. If the treadmill is unable to pick up a signal, or if the PDA displays a message of “Exercise product not responding,” take the PDA out of the cup holder and tap Beam again. Make sure the IR window on the PDA is pointed up, or towards the top of the cup holder. If the treadmill continues to not respond, contact the front desk staff at your facility to verify that your facility’s treadmills are equipped with the Pro Partner feature. Collecting Your Workout Data Leave your PDA positioned in the water bottle holder for the duration of your workout. It will continuously collect data as you progress through your workout. It will update the data upon speed and level changes or once per minute. NOTE: If you need to remove your PDA from the left cup holder, you may do so at any time. The power does not need to be on during the workout but it does need to be turned on before your workout is complete. If you want to track your workouts, you must return the PDA to the left cup holder BEFORE your workout session is complete so that the details of your workout can be beamed back to your PDA. When your workout is complete, remove your PDA from the treadmill and tap on Done to save your workout data. Your information will be stored and it is ready to be reviewed at any time. 2. Beaming to a Pro Bike Select your workout by tapping on the Star Trac exercise product you wish to perform your workout on. In the example below, we will select the Pro Bike. The screen will list workout profiles created for the Pro Bike (see images below). 15 Image #35: Custom Workout List (Pro Bike) Image #36: List of Custom Workouts Select your desired workout by tapping on the workout name and it will bring up the workout profile. Image #37: Beaming Custom Workouts To begin your workout, tap Beam. The Select Client box will pop up and ask you to “Please select a client.” Choose a client’s name from the drop down list and press OK. If a client’s name has not been stored, select New and a pop up box will display for you to enter the client’s name. Use the PDA’s graffiti text entry or select individual letters by tapping Keyboard options to enter a client’s name. Once finished entering the name, press OK. (Tap on Delete to remove a client’s name or Cancel at any time to get back to the main page). Image #38: Select Client Tap Beam on your PDA (see image above). A dialog box will pop up that asks, “What are you beaming to?” (See image #39). Choose from the following three options: 16 Equipment Palm Cancel Image #39: Pop-Up Dialog Box In this example, tap on the Equipment button and start pedaling. Once the bike display lights up, immediately place your PDA in the left cup holder of your Star Trac Pro Bike. Once you place your PDA in the left cup holder, look at the bike display for confirmation that the workout is being received. NOTE: You must continue pedaling in order to keep the bike powered up. If the manual program on the Pro Bike has all ready started without Pro Partner being recognized, you must wait for the bike to completely power down (approximately thirteen seconds) and then repeat the steps above. Once the PDA has been recognized, the bike display will read PALM PC IR DETECTED immediately followed by RECEIVING PROGRAM. Continue pedaling and your workout will be loaded into the Pro Bike. The bike will then request you to verify the custom workout by pressing the OK key on the bike display. Your custom workout will now automatically begin. NOTE: Make sure your IR beaming port on the PDA is oriented with the IR port on the right side of the left cup holder. The bike will not pick up your workout if your IR beaming port is facing in the wrong direction. If the bike does not immediately pick up the IR beam, try readjusting your PDA in the cup holder. Collecting Your Workout Data Leave your PDA positioned in the left cup holder for the duration of your workout. It will continuously collect data as you progress through your workout. It will update the data every 5 to 10 seconds. NOTE: If you need to remove your PDA from the left cup holder, you may do so at any time. If you want to track your workouts, you must return the PDA to the 17 left cup holder in the on position BEFORE your workout session is complete so that the details of your workout can be beamed back to your PDA. When your workout is complete, remove your PDA from the bike and tap on DONE to close the screen. 3. Beaming to a PDA Device Begin by tapping on Custom Workouts on the main menu. Tap on the exercise product you wish to choose your custom workout program from Pro Bike or Pro Tread. Tap on your desired workout program and when the program profile is displayed, tap on Beam. Image #40: Home Page Image #41: Custom Workouts Image #42: List of Custom Workouts Image #43: Beaming Custom Workouts To begin your workout, tap Beam. The Select Client box will pop up and ask you to “Please select a client.” Choose a client’s name from the drop down list and press OK. If a client’s name has not been stored, select New and a pop up box will display for you to enter the client’s name. Use the PDA’s graffiti text entry or select individual letters by tapping Keyboard options to enter a client’s name. Once finished entering the name, press OK. (Tap on Delete to remove a client’s name or Cancel at any time to get back to the main page). 18 Image #44: Select Client A pop-up dialog box will appear that asks, “What are you beaming to?” You must choose from the following three options: Equipment Palm Cancel Image #45: Enter Pop-Up Dialog Box Image #46: Searching Dialog Box In this example, tap on Palm (image #45) and face the IR port of your PDA directly at the IR port on the PDA you are beaming to. This will take a few moments and the screen will display “Searching…” (Image #46). When the program is done beaming, the PDA that is accepting the program will ask the owner to verify acceptance. VII. Editing a Workout You may make changes to a previously saved customized workout. Begin by tapping on Custom Workouts on the main menu. Tap on the exercise product you wish to choose your custom workout program from. Next, tap on the desired workout program and when the program profile is displayed, tap on Edit. You are now able to make any necessary changes to the workout. Be sure that you tap Save to save the changes you have made to the workout. 19 Image #47: Home Page Image #48: Custom Workouts Image #49: List of Custom Workouts Note: If you do not change the Workout Name, a pop-up icon will appear that asks “Do you want to overwrite this workout?” You may press OK to save and overwrite the workout, or press Cancel and save the workout under another name. Image #50: Overwrite Workout NOTE: You may hit Cancel at any time to exit the editing mode and return to the previous screen. VIII. Deleting a Workout You may wish to organize your workouts by deleting a workout you no longer wish to keep. Begin by tapping on Custom Workouts on the main menu. Tap on the exercise product you wish to choose your custom workout program from. Tap on your desired workout program and when the program profile is displayed, tap on 20 Delete. A pop-up icon will appear that asks “Are you sure you would like to delete this workout?” Press Delete to continue or Cancel to exit out of the delete mode. Image #51: Delete Dialog Box IX. Reviewing a Completed Workout Select Review Workout from the Workout Partner home page. Image #52: Home Page Immediately the Select client box will pop up and ask you to “Please select a client.” Choose a client’s name from the drop down list and press OK. If a client’s name has not been stored, select New and a pop up box will display for you to enter the client’s name. Use the PDA’s graffiti text entry or select individual letters by tapping Keyboard options to enter a client’s name. Once finished entering the name, press OK. (Tap on Delete to remove a client’s name or Cancel at any time to get back to the main page). Image #53: Select Client 21 A list of completed workouts will be listed on the screen with the most recently collected workouts listed starting at the top. Image #54: Review Workout (Workout List) NOTE: If you have not collected a workout, the following screen will appear: Image #55: No Workouts Available Select the workout you would like to review by tapping on a completed workout. The most recent workout performed will appear at the top of the list. Details of your workout will be displayed on the screen. Tap on the down arrow button on your PDA to scroll to the second screen of data (image #56 and #57). Image #56 and #57: Review Workout Data Tap Done when you are finished to return to the Review Workouts screen. X. Collecting an Existing Workout from the Pro or Elite Treadmill or Pro Bike 22 With the Collect Workout feature of Pro Partner, a trainer can collect the results of a client’s workout that was not initiated from a customized PDA workout or from any workout that is all ready in progress. Begin by tapping on COLLECT WORKOUT on the home screen. Image #58: Home Page The Select Client box will pop up and ask you to “Please select a client.” Choose a client’s name from the drop down list and press OK. If a client’s name has not been stored, select New and a pop up box will display for you to enter the client’s name. Use the PDA’s graffiti text entry or select individual letters by tapping Keyboard options to enter a client’s name. Once finished entering the name, press OK. (Tap on Delete to remove a client’s name or Cancel at any time to get back to the main page). Image #59: Select Client Next, the program will prompt you to select the exercise product you are working with (Treadmill or Bike). Image #60: Select Exercise Product 23 After selecting the desired equipment, immediately place your PDA in the left cup holder to begin data collection. Proceed with your workout (continue pedaling on the bike or by walking on the treadmill). Once the workout is recognized, a new workout will appear on the Review Workouts screen for that client. The most recent workout performed will appear at the top of the list. Details of your workout will be displayed on the screen. Tap on the down arrow button on your PDA to scroll to the second screen of data (images #61 and #62). Image #61 and #62: Review Workout Data Enjoy Training Partner! 24 XI. Appendix A (updated 8/25/04) PDA Model Garmin iQue-3600 Handspring Treo 180 Handspring Treo 180g Handspring Treo 90 Palm i705 Palm III Palm IIIc Palm IIIe Palm IIIx Palm IIIx Deluxe Palm IIIxe Palm m100 Palm m105 Palm m125 Palm m130 Palm m500 Palm m505 Palm m515 Palm V Palm VII Palm VIIx Palm Vx Sony Clié PEG-N610C Sony Clié PEG-N710C Sony Clié PEG-N760C Sony Clié PEG-NR70 Sony Clié PEG-NR70V Sony Clié PEG-NX60 Sony Clié PEG-NX70V Sony Clié PEG-NX73V Sony Clié PEG-NX80V Sony Clié PEG-NZ90 Sony Clié PEG-S300 Sony Clié PEG-S320 Sony Clié PEG-S360 Sony Clié PEG-SJ20 Sony Clié PEG-SJ22 Sony Clié PEG-SJ30 Sony Clié PEG-SJ33 Sony Clié PEG-SL10 Sony Clié PEG-T415 Sony Clié PEG-T615C Sony Clié PEG-T665C Sony Clié PEG-TG50 25 Pro or Elite Treadmill Compatible X X X X X X X X X X X X X X X X X X X X X X X X X X X X X X X X X X X X X X Pro Bike Compatible X X X X X X X X X X X X X X X X X X X X X X X X X X X X X X X X X X X X X X X X X X X X PDA Model Sony Clié PEG-TH55 Sony Clié PEG-TJ25 Sony Clié PEG-TJ27 Sony Clié PEG-TJ35 Sony Clié PEG-TJ37 Sony Clié PEG-UX40 Sony Clié PEG-UX50 Treo 270 Treo 300 Treo 600 Tungsten C Tungsten E Tungsten T Tungsten T2 Tungsten T3 Tungsten W Visor Visor Deluxe Visor Edge Visor Neo Visor Platinum Visor Prism Visor Pro Zire Zire 21 Zire 31 Zire 71 Zire 72 26 Pro or Elite Treadmill Compatible X X X X X X X X X X X X X Pro Bike Compatible X X X X X X X X X X X X X X X X X X X X X X X X X X X X