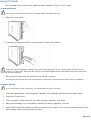
1
Notice to Users © 2000 Sony Electronics Inc. Reproduction in whole or in part without written permission is prohibited. All rights reserved. This manual and the software described herein, in whole or in part, may not be reproduced, translated, or reduced to any machine-readable form without prior written approval. Sony, VAIO, the VAIO logo, VAIO Slimtop, Ergo-Angle, AutoAlert, VAIO Smart, Handycam, VAIO Digital Studio, Memory Stick, i.LINK, Media Bar, Mavica, and PictureGear are trademarks of Sony. Windows and the Windows logo are registered trademarks of Microsoft Corporation. K56flex is a trademark of Lucent Technologies Inc. and Rockwell International. All other trademarks are trademarks of their respective owners. For questions regarding your product or for the Sony Service Center nearest you, call 1-888-476-6972. The number below is for FCC related matters only. Regulatory Information Declaration of Conformity Trade Name: SONY Model No.: PCV-L630 Responsible Party: Sony Electronics Inc. Address: 1 Sony Drive Park Ridge, NJ 07656 Telephone No: 201-930-6972 This device complies with Part 15 of FCC Rules. Operation is subject to the two following conditions: (1) This device may not cause harmful interference, and (2) this device must accept any interference received, including interference that may cause undesired operation. Page 1 Read Me First PCV-L630 Thank you for purchasing your new Sony computer. Many common questions about your computer are answered in this manual. For the most recent information, please refer to the online version of Read Me First. You can access all of the electronic documentation from the Windows® Start menu by selecting Programs, and then VAIO Documentation. Check the Sony Support Web site at http://www.sony.com/pcsupport for the latest updates and information. For a VAIO demonstration, press the Help key (P6). To reprogram this key to launch Help, see Reprogramming Your Programmable Power Keys. Frequently Asked Questions (FAQs) Q: How do I recover applications or drivers that came with my computer if the files are corrupted or deleted? A: The Application Recovery CDs allow you to reinstall individual applications and device drivers if they are corrupted or accidentally erased. Reinstalling an individual device driver or software title may correct a problem you are experiencing with your computer, and you may not need to recover the entire contents of your hard drive. If you do need to reinstall all the software titles that shipped with your computer, use the System Recovery CD(s). You must be in Windows to run the Application Recovery CD(s). The application will not run from DOS. If you have any questions on using the Application Recovery CD(s), contact Sony Customer Support. To use the Application Recovery CD(s) 1. Turn on your computer. If your computer is already on, close all applications. 2. When the Windows desktop appears, insert the Sony Application Recovery CD in the DVD-ROM drive. The Application Recovery utility loads automatically. 3. When the Application Recovery menu appears, follow the on-screen instructions to complete the recovery process. Your system may include one or two Application Recovery CDs. If you have two Application Recovery CDs, insert the first CD to run the Application Recovery program. You may be prompted to insert the second CD, depending on the application you wish to restore. Q: How do I change the parallel port type to ECP, EPP, or bi-directional? A: You can change the parallel port type using the System Setup utility. To access System Setup, click the Start button, select Shut Down, and then select Restart. When the Sony screen displays, press the Delete key on your keyboard. Select "Chipset Features Setup" from the CMOS Setup Utility screen. Use the arrow keys to highlight Parallel Port Mode. You can toggle between the Normal (bi-directional), ECP, EPP and ECP+EPP options using the Page Up (PU) or Page Down (PD) buttons. When the desired setting displays, press the Escape key to return to the CMOS Setup Utility screen. Select the F10 key to Save and Exit. Select Yes (Y) to save the CMOS settings and exit. Press the Enter key. The system automatically starts with the new settings. Q: Why isn't the DVD-ROM drive reading a CD? A: After inserting a CD, you must wait a few seconds for the CD to be detected before trying to access it. If your drive reads some CDs but not others, check the shiny side of the disc for dirt or scratches. You may also need to clean the DVD-ROM drive lens with a CD-ROM cleaner. Q: How do I set up faxing capability in Windows® 98 Second Edition? A: Windows 98 does not provide a built-in fax utility. Sony has included the Symantec® WinFax Basic Edition for your faxing needs. To set up WinFax Basic software, click the Start button, point to Programs, and select Configure WinFax Basic Edition. Follow the on-screen instructions to configure Page 2 the fax utility. Q: How do I change the video resolution of my display? A: From the Start menu, select Settings, and then click Control Panel. Click the Display icon. Select the Settings tab. Move the slider under Screen area to change the resolution. Q: Why does Windows lock up during shut down? A: Windows may not shut down properly for many reasons, including incompatible or conflicting drivers, damaged files, or non-responsive hardware. For troubleshooting information, you can search Windows 98 Help. From the Start menu, select Help, click the Contents tab, click Troubleshooting, and then click Windows 98 Troubleshooters. Click the subject for which you want information, and then answer the questions that are appropriate for your problem. Q: Why is my system running slowly? A: Your system responsiveness varies depending on the number of applications that are open and running. Close any applications that you are not currently using. Increasing the system memory may also help. The computer has two memory slots. For memory upgrades, use only 3.3V 64-bit PC-100 SDRAM DIMM modules. Q: Why is there no sound in any application? A: There are several independent controls for your system volume. There is a volume control Windows task tray. In addition to adjusting the volume, check that the Mute check box is not selected in the Windows volume control on the right side of your LCD display and a volume control in the . If you are using headphones, adjust the volume control on the front of the system. Q: How do I turn off my Information LED after I have read my e-mail? A: To turn off the Information LED, click the icon in the Windows task tray. Q: Why is the Play button in my Microsoft CD Player grayed out when I try to play a music CD? A: When you insert a music CD, the Sony Media Bar application software automatically launches to play your CD. When the Sony Media Bar software is running, the Microsoft CD Player does not have access to the CD. If the Sony Media Bar is not visible, move your cursor to the top of the screen to bring forward the hidden Media Bar. If you do not hear any music, check all your volume controls. Q: How do I change my modem to rotary or Touch-Tone dialing? A: Click the My Computer icon on your desktop. Click Control Panel, and then click Modems. Click Dialing Properties. Next to "Dial using," select the Tone dial or Pulse dial radio button. Click OK. Q: Why is there unusual activity on my floppy disk drive? A: If you notice that your system is slow to respond due to unusual floppy disk drive activity, it could be because of Find Fast. To determine if Find Fast is present, click Start, point to Programs, and then point to Startup. Removing this item may remedy the problem. Supplementary Information Recovering Microsoft® Word 2000 If you recover your operating system using the System Recovery CD, Microsoft Word 2000 will not be recovered. Use the supplied Word 2000 CD-ROM to recover this application. Reprogramming Your Programmable Power Keys Page 3 Your Programmable Power Keys (PPK) come preprogrammed to launch designated applications. To change the applications launched by any of the PPK, see VAIO Action Setup Help. To access the Help file, from the Start menu, point to Programs/VAIO Action Setup/VAIO Action Setup Help. Copying Data From Memory Stick® Media When copying from one Memory Stick media to another Memory Stick media when the media are of different memory capacity, use the drag and drop method to copy data. Do not use the Copy Disk function of Windows. The Copy Disk function will result in the loss of media memory. Using the AutoAlert E-mail Notification System Your VAIO Slimtop LCD computer has an Information LED on the LCD display which can be set up to automatically alert you if you have new e-mail. You can also set up the internal timer on your computer to wake up automatically and download e-mail at preset times each day. You can use the timer to send and receive mail using Microsoft Outlook Express. If you use Outlook Express, the LED indicator lights when you receive new e-mail. To use these features, you must first designate your Internet Service Provider (ISP) and the e-mail software you wish to use. The "Internet" (P1) and "Mail" (P2) buttons on your keyboard are preprogrammed to run Microsoft Internet Explorer and Microsoft Outlook Express, respectively. If you have not set up your Internet or Mail connections, pressing P1 or P2 launches the Internet Connection Wizard. The wizard helps you set up your Internet account and e-mail software step by step. Refer to the information provided by your ISP or your e-mail software for more information. Once you have set up your Internet account and Outlook, you can use the AutoAlert E-mail Notification System and internal timer features. For more information, see Internal Timer and AutoAlert E-mail Notification System in the VAIO Slimtop LCD Computer User Guide. Using the Power Button on the System and on the Keyboard The power button on the keyboard performs a system shutdown, but does not give you the options available when you use the Windows Shutdown menu. Shutting down from the Windows Shutdown menu allows you to choose options such as Standby, Restart, and Restart in MS-DOS mode. Shutting down your computer improperly may result in loss of data. In the event your system has "locked up" or crashed, press and hold the power button on the system for several seconds to force your system to power off. You may need to repeat this procedure. To Resume from Standby Mode There are three ways to bring your computer back from the standby mode: press the space bar on your keyboard, press the left mouse button, or momentarily depress the power button on your computer. Resetting Your Computer For Printer Use After Resuming From A Power Saving Mode Your connected printer may not function after the computer resumes from a power saving mode. When this occurs, follow the procedures below to reset the printer connection: 1. Right-click the My Computer icon on the desktop, and then select Properties. 2. Click the Device Manager tab. 3. Select Refresh, and then click OK. The printer should now function properly. Applications That Use the TWAIN Driver Page 4 Digital imaging applications, such as Adobe PhotoDeluxe®, allow you to transfer images to your computer from external devices, including scanners or digital cameras. For some devices, a TWAIN driver window appears on the screen. Always close the TWAIN driver window before exiting or minimizing a digital imaging application. PCI Add-in Board Size Your computer can accommodate PCI add-in boards up to 6.6 inches in length. Memory Upgrade Specifications When upgrading memory, use only 3.3V 64-bit PC-100 SDRAM modules (gold lead contacts). For more information on VAIO Computer compatible memory, call Sony Customer Support at 1-888-4SONYPC (1-888-476-6972). Sony computer supplies, accessories and peripherals can be purchased from your Sony-authorized dealer or by contacting Sony at http://www.sony.com/accessories. For Answers to Your Software Questions Adobe Systems Incorporated 206-628-5737 (M-F, 6 AM-5 PM Pacific Time) America Online 800-827-3338 (7 days a week, 6 AM - 2 PM Eastern Time) AT&T 800-400-1447 (7 days a week, 24 hours a day) CompuServe Interactive Services 800-848-8990 (M-F, 8 AM - 1 AM Eastern Time, S-S 10 AM - 10 PM Eastern Time) EarthLink Network, Inc. 800-395-8410 (7 days a week, 24 hours a day) GTE Internet 800-927-3000 (7 days a week, 24 hours a day) Intuit Inc. 900-555-4688 (7 days a week, 24 hours a day) MindSpring Enterprises, Inc. 800-719-4660 Network Associates, Inc.408-988-3832 (M-F 9AM - 5PM Central Time) Prodigy Communications Corporation 800-PRODIGY (7 AM - 3 AM Eastern Time) Sonic Foundry 608-256-5555 (M-F, 8 AM - 7 PM Central Time) Symantec Corporation 800-798-0850 © 2000 Sony Electronics Inc. Reproduction in whole or in part without written permission is prohibited. All rights reserved. Sony, AutoAlert, and VAIO Slimtop are trademarks of Sony. WinFax is a trademark of Symantec Corporation. All other trademarks are trademarks or registered trademarks of their respective owners. Page 5 Read Me First PCV-L630 Thank you for purchasing your new Sony computer. Many common questions about your computer are answered in this manual. For the most recent information, please refer to the online version of Read Me First. You can access all of the electronic documentation from the Windows® Start menu by selecting Programs, and then VAIO Documentation. Check the Sony Support Web site at http://www.sony.com/pcsupport for the latest updates and information. For a VAIO demonstration, press the Help key (P6). To reprogram this key to launch Help, see Reprogramming Your Programmable Power Keys. Frequently Asked Questions (FAQs) Q: How do I recover applications or drivers that came with my computer if the files are corrupted or deleted? A: The Application Recovery CDs allow you to reinstall individual applications and device drivers if they are corrupted or accidentally erased. Reinstalling an individual device driver or software title may correct a problem you are experiencing with your computer, and you may not need to recover the entire contents of your hard drive. If you do need to reinstall all the software titles that shipped with your computer, use the System Recovery CD(s). You must be in Windows to run the Application Recovery CD(s). The application will not run from DOS. If you have any questions on using the Application Recovery CD(s), contact Sony Customer Support. To use the Application Recovery CD(s) 1. Turn on your computer. If your computer is already on, close all applications. 2. When the Windows desktop appears, insert the Sony Application Recovery CD in the DVD-ROM drive. The Application Recovery utility loads automatically. 3. When the Application Recovery menu appears, follow the on-screen instructions to complete the recovery process. Your system may include one or two Application Recovery CDs. If you have two Application Recovery CDs, insert the first CD to run the Application Recovery program. You may be prompted to insert the second CD, depending on the application you wish to restore. Q: How do I change the parallel port type to ECP, EPP, or bi-directional? A: You can change the parallel port type using the System Setup utility. To access System Setup, click the Start button, select Shut Down, and then select Restart. When the Sony screen displays, press the Delete key on your keyboard. Select "Chipset Features Setup" from the CMOS Setup Utility screen. Use the arrow keys to highlight Parallel Port Mode. You can toggle between the Normal (bi-directional), ECP, EPP and ECP+EPP options using the Page Up (PU) or Page Down (PD) buttons. When the desired setting displays, press the Escape key to return to the CMOS Setup Utility screen. Select the F10 key to Save and Exit. Select Yes (Y) to save the CMOS settings and exit. Press the Enter key. The system automatically starts with the new settings. Q: Why isn't the DVD-ROM drive reading a CD? A: After inserting a CD, you must wait a few seconds for the CD to be detected before trying to access it. If your drive reads some CDs but not others, check the shiny side of the disc for dirt or scratches. You may also need to clean the DVD-ROM drive lens with a CD-ROM cleaner. Q: How do I set up faxing capability in Windows® 98 Second Edition? A: Windows 98 does not provide a built-in fax utility. Sony has included the Symantec® WinFax Basic Edition for your faxing needs. To set up WinFax Basic software, click the Start button, point to Programs, and select Configure WinFax Basic Edition. Follow the on-screen instructions to configure Page 6 the fax utility. Q: How do I change the video resolution of my display? A: From the Start menu, select Settings, and then click Control Panel. Click the Display icon. Select the Settings tab. Move the slider under Screen area to change the resolution. Q: Why does Windows lock up during shut down? A: Windows may not shut down properly for many reasons, including incompatible or conflicting drivers, damaged files, or non-responsive hardware. For troubleshooting information, you can search Windows 98 Help. From the Start menu, select Help, click the Contents tab, click Troubleshooting, and then click Windows 98 Troubleshooters. Click the subject for which you want information, and then answer the questions that are appropriate for your problem. Q: Why is my system running slowly? A: Your system responsiveness varies depending on the number of applications that are open and running. Close any applications that you are not currently using. Increasing the system memory may also help. The computer has two memory slots. For memory upgrades, use only 3.3V 64-bit PC-100 SDRAM DIMM modules. Q: Why is there no sound in any application? A: There are several independent controls for your system volume. There is a volume control Windows task tray. In addition to adjusting the volume, check that the Mute check box is not selected in the Windows volume control on the right side of your LCD display and a volume control in the . If you are using headphones, adjust the volume control on the front of the system. Q: How do I turn off my Information LED after I have read my e-mail? A: To turn off the Information LED, click the icon in the Windows task tray. Q: Why is the Play button in my Microsoft CD Player grayed out when I try to play a music CD? A: When you insert a music CD, the Sony Media Bar application software automatically launches to play your CD. When the Sony Media Bar software is running, the Microsoft CD Player does not have access to the CD. If the Sony Media Bar is not visible, move your cursor to the top of the screen to bring forward the hidden Media Bar. If you do not hear any music, check all your volume controls. Q: How do I change my modem to rotary or Touch-Tone dialing? A: Click the My Computer icon on your desktop. Click Control Panel, and then click Modems. Click Dialing Properties. Next to "Dial using," select the Tone dial or Pulse dial radio button. Click OK. Q: Why is there unusual activity on my floppy disk drive? A: If you notice that your system is slow to respond due to unusual floppy disk drive activity, it could be because of Find Fast. To determine if Find Fast is present, click Start, point to Programs, and then point to Startup. Removing this item may remedy the problem. Supplementary Information Recovering Microsoft® Word 2000 If you recover your operating system using the System Recovery CD, Microsoft Word 2000 will not be recovered. Use the supplied Word 2000 CD-ROM to recover this application. Reprogramming Your Programmable Power Keys Page 7 Your Programmable Power Keys (PPK) come preprogrammed to launch designated applications. To change the applications launched by any of the PPK, see VAIO Action Setup Help. To access the Help file, from the Start menu, point to Programs/VAIO Action Setup/VAIO Action Setup Help. Copying Data From Memory Stick® Media When copying from one Memory Stick media to another Memory Stick media when the media are of different memory capacity, use the drag and drop method to copy data. Do not use the Copy Disk function of Windows. The Copy Disk function will result in the loss of media memory. Using the AutoAlert E-mail Notification System Your VAIO Slimtop LCD computer has an Information LED on the LCD display which can be set up to automatically alert you if you have new e-mail. You can also set up the internal timer on your computer to wake up automatically and download e-mail at preset times each day. You can use the timer to send and receive mail using Microsoft Outlook Express. If you use Outlook Express, the LED indicator lights when you receive new e-mail. To use these features, you must first designate your Internet Service Provider (ISP) and the e-mail software you wish to use. The "Internet" (P1) and "Mail" (P2) buttons on your keyboard are preprogrammed to run Microsoft Internet Explorer and Microsoft Outlook Express, respectively. If you have not set up your Internet or Mail connections, pressing P1 or P2 launches the Internet Connection Wizard. The wizard helps you set up your Internet account and e-mail software step by step. Refer to the information provided by your ISP or your e-mail software for more information. Once you have set up your Internet account and Outlook, you can use the AutoAlert E-mail Notification System and internal timer features. For more information, see Internal Timer and AutoAlert E-mail Notification System in the VAIO Slimtop LCD Computer User Guide. Using the Power Button on the System and on the Keyboard The power button on the keyboard performs a system shutdown, but does not give you the options available when you use the Windows Shutdown menu. Shutting down from the Windows Shutdown menu allows you to choose options such as Standby, Restart, and Restart in MS-DOS mode. Shutting down your computer improperly may result in loss of data. In the event your system has "locked up" or crashed, press and hold the power button on the system for several seconds to force your system to power off. You may need to repeat this procedure. To Resume from Standby Mode There are three ways to bring your computer back from the standby mode: press the space bar on your keyboard, press the left mouse button, or momentarily depress the power button on your computer. Resetting Your Computer For Printer Use After Resuming From A Power Saving Mode Your connected printer may not function after the computer resumes from a power saving mode. When this occurs, follow the procedures below to reset the printer connection: 1. Right-click the My Computer icon on the desktop, and then select Properties. 2. Click the Device Manager tab. 3. Select Refresh, and then click OK. The printer should now function properly. Applications That Use the TWAIN Driver Page 8 Digital imaging applications, such as Adobe PhotoDeluxe®, allow you to transfer images to your computer from external devices, including scanners or digital cameras. For some devices, a TWAIN driver window appears on the screen. Always close the TWAIN driver window before exiting or minimizing a digital imaging application. PCI Add-in Board Size Your computer can accommodate PCI add-in boards up to 6.6 inches in length. Memory Upgrade Specifications When upgrading memory, use only 3.3V 64-bit PC-100 SDRAM modules (gold lead contacts). For more information on VAIO Computer compatible memory, call Sony Customer Support at 1-888-4SONYPC (1-888-476-6972). Sony computer supplies, accessories and peripherals can be purchased from your Sony-authorized dealer or by contacting Sony at http://www.sony.com/accessories. For Answers to Your Software Questions Adobe Systems Incorporated 206-628-5737 (M-F, 6 AM-5 PM Pacific Time) America Online 800-827-3338 (7 days a week, 6 AM - 2 PM Eastern Time) AT&T 800-400-1447 (7 days a week, 24 hours a day) CompuServe Interactive Services 800-848-8990 (M-F, 8 AM - 1 AM Eastern Time, S-S 10 AM - 10 PM Eastern Time) EarthLink Network, Inc. 800-395-8410 (7 days a week, 24 hours a day) GTE Internet 800-927-3000 (7 days a week, 24 hours a day) Intuit Inc. 900-555-4688 (7 days a week, 24 hours a day) MindSpring Enterprises, Inc. 800-719-4660 Network Associates, Inc.408-988-3832 (M-F 9AM - 5PM Central Time) Prodigy Communications Corporation 800-PRODIGY (7 AM - 3 AM Eastern Time) Sonic Foundry 608-256-5555 (M-F, 8 AM - 7 PM Central Time) Symantec Corporation 800-798-0850 © 2000 Sony Electronics Inc. Reproduction in whole or in part without written permission is prohibited. All rights reserved. Sony, AutoAlert, and VAIO Slimtop are trademarks of Sony. WinFax is a trademark of Symantec Corporation. All other trademarks are trademarks or registered trademarks of their respective owners. Page 9 Read Me First PCV-L630 Thank you for purchasing your new Sony computer. Many common questions about your computer are answered in this manual. For the most recent information, please refer to the online version of Read Me First. You can access all of the electronic documentation from the Windows® Start menu by selecting Programs, and then VAIO Documentation. Check the Sony Support Web site at http://www.sony.com/pcsupport for the latest updates and information. For a VAIO demonstration, press the Help key (P6). To reprogram this key to launch Help, see Reprogramming Your Programmable Power Keys. Frequently Asked Questions (FAQs) Q: How do I recover applications or drivers that came with my computer if the files are corrupted or deleted? A: The Application Recovery CDs allow you to reinstall individual applications and device drivers if they are corrupted or accidentally erased. Reinstalling an individual device driver or software title may correct a problem you are experiencing with your computer, and you may not need to recover the entire contents of your hard drive. If you do need to reinstall all the software titles that shipped with your computer, use the System Recovery CD(s). You must be in Windows to run the Application Recovery CD(s). The application will not run from DOS. If you have any questions on using the Application Recovery CD(s), contact Sony Customer Support. To use the Application Recovery CD(s) 1. Turn on your computer. If your computer is already on, close all applications. 2. When the Windows desktop appears, insert the Sony Application Recovery CD in the DVD-ROM drive. The Application Recovery utility loads automatically. 3. When the Application Recovery menu appears, follow the on-screen instructions to complete the recovery process. Your system may include one or two Application Recovery CDs. If you have two Application Recovery CDs, insert the first CD to run the Application Recovery program. You may be prompted to insert the second CD, depending on the application you wish to restore. Q: How do I change the parallel port type to ECP, EPP, or bi-directional? A: You can change the parallel port type using the System Setup utility. To access System Setup, click the Start button, select Shut Down, and then select Restart. When the Sony screen displays, press the Delete key on your keyboard. Select "Chipset Features Setup" from the CMOS Setup Utility screen. Use the arrow keys to highlight Parallel Port Mode. You can toggle between the Normal (bi-directional), ECP, EPP and ECP+EPP options using the Page Up (PU) or Page Down (PD) buttons. When the desired setting displays, press the Escape key to return to the CMOS Setup Utility screen. Select the F10 key to Save and Exit. Select Yes (Y) to save the CMOS settings and exit. Press the Enter key. The system automatically starts with the new settings. Q: Why isn't the DVD-ROM drive reading a CD? A: After inserting a CD, you must wait a few seconds for the CD to be detected before trying to access it. If your drive reads some CDs but not others, check the shiny side of the disc for dirt or scratches. You may also need to clean the DVD-ROM drive lens with a CD-ROM cleaner. Q: How do I set up faxing capability in Windows® 98 Second Edition? A: Windows 98 does not provide a built-in fax utility. Sony has included the Symantec® WinFax Basic Edition for your faxing needs. To set up WinFax Basic software, click the Start button, point to Programs, and select Configure WinFax Basic Edition. Follow the on-screen instructions to configure Page 10 the fax utility. Q: How do I change the video resolution of my display? A: From the Start menu, select Settings, and then click Control Panel. Click the Display icon. Select the Settings tab. Move the slider under Screen area to change the resolution. Q: Why does Windows lock up during shut down? A: Windows may not shut down properly for many reasons, including incompatible or conflicting drivers, damaged files, or non-responsive hardware. For troubleshooting information, you can search Windows 98 Help. From the Start menu, select Help, click the Contents tab, click Troubleshooting, and then click Windows 98 Troubleshooters. Click the subject for which you want information, and then answer the questions that are appropriate for your problem. Q: Why is my system running slowly? A: Your system responsiveness varies depending on the number of applications that are open and running. Close any applications that you are not currently using. Increasing the system memory may also help. The computer has two memory slots. For memory upgrades, use only 3.3V 64-bit PC-100 SDRAM DIMM modules. Q: Why is there no sound in any application? A: There are several independent controls for your system volume. There is a volume control Windows task tray. In addition to adjusting the volume, check that the Mute check box is not selected in the Windows volume control on the right side of your LCD display and a volume control in the . If you are using headphones, adjust the volume control on the front of the system. Q: How do I turn off my Information LED after I have read my e-mail? A: To turn off the Information LED, click the icon in the Windows task tray. Q: Why is the Play button in my Microsoft CD Player grayed out when I try to play a music CD? A: When you insert a music CD, the Sony Media Bar application software automatically launches to play your CD. When the Sony Media Bar software is running, the Microsoft CD Player does not have access to the CD. If the Sony Media Bar is not visible, move your cursor to the top of the screen to bring forward the hidden Media Bar. If you do not hear any music, check all your volume controls. Q: How do I change my modem to rotary or Touch-Tone dialing? A: Click the My Computer icon on your desktop. Click Control Panel, and then click Modems. Click Dialing Properties. Next to "Dial using," select the Tone dial or Pulse dial radio button. Click OK. Q: Why is there unusual activity on my floppy disk drive? A: If you notice that your system is slow to respond due to unusual floppy disk drive activity, it could be because of Find Fast. To determine if Find Fast is present, click Start, point to Programs, and then point to Startup. Removing this item may remedy the problem. Supplementary Information Recovering Microsoft® Word 2000 If you recover your operating system using the System Recovery CD, Microsoft Word 2000 will not be recovered. Use the supplied Word 2000 CD-ROM to recover this application. Reprogramming Your Programmable Power Keys Page 11 Your Programmable Power Keys (PPK) come preprogrammed to launch designated applications. To change the applications launched by any of the PPK, see VAIO Action Setup Help. To access the Help file, from the Start menu, point to Programs/VAIO Action Setup/VAIO Action Setup Help. Copying Data From Memory Stick® Media When copying from one Memory Stick media to another Memory Stick media when the media are of different memory capacity, use the drag and drop method to copy data. Do not use the Copy Disk function of Windows. The Copy Disk function will result in the loss of media memory. Using the AutoAlert E-mail Notification System Your VAIO Slimtop LCD computer has an Information LED on the LCD display which can be set up to automatically alert you if you have new e-mail. You can also set up the internal timer on your computer to wake up automatically and download e-mail at preset times each day. You can use the timer to send and receive mail using Microsoft Outlook Express. If you use Outlook Express, the LED indicator lights when you receive new e-mail. To use these features, you must first designate your Internet Service Provider (ISP) and the e-mail software you wish to use. The "Internet" (P1) and "Mail" (P2) buttons on your keyboard are preprogrammed to run Microsoft Internet Explorer and Microsoft Outlook Express, respectively. If you have not set up your Internet or Mail connections, pressing P1 or P2 launches the Internet Connection Wizard. The wizard helps you set up your Internet account and e-mail software step by step. Refer to the information provided by your ISP or your e-mail software for more information. Once you have set up your Internet account and Outlook, you can use the AutoAlert E-mail Notification System and internal timer features. For more information, see Internal Timer and AutoAlert E-mail Notification System in the VAIO Slimtop LCD Computer User Guide. Using the Power Button on the System and on the Keyboard The power button on the keyboard performs a system shutdown, but does not give you the options available when you use the Windows Shutdown menu. Shutting down from the Windows Shutdown menu allows you to choose options such as Standby, Restart, and Restart in MS-DOS mode. Shutting down your computer improperly may result in loss of data. In the event your system has "locked up" or crashed, press and hold the power button on the system for several seconds to force your system to power off. You may need to repeat this procedure. To Resume from Standby Mode There are three ways to bring your computer back from the standby mode: press the space bar on your keyboard, press the left mouse button, or momentarily depress the power button on your computer. Resetting Your Computer For Printer Use After Resuming From A Power Saving Mode Your connected printer may not function after the computer resumes from a power saving mode. When this occurs, follow the procedures below to reset the printer connection: 1. Right-click the My Computer icon on the desktop, and then select Properties. 2. Click the Device Manager tab. 3. Select Refresh, and then click OK. The printer should now function properly. Applications That Use the TWAIN Driver Page 12 Digital imaging applications, such as Adobe PhotoDeluxe®, allow you to transfer images to your computer from external devices, including scanners or digital cameras. For some devices, a TWAIN driver window appears on the screen. Always close the TWAIN driver window before exiting or minimizing a digital imaging application. PCI Add-in Board Size Your computer can accommodate PCI add-in boards up to 6.6 inches in length. Memory Upgrade Specifications When upgrading memory, use only 3.3V 64-bit PC-100 SDRAM modules (gold lead contacts). For more information on VAIO Computer compatible memory, call Sony Customer Support at 1-888-4SONYPC (1-888-476-6972). Sony computer supplies, accessories and peripherals can be purchased from your Sony-authorized dealer or by contacting Sony at http://www.sony.com/accessories. For Answers to Your Software Questions Adobe Systems Incorporated 206-628-5737 (M-F, 6 AM-5 PM Pacific Time) America Online 800-827-3338 (7 days a week, 6 AM - 2 PM Eastern Time) AT&T 800-400-1447 (7 days a week, 24 hours a day) CompuServe Interactive Services 800-848-8990 (M-F, 8 AM - 1 AM Eastern Time, S-S 10 AM - 10 PM Eastern Time) EarthLink Network, Inc. 800-395-8410 (7 days a week, 24 hours a day) GTE Internet 800-927-3000 (7 days a week, 24 hours a day) Intuit Inc. 900-555-4688 (7 days a week, 24 hours a day) MindSpring Enterprises, Inc. 800-719-4660 Network Associates, Inc.408-988-3832 (M-F 9AM - 5PM Central Time) Prodigy Communications Corporation 800-PRODIGY (7 AM - 3 AM Eastern Time) Sonic Foundry 608-256-5555 (M-F, 8 AM - 7 PM Central Time) Symantec Corporation 800-798-0850 © 2000 Sony Electronics Inc. Reproduction in whole or in part without written permission is prohibited. All rights reserved. Sony, AutoAlert, and VAIO Slimtop are trademarks of Sony. WinFax is a trademark of Symantec Corporation. All other trademarks are trademarks or registered trademarks of their respective owners. Page 13 Read Me First PCV-L630 Thank you for purchasing your new Sony computer. Many common questions about your computer are answered in this manual. For the most recent information, please refer to the online version of Read Me First. You can access all of the electronic documentation from the Windows® Start menu by selecting Programs, and then VAIO Documentation. Check the Sony Support Web site at http://www.sony.com/pcsupport for the latest updates and information. For a VAIO demonstration, press the Help key (P6). To reprogram this key to launch Help, see Reprogramming Your Programmable Power Keys. Frequently Asked Questions (FAQs) Q: How do I recover applications or drivers that came with my computer if the files are corrupted or deleted? A: The Application Recovery CDs allow you to reinstall individual applications and device drivers if they are corrupted or accidentally erased. Reinstalling an individual device driver or software title may correct a problem you are experiencing with your computer, and you may not need to recover the entire contents of your hard drive. If you do need to reinstall all the software titles that shipped with your computer, use the System Recovery CD(s). You must be in Windows to run the Application Recovery CD(s). The application will not run from DOS. If you have any questions on using the Application Recovery CD(s), contact Sony Customer Support. To use the Application Recovery CD(s) 1. Turn on your computer. If your computer is already on, close all applications. 2. When the Windows desktop appears, insert the Sony Application Recovery CD in the DVD-ROM drive. The Application Recovery utility loads automatically. 3. When the Application Recovery menu appears, follow the on-screen instructions to complete the recovery process. Your system may include one or two Application Recovery CDs. If you have two Application Recovery CDs, insert the first CD to run the Application Recovery program. You may be prompted to insert the second CD, depending on the application you wish to restore. Q: How do I change the parallel port type to ECP, EPP, or bi-directional? A: You can change the parallel port type using the System Setup utility. To access System Setup, click the Start button, select Shut Down, and then select Restart. When the Sony screen displays, press the Delete key on your keyboard. Select "Chipset Features Setup" from the CMOS Setup Utility screen. Use the arrow keys to highlight Parallel Port Mode. You can toggle between the Normal (bi-directional), ECP, EPP and ECP+EPP options using the Page Up (PU) or Page Down (PD) buttons. When the desired setting displays, press the Escape key to return to the CMOS Setup Utility screen. Select the F10 key to Save and Exit. Select Yes (Y) to save the CMOS settings and exit. Press the Enter key. The system automatically starts with the new settings. Q: Why isn't the DVD-ROM drive reading a CD? A: After inserting a CD, you must wait a few seconds for the CD to be detected before trying to access it. If your drive reads some CDs but not others, check the shiny side of the disc for dirt or scratches. You may also need to clean the DVD-ROM drive lens with a CD-ROM cleaner. Q: How do I set up faxing capability in Windows® 98 Second Edition? A: Windows 98 does not provide a built-in fax utility. Sony has included the Symantec® WinFax Basic Edition for your faxing needs. To set up WinFax Basic software, click the Start button, point to Programs, and select Configure WinFax Basic Edition. Follow the on-screen instructions to configure Page 14 the fax utility. Q: How do I change the video resolution of my display? A: From the Start menu, select Settings, and then click Control Panel. Click the Display icon. Select the Settings tab. Move the slider under Screen area to change the resolution. Q: Why does Windows lock up during shut down? A: Windows may not shut down properly for many reasons, including incompatible or conflicting drivers, damaged files, or non-responsive hardware. For troubleshooting information, you can search Windows 98 Help. From the Start menu, select Help, click the Contents tab, click Troubleshooting, and then click Windows 98 Troubleshooters. Click the subject for which you want information, and then answer the questions that are appropriate for your problem. Q: Why is my system running slowly? A: Your system responsiveness varies depending on the number of applications that are open and running. Close any applications that you are not currently using. Increasing the system memory may also help. The computer has two memory slots. For memory upgrades, use only 3.3V 64-bit PC-100 SDRAM DIMM modules. Q: Why is there no sound in any application? A: There are several independent controls for your system volume. There is a volume control Windows task tray. In addition to adjusting the volume, check that the Mute check box is not selected in the Windows volume control on the right side of your LCD display and a volume control in the . If you are using headphones, adjust the volume control on the front of the system. Q: How do I turn off my Information LED after I have read my e-mail? A: To turn off the Information LED, click the icon in the Windows task tray. Q: Why is the Play button in my Microsoft CD Player grayed out when I try to play a music CD? A: When you insert a music CD, the Sony Media Bar application software automatically launches to play your CD. When the Sony Media Bar software is running, the Microsoft CD Player does not have access to the CD. If the Sony Media Bar is not visible, move your cursor to the top of the screen to bring forward the hidden Media Bar. If you do not hear any music, check all your volume controls. Q: How do I change my modem to rotary or Touch-Tone dialing? A: Click the My Computer icon on your desktop. Click Control Panel, and then click Modems. Click Dialing Properties. Next to "Dial using," select the Tone dial or Pulse dial radio button. Click OK. Q: Why is there unusual activity on my floppy disk drive? A: If you notice that your system is slow to respond due to unusual floppy disk drive activity, it could be because of Find Fast. To determine if Find Fast is present, click Start, point to Programs, and then point to Startup. Removing this item may remedy the problem. Supplementary Information Recovering Microsoft® Word 2000 If you recover your operating system using the System Recovery CD, Microsoft Word 2000 will not be recovered. Use the supplied Word 2000 CD-ROM to recover this application. Reprogramming Your Programmable Power Keys Page 15 Your Programmable Power Keys (PPK) come preprogrammed to launch designated applications. To change the applications launched by any of the PPK, see VAIO Action Setup Help. To access the Help file, from the Start menu, point to Programs/VAIO Action Setup/VAIO Action Setup Help. Copying Data From Memory Stick® Media When copying from one Memory Stick media to another Memory Stick media when the media are of different memory capacity, use the drag and drop method to copy data. Do not use the Copy Disk function of Windows. The Copy Disk function will result in the loss of media memory. Using the AutoAlert E-mail Notification System Your VAIO Slimtop LCD computer has an Information LED on the LCD display which can be set up to automatically alert you if you have new e-mail. You can also set up the internal timer on your computer to wake up automatically and download e-mail at preset times each day. You can use the timer to send and receive mail using Microsoft Outlook Express. If you use Outlook Express, the LED indicator lights when you receive new e-mail. To use these features, you must first designate your Internet Service Provider (ISP) and the e-mail software you wish to use. The "Internet" (P1) and "Mail" (P2) buttons on your keyboard are preprogrammed to run Microsoft Internet Explorer and Microsoft Outlook Express, respectively. If you have not set up your Internet or Mail connections, pressing P1 or P2 launches the Internet Connection Wizard. The wizard helps you set up your Internet account and e-mail software step by step. Refer to the information provided by your ISP or your e-mail software for more information. Once you have set up your Internet account and Outlook, you can use the AutoAlert E-mail Notification System and internal timer features. For more information, see Internal Timer and AutoAlert E-mail Notification System in the VAIO Slimtop LCD Computer User Guide. Using the Power Button on the System and on the Keyboard The power button on the keyboard performs a system shutdown, but does not give you the options available when you use the Windows Shutdown menu. Shutting down from the Windows Shutdown menu allows you to choose options such as Standby, Restart, and Restart in MS-DOS mode. Shutting down your computer improperly may result in loss of data. In the event your system has "locked up" or crashed, press and hold the power button on the system for several seconds to force your system to power off. You may need to repeat this procedure. To Resume from Standby Mode There are three ways to bring your computer back from the standby mode: press the space bar on your keyboard, press the left mouse button, or momentarily depress the power button on your computer. Resetting Your Computer For Printer Use After Resuming From A Power Saving Mode Your connected printer may not function after the computer resumes from a power saving mode. When this occurs, follow the procedures below to reset the printer connection: 1. Right-click the My Computer icon on the desktop, and then select Properties. 2. Click the Device Manager tab. 3. Select Refresh, and then click OK. The printer should now function properly. Applications That Use the TWAIN Driver Page 16 Digital imaging applications, such as Adobe PhotoDeluxe®, allow you to transfer images to your computer from external devices, including scanners or digital cameras. For some devices, a TWAIN driver window appears on the screen. Always close the TWAIN driver window before exiting or minimizing a digital imaging application. PCI Add-in Board Size Your computer can accommodate PCI add-in boards up to 6.6 inches in length. Memory Upgrade Specifications When upgrading memory, use only 3.3V 64-bit PC-100 SDRAM modules (gold lead contacts). For more information on VAIO Computer compatible memory, call Sony Customer Support at 1-888-4SONYPC (1-888-476-6972). Sony computer supplies, accessories and peripherals can be purchased from your Sony-authorized dealer or by contacting Sony at http://www.sony.com/accessories. For Answers to Your Software Questions Adobe Systems Incorporated 206-628-5737 (M-F, 6 AM-5 PM Pacific Time) America Online 800-827-3338 (7 days a week, 6 AM - 2 PM Eastern Time) AT&T 800-400-1447 (7 days a week, 24 hours a day) CompuServe Interactive Services 800-848-8990 (M-F, 8 AM - 1 AM Eastern Time, S-S 10 AM - 10 PM Eastern Time) EarthLink Network, Inc. 800-395-8410 (7 days a week, 24 hours a day) GTE Internet 800-927-3000 (7 days a week, 24 hours a day) Intuit Inc. 900-555-4688 (7 days a week, 24 hours a day) MindSpring Enterprises, Inc. 800-719-4660 Network Associates, Inc.408-988-3832 (M-F 9AM - 5PM Central Time) Prodigy Communications Corporation 800-PRODIGY (7 AM - 3 AM Eastern Time) Sonic Foundry 608-256-5555 (M-F, 8 AM - 7 PM Central Time) Symantec Corporation 800-798-0850 © 2000 Sony Electronics Inc. Reproduction in whole or in part without written permission is prohibited. All rights reserved. Sony, AutoAlert, and VAIO Slimtop are trademarks of Sony. WinFax is a trademark of Symantec Corporation. All other trademarks are trademarks or registered trademarks of their respective owners. Page 17 Read Me First PCV-L630 Thank you for purchasing your new Sony computer. Many common questions about your computer are answered in this manual. For the most recent information, please refer to the online version of Read Me First. You can access all of the electronic documentation from the Windows® Start menu by selecting Programs, and then VAIO Documentation. Check the Sony Support Web site at http://www.sony.com/pcsupport for the latest updates and information. For a VAIO demonstration, press the Help key (P6). To reprogram this key to launch Help, see Reprogramming Your Programmable Power Keys. Frequently Asked Questions (FAQs) Q: How do I recover applications or drivers that came with my computer if the files are corrupted or deleted? A: The Application Recovery CDs allow you to reinstall individual applications and device drivers if they are corrupted or accidentally erased. Reinstalling an individual device driver or software title may correct a problem you are experiencing with your computer, and you may not need to recover the entire contents of your hard drive. If you do need to reinstall all the software titles that shipped with your computer, use the System Recovery CD(s). You must be in Windows to run the Application Recovery CD(s). The application will not run from DOS. If you have any questions on using the Application Recovery CD(s), contact Sony Customer Support. To use the Application Recovery CD(s) 1. Turn on your computer. If your computer is already on, close all applications. 2. When the Windows desktop appears, insert the Sony Application Recovery CD in the DVD-ROM drive. The Application Recovery utility loads automatically. 3. When the Application Recovery menu appears, follow the on-screen instructions to complete the recovery process. Your system may include one or two Application Recovery CDs. If you have two Application Recovery CDs, insert the first CD to run the Application Recovery program. You may be prompted to insert the second CD, depending on the application you wish to restore. Q: How do I change the parallel port type to ECP, EPP, or bi-directional? A: You can change the parallel port type using the System Setup utility. To access System Setup, click the Start button, select Shut Down, and then select Restart. When the Sony screen displays, press the Delete key on your keyboard. Select "Chipset Features Setup" from the CMOS Setup Utility screen. Use the arrow keys to highlight Parallel Port Mode. You can toggle between the Normal (bi-directional), ECP, EPP and ECP+EPP options using the Page Up (PU) or Page Down (PD) buttons. When the desired setting displays, press the Escape key to return to the CMOS Setup Utility screen. Select the F10 key to Save and Exit. Select Yes (Y) to save the CMOS settings and exit. Press the Enter key. The system automatically starts with the new settings. Q: Why isn't the DVD-ROM drive reading a CD? A: After inserting a CD, you must wait a few seconds for the CD to be detected before trying to access it. If your drive reads some CDs but not others, check the shiny side of the disc for dirt or scratches. You may also need to clean the DVD-ROM drive lens with a CD-ROM cleaner. Q: How do I set up faxing capability in Windows® 98 Second Edition? A: Windows 98 does not provide a built-in fax utility. Sony has included the Symantec® WinFax Basic Edition for your faxing needs. To set up WinFax Basic software, click the Start button, point to Programs, and select Configure WinFax Basic Edition. Follow the on-screen instructions to configure Page 18 the fax utility. Q: How do I change the video resolution of my display? A: From the Start menu, select Settings, and then click Control Panel. Click the Display icon. Select the Settings tab. Move the slider under Screen area to change the resolution. Q: Why does Windows lock up during shut down? A: Windows may not shut down properly for many reasons, including incompatible or conflicting drivers, damaged files, or non-responsive hardware. For troubleshooting information, you can search Windows 98 Help. From the Start menu, select Help, click the Contents tab, click Troubleshooting, and then click Windows 98 Troubleshooters. Click the subject for which you want information, and then answer the questions that are appropriate for your problem. Q: Why is my system running slowly? A: Your system responsiveness varies depending on the number of applications that are open and running. Close any applications that you are not currently using. Increasing the system memory may also help. The computer has two memory slots. For memory upgrades, use only 3.3V 64-bit PC-100 SDRAM DIMM modules. Q: Why is there no sound in any application? A: There are several independent controls for your system volume. There is a volume control Windows task tray. In addition to adjusting the volume, check that the Mute check box is not selected in the Windows volume control on the right side of your LCD display and a volume control in the . If you are using headphones, adjust the volume control on the front of the system. Q: How do I turn off my Information LED after I have read my e-mail? A: To turn off the Information LED, click the icon in the Windows task tray. Q: Why is the Play button in my Microsoft CD Player grayed out when I try to play a music CD? A: When you insert a music CD, the Sony Media Bar application software automatically launches to play your CD. When the Sony Media Bar software is running, the Microsoft CD Player does not have access to the CD. If the Sony Media Bar is not visible, move your cursor to the top of the screen to bring forward the hidden Media Bar. If you do not hear any music, check all your volume controls. Q: How do I change my modem to rotary or Touch-Tone dialing? A: Click the My Computer icon on your desktop. Click Control Panel, and then click Modems. Click Dialing Properties. Next to "Dial using," select the Tone dial or Pulse dial radio button. Click OK. Q: Why is there unusual activity on my floppy disk drive? A: If you notice that your system is slow to respond due to unusual floppy disk drive activity, it could be because of Find Fast. To determine if Find Fast is present, click Start, point to Programs, and then point to Startup. Removing this item may remedy the problem. Supplementary Information Recovering Microsoft® Word 2000 If you recover your operating system using the System Recovery CD, Microsoft Word 2000 will not be recovered. Use the supplied Word 2000 CD-ROM to recover this application. Reprogramming Your Programmable Power Keys Page 19 Your Programmable Power Keys (PPK) come preprogrammed to launch designated applications. To change the applications launched by any of the PPK, see VAIO Action Setup Help. To access the Help file, from the Start menu, point to Programs/VAIO Action Setup/VAIO Action Setup Help. Copying Data From Memory Stick® Media When copying from one Memory Stick media to another Memory Stick media when the media are of different memory capacity, use the drag and drop method to copy data. Do not use the Copy Disk function of Windows. The Copy Disk function will result in the loss of media memory. Using the AutoAlert E-mail Notification System Your VAIO Slimtop LCD computer has an Information LED on the LCD display which can be set up to automatically alert you if you have new e-mail. You can also set up the internal timer on your computer to wake up automatically and download e-mail at preset times each day. You can use the timer to send and receive mail using Microsoft Outlook Express. If you use Outlook Express, the LED indicator lights when you receive new e-mail. To use these features, you must first designate your Internet Service Provider (ISP) and the e-mail software you wish to use. The "Internet" (P1) and "Mail" (P2) buttons on your keyboard are preprogrammed to run Microsoft Internet Explorer and Microsoft Outlook Express, respectively. If you have not set up your Internet or Mail connections, pressing P1 or P2 launches the Internet Connection Wizard. The wizard helps you set up your Internet account and e-mail software step by step. Refer to the information provided by your ISP or your e-mail software for more information. Once you have set up your Internet account and Outlook, you can use the AutoAlert E-mail Notification System and internal timer features. For more information, see Internal Timer and AutoAlert E-mail Notification System in the VAIO Slimtop LCD Computer User Guide. Using the Power Button on the System and on the Keyboard The power button on the keyboard performs a system shutdown, but does not give you the options available when you use the Windows Shutdown menu. Shutting down from the Windows Shutdown menu allows you to choose options such as Standby, Restart, and Restart in MS-DOS mode. Shutting down your computer improperly may result in loss of data. In the event your system has "locked up" or crashed, press and hold the power button on the system for several seconds to force your system to power off. You may need to repeat this procedure. To Resume from Standby Mode There are three ways to bring your computer back from the standby mode: press the space bar on your keyboard, press the left mouse button, or momentarily depress the power button on your computer. Resetting Your Computer For Printer Use After Resuming From A Power Saving Mode Your connected printer may not function after the computer resumes from a power saving mode. When this occurs, follow the procedures below to reset the printer connection: 1. Right-click the My Computer icon on the desktop, and then select Properties. 2. Click the Device Manager tab. 3. Select Refresh, and then click OK. The printer should now function properly. Applications That Use the TWAIN Driver Page 20 Digital imaging applications, such as Adobe PhotoDeluxe®, allow you to transfer images to your computer from external devices, including scanners or digital cameras. For some devices, a TWAIN driver window appears on the screen. Always close the TWAIN driver window before exiting or minimizing a digital imaging application. PCI Add-in Board Size Your computer can accommodate PCI add-in boards up to 6.6 inches in length. Memory Upgrade Specifications When upgrading memory, use only 3.3V 64-bit PC-100 SDRAM modules (gold lead contacts). For more information on VAIO Computer compatible memory, call Sony Customer Support at 1-888-4SONYPC (1-888-476-6972). Sony computer supplies, accessories and peripherals can be purchased from your Sony-authorized dealer or by contacting Sony at http://www.sony.com/accessories. For Answers to Your Software Questions Adobe Systems Incorporated 206-628-5737 (M-F, 6 AM-5 PM Pacific Time) America Online 800-827-3338 (7 days a week, 6 AM - 2 PM Eastern Time) AT&T 800-400-1447 (7 days a week, 24 hours a day) CompuServe Interactive Services 800-848-8990 (M-F, 8 AM - 1 AM Eastern Time, S-S 10 AM - 10 PM Eastern Time) EarthLink Network, Inc. 800-395-8410 (7 days a week, 24 hours a day) GTE Internet 800-927-3000 (7 days a week, 24 hours a day) Intuit Inc. 900-555-4688 (7 days a week, 24 hours a day) MindSpring Enterprises, Inc. 800-719-4660 Network Associates, Inc.408-988-3832 (M-F 9AM - 5PM Central Time) Prodigy Communications Corporation 800-PRODIGY (7 AM - 3 AM Eastern Time) Sonic Foundry 608-256-5555 (M-F, 8 AM - 7 PM Central Time) Symantec Corporation 800-798-0850 © 2000 Sony Electronics Inc. Reproduction in whole or in part without written permission is prohibited. All rights reserved. Sony, AutoAlert, and VAIO Slimtop are trademarks of Sony. WinFax is a trademark of Symantec Corporation. All other trademarks are trademarks or registered trademarks of their respective owners. Page 21 Read Me First PCV-L630 Thank you for purchasing your new Sony computer. Many common questions about your computer are answered in this manual. For the most recent information, please refer to the online version of Read Me First. You can access all of the electronic documentation from the Windows® Start menu by selecting Programs, and then VAIO Documentation. Check the Sony Support Web site at http://www.sony.com/pcsupport for the latest updates and information. For a VAIO demonstration, press the Help key (P6). To reprogram this key to launch Help, see Reprogramming Your Programmable Power Keys. Frequently Asked Questions (FAQs) Q: How do I recover applications or drivers that came with my computer if the files are corrupted or deleted? A: The Application Recovery CDs allow you to reinstall individual applications and device drivers if they are corrupted or accidentally erased. Reinstalling an individual device driver or software title may correct a problem you are experiencing with your computer, and you may not need to recover the entire contents of your hard drive. If you do need to reinstall all the software titles that shipped with your computer, use the System Recovery CD(s). You must be in Windows to run the Application Recovery CD(s). The application will not run from DOS. If you have any questions on using the Application Recovery CD(s), contact Sony Customer Support. To use the Application Recovery CD(s) 1. Turn on your computer. If your computer is already on, close all applications. 2. When the Windows desktop appears, insert the Sony Application Recovery CD in the DVD-ROM drive. The Application Recovery utility loads automatically. 3. When the Application Recovery menu appears, follow the on-screen instructions to complete the recovery process. Your system may include one or two Application Recovery CDs. If you have two Application Recovery CDs, insert the first CD to run the Application Recovery program. You may be prompted to insert the second CD, depending on the application you wish to restore. Q: How do I change the parallel port type to ECP, EPP, or bi-directional? A: You can change the parallel port type using the System Setup utility. To access System Setup, click the Start button, select Shut Down, and then select Restart. When the Sony screen displays, press the Delete key on your keyboard. Select "Chipset Features Setup" from the CMOS Setup Utility screen. Use the arrow keys to highlight Parallel Port Mode. You can toggle between the Normal (bi-directional), ECP, EPP and ECP+EPP options using the Page Up (PU) or Page Down (PD) buttons. When the desired setting displays, press the Escape key to return to the CMOS Setup Utility screen. Select the F10 key to Save and Exit. Select Yes (Y) to save the CMOS settings and exit. Press the Enter key. The system automatically starts with the new settings. Q: Why isn't the DVD-ROM drive reading a CD? A: After inserting a CD, you must wait a few seconds for the CD to be detected before trying to access it. If your drive reads some CDs but not others, check the shiny side of the disc for dirt or scratches. You may also need to clean the DVD-ROM drive lens with a CD-ROM cleaner. Q: How do I set up faxing capability in Windows® 98 Second Edition? A: Windows 98 does not provide a built-in fax utility. Sony has included the Symantec® WinFax Basic Edition for your faxing needs. To set up WinFax Basic software, click the Start button, point to Programs, and select Configure WinFax Basic Edition. Follow the on-screen instructions to configure Page 22 the fax utility. Q: How do I change the video resolution of my display? A: From the Start menu, select Settings, and then click Control Panel. Click the Display icon. Select the Settings tab. Move the slider under Screen area to change the resolution. Q: Why does Windows lock up during shut down? A: Windows may not shut down properly for many reasons, including incompatible or conflicting drivers, damaged files, or non-responsive hardware. For troubleshooting information, you can search Windows 98 Help. From the Start menu, select Help, click the Contents tab, click Troubleshooting, and then click Windows 98 Troubleshooters. Click the subject for which you want information, and then answer the questions that are appropriate for your problem. Q: Why is my system running slowly? A: Your system responsiveness varies depending on the number of applications that are open and running. Close any applications that you are not currently using. Increasing the system memory may also help. The computer has two memory slots. For memory upgrades, use only 3.3V 64-bit PC-100 SDRAM DIMM modules. Q: Why is there no sound in any application? A: There are several independent controls for your system volume. There is a volume control Windows task tray. In addition to adjusting the volume, check that the Mute check box is not selected in the Windows volume control on the right side of your LCD display and a volume control in the . If you are using headphones, adjust the volume control on the front of the system. Q: How do I turn off my Information LED after I have read my e-mail? A: To turn off the Information LED, click the icon in the Windows task tray. Q: Why is the Play button in my Microsoft CD Player grayed out when I try to play a music CD? A: When you insert a music CD, the Sony Media Bar application software automatically launches to play your CD. When the Sony Media Bar software is running, the Microsoft CD Player does not have access to the CD. If the Sony Media Bar is not visible, move your cursor to the top of the screen to bring forward the hidden Media Bar. If you do not hear any music, check all your volume controls. Q: How do I change my modem to rotary or Touch-Tone dialing? A: Click the My Computer icon on your desktop. Click Control Panel, and then click Modems. Click Dialing Properties. Next to "Dial using," select the Tone dial or Pulse dial radio button. Click OK. Q: Why is there unusual activity on my floppy disk drive? A: If you notice that your system is slow to respond due to unusual floppy disk drive activity, it could be because of Find Fast. To determine if Find Fast is present, click Start, point to Programs, and then point to Startup. Removing this item may remedy the problem. Supplementary Information Recovering Microsoft® Word 2000 If you recover your operating system using the System Recovery CD, Microsoft Word 2000 will not be recovered. Use the supplied Word 2000 CD-ROM to recover this application. Reprogramming Your Programmable Power Keys Page 23 Your Programmable Power Keys (PPK) come preprogrammed to launch designated applications. To change the applications launched by any of the PPK, see VAIO Action Setup Help. To access the Help file, from the Start menu, point to Programs/VAIO Action Setup/VAIO Action Setup Help. Copying Data From Memory Stick® Media When copying from one Memory Stick media to another Memory Stick media when the media are of different memory capacity, use the drag and drop method to copy data. Do not use the Copy Disk function of Windows. The Copy Disk function will result in the loss of media memory. Using the AutoAlert E-mail Notification System Your VAIO Slimtop LCD computer has an Information LED on the LCD display which can be set up to automatically alert you if you have new e-mail. You can also set up the internal timer on your computer to wake up automatically and download e-mail at preset times each day. You can use the timer to send and receive mail using Microsoft Outlook Express. If you use Outlook Express, the LED indicator lights when you receive new e-mail. To use these features, you must first designate your Internet Service Provider (ISP) and the e-mail software you wish to use. The "Internet" (P1) and "Mail" (P2) buttons on your keyboard are preprogrammed to run Microsoft Internet Explorer and Microsoft Outlook Express, respectively. If you have not set up your Internet or Mail connections, pressing P1 or P2 launches the Internet Connection Wizard. The wizard helps you set up your Internet account and e-mail software step by step. Refer to the information provided by your ISP or your e-mail software for more information. Once you have set up your Internet account and Outlook, you can use the AutoAlert E-mail Notification System and internal timer features. For more information, see Internal Timer and AutoAlert E-mail Notification System in the VAIO Slimtop LCD Computer User Guide. Using the Power Button on the System and on the Keyboard The power button on the keyboard performs a system shutdown, but does not give you the options available when you use the Windows Shutdown menu. Shutting down from the Windows Shutdown menu allows you to choose options such as Standby, Restart, and Restart in MS-DOS mode. Shutting down your computer improperly may result in loss of data. In the event your system has "locked up" or crashed, press and hold the power button on the system for several seconds to force your system to power off. You may need to repeat this procedure. To Resume from Standby Mode There are three ways to bring your computer back from the standby mode: press the space bar on your keyboard, press the left mouse button, or momentarily depress the power button on your computer. Resetting Your Computer For Printer Use After Resuming From A Power Saving Mode Your connected printer may not function after the computer resumes from a power saving mode. When this occurs, follow the procedures below to reset the printer connection: 1. Right-click the My Computer icon on the desktop, and then select Properties. 2. Click the Device Manager tab. 3. Select Refresh, and then click OK. The printer should now function properly. Applications That Use the TWAIN Driver Page 24 Digital imaging applications, such as Adobe PhotoDeluxe®, allow you to transfer images to your computer from external devices, including scanners or digital cameras. For some devices, a TWAIN driver window appears on the screen. Always close the TWAIN driver window before exiting or minimizing a digital imaging application. PCI Add-in Board Size Your computer can accommodate PCI add-in boards up to 6.6 inches in length. Memory Upgrade Specifications When upgrading memory, use only 3.3V 64-bit PC-100 SDRAM modules (gold lead contacts). For more information on VAIO Computer compatible memory, call Sony Customer Support at 1-888-4SONYPC (1-888-476-6972). Sony computer supplies, accessories and peripherals can be purchased from your Sony-authorized dealer or by contacting Sony at http://www.sony.com/accessories. For Answers to Your Software Questions Adobe Systems Incorporated 206-628-5737 (M-F, 6 AM-5 PM Pacific Time) America Online 800-827-3338 (7 days a week, 6 AM - 2 PM Eastern Time) AT&T 800-400-1447 (7 days a week, 24 hours a day) CompuServe Interactive Services 800-848-8990 (M-F, 8 AM - 1 AM Eastern Time, S-S 10 AM - 10 PM Eastern Time) EarthLink Network, Inc. 800-395-8410 (7 days a week, 24 hours a day) GTE Internet 800-927-3000 (7 days a week, 24 hours a day) Intuit Inc. 900-555-4688 (7 days a week, 24 hours a day) MindSpring Enterprises, Inc. 800-719-4660 Network Associates, Inc.408-988-3832 (M-F 9AM - 5PM Central Time) Prodigy Communications Corporation 800-PRODIGY (7 AM - 3 AM Eastern Time) Sonic Foundry 608-256-5555 (M-F, 8 AM - 7 PM Central Time) Symantec Corporation 800-798-0850 © 2000 Sony Electronics Inc. Reproduction in whole or in part without written permission is prohibited. All rights reserved. Sony, AutoAlert, and VAIO Slimtop are trademarks of Sony. WinFax is a trademark of Symantec Corporation. All other trademarks are trademarks or registered trademarks of their respective owners. Page 25 Read Me First PCV-L630 Thank you for purchasing your new Sony computer. Many common questions about your computer are answered in this manual. For the most recent information, please refer to the online version of Read Me First. You can access all of the electronic documentation from the Windows® Start menu by selecting Programs, and then VAIO Documentation. Check the Sony Support Web site at http://www.sony.com/pcsupport for the latest updates and information. For a VAIO demonstration, press the Help key (P6). To reprogram this key to launch Help, see Reprogramming Your Programmable Power Keys. Frequently Asked Questions (FAQs) Q: How do I recover applications or drivers that came with my computer if the files are corrupted or deleted? A: The Application Recovery CDs allow you to reinstall individual applications and device drivers if they are corrupted or accidentally erased. Reinstalling an individual device driver or software title may correct a problem you are experiencing with your computer, and you may not need to recover the entire contents of your hard drive. If you do need to reinstall all the software titles that shipped with your computer, use the System Recovery CD(s). You must be in Windows to run the Application Recovery CD(s). The application will not run from DOS. If you have any questions on using the Application Recovery CD(s), contact Sony Customer Support. To use the Application Recovery CD(s) 1. Turn on your computer. If your computer is already on, close all applications. 2. When the Windows desktop appears, insert the Sony Application Recovery CD in the DVD-ROM drive. The Application Recovery utility loads automatically. 3. When the Application Recovery menu appears, follow the on-screen instructions to complete the recovery process. Your system may include one or two Application Recovery CDs. If you have two Application Recovery CDs, insert the first CD to run the Application Recovery program. You may be prompted to insert the second CD, depending on the application you wish to restore. Q: How do I change the parallel port type to ECP, EPP, or bi-directional? A: You can change the parallel port type using the System Setup utility. To access System Setup, click the Start button, select Shut Down, and then select Restart. When the Sony screen displays, press the Delete key on your keyboard. Select "Chipset Features Setup" from the CMOS Setup Utility screen. Use the arrow keys to highlight Parallel Port Mode. You can toggle between the Normal (bi-directional), ECP, EPP and ECP+EPP options using the Page Up (PU) or Page Down (PD) buttons. When the desired setting displays, press the Escape key to return to the CMOS Setup Utility screen. Select the F10 key to Save and Exit. Select Yes (Y) to save the CMOS settings and exit. Press the Enter key. The system automatically starts with the new settings. Q: Why isn't the DVD-ROM drive reading a CD? A: After inserting a CD, you must wait a few seconds for the CD to be detected before trying to access it. If your drive reads some CDs but not others, check the shiny side of the disc for dirt or scratches. You may also need to clean the DVD-ROM drive lens with a CD-ROM cleaner. Q: How do I set up faxing capability in Windows® 98 Second Edition? A: Windows 98 does not provide a built-in fax utility. Sony has included the Symantec® WinFax Basic Edition for your faxing needs. To set up WinFax Basic software, click the Start button, point to Programs, and select Configure WinFax Basic Edition. Follow the on-screen instructions to configure Page 26 the fax utility. Q: How do I change the video resolution of my display? A: From the Start menu, select Settings, and then click Control Panel. Click the Display icon. Select the Settings tab. Move the slider under Screen area to change the resolution. Q: Why does Windows lock up during shut down? A: Windows may not shut down properly for many reasons, including incompatible or conflicting drivers, damaged files, or non-responsive hardware. For troubleshooting information, you can search Windows 98 Help. From the Start menu, select Help, click the Contents tab, click Troubleshooting, and then click Windows 98 Troubleshooters. Click the subject for which you want information, and then answer the questions that are appropriate for your problem. Q: Why is my system running slowly? A: Your system responsiveness varies depending on the number of applications that are open and running. Close any applications that you are not currently using. Increasing the system memory may also help. The computer has two memory slots. For memory upgrades, use only 3.3V 64-bit PC-100 SDRAM DIMM modules. Q: Why is there no sound in any application? A: There are several independent controls for your system volume. There is a volume control Windows task tray. In addition to adjusting the volume, check that the Mute check box is not selected in the Windows volume control on the right side of your LCD display and a volume control in the . If you are using headphones, adjust the volume control on the front of the system. Q: How do I turn off my Information LED after I have read my e-mail? A: To turn off the Information LED, click the icon in the Windows task tray. Q: Why is the Play button in my Microsoft CD Player grayed out when I try to play a music CD? A: When you insert a music CD, the Sony Media Bar application software automatically launches to play your CD. When the Sony Media Bar software is running, the Microsoft CD Player does not have access to the CD. If the Sony Media Bar is not visible, move your cursor to the top of the screen to bring forward the hidden Media Bar. If you do not hear any music, check all your volume controls. Q: How do I change my modem to rotary or Touch-Tone dialing? A: Click the My Computer icon on your desktop. Click Control Panel, and then click Modems. Click Dialing Properties. Next to "Dial using," select the Tone dial or Pulse dial radio button. Click OK. Q: Why is there unusual activity on my floppy disk drive? A: If you notice that your system is slow to respond due to unusual floppy disk drive activity, it could be because of Find Fast. To determine if Find Fast is present, click Start, point to Programs, and then point to Startup. Removing this item may remedy the problem. Supplementary Information Recovering Microsoft® Word 2000 If you recover your operating system using the System Recovery CD, Microsoft Word 2000 will not be recovered. Use the supplied Word 2000 CD-ROM to recover this application. Reprogramming Your Programmable Power Keys Page 27 Your Programmable Power Keys (PPK) come preprogrammed to launch designated applications. To change the applications launched by any of the PPK, see VAIO Action Setup Help. To access the Help file, from the Start menu, point to Programs/VAIO Action Setup/VAIO Action Setup Help. Copying Data From Memory Stick® Media When copying from one Memory Stick media to another Memory Stick media when the media are of different memory capacity, use the drag and drop method to copy data. Do not use the Copy Disk function of Windows. The Copy Disk function will result in the loss of media memory. Using the AutoAlert E-mail Notification System Your VAIO Slimtop LCD computer has an Information LED on the LCD display which can be set up to automatically alert you if you have new e-mail. You can also set up the internal timer on your computer to wake up automatically and download e-mail at preset times each day. You can use the timer to send and receive mail using Microsoft Outlook Express. If you use Outlook Express, the LED indicator lights when you receive new e-mail. To use these features, you must first designate your Internet Service Provider (ISP) and the e-mail software you wish to use. The "Internet" (P1) and "Mail" (P2) buttons on your keyboard are preprogrammed to run Microsoft Internet Explorer and Microsoft Outlook Express, respectively. If you have not set up your Internet or Mail connections, pressing P1 or P2 launches the Internet Connection Wizard. The wizard helps you set up your Internet account and e-mail software step by step. Refer to the information provided by your ISP or your e-mail software for more information. Once you have set up your Internet account and Outlook, you can use the AutoAlert E-mail Notification System and internal timer features. For more information, see Internal Timer and AutoAlert E-mail Notification System in the VAIO Slimtop LCD Computer User Guide. Using the Power Button on the System and on the Keyboard The power button on the keyboard performs a system shutdown, but does not give you the options available when you use the Windows Shutdown menu. Shutting down from the Windows Shutdown menu allows you to choose options such as Standby, Restart, and Restart in MS-DOS mode. Shutting down your computer improperly may result in loss of data. In the event your system has "locked up" or crashed, press and hold the power button on the system for several seconds to force your system to power off. You may need to repeat this procedure. To Resume from Standby Mode There are three ways to bring your computer back from the standby mode: press the space bar on your keyboard, press the left mouse button, or momentarily depress the power button on your computer. Resetting Your Computer For Printer Use After Resuming From A Power Saving Mode Your connected printer may not function after the computer resumes from a power saving mode. When this occurs, follow the procedures below to reset the printer connection: 1. Right-click the My Computer icon on the desktop, and then select Properties. 2. Click the Device Manager tab. 3. Select Refresh, and then click OK. The printer should now function properly. Applications That Use the TWAIN Driver Page 28 Digital imaging applications, such as Adobe PhotoDeluxe®, allow you to transfer images to your computer from external devices, including scanners or digital cameras. For some devices, a TWAIN driver window appears on the screen. Always close the TWAIN driver window before exiting or minimizing a digital imaging application. PCI Add-in Board Size Your computer can accommodate PCI add-in boards up to 6.6 inches in length. Memory Upgrade Specifications When upgrading memory, use only 3.3V 64-bit PC-100 SDRAM modules (gold lead contacts). For more information on VAIO Computer compatible memory, call Sony Customer Support at 1-888-4SONYPC (1-888-476-6972). Sony computer supplies, accessories and peripherals can be purchased from your Sony-authorized dealer or by contacting Sony at http://www.sony.com/accessories. For Answers to Your Software Questions Adobe Systems Incorporated 206-628-5737 (M-F, 6 AM-5 PM Pacific Time) America Online 800-827-3338 (7 days a week, 6 AM - 2 PM Eastern Time) AT&T 800-400-1447 (7 days a week, 24 hours a day) CompuServe Interactive Services 800-848-8990 (M-F, 8 AM - 1 AM Eastern Time, S-S 10 AM - 10 PM Eastern Time) EarthLink Network, Inc. 800-395-8410 (7 days a week, 24 hours a day) GTE Internet 800-927-3000 (7 days a week, 24 hours a day) Intuit Inc. 900-555-4688 (7 days a week, 24 hours a day) MindSpring Enterprises, Inc. 800-719-4660 Network Associates, Inc.408-988-3832 (M-F 9AM - 5PM Central Time) Prodigy Communications Corporation 800-PRODIGY (7 AM - 3 AM Eastern Time) Sonic Foundry 608-256-5555 (M-F, 8 AM - 7 PM Central Time) Symantec Corporation 800-798-0850 © 2000 Sony Electronics Inc. Reproduction in whole or in part without written permission is prohibited. All rights reserved. Sony, AutoAlert, and VAIO Slimtop are trademarks of Sony. WinFax is a trademark of Symantec Corporation. All other trademarks are trademarks or registered trademarks of their respective owners. Page 29 Read Me First PCV-L630 Thank you for purchasing your new Sony computer. Many common questions about your computer are answered in this manual. For the most recent information, please refer to the online version of Read Me First. You can access all of the electronic documentation from the Windows® Start menu by selecting Programs, and then VAIO Documentation. Check the Sony Support Web site at http://www.sony.com/pcsupport for the latest updates and information. For a VAIO demonstration, press the Help key (P6). To reprogram this key to launch Help, see Reprogramming Your Programmable Power Keys. Frequently Asked Questions (FAQs) Q: How do I recover applications or drivers that came with my computer if the files are corrupted or deleted? A: The Application Recovery CDs allow you to reinstall individual applications and device drivers if they are corrupted or accidentally erased. Reinstalling an individual device driver or software title may correct a problem you are experiencing with your computer, and you may not need to recover the entire contents of your hard drive. If you do need to reinstall all the software titles that shipped with your computer, use the System Recovery CD(s). You must be in Windows to run the Application Recovery CD(s). The application will not run from DOS. If you have any questions on using the Application Recovery CD(s), contact Sony Customer Support. To use the Application Recovery CD(s) 1. Turn on your computer. If your computer is already on, close all applications. 2. When the Windows desktop appears, insert the Sony Application Recovery CD in the DVD-ROM drive. The Application Recovery utility loads automatically. 3. When the Application Recovery menu appears, follow the on-screen instructions to complete the recovery process. Your system may include one or two Application Recovery CDs. If you have two Application Recovery CDs, insert the first CD to run the Application Recovery program. You may be prompted to insert the second CD, depending on the application you wish to restore. Q: How do I change the parallel port type to ECP, EPP, or bi-directional? A: You can change the parallel port type using the System Setup utility. To access System Setup, click the Start button, select Shut Down, and then select Restart. When the Sony screen displays, press the Delete key on your keyboard. Select "Chipset Features Setup" from the CMOS Setup Utility screen. Use the arrow keys to highlight Parallel Port Mode. You can toggle between the Normal (bi-directional), ECP, EPP and ECP+EPP options using the Page Up (PU) or Page Down (PD) buttons. When the desired setting displays, press the Escape key to return to the CMOS Setup Utility screen. Select the F10 key to Save and Exit. Select Yes (Y) to save the CMOS settings and exit. Press the Enter key. The system automatically starts with the new settings. Q: Why isn't the DVD-ROM drive reading a CD? A: After inserting a CD, you must wait a few seconds for the CD to be detected before trying to access it. If your drive reads some CDs but not others, check the shiny side of the disc for dirt or scratches. You may also need to clean the DVD-ROM drive lens with a CD-ROM cleaner. Q: How do I set up faxing capability in Windows® 98 Second Edition? A: Windows 98 does not provide a built-in fax utility. Sony has included the Symantec® WinFax Basic Edition for your faxing needs. To set up WinFax Basic software, click the Start button, point to Programs, and select Configure WinFax Basic Edition. Follow the on-screen instructions to configure Page 30 the fax utility. Q: How do I change the video resolution of my display? A: From the Start menu, select Settings, and then click Control Panel. Click the Display icon. Select the Settings tab. Move the slider under Screen area to change the resolution. Q: Why does Windows lock up during shut down? A: Windows may not shut down properly for many reasons, including incompatible or conflicting drivers, damaged files, or non-responsive hardware. For troubleshooting information, you can search Windows 98 Help. From the Start menu, select Help, click the Contents tab, click Troubleshooting, and then click Windows 98 Troubleshooters. Click the subject for which you want information, and then answer the questions that are appropriate for your problem. Q: Why is my system running slowly? A: Your system responsiveness varies depending on the number of applications that are open and running. Close any applications that you are not currently using. Increasing the system memory may also help. The computer has two memory slots. For memory upgrades, use only 3.3V 64-bit PC-100 SDRAM DIMM modules. Q: Why is there no sound in any application? A: There are several independent controls for your system volume. There is a volume control Windows task tray. In addition to adjusting the volume, check that the Mute check box is not selected in the Windows volume control on the right side of your LCD display and a volume control in the . If you are using headphones, adjust the volume control on the front of the system. Q: How do I turn off my Information LED after I have read my e-mail? A: To turn off the Information LED, click the icon in the Windows task tray. Q: Why is the Play button in my Microsoft CD Player grayed out when I try to play a music CD? A: When you insert a music CD, the Sony Media Bar application software automatically launches to play your CD. When the Sony Media Bar software is running, the Microsoft CD Player does not have access to the CD. If the Sony Media Bar is not visible, move your cursor to the top of the screen to bring forward the hidden Media Bar. If you do not hear any music, check all your volume controls. Q: How do I change my modem to rotary or Touch-Tone dialing? A: Click the My Computer icon on your desktop. Click Control Panel, and then click Modems. Click Dialing Properties. Next to "Dial using," select the Tone dial or Pulse dial radio button. Click OK. Q: Why is there unusual activity on my floppy disk drive? A: If you notice that your system is slow to respond due to unusual floppy disk drive activity, it could be because of Find Fast. To determine if Find Fast is present, click Start, point to Programs, and then point to Startup. Removing this item may remedy the problem. Supplementary Information Recovering Microsoft® Word 2000 If you recover your operating system using the System Recovery CD, Microsoft Word 2000 will not be recovered. Use the supplied Word 2000 CD-ROM to recover this application. Reprogramming Your Programmable Power Keys Page 31 Your Programmable Power Keys (PPK) come preprogrammed to launch designated applications. To change the applications launched by any of the PPK, see VAIO Action Setup Help. To access the Help file, from the Start menu, point to Programs/VAIO Action Setup/VAIO Action Setup Help. Copying Data From Memory Stick® Media When copying from one Memory Stick media to another Memory Stick media when the media are of different memory capacity, use the drag and drop method to copy data. Do not use the Copy Disk function of Windows. The Copy Disk function will result in the loss of media memory. Using the AutoAlert E-mail Notification System Your VAIO Slimtop LCD computer has an Information LED on the LCD display which can be set up to automatically alert you if you have new e-mail. You can also set up the internal timer on your computer to wake up automatically and download e-mail at preset times each day. You can use the timer to send and receive mail using Microsoft Outlook Express. If you use Outlook Express, the LED indicator lights when you receive new e-mail. To use these features, you must first designate your Internet Service Provider (ISP) and the e-mail software you wish to use. The "Internet" (P1) and "Mail" (P2) buttons on your keyboard are preprogrammed to run Microsoft Internet Explorer and Microsoft Outlook Express, respectively. If you have not set up your Internet or Mail connections, pressing P1 or P2 launches the Internet Connection Wizard. The wizard helps you set up your Internet account and e-mail software step by step. Refer to the information provided by your ISP or your e-mail software for more information. Once you have set up your Internet account and Outlook, you can use the AutoAlert E-mail Notification System and internal timer features. For more information, see Internal Timer and AutoAlert E-mail Notification System in the VAIO Slimtop LCD Computer User Guide. Using the Power Button on the System and on the Keyboard The power button on the keyboard performs a system shutdown, but does not give you the options available when you use the Windows Shutdown menu. Shutting down from the Windows Shutdown menu allows you to choose options such as Standby, Restart, and Restart in MS-DOS mode. Shutting down your computer improperly may result in loss of data. In the event your system has "locked up" or crashed, press and hold the power button on the system for several seconds to force your system to power off. You may need to repeat this procedure. To Resume from Standby Mode There are three ways to bring your computer back from the standby mode: press the space bar on your keyboard, press the left mouse button, or momentarily depress the power button on your computer. Resetting Your Computer For Printer Use After Resuming From A Power Saving Mode Your connected printer may not function after the computer resumes from a power saving mode. When this occurs, follow the procedures below to reset the printer connection: 1. Right-click the My Computer icon on the desktop, and then select Properties. 2. Click the Device Manager tab. 3. Select Refresh, and then click OK. The printer should now function properly. Applications That Use the TWAIN Driver Page 32 Digital imaging applications, such as Adobe PhotoDeluxe®, allow you to transfer images to your computer from external devices, including scanners or digital cameras. For some devices, a TWAIN driver window appears on the screen. Always close the TWAIN driver window before exiting or minimizing a digital imaging application. PCI Add-in Board Size Your computer can accommodate PCI add-in boards up to 6.6 inches in length. Memory Upgrade Specifications When upgrading memory, use only 3.3V 64-bit PC-100 SDRAM modules (gold lead contacts). For more information on VAIO Computer compatible memory, call Sony Customer Support at 1-888-4SONYPC (1-888-476-6972). Sony computer supplies, accessories and peripherals can be purchased from your Sony-authorized dealer or by contacting Sony at http://www.sony.com/accessories. For Answers to Your Software Questions Adobe Systems Incorporated 206-628-5737 (M-F, 6 AM-5 PM Pacific Time) America Online 800-827-3338 (7 days a week, 6 AM - 2 PM Eastern Time) AT&T 800-400-1447 (7 days a week, 24 hours a day) CompuServe Interactive Services 800-848-8990 (M-F, 8 AM - 1 AM Eastern Time, S-S 10 AM - 10 PM Eastern Time) EarthLink Network, Inc. 800-395-8410 (7 days a week, 24 hours a day) GTE Internet 800-927-3000 (7 days a week, 24 hours a day) Intuit Inc. 900-555-4688 (7 days a week, 24 hours a day) MindSpring Enterprises, Inc. 800-719-4660 Network Associates, Inc.408-988-3832 (M-F 9AM - 5PM Central Time) Prodigy Communications Corporation 800-PRODIGY (7 AM - 3 AM Eastern Time) Sonic Foundry 608-256-5555 (M-F, 8 AM - 7 PM Central Time) Symantec Corporation 800-798-0850 © 2000 Sony Electronics Inc. Reproduction in whole or in part without written permission is prohibited. All rights reserved. Sony, AutoAlert, and VAIO Slimtop are trademarks of Sony. WinFax is a trademark of Symantec Corporation. All other trademarks are trademarks or registered trademarks of their respective owners. Page 33 Read Me First PCV-L630 Thank you for purchasing your new Sony computer. Many common questions about your computer are answered in this manual. For the most recent information, please refer to the online version of Read Me First. You can access all of the electronic documentation from the Windows® Start menu by selecting Programs, and then VAIO Documentation. Check the Sony Support Web site at http://www.sony.com/pcsupport for the latest updates and information. For a VAIO demonstration, press the Help key (P6). To reprogram this key to launch Help, see Reprogramming Your Programmable Power Keys. Frequently Asked Questions (FAQs) Q: How do I recover applications or drivers that came with my computer if the files are corrupted or deleted? A: The Application Recovery CDs allow you to reinstall individual applications and device drivers if they are corrupted or accidentally erased. Reinstalling an individual device driver or software title may correct a problem you are experiencing with your computer, and you may not need to recover the entire contents of your hard drive. If you do need to reinstall all the software titles that shipped with your computer, use the System Recovery CD(s). You must be in Windows to run the Application Recovery CD(s). The application will not run from DOS. If you have any questions on using the Application Recovery CD(s), contact Sony Customer Support. To use the Application Recovery CD(s) 1. Turn on your computer. If your computer is already on, close all applications. 2. When the Windows desktop appears, insert the Sony Application Recovery CD in the DVD-ROM drive. The Application Recovery utility loads automatically. 3. When the Application Recovery menu appears, follow the on-screen instructions to complete the recovery process. Your system may include one or two Application Recovery CDs. If you have two Application Recovery CDs, insert the first CD to run the Application Recovery program. You may be prompted to insert the second CD, depending on the application you wish to restore. Q: How do I change the parallel port type to ECP, EPP, or bi-directional? A: You can change the parallel port type using the System Setup utility. To access System Setup, click the Start button, select Shut Down, and then select Restart. When the Sony screen displays, press the Delete key on your keyboard. Select "Chipset Features Setup" from the CMOS Setup Utility screen. Use the arrow keys to highlight Parallel Port Mode. You can toggle between the Normal (bi-directional), ECP, EPP and ECP+EPP options using the Page Up (PU) or Page Down (PD) buttons. When the desired setting displays, press the Escape key to return to the CMOS Setup Utility screen. Select the F10 key to Save and Exit. Select Yes (Y) to save the CMOS settings and exit. Press the Enter key. The system automatically starts with the new settings. Q: Why isn't the DVD-ROM drive reading a CD? A: After inserting a CD, you must wait a few seconds for the CD to be detected before trying to access it. If your drive reads some CDs but not others, check the shiny side of the disc for dirt or scratches. You may also need to clean the DVD-ROM drive lens with a CD-ROM cleaner. Q: How do I set up faxing capability in Windows® 98 Second Edition? A: Windows 98 does not provide a built-in fax utility. Sony has included the Symantec® WinFax Basic Edition for your faxing needs. To set up WinFax Basic software, click the Start button, point to Programs, and select Configure WinFax Basic Edition. Follow the on-screen instructions to configure Page 34 the fax utility. Q: How do I change the video resolution of my display? A: From the Start menu, select Settings, and then click Control Panel. Click the Display icon. Select the Settings tab. Move the slider under Screen area to change the resolution. Q: Why does Windows lock up during shut down? A: Windows may not shut down properly for many reasons, including incompatible or conflicting drivers, damaged files, or non-responsive hardware. For troubleshooting information, you can search Windows 98 Help. From the Start menu, select Help, click the Contents tab, click Troubleshooting, and then click Windows 98 Troubleshooters. Click the subject for which you want information, and then answer the questions that are appropriate for your problem. Q: Why is my system running slowly? A: Your system responsiveness varies depending on the number of applications that are open and running. Close any applications that you are not currently using. Increasing the system memory may also help. The computer has two memory slots. For memory upgrades, use only 3.3V 64-bit PC-100 SDRAM DIMM modules. Q: Why is there no sound in any application? A: There are several independent controls for your system volume. There is a volume control Windows task tray. In addition to adjusting the volume, check that the Mute check box is not selected in the Windows volume control on the right side of your LCD display and a volume control in the . If you are using headphones, adjust the volume control on the front of the system. Q: How do I turn off my Information LED after I have read my e-mail? A: To turn off the Information LED, click the icon in the Windows task tray. Q: Why is the Play button in my Microsoft CD Player grayed out when I try to play a music CD? A: When you insert a music CD, the Sony Media Bar application software automatically launches to play your CD. When the Sony Media Bar software is running, the Microsoft CD Player does not have access to the CD. If the Sony Media Bar is not visible, move your cursor to the top of the screen to bring forward the hidden Media Bar. If you do not hear any music, check all your volume controls. Q: How do I change my modem to rotary or Touch-Tone dialing? A: Click the My Computer icon on your desktop. Click Control Panel, and then click Modems. Click Dialing Properties. Next to "Dial using," select the Tone dial or Pulse dial radio button. Click OK. Q: Why is there unusual activity on my floppy disk drive? A: If you notice that your system is slow to respond due to unusual floppy disk drive activity, it could be because of Find Fast. To determine if Find Fast is present, click Start, point to Programs, and then point to Startup. Removing this item may remedy the problem. Supplementary Information Recovering Microsoft® Word 2000 If you recover your operating system using the System Recovery CD, Microsoft Word 2000 will not be recovered. Use the supplied Word 2000 CD-ROM to recover this application. Reprogramming Your Programmable Power Keys Page 35 Your Programmable Power Keys (PPK) come preprogrammed to launch designated applications. To change the applications launched by any of the PPK, see VAIO Action Setup Help. To access the Help file, from the Start menu, point to Programs/VAIO Action Setup/VAIO Action Setup Help. Copying Data From Memory Stick® Media When copying from one Memory Stick media to another Memory Stick media when the media are of different memory capacity, use the drag and drop method to copy data. Do not use the Copy Disk function of Windows. The Copy Disk function will result in the loss of media memory. Using the AutoAlert E-mail Notification System Your VAIO Slimtop LCD computer has an Information LED on the LCD display which can be set up to automatically alert you if you have new e-mail. You can also set up the internal timer on your computer to wake up automatically and download e-mail at preset times each day. You can use the timer to send and receive mail using Microsoft Outlook Express. If you use Outlook Express, the LED indicator lights when you receive new e-mail. To use these features, you must first designate your Internet Service Provider (ISP) and the e-mail software you wish to use. The "Internet" (P1) and "Mail" (P2) buttons on your keyboard are preprogrammed to run Microsoft Internet Explorer and Microsoft Outlook Express, respectively. If you have not set up your Internet or Mail connections, pressing P1 or P2 launches the Internet Connection Wizard. The wizard helps you set up your Internet account and e-mail software step by step. Refer to the information provided by your ISP or your e-mail software for more information. Once you have set up your Internet account and Outlook, you can use the AutoAlert E-mail Notification System and internal timer features. For more information, see Internal Timer and AutoAlert E-mail Notification System in the VAIO Slimtop LCD Computer User Guide. Using the Power Button on the System and on the Keyboard The power button on the keyboard performs a system shutdown, but does not give you the options available when you use the Windows Shutdown menu. Shutting down from the Windows Shutdown menu allows you to choose options such as Standby, Restart, and Restart in MS-DOS mode. Shutting down your computer improperly may result in loss of data. In the event your system has "locked up" or crashed, press and hold the power button on the system for several seconds to force your system to power off. You may need to repeat this procedure. To Resume from Standby Mode There are three ways to bring your computer back from the standby mode: press the space bar on your keyboard, press the left mouse button, or momentarily depress the power button on your computer. Resetting Your Computer For Printer Use After Resuming From A Power Saving Mode Your connected printer may not function after the computer resumes from a power saving mode. When this occurs, follow the procedures below to reset the printer connection: 1. Right-click the My Computer icon on the desktop, and then select Properties. 2. Click the Device Manager tab. 3. Select Refresh, and then click OK. The printer should now function properly. Applications That Use the TWAIN Driver Page 36 Digital imaging applications, such as Adobe PhotoDeluxe®, allow you to transfer images to your computer from external devices, including scanners or digital cameras. For some devices, a TWAIN driver window appears on the screen. Always close the TWAIN driver window before exiting or minimizing a digital imaging application. PCI Add-in Board Size Your computer can accommodate PCI add-in boards up to 6.6 inches in length. Memory Upgrade Specifications When upgrading memory, use only 3.3V 64-bit PC-100 SDRAM modules (gold lead contacts). For more information on VAIO Computer compatible memory, call Sony Customer Support at 1-888-4SONYPC (1-888-476-6972). Sony computer supplies, accessories and peripherals can be purchased from your Sony-authorized dealer or by contacting Sony at http://www.sony.com/accessories. For Answers to Your Software Questions Adobe Systems Incorporated 206-628-5737 (M-F, 6 AM-5 PM Pacific Time) America Online 800-827-3338 (7 days a week, 6 AM - 2 PM Eastern Time) AT&T 800-400-1447 (7 days a week, 24 hours a day) CompuServe Interactive Services 800-848-8990 (M-F, 8 AM - 1 AM Eastern Time, S-S 10 AM - 10 PM Eastern Time) EarthLink Network, Inc. 800-395-8410 (7 days a week, 24 hours a day) GTE Internet 800-927-3000 (7 days a week, 24 hours a day) Intuit Inc. 900-555-4688 (7 days a week, 24 hours a day) MindSpring Enterprises, Inc. 800-719-4660 Network Associates, Inc.408-988-3832 (M-F 9AM - 5PM Central Time) Prodigy Communications Corporation 800-PRODIGY (7 AM - 3 AM Eastern Time) Sonic Foundry 608-256-5555 (M-F, 8 AM - 7 PM Central Time) Symantec Corporation 800-798-0850 © 2000 Sony Electronics Inc. Reproduction in whole or in part without written permission is prohibited. All rights reserved. Sony, AutoAlert, and VAIO Slimtop are trademarks of Sony. WinFax is a trademark of Symantec Corporation. All other trademarks are trademarks or registered trademarks of their respective owners. Page 37 Read Me First PCV-L630 Thank you for purchasing your new Sony computer. Many common questions about your computer are answered in this manual. For the most recent information, please refer to the online version of Read Me First. You can access all of the electronic documentation from the Windows® Start menu by selecting Programs, and then VAIO Documentation. Check the Sony Support Web site at http://www.sony.com/pcsupport for the latest updates and information. For a VAIO demonstration, press the Help key (P6). To reprogram this key to launch Help, see Reprogramming Your Programmable Power Keys. Frequently Asked Questions (FAQs) Q: How do I recover applications or drivers that came with my computer if the files are corrupted or deleted? A: The Application Recovery CDs allow you to reinstall individual applications and device drivers if they are corrupted or accidentally erased. Reinstalling an individual device driver or software title may correct a problem you are experiencing with your computer, and you may not need to recover the entire contents of your hard drive. If you do need to reinstall all the software titles that shipped with your computer, use the System Recovery CD(s). You must be in Windows to run the Application Recovery CD(s). The application will not run from DOS. If you have any questions on using the Application Recovery CD(s), contact Sony Customer Support. To use the Application Recovery CD(s) 1. Turn on your computer. If your computer is already on, close all applications. 2. When the Windows desktop appears, insert the Sony Application Recovery CD in the DVD-ROM drive. The Application Recovery utility loads automatically. 3. When the Application Recovery menu appears, follow the on-screen instructions to complete the recovery process. Your system may include one or two Application Recovery CDs. If you have two Application Recovery CDs, insert the first CD to run the Application Recovery program. You may be prompted to insert the second CD, depending on the application you wish to restore. Q: How do I change the parallel port type to ECP, EPP, or bi-directional? A: You can change the parallel port type using the System Setup utility. To access System Setup, click the Start button, select Shut Down, and then select Restart. When the Sony screen displays, press the Delete key on your keyboard. Select "Chipset Features Setup" from the CMOS Setup Utility screen. Use the arrow keys to highlight Parallel Port Mode. You can toggle between the Normal (bi-directional), ECP, EPP and ECP+EPP options using the Page Up (PU) or Page Down (PD) buttons. When the desired setting displays, press the Escape key to return to the CMOS Setup Utility screen. Select the F10 key to Save and Exit. Select Yes (Y) to save the CMOS settings and exit. Press the Enter key. The system automatically starts with the new settings. Q: Why isn't the DVD-ROM drive reading a CD? A: After inserting a CD, you must wait a few seconds for the CD to be detected before trying to access it. If your drive reads some CDs but not others, check the shiny side of the disc for dirt or scratches. You may also need to clean the DVD-ROM drive lens with a CD-ROM cleaner. Q: How do I set up faxing capability in Windows® 98 Second Edition? A: Windows 98 does not provide a built-in fax utility. Sony has included the Symantec® WinFax Basic Edition for your faxing needs. To set up WinFax Basic software, click the Start button, point to Programs, and select Configure WinFax Basic Edition. Follow the on-screen instructions to configure Page 38 the fax utility. Q: How do I change the video resolution of my display? A: From the Start menu, select Settings, and then click Control Panel. Click the Display icon. Select the Settings tab. Move the slider under Screen area to change the resolution. Q: Why does Windows lock up during shut down? A: Windows may not shut down properly for many reasons, including incompatible or conflicting drivers, damaged files, or non-responsive hardware. For troubleshooting information, you can search Windows 98 Help. From the Start menu, select Help, click the Contents tab, click Troubleshooting, and then click Windows 98 Troubleshooters. Click the subject for which you want information, and then answer the questions that are appropriate for your problem. Q: Why is my system running slowly? A: Your system responsiveness varies depending on the number of applications that are open and running. Close any applications that you are not currently using. Increasing the system memory may also help. The computer has two memory slots. For memory upgrades, use only 3.3V 64-bit PC-100 SDRAM DIMM modules. Q: Why is there no sound in any application? A: There are several independent controls for your system volume. There is a volume control Windows task tray. In addition to adjusting the volume, check that the Mute check box is not selected in the Windows volume control on the right side of your LCD display and a volume control in the . If you are using headphones, adjust the volume control on the front of the system. Q: How do I turn off my Information LED after I have read my e-mail? A: To turn off the Information LED, click the icon in the Windows task tray. Q: Why is the Play button in my Microsoft CD Player grayed out when I try to play a music CD? A: When you insert a music CD, the Sony Media Bar application software automatically launches to play your CD. When the Sony Media Bar software is running, the Microsoft CD Player does not have access to the CD. If the Sony Media Bar is not visible, move your cursor to the top of the screen to bring forward the hidden Media Bar. If you do not hear any music, check all your volume controls. Q: How do I change my modem to rotary or Touch-Tone dialing? A: Click the My Computer icon on your desktop. Click Control Panel, and then click Modems. Click Dialing Properties. Next to "Dial using," select the Tone dial or Pulse dial radio button. Click OK. Q: Why is there unusual activity on my floppy disk drive? A: If you notice that your system is slow to respond due to unusual floppy disk drive activity, it could be because of Find Fast. To determine if Find Fast is present, click Start, point to Programs, and then point to Startup. Removing this item may remedy the problem. Supplementary Information Recovering Microsoft® Word 2000 If you recover your operating system using the System Recovery CD, Microsoft Word 2000 will not be recovered. Use the supplied Word 2000 CD-ROM to recover this application. Reprogramming Your Programmable Power Keys Page 39 Your Programmable Power Keys (PPK) come preprogrammed to launch designated applications. To change the applications launched by any of the PPK, see VAIO Action Setup Help. To access the Help file, from the Start menu, point to Programs/VAIO Action Setup/VAIO Action Setup Help. Copying Data From Memory Stick® Media When copying from one Memory Stick media to another Memory Stick media when the media are of different memory capacity, use the drag and drop method to copy data. Do not use the Copy Disk function of Windows. The Copy Disk function will result in the loss of media memory. Using the AutoAlert E-mail Notification System Your VAIO Slimtop LCD computer has an Information LED on the LCD display which can be set up to automatically alert you if you have new e-mail. You can also set up the internal timer on your computer to wake up automatically and download e-mail at preset times each day. You can use the timer to send and receive mail using Microsoft Outlook Express. If you use Outlook Express, the LED indicator lights when you receive new e-mail. To use these features, you must first designate your Internet Service Provider (ISP) and the e-mail software you wish to use. The "Internet" (P1) and "Mail" (P2) buttons on your keyboard are preprogrammed to run Microsoft Internet Explorer and Microsoft Outlook Express, respectively. If you have not set up your Internet or Mail connections, pressing P1 or P2 launches the Internet Connection Wizard. The wizard helps you set up your Internet account and e-mail software step by step. Refer to the information provided by your ISP or your e-mail software for more information. Once you have set up your Internet account and Outlook, you can use the AutoAlert E-mail Notification System and internal timer features. For more information, see Internal Timer and AutoAlert E-mail Notification System in the VAIO Slimtop LCD Computer User Guide. Using the Power Button on the System and on the Keyboard The power button on the keyboard performs a system shutdown, but does not give you the options available when you use the Windows Shutdown menu. Shutting down from the Windows Shutdown menu allows you to choose options such as Standby, Restart, and Restart in MS-DOS mode. Shutting down your computer improperly may result in loss of data. In the event your system has "locked up" or crashed, press and hold the power button on the system for several seconds to force your system to power off. You may need to repeat this procedure. To Resume from Standby Mode There are three ways to bring your computer back from the standby mode: press the space bar on your keyboard, press the left mouse button, or momentarily depress the power button on your computer. Resetting Your Computer For Printer Use After Resuming From A Power Saving Mode Your connected printer may not function after the computer resumes from a power saving mode. When this occurs, follow the procedures below to reset the printer connection: 1. Right-click the My Computer icon on the desktop, and then select Properties. 2. Click the Device Manager tab. 3. Select Refresh, and then click OK. The printer should now function properly. Applications That Use the TWAIN Driver Page 40 Digital imaging applications, such as Adobe PhotoDeluxe®, allow you to transfer images to your computer from external devices, including scanners or digital cameras. For some devices, a TWAIN driver window appears on the screen. Always close the TWAIN driver window before exiting or minimizing a digital imaging application. PCI Add-in Board Size Your computer can accommodate PCI add-in boards up to 6.6 inches in length. Memory Upgrade Specifications When upgrading memory, use only 3.3V 64-bit PC-100 SDRAM modules (gold lead contacts). For more information on VAIO Computer compatible memory, call Sony Customer Support at 1-888-4SONYPC (1-888-476-6972). Sony computer supplies, accessories and peripherals can be purchased from your Sony-authorized dealer or by contacting Sony at http://www.sony.com/accessories. For Answers to Your Software Questions Adobe Systems Incorporated 206-628-5737 (M-F, 6 AM-5 PM Pacific Time) America Online 800-827-3338 (7 days a week, 6 AM - 2 PM Eastern Time) AT&T 800-400-1447 (7 days a week, 24 hours a day) CompuServe Interactive Services 800-848-8990 (M-F, 8 AM - 1 AM Eastern Time, S-S 10 AM - 10 PM Eastern Time) EarthLink Network, Inc. 800-395-8410 (7 days a week, 24 hours a day) GTE Internet 800-927-3000 (7 days a week, 24 hours a day) Intuit Inc. 900-555-4688 (7 days a week, 24 hours a day) MindSpring Enterprises, Inc. 800-719-4660 Network Associates, Inc.408-988-3832 (M-F 9AM - 5PM Central Time) Prodigy Communications Corporation 800-PRODIGY (7 AM - 3 AM Eastern Time) Sonic Foundry 608-256-5555 (M-F, 8 AM - 7 PM Central Time) Symantec Corporation 800-798-0850 © 2000 Sony Electronics Inc. Reproduction in whole or in part without written permission is prohibited. All rights reserved. Sony, AutoAlert, and VAIO Slimtop are trademarks of Sony. WinFax is a trademark of Symantec Corporation. All other trademarks are trademarks or registered trademarks of their respective owners. Page 41 Read Me First PCV-L630 Thank you for purchasing your new Sony computer. Many common questions about your computer are answered in this manual. For the most recent information, please refer to the online version of Read Me First. You can access all of the electronic documentation from the Windows® Start menu by selecting Programs, and then VAIO Documentation. Check the Sony Support Web site at http://www.sony.com/pcsupport for the latest updates and information. For a VAIO demonstration, press the Help key (P6). To reprogram this key to launch Help, see Reprogramming Your Programmable Power Keys. Frequently Asked Questions (FAQs) Q: How do I recover applications or drivers that came with my computer if the files are corrupted or deleted? A: The Application Recovery CDs allow you to reinstall individual applications and device drivers if they are corrupted or accidentally erased. Reinstalling an individual device driver or software title may correct a problem you are experiencing with your computer, and you may not need to recover the entire contents of your hard drive. If you do need to reinstall all the software titles that shipped with your computer, use the System Recovery CD(s). You must be in Windows to run the Application Recovery CD(s). The application will not run from DOS. If you have any questions on using the Application Recovery CD(s), contact Sony Customer Support. To use the Application Recovery CD(s) 1. Turn on your computer. If your computer is already on, close all applications. 2. When the Windows desktop appears, insert the Sony Application Recovery CD in the DVD-ROM drive. The Application Recovery utility loads automatically. 3. When the Application Recovery menu appears, follow the on-screen instructions to complete the recovery process. Your system may include one or two Application Recovery CDs. If you have two Application Recovery CDs, insert the first CD to run the Application Recovery program. You may be prompted to insert the second CD, depending on the application you wish to restore. Q: How do I change the parallel port type to ECP, EPP, or bi-directional? A: You can change the parallel port type using the System Setup utility. To access System Setup, click the Start button, select Shut Down, and then select Restart. When the Sony screen displays, press the Delete key on your keyboard. Select "Chipset Features Setup" from the CMOS Setup Utility screen. Use the arrow keys to highlight Parallel Port Mode. You can toggle between the Normal (bi-directional), ECP, EPP and ECP+EPP options using the Page Up (PU) or Page Down (PD) buttons. When the desired setting displays, press the Escape key to return to the CMOS Setup Utility screen. Select the F10 key to Save and Exit. Select Yes (Y) to save the CMOS settings and exit. Press the Enter key. The system automatically starts with the new settings. Q: Why isn't the DVD-ROM drive reading a CD? A: After inserting a CD, you must wait a few seconds for the CD to be detected before trying to access it. If your drive reads some CDs but not others, check the shiny side of the disc for dirt or scratches. You may also need to clean the DVD-ROM drive lens with a CD-ROM cleaner. Q: How do I set up faxing capability in Windows® 98 Second Edition? A: Windows 98 does not provide a built-in fax utility. Sony has included the Symantec® WinFax Basic Edition for your faxing needs. To set up WinFax Basic software, click the Start button, point to Programs, and select Configure WinFax Basic Edition. Follow the on-screen instructions to configure Page 42 the fax utility. Q: How do I change the video resolution of my display? A: From the Start menu, select Settings, and then click Control Panel. Click the Display icon. Select the Settings tab. Move the slider under Screen area to change the resolution. Q: Why does Windows lock up during shut down? A: Windows may not shut down properly for many reasons, including incompatible or conflicting drivers, damaged files, or non-responsive hardware. For troubleshooting information, you can search Windows 98 Help. From the Start menu, select Help, click the Contents tab, click Troubleshooting, and then click Windows 98 Troubleshooters. Click the subject for which you want information, and then answer the questions that are appropriate for your problem. Q: Why is my system running slowly? A: Your system responsiveness varies depending on the number of applications that are open and running. Close any applications that you are not currently using. Increasing the system memory may also help. The computer has two memory slots. For memory upgrades, use only 3.3V 64-bit PC-100 SDRAM DIMM modules. Q: Why is there no sound in any application? A: There are several independent controls for your system volume. There is a volume control Windows task tray. In addition to adjusting the volume, check that the Mute check box is not selected in the Windows volume control on the right side of your LCD display and a volume control in the . If you are using headphones, adjust the volume control on the front of the system. Q: How do I turn off my Information LED after I have read my e-mail? A: To turn off the Information LED, click the icon in the Windows task tray. Q: Why is the Play button in my Microsoft CD Player grayed out when I try to play a music CD? A: When you insert a music CD, the Sony Media Bar application software automatically launches to play your CD. When the Sony Media Bar software is running, the Microsoft CD Player does not have access to the CD. If the Sony Media Bar is not visible, move your cursor to the top of the screen to bring forward the hidden Media Bar. If you do not hear any music, check all your volume controls. Q: How do I change my modem to rotary or Touch-Tone dialing? A: Click the My Computer icon on your desktop. Click Control Panel, and then click Modems. Click Dialing Properties. Next to "Dial using," select the Tone dial or Pulse dial radio button. Click OK. Q: Why is there unusual activity on my floppy disk drive? A: If you notice that your system is slow to respond due to unusual floppy disk drive activity, it could be because of Find Fast. To determine if Find Fast is present, click Start, point to Programs, and then point to Startup. Removing this item may remedy the problem. Supplementary Information Recovering Microsoft® Word 2000 If you recover your operating system using the System Recovery CD, Microsoft Word 2000 will not be recovered. Use the supplied Word 2000 CD-ROM to recover this application. Reprogramming Your Programmable Power Keys Page 43 Your Programmable Power Keys (PPK) come preprogrammed to launch designated applications. To change the applications launched by any of the PPK, see VAIO Action Setup Help. To access the Help file, from the Start menu, point to Programs/VAIO Action Setup/VAIO Action Setup Help. Copying Data From Memory Stick® Media When copying from one Memory Stick media to another Memory Stick media when the media are of different memory capacity, use the drag and drop method to copy data. Do not use the Copy Disk function of Windows. The Copy Disk function will result in the loss of media memory. Using the AutoAlert E-mail Notification System Your VAIO Slimtop LCD computer has an Information LED on the LCD display which can be set up to automatically alert you if you have new e-mail. You can also set up the internal timer on your computer to wake up automatically and download e-mail at preset times each day. You can use the timer to send and receive mail using Microsoft Outlook Express. If you use Outlook Express, the LED indicator lights when you receive new e-mail. To use these features, you must first designate your Internet Service Provider (ISP) and the e-mail software you wish to use. The "Internet" (P1) and "Mail" (P2) buttons on your keyboard are preprogrammed to run Microsoft Internet Explorer and Microsoft Outlook Express, respectively. If you have not set up your Internet or Mail connections, pressing P1 or P2 launches the Internet Connection Wizard. The wizard helps you set up your Internet account and e-mail software step by step. Refer to the information provided by your ISP or your e-mail software for more information. Once you have set up your Internet account and Outlook, you can use the AutoAlert E-mail Notification System and internal timer features. For more information, see Internal Timer and AutoAlert E-mail Notification System in the VAIO Slimtop LCD Computer User Guide. Using the Power Button on the System and on the Keyboard The power button on the keyboard performs a system shutdown, but does not give you the options available when you use the Windows Shutdown menu. Shutting down from the Windows Shutdown menu allows you to choose options such as Standby, Restart, and Restart in MS-DOS mode. Shutting down your computer improperly may result in loss of data. In the event your system has "locked up" or crashed, press and hold the power button on the system for several seconds to force your system to power off. You may need to repeat this procedure. To Resume from Standby Mode There are three ways to bring your computer back from the standby mode: press the space bar on your keyboard, press the left mouse button, or momentarily depress the power button on your computer. Resetting Your Computer For Printer Use After Resuming From A Power Saving Mode Your connected printer may not function after the computer resumes from a power saving mode. When this occurs, follow the procedures below to reset the printer connection: 1. Right-click the My Computer icon on the desktop, and then select Properties. 2. Click the Device Manager tab. 3. Select Refresh, and then click OK. The printer should now function properly. Applications That Use the TWAIN Driver Page 44 Digital imaging applications, such as Adobe PhotoDeluxe®, allow you to transfer images to your computer from external devices, including scanners or digital cameras. For some devices, a TWAIN driver window appears on the screen. Always close the TWAIN driver window before exiting or minimizing a digital imaging application. PCI Add-in Board Size Your computer can accommodate PCI add-in boards up to 6.6 inches in length. Memory Upgrade Specifications When upgrading memory, use only 3.3V 64-bit PC-100 SDRAM modules (gold lead contacts). For more information on VAIO Computer compatible memory, call Sony Customer Support at 1-888-4SONYPC (1-888-476-6972). Sony computer supplies, accessories and peripherals can be purchased from your Sony-authorized dealer or by contacting Sony at http://www.sony.com/accessories. For Answers to Your Software Questions Adobe Systems Incorporated 206-628-5737 (M-F, 6 AM-5 PM Pacific Time) America Online 800-827-3338 (7 days a week, 6 AM - 2 PM Eastern Time) AT&T 800-400-1447 (7 days a week, 24 hours a day) CompuServe Interactive Services 800-848-8990 (M-F, 8 AM - 1 AM Eastern Time, S-S 10 AM - 10 PM Eastern Time) EarthLink Network, Inc. 800-395-8410 (7 days a week, 24 hours a day) GTE Internet 800-927-3000 (7 days a week, 24 hours a day) Intuit Inc. 900-555-4688 (7 days a week, 24 hours a day) MindSpring Enterprises, Inc. 800-719-4660 Network Associates, Inc.408-988-3832 (M-F 9AM - 5PM Central Time) Prodigy Communications Corporation 800-PRODIGY (7 AM - 3 AM Eastern Time) Sonic Foundry 608-256-5555 (M-F, 8 AM - 7 PM Central Time) Symantec Corporation 800-798-0850 © 2000 Sony Electronics Inc. Reproduction in whole or in part without written permission is prohibited. All rights reserved. Sony, AutoAlert, and VAIO Slimtop are trademarks of Sony. WinFax is a trademark of Symantec Corporation. All other trademarks are trademarks or registered trademarks of their respective owners. Page 45 Read Me First PCV-L630 Thank you for purchasing your new Sony computer. Many common questions about your computer are answered in this manual. For the most recent information, please refer to the online version of Read Me First. You can access all of the electronic documentation from the Windows® Start menu by selecting Programs, and then VAIO Documentation. Check the Sony Support Web site at http://www.sony.com/pcsupport for the latest updates and information. For a VAIO demonstration, press the Help key (P6). To reprogram this key to launch Help, see Reprogramming Your Programmable Power Keys. Frequently Asked Questions (FAQs) Q: How do I recover applications or drivers that came with my computer if the files are corrupted or deleted? A: The Application Recovery CDs allow you to reinstall individual applications and device drivers if they are corrupted or accidentally erased. Reinstalling an individual device driver or software title may correct a problem you are experiencing with your computer, and you may not need to recover the entire contents of your hard drive. If you do need to reinstall all the software titles that shipped with your computer, use the System Recovery CD(s). You must be in Windows to run the Application Recovery CD(s). The application will not run from DOS. If you have any questions on using the Application Recovery CD(s), contact Sony Customer Support. To use the Application Recovery CD(s) 1. Turn on your computer. If your computer is already on, close all applications. 2. When the Windows desktop appears, insert the Sony Application Recovery CD in the DVD-ROM drive. The Application Recovery utility loads automatically. 3. When the Application Recovery menu appears, follow the on-screen instructions to complete the recovery process. Your system may include one or two Application Recovery CDs. If you have two Application Recovery CDs, insert the first CD to run the Application Recovery program. You may be prompted to insert the second CD, depending on the application you wish to restore. Q: How do I change the parallel port type to ECP, EPP, or bi-directional? A: You can change the parallel port type using the System Setup utility. To access System Setup, click the Start button, select Shut Down, and then select Restart. When the Sony screen displays, press the Delete key on your keyboard. Select "Chipset Features Setup" from the CMOS Setup Utility screen. Use the arrow keys to highlight Parallel Port Mode. You can toggle between the Normal (bi-directional), ECP, EPP and ECP+EPP options using the Page Up (PU) or Page Down (PD) buttons. When the desired setting displays, press the Escape key to return to the CMOS Setup Utility screen. Select the F10 key to Save and Exit. Select Yes (Y) to save the CMOS settings and exit. Press the Enter key. The system automatically starts with the new settings. Q: Why isn't the DVD-ROM drive reading a CD? A: After inserting a CD, you must wait a few seconds for the CD to be detected before trying to access it. If your drive reads some CDs but not others, check the shiny side of the disc for dirt or scratches. You may also need to clean the DVD-ROM drive lens with a CD-ROM cleaner. Q: How do I set up faxing capability in Windows® 98 Second Edition? A: Windows 98 does not provide a built-in fax utility. Sony has included the Symantec® WinFax Basic Edition for your faxing needs. To set up WinFax Basic software, click the Start button, point to Programs, and select Configure WinFax Basic Edition. Follow the on-screen instructions to configure Page 46 the fax utility. Q: How do I change the video resolution of my display? A: From the Start menu, select Settings, and then click Control Panel. Click the Display icon. Select the Settings tab. Move the slider under Screen area to change the resolution. Q: Why does Windows lock up during shut down? A: Windows may not shut down properly for many reasons, including incompatible or conflicting drivers, damaged files, or non-responsive hardware. For troubleshooting information, you can search Windows 98 Help. From the Start menu, select Help, click the Contents tab, click Troubleshooting, and then click Windows 98 Troubleshooters. Click the subject for which you want information, and then answer the questions that are appropriate for your problem. Q: Why is my system running slowly? A: Your system responsiveness varies depending on the number of applications that are open and running. Close any applications that you are not currently using. Increasing the system memory may also help. The computer has two memory slots. For memory upgrades, use only 3.3V 64-bit PC-100 SDRAM DIMM modules. Q: Why is there no sound in any application? A: There are several independent controls for your system volume. There is a volume control Windows task tray. In addition to adjusting the volume, check that the Mute check box is not selected in the Windows volume control on the right side of your LCD display and a volume control in the . If you are using headphones, adjust the volume control on the front of the system. Q: How do I turn off my Information LED after I have read my e-mail? A: To turn off the Information LED, click the icon in the Windows task tray. Q: Why is the Play button in my Microsoft CD Player grayed out when I try to play a music CD? A: When you insert a music CD, the Sony Media Bar application software automatically launches to play your CD. When the Sony Media Bar software is running, the Microsoft CD Player does not have access to the CD. If the Sony Media Bar is not visible, move your cursor to the top of the screen to bring forward the hidden Media Bar. If you do not hear any music, check all your volume controls. Q: How do I change my modem to rotary or Touch-Tone dialing? A: Click the My Computer icon on your desktop. Click Control Panel, and then click Modems. Click Dialing Properties. Next to "Dial using," select the Tone dial or Pulse dial radio button. Click OK. Q: Why is there unusual activity on my floppy disk drive? A: If you notice that your system is slow to respond due to unusual floppy disk drive activity, it could be because of Find Fast. To determine if Find Fast is present, click Start, point to Programs, and then point to Startup. Removing this item may remedy the problem. Supplementary Information Recovering Microsoft® Word 2000 If you recover your operating system using the System Recovery CD, Microsoft Word 2000 will not be recovered. Use the supplied Word 2000 CD-ROM to recover this application. Reprogramming Your Programmable Power Keys Page 47 Your Programmable Power Keys (PPK) come preprogrammed to launch designated applications. To change the applications launched by any of the PPK, see VAIO Action Setup Help. To access the Help file, from the Start menu, point to Programs/VAIO Action Setup/VAIO Action Setup Help. Copying Data From Memory Stick® Media When copying from one Memory Stick media to another Memory Stick media when the media are of different memory capacity, use the drag and drop method to copy data. Do not use the Copy Disk function of Windows. The Copy Disk function will result in the loss of media memory. Using the AutoAlert E-mail Notification System Your VAIO Slimtop LCD computer has an Information LED on the LCD display which can be set up to automatically alert you if you have new e-mail. You can also set up the internal timer on your computer to wake up automatically and download e-mail at preset times each day. You can use the timer to send and receive mail using Microsoft Outlook Express. If you use Outlook Express, the LED indicator lights when you receive new e-mail. To use these features, you must first designate your Internet Service Provider (ISP) and the e-mail software you wish to use. The "Internet" (P1) and "Mail" (P2) buttons on your keyboard are preprogrammed to run Microsoft Internet Explorer and Microsoft Outlook Express, respectively. If you have not set up your Internet or Mail connections, pressing P1 or P2 launches the Internet Connection Wizard. The wizard helps you set up your Internet account and e-mail software step by step. Refer to the information provided by your ISP or your e-mail software for more information. Once you have set up your Internet account and Outlook, you can use the AutoAlert E-mail Notification System and internal timer features. For more information, see Internal Timer and AutoAlert E-mail Notification System in the VAIO Slimtop LCD Computer User Guide. Using the Power Button on the System and on the Keyboard The power button on the keyboard performs a system shutdown, but does not give you the options available when you use the Windows Shutdown menu. Shutting down from the Windows Shutdown menu allows you to choose options such as Standby, Restart, and Restart in MS-DOS mode. Shutting down your computer improperly may result in loss of data. In the event your system has "locked up" or crashed, press and hold the power button on the system for several seconds to force your system to power off. You may need to repeat this procedure. To Resume from Standby Mode There are three ways to bring your computer back from the standby mode: press the space bar on your keyboard, press the left mouse button, or momentarily depress the power button on your computer. Resetting Your Computer For Printer Use After Resuming From A Power Saving Mode Your connected printer may not function after the computer resumes from a power saving mode. When this occurs, follow the procedures below to reset the printer connection: 1. Right-click the My Computer icon on the desktop, and then select Properties. 2. Click the Device Manager tab. 3. Select Refresh, and then click OK. The printer should now function properly. Applications That Use the TWAIN Driver Page 48 Digital imaging applications, such as Adobe PhotoDeluxe®, allow you to transfer images to your computer from external devices, including scanners or digital cameras. For some devices, a TWAIN driver window appears on the screen. Always close the TWAIN driver window before exiting or minimizing a digital imaging application. PCI Add-in Board Size Your computer can accommodate PCI add-in boards up to 6.6 inches in length. Memory Upgrade Specifications When upgrading memory, use only 3.3V 64-bit PC-100 SDRAM modules (gold lead contacts). For more information on VAIO Computer compatible memory, call Sony Customer Support at 1-888-4SONYPC (1-888-476-6972). Sony computer supplies, accessories and peripherals can be purchased from your Sony-authorized dealer or by contacting Sony at http://www.sony.com/accessories. For Answers to Your Software Questions Adobe Systems Incorporated 206-628-5737 (M-F, 6 AM-5 PM Pacific Time) America Online 800-827-3338 (7 days a week, 6 AM - 2 PM Eastern Time) AT&T 800-400-1447 (7 days a week, 24 hours a day) CompuServe Interactive Services 800-848-8990 (M-F, 8 AM - 1 AM Eastern Time, S-S 10 AM - 10 PM Eastern Time) EarthLink Network, Inc. 800-395-8410 (7 days a week, 24 hours a day) GTE Internet 800-927-3000 (7 days a week, 24 hours a day) Intuit Inc. 900-555-4688 (7 days a week, 24 hours a day) MindSpring Enterprises, Inc. 800-719-4660 Network Associates, Inc.408-988-3832 (M-F 9AM - 5PM Central Time) Prodigy Communications Corporation 800-PRODIGY (7 AM - 3 AM Eastern Time) Sonic Foundry 608-256-5555 (M-F, 8 AM - 7 PM Central Time) Symantec Corporation 800-798-0850 © 2000 Sony Electronics Inc. Reproduction in whole or in part without written permission is prohibited. All rights reserved. Sony, AutoAlert, and VAIO Slimtop are trademarks of Sony. WinFax is a trademark of Symantec Corporation. All other trademarks are trademarks or registered trademarks of their respective owners. Page 49 Read Me First PCV-L630 Thank you for purchasing your new Sony computer. Many common questions about your computer are answered in this manual. For the most recent information, please refer to the online version of Read Me First. You can access all of the electronic documentation from the Windows® Start menu by selecting Programs, and then VAIO Documentation. Check the Sony Support Web site at http://www.sony.com/pcsupport for the latest updates and information. For a VAIO demonstration, press the Help key (P6). To reprogram this key to launch Help, see Reprogramming Your Programmable Power Keys. Frequently Asked Questions (FAQs) Q: How do I recover applications or drivers that came with my computer if the files are corrupted or deleted? A: The Application Recovery CDs allow you to reinstall individual applications and device drivers if they are corrupted or accidentally erased. Reinstalling an individual device driver or software title may correct a problem you are experiencing with your computer, and you may not need to recover the entire contents of your hard drive. If you do need to reinstall all the software titles that shipped with your computer, use the System Recovery CD(s). You must be in Windows to run the Application Recovery CD(s). The application will not run from DOS. If you have any questions on using the Application Recovery CD(s), contact Sony Customer Support. To use the Application Recovery CD(s) 1. Turn on your computer. If your computer is already on, close all applications. 2. When the Windows desktop appears, insert the Sony Application Recovery CD in the DVD-ROM drive. The Application Recovery utility loads automatically. 3. When the Application Recovery menu appears, follow the on-screen instructions to complete the recovery process. Your system may include one or two Application Recovery CDs. If you have two Application Recovery CDs, insert the first CD to run the Application Recovery program. You may be prompted to insert the second CD, depending on the application you wish to restore. Q: How do I change the parallel port type to ECP, EPP, or bi-directional? A: You can change the parallel port type using the System Setup utility. To access System Setup, click the Start button, select Shut Down, and then select Restart. When the Sony screen displays, press the Delete key on your keyboard. Select "Chipset Features Setup" from the CMOS Setup Utility screen. Use the arrow keys to highlight Parallel Port Mode. You can toggle between the Normal (bi-directional), ECP, EPP and ECP+EPP options using the Page Up (PU) or Page Down (PD) buttons. When the desired setting displays, press the Escape key to return to the CMOS Setup Utility screen. Select the F10 key to Save and Exit. Select Yes (Y) to save the CMOS settings and exit. Press the Enter key. The system automatically starts with the new settings. Q: Why isn't the DVD-ROM drive reading a CD? A: After inserting a CD, you must wait a few seconds for the CD to be detected before trying to access it. If your drive reads some CDs but not others, check the shiny side of the disc for dirt or scratches. You may also need to clean the DVD-ROM drive lens with a CD-ROM cleaner. Q: How do I set up faxing capability in Windows® 98 Second Edition? A: Windows 98 does not provide a built-in fax utility. Sony has included the Symantec® WinFax Basic Edition for your faxing needs. To set up WinFax Basic software, click the Start button, point to Programs, and select Configure WinFax Basic Edition. Follow the on-screen instructions to configure Page 50 the fax utility. Q: How do I change the video resolution of my display? A: From the Start menu, select Settings, and then click Control Panel. Click the Display icon. Select the Settings tab. Move the slider under Screen area to change the resolution. Q: Why does Windows lock up during shut down? A: Windows may not shut down properly for many reasons, including incompatible or conflicting drivers, damaged files, or non-responsive hardware. For troubleshooting information, you can search Windows 98 Help. From the Start menu, select Help, click the Contents tab, click Troubleshooting, and then click Windows 98 Troubleshooters. Click the subject for which you want information, and then answer the questions that are appropriate for your problem. Q: Why is my system running slowly? A: Your system responsiveness varies depending on the number of applications that are open and running. Close any applications that you are not currently using. Increasing the system memory may also help. The computer has two memory slots. For memory upgrades, use only 3.3V 64-bit PC-100 SDRAM DIMM modules. Q: Why is there no sound in any application? A: There are several independent controls for your system volume. There is a volume control Windows task tray. In addition to adjusting the volume, check that the Mute check box is not selected in the Windows volume control on the right side of your LCD display and a volume control in the . If you are using headphones, adjust the volume control on the front of the system. Q: How do I turn off my Information LED after I have read my e-mail? A: To turn off the Information LED, click the icon in the Windows task tray. Q: Why is the Play button in my Microsoft CD Player grayed out when I try to play a music CD? A: When you insert a music CD, the Sony Media Bar application software automatically launches to play your CD. When the Sony Media Bar software is running, the Microsoft CD Player does not have access to the CD. If the Sony Media Bar is not visible, move your cursor to the top of the screen to bring forward the hidden Media Bar. If you do not hear any music, check all your volume controls. Q: How do I change my modem to rotary or Touch-Tone dialing? A: Click the My Computer icon on your desktop. Click Control Panel, and then click Modems. Click Dialing Properties. Next to "Dial using," select the Tone dial or Pulse dial radio button. Click OK. Q: Why is there unusual activity on my floppy disk drive? A: If you notice that your system is slow to respond due to unusual floppy disk drive activity, it could be because of Find Fast. To determine if Find Fast is present, click Start, point to Programs, and then point to Startup. Removing this item may remedy the problem. Supplementary Information Recovering Microsoft® Word 2000 If you recover your operating system using the System Recovery CD, Microsoft Word 2000 will not be recovered. Use the supplied Word 2000 CD-ROM to recover this application. Reprogramming Your Programmable Power Keys Page 51 Your Programmable Power Keys (PPK) come preprogrammed to launch designated applications. To change the applications launched by any of the PPK, see VAIO Action Setup Help. To access the Help file, from the Start menu, point to Programs/VAIO Action Setup/VAIO Action Setup Help. Copying Data From Memory Stick® Media When copying from one Memory Stick media to another Memory Stick media when the media are of different memory capacity, use the drag and drop method to copy data. Do not use the Copy Disk function of Windows. The Copy Disk function will result in the loss of media memory. Using the AutoAlert E-mail Notification System Your VAIO Slimtop LCD computer has an Information LED on the LCD display which can be set up to automatically alert you if you have new e-mail. You can also set up the internal timer on your computer to wake up automatically and download e-mail at preset times each day. You can use the timer to send and receive mail using Microsoft Outlook Express. If you use Outlook Express, the LED indicator lights when you receive new e-mail. To use these features, you must first designate your Internet Service Provider (ISP) and the e-mail software you wish to use. The "Internet" (P1) and "Mail" (P2) buttons on your keyboard are preprogrammed to run Microsoft Internet Explorer and Microsoft Outlook Express, respectively. If you have not set up your Internet or Mail connections, pressing P1 or P2 launches the Internet Connection Wizard. The wizard helps you set up your Internet account and e-mail software step by step. Refer to the information provided by your ISP or your e-mail software for more information. Once you have set up your Internet account and Outlook, you can use the AutoAlert E-mail Notification System and internal timer features. For more information, see Internal Timer and AutoAlert E-mail Notification System in the VAIO Slimtop LCD Computer User Guide. Using the Power Button on the System and on the Keyboard The power button on the keyboard performs a system shutdown, but does not give you the options available when you use the Windows Shutdown menu. Shutting down from the Windows Shutdown menu allows you to choose options such as Standby, Restart, and Restart in MS-DOS mode. Shutting down your computer improperly may result in loss of data. In the event your system has "locked up" or crashed, press and hold the power button on the system for several seconds to force your system to power off. You may need to repeat this procedure. To Resume from Standby Mode There are three ways to bring your computer back from the standby mode: press the space bar on your keyboard, press the left mouse button, or momentarily depress the power button on your computer. Resetting Your Computer For Printer Use After Resuming From A Power Saving Mode Your connected printer may not function after the computer resumes from a power saving mode. When this occurs, follow the procedures below to reset the printer connection: 1. Right-click the My Computer icon on the desktop, and then select Properties. 2. Click the Device Manager tab. 3. Select Refresh, and then click OK. The printer should now function properly. Applications That Use the TWAIN Driver Page 52 Digital imaging applications, such as Adobe PhotoDeluxe®, allow you to transfer images to your computer from external devices, including scanners or digital cameras. For some devices, a TWAIN driver window appears on the screen. Always close the TWAIN driver window before exiting or minimizing a digital imaging application. PCI Add-in Board Size Your computer can accommodate PCI add-in boards up to 6.6 inches in length. Memory Upgrade Specifications When upgrading memory, use only 3.3V 64-bit PC-100 SDRAM modules (gold lead contacts). For more information on VAIO Computer compatible memory, call Sony Customer Support at 1-888-4SONYPC (1-888-476-6972). Sony computer supplies, accessories and peripherals can be purchased from your Sony-authorized dealer or by contacting Sony at http://www.sony.com/accessories. For Answers to Your Software Questions Adobe Systems Incorporated 206-628-5737 (M-F, 6 AM-5 PM Pacific Time) America Online 800-827-3338 (7 days a week, 6 AM - 2 PM Eastern Time) AT&T 800-400-1447 (7 days a week, 24 hours a day) CompuServe Interactive Services 800-848-8990 (M-F, 8 AM - 1 AM Eastern Time, S-S 10 AM - 10 PM Eastern Time) EarthLink Network, Inc. 800-395-8410 (7 days a week, 24 hours a day) GTE Internet 800-927-3000 (7 days a week, 24 hours a day) Intuit Inc. 900-555-4688 (7 days a week, 24 hours a day) MindSpring Enterprises, Inc. 800-719-4660 Network Associates, Inc.408-988-3832 (M-F 9AM - 5PM Central Time) Prodigy Communications Corporation 800-PRODIGY (7 AM - 3 AM Eastern Time) Sonic Foundry 608-256-5555 (M-F, 8 AM - 7 PM Central Time) Symantec Corporation 800-798-0850 © 2000 Sony Electronics Inc. Reproduction in whole or in part without written permission is prohibited. All rights reserved. Sony, AutoAlert, and VAIO Slimtop are trademarks of Sony. WinFax is a trademark of Symantec Corporation. All other trademarks are trademarks or registered trademarks of their respective owners. Page 53 Read Me First PCV-L630 Thank you for purchasing your new Sony computer. Many common questions about your computer are answered in this manual. For the most recent information, please refer to the online version of Read Me First. You can access all of the electronic documentation from the Windows® Start menu by selecting Programs, and then VAIO Documentation. Check the Sony Support Web site at http://www.sony.com/pcsupport for the latest updates and information. For a VAIO demonstration, press the Help key (P6). To reprogram this key to launch Help, see Reprogramming Your Programmable Power Keys. Frequently Asked Questions (FAQs) Q: How do I recover applications or drivers that came with my computer if the files are corrupted or deleted? A: The Application Recovery CDs allow you to reinstall individual applications and device drivers if they are corrupted or accidentally erased. Reinstalling an individual device driver or software title may correct a problem you are experiencing with your computer, and you may not need to recover the entire contents of your hard drive. If you do need to reinstall all the software titles that shipped with your computer, use the System Recovery CD(s). You must be in Windows to run the Application Recovery CD(s). The application will not run from DOS. If you have any questions on using the Application Recovery CD(s), contact Sony Customer Support. To use the Application Recovery CD(s) 1. Turn on your computer. If your computer is already on, close all applications. 2. When the Windows desktop appears, insert the Sony Application Recovery CD in the DVD-ROM drive. The Application Recovery utility loads automatically. 3. When the Application Recovery menu appears, follow the on-screen instructions to complete the recovery process. Your system may include one or two Application Recovery CDs. If you have two Application Recovery CDs, insert the first CD to run the Application Recovery program. You may be prompted to insert the second CD, depending on the application you wish to restore. Q: How do I change the parallel port type to ECP, EPP, or bi-directional? A: You can change the parallel port type using the System Setup utility. To access System Setup, click the Start button, select Shut Down, and then select Restart. When the Sony screen displays, press the Delete key on your keyboard. Select "Chipset Features Setup" from the CMOS Setup Utility screen. Use the arrow keys to highlight Parallel Port Mode. You can toggle between the Normal (bi-directional), ECP, EPP and ECP+EPP options using the Page Up (PU) or Page Down (PD) buttons. When the desired setting displays, press the Escape key to return to the CMOS Setup Utility screen. Select the F10 key to Save and Exit. Select Yes (Y) to save the CMOS settings and exit. Press the Enter key. The system automatically starts with the new settings. Q: Why isn't the DVD-ROM drive reading a CD? A: After inserting a CD, you must wait a few seconds for the CD to be detected before trying to access it. If your drive reads some CDs but not others, check the shiny side of the disc for dirt or scratches. You may also need to clean the DVD-ROM drive lens with a CD-ROM cleaner. Q: How do I set up faxing capability in Windows® 98 Second Edition? A: Windows 98 does not provide a built-in fax utility. Sony has included the Symantec® WinFax Basic Edition for your faxing needs. To set up WinFax Basic software, click the Start button, point to Programs, and select Configure WinFax Basic Edition. Follow the on-screen instructions to configure Page 54 the fax utility. Q: How do I change the video resolution of my display? A: From the Start menu, select Settings, and then click Control Panel. Click the Display icon. Select the Settings tab. Move the slider under Screen area to change the resolution. Q: Why does Windows lock up during shut down? A: Windows may not shut down properly for many reasons, including incompatible or conflicting drivers, damaged files, or non-responsive hardware. For troubleshooting information, you can search Windows 98 Help. From the Start menu, select Help, click the Contents tab, click Troubleshooting, and then click Windows 98 Troubleshooters. Click the subject for which you want information, and then answer the questions that are appropriate for your problem. Q: Why is my system running slowly? A: Your system responsiveness varies depending on the number of applications that are open and running. Close any applications that you are not currently using. Increasing the system memory may also help. The computer has two memory slots. For memory upgrades, use only 3.3V 64-bit PC-100 SDRAM DIMM modules. Q: Why is there no sound in any application? A: There are several independent controls for your system volume. There is a volume control Windows task tray. In addition to adjusting the volume, check that the Mute check box is not selected in the Windows volume control on the right side of your LCD display and a volume control in the . If you are using headphones, adjust the volume control on the front of the system. Q: How do I turn off my Information LED after I have read my e-mail? A: To turn off the Information LED, click the icon in the Windows task tray. Q: Why is the Play button in my Microsoft CD Player grayed out when I try to play a music CD? A: When you insert a music CD, the Sony Media Bar application software automatically launches to play your CD. When the Sony Media Bar software is running, the Microsoft CD Player does not have access to the CD. If the Sony Media Bar is not visible, move your cursor to the top of the screen to bring forward the hidden Media Bar. If you do not hear any music, check all your volume controls. Q: How do I change my modem to rotary or Touch-Tone dialing? A: Click the My Computer icon on your desktop. Click Control Panel, and then click Modems. Click Dialing Properties. Next to "Dial using," select the Tone dial or Pulse dial radio button. Click OK. Q: Why is there unusual activity on my floppy disk drive? A: If you notice that your system is slow to respond due to unusual floppy disk drive activity, it could be because of Find Fast. To determine if Find Fast is present, click Start, point to Programs, and then point to Startup. Removing this item may remedy the problem. Supplementary Information Recovering Microsoft® Word 2000 If you recover your operating system using the System Recovery CD, Microsoft Word 2000 will not be recovered. Use the supplied Word 2000 CD-ROM to recover this application. Reprogramming Your Programmable Power Keys Page 55 Your Programmable Power Keys (PPK) come preprogrammed to launch designated applications. To change the applications launched by any of the PPK, see VAIO Action Setup Help. To access the Help file, from the Start menu, point to Programs/VAIO Action Setup/VAIO Action Setup Help. Copying Data From Memory Stick® Media When copying from one Memory Stick media to another Memory Stick media when the media are of different memory capacity, use the drag and drop method to copy data. Do not use the Copy Disk function of Windows. The Copy Disk function will result in the loss of media memory. Using the AutoAlert E-mail Notification System Your VAIO Slimtop LCD computer has an Information LED on the LCD display which can be set up to automatically alert you if you have new e-mail. You can also set up the internal timer on your computer to wake up automatically and download e-mail at preset times each day. You can use the timer to send and receive mail using Microsoft Outlook Express. If you use Outlook Express, the LED indicator lights when you receive new e-mail. To use these features, you must first designate your Internet Service Provider (ISP) and the e-mail software you wish to use. The "Internet" (P1) and "Mail" (P2) buttons on your keyboard are preprogrammed to run Microsoft Internet Explorer and Microsoft Outlook Express, respectively. If you have not set up your Internet or Mail connections, pressing P1 or P2 launches the Internet Connection Wizard. The wizard helps you set up your Internet account and e-mail software step by step. Refer to the information provided by your ISP or your e-mail software for more information. Once you have set up your Internet account and Outlook, you can use the AutoAlert E-mail Notification System and internal timer features. For more information, see Internal Timer and AutoAlert E-mail Notification System in the VAIO Slimtop LCD Computer User Guide. Using the Power Button on the System and on the Keyboard The power button on the keyboard performs a system shutdown, but does not give you the options available when you use the Windows Shutdown menu. Shutting down from the Windows Shutdown menu allows you to choose options such as Standby, Restart, and Restart in MS-DOS mode. Shutting down your computer improperly may result in loss of data. In the event your system has "locked up" or crashed, press and hold the power button on the system for several seconds to force your system to power off. You may need to repeat this procedure. To Resume from Standby Mode There are three ways to bring your computer back from the standby mode: press the space bar on your keyboard, press the left mouse button, or momentarily depress the power button on your computer. Resetting Your Computer For Printer Use After Resuming From A Power Saving Mode Your connected printer may not function after the computer resumes from a power saving mode. When this occurs, follow the procedures below to reset the printer connection: 1. Right-click the My Computer icon on the desktop, and then select Properties. 2. Click the Device Manager tab. 3. Select Refresh, and then click OK. The printer should now function properly. Applications That Use the TWAIN Driver Page 56 Digital imaging applications, such as Adobe PhotoDeluxe®, allow you to transfer images to your computer from external devices, including scanners or digital cameras. For some devices, a TWAIN driver window appears on the screen. Always close the TWAIN driver window before exiting or minimizing a digital imaging application. PCI Add-in Board Size Your computer can accommodate PCI add-in boards up to 6.6 inches in length. Memory Upgrade Specifications When upgrading memory, use only 3.3V 64-bit PC-100 SDRAM modules (gold lead contacts). For more information on VAIO Computer compatible memory, call Sony Customer Support at 1-888-4SONYPC (1-888-476-6972). Sony computer supplies, accessories and peripherals can be purchased from your Sony-authorized dealer or by contacting Sony at http://www.sony.com/accessories. For Answers to Your Software Questions Adobe Systems Incorporated 206-628-5737 (M-F, 6 AM-5 PM Pacific Time) America Online 800-827-3338 (7 days a week, 6 AM - 2 PM Eastern Time) AT&T 800-400-1447 (7 days a week, 24 hours a day) CompuServe Interactive Services 800-848-8990 (M-F, 8 AM - 1 AM Eastern Time, S-S 10 AM - 10 PM Eastern Time) EarthLink Network, Inc. 800-395-8410 (7 days a week, 24 hours a day) GTE Internet 800-927-3000 (7 days a week, 24 hours a day) Intuit Inc. 900-555-4688 (7 days a week, 24 hours a day) MindSpring Enterprises, Inc. 800-719-4660 Network Associates, Inc.408-988-3832 (M-F 9AM - 5PM Central Time) Prodigy Communications Corporation 800-PRODIGY (7 AM - 3 AM Eastern Time) Sonic Foundry 608-256-5555 (M-F, 8 AM - 7 PM Central Time) Symantec Corporation 800-798-0850 © 2000 Sony Electronics Inc. Reproduction in whole or in part without written permission is prohibited. All rights reserved. Sony, AutoAlert, and VAIO Slimtop are trademarks of Sony. WinFax is a trademark of Symantec Corporation. All other trademarks are trademarks or registered trademarks of their respective owners. Page 57 Features For a complete description of the specifications of your Sony computer, see Specifications. i.LINK® (IEEE-1394): Two built-in i.LINK ports provide you with front and rear digital connection capability. The i.LINK name and logo identify a digital interface (IEEE-1394) for high speed communication. Exceptional performance: Your computer includes a fast Intel® processor and a V.90-compatible data/fax modem. Ergo-Angle Multimedia LCD display: With its exclusive dual-hinge pedestal, this 15" XGA TFT display provides twice the flexibility of other LCDs. Select the perfect viewing angle and enjoy the built-in Harman/Kardon® stereo speakers. AutoAlert E-mail Notification System: Custom software automatically downloads e-mail on a pre-set schedule via Microsoft® Outlook® Express. A light on the LCD display instantly lets you know when new mail is received. VAIO Smart convertible keyboard: The innovative palm rest converts to a keyboard cover for a sleek look when not in use. Six Programmable Power Keys let you launch any application with the push of a button; dual-sided mouse connections for left- or right- hand use. Sony Memory Stick® media slot: The next generation of digital media, smaller than a stick of gum. Easily delivers information from one Memory Stick-equipped electronic device to another, so you can transfer images, sounds, data and text between cameras, computers, and more. Compact components: Enjoy the small footprint and versatile setup options available by positioning the components in an arrangement of your choice. Sony audio and video quality: High-fidelity 3D audio system and high-powered 3D graphics (AGP) enable you to take advantage of today's advanced multimedia applications, games, and entertainment software. Preinstalled software titles: All the software on your computer is preinstalled, configured, and ready for you to use right out of the box. Microsoft® Windows® 98 Second Edition operating system: Your system includes the latest operating system from Microsoft. Communications: Access popular online services, browse the Internet, send faxes, and more. * Actual upload and download speeds may vary due to line conditions, ISP support, and government regulations. Unpacking Your Computer Computer and Supplied Accessories Page 58 Manuals Read Me First contains last-minute supplementary information and software support numbers. The VAIO Slimtop LCD Computer User Guide (this manual) contains features and specifications of your computer. It also includes information on the applications included with your system and how to contact software vendors, get started with your computer, and solve common problems. The VAIO VAIO® Consumer Information Guide contains safety and regulatory information, ergonomic considerations, information on help resources, and your computer's limited warranty statement. The Microsoft® Windows®98 Second Edition Getting Started manual explains how to use the basic features of the Windows® operating system. Recovery CDs System Recovery CD(s) - Enables you to reinstall software that shipped with your computer if it is corrupted or accidentally erased. For more information, see Using the System Recovery CD(s). Application Recovery CD(s) - Allows you to reinstall individual applications or device drivers if they are corrupted or accidentally erased. For more information, see Using the Application Recovery CD(s). Other Setting up your VAIO Slimtop LCD Computer (poster) Packet containing special product offers Software CDs Page 59 Microsoft® Word 2000 Setting Up Your VAIO Slimtop LCD Computer Locating Controls and Connectors Front Panel 1 Power switch and indicator light Turns on/off the computer and the display. The indicator light is green while the power is on and amber when the computer is in standby mode. 2 Floppy disk drive Reads/writes data from/to a 3.5-inch floppy disk. 3 Floppy disk eject button Ejects the floppy disk. 4 DVD-ROM drive Reads data from a DVD-ROM/CD-ROM. 5 DVD-ROM/CD-ROM eject button Ejects a DVD-ROM/CD-ROM. 6 Manual eject hole If the DVD-ROM/CD-ROM does not come out when you press the DVD-ROM/CD-ROM eject button, insert a thin, pointed object into this hole to eject the disc manually. 7 FD (Floppy disk drive) access indicator light Lights in green while reading/writing data from/to a floppy disk. 8 Disc (DVD-ROM drive) access indicator light Lights in amber while reading data from a DVD-ROM/CD-ROM. 9 HD (drive) access indicator light Lights in green while reading/writing data from/to the hard disk. 10 MIC (Microphone) connector* Connects a microphone (not supplied). 11 PHONES (Headphones) connector* Connects headphones (not supplied). 12 VOLUME control Page 60 Adjusts the volume of the headphones connected to the PHONES connector. Users should note that this does not control the volume of the integrated LCD speakers. 13 PC CARD slot A PC Card (also called a PCMCIA card) can be installed in this slot. PC cards enable you to add functionality to your system. MEMORY STICK media slot 14 Insert a Sony Memory Stick® card into this slot. See Using the Memory Stick® Media for details on using Memory Stick media. 15 i.LINK (4-pin) Connects a digital device such as a Sony Digital Handycam® Camcorder. 16 USB (Universal Serial Bus) connector Connects a USB device. * See Using a Headphone or Microphone for important information about connecting a microphone and headphone. Rear Panel 1 AC INPUT connector Connects the supplied power cord. 2 LINE jack Connects a phone cable to the wall jack. 3 EMPTY PCI SLOT (FILLED WITH ETHERNET CARD ON CUSTOM MODELS) For a PCI Add-On Card (not supplied). 4 TELEPHONE jack Connects the phone to the computer. 5 PRINTER connector Connects a parallel device, such as a printer or scanner. 6 SERIAL connector Connects a serial device, such as a digital still camera. 7 MONITOR connector Connects a standard CRT display. 8 USB (Universal Serial Bus) connector Connects a USB device. 9 LINE IN connector Connects an audio device. 10 LINE OUT connector Connects an audio device or an active speaker. 11 i.LINK (6-pin) Connects a digital device such as a Sony Digital Handycam® Camcorder. 12 LCD MONITOR connector Connects the LCD that comes with the VAIO Slimtop LCD computer. Note: Do not connect any display to this connector other than the LCD that is supplied with this system. Page 61 13 KEYBOARD connector Connects a keyboard. LCD 1 Power indicator light Light is green while the power is on. When the computer enters the standby mode, this indicator light turns amber. 2 Information LED Light turns red to alert the user to activities, such as the arrival of e-mail. See AutoAlert E-mail Notification System. 3 Adjusts 4 Adjusts Brightness control the brightness of the screen. Volume control the volume of the integrated speakers on the LCD display. Using the Wheel Mouse For information about the Wheel Mouse that connects to either side of your keyboard, see MouseWare Help. To access MouseWare Help, from the Start menu, point to Programs, MouseWare, and then click MouseWare Help. To set up the mouse for left-handed use: 1. Click the My Computer icon on your desktop. 2. Click Control Panel, and then click Mouse. The Mouse Properties dialog box appears. 3. In the Quick Setup tab, click Device Setup. 4. In the Device Setup Wizard dialog box, click Next. 5. Select the radio button next to "Left side of the keyboard." 6. Click Next three times, and then click Finish. 7. Click Apply. Using a Headphone or Microphone When you connect a microphone or headphone to your computer, attaching a ferrite core will reduce electrical interference. Attach the (supplied) ferrite core at the end of the headphone or microphone cable closest to the computer. Wrap the cable through the center of the ferrite core. The following illustration shows how to attach the ferrite core when you are using both a headphone and a microphone. Page 62 The LCD and keyboard cables already include a ferrite core. Do not remove the ferrite core from these cables. To adjust the height and viewing angle of the display Holding both sides of the display, push the display panel out and up, and then adjust the viewing angle. The LCD display is designed to maintain the best ergonomic viewing angle. Set the display height so that it does not touch the keyboard, and adjust the viewing angle approximately 27 degrees from eye level to the center of the screen. Attaching the Stand to the System Unit The main system unit can be oriented horizontally or vertically. If you place the system in a vertical position, you must attach the supplied stand to ensure stability. 1. Place the system unit on its right side, with the front of the system facing forward. 2. Insert the grooved side of the stand into the ventilation holes of the system so that the two screw holes are aligned and the stand's fins are at the rear of the unit. 3. Secure the stand to the unit with the supplied screw. Page 63 The stand keeps the system cool by allowing air to flow under it. If you choose to place the system unit in a vertical position, it is important to use the stand and to place the system unit on its left side, as in the illustration above; otherwise, the system may overheat. Registering Your Computer Take advantage of Sony's commitment to quality customer support and receive these benefits by registering your computer: Sony Customer Support--Talk to a Support Representative to troubleshoot problems you may be having with your computer. Limited warranty--Protect your investment. See Limited Warranty Statement in the VAIO® Consumer Information Guide for details. You must register your computer to extend the warranty from the initial 90-day warranty period to one year from the original date of purchase. Express Service--Provides a fast and direct return of your VAIO Slimtop Sony for service of your computer. LCD Computer to If you did not already register when you first turned on your computer, follow these steps to use the computer online registration service. 1. Click the registration icon on the VAIO desktop. 2. Enter the information requested on the first online registration form. Press the tab key to move from box to box. 3. Click the Next button to advance to the next form. 4. Complete the remaining forms by clicking the Next button each time you complete a form. The computer automatically transfers your registration information using your built-in modem and a toll-free telephone number or a local number. You may sign up for Internet access with a Sony preferred Internet Service Provider. VAIO Action Setup VAIO Action Setup manages the settings for your computer's Programmable Power Keys (PPK), Memory Stick® media, i.LINK interface, and internal timer. An overview of each of these functions is provided below. For more information on changing the settings using VAIO Action Setup, see the online VAIO Action Setup help files. To access the help files, from the Start menu, point to Programs/VAIO Action Setup/VAIO Action Setup Help. Programmable Power Keys Your Sony computer comes with technology that allows you to get to your favorite applications Page easily. Each Programmable Power Key (PPK) on your VAIO Smart convertible keyboard comes 64 programmed to launch a preset application with a single press of the key. If you wish, you can use the VAIO Action Setup software to change the Programmable Power Keys' preset functions. The Programmable Power Keys are located at the top of your keyboard, and are numbered P1 through P6. The keys work even when the computer is turned off. Pressing one of these keys turns on the computer and launches the preset application. The six Programmable Power Keys come to you preprogrammed to perform the functions listed in the table below. Key Function P1 (INTERNET) Starts Microsoft® Internet Explorer for Windows® 98. P2 (MAIL) Starts Microsoft® Outlook® Express P3 (WORK) Starts Microsoft® Word P4 (FINANCE) Starts Intuit® Quicken® Basic 2000. P5 (SETUP) Starts PPK Setup. P6 (HELP) Opens a menu of help options. Memory Stick You can use VAIO Action Setup to preset your computer to automatically launch an application when you insert a Memory Stick. For more information on Memory Stick media, see Using the Memory Stick® Media . Internal Timer The VAIO Action Setup software allows you to set your computer's internal timer to launch certain applications automatically. The timer can start applications even when the power is off. Some software applications take longer than others to launch. It is advisable to confirm in advance the amount of time your selected application takes to start. AutoAlert E-mail Notification System VAIO Action Setup also enables you to set up your computer to notify you with an Information LED when new mail arrives in your e-mail mailbox. The Information LED turns red to indicate that new e-mail has arrived. For this AutoAlert E-mail Notification System to work, you must use Microsoft® Outlook® Express as your default e-mail software, and you must have an Internet Service Provider with dial-up capabilities set up. As an alternative, you can program your AutoAlert E-mail Notification System to set the Information LED to turn on when it has successfully completed the task of dialing up and connecting to receive mail. In this case, the Information LED turns on to indicate that your e-mail account has been accessed successfully, regardless of whether or not you have mail; this works with Microsoft Outlook Express. The e-mail software you choose to use with PPK must be set as your default e-mail software. See LCD for an illustration showing the Information LED's location. AutoAlert E-mail Notification System Software Restrictions If you use software that uses a phone line The computer may not be able to disconnect the phone line due to communication and server conditions. Be sure to monitor the status of the software when running the AutoAlert E-mail Notification System, and manually disconnect the phone line if you notice a malfunction. Furthermore, when using the timer to start the software, it is advised that you set the computer to shut down or enter system standby mode after a certain length of time. This allows the computer to disconnect the phone line if the computer fails to disconnect the line normally. If you are using the timer to download e-mail automatically Page 65 It is advisable to set up your e-mail software to redial automatically if it does not connect the first time. It is also advisable to set the e-mail software to disconnect the phone line automatically when all mail has been downloaded. If you are using Microsoft® Outlook® Express When using the AutoAlert E-mail Notification System with Microsoft Outlook Express, it is advisable to select the Dial automatically setting in your Microsoft Outlook Express software. If you have not chosen this setting and wish to do so, start Outlook Express, click Tools, and then select Options. Select the check box "Automatically dial when checking for new messages." Click OK. Changing the Window Design of Sony Software To change the window design of Sony software 1. Click the Start button, point to Settings, and then click Control Panel. 2. Click UI Design Selector. 3. Click << or >> and select the desired design. 4. Click Apply. The "UI Design Selector" window design changes. The window design for your Sony software will match the "UI Design Selector" window. To try another selection, click << or >>. Then, click OK. The UI Design Selector closes and the window design of your Sony software window design displays. You may use the feature with UI Design Selector-compatible software only. Using the Memory Stick® Media Your Sony computer is designed to support the new Memory Stick recording media. The Memory Stick media is a small, versatile device that allows you to share data between various types of Sony equipment. When you use the card, your computer automatically launches Windows Explorer. This allows you to view the contents of the card. If the image files are created by a Sony digital camera or camcorder, you do not need the following steps. If you want to create a slide show that launches automatically when you insert a Memory Stick, follow these steps to transfer images from your hard drive to a Memory Stick. 1. Insert the Memory Stick into the appropriate slot. 2. Click the My Computer icon on the desktop. Page 66 3. Click the Removable Disk S: icon. 4. Create a new folder and name it "DCIM." 5. Open the DCIM folder and create a new folder named "100MSDCF." 6. Click the Start button, select VAIO, and then click PictureGear to launch the PictureGear application. 7. Select the digital images you want to save in your slide show. 8. From the PictureGear File menu, point to File Process, and then select Still Format Conversion. 9. Select Memory Stick as the Output Format. 10. Use the Browse button to select the DCIM/100MSDCF folder on the Removable Disk (S:) drive. 11. Name the file. The file name must begin with DSC (DSC0xxxx). The full file name without extension must have at least eight characters. The order in which your photos appear in your slide show will be determined by the number (xxxx) in the file name. Some examples of acceptable file names are DSC00001.jpg and DSC00002.jpg 12. Click OK to save the file. You can also add MPEG1 video files to your Slide Show by following the steps below. The order in which your video clips (MOV0xxxx files) appear in your Slide Show is determined by the number (xxxx) in the file name. 1. Insert the Memory Stick into the media slot. 2. Click the My Computer icon on the desktop. 3. Click the Removable Disk S: icon. 4. Create a new folder and name it "MSSONY." 5. Open the MSSONY folder and create a new folder named "MOML0001." 6. From the PictureGear File menu, point to File Process, and then select Still Format Conversion. 7. Copy the MPEG file into the MOML0001 folder. 8. Rename the MPEG file MOV0xxxx.mpg, where xxxx is any four-digit number. 9. To begin showing your slides, eject the Memory Stick and then reinsert it. The slide show will begin automatically. To protect data on Memory Stick media from accidental changes Memory Stick media contains a write-protect tab. The write-protect tab prevents accidental changes to information recorded on the Memory Stick media. When you slide the write-protect tab to the LOCK position, the Memory Stick is write-protected, which means you cannot delete, copy, or save information on the Memory Stick. When you slide the tab to the un-LOCK position, you can write to or modify the Memory Stick contents. To change the way the computer responds when a Memory Stick is inserted into the Memory Stick media slot Change the options on the Memory Stick tab in the PPK Setup software. Page 67 Using PC Cards This computer has a card bus PC card slot that supports a Type I or II PC card. To insert a PC card You do not need to shut down your computer when inserting a PC card. 1. Open the front panel. 2. Insert the PC card into the PC card slot until it clicks into position. When the card is completely inserted, the eject button pops out. If you cannot insert the card, do not forcibly insert it. In this case, make sure the card is not inserted upside-down or backward, and then reinsert the card into the slot carefully. See the manual that came with the PC card for details on using it. To close the front panel when the eject button is protruding, fold the button down onto the computer. To eject a PC card If you eject the PC card incorrectly, the system may not work correctly. 1. Click the Start button on the Windows® taskbar, click Settings, and then click Control Panel. 2. Click the PC Card icon. 3. Click the name of the card that you want to eject, and then click Stop. 4. When the message "You may safely remove this device" appears, click OK. 5. Push the PC card eject button on the front panel of the system unit. You may need to pull out the eject button before you can eject the card. Page 68 The card is ejected from the card connector. Remove the card by holding it by its edge and pulling it out carefully. Using the Standby Function When you are finished using your computer, you can put it in standby mode rather than turn it off completely. Putting the computer in standby mode allows you to return quickly to normal computer use. To put the computer in standby mode manually 1. Save your work and close any applications that are running. (You can leave Windows running.) 2. Press the (Standby) button on the top of the keyboard. The computer goes into standby mode. Alternatively, you can click the Start button on the Windows® taskbar, click Shut Down, select Standby, and then click OK. To let the computer go into standby mode automatically Click the My Computer icon on your desktop. Click Control Panel, and then click the Power Management icon. On the Power Schemes tab, select from the options in the Power schemes drop-down list. Then, choose settings for the power scheme you have selected. To save the settings under a name that is not offered in the Power schemes pulldown menu, choose your settings and then click Save As. Type in a name, and click OK. Click Apply to finalize your power settings. To resume from standby mode There are three ways to bring your computer back from the standby mode: press the space bar on your keyboard, press the left mouse button, or momentarily depress the power button on your computer. If the display does not return from standby when you press the (Standby) button, your system may be in video standby mode. Press the space bar on the keyboard to return from video standby. Standby Mode Indicators You can tell which mode the computer is in by the color of the power indicator light. Color Amber Green No color Mode Computer is in standby mode. Computer is out of standby mode, ready to use. Computer is turned off. In standby mode you may periodically hear the computer's fan turn on and off, depending on the room's temperature. This is normal functioning in standby mode. Page 69 Shutting Down Your Computer When you are ready to turn off your computer for an extended period of time, use the following procedure to shut down the computer. To avoid the potential loss of data, do not use the power switch to shut down the computer. To shut down your computer If you plan to shut down your computer for a short period of time, you may want to use standby mode instead. See Using the Standby Function. 1. Click the Start button on the Windows® taskbar to open the Start menu. 2. Click Shut Down to display the Shut Down Windows dialog box. 3. Select the Shut Down option. 4. Click OK to complete the shutdown process. Respond to any prompts about saving documents. 5. Wait for your computer to turn off automatically -- the power indicator light turns off. 6. Turn off any peripherals connected to your computer. The LCD display turns off automatically when the computer shuts down. You can also shut down your computer using the (Power) button on the keyboard. Pressing this button causes the system to perform a shutdown but does not give you any of the other options available on the Windows® Shut Down menu. About the Power Switch If your system "locks up" or "crashes," press and hold the power switch for four seconds to force your system to power off. You may need to repeat this procedure. See Locating Controls and Connectors for the power switch's location. Using the System Recovery CD(s) You can reinstall software titles that shipped with your computer if they are corrupted or accidentally erased. You may not need to recover the entire contents of your hard drive. If you experience a problem with your computer, reinstalling an individual device driver or software title may correct the problem. Use the Application Recovery CD(s) to reinstall individual applications or device drivers. See Using the Application Recovery CD(s). The System Recovery CD(s) contain a backup copy of all the software originally installed on your hard disk drive. They can be used only to recover the hard disk of the Sony computer you purchased. The System Recovery utility gives you three options: Full Restore without Format restores all the software titles that originally came with your computer without formatting the hard disk. Full Restore with Format formats the hard disk drive and then restores all the original software. If your hard drive is partitioned into C and D drives, the computer will offer you the option to reformat the drive into a single partition. Operating System Only (Windows 98® Restore with Format) formats the hard disk drive and Page 70 restores the Windows® operating system and the device drivers that shipped with your computer. This option is recommended for advanced users only. If you choose the Full Restore with Format or Operating System Only option, your hard disk will be formatted, which removes all the information on the hard disk drive. You will lose any software you have installed and any other files you have created since you started to use your computer. This means you will have to reinstall any applications that were not included with the computer when you purchased it. If you choose the Full Restore without Format option, you may need to reinstall applications that were not included with the computer when you purchased it. If you have any questions on using the System Recovery CD(s), contact Sony Customer Support. To use the System Recovery CD(s) You need to complete the Windows registration process when you use the System Recovery CD(s). 1. Insert the Sony System Recovery CD(s) in the DVD-ROM drive. The System Recovery utility boots from the DVD-ROM drive. It must be in the drive when you turn on the computer. 2. Shut down your computer as described in Shutting Down Your Computer. 3. Wait 30 seconds and turn on your computer. 4. Click OK to signify you have read and accept the Microsoft End-User License Agreement. 5. When the System Recovery menu appears, follow the on-screen instructions to complete the recovery process. Your system may include one or two System Recovery CDs. If you have two System Recovery CDs, insert the first CD to run the System Recovery program. You are prompted to insert the second CD once the information from the first CD has been installed. The recovery process takes 30 to 60 minutes to complete. Using the Application Recovery CD(s) The Application Recovery CD(s) allow you to reinstall individual applications and device drivers if they are corrupted or accidentally erased. Reinstalling an individual device driver or software title may correct a problem you are experiencing with your computer, and you may not need to recover the entire contents of your hard drive. If you do need to reinstall all the software titles that shipped with your computer, use the System Recovery CD(s). See Using the System Recovery CD(s). You must be in Windows to run the Application Recovery CD(s). The application will not run from DOS. If you have any questions on using the Application Recovery CD(s), contact Sony Customer Support. To use the Application Recovery CD(s) 1. Turn on your computer. If your computer is already on, close all applications. 2. When the Windows desktop appears, insert the Sony Application Recovery CD in the DVD-ROM drive. The Application Recovery utility loads automatically. 3. When the Application Recovery menu appears, follow the on-screen instructions to complete the recovery process. Your system may include one or two Application Recovery CDs. If you have two Application Recovery CDs, insert the first CD to run the Application Recovery program. You may be prompted to insert the second CD, depending on the application you wish to restore. Page 71 About the Software on Your Computer Your VAIO Slimtop computer is ready to help you work, play, learn, and communicate as soon as you turn it on. This section gives you an overview of the activities you can perform with your software titles. For support information, see For Answers to Your Software Questions . Adobe Acrobat® Reader Adobe Systems Incorporated Acrobat Reader software allows you to view, navigate, and print electronic documents in Adobe's Portable Document Format (PDF), an open file format that is intended to preserve the fidelity of documents created on all major computer platforms. Adobe PhotoDeluxe® Home Edition Adobe Systems Incorporated Create amazing photo effects with PhotoDeluxe. Without learning complex software, you can enhance, restore, and be creative with your photos. Includes built-in guided activities, stock photos, clip art, and templates to assist you. Adobe Premiere® LE Adobe Systems Incorporated Adobe Premiere LE offers an interface and editing tool for producing movies for video, multimedia, or the Web. View source clips and edited footage simultaneously in the monitor window. Create video clips up to three hours long with complete audio-video synchronization. America Online® America Online America Online is the world's most popular Internet online service. Stay in touch with family and friends with Easy-to-Use E-mail, manage your personal finances, get the latest news and sports scores, and chat with thousands of others who share your interests. AT&T WorldNet® Service AT&T Fast, reliable Internet access from AT&T WorldNet Service. AT&T WorldNet Service provides Web-based e-mail, a personalized start page from Excite, easy access to the Excite search engine, free Web pages, online and live agent technical support, instant messaging, and special shopping discounts at Market Square. CompuServe® 2000 CompuServe Interactive Services The all new CompuServe 2000 delivers a powerful tool for Internet users who want serious and timely information, in-depth research, and professional communities backed by state-of-the-art technologies, including high-speed access and powerful e-mail messaging. Digital Media Bar Sony Electronics Media Bar software is your all-in-one solution for audio/video playback. It handles all common computer multimedia formats, and controls selected Sony devices. Media Bar software encompasses audio/video library cataloging and playlist management, in addition to digital video quality control and effects features. DVgate Sony Electronics Connect a digital video camera recorder to the i.LINK connector and capture your own video clips. You can edit the clips from your video, add others, and combine clips into new movie segments. EarthLink TotalAccess EarthLink Network, Inc. Page 72 An Internet Service Provider that supplies access, information, and assistance to its customers, introducing them to the Internet. Member benefits include e-mail, newsgroups, a Personal Start Page, a free 6 MB web site, a member magazine, and 24-hour technical support. McAfee's VirusScan® Network Associates, Inc. Protect your computer from viruses. VirusScan can detect viruses from floppy disks, Internet downloads, e-mail attachments, intranets, shared files, CD-ROMs, and online services. Microsoft® Internet Explorer for Windows® 98 Microsoft Corporation Internet Explorer delivers the Web the way you want it. It's safe, easy to use, and you can personalize how you access the Web. Outlook Express and other tools in Internet Explorer also help you have a great experience when you are on the Web! Microsoft® Outlook® Express Microsoft Corporation Outlook Express, the messaging tool that takes your e-mail and newsgroup communications to new heights! Outlook Express is easy to set up and use, and provides you with secure, personalized, and complete features that make creating, sending, and reading your e-mail a more rich and dynamic experience. Microsoft® Word 2000 Microsoft Corporation Microsoft Word 2000 makes it easy to create common Web, e-mail, and print documents for use around the world. It embraces HTML as a first-class file format and extends Word's ease-of-use to the Web and e-mail. Word 2000 also extends that ease of use to international users, making it easy to create multilingual documents. Netscape Communicator® Netscape Communications Netscape Communicator is the all-in-one Internet tool that makes it easy to browse the Web, send Internet e-mail, chat, read newsgroups, and compose great Web documents. PictureGear Sony Electronics This image management software displays images from your hard drive, a Sony digital still camera, or a Sony Mavica® camera. The images appear in a convenient light-table format, so that you can easily view the contents of an entire folder. Prodigy Internet Prodigy Communications Corporation An Internet service that helps you find what you need online faster and smarter. Prodigy delivers powerful online content, such as sports scores, stock quotes, news, and easy access to Excite , plus a personal e-mail account and quality customer service, all at a competitive price. Quicken® Basic Intuit, Inc. Quicken is the fastest, easiest way to organize your finances. Quicken works just like your checkbook, so it's easy to learn and use. Quicken manages all of your finances, bank accounts, credit cards, investments, and loans. You can even pay your bills online. Smart Capture Sony Electronics Smart Capture is a fun new way to send multimedia messages via e-mail. Smart Capture manages the i.LINK connection between your computer and a Sony Digital Handycam® Camcorder or other Page 73 cameras that support the i.LINK interface. It allows you to capture and compress video or still images that you can save or share via e-mail. A smart solution to computer, digital audio/video, and network convergence. Smart Connect Sony Electronics Smart Connect allows you to use an i.LINK cable to connect your VAIO computer to another VAIO computer that supports Smart Connect. You can then use one computer to copy, delete, and edit files on the other computer. You can also print from a printer attached to either computer. Sound Forge® Sonic Foundry Sound Forge allows you to put powerful audio processing tools and effects to work on your desktop. Simply cut, copy, and paste your way to striking multimedia files for use in everything from Web pages to desktop presentations. VAIO Action Setup Sony Electronics VAIO Action Setup manages the settings for your computer's Programmable Power Keys (PPK), Memory Stick media, i.LINK interface, and internal timer. For more information, see VAIO Action Setup. WinFax® Basic Edition Symantec Corporation WinFax Basic Edition incorporates an easy-to-use interface that allows you to send and receive faxes easily. Upgrade to WinFax Pro to receive additional features. About Your Recovery CDs Application Recovery CD(s) Sony Electronics The Application Recovery CD program allows you to reinstall individual applications and device drivers. Use it to restore corrupted or accidentally erased files. System Recovery CD(s) Sony Electronics The System Recovery CD program allows you to restore the software titles that shipped with your computer if they become corrupted or are erased accidentally. It can be used only to restore the hard disk of the Sony computer you purchased. For Answers to Your Software Questions Acrobat® Reader, Adobe PhotoDeluxe® Home Edition (Adobe Systems Incorporated) Web site http://www.adobe.com/ phone 206-628-2746 (fee-based support) fax 206-628-5737 e-mail [email protected] hours M-F, 6 AM-5 PM PT America Online® (America Online) Web site phone hours http://www.aol.com/ 800-827-3338 7 days a week, 6 AM - 2 PM ET AT&T WorldNet® Service (AT&T) Web site phone e-mail http://www.att.net 800-400-1447 [email protected] Page 74 hours 7 days a week, 24 hours a day CompuServe® 2000 (CompuServe Interactive Services) Web site phone hours http://www.compuserve.com/ 800-848-8990 M-F, 8 AM - 1 AM ET, S-S 10 AM - 10 PM ET EarthLink TotalAccess Web site phone e-mail hours (EarthLink Network, Inc.) http://help.earthlink.net/techsupport/ 800-395-8410 [email protected] 7 days a week, 24 hours a day GTE Easy Sign-up (GTE Internet) phone hours 800-927-3000 7 days a week, 24 hours a day McAfee's VirusScan (Network Associates, Inc.) Web site phone e-mail hours http://support.mcafee.com 408-988-3832 [email protected] M - F 9 AM - 5 PM Central Time MindSpring Internet Desktop (MindSpring Enterprises, Inc.) Web site phone http://help.mindspring.com/support 800-719-4660 Quicken® Basic (Intuit Inc.) Web site phone hours http://www.intuit.com/support 900-555-4688 7 days a week, 24 hours a day Sound Forge® (Sonic Foundry) Web site http://www.sonicfoundry.com/support/ phone 608-256-5555 fax 608-256-7300 e-mail [email protected] hours M - F, 8 AM - 7 PM CT Windows® 98 Second Edition Operating System, Word® 2000, Internet Explorer 5, Outlook® Express (Microsoft Corporation) Web site phone hours 1 http://www.sony.com/pcsupport 888-4SONYPC (888-476-6972) 1 7 days a week, 24 hours a day Support from 1-888-4SONYPC is free of charge for 90 days after the original date of purchase. WinFax® Basic Edition (Symantec Corporation) Web site http://www.symantec.com/techsupp/ phone 800-798-0850 fax 800-554-4403 in North America 541-984-2490 outside North America Troubleshooting This section describes how to solve common problems you may encounter when using your computer. Many problems have simple solutions, so try these suggestions before you call Sony Customer Support. My computer does not start Check that the computer is plugged into a power source and that it is turned on. Check that the power light is lit on the front panel of the computer. Confirm that a diskette is not in the diskette drive (unless you are using a bootable diskette). Confirm that the power cord and all cables are connected firmly, as described on the color poster. Page 75 If you plugged the computer into a power strip or UPS, make sure the power strip or UPS is turned on and working. My computer or software program "locks up" Close the application that is currently "locked up" by pressing Ctrl+Alt+Delete. In the Close Program dialog box, scroll down until you locate "(Not responding)" next to an application. Select this application and click End Task. Windows attempts to close the application. If the attempt is unsuccessful, a second dialog box appears. Select End Task again. If you are unable to "unlock" the application, repeat the above steps but select Shut Down when the Close Program dialog box appears. If the above steps fail to "unlock" your computer, save any unsaved work, if possible. Press Alt+F4. Select Restart and click OK. If you cannot restart as described in the preceding steps, you can restart the computer by pressing Ctrl+Alt+Delete or by pressing the power switch for more than six seconds. Pressing Ctrl+Alt+Delete may result in the loss of changes made to files that are currently open. Contact the software publisher or designated provider for technical support. See For Answers to Your Software Questions for a list of phone numbers and Web addresses or see Read Me First . My DVD-ROM/CD-ROM drive tray does not open Make sure the computer is turned on. If the Eject button does not work, you can open the tray by inserting a straightened heavyweight paper clip into the emergency eject hole. When I click an application icon, a message such as "You must insert the application CD into your CD-ROM (DVD-ROM) drive" appears and the software does not start Some titles require specific files that are located on the application's DVD-ROM/CD-ROM. Insert the disc and try starting the program again. Check to make sure you inserted the DVD-ROM/CD-ROM with the label side facing up. My modem connection is slow The computer's modem uses K56flex technology/V.90. Many factors influence modem connection speed, including telephone line noise or compatibility with telephone equipment (such as fax machines or other modems). If you think your modem is not connecting properly to other computer-based modems, fax machines, or your Internet Service Provider, check the following: Have your phone company check that your phone line is free from any line noise. If your problem is fax-related, check that there are no problems with the fax machine you are calling. The modem that receives your call may be slower or may use a different communications protocol than your modem. If this is the case, the connection speed may be slower than expected. For optimum performance, ensure you are calling an Internet Service Provider number that is V.90-compliant. If you are having a problem connecting with your Internet Service Provider, check that the ISP is not experiencing technical problems. If you have a second phone line available, try connecting the modem to this line. My modem does not work Check that the phone line is plugged into the line jack. Page Check that the phone line is working. You can check the line by plugging in an ordinary phone and76 listening for a dial tone. Check that the phone number the program is dialing is correct. Verify that the software you are using is appropriately configured to recognize and interact with the Sony computer modem. Call the software publisher if you do not know how to configure the software to recognize the modem. All programs preinstalled by Sony are compatible. If you suspect your modem is not functioning, you can perform a simple test to find out. Click the My Computer icon on your desktop. Click Control Panel, and then click Modems. Click the Diagnostics tab and select COM3. Click More Info. If your modem is functioning, a More Info dialog box will display. If your modem is not functioning, an error message will appear. My microphone is too sensitive to background noise If you find there is too much background noise when you record sound, you should adjust the microphone gain by following these steps: 1. Right-click the speaker icon (Volume) in the lower-right Windows® task tray. 2. Click Open Volume Controls. The Volume Control screen appears. 3. In the Options menu, select Properties. The Properties screen appears. 4. Change the setting for "Adjust volume for" from Playback to Recording, and then click OK. 5. Click the Advanced button under Microphone Balance. The Advanced Controls for Microphone screen appears. 6. Deselect the check box for 1 Mic Gain (+20dB), then click the Close button. 7. Close the Recording Control window. My mouse does not work Check that the mouse is plugged into one of the PS/2® connectors on the keyboard. The other connector connects the keyboard to the computer. There may be dust or dirt inside the mouse mechanism. To clean the mouse, follow these steps: o Turn off your computer. See Shutting Down Your Computer for details. o Remove the mouse ball cover on the back of the mouse by turning the ring that covers the mouse ball clockwise. o Turn the mouse upright, and drop the mouse ball into your hand. o Using a piece of tape, remove any dust or dirt on the mouse ball and inside the mouse ball socket. o Return the mouse ball to the socket, and replace the mouse ball cover. Secure the cover by turning the ring counter-clockwise. I cannot find the Windows® taskbar Check that the taskbar is not hidden or shrunken. Use the mouse to point to the left, right, top, and bottom edges of the screen. See Read Me First for additional information on using your Sony computer. To Reach Sony For further assistance, call 1-888-4SONYPC (1-888-476-6972). Page 77 Specifications Model PCV-L630 Processor 600E MHz* Pentium® III Hard Disk Drive 17 GB Ultra DMA Standard SDRAM 128 MB PC-100 SDRAM, expandable to 256 MB Video RAM 8 MB SDRAM Graphics 2X AGP 3D graphics hardware acceleration (ATi Rage 128 Pro 4XL) Sound Capabilities High fidelity 3D PCI audio Aureal AU8810 Diskette Drive 3.5" 1.44 MB FDD DVD-ROM/CD-ROM Drive 4.8X (max.) DVD-ROM reading 24X (max.) CD-ROM reading** Modem K56flex technology/V.90 compatible data/fax modem Expansion Capabilities Two PCI slots Connection Capabilities (Front) PC card (Card bus support) USB port Microphone Headphone Memory Stick media slot i.LINK (4-pin) Connection Capabilities (Rear) USB port Modem line (RJ-11) Phone line (RJ-11) Parallel (printer) Serial port VGA monitor LCD display Line In Line Out Keyboard i.LINK (6-pin) Connection Capabilities (Keyboard) Mouse (PS/2-style) left and right connectors Supplied Accessories Stand (for vertical installation) Power cable Phone cable Keyboard cable PS/2 Wheel Mouse VAIO Smart Convertible Keyboard Spacers (for bottom of the system) Ferrite core Service 90-day limited express service*** Extendible to one year from original date of purchase upon registration Limited Warranty90-day parts/labor standard Extendible to one year from original date of purchase upon registration Power Requirements 130 watts maximum Dimensions CPU: 11.2"(w) x 3.6" (h) x 13.4" (d) (280 mm x 90 mm x 335 mm) Keyboard: 15.9" (w) x 1.8" (h) x 7.1" (d) (398 mm x 45 mm x 178 mm) Display: 16.1" (w) x 13.1" (h) x 6.9" (d) (403 mm x 327 mm x 172 mm) Weight CPU: 11.9 lbs. (5.4kg) Display: 7.05 lbs (3.2 kg) Keyboard: 2.9 lbs. (1.3kg) Operating Temperature 50º F to 95º F (+10º C to 35º C) * MHz denotes microprocessor internal clock speed; other factors may affect application performance. Page 78 GB means one billion bytes when referring to hard drive capacity. Accessible capacity may vary. **Data on a DVD-ROM is read at a variable transfer rate, ranging from 2X at the innermost track to 4.8X at the outermost track(the data transfer standard 1X rate is 1385 kbytes/s). The average data transfer rate is 3.6X(4986 kbytes/s). Data on a CD-ROM is read at a variable transfer rate, ranging from 10.5X at the innermost track to 24X at the outermost track(the data transfer standard 1X rate is 150 kbytes/s). The average data transfer is 18X(2700 kbytes/s). Maximum speed for faxing is 14.4 kbytes/s. Your modem is capable of downloading at 56 kbytes/s using K56flex technology or V.90. Your phone service, online service, or Internet Service Provider, however, may not support this technology or operate at this speed. ***Certain restrictions apply. Specifications are subject to change without notice. Page 79 Features For a complete description of the specifications of your Sony computer, see Specifications. i.LINK® (IEEE-1394): Two built-in i.LINK ports provide you with front and rear digital connection capability. The i.LINK name and logo identify a digital interface (IEEE-1394) for high speed communication. Exceptional performance: Your computer includes a fast Intel® processor and a V.90-compatible data/fax modem. Ergo-Angle Multimedia LCD display: With its exclusive dual-hinge pedestal, this 15" XGA TFT display provides twice the flexibility of other LCDs. Select the perfect viewing angle and enjoy the built-in Harman/Kardon® stereo speakers. AutoAlert E-mail Notification System: Custom software automatically downloads e-mail on a pre-set schedule via Microsoft® Outlook® Express. A light on the LCD display instantly lets you know when new mail is received. VAIO Smart convertible keyboard: The innovative palm rest converts to a keyboard cover for a sleek look when not in use. Six Programmable Power Keys let you launch any application with the push of a button; dual-sided mouse connections for left- or right- hand use. Sony Memory Stick® media slot: The next generation of digital media, smaller than a stick of gum. Easily delivers information from one Memory Stick-equipped electronic device to another, so you can transfer images, sounds, data and text between cameras, computers, and more. Compact components: Enjoy the small footprint and versatile setup options available by positioning the components in an arrangement of your choice. Sony audio and video quality: High-fidelity 3D audio system and high-powered 3D graphics (AGP) enable you to take advantage of today's advanced multimedia applications, games, and entertainment software. Preinstalled software titles: All the software on your computer is preinstalled, configured, and ready for you to use right out of the box. Microsoft® Windows® 98 Second Edition operating system: Your system includes the latest operating system from Microsoft. Communications: Access popular online services, browse the Internet, send faxes, and more. * Actual upload and download speeds may vary due to line conditions, ISP support, and government regulations. Unpacking Your Computer Computer and Supplied Accessories Page 80 Manuals Read Me First contains last-minute supplementary information and software support numbers. The VAIO Slimtop LCD Computer User Guide (this manual) contains features and specifications of your computer. It also includes information on the applications included with your system and how to contact software vendors, get started with your computer, and solve common problems. The VAIO VAIO® Consumer Information Guide contains safety and regulatory information, ergonomic considerations, information on help resources, and your computer's limited warranty statement. The Microsoft® Windows®98 Second Edition Getting Started manual explains how to use the basic features of the Windows® operating system. Recovery CDs System Recovery CD(s) - Enables you to reinstall software that shipped with your computer if it is corrupted or accidentally erased. For more information, see Using the System Recovery CD(s). Application Recovery CD(s) - Allows you to reinstall individual applications or device drivers if they are corrupted or accidentally erased. For more information, see Using the Application Recovery CD(s). Other Setting up your VAIO Slimtop LCD Computer (poster) Packet containing special product offers Software CDs Page 81 Microsoft® Word 2000 Setting Up Your VAIO Slimtop LCD Computer Locating Controls and Connectors Front Panel 1 Power switch and indicator light Turns on/off the computer and the display. The indicator light is green while the power is on and amber when the computer is in standby mode. 2 Floppy disk drive Reads/writes data from/to a 3.5-inch floppy disk. 3 Floppy disk eject button Ejects the floppy disk. 4 DVD-ROM drive Reads data from a DVD-ROM/CD-ROM. 5 DVD-ROM/CD-ROM eject button Ejects a DVD-ROM/CD-ROM. 6 Manual eject hole If the DVD-ROM/CD-ROM does not come out when you press the DVD-ROM/CD-ROM eject button, insert a thin, pointed object into this hole to eject the disc manually. 7 FD (Floppy disk drive) access indicator light Lights in green while reading/writing data from/to a floppy disk. 8 Disc (DVD-ROM drive) access indicator light Lights in amber while reading data from a DVD-ROM/CD-ROM. 9 HD (drive) access indicator light Lights in green while reading/writing data from/to the hard disk. 10 MIC (Microphone) connector* Connects a microphone (not supplied). 11 PHONES (Headphones) connector* Connects headphones (not supplied). 12 VOLUME control Page 82 Adjusts the volume of the headphones connected to the PHONES connector. Users should note that this does not control the volume of the integrated LCD speakers. 13 PC CARD slot A PC Card (also called a PCMCIA card) can be installed in this slot. PC cards enable you to add functionality to your system. MEMORY STICK media slot 14 Insert a Sony Memory Stick® card into this slot. See Using the Memory Stick® Media for details on using Memory Stick media. 15 i.LINK (4-pin) Connects a digital device such as a Sony Digital Handycam® Camcorder. 16 USB (Universal Serial Bus) connector Connects a USB device. * See Using a Headphone or Microphone for important information about connecting a microphone and headphone. Rear Panel 1 AC INPUT connector Connects the supplied power cord. 2 LINE jack Connects a phone cable to the wall jack. 3 EMPTY PCI SLOT (FILLED WITH ETHERNET CARD ON CUSTOM MODELS) For a PCI Add-On Card (not supplied). 4 TELEPHONE jack Connects the phone to the computer. 5 PRINTER connector Connects a parallel device, such as a printer or scanner. 6 SERIAL connector Connects a serial device, such as a digital still camera. 7 MONITOR connector Connects a standard CRT display. 8 USB (Universal Serial Bus) connector Connects a USB device. 9 LINE IN connector Connects an audio device. 10 LINE OUT connector Connects an audio device or an active speaker. 11 i.LINK (6-pin) Connects a digital device such as a Sony Digital Handycam® Camcorder. 12 LCD MONITOR connector Connects the LCD that comes with the VAIO Slimtop LCD computer. Note: Do not connect any display to this connector other than the LCD that is supplied with this system. Page 83 13 KEYBOARD connector Connects a keyboard. LCD 1 Power indicator light Light is green while the power is on. When the computer enters the standby mode, this indicator light turns amber. 2 Information LED Light turns red to alert the user to activities, such as the arrival of e-mail. See AutoAlert E-mail Notification System. 3 Adjusts 4 Adjusts Brightness control the brightness of the screen. Volume control the volume of the integrated speakers on the LCD display. Using the Wheel Mouse For information about the Wheel Mouse that connects to either side of your keyboard, see MouseWare Help. To access MouseWare Help, from the Start menu, point to Programs, MouseWare, and then click MouseWare Help. To set up the mouse for left-handed use: 1. Click the My Computer icon on your desktop. 2. Click Control Panel, and then click Mouse. The Mouse Properties dialog box appears. 3. In the Quick Setup tab, click Device Setup. 4. In the Device Setup Wizard dialog box, click Next. 5. Select the radio button next to "Left side of the keyboard." 6. Click Next three times, and then click Finish. 7. Click Apply. Using a Headphone or Microphone When you connect a microphone or headphone to your computer, attaching a ferrite core will reduce electrical interference. Attach the (supplied) ferrite core at the end of the headphone or microphone cable closest to the computer. Wrap the cable through the center of the ferrite core. The following illustration shows how to attach the ferrite core when you are using both a headphone and a microphone. Page 84 The LCD and keyboard cables already include a ferrite core. Do not remove the ferrite core from these cables. To adjust the height and viewing angle of the display Holding both sides of the display, push the display panel out and up, and then adjust the viewing angle. The LCD display is designed to maintain the best ergonomic viewing angle. Set the display height so that it does not touch the keyboard, and adjust the viewing angle approximately 27 degrees from eye level to the center of the screen. Attaching the Stand to the System Unit The main system unit can be oriented horizontally or vertically. If you place the system in a vertical position, you must attach the supplied stand to ensure stability. 1. Place the system unit on its right side, with the front of the system facing forward. 2. Insert the grooved side of the stand into the ventilation holes of the system so that the two screw holes are aligned and the stand's fins are at the rear of the unit. 3. Secure the stand to the unit with the supplied screw. Page 85 The stand keeps the system cool by allowing air to flow under it. If you choose to place the system unit in a vertical position, it is important to use the stand and to place the system unit on its left side, as in the illustration above; otherwise, the system may overheat. Registering Your Computer Take advantage of Sony's commitment to quality customer support and receive these benefits by registering your computer: Sony Customer Support--Talk to a Support Representative to troubleshoot problems you may be having with your computer. Limited warranty--Protect your investment. See Limited Warranty Statement in the VAIO® Consumer Information Guide for details. You must register your computer to extend the warranty from the initial 90-day warranty period to one year from the original date of purchase. Express Service--Provides a fast and direct return of your VAIO Slimtop Sony for service of your computer. LCD Computer to If you did not already register when you first turned on your computer, follow these steps to use the computer online registration service. 1. Click the registration icon on the VAIO desktop. 2. Enter the information requested on the first online registration form. Press the tab key to move from box to box. 3. Click the Next button to advance to the next form. 4. Complete the remaining forms by clicking the Next button each time you complete a form. The computer automatically transfers your registration information using your built-in modem and a toll-free telephone number or a local number. You may sign up for Internet access with a Sony preferred Internet Service Provider. VAIO Action Setup VAIO Action Setup manages the settings for your computer's Programmable Power Keys (PPK), Memory Stick® media, i.LINK interface, and internal timer. An overview of each of these functions is provided below. For more information on changing the settings using VAIO Action Setup, see the online VAIO Action Setup help files. To access the help files, from the Start menu, point to Programs/VAIO Action Setup/VAIO Action Setup Help. Programmable Power Keys Your Sony computer comes with technology that allows you to get to your favorite applications Page easily. Each Programmable Power Key (PPK) on your VAIO Smart convertible keyboard comes 86 programmed to launch a preset application with a single press of the key. If you wish, you can use the VAIO Action Setup software to change the Programmable Power Keys' preset functions. The Programmable Power Keys are located at the top of your keyboard, and are numbered P1 through P6. The keys work even when the computer is turned off. Pressing one of these keys turns on the computer and launches the preset application. The six Programmable Power Keys come to you preprogrammed to perform the functions listed in the table below. Key Function P1 (INTERNET) Starts Microsoft® Internet Explorer for Windows® 98. P2 (MAIL) Starts Microsoft® Outlook® Express P3 (WORK) Starts Microsoft® Word P4 (FINANCE) Starts Intuit® Quicken® Basic 2000. P5 (SETUP) Starts PPK Setup. P6 (HELP) Opens a menu of help options. Memory Stick You can use VAIO Action Setup to preset your computer to automatically launch an application when you insert a Memory Stick. For more information on Memory Stick media, see Using the Memory Stick® Media . Internal Timer The VAIO Action Setup software allows you to set your computer's internal timer to launch certain applications automatically. The timer can start applications even when the power is off. Some software applications take longer than others to launch. It is advisable to confirm in advance the amount of time your selected application takes to start. AutoAlert E-mail Notification System VAIO Action Setup also enables you to set up your computer to notify you with an Information LED when new mail arrives in your e-mail mailbox. The Information LED turns red to indicate that new e-mail has arrived. For this AutoAlert E-mail Notification System to work, you must use Microsoft® Outlook® Express as your default e-mail software, and you must have an Internet Service Provider with dial-up capabilities set up. As an alternative, you can program your AutoAlert E-mail Notification System to set the Information LED to turn on when it has successfully completed the task of dialing up and connecting to receive mail. In this case, the Information LED turns on to indicate that your e-mail account has been accessed successfully, regardless of whether or not you have mail; this works with Microsoft Outlook Express. The e-mail software you choose to use with PPK must be set as your default e-mail software. See LCD for an illustration showing the Information LED's location. AutoAlert E-mail Notification System Software Restrictions If you use software that uses a phone line The computer may not be able to disconnect the phone line due to communication and server conditions. Be sure to monitor the status of the software when running the AutoAlert E-mail Notification System, and manually disconnect the phone line if you notice a malfunction. Furthermore, when using the timer to start the software, it is advised that you set the computer to shut down or enter system standby mode after a certain length of time. This allows the computer to disconnect the phone line if the computer fails to disconnect the line normally. If you are using the timer to download e-mail automatically Page 87 It is advisable to set up your e-mail software to redial automatically if it does not connect the first time. It is also advisable to set the e-mail software to disconnect the phone line automatically when all mail has been downloaded. If you are using Microsoft® Outlook® Express When using the AutoAlert E-mail Notification System with Microsoft Outlook Express, it is advisable to select the Dial automatically setting in your Microsoft Outlook Express software. If you have not chosen this setting and wish to do so, start Outlook Express, click Tools, and then select Options. Select the check box "Automatically dial when checking for new messages." Click OK. Changing the Window Design of Sony Software To change the window design of Sony software 1. Click the Start button, point to Settings, and then click Control Panel. 2. Click UI Design Selector. 3. Click << or >> and select the desired design. 4. Click Apply. The "UI Design Selector" window design changes. The window design for your Sony software will match the "UI Design Selector" window. To try another selection, click << or >>. Then, click OK. The UI Design Selector closes and the window design of your Sony software window design displays. You may use the feature with UI Design Selector-compatible software only. Using the Memory Stick® Media Your Sony computer is designed to support the new Memory Stick recording media. The Memory Stick media is a small, versatile device that allows you to share data between various types of Sony equipment. When you use the card, your computer automatically launches Windows Explorer. This allows you to view the contents of the card. If the image files are created by a Sony digital camera or camcorder, you do not need the following steps. If you want to create a slide show that launches automatically when you insert a Memory Stick, follow these steps to transfer images from your hard drive to a Memory Stick. 1. Insert the Memory Stick into the appropriate slot. 2. Click the My Computer icon on the desktop. Page 88 3. Click the Removable Disk S: icon. 4. Create a new folder and name it "DCIM." 5. Open the DCIM folder and create a new folder named "100MSDCF." 6. Click the Start button, select VAIO, and then click PictureGear to launch the PictureGear application. 7. Select the digital images you want to save in your slide show. 8. From the PictureGear File menu, point to File Process, and then select Still Format Conversion. 9. Select Memory Stick as the Output Format. 10. Use the Browse button to select the DCIM/100MSDCF folder on the Removable Disk (S:) drive. 11. Name the file. The file name must begin with DSC (DSC0xxxx). The full file name without extension must have at least eight characters. The order in which your photos appear in your slide show will be determined by the number (xxxx) in the file name. Some examples of acceptable file names are DSC00001.jpg and DSC00002.jpg 12. Click OK to save the file. You can also add MPEG1 video files to your Slide Show by following the steps below. The order in which your video clips (MOV0xxxx files) appear in your Slide Show is determined by the number (xxxx) in the file name. 1. Insert the Memory Stick into the media slot. 2. Click the My Computer icon on the desktop. 3. Click the Removable Disk S: icon. 4. Create a new folder and name it "MSSONY." 5. Open the MSSONY folder and create a new folder named "MOML0001." 6. From the PictureGear File menu, point to File Process, and then select Still Format Conversion. 7. Copy the MPEG file into the MOML0001 folder. 8. Rename the MPEG file MOV0xxxx.mpg, where xxxx is any four-digit number. 9. To begin showing your slides, eject the Memory Stick and then reinsert it. The slide show will begin automatically. To protect data on Memory Stick media from accidental changes Memory Stick media contains a write-protect tab. The write-protect tab prevents accidental changes to information recorded on the Memory Stick media. When you slide the write-protect tab to the LOCK position, the Memory Stick is write-protected, which means you cannot delete, copy, or save information on the Memory Stick. When you slide the tab to the un-LOCK position, you can write to or modify the Memory Stick contents. To change the way the computer responds when a Memory Stick is inserted into the Memory Stick media slot Change the options on the Memory Stick tab in the PPK Setup software. Page 89 Using PC Cards This computer has a card bus PC card slot that supports a Type I or II PC card. To insert a PC card You do not need to shut down your computer when inserting a PC card. 1. Open the front panel. 2. Insert the PC card into the PC card slot until it clicks into position. When the card is completely inserted, the eject button pops out. If you cannot insert the card, do not forcibly insert it. In this case, make sure the card is not inserted upside-down or backward, and then reinsert the card into the slot carefully. See the manual that came with the PC card for details on using it. To close the front panel when the eject button is protruding, fold the button down onto the computer. To eject a PC card If you eject the PC card incorrectly, the system may not work correctly. 1. Click the Start button on the Windows® taskbar, click Settings, and then click Control Panel. 2. Click the PC Card icon. 3. Click the name of the card that you want to eject, and then click Stop. 4. When the message "You may safely remove this device" appears, click OK. 5. Push the PC card eject button on the front panel of the system unit. You may need to pull out the eject button before you can eject the card. Page 90 The card is ejected from the card connector. Remove the card by holding it by its edge and pulling it out carefully. Using the Standby Function When you are finished using your computer, you can put it in standby mode rather than turn it off completely. Putting the computer in standby mode allows you to return quickly to normal computer use. To put the computer in standby mode manually 1. Save your work and close any applications that are running. (You can leave Windows running.) 2. Press the (Standby) button on the top of the keyboard. The computer goes into standby mode. Alternatively, you can click the Start button on the Windows® taskbar, click Shut Down, select Standby, and then click OK. To let the computer go into standby mode automatically Click the My Computer icon on your desktop. Click Control Panel, and then click the Power Management icon. On the Power Schemes tab, select from the options in the Power schemes drop-down list. Then, choose settings for the power scheme you have selected. To save the settings under a name that is not offered in the Power schemes pulldown menu, choose your settings and then click Save As. Type in a name, and click OK. Click Apply to finalize your power settings. To resume from standby mode There are three ways to bring your computer back from the standby mode: press the space bar on your keyboard, press the left mouse button, or momentarily depress the power button on your computer. If the display does not return from standby when you press the (Standby) button, your system may be in video standby mode. Press the space bar on the keyboard to return from video standby. Standby Mode Indicators You can tell which mode the computer is in by the color of the power indicator light. Color Amber Green No color Mode Computer is in standby mode. Computer is out of standby mode, ready to use. Computer is turned off. In standby mode you may periodically hear the computer's fan turn on and off, depending on the room's temperature. This is normal functioning in standby mode. Page 91 Shutting Down Your Computer When you are ready to turn off your computer for an extended period of time, use the following procedure to shut down the computer. To avoid the potential loss of data, do not use the power switch to shut down the computer. To shut down your computer If you plan to shut down your computer for a short period of time, you may want to use standby mode instead. See Using the Standby Function. 1. Click the Start button on the Windows® taskbar to open the Start menu. 2. Click Shut Down to display the Shut Down Windows dialog box. 3. Select the Shut Down option. 4. Click OK to complete the shutdown process. Respond to any prompts about saving documents. 5. Wait for your computer to turn off automatically -- the power indicator light turns off. 6. Turn off any peripherals connected to your computer. The LCD display turns off automatically when the computer shuts down. You can also shut down your computer using the (Power) button on the keyboard. Pressing this button causes the system to perform a shutdown but does not give you any of the other options available on the Windows® Shut Down menu. About the Power Switch If your system "locks up" or "crashes," press and hold the power switch for four seconds to force your system to power off. You may need to repeat this procedure. See Locating Controls and Connectors for the power switch's location. Using the System Recovery CD(s) You can reinstall software titles that shipped with your computer if they are corrupted or accidentally erased. You may not need to recover the entire contents of your hard drive. If you experience a problem with your computer, reinstalling an individual device driver or software title may correct the problem. Use the Application Recovery CD(s) to reinstall individual applications or device drivers. See Using the Application Recovery CD(s). The System Recovery CD(s) contain a backup copy of all the software originally installed on your hard disk drive. They can be used only to recover the hard disk of the Sony computer you purchased. The System Recovery utility gives you three options: Full Restore without Format restores all the software titles that originally came with your computer without formatting the hard disk. Full Restore with Format formats the hard disk drive and then restores all the original software. If your hard drive is partitioned into C and D drives, the computer will offer you the option to reformat the drive into a single partition. Operating System Only (Windows 98® Restore with Format) formats the hard disk drive and Page 92 restores the Windows® operating system and the device drivers that shipped with your computer. This option is recommended for advanced users only. If you choose the Full Restore with Format or Operating System Only option, your hard disk will be formatted, which removes all the information on the hard disk drive. You will lose any software you have installed and any other files you have created since you started to use your computer. This means you will have to reinstall any applications that were not included with the computer when you purchased it. If you choose the Full Restore without Format option, you may need to reinstall applications that were not included with the computer when you purchased it. If you have any questions on using the System Recovery CD(s), contact Sony Customer Support. To use the System Recovery CD(s) You need to complete the Windows registration process when you use the System Recovery CD(s). 1. Insert the Sony System Recovery CD(s) in the DVD-ROM drive. The System Recovery utility boots from the DVD-ROM drive. It must be in the drive when you turn on the computer. 2. Shut down your computer as described in Shutting Down Your Computer. 3. Wait 30 seconds and turn on your computer. 4. Click OK to signify you have read and accept the Microsoft End-User License Agreement. 5. When the System Recovery menu appears, follow the on-screen instructions to complete the recovery process. Your system may include one or two System Recovery CDs. If you have two System Recovery CDs, insert the first CD to run the System Recovery program. You are prompted to insert the second CD once the information from the first CD has been installed. The recovery process takes 30 to 60 minutes to complete. Using the Application Recovery CD(s) The Application Recovery CD(s) allow you to reinstall individual applications and device drivers if they are corrupted or accidentally erased. Reinstalling an individual device driver or software title may correct a problem you are experiencing with your computer, and you may not need to recover the entire contents of your hard drive. If you do need to reinstall all the software titles that shipped with your computer, use the System Recovery CD(s). See Using the System Recovery CD(s). You must be in Windows to run the Application Recovery CD(s). The application will not run from DOS. If you have any questions on using the Application Recovery CD(s), contact Sony Customer Support. To use the Application Recovery CD(s) 1. Turn on your computer. If your computer is already on, close all applications. 2. When the Windows desktop appears, insert the Sony Application Recovery CD in the DVD-ROM drive. The Application Recovery utility loads automatically. 3. When the Application Recovery menu appears, follow the on-screen instructions to complete the recovery process. Your system may include one or two Application Recovery CDs. If you have two Application Recovery CDs, insert the first CD to run the Application Recovery program. You may be prompted to insert the second CD, depending on the application you wish to restore. Page 93 About the Software on Your Computer Your VAIO Slimtop computer is ready to help you work, play, learn, and communicate as soon as you turn it on. This section gives you an overview of the activities you can perform with your software titles. For support information, see For Answers to Your Software Questions . Adobe Acrobat® Reader Adobe Systems Incorporated Acrobat Reader software allows you to view, navigate, and print electronic documents in Adobe's Portable Document Format (PDF), an open file format that is intended to preserve the fidelity of documents created on all major computer platforms. Adobe PhotoDeluxe® Home Edition Adobe Systems Incorporated Create amazing photo effects with PhotoDeluxe. Without learning complex software, you can enhance, restore, and be creative with your photos. Includes built-in guided activities, stock photos, clip art, and templates to assist you. Adobe Premiere® LE Adobe Systems Incorporated Adobe Premiere LE offers an interface and editing tool for producing movies for video, multimedia, or the Web. View source clips and edited footage simultaneously in the monitor window. Create video clips up to three hours long with complete audio-video synchronization. America Online® America Online America Online is the world's most popular Internet online service. Stay in touch with family and friends with Easy-to-Use E-mail, manage your personal finances, get the latest news and sports scores, and chat with thousands of others who share your interests. AT&T WorldNet® Service AT&T Fast, reliable Internet access from AT&T WorldNet Service. AT&T WorldNet Service provides Web-based e-mail, a personalized start page from Excite, easy access to the Excite search engine, free Web pages, online and live agent technical support, instant messaging, and special shopping discounts at Market Square. CompuServe® 2000 CompuServe Interactive Services The all new CompuServe 2000 delivers a powerful tool for Internet users who want serious and timely information, in-depth research, and professional communities backed by state-of-the-art technologies, including high-speed access and powerful e-mail messaging. Digital Media Bar Sony Electronics Media Bar software is your all-in-one solution for audio/video playback. It handles all common computer multimedia formats, and controls selected Sony devices. Media Bar software encompasses audio/video library cataloging and playlist management, in addition to digital video quality control and effects features. DVgate Sony Electronics Connect a digital video camera recorder to the i.LINK connector and capture your own video clips. You can edit the clips from your video, add others, and combine clips into new movie segments. EarthLink TotalAccess EarthLink Network, Inc. Page 94 An Internet Service Provider that supplies access, information, and assistance to its customers, introducing them to the Internet. Member benefits include e-mail, newsgroups, a Personal Start Page, a free 6 MB web site, a member magazine, and 24-hour technical support. McAfee's VirusScan® Network Associates, Inc. Protect your computer from viruses. VirusScan can detect viruses from floppy disks, Internet downloads, e-mail attachments, intranets, shared files, CD-ROMs, and online services. Microsoft® Internet Explorer for Windows® 98 Microsoft Corporation Internet Explorer delivers the Web the way you want it. It's safe, easy to use, and you can personalize how you access the Web. Outlook Express and other tools in Internet Explorer also help you have a great experience when you are on the Web! Microsoft® Outlook® Express Microsoft Corporation Outlook Express, the messaging tool that takes your e-mail and newsgroup communications to new heights! Outlook Express is easy to set up and use, and provides you with secure, personalized, and complete features that make creating, sending, and reading your e-mail a more rich and dynamic experience. Microsoft® Word 2000 Microsoft Corporation Microsoft Word 2000 makes it easy to create common Web, e-mail, and print documents for use around the world. It embraces HTML as a first-class file format and extends Word's ease-of-use to the Web and e-mail. Word 2000 also extends that ease of use to international users, making it easy to create multilingual documents. Netscape Communicator® Netscape Communications Netscape Communicator is the all-in-one Internet tool that makes it easy to browse the Web, send Internet e-mail, chat, read newsgroups, and compose great Web documents. PictureGear Sony Electronics This image management software displays images from your hard drive, a Sony digital still camera, or a Sony Mavica® camera. The images appear in a convenient light-table format, so that you can easily view the contents of an entire folder. Prodigy Internet Prodigy Communications Corporation An Internet service that helps you find what you need online faster and smarter. Prodigy delivers powerful online content, such as sports scores, stock quotes, news, and easy access to Excite , plus a personal e-mail account and quality customer service, all at a competitive price. Quicken® Basic Intuit, Inc. Quicken is the fastest, easiest way to organize your finances. Quicken works just like your checkbook, so it's easy to learn and use. Quicken manages all of your finances, bank accounts, credit cards, investments, and loans. You can even pay your bills online. Smart Capture Sony Electronics Smart Capture is a fun new way to send multimedia messages via e-mail. Smart Capture manages the i.LINK connection between your computer and a Sony Digital Handycam® Camcorder or other Page 95 cameras that support the i.LINK interface. It allows you to capture and compress video or still images that you can save or share via e-mail. A smart solution to computer, digital audio/video, and network convergence. Smart Connect Sony Electronics Smart Connect allows you to use an i.LINK cable to connect your VAIO computer to another VAIO computer that supports Smart Connect. You can then use one computer to copy, delete, and edit files on the other computer. You can also print from a printer attached to either computer. Sound Forge® Sonic Foundry Sound Forge allows you to put powerful audio processing tools and effects to work on your desktop. Simply cut, copy, and paste your way to striking multimedia files for use in everything from Web pages to desktop presentations. VAIO Action Setup Sony Electronics VAIO Action Setup manages the settings for your computer's Programmable Power Keys (PPK), Memory Stick media, i.LINK interface, and internal timer. For more information, see VAIO Action Setup. WinFax® Basic Edition Symantec Corporation WinFax Basic Edition incorporates an easy-to-use interface that allows you to send and receive faxes easily. Upgrade to WinFax Pro to receive additional features. About Your Recovery CDs Application Recovery CD(s) Sony Electronics The Application Recovery CD program allows you to reinstall individual applications and device drivers. Use it to restore corrupted or accidentally erased files. System Recovery CD(s) Sony Electronics The System Recovery CD program allows you to restore the software titles that shipped with your computer if they become corrupted or are erased accidentally. It can be used only to restore the hard disk of the Sony computer you purchased. For Answers to Your Software Questions Acrobat® Reader, Adobe PhotoDeluxe® Home Edition (Adobe Systems Incorporated) Web site http://www.adobe.com/ phone 206-628-2746 (fee-based support) fax 206-628-5737 e-mail [email protected] hours M-F, 6 AM-5 PM PT America Online® (America Online) Web site phone hours http://www.aol.com/ 800-827-3338 7 days a week, 6 AM - 2 PM ET AT&T WorldNet® Service (AT&T) Web site phone e-mail http://www.att.net 800-400-1447 [email protected] Page 96 hours 7 days a week, 24 hours a day CompuServe® 2000 (CompuServe Interactive Services) Web site phone hours http://www.compuserve.com/ 800-848-8990 M-F, 8 AM - 1 AM ET, S-S 10 AM - 10 PM ET EarthLink TotalAccess Web site phone e-mail hours (EarthLink Network, Inc.) http://help.earthlink.net/techsupport/ 800-395-8410 [email protected] 7 days a week, 24 hours a day GTE Easy Sign-up (GTE Internet) phone hours 800-927-3000 7 days a week, 24 hours a day McAfee's VirusScan (Network Associates, Inc.) Web site phone e-mail hours http://support.mcafee.com 408-988-3832 [email protected] M - F 9 AM - 5 PM Central Time MindSpring Internet Desktop (MindSpring Enterprises, Inc.) Web site phone http://help.mindspring.com/support 800-719-4660 Quicken® Basic (Intuit Inc.) Web site phone hours http://www.intuit.com/support 900-555-4688 7 days a week, 24 hours a day Sound Forge® (Sonic Foundry) Web site http://www.sonicfoundry.com/support/ phone 608-256-5555 fax 608-256-7300 e-mail [email protected] hours M - F, 8 AM - 7 PM CT Windows® 98 Second Edition Operating System, Word® 2000, Internet Explorer 5, Outlook® Express (Microsoft Corporation) Web site phone hours 1 http://www.sony.com/pcsupport 888-4SONYPC (888-476-6972) 1 7 days a week, 24 hours a day Support from 1-888-4SONYPC is free of charge for 90 days after the original date of purchase. WinFax® Basic Edition (Symantec Corporation) Web site http://www.symantec.com/techsupp/ phone 800-798-0850 fax 800-554-4403 in North America 541-984-2490 outside North America Troubleshooting This section describes how to solve common problems you may encounter when using your computer. Many problems have simple solutions, so try these suggestions before you call Sony Customer Support. My computer does not start Check that the computer is plugged into a power source and that it is turned on. Check that the power light is lit on the front panel of the computer. Confirm that a diskette is not in the diskette drive (unless you are using a bootable diskette). Confirm that the power cord and all cables are connected firmly, as described on the color poster. Page 97 If you plugged the computer into a power strip or UPS, make sure the power strip or UPS is turned on and working. My computer or software program "locks up" Close the application that is currently "locked up" by pressing Ctrl+Alt+Delete. In the Close Program dialog box, scroll down until you locate "(Not responding)" next to an application. Select this application and click End Task. Windows attempts to close the application. If the attempt is unsuccessful, a second dialog box appears. Select End Task again. If you are unable to "unlock" the application, repeat the above steps but select Shut Down when the Close Program dialog box appears. If the above steps fail to "unlock" your computer, save any unsaved work, if possible. Press Alt+F4. Select Restart and click OK. If you cannot restart as described in the preceding steps, you can restart the computer by pressing Ctrl+Alt+Delete or by pressing the power switch for more than six seconds. Pressing Ctrl+Alt+Delete may result in the loss of changes made to files that are currently open. Contact the software publisher or designated provider for technical support. See For Answers to Your Software Questions for a list of phone numbers and Web addresses or see Read Me First . My DVD-ROM/CD-ROM drive tray does not open Make sure the computer is turned on. If the Eject button does not work, you can open the tray by inserting a straightened heavyweight paper clip into the emergency eject hole. When I click an application icon, a message such as "You must insert the application CD into your CD-ROM (DVD-ROM) drive" appears and the software does not start Some titles require specific files that are located on the application's DVD-ROM/CD-ROM. Insert the disc and try starting the program again. Check to make sure you inserted the DVD-ROM/CD-ROM with the label side facing up. My modem connection is slow The computer's modem uses K56flex technology/V.90. Many factors influence modem connection speed, including telephone line noise or compatibility with telephone equipment (such as fax machines or other modems). If you think your modem is not connecting properly to other computer-based modems, fax machines, or your Internet Service Provider, check the following: Have your phone company check that your phone line is free from any line noise. If your problem is fax-related, check that there are no problems with the fax machine you are calling. The modem that receives your call may be slower or may use a different communications protocol than your modem. If this is the case, the connection speed may be slower than expected. For optimum performance, ensure you are calling an Internet Service Provider number that is V.90-compliant. If you are having a problem connecting with your Internet Service Provider, check that the ISP is not experiencing technical problems. If you have a second phone line available, try connecting the modem to this line. My modem does not work Check that the phone line is plugged into the line jack. Page Check that the phone line is working. You can check the line by plugging in an ordinary phone and98 listening for a dial tone. Check that the phone number the program is dialing is correct. Verify that the software you are using is appropriately configured to recognize and interact with the Sony computer modem. Call the software publisher if you do not know how to configure the software to recognize the modem. All programs preinstalled by Sony are compatible. If you suspect your modem is not functioning, you can perform a simple test to find out. Click the My Computer icon on your desktop. Click Control Panel, and then click Modems. Click the Diagnostics tab and select COM3. Click More Info. If your modem is functioning, a More Info dialog box will display. If your modem is not functioning, an error message will appear. My microphone is too sensitive to background noise If you find there is too much background noise when you record sound, you should adjust the microphone gain by following these steps: 1. Right-click the speaker icon (Volume) in the lower-right Windows® task tray. 2. Click Open Volume Controls. The Volume Control screen appears. 3. In the Options menu, select Properties. The Properties screen appears. 4. Change the setting for "Adjust volume for" from Playback to Recording, and then click OK. 5. Click the Advanced button under Microphone Balance. The Advanced Controls for Microphone screen appears. 6. Deselect the check box for 1 Mic Gain (+20dB), then click the Close button. 7. Close the Recording Control window. My mouse does not work Check that the mouse is plugged into one of the PS/2® connectors on the keyboard. The other connector connects the keyboard to the computer. There may be dust or dirt inside the mouse mechanism. To clean the mouse, follow these steps: o Turn off your computer. See Shutting Down Your Computer for details. o Remove the mouse ball cover on the back of the mouse by turning the ring that covers the mouse ball clockwise. o Turn the mouse upright, and drop the mouse ball into your hand. o Using a piece of tape, remove any dust or dirt on the mouse ball and inside the mouse ball socket. o Return the mouse ball to the socket, and replace the mouse ball cover. Secure the cover by turning the ring counter-clockwise. I cannot find the Windows® taskbar Check that the taskbar is not hidden or shrunken. Use the mouse to point to the left, right, top, and bottom edges of the screen. See Read Me First for additional information on using your Sony computer. To Reach Sony For further assistance, call 1-888-4SONYPC (1-888-476-6972). Page 99 Specifications Model PCV-L630 Processor 600E MHz* Pentium® III Hard Disk Drive 17 GB Ultra DMA Standard SDRAM 128 MB PC-100 SDRAM, expandable to 256 MB Video RAM 8 MB SDRAM Graphics 2X AGP 3D graphics hardware acceleration (ATi Rage 128 Pro 4XL) Sound Capabilities High fidelity 3D PCI audio Aureal AU8810 Diskette Drive 3.5" 1.44 MB FDD DVD-ROM/CD-ROM Drive 4.8X (max.) DVD-ROM reading 24X (max.) CD-ROM reading** Modem K56flex technology/V.90 compatible data/fax modem Expansion Capabilities Two PCI slots Connection Capabilities (Front) PC card (Card bus support) USB port Microphone Headphone Memory Stick media slot i.LINK (4-pin) Connection Capabilities (Rear) USB port Modem line (RJ-11) Phone line (RJ-11) Parallel (printer) Serial port VGA monitor LCD display Line In Line Out Keyboard i.LINK (6-pin) Connection Capabilities (Keyboard) Mouse (PS/2-style) left and right connectors Supplied Accessories Stand (for vertical installation) Power cable Phone cable Keyboard cable PS/2 Wheel Mouse VAIO Smart Convertible Keyboard Spacers (for bottom of the system) Ferrite core Service 90-day limited express service*** Extendible to one year from original date of purchase upon registration Limited Warranty90-day parts/labor standard Extendible to one year from original date of purchase upon registration Power Requirements 130 watts maximum Dimensions CPU: 11.2"(w) x 3.6" (h) x 13.4" (d) (280 mm x 90 mm x 335 mm) Keyboard: 15.9" (w) x 1.8" (h) x 7.1" (d) (398 mm x 45 mm x 178 mm) Display: 16.1" (w) x 13.1" (h) x 6.9" (d) (403 mm x 327 mm x 172 mm) Weight CPU: 11.9 lbs. (5.4kg) Display: 7.05 lbs (3.2 kg) Keyboard: 2.9 lbs. (1.3kg) Operating Temperature 50º F to 95º F (+10º C to 35º C) * MHz denotes microprocessor internal clock speed; other factors may affect application performance. Page 100 GB means one billion bytes when referring to hard drive capacity. Accessible capacity may vary. **Data on a DVD-ROM is read at a variable transfer rate, ranging from 2X at the innermost track to 4.8X at the outermost track(the data transfer standard 1X rate is 1385 kbytes/s). The average data transfer rate is 3.6X(4986 kbytes/s). Data on a CD-ROM is read at a variable transfer rate, ranging from 10.5X at the innermost track to 24X at the outermost track(the data transfer standard 1X rate is 150 kbytes/s). The average data transfer is 18X(2700 kbytes/s). Maximum speed for faxing is 14.4 kbytes/s. Your modem is capable of downloading at 56 kbytes/s using K56flex technology or V.90. Your phone service, online service, or Internet Service Provider, however, may not support this technology or operate at this speed. ***Certain restrictions apply. Specifications are subject to change without notice. Page 101 Features For a complete description of the specifications of your Sony computer, see Specifications. i.LINK® (IEEE-1394): Two built-in i.LINK ports provide you with front and rear digital connection capability. The i.LINK name and logo identify a digital interface (IEEE-1394) for high speed communication. Exceptional performance: Your computer includes a fast Intel® processor and a V.90-compatible data/fax modem. Ergo-Angle Multimedia LCD display: With its exclusive dual-hinge pedestal, this 15" XGA TFT display provides twice the flexibility of other LCDs. Select the perfect viewing angle and enjoy the built-in Harman/Kardon® stereo speakers. AutoAlert E-mail Notification System: Custom software automatically downloads e-mail on a pre-set schedule via Microsoft® Outlook® Express. A light on the LCD display instantly lets you know when new mail is received. VAIO Smart convertible keyboard: The innovative palm rest converts to a keyboard cover for a sleek look when not in use. Six Programmable Power Keys let you launch any application with the push of a button; dual-sided mouse connections for left- or right- hand use. Sony Memory Stick® media slot: The next generation of digital media, smaller than a stick of gum. Easily delivers information from one Memory Stick-equipped electronic device to another, so you can transfer images, sounds, data and text between cameras, computers, and more. Compact components: Enjoy the small footprint and versatile setup options available by positioning the components in an arrangement of your choice. Sony audio and video quality: High-fidelity 3D audio system and high-powered 3D graphics (AGP) enable you to take advantage of today's advanced multimedia applications, games, and entertainment software. Preinstalled software titles: All the software on your computer is preinstalled, configured, and ready for you to use right out of the box. Microsoft® Windows® 98 Second Edition operating system: Your system includes the latest operating system from Microsoft. Communications: Access popular online services, browse the Internet, send faxes, and more. * Actual upload and download speeds may vary due to line conditions, ISP support, and government regulations. Unpacking Your Computer Computer and Supplied Accessories Page 102 Manuals Read Me First contains last-minute supplementary information and software support numbers. The VAIO Slimtop LCD Computer User Guide (this manual) contains features and specifications of your computer. It also includes information on the applications included with your system and how to contact software vendors, get started with your computer, and solve common problems. The VAIO VAIO® Consumer Information Guide contains safety and regulatory information, ergonomic considerations, information on help resources, and your computer's limited warranty statement. The Microsoft® Windows®98 Second Edition Getting Started manual explains how to use the basic features of the Windows® operating system. Recovery CDs System Recovery CD(s) - Enables you to reinstall software that shipped with your computer if it is corrupted or accidentally erased. For more information, see Using the System Recovery CD(s). Application Recovery CD(s) - Allows you to reinstall individual applications or device drivers if they are corrupted or accidentally erased. For more information, see Using the Application Recovery CD(s). Other Setting up your VAIO Slimtop LCD Computer (poster) Packet containing special product offers Software CDs Page 103 Microsoft® Word 2000 Setting Up Your VAIO Slimtop LCD Computer Locating Controls and Connectors Front Panel 1 Power switch and indicator light Turns on/off the computer and the display. The indicator light is green while the power is on and amber when the computer is in standby mode. 2 Floppy disk drive Reads/writes data from/to a 3.5-inch floppy disk. 3 Floppy disk eject button Ejects the floppy disk. 4 DVD-ROM drive Reads data from a DVD-ROM/CD-ROM. 5 DVD-ROM/CD-ROM eject button Ejects a DVD-ROM/CD-ROM. 6 Manual eject hole If the DVD-ROM/CD-ROM does not come out when you press the DVD-ROM/CD-ROM eject button, insert a thin, pointed object into this hole to eject the disc manually. 7 FD (Floppy disk drive) access indicator light Lights in green while reading/writing data from/to a floppy disk. 8 Disc (DVD-ROM drive) access indicator light Lights in amber while reading data from a DVD-ROM/CD-ROM. 9 HD (drive) access indicator light Lights in green while reading/writing data from/to the hard disk. 10 MIC (Microphone) connector* Connects a microphone (not supplied). 11 PHONES (Headphones) connector* Connects headphones (not supplied). 12 VOLUME control Page 104 Adjusts the volume of the headphones connected to the PHONES connector. Users should note that this does not control the volume of the integrated LCD speakers. 13 PC CARD slot A PC Card (also called a PCMCIA card) can be installed in this slot. PC cards enable you to add functionality to your system. MEMORY STICK media slot 14 Insert a Sony Memory Stick® card into this slot. See Using the Memory Stick® Media for details on using Memory Stick media. 15 i.LINK (4-pin) Connects a digital device such as a Sony Digital Handycam® Camcorder. 16 USB (Universal Serial Bus) connector Connects a USB device. * See Using a Headphone or Microphone for important information about connecting a microphone and headphone. Rear Panel 1 AC INPUT connector Connects the supplied power cord. 2 LINE jack Connects a phone cable to the wall jack. 3 EMPTY PCI SLOT (FILLED WITH ETHERNET CARD ON CUSTOM MODELS) For a PCI Add-On Card (not supplied). 4 TELEPHONE jack Connects the phone to the computer. 5 PRINTER connector Connects a parallel device, such as a printer or scanner. 6 SERIAL connector Connects a serial device, such as a digital still camera. 7 MONITOR connector Connects a standard CRT display. 8 USB (Universal Serial Bus) connector Connects a USB device. 9 LINE IN connector Connects an audio device. 10 LINE OUT connector Connects an audio device or an active speaker. 11 i.LINK (6-pin) Connects a digital device such as a Sony Digital Handycam® Camcorder. 12 LCD MONITOR connector Connects the LCD that comes with the VAIO Slimtop LCD computer. Note: Do not connect any display to this connector other than the LCD that is supplied with this system. Page 105 13 KEYBOARD connector Connects a keyboard. LCD 1 Power indicator light Light is green while the power is on. When the computer enters the standby mode, this indicator light turns amber. 2 Information LED Light turns red to alert the user to activities, such as the arrival of e-mail. See AutoAlert E-mail Notification System. 3 Adjusts 4 Adjusts Brightness control the brightness of the screen. Volume control the volume of the integrated speakers on the LCD display. Using the Wheel Mouse For information about the Wheel Mouse that connects to either side of your keyboard, see MouseWare Help. To access MouseWare Help, from the Start menu, point to Programs, MouseWare, and then click MouseWare Help. To set up the mouse for left-handed use: 1. Click the My Computer icon on your desktop. 2. Click Control Panel, and then click Mouse. The Mouse Properties dialog box appears. 3. In the Quick Setup tab, click Device Setup. 4. In the Device Setup Wizard dialog box, click Next. 5. Select the radio button next to "Left side of the keyboard." 6. Click Next three times, and then click Finish. 7. Click Apply. Using a Headphone or Microphone When you connect a microphone or headphone to your computer, attaching a ferrite core will reduce electrical interference. Attach the (supplied) ferrite core at the end of the headphone or microphone cable closest to the computer. Wrap the cable through the center of the ferrite core. The following illustration shows how to attach the ferrite core when you are using both a headphone and a microphone. Page 106 The LCD and keyboard cables already include a ferrite core. Do not remove the ferrite core from these cables. To adjust the height and viewing angle of the display Holding both sides of the display, push the display panel out and up, and then adjust the viewing angle. The LCD display is designed to maintain the best ergonomic viewing angle. Set the display height so that it does not touch the keyboard, and adjust the viewing angle approximately 27 degrees from eye level to the center of the screen. Attaching the Stand to the System Unit The main system unit can be oriented horizontally or vertically. If you place the system in a vertical position, you must attach the supplied stand to ensure stability. 1. Place the system unit on its right side, with the front of the system facing forward. 2. Insert the grooved side of the stand into the ventilation holes of the system so that the two screw holes are aligned and the stand's fins are at the rear of the unit. 3. Secure the stand to the unit with the supplied screw. Page 107 The stand keeps the system cool by allowing air to flow under it. If you choose to place the system unit in a vertical position, it is important to use the stand and to place the system unit on its left side, as in the illustration above; otherwise, the system may overheat. Registering Your Computer Take advantage of Sony's commitment to quality customer support and receive these benefits by registering your computer: Sony Customer Support--Talk to a Support Representative to troubleshoot problems you may be having with your computer. Limited warranty--Protect your investment. See Limited Warranty Statement in the VAIO® Consumer Information Guide for details. You must register your computer to extend the warranty from the initial 90-day warranty period to one year from the original date of purchase. Express Service--Provides a fast and direct return of your VAIO Slimtop Sony for service of your computer. LCD Computer to If you did not already register when you first turned on your computer, follow these steps to use the computer online registration service. 1. Click the registration icon on the VAIO desktop. 2. Enter the information requested on the first online registration form. Press the tab key to move from box to box. 3. Click the Next button to advance to the next form. 4. Complete the remaining forms by clicking the Next button each time you complete a form. The computer automatically transfers your registration information using your built-in modem and a toll-free telephone number or a local number. You may sign up for Internet access with a Sony preferred Internet Service Provider. VAIO Action Setup VAIO Action Setup manages the settings for your computer's Programmable Power Keys (PPK), Memory Stick® media, i.LINK interface, and internal timer. An overview of each of these functions is provided below. For more information on changing the settings using VAIO Action Setup, see the online VAIO Action Setup help files. To access the help files, from the Start menu, point to Programs/VAIO Action Setup/VAIO Action Setup Help. Programmable Power Keys Your Sony computer comes with technology that allows you to get to your favorite applications Page easily. Each Programmable Power Key (PPK) on your VAIO Smart convertible keyboard comes 108 programmed to launch a preset application with a single press of the key. If you wish, you can use the VAIO Action Setup software to change the Programmable Power Keys' preset functions. The Programmable Power Keys are located at the top of your keyboard, and are numbered P1 through P6. The keys work even when the computer is turned off. Pressing one of these keys turns on the computer and launches the preset application. The six Programmable Power Keys come to you preprogrammed to perform the functions listed in the table below. Key Function P1 (INTERNET) Starts Microsoft® Internet Explorer for Windows® 98. P2 (MAIL) Starts Microsoft® Outlook® Express P3 (WORK) Starts Microsoft® Word P4 (FINANCE) Starts Intuit® Quicken® Basic 2000. P5 (SETUP) Starts PPK Setup. P6 (HELP) Opens a menu of help options. Memory Stick You can use VAIO Action Setup to preset your computer to automatically launch an application when you insert a Memory Stick. For more information on Memory Stick media, see Using the Memory Stick® Media . Internal Timer The VAIO Action Setup software allows you to set your computer's internal timer to launch certain applications automatically. The timer can start applications even when the power is off. Some software applications take longer than others to launch. It is advisable to confirm in advance the amount of time your selected application takes to start. AutoAlert E-mail Notification System VAIO Action Setup also enables you to set up your computer to notify you with an Information LED when new mail arrives in your e-mail mailbox. The Information LED turns red to indicate that new e-mail has arrived. For this AutoAlert E-mail Notification System to work, you must use Microsoft® Outlook® Express as your default e-mail software, and you must have an Internet Service Provider with dial-up capabilities set up. As an alternative, you can program your AutoAlert E-mail Notification System to set the Information LED to turn on when it has successfully completed the task of dialing up and connecting to receive mail. In this case, the Information LED turns on to indicate that your e-mail account has been accessed successfully, regardless of whether or not you have mail; this works with Microsoft Outlook Express. The e-mail software you choose to use with PPK must be set as your default e-mail software. See LCD for an illustration showing the Information LED's location. AutoAlert E-mail Notification System Software Restrictions If you use software that uses a phone line The computer may not be able to disconnect the phone line due to communication and server conditions. Be sure to monitor the status of the software when running the AutoAlert E-mail Notification System, and manually disconnect the phone line if you notice a malfunction. Furthermore, when using the timer to start the software, it is advised that you set the computer to shut down or enter system standby mode after a certain length of time. This allows the computer to disconnect the phone line if the computer fails to disconnect the line normally. If you are using the timer to download e-mail automatically Page 109 It is advisable to set up your e-mail software to redial automatically if it does not connect the first time. It is also advisable to set the e-mail software to disconnect the phone line automatically when all mail has been downloaded. If you are using Microsoft® Outlook® Express When using the AutoAlert E-mail Notification System with Microsoft Outlook Express, it is advisable to select the Dial automatically setting in your Microsoft Outlook Express software. If you have not chosen this setting and wish to do so, start Outlook Express, click Tools, and then select Options. Select the check box "Automatically dial when checking for new messages." Click OK. Changing the Window Design of Sony Software To change the window design of Sony software 1. Click the Start button, point to Settings, and then click Control Panel. 2. Click UI Design Selector. 3. Click << or >> and select the desired design. 4. Click Apply. The "UI Design Selector" window design changes. The window design for your Sony software will match the "UI Design Selector" window. To try another selection, click << or >>. Then, click OK. The UI Design Selector closes and the window design of your Sony software window design displays. You may use the feature with UI Design Selector-compatible software only. Using the Memory Stick® Media Your Sony computer is designed to support the new Memory Stick recording media. The Memory Stick media is a small, versatile device that allows you to share data between various types of Sony equipment. When you use the card, your computer automatically launches Windows Explorer. This allows you to view the contents of the card. If the image files are created by a Sony digital camera or camcorder, you do not need the following steps. If you want to create a slide show that launches automatically when you insert a Memory Stick, follow these steps to transfer images from your hard drive to a Memory Stick. 1. Insert the Memory Stick into the appropriate slot. 2. Click the My Computer icon on the desktop. Page 110 3. Click the Removable Disk S: icon. 4. Create a new folder and name it "DCIM." 5. Open the DCIM folder and create a new folder named "100MSDCF." 6. Click the Start button, select VAIO, and then click PictureGear to launch the PictureGear application. 7. Select the digital images you want to save in your slide show. 8. From the PictureGear File menu, point to File Process, and then select Still Format Conversion. 9. Select Memory Stick as the Output Format. 10. Use the Browse button to select the DCIM/100MSDCF folder on the Removable Disk (S:) drive. 11. Name the file. The file name must begin with DSC (DSC0xxxx). The full file name without extension must have at least eight characters. The order in which your photos appear in your slide show will be determined by the number (xxxx) in the file name. Some examples of acceptable file names are DSC00001.jpg and DSC00002.jpg 12. Click OK to save the file. You can also add MPEG1 video files to your Slide Show by following the steps below. The order in which your video clips (MOV0xxxx files) appear in your Slide Show is determined by the number (xxxx) in the file name. 1. Insert the Memory Stick into the media slot. 2. Click the My Computer icon on the desktop. 3. Click the Removable Disk S: icon. 4. Create a new folder and name it "MSSONY." 5. Open the MSSONY folder and create a new folder named "MOML0001." 6. From the PictureGear File menu, point to File Process, and then select Still Format Conversion. 7. Copy the MPEG file into the MOML0001 folder. 8. Rename the MPEG file MOV0xxxx.mpg, where xxxx is any four-digit number. 9. To begin showing your slides, eject the Memory Stick and then reinsert it. The slide show will begin automatically. To protect data on Memory Stick media from accidental changes Memory Stick media contains a write-protect tab. The write-protect tab prevents accidental changes to information recorded on the Memory Stick media. When you slide the write-protect tab to the LOCK position, the Memory Stick is write-protected, which means you cannot delete, copy, or save information on the Memory Stick. When you slide the tab to the un-LOCK position, you can write to or modify the Memory Stick contents. To change the way the computer responds when a Memory Stick is inserted into the Memory Stick media slot Change the options on the Memory Stick tab in the PPK Setup software. Page 111 Using PC Cards This computer has a card bus PC card slot that supports a Type I or II PC card. To insert a PC card You do not need to shut down your computer when inserting a PC card. 1. Open the front panel. 2. Insert the PC card into the PC card slot until it clicks into position. When the card is completely inserted, the eject button pops out. If you cannot insert the card, do not forcibly insert it. In this case, make sure the card is not inserted upside-down or backward, and then reinsert the card into the slot carefully. See the manual that came with the PC card for details on using it. To close the front panel when the eject button is protruding, fold the button down onto the computer. To eject a PC card If you eject the PC card incorrectly, the system may not work correctly. 1. Click the Start button on the Windows® taskbar, click Settings, and then click Control Panel. 2. Click the PC Card icon. 3. Click the name of the card that you want to eject, and then click Stop. 4. When the message "You may safely remove this device" appears, click OK. 5. Push the PC card eject button on the front panel of the system unit. You may need to pull out the eject button before you can eject the card. Page 112 The card is ejected from the card connector. Remove the card by holding it by its edge and pulling it out carefully. Using the Standby Function When you are finished using your computer, you can put it in standby mode rather than turn it off completely. Putting the computer in standby mode allows you to return quickly to normal computer use. To put the computer in standby mode manually 1. Save your work and close any applications that are running. (You can leave Windows running.) 2. Press the (Standby) button on the top of the keyboard. The computer goes into standby mode. Alternatively, you can click the Start button on the Windows® taskbar, click Shut Down, select Standby, and then click OK. To let the computer go into standby mode automatically Click the My Computer icon on your desktop. Click Control Panel, and then click the Power Management icon. On the Power Schemes tab, select from the options in the Power schemes drop-down list. Then, choose settings for the power scheme you have selected. To save the settings under a name that is not offered in the Power schemes pulldown menu, choose your settings and then click Save As. Type in a name, and click OK. Click Apply to finalize your power settings. To resume from standby mode There are three ways to bring your computer back from the standby mode: press the space bar on your keyboard, press the left mouse button, or momentarily depress the power button on your computer. If the display does not return from standby when you press the (Standby) button, your system may be in video standby mode. Press the space bar on the keyboard to return from video standby. Standby Mode Indicators You can tell which mode the computer is in by the color of the power indicator light. Color Amber Green No color Mode Computer is in standby mode. Computer is out of standby mode, ready to use. Computer is turned off. In standby mode you may periodically hear the computer's fan turn on and off, depending on the room's temperature. This is normal functioning in standby mode. Page 113 Shutting Down Your Computer When you are ready to turn off your computer for an extended period of time, use the following procedure to shut down the computer. To avoid the potential loss of data, do not use the power switch to shut down the computer. To shut down your computer If you plan to shut down your computer for a short period of time, you may want to use standby mode instead. See Using the Standby Function. 1. Click the Start button on the Windows® taskbar to open the Start menu. 2. Click Shut Down to display the Shut Down Windows dialog box. 3. Select the Shut Down option. 4. Click OK to complete the shutdown process. Respond to any prompts about saving documents. 5. Wait for your computer to turn off automatically -- the power indicator light turns off. 6. Turn off any peripherals connected to your computer. The LCD display turns off automatically when the computer shuts down. You can also shut down your computer using the (Power) button on the keyboard. Pressing this button causes the system to perform a shutdown but does not give you any of the other options available on the Windows® Shut Down menu. About the Power Switch If your system "locks up" or "crashes," press and hold the power switch for four seconds to force your system to power off. You may need to repeat this procedure. See Locating Controls and Connectors for the power switch's location. Using the System Recovery CD(s) You can reinstall software titles that shipped with your computer if they are corrupted or accidentally erased. You may not need to recover the entire contents of your hard drive. If you experience a problem with your computer, reinstalling an individual device driver or software title may correct the problem. Use the Application Recovery CD(s) to reinstall individual applications or device drivers. See Using the Application Recovery CD(s). The System Recovery CD(s) contain a backup copy of all the software originally installed on your hard disk drive. They can be used only to recover the hard disk of the Sony computer you purchased. The System Recovery utility gives you three options: Full Restore without Format restores all the software titles that originally came with your computer without formatting the hard disk. Full Restore with Format formats the hard disk drive and then restores all the original software. If your hard drive is partitioned into C and D drives, the computer will offer you the option to reformat the drive into a single partition. Operating System Only (Windows 98® Restore with Format) formats the hard disk drive and Page 114 restores the Windows® operating system and the device drivers that shipped with your computer. This option is recommended for advanced users only. If you choose the Full Restore with Format or Operating System Only option, your hard disk will be formatted, which removes all the information on the hard disk drive. You will lose any software you have installed and any other files you have created since you started to use your computer. This means you will have to reinstall any applications that were not included with the computer when you purchased it. If you choose the Full Restore without Format option, you may need to reinstall applications that were not included with the computer when you purchased it. If you have any questions on using the System Recovery CD(s), contact Sony Customer Support. To use the System Recovery CD(s) You need to complete the Windows registration process when you use the System Recovery CD(s). 1. Insert the Sony System Recovery CD(s) in the DVD-ROM drive. The System Recovery utility boots from the DVD-ROM drive. It must be in the drive when you turn on the computer. 2. Shut down your computer as described in Shutting Down Your Computer. 3. Wait 30 seconds and turn on your computer. 4. Click OK to signify you have read and accept the Microsoft End-User License Agreement. 5. When the System Recovery menu appears, follow the on-screen instructions to complete the recovery process. Your system may include one or two System Recovery CDs. If you have two System Recovery CDs, insert the first CD to run the System Recovery program. You are prompted to insert the second CD once the information from the first CD has been installed. The recovery process takes 30 to 60 minutes to complete. Using the Application Recovery CD(s) The Application Recovery CD(s) allow you to reinstall individual applications and device drivers if they are corrupted or accidentally erased. Reinstalling an individual device driver or software title may correct a problem you are experiencing with your computer, and you may not need to recover the entire contents of your hard drive. If you do need to reinstall all the software titles that shipped with your computer, use the System Recovery CD(s). See Using the System Recovery CD(s). You must be in Windows to run the Application Recovery CD(s). The application will not run from DOS. If you have any questions on using the Application Recovery CD(s), contact Sony Customer Support. To use the Application Recovery CD(s) 1. Turn on your computer. If your computer is already on, close all applications. 2. When the Windows desktop appears, insert the Sony Application Recovery CD in the DVD-ROM drive. The Application Recovery utility loads automatically. 3. When the Application Recovery menu appears, follow the on-screen instructions to complete the recovery process. Your system may include one or two Application Recovery CDs. If you have two Application Recovery CDs, insert the first CD to run the Application Recovery program. You may be prompted to insert the second CD, depending on the application you wish to restore. Page 115 About the Software on Your Computer Your VAIO Slimtop computer is ready to help you work, play, learn, and communicate as soon as you turn it on. This section gives you an overview of the activities you can perform with your software titles. For support information, see For Answers to Your Software Questions . Adobe Acrobat® Reader Adobe Systems Incorporated Acrobat Reader software allows you to view, navigate, and print electronic documents in Adobe's Portable Document Format (PDF), an open file format that is intended to preserve the fidelity of documents created on all major computer platforms. Adobe PhotoDeluxe® Home Edition Adobe Systems Incorporated Create amazing photo effects with PhotoDeluxe. Without learning complex software, you can enhance, restore, and be creative with your photos. Includes built-in guided activities, stock photos, clip art, and templates to assist you. Adobe Premiere® LE Adobe Systems Incorporated Adobe Premiere LE offers an interface and editing tool for producing movies for video, multimedia, or the Web. View source clips and edited footage simultaneously in the monitor window. Create video clips up to three hours long with complete audio-video synchronization. America Online® America Online America Online is the world's most popular Internet online service. Stay in touch with family and friends with Easy-to-Use E-mail, manage your personal finances, get the latest news and sports scores, and chat with thousands of others who share your interests. AT&T WorldNet® Service AT&T Fast, reliable Internet access from AT&T WorldNet Service. AT&T WorldNet Service provides Web-based e-mail, a personalized start page from Excite, easy access to the Excite search engine, free Web pages, online and live agent technical support, instant messaging, and special shopping discounts at Market Square. CompuServe® 2000 CompuServe Interactive Services The all new CompuServe 2000 delivers a powerful tool for Internet users who want serious and timely information, in-depth research, and professional communities backed by state-of-the-art technologies, including high-speed access and powerful e-mail messaging. Digital Media Bar Sony Electronics Media Bar software is your all-in-one solution for audio/video playback. It handles all common computer multimedia formats, and controls selected Sony devices. Media Bar software encompasses audio/video library cataloging and playlist management, in addition to digital video quality control and effects features. DVgate Sony Electronics Connect a digital video camera recorder to the i.LINK connector and capture your own video clips. You can edit the clips from your video, add others, and combine clips into new movie segments. EarthLink TotalAccess EarthLink Network, Inc. Page 116 An Internet Service Provider that supplies access, information, and assistance to its customers, introducing them to the Internet. Member benefits include e-mail, newsgroups, a Personal Start Page, a free 6 MB web site, a member magazine, and 24-hour technical support. McAfee's VirusScan® Network Associates, Inc. Protect your computer from viruses. VirusScan can detect viruses from floppy disks, Internet downloads, e-mail attachments, intranets, shared files, CD-ROMs, and online services. Microsoft® Internet Explorer for Windows® 98 Microsoft Corporation Internet Explorer delivers the Web the way you want it. It's safe, easy to use, and you can personalize how you access the Web. Outlook Express and other tools in Internet Explorer also help you have a great experience when you are on the Web! Microsoft® Outlook® Express Microsoft Corporation Outlook Express, the messaging tool that takes your e-mail and newsgroup communications to new heights! Outlook Express is easy to set up and use, and provides you with secure, personalized, and complete features that make creating, sending, and reading your e-mail a more rich and dynamic experience. Microsoft® Word 2000 Microsoft Corporation Microsoft Word 2000 makes it easy to create common Web, e-mail, and print documents for use around the world. It embraces HTML as a first-class file format and extends Word's ease-of-use to the Web and e-mail. Word 2000 also extends that ease of use to international users, making it easy to create multilingual documents. Netscape Communicator® Netscape Communications Netscape Communicator is the all-in-one Internet tool that makes it easy to browse the Web, send Internet e-mail, chat, read newsgroups, and compose great Web documents. PictureGear Sony Electronics This image management software displays images from your hard drive, a Sony digital still camera, or a Sony Mavica® camera. The images appear in a convenient light-table format, so that you can easily view the contents of an entire folder. Prodigy Internet Prodigy Communications Corporation An Internet service that helps you find what you need online faster and smarter. Prodigy delivers powerful online content, such as sports scores, stock quotes, news, and easy access to Excite , plus a personal e-mail account and quality customer service, all at a competitive price. Quicken® Basic Intuit, Inc. Quicken is the fastest, easiest way to organize your finances. Quicken works just like your checkbook, so it's easy to learn and use. Quicken manages all of your finances, bank accounts, credit cards, investments, and loans. You can even pay your bills online. Smart Capture Sony Electronics Smart Capture is a fun new way to send multimedia messages via e-mail. Smart Capture manages the i.LINK connection between your computer and a Sony Digital Handycam® Camcorder or other Page 117 cameras that support the i.LINK interface. It allows you to capture and compress video or still images that you can save or share via e-mail. A smart solution to computer, digital audio/video, and network convergence. Smart Connect Sony Electronics Smart Connect allows you to use an i.LINK cable to connect your VAIO computer to another VAIO computer that supports Smart Connect. You can then use one computer to copy, delete, and edit files on the other computer. You can also print from a printer attached to either computer. Sound Forge® Sonic Foundry Sound Forge allows you to put powerful audio processing tools and effects to work on your desktop. Simply cut, copy, and paste your way to striking multimedia files for use in everything from Web pages to desktop presentations. VAIO Action Setup Sony Electronics VAIO Action Setup manages the settings for your computer's Programmable Power Keys (PPK), Memory Stick media, i.LINK interface, and internal timer. For more information, see VAIO Action Setup. WinFax® Basic Edition Symantec Corporation WinFax Basic Edition incorporates an easy-to-use interface that allows you to send and receive faxes easily. Upgrade to WinFax Pro to receive additional features. About Your Recovery CDs Application Recovery CD(s) Sony Electronics The Application Recovery CD program allows you to reinstall individual applications and device drivers. Use it to restore corrupted or accidentally erased files. System Recovery CD(s) Sony Electronics The System Recovery CD program allows you to restore the software titles that shipped with your computer if they become corrupted or are erased accidentally. It can be used only to restore the hard disk of the Sony computer you purchased. For Answers to Your Software Questions Acrobat® Reader, Adobe PhotoDeluxe® Home Edition (Adobe Systems Incorporated) Web site http://www.adobe.com/ phone 206-628-2746 (fee-based support) fax 206-628-5737 e-mail [email protected] hours M-F, 6 AM-5 PM PT America Online® (America Online) Web site phone hours http://www.aol.com/ 800-827-3338 7 days a week, 6 AM - 2 PM ET AT&T WorldNet® Service (AT&T) Web site phone e-mail http://www.att.net 800-400-1447 [email protected] Page 118 hours 7 days a week, 24 hours a day CompuServe® 2000 (CompuServe Interactive Services) Web site phone hours http://www.compuserve.com/ 800-848-8990 M-F, 8 AM - 1 AM ET, S-S 10 AM - 10 PM ET EarthLink TotalAccess Web site phone e-mail hours (EarthLink Network, Inc.) http://help.earthlink.net/techsupport/ 800-395-8410 [email protected] 7 days a week, 24 hours a day GTE Easy Sign-up (GTE Internet) phone hours 800-927-3000 7 days a week, 24 hours a day McAfee's VirusScan (Network Associates, Inc.) Web site phone e-mail hours http://support.mcafee.com 408-988-3832 [email protected] M - F 9 AM - 5 PM Central Time MindSpring Internet Desktop (MindSpring Enterprises, Inc.) Web site phone http://help.mindspring.com/support 800-719-4660 Quicken® Basic (Intuit Inc.) Web site phone hours http://www.intuit.com/support 900-555-4688 7 days a week, 24 hours a day Sound Forge® (Sonic Foundry) Web site http://www.sonicfoundry.com/support/ phone 608-256-5555 fax 608-256-7300 e-mail [email protected] hours M - F, 8 AM - 7 PM CT Windows® 98 Second Edition Operating System, Word® 2000, Internet Explorer 5, Outlook® Express (Microsoft Corporation) Web site phone hours 1 http://www.sony.com/pcsupport 888-4SONYPC (888-476-6972) 1 7 days a week, 24 hours a day Support from 1-888-4SONYPC is free of charge for 90 days after the original date of purchase. WinFax® Basic Edition (Symantec Corporation) Web site http://www.symantec.com/techsupp/ phone 800-798-0850 fax 800-554-4403 in North America 541-984-2490 outside North America Troubleshooting This section describes how to solve common problems you may encounter when using your computer. Many problems have simple solutions, so try these suggestions before you call Sony Customer Support. My computer does not start Check that the computer is plugged into a power source and that it is turned on. Check that the power light is lit on the front panel of the computer. Confirm that a diskette is not in the diskette drive (unless you are using a bootable diskette). Confirm that the power cord and all cables are connected firmly, as described on the color poster. Page 119 If you plugged the computer into a power strip or UPS, make sure the power strip or UPS is turned on and working. My computer or software program "locks up" Close the application that is currently "locked up" by pressing Ctrl+Alt+Delete. In the Close Program dialog box, scroll down until you locate "(Not responding)" next to an application. Select this application and click End Task. Windows attempts to close the application. If the attempt is unsuccessful, a second dialog box appears. Select End Task again. If you are unable to "unlock" the application, repeat the above steps but select Shut Down when the Close Program dialog box appears. If the above steps fail to "unlock" your computer, save any unsaved work, if possible. Press Alt+F4. Select Restart and click OK. If you cannot restart as described in the preceding steps, you can restart the computer by pressing Ctrl+Alt+Delete or by pressing the power switch for more than six seconds. Pressing Ctrl+Alt+Delete may result in the loss of changes made to files that are currently open. Contact the software publisher or designated provider for technical support. See For Answers to Your Software Questions for a list of phone numbers and Web addresses or see Read Me First . My DVD-ROM/CD-ROM drive tray does not open Make sure the computer is turned on. If the Eject button does not work, you can open the tray by inserting a straightened heavyweight paper clip into the emergency eject hole. When I click an application icon, a message such as "You must insert the application CD into your CD-ROM (DVD-ROM) drive" appears and the software does not start Some titles require specific files that are located on the application's DVD-ROM/CD-ROM. Insert the disc and try starting the program again. Check to make sure you inserted the DVD-ROM/CD-ROM with the label side facing up. My modem connection is slow The computer's modem uses K56flex technology/V.90. Many factors influence modem connection speed, including telephone line noise or compatibility with telephone equipment (such as fax machines or other modems). If you think your modem is not connecting properly to other computer-based modems, fax machines, or your Internet Service Provider, check the following: Have your phone company check that your phone line is free from any line noise. If your problem is fax-related, check that there are no problems with the fax machine you are calling. The modem that receives your call may be slower or may use a different communications protocol than your modem. If this is the case, the connection speed may be slower than expected. For optimum performance, ensure you are calling an Internet Service Provider number that is V.90-compliant. If you are having a problem connecting with your Internet Service Provider, check that the ISP is not experiencing technical problems. If you have a second phone line available, try connecting the modem to this line. My modem does not work Check that the phone line is plugged into the line jack. Page Check that the phone line is working. You can check the line by plugging in an ordinary phone and120 listening for a dial tone. Check that the phone number the program is dialing is correct. Verify that the software you are using is appropriately configured to recognize and interact with the Sony computer modem. Call the software publisher if you do not know how to configure the software to recognize the modem. All programs preinstalled by Sony are compatible. If you suspect your modem is not functioning, you can perform a simple test to find out. Click the My Computer icon on your desktop. Click Control Panel, and then click Modems. Click the Diagnostics tab and select COM3. Click More Info. If your modem is functioning, a More Info dialog box will display. If your modem is not functioning, an error message will appear. My microphone is too sensitive to background noise If you find there is too much background noise when you record sound, you should adjust the microphone gain by following these steps: 1. Right-click the speaker icon (Volume) in the lower-right Windows® task tray. 2. Click Open Volume Controls. The Volume Control screen appears. 3. In the Options menu, select Properties. The Properties screen appears. 4. Change the setting for "Adjust volume for" from Playback to Recording, and then click OK. 5. Click the Advanced button under Microphone Balance. The Advanced Controls for Microphone screen appears. 6. Deselect the check box for 1 Mic Gain (+20dB), then click the Close button. 7. Close the Recording Control window. My mouse does not work Check that the mouse is plugged into one of the PS/2® connectors on the keyboard. The other connector connects the keyboard to the computer. There may be dust or dirt inside the mouse mechanism. To clean the mouse, follow these steps: o Turn off your computer. See Shutting Down Your Computer for details. o Remove the mouse ball cover on the back of the mouse by turning the ring that covers the mouse ball clockwise. o Turn the mouse upright, and drop the mouse ball into your hand. o Using a piece of tape, remove any dust or dirt on the mouse ball and inside the mouse ball socket. o Return the mouse ball to the socket, and replace the mouse ball cover. Secure the cover by turning the ring counter-clockwise. I cannot find the Windows® taskbar Check that the taskbar is not hidden or shrunken. Use the mouse to point to the left, right, top, and bottom edges of the screen. See Read Me First for additional information on using your Sony computer. To Reach Sony For further assistance, call 1-888-4SONYPC (1-888-476-6972). Page 121 Specifications Model PCV-L630 Processor 600E MHz* Pentium® III Hard Disk Drive 17 GB Ultra DMA Standard SDRAM 128 MB PC-100 SDRAM, expandable to 256 MB Video RAM 8 MB SDRAM Graphics 2X AGP 3D graphics hardware acceleration (ATi Rage 128 Pro 4XL) Sound Capabilities High fidelity 3D PCI audio Aureal AU8810 Diskette Drive 3.5" 1.44 MB FDD DVD-ROM/CD-ROM Drive 4.8X (max.) DVD-ROM reading 24X (max.) CD-ROM reading** Modem K56flex technology/V.90 compatible data/fax modem Expansion Capabilities Two PCI slots Connection Capabilities (Front) PC card (Card bus support) USB port Microphone Headphone Memory Stick media slot i.LINK (4-pin) Connection Capabilities (Rear) USB port Modem line (RJ-11) Phone line (RJ-11) Parallel (printer) Serial port VGA monitor LCD display Line In Line Out Keyboard i.LINK (6-pin) Connection Capabilities (Keyboard) Mouse (PS/2-style) left and right connectors Supplied Accessories Stand (for vertical installation) Power cable Phone cable Keyboard cable PS/2 Wheel Mouse VAIO Smart Convertible Keyboard Spacers (for bottom of the system) Ferrite core Service 90-day limited express service*** Extendible to one year from original date of purchase upon registration Limited Warranty90-day parts/labor standard Extendible to one year from original date of purchase upon registration Power Requirements 130 watts maximum Dimensions CPU: 11.2"(w) x 3.6" (h) x 13.4" (d) (280 mm x 90 mm x 335 mm) Keyboard: 15.9" (w) x 1.8" (h) x 7.1" (d) (398 mm x 45 mm x 178 mm) Display: 16.1" (w) x 13.1" (h) x 6.9" (d) (403 mm x 327 mm x 172 mm) Weight CPU: 11.9 lbs. (5.4kg) Display: 7.05 lbs (3.2 kg) Keyboard: 2.9 lbs. (1.3kg) Operating Temperature 50º F to 95º F (+10º C to 35º C) * MHz denotes microprocessor internal clock speed; other factors may affect application performance. Page 122 GB means one billion bytes when referring to hard drive capacity. Accessible capacity may vary. **Data on a DVD-ROM is read at a variable transfer rate, ranging from 2X at the innermost track to 4.8X at the outermost track(the data transfer standard 1X rate is 1385 kbytes/s). The average data transfer rate is 3.6X(4986 kbytes/s). Data on a CD-ROM is read at a variable transfer rate, ranging from 10.5X at the innermost track to 24X at the outermost track(the data transfer standard 1X rate is 150 kbytes/s). The average data transfer is 18X(2700 kbytes/s). Maximum speed for faxing is 14.4 kbytes/s. Your modem is capable of downloading at 56 kbytes/s using K56flex technology or V.90. Your phone service, online service, or Internet Service Provider, however, may not support this technology or operate at this speed. ***Certain restrictions apply. Specifications are subject to change without notice. Page 123 Features For a complete description of the specifications of your Sony computer, see Specifications. i.LINK® (IEEE-1394): Two built-in i.LINK ports provide you with front and rear digital connection capability. The i.LINK name and logo identify a digital interface (IEEE-1394) for high speed communication. Exceptional performance: Your computer includes a fast Intel® processor and a V.90-compatible data/fax modem. Ergo-Angle Multimedia LCD display: With its exclusive dual-hinge pedestal, this 15" XGA TFT display provides twice the flexibility of other LCDs. Select the perfect viewing angle and enjoy the built-in Harman/Kardon® stereo speakers. AutoAlert E-mail Notification System: Custom software automatically downloads e-mail on a pre-set schedule via Microsoft® Outlook® Express. A light on the LCD display instantly lets you know when new mail is received. VAIO Smart convertible keyboard: The innovative palm rest converts to a keyboard cover for a sleek look when not in use. Six Programmable Power Keys let you launch any application with the push of a button; dual-sided mouse connections for left- or right- hand use. Sony Memory Stick® media slot: The next generation of digital media, smaller than a stick of gum. Easily delivers information from one Memory Stick-equipped electronic device to another, so you can transfer images, sounds, data and text between cameras, computers, and more. Compact components: Enjoy the small footprint and versatile setup options available by positioning the components in an arrangement of your choice. Sony audio and video quality: High-fidelity 3D audio system and high-powered 3D graphics (AGP) enable you to take advantage of today's advanced multimedia applications, games, and entertainment software. Preinstalled software titles: All the software on your computer is preinstalled, configured, and ready for you to use right out of the box. Microsoft® Windows® 98 Second Edition operating system: Your system includes the latest operating system from Microsoft. Communications: Access popular online services, browse the Internet, send faxes, and more. * Actual upload and download speeds may vary due to line conditions, ISP support, and government regulations. Unpacking Your Computer Computer and Supplied Accessories Page 124 Manuals Read Me First contains last-minute supplementary information and software support numbers. The VAIO Slimtop LCD Computer User Guide (this manual) contains features and specifications of your computer. It also includes information on the applications included with your system and how to contact software vendors, get started with your computer, and solve common problems. The VAIO VAIO® Consumer Information Guide contains safety and regulatory information, ergonomic considerations, information on help resources, and your computer's limited warranty statement. The Microsoft® Windows®98 Second Edition Getting Started manual explains how to use the basic features of the Windows® operating system. Recovery CDs System Recovery CD(s) - Enables you to reinstall software that shipped with your computer if it is corrupted or accidentally erased. For more information, see Using the System Recovery CD(s). Application Recovery CD(s) - Allows you to reinstall individual applications or device drivers if they are corrupted or accidentally erased. For more information, see Using the Application Recovery CD(s). Other Setting up your VAIO Slimtop LCD Computer (poster) Packet containing special product offers Software CDs Page 125 Microsoft® Word 2000 Setting Up Your VAIO Slimtop LCD Computer Locating Controls and Connectors Front Panel 1 Power switch and indicator light Turns on/off the computer and the display. The indicator light is green while the power is on and amber when the computer is in standby mode. 2 Floppy disk drive Reads/writes data from/to a 3.5-inch floppy disk. 3 Floppy disk eject button Ejects the floppy disk. 4 DVD-ROM drive Reads data from a DVD-ROM/CD-ROM. 5 DVD-ROM/CD-ROM eject button Ejects a DVD-ROM/CD-ROM. 6 Manual eject hole If the DVD-ROM/CD-ROM does not come out when you press the DVD-ROM/CD-ROM eject button, insert a thin, pointed object into this hole to eject the disc manually. 7 FD (Floppy disk drive) access indicator light Lights in green while reading/writing data from/to a floppy disk. 8 Disc (DVD-ROM drive) access indicator light Lights in amber while reading data from a DVD-ROM/CD-ROM. 9 HD (drive) access indicator light Lights in green while reading/writing data from/to the hard disk. 10 MIC (Microphone) connector* Connects a microphone (not supplied). 11 PHONES (Headphones) connector* Connects headphones (not supplied). 12 VOLUME control Page 126 Adjusts the volume of the headphones connected to the PHONES connector. Users should note that this does not control the volume of the integrated LCD speakers. 13 PC CARD slot A PC Card (also called a PCMCIA card) can be installed in this slot. PC cards enable you to add functionality to your system. MEMORY STICK media slot 14 Insert a Sony Memory Stick® card into this slot. See Using the Memory Stick® Media for details on using Memory Stick media. 15 i.LINK (4-pin) Connects a digital device such as a Sony Digital Handycam® Camcorder. 16 USB (Universal Serial Bus) connector Connects a USB device. * See Using a Headphone or Microphone for important information about connecting a microphone and headphone. Rear Panel 1 AC INPUT connector Connects the supplied power cord. 2 LINE jack Connects a phone cable to the wall jack. 3 EMPTY PCI SLOT (FILLED WITH ETHERNET CARD ON CUSTOM MODELS) For a PCI Add-On Card (not supplied). 4 TELEPHONE jack Connects the phone to the computer. 5 PRINTER connector Connects a parallel device, such as a printer or scanner. 6 SERIAL connector Connects a serial device, such as a digital still camera. 7 MONITOR connector Connects a standard CRT display. 8 USB (Universal Serial Bus) connector Connects a USB device. 9 LINE IN connector Connects an audio device. 10 LINE OUT connector Connects an audio device or an active speaker. 11 i.LINK (6-pin) Connects a digital device such as a Sony Digital Handycam® Camcorder. 12 LCD MONITOR connector Connects the LCD that comes with the VAIO Slimtop LCD computer. Note: Do not connect any display to this connector other than the LCD that is supplied with this system. Page 127 13 KEYBOARD connector Connects a keyboard. LCD 1 Power indicator light Light is green while the power is on. When the computer enters the standby mode, this indicator light turns amber. 2 Information LED Light turns red to alert the user to activities, such as the arrival of e-mail. See AutoAlert E-mail Notification System. 3 Adjusts 4 Adjusts Brightness control the brightness of the screen. Volume control the volume of the integrated speakers on the LCD display. Using the Wheel Mouse For information about the Wheel Mouse that connects to either side of your keyboard, see MouseWare Help. To access MouseWare Help, from the Start menu, point to Programs, MouseWare, and then click MouseWare Help. To set up the mouse for left-handed use: 1. Click the My Computer icon on your desktop. 2. Click Control Panel, and then click Mouse. The Mouse Properties dialog box appears. 3. In the Quick Setup tab, click Device Setup. 4. In the Device Setup Wizard dialog box, click Next. 5. Select the radio button next to "Left side of the keyboard." 6. Click Next three times, and then click Finish. 7. Click Apply. Using a Headphone or Microphone When you connect a microphone or headphone to your computer, attaching a ferrite core will reduce electrical interference. Attach the (supplied) ferrite core at the end of the headphone or microphone cable closest to the computer. Wrap the cable through the center of the ferrite core. The following illustration shows how to attach the ferrite core when you are using both a headphone and a microphone. Page 128 The LCD and keyboard cables already include a ferrite core. Do not remove the ferrite core from these cables. To adjust the height and viewing angle of the display Holding both sides of the display, push the display panel out and up, and then adjust the viewing angle. The LCD display is designed to maintain the best ergonomic viewing angle. Set the display height so that it does not touch the keyboard, and adjust the viewing angle approximately 27 degrees from eye level to the center of the screen. Attaching the Stand to the System Unit The main system unit can be oriented horizontally or vertically. If you place the system in a vertical position, you must attach the supplied stand to ensure stability. 1. Place the system unit on its right side, with the front of the system facing forward. 2. Insert the grooved side of the stand into the ventilation holes of the system so that the two screw holes are aligned and the stand's fins are at the rear of the unit. 3. Secure the stand to the unit with the supplied screw. Page 129 The stand keeps the system cool by allowing air to flow under it. If you choose to place the system unit in a vertical position, it is important to use the stand and to place the system unit on its left side, as in the illustration above; otherwise, the system may overheat. Registering Your Computer Take advantage of Sony's commitment to quality customer support and receive these benefits by registering your computer: Sony Customer Support--Talk to a Support Representative to troubleshoot problems you may be having with your computer. Limited warranty--Protect your investment. See Limited Warranty Statement in the VAIO® Consumer Information Guide for details. You must register your computer to extend the warranty from the initial 90-day warranty period to one year from the original date of purchase. Express Service--Provides a fast and direct return of your VAIO Slimtop Sony for service of your computer. LCD Computer to If you did not already register when you first turned on your computer, follow these steps to use the computer online registration service. 1. Click the registration icon on the VAIO desktop. 2. Enter the information requested on the first online registration form. Press the tab key to move from box to box. 3. Click the Next button to advance to the next form. 4. Complete the remaining forms by clicking the Next button each time you complete a form. The computer automatically transfers your registration information using your built-in modem and a toll-free telephone number or a local number. You may sign up for Internet access with a Sony preferred Internet Service Provider. VAIO Action Setup VAIO Action Setup manages the settings for your computer's Programmable Power Keys (PPK), Memory Stick® media, i.LINK interface, and internal timer. An overview of each of these functions is provided below. For more information on changing the settings using VAIO Action Setup, see the online VAIO Action Setup help files. To access the help files, from the Start menu, point to Programs/VAIO Action Setup/VAIO Action Setup Help. Programmable Power Keys Your Sony computer comes with technology that allows you to get to your favorite applications Page easily. Each Programmable Power Key (PPK) on your VAIO Smart convertible keyboard comes 130 programmed to launch a preset application with a single press of the key. If you wish, you can use the VAIO Action Setup software to change the Programmable Power Keys' preset functions. The Programmable Power Keys are located at the top of your keyboard, and are numbered P1 through P6. The keys work even when the computer is turned off. Pressing one of these keys turns on the computer and launches the preset application. The six Programmable Power Keys come to you preprogrammed to perform the functions listed in the table below. Key Function P1 (INTERNET) Starts Microsoft® Internet Explorer for Windows® 98. P2 (MAIL) Starts Microsoft® Outlook® Express P3 (WORK) Starts Microsoft® Word P4 (FINANCE) Starts Intuit® Quicken® Basic 2000. P5 (SETUP) Starts PPK Setup. P6 (HELP) Opens a menu of help options. Memory Stick You can use VAIO Action Setup to preset your computer to automatically launch an application when you insert a Memory Stick. For more information on Memory Stick media, see Using the Memory Stick® Media . Internal Timer The VAIO Action Setup software allows you to set your computer's internal timer to launch certain applications automatically. The timer can start applications even when the power is off. Some software applications take longer than others to launch. It is advisable to confirm in advance the amount of time your selected application takes to start. AutoAlert E-mail Notification System VAIO Action Setup also enables you to set up your computer to notify you with an Information LED when new mail arrives in your e-mail mailbox. The Information LED turns red to indicate that new e-mail has arrived. For this AutoAlert E-mail Notification System to work, you must use Microsoft® Outlook® Express as your default e-mail software, and you must have an Internet Service Provider with dial-up capabilities set up. As an alternative, you can program your AutoAlert E-mail Notification System to set the Information LED to turn on when it has successfully completed the task of dialing up and connecting to receive mail. In this case, the Information LED turns on to indicate that your e-mail account has been accessed successfully, regardless of whether or not you have mail; this works with Microsoft Outlook Express. The e-mail software you choose to use with PPK must be set as your default e-mail software. See LCD for an illustration showing the Information LED's location. AutoAlert E-mail Notification System Software Restrictions If you use software that uses a phone line The computer may not be able to disconnect the phone line due to communication and server conditions. Be sure to monitor the status of the software when running the AutoAlert E-mail Notification System, and manually disconnect the phone line if you notice a malfunction. Furthermore, when using the timer to start the software, it is advised that you set the computer to shut down or enter system standby mode after a certain length of time. This allows the computer to disconnect the phone line if the computer fails to disconnect the line normally. If you are using the timer to download e-mail automatically Page 131 It is advisable to set up your e-mail software to redial automatically if it does not connect the first time. It is also advisable to set the e-mail software to disconnect the phone line automatically when all mail has been downloaded. If you are using Microsoft® Outlook® Express When using the AutoAlert E-mail Notification System with Microsoft Outlook Express, it is advisable to select the Dial automatically setting in your Microsoft Outlook Express software. If you have not chosen this setting and wish to do so, start Outlook Express, click Tools, and then select Options. Select the check box "Automatically dial when checking for new messages." Click OK. Changing the Window Design of Sony Software To change the window design of Sony software 1. Click the Start button, point to Settings, and then click Control Panel. 2. Click UI Design Selector. 3. Click << or >> and select the desired design. 4. Click Apply. The "UI Design Selector" window design changes. The window design for your Sony software will match the "UI Design Selector" window. To try another selection, click << or >>. Then, click OK. The UI Design Selector closes and the window design of your Sony software window design displays. You may use the feature with UI Design Selector-compatible software only. Using the Memory Stick® Media Your Sony computer is designed to support the new Memory Stick recording media. The Memory Stick media is a small, versatile device that allows you to share data between various types of Sony equipment. When you use the card, your computer automatically launches Windows Explorer. This allows you to view the contents of the card. If the image files are created by a Sony digital camera or camcorder, you do not need the following steps. If you want to create a slide show that launches automatically when you insert a Memory Stick, follow these steps to transfer images from your hard drive to a Memory Stick. 1. Insert the Memory Stick into the appropriate slot. 2. Click the My Computer icon on the desktop. Page 132 3. Click the Removable Disk S: icon. 4. Create a new folder and name it "DCIM." 5. Open the DCIM folder and create a new folder named "100MSDCF." 6. Click the Start button, select VAIO, and then click PictureGear to launch the PictureGear application. 7. Select the digital images you want to save in your slide show. 8. From the PictureGear File menu, point to File Process, and then select Still Format Conversion. 9. Select Memory Stick as the Output Format. 10. Use the Browse button to select the DCIM/100MSDCF folder on the Removable Disk (S:) drive. 11. Name the file. The file name must begin with DSC (DSC0xxxx). The full file name without extension must have at least eight characters. The order in which your photos appear in your slide show will be determined by the number (xxxx) in the file name. Some examples of acceptable file names are DSC00001.jpg and DSC00002.jpg 12. Click OK to save the file. You can also add MPEG1 video files to your Slide Show by following the steps below. The order in which your video clips (MOV0xxxx files) appear in your Slide Show is determined by the number (xxxx) in the file name. 1. Insert the Memory Stick into the media slot. 2. Click the My Computer icon on the desktop. 3. Click the Removable Disk S: icon. 4. Create a new folder and name it "MSSONY." 5. Open the MSSONY folder and create a new folder named "MOML0001." 6. From the PictureGear File menu, point to File Process, and then select Still Format Conversion. 7. Copy the MPEG file into the MOML0001 folder. 8. Rename the MPEG file MOV0xxxx.mpg, where xxxx is any four-digit number. 9. To begin showing your slides, eject the Memory Stick and then reinsert it. The slide show will begin automatically. To protect data on Memory Stick media from accidental changes Memory Stick media contains a write-protect tab. The write-protect tab prevents accidental changes to information recorded on the Memory Stick media. When you slide the write-protect tab to the LOCK position, the Memory Stick is write-protected, which means you cannot delete, copy, or save information on the Memory Stick. When you slide the tab to the un-LOCK position, you can write to or modify the Memory Stick contents. To change the way the computer responds when a Memory Stick is inserted into the Memory Stick media slot Change the options on the Memory Stick tab in the PPK Setup software. Page 133 Using PC Cards This computer has a card bus PC card slot that supports a Type I or II PC card. To insert a PC card You do not need to shut down your computer when inserting a PC card. 1. Open the front panel. 2. Insert the PC card into the PC card slot until it clicks into position. When the card is completely inserted, the eject button pops out. If you cannot insert the card, do not forcibly insert it. In this case, make sure the card is not inserted upside-down or backward, and then reinsert the card into the slot carefully. See the manual that came with the PC card for details on using it. To close the front panel when the eject button is protruding, fold the button down onto the computer. To eject a PC card If you eject the PC card incorrectly, the system may not work correctly. 1. Click the Start button on the Windows® taskbar, click Settings, and then click Control Panel. 2. Click the PC Card icon. 3. Click the name of the card that you want to eject, and then click Stop. 4. When the message "You may safely remove this device" appears, click OK. 5. Push the PC card eject button on the front panel of the system unit. You may need to pull out the eject button before you can eject the card. Page 134 The card is ejected from the card connector. Remove the card by holding it by its edge and pulling it out carefully. Using the Standby Function When you are finished using your computer, you can put it in standby mode rather than turn it off completely. Putting the computer in standby mode allows you to return quickly to normal computer use. To put the computer in standby mode manually 1. Save your work and close any applications that are running. (You can leave Windows running.) 2. Press the (Standby) button on the top of the keyboard. The computer goes into standby mode. Alternatively, you can click the Start button on the Windows® taskbar, click Shut Down, select Standby, and then click OK. To let the computer go into standby mode automatically Click the My Computer icon on your desktop. Click Control Panel, and then click the Power Management icon. On the Power Schemes tab, select from the options in the Power schemes drop-down list. Then, choose settings for the power scheme you have selected. To save the settings under a name that is not offered in the Power schemes pulldown menu, choose your settings and then click Save As. Type in a name, and click OK. Click Apply to finalize your power settings. To resume from standby mode There are three ways to bring your computer back from the standby mode: press the space bar on your keyboard, press the left mouse button, or momentarily depress the power button on your computer. If the display does not return from standby when you press the (Standby) button, your system may be in video standby mode. Press the space bar on the keyboard to return from video standby. Standby Mode Indicators You can tell which mode the computer is in by the color of the power indicator light. Color Amber Green No color Mode Computer is in standby mode. Computer is out of standby mode, ready to use. Computer is turned off. In standby mode you may periodically hear the computer's fan turn on and off, depending on the room's temperature. This is normal functioning in standby mode. Page 135 Shutting Down Your Computer When you are ready to turn off your computer for an extended period of time, use the following procedure to shut down the computer. To avoid the potential loss of data, do not use the power switch to shut down the computer. To shut down your computer If you plan to shut down your computer for a short period of time, you may want to use standby mode instead. See Using the Standby Function. 1. Click the Start button on the Windows® taskbar to open the Start menu. 2. Click Shut Down to display the Shut Down Windows dialog box. 3. Select the Shut Down option. 4. Click OK to complete the shutdown process. Respond to any prompts about saving documents. 5. Wait for your computer to turn off automatically -- the power indicator light turns off. 6. Turn off any peripherals connected to your computer. The LCD display turns off automatically when the computer shuts down. You can also shut down your computer using the (Power) button on the keyboard. Pressing this button causes the system to perform a shutdown but does not give you any of the other options available on the Windows® Shut Down menu. About the Power Switch If your system "locks up" or "crashes," press and hold the power switch for four seconds to force your system to power off. You may need to repeat this procedure. See Locating Controls and Connectors for the power switch's location. Using the System Recovery CD(s) You can reinstall software titles that shipped with your computer if they are corrupted or accidentally erased. You may not need to recover the entire contents of your hard drive. If you experience a problem with your computer, reinstalling an individual device driver or software title may correct the problem. Use the Application Recovery CD(s) to reinstall individual applications or device drivers. See Using the Application Recovery CD(s). The System Recovery CD(s) contain a backup copy of all the software originally installed on your hard disk drive. They can be used only to recover the hard disk of the Sony computer you purchased. The System Recovery utility gives you three options: Full Restore without Format restores all the software titles that originally came with your computer without formatting the hard disk. Full Restore with Format formats the hard disk drive and then restores all the original software. If your hard drive is partitioned into C and D drives, the computer will offer you the option to reformat the drive into a single partition. Operating System Only (Windows 98® Restore with Format) formats the hard disk drive and Page 136 restores the Windows® operating system and the device drivers that shipped with your computer. This option is recommended for advanced users only. If you choose the Full Restore with Format or Operating System Only option, your hard disk will be formatted, which removes all the information on the hard disk drive. You will lose any software you have installed and any other files you have created since you started to use your computer. This means you will have to reinstall any applications that were not included with the computer when you purchased it. If you choose the Full Restore without Format option, you may need to reinstall applications that were not included with the computer when you purchased it. If you have any questions on using the System Recovery CD(s), contact Sony Customer Support. To use the System Recovery CD(s) You need to complete the Windows registration process when you use the System Recovery CD(s). 1. Insert the Sony System Recovery CD(s) in the DVD-ROM drive. The System Recovery utility boots from the DVD-ROM drive. It must be in the drive when you turn on the computer. 2. Shut down your computer as described in Shutting Down Your Computer. 3. Wait 30 seconds and turn on your computer. 4. Click OK to signify you have read and accept the Microsoft End-User License Agreement. 5. When the System Recovery menu appears, follow the on-screen instructions to complete the recovery process. Your system may include one or two System Recovery CDs. If you have two System Recovery CDs, insert the first CD to run the System Recovery program. You are prompted to insert the second CD once the information from the first CD has been installed. The recovery process takes 30 to 60 minutes to complete. Using the Application Recovery CD(s) The Application Recovery CD(s) allow you to reinstall individual applications and device drivers if they are corrupted or accidentally erased. Reinstalling an individual device driver or software title may correct a problem you are experiencing with your computer, and you may not need to recover the entire contents of your hard drive. If you do need to reinstall all the software titles that shipped with your computer, use the System Recovery CD(s). See Using the System Recovery CD(s). You must be in Windows to run the Application Recovery CD(s). The application will not run from DOS. If you have any questions on using the Application Recovery CD(s), contact Sony Customer Support. To use the Application Recovery CD(s) 1. Turn on your computer. If your computer is already on, close all applications. 2. When the Windows desktop appears, insert the Sony Application Recovery CD in the DVD-ROM drive. The Application Recovery utility loads automatically. 3. When the Application Recovery menu appears, follow the on-screen instructions to complete the recovery process. Your system may include one or two Application Recovery CDs. If you have two Application Recovery CDs, insert the first CD to run the Application Recovery program. You may be prompted to insert the second CD, depending on the application you wish to restore. Page 137 About the Software on Your Computer Your VAIO Slimtop computer is ready to help you work, play, learn, and communicate as soon as you turn it on. This section gives you an overview of the activities you can perform with your software titles. For support information, see For Answers to Your Software Questions . Adobe Acrobat® Reader Adobe Systems Incorporated Acrobat Reader software allows you to view, navigate, and print electronic documents in Adobe's Portable Document Format (PDF), an open file format that is intended to preserve the fidelity of documents created on all major computer platforms. Adobe PhotoDeluxe® Home Edition Adobe Systems Incorporated Create amazing photo effects with PhotoDeluxe. Without learning complex software, you can enhance, restore, and be creative with your photos. Includes built-in guided activities, stock photos, clip art, and templates to assist you. Adobe Premiere® LE Adobe Systems Incorporated Adobe Premiere LE offers an interface and editing tool for producing movies for video, multimedia, or the Web. View source clips and edited footage simultaneously in the monitor window. Create video clips up to three hours long with complete audio-video synchronization. America Online® America Online America Online is the world's most popular Internet online service. Stay in touch with family and friends with Easy-to-Use E-mail, manage your personal finances, get the latest news and sports scores, and chat with thousands of others who share your interests. AT&T WorldNet® Service AT&T Fast, reliable Internet access from AT&T WorldNet Service. AT&T WorldNet Service provides Web-based e-mail, a personalized start page from Excite, easy access to the Excite search engine, free Web pages, online and live agent technical support, instant messaging, and special shopping discounts at Market Square. CompuServe® 2000 CompuServe Interactive Services The all new CompuServe 2000 delivers a powerful tool for Internet users who want serious and timely information, in-depth research, and professional communities backed by state-of-the-art technologies, including high-speed access and powerful e-mail messaging. Digital Media Bar Sony Electronics Media Bar software is your all-in-one solution for audio/video playback. It handles all common computer multimedia formats, and controls selected Sony devices. Media Bar software encompasses audio/video library cataloging and playlist management, in addition to digital video quality control and effects features. DVgate Sony Electronics Connect a digital video camera recorder to the i.LINK connector and capture your own video clips. You can edit the clips from your video, add others, and combine clips into new movie segments. EarthLink TotalAccess EarthLink Network, Inc. Page 138 An Internet Service Provider that supplies access, information, and assistance to its customers, introducing them to the Internet. Member benefits include e-mail, newsgroups, a Personal Start Page, a free 6 MB web site, a member magazine, and 24-hour technical support. McAfee's VirusScan® Network Associates, Inc. Protect your computer from viruses. VirusScan can detect viruses from floppy disks, Internet downloads, e-mail attachments, intranets, shared files, CD-ROMs, and online services. Microsoft® Internet Explorer for Windows® 98 Microsoft Corporation Internet Explorer delivers the Web the way you want it. It's safe, easy to use, and you can personalize how you access the Web. Outlook Express and other tools in Internet Explorer also help you have a great experience when you are on the Web! Microsoft® Outlook® Express Microsoft Corporation Outlook Express, the messaging tool that takes your e-mail and newsgroup communications to new heights! Outlook Express is easy to set up and use, and provides you with secure, personalized, and complete features that make creating, sending, and reading your e-mail a more rich and dynamic experience. Microsoft® Word 2000 Microsoft Corporation Microsoft Word 2000 makes it easy to create common Web, e-mail, and print documents for use around the world. It embraces HTML as a first-class file format and extends Word's ease-of-use to the Web and e-mail. Word 2000 also extends that ease of use to international users, making it easy to create multilingual documents. Netscape Communicator® Netscape Communications Netscape Communicator is the all-in-one Internet tool that makes it easy to browse the Web, send Internet e-mail, chat, read newsgroups, and compose great Web documents. PictureGear Sony Electronics This image management software displays images from your hard drive, a Sony digital still camera, or a Sony Mavica® camera. The images appear in a convenient light-table format, so that you can easily view the contents of an entire folder. Prodigy Internet Prodigy Communications Corporation An Internet service that helps you find what you need online faster and smarter. Prodigy delivers powerful online content, such as sports scores, stock quotes, news, and easy access to Excite , plus a personal e-mail account and quality customer service, all at a competitive price. Quicken® Basic Intuit, Inc. Quicken is the fastest, easiest way to organize your finances. Quicken works just like your checkbook, so it's easy to learn and use. Quicken manages all of your finances, bank accounts, credit cards, investments, and loans. You can even pay your bills online. Smart Capture Sony Electronics Smart Capture is a fun new way to send multimedia messages via e-mail. Smart Capture manages the i.LINK connection between your computer and a Sony Digital Handycam® Camcorder or other Page 139 cameras that support the i.LINK interface. It allows you to capture and compress video or still images that you can save or share via e-mail. A smart solution to computer, digital audio/video, and network convergence. Smart Connect Sony Electronics Smart Connect allows you to use an i.LINK cable to connect your VAIO computer to another VAIO computer that supports Smart Connect. You can then use one computer to copy, delete, and edit files on the other computer. You can also print from a printer attached to either computer. Sound Forge® Sonic Foundry Sound Forge allows you to put powerful audio processing tools and effects to work on your desktop. Simply cut, copy, and paste your way to striking multimedia files for use in everything from Web pages to desktop presentations. VAIO Action Setup Sony Electronics VAIO Action Setup manages the settings for your computer's Programmable Power Keys (PPK), Memory Stick media, i.LINK interface, and internal timer. For more information, see VAIO Action Setup. WinFax® Basic Edition Symantec Corporation WinFax Basic Edition incorporates an easy-to-use interface that allows you to send and receive faxes easily. Upgrade to WinFax Pro to receive additional features. About Your Recovery CDs Application Recovery CD(s) Sony Electronics The Application Recovery CD program allows you to reinstall individual applications and device drivers. Use it to restore corrupted or accidentally erased files. System Recovery CD(s) Sony Electronics The System Recovery CD program allows you to restore the software titles that shipped with your computer if they become corrupted or are erased accidentally. It can be used only to restore the hard disk of the Sony computer you purchased. For Answers to Your Software Questions Acrobat® Reader, Adobe PhotoDeluxe® Home Edition (Adobe Systems Incorporated) Web site http://www.adobe.com/ phone 206-628-2746 (fee-based support) fax 206-628-5737 e-mail [email protected] hours M-F, 6 AM-5 PM PT America Online® (America Online) Web site phone hours http://www.aol.com/ 800-827-3338 7 days a week, 6 AM - 2 PM ET AT&T WorldNet® Service (AT&T) Web site phone e-mail http://www.att.net 800-400-1447 [email protected] Page 140 hours 7 days a week, 24 hours a day CompuServe® 2000 (CompuServe Interactive Services) Web site phone hours http://www.compuserve.com/ 800-848-8990 M-F, 8 AM - 1 AM ET, S-S 10 AM - 10 PM ET EarthLink TotalAccess Web site phone e-mail hours (EarthLink Network, Inc.) http://help.earthlink.net/techsupport/ 800-395-8410 [email protected] 7 days a week, 24 hours a day GTE Easy Sign-up (GTE Internet) phone hours 800-927-3000 7 days a week, 24 hours a day McAfee's VirusScan (Network Associates, Inc.) Web site phone e-mail hours http://support.mcafee.com 408-988-3832 [email protected] M - F 9 AM - 5 PM Central Time MindSpring Internet Desktop (MindSpring Enterprises, Inc.) Web site phone http://help.mindspring.com/support 800-719-4660 Quicken® Basic (Intuit Inc.) Web site phone hours http://www.intuit.com/support 900-555-4688 7 days a week, 24 hours a day Sound Forge® (Sonic Foundry) Web site http://www.sonicfoundry.com/support/ phone 608-256-5555 fax 608-256-7300 e-mail [email protected] hours M - F, 8 AM - 7 PM CT Windows® 98 Second Edition Operating System, Word® 2000, Internet Explorer 5, Outlook® Express (Microsoft Corporation) Web site phone hours 1 http://www.sony.com/pcsupport 888-4SONYPC (888-476-6972) 1 7 days a week, 24 hours a day Support from 1-888-4SONYPC is free of charge for 90 days after the original date of purchase. WinFax® Basic Edition (Symantec Corporation) Web site http://www.symantec.com/techsupp/ phone 800-798-0850 fax 800-554-4403 in North America 541-984-2490 outside North America Troubleshooting This section describes how to solve common problems you may encounter when using your computer. Many problems have simple solutions, so try these suggestions before you call Sony Customer Support. My computer does not start Check that the computer is plugged into a power source and that it is turned on. Check that the power light is lit on the front panel of the computer. Confirm that a diskette is not in the diskette drive (unless you are using a bootable diskette). Confirm that the power cord and all cables are connected firmly, as described on the color poster. Page 141 If you plugged the computer into a power strip or UPS, make sure the power strip or UPS is turned on and working. My computer or software program "locks up" Close the application that is currently "locked up" by pressing Ctrl+Alt+Delete. In the Close Program dialog box, scroll down until you locate "(Not responding)" next to an application. Select this application and click End Task. Windows attempts to close the application. If the attempt is unsuccessful, a second dialog box appears. Select End Task again. If you are unable to "unlock" the application, repeat the above steps but select Shut Down when the Close Program dialog box appears. If the above steps fail to "unlock" your computer, save any unsaved work, if possible. Press Alt+F4. Select Restart and click OK. If you cannot restart as described in the preceding steps, you can restart the computer by pressing Ctrl+Alt+Delete or by pressing the power switch for more than six seconds. Pressing Ctrl+Alt+Delete may result in the loss of changes made to files that are currently open. Contact the software publisher or designated provider for technical support. See For Answers to Your Software Questions for a list of phone numbers and Web addresses or see Read Me First . My DVD-ROM/CD-ROM drive tray does not open Make sure the computer is turned on. If the Eject button does not work, you can open the tray by inserting a straightened heavyweight paper clip into the emergency eject hole. When I click an application icon, a message such as "You must insert the application CD into your CD-ROM (DVD-ROM) drive" appears and the software does not start Some titles require specific files that are located on the application's DVD-ROM/CD-ROM. Insert the disc and try starting the program again. Check to make sure you inserted the DVD-ROM/CD-ROM with the label side facing up. My modem connection is slow The computer's modem uses K56flex technology/V.90. Many factors influence modem connection speed, including telephone line noise or compatibility with telephone equipment (such as fax machines or other modems). If you think your modem is not connecting properly to other computer-based modems, fax machines, or your Internet Service Provider, check the following: Have your phone company check that your phone line is free from any line noise. If your problem is fax-related, check that there are no problems with the fax machine you are calling. The modem that receives your call may be slower or may use a different communications protocol than your modem. If this is the case, the connection speed may be slower than expected. For optimum performance, ensure you are calling an Internet Service Provider number that is V.90-compliant. If you are having a problem connecting with your Internet Service Provider, check that the ISP is not experiencing technical problems. If you have a second phone line available, try connecting the modem to this line. My modem does not work Check that the phone line is plugged into the line jack. Page Check that the phone line is working. You can check the line by plugging in an ordinary phone and142 listening for a dial tone. Check that the phone number the program is dialing is correct. Verify that the software you are using is appropriately configured to recognize and interact with the Sony computer modem. Call the software publisher if you do not know how to configure the software to recognize the modem. All programs preinstalled by Sony are compatible. If you suspect your modem is not functioning, you can perform a simple test to find out. Click the My Computer icon on your desktop. Click Control Panel, and then click Modems. Click the Diagnostics tab and select COM3. Click More Info. If your modem is functioning, a More Info dialog box will display. If your modem is not functioning, an error message will appear. My microphone is too sensitive to background noise If you find there is too much background noise when you record sound, you should adjust the microphone gain by following these steps: 1. Right-click the speaker icon (Volume) in the lower-right Windows® task tray. 2. Click Open Volume Controls. The Volume Control screen appears. 3. In the Options menu, select Properties. The Properties screen appears. 4. Change the setting for "Adjust volume for" from Playback to Recording, and then click OK. 5. Click the Advanced button under Microphone Balance. The Advanced Controls for Microphone screen appears. 6. Deselect the check box for 1 Mic Gain (+20dB), then click the Close button. 7. Close the Recording Control window. My mouse does not work Check that the mouse is plugged into one of the PS/2® connectors on the keyboard. The other connector connects the keyboard to the computer. There may be dust or dirt inside the mouse mechanism. To clean the mouse, follow these steps: o Turn off your computer. See Shutting Down Your Computer for details. o Remove the mouse ball cover on the back of the mouse by turning the ring that covers the mouse ball clockwise. o Turn the mouse upright, and drop the mouse ball into your hand. o Using a piece of tape, remove any dust or dirt on the mouse ball and inside the mouse ball socket. o Return the mouse ball to the socket, and replace the mouse ball cover. Secure the cover by turning the ring counter-clockwise. I cannot find the Windows® taskbar Check that the taskbar is not hidden or shrunken. Use the mouse to point to the left, right, top, and bottom edges of the screen. See Read Me First for additional information on using your Sony computer. To Reach Sony For further assistance, call 1-888-4SONYPC (1-888-476-6972). Page 143 Specifications Model PCV-L630 Processor 600E MHz* Pentium® III Hard Disk Drive 17 GB Ultra DMA Standard SDRAM 128 MB PC-100 SDRAM, expandable to 256 MB Video RAM 8 MB SDRAM Graphics 2X AGP 3D graphics hardware acceleration (ATi Rage 128 Pro 4XL) Sound Capabilities High fidelity 3D PCI audio Aureal AU8810 Diskette Drive 3.5" 1.44 MB FDD DVD-ROM/CD-ROM Drive 4.8X (max.) DVD-ROM reading 24X (max.) CD-ROM reading** Modem K56flex technology/V.90 compatible data/fax modem Expansion Capabilities Two PCI slots Connection Capabilities (Front) PC card (Card bus support) USB port Microphone Headphone Memory Stick media slot i.LINK (4-pin) Connection Capabilities (Rear) USB port Modem line (RJ-11) Phone line (RJ-11) Parallel (printer) Serial port VGA monitor LCD display Line In Line Out Keyboard i.LINK (6-pin) Connection Capabilities (Keyboard) Mouse (PS/2-style) left and right connectors Supplied Accessories Stand (for vertical installation) Power cable Phone cable Keyboard cable PS/2 Wheel Mouse VAIO Smart Convertible Keyboard Spacers (for bottom of the system) Ferrite core Service 90-day limited express service*** Extendible to one year from original date of purchase upon registration Limited Warranty90-day parts/labor standard Extendible to one year from original date of purchase upon registration Power Requirements 130 watts maximum Dimensions CPU: 11.2"(w) x 3.6" (h) x 13.4" (d) (280 mm x 90 mm x 335 mm) Keyboard: 15.9" (w) x 1.8" (h) x 7.1" (d) (398 mm x 45 mm x 178 mm) Display: 16.1" (w) x 13.1" (h) x 6.9" (d) (403 mm x 327 mm x 172 mm) Weight CPU: 11.9 lbs. (5.4kg) Display: 7.05 lbs (3.2 kg) Keyboard: 2.9 lbs. (1.3kg) Operating Temperature 50º F to 95º F (+10º C to 35º C) * MHz denotes microprocessor internal clock speed; other factors may affect application performance. Page 144 GB means one billion bytes when referring to hard drive capacity. Accessible capacity may vary. **Data on a DVD-ROM is read at a variable transfer rate, ranging from 2X at the innermost track to 4.8X at the outermost track(the data transfer standard 1X rate is 1385 kbytes/s). The average data transfer rate is 3.6X(4986 kbytes/s). Data on a CD-ROM is read at a variable transfer rate, ranging from 10.5X at the innermost track to 24X at the outermost track(the data transfer standard 1X rate is 150 kbytes/s). The average data transfer is 18X(2700 kbytes/s). Maximum speed for faxing is 14.4 kbytes/s. Your modem is capable of downloading at 56 kbytes/s using K56flex technology or V.90. Your phone service, online service, or Internet Service Provider, however, may not support this technology or operate at this speed. ***Certain restrictions apply. Specifications are subject to change without notice. Page 145 Features For a complete description of the specifications of your Sony computer, see Specifications. i.LINK® (IEEE-1394): Two built-in i.LINK ports provide you with front and rear digital connection capability. The i.LINK name and logo identify a digital interface (IEEE-1394) for high speed communication. Exceptional performance: Your computer includes a fast Intel® processor and a V.90-compatible data/fax modem. Ergo-Angle Multimedia LCD display: With its exclusive dual-hinge pedestal, this 15" XGA TFT display provides twice the flexibility of other LCDs. Select the perfect viewing angle and enjoy the built-in Harman/Kardon® stereo speakers. AutoAlert E-mail Notification System: Custom software automatically downloads e-mail on a pre-set schedule via Microsoft® Outlook® Express. A light on the LCD display instantly lets you know when new mail is received. VAIO Smart convertible keyboard: The innovative palm rest converts to a keyboard cover for a sleek look when not in use. Six Programmable Power Keys let you launch any application with the push of a button; dual-sided mouse connections for left- or right- hand use. Sony Memory Stick® media slot: The next generation of digital media, smaller than a stick of gum. Easily delivers information from one Memory Stick-equipped electronic device to another, so you can transfer images, sounds, data and text between cameras, computers, and more. Compact components: Enjoy the small footprint and versatile setup options available by positioning the components in an arrangement of your choice. Sony audio and video quality: High-fidelity 3D audio system and high-powered 3D graphics (AGP) enable you to take advantage of today's advanced multimedia applications, games, and entertainment software. Preinstalled software titles: All the software on your computer is preinstalled, configured, and ready for you to use right out of the box. Microsoft® Windows® 98 Second Edition operating system: Your system includes the latest operating system from Microsoft. Communications: Access popular online services, browse the Internet, send faxes, and more. * Actual upload and download speeds may vary due to line conditions, ISP support, and government regulations. Unpacking Your Computer Computer and Supplied Accessories Page 146 Manuals Read Me First contains last-minute supplementary information and software support numbers. The VAIO Slimtop LCD Computer User Guide (this manual) contains features and specifications of your computer. It also includes information on the applications included with your system and how to contact software vendors, get started with your computer, and solve common problems. The VAIO VAIO® Consumer Information Guide contains safety and regulatory information, ergonomic considerations, information on help resources, and your computer's limited warranty statement. The Microsoft® Windows®98 Second Edition Getting Started manual explains how to use the basic features of the Windows® operating system. Recovery CDs System Recovery CD(s) - Enables you to reinstall software that shipped with your computer if it is corrupted or accidentally erased. For more information, see Using the System Recovery CD(s). Application Recovery CD(s) - Allows you to reinstall individual applications or device drivers if they are corrupted or accidentally erased. For more information, see Using the Application Recovery CD(s). Other Setting up your VAIO Slimtop LCD Computer (poster) Packet containing special product offers Software CDs Page 147 Microsoft® Word 2000 Setting Up Your VAIO Slimtop LCD Computer Locating Controls and Connectors Front Panel 1 Power switch and indicator light Turns on/off the computer and the display. The indicator light is green while the power is on and amber when the computer is in standby mode. 2 Floppy disk drive Reads/writes data from/to a 3.5-inch floppy disk. 3 Floppy disk eject button Ejects the floppy disk. 4 DVD-ROM drive Reads data from a DVD-ROM/CD-ROM. 5 DVD-ROM/CD-ROM eject button Ejects a DVD-ROM/CD-ROM. 6 Manual eject hole If the DVD-ROM/CD-ROM does not come out when you press the DVD-ROM/CD-ROM eject button, insert a thin, pointed object into this hole to eject the disc manually. 7 FD (Floppy disk drive) access indicator light Lights in green while reading/writing data from/to a floppy disk. 8 Disc (DVD-ROM drive) access indicator light Lights in amber while reading data from a DVD-ROM/CD-ROM. 9 HD (drive) access indicator light Lights in green while reading/writing data from/to the hard disk. 10 MIC (Microphone) connector* Connects a microphone (not supplied). 11 PHONES (Headphones) connector* Connects headphones (not supplied). 12 VOLUME control Page 148 Adjusts the volume of the headphones connected to the PHONES connector. Users should note that this does not control the volume of the integrated LCD speakers. 13 PC CARD slot A PC Card (also called a PCMCIA card) can be installed in this slot. PC cards enable you to add functionality to your system. MEMORY STICK media slot 14 Insert a Sony Memory Stick® card into this slot. See Using the Memory Stick® Media for details on using Memory Stick media. 15 i.LINK (4-pin) Connects a digital device such as a Sony Digital Handycam® Camcorder. 16 USB (Universal Serial Bus) connector Connects a USB device. * See Using a Headphone or Microphone for important information about connecting a microphone and headphone. Rear Panel 1 AC INPUT connector Connects the supplied power cord. 2 LINE jack Connects a phone cable to the wall jack. 3 EMPTY PCI SLOT (FILLED WITH ETHERNET CARD ON CUSTOM MODELS) For a PCI Add-On Card (not supplied). 4 TELEPHONE jack Connects the phone to the computer. 5 PRINTER connector Connects a parallel device, such as a printer or scanner. 6 SERIAL connector Connects a serial device, such as a digital still camera. 7 MONITOR connector Connects a standard CRT display. 8 USB (Universal Serial Bus) connector Connects a USB device. 9 LINE IN connector Connects an audio device. 10 LINE OUT connector Connects an audio device or an active speaker. 11 i.LINK (6-pin) Connects a digital device such as a Sony Digital Handycam® Camcorder. 12 LCD MONITOR connector Connects the LCD that comes with the VAIO Slimtop LCD computer. Note: Do not connect any display to this connector other than the LCD that is supplied with this system. Page 149 13 KEYBOARD connector Connects a keyboard. LCD 1 Power indicator light Light is green while the power is on. When the computer enters the standby mode, this indicator light turns amber. 2 Information LED Light turns red to alert the user to activities, such as the arrival of e-mail. See AutoAlert E-mail Notification System. 3 Adjusts 4 Adjusts Brightness control the brightness of the screen. Volume control the volume of the integrated speakers on the LCD display. Using the Wheel Mouse For information about the Wheel Mouse that connects to either side of your keyboard, see MouseWare Help. To access MouseWare Help, from the Start menu, point to Programs, MouseWare, and then click MouseWare Help. To set up the mouse for left-handed use: 1. Click the My Computer icon on your desktop. 2. Click Control Panel, and then click Mouse. The Mouse Properties dialog box appears. 3. In the Quick Setup tab, click Device Setup. 4. In the Device Setup Wizard dialog box, click Next. 5. Select the radio button next to "Left side of the keyboard." 6. Click Next three times, and then click Finish. 7. Click Apply. Using a Headphone or Microphone When you connect a microphone or headphone to your computer, attaching a ferrite core will reduce electrical interference. Attach the (supplied) ferrite core at the end of the headphone or microphone cable closest to the computer. Wrap the cable through the center of the ferrite core. The following illustration shows how to attach the ferrite core when you are using both a headphone and a microphone. Page 150 The LCD and keyboard cables already include a ferrite core. Do not remove the ferrite core from these cables. To adjust the height and viewing angle of the display Holding both sides of the display, push the display panel out and up, and then adjust the viewing angle. The LCD display is designed to maintain the best ergonomic viewing angle. Set the display height so that it does not touch the keyboard, and adjust the viewing angle approximately 27 degrees from eye level to the center of the screen. Attaching the Stand to the System Unit The main system unit can be oriented horizontally or vertically. If you place the system in a vertical position, you must attach the supplied stand to ensure stability. 1. Place the system unit on its right side, with the front of the system facing forward. 2. Insert the grooved side of the stand into the ventilation holes of the system so that the two screw holes are aligned and the stand's fins are at the rear of the unit. 3. Secure the stand to the unit with the supplied screw. Page 151 The stand keeps the system cool by allowing air to flow under it. If you choose to place the system unit in a vertical position, it is important to use the stand and to place the system unit on its left side, as in the illustration above; otherwise, the system may overheat. Registering Your Computer Take advantage of Sony's commitment to quality customer support and receive these benefits by registering your computer: Sony Customer Support--Talk to a Support Representative to troubleshoot problems you may be having with your computer. Limited warranty--Protect your investment. See Limited Warranty Statement in the VAIO® Consumer Information Guide for details. You must register your computer to extend the warranty from the initial 90-day warranty period to one year from the original date of purchase. Express Service--Provides a fast and direct return of your VAIO Slimtop Sony for service of your computer. LCD Computer to If you did not already register when you first turned on your computer, follow these steps to use the computer online registration service. 1. Click the registration icon on the VAIO desktop. 2. Enter the information requested on the first online registration form. Press the tab key to move from box to box. 3. Click the Next button to advance to the next form. 4. Complete the remaining forms by clicking the Next button each time you complete a form. The computer automatically transfers your registration information using your built-in modem and a toll-free telephone number or a local number. You may sign up for Internet access with a Sony preferred Internet Service Provider. VAIO Action Setup VAIO Action Setup manages the settings for your computer's Programmable Power Keys (PPK), Memory Stick® media, i.LINK interface, and internal timer. An overview of each of these functions is provided below. For more information on changing the settings using VAIO Action Setup, see the online VAIO Action Setup help files. To access the help files, from the Start menu, point to Programs/VAIO Action Setup/VAIO Action Setup Help. Programmable Power Keys Your Sony computer comes with technology that allows you to get to your favorite applications Page easily. Each Programmable Power Key (PPK) on your VAIO Smart convertible keyboard comes 152 programmed to launch a preset application with a single press of the key. If you wish, you can use the VAIO Action Setup software to change the Programmable Power Keys' preset functions. The Programmable Power Keys are located at the top of your keyboard, and are numbered P1 through P6. The keys work even when the computer is turned off. Pressing one of these keys turns on the computer and launches the preset application. The six Programmable Power Keys come to you preprogrammed to perform the functions listed in the table below. Key Function P1 (INTERNET) Starts Microsoft® Internet Explorer for Windows® 98. P2 (MAIL) Starts Microsoft® Outlook® Express P3 (WORK) Starts Microsoft® Word P4 (FINANCE) Starts Intuit® Quicken® Basic 2000. P5 (SETUP) Starts PPK Setup. P6 (HELP) Opens a menu of help options. Memory Stick You can use VAIO Action Setup to preset your computer to automatically launch an application when you insert a Memory Stick. For more information on Memory Stick media, see Using the Memory Stick® Media . Internal Timer The VAIO Action Setup software allows you to set your computer's internal timer to launch certain applications automatically. The timer can start applications even when the power is off. Some software applications take longer than others to launch. It is advisable to confirm in advance the amount of time your selected application takes to start. AutoAlert E-mail Notification System VAIO Action Setup also enables you to set up your computer to notify you with an Information LED when new mail arrives in your e-mail mailbox. The Information LED turns red to indicate that new e-mail has arrived. For this AutoAlert E-mail Notification System to work, you must use Microsoft® Outlook® Express as your default e-mail software, and you must have an Internet Service Provider with dial-up capabilities set up. As an alternative, you can program your AutoAlert E-mail Notification System to set the Information LED to turn on when it has successfully completed the task of dialing up and connecting to receive mail. In this case, the Information LED turns on to indicate that your e-mail account has been accessed successfully, regardless of whether or not you have mail; this works with Microsoft Outlook Express. The e-mail software you choose to use with PPK must be set as your default e-mail software. See LCD for an illustration showing the Information LED's location. AutoAlert E-mail Notification System Software Restrictions If you use software that uses a phone line The computer may not be able to disconnect the phone line due to communication and server conditions. Be sure to monitor the status of the software when running the AutoAlert E-mail Notification System, and manually disconnect the phone line if you notice a malfunction. Furthermore, when using the timer to start the software, it is advised that you set the computer to shut down or enter system standby mode after a certain length of time. This allows the computer to disconnect the phone line if the computer fails to disconnect the line normally. If you are using the timer to download e-mail automatically Page 153 It is advisable to set up your e-mail software to redial automatically if it does not connect the first time. It is also advisable to set the e-mail software to disconnect the phone line automatically when all mail has been downloaded. If you are using Microsoft® Outlook® Express When using the AutoAlert E-mail Notification System with Microsoft Outlook Express, it is advisable to select the Dial automatically setting in your Microsoft Outlook Express software. If you have not chosen this setting and wish to do so, start Outlook Express, click Tools, and then select Options. Select the check box "Automatically dial when checking for new messages." Click OK. Changing the Window Design of Sony Software To change the window design of Sony software 1. Click the Start button, point to Settings, and then click Control Panel. 2. Click UI Design Selector. 3. Click << or >> and select the desired design. 4. Click Apply. The "UI Design Selector" window design changes. The window design for your Sony software will match the "UI Design Selector" window. To try another selection, click << or >>. Then, click OK. The UI Design Selector closes and the window design of your Sony software window design displays. You may use the feature with UI Design Selector-compatible software only. Using the Memory Stick® Media Your Sony computer is designed to support the new Memory Stick recording media. The Memory Stick media is a small, versatile device that allows you to share data between various types of Sony equipment. When you use the card, your computer automatically launches Windows Explorer. This allows you to view the contents of the card. If the image files are created by a Sony digital camera or camcorder, you do not need the following steps. If you want to create a slide show that launches automatically when you insert a Memory Stick, follow these steps to transfer images from your hard drive to a Memory Stick. 1. Insert the Memory Stick into the appropriate slot. 2. Click the My Computer icon on the desktop. Page 154 3. Click the Removable Disk S: icon. 4. Create a new folder and name it "DCIM." 5. Open the DCIM folder and create a new folder named "100MSDCF." 6. Click the Start button, select VAIO, and then click PictureGear to launch the PictureGear application. 7. Select the digital images you want to save in your slide show. 8. From the PictureGear File menu, point to File Process, and then select Still Format Conversion. 9. Select Memory Stick as the Output Format. 10. Use the Browse button to select the DCIM/100MSDCF folder on the Removable Disk (S:) drive. 11. Name the file. The file name must begin with DSC (DSC0xxxx). The full file name without extension must have at least eight characters. The order in which your photos appear in your slide show will be determined by the number (xxxx) in the file name. Some examples of acceptable file names are DSC00001.jpg and DSC00002.jpg 12. Click OK to save the file. You can also add MPEG1 video files to your Slide Show by following the steps below. The order in which your video clips (MOV0xxxx files) appear in your Slide Show is determined by the number (xxxx) in the file name. 1. Insert the Memory Stick into the media slot. 2. Click the My Computer icon on the desktop. 3. Click the Removable Disk S: icon. 4. Create a new folder and name it "MSSONY." 5. Open the MSSONY folder and create a new folder named "MOML0001." 6. From the PictureGear File menu, point to File Process, and then select Still Format Conversion. 7. Copy the MPEG file into the MOML0001 folder. 8. Rename the MPEG file MOV0xxxx.mpg, where xxxx is any four-digit number. 9. To begin showing your slides, eject the Memory Stick and then reinsert it. The slide show will begin automatically. To protect data on Memory Stick media from accidental changes Memory Stick media contains a write-protect tab. The write-protect tab prevents accidental changes to information recorded on the Memory Stick media. When you slide the write-protect tab to the LOCK position, the Memory Stick is write-protected, which means you cannot delete, copy, or save information on the Memory Stick. When you slide the tab to the un-LOCK position, you can write to or modify the Memory Stick contents. To change the way the computer responds when a Memory Stick is inserted into the Memory Stick media slot Change the options on the Memory Stick tab in the PPK Setup software. Page 155 Using PC Cards This computer has a card bus PC card slot that supports a Type I or II PC card. To insert a PC card You do not need to shut down your computer when inserting a PC card. 1. Open the front panel. 2. Insert the PC card into the PC card slot until it clicks into position. When the card is completely inserted, the eject button pops out. If you cannot insert the card, do not forcibly insert it. In this case, make sure the card is not inserted upside-down or backward, and then reinsert the card into the slot carefully. See the manual that came with the PC card for details on using it. To close the front panel when the eject button is protruding, fold the button down onto the computer. To eject a PC card If you eject the PC card incorrectly, the system may not work correctly. 1. Click the Start button on the Windows® taskbar, click Settings, and then click Control Panel. 2. Click the PC Card icon. 3. Click the name of the card that you want to eject, and then click Stop. 4. When the message "You may safely remove this device" appears, click OK. 5. Push the PC card eject button on the front panel of the system unit. You may need to pull out the eject button before you can eject the card. Page 156 The card is ejected from the card connector. Remove the card by holding it by its edge and pulling it out carefully. Using the Standby Function When you are finished using your computer, you can put it in standby mode rather than turn it off completely. Putting the computer in standby mode allows you to return quickly to normal computer use. To put the computer in standby mode manually 1. Save your work and close any applications that are running. (You can leave Windows running.) 2. Press the (Standby) button on the top of the keyboard. The computer goes into standby mode. Alternatively, you can click the Start button on the Windows® taskbar, click Shut Down, select Standby, and then click OK. To let the computer go into standby mode automatically Click the My Computer icon on your desktop. Click Control Panel, and then click the Power Management icon. On the Power Schemes tab, select from the options in the Power schemes drop-down list. Then, choose settings for the power scheme you have selected. To save the settings under a name that is not offered in the Power schemes pulldown menu, choose your settings and then click Save As. Type in a name, and click OK. Click Apply to finalize your power settings. To resume from standby mode There are three ways to bring your computer back from the standby mode: press the space bar on your keyboard, press the left mouse button, or momentarily depress the power button on your computer. If the display does not return from standby when you press the (Standby) button, your system may be in video standby mode. Press the space bar on the keyboard to return from video standby. Standby Mode Indicators You can tell which mode the computer is in by the color of the power indicator light. Color Amber Green No color Mode Computer is in standby mode. Computer is out of standby mode, ready to use. Computer is turned off. In standby mode you may periodically hear the computer's fan turn on and off, depending on the room's temperature. This is normal functioning in standby mode. Page 157 Shutting Down Your Computer When you are ready to turn off your computer for an extended period of time, use the following procedure to shut down the computer. To avoid the potential loss of data, do not use the power switch to shut down the computer. To shut down your computer If you plan to shut down your computer for a short period of time, you may want to use standby mode instead. See Using the Standby Function. 1. Click the Start button on the Windows® taskbar to open the Start menu. 2. Click Shut Down to display the Shut Down Windows dialog box. 3. Select the Shut Down option. 4. Click OK to complete the shutdown process. Respond to any prompts about saving documents. 5. Wait for your computer to turn off automatically -- the power indicator light turns off. 6. Turn off any peripherals connected to your computer. The LCD display turns off automatically when the computer shuts down. You can also shut down your computer using the (Power) button on the keyboard. Pressing this button causes the system to perform a shutdown but does not give you any of the other options available on the Windows® Shut Down menu. About the Power Switch If your system "locks up" or "crashes," press and hold the power switch for four seconds to force your system to power off. You may need to repeat this procedure. See Locating Controls and Connectors for the power switch's location. Using the System Recovery CD(s) You can reinstall software titles that shipped with your computer if they are corrupted or accidentally erased. You may not need to recover the entire contents of your hard drive. If you experience a problem with your computer, reinstalling an individual device driver or software title may correct the problem. Use the Application Recovery CD(s) to reinstall individual applications or device drivers. See Using the Application Recovery CD(s). The System Recovery CD(s) contain a backup copy of all the software originally installed on your hard disk drive. They can be used only to recover the hard disk of the Sony computer you purchased. The System Recovery utility gives you three options: Full Restore without Format restores all the software titles that originally came with your computer without formatting the hard disk. Full Restore with Format formats the hard disk drive and then restores all the original software. If your hard drive is partitioned into C and D drives, the computer will offer you the option to reformat the drive into a single partition. Operating System Only (Windows 98® Restore with Format) formats the hard disk drive and Page 158 restores the Windows® operating system and the device drivers that shipped with your computer. This option is recommended for advanced users only. If you choose the Full Restore with Format or Operating System Only option, your hard disk will be formatted, which removes all the information on the hard disk drive. You will lose any software you have installed and any other files you have created since you started to use your computer. This means you will have to reinstall any applications that were not included with the computer when you purchased it. If you choose the Full Restore without Format option, you may need to reinstall applications that were not included with the computer when you purchased it. If you have any questions on using the System Recovery CD(s), contact Sony Customer Support. To use the System Recovery CD(s) You need to complete the Windows registration process when you use the System Recovery CD(s). 1. Insert the Sony System Recovery CD(s) in the DVD-ROM drive. The System Recovery utility boots from the DVD-ROM drive. It must be in the drive when you turn on the computer. 2. Shut down your computer as described in Shutting Down Your Computer. 3. Wait 30 seconds and turn on your computer. 4. Click OK to signify you have read and accept the Microsoft End-User License Agreement. 5. When the System Recovery menu appears, follow the on-screen instructions to complete the recovery process. Your system may include one or two System Recovery CDs. If you have two System Recovery CDs, insert the first CD to run the System Recovery program. You are prompted to insert the second CD once the information from the first CD has been installed. The recovery process takes 30 to 60 minutes to complete. Using the Application Recovery CD(s) The Application Recovery CD(s) allow you to reinstall individual applications and device drivers if they are corrupted or accidentally erased. Reinstalling an individual device driver or software title may correct a problem you are experiencing with your computer, and you may not need to recover the entire contents of your hard drive. If you do need to reinstall all the software titles that shipped with your computer, use the System Recovery CD(s). See Using the System Recovery CD(s). You must be in Windows to run the Application Recovery CD(s). The application will not run from DOS. If you have any questions on using the Application Recovery CD(s), contact Sony Customer Support. To use the Application Recovery CD(s) 1. Turn on your computer. If your computer is already on, close all applications. 2. When the Windows desktop appears, insert the Sony Application Recovery CD in the DVD-ROM drive. The Application Recovery utility loads automatically. 3. When the Application Recovery menu appears, follow the on-screen instructions to complete the recovery process. Your system may include one or two Application Recovery CDs. If you have two Application Recovery CDs, insert the first CD to run the Application Recovery program. You may be prompted to insert the second CD, depending on the application you wish to restore. Page 159 About the Software on Your Computer Your VAIO Slimtop computer is ready to help you work, play, learn, and communicate as soon as you turn it on. This section gives you an overview of the activities you can perform with your software titles. For support information, see For Answers to Your Software Questions . Adobe Acrobat® Reader Adobe Systems Incorporated Acrobat Reader software allows you to view, navigate, and print electronic documents in Adobe's Portable Document Format (PDF), an open file format that is intended to preserve the fidelity of documents created on all major computer platforms. Adobe PhotoDeluxe® Home Edition Adobe Systems Incorporated Create amazing photo effects with PhotoDeluxe. Without learning complex software, you can enhance, restore, and be creative with your photos. Includes built-in guided activities, stock photos, clip art, and templates to assist you. Adobe Premiere® LE Adobe Systems Incorporated Adobe Premiere LE offers an interface and editing tool for producing movies for video, multimedia, or the Web. View source clips and edited footage simultaneously in the monitor window. Create video clips up to three hours long with complete audio-video synchronization. America Online® America Online America Online is the world's most popular Internet online service. Stay in touch with family and friends with Easy-to-Use E-mail, manage your personal finances, get the latest news and sports scores, and chat with thousands of others who share your interests. AT&T WorldNet® Service AT&T Fast, reliable Internet access from AT&T WorldNet Service. AT&T WorldNet Service provides Web-based e-mail, a personalized start page from Excite, easy access to the Excite search engine, free Web pages, online and live agent technical support, instant messaging, and special shopping discounts at Market Square. CompuServe® 2000 CompuServe Interactive Services The all new CompuServe 2000 delivers a powerful tool for Internet users who want serious and timely information, in-depth research, and professional communities backed by state-of-the-art technologies, including high-speed access and powerful e-mail messaging. Digital Media Bar Sony Electronics Media Bar software is your all-in-one solution for audio/video playback. It handles all common computer multimedia formats, and controls selected Sony devices. Media Bar software encompasses audio/video library cataloging and playlist management, in addition to digital video quality control and effects features. DVgate Sony Electronics Connect a digital video camera recorder to the i.LINK connector and capture your own video clips. You can edit the clips from your video, add others, and combine clips into new movie segments. EarthLink TotalAccess EarthLink Network, Inc. Page 160 An Internet Service Provider that supplies access, information, and assistance to its customers, introducing them to the Internet. Member benefits include e-mail, newsgroups, a Personal Start Page, a free 6 MB web site, a member magazine, and 24-hour technical support. McAfee's VirusScan® Network Associates, Inc. Protect your computer from viruses. VirusScan can detect viruses from floppy disks, Internet downloads, e-mail attachments, intranets, shared files, CD-ROMs, and online services. Microsoft® Internet Explorer for Windows® 98 Microsoft Corporation Internet Explorer delivers the Web the way you want it. It's safe, easy to use, and you can personalize how you access the Web. Outlook Express and other tools in Internet Explorer also help you have a great experience when you are on the Web! Microsoft® Outlook® Express Microsoft Corporation Outlook Express, the messaging tool that takes your e-mail and newsgroup communications to new heights! Outlook Express is easy to set up and use, and provides you with secure, personalized, and complete features that make creating, sending, and reading your e-mail a more rich and dynamic experience. Microsoft® Word 2000 Microsoft Corporation Microsoft Word 2000 makes it easy to create common Web, e-mail, and print documents for use around the world. It embraces HTML as a first-class file format and extends Word's ease-of-use to the Web and e-mail. Word 2000 also extends that ease of use to international users, making it easy to create multilingual documents. Netscape Communicator® Netscape Communications Netscape Communicator is the all-in-one Internet tool that makes it easy to browse the Web, send Internet e-mail, chat, read newsgroups, and compose great Web documents. PictureGear Sony Electronics This image management software displays images from your hard drive, a Sony digital still camera, or a Sony Mavica® camera. The images appear in a convenient light-table format, so that you can easily view the contents of an entire folder. Prodigy Internet Prodigy Communications Corporation An Internet service that helps you find what you need online faster and smarter. Prodigy delivers powerful online content, such as sports scores, stock quotes, news, and easy access to Excite , plus a personal e-mail account and quality customer service, all at a competitive price. Quicken® Basic Intuit, Inc. Quicken is the fastest, easiest way to organize your finances. Quicken works just like your checkbook, so it's easy to learn and use. Quicken manages all of your finances, bank accounts, credit cards, investments, and loans. You can even pay your bills online. Smart Capture Sony Electronics Smart Capture is a fun new way to send multimedia messages via e-mail. Smart Capture manages the i.LINK connection between your computer and a Sony Digital Handycam® Camcorder or other Page 161 cameras that support the i.LINK interface. It allows you to capture and compress video or still images that you can save or share via e-mail. A smart solution to computer, digital audio/video, and network convergence. Smart Connect Sony Electronics Smart Connect allows you to use an i.LINK cable to connect your VAIO computer to another VAIO computer that supports Smart Connect. You can then use one computer to copy, delete, and edit files on the other computer. You can also print from a printer attached to either computer. Sound Forge® Sonic Foundry Sound Forge allows you to put powerful audio processing tools and effects to work on your desktop. Simply cut, copy, and paste your way to striking multimedia files for use in everything from Web pages to desktop presentations. VAIO Action Setup Sony Electronics VAIO Action Setup manages the settings for your computer's Programmable Power Keys (PPK), Memory Stick media, i.LINK interface, and internal timer. For more information, see VAIO Action Setup. WinFax® Basic Edition Symantec Corporation WinFax Basic Edition incorporates an easy-to-use interface that allows you to send and receive faxes easily. Upgrade to WinFax Pro to receive additional features. About Your Recovery CDs Application Recovery CD(s) Sony Electronics The Application Recovery CD program allows you to reinstall individual applications and device drivers. Use it to restore corrupted or accidentally erased files. System Recovery CD(s) Sony Electronics The System Recovery CD program allows you to restore the software titles that shipped with your computer if they become corrupted or are erased accidentally. It can be used only to restore the hard disk of the Sony computer you purchased. For Answers to Your Software Questions Acrobat® Reader, Adobe PhotoDeluxe® Home Edition (Adobe Systems Incorporated) Web site http://www.adobe.com/ phone 206-628-2746 (fee-based support) fax 206-628-5737 e-mail [email protected] hours M-F, 6 AM-5 PM PT America Online® (America Online) Web site phone hours http://www.aol.com/ 800-827-3338 7 days a week, 6 AM - 2 PM ET AT&T WorldNet® Service (AT&T) Web site phone e-mail http://www.att.net 800-400-1447 [email protected] Page 162 hours 7 days a week, 24 hours a day CompuServe® 2000 (CompuServe Interactive Services) Web site phone hours http://www.compuserve.com/ 800-848-8990 M-F, 8 AM - 1 AM ET, S-S 10 AM - 10 PM ET EarthLink TotalAccess Web site phone e-mail hours (EarthLink Network, Inc.) http://help.earthlink.net/techsupport/ 800-395-8410 [email protected] 7 days a week, 24 hours a day GTE Easy Sign-up (GTE Internet) phone hours 800-927-3000 7 days a week, 24 hours a day McAfee's VirusScan (Network Associates, Inc.) Web site phone e-mail hours http://support.mcafee.com 408-988-3832 [email protected] M - F 9 AM - 5 PM Central Time MindSpring Internet Desktop (MindSpring Enterprises, Inc.) Web site phone http://help.mindspring.com/support 800-719-4660 Quicken® Basic (Intuit Inc.) Web site phone hours http://www.intuit.com/support 900-555-4688 7 days a week, 24 hours a day Sound Forge® (Sonic Foundry) Web site http://www.sonicfoundry.com/support/ phone 608-256-5555 fax 608-256-7300 e-mail [email protected] hours M - F, 8 AM - 7 PM CT Windows® 98 Second Edition Operating System, Word® 2000, Internet Explorer 5, Outlook® Express (Microsoft Corporation) Web site phone hours 1 http://www.sony.com/pcsupport 888-4SONYPC (888-476-6972) 1 7 days a week, 24 hours a day Support from 1-888-4SONYPC is free of charge for 90 days after the original date of purchase. WinFax® Basic Edition (Symantec Corporation) Web site http://www.symantec.com/techsupp/ phone 800-798-0850 fax 800-554-4403 in North America 541-984-2490 outside North America Troubleshooting This section describes how to solve common problems you may encounter when using your computer. Many problems have simple solutions, so try these suggestions before you call Sony Customer Support. My computer does not start Check that the computer is plugged into a power source and that it is turned on. Check that the power light is lit on the front panel of the computer. Confirm that a diskette is not in the diskette drive (unless you are using a bootable diskette). Confirm that the power cord and all cables are connected firmly, as described on the color poster. Page 163 If you plugged the computer into a power strip or UPS, make sure the power strip or UPS is turned on and working. My computer or software program "locks up" Close the application that is currently "locked up" by pressing Ctrl+Alt+Delete. In the Close Program dialog box, scroll down until you locate "(Not responding)" next to an application. Select this application and click End Task. Windows attempts to close the application. If the attempt is unsuccessful, a second dialog box appears. Select End Task again. If you are unable to "unlock" the application, repeat the above steps but select Shut Down when the Close Program dialog box appears. If the above steps fail to "unlock" your computer, save any unsaved work, if possible. Press Alt+F4. Select Restart and click OK. If you cannot restart as described in the preceding steps, you can restart the computer by pressing Ctrl+Alt+Delete or by pressing the power switch for more than six seconds. Pressing Ctrl+Alt+Delete may result in the loss of changes made to files that are currently open. Contact the software publisher or designated provider for technical support. See For Answers to Your Software Questions for a list of phone numbers and Web addresses or see Read Me First . My DVD-ROM/CD-ROM drive tray does not open Make sure the computer is turned on. If the Eject button does not work, you can open the tray by inserting a straightened heavyweight paper clip into the emergency eject hole. When I click an application icon, a message such as "You must insert the application CD into your CD-ROM (DVD-ROM) drive" appears and the software does not start Some titles require specific files that are located on the application's DVD-ROM/CD-ROM. Insert the disc and try starting the program again. Check to make sure you inserted the DVD-ROM/CD-ROM with the label side facing up. My modem connection is slow The computer's modem uses K56flex technology/V.90. Many factors influence modem connection speed, including telephone line noise or compatibility with telephone equipment (such as fax machines or other modems). If you think your modem is not connecting properly to other computer-based modems, fax machines, or your Internet Service Provider, check the following: Have your phone company check that your phone line is free from any line noise. If your problem is fax-related, check that there are no problems with the fax machine you are calling. The modem that receives your call may be slower or may use a different communications protocol than your modem. If this is the case, the connection speed may be slower than expected. For optimum performance, ensure you are calling an Internet Service Provider number that is V.90-compliant. If you are having a problem connecting with your Internet Service Provider, check that the ISP is not experiencing technical problems. If you have a second phone line available, try connecting the modem to this line. My modem does not work Check that the phone line is plugged into the line jack. Page Check that the phone line is working. You can check the line by plugging in an ordinary phone and164 listening for a dial tone. Check that the phone number the program is dialing is correct. Verify that the software you are using is appropriately configured to recognize and interact with the Sony computer modem. Call the software publisher if you do not know how to configure the software to recognize the modem. All programs preinstalled by Sony are compatible. If you suspect your modem is not functioning, you can perform a simple test to find out. Click the My Computer icon on your desktop. Click Control Panel, and then click Modems. Click the Diagnostics tab and select COM3. Click More Info. If your modem is functioning, a More Info dialog box will display. If your modem is not functioning, an error message will appear. My microphone is too sensitive to background noise If you find there is too much background noise when you record sound, you should adjust the microphone gain by following these steps: 1. Right-click the speaker icon (Volume) in the lower-right Windows® task tray. 2. Click Open Volume Controls. The Volume Control screen appears. 3. In the Options menu, select Properties. The Properties screen appears. 4. Change the setting for "Adjust volume for" from Playback to Recording, and then click OK. 5. Click the Advanced button under Microphone Balance. The Advanced Controls for Microphone screen appears. 6. Deselect the check box for 1 Mic Gain (+20dB), then click the Close button. 7. Close the Recording Control window. My mouse does not work Check that the mouse is plugged into one of the PS/2® connectors on the keyboard. The other connector connects the keyboard to the computer. There may be dust or dirt inside the mouse mechanism. To clean the mouse, follow these steps: o Turn off your computer. See Shutting Down Your Computer for details. o Remove the mouse ball cover on the back of the mouse by turning the ring that covers the mouse ball clockwise. o Turn the mouse upright, and drop the mouse ball into your hand. o Using a piece of tape, remove any dust or dirt on the mouse ball and inside the mouse ball socket. o Return the mouse ball to the socket, and replace the mouse ball cover. Secure the cover by turning the ring counter-clockwise. I cannot find the Windows® taskbar Check that the taskbar is not hidden or shrunken. Use the mouse to point to the left, right, top, and bottom edges of the screen. See Read Me First for additional information on using your Sony computer. To Reach Sony For further assistance, call 1-888-4SONYPC (1-888-476-6972). Page 165 Specifications Model PCV-L630 Processor 600E MHz* Pentium® III Hard Disk Drive 17 GB Ultra DMA Standard SDRAM 128 MB PC-100 SDRAM, expandable to 256 MB Video RAM 8 MB SDRAM Graphics 2X AGP 3D graphics hardware acceleration (ATi Rage 128 Pro 4XL) Sound Capabilities High fidelity 3D PCI audio Aureal AU8810 Diskette Drive 3.5" 1.44 MB FDD DVD-ROM/CD-ROM Drive 4.8X (max.) DVD-ROM reading 24X (max.) CD-ROM reading** Modem K56flex technology/V.90 compatible data/fax modem Expansion Capabilities Two PCI slots Connection Capabilities (Front) PC card (Card bus support) USB port Microphone Headphone Memory Stick media slot i.LINK (4-pin) Connection Capabilities (Rear) USB port Modem line (RJ-11) Phone line (RJ-11) Parallel (printer) Serial port VGA monitor LCD display Line In Line Out Keyboard i.LINK (6-pin) Connection Capabilities (Keyboard) Mouse (PS/2-style) left and right connectors Supplied Accessories Stand (for vertical installation) Power cable Phone cable Keyboard cable PS/2 Wheel Mouse VAIO Smart Convertible Keyboard Spacers (for bottom of the system) Ferrite core Service 90-day limited express service*** Extendible to one year from original date of purchase upon registration Limited Warranty90-day parts/labor standard Extendible to one year from original date of purchase upon registration Power Requirements 130 watts maximum Dimensions CPU: 11.2"(w) x 3.6" (h) x 13.4" (d) (280 mm x 90 mm x 335 mm) Keyboard: 15.9" (w) x 1.8" (h) x 7.1" (d) (398 mm x 45 mm x 178 mm) Display: 16.1" (w) x 13.1" (h) x 6.9" (d) (403 mm x 327 mm x 172 mm) Weight CPU: 11.9 lbs. (5.4kg) Display: 7.05 lbs (3.2 kg) Keyboard: 2.9 lbs. (1.3kg) Operating Temperature 50º F to 95º F (+10º C to 35º C) * MHz denotes microprocessor internal clock speed; other factors may affect application performance. Page 166 GB means one billion bytes when referring to hard drive capacity. Accessible capacity may vary. **Data on a DVD-ROM is read at a variable transfer rate, ranging from 2X at the innermost track to 4.8X at the outermost track(the data transfer standard 1X rate is 1385 kbytes/s). The average data transfer rate is 3.6X(4986 kbytes/s). Data on a CD-ROM is read at a variable transfer rate, ranging from 10.5X at the innermost track to 24X at the outermost track(the data transfer standard 1X rate is 150 kbytes/s). The average data transfer is 18X(2700 kbytes/s). Maximum speed for faxing is 14.4 kbytes/s. Your modem is capable of downloading at 56 kbytes/s using K56flex technology or V.90. Your phone service, online service, or Internet Service Provider, however, may not support this technology or operate at this speed. ***Certain restrictions apply. Specifications are subject to change without notice. Page 167 Features For a complete description of the specifications of your Sony computer, see Specifications. i.LINK® (IEEE-1394): Two built-in i.LINK ports provide you with front and rear digital connection capability. The i.LINK name and logo identify a digital interface (IEEE-1394) for high speed communication. Exceptional performance: Your computer includes a fast Intel® processor and a V.90-compatible data/fax modem. Ergo-Angle Multimedia LCD display: With its exclusive dual-hinge pedestal, this 15" XGA TFT display provides twice the flexibility of other LCDs. Select the perfect viewing angle and enjoy the built-in Harman/Kardon® stereo speakers. AutoAlert E-mail Notification System: Custom software automatically downloads e-mail on a pre-set schedule via Microsoft® Outlook® Express. A light on the LCD display instantly lets you know when new mail is received. VAIO Smart convertible keyboard: The innovative palm rest converts to a keyboard cover for a sleek look when not in use. Six Programmable Power Keys let you launch any application with the push of a button; dual-sided mouse connections for left- or right- hand use. Sony Memory Stick® media slot: The next generation of digital media, smaller than a stick of gum. Easily delivers information from one Memory Stick-equipped electronic device to another, so you can transfer images, sounds, data and text between cameras, computers, and more. Compact components: Enjoy the small footprint and versatile setup options available by positioning the components in an arrangement of your choice. Sony audio and video quality: High-fidelity 3D audio system and high-powered 3D graphics (AGP) enable you to take advantage of today's advanced multimedia applications, games, and entertainment software. Preinstalled software titles: All the software on your computer is preinstalled, configured, and ready for you to use right out of the box. Microsoft® Windows® 98 Second Edition operating system: Your system includes the latest operating system from Microsoft. Communications: Access popular online services, browse the Internet, send faxes, and more. * Actual upload and download speeds may vary due to line conditions, ISP support, and government regulations. Unpacking Your Computer Computer and Supplied Accessories Page 168 Manuals Read Me First contains last-minute supplementary information and software support numbers. The VAIO Slimtop LCD Computer User Guide (this manual) contains features and specifications of your computer. It also includes information on the applications included with your system and how to contact software vendors, get started with your computer, and solve common problems. The VAIO VAIO® Consumer Information Guide contains safety and regulatory information, ergonomic considerations, information on help resources, and your computer's limited warranty statement. The Microsoft® Windows®98 Second Edition Getting Started manual explains how to use the basic features of the Windows® operating system. Recovery CDs System Recovery CD(s) - Enables you to reinstall software that shipped with your computer if it is corrupted or accidentally erased. For more information, see Using the System Recovery CD(s). Application Recovery CD(s) - Allows you to reinstall individual applications or device drivers if they are corrupted or accidentally erased. For more information, see Using the Application Recovery CD(s). Other Setting up your VAIO Slimtop LCD Computer (poster) Packet containing special product offers Software CDs Page 169 Microsoft® Word 2000 Setting Up Your VAIO Slimtop LCD Computer Locating Controls and Connectors Front Panel 1 Power switch and indicator light Turns on/off the computer and the display. The indicator light is green while the power is on and amber when the computer is in standby mode. 2 Floppy disk drive Reads/writes data from/to a 3.5-inch floppy disk. 3 Floppy disk eject button Ejects the floppy disk. 4 DVD-ROM drive Reads data from a DVD-ROM/CD-ROM. 5 DVD-ROM/CD-ROM eject button Ejects a DVD-ROM/CD-ROM. 6 Manual eject hole If the DVD-ROM/CD-ROM does not come out when you press the DVD-ROM/CD-ROM eject button, insert a thin, pointed object into this hole to eject the disc manually. 7 FD (Floppy disk drive) access indicator light Lights in green while reading/writing data from/to a floppy disk. 8 Disc (DVD-ROM drive) access indicator light Lights in amber while reading data from a DVD-ROM/CD-ROM. 9 HD (drive) access indicator light Lights in green while reading/writing data from/to the hard disk. 10 MIC (Microphone) connector* Connects a microphone (not supplied). 11 PHONES (Headphones) connector* Connects headphones (not supplied). 12 VOLUME control Page 170 Adjusts the volume of the headphones connected to the PHONES connector. Users should note that this does not control the volume of the integrated LCD speakers. 13 PC CARD slot A PC Card (also called a PCMCIA card) can be installed in this slot. PC cards enable you to add functionality to your system. MEMORY STICK media slot 14 Insert a Sony Memory Stick® card into this slot. See Using the Memory Stick® Media for details on using Memory Stick media. 15 i.LINK (4-pin) Connects a digital device such as a Sony Digital Handycam® Camcorder. 16 USB (Universal Serial Bus) connector Connects a USB device. * See Using a Headphone or Microphone for important information about connecting a microphone and headphone. Rear Panel 1 AC INPUT connector Connects the supplied power cord. 2 LINE jack Connects a phone cable to the wall jack. 3 EMPTY PCI SLOT (FILLED WITH ETHERNET CARD ON CUSTOM MODELS) For a PCI Add-On Card (not supplied). 4 TELEPHONE jack Connects the phone to the computer. 5 PRINTER connector Connects a parallel device, such as a printer or scanner. 6 SERIAL connector Connects a serial device, such as a digital still camera. 7 MONITOR connector Connects a standard CRT display. 8 USB (Universal Serial Bus) connector Connects a USB device. 9 LINE IN connector Connects an audio device. 10 LINE OUT connector Connects an audio device or an active speaker. 11 i.LINK (6-pin) Connects a digital device such as a Sony Digital Handycam® Camcorder. 12 LCD MONITOR connector Connects the LCD that comes with the VAIO Slimtop LCD computer. Note: Do not connect any display to this connector other than the LCD that is supplied with this system. Page 171 13 KEYBOARD connector Connects a keyboard. LCD 1 Power indicator light Light is green while the power is on. When the computer enters the standby mode, this indicator light turns amber. 2 Information LED Light turns red to alert the user to activities, such as the arrival of e-mail. See AutoAlert E-mail Notification System. 3 Adjusts 4 Adjusts Brightness control the brightness of the screen. Volume control the volume of the integrated speakers on the LCD display. Using the Wheel Mouse For information about the Wheel Mouse that connects to either side of your keyboard, see MouseWare Help. To access MouseWare Help, from the Start menu, point to Programs, MouseWare, and then click MouseWare Help. To set up the mouse for left-handed use: 1. Click the My Computer icon on your desktop. 2. Click Control Panel, and then click Mouse. The Mouse Properties dialog box appears. 3. In the Quick Setup tab, click Device Setup. 4. In the Device Setup Wizard dialog box, click Next. 5. Select the radio button next to "Left side of the keyboard." 6. Click Next three times, and then click Finish. 7. Click Apply. Using a Headphone or Microphone When you connect a microphone or headphone to your computer, attaching a ferrite core will reduce electrical interference. Attach the (supplied) ferrite core at the end of the headphone or microphone cable closest to the computer. Wrap the cable through the center of the ferrite core. The following illustration shows how to attach the ferrite core when you are using both a headphone and a microphone. Page 172 The LCD and keyboard cables already include a ferrite core. Do not remove the ferrite core from these cables. To adjust the height and viewing angle of the display Holding both sides of the display, push the display panel out and up, and then adjust the viewing angle. The LCD display is designed to maintain the best ergonomic viewing angle. Set the display height so that it does not touch the keyboard, and adjust the viewing angle approximately 27 degrees from eye level to the center of the screen. Attaching the Stand to the System Unit The main system unit can be oriented horizontally or vertically. If you place the system in a vertical position, you must attach the supplied stand to ensure stability. 1. Place the system unit on its right side, with the front of the system facing forward. 2. Insert the grooved side of the stand into the ventilation holes of the system so that the two screw holes are aligned and the stand's fins are at the rear of the unit. 3. Secure the stand to the unit with the supplied screw. Page 173 The stand keeps the system cool by allowing air to flow under it. If you choose to place the system unit in a vertical position, it is important to use the stand and to place the system unit on its left side, as in the illustration above; otherwise, the system may overheat. Registering Your Computer Take advantage of Sony's commitment to quality customer support and receive these benefits by registering your computer: Sony Customer Support--Talk to a Support Representative to troubleshoot problems you may be having with your computer. Limited warranty--Protect your investment. See Limited Warranty Statement in the VAIO® Consumer Information Guide for details. You must register your computer to extend the warranty from the initial 90-day warranty period to one year from the original date of purchase. Express Service--Provides a fast and direct return of your VAIO Slimtop Sony for service of your computer. LCD Computer to If you did not already register when you first turned on your computer, follow these steps to use the computer online registration service. 1. Click the registration icon on the VAIO desktop. 2. Enter the information requested on the first online registration form. Press the tab key to move from box to box. 3. Click the Next button to advance to the next form. 4. Complete the remaining forms by clicking the Next button each time you complete a form. The computer automatically transfers your registration information using your built-in modem and a toll-free telephone number or a local number. You may sign up for Internet access with a Sony preferred Internet Service Provider. VAIO Action Setup VAIO Action Setup manages the settings for your computer's Programmable Power Keys (PPK), Memory Stick® media, i.LINK interface, and internal timer. An overview of each of these functions is provided below. For more information on changing the settings using VAIO Action Setup, see the online VAIO Action Setup help files. To access the help files, from the Start menu, point to Programs/VAIO Action Setup/VAIO Action Setup Help. Programmable Power Keys Your Sony computer comes with technology that allows you to get to your favorite applications Page easily. Each Programmable Power Key (PPK) on your VAIO Smart convertible keyboard comes 174 programmed to launch a preset application with a single press of the key. If you wish, you can use the VAIO Action Setup software to change the Programmable Power Keys' preset functions. The Programmable Power Keys are located at the top of your keyboard, and are numbered P1 through P6. The keys work even when the computer is turned off. Pressing one of these keys turns on the computer and launches the preset application. The six Programmable Power Keys come to you preprogrammed to perform the functions listed in the table below. Key Function P1 (INTERNET) Starts Microsoft® Internet Explorer for Windows® 98. P2 (MAIL) Starts Microsoft® Outlook® Express P3 (WORK) Starts Microsoft® Word P4 (FINANCE) Starts Intuit® Quicken® Basic 2000. P5 (SETUP) Starts PPK Setup. P6 (HELP) Opens a menu of help options. Memory Stick You can use VAIO Action Setup to preset your computer to automatically launch an application when you insert a Memory Stick. For more information on Memory Stick media, see Using the Memory Stick® Media . Internal Timer The VAIO Action Setup software allows you to set your computer's internal timer to launch certain applications automatically. The timer can start applications even when the power is off. Some software applications take longer than others to launch. It is advisable to confirm in advance the amount of time your selected application takes to start. AutoAlert E-mail Notification System VAIO Action Setup also enables you to set up your computer to notify you with an Information LED when new mail arrives in your e-mail mailbox. The Information LED turns red to indicate that new e-mail has arrived. For this AutoAlert E-mail Notification System to work, you must use Microsoft® Outlook® Express as your default e-mail software, and you must have an Internet Service Provider with dial-up capabilities set up. As an alternative, you can program your AutoAlert E-mail Notification System to set the Information LED to turn on when it has successfully completed the task of dialing up and connecting to receive mail. In this case, the Information LED turns on to indicate that your e-mail account has been accessed successfully, regardless of whether or not you have mail; this works with Microsoft Outlook Express. The e-mail software you choose to use with PPK must be set as your default e-mail software. See LCD for an illustration showing the Information LED's location. AutoAlert E-mail Notification System Software Restrictions If you use software that uses a phone line The computer may not be able to disconnect the phone line due to communication and server conditions. Be sure to monitor the status of the software when running the AutoAlert E-mail Notification System, and manually disconnect the phone line if you notice a malfunction. Furthermore, when using the timer to start the software, it is advised that you set the computer to shut down or enter system standby mode after a certain length of time. This allows the computer to disconnect the phone line if the computer fails to disconnect the line normally. If you are using the timer to download e-mail automatically Page 175 It is advisable to set up your e-mail software to redial automatically if it does not connect the first time. It is also advisable to set the e-mail software to disconnect the phone line automatically when all mail has been downloaded. If you are using Microsoft® Outlook® Express When using the AutoAlert E-mail Notification System with Microsoft Outlook Express, it is advisable to select the Dial automatically setting in your Microsoft Outlook Express software. If you have not chosen this setting and wish to do so, start Outlook Express, click Tools, and then select Options. Select the check box "Automatically dial when checking for new messages." Click OK. Changing the Window Design of Sony Software To change the window design of Sony software 1. Click the Start button, point to Settings, and then click Control Panel. 2. Click UI Design Selector. 3. Click << or >> and select the desired design. 4. Click Apply. The "UI Design Selector" window design changes. The window design for your Sony software will match the "UI Design Selector" window. To try another selection, click << or >>. Then, click OK. The UI Design Selector closes and the window design of your Sony software window design displays. You may use the feature with UI Design Selector-compatible software only. Using the Memory Stick® Media Your Sony computer is designed to support the new Memory Stick recording media. The Memory Stick media is a small, versatile device that allows you to share data between various types of Sony equipment. When you use the card, your computer automatically launches Windows Explorer. This allows you to view the contents of the card. If the image files are created by a Sony digital camera or camcorder, you do not need the following steps. If you want to create a slide show that launches automatically when you insert a Memory Stick, follow these steps to transfer images from your hard drive to a Memory Stick. 1. Insert the Memory Stick into the appropriate slot. 2. Click the My Computer icon on the desktop. Page 176 3. Click the Removable Disk S: icon. 4. Create a new folder and name it "DCIM." 5. Open the DCIM folder and create a new folder named "100MSDCF." 6. Click the Start button, select VAIO, and then click PictureGear to launch the PictureGear application. 7. Select the digital images you want to save in your slide show. 8. From the PictureGear File menu, point to File Process, and then select Still Format Conversion. 9. Select Memory Stick as the Output Format. 10. Use the Browse button to select the DCIM/100MSDCF folder on the Removable Disk (S:) drive. 11. Name the file. The file name must begin with DSC (DSC0xxxx). The full file name without extension must have at least eight characters. The order in which your photos appear in your slide show will be determined by the number (xxxx) in the file name. Some examples of acceptable file names are DSC00001.jpg and DSC00002.jpg 12. Click OK to save the file. You can also add MPEG1 video files to your Slide Show by following the steps below. The order in which your video clips (MOV0xxxx files) appear in your Slide Show is determined by the number (xxxx) in the file name. 1. Insert the Memory Stick into the media slot. 2. Click the My Computer icon on the desktop. 3. Click the Removable Disk S: icon. 4. Create a new folder and name it "MSSONY." 5. Open the MSSONY folder and create a new folder named "MOML0001." 6. From the PictureGear File menu, point to File Process, and then select Still Format Conversion. 7. Copy the MPEG file into the MOML0001 folder. 8. Rename the MPEG file MOV0xxxx.mpg, where xxxx is any four-digit number. 9. To begin showing your slides, eject the Memory Stick and then reinsert it. The slide show will begin automatically. To protect data on Memory Stick media from accidental changes Memory Stick media contains a write-protect tab. The write-protect tab prevents accidental changes to information recorded on the Memory Stick media. When you slide the write-protect tab to the LOCK position, the Memory Stick is write-protected, which means you cannot delete, copy, or save information on the Memory Stick. When you slide the tab to the un-LOCK position, you can write to or modify the Memory Stick contents. To change the way the computer responds when a Memory Stick is inserted into the Memory Stick media slot Change the options on the Memory Stick tab in the PPK Setup software. Page 177 Using PC Cards This computer has a card bus PC card slot that supports a Type I or II PC card. To insert a PC card You do not need to shut down your computer when inserting a PC card. 1. Open the front panel. 2. Insert the PC card into the PC card slot until it clicks into position. When the card is completely inserted, the eject button pops out. If you cannot insert the card, do not forcibly insert it. In this case, make sure the card is not inserted upside-down or backward, and then reinsert the card into the slot carefully. See the manual that came with the PC card for details on using it. To close the front panel when the eject button is protruding, fold the button down onto the computer. To eject a PC card If you eject the PC card incorrectly, the system may not work correctly. 1. Click the Start button on the Windows® taskbar, click Settings, and then click Control Panel. 2. Click the PC Card icon. 3. Click the name of the card that you want to eject, and then click Stop. 4. When the message "You may safely remove this device" appears, click OK. 5. Push the PC card eject button on the front panel of the system unit. You may need to pull out the eject button before you can eject the card. Page 178 The card is ejected from the card connector. Remove the card by holding it by its edge and pulling it out carefully. Using the Standby Function When you are finished using your computer, you can put it in standby mode rather than turn it off completely. Putting the computer in standby mode allows you to return quickly to normal computer use. To put the computer in standby mode manually 1. Save your work and close any applications that are running. (You can leave Windows running.) 2. Press the (Standby) button on the top of the keyboard. The computer goes into standby mode. Alternatively, you can click the Start button on the Windows® taskbar, click Shut Down, select Standby, and then click OK. To let the computer go into standby mode automatically Click the My Computer icon on your desktop. Click Control Panel, and then click the Power Management icon. On the Power Schemes tab, select from the options in the Power schemes drop-down list. Then, choose settings for the power scheme you have selected. To save the settings under a name that is not offered in the Power schemes pulldown menu, choose your settings and then click Save As. Type in a name, and click OK. Click Apply to finalize your power settings. To resume from standby mode There are three ways to bring your computer back from the standby mode: press the space bar on your keyboard, press the left mouse button, or momentarily depress the power button on your computer. If the display does not return from standby when you press the (Standby) button, your system may be in video standby mode. Press the space bar on the keyboard to return from video standby. Standby Mode Indicators You can tell which mode the computer is in by the color of the power indicator light. Color Amber Green No color Mode Computer is in standby mode. Computer is out of standby mode, ready to use. Computer is turned off. In standby mode you may periodically hear the computer's fan turn on and off, depending on the room's temperature. This is normal functioning in standby mode. Page 179 Shutting Down Your Computer When you are ready to turn off your computer for an extended period of time, use the following procedure to shut down the computer. To avoid the potential loss of data, do not use the power switch to shut down the computer. To shut down your computer If you plan to shut down your computer for a short period of time, you may want to use standby mode instead. See Using the Standby Function. 1. Click the Start button on the Windows® taskbar to open the Start menu. 2. Click Shut Down to display the Shut Down Windows dialog box. 3. Select the Shut Down option. 4. Click OK to complete the shutdown process. Respond to any prompts about saving documents. 5. Wait for your computer to turn off automatically -- the power indicator light turns off. 6. Turn off any peripherals connected to your computer. The LCD display turns off automatically when the computer shuts down. You can also shut down your computer using the (Power) button on the keyboard. Pressing this button causes the system to perform a shutdown but does not give you any of the other options available on the Windows® Shut Down menu. About the Power Switch If your system "locks up" or "crashes," press and hold the power switch for four seconds to force your system to power off. You may need to repeat this procedure. See Locating Controls and Connectors for the power switch's location. Using the System Recovery CD(s) You can reinstall software titles that shipped with your computer if they are corrupted or accidentally erased. You may not need to recover the entire contents of your hard drive. If you experience a problem with your computer, reinstalling an individual device driver or software title may correct the problem. Use the Application Recovery CD(s) to reinstall individual applications or device drivers. See Using the Application Recovery CD(s). The System Recovery CD(s) contain a backup copy of all the software originally installed on your hard disk drive. They can be used only to recover the hard disk of the Sony computer you purchased. The System Recovery utility gives you three options: Full Restore without Format restores all the software titles that originally came with your computer without formatting the hard disk. Full Restore with Format formats the hard disk drive and then restores all the original software. If your hard drive is partitioned into C and D drives, the computer will offer you the option to reformat the drive into a single partition. Operating System Only (Windows 98® Restore with Format) formats the hard disk drive and Page 180 restores the Windows® operating system and the device drivers that shipped with your computer. This option is recommended for advanced users only. If you choose the Full Restore with Format or Operating System Only option, your hard disk will be formatted, which removes all the information on the hard disk drive. You will lose any software you have installed and any other files you have created since you started to use your computer. This means you will have to reinstall any applications that were not included with the computer when you purchased it. If you choose the Full Restore without Format option, you may need to reinstall applications that were not included with the computer when you purchased it. If you have any questions on using the System Recovery CD(s), contact Sony Customer Support. To use the System Recovery CD(s) You need to complete the Windows registration process when you use the System Recovery CD(s). 1. Insert the Sony System Recovery CD(s) in the DVD-ROM drive. The System Recovery utility boots from the DVD-ROM drive. It must be in the drive when you turn on the computer. 2. Shut down your computer as described in Shutting Down Your Computer. 3. Wait 30 seconds and turn on your computer. 4. Click OK to signify you have read and accept the Microsoft End-User License Agreement. 5. When the System Recovery menu appears, follow the on-screen instructions to complete the recovery process. Your system may include one or two System Recovery CDs. If you have two System Recovery CDs, insert the first CD to run the System Recovery program. You are prompted to insert the second CD once the information from the first CD has been installed. The recovery process takes 30 to 60 minutes to complete. Using the Application Recovery CD(s) The Application Recovery CD(s) allow you to reinstall individual applications and device drivers if they are corrupted or accidentally erased. Reinstalling an individual device driver or software title may correct a problem you are experiencing with your computer, and you may not need to recover the entire contents of your hard drive. If you do need to reinstall all the software titles that shipped with your computer, use the System Recovery CD(s). See Using the System Recovery CD(s). You must be in Windows to run the Application Recovery CD(s). The application will not run from DOS. If you have any questions on using the Application Recovery CD(s), contact Sony Customer Support. To use the Application Recovery CD(s) 1. Turn on your computer. If your computer is already on, close all applications. 2. When the Windows desktop appears, insert the Sony Application Recovery CD in the DVD-ROM drive. The Application Recovery utility loads automatically. 3. When the Application Recovery menu appears, follow the on-screen instructions to complete the recovery process. Your system may include one or two Application Recovery CDs. If you have two Application Recovery CDs, insert the first CD to run the Application Recovery program. You may be prompted to insert the second CD, depending on the application you wish to restore. Page 181 About the Software on Your Computer Your VAIO Slimtop computer is ready to help you work, play, learn, and communicate as soon as you turn it on. This section gives you an overview of the activities you can perform with your software titles. For support information, see For Answers to Your Software Questions . Adobe Acrobat® Reader Adobe Systems Incorporated Acrobat Reader software allows you to view, navigate, and print electronic documents in Adobe's Portable Document Format (PDF), an open file format that is intended to preserve the fidelity of documents created on all major computer platforms. Adobe PhotoDeluxe® Home Edition Adobe Systems Incorporated Create amazing photo effects with PhotoDeluxe. Without learning complex software, you can enhance, restore, and be creative with your photos. Includes built-in guided activities, stock photos, clip art, and templates to assist you. Adobe Premiere® LE Adobe Systems Incorporated Adobe Premiere LE offers an interface and editing tool for producing movies for video, multimedia, or the Web. View source clips and edited footage simultaneously in the monitor window. Create video clips up to three hours long with complete audio-video synchronization. America Online® America Online America Online is the world's most popular Internet online service. Stay in touch with family and friends with Easy-to-Use E-mail, manage your personal finances, get the latest news and sports scores, and chat with thousands of others who share your interests. AT&T WorldNet® Service AT&T Fast, reliable Internet access from AT&T WorldNet Service. AT&T WorldNet Service provides Web-based e-mail, a personalized start page from Excite, easy access to the Excite search engine, free Web pages, online and live agent technical support, instant messaging, and special shopping discounts at Market Square. CompuServe® 2000 CompuServe Interactive Services The all new CompuServe 2000 delivers a powerful tool for Internet users who want serious and timely information, in-depth research, and professional communities backed by state-of-the-art technologies, including high-speed access and powerful e-mail messaging. Digital Media Bar Sony Electronics Media Bar software is your all-in-one solution for audio/video playback. It handles all common computer multimedia formats, and controls selected Sony devices. Media Bar software encompasses audio/video library cataloging and playlist management, in addition to digital video quality control and effects features. DVgate Sony Electronics Connect a digital video camera recorder to the i.LINK connector and capture your own video clips. You can edit the clips from your video, add others, and combine clips into new movie segments. EarthLink TotalAccess EarthLink Network, Inc. Page 182 An Internet Service Provider that supplies access, information, and assistance to its customers, introducing them to the Internet. Member benefits include e-mail, newsgroups, a Personal Start Page, a free 6 MB web site, a member magazine, and 24-hour technical support. McAfee's VirusScan® Network Associates, Inc. Protect your computer from viruses. VirusScan can detect viruses from floppy disks, Internet downloads, e-mail attachments, intranets, shared files, CD-ROMs, and online services. Microsoft® Internet Explorer for Windows® 98 Microsoft Corporation Internet Explorer delivers the Web the way you want it. It's safe, easy to use, and you can personalize how you access the Web. Outlook Express and other tools in Internet Explorer also help you have a great experience when you are on the Web! Microsoft® Outlook® Express Microsoft Corporation Outlook Express, the messaging tool that takes your e-mail and newsgroup communications to new heights! Outlook Express is easy to set up and use, and provides you with secure, personalized, and complete features that make creating, sending, and reading your e-mail a more rich and dynamic experience. Microsoft® Word 2000 Microsoft Corporation Microsoft Word 2000 makes it easy to create common Web, e-mail, and print documents for use around the world. It embraces HTML as a first-class file format and extends Word's ease-of-use to the Web and e-mail. Word 2000 also extends that ease of use to international users, making it easy to create multilingual documents. Netscape Communicator® Netscape Communications Netscape Communicator is the all-in-one Internet tool that makes it easy to browse the Web, send Internet e-mail, chat, read newsgroups, and compose great Web documents. PictureGear Sony Electronics This image management software displays images from your hard drive, a Sony digital still camera, or a Sony Mavica® camera. The images appear in a convenient light-table format, so that you can easily view the contents of an entire folder. Prodigy Internet Prodigy Communications Corporation An Internet service that helps you find what you need online faster and smarter. Prodigy delivers powerful online content, such as sports scores, stock quotes, news, and easy access to Excite , plus a personal e-mail account and quality customer service, all at a competitive price. Quicken® Basic Intuit, Inc. Quicken is the fastest, easiest way to organize your finances. Quicken works just like your checkbook, so it's easy to learn and use. Quicken manages all of your finances, bank accounts, credit cards, investments, and loans. You can even pay your bills online. Smart Capture Sony Electronics Smart Capture is a fun new way to send multimedia messages via e-mail. Smart Capture manages the i.LINK connection between your computer and a Sony Digital Handycam® Camcorder or other Page 183 cameras that support the i.LINK interface. It allows you to capture and compress video or still images that you can save or share via e-mail. A smart solution to computer, digital audio/video, and network convergence. Smart Connect Sony Electronics Smart Connect allows you to use an i.LINK cable to connect your VAIO computer to another VAIO computer that supports Smart Connect. You can then use one computer to copy, delete, and edit files on the other computer. You can also print from a printer attached to either computer. Sound Forge® Sonic Foundry Sound Forge allows you to put powerful audio processing tools and effects to work on your desktop. Simply cut, copy, and paste your way to striking multimedia files for use in everything from Web pages to desktop presentations. VAIO Action Setup Sony Electronics VAIO Action Setup manages the settings for your computer's Programmable Power Keys (PPK), Memory Stick media, i.LINK interface, and internal timer. For more information, see VAIO Action Setup. WinFax® Basic Edition Symantec Corporation WinFax Basic Edition incorporates an easy-to-use interface that allows you to send and receive faxes easily. Upgrade to WinFax Pro to receive additional features. About Your Recovery CDs Application Recovery CD(s) Sony Electronics The Application Recovery CD program allows you to reinstall individual applications and device drivers. Use it to restore corrupted or accidentally erased files. System Recovery CD(s) Sony Electronics The System Recovery CD program allows you to restore the software titles that shipped with your computer if they become corrupted or are erased accidentally. It can be used only to restore the hard disk of the Sony computer you purchased. For Answers to Your Software Questions Acrobat® Reader, Adobe PhotoDeluxe® Home Edition (Adobe Systems Incorporated) Web site http://www.adobe.com/ phone 206-628-2746 (fee-based support) fax 206-628-5737 e-mail [email protected] hours M-F, 6 AM-5 PM PT America Online® (America Online) Web site phone hours http://www.aol.com/ 800-827-3338 7 days a week, 6 AM - 2 PM ET AT&T WorldNet® Service (AT&T) Web site phone e-mail http://www.att.net 800-400-1447 [email protected] Page 184 hours 7 days a week, 24 hours a day CompuServe® 2000 (CompuServe Interactive Services) Web site phone hours http://www.compuserve.com/ 800-848-8990 M-F, 8 AM - 1 AM ET, S-S 10 AM - 10 PM ET EarthLink TotalAccess Web site phone e-mail hours (EarthLink Network, Inc.) http://help.earthlink.net/techsupport/ 800-395-8410 [email protected] 7 days a week, 24 hours a day GTE Easy Sign-up (GTE Internet) phone hours 800-927-3000 7 days a week, 24 hours a day McAfee's VirusScan (Network Associates, Inc.) Web site phone e-mail hours http://support.mcafee.com 408-988-3832 [email protected] M - F 9 AM - 5 PM Central Time MindSpring Internet Desktop (MindSpring Enterprises, Inc.) Web site phone http://help.mindspring.com/support 800-719-4660 Quicken® Basic (Intuit Inc.) Web site phone hours http://www.intuit.com/support 900-555-4688 7 days a week, 24 hours a day Sound Forge® (Sonic Foundry) Web site http://www.sonicfoundry.com/support/ phone 608-256-5555 fax 608-256-7300 e-mail [email protected] hours M - F, 8 AM - 7 PM CT Windows® 98 Second Edition Operating System, Word® 2000, Internet Explorer 5, Outlook® Express (Microsoft Corporation) Web site phone hours 1 http://www.sony.com/pcsupport 888-4SONYPC (888-476-6972) 1 7 days a week, 24 hours a day Support from 1-888-4SONYPC is free of charge for 90 days after the original date of purchase. WinFax® Basic Edition (Symantec Corporation) Web site http://www.symantec.com/techsupp/ phone 800-798-0850 fax 800-554-4403 in North America 541-984-2490 outside North America Troubleshooting This section describes how to solve common problems you may encounter when using your computer. Many problems have simple solutions, so try these suggestions before you call Sony Customer Support. My computer does not start Check that the computer is plugged into a power source and that it is turned on. Check that the power light is lit on the front panel of the computer. Confirm that a diskette is not in the diskette drive (unless you are using a bootable diskette). Confirm that the power cord and all cables are connected firmly, as described on the color poster. Page 185 If you plugged the computer into a power strip or UPS, make sure the power strip or UPS is turned on and working. My computer or software program "locks up" Close the application that is currently "locked up" by pressing Ctrl+Alt+Delete. In the Close Program dialog box, scroll down until you locate "(Not responding)" next to an application. Select this application and click End Task. Windows attempts to close the application. If the attempt is unsuccessful, a second dialog box appears. Select End Task again. If you are unable to "unlock" the application, repeat the above steps but select Shut Down when the Close Program dialog box appears. If the above steps fail to "unlock" your computer, save any unsaved work, if possible. Press Alt+F4. Select Restart and click OK. If you cannot restart as described in the preceding steps, you can restart the computer by pressing Ctrl+Alt+Delete or by pressing the power switch for more than six seconds. Pressing Ctrl+Alt+Delete may result in the loss of changes made to files that are currently open. Contact the software publisher or designated provider for technical support. See For Answers to Your Software Questions for a list of phone numbers and Web addresses or see Read Me First . My DVD-ROM/CD-ROM drive tray does not open Make sure the computer is turned on. If the Eject button does not work, you can open the tray by inserting a straightened heavyweight paper clip into the emergency eject hole. When I click an application icon, a message such as "You must insert the application CD into your CD-ROM (DVD-ROM) drive" appears and the software does not start Some titles require specific files that are located on the application's DVD-ROM/CD-ROM. Insert the disc and try starting the program again. Check to make sure you inserted the DVD-ROM/CD-ROM with the label side facing up. My modem connection is slow The computer's modem uses K56flex technology/V.90. Many factors influence modem connection speed, including telephone line noise or compatibility with telephone equipment (such as fax machines or other modems). If you think your modem is not connecting properly to other computer-based modems, fax machines, or your Internet Service Provider, check the following: Have your phone company check that your phone line is free from any line noise. If your problem is fax-related, check that there are no problems with the fax machine you are calling. The modem that receives your call may be slower or may use a different communications protocol than your modem. If this is the case, the connection speed may be slower than expected. For optimum performance, ensure you are calling an Internet Service Provider number that is V.90-compliant. If you are having a problem connecting with your Internet Service Provider, check that the ISP is not experiencing technical problems. If you have a second phone line available, try connecting the modem to this line. My modem does not work Check that the phone line is plugged into the line jack. Page Check that the phone line is working. You can check the line by plugging in an ordinary phone and186 listening for a dial tone. Check that the phone number the program is dialing is correct. Verify that the software you are using is appropriately configured to recognize and interact with the Sony computer modem. Call the software publisher if you do not know how to configure the software to recognize the modem. All programs preinstalled by Sony are compatible. If you suspect your modem is not functioning, you can perform a simple test to find out. Click the My Computer icon on your desktop. Click Control Panel, and then click Modems. Click the Diagnostics tab and select COM3. Click More Info. If your modem is functioning, a More Info dialog box will display. If your modem is not functioning, an error message will appear. My microphone is too sensitive to background noise If you find there is too much background noise when you record sound, you should adjust the microphone gain by following these steps: 1. Right-click the speaker icon (Volume) in the lower-right Windows® task tray. 2. Click Open Volume Controls. The Volume Control screen appears. 3. In the Options menu, select Properties. The Properties screen appears. 4. Change the setting for "Adjust volume for" from Playback to Recording, and then click OK. 5. Click the Advanced button under Microphone Balance. The Advanced Controls for Microphone screen appears. 6. Deselect the check box for 1 Mic Gain (+20dB), then click the Close button. 7. Close the Recording Control window. My mouse does not work Check that the mouse is plugged into one of the PS/2® connectors on the keyboard. The other connector connects the keyboard to the computer. There may be dust or dirt inside the mouse mechanism. To clean the mouse, follow these steps: o Turn off your computer. See Shutting Down Your Computer for details. o Remove the mouse ball cover on the back of the mouse by turning the ring that covers the mouse ball clockwise. o Turn the mouse upright, and drop the mouse ball into your hand. o Using a piece of tape, remove any dust or dirt on the mouse ball and inside the mouse ball socket. o Return the mouse ball to the socket, and replace the mouse ball cover. Secure the cover by turning the ring counter-clockwise. I cannot find the Windows® taskbar Check that the taskbar is not hidden or shrunken. Use the mouse to point to the left, right, top, and bottom edges of the screen. See Read Me First for additional information on using your Sony computer. To Reach Sony For further assistance, call 1-888-4SONYPC (1-888-476-6972). Page 187 Specifications Model PCV-L630 Processor 600E MHz* Pentium® III Hard Disk Drive 17 GB Ultra DMA Standard SDRAM 128 MB PC-100 SDRAM, expandable to 256 MB Video RAM 8 MB SDRAM Graphics 2X AGP 3D graphics hardware acceleration (ATi Rage 128 Pro 4XL) Sound Capabilities High fidelity 3D PCI audio Aureal AU8810 Diskette Drive 3.5" 1.44 MB FDD DVD-ROM/CD-ROM Drive 4.8X (max.) DVD-ROM reading 24X (max.) CD-ROM reading** Modem K56flex technology/V.90 compatible data/fax modem Expansion Capabilities Two PCI slots Connection Capabilities (Front) PC card (Card bus support) USB port Microphone Headphone Memory Stick media slot i.LINK (4-pin) Connection Capabilities (Rear) USB port Modem line (RJ-11) Phone line (RJ-11) Parallel (printer) Serial port VGA monitor LCD display Line In Line Out Keyboard i.LINK (6-pin) Connection Capabilities (Keyboard) Mouse (PS/2-style) left and right connectors Supplied Accessories Stand (for vertical installation) Power cable Phone cable Keyboard cable PS/2 Wheel Mouse VAIO Smart Convertible Keyboard Spacers (for bottom of the system) Ferrite core Service 90-day limited express service*** Extendible to one year from original date of purchase upon registration Limited Warranty90-day parts/labor standard Extendible to one year from original date of purchase upon registration Power Requirements 130 watts maximum Dimensions CPU: 11.2"(w) x 3.6" (h) x 13.4" (d) (280 mm x 90 mm x 335 mm) Keyboard: 15.9" (w) x 1.8" (h) x 7.1" (d) (398 mm x 45 mm x 178 mm) Display: 16.1" (w) x 13.1" (h) x 6.9" (d) (403 mm x 327 mm x 172 mm) Weight CPU: 11.9 lbs. (5.4kg) Display: 7.05 lbs (3.2 kg) Keyboard: 2.9 lbs. (1.3kg) Operating Temperature 50º F to 95º F (+10º C to 35º C) * MHz denotes microprocessor internal clock speed; other factors may affect application performance. Page 188 GB means one billion bytes when referring to hard drive capacity. Accessible capacity may vary. **Data on a DVD-ROM is read at a variable transfer rate, ranging from 2X at the innermost track to 4.8X at the outermost track(the data transfer standard 1X rate is 1385 kbytes/s). The average data transfer rate is 3.6X(4986 kbytes/s). Data on a CD-ROM is read at a variable transfer rate, ranging from 10.5X at the innermost track to 24X at the outermost track(the data transfer standard 1X rate is 150 kbytes/s). The average data transfer is 18X(2700 kbytes/s). Maximum speed for faxing is 14.4 kbytes/s. Your modem is capable of downloading at 56 kbytes/s using K56flex technology or V.90. Your phone service, online service, or Internet Service Provider, however, may not support this technology or operate at this speed. ***Certain restrictions apply. Specifications are subject to change without notice. Page 189 Features For a complete description of the specifications of your Sony computer, see Specifications. i.LINK® (IEEE-1394): Two built-in i.LINK ports provide you with front and rear digital connection capability. The i.LINK name and logo identify a digital interface (IEEE-1394) for high speed communication. Exceptional performance: Your computer includes a fast Intel® processor and a V.90-compatible data/fax modem. Ergo-Angle Multimedia LCD display: With its exclusive dual-hinge pedestal, this 15" XGA TFT display provides twice the flexibility of other LCDs. Select the perfect viewing angle and enjoy the built-in Harman/Kardon® stereo speakers. AutoAlert E-mail Notification System: Custom software automatically downloads e-mail on a pre-set schedule via Microsoft® Outlook® Express. A light on the LCD display instantly lets you know when new mail is received. VAIO Smart convertible keyboard: The innovative palm rest converts to a keyboard cover for a sleek look when not in use. Six Programmable Power Keys let you launch any application with the push of a button; dual-sided mouse connections for left- or right- hand use. Sony Memory Stick® media slot: The next generation of digital media, smaller than a stick of gum. Easily delivers information from one Memory Stick-equipped electronic device to another, so you can transfer images, sounds, data and text between cameras, computers, and more. Compact components: Enjoy the small footprint and versatile setup options available by positioning the components in an arrangement of your choice. Sony audio and video quality: High-fidelity 3D audio system and high-powered 3D graphics (AGP) enable you to take advantage of today's advanced multimedia applications, games, and entertainment software. Preinstalled software titles: All the software on your computer is preinstalled, configured, and ready for you to use right out of the box. Microsoft® Windows® 98 Second Edition operating system: Your system includes the latest operating system from Microsoft. Communications: Access popular online services, browse the Internet, send faxes, and more. * Actual upload and download speeds may vary due to line conditions, ISP support, and government regulations. Unpacking Your Computer Computer and Supplied Accessories Page 190 Manuals Read Me First contains last-minute supplementary information and software support numbers. The VAIO Slimtop LCD Computer User Guide (this manual) contains features and specifications of your computer. It also includes information on the applications included with your system and how to contact software vendors, get started with your computer, and solve common problems. The VAIO VAIO® Consumer Information Guide contains safety and regulatory information, ergonomic considerations, information on help resources, and your computer's limited warranty statement. The Microsoft® Windows®98 Second Edition Getting Started manual explains how to use the basic features of the Windows® operating system. Recovery CDs System Recovery CD(s) - Enables you to reinstall software that shipped with your computer if it is corrupted or accidentally erased. For more information, see Using the System Recovery CD(s). Application Recovery CD(s) - Allows you to reinstall individual applications or device drivers if they are corrupted or accidentally erased. For more information, see Using the Application Recovery CD(s). Other Setting up your VAIO Slimtop LCD Computer (poster) Packet containing special product offers Software CDs Page 191 Microsoft® Word 2000 Setting Up Your VAIO Slimtop LCD Computer Locating Controls and Connectors Front Panel 1 Power switch and indicator light Turns on/off the computer and the display. The indicator light is green while the power is on and amber when the computer is in standby mode. 2 Floppy disk drive Reads/writes data from/to a 3.5-inch floppy disk. 3 Floppy disk eject button Ejects the floppy disk. 4 DVD-ROM drive Reads data from a DVD-ROM/CD-ROM. 5 DVD-ROM/CD-ROM eject button Ejects a DVD-ROM/CD-ROM. 6 Manual eject hole If the DVD-ROM/CD-ROM does not come out when you press the DVD-ROM/CD-ROM eject button, insert a thin, pointed object into this hole to eject the disc manually. 7 FD (Floppy disk drive) access indicator light Lights in green while reading/writing data from/to a floppy disk. 8 Disc (DVD-ROM drive) access indicator light Lights in amber while reading data from a DVD-ROM/CD-ROM. 9 HD (drive) access indicator light Lights in green while reading/writing data from/to the hard disk. 10 MIC (Microphone) connector* Connects a microphone (not supplied). 11 PHONES (Headphones) connector* Connects headphones (not supplied). 12 VOLUME control Page 192 Adjusts the volume of the headphones connected to the PHONES connector. Users should note that this does not control the volume of the integrated LCD speakers. 13 PC CARD slot A PC Card (also called a PCMCIA card) can be installed in this slot. PC cards enable you to add functionality to your system. MEMORY STICK media slot 14 Insert a Sony Memory Stick® card into this slot. See Using the Memory Stick® Media for details on using Memory Stick media. 15 i.LINK (4-pin) Connects a digital device such as a Sony Digital Handycam® Camcorder. 16 USB (Universal Serial Bus) connector Connects a USB device. * See Using a Headphone or Microphone for important information about connecting a microphone and headphone. Rear Panel 1 AC INPUT connector Connects the supplied power cord. 2 LINE jack Connects a phone cable to the wall jack. 3 EMPTY PCI SLOT (FILLED WITH ETHERNET CARD ON CUSTOM MODELS) For a PCI Add-On Card (not supplied). 4 TELEPHONE jack Connects the phone to the computer. 5 PRINTER connector Connects a parallel device, such as a printer or scanner. 6 SERIAL connector Connects a serial device, such as a digital still camera. 7 MONITOR connector Connects a standard CRT display. 8 USB (Universal Serial Bus) connector Connects a USB device. 9 LINE IN connector Connects an audio device. 10 LINE OUT connector Connects an audio device or an active speaker. 11 i.LINK (6-pin) Connects a digital device such as a Sony Digital Handycam® Camcorder. 12 LCD MONITOR connector Connects the LCD that comes with the VAIO Slimtop LCD computer. Note: Do not connect any display to this connector other than the LCD that is supplied with this system. Page 193 13 KEYBOARD connector Connects a keyboard. LCD 1 Power indicator light Light is green while the power is on. When the computer enters the standby mode, this indicator light turns amber. 2 Information LED Light turns red to alert the user to activities, such as the arrival of e-mail. See AutoAlert E-mail Notification System. 3 Adjusts 4 Adjusts Brightness control the brightness of the screen. Volume control the volume of the integrated speakers on the LCD display. Using the Wheel Mouse For information about the Wheel Mouse that connects to either side of your keyboard, see MouseWare Help. To access MouseWare Help, from the Start menu, point to Programs, MouseWare, and then click MouseWare Help. To set up the mouse for left-handed use: 1. Click the My Computer icon on your desktop. 2. Click Control Panel, and then click Mouse. The Mouse Properties dialog box appears. 3. In the Quick Setup tab, click Device Setup. 4. In the Device Setup Wizard dialog box, click Next. 5. Select the radio button next to "Left side of the keyboard." 6. Click Next three times, and then click Finish. 7. Click Apply. Using a Headphone or Microphone When you connect a microphone or headphone to your computer, attaching a ferrite core will reduce electrical interference. Attach the (supplied) ferrite core at the end of the headphone or microphone cable closest to the computer. Wrap the cable through the center of the ferrite core. The following illustration shows how to attach the ferrite core when you are using both a headphone and a microphone. Page 194 The LCD and keyboard cables already include a ferrite core. Do not remove the ferrite core from these cables. To adjust the height and viewing angle of the display Holding both sides of the display, push the display panel out and up, and then adjust the viewing angle. The LCD display is designed to maintain the best ergonomic viewing angle. Set the display height so that it does not touch the keyboard, and adjust the viewing angle approximately 27 degrees from eye level to the center of the screen. Attaching the Stand to the System Unit The main system unit can be oriented horizontally or vertically. If you place the system in a vertical position, you must attach the supplied stand to ensure stability. 1. Place the system unit on its right side, with the front of the system facing forward. 2. Insert the grooved side of the stand into the ventilation holes of the system so that the two screw holes are aligned and the stand's fins are at the rear of the unit. 3. Secure the stand to the unit with the supplied screw. Page 195 The stand keeps the system cool by allowing air to flow under it. If you choose to place the system unit in a vertical position, it is important to use the stand and to place the system unit on its left side, as in the illustration above; otherwise, the system may overheat. Registering Your Computer Take advantage of Sony's commitment to quality customer support and receive these benefits by registering your computer: Sony Customer Support--Talk to a Support Representative to troubleshoot problems you may be having with your computer. Limited warranty--Protect your investment. See Limited Warranty Statement in the VAIO® Consumer Information Guide for details. You must register your computer to extend the warranty from the initial 90-day warranty period to one year from the original date of purchase. Express Service--Provides a fast and direct return of your VAIO Slimtop Sony for service of your computer. LCD Computer to If you did not already register when you first turned on your computer, follow these steps to use the computer online registration service. 1. Click the registration icon on the VAIO desktop. 2. Enter the information requested on the first online registration form. Press the tab key to move from box to box. 3. Click the Next button to advance to the next form. 4. Complete the remaining forms by clicking the Next button each time you complete a form. The computer automatically transfers your registration information using your built-in modem and a toll-free telephone number or a local number. You may sign up for Internet access with a Sony preferred Internet Service Provider. VAIO Action Setup VAIO Action Setup manages the settings for your computer's Programmable Power Keys (PPK), Memory Stick® media, i.LINK interface, and internal timer. An overview of each of these functions is provided below. For more information on changing the settings using VAIO Action Setup, see the online VAIO Action Setup help files. To access the help files, from the Start menu, point to Programs/VAIO Action Setup/VAIO Action Setup Help. Programmable Power Keys Your Sony computer comes with technology that allows you to get to your favorite applications Page easily. Each Programmable Power Key (PPK) on your VAIO Smart convertible keyboard comes 196 programmed to launch a preset application with a single press of the key. If you wish, you can use the VAIO Action Setup software to change the Programmable Power Keys' preset functions. The Programmable Power Keys are located at the top of your keyboard, and are numbered P1 through P6. The keys work even when the computer is turned off. Pressing one of these keys turns on the computer and launches the preset application. The six Programmable Power Keys come to you preprogrammed to perform the functions listed in the table below. Key Function P1 (INTERNET) Starts Microsoft® Internet Explorer for Windows® 98. P2 (MAIL) Starts Microsoft® Outlook® Express P3 (WORK) Starts Microsoft® Word P4 (FINANCE) Starts Intuit® Quicken® Basic 2000. P5 (SETUP) Starts PPK Setup. P6 (HELP) Opens a menu of help options. Memory Stick You can use VAIO Action Setup to preset your computer to automatically launch an application when you insert a Memory Stick. For more information on Memory Stick media, see Using the Memory Stick® Media . Internal Timer The VAIO Action Setup software allows you to set your computer's internal timer to launch certain applications automatically. The timer can start applications even when the power is off. Some software applications take longer than others to launch. It is advisable to confirm in advance the amount of time your selected application takes to start. AutoAlert E-mail Notification System VAIO Action Setup also enables you to set up your computer to notify you with an Information LED when new mail arrives in your e-mail mailbox. The Information LED turns red to indicate that new e-mail has arrived. For this AutoAlert E-mail Notification System to work, you must use Microsoft® Outlook® Express as your default e-mail software, and you must have an Internet Service Provider with dial-up capabilities set up. As an alternative, you can program your AutoAlert E-mail Notification System to set the Information LED to turn on when it has successfully completed the task of dialing up and connecting to receive mail. In this case, the Information LED turns on to indicate that your e-mail account has been accessed successfully, regardless of whether or not you have mail; this works with Microsoft Outlook Express. The e-mail software you choose to use with PPK must be set as your default e-mail software. See LCD for an illustration showing the Information LED's location. AutoAlert E-mail Notification System Software Restrictions If you use software that uses a phone line The computer may not be able to disconnect the phone line due to communication and server conditions. Be sure to monitor the status of the software when running the AutoAlert E-mail Notification System, and manually disconnect the phone line if you notice a malfunction. Furthermore, when using the timer to start the software, it is advised that you set the computer to shut down or enter system standby mode after a certain length of time. This allows the computer to disconnect the phone line if the computer fails to disconnect the line normally. If you are using the timer to download e-mail automatically Page 197 It is advisable to set up your e-mail software to redial automatically if it does not connect the first time. It is also advisable to set the e-mail software to disconnect the phone line automatically when all mail has been downloaded. If you are using Microsoft® Outlook® Express When using the AutoAlert E-mail Notification System with Microsoft Outlook Express, it is advisable to select the Dial automatically setting in your Microsoft Outlook Express software. If you have not chosen this setting and wish to do so, start Outlook Express, click Tools, and then select Options. Select the check box "Automatically dial when checking for new messages." Click OK. Changing the Window Design of Sony Software To change the window design of Sony software 1. Click the Start button, point to Settings, and then click Control Panel. 2. Click UI Design Selector. 3. Click << or >> and select the desired design. 4. Click Apply. The "UI Design Selector" window design changes. The window design for your Sony software will match the "UI Design Selector" window. To try another selection, click << or >>. Then, click OK. The UI Design Selector closes and the window design of your Sony software window design displays. You may use the feature with UI Design Selector-compatible software only. Using the Memory Stick® Media Your Sony computer is designed to support the new Memory Stick recording media. The Memory Stick media is a small, versatile device that allows you to share data between various types of Sony equipment. When you use the card, your computer automatically launches Windows Explorer. This allows you to view the contents of the card. If the image files are created by a Sony digital camera or camcorder, you do not need the following steps. If you want to create a slide show that launches automatically when you insert a Memory Stick, follow these steps to transfer images from your hard drive to a Memory Stick. 1. Insert the Memory Stick into the appropriate slot. 2. Click the My Computer icon on the desktop. Page 198 3. Click the Removable Disk S: icon. 4. Create a new folder and name it "DCIM." 5. Open the DCIM folder and create a new folder named "100MSDCF." 6. Click the Start button, select VAIO, and then click PictureGear to launch the PictureGear application. 7. Select the digital images you want to save in your slide show. 8. From the PictureGear File menu, point to File Process, and then select Still Format Conversion. 9. Select Memory Stick as the Output Format. 10. Use the Browse button to select the DCIM/100MSDCF folder on the Removable Disk (S:) drive. 11. Name the file. The file name must begin with DSC (DSC0xxxx). The full file name without extension must have at least eight characters. The order in which your photos appear in your slide show will be determined by the number (xxxx) in the file name. Some examples of acceptable file names are DSC00001.jpg and DSC00002.jpg 12. Click OK to save the file. You can also add MPEG1 video files to your Slide Show by following the steps below. The order in which your video clips (MOV0xxxx files) appear in your Slide Show is determined by the number (xxxx) in the file name. 1. Insert the Memory Stick into the media slot. 2. Click the My Computer icon on the desktop. 3. Click the Removable Disk S: icon. 4. Create a new folder and name it "MSSONY." 5. Open the MSSONY folder and create a new folder named "MOML0001." 6. From the PictureGear File menu, point to File Process, and then select Still Format Conversion. 7. Copy the MPEG file into the MOML0001 folder. 8. Rename the MPEG file MOV0xxxx.mpg, where xxxx is any four-digit number. 9. To begin showing your slides, eject the Memory Stick and then reinsert it. The slide show will begin automatically. To protect data on Memory Stick media from accidental changes Memory Stick media contains a write-protect tab. The write-protect tab prevents accidental changes to information recorded on the Memory Stick media. When you slide the write-protect tab to the LOCK position, the Memory Stick is write-protected, which means you cannot delete, copy, or save information on the Memory Stick. When you slide the tab to the un-LOCK position, you can write to or modify the Memory Stick contents. To change the way the computer responds when a Memory Stick is inserted into the Memory Stick media slot Change the options on the Memory Stick tab in the PPK Setup software. Page 199 Using PC Cards This computer has a card bus PC card slot that supports a Type I or II PC card. To insert a PC card You do not need to shut down your computer when inserting a PC card. 1. Open the front panel. 2. Insert the PC card into the PC card slot until it clicks into position. When the card is completely inserted, the eject button pops out. If you cannot insert the card, do not forcibly insert it. In this case, make sure the card is not inserted upside-down or backward, and then reinsert the card into the slot carefully. See the manual that came with the PC card for details on using it. To close the front panel when the eject button is protruding, fold the button down onto the computer. To eject a PC card If you eject the PC card incorrectly, the system may not work correctly. 1. Click the Start button on the Windows® taskbar, click Settings, and then click Control Panel. 2. Click the PC Card icon. 3. Click the name of the card that you want to eject, and then click Stop. 4. When the message "You may safely remove this device" appears, click OK. 5. Push the PC card eject button on the front panel of the system unit. You may need to pull out the eject button before you can eject the card. Page 200 The card is ejected from the card connector. Remove the card by holding it by its edge and pulling it out carefully. Using the Standby Function When you are finished using your computer, you can put it in standby mode rather than turn it off completely. Putting the computer in standby mode allows you to return quickly to normal computer use. To put the computer in standby mode manually 1. Save your work and close any applications that are running. (You can leave Windows running.) 2. Press the (Standby) button on the top of the keyboard. The computer goes into standby mode. Alternatively, you can click the Start button on the Windows® taskbar, click Shut Down, select Standby, and then click OK. To let the computer go into standby mode automatically Click the My Computer icon on your desktop. Click Control Panel, and then click the Power Management icon. On the Power Schemes tab, select from the options in the Power schemes drop-down list. Then, choose settings for the power scheme you have selected. To save the settings under a name that is not offered in the Power schemes pulldown menu, choose your settings and then click Save As. Type in a name, and click OK. Click Apply to finalize your power settings. To resume from standby mode There are three ways to bring your computer back from the standby mode: press the space bar on your keyboard, press the left mouse button, or momentarily depress the power button on your computer. If the display does not return from standby when you press the (Standby) button, your system may be in video standby mode. Press the space bar on the keyboard to return from video standby. Standby Mode Indicators You can tell which mode the computer is in by the color of the power indicator light. Color Amber Green No color Mode Computer is in standby mode. Computer is out of standby mode, ready to use. Computer is turned off. In standby mode you may periodically hear the computer's fan turn on and off, depending on the room's temperature. This is normal functioning in standby mode. Page 201 Shutting Down Your Computer When you are ready to turn off your computer for an extended period of time, use the following procedure to shut down the computer. To avoid the potential loss of data, do not use the power switch to shut down the computer. To shut down your computer If you plan to shut down your computer for a short period of time, you may want to use standby mode instead. See Using the Standby Function. 1. Click the Start button on the Windows® taskbar to open the Start menu. 2. Click Shut Down to display the Shut Down Windows dialog box. 3. Select the Shut Down option. 4. Click OK to complete the shutdown process. Respond to any prompts about saving documents. 5. Wait for your computer to turn off automatically -- the power indicator light turns off. 6. Turn off any peripherals connected to your computer. The LCD display turns off automatically when the computer shuts down. You can also shut down your computer using the (Power) button on the keyboard. Pressing this button causes the system to perform a shutdown but does not give you any of the other options available on the Windows® Shut Down menu. About the Power Switch If your system "locks up" or "crashes," press and hold the power switch for four seconds to force your system to power off. You may need to repeat this procedure. See Locating Controls and Connectors for the power switch's location. Using the System Recovery CD(s) You can reinstall software titles that shipped with your computer if they are corrupted or accidentally erased. You may not need to recover the entire contents of your hard drive. If you experience a problem with your computer, reinstalling an individual device driver or software title may correct the problem. Use the Application Recovery CD(s) to reinstall individual applications or device drivers. See Using the Application Recovery CD(s). The System Recovery CD(s) contain a backup copy of all the software originally installed on your hard disk drive. They can be used only to recover the hard disk of the Sony computer you purchased. The System Recovery utility gives you three options: Full Restore without Format restores all the software titles that originally came with your computer without formatting the hard disk. Full Restore with Format formats the hard disk drive and then restores all the original software. If your hard drive is partitioned into C and D drives, the computer will offer you the option to reformat the drive into a single partition. Operating System Only (Windows 98® Restore with Format) formats the hard disk drive and Page 202 restores the Windows® operating system and the device drivers that shipped with your computer. This option is recommended for advanced users only. If you choose the Full Restore with Format or Operating System Only option, your hard disk will be formatted, which removes all the information on the hard disk drive. You will lose any software you have installed and any other files you have created since you started to use your computer. This means you will have to reinstall any applications that were not included with the computer when you purchased it. If you choose the Full Restore without Format option, you may need to reinstall applications that were not included with the computer when you purchased it. If you have any questions on using the System Recovery CD(s), contact Sony Customer Support. To use the System Recovery CD(s) You need to complete the Windows registration process when you use the System Recovery CD(s). 1. Insert the Sony System Recovery CD(s) in the DVD-ROM drive. The System Recovery utility boots from the DVD-ROM drive. It must be in the drive when you turn on the computer. 2. Shut down your computer as described in Shutting Down Your Computer. 3. Wait 30 seconds and turn on your computer. 4. Click OK to signify you have read and accept the Microsoft End-User License Agreement. 5. When the System Recovery menu appears, follow the on-screen instructions to complete the recovery process. Your system may include one or two System Recovery CDs. If you have two System Recovery CDs, insert the first CD to run the System Recovery program. You are prompted to insert the second CD once the information from the first CD has been installed. The recovery process takes 30 to 60 minutes to complete. Using the Application Recovery CD(s) The Application Recovery CD(s) allow you to reinstall individual applications and device drivers if they are corrupted or accidentally erased. Reinstalling an individual device driver or software title may correct a problem you are experiencing with your computer, and you may not need to recover the entire contents of your hard drive. If you do need to reinstall all the software titles that shipped with your computer, use the System Recovery CD(s). See Using the System Recovery CD(s). You must be in Windows to run the Application Recovery CD(s). The application will not run from DOS. If you have any questions on using the Application Recovery CD(s), contact Sony Customer Support. To use the Application Recovery CD(s) 1. Turn on your computer. If your computer is already on, close all applications. 2. When the Windows desktop appears, insert the Sony Application Recovery CD in the DVD-ROM drive. The Application Recovery utility loads automatically. 3. When the Application Recovery menu appears, follow the on-screen instructions to complete the recovery process. Your system may include one or two Application Recovery CDs. If you have two Application Recovery CDs, insert the first CD to run the Application Recovery program. You may be prompted to insert the second CD, depending on the application you wish to restore. Page 203 About the Software on Your Computer Your VAIO Slimtop computer is ready to help you work, play, learn, and communicate as soon as you turn it on. This section gives you an overview of the activities you can perform with your software titles. For support information, see For Answers to Your Software Questions . Adobe Acrobat® Reader Adobe Systems Incorporated Acrobat Reader software allows you to view, navigate, and print electronic documents in Adobe's Portable Document Format (PDF), an open file format that is intended to preserve the fidelity of documents created on all major computer platforms. Adobe PhotoDeluxe® Home Edition Adobe Systems Incorporated Create amazing photo effects with PhotoDeluxe. Without learning complex software, you can enhance, restore, and be creative with your photos. Includes built-in guided activities, stock photos, clip art, and templates to assist you. Adobe Premiere® LE Adobe Systems Incorporated Adobe Premiere LE offers an interface and editing tool for producing movies for video, multimedia, or the Web. View source clips and edited footage simultaneously in the monitor window. Create video clips up to three hours long with complete audio-video synchronization. America Online® America Online America Online is the world's most popular Internet online service. Stay in touch with family and friends with Easy-to-Use E-mail, manage your personal finances, get the latest news and sports scores, and chat with thousands of others who share your interests. AT&T WorldNet® Service AT&T Fast, reliable Internet access from AT&T WorldNet Service. AT&T WorldNet Service provides Web-based e-mail, a personalized start page from Excite, easy access to the Excite search engine, free Web pages, online and live agent technical support, instant messaging, and special shopping discounts at Market Square. CompuServe® 2000 CompuServe Interactive Services The all new CompuServe 2000 delivers a powerful tool for Internet users who want serious and timely information, in-depth research, and professional communities backed by state-of-the-art technologies, including high-speed access and powerful e-mail messaging. Digital Media Bar Sony Electronics Media Bar software is your all-in-one solution for audio/video playback. It handles all common computer multimedia formats, and controls selected Sony devices. Media Bar software encompasses audio/video library cataloging and playlist management, in addition to digital video quality control and effects features. DVgate Sony Electronics Connect a digital video camera recorder to the i.LINK connector and capture your own video clips. You can edit the clips from your video, add others, and combine clips into new movie segments. EarthLink TotalAccess EarthLink Network, Inc. Page 204 An Internet Service Provider that supplies access, information, and assistance to its customers, introducing them to the Internet. Member benefits include e-mail, newsgroups, a Personal Start Page, a free 6 MB web site, a member magazine, and 24-hour technical support. McAfee's VirusScan® Network Associates, Inc. Protect your computer from viruses. VirusScan can detect viruses from floppy disks, Internet downloads, e-mail attachments, intranets, shared files, CD-ROMs, and online services. Microsoft® Internet Explorer for Windows® 98 Microsoft Corporation Internet Explorer delivers the Web the way you want it. It's safe, easy to use, and you can personalize how you access the Web. Outlook Express and other tools in Internet Explorer also help you have a great experience when you are on the Web! Microsoft® Outlook® Express Microsoft Corporation Outlook Express, the messaging tool that takes your e-mail and newsgroup communications to new heights! Outlook Express is easy to set up and use, and provides you with secure, personalized, and complete features that make creating, sending, and reading your e-mail a more rich and dynamic experience. Microsoft® Word 2000 Microsoft Corporation Microsoft Word 2000 makes it easy to create common Web, e-mail, and print documents for use around the world. It embraces HTML as a first-class file format and extends Word's ease-of-use to the Web and e-mail. Word 2000 also extends that ease of use to international users, making it easy to create multilingual documents. Netscape Communicator® Netscape Communications Netscape Communicator is the all-in-one Internet tool that makes it easy to browse the Web, send Internet e-mail, chat, read newsgroups, and compose great Web documents. PictureGear Sony Electronics This image management software displays images from your hard drive, a Sony digital still camera, or a Sony Mavica® camera. The images appear in a convenient light-table format, so that you can easily view the contents of an entire folder. Prodigy Internet Prodigy Communications Corporation An Internet service that helps you find what you need online faster and smarter. Prodigy delivers powerful online content, such as sports scores, stock quotes, news, and easy access to Excite , plus a personal e-mail account and quality customer service, all at a competitive price. Quicken® Basic Intuit, Inc. Quicken is the fastest, easiest way to organize your finances. Quicken works just like your checkbook, so it's easy to learn and use. Quicken manages all of your finances, bank accounts, credit cards, investments, and loans. You can even pay your bills online. Smart Capture Sony Electronics Smart Capture is a fun new way to send multimedia messages via e-mail. Smart Capture manages the i.LINK connection between your computer and a Sony Digital Handycam® Camcorder or other Page 205 cameras that support the i.LINK interface. It allows you to capture and compress video or still images that you can save or share via e-mail. A smart solution to computer, digital audio/video, and network convergence. Smart Connect Sony Electronics Smart Connect allows you to use an i.LINK cable to connect your VAIO computer to another VAIO computer that supports Smart Connect. You can then use one computer to copy, delete, and edit files on the other computer. You can also print from a printer attached to either computer. Sound Forge® Sonic Foundry Sound Forge allows you to put powerful audio processing tools and effects to work on your desktop. Simply cut, copy, and paste your way to striking multimedia files for use in everything from Web pages to desktop presentations. VAIO Action Setup Sony Electronics VAIO Action Setup manages the settings for your computer's Programmable Power Keys (PPK), Memory Stick media, i.LINK interface, and internal timer. For more information, see VAIO Action Setup. WinFax® Basic Edition Symantec Corporation WinFax Basic Edition incorporates an easy-to-use interface that allows you to send and receive faxes easily. Upgrade to WinFax Pro to receive additional features. About Your Recovery CDs Application Recovery CD(s) Sony Electronics The Application Recovery CD program allows you to reinstall individual applications and device drivers. Use it to restore corrupted or accidentally erased files. System Recovery CD(s) Sony Electronics The System Recovery CD program allows you to restore the software titles that shipped with your computer if they become corrupted or are erased accidentally. It can be used only to restore the hard disk of the Sony computer you purchased. For Answers to Your Software Questions Acrobat® Reader, Adobe PhotoDeluxe® Home Edition (Adobe Systems Incorporated) Web site http://www.adobe.com/ phone 206-628-2746 (fee-based support) fax 206-628-5737 e-mail [email protected] hours M-F, 6 AM-5 PM PT America Online® (America Online) Web site phone hours http://www.aol.com/ 800-827-3338 7 days a week, 6 AM - 2 PM ET AT&T WorldNet® Service (AT&T) Web site phone e-mail http://www.att.net 800-400-1447 [email protected] Page 206 hours 7 days a week, 24 hours a day CompuServe® 2000 (CompuServe Interactive Services) Web site phone hours http://www.compuserve.com/ 800-848-8990 M-F, 8 AM - 1 AM ET, S-S 10 AM - 10 PM ET EarthLink TotalAccess Web site phone e-mail hours (EarthLink Network, Inc.) http://help.earthlink.net/techsupport/ 800-395-8410 [email protected] 7 days a week, 24 hours a day GTE Easy Sign-up (GTE Internet) phone hours 800-927-3000 7 days a week, 24 hours a day McAfee's VirusScan (Network Associates, Inc.) Web site phone e-mail hours http://support.mcafee.com 408-988-3832 [email protected] M - F 9 AM - 5 PM Central Time MindSpring Internet Desktop (MindSpring Enterprises, Inc.) Web site phone http://help.mindspring.com/support 800-719-4660 Quicken® Basic (Intuit Inc.) Web site phone hours http://www.intuit.com/support 900-555-4688 7 days a week, 24 hours a day Sound Forge® (Sonic Foundry) Web site http://www.sonicfoundry.com/support/ phone 608-256-5555 fax 608-256-7300 e-mail [email protected] hours M - F, 8 AM - 7 PM CT Windows® 98 Second Edition Operating System, Word® 2000, Internet Explorer 5, Outlook® Express (Microsoft Corporation) Web site phone hours 1 http://www.sony.com/pcsupport 888-4SONYPC (888-476-6972) 1 7 days a week, 24 hours a day Support from 1-888-4SONYPC is free of charge for 90 days after the original date of purchase. WinFax® Basic Edition (Symantec Corporation) Web site http://www.symantec.com/techsupp/ phone 800-798-0850 fax 800-554-4403 in North America 541-984-2490 outside North America Troubleshooting This section describes how to solve common problems you may encounter when using your computer. Many problems have simple solutions, so try these suggestions before you call Sony Customer Support. My computer does not start Check that the computer is plugged into a power source and that it is turned on. Check that the power light is lit on the front panel of the computer. Confirm that a diskette is not in the diskette drive (unless you are using a bootable diskette). Confirm that the power cord and all cables are connected firmly, as described on the color poster. Page 207 If you plugged the computer into a power strip or UPS, make sure the power strip or UPS is turned on and working. My computer or software program "locks up" Close the application that is currently "locked up" by pressing Ctrl+Alt+Delete. In the Close Program dialog box, scroll down until you locate "(Not responding)" next to an application. Select this application and click End Task. Windows attempts to close the application. If the attempt is unsuccessful, a second dialog box appears. Select End Task again. If you are unable to "unlock" the application, repeat the above steps but select Shut Down when the Close Program dialog box appears. If the above steps fail to "unlock" your computer, save any unsaved work, if possible. Press Alt+F4. Select Restart and click OK. If you cannot restart as described in the preceding steps, you can restart the computer by pressing Ctrl+Alt+Delete or by pressing the power switch for more than six seconds. Pressing Ctrl+Alt+Delete may result in the loss of changes made to files that are currently open. Contact the software publisher or designated provider for technical support. See For Answers to Your Software Questions for a list of phone numbers and Web addresses or see Read Me First . My DVD-ROM/CD-ROM drive tray does not open Make sure the computer is turned on. If the Eject button does not work, you can open the tray by inserting a straightened heavyweight paper clip into the emergency eject hole. When I click an application icon, a message such as "You must insert the application CD into your CD-ROM (DVD-ROM) drive" appears and the software does not start Some titles require specific files that are located on the application's DVD-ROM/CD-ROM. Insert the disc and try starting the program again. Check to make sure you inserted the DVD-ROM/CD-ROM with the label side facing up. My modem connection is slow The computer's modem uses K56flex technology/V.90. Many factors influence modem connection speed, including telephone line noise or compatibility with telephone equipment (such as fax machines or other modems). If you think your modem is not connecting properly to other computer-based modems, fax machines, or your Internet Service Provider, check the following: Have your phone company check that your phone line is free from any line noise. If your problem is fax-related, check that there are no problems with the fax machine you are calling. The modem that receives your call may be slower or may use a different communications protocol than your modem. If this is the case, the connection speed may be slower than expected. For optimum performance, ensure you are calling an Internet Service Provider number that is V.90-compliant. If you are having a problem connecting with your Internet Service Provider, check that the ISP is not experiencing technical problems. If you have a second phone line available, try connecting the modem to this line. My modem does not work Check that the phone line is plugged into the line jack. Page Check that the phone line is working. You can check the line by plugging in an ordinary phone and208 listening for a dial tone. Check that the phone number the program is dialing is correct. Verify that the software you are using is appropriately configured to recognize and interact with the Sony computer modem. Call the software publisher if you do not know how to configure the software to recognize the modem. All programs preinstalled by Sony are compatible. If you suspect your modem is not functioning, you can perform a simple test to find out. Click the My Computer icon on your desktop. Click Control Panel, and then click Modems. Click the Diagnostics tab and select COM3. Click More Info. If your modem is functioning, a More Info dialog box will display. If your modem is not functioning, an error message will appear. My microphone is too sensitive to background noise If you find there is too much background noise when you record sound, you should adjust the microphone gain by following these steps: 1. Right-click the speaker icon (Volume) in the lower-right Windows® task tray. 2. Click Open Volume Controls. The Volume Control screen appears. 3. In the Options menu, select Properties. The Properties screen appears. 4. Change the setting for "Adjust volume for" from Playback to Recording, and then click OK. 5. Click the Advanced button under Microphone Balance. The Advanced Controls for Microphone screen appears. 6. Deselect the check box for 1 Mic Gain (+20dB), then click the Close button. 7. Close the Recording Control window. My mouse does not work Check that the mouse is plugged into one of the PS/2® connectors on the keyboard. The other connector connects the keyboard to the computer. There may be dust or dirt inside the mouse mechanism. To clean the mouse, follow these steps: o Turn off your computer. See Shutting Down Your Computer for details. o Remove the mouse ball cover on the back of the mouse by turning the ring that covers the mouse ball clockwise. o Turn the mouse upright, and drop the mouse ball into your hand. o Using a piece of tape, remove any dust or dirt on the mouse ball and inside the mouse ball socket. o Return the mouse ball to the socket, and replace the mouse ball cover. Secure the cover by turning the ring counter-clockwise. I cannot find the Windows® taskbar Check that the taskbar is not hidden or shrunken. Use the mouse to point to the left, right, top, and bottom edges of the screen. See Read Me First for additional information on using your Sony computer. To Reach Sony For further assistance, call 1-888-4SONYPC (1-888-476-6972). Page 209 Specifications Model PCV-L630 Processor 600E MHz* Pentium® III Hard Disk Drive 17 GB Ultra DMA Standard SDRAM 128 MB PC-100 SDRAM, expandable to 256 MB Video RAM 8 MB SDRAM Graphics 2X AGP 3D graphics hardware acceleration (ATi Rage 128 Pro 4XL) Sound Capabilities High fidelity 3D PCI audio Aureal AU8810 Diskette Drive 3.5" 1.44 MB FDD DVD-ROM/CD-ROM Drive 4.8X (max.) DVD-ROM reading 24X (max.) CD-ROM reading** Modem K56flex technology/V.90 compatible data/fax modem Expansion Capabilities Two PCI slots Connection Capabilities (Front) PC card (Card bus support) USB port Microphone Headphone Memory Stick media slot i.LINK (4-pin) Connection Capabilities (Rear) USB port Modem line (RJ-11) Phone line (RJ-11) Parallel (printer) Serial port VGA monitor LCD display Line In Line Out Keyboard i.LINK (6-pin) Connection Capabilities (Keyboard) Mouse (PS/2-style) left and right connectors Supplied Accessories Stand (for vertical installation) Power cable Phone cable Keyboard cable PS/2 Wheel Mouse VAIO Smart Convertible Keyboard Spacers (for bottom of the system) Ferrite core Service 90-day limited express service*** Extendible to one year from original date of purchase upon registration Limited Warranty90-day parts/labor standard Extendible to one year from original date of purchase upon registration Power Requirements 130 watts maximum Dimensions CPU: 11.2"(w) x 3.6" (h) x 13.4" (d) (280 mm x 90 mm x 335 mm) Keyboard: 15.9" (w) x 1.8" (h) x 7.1" (d) (398 mm x 45 mm x 178 mm) Display: 16.1" (w) x 13.1" (h) x 6.9" (d) (403 mm x 327 mm x 172 mm) Weight CPU: 11.9 lbs. (5.4kg) Display: 7.05 lbs (3.2 kg) Keyboard: 2.9 lbs. (1.3kg) Operating Temperature 50º F to 95º F (+10º C to 35º C) * MHz denotes microprocessor internal clock speed; other factors may affect application performance. Page 210 GB means one billion bytes when referring to hard drive capacity. Accessible capacity may vary. **Data on a DVD-ROM is read at a variable transfer rate, ranging from 2X at the innermost track to 4.8X at the outermost track(the data transfer standard 1X rate is 1385 kbytes/s). The average data transfer rate is 3.6X(4986 kbytes/s). Data on a CD-ROM is read at a variable transfer rate, ranging from 10.5X at the innermost track to 24X at the outermost track(the data transfer standard 1X rate is 150 kbytes/s). The average data transfer is 18X(2700 kbytes/s). Maximum speed for faxing is 14.4 kbytes/s. Your modem is capable of downloading at 56 kbytes/s using K56flex technology or V.90. Your phone service, online service, or Internet Service Provider, however, may not support this technology or operate at this speed. ***Certain restrictions apply. Specifications are subject to change without notice. Page 211 Features For a complete description of the specifications of your Sony computer, see Specifications. i.LINK® (IEEE-1394): Two built-in i.LINK ports provide you with front and rear digital connection capability. The i.LINK name and logo identify a digital interface (IEEE-1394) for high speed communication. Exceptional performance: Your computer includes a fast Intel® processor and a V.90-compatible data/fax modem. Ergo-Angle Multimedia LCD display: With its exclusive dual-hinge pedestal, this 15" XGA TFT display provides twice the flexibility of other LCDs. Select the perfect viewing angle and enjoy the built-in Harman/Kardon® stereo speakers. AutoAlert E-mail Notification System: Custom software automatically downloads e-mail on a pre-set schedule via Microsoft® Outlook® Express. A light on the LCD display instantly lets you know when new mail is received. VAIO Smart convertible keyboard: The innovative palm rest converts to a keyboard cover for a sleek look when not in use. Six Programmable Power Keys let you launch any application with the push of a button; dual-sided mouse connections for left- or right- hand use. Sony Memory Stick® media slot: The next generation of digital media, smaller than a stick of gum. Easily delivers information from one Memory Stick-equipped electronic device to another, so you can transfer images, sounds, data and text between cameras, computers, and more. Compact components: Enjoy the small footprint and versatile setup options available by positioning the components in an arrangement of your choice. Sony audio and video quality: High-fidelity 3D audio system and high-powered 3D graphics (AGP) enable you to take advantage of today's advanced multimedia applications, games, and entertainment software. Preinstalled software titles: All the software on your computer is preinstalled, configured, and ready for you to use right out of the box. Microsoft® Windows® 98 Second Edition operating system: Your system includes the latest operating system from Microsoft. Communications: Access popular online services, browse the Internet, send faxes, and more. * Actual upload and download speeds may vary due to line conditions, ISP support, and government regulations. Unpacking Your Computer Computer and Supplied Accessories Page 212 Manuals Read Me First contains last-minute supplementary information and software support numbers. The VAIO Slimtop LCD Computer User Guide (this manual) contains features and specifications of your computer. It also includes information on the applications included with your system and how to contact software vendors, get started with your computer, and solve common problems. The VAIO VAIO® Consumer Information Guide contains safety and regulatory information, ergonomic considerations, information on help resources, and your computer's limited warranty statement. The Microsoft® Windows®98 Second Edition Getting Started manual explains how to use the basic features of the Windows® operating system. Recovery CDs System Recovery CD(s) - Enables you to reinstall software that shipped with your computer if it is corrupted or accidentally erased. For more information, see Using the System Recovery CD(s). Application Recovery CD(s) - Allows you to reinstall individual applications or device drivers if they are corrupted or accidentally erased. For more information, see Using the Application Recovery CD(s). Other Setting up your VAIO Slimtop LCD Computer (poster) Packet containing special product offers Software CDs Page 213 Microsoft® Word 2000 Setting Up Your VAIO Slimtop LCD Computer Locating Controls and Connectors Front Panel 1 Power switch and indicator light Turns on/off the computer and the display. The indicator light is green while the power is on and amber when the computer is in standby mode. 2 Floppy disk drive Reads/writes data from/to a 3.5-inch floppy disk. 3 Floppy disk eject button Ejects the floppy disk. 4 DVD-ROM drive Reads data from a DVD-ROM/CD-ROM. 5 DVD-ROM/CD-ROM eject button Ejects a DVD-ROM/CD-ROM. 6 Manual eject hole If the DVD-ROM/CD-ROM does not come out when you press the DVD-ROM/CD-ROM eject button, insert a thin, pointed object into this hole to eject the disc manually. 7 FD (Floppy disk drive) access indicator light Lights in green while reading/writing data from/to a floppy disk. 8 Disc (DVD-ROM drive) access indicator light Lights in amber while reading data from a DVD-ROM/CD-ROM. 9 HD (drive) access indicator light Lights in green while reading/writing data from/to the hard disk. 10 MIC (Microphone) connector* Connects a microphone (not supplied). 11 PHONES (Headphones) connector* Connects headphones (not supplied). 12 VOLUME control Page 214 Adjusts the volume of the headphones connected to the PHONES connector. Users should note that this does not control the volume of the integrated LCD speakers. 13 PC CARD slot A PC Card (also called a PCMCIA card) can be installed in this slot. PC cards enable you to add functionality to your system. MEMORY STICK media slot 14 Insert a Sony Memory Stick® card into this slot. See Using the Memory Stick® Media for details on using Memory Stick media. 15 i.LINK (4-pin) Connects a digital device such as a Sony Digital Handycam® Camcorder. 16 USB (Universal Serial Bus) connector Connects a USB device. * See Using a Headphone or Microphone for important information about connecting a microphone and headphone. Rear Panel 1 AC INPUT connector Connects the supplied power cord. 2 LINE jack Connects a phone cable to the wall jack. 3 EMPTY PCI SLOT (FILLED WITH ETHERNET CARD ON CUSTOM MODELS) For a PCI Add-On Card (not supplied). 4 TELEPHONE jack Connects the phone to the computer. 5 PRINTER connector Connects a parallel device, such as a printer or scanner. 6 SERIAL connector Connects a serial device, such as a digital still camera. 7 MONITOR connector Connects a standard CRT display. 8 USB (Universal Serial Bus) connector Connects a USB device. 9 LINE IN connector Connects an audio device. 10 LINE OUT connector Connects an audio device or an active speaker. 11 i.LINK (6-pin) Connects a digital device such as a Sony Digital Handycam® Camcorder. 12 LCD MONITOR connector Connects the LCD that comes with the VAIO Slimtop LCD computer. Note: Do not connect any display to this connector other than the LCD that is supplied with this system. Page 215 13 KEYBOARD connector Connects a keyboard. LCD 1 Power indicator light Light is green while the power is on. When the computer enters the standby mode, this indicator light turns amber. 2 Information LED Light turns red to alert the user to activities, such as the arrival of e-mail. See AutoAlert E-mail Notification System. 3 Adjusts 4 Adjusts Brightness control the brightness of the screen. Volume control the volume of the integrated speakers on the LCD display. Using the Wheel Mouse For information about the Wheel Mouse that connects to either side of your keyboard, see MouseWare Help. To access MouseWare Help, from the Start menu, point to Programs, MouseWare, and then click MouseWare Help. To set up the mouse for left-handed use: 1. Click the My Computer icon on your desktop. 2. Click Control Panel, and then click Mouse. The Mouse Properties dialog box appears. 3. In the Quick Setup tab, click Device Setup. 4. In the Device Setup Wizard dialog box, click Next. 5. Select the radio button next to "Left side of the keyboard." 6. Click Next three times, and then click Finish. 7. Click Apply. Using a Headphone or Microphone When you connect a microphone or headphone to your computer, attaching a ferrite core will reduce electrical interference. Attach the (supplied) ferrite core at the end of the headphone or microphone cable closest to the computer. Wrap the cable through the center of the ferrite core. The following illustration shows how to attach the ferrite core when you are using both a headphone and a microphone. Page 216 The LCD and keyboard cables already include a ferrite core. Do not remove the ferrite core from these cables. To adjust the height and viewing angle of the display Holding both sides of the display, push the display panel out and up, and then adjust the viewing angle. The LCD display is designed to maintain the best ergonomic viewing angle. Set the display height so that it does not touch the keyboard, and adjust the viewing angle approximately 27 degrees from eye level to the center of the screen. Attaching the Stand to the System Unit The main system unit can be oriented horizontally or vertically. If you place the system in a vertical position, you must attach the supplied stand to ensure stability. 1. Place the system unit on its right side, with the front of the system facing forward. 2. Insert the grooved side of the stand into the ventilation holes of the system so that the two screw holes are aligned and the stand's fins are at the rear of the unit. 3. Secure the stand to the unit with the supplied screw. Page 217 The stand keeps the system cool by allowing air to flow under it. If you choose to place the system unit in a vertical position, it is important to use the stand and to place the system unit on its left side, as in the illustration above; otherwise, the system may overheat. Registering Your Computer Take advantage of Sony's commitment to quality customer support and receive these benefits by registering your computer: Sony Customer Support--Talk to a Support Representative to troubleshoot problems you may be having with your computer. Limited warranty--Protect your investment. See Limited Warranty Statement in the VAIO® Consumer Information Guide for details. You must register your computer to extend the warranty from the initial 90-day warranty period to one year from the original date of purchase. Express Service--Provides a fast and direct return of your VAIO Slimtop Sony for service of your computer. LCD Computer to If you did not already register when you first turned on your computer, follow these steps to use the computer online registration service. 1. Click the registration icon on the VAIO desktop. 2. Enter the information requested on the first online registration form. Press the tab key to move from box to box. 3. Click the Next button to advance to the next form. 4. Complete the remaining forms by clicking the Next button each time you complete a form. The computer automatically transfers your registration information using your built-in modem and a toll-free telephone number or a local number. You may sign up for Internet access with a Sony preferred Internet Service Provider. VAIO Action Setup VAIO Action Setup manages the settings for your computer's Programmable Power Keys (PPK), Memory Stick® media, i.LINK interface, and internal timer. An overview of each of these functions is provided below. For more information on changing the settings using VAIO Action Setup, see the online VAIO Action Setup help files. To access the help files, from the Start menu, point to Programs/VAIO Action Setup/VAIO Action Setup Help. Programmable Power Keys Your Sony computer comes with technology that allows you to get to your favorite applications Page easily. Each Programmable Power Key (PPK) on your VAIO Smart convertible keyboard comes 218 programmed to launch a preset application with a single press of the key. If you wish, you can use the VAIO Action Setup software to change the Programmable Power Keys' preset functions. The Programmable Power Keys are located at the top of your keyboard, and are numbered P1 through P6. The keys work even when the computer is turned off. Pressing one of these keys turns on the computer and launches the preset application. The six Programmable Power Keys come to you preprogrammed to perform the functions listed in the table below. Key Function P1 (INTERNET) Starts Microsoft® Internet Explorer for Windows® 98. P2 (MAIL) Starts Microsoft® Outlook® Express P3 (WORK) Starts Microsoft® Word P4 (FINANCE) Starts Intuit® Quicken® Basic 2000. P5 (SETUP) Starts PPK Setup. P6 (HELP) Opens a menu of help options. Memory Stick You can use VAIO Action Setup to preset your computer to automatically launch an application when you insert a Memory Stick. For more information on Memory Stick media, see Using the Memory Stick® Media . Internal Timer The VAIO Action Setup software allows you to set your computer's internal timer to launch certain applications automatically. The timer can start applications even when the power is off. Some software applications take longer than others to launch. It is advisable to confirm in advance the amount of time your selected application takes to start. AutoAlert E-mail Notification System VAIO Action Setup also enables you to set up your computer to notify you with an Information LED when new mail arrives in your e-mail mailbox. The Information LED turns red to indicate that new e-mail has arrived. For this AutoAlert E-mail Notification System to work, you must use Microsoft® Outlook® Express as your default e-mail software, and you must have an Internet Service Provider with dial-up capabilities set up. As an alternative, you can program your AutoAlert E-mail Notification System to set the Information LED to turn on when it has successfully completed the task of dialing up and connecting to receive mail. In this case, the Information LED turns on to indicate that your e-mail account has been accessed successfully, regardless of whether or not you have mail; this works with Microsoft Outlook Express. The e-mail software you choose to use with PPK must be set as your default e-mail software. See LCD for an illustration showing the Information LED's location. AutoAlert E-mail Notification System Software Restrictions If you use software that uses a phone line The computer may not be able to disconnect the phone line due to communication and server conditions. Be sure to monitor the status of the software when running the AutoAlert E-mail Notification System, and manually disconnect the phone line if you notice a malfunction. Furthermore, when using the timer to start the software, it is advised that you set the computer to shut down or enter system standby mode after a certain length of time. This allows the computer to disconnect the phone line if the computer fails to disconnect the line normally. If you are using the timer to download e-mail automatically Page 219 It is advisable to set up your e-mail software to redial automatically if it does not connect the first time. It is also advisable to set the e-mail software to disconnect the phone line automatically when all mail has been downloaded. If you are using Microsoft® Outlook® Express When using the AutoAlert E-mail Notification System with Microsoft Outlook Express, it is advisable to select the Dial automatically setting in your Microsoft Outlook Express software. If you have not chosen this setting and wish to do so, start Outlook Express, click Tools, and then select Options. Select the check box "Automatically dial when checking for new messages." Click OK. Changing the Window Design of Sony Software To change the window design of Sony software 1. Click the Start button, point to Settings, and then click Control Panel. 2. Click UI Design Selector. 3. Click << or >> and select the desired design. 4. Click Apply. The "UI Design Selector" window design changes. The window design for your Sony software will match the "UI Design Selector" window. To try another selection, click << or >>. Then, click OK. The UI Design Selector closes and the window design of your Sony software window design displays. You may use the feature with UI Design Selector-compatible software only. Using the Memory Stick® Media Your Sony computer is designed to support the new Memory Stick recording media. The Memory Stick media is a small, versatile device that allows you to share data between various types of Sony equipment. When you use the card, your computer automatically launches Windows Explorer. This allows you to view the contents of the card. If the image files are created by a Sony digital camera or camcorder, you do not need the following steps. If you want to create a slide show that launches automatically when you insert a Memory Stick, follow these steps to transfer images from your hard drive to a Memory Stick. 1. Insert the Memory Stick into the appropriate slot. 2. Click the My Computer icon on the desktop. Page 220 3. Click the Removable Disk S: icon. 4. Create a new folder and name it "DCIM." 5. Open the DCIM folder and create a new folder named "100MSDCF." 6. Click the Start button, select VAIO, and then click PictureGear to launch the PictureGear application. 7. Select the digital images you want to save in your slide show. 8. From the PictureGear File menu, point to File Process, and then select Still Format Conversion. 9. Select Memory Stick as the Output Format. 10. Use the Browse button to select the DCIM/100MSDCF folder on the Removable Disk (S:) drive. 11. Name the file. The file name must begin with DSC (DSC0xxxx). The full file name without extension must have at least eight characters. The order in which your photos appear in your slide show will be determined by the number (xxxx) in the file name. Some examples of acceptable file names are DSC00001.jpg and DSC00002.jpg 12. Click OK to save the file. You can also add MPEG1 video files to your Slide Show by following the steps below. The order in which your video clips (MOV0xxxx files) appear in your Slide Show is determined by the number (xxxx) in the file name. 1. Insert the Memory Stick into the media slot. 2. Click the My Computer icon on the desktop. 3. Click the Removable Disk S: icon. 4. Create a new folder and name it "MSSONY." 5. Open the MSSONY folder and create a new folder named "MOML0001." 6. From the PictureGear File menu, point to File Process, and then select Still Format Conversion. 7. Copy the MPEG file into the MOML0001 folder. 8. Rename the MPEG file MOV0xxxx.mpg, where xxxx is any four-digit number. 9. To begin showing your slides, eject the Memory Stick and then reinsert it. The slide show will begin automatically. To protect data on Memory Stick media from accidental changes Memory Stick media contains a write-protect tab. The write-protect tab prevents accidental changes to information recorded on the Memory Stick media. When you slide the write-protect tab to the LOCK position, the Memory Stick is write-protected, which means you cannot delete, copy, or save information on the Memory Stick. When you slide the tab to the un-LOCK position, you can write to or modify the Memory Stick contents. To change the way the computer responds when a Memory Stick is inserted into the Memory Stick media slot Change the options on the Memory Stick tab in the PPK Setup software. Page 221 Using PC Cards This computer has a card bus PC card slot that supports a Type I or II PC card. To insert a PC card You do not need to shut down your computer when inserting a PC card. 1. Open the front panel. 2. Insert the PC card into the PC card slot until it clicks into position. When the card is completely inserted, the eject button pops out. If you cannot insert the card, do not forcibly insert it. In this case, make sure the card is not inserted upside-down or backward, and then reinsert the card into the slot carefully. See the manual that came with the PC card for details on using it. To close the front panel when the eject button is protruding, fold the button down onto the computer. To eject a PC card If you eject the PC card incorrectly, the system may not work correctly. 1. Click the Start button on the Windows® taskbar, click Settings, and then click Control Panel. 2. Click the PC Card icon. 3. Click the name of the card that you want to eject, and then click Stop. 4. When the message "You may safely remove this device" appears, click OK. 5. Push the PC card eject button on the front panel of the system unit. You may need to pull out the eject button before you can eject the card. Page 222 The card is ejected from the card connector. Remove the card by holding it by its edge and pulling it out carefully. Using the Standby Function When you are finished using your computer, you can put it in standby mode rather than turn it off completely. Putting the computer in standby mode allows you to return quickly to normal computer use. To put the computer in standby mode manually 1. Save your work and close any applications that are running. (You can leave Windows running.) 2. Press the (Standby) button on the top of the keyboard. The computer goes into standby mode. Alternatively, you can click the Start button on the Windows® taskbar, click Shut Down, select Standby, and then click OK. To let the computer go into standby mode automatically Click the My Computer icon on your desktop. Click Control Panel, and then click the Power Management icon. On the Power Schemes tab, select from the options in the Power schemes drop-down list. Then, choose settings for the power scheme you have selected. To save the settings under a name that is not offered in the Power schemes pulldown menu, choose your settings and then click Save As. Type in a name, and click OK. Click Apply to finalize your power settings. To resume from standby mode There are three ways to bring your computer back from the standby mode: press the space bar on your keyboard, press the left mouse button, or momentarily depress the power button on your computer. If the display does not return from standby when you press the (Standby) button, your system may be in video standby mode. Press the space bar on the keyboard to return from video standby. Standby Mode Indicators You can tell which mode the computer is in by the color of the power indicator light. Color Amber Green No color Mode Computer is in standby mode. Computer is out of standby mode, ready to use. Computer is turned off. In standby mode you may periodically hear the computer's fan turn on and off, depending on the room's temperature. This is normal functioning in standby mode. Page 223 Shutting Down Your Computer When you are ready to turn off your computer for an extended period of time, use the following procedure to shut down the computer. To avoid the potential loss of data, do not use the power switch to shut down the computer. To shut down your computer If you plan to shut down your computer for a short period of time, you may want to use standby mode instead. See Using the Standby Function. 1. Click the Start button on the Windows® taskbar to open the Start menu. 2. Click Shut Down to display the Shut Down Windows dialog box. 3. Select the Shut Down option. 4. Click OK to complete the shutdown process. Respond to any prompts about saving documents. 5. Wait for your computer to turn off automatically -- the power indicator light turns off. 6. Turn off any peripherals connected to your computer. The LCD display turns off automatically when the computer shuts down. You can also shut down your computer using the (Power) button on the keyboard. Pressing this button causes the system to perform a shutdown but does not give you any of the other options available on the Windows® Shut Down menu. About the Power Switch If your system "locks up" or "crashes," press and hold the power switch for four seconds to force your system to power off. You may need to repeat this procedure. See Locating Controls and Connectors for the power switch's location. Using the System Recovery CD(s) You can reinstall software titles that shipped with your computer if they are corrupted or accidentally erased. You may not need to recover the entire contents of your hard drive. If you experience a problem with your computer, reinstalling an individual device driver or software title may correct the problem. Use the Application Recovery CD(s) to reinstall individual applications or device drivers. See Using the Application Recovery CD(s). The System Recovery CD(s) contain a backup copy of all the software originally installed on your hard disk drive. They can be used only to recover the hard disk of the Sony computer you purchased. The System Recovery utility gives you three options: Full Restore without Format restores all the software titles that originally came with your computer without formatting the hard disk. Full Restore with Format formats the hard disk drive and then restores all the original software. If your hard drive is partitioned into C and D drives, the computer will offer you the option to reformat the drive into a single partition. Operating System Only (Windows 98® Restore with Format) formats the hard disk drive and Page 224 restores the Windows® operating system and the device drivers that shipped with your computer. This option is recommended for advanced users only. If you choose the Full Restore with Format or Operating System Only option, your hard disk will be formatted, which removes all the information on the hard disk drive. You will lose any software you have installed and any other files you have created since you started to use your computer. This means you will have to reinstall any applications that were not included with the computer when you purchased it. If you choose the Full Restore without Format option, you may need to reinstall applications that were not included with the computer when you purchased it. If you have any questions on using the System Recovery CD(s), contact Sony Customer Support. To use the System Recovery CD(s) You need to complete the Windows registration process when you use the System Recovery CD(s). 1. Insert the Sony System Recovery CD(s) in the DVD-ROM drive. The System Recovery utility boots from the DVD-ROM drive. It must be in the drive when you turn on the computer. 2. Shut down your computer as described in Shutting Down Your Computer. 3. Wait 30 seconds and turn on your computer. 4. Click OK to signify you have read and accept the Microsoft End-User License Agreement. 5. When the System Recovery menu appears, follow the on-screen instructions to complete the recovery process. Your system may include one or two System Recovery CDs. If you have two System Recovery CDs, insert the first CD to run the System Recovery program. You are prompted to insert the second CD once the information from the first CD has been installed. The recovery process takes 30 to 60 minutes to complete. Using the Application Recovery CD(s) The Application Recovery CD(s) allow you to reinstall individual applications and device drivers if they are corrupted or accidentally erased. Reinstalling an individual device driver or software title may correct a problem you are experiencing with your computer, and you may not need to recover the entire contents of your hard drive. If you do need to reinstall all the software titles that shipped with your computer, use the System Recovery CD(s). See Using the System Recovery CD(s). You must be in Windows to run the Application Recovery CD(s). The application will not run from DOS. If you have any questions on using the Application Recovery CD(s), contact Sony Customer Support. To use the Application Recovery CD(s) 1. Turn on your computer. If your computer is already on, close all applications. 2. When the Windows desktop appears, insert the Sony Application Recovery CD in the DVD-ROM drive. The Application Recovery utility loads automatically. 3. When the Application Recovery menu appears, follow the on-screen instructions to complete the recovery process. Your system may include one or two Application Recovery CDs. If you have two Application Recovery CDs, insert the first CD to run the Application Recovery program. You may be prompted to insert the second CD, depending on the application you wish to restore. Page 225 About the Software on Your Computer Your VAIO Slimtop computer is ready to help you work, play, learn, and communicate as soon as you turn it on. This section gives you an overview of the activities you can perform with your software titles. For support information, see For Answers to Your Software Questions . Adobe Acrobat® Reader Adobe Systems Incorporated Acrobat Reader software allows you to view, navigate, and print electronic documents in Adobe's Portable Document Format (PDF), an open file format that is intended to preserve the fidelity of documents created on all major computer platforms. Adobe PhotoDeluxe® Home Edition Adobe Systems Incorporated Create amazing photo effects with PhotoDeluxe. Without learning complex software, you can enhance, restore, and be creative with your photos. Includes built-in guided activities, stock photos, clip art, and templates to assist you. Adobe Premiere® LE Adobe Systems Incorporated Adobe Premiere LE offers an interface and editing tool for producing movies for video, multimedia, or the Web. View source clips and edited footage simultaneously in the monitor window. Create video clips up to three hours long with complete audio-video synchronization. America Online® America Online America Online is the world's most popular Internet online service. Stay in touch with family and friends with Easy-to-Use E-mail, manage your personal finances, get the latest news and sports scores, and chat with thousands of others who share your interests. AT&T WorldNet® Service AT&T Fast, reliable Internet access from AT&T WorldNet Service. AT&T WorldNet Service provides Web-based e-mail, a personalized start page from Excite, easy access to the Excite search engine, free Web pages, online and live agent technical support, instant messaging, and special shopping discounts at Market Square. CompuServe® 2000 CompuServe Interactive Services The all new CompuServe 2000 delivers a powerful tool for Internet users who want serious and timely information, in-depth research, and professional communities backed by state-of-the-art technologies, including high-speed access and powerful e-mail messaging. Digital Media Bar Sony Electronics Media Bar software is your all-in-one solution for audio/video playback. It handles all common computer multimedia formats, and controls selected Sony devices. Media Bar software encompasses audio/video library cataloging and playlist management, in addition to digital video quality control and effects features. DVgate Sony Electronics Connect a digital video camera recorder to the i.LINK connector and capture your own video clips. You can edit the clips from your video, add others, and combine clips into new movie segments. EarthLink TotalAccess EarthLink Network, Inc. Page 226 An Internet Service Provider that supplies access, information, and assistance to its customers, introducing them to the Internet. Member benefits include e-mail, newsgroups, a Personal Start Page, a free 6 MB web site, a member magazine, and 24-hour technical support. McAfee's VirusScan® Network Associates, Inc. Protect your computer from viruses. VirusScan can detect viruses from floppy disks, Internet downloads, e-mail attachments, intranets, shared files, CD-ROMs, and online services. Microsoft® Internet Explorer for Windows® 98 Microsoft Corporation Internet Explorer delivers the Web the way you want it. It's safe, easy to use, and you can personalize how you access the Web. Outlook Express and other tools in Internet Explorer also help you have a great experience when you are on the Web! Microsoft® Outlook® Express Microsoft Corporation Outlook Express, the messaging tool that takes your e-mail and newsgroup communications to new heights! Outlook Express is easy to set up and use, and provides you with secure, personalized, and complete features that make creating, sending, and reading your e-mail a more rich and dynamic experience. Microsoft® Word 2000 Microsoft Corporation Microsoft Word 2000 makes it easy to create common Web, e-mail, and print documents for use around the world. It embraces HTML as a first-class file format and extends Word's ease-of-use to the Web and e-mail. Word 2000 also extends that ease of use to international users, making it easy to create multilingual documents. Netscape Communicator® Netscape Communications Netscape Communicator is the all-in-one Internet tool that makes it easy to browse the Web, send Internet e-mail, chat, read newsgroups, and compose great Web documents. PictureGear Sony Electronics This image management software displays images from your hard drive, a Sony digital still camera, or a Sony Mavica® camera. The images appear in a convenient light-table format, so that you can easily view the contents of an entire folder. Prodigy Internet Prodigy Communications Corporation An Internet service that helps you find what you need online faster and smarter. Prodigy delivers powerful online content, such as sports scores, stock quotes, news, and easy access to Excite , plus a personal e-mail account and quality customer service, all at a competitive price. Quicken® Basic Intuit, Inc. Quicken is the fastest, easiest way to organize your finances. Quicken works just like your checkbook, so it's easy to learn and use. Quicken manages all of your finances, bank accounts, credit cards, investments, and loans. You can even pay your bills online. Smart Capture Sony Electronics Smart Capture is a fun new way to send multimedia messages via e-mail. Smart Capture manages the i.LINK connection between your computer and a Sony Digital Handycam® Camcorder or other Page 227 cameras that support the i.LINK interface. It allows you to capture and compress video or still images that you can save or share via e-mail. A smart solution to computer, digital audio/video, and network convergence. Smart Connect Sony Electronics Smart Connect allows you to use an i.LINK cable to connect your VAIO computer to another VAIO computer that supports Smart Connect. You can then use one computer to copy, delete, and edit files on the other computer. You can also print from a printer attached to either computer. Sound Forge® Sonic Foundry Sound Forge allows you to put powerful audio processing tools and effects to work on your desktop. Simply cut, copy, and paste your way to striking multimedia files for use in everything from Web pages to desktop presentations. VAIO Action Setup Sony Electronics VAIO Action Setup manages the settings for your computer's Programmable Power Keys (PPK), Memory Stick media, i.LINK interface, and internal timer. For more information, see VAIO Action Setup. WinFax® Basic Edition Symantec Corporation WinFax Basic Edition incorporates an easy-to-use interface that allows you to send and receive faxes easily. Upgrade to WinFax Pro to receive additional features. About Your Recovery CDs Application Recovery CD(s) Sony Electronics The Application Recovery CD program allows you to reinstall individual applications and device drivers. Use it to restore corrupted or accidentally erased files. System Recovery CD(s) Sony Electronics The System Recovery CD program allows you to restore the software titles that shipped with your computer if they become corrupted or are erased accidentally. It can be used only to restore the hard disk of the Sony computer you purchased. For Answers to Your Software Questions Acrobat® Reader, Adobe PhotoDeluxe® Home Edition (Adobe Systems Incorporated) Web site http://www.adobe.com/ phone 206-628-2746 (fee-based support) fax 206-628-5737 e-mail [email protected] hours M-F, 6 AM-5 PM PT America Online® (America Online) Web site phone hours http://www.aol.com/ 800-827-3338 7 days a week, 6 AM - 2 PM ET AT&T WorldNet® Service (AT&T) Web site phone e-mail http://www.att.net 800-400-1447 [email protected] Page 228 hours 7 days a week, 24 hours a day CompuServe® 2000 (CompuServe Interactive Services) Web site phone hours http://www.compuserve.com/ 800-848-8990 M-F, 8 AM - 1 AM ET, S-S 10 AM - 10 PM ET EarthLink TotalAccess Web site phone e-mail hours (EarthLink Network, Inc.) http://help.earthlink.net/techsupport/ 800-395-8410 [email protected] 7 days a week, 24 hours a day GTE Easy Sign-up (GTE Internet) phone hours 800-927-3000 7 days a week, 24 hours a day McAfee's VirusScan (Network Associates, Inc.) Web site phone e-mail hours http://support.mcafee.com 408-988-3832 [email protected] M - F 9 AM - 5 PM Central Time MindSpring Internet Desktop (MindSpring Enterprises, Inc.) Web site phone http://help.mindspring.com/support 800-719-4660 Quicken® Basic (Intuit Inc.) Web site phone hours http://www.intuit.com/support 900-555-4688 7 days a week, 24 hours a day Sound Forge® (Sonic Foundry) Web site http://www.sonicfoundry.com/support/ phone 608-256-5555 fax 608-256-7300 e-mail [email protected] hours M - F, 8 AM - 7 PM CT Windows® 98 Second Edition Operating System, Word® 2000, Internet Explorer 5, Outlook® Express (Microsoft Corporation) Web site phone hours 1 http://www.sony.com/pcsupport 888-4SONYPC (888-476-6972) 1 7 days a week, 24 hours a day Support from 1-888-4SONYPC is free of charge for 90 days after the original date of purchase. WinFax® Basic Edition (Symantec Corporation) Web site http://www.symantec.com/techsupp/ phone 800-798-0850 fax 800-554-4403 in North America 541-984-2490 outside North America Troubleshooting This section describes how to solve common problems you may encounter when using your computer. Many problems have simple solutions, so try these suggestions before you call Sony Customer Support. My computer does not start Check that the computer is plugged into a power source and that it is turned on. Check that the power light is lit on the front panel of the computer. Confirm that a diskette is not in the diskette drive (unless you are using a bootable diskette). Confirm that the power cord and all cables are connected firmly, as described on the color poster. Page 229 If you plugged the computer into a power strip or UPS, make sure the power strip or UPS is turned on and working. My computer or software program "locks up" Close the application that is currently "locked up" by pressing Ctrl+Alt+Delete. In the Close Program dialog box, scroll down until you locate "(Not responding)" next to an application. Select this application and click End Task. Windows attempts to close the application. If the attempt is unsuccessful, a second dialog box appears. Select End Task again. If you are unable to "unlock" the application, repeat the above steps but select Shut Down when the Close Program dialog box appears. If the above steps fail to "unlock" your computer, save any unsaved work, if possible. Press Alt+F4. Select Restart and click OK. If you cannot restart as described in the preceding steps, you can restart the computer by pressing Ctrl+Alt+Delete or by pressing the power switch for more than six seconds. Pressing Ctrl+Alt+Delete may result in the loss of changes made to files that are currently open. Contact the software publisher or designated provider for technical support. See For Answers to Your Software Questions for a list of phone numbers and Web addresses or see Read Me First . My DVD-ROM/CD-ROM drive tray does not open Make sure the computer is turned on. If the Eject button does not work, you can open the tray by inserting a straightened heavyweight paper clip into the emergency eject hole. When I click an application icon, a message such as "You must insert the application CD into your CD-ROM (DVD-ROM) drive" appears and the software does not start Some titles require specific files that are located on the application's DVD-ROM/CD-ROM. Insert the disc and try starting the program again. Check to make sure you inserted the DVD-ROM/CD-ROM with the label side facing up. My modem connection is slow The computer's modem uses K56flex technology/V.90. Many factors influence modem connection speed, including telephone line noise or compatibility with telephone equipment (such as fax machines or other modems). If you think your modem is not connecting properly to other computer-based modems, fax machines, or your Internet Service Provider, check the following: Have your phone company check that your phone line is free from any line noise. If your problem is fax-related, check that there are no problems with the fax machine you are calling. The modem that receives your call may be slower or may use a different communications protocol than your modem. If this is the case, the connection speed may be slower than expected. For optimum performance, ensure you are calling an Internet Service Provider number that is V.90-compliant. If you are having a problem connecting with your Internet Service Provider, check that the ISP is not experiencing technical problems. If you have a second phone line available, try connecting the modem to this line. My modem does not work Check that the phone line is plugged into the line jack. Page Check that the phone line is working. You can check the line by plugging in an ordinary phone and230 listening for a dial tone. Check that the phone number the program is dialing is correct. Verify that the software you are using is appropriately configured to recognize and interact with the Sony computer modem. Call the software publisher if you do not know how to configure the software to recognize the modem. All programs preinstalled by Sony are compatible. If you suspect your modem is not functioning, you can perform a simple test to find out. Click the My Computer icon on your desktop. Click Control Panel, and then click Modems. Click the Diagnostics tab and select COM3. Click More Info. If your modem is functioning, a More Info dialog box will display. If your modem is not functioning, an error message will appear. My microphone is too sensitive to background noise If you find there is too much background noise when you record sound, you should adjust the microphone gain by following these steps: 1. Right-click the speaker icon (Volume) in the lower-right Windows® task tray. 2. Click Open Volume Controls. The Volume Control screen appears. 3. In the Options menu, select Properties. The Properties screen appears. 4. Change the setting for "Adjust volume for" from Playback to Recording, and then click OK. 5. Click the Advanced button under Microphone Balance. The Advanced Controls for Microphone screen appears. 6. Deselect the check box for 1 Mic Gain (+20dB), then click the Close button. 7. Close the Recording Control window. My mouse does not work Check that the mouse is plugged into one of the PS/2® connectors on the keyboard. The other connector connects the keyboard to the computer. There may be dust or dirt inside the mouse mechanism. To clean the mouse, follow these steps: o Turn off your computer. See Shutting Down Your Computer for details. o Remove the mouse ball cover on the back of the mouse by turning the ring that covers the mouse ball clockwise. o Turn the mouse upright, and drop the mouse ball into your hand. o Using a piece of tape, remove any dust or dirt on the mouse ball and inside the mouse ball socket. o Return the mouse ball to the socket, and replace the mouse ball cover. Secure the cover by turning the ring counter-clockwise. I cannot find the Windows® taskbar Check that the taskbar is not hidden or shrunken. Use the mouse to point to the left, right, top, and bottom edges of the screen. See Read Me First for additional information on using your Sony computer. To Reach Sony For further assistance, call 1-888-4SONYPC (1-888-476-6972). Page 231 Specifications Model PCV-L630 Processor 600E MHz* Pentium® III Hard Disk Drive 17 GB Ultra DMA Standard SDRAM 128 MB PC-100 SDRAM, expandable to 256 MB Video RAM 8 MB SDRAM Graphics 2X AGP 3D graphics hardware acceleration (ATi Rage 128 Pro 4XL) Sound Capabilities High fidelity 3D PCI audio Aureal AU8810 Diskette Drive 3.5" 1.44 MB FDD DVD-ROM/CD-ROM Drive 4.8X (max.) DVD-ROM reading 24X (max.) CD-ROM reading** Modem K56flex technology/V.90 compatible data/fax modem Expansion Capabilities Two PCI slots Connection Capabilities (Front) PC card (Card bus support) USB port Microphone Headphone Memory Stick media slot i.LINK (4-pin) Connection Capabilities (Rear) USB port Modem line (RJ-11) Phone line (RJ-11) Parallel (printer) Serial port VGA monitor LCD display Line In Line Out Keyboard i.LINK (6-pin) Connection Capabilities (Keyboard) Mouse (PS/2-style) left and right connectors Supplied Accessories Stand (for vertical installation) Power cable Phone cable Keyboard cable PS/2 Wheel Mouse VAIO Smart Convertible Keyboard Spacers (for bottom of the system) Ferrite core Service 90-day limited express service*** Extendible to one year from original date of purchase upon registration Limited Warranty90-day parts/labor standard Extendible to one year from original date of purchase upon registration Power Requirements 130 watts maximum Dimensions CPU: 11.2"(w) x 3.6" (h) x 13.4" (d) (280 mm x 90 mm x 335 mm) Keyboard: 15.9" (w) x 1.8" (h) x 7.1" (d) (398 mm x 45 mm x 178 mm) Display: 16.1" (w) x 13.1" (h) x 6.9" (d) (403 mm x 327 mm x 172 mm) Weight CPU: 11.9 lbs. (5.4kg) Display: 7.05 lbs (3.2 kg) Keyboard: 2.9 lbs. (1.3kg) Operating Temperature 50º F to 95º F (+10º C to 35º C) * MHz denotes microprocessor internal clock speed; other factors may affect application performance. Page 232 GB means one billion bytes when referring to hard drive capacity. Accessible capacity may vary. **Data on a DVD-ROM is read at a variable transfer rate, ranging from 2X at the innermost track to 4.8X at the outermost track(the data transfer standard 1X rate is 1385 kbytes/s). The average data transfer rate is 3.6X(4986 kbytes/s). Data on a CD-ROM is read at a variable transfer rate, ranging from 10.5X at the innermost track to 24X at the outermost track(the data transfer standard 1X rate is 150 kbytes/s). The average data transfer is 18X(2700 kbytes/s). Maximum speed for faxing is 14.4 kbytes/s. Your modem is capable of downloading at 56 kbytes/s using K56flex technology or V.90. Your phone service, online service, or Internet Service Provider, however, may not support this technology or operate at this speed. ***Certain restrictions apply. Specifications are subject to change without notice. Page 233 Features For a complete description of the specifications of your Sony computer, see Specifications. i.LINK® (IEEE-1394): Two built-in i.LINK ports provide you with front and rear digital connection capability. The i.LINK name and logo identify a digital interface (IEEE-1394) for high speed communication. Exceptional performance: Your computer includes a fast Intel® processor and a V.90-compatible data/fax modem. Ergo-Angle Multimedia LCD display: With its exclusive dual-hinge pedestal, this 15" XGA TFT display provides twice the flexibility of other LCDs. Select the perfect viewing angle and enjoy the built-in Harman/Kardon® stereo speakers. AutoAlert E-mail Notification System: Custom software automatically downloads e-mail on a pre-set schedule via Microsoft® Outlook® Express. A light on the LCD display instantly lets you know when new mail is received. VAIO Smart convertible keyboard: The innovative palm rest converts to a keyboard cover for a sleek look when not in use. Six Programmable Power Keys let you launch any application with the push of a button; dual-sided mouse connections for left- or right- hand use. Sony Memory Stick® media slot: The next generation of digital media, smaller than a stick of gum. Easily delivers information from one Memory Stick-equipped electronic device to another, so you can transfer images, sounds, data and text between cameras, computers, and more. Compact components: Enjoy the small footprint and versatile setup options available by positioning the components in an arrangement of your choice. Sony audio and video quality: High-fidelity 3D audio system and high-powered 3D graphics (AGP) enable you to take advantage of today's advanced multimedia applications, games, and entertainment software. Preinstalled software titles: All the software on your computer is preinstalled, configured, and ready for you to use right out of the box. Microsoft® Windows® 98 Second Edition operating system: Your system includes the latest operating system from Microsoft. Communications: Access popular online services, browse the Internet, send faxes, and more. * Actual upload and download speeds may vary due to line conditions, ISP support, and government regulations. Unpacking Your Computer Computer and Supplied Accessories Page 234 Manuals Read Me First contains last-minute supplementary information and software support numbers. The VAIO Slimtop LCD Computer User Guide (this manual) contains features and specifications of your computer. It also includes information on the applications included with your system and how to contact software vendors, get started with your computer, and solve common problems. The VAIO VAIO® Consumer Information Guide contains safety and regulatory information, ergonomic considerations, information on help resources, and your computer's limited warranty statement. The Microsoft® Windows®98 Second Edition Getting Started manual explains how to use the basic features of the Windows® operating system. Recovery CDs System Recovery CD(s) - Enables you to reinstall software that shipped with your computer if it is corrupted or accidentally erased. For more information, see Using the System Recovery CD(s). Application Recovery CD(s) - Allows you to reinstall individual applications or device drivers if they are corrupted or accidentally erased. For more information, see Using the Application Recovery CD(s). Other Setting up your VAIO Slimtop LCD Computer (poster) Packet containing special product offers Software CDs Page 235 Microsoft® Word 2000 Setting Up Your VAIO Slimtop LCD Computer Locating Controls and Connectors Front Panel 1 Power switch and indicator light Turns on/off the computer and the display. The indicator light is green while the power is on and amber when the computer is in standby mode. 2 Floppy disk drive Reads/writes data from/to a 3.5-inch floppy disk. 3 Floppy disk eject button Ejects the floppy disk. 4 DVD-ROM drive Reads data from a DVD-ROM/CD-ROM. 5 DVD-ROM/CD-ROM eject button Ejects a DVD-ROM/CD-ROM. 6 Manual eject hole If the DVD-ROM/CD-ROM does not come out when you press the DVD-ROM/CD-ROM eject button, insert a thin, pointed object into this hole to eject the disc manually. 7 FD (Floppy disk drive) access indicator light Lights in green while reading/writing data from/to a floppy disk. 8 Disc (DVD-ROM drive) access indicator light Lights in amber while reading data from a DVD-ROM/CD-ROM. 9 HD (drive) access indicator light Lights in green while reading/writing data from/to the hard disk. 10 MIC (Microphone) connector* Connects a microphone (not supplied). 11 PHONES (Headphones) connector* Connects headphones (not supplied). 12 VOLUME control Page 236 Adjusts the volume of the headphones connected to the PHONES connector. Users should note that this does not control the volume of the integrated LCD speakers. 13 PC CARD slot A PC Card (also called a PCMCIA card) can be installed in this slot. PC cards enable you to add functionality to your system. MEMORY STICK media slot 14 Insert a Sony Memory Stick® card into this slot. See Using the Memory Stick® Media for details on using Memory Stick media. 15 i.LINK (4-pin) Connects a digital device such as a Sony Digital Handycam® Camcorder. 16 USB (Universal Serial Bus) connector Connects a USB device. * See Using a Headphone or Microphone for important information about connecting a microphone and headphone. Rear Panel 1 AC INPUT connector Connects the supplied power cord. 2 LINE jack Connects a phone cable to the wall jack. 3 EMPTY PCI SLOT (FILLED WITH ETHERNET CARD ON CUSTOM MODELS) For a PCI Add-On Card (not supplied). 4 TELEPHONE jack Connects the phone to the computer. 5 PRINTER connector Connects a parallel device, such as a printer or scanner. 6 SERIAL connector Connects a serial device, such as a digital still camera. 7 MONITOR connector Connects a standard CRT display. 8 USB (Universal Serial Bus) connector Connects a USB device. 9 LINE IN connector Connects an audio device. 10 LINE OUT connector Connects an audio device or an active speaker. 11 i.LINK (6-pin) Connects a digital device such as a Sony Digital Handycam® Camcorder. 12 LCD MONITOR connector Connects the LCD that comes with the VAIO Slimtop LCD computer. Note: Do not connect any display to this connector other than the LCD that is supplied with this system. Page 237 13 KEYBOARD connector Connects a keyboard. LCD 1 Power indicator light Light is green while the power is on. When the computer enters the standby mode, this indicator light turns amber. 2 Information LED Light turns red to alert the user to activities, such as the arrival of e-mail. See AutoAlert E-mail Notification System. 3 Adjusts 4 Adjusts Brightness control the brightness of the screen. Volume control the volume of the integrated speakers on the LCD display. Using the Wheel Mouse For information about the Wheel Mouse that connects to either side of your keyboard, see MouseWare Help. To access MouseWare Help, from the Start menu, point to Programs, MouseWare, and then click MouseWare Help. To set up the mouse for left-handed use: 1. Click the My Computer icon on your desktop. 2. Click Control Panel, and then click Mouse. The Mouse Properties dialog box appears. 3. In the Quick Setup tab, click Device Setup. 4. In the Device Setup Wizard dialog box, click Next. 5. Select the radio button next to "Left side of the keyboard." 6. Click Next three times, and then click Finish. 7. Click Apply. Using a Headphone or Microphone When you connect a microphone or headphone to your computer, attaching a ferrite core will reduce electrical interference. Attach the (supplied) ferrite core at the end of the headphone or microphone cable closest to the computer. Wrap the cable through the center of the ferrite core. The following illustration shows how to attach the ferrite core when you are using both a headphone and a microphone. Page 238 The LCD and keyboard cables already include a ferrite core. Do not remove the ferrite core from these cables. To adjust the height and viewing angle of the display Holding both sides of the display, push the display panel out and up, and then adjust the viewing angle. The LCD display is designed to maintain the best ergonomic viewing angle. Set the display height so that it does not touch the keyboard, and adjust the viewing angle approximately 27 degrees from eye level to the center of the screen. Attaching the Stand to the System Unit The main system unit can be oriented horizontally or vertically. If you place the system in a vertical position, you must attach the supplied stand to ensure stability. 1. Place the system unit on its right side, with the front of the system facing forward. 2. Insert the grooved side of the stand into the ventilation holes of the system so that the two screw holes are aligned and the stand's fins are at the rear of the unit. 3. Secure the stand to the unit with the supplied screw. Page 239 The stand keeps the system cool by allowing air to flow under it. If you choose to place the system unit in a vertical position, it is important to use the stand and to place the system unit on its left side, as in the illustration above; otherwise, the system may overheat. Registering Your Computer Take advantage of Sony's commitment to quality customer support and receive these benefits by registering your computer: Sony Customer Support--Talk to a Support Representative to troubleshoot problems you may be having with your computer. Limited warranty--Protect your investment. See Limited Warranty Statement in the VAIO® Consumer Information Guide for details. You must register your computer to extend the warranty from the initial 90-day warranty period to one year from the original date of purchase. Express Service--Provides a fast and direct return of your VAIO Slimtop Sony for service of your computer. LCD Computer to If you did not already register when you first turned on your computer, follow these steps to use the computer online registration service. 1. Click the registration icon on the VAIO desktop. 2. Enter the information requested on the first online registration form. Press the tab key to move from box to box. 3. Click the Next button to advance to the next form. 4. Complete the remaining forms by clicking the Next button each time you complete a form. The computer automatically transfers your registration information using your built-in modem and a toll-free telephone number or a local number. You may sign up for Internet access with a Sony preferred Internet Service Provider. VAIO Action Setup VAIO Action Setup manages the settings for your computer's Programmable Power Keys (PPK), Memory Stick® media, i.LINK interface, and internal timer. An overview of each of these functions is provided below. For more information on changing the settings using VAIO Action Setup, see the online VAIO Action Setup help files. To access the help files, from the Start menu, point to Programs/VAIO Action Setup/VAIO Action Setup Help. Programmable Power Keys Your Sony computer comes with technology that allows you to get to your favorite applications Page easily. Each Programmable Power Key (PPK) on your VAIO Smart convertible keyboard comes 240 programmed to launch a preset application with a single press of the key. If you wish, you can use the VAIO Action Setup software to change the Programmable Power Keys' preset functions. The Programmable Power Keys are located at the top of your keyboard, and are numbered P1 through P6. The keys work even when the computer is turned off. Pressing one of these keys turns on the computer and launches the preset application. The six Programmable Power Keys come to you preprogrammed to perform the functions listed in the table below. Key Function P1 (INTERNET) Starts Microsoft® Internet Explorer for Windows® 98. P2 (MAIL) Starts Microsoft® Outlook® Express P3 (WORK) Starts Microsoft® Word P4 (FINANCE) Starts Intuit® Quicken® Basic 2000. P5 (SETUP) Starts PPK Setup. P6 (HELP) Opens a menu of help options. Memory Stick You can use VAIO Action Setup to preset your computer to automatically launch an application when you insert a Memory Stick. For more information on Memory Stick media, see Using the Memory Stick® Media . Internal Timer The VAIO Action Setup software allows you to set your computer's internal timer to launch certain applications automatically. The timer can start applications even when the power is off. Some software applications take longer than others to launch. It is advisable to confirm in advance the amount of time your selected application takes to start. AutoAlert E-mail Notification System VAIO Action Setup also enables you to set up your computer to notify you with an Information LED when new mail arrives in your e-mail mailbox. The Information LED turns red to indicate that new e-mail has arrived. For this AutoAlert E-mail Notification System to work, you must use Microsoft® Outlook® Express as your default e-mail software, and you must have an Internet Service Provider with dial-up capabilities set up. As an alternative, you can program your AutoAlert E-mail Notification System to set the Information LED to turn on when it has successfully completed the task of dialing up and connecting to receive mail. In this case, the Information LED turns on to indicate that your e-mail account has been accessed successfully, regardless of whether or not you have mail; this works with Microsoft Outlook Express. The e-mail software you choose to use with PPK must be set as your default e-mail software. See LCD for an illustration showing the Information LED's location. AutoAlert E-mail Notification System Software Restrictions If you use software that uses a phone line The computer may not be able to disconnect the phone line due to communication and server conditions. Be sure to monitor the status of the software when running the AutoAlert E-mail Notification System, and manually disconnect the phone line if you notice a malfunction. Furthermore, when using the timer to start the software, it is advised that you set the computer to shut down or enter system standby mode after a certain length of time. This allows the computer to disconnect the phone line if the computer fails to disconnect the line normally. If you are using the timer to download e-mail automatically Page 241 It is advisable to set up your e-mail software to redial automatically if it does not connect the first time. It is also advisable to set the e-mail software to disconnect the phone line automatically when all mail has been downloaded. If you are using Microsoft® Outlook® Express When using the AutoAlert E-mail Notification System with Microsoft Outlook Express, it is advisable to select the Dial automatically setting in your Microsoft Outlook Express software. If you have not chosen this setting and wish to do so, start Outlook Express, click Tools, and then select Options. Select the check box "Automatically dial when checking for new messages." Click OK. Changing the Window Design of Sony Software To change the window design of Sony software 1. Click the Start button, point to Settings, and then click Control Panel. 2. Click UI Design Selector. 3. Click << or >> and select the desired design. 4. Click Apply. The "UI Design Selector" window design changes. The window design for your Sony software will match the "UI Design Selector" window. To try another selection, click << or >>. Then, click OK. The UI Design Selector closes and the window design of your Sony software window design displays. You may use the feature with UI Design Selector-compatible software only. Using the Memory Stick® Media Your Sony computer is designed to support the new Memory Stick recording media. The Memory Stick media is a small, versatile device that allows you to share data between various types of Sony equipment. When you use the card, your computer automatically launches Windows Explorer. This allows you to view the contents of the card. If the image files are created by a Sony digital camera or camcorder, you do not need the following steps. If you want to create a slide show that launches automatically when you insert a Memory Stick, follow these steps to transfer images from your hard drive to a Memory Stick. 1. Insert the Memory Stick into the appropriate slot. 2. Click the My Computer icon on the desktop. Page 242 3. Click the Removable Disk S: icon. 4. Create a new folder and name it "DCIM." 5. Open the DCIM folder and create a new folder named "100MSDCF." 6. Click the Start button, select VAIO, and then click PictureGear to launch the PictureGear application. 7. Select the digital images you want to save in your slide show. 8. From the PictureGear File menu, point to File Process, and then select Still Format Conversion. 9. Select Memory Stick as the Output Format. 10. Use the Browse button to select the DCIM/100MSDCF folder on the Removable Disk (S:) drive. 11. Name the file. The file name must begin with DSC (DSC0xxxx). The full file name without extension must have at least eight characters. The order in which your photos appear in your slide show will be determined by the number (xxxx) in the file name. Some examples of acceptable file names are DSC00001.jpg and DSC00002.jpg 12. Click OK to save the file. You can also add MPEG1 video files to your Slide Show by following the steps below. The order in which your video clips (MOV0xxxx files) appear in your Slide Show is determined by the number (xxxx) in the file name. 1. Insert the Memory Stick into the media slot. 2. Click the My Computer icon on the desktop. 3. Click the Removable Disk S: icon. 4. Create a new folder and name it "MSSONY." 5. Open the MSSONY folder and create a new folder named "MOML0001." 6. From the PictureGear File menu, point to File Process, and then select Still Format Conversion. 7. Copy the MPEG file into the MOML0001 folder. 8. Rename the MPEG file MOV0xxxx.mpg, where xxxx is any four-digit number. 9. To begin showing your slides, eject the Memory Stick and then reinsert it. The slide show will begin automatically. To protect data on Memory Stick media from accidental changes Memory Stick media contains a write-protect tab. The write-protect tab prevents accidental changes to information recorded on the Memory Stick media. When you slide the write-protect tab to the LOCK position, the Memory Stick is write-protected, which means you cannot delete, copy, or save information on the Memory Stick. When you slide the tab to the un-LOCK position, you can write to or modify the Memory Stick contents. To change the way the computer responds when a Memory Stick is inserted into the Memory Stick media slot Change the options on the Memory Stick tab in the PPK Setup software. Page 243 Using PC Cards This computer has a card bus PC card slot that supports a Type I or II PC card. To insert a PC card You do not need to shut down your computer when inserting a PC card. 1. Open the front panel. 2. Insert the PC card into the PC card slot until it clicks into position. When the card is completely inserted, the eject button pops out. If you cannot insert the card, do not forcibly insert it. In this case, make sure the card is not inserted upside-down or backward, and then reinsert the card into the slot carefully. See the manual that came with the PC card for details on using it. To close the front panel when the eject button is protruding, fold the button down onto the computer. To eject a PC card If you eject the PC card incorrectly, the system may not work correctly. 1. Click the Start button on the Windows® taskbar, click Settings, and then click Control Panel. 2. Click the PC Card icon. 3. Click the name of the card that you want to eject, and then click Stop. 4. When the message "You may safely remove this device" appears, click OK. 5. Push the PC card eject button on the front panel of the system unit. You may need to pull out the eject button before you can eject the card. Page 244 The card is ejected from the card connector. Remove the card by holding it by its edge and pulling it out carefully. Using the Standby Function When you are finished using your computer, you can put it in standby mode rather than turn it off completely. Putting the computer in standby mode allows you to return quickly to normal computer use. To put the computer in standby mode manually 1. Save your work and close any applications that are running. (You can leave Windows running.) 2. Press the (Standby) button on the top of the keyboard. The computer goes into standby mode. Alternatively, you can click the Start button on the Windows® taskbar, click Shut Down, select Standby, and then click OK. To let the computer go into standby mode automatically Click the My Computer icon on your desktop. Click Control Panel, and then click the Power Management icon. On the Power Schemes tab, select from the options in the Power schemes drop-down list. Then, choose settings for the power scheme you have selected. To save the settings under a name that is not offered in the Power schemes pulldown menu, choose your settings and then click Save As. Type in a name, and click OK. Click Apply to finalize your power settings. To resume from standby mode There are three ways to bring your computer back from the standby mode: press the space bar on your keyboard, press the left mouse button, or momentarily depress the power button on your computer. If the display does not return from standby when you press the (Standby) button, your system may be in video standby mode. Press the space bar on the keyboard to return from video standby. Standby Mode Indicators You can tell which mode the computer is in by the color of the power indicator light. Color Amber Green No color Mode Computer is in standby mode. Computer is out of standby mode, ready to use. Computer is turned off. In standby mode you may periodically hear the computer's fan turn on and off, depending on the room's temperature. This is normal functioning in standby mode. Page 245 Shutting Down Your Computer When you are ready to turn off your computer for an extended period of time, use the following procedure to shut down the computer. To avoid the potential loss of data, do not use the power switch to shut down the computer. To shut down your computer If you plan to shut down your computer for a short period of time, you may want to use standby mode instead. See Using the Standby Function. 1. Click the Start button on the Windows® taskbar to open the Start menu. 2. Click Shut Down to display the Shut Down Windows dialog box. 3. Select the Shut Down option. 4. Click OK to complete the shutdown process. Respond to any prompts about saving documents. 5. Wait for your computer to turn off automatically -- the power indicator light turns off. 6. Turn off any peripherals connected to your computer. The LCD display turns off automatically when the computer shuts down. You can also shut down your computer using the (Power) button on the keyboard. Pressing this button causes the system to perform a shutdown but does not give you any of the other options available on the Windows® Shut Down menu. About the Power Switch If your system "locks up" or "crashes," press and hold the power switch for four seconds to force your system to power off. You may need to repeat this procedure. See Locating Controls and Connectors for the power switch's location. Using the System Recovery CD(s) You can reinstall software titles that shipped with your computer if they are corrupted or accidentally erased. You may not need to recover the entire contents of your hard drive. If you experience a problem with your computer, reinstalling an individual device driver or software title may correct the problem. Use the Application Recovery CD(s) to reinstall individual applications or device drivers. See Using the Application Recovery CD(s). The System Recovery CD(s) contain a backup copy of all the software originally installed on your hard disk drive. They can be used only to recover the hard disk of the Sony computer you purchased. The System Recovery utility gives you three options: Full Restore without Format restores all the software titles that originally came with your computer without formatting the hard disk. Full Restore with Format formats the hard disk drive and then restores all the original software. If your hard drive is partitioned into C and D drives, the computer will offer you the option to reformat the drive into a single partition. Operating System Only (Windows 98® Restore with Format) formats the hard disk drive and Page 246 restores the Windows® operating system and the device drivers that shipped with your computer. This option is recommended for advanced users only. If you choose the Full Restore with Format or Operating System Only option, your hard disk will be formatted, which removes all the information on the hard disk drive. You will lose any software you have installed and any other files you have created since you started to use your computer. This means you will have to reinstall any applications that were not included with the computer when you purchased it. If you choose the Full Restore without Format option, you may need to reinstall applications that were not included with the computer when you purchased it. If you have any questions on using the System Recovery CD(s), contact Sony Customer Support. To use the System Recovery CD(s) You need to complete the Windows registration process when you use the System Recovery CD(s). 1. Insert the Sony System Recovery CD(s) in the DVD-ROM drive. The System Recovery utility boots from the DVD-ROM drive. It must be in the drive when you turn on the computer. 2. Shut down your computer as described in Shutting Down Your Computer. 3. Wait 30 seconds and turn on your computer. 4. Click OK to signify you have read and accept the Microsoft End-User License Agreement. 5. When the System Recovery menu appears, follow the on-screen instructions to complete the recovery process. Your system may include one or two System Recovery CDs. If you have two System Recovery CDs, insert the first CD to run the System Recovery program. You are prompted to insert the second CD once the information from the first CD has been installed. The recovery process takes 30 to 60 minutes to complete. Using the Application Recovery CD(s) The Application Recovery CD(s) allow you to reinstall individual applications and device drivers if they are corrupted or accidentally erased. Reinstalling an individual device driver or software title may correct a problem you are experiencing with your computer, and you may not need to recover the entire contents of your hard drive. If you do need to reinstall all the software titles that shipped with your computer, use the System Recovery CD(s). See Using the System Recovery CD(s). You must be in Windows to run the Application Recovery CD(s). The application will not run from DOS. If you have any questions on using the Application Recovery CD(s), contact Sony Customer Support. To use the Application Recovery CD(s) 1. Turn on your computer. If your computer is already on, close all applications. 2. When the Windows desktop appears, insert the Sony Application Recovery CD in the DVD-ROM drive. The Application Recovery utility loads automatically. 3. When the Application Recovery menu appears, follow the on-screen instructions to complete the recovery process. Your system may include one or two Application Recovery CDs. If you have two Application Recovery CDs, insert the first CD to run the Application Recovery program. You may be prompted to insert the second CD, depending on the application you wish to restore. Page 247 About the Software on Your Computer Your VAIO Slimtop computer is ready to help you work, play, learn, and communicate as soon as you turn it on. This section gives you an overview of the activities you can perform with your software titles. For support information, see For Answers to Your Software Questions . Adobe Acrobat® Reader Adobe Systems Incorporated Acrobat Reader software allows you to view, navigate, and print electronic documents in Adobe's Portable Document Format (PDF), an open file format that is intended to preserve the fidelity of documents created on all major computer platforms. Adobe PhotoDeluxe® Home Edition Adobe Systems Incorporated Create amazing photo effects with PhotoDeluxe. Without learning complex software, you can enhance, restore, and be creative with your photos. Includes built-in guided activities, stock photos, clip art, and templates to assist you. Adobe Premiere® LE Adobe Systems Incorporated Adobe Premiere LE offers an interface and editing tool for producing movies for video, multimedia, or the Web. View source clips and edited footage simultaneously in the monitor window. Create video clips up to three hours long with complete audio-video synchronization. America Online® America Online America Online is the world's most popular Internet online service. Stay in touch with family and friends with Easy-to-Use E-mail, manage your personal finances, get the latest news and sports scores, and chat with thousands of others who share your interests. AT&T WorldNet® Service AT&T Fast, reliable Internet access from AT&T WorldNet Service. AT&T WorldNet Service provides Web-based e-mail, a personalized start page from Excite, easy access to the Excite search engine, free Web pages, online and live agent technical support, instant messaging, and special shopping discounts at Market Square. CompuServe® 2000 CompuServe Interactive Services The all new CompuServe 2000 delivers a powerful tool for Internet users who want serious and timely information, in-depth research, and professional communities backed by state-of-the-art technologies, including high-speed access and powerful e-mail messaging. Digital Media Bar Sony Electronics Media Bar software is your all-in-one solution for audio/video playback. It handles all common computer multimedia formats, and controls selected Sony devices. Media Bar software encompasses audio/video library cataloging and playlist management, in addition to digital video quality control and effects features. DVgate Sony Electronics Connect a digital video camera recorder to the i.LINK connector and capture your own video clips. You can edit the clips from your video, add others, and combine clips into new movie segments. EarthLink TotalAccess EarthLink Network, Inc. Page 248 An Internet Service Provider that supplies access, information, and assistance to its customers, introducing them to the Internet. Member benefits include e-mail, newsgroups, a Personal Start Page, a free 6 MB web site, a member magazine, and 24-hour technical support. McAfee's VirusScan® Network Associates, Inc. Protect your computer from viruses. VirusScan can detect viruses from floppy disks, Internet downloads, e-mail attachments, intranets, shared files, CD-ROMs, and online services. Microsoft® Internet Explorer for Windows® 98 Microsoft Corporation Internet Explorer delivers the Web the way you want it. It's safe, easy to use, and you can personalize how you access the Web. Outlook Express and other tools in Internet Explorer also help you have a great experience when you are on the Web! Microsoft® Outlook® Express Microsoft Corporation Outlook Express, the messaging tool that takes your e-mail and newsgroup communications to new heights! Outlook Express is easy to set up and use, and provides you with secure, personalized, and complete features that make creating, sending, and reading your e-mail a more rich and dynamic experience. Microsoft® Word 2000 Microsoft Corporation Microsoft Word 2000 makes it easy to create common Web, e-mail, and print documents for use around the world. It embraces HTML as a first-class file format and extends Word's ease-of-use to the Web and e-mail. Word 2000 also extends that ease of use to international users, making it easy to create multilingual documents. Netscape Communicator® Netscape Communications Netscape Communicator is the all-in-one Internet tool that makes it easy to browse the Web, send Internet e-mail, chat, read newsgroups, and compose great Web documents. PictureGear Sony Electronics This image management software displays images from your hard drive, a Sony digital still camera, or a Sony Mavica® camera. The images appear in a convenient light-table format, so that you can easily view the contents of an entire folder. Prodigy Internet Prodigy Communications Corporation An Internet service that helps you find what you need online faster and smarter. Prodigy delivers powerful online content, such as sports scores, stock quotes, news, and easy access to Excite , plus a personal e-mail account and quality customer service, all at a competitive price. Quicken® Basic Intuit, Inc. Quicken is the fastest, easiest way to organize your finances. Quicken works just like your checkbook, so it's easy to learn and use. Quicken manages all of your finances, bank accounts, credit cards, investments, and loans. You can even pay your bills online. Smart Capture Sony Electronics Smart Capture is a fun new way to send multimedia messages via e-mail. Smart Capture manages the i.LINK connection between your computer and a Sony Digital Handycam® Camcorder or other Page 249 cameras that support the i.LINK interface. It allows you to capture and compress video or still images that you can save or share via e-mail. A smart solution to computer, digital audio/video, and network convergence. Smart Connect Sony Electronics Smart Connect allows you to use an i.LINK cable to connect your VAIO computer to another VAIO computer that supports Smart Connect. You can then use one computer to copy, delete, and edit files on the other computer. You can also print from a printer attached to either computer. Sound Forge® Sonic Foundry Sound Forge allows you to put powerful audio processing tools and effects to work on your desktop. Simply cut, copy, and paste your way to striking multimedia files for use in everything from Web pages to desktop presentations. VAIO Action Setup Sony Electronics VAIO Action Setup manages the settings for your computer's Programmable Power Keys (PPK), Memory Stick media, i.LINK interface, and internal timer. For more information, see VAIO Action Setup. WinFax® Basic Edition Symantec Corporation WinFax Basic Edition incorporates an easy-to-use interface that allows you to send and receive faxes easily. Upgrade to WinFax Pro to receive additional features. About Your Recovery CDs Application Recovery CD(s) Sony Electronics The Application Recovery CD program allows you to reinstall individual applications and device drivers. Use it to restore corrupted or accidentally erased files. System Recovery CD(s) Sony Electronics The System Recovery CD program allows you to restore the software titles that shipped with your computer if they become corrupted or are erased accidentally. It can be used only to restore the hard disk of the Sony computer you purchased. For Answers to Your Software Questions Acrobat® Reader, Adobe PhotoDeluxe® Home Edition (Adobe Systems Incorporated) Web site http://www.adobe.com/ phone 206-628-2746 (fee-based support) fax 206-628-5737 e-mail [email protected] hours M-F, 6 AM-5 PM PT America Online® (America Online) Web site phone hours http://www.aol.com/ 800-827-3338 7 days a week, 6 AM - 2 PM ET AT&T WorldNet® Service (AT&T) Web site phone e-mail http://www.att.net 800-400-1447 [email protected] Page 250 hours 7 days a week, 24 hours a day CompuServe® 2000 (CompuServe Interactive Services) Web site phone hours http://www.compuserve.com/ 800-848-8990 M-F, 8 AM - 1 AM ET, S-S 10 AM - 10 PM ET EarthLink TotalAccess Web site phone e-mail hours (EarthLink Network, Inc.) http://help.earthlink.net/techsupport/ 800-395-8410 [email protected] 7 days a week, 24 hours a day GTE Easy Sign-up (GTE Internet) phone hours 800-927-3000 7 days a week, 24 hours a day McAfee's VirusScan (Network Associates, Inc.) Web site phone e-mail hours http://support.mcafee.com 408-988-3832 [email protected] M - F 9 AM - 5 PM Central Time MindSpring Internet Desktop (MindSpring Enterprises, Inc.) Web site phone http://help.mindspring.com/support 800-719-4660 Quicken® Basic (Intuit Inc.) Web site phone hours http://www.intuit.com/support 900-555-4688 7 days a week, 24 hours a day Sound Forge® (Sonic Foundry) Web site http://www.sonicfoundry.com/support/ phone 608-256-5555 fax 608-256-7300 e-mail [email protected] hours M - F, 8 AM - 7 PM CT Windows® 98 Second Edition Operating System, Word® 2000, Internet Explorer 5, Outlook® Express (Microsoft Corporation) Web site phone hours 1 http://www.sony.com/pcsupport 888-4SONYPC (888-476-6972) 1 7 days a week, 24 hours a day Support from 1-888-4SONYPC is free of charge for 90 days after the original date of purchase. WinFax® Basic Edition (Symantec Corporation) Web site http://www.symantec.com/techsupp/ phone 800-798-0850 fax 800-554-4403 in North America 541-984-2490 outside North America Troubleshooting This section describes how to solve common problems you may encounter when using your computer. Many problems have simple solutions, so try these suggestions before you call Sony Customer Support. My computer does not start Check that the computer is plugged into a power source and that it is turned on. Check that the power light is lit on the front panel of the computer. Confirm that a diskette is not in the diskette drive (unless you are using a bootable diskette). Confirm that the power cord and all cables are connected firmly, as described on the color poster. Page 251 If you plugged the computer into a power strip or UPS, make sure the power strip or UPS is turned on and working. My computer or software program "locks up" Close the application that is currently "locked up" by pressing Ctrl+Alt+Delete. In the Close Program dialog box, scroll down until you locate "(Not responding)" next to an application. Select this application and click End Task. Windows attempts to close the application. If the attempt is unsuccessful, a second dialog box appears. Select End Task again. If you are unable to "unlock" the application, repeat the above steps but select Shut Down when the Close Program dialog box appears. If the above steps fail to "unlock" your computer, save any unsaved work, if possible. Press Alt+F4. Select Restart and click OK. If you cannot restart as described in the preceding steps, you can restart the computer by pressing Ctrl+Alt+Delete or by pressing the power switch for more than six seconds. Pressing Ctrl+Alt+Delete may result in the loss of changes made to files that are currently open. Contact the software publisher or designated provider for technical support. See For Answers to Your Software Questions for a list of phone numbers and Web addresses or see Read Me First . My DVD-ROM/CD-ROM drive tray does not open Make sure the computer is turned on. If the Eject button does not work, you can open the tray by inserting a straightened heavyweight paper clip into the emergency eject hole. When I click an application icon, a message such as "You must insert the application CD into your CD-ROM (DVD-ROM) drive" appears and the software does not start Some titles require specific files that are located on the application's DVD-ROM/CD-ROM. Insert the disc and try starting the program again. Check to make sure you inserted the DVD-ROM/CD-ROM with the label side facing up. My modem connection is slow The computer's modem uses K56flex technology/V.90. Many factors influence modem connection speed, including telephone line noise or compatibility with telephone equipment (such as fax machines or other modems). If you think your modem is not connecting properly to other computer-based modems, fax machines, or your Internet Service Provider, check the following: Have your phone company check that your phone line is free from any line noise. If your problem is fax-related, check that there are no problems with the fax machine you are calling. The modem that receives your call may be slower or may use a different communications protocol than your modem. If this is the case, the connection speed may be slower than expected. For optimum performance, ensure you are calling an Internet Service Provider number that is V.90-compliant. If you are having a problem connecting with your Internet Service Provider, check that the ISP is not experiencing technical problems. If you have a second phone line available, try connecting the modem to this line. My modem does not work Check that the phone line is plugged into the line jack. Page Check that the phone line is working. You can check the line by plugging in an ordinary phone and252 listening for a dial tone. Check that the phone number the program is dialing is correct. Verify that the software you are using is appropriately configured to recognize and interact with the Sony computer modem. Call the software publisher if you do not know how to configure the software to recognize the modem. All programs preinstalled by Sony are compatible. If you suspect your modem is not functioning, you can perform a simple test to find out. Click the My Computer icon on your desktop. Click Control Panel, and then click Modems. Click the Diagnostics tab and select COM3. Click More Info. If your modem is functioning, a More Info dialog box will display. If your modem is not functioning, an error message will appear. My microphone is too sensitive to background noise If you find there is too much background noise when you record sound, you should adjust the microphone gain by following these steps: 1. Right-click the speaker icon (Volume) in the lower-right Windows® task tray. 2. Click Open Volume Controls. The Volume Control screen appears. 3. In the Options menu, select Properties. The Properties screen appears. 4. Change the setting for "Adjust volume for" from Playback to Recording, and then click OK. 5. Click the Advanced button under Microphone Balance. The Advanced Controls for Microphone screen appears. 6. Deselect the check box for 1 Mic Gain (+20dB), then click the Close button. 7. Close the Recording Control window. My mouse does not work Check that the mouse is plugged into one of the PS/2® connectors on the keyboard. The other connector connects the keyboard to the computer. There may be dust or dirt inside the mouse mechanism. To clean the mouse, follow these steps: o Turn off your computer. See Shutting Down Your Computer for details. o Remove the mouse ball cover on the back of the mouse by turning the ring that covers the mouse ball clockwise. o Turn the mouse upright, and drop the mouse ball into your hand. o Using a piece of tape, remove any dust or dirt on the mouse ball and inside the mouse ball socket. o Return the mouse ball to the socket, and replace the mouse ball cover. Secure the cover by turning the ring counter-clockwise. I cannot find the Windows® taskbar Check that the taskbar is not hidden or shrunken. Use the mouse to point to the left, right, top, and bottom edges of the screen. See Read Me First for additional information on using your Sony computer. To Reach Sony For further assistance, call 1-888-4SONYPC (1-888-476-6972). Page 253 Specifications Model PCV-L630 Processor 600E MHz* Pentium® III Hard Disk Drive 17 GB Ultra DMA Standard SDRAM 128 MB PC-100 SDRAM, expandable to 256 MB Video RAM 8 MB SDRAM Graphics 2X AGP 3D graphics hardware acceleration (ATi Rage 128 Pro 4XL) Sound Capabilities High fidelity 3D PCI audio Aureal AU8810 Diskette Drive 3.5" 1.44 MB FDD DVD-ROM/CD-ROM Drive 4.8X (max.) DVD-ROM reading 24X (max.) CD-ROM reading** Modem K56flex technology/V.90 compatible data/fax modem Expansion Capabilities Two PCI slots Connection Capabilities (Front) PC card (Card bus support) USB port Microphone Headphone Memory Stick media slot i.LINK (4-pin) Connection Capabilities (Rear) USB port Modem line (RJ-11) Phone line (RJ-11) Parallel (printer) Serial port VGA monitor LCD display Line In Line Out Keyboard i.LINK (6-pin) Connection Capabilities (Keyboard) Mouse (PS/2-style) left and right connectors Supplied Accessories Stand (for vertical installation) Power cable Phone cable Keyboard cable PS/2 Wheel Mouse VAIO Smart Convertible Keyboard Spacers (for bottom of the system) Ferrite core Service 90-day limited express service*** Extendible to one year from original date of purchase upon registration Limited Warranty90-day parts/labor standard Extendible to one year from original date of purchase upon registration Power Requirements 130 watts maximum Dimensions CPU: 11.2"(w) x 3.6" (h) x 13.4" (d) (280 mm x 90 mm x 335 mm) Keyboard: 15.9" (w) x 1.8" (h) x 7.1" (d) (398 mm x 45 mm x 178 mm) Display: 16.1" (w) x 13.1" (h) x 6.9" (d) (403 mm x 327 mm x 172 mm) Weight CPU: 11.9 lbs. (5.4kg) Display: 7.05 lbs (3.2 kg) Keyboard: 2.9 lbs. (1.3kg) Operating Temperature 50º F to 95º F (+10º C to 35º C) * MHz denotes microprocessor internal clock speed; other factors may affect application performance. Page 254 GB means one billion bytes when referring to hard drive capacity. Accessible capacity may vary. **Data on a DVD-ROM is read at a variable transfer rate, ranging from 2X at the innermost track to 4.8X at the outermost track(the data transfer standard 1X rate is 1385 kbytes/s). The average data transfer rate is 3.6X(4986 kbytes/s). Data on a CD-ROM is read at a variable transfer rate, ranging from 10.5X at the innermost track to 24X at the outermost track(the data transfer standard 1X rate is 150 kbytes/s). The average data transfer is 18X(2700 kbytes/s). Maximum speed for faxing is 14.4 kbytes/s. Your modem is capable of downloading at 56 kbytes/s using K56flex technology or V.90. Your phone service, online service, or Internet Service Provider, however, may not support this technology or operate at this speed. ***Certain restrictions apply. Specifications are subject to change without notice. Page 255 Features For a complete description of the specifications of your Sony computer, see Specifications. i.LINK® (IEEE-1394): Two built-in i.LINK ports provide you with front and rear digital connection capability. The i.LINK name and logo identify a digital interface (IEEE-1394) for high speed communication. Exceptional performance: Your computer includes a fast Intel® processor and a V.90-compatible data/fax modem. Ergo-Angle Multimedia LCD display: With its exclusive dual-hinge pedestal, this 15" XGA TFT display provides twice the flexibility of other LCDs. Select the perfect viewing angle and enjoy the built-in Harman/Kardon® stereo speakers. AutoAlert E-mail Notification System: Custom software automatically downloads e-mail on a pre-set schedule via Microsoft® Outlook® Express. A light on the LCD display instantly lets you know when new mail is received. VAIO Smart convertible keyboard: The innovative palm rest converts to a keyboard cover for a sleek look when not in use. Six Programmable Power Keys let you launch any application with the push of a button; dual-sided mouse connections for left- or right- hand use. Sony Memory Stick® media slot: The next generation of digital media, smaller than a stick of gum. Easily delivers information from one Memory Stick-equipped electronic device to another, so you can transfer images, sounds, data and text between cameras, computers, and more. Compact components: Enjoy the small footprint and versatile setup options available by positioning the components in an arrangement of your choice. Sony audio and video quality: High-fidelity 3D audio system and high-powered 3D graphics (AGP) enable you to take advantage of today's advanced multimedia applications, games, and entertainment software. Preinstalled software titles: All the software on your computer is preinstalled, configured, and ready for you to use right out of the box. Microsoft® Windows® 98 Second Edition operating system: Your system includes the latest operating system from Microsoft. Communications: Access popular online services, browse the Internet, send faxes, and more. * Actual upload and download speeds may vary due to line conditions, ISP support, and government regulations. Unpacking Your Computer Computer and Supplied Accessories Page 256 Manuals Read Me First contains last-minute supplementary information and software support numbers. The VAIO Slimtop LCD Computer User Guide (this manual) contains features and specifications of your computer. It also includes information on the applications included with your system and how to contact software vendors, get started with your computer, and solve common problems. The VAIO VAIO® Consumer Information Guide contains safety and regulatory information, ergonomic considerations, information on help resources, and your computer's limited warranty statement. The Microsoft® Windows®98 Second Edition Getting Started manual explains how to use the basic features of the Windows® operating system. Recovery CDs System Recovery CD(s) - Enables you to reinstall software that shipped with your computer if it is corrupted or accidentally erased. For more information, see Using the System Recovery CD(s). Application Recovery CD(s) - Allows you to reinstall individual applications or device drivers if they are corrupted or accidentally erased. For more information, see Using the Application Recovery CD(s). Other Setting up your VAIO Slimtop LCD Computer (poster) Packet containing special product offers Software CDs Page 257 Microsoft® Word 2000 Setting Up Your VAIO Slimtop LCD Computer Locating Controls and Connectors Front Panel 1 Power switch and indicator light Turns on/off the computer and the display. The indicator light is green while the power is on and amber when the computer is in standby mode. 2 Floppy disk drive Reads/writes data from/to a 3.5-inch floppy disk. 3 Floppy disk eject button Ejects the floppy disk. 4 DVD-ROM drive Reads data from a DVD-ROM/CD-ROM. 5 DVD-ROM/CD-ROM eject button Ejects a DVD-ROM/CD-ROM. 6 Manual eject hole If the DVD-ROM/CD-ROM does not come out when you press the DVD-ROM/CD-ROM eject button, insert a thin, pointed object into this hole to eject the disc manually. 7 FD (Floppy disk drive) access indicator light Lights in green while reading/writing data from/to a floppy disk. 8 Disc (DVD-ROM drive) access indicator light Lights in amber while reading data from a DVD-ROM/CD-ROM. 9 HD (drive) access indicator light Lights in green while reading/writing data from/to the hard disk. 10 MIC (Microphone) connector* Connects a microphone (not supplied). 11 PHONES (Headphones) connector* Connects headphones (not supplied). 12 VOLUME control Page 258 Adjusts the volume of the headphones connected to the PHONES connector. Users should note that this does not control the volume of the integrated LCD speakers. 13 PC CARD slot A PC Card (also called a PCMCIA card) can be installed in this slot. PC cards enable you to add functionality to your system. MEMORY STICK media slot 14 Insert a Sony Memory Stick® card into this slot. See Using the Memory Stick® Media for details on using Memory Stick media. 15 i.LINK (4-pin) Connects a digital device such as a Sony Digital Handycam® Camcorder. 16 USB (Universal Serial Bus) connector Connects a USB device. * See Using a Headphone or Microphone for important information about connecting a microphone and headphone. Rear Panel 1 AC INPUT connector Connects the supplied power cord. 2 LINE jack Connects a phone cable to the wall jack. 3 EMPTY PCI SLOT (FILLED WITH ETHERNET CARD ON CUSTOM MODELS) For a PCI Add-On Card (not supplied). 4 TELEPHONE jack Connects the phone to the computer. 5 PRINTER connector Connects a parallel device, such as a printer or scanner. 6 SERIAL connector Connects a serial device, such as a digital still camera. 7 MONITOR connector Connects a standard CRT display. 8 USB (Universal Serial Bus) connector Connects a USB device. 9 LINE IN connector Connects an audio device. 10 LINE OUT connector Connects an audio device or an active speaker. 11 i.LINK (6-pin) Connects a digital device such as a Sony Digital Handycam® Camcorder. 12 LCD MONITOR connector Connects the LCD that comes with the VAIO Slimtop LCD computer. Note: Do not connect any display to this connector other than the LCD that is supplied with this system. Page 259 13 KEYBOARD connector Connects a keyboard. LCD 1 Power indicator light Light is green while the power is on. When the computer enters the standby mode, this indicator light turns amber. 2 Information LED Light turns red to alert the user to activities, such as the arrival of e-mail. See AutoAlert E-mail Notification System. 3 Adjusts 4 Adjusts Brightness control the brightness of the screen. Volume control the volume of the integrated speakers on the LCD display. Using the Wheel Mouse For information about the Wheel Mouse that connects to either side of your keyboard, see MouseWare Help. To access MouseWare Help, from the Start menu, point to Programs, MouseWare, and then click MouseWare Help. To set up the mouse for left-handed use: 1. Click the My Computer icon on your desktop. 2. Click Control Panel, and then click Mouse. The Mouse Properties dialog box appears. 3. In the Quick Setup tab, click Device Setup. 4. In the Device Setup Wizard dialog box, click Next. 5. Select the radio button next to "Left side of the keyboard." 6. Click Next three times, and then click Finish. 7. Click Apply. Using a Headphone or Microphone When you connect a microphone or headphone to your computer, attaching a ferrite core will reduce electrical interference. Attach the (supplied) ferrite core at the end of the headphone or microphone cable closest to the computer. Wrap the cable through the center of the ferrite core. The following illustration shows how to attach the ferrite core when you are using both a headphone and a microphone. Page 260 The LCD and keyboard cables already include a ferrite core. Do not remove the ferrite core from these cables. To adjust the height and viewing angle of the display Holding both sides of the display, push the display panel out and up, and then adjust the viewing angle. The LCD display is designed to maintain the best ergonomic viewing angle. Set the display height so that it does not touch the keyboard, and adjust the viewing angle approximately 27 degrees from eye level to the center of the screen. Attaching the Stand to the System Unit The main system unit can be oriented horizontally or vertically. If you place the system in a vertical position, you must attach the supplied stand to ensure stability. 1. Place the system unit on its right side, with the front of the system facing forward. 2. Insert the grooved side of the stand into the ventilation holes of the system so that the two screw holes are aligned and the stand's fins are at the rear of the unit. 3. Secure the stand to the unit with the supplied screw. Page 261 The stand keeps the system cool by allowing air to flow under it. If you choose to place the system unit in a vertical position, it is important to use the stand and to place the system unit on its left side, as in the illustration above; otherwise, the system may overheat. Registering Your Computer Take advantage of Sony's commitment to quality customer support and receive these benefits by registering your computer: Sony Customer Support--Talk to a Support Representative to troubleshoot problems you may be having with your computer. Limited warranty--Protect your investment. See Limited Warranty Statement in the VAIO® Consumer Information Guide for details. You must register your computer to extend the warranty from the initial 90-day warranty period to one year from the original date of purchase. Express Service--Provides a fast and direct return of your VAIO Slimtop Sony for service of your computer. LCD Computer to If you did not already register when you first turned on your computer, follow these steps to use the computer online registration service. 1. Click the registration icon on the VAIO desktop. 2. Enter the information requested on the first online registration form. Press the tab key to move from box to box. 3. Click the Next button to advance to the next form. 4. Complete the remaining forms by clicking the Next button each time you complete a form. The computer automatically transfers your registration information using your built-in modem and a toll-free telephone number or a local number. You may sign up for Internet access with a Sony preferred Internet Service Provider. VAIO Action Setup VAIO Action Setup manages the settings for your computer's Programmable Power Keys (PPK), Memory Stick® media, i.LINK interface, and internal timer. An overview of each of these functions is provided below. For more information on changing the settings using VAIO Action Setup, see the online VAIO Action Setup help files. To access the help files, from the Start menu, point to Programs/VAIO Action Setup/VAIO Action Setup Help. Programmable Power Keys Your Sony computer comes with technology that allows you to get to your favorite applications Page easily. Each Programmable Power Key (PPK) on your VAIO Smart convertible keyboard comes 262 programmed to launch a preset application with a single press of the key. If you wish, you can use the VAIO Action Setup software to change the Programmable Power Keys' preset functions. The Programmable Power Keys are located at the top of your keyboard, and are numbered P1 through P6. The keys work even when the computer is turned off. Pressing one of these keys turns on the computer and launches the preset application. The six Programmable Power Keys come to you preprogrammed to perform the functions listed in the table below. Key Function P1 (INTERNET) Starts Microsoft® Internet Explorer for Windows® 98. P2 (MAIL) Starts Microsoft® Outlook® Express P3 (WORK) Starts Microsoft® Word P4 (FINANCE) Starts Intuit® Quicken® Basic 2000. P5 (SETUP) Starts PPK Setup. P6 (HELP) Opens a menu of help options. Memory Stick You can use VAIO Action Setup to preset your computer to automatically launch an application when you insert a Memory Stick. For more information on Memory Stick media, see Using the Memory Stick® Media . Internal Timer The VAIO Action Setup software allows you to set your computer's internal timer to launch certain applications automatically. The timer can start applications even when the power is off. Some software applications take longer than others to launch. It is advisable to confirm in advance the amount of time your selected application takes to start. AutoAlert E-mail Notification System VAIO Action Setup also enables you to set up your computer to notify you with an Information LED when new mail arrives in your e-mail mailbox. The Information LED turns red to indicate that new e-mail has arrived. For this AutoAlert E-mail Notification System to work, you must use Microsoft® Outlook® Express as your default e-mail software, and you must have an Internet Service Provider with dial-up capabilities set up. As an alternative, you can program your AutoAlert E-mail Notification System to set the Information LED to turn on when it has successfully completed the task of dialing up and connecting to receive mail. In this case, the Information LED turns on to indicate that your e-mail account has been accessed successfully, regardless of whether or not you have mail; this works with Microsoft Outlook Express. The e-mail software you choose to use with PPK must be set as your default e-mail software. See LCD for an illustration showing the Information LED's location. AutoAlert E-mail Notification System Software Restrictions If you use software that uses a phone line The computer may not be able to disconnect the phone line due to communication and server conditions. Be sure to monitor the status of the software when running the AutoAlert E-mail Notification System, and manually disconnect the phone line if you notice a malfunction. Furthermore, when using the timer to start the software, it is advised that you set the computer to shut down or enter system standby mode after a certain length of time. This allows the computer to disconnect the phone line if the computer fails to disconnect the line normally. If you are using the timer to download e-mail automatically Page 263 It is advisable to set up your e-mail software to redial automatically if it does not connect the first time. It is also advisable to set the e-mail software to disconnect the phone line automatically when all mail has been downloaded. If you are using Microsoft® Outlook® Express When using the AutoAlert E-mail Notification System with Microsoft Outlook Express, it is advisable to select the Dial automatically setting in your Microsoft Outlook Express software. If you have not chosen this setting and wish to do so, start Outlook Express, click Tools, and then select Options. Select the check box "Automatically dial when checking for new messages." Click OK. Changing the Window Design of Sony Software To change the window design of Sony software 1. Click the Start button, point to Settings, and then click Control Panel. 2. Click UI Design Selector. 3. Click << or >> and select the desired design. 4. Click Apply. The "UI Design Selector" window design changes. The window design for your Sony software will match the "UI Design Selector" window. To try another selection, click << or >>. Then, click OK. The UI Design Selector closes and the window design of your Sony software window design displays. You may use the feature with UI Design Selector-compatible software only. Using the Memory Stick® Media Your Sony computer is designed to support the new Memory Stick recording media. The Memory Stick media is a small, versatile device that allows you to share data between various types of Sony equipment. When you use the card, your computer automatically launches Windows Explorer. This allows you to view the contents of the card. If the image files are created by a Sony digital camera or camcorder, you do not need the following steps. If you want to create a slide show that launches automatically when you insert a Memory Stick, follow these steps to transfer images from your hard drive to a Memory Stick. 1. Insert the Memory Stick into the appropriate slot. 2. Click the My Computer icon on the desktop. Page 264 3. Click the Removable Disk S: icon. 4. Create a new folder and name it "DCIM." 5. Open the DCIM folder and create a new folder named "100MSDCF." 6. Click the Start button, select VAIO, and then click PictureGear to launch the PictureGear application. 7. Select the digital images you want to save in your slide show. 8. From the PictureGear File menu, point to File Process, and then select Still Format Conversion. 9. Select Memory Stick as the Output Format. 10. Use the Browse button to select the DCIM/100MSDCF folder on the Removable Disk (S:) drive. 11. Name the file. The file name must begin with DSC (DSC0xxxx). The full file name without extension must have at least eight characters. The order in which your photos appear in your slide show will be determined by the number (xxxx) in the file name. Some examples of acceptable file names are DSC00001.jpg and DSC00002.jpg 12. Click OK to save the file. You can also add MPEG1 video files to your Slide Show by following the steps below. The order in which your video clips (MOV0xxxx files) appear in your Slide Show is determined by the number (xxxx) in the file name. 1. Insert the Memory Stick into the media slot. 2. Click the My Computer icon on the desktop. 3. Click the Removable Disk S: icon. 4. Create a new folder and name it "MSSONY." 5. Open the MSSONY folder and create a new folder named "MOML0001." 6. From the PictureGear File menu, point to File Process, and then select Still Format Conversion. 7. Copy the MPEG file into the MOML0001 folder. 8. Rename the MPEG file MOV0xxxx.mpg, where xxxx is any four-digit number. 9. To begin showing your slides, eject the Memory Stick and then reinsert it. The slide show will begin automatically. To protect data on Memory Stick media from accidental changes Memory Stick media contains a write-protect tab. The write-protect tab prevents accidental changes to information recorded on the Memory Stick media. When you slide the write-protect tab to the LOCK position, the Memory Stick is write-protected, which means you cannot delete, copy, or save information on the Memory Stick. When you slide the tab to the un-LOCK position, you can write to or modify the Memory Stick contents. To change the way the computer responds when a Memory Stick is inserted into the Memory Stick media slot Change the options on the Memory Stick tab in the PPK Setup software. Page 265 Using PC Cards This computer has a card bus PC card slot that supports a Type I or II PC card. To insert a PC card You do not need to shut down your computer when inserting a PC card. 1. Open the front panel. 2. Insert the PC card into the PC card slot until it clicks into position. When the card is completely inserted, the eject button pops out. If you cannot insert the card, do not forcibly insert it. In this case, make sure the card is not inserted upside-down or backward, and then reinsert the card into the slot carefully. See the manual that came with the PC card for details on using it. To close the front panel when the eject button is protruding, fold the button down onto the computer. To eject a PC card If you eject the PC card incorrectly, the system may not work correctly. 1. Click the Start button on the Windows® taskbar, click Settings, and then click Control Panel. 2. Click the PC Card icon. 3. Click the name of the card that you want to eject, and then click Stop. 4. When the message "You may safely remove this device" appears, click OK. 5. Push the PC card eject button on the front panel of the system unit. You may need to pull out the eject button before you can eject the card. Page 266 The card is ejected from the card connector. Remove the card by holding it by its edge and pulling it out carefully. Using the Standby Function When you are finished using your computer, you can put it in standby mode rather than turn it off completely. Putting the computer in standby mode allows you to return quickly to normal computer use. To put the computer in standby mode manually 1. Save your work and close any applications that are running. (You can leave Windows running.) 2. Press the (Standby) button on the top of the keyboard. The computer goes into standby mode. Alternatively, you can click the Start button on the Windows® taskbar, click Shut Down, select Standby, and then click OK. To let the computer go into standby mode automatically Click the My Computer icon on your desktop. Click Control Panel, and then click the Power Management icon. On the Power Schemes tab, select from the options in the Power schemes drop-down list. Then, choose settings for the power scheme you have selected. To save the settings under a name that is not offered in the Power schemes pulldown menu, choose your settings and then click Save As. Type in a name, and click OK. Click Apply to finalize your power settings. To resume from standby mode There are three ways to bring your computer back from the standby mode: press the space bar on your keyboard, press the left mouse button, or momentarily depress the power button on your computer. If the display does not return from standby when you press the (Standby) button, your system may be in video standby mode. Press the space bar on the keyboard to return from video standby. Standby Mode Indicators You can tell which mode the computer is in by the color of the power indicator light. Color Amber Green No color Mode Computer is in standby mode. Computer is out of standby mode, ready to use. Computer is turned off. In standby mode you may periodically hear the computer's fan turn on and off, depending on the room's temperature. This is normal functioning in standby mode. Page 267 Shutting Down Your Computer When you are ready to turn off your computer for an extended period of time, use the following procedure to shut down the computer. To avoid the potential loss of data, do not use the power switch to shut down the computer. To shut down your computer If you plan to shut down your computer for a short period of time, you may want to use standby mode instead. See Using the Standby Function. 1. Click the Start button on the Windows® taskbar to open the Start menu. 2. Click Shut Down to display the Shut Down Windows dialog box. 3. Select the Shut Down option. 4. Click OK to complete the shutdown process. Respond to any prompts about saving documents. 5. Wait for your computer to turn off automatically -- the power indicator light turns off. 6. Turn off any peripherals connected to your computer. The LCD display turns off automatically when the computer shuts down. You can also shut down your computer using the (Power) button on the keyboard. Pressing this button causes the system to perform a shutdown but does not give you any of the other options available on the Windows® Shut Down menu. About the Power Switch If your system "locks up" or "crashes," press and hold the power switch for four seconds to force your system to power off. You may need to repeat this procedure. See Locating Controls and Connectors for the power switch's location. Using the System Recovery CD(s) You can reinstall software titles that shipped with your computer if they are corrupted or accidentally erased. You may not need to recover the entire contents of your hard drive. If you experience a problem with your computer, reinstalling an individual device driver or software title may correct the problem. Use the Application Recovery CD(s) to reinstall individual applications or device drivers. See Using the Application Recovery CD(s). The System Recovery CD(s) contain a backup copy of all the software originally installed on your hard disk drive. They can be used only to recover the hard disk of the Sony computer you purchased. The System Recovery utility gives you three options: Full Restore without Format restores all the software titles that originally came with your computer without formatting the hard disk. Full Restore with Format formats the hard disk drive and then restores all the original software. If your hard drive is partitioned into C and D drives, the computer will offer you the option to reformat the drive into a single partition. Operating System Only (Windows 98® Restore with Format) formats the hard disk drive and Page 268 restores the Windows® operating system and the device drivers that shipped with your computer. This option is recommended for advanced users only. If you choose the Full Restore with Format or Operating System Only option, your hard disk will be formatted, which removes all the information on the hard disk drive. You will lose any software you have installed and any other files you have created since you started to use your computer. This means you will have to reinstall any applications that were not included with the computer when you purchased it. If you choose the Full Restore without Format option, you may need to reinstall applications that were not included with the computer when you purchased it. If you have any questions on using the System Recovery CD(s), contact Sony Customer Support. To use the System Recovery CD(s) You need to complete the Windows registration process when you use the System Recovery CD(s). 1. Insert the Sony System Recovery CD(s) in the DVD-ROM drive. The System Recovery utility boots from the DVD-ROM drive. It must be in the drive when you turn on the computer. 2. Shut down your computer as described in Shutting Down Your Computer. 3. Wait 30 seconds and turn on your computer. 4. Click OK to signify you have read and accept the Microsoft End-User License Agreement. 5. When the System Recovery menu appears, follow the on-screen instructions to complete the recovery process. Your system may include one or two System Recovery CDs. If you have two System Recovery CDs, insert the first CD to run the System Recovery program. You are prompted to insert the second CD once the information from the first CD has been installed. The recovery process takes 30 to 60 minutes to complete. Using the Application Recovery CD(s) The Application Recovery CD(s) allow you to reinstall individual applications and device drivers if they are corrupted or accidentally erased. Reinstalling an individual device driver or software title may correct a problem you are experiencing with your computer, and you may not need to recover the entire contents of your hard drive. If you do need to reinstall all the software titles that shipped with your computer, use the System Recovery CD(s). See Using the System Recovery CD(s). You must be in Windows to run the Application Recovery CD(s). The application will not run from DOS. If you have any questions on using the Application Recovery CD(s), contact Sony Customer Support. To use the Application Recovery CD(s) 1. Turn on your computer. If your computer is already on, close all applications. 2. When the Windows desktop appears, insert the Sony Application Recovery CD in the DVD-ROM drive. The Application Recovery utility loads automatically. 3. When the Application Recovery menu appears, follow the on-screen instructions to complete the recovery process. Your system may include one or two Application Recovery CDs. If you have two Application Recovery CDs, insert the first CD to run the Application Recovery program. You may be prompted to insert the second CD, depending on the application you wish to restore. Page 269 About the Software on Your Computer Your VAIO Slimtop computer is ready to help you work, play, learn, and communicate as soon as you turn it on. This section gives you an overview of the activities you can perform with your software titles. For support information, see For Answers to Your Software Questions . Adobe Acrobat® Reader Adobe Systems Incorporated Acrobat Reader software allows you to view, navigate, and print electronic documents in Adobe's Portable Document Format (PDF), an open file format that is intended to preserve the fidelity of documents created on all major computer platforms. Adobe PhotoDeluxe® Home Edition Adobe Systems Incorporated Create amazing photo effects with PhotoDeluxe. Without learning complex software, you can enhance, restore, and be creative with your photos. Includes built-in guided activities, stock photos, clip art, and templates to assist you. Adobe Premiere® LE Adobe Systems Incorporated Adobe Premiere LE offers an interface and editing tool for producing movies for video, multimedia, or the Web. View source clips and edited footage simultaneously in the monitor window. Create video clips up to three hours long with complete audio-video synchronization. America Online® America Online America Online is the world's most popular Internet online service. Stay in touch with family and friends with Easy-to-Use E-mail, manage your personal finances, get the latest news and sports scores, and chat with thousands of others who share your interests. AT&T WorldNet® Service AT&T Fast, reliable Internet access from AT&T WorldNet Service. AT&T WorldNet Service provides Web-based e-mail, a personalized start page from Excite, easy access to the Excite search engine, free Web pages, online and live agent technical support, instant messaging, and special shopping discounts at Market Square. CompuServe® 2000 CompuServe Interactive Services The all new CompuServe 2000 delivers a powerful tool for Internet users who want serious and timely information, in-depth research, and professional communities backed by state-of-the-art technologies, including high-speed access and powerful e-mail messaging. Digital Media Bar Sony Electronics Media Bar software is your all-in-one solution for audio/video playback. It handles all common computer multimedia formats, and controls selected Sony devices. Media Bar software encompasses audio/video library cataloging and playlist management, in addition to digital video quality control and effects features. DVgate Sony Electronics Connect a digital video camera recorder to the i.LINK connector and capture your own video clips. You can edit the clips from your video, add others, and combine clips into new movie segments. EarthLink TotalAccess EarthLink Network, Inc. Page 270 An Internet Service Provider that supplies access, information, and assistance to its customers, introducing them to the Internet. Member benefits include e-mail, newsgroups, a Personal Start Page, a free 6 MB web site, a member magazine, and 24-hour technical support. McAfee's VirusScan® Network Associates, Inc. Protect your computer from viruses. VirusScan can detect viruses from floppy disks, Internet downloads, e-mail attachments, intranets, shared files, CD-ROMs, and online services. Microsoft® Internet Explorer for Windows® 98 Microsoft Corporation Internet Explorer delivers the Web the way you want it. It's safe, easy to use, and you can personalize how you access the Web. Outlook Express and other tools in Internet Explorer also help you have a great experience when you are on the Web! Microsoft® Outlook® Express Microsoft Corporation Outlook Express, the messaging tool that takes your e-mail and newsgroup communications to new heights! Outlook Express is easy to set up and use, and provides you with secure, personalized, and complete features that make creating, sending, and reading your e-mail a more rich and dynamic experience. Microsoft® Word 2000 Microsoft Corporation Microsoft Word 2000 makes it easy to create common Web, e-mail, and print documents for use around the world. It embraces HTML as a first-class file format and extends Word's ease-of-use to the Web and e-mail. Word 2000 also extends that ease of use to international users, making it easy to create multilingual documents. Netscape Communicator® Netscape Communications Netscape Communicator is the all-in-one Internet tool that makes it easy to browse the Web, send Internet e-mail, chat, read newsgroups, and compose great Web documents. PictureGear Sony Electronics This image management software displays images from your hard drive, a Sony digital still camera, or a Sony Mavica® camera. The images appear in a convenient light-table format, so that you can easily view the contents of an entire folder. Prodigy Internet Prodigy Communications Corporation An Internet service that helps you find what you need online faster and smarter. Prodigy delivers powerful online content, such as sports scores, stock quotes, news, and easy access to Excite , plus a personal e-mail account and quality customer service, all at a competitive price. Quicken® Basic Intuit, Inc. Quicken is the fastest, easiest way to organize your finances. Quicken works just like your checkbook, so it's easy to learn and use. Quicken manages all of your finances, bank accounts, credit cards, investments, and loans. You can even pay your bills online. Smart Capture Sony Electronics Smart Capture is a fun new way to send multimedia messages via e-mail. Smart Capture manages the i.LINK connection between your computer and a Sony Digital Handycam® Camcorder or other Page 271 cameras that support the i.LINK interface. It allows you to capture and compress video or still images that you can save or share via e-mail. A smart solution to computer, digital audio/video, and network convergence. Smart Connect Sony Electronics Smart Connect allows you to use an i.LINK cable to connect your VAIO computer to another VAIO computer that supports Smart Connect. You can then use one computer to copy, delete, and edit files on the other computer. You can also print from a printer attached to either computer. Sound Forge® Sonic Foundry Sound Forge allows you to put powerful audio processing tools and effects to work on your desktop. Simply cut, copy, and paste your way to striking multimedia files for use in everything from Web pages to desktop presentations. VAIO Action Setup Sony Electronics VAIO Action Setup manages the settings for your computer's Programmable Power Keys (PPK), Memory Stick media, i.LINK interface, and internal timer. For more information, see VAIO Action Setup. WinFax® Basic Edition Symantec Corporation WinFax Basic Edition incorporates an easy-to-use interface that allows you to send and receive faxes easily. Upgrade to WinFax Pro to receive additional features. About Your Recovery CDs Application Recovery CD(s) Sony Electronics The Application Recovery CD program allows you to reinstall individual applications and device drivers. Use it to restore corrupted or accidentally erased files. System Recovery CD(s) Sony Electronics The System Recovery CD program allows you to restore the software titles that shipped with your computer if they become corrupted or are erased accidentally. It can be used only to restore the hard disk of the Sony computer you purchased. For Answers to Your Software Questions Acrobat® Reader, Adobe PhotoDeluxe® Home Edition (Adobe Systems Incorporated) Web site http://www.adobe.com/ phone 206-628-2746 (fee-based support) fax 206-628-5737 e-mail [email protected] hours M-F, 6 AM-5 PM PT America Online® (America Online) Web site phone hours http://www.aol.com/ 800-827-3338 7 days a week, 6 AM - 2 PM ET AT&T WorldNet® Service (AT&T) Web site phone e-mail http://www.att.net 800-400-1447 [email protected] Page 272 hours 7 days a week, 24 hours a day CompuServe® 2000 (CompuServe Interactive Services) Web site phone hours http://www.compuserve.com/ 800-848-8990 M-F, 8 AM - 1 AM ET, S-S 10 AM - 10 PM ET EarthLink TotalAccess Web site phone e-mail hours (EarthLink Network, Inc.) http://help.earthlink.net/techsupport/ 800-395-8410 [email protected] 7 days a week, 24 hours a day GTE Easy Sign-up (GTE Internet) phone hours 800-927-3000 7 days a week, 24 hours a day McAfee's VirusScan (Network Associates, Inc.) Web site phone e-mail hours http://support.mcafee.com 408-988-3832 [email protected] M - F 9 AM - 5 PM Central Time MindSpring Internet Desktop (MindSpring Enterprises, Inc.) Web site phone http://help.mindspring.com/support 800-719-4660 Quicken® Basic (Intuit Inc.) Web site phone hours http://www.intuit.com/support 900-555-4688 7 days a week, 24 hours a day Sound Forge® (Sonic Foundry) Web site http://www.sonicfoundry.com/support/ phone 608-256-5555 fax 608-256-7300 e-mail [email protected] hours M - F, 8 AM - 7 PM CT Windows® 98 Second Edition Operating System, Word® 2000, Internet Explorer 5, Outlook® Express (Microsoft Corporation) Web site phone hours 1 http://www.sony.com/pcsupport 888-4SONYPC (888-476-6972) 1 7 days a week, 24 hours a day Support from 1-888-4SONYPC is free of charge for 90 days after the original date of purchase. WinFax® Basic Edition (Symantec Corporation) Web site http://www.symantec.com/techsupp/ phone 800-798-0850 fax 800-554-4403 in North America 541-984-2490 outside North America Troubleshooting This section describes how to solve common problems you may encounter when using your computer. Many problems have simple solutions, so try these suggestions before you call Sony Customer Support. My computer does not start Check that the computer is plugged into a power source and that it is turned on. Check that the power light is lit on the front panel of the computer. Confirm that a diskette is not in the diskette drive (unless you are using a bootable diskette). Confirm that the power cord and all cables are connected firmly, as described on the color poster. Page 273 If you plugged the computer into a power strip or UPS, make sure the power strip or UPS is turned on and working. My computer or software program "locks up" Close the application that is currently "locked up" by pressing Ctrl+Alt+Delete. In the Close Program dialog box, scroll down until you locate "(Not responding)" next to an application. Select this application and click End Task. Windows attempts to close the application. If the attempt is unsuccessful, a second dialog box appears. Select End Task again. If you are unable to "unlock" the application, repeat the above steps but select Shut Down when the Close Program dialog box appears. If the above steps fail to "unlock" your computer, save any unsaved work, if possible. Press Alt+F4. Select Restart and click OK. If you cannot restart as described in the preceding steps, you can restart the computer by pressing Ctrl+Alt+Delete or by pressing the power switch for more than six seconds. Pressing Ctrl+Alt+Delete may result in the loss of changes made to files that are currently open. Contact the software publisher or designated provider for technical support. See For Answers to Your Software Questions for a list of phone numbers and Web addresses or see Read Me First . My DVD-ROM/CD-ROM drive tray does not open Make sure the computer is turned on. If the Eject button does not work, you can open the tray by inserting a straightened heavyweight paper clip into the emergency eject hole. When I click an application icon, a message such as "You must insert the application CD into your CD-ROM (DVD-ROM) drive" appears and the software does not start Some titles require specific files that are located on the application's DVD-ROM/CD-ROM. Insert the disc and try starting the program again. Check to make sure you inserted the DVD-ROM/CD-ROM with the label side facing up. My modem connection is slow The computer's modem uses K56flex technology/V.90. Many factors influence modem connection speed, including telephone line noise or compatibility with telephone equipment (such as fax machines or other modems). If you think your modem is not connecting properly to other computer-based modems, fax machines, or your Internet Service Provider, check the following: Have your phone company check that your phone line is free from any line noise. If your problem is fax-related, check that there are no problems with the fax machine you are calling. The modem that receives your call may be slower or may use a different communications protocol than your modem. If this is the case, the connection speed may be slower than expected. For optimum performance, ensure you are calling an Internet Service Provider number that is V.90-compliant. If you are having a problem connecting with your Internet Service Provider, check that the ISP is not experiencing technical problems. If you have a second phone line available, try connecting the modem to this line. My modem does not work Check that the phone line is plugged into the line jack. Page Check that the phone line is working. You can check the line by plugging in an ordinary phone and274 listening for a dial tone. Check that the phone number the program is dialing is correct. Verify that the software you are using is appropriately configured to recognize and interact with the Sony computer modem. Call the software publisher if you do not know how to configure the software to recognize the modem. All programs preinstalled by Sony are compatible. If you suspect your modem is not functioning, you can perform a simple test to find out. Click the My Computer icon on your desktop. Click Control Panel, and then click Modems. Click the Diagnostics tab and select COM3. Click More Info. If your modem is functioning, a More Info dialog box will display. If your modem is not functioning, an error message will appear. My microphone is too sensitive to background noise If you find there is too much background noise when you record sound, you should adjust the microphone gain by following these steps: 1. Right-click the speaker icon (Volume) in the lower-right Windows® task tray. 2. Click Open Volume Controls. The Volume Control screen appears. 3. In the Options menu, select Properties. The Properties screen appears. 4. Change the setting for "Adjust volume for" from Playback to Recording, and then click OK. 5. Click the Advanced button under Microphone Balance. The Advanced Controls for Microphone screen appears. 6. Deselect the check box for 1 Mic Gain (+20dB), then click the Close button. 7. Close the Recording Control window. My mouse does not work Check that the mouse is plugged into one of the PS/2® connectors on the keyboard. The other connector connects the keyboard to the computer. There may be dust or dirt inside the mouse mechanism. To clean the mouse, follow these steps: o Turn off your computer. See Shutting Down Your Computer for details. o Remove the mouse ball cover on the back of the mouse by turning the ring that covers the mouse ball clockwise. o Turn the mouse upright, and drop the mouse ball into your hand. o Using a piece of tape, remove any dust or dirt on the mouse ball and inside the mouse ball socket. o Return the mouse ball to the socket, and replace the mouse ball cover. Secure the cover by turning the ring counter-clockwise. I cannot find the Windows® taskbar Check that the taskbar is not hidden or shrunken. Use the mouse to point to the left, right, top, and bottom edges of the screen. See Read Me First for additional information on using your Sony computer. To Reach Sony For further assistance, call 1-888-4SONYPC (1-888-476-6972). Page 275 Specifications Model PCV-L630 Processor 600E MHz* Pentium® III Hard Disk Drive 17 GB Ultra DMA Standard SDRAM 128 MB PC-100 SDRAM, expandable to 256 MB Video RAM 8 MB SDRAM Graphics 2X AGP 3D graphics hardware acceleration (ATi Rage 128 Pro 4XL) Sound Capabilities High fidelity 3D PCI audio Aureal AU8810 Diskette Drive 3.5" 1.44 MB FDD DVD-ROM/CD-ROM Drive 4.8X (max.) DVD-ROM reading 24X (max.) CD-ROM reading** Modem K56flex technology/V.90 compatible data/fax modem Expansion Capabilities Two PCI slots Connection Capabilities (Front) PC card (Card bus support) USB port Microphone Headphone Memory Stick media slot i.LINK (4-pin) Connection Capabilities (Rear) USB port Modem line (RJ-11) Phone line (RJ-11) Parallel (printer) Serial port VGA monitor LCD display Line In Line Out Keyboard i.LINK (6-pin) Connection Capabilities (Keyboard) Mouse (PS/2-style) left and right connectors Supplied Accessories Stand (for vertical installation) Power cable Phone cable Keyboard cable PS/2 Wheel Mouse VAIO Smart Convertible Keyboard Spacers (for bottom of the system) Ferrite core Service 90-day limited express service*** Extendible to one year from original date of purchase upon registration Limited Warranty90-day parts/labor standard Extendible to one year from original date of purchase upon registration Power Requirements 130 watts maximum Dimensions CPU: 11.2"(w) x 3.6" (h) x 13.4" (d) (280 mm x 90 mm x 335 mm) Keyboard: 15.9" (w) x 1.8" (h) x 7.1" (d) (398 mm x 45 mm x 178 mm) Display: 16.1" (w) x 13.1" (h) x 6.9" (d) (403 mm x 327 mm x 172 mm) Weight CPU: 11.9 lbs. (5.4kg) Display: 7.05 lbs (3.2 kg) Keyboard: 2.9 lbs. (1.3kg) Operating Temperature 50º F to 95º F (+10º C to 35º C) * MHz denotes microprocessor internal clock speed; other factors may affect application performance. Page 276 GB means one billion bytes when referring to hard drive capacity. Accessible capacity may vary. **Data on a DVD-ROM is read at a variable transfer rate, ranging from 2X at the innermost track to 4.8X at the outermost track(the data transfer standard 1X rate is 1385 kbytes/s). The average data transfer rate is 3.6X(4986 kbytes/s). Data on a CD-ROM is read at a variable transfer rate, ranging from 10.5X at the innermost track to 24X at the outermost track(the data transfer standard 1X rate is 150 kbytes/s). The average data transfer is 18X(2700 kbytes/s). Maximum speed for faxing is 14.4 kbytes/s. Your modem is capable of downloading at 56 kbytes/s using K56flex technology or V.90. Your phone service, online service, or Internet Service Provider, however, may not support this technology or operate at this speed. ***Certain restrictions apply. Specifications are subject to change without notice. Page 277 Features For a complete description of the specifications of your Sony computer, see Specifications. i.LINK® (IEEE-1394): Two built-in i.LINK ports provide you with front and rear digital connection capability. The i.LINK name and logo identify a digital interface (IEEE-1394) for high speed communication. Exceptional performance: Your computer includes a fast Intel® processor and a V.90-compatible data/fax modem. Ergo-Angle Multimedia LCD display: With its exclusive dual-hinge pedestal, this 15" XGA TFT display provides twice the flexibility of other LCDs. Select the perfect viewing angle and enjoy the built-in Harman/Kardon® stereo speakers. AutoAlert E-mail Notification System: Custom software automatically downloads e-mail on a pre-set schedule via Microsoft® Outlook® Express. A light on the LCD display instantly lets you know when new mail is received. VAIO Smart convertible keyboard: The innovative palm rest converts to a keyboard cover for a sleek look when not in use. Six Programmable Power Keys let you launch any application with the push of a button; dual-sided mouse connections for left- or right- hand use. Sony Memory Stick® media slot: The next generation of digital media, smaller than a stick of gum. Easily delivers information from one Memory Stick-equipped electronic device to another, so you can transfer images, sounds, data and text between cameras, computers, and more. Compact components: Enjoy the small footprint and versatile setup options available by positioning the components in an arrangement of your choice. Sony audio and video quality: High-fidelity 3D audio system and high-powered 3D graphics (AGP) enable you to take advantage of today's advanced multimedia applications, games, and entertainment software. Preinstalled software titles: All the software on your computer is preinstalled, configured, and ready for you to use right out of the box. Microsoft® Windows® 98 Second Edition operating system: Your system includes the latest operating system from Microsoft. Communications: Access popular online services, browse the Internet, send faxes, and more. * Actual upload and download speeds may vary due to line conditions, ISP support, and government regulations. Unpacking Your Computer Computer and Supplied Accessories Page 278 Manuals Read Me First contains last-minute supplementary information and software support numbers. The VAIO Slimtop LCD Computer User Guide (this manual) contains features and specifications of your computer. It also includes information on the applications included with your system and how to contact software vendors, get started with your computer, and solve common problems. The VAIO VAIO® Consumer Information Guide contains safety and regulatory information, ergonomic considerations, information on help resources, and your computer's limited warranty statement. The Microsoft® Windows®98 Second Edition Getting Started manual explains how to use the basic features of the Windows® operating system. Recovery CDs System Recovery CD(s) - Enables you to reinstall software that shipped with your computer if it is corrupted or accidentally erased. For more information, see Using the System Recovery CD(s). Application Recovery CD(s) - Allows you to reinstall individual applications or device drivers if they are corrupted or accidentally erased. For more information, see Using the Application Recovery CD(s). Other Setting up your VAIO Slimtop LCD Computer (poster) Packet containing special product offers Software CDs Page 279 Microsoft® Word 2000 Setting Up Your VAIO Slimtop LCD Computer Locating Controls and Connectors Front Panel 1 Power switch and indicator light Turns on/off the computer and the display. The indicator light is green while the power is on and amber when the computer is in standby mode. 2 Floppy disk drive Reads/writes data from/to a 3.5-inch floppy disk. 3 Floppy disk eject button Ejects the floppy disk. 4 DVD-ROM drive Reads data from a DVD-ROM/CD-ROM. 5 DVD-ROM/CD-ROM eject button Ejects a DVD-ROM/CD-ROM. 6 Manual eject hole If the DVD-ROM/CD-ROM does not come out when you press the DVD-ROM/CD-ROM eject button, insert a thin, pointed object into this hole to eject the disc manually. 7 FD (Floppy disk drive) access indicator light Lights in green while reading/writing data from/to a floppy disk. 8 Disc (DVD-ROM drive) access indicator light Lights in amber while reading data from a DVD-ROM/CD-ROM. 9 HD (drive) access indicator light Lights in green while reading/writing data from/to the hard disk. 10 MIC (Microphone) connector* Connects a microphone (not supplied). 11 PHONES (Headphones) connector* Connects headphones (not supplied). 12 VOLUME control Page 280 Adjusts the volume of the headphones connected to the PHONES connector. Users should note that this does not control the volume of the integrated LCD speakers. 13 PC CARD slot A PC Card (also called a PCMCIA card) can be installed in this slot. PC cards enable you to add functionality to your system. MEMORY STICK media slot 14 Insert a Sony Memory Stick® card into this slot. See Using the Memory Stick® Media for details on using Memory Stick media. 15 i.LINK (4-pin) Connects a digital device such as a Sony Digital Handycam® Camcorder. 16 USB (Universal Serial Bus) connector Connects a USB device. * See Using a Headphone or Microphone for important information about connecting a microphone and headphone. Rear Panel 1 AC INPUT connector Connects the supplied power cord. 2 LINE jack Connects a phone cable to the wall jack. 3 EMPTY PCI SLOT (FILLED WITH ETHERNET CARD ON CUSTOM MODELS) For a PCI Add-On Card (not supplied). 4 TELEPHONE jack Connects the phone to the computer. 5 PRINTER connector Connects a parallel device, such as a printer or scanner. 6 SERIAL connector Connects a serial device, such as a digital still camera. 7 MONITOR connector Connects a standard CRT display. 8 USB (Universal Serial Bus) connector Connects a USB device. 9 LINE IN connector Connects an audio device. 10 LINE OUT connector Connects an audio device or an active speaker. 11 i.LINK (6-pin) Connects a digital device such as a Sony Digital Handycam® Camcorder. 12 LCD MONITOR connector Connects the LCD that comes with the VAIO Slimtop LCD computer. Note: Do not connect any display to this connector other than the LCD that is supplied with this system. Page 281 13 KEYBOARD connector Connects a keyboard. LCD 1 Power indicator light Light is green while the power is on. When the computer enters the standby mode, this indicator light turns amber. 2 Information LED Light turns red to alert the user to activities, such as the arrival of e-mail. See AutoAlert E-mail Notification System. 3 Adjusts 4 Adjusts Brightness control the brightness of the screen. Volume control the volume of the integrated speakers on the LCD display. Using the Wheel Mouse For information about the Wheel Mouse that connects to either side of your keyboard, see MouseWare Help. To access MouseWare Help, from the Start menu, point to Programs, MouseWare, and then click MouseWare Help. To set up the mouse for left-handed use: 1. Click the My Computer icon on your desktop. 2. Click Control Panel, and then click Mouse. The Mouse Properties dialog box appears. 3. In the Quick Setup tab, click Device Setup. 4. In the Device Setup Wizard dialog box, click Next. 5. Select the radio button next to "Left side of the keyboard." 6. Click Next three times, and then click Finish. 7. Click Apply. Using a Headphone or Microphone When you connect a microphone or headphone to your computer, attaching a ferrite core will reduce electrical interference. Attach the (supplied) ferrite core at the end of the headphone or microphone cable closest to the computer. Wrap the cable through the center of the ferrite core. The following illustration shows how to attach the ferrite core when you are using both a headphone and a microphone. Page 282 The LCD and keyboard cables already include a ferrite core. Do not remove the ferrite core from these cables. To adjust the height and viewing angle of the display Holding both sides of the display, push the display panel out and up, and then adjust the viewing angle. The LCD display is designed to maintain the best ergonomic viewing angle. Set the display height so that it does not touch the keyboard, and adjust the viewing angle approximately 27 degrees from eye level to the center of the screen. Attaching the Stand to the System Unit The main system unit can be oriented horizontally or vertically. If you place the system in a vertical position, you must attach the supplied stand to ensure stability. 1. Place the system unit on its right side, with the front of the system facing forward. 2. Insert the grooved side of the stand into the ventilation holes of the system so that the two screw holes are aligned and the stand's fins are at the rear of the unit. 3. Secure the stand to the unit with the supplied screw. Page 283 The stand keeps the system cool by allowing air to flow under it. If you choose to place the system unit in a vertical position, it is important to use the stand and to place the system unit on its left side, as in the illustration above; otherwise, the system may overheat. Registering Your Computer Take advantage of Sony's commitment to quality customer support and receive these benefits by registering your computer: Sony Customer Support--Talk to a Support Representative to troubleshoot problems you may be having with your computer. Limited warranty--Protect your investment. See Limited Warranty Statement in the VAIO® Consumer Information Guide for details. You must register your computer to extend the warranty from the initial 90-day warranty period to one year from the original date of purchase. Express Service--Provides a fast and direct return of your VAIO Slimtop Sony for service of your computer. LCD Computer to If you did not already register when you first turned on your computer, follow these steps to use the computer online registration service. 1. Click the registration icon on the VAIO desktop. 2. Enter the information requested on the first online registration form. Press the tab key to move from box to box. 3. Click the Next button to advance to the next form. 4. Complete the remaining forms by clicking the Next button each time you complete a form. The computer automatically transfers your registration information using your built-in modem and a toll-free telephone number or a local number. You may sign up for Internet access with a Sony preferred Internet Service Provider. VAIO Action Setup VAIO Action Setup manages the settings for your computer's Programmable Power Keys (PPK), Memory Stick® media, i.LINK interface, and internal timer. An overview of each of these functions is provided below. For more information on changing the settings using VAIO Action Setup, see the online VAIO Action Setup help files. To access the help files, from the Start menu, point to Programs/VAIO Action Setup/VAIO Action Setup Help. Programmable Power Keys Your Sony computer comes with technology that allows you to get to your favorite applications Page easily. Each Programmable Power Key (PPK) on your VAIO Smart convertible keyboard comes 284 programmed to launch a preset application with a single press of the key. If you wish, you can use the VAIO Action Setup software to change the Programmable Power Keys' preset functions. The Programmable Power Keys are located at the top of your keyboard, and are numbered P1 through P6. The keys work even when the computer is turned off. Pressing one of these keys turns on the computer and launches the preset application. The six Programmable Power Keys come to you preprogrammed to perform the functions listed in the table below. Key Function P1 (INTERNET) Starts Microsoft® Internet Explorer for Windows® 98. P2 (MAIL) Starts Microsoft® Outlook® Express P3 (WORK) Starts Microsoft® Word P4 (FINANCE) Starts Intuit® Quicken® Basic 2000. P5 (SETUP) Starts PPK Setup. P6 (HELP) Opens a menu of help options. Memory Stick You can use VAIO Action Setup to preset your computer to automatically launch an application when you insert a Memory Stick. For more information on Memory Stick media, see Using the Memory Stick® Media . Internal Timer The VAIO Action Setup software allows you to set your computer's internal timer to launch certain applications automatically. The timer can start applications even when the power is off. Some software applications take longer than others to launch. It is advisable to confirm in advance the amount of time your selected application takes to start. AutoAlert E-mail Notification System VAIO Action Setup also enables you to set up your computer to notify you with an Information LED when new mail arrives in your e-mail mailbox. The Information LED turns red to indicate that new e-mail has arrived. For this AutoAlert E-mail Notification System to work, you must use Microsoft® Outlook® Express as your default e-mail software, and you must have an Internet Service Provider with dial-up capabilities set up. As an alternative, you can program your AutoAlert E-mail Notification System to set the Information LED to turn on when it has successfully completed the task of dialing up and connecting to receive mail. In this case, the Information LED turns on to indicate that your e-mail account has been accessed successfully, regardless of whether or not you have mail; this works with Microsoft Outlook Express. The e-mail software you choose to use with PPK must be set as your default e-mail software. See LCD for an illustration showing the Information LED's location. AutoAlert E-mail Notification System Software Restrictions If you use software that uses a phone line The computer may not be able to disconnect the phone line due to communication and server conditions. Be sure to monitor the status of the software when running the AutoAlert E-mail Notification System, and manually disconnect the phone line if you notice a malfunction. Furthermore, when using the timer to start the software, it is advised that you set the computer to shut down or enter system standby mode after a certain length of time. This allows the computer to disconnect the phone line if the computer fails to disconnect the line normally. If you are using the timer to download e-mail automatically Page 285 It is advisable to set up your e-mail software to redial automatically if it does not connect the first time. It is also advisable to set the e-mail software to disconnect the phone line automatically when all mail has been downloaded. If you are using Microsoft® Outlook® Express When using the AutoAlert E-mail Notification System with Microsoft Outlook Express, it is advisable to select the Dial automatically setting in your Microsoft Outlook Express software. If you have not chosen this setting and wish to do so, start Outlook Express, click Tools, and then select Options. Select the check box "Automatically dial when checking for new messages." Click OK. Changing the Window Design of Sony Software To change the window design of Sony software 1. Click the Start button, point to Settings, and then click Control Panel. 2. Click UI Design Selector. 3. Click << or >> and select the desired design. 4. Click Apply. The "UI Design Selector" window design changes. The window design for your Sony software will match the "UI Design Selector" window. To try another selection, click << or >>. Then, click OK. The UI Design Selector closes and the window design of your Sony software window design displays. You may use the feature with UI Design Selector-compatible software only. Using the Memory Stick® Media Your Sony computer is designed to support the new Memory Stick recording media. The Memory Stick media is a small, versatile device that allows you to share data between various types of Sony equipment. When you use the card, your computer automatically launches Windows Explorer. This allows you to view the contents of the card. If the image files are created by a Sony digital camera or camcorder, you do not need the following steps. If you want to create a slide show that launches automatically when you insert a Memory Stick, follow these steps to transfer images from your hard drive to a Memory Stick. 1. Insert the Memory Stick into the appropriate slot. 2. Click the My Computer icon on the desktop. Page 286 3. Click the Removable Disk S: icon. 4. Create a new folder and name it "DCIM." 5. Open the DCIM folder and create a new folder named "100MSDCF." 6. Click the Start button, select VAIO, and then click PictureGear to launch the PictureGear application. 7. Select the digital images you want to save in your slide show. 8. From the PictureGear File menu, point to File Process, and then select Still Format Conversion. 9. Select Memory Stick as the Output Format. 10. Use the Browse button to select the DCIM/100MSDCF folder on the Removable Disk (S:) drive. 11. Name the file. The file name must begin with DSC (DSC0xxxx). The full file name without extension must have at least eight characters. The order in which your photos appear in your slide show will be determined by the number (xxxx) in the file name. Some examples of acceptable file names are DSC00001.jpg and DSC00002.jpg 12. Click OK to save the file. You can also add MPEG1 video files to your Slide Show by following the steps below. The order in which your video clips (MOV0xxxx files) appear in your Slide Show is determined by the number (xxxx) in the file name. 1. Insert the Memory Stick into the media slot. 2. Click the My Computer icon on the desktop. 3. Click the Removable Disk S: icon. 4. Create a new folder and name it "MSSONY." 5. Open the MSSONY folder and create a new folder named "MOML0001." 6. From the PictureGear File menu, point to File Process, and then select Still Format Conversion. 7. Copy the MPEG file into the MOML0001 folder. 8. Rename the MPEG file MOV0xxxx.mpg, where xxxx is any four-digit number. 9. To begin showing your slides, eject the Memory Stick and then reinsert it. The slide show will begin automatically. To protect data on Memory Stick media from accidental changes Memory Stick media contains a write-protect tab. The write-protect tab prevents accidental changes to information recorded on the Memory Stick media. When you slide the write-protect tab to the LOCK position, the Memory Stick is write-protected, which means you cannot delete, copy, or save information on the Memory Stick. When you slide the tab to the un-LOCK position, you can write to or modify the Memory Stick contents. To change the way the computer responds when a Memory Stick is inserted into the Memory Stick media slot Change the options on the Memory Stick tab in the PPK Setup software. Page 287 Using PC Cards This computer has a card bus PC card slot that supports a Type I or II PC card. To insert a PC card You do not need to shut down your computer when inserting a PC card. 1. Open the front panel. 2. Insert the PC card into the PC card slot until it clicks into position. When the card is completely inserted, the eject button pops out. If you cannot insert the card, do not forcibly insert it. In this case, make sure the card is not inserted upside-down or backward, and then reinsert the card into the slot carefully. See the manual that came with the PC card for details on using it. To close the front panel when the eject button is protruding, fold the button down onto the computer. To eject a PC card If you eject the PC card incorrectly, the system may not work correctly. 1. Click the Start button on the Windows® taskbar, click Settings, and then click Control Panel. 2. Click the PC Card icon. 3. Click the name of the card that you want to eject, and then click Stop. 4. When the message "You may safely remove this device" appears, click OK. 5. Push the PC card eject button on the front panel of the system unit. You may need to pull out the eject button before you can eject the card. Page 288 The card is ejected from the card connector. Remove the card by holding it by its edge and pulling it out carefully. Using the Standby Function When you are finished using your computer, you can put it in standby mode rather than turn it off completely. Putting the computer in standby mode allows you to return quickly to normal computer use. To put the computer in standby mode manually 1. Save your work and close any applications that are running. (You can leave Windows running.) 2. Press the (Standby) button on the top of the keyboard. The computer goes into standby mode. Alternatively, you can click the Start button on the Windows® taskbar, click Shut Down, select Standby, and then click OK. To let the computer go into standby mode automatically Click the My Computer icon on your desktop. Click Control Panel, and then click the Power Management icon. On the Power Schemes tab, select from the options in the Power schemes drop-down list. Then, choose settings for the power scheme you have selected. To save the settings under a name that is not offered in the Power schemes pulldown menu, choose your settings and then click Save As. Type in a name, and click OK. Click Apply to finalize your power settings. To resume from standby mode There are three ways to bring your computer back from the standby mode: press the space bar on your keyboard, press the left mouse button, or momentarily depress the power button on your computer. If the display does not return from standby when you press the (Standby) button, your system may be in video standby mode. Press the space bar on the keyboard to return from video standby. Standby Mode Indicators You can tell which mode the computer is in by the color of the power indicator light. Color Amber Green No color Mode Computer is in standby mode. Computer is out of standby mode, ready to use. Computer is turned off. In standby mode you may periodically hear the computer's fan turn on and off, depending on the room's temperature. This is normal functioning in standby mode. Page 289 Shutting Down Your Computer When you are ready to turn off your computer for an extended period of time, use the following procedure to shut down the computer. To avoid the potential loss of data, do not use the power switch to shut down the computer. To shut down your computer If you plan to shut down your computer for a short period of time, you may want to use standby mode instead. See Using the Standby Function. 1. Click the Start button on the Windows® taskbar to open the Start menu. 2. Click Shut Down to display the Shut Down Windows dialog box. 3. Select the Shut Down option. 4. Click OK to complete the shutdown process. Respond to any prompts about saving documents. 5. Wait for your computer to turn off automatically -- the power indicator light turns off. 6. Turn off any peripherals connected to your computer. The LCD display turns off automatically when the computer shuts down. You can also shut down your computer using the (Power) button on the keyboard. Pressing this button causes the system to perform a shutdown but does not give you any of the other options available on the Windows® Shut Down menu. About the Power Switch If your system "locks up" or "crashes," press and hold the power switch for four seconds to force your system to power off. You may need to repeat this procedure. See Locating Controls and Connectors for the power switch's location. Using the System Recovery CD(s) You can reinstall software titles that shipped with your computer if they are corrupted or accidentally erased. You may not need to recover the entire contents of your hard drive. If you experience a problem with your computer, reinstalling an individual device driver or software title may correct the problem. Use the Application Recovery CD(s) to reinstall individual applications or device drivers. See Using the Application Recovery CD(s). The System Recovery CD(s) contain a backup copy of all the software originally installed on your hard disk drive. They can be used only to recover the hard disk of the Sony computer you purchased. The System Recovery utility gives you three options: Full Restore without Format restores all the software titles that originally came with your computer without formatting the hard disk. Full Restore with Format formats the hard disk drive and then restores all the original software. If your hard drive is partitioned into C and D drives, the computer will offer you the option to reformat the drive into a single partition. Operating System Only (Windows 98® Restore with Format) formats the hard disk drive and Page 290 restores the Windows® operating system and the device drivers that shipped with your computer. This option is recommended for advanced users only. If you choose the Full Restore with Format or Operating System Only option, your hard disk will be formatted, which removes all the information on the hard disk drive. You will lose any software you have installed and any other files you have created since you started to use your computer. This means you will have to reinstall any applications that were not included with the computer when you purchased it. If you choose the Full Restore without Format option, you may need to reinstall applications that were not included with the computer when you purchased it. If you have any questions on using the System Recovery CD(s), contact Sony Customer Support. To use the System Recovery CD(s) You need to complete the Windows registration process when you use the System Recovery CD(s). 1. Insert the Sony System Recovery CD(s) in the DVD-ROM drive. The System Recovery utility boots from the DVD-ROM drive. It must be in the drive when you turn on the computer. 2. Shut down your computer as described in Shutting Down Your Computer. 3. Wait 30 seconds and turn on your computer. 4. Click OK to signify you have read and accept the Microsoft End-User License Agreement. 5. When the System Recovery menu appears, follow the on-screen instructions to complete the recovery process. Your system may include one or two System Recovery CDs. If you have two System Recovery CDs, insert the first CD to run the System Recovery program. You are prompted to insert the second CD once the information from the first CD has been installed. The recovery process takes 30 to 60 minutes to complete. Using the Application Recovery CD(s) The Application Recovery CD(s) allow you to reinstall individual applications and device drivers if they are corrupted or accidentally erased. Reinstalling an individual device driver or software title may correct a problem you are experiencing with your computer, and you may not need to recover the entire contents of your hard drive. If you do need to reinstall all the software titles that shipped with your computer, use the System Recovery CD(s). See Using the System Recovery CD(s). You must be in Windows to run the Application Recovery CD(s). The application will not run from DOS. If you have any questions on using the Application Recovery CD(s), contact Sony Customer Support. To use the Application Recovery CD(s) 1. Turn on your computer. If your computer is already on, close all applications. 2. When the Windows desktop appears, insert the Sony Application Recovery CD in the DVD-ROM drive. The Application Recovery utility loads automatically. 3. When the Application Recovery menu appears, follow the on-screen instructions to complete the recovery process. Your system may include one or two Application Recovery CDs. If you have two Application Recovery CDs, insert the first CD to run the Application Recovery program. You may be prompted to insert the second CD, depending on the application you wish to restore. Page 291 About the Software on Your Computer Your VAIO Slimtop computer is ready to help you work, play, learn, and communicate as soon as you turn it on. This section gives you an overview of the activities you can perform with your software titles. For support information, see For Answers to Your Software Questions . Adobe Acrobat® Reader Adobe Systems Incorporated Acrobat Reader software allows you to view, navigate, and print electronic documents in Adobe's Portable Document Format (PDF), an open file format that is intended to preserve the fidelity of documents created on all major computer platforms. Adobe PhotoDeluxe® Home Edition Adobe Systems Incorporated Create amazing photo effects with PhotoDeluxe. Without learning complex software, you can enhance, restore, and be creative with your photos. Includes built-in guided activities, stock photos, clip art, and templates to assist you. Adobe Premiere® LE Adobe Systems Incorporated Adobe Premiere LE offers an interface and editing tool for producing movies for video, multimedia, or the Web. View source clips and edited footage simultaneously in the monitor window. Create video clips up to three hours long with complete audio-video synchronization. America Online® America Online America Online is the world's most popular Internet online service. Stay in touch with family and friends with Easy-to-Use E-mail, manage your personal finances, get the latest news and sports scores, and chat with thousands of others who share your interests. AT&T WorldNet® Service AT&T Fast, reliable Internet access from AT&T WorldNet Service. AT&T WorldNet Service provides Web-based e-mail, a personalized start page from Excite, easy access to the Excite search engine, free Web pages, online and live agent technical support, instant messaging, and special shopping discounts at Market Square. CompuServe® 2000 CompuServe Interactive Services The all new CompuServe 2000 delivers a powerful tool for Internet users who want serious and timely information, in-depth research, and professional communities backed by state-of-the-art technologies, including high-speed access and powerful e-mail messaging. Digital Media Bar Sony Electronics Media Bar software is your all-in-one solution for audio/video playback. It handles all common computer multimedia formats, and controls selected Sony devices. Media Bar software encompasses audio/video library cataloging and playlist management, in addition to digital video quality control and effects features. DVgate Sony Electronics Connect a digital video camera recorder to the i.LINK connector and capture your own video clips. You can edit the clips from your video, add others, and combine clips into new movie segments. EarthLink TotalAccess EarthLink Network, Inc. Page 292 An Internet Service Provider that supplies access, information, and assistance to its customers, introducing them to the Internet. Member benefits include e-mail, newsgroups, a Personal Start Page, a free 6 MB web site, a member magazine, and 24-hour technical support. McAfee's VirusScan® Network Associates, Inc. Protect your computer from viruses. VirusScan can detect viruses from floppy disks, Internet downloads, e-mail attachments, intranets, shared files, CD-ROMs, and online services. Microsoft® Internet Explorer for Windows® 98 Microsoft Corporation Internet Explorer delivers the Web the way you want it. It's safe, easy to use, and you can personalize how you access the Web. Outlook Express and other tools in Internet Explorer also help you have a great experience when you are on the Web! Microsoft® Outlook® Express Microsoft Corporation Outlook Express, the messaging tool that takes your e-mail and newsgroup communications to new heights! Outlook Express is easy to set up and use, and provides you with secure, personalized, and complete features that make creating, sending, and reading your e-mail a more rich and dynamic experience. Microsoft® Word 2000 Microsoft Corporation Microsoft Word 2000 makes it easy to create common Web, e-mail, and print documents for use around the world. It embraces HTML as a first-class file format and extends Word's ease-of-use to the Web and e-mail. Word 2000 also extends that ease of use to international users, making it easy to create multilingual documents. Netscape Communicator® Netscape Communications Netscape Communicator is the all-in-one Internet tool that makes it easy to browse the Web, send Internet e-mail, chat, read newsgroups, and compose great Web documents. PictureGear Sony Electronics This image management software displays images from your hard drive, a Sony digital still camera, or a Sony Mavica® camera. The images appear in a convenient light-table format, so that you can easily view the contents of an entire folder. Prodigy Internet Prodigy Communications Corporation An Internet service that helps you find what you need online faster and smarter. Prodigy delivers powerful online content, such as sports scores, stock quotes, news, and easy access to Excite , plus a personal e-mail account and quality customer service, all at a competitive price. Quicken® Basic Intuit, Inc. Quicken is the fastest, easiest way to organize your finances. Quicken works just like your checkbook, so it's easy to learn and use. Quicken manages all of your finances, bank accounts, credit cards, investments, and loans. You can even pay your bills online. Smart Capture Sony Electronics Smart Capture is a fun new way to send multimedia messages via e-mail. Smart Capture manages the i.LINK connection between your computer and a Sony Digital Handycam® Camcorder or other Page 293 cameras that support the i.LINK interface. It allows you to capture and compress video or still images that you can save or share via e-mail. A smart solution to computer, digital audio/video, and network convergence. Smart Connect Sony Electronics Smart Connect allows you to use an i.LINK cable to connect your VAIO computer to another VAIO computer that supports Smart Connect. You can then use one computer to copy, delete, and edit files on the other computer. You can also print from a printer attached to either computer. Sound Forge® Sonic Foundry Sound Forge allows you to put powerful audio processing tools and effects to work on your desktop. Simply cut, copy, and paste your way to striking multimedia files for use in everything from Web pages to desktop presentations. VAIO Action Setup Sony Electronics VAIO Action Setup manages the settings for your computer's Programmable Power Keys (PPK), Memory Stick media, i.LINK interface, and internal timer. For more information, see VAIO Action Setup. WinFax® Basic Edition Symantec Corporation WinFax Basic Edition incorporates an easy-to-use interface that allows you to send and receive faxes easily. Upgrade to WinFax Pro to receive additional features. About Your Recovery CDs Application Recovery CD(s) Sony Electronics The Application Recovery CD program allows you to reinstall individual applications and device drivers. Use it to restore corrupted or accidentally erased files. System Recovery CD(s) Sony Electronics The System Recovery CD program allows you to restore the software titles that shipped with your computer if they become corrupted or are erased accidentally. It can be used only to restore the hard disk of the Sony computer you purchased. For Answers to Your Software Questions Acrobat® Reader, Adobe PhotoDeluxe® Home Edition (Adobe Systems Incorporated) Web site http://www.adobe.com/ phone 206-628-2746 (fee-based support) fax 206-628-5737 e-mail [email protected] hours M-F, 6 AM-5 PM PT America Online® (America Online) Web site phone hours http://www.aol.com/ 800-827-3338 7 days a week, 6 AM - 2 PM ET AT&T WorldNet® Service (AT&T) Web site phone e-mail http://www.att.net 800-400-1447 [email protected] Page 294 hours 7 days a week, 24 hours a day CompuServe® 2000 (CompuServe Interactive Services) Web site phone hours http://www.compuserve.com/ 800-848-8990 M-F, 8 AM - 1 AM ET, S-S 10 AM - 10 PM ET EarthLink TotalAccess Web site phone e-mail hours (EarthLink Network, Inc.) http://help.earthlink.net/techsupport/ 800-395-8410 [email protected] 7 days a week, 24 hours a day GTE Easy Sign-up (GTE Internet) phone hours 800-927-3000 7 days a week, 24 hours a day McAfee's VirusScan (Network Associates, Inc.) Web site phone e-mail hours http://support.mcafee.com 408-988-3832 [email protected] M - F 9 AM - 5 PM Central Time MindSpring Internet Desktop (MindSpring Enterprises, Inc.) Web site phone http://help.mindspring.com/support 800-719-4660 Quicken® Basic (Intuit Inc.) Web site phone hours http://www.intuit.com/support 900-555-4688 7 days a week, 24 hours a day Sound Forge® (Sonic Foundry) Web site http://www.sonicfoundry.com/support/ phone 608-256-5555 fax 608-256-7300 e-mail [email protected] hours M - F, 8 AM - 7 PM CT Windows® 98 Second Edition Operating System, Word® 2000, Internet Explorer 5, Outlook® Express (Microsoft Corporation) Web site phone hours 1 http://www.sony.com/pcsupport 888-4SONYPC (888-476-6972) 1 7 days a week, 24 hours a day Support from 1-888-4SONYPC is free of charge for 90 days after the original date of purchase. WinFax® Basic Edition (Symantec Corporation) Web site http://www.symantec.com/techsupp/ phone 800-798-0850 fax 800-554-4403 in North America 541-984-2490 outside North America Troubleshooting This section describes how to solve common problems you may encounter when using your computer. Many problems have simple solutions, so try these suggestions before you call Sony Customer Support. My computer does not start Check that the computer is plugged into a power source and that it is turned on. Check that the power light is lit on the front panel of the computer. Confirm that a diskette is not in the diskette drive (unless you are using a bootable diskette). Confirm that the power cord and all cables are connected firmly, as described on the color poster. Page 295 If you plugged the computer into a power strip or UPS, make sure the power strip or UPS is turned on and working. My computer or software program "locks up" Close the application that is currently "locked up" by pressing Ctrl+Alt+Delete. In the Close Program dialog box, scroll down until you locate "(Not responding)" next to an application. Select this application and click End Task. Windows attempts to close the application. If the attempt is unsuccessful, a second dialog box appears. Select End Task again. If you are unable to "unlock" the application, repeat the above steps but select Shut Down when the Close Program dialog box appears. If the above steps fail to "unlock" your computer, save any unsaved work, if possible. Press Alt+F4. Select Restart and click OK. If you cannot restart as described in the preceding steps, you can restart the computer by pressing Ctrl+Alt+Delete or by pressing the power switch for more than six seconds. Pressing Ctrl+Alt+Delete may result in the loss of changes made to files that are currently open. Contact the software publisher or designated provider for technical support. See For Answers to Your Software Questions for a list of phone numbers and Web addresses or see Read Me First . My DVD-ROM/CD-ROM drive tray does not open Make sure the computer is turned on. If the Eject button does not work, you can open the tray by inserting a straightened heavyweight paper clip into the emergency eject hole. When I click an application icon, a message such as "You must insert the application CD into your CD-ROM (DVD-ROM) drive" appears and the software does not start Some titles require specific files that are located on the application's DVD-ROM/CD-ROM. Insert the disc and try starting the program again. Check to make sure you inserted the DVD-ROM/CD-ROM with the label side facing up. My modem connection is slow The computer's modem uses K56flex technology/V.90. Many factors influence modem connection speed, including telephone line noise or compatibility with telephone equipment (such as fax machines or other modems). If you think your modem is not connecting properly to other computer-based modems, fax machines, or your Internet Service Provider, check the following: Have your phone company check that your phone line is free from any line noise. If your problem is fax-related, check that there are no problems with the fax machine you are calling. The modem that receives your call may be slower or may use a different communications protocol than your modem. If this is the case, the connection speed may be slower than expected. For optimum performance, ensure you are calling an Internet Service Provider number that is V.90-compliant. If you are having a problem connecting with your Internet Service Provider, check that the ISP is not experiencing technical problems. If you have a second phone line available, try connecting the modem to this line. My modem does not work Check that the phone line is plugged into the line jack. Page Check that the phone line is working. You can check the line by plugging in an ordinary phone and296 listening for a dial tone. Check that the phone number the program is dialing is correct. Verify that the software you are using is appropriately configured to recognize and interact with the Sony computer modem. Call the software publisher if you do not know how to configure the software to recognize the modem. All programs preinstalled by Sony are compatible. If you suspect your modem is not functioning, you can perform a simple test to find out. Click the My Computer icon on your desktop. Click Control Panel, and then click Modems. Click the Diagnostics tab and select COM3. Click More Info. If your modem is functioning, a More Info dialog box will display. If your modem is not functioning, an error message will appear. My microphone is too sensitive to background noise If you find there is too much background noise when you record sound, you should adjust the microphone gain by following these steps: 1. Right-click the speaker icon (Volume) in the lower-right Windows® task tray. 2. Click Open Volume Controls. The Volume Control screen appears. 3. In the Options menu, select Properties. The Properties screen appears. 4. Change the setting for "Adjust volume for" from Playback to Recording, and then click OK. 5. Click the Advanced button under Microphone Balance. The Advanced Controls for Microphone screen appears. 6. Deselect the check box for 1 Mic Gain (+20dB), then click the Close button. 7. Close the Recording Control window. My mouse does not work Check that the mouse is plugged into one of the PS/2® connectors on the keyboard. The other connector connects the keyboard to the computer. There may be dust or dirt inside the mouse mechanism. To clean the mouse, follow these steps: o Turn off your computer. See Shutting Down Your Computer for details. o Remove the mouse ball cover on the back of the mouse by turning the ring that covers the mouse ball clockwise. o Turn the mouse upright, and drop the mouse ball into your hand. o Using a piece of tape, remove any dust or dirt on the mouse ball and inside the mouse ball socket. o Return the mouse ball to the socket, and replace the mouse ball cover. Secure the cover by turning the ring counter-clockwise. I cannot find the Windows® taskbar Check that the taskbar is not hidden or shrunken. Use the mouse to point to the left, right, top, and bottom edges of the screen. See Read Me First for additional information on using your Sony computer. To Reach Sony For further assistance, call 1-888-4SONYPC (1-888-476-6972). Page 297 Specifications Model PCV-L630 Processor 600E MHz* Pentium® III Hard Disk Drive 17 GB Ultra DMA Standard SDRAM 128 MB PC-100 SDRAM, expandable to 256 MB Video RAM 8 MB SDRAM Graphics 2X AGP 3D graphics hardware acceleration (ATi Rage 128 Pro 4XL) Sound Capabilities High fidelity 3D PCI audio Aureal AU8810 Diskette Drive 3.5" 1.44 MB FDD DVD-ROM/CD-ROM Drive 4.8X (max.) DVD-ROM reading 24X (max.) CD-ROM reading** Modem K56flex technology/V.90 compatible data/fax modem Expansion Capabilities Two PCI slots Connection Capabilities (Front) PC card (Card bus support) USB port Microphone Headphone Memory Stick media slot i.LINK (4-pin) Connection Capabilities (Rear) USB port Modem line (RJ-11) Phone line (RJ-11) Parallel (printer) Serial port VGA monitor LCD display Line In Line Out Keyboard i.LINK (6-pin) Connection Capabilities (Keyboard) Mouse (PS/2-style) left and right connectors Supplied Accessories Stand (for vertical installation) Power cable Phone cable Keyboard cable PS/2 Wheel Mouse VAIO Smart Convertible Keyboard Spacers (for bottom of the system) Ferrite core Service 90-day limited express service*** Extendible to one year from original date of purchase upon registration Limited Warranty90-day parts/labor standard Extendible to one year from original date of purchase upon registration Power Requirements 130 watts maximum Dimensions CPU: 11.2"(w) x 3.6" (h) x 13.4" (d) (280 mm x 90 mm x 335 mm) Keyboard: 15.9" (w) x 1.8" (h) x 7.1" (d) (398 mm x 45 mm x 178 mm) Display: 16.1" (w) x 13.1" (h) x 6.9" (d) (403 mm x 327 mm x 172 mm) Weight CPU: 11.9 lbs. (5.4kg) Display: 7.05 lbs (3.2 kg) Keyboard: 2.9 lbs. (1.3kg) Operating Temperature 50º F to 95º F (+10º C to 35º C) * MHz denotes microprocessor internal clock speed; other factors may affect application performance. Page 298 GB means one billion bytes when referring to hard drive capacity. Accessible capacity may vary. **Data on a DVD-ROM is read at a variable transfer rate, ranging from 2X at the innermost track to 4.8X at the outermost track(the data transfer standard 1X rate is 1385 kbytes/s). The average data transfer rate is 3.6X(4986 kbytes/s). Data on a CD-ROM is read at a variable transfer rate, ranging from 10.5X at the innermost track to 24X at the outermost track(the data transfer standard 1X rate is 150 kbytes/s). The average data transfer is 18X(2700 kbytes/s). Maximum speed for faxing is 14.4 kbytes/s. Your modem is capable of downloading at 56 kbytes/s using K56flex technology or V.90. Your phone service, online service, or Internet Service Provider, however, may not support this technology or operate at this speed. ***Certain restrictions apply. Specifications are subject to change without notice. Page 299 Features For a complete description of the specifications of your Sony computer, see Specifications. i.LINK® (IEEE-1394): Two built-in i.LINK ports provide you with front and rear digital connection capability. The i.LINK name and logo identify a digital interface (IEEE-1394) for high speed communication. Exceptional performance: Your computer includes a fast Intel® processor and a V.90-compatible data/fax modem. Ergo-Angle Multimedia LCD display: With its exclusive dual-hinge pedestal, this 15" XGA TFT display provides twice the flexibility of other LCDs. Select the perfect viewing angle and enjoy the built-in Harman/Kardon® stereo speakers. AutoAlert E-mail Notification System: Custom software automatically downloads e-mail on a pre-set schedule via Microsoft® Outlook® Express. A light on the LCD display instantly lets you know when new mail is received. VAIO Smart convertible keyboard: The innovative palm rest converts to a keyboard cover for a sleek look when not in use. Six Programmable Power Keys let you launch any application with the push of a button; dual-sided mouse connections for left- or right- hand use. Sony Memory Stick® media slot: The next generation of digital media, smaller than a stick of gum. Easily delivers information from one Memory Stick-equipped electronic device to another, so you can transfer images, sounds, data and text between cameras, computers, and more. Compact components: Enjoy the small footprint and versatile setup options available by positioning the components in an arrangement of your choice. Sony audio and video quality: High-fidelity 3D audio system and high-powered 3D graphics (AGP) enable you to take advantage of today's advanced multimedia applications, games, and entertainment software. Preinstalled software titles: All the software on your computer is preinstalled, configured, and ready for you to use right out of the box. Microsoft® Windows® 98 Second Edition operating system: Your system includes the latest operating system from Microsoft. Communications: Access popular online services, browse the Internet, send faxes, and more. * Actual upload and download speeds may vary due to line conditions, ISP support, and government regulations. Unpacking Your Computer Computer and Supplied Accessories Page 300 Manuals Read Me First contains last-minute supplementary information and software support numbers. The VAIO Slimtop LCD Computer User Guide (this manual) contains features and specifications of your computer. It also includes information on the applications included with your system and how to contact software vendors, get started with your computer, and solve common problems. The VAIO VAIO® Consumer Information Guide contains safety and regulatory information, ergonomic considerations, information on help resources, and your computer's limited warranty statement. The Microsoft® Windows®98 Second Edition Getting Started manual explains how to use the basic features of the Windows® operating system. Recovery CDs System Recovery CD(s) - Enables you to reinstall software that shipped with your computer if it is corrupted or accidentally erased. For more information, see Using the System Recovery CD(s). Application Recovery CD(s) - Allows you to reinstall individual applications or device drivers if they are corrupted or accidentally erased. For more information, see Using the Application Recovery CD(s). Other Setting up your VAIO Slimtop LCD Computer (poster) Packet containing special product offers Software CDs Page 301 Microsoft® Word 2000 Setting Up Your VAIO Slimtop LCD Computer Locating Controls and Connectors Front Panel 1 Power switch and indicator light Turns on/off the computer and the display. The indicator light is green while the power is on and amber when the computer is in standby mode. 2 Floppy disk drive Reads/writes data from/to a 3.5-inch floppy disk. 3 Floppy disk eject button Ejects the floppy disk. 4 DVD-ROM drive Reads data from a DVD-ROM/CD-ROM. 5 DVD-ROM/CD-ROM eject button Ejects a DVD-ROM/CD-ROM. 6 Manual eject hole If the DVD-ROM/CD-ROM does not come out when you press the DVD-ROM/CD-ROM eject button, insert a thin, pointed object into this hole to eject the disc manually. 7 FD (Floppy disk drive) access indicator light Lights in green while reading/writing data from/to a floppy disk. 8 Disc (DVD-ROM drive) access indicator light Lights in amber while reading data from a DVD-ROM/CD-ROM. 9 HD (drive) access indicator light Lights in green while reading/writing data from/to the hard disk. 10 MIC (Microphone) connector* Connects a microphone (not supplied). 11 PHONES (Headphones) connector* Connects headphones (not supplied). 12 VOLUME control Page 302 Adjusts the volume of the headphones connected to the PHONES connector. Users should note that this does not control the volume of the integrated LCD speakers. 13 PC CARD slot A PC Card (also called a PCMCIA card) can be installed in this slot. PC cards enable you to add functionality to your system. MEMORY STICK media slot 14 Insert a Sony Memory Stick® card into this slot. See Using the Memory Stick® Media for details on using Memory Stick media. 15 i.LINK (4-pin) Connects a digital device such as a Sony Digital Handycam® Camcorder. 16 USB (Universal Serial Bus) connector Connects a USB device. * See Using a Headphone or Microphone for important information about connecting a microphone and headphone. Rear Panel 1 AC INPUT connector Connects the supplied power cord. 2 LINE jack Connects a phone cable to the wall jack. 3 EMPTY PCI SLOT (FILLED WITH ETHERNET CARD ON CUSTOM MODELS) For a PCI Add-On Card (not supplied). 4 TELEPHONE jack Connects the phone to the computer. 5 PRINTER connector Connects a parallel device, such as a printer or scanner. 6 SERIAL connector Connects a serial device, such as a digital still camera. 7 MONITOR connector Connects a standard CRT display. 8 USB (Universal Serial Bus) connector Connects a USB device. 9 LINE IN connector Connects an audio device. 10 LINE OUT connector Connects an audio device or an active speaker. 11 i.LINK (6-pin) Connects a digital device such as a Sony Digital Handycam® Camcorder. 12 LCD MONITOR connector Connects the LCD that comes with the VAIO Slimtop LCD computer. Note: Do not connect any display to this connector other than the LCD that is supplied with this system. Page 303 13 KEYBOARD connector Connects a keyboard. LCD 1 Power indicator light Light is green while the power is on. When the computer enters the standby mode, this indicator light turns amber. 2 Information LED Light turns red to alert the user to activities, such as the arrival of e-mail. See AutoAlert E-mail Notification System. 3 Adjusts 4 Adjusts Brightness control the brightness of the screen. Volume control the volume of the integrated speakers on the LCD display. Using the Wheel Mouse For information about the Wheel Mouse that connects to either side of your keyboard, see MouseWare Help. To access MouseWare Help, from the Start menu, point to Programs, MouseWare, and then click MouseWare Help. To set up the mouse for left-handed use: 1. Click the My Computer icon on your desktop. 2. Click Control Panel, and then click Mouse. The Mouse Properties dialog box appears. 3. In the Quick Setup tab, click Device Setup. 4. In the Device Setup Wizard dialog box, click Next. 5. Select the radio button next to "Left side of the keyboard." 6. Click Next three times, and then click Finish. 7. Click Apply. Using a Headphone or Microphone When you connect a microphone or headphone to your computer, attaching a ferrite core will reduce electrical interference. Attach the (supplied) ferrite core at the end of the headphone or microphone cable closest to the computer. Wrap the cable through the center of the ferrite core. The following illustration shows how to attach the ferrite core when you are using both a headphone and a microphone. Page 304 The LCD and keyboard cables already include a ferrite core. Do not remove the ferrite core from these cables. To adjust the height and viewing angle of the display Holding both sides of the display, push the display panel out and up, and then adjust the viewing angle. The LCD display is designed to maintain the best ergonomic viewing angle. Set the display height so that it does not touch the keyboard, and adjust the viewing angle approximately 27 degrees from eye level to the center of the screen. Attaching the Stand to the System Unit The main system unit can be oriented horizontally or vertically. If you place the system in a vertical position, you must attach the supplied stand to ensure stability. 1. Place the system unit on its right side, with the front of the system facing forward. 2. Insert the grooved side of the stand into the ventilation holes of the system so that the two screw holes are aligned and the stand's fins are at the rear of the unit. 3. Secure the stand to the unit with the supplied screw. Page 305 The stand keeps the system cool by allowing air to flow under it. If you choose to place the system unit in a vertical position, it is important to use the stand and to place the system unit on its left side, as in the illustration above; otherwise, the system may overheat. Registering Your Computer Take advantage of Sony's commitment to quality customer support and receive these benefits by registering your computer: Sony Customer Support--Talk to a Support Representative to troubleshoot problems you may be having with your computer. Limited warranty--Protect your investment. See Limited Warranty Statement in the VAIO® Consumer Information Guide for details. You must register your computer to extend the warranty from the initial 90-day warranty period to one year from the original date of purchase. Express Service--Provides a fast and direct return of your VAIO Slimtop Sony for service of your computer. LCD Computer to If you did not already register when you first turned on your computer, follow these steps to use the computer online registration service. 1. Click the registration icon on the VAIO desktop. 2. Enter the information requested on the first online registration form. Press the tab key to move from box to box. 3. Click the Next button to advance to the next form. 4. Complete the remaining forms by clicking the Next button each time you complete a form. The computer automatically transfers your registration information using your built-in modem and a toll-free telephone number or a local number. You may sign up for Internet access with a Sony preferred Internet Service Provider. VAIO Action Setup VAIO Action Setup manages the settings for your computer's Programmable Power Keys (PPK), Memory Stick® media, i.LINK interface, and internal timer. An overview of each of these functions is provided below. For more information on changing the settings using VAIO Action Setup, see the online VAIO Action Setup help files. To access the help files, from the Start menu, point to Programs/VAIO Action Setup/VAIO Action Setup Help. Programmable Power Keys Your Sony computer comes with technology that allows you to get to your favorite applications Page easily. Each Programmable Power Key (PPK) on your VAIO Smart convertible keyboard comes 306 programmed to launch a preset application with a single press of the key. If you wish, you can use the VAIO Action Setup software to change the Programmable Power Keys' preset functions. The Programmable Power Keys are located at the top of your keyboard, and are numbered P1 through P6. The keys work even when the computer is turned off. Pressing one of these keys turns on the computer and launches the preset application. The six Programmable Power Keys come to you preprogrammed to perform the functions listed in the table below. Key Function P1 (INTERNET) Starts Microsoft® Internet Explorer for Windows® 98. P2 (MAIL) Starts Microsoft® Outlook® Express P3 (WORK) Starts Microsoft® Word P4 (FINANCE) Starts Intuit® Quicken® Basic 2000. P5 (SETUP) Starts PPK Setup. P6 (HELP) Opens a menu of help options. Memory Stick You can use VAIO Action Setup to preset your computer to automatically launch an application when you insert a Memory Stick. For more information on Memory Stick media, see Using the Memory Stick® Media . Internal Timer The VAIO Action Setup software allows you to set your computer's internal timer to launch certain applications automatically. The timer can start applications even when the power is off. Some software applications take longer than others to launch. It is advisable to confirm in advance the amount of time your selected application takes to start. AutoAlert E-mail Notification System VAIO Action Setup also enables you to set up your computer to notify you with an Information LED when new mail arrives in your e-mail mailbox. The Information LED turns red to indicate that new e-mail has arrived. For this AutoAlert E-mail Notification System to work, you must use Microsoft® Outlook® Express as your default e-mail software, and you must have an Internet Service Provider with dial-up capabilities set up. As an alternative, you can program your AutoAlert E-mail Notification System to set the Information LED to turn on when it has successfully completed the task of dialing up and connecting to receive mail. In this case, the Information LED turns on to indicate that your e-mail account has been accessed successfully, regardless of whether or not you have mail; this works with Microsoft Outlook Express. The e-mail software you choose to use with PPK must be set as your default e-mail software. See LCD for an illustration showing the Information LED's location. AutoAlert E-mail Notification System Software Restrictions If you use software that uses a phone line The computer may not be able to disconnect the phone line due to communication and server conditions. Be sure to monitor the status of the software when running the AutoAlert E-mail Notification System, and manually disconnect the phone line if you notice a malfunction. Furthermore, when using the timer to start the software, it is advised that you set the computer to shut down or enter system standby mode after a certain length of time. This allows the computer to disconnect the phone line if the computer fails to disconnect the line normally. If you are using the timer to download e-mail automatically Page 307 It is advisable to set up your e-mail software to redial automatically if it does not connect the first time. It is also advisable to set the e-mail software to disconnect the phone line automatically when all mail has been downloaded. If you are using Microsoft® Outlook® Express When using the AutoAlert E-mail Notification System with Microsoft Outlook Express, it is advisable to select the Dial automatically setting in your Microsoft Outlook Express software. If you have not chosen this setting and wish to do so, start Outlook Express, click Tools, and then select Options. Select the check box "Automatically dial when checking for new messages." Click OK. Changing the Window Design of Sony Software To change the window design of Sony software 1. Click the Start button, point to Settings, and then click Control Panel. 2. Click UI Design Selector. 3. Click << or >> and select the desired design. 4. Click Apply. The "UI Design Selector" window design changes. The window design for your Sony software will match the "UI Design Selector" window. To try another selection, click << or >>. Then, click OK. The UI Design Selector closes and the window design of your Sony software window design displays. You may use the feature with UI Design Selector-compatible software only. Using the Memory Stick® Media Your Sony computer is designed to support the new Memory Stick recording media. The Memory Stick media is a small, versatile device that allows you to share data between various types of Sony equipment. When you use the card, your computer automatically launches Windows Explorer. This allows you to view the contents of the card. If the image files are created by a Sony digital camera or camcorder, you do not need the following steps. If you want to create a slide show that launches automatically when you insert a Memory Stick, follow these steps to transfer images from your hard drive to a Memory Stick. 1. Insert the Memory Stick into the appropriate slot. 2. Click the My Computer icon on the desktop. Page 308 3. Click the Removable Disk S: icon. 4. Create a new folder and name it "DCIM." 5. Open the DCIM folder and create a new folder named "100MSDCF." 6. Click the Start button, select VAIO, and then click PictureGear to launch the PictureGear application. 7. Select the digital images you want to save in your slide show. 8. From the PictureGear File menu, point to File Process, and then select Still Format Conversion. 9. Select Memory Stick as the Output Format. 10. Use the Browse button to select the DCIM/100MSDCF folder on the Removable Disk (S:) drive. 11. Name the file. The file name must begin with DSC (DSC0xxxx). The full file name without extension must have at least eight characters. The order in which your photos appear in your slide show will be determined by the number (xxxx) in the file name. Some examples of acceptable file names are DSC00001.jpg and DSC00002.jpg 12. Click OK to save the file. You can also add MPEG1 video files to your Slide Show by following the steps below. The order in which your video clips (MOV0xxxx files) appear in your Slide Show is determined by the number (xxxx) in the file name. 1. Insert the Memory Stick into the media slot. 2. Click the My Computer icon on the desktop. 3. Click the Removable Disk S: icon. 4. Create a new folder and name it "MSSONY." 5. Open the MSSONY folder and create a new folder named "MOML0001." 6. From the PictureGear File menu, point to File Process, and then select Still Format Conversion. 7. Copy the MPEG file into the MOML0001 folder. 8. Rename the MPEG file MOV0xxxx.mpg, where xxxx is any four-digit number. 9. To begin showing your slides, eject the Memory Stick and then reinsert it. The slide show will begin automatically. To protect data on Memory Stick media from accidental changes Memory Stick media contains a write-protect tab. The write-protect tab prevents accidental changes to information recorded on the Memory Stick media. When you slide the write-protect tab to the LOCK position, the Memory Stick is write-protected, which means you cannot delete, copy, or save information on the Memory Stick. When you slide the tab to the un-LOCK position, you can write to or modify the Memory Stick contents. To change the way the computer responds when a Memory Stick is inserted into the Memory Stick media slot Change the options on the Memory Stick tab in the PPK Setup software. Page 309 Using PC Cards This computer has a card bus PC card slot that supports a Type I or II PC card. To insert a PC card You do not need to shut down your computer when inserting a PC card. 1. Open the front panel. 2. Insert the PC card into the PC card slot until it clicks into position. When the card is completely inserted, the eject button pops out. If you cannot insert the card, do not forcibly insert it. In this case, make sure the card is not inserted upside-down or backward, and then reinsert the card into the slot carefully. See the manual that came with the PC card for details on using it. To close the front panel when the eject button is protruding, fold the button down onto the computer. To eject a PC card If you eject the PC card incorrectly, the system may not work correctly. 1. Click the Start button on the Windows® taskbar, click Settings, and then click Control Panel. 2. Click the PC Card icon. 3. Click the name of the card that you want to eject, and then click Stop. 4. When the message "You may safely remove this device" appears, click OK. 5. Push the PC card eject button on the front panel of the system unit. You may need to pull out the eject button before you can eject the card. Page 310 The card is ejected from the card connector. Remove the card by holding it by its edge and pulling it out carefully. Using the Standby Function When you are finished using your computer, you can put it in standby mode rather than turn it off completely. Putting the computer in standby mode allows you to return quickly to normal computer use. To put the computer in standby mode manually 1. Save your work and close any applications that are running. (You can leave Windows running.) 2. Press the (Standby) button on the top of the keyboard. The computer goes into standby mode. Alternatively, you can click the Start button on the Windows® taskbar, click Shut Down, select Standby, and then click OK. To let the computer go into standby mode automatically Click the My Computer icon on your desktop. Click Control Panel, and then click the Power Management icon. On the Power Schemes tab, select from the options in the Power schemes drop-down list. Then, choose settings for the power scheme you have selected. To save the settings under a name that is not offered in the Power schemes pulldown menu, choose your settings and then click Save As. Type in a name, and click OK. Click Apply to finalize your power settings. To resume from standby mode There are three ways to bring your computer back from the standby mode: press the space bar on your keyboard, press the left mouse button, or momentarily depress the power button on your computer. If the display does not return from standby when you press the (Standby) button, your system may be in video standby mode. Press the space bar on the keyboard to return from video standby. Standby Mode Indicators You can tell which mode the computer is in by the color of the power indicator light. Color Amber Green No color Mode Computer is in standby mode. Computer is out of standby mode, ready to use. Computer is turned off. In standby mode you may periodically hear the computer's fan turn on and off, depending on the room's temperature. This is normal functioning in standby mode. Page 311 Shutting Down Your Computer When you are ready to turn off your computer for an extended period of time, use the following procedure to shut down the computer. To avoid the potential loss of data, do not use the power switch to shut down the computer. To shut down your computer If you plan to shut down your computer for a short period of time, you may want to use standby mode instead. See Using the Standby Function. 1. Click the Start button on the Windows® taskbar to open the Start menu. 2. Click Shut Down to display the Shut Down Windows dialog box. 3. Select the Shut Down option. 4. Click OK to complete the shutdown process. Respond to any prompts about saving documents. 5. Wait for your computer to turn off automatically -- the power indicator light turns off. 6. Turn off any peripherals connected to your computer. The LCD display turns off automatically when the computer shuts down. You can also shut down your computer using the (Power) button on the keyboard. Pressing this button causes the system to perform a shutdown but does not give you any of the other options available on the Windows® Shut Down menu. About the Power Switch If your system "locks up" or "crashes," press and hold the power switch for four seconds to force your system to power off. You may need to repeat this procedure. See Locating Controls and Connectors for the power switch's location. Using the System Recovery CD(s) You can reinstall software titles that shipped with your computer if they are corrupted or accidentally erased. You may not need to recover the entire contents of your hard drive. If you experience a problem with your computer, reinstalling an individual device driver or software title may correct the problem. Use the Application Recovery CD(s) to reinstall individual applications or device drivers. See Using the Application Recovery CD(s). The System Recovery CD(s) contain a backup copy of all the software originally installed on your hard disk drive. They can be used only to recover the hard disk of the Sony computer you purchased. The System Recovery utility gives you three options: Full Restore without Format restores all the software titles that originally came with your computer without formatting the hard disk. Full Restore with Format formats the hard disk drive and then restores all the original software. If your hard drive is partitioned into C and D drives, the computer will offer you the option to reformat the drive into a single partition. Operating System Only (Windows 98® Restore with Format) formats the hard disk drive and Page 312 restores the Windows® operating system and the device drivers that shipped with your computer. This option is recommended for advanced users only. If you choose the Full Restore with Format or Operating System Only option, your hard disk will be formatted, which removes all the information on the hard disk drive. You will lose any software you have installed and any other files you have created since you started to use your computer. This means you will have to reinstall any applications that were not included with the computer when you purchased it. If you choose the Full Restore without Format option, you may need to reinstall applications that were not included with the computer when you purchased it. If you have any questions on using the System Recovery CD(s), contact Sony Customer Support. To use the System Recovery CD(s) You need to complete the Windows registration process when you use the System Recovery CD(s). 1. Insert the Sony System Recovery CD(s) in the DVD-ROM drive. The System Recovery utility boots from the DVD-ROM drive. It must be in the drive when you turn on the computer. 2. Shut down your computer as described in Shutting Down Your Computer. 3. Wait 30 seconds and turn on your computer. 4. Click OK to signify you have read and accept the Microsoft End-User License Agreement. 5. When the System Recovery menu appears, follow the on-screen instructions to complete the recovery process. Your system may include one or two System Recovery CDs. If you have two System Recovery CDs, insert the first CD to run the System Recovery program. You are prompted to insert the second CD once the information from the first CD has been installed. The recovery process takes 30 to 60 minutes to complete. Using the Application Recovery CD(s) The Application Recovery CD(s) allow you to reinstall individual applications and device drivers if they are corrupted or accidentally erased. Reinstalling an individual device driver or software title may correct a problem you are experiencing with your computer, and you may not need to recover the entire contents of your hard drive. If you do need to reinstall all the software titles that shipped with your computer, use the System Recovery CD(s). See Using the System Recovery CD(s). You must be in Windows to run the Application Recovery CD(s). The application will not run from DOS. If you have any questions on using the Application Recovery CD(s), contact Sony Customer Support. To use the Application Recovery CD(s) 1. Turn on your computer. If your computer is already on, close all applications. 2. When the Windows desktop appears, insert the Sony Application Recovery CD in the DVD-ROM drive. The Application Recovery utility loads automatically. 3. When the Application Recovery menu appears, follow the on-screen instructions to complete the recovery process. Your system may include one or two Application Recovery CDs. If you have two Application Recovery CDs, insert the first CD to run the Application Recovery program. You may be prompted to insert the second CD, depending on the application you wish to restore. Page 313 About the Software on Your Computer Your VAIO Slimtop computer is ready to help you work, play, learn, and communicate as soon as you turn it on. This section gives you an overview of the activities you can perform with your software titles. For support information, see For Answers to Your Software Questions . Adobe Acrobat® Reader Adobe Systems Incorporated Acrobat Reader software allows you to view, navigate, and print electronic documents in Adobe's Portable Document Format (PDF), an open file format that is intended to preserve the fidelity of documents created on all major computer platforms. Adobe PhotoDeluxe® Home Edition Adobe Systems Incorporated Create amazing photo effects with PhotoDeluxe. Without learning complex software, you can enhance, restore, and be creative with your photos. Includes built-in guided activities, stock photos, clip art, and templates to assist you. Adobe Premiere® LE Adobe Systems Incorporated Adobe Premiere LE offers an interface and editing tool for producing movies for video, multimedia, or the Web. View source clips and edited footage simultaneously in the monitor window. Create video clips up to three hours long with complete audio-video synchronization. America Online® America Online America Online is the world's most popular Internet online service. Stay in touch with family and friends with Easy-to-Use E-mail, manage your personal finances, get the latest news and sports scores, and chat with thousands of others who share your interests. AT&T WorldNet® Service AT&T Fast, reliable Internet access from AT&T WorldNet Service. AT&T WorldNet Service provides Web-based e-mail, a personalized start page from Excite, easy access to the Excite search engine, free Web pages, online and live agent technical support, instant messaging, and special shopping discounts at Market Square. CompuServe® 2000 CompuServe Interactive Services The all new CompuServe 2000 delivers a powerful tool for Internet users who want serious and timely information, in-depth research, and professional communities backed by state-of-the-art technologies, including high-speed access and powerful e-mail messaging. Digital Media Bar Sony Electronics Media Bar software is your all-in-one solution for audio/video playback. It handles all common computer multimedia formats, and controls selected Sony devices. Media Bar software encompasses audio/video library cataloging and playlist management, in addition to digital video quality control and effects features. DVgate Sony Electronics Connect a digital video camera recorder to the i.LINK connector and capture your own video clips. You can edit the clips from your video, add others, and combine clips into new movie segments. EarthLink TotalAccess EarthLink Network, Inc. Page 314 An Internet Service Provider that supplies access, information, and assistance to its customers, introducing them to the Internet. Member benefits include e-mail, newsgroups, a Personal Start Page, a free 6 MB web site, a member magazine, and 24-hour technical support. McAfee's VirusScan® Network Associates, Inc. Protect your computer from viruses. VirusScan can detect viruses from floppy disks, Internet downloads, e-mail attachments, intranets, shared files, CD-ROMs, and online services. Microsoft® Internet Explorer for Windows® 98 Microsoft Corporation Internet Explorer delivers the Web the way you want it. It's safe, easy to use, and you can personalize how you access the Web. Outlook Express and other tools in Internet Explorer also help you have a great experience when you are on the Web! Microsoft® Outlook® Express Microsoft Corporation Outlook Express, the messaging tool that takes your e-mail and newsgroup communications to new heights! Outlook Express is easy to set up and use, and provides you with secure, personalized, and complete features that make creating, sending, and reading your e-mail a more rich and dynamic experience. Microsoft® Word 2000 Microsoft Corporation Microsoft Word 2000 makes it easy to create common Web, e-mail, and print documents for use around the world. It embraces HTML as a first-class file format and extends Word's ease-of-use to the Web and e-mail. Word 2000 also extends that ease of use to international users, making it easy to create multilingual documents. Netscape Communicator® Netscape Communications Netscape Communicator is the all-in-one Internet tool that makes it easy to browse the Web, send Internet e-mail, chat, read newsgroups, and compose great Web documents. PictureGear Sony Electronics This image management software displays images from your hard drive, a Sony digital still camera, or a Sony Mavica® camera. The images appear in a convenient light-table format, so that you can easily view the contents of an entire folder. Prodigy Internet Prodigy Communications Corporation An Internet service that helps you find what you need online faster and smarter. Prodigy delivers powerful online content, such as sports scores, stock quotes, news, and easy access to Excite , plus a personal e-mail account and quality customer service, all at a competitive price. Quicken® Basic Intuit, Inc. Quicken is the fastest, easiest way to organize your finances. Quicken works just like your checkbook, so it's easy to learn and use. Quicken manages all of your finances, bank accounts, credit cards, investments, and loans. You can even pay your bills online. Smart Capture Sony Electronics Smart Capture is a fun new way to send multimedia messages via e-mail. Smart Capture manages the i.LINK connection between your computer and a Sony Digital Handycam® Camcorder or other Page 315 cameras that support the i.LINK interface. It allows you to capture and compress video or still images that you can save or share via e-mail. A smart solution to computer, digital audio/video, and network convergence. Smart Connect Sony Electronics Smart Connect allows you to use an i.LINK cable to connect your VAIO computer to another VAIO computer that supports Smart Connect. You can then use one computer to copy, delete, and edit files on the other computer. You can also print from a printer attached to either computer. Sound Forge® Sonic Foundry Sound Forge allows you to put powerful audio processing tools and effects to work on your desktop. Simply cut, copy, and paste your way to striking multimedia files for use in everything from Web pages to desktop presentations. VAIO Action Setup Sony Electronics VAIO Action Setup manages the settings for your computer's Programmable Power Keys (PPK), Memory Stick media, i.LINK interface, and internal timer. For more information, see VAIO Action Setup. WinFax® Basic Edition Symantec Corporation WinFax Basic Edition incorporates an easy-to-use interface that allows you to send and receive faxes easily. Upgrade to WinFax Pro to receive additional features. About Your Recovery CDs Application Recovery CD(s) Sony Electronics The Application Recovery CD program allows you to reinstall individual applications and device drivers. Use it to restore corrupted or accidentally erased files. System Recovery CD(s) Sony Electronics The System Recovery CD program allows you to restore the software titles that shipped with your computer if they become corrupted or are erased accidentally. It can be used only to restore the hard disk of the Sony computer you purchased. For Answers to Your Software Questions Acrobat® Reader, Adobe PhotoDeluxe® Home Edition (Adobe Systems Incorporated) Web site http://www.adobe.com/ phone 206-628-2746 (fee-based support) fax 206-628-5737 e-mail [email protected] hours M-F, 6 AM-5 PM PT America Online® (America Online) Web site phone hours http://www.aol.com/ 800-827-3338 7 days a week, 6 AM - 2 PM ET AT&T WorldNet® Service (AT&T) Web site phone e-mail http://www.att.net 800-400-1447 [email protected] Page 316 hours 7 days a week, 24 hours a day CompuServe® 2000 (CompuServe Interactive Services) Web site phone hours http://www.compuserve.com/ 800-848-8990 M-F, 8 AM - 1 AM ET, S-S 10 AM - 10 PM ET EarthLink TotalAccess Web site phone e-mail hours (EarthLink Network, Inc.) http://help.earthlink.net/techsupport/ 800-395-8410 [email protected] 7 days a week, 24 hours a day GTE Easy Sign-up (GTE Internet) phone hours 800-927-3000 7 days a week, 24 hours a day McAfee's VirusScan (Network Associates, Inc.) Web site phone e-mail hours http://support.mcafee.com 408-988-3832 [email protected] M - F 9 AM - 5 PM Central Time MindSpring Internet Desktop (MindSpring Enterprises, Inc.) Web site phone http://help.mindspring.com/support 800-719-4660 Quicken® Basic (Intuit Inc.) Web site phone hours http://www.intuit.com/support 900-555-4688 7 days a week, 24 hours a day Sound Forge® (Sonic Foundry) Web site http://www.sonicfoundry.com/support/ phone 608-256-5555 fax 608-256-7300 e-mail [email protected] hours M - F, 8 AM - 7 PM CT Windows® 98 Second Edition Operating System, Word® 2000, Internet Explorer 5, Outlook® Express (Microsoft Corporation) Web site phone hours 1 http://www.sony.com/pcsupport 888-4SONYPC (888-476-6972) 1 7 days a week, 24 hours a day Support from 1-888-4SONYPC is free of charge for 90 days after the original date of purchase. WinFax® Basic Edition (Symantec Corporation) Web site http://www.symantec.com/techsupp/ phone 800-798-0850 fax 800-554-4403 in North America 541-984-2490 outside North America Troubleshooting This section describes how to solve common problems you may encounter when using your computer. Many problems have simple solutions, so try these suggestions before you call Sony Customer Support. My computer does not start Check that the computer is plugged into a power source and that it is turned on. Check that the power light is lit on the front panel of the computer. Confirm that a diskette is not in the diskette drive (unless you are using a bootable diskette). Confirm that the power cord and all cables are connected firmly, as described on the color poster. Page 317 If you plugged the computer into a power strip or UPS, make sure the power strip or UPS is turned on and working. My computer or software program "locks up" Close the application that is currently "locked up" by pressing Ctrl+Alt+Delete. In the Close Program dialog box, scroll down until you locate "(Not responding)" next to an application. Select this application and click End Task. Windows attempts to close the application. If the attempt is unsuccessful, a second dialog box appears. Select End Task again. If you are unable to "unlock" the application, repeat the above steps but select Shut Down when the Close Program dialog box appears. If the above steps fail to "unlock" your computer, save any unsaved work, if possible. Press Alt+F4. Select Restart and click OK. If you cannot restart as described in the preceding steps, you can restart the computer by pressing Ctrl+Alt+Delete or by pressing the power switch for more than six seconds. Pressing Ctrl+Alt+Delete may result in the loss of changes made to files that are currently open. Contact the software publisher or designated provider for technical support. See For Answers to Your Software Questions for a list of phone numbers and Web addresses or see Read Me First . My DVD-ROM/CD-ROM drive tray does not open Make sure the computer is turned on. If the Eject button does not work, you can open the tray by inserting a straightened heavyweight paper clip into the emergency eject hole. When I click an application icon, a message such as "You must insert the application CD into your CD-ROM (DVD-ROM) drive" appears and the software does not start Some titles require specific files that are located on the application's DVD-ROM/CD-ROM. Insert the disc and try starting the program again. Check to make sure you inserted the DVD-ROM/CD-ROM with the label side facing up. My modem connection is slow The computer's modem uses K56flex technology/V.90. Many factors influence modem connection speed, including telephone line noise or compatibility with telephone equipment (such as fax machines or other modems). If you think your modem is not connecting properly to other computer-based modems, fax machines, or your Internet Service Provider, check the following: Have your phone company check that your phone line is free from any line noise. If your problem is fax-related, check that there are no problems with the fax machine you are calling. The modem that receives your call may be slower or may use a different communications protocol than your modem. If this is the case, the connection speed may be slower than expected. For optimum performance, ensure you are calling an Internet Service Provider number that is V.90-compliant. If you are having a problem connecting with your Internet Service Provider, check that the ISP is not experiencing technical problems. If you have a second phone line available, try connecting the modem to this line. My modem does not work Check that the phone line is plugged into the line jack. Page Check that the phone line is working. You can check the line by plugging in an ordinary phone and318 listening for a dial tone. Check that the phone number the program is dialing is correct. Verify that the software you are using is appropriately configured to recognize and interact with the Sony computer modem. Call the software publisher if you do not know how to configure the software to recognize the modem. All programs preinstalled by Sony are compatible. If you suspect your modem is not functioning, you can perform a simple test to find out. Click the My Computer icon on your desktop. Click Control Panel, and then click Modems. Click the Diagnostics tab and select COM3. Click More Info. If your modem is functioning, a More Info dialog box will display. If your modem is not functioning, an error message will appear. My microphone is too sensitive to background noise If you find there is too much background noise when you record sound, you should adjust the microphone gain by following these steps: 1. Right-click the speaker icon (Volume) in the lower-right Windows® task tray. 2. Click Open Volume Controls. The Volume Control screen appears. 3. In the Options menu, select Properties. The Properties screen appears. 4. Change the setting for "Adjust volume for" from Playback to Recording, and then click OK. 5. Click the Advanced button under Microphone Balance. The Advanced Controls for Microphone screen appears. 6. Deselect the check box for 1 Mic Gain (+20dB), then click the Close button. 7. Close the Recording Control window. My mouse does not work Check that the mouse is plugged into one of the PS/2® connectors on the keyboard. The other connector connects the keyboard to the computer. There may be dust or dirt inside the mouse mechanism. To clean the mouse, follow these steps: o Turn off your computer. See Shutting Down Your Computer for details. o Remove the mouse ball cover on the back of the mouse by turning the ring that covers the mouse ball clockwise. o Turn the mouse upright, and drop the mouse ball into your hand. o Using a piece of tape, remove any dust or dirt on the mouse ball and inside the mouse ball socket. o Return the mouse ball to the socket, and replace the mouse ball cover. Secure the cover by turning the ring counter-clockwise. I cannot find the Windows® taskbar Check that the taskbar is not hidden or shrunken. Use the mouse to point to the left, right, top, and bottom edges of the screen. See Read Me First for additional information on using your Sony computer. To Reach Sony For further assistance, call 1-888-4SONYPC (1-888-476-6972). Page 319 Specifications Model PCV-L630 Processor 600E MHz* Pentium® III Hard Disk Drive 17 GB Ultra DMA Standard SDRAM 128 MB PC-100 SDRAM, expandable to 256 MB Video RAM 8 MB SDRAM Graphics 2X AGP 3D graphics hardware acceleration (ATi Rage 128 Pro 4XL) Sound Capabilities High fidelity 3D PCI audio Aureal AU8810 Diskette Drive 3.5" 1.44 MB FDD DVD-ROM/CD-ROM Drive 4.8X (max.) DVD-ROM reading 24X (max.) CD-ROM reading** Modem K56flex technology/V.90 compatible data/fax modem Expansion Capabilities Two PCI slots Connection Capabilities (Front) PC card (Card bus support) USB port Microphone Headphone Memory Stick media slot i.LINK (4-pin) Connection Capabilities (Rear) USB port Modem line (RJ-11) Phone line (RJ-11) Parallel (printer) Serial port VGA monitor LCD display Line In Line Out Keyboard i.LINK (6-pin) Connection Capabilities (Keyboard) Mouse (PS/2-style) left and right connectors Supplied Accessories Stand (for vertical installation) Power cable Phone cable Keyboard cable PS/2 Wheel Mouse VAIO Smart Convertible Keyboard Spacers (for bottom of the system) Ferrite core Service 90-day limited express service*** Extendible to one year from original date of purchase upon registration Limited Warranty90-day parts/labor standard Extendible to one year from original date of purchase upon registration Power Requirements 130 watts maximum Dimensions CPU: 11.2"(w) x 3.6" (h) x 13.4" (d) (280 mm x 90 mm x 335 mm) Keyboard: 15.9" (w) x 1.8" (h) x 7.1" (d) (398 mm x 45 mm x 178 mm) Display: 16.1" (w) x 13.1" (h) x 6.9" (d) (403 mm x 327 mm x 172 mm) Weight CPU: 11.9 lbs. (5.4kg) Display: 7.05 lbs (3.2 kg) Keyboard: 2.9 lbs. (1.3kg) Operating Temperature 50º F to 95º F (+10º C to 35º C) * MHz denotes microprocessor internal clock speed; other factors may affect application performance. Page 320 GB means one billion bytes when referring to hard drive capacity. Accessible capacity may vary. **Data on a DVD-ROM is read at a variable transfer rate, ranging from 2X at the innermost track to 4.8X at the outermost track(the data transfer standard 1X rate is 1385 kbytes/s). The average data transfer rate is 3.6X(4986 kbytes/s). Data on a CD-ROM is read at a variable transfer rate, ranging from 10.5X at the innermost track to 24X at the outermost track(the data transfer standard 1X rate is 150 kbytes/s). The average data transfer is 18X(2700 kbytes/s). Maximum speed for faxing is 14.4 kbytes/s. Your modem is capable of downloading at 56 kbytes/s using K56flex technology or V.90. Your phone service, online service, or Internet Service Provider, however, may not support this technology or operate at this speed. ***Certain restrictions apply. Specifications are subject to change without notice. Page 321 Features For a complete description of the specifications of your Sony computer, see Specifications. i.LINK® (IEEE-1394): Two built-in i.LINK ports provide you with front and rear digital connection capability. The i.LINK name and logo identify a digital interface (IEEE-1394) for high speed communication. Exceptional performance: Your computer includes a fast Intel® processor and a V.90-compatible data/fax modem. Ergo-Angle Multimedia LCD display: With its exclusive dual-hinge pedestal, this 15" XGA TFT display provides twice the flexibility of other LCDs. Select the perfect viewing angle and enjoy the built-in Harman/Kardon® stereo speakers. AutoAlert E-mail Notification System: Custom software automatically downloads e-mail on a pre-set schedule via Microsoft® Outlook® Express. A light on the LCD display instantly lets you know when new mail is received. VAIO Smart convertible keyboard: The innovative palm rest converts to a keyboard cover for a sleek look when not in use. Six Programmable Power Keys let you launch any application with the push of a button; dual-sided mouse connections for left- or right- hand use. Sony Memory Stick® media slot: The next generation of digital media, smaller than a stick of gum. Easily delivers information from one Memory Stick-equipped electronic device to another, so you can transfer images, sounds, data and text between cameras, computers, and more. Compact components: Enjoy the small footprint and versatile setup options available by positioning the components in an arrangement of your choice. Sony audio and video quality: High-fidelity 3D audio system and high-powered 3D graphics (AGP) enable you to take advantage of today's advanced multimedia applications, games, and entertainment software. Preinstalled software titles: All the software on your computer is preinstalled, configured, and ready for you to use right out of the box. Microsoft® Windows® 98 Second Edition operating system: Your system includes the latest operating system from Microsoft. Communications: Access popular online services, browse the Internet, send faxes, and more. * Actual upload and download speeds may vary due to line conditions, ISP support, and government regulations. Unpacking Your Computer Computer and Supplied Accessories Page 322 Manuals Read Me First contains last-minute supplementary information and software support numbers. The VAIO Slimtop LCD Computer User Guide (this manual) contains features and specifications of your computer. It also includes information on the applications included with your system and how to contact software vendors, get started with your computer, and solve common problems. The VAIO VAIO® Consumer Information Guide contains safety and regulatory information, ergonomic considerations, information on help resources, and your computer's limited warranty statement. The Microsoft® Windows®98 Second Edition Getting Started manual explains how to use the basic features of the Windows® operating system. Recovery CDs System Recovery CD(s) - Enables you to reinstall software that shipped with your computer if it is corrupted or accidentally erased. For more information, see Using the System Recovery CD(s). Application Recovery CD(s) - Allows you to reinstall individual applications or device drivers if they are corrupted or accidentally erased. For more information, see Using the Application Recovery CD(s). Other Setting up your VAIO Slimtop LCD Computer (poster) Packet containing special product offers Software CDs Page 323 Microsoft® Word 2000 Setting Up Your VAIO Slimtop LCD Computer Locating Controls and Connectors Front Panel 1 Power switch and indicator light Turns on/off the computer and the display. The indicator light is green while the power is on and amber when the computer is in standby mode. 2 Floppy disk drive Reads/writes data from/to a 3.5-inch floppy disk. 3 Floppy disk eject button Ejects the floppy disk. 4 DVD-ROM drive Reads data from a DVD-ROM/CD-ROM. 5 DVD-ROM/CD-ROM eject button Ejects a DVD-ROM/CD-ROM. 6 Manual eject hole If the DVD-ROM/CD-ROM does not come out when you press the DVD-ROM/CD-ROM eject button, insert a thin, pointed object into this hole to eject the disc manually. 7 FD (Floppy disk drive) access indicator light Lights in green while reading/writing data from/to a floppy disk. 8 Disc (DVD-ROM drive) access indicator light Lights in amber while reading data from a DVD-ROM/CD-ROM. 9 HD (drive) access indicator light Lights in green while reading/writing data from/to the hard disk. 10 MIC (Microphone) connector* Connects a microphone (not supplied). 11 PHONES (Headphones) connector* Connects headphones (not supplied). 12 VOLUME control Page 324 Adjusts the volume of the headphones connected to the PHONES connector. Users should note that this does not control the volume of the integrated LCD speakers. 13 PC CARD slot A PC Card (also called a PCMCIA card) can be installed in this slot. PC cards enable you to add functionality to your system. MEMORY STICK media slot 14 Insert a Sony Memory Stick® card into this slot. See Using the Memory Stick® Media for details on using Memory Stick media. 15 i.LINK (4-pin) Connects a digital device such as a Sony Digital Handycam® Camcorder. 16 USB (Universal Serial Bus) connector Connects a USB device. * See Using a Headphone or Microphone for important information about connecting a microphone and headphone. Rear Panel 1 AC INPUT connector Connects the supplied power cord. 2 LINE jack Connects a phone cable to the wall jack. 3 EMPTY PCI SLOT (FILLED WITH ETHERNET CARD ON CUSTOM MODELS) For a PCI Add-On Card (not supplied). 4 TELEPHONE jack Connects the phone to the computer. 5 PRINTER connector Connects a parallel device, such as a printer or scanner. 6 SERIAL connector Connects a serial device, such as a digital still camera. 7 MONITOR connector Connects a standard CRT display. 8 USB (Universal Serial Bus) connector Connects a USB device. 9 LINE IN connector Connects an audio device. 10 LINE OUT connector Connects an audio device or an active speaker. 11 i.LINK (6-pin) Connects a digital device such as a Sony Digital Handycam® Camcorder. 12 LCD MONITOR connector Connects the LCD that comes with the VAIO Slimtop LCD computer. Note: Do not connect any display to this connector other than the LCD that is supplied with this system. Page 325 13 KEYBOARD connector Connects a keyboard. LCD 1 Power indicator light Light is green while the power is on. When the computer enters the standby mode, this indicator light turns amber. 2 Information LED Light turns red to alert the user to activities, such as the arrival of e-mail. See AutoAlert E-mail Notification System. 3 Adjusts 4 Adjusts Brightness control the brightness of the screen. Volume control the volume of the integrated speakers on the LCD display. Using the Wheel Mouse For information about the Wheel Mouse that connects to either side of your keyboard, see MouseWare Help. To access MouseWare Help, from the Start menu, point to Programs, MouseWare, and then click MouseWare Help. To set up the mouse for left-handed use: 1. Click the My Computer icon on your desktop. 2. Click Control Panel, and then click Mouse. The Mouse Properties dialog box appears. 3. In the Quick Setup tab, click Device Setup. 4. In the Device Setup Wizard dialog box, click Next. 5. Select the radio button next to "Left side of the keyboard." 6. Click Next three times, and then click Finish. 7. Click Apply. Using a Headphone or Microphone When you connect a microphone or headphone to your computer, attaching a ferrite core will reduce electrical interference. Attach the (supplied) ferrite core at the end of the headphone or microphone cable closest to the computer. Wrap the cable through the center of the ferrite core. The following illustration shows how to attach the ferrite core when you are using both a headphone and a microphone. Page 326 The LCD and keyboard cables already include a ferrite core. Do not remove the ferrite core from these cables. To adjust the height and viewing angle of the display Holding both sides of the display, push the display panel out and up, and then adjust the viewing angle. The LCD display is designed to maintain the best ergonomic viewing angle. Set the display height so that it does not touch the keyboard, and adjust the viewing angle approximately 27 degrees from eye level to the center of the screen. Attaching the Stand to the System Unit The main system unit can be oriented horizontally or vertically. If you place the system in a vertical position, you must attach the supplied stand to ensure stability. 1. Place the system unit on its right side, with the front of the system facing forward. 2. Insert the grooved side of the stand into the ventilation holes of the system so that the two screw holes are aligned and the stand's fins are at the rear of the unit. 3. Secure the stand to the unit with the supplied screw. Page 327 The stand keeps the system cool by allowing air to flow under it. If you choose to place the system unit in a vertical position, it is important to use the stand and to place the system unit on its left side, as in the illustration above; otherwise, the system may overheat. Registering Your Computer Take advantage of Sony's commitment to quality customer support and receive these benefits by registering your computer: Sony Customer Support--Talk to a Support Representative to troubleshoot problems you may be having with your computer. Limited warranty--Protect your investment. See Limited Warranty Statement in the VAIO® Consumer Information Guide for details. You must register your computer to extend the warranty from the initial 90-day warranty period to one year from the original date of purchase. Express Service--Provides a fast and direct return of your VAIO Slimtop Sony for service of your computer. LCD Computer to If you did not already register when you first turned on your computer, follow these steps to use the computer online registration service. 1. Click the registration icon on the VAIO desktop. 2. Enter the information requested on the first online registration form. Press the tab key to move from box to box. 3. Click the Next button to advance to the next form. 4. Complete the remaining forms by clicking the Next button each time you complete a form. The computer automatically transfers your registration information using your built-in modem and a toll-free telephone number or a local number. You may sign up for Internet access with a Sony preferred Internet Service Provider. VAIO Action Setup VAIO Action Setup manages the settings for your computer's Programmable Power Keys (PPK), Memory Stick® media, i.LINK interface, and internal timer. An overview of each of these functions is provided below. For more information on changing the settings using VAIO Action Setup, see the online VAIO Action Setup help files. To access the help files, from the Start menu, point to Programs/VAIO Action Setup/VAIO Action Setup Help. Programmable Power Keys Your Sony computer comes with technology that allows you to get to your favorite applications Page easily. Each Programmable Power Key (PPK) on your VAIO Smart convertible keyboard comes 328 programmed to launch a preset application with a single press of the key. If you wish, you can use the VAIO Action Setup software to change the Programmable Power Keys' preset functions. The Programmable Power Keys are located at the top of your keyboard, and are numbered P1 through P6. The keys work even when the computer is turned off. Pressing one of these keys turns on the computer and launches the preset application. The six Programmable Power Keys come to you preprogrammed to perform the functions listed in the table below. Key Function P1 (INTERNET) Starts Microsoft® Internet Explorer for Windows® 98. P2 (MAIL) Starts Microsoft® Outlook® Express P3 (WORK) Starts Microsoft® Word P4 (FINANCE) Starts Intuit® Quicken® Basic 2000. P5 (SETUP) Starts PPK Setup. P6 (HELP) Opens a menu of help options. Memory Stick You can use VAIO Action Setup to preset your computer to automatically launch an application when you insert a Memory Stick. For more information on Memory Stick media, see Using the Memory Stick® Media . Internal Timer The VAIO Action Setup software allows you to set your computer's internal timer to launch certain applications automatically. The timer can start applications even when the power is off. Some software applications take longer than others to launch. It is advisable to confirm in advance the amount of time your selected application takes to start. AutoAlert E-mail Notification System VAIO Action Setup also enables you to set up your computer to notify you with an Information LED when new mail arrives in your e-mail mailbox. The Information LED turns red to indicate that new e-mail has arrived. For this AutoAlert E-mail Notification System to work, you must use Microsoft® Outlook® Express as your default e-mail software, and you must have an Internet Service Provider with dial-up capabilities set up. As an alternative, you can program your AutoAlert E-mail Notification System to set the Information LED to turn on when it has successfully completed the task of dialing up and connecting to receive mail. In this case, the Information LED turns on to indicate that your e-mail account has been accessed successfully, regardless of whether or not you have mail; this works with Microsoft Outlook Express. The e-mail software you choose to use with PPK must be set as your default e-mail software. See LCD for an illustration showing the Information LED's location. AutoAlert E-mail Notification System Software Restrictions If you use software that uses a phone line The computer may not be able to disconnect the phone line due to communication and server conditions. Be sure to monitor the status of the software when running the AutoAlert E-mail Notification System, and manually disconnect the phone line if you notice a malfunction. Furthermore, when using the timer to start the software, it is advised that you set the computer to shut down or enter system standby mode after a certain length of time. This allows the computer to disconnect the phone line if the computer fails to disconnect the line normally. If you are using the timer to download e-mail automatically Page 329 It is advisable to set up your e-mail software to redial automatically if it does not connect the first time. It is also advisable to set the e-mail software to disconnect the phone line automatically when all mail has been downloaded. If you are using Microsoft® Outlook® Express When using the AutoAlert E-mail Notification System with Microsoft Outlook Express, it is advisable to select the Dial automatically setting in your Microsoft Outlook Express software. If you have not chosen this setting and wish to do so, start Outlook Express, click Tools, and then select Options. Select the check box "Automatically dial when checking for new messages." Click OK. Changing the Window Design of Sony Software To change the window design of Sony software 1. Click the Start button, point to Settings, and then click Control Panel. 2. Click UI Design Selector. 3. Click << or >> and select the desired design. 4. Click Apply. The "UI Design Selector" window design changes. The window design for your Sony software will match the "UI Design Selector" window. To try another selection, click << or >>. Then, click OK. The UI Design Selector closes and the window design of your Sony software window design displays. You may use the feature with UI Design Selector-compatible software only. Using the Memory Stick® Media Your Sony computer is designed to support the new Memory Stick recording media. The Memory Stick media is a small, versatile device that allows you to share data between various types of Sony equipment. When you use the card, your computer automatically launches Windows Explorer. This allows you to view the contents of the card. If the image files are created by a Sony digital camera or camcorder, you do not need the following steps. If you want to create a slide show that launches automatically when you insert a Memory Stick, follow these steps to transfer images from your hard drive to a Memory Stick. 1. Insert the Memory Stick into the appropriate slot. 2. Click the My Computer icon on the desktop. Page 330 3. Click the Removable Disk S: icon. 4. Create a new folder and name it "DCIM." 5. Open the DCIM folder and create a new folder named "100MSDCF." 6. Click the Start button, select VAIO, and then click PictureGear to launch the PictureGear application. 7. Select the digital images you want to save in your slide show. 8. From the PictureGear File menu, point to File Process, and then select Still Format Conversion. 9. Select Memory Stick as the Output Format. 10. Use the Browse button to select the DCIM/100MSDCF folder on the Removable Disk (S:) drive. 11. Name the file. The file name must begin with DSC (DSC0xxxx). The full file name without extension must have at least eight characters. The order in which your photos appear in your slide show will be determined by the number (xxxx) in the file name. Some examples of acceptable file names are DSC00001.jpg and DSC00002.jpg 12. Click OK to save the file. You can also add MPEG1 video files to your Slide Show by following the steps below. The order in which your video clips (MOV0xxxx files) appear in your Slide Show is determined by the number (xxxx) in the file name. 1. Insert the Memory Stick into the media slot. 2. Click the My Computer icon on the desktop. 3. Click the Removable Disk S: icon. 4. Create a new folder and name it "MSSONY." 5. Open the MSSONY folder and create a new folder named "MOML0001." 6. From the PictureGear File menu, point to File Process, and then select Still Format Conversion. 7. Copy the MPEG file into the MOML0001 folder. 8. Rename the MPEG file MOV0xxxx.mpg, where xxxx is any four-digit number. 9. To begin showing your slides, eject the Memory Stick and then reinsert it. The slide show will begin automatically. To protect data on Memory Stick media from accidental changes Memory Stick media contains a write-protect tab. The write-protect tab prevents accidental changes to information recorded on the Memory Stick media. When you slide the write-protect tab to the LOCK position, the Memory Stick is write-protected, which means you cannot delete, copy, or save information on the Memory Stick. When you slide the tab to the un-LOCK position, you can write to or modify the Memory Stick contents. To change the way the computer responds when a Memory Stick is inserted into the Memory Stick media slot Change the options on the Memory Stick tab in the PPK Setup software. Page 331 Using PC Cards This computer has a card bus PC card slot that supports a Type I or II PC card. To insert a PC card You do not need to shut down your computer when inserting a PC card. 1. Open the front panel. 2. Insert the PC card into the PC card slot until it clicks into position. When the card is completely inserted, the eject button pops out. If you cannot insert the card, do not forcibly insert it. In this case, make sure the card is not inserted upside-down or backward, and then reinsert the card into the slot carefully. See the manual that came with the PC card for details on using it. To close the front panel when the eject button is protruding, fold the button down onto the computer. To eject a PC card If you eject the PC card incorrectly, the system may not work correctly. 1. Click the Start button on the Windows® taskbar, click Settings, and then click Control Panel. 2. Click the PC Card icon. 3. Click the name of the card that you want to eject, and then click Stop. 4. When the message "You may safely remove this device" appears, click OK. 5. Push the PC card eject button on the front panel of the system unit. You may need to pull out the eject button before you can eject the card. Page 332 The card is ejected from the card connector. Remove the card by holding it by its edge and pulling it out carefully. Using the Standby Function When you are finished using your computer, you can put it in standby mode rather than turn it off completely. Putting the computer in standby mode allows you to return quickly to normal computer use. To put the computer in standby mode manually 1. Save your work and close any applications that are running. (You can leave Windows running.) 2. Press the (Standby) button on the top of the keyboard. The computer goes into standby mode. Alternatively, you can click the Start button on the Windows® taskbar, click Shut Down, select Standby, and then click OK. To let the computer go into standby mode automatically Click the My Computer icon on your desktop. Click Control Panel, and then click the Power Management icon. On the Power Schemes tab, select from the options in the Power schemes drop-down list. Then, choose settings for the power scheme you have selected. To save the settings under a name that is not offered in the Power schemes pulldown menu, choose your settings and then click Save As. Type in a name, and click OK. Click Apply to finalize your power settings. To resume from standby mode There are three ways to bring your computer back from the standby mode: press the space bar on your keyboard, press the left mouse button, or momentarily depress the power button on your computer. If the display does not return from standby when you press the (Standby) button, your system may be in video standby mode. Press the space bar on the keyboard to return from video standby. Standby Mode Indicators You can tell which mode the computer is in by the color of the power indicator light. Color Amber Green No color Mode Computer is in standby mode. Computer is out of standby mode, ready to use. Computer is turned off. In standby mode you may periodically hear the computer's fan turn on and off, depending on the room's temperature. This is normal functioning in standby mode. Page 333 Shutting Down Your Computer When you are ready to turn off your computer for an extended period of time, use the following procedure to shut down the computer. To avoid the potential loss of data, do not use the power switch to shut down the computer. To shut down your computer If you plan to shut down your computer for a short period of time, you may want to use standby mode instead. See Using the Standby Function. 1. Click the Start button on the Windows® taskbar to open the Start menu. 2. Click Shut Down to display the Shut Down Windows dialog box. 3. Select the Shut Down option. 4. Click OK to complete the shutdown process. Respond to any prompts about saving documents. 5. Wait for your computer to turn off automatically -- the power indicator light turns off. 6. Turn off any peripherals connected to your computer. The LCD display turns off automatically when the computer shuts down. You can also shut down your computer using the (Power) button on the keyboard. Pressing this button causes the system to perform a shutdown but does not give you any of the other options available on the Windows® Shut Down menu. About the Power Switch If your system "locks up" or "crashes," press and hold the power switch for four seconds to force your system to power off. You may need to repeat this procedure. See Locating Controls and Connectors for the power switch's location. Using the System Recovery CD(s) You can reinstall software titles that shipped with your computer if they are corrupted or accidentally erased. You may not need to recover the entire contents of your hard drive. If you experience a problem with your computer, reinstalling an individual device driver or software title may correct the problem. Use the Application Recovery CD(s) to reinstall individual applications or device drivers. See Using the Application Recovery CD(s). The System Recovery CD(s) contain a backup copy of all the software originally installed on your hard disk drive. They can be used only to recover the hard disk of the Sony computer you purchased. The System Recovery utility gives you three options: Full Restore without Format restores all the software titles that originally came with your computer without formatting the hard disk. Full Restore with Format formats the hard disk drive and then restores all the original software. If your hard drive is partitioned into C and D drives, the computer will offer you the option to reformat the drive into a single partition. Operating System Only (Windows 98® Restore with Format) formats the hard disk drive and Page 334 restores the Windows® operating system and the device drivers that shipped with your computer. This option is recommended for advanced users only. If you choose the Full Restore with Format or Operating System Only option, your hard disk will be formatted, which removes all the information on the hard disk drive. You will lose any software you have installed and any other files you have created since you started to use your computer. This means you will have to reinstall any applications that were not included with the computer when you purchased it. If you choose the Full Restore without Format option, you may need to reinstall applications that were not included with the computer when you purchased it. If you have any questions on using the System Recovery CD(s), contact Sony Customer Support. To use the System Recovery CD(s) You need to complete the Windows registration process when you use the System Recovery CD(s). 1. Insert the Sony System Recovery CD(s) in the DVD-ROM drive. The System Recovery utility boots from the DVD-ROM drive. It must be in the drive when you turn on the computer. 2. Shut down your computer as described in Shutting Down Your Computer. 3. Wait 30 seconds and turn on your computer. 4. Click OK to signify you have read and accept the Microsoft End-User License Agreement. 5. When the System Recovery menu appears, follow the on-screen instructions to complete the recovery process. Your system may include one or two System Recovery CDs. If you have two System Recovery CDs, insert the first CD to run the System Recovery program. You are prompted to insert the second CD once the information from the first CD has been installed. The recovery process takes 30 to 60 minutes to complete. Using the Application Recovery CD(s) The Application Recovery CD(s) allow you to reinstall individual applications and device drivers if they are corrupted or accidentally erased. Reinstalling an individual device driver or software title may correct a problem you are experiencing with your computer, and you may not need to recover the entire contents of your hard drive. If you do need to reinstall all the software titles that shipped with your computer, use the System Recovery CD(s). See Using the System Recovery CD(s). You must be in Windows to run the Application Recovery CD(s). The application will not run from DOS. If you have any questions on using the Application Recovery CD(s), contact Sony Customer Support. To use the Application Recovery CD(s) 1. Turn on your computer. If your computer is already on, close all applications. 2. When the Windows desktop appears, insert the Sony Application Recovery CD in the DVD-ROM drive. The Application Recovery utility loads automatically. 3. When the Application Recovery menu appears, follow the on-screen instructions to complete the recovery process. Your system may include one or two Application Recovery CDs. If you have two Application Recovery CDs, insert the first CD to run the Application Recovery program. You may be prompted to insert the second CD, depending on the application you wish to restore. Page 335 About the Software on Your Computer Your VAIO Slimtop computer is ready to help you work, play, learn, and communicate as soon as you turn it on. This section gives you an overview of the activities you can perform with your software titles. For support information, see For Answers to Your Software Questions . Adobe Acrobat® Reader Adobe Systems Incorporated Acrobat Reader software allows you to view, navigate, and print electronic documents in Adobe's Portable Document Format (PDF), an open file format that is intended to preserve the fidelity of documents created on all major computer platforms. Adobe PhotoDeluxe® Home Edition Adobe Systems Incorporated Create amazing photo effects with PhotoDeluxe. Without learning complex software, you can enhance, restore, and be creative with your photos. Includes built-in guided activities, stock photos, clip art, and templates to assist you. Adobe Premiere® LE Adobe Systems Incorporated Adobe Premiere LE offers an interface and editing tool for producing movies for video, multimedia, or the Web. View source clips and edited footage simultaneously in the monitor window. Create video clips up to three hours long with complete audio-video synchronization. America Online® America Online America Online is the world's most popular Internet online service. Stay in touch with family and friends with Easy-to-Use E-mail, manage your personal finances, get the latest news and sports scores, and chat with thousands of others who share your interests. AT&T WorldNet® Service AT&T Fast, reliable Internet access from AT&T WorldNet Service. AT&T WorldNet Service provides Web-based e-mail, a personalized start page from Excite, easy access to the Excite search engine, free Web pages, online and live agent technical support, instant messaging, and special shopping discounts at Market Square. CompuServe® 2000 CompuServe Interactive Services The all new CompuServe 2000 delivers a powerful tool for Internet users who want serious and timely information, in-depth research, and professional communities backed by state-of-the-art technologies, including high-speed access and powerful e-mail messaging. Digital Media Bar Sony Electronics Media Bar software is your all-in-one solution for audio/video playback. It handles all common computer multimedia formats, and controls selected Sony devices. Media Bar software encompasses audio/video library cataloging and playlist management, in addition to digital video quality control and effects features. DVgate Sony Electronics Connect a digital video camera recorder to the i.LINK connector and capture your own video clips. You can edit the clips from your video, add others, and combine clips into new movie segments. EarthLink TotalAccess EarthLink Network, Inc. Page 336 An Internet Service Provider that supplies access, information, and assistance to its customers, introducing them to the Internet. Member benefits include e-mail, newsgroups, a Personal Start Page, a free 6 MB web site, a member magazine, and 24-hour technical support. McAfee's VirusScan® Network Associates, Inc. Protect your computer from viruses. VirusScan can detect viruses from floppy disks, Internet downloads, e-mail attachments, intranets, shared files, CD-ROMs, and online services. Microsoft® Internet Explorer for Windows® 98 Microsoft Corporation Internet Explorer delivers the Web the way you want it. It's safe, easy to use, and you can personalize how you access the Web. Outlook Express and other tools in Internet Explorer also help you have a great experience when you are on the Web! Microsoft® Outlook® Express Microsoft Corporation Outlook Express, the messaging tool that takes your e-mail and newsgroup communications to new heights! Outlook Express is easy to set up and use, and provides you with secure, personalized, and complete features that make creating, sending, and reading your e-mail a more rich and dynamic experience. Microsoft® Word 2000 Microsoft Corporation Microsoft Word 2000 makes it easy to create common Web, e-mail, and print documents for use around the world. It embraces HTML as a first-class file format and extends Word's ease-of-use to the Web and e-mail. Word 2000 also extends that ease of use to international users, making it easy to create multilingual documents. Netscape Communicator® Netscape Communications Netscape Communicator is the all-in-one Internet tool that makes it easy to browse the Web, send Internet e-mail, chat, read newsgroups, and compose great Web documents. PictureGear Sony Electronics This image management software displays images from your hard drive, a Sony digital still camera, or a Sony Mavica® camera. The images appear in a convenient light-table format, so that you can easily view the contents of an entire folder. Prodigy Internet Prodigy Communications Corporation An Internet service that helps you find what you need online faster and smarter. Prodigy delivers powerful online content, such as sports scores, stock quotes, news, and easy access to Excite , plus a personal e-mail account and quality customer service, all at a competitive price. Quicken® Basic Intuit, Inc. Quicken is the fastest, easiest way to organize your finances. Quicken works just like your checkbook, so it's easy to learn and use. Quicken manages all of your finances, bank accounts, credit cards, investments, and loans. You can even pay your bills online. Smart Capture Sony Electronics Smart Capture is a fun new way to send multimedia messages via e-mail. Smart Capture manages the i.LINK connection between your computer and a Sony Digital Handycam® Camcorder or other Page 337 cameras that support the i.LINK interface. It allows you to capture and compress video or still images that you can save or share via e-mail. A smart solution to computer, digital audio/video, and network convergence. Smart Connect Sony Electronics Smart Connect allows you to use an i.LINK cable to connect your VAIO computer to another VAIO computer that supports Smart Connect. You can then use one computer to copy, delete, and edit files on the other computer. You can also print from a printer attached to either computer. Sound Forge® Sonic Foundry Sound Forge allows you to put powerful audio processing tools and effects to work on your desktop. Simply cut, copy, and paste your way to striking multimedia files for use in everything from Web pages to desktop presentations. VAIO Action Setup Sony Electronics VAIO Action Setup manages the settings for your computer's Programmable Power Keys (PPK), Memory Stick media, i.LINK interface, and internal timer. For more information, see VAIO Action Setup. WinFax® Basic Edition Symantec Corporation WinFax Basic Edition incorporates an easy-to-use interface that allows you to send and receive faxes easily. Upgrade to WinFax Pro to receive additional features. About Your Recovery CDs Application Recovery CD(s) Sony Electronics The Application Recovery CD program allows you to reinstall individual applications and device drivers. Use it to restore corrupted or accidentally erased files. System Recovery CD(s) Sony Electronics The System Recovery CD program allows you to restore the software titles that shipped with your computer if they become corrupted or are erased accidentally. It can be used only to restore the hard disk of the Sony computer you purchased. For Answers to Your Software Questions Acrobat® Reader, Adobe PhotoDeluxe® Home Edition (Adobe Systems Incorporated) Web site http://www.adobe.com/ phone 206-628-2746 (fee-based support) fax 206-628-5737 e-mail [email protected] hours M-F, 6 AM-5 PM PT America Online® (America Online) Web site phone hours http://www.aol.com/ 800-827-3338 7 days a week, 6 AM - 2 PM ET AT&T WorldNet® Service (AT&T) Web site phone e-mail http://www.att.net 800-400-1447 [email protected] Page 338 hours 7 days a week, 24 hours a day CompuServe® 2000 (CompuServe Interactive Services) Web site phone hours http://www.compuserve.com/ 800-848-8990 M-F, 8 AM - 1 AM ET, S-S 10 AM - 10 PM ET EarthLink TotalAccess Web site phone e-mail hours (EarthLink Network, Inc.) http://help.earthlink.net/techsupport/ 800-395-8410 [email protected] 7 days a week, 24 hours a day GTE Easy Sign-up (GTE Internet) phone hours 800-927-3000 7 days a week, 24 hours a day McAfee's VirusScan (Network Associates, Inc.) Web site phone e-mail hours http://support.mcafee.com 408-988-3832 [email protected] M - F 9 AM - 5 PM Central Time MindSpring Internet Desktop (MindSpring Enterprises, Inc.) Web site phone http://help.mindspring.com/support 800-719-4660 Quicken® Basic (Intuit Inc.) Web site phone hours http://www.intuit.com/support 900-555-4688 7 days a week, 24 hours a day Sound Forge® (Sonic Foundry) Web site http://www.sonicfoundry.com/support/ phone 608-256-5555 fax 608-256-7300 e-mail [email protected] hours M - F, 8 AM - 7 PM CT Windows® 98 Second Edition Operating System, Word® 2000, Internet Explorer 5, Outlook® Express (Microsoft Corporation) Web site phone hours 1 http://www.sony.com/pcsupport 888-4SONYPC (888-476-6972) 1 7 days a week, 24 hours a day Support from 1-888-4SONYPC is free of charge for 90 days after the original date of purchase. WinFax® Basic Edition (Symantec Corporation) Web site http://www.symantec.com/techsupp/ phone 800-798-0850 fax 800-554-4403 in North America 541-984-2490 outside North America Troubleshooting This section describes how to solve common problems you may encounter when using your computer. Many problems have simple solutions, so try these suggestions before you call Sony Customer Support. My computer does not start Check that the computer is plugged into a power source and that it is turned on. Check that the power light is lit on the front panel of the computer. Confirm that a diskette is not in the diskette drive (unless you are using a bootable diskette). Confirm that the power cord and all cables are connected firmly, as described on the color poster. Page 339 If you plugged the computer into a power strip or UPS, make sure the power strip or UPS is turned on and working. My computer or software program "locks up" Close the application that is currently "locked up" by pressing Ctrl+Alt+Delete. In the Close Program dialog box, scroll down until you locate "(Not responding)" next to an application. Select this application and click End Task. Windows attempts to close the application. If the attempt is unsuccessful, a second dialog box appears. Select End Task again. If you are unable to "unlock" the application, repeat the above steps but select Shut Down when the Close Program dialog box appears. If the above steps fail to "unlock" your computer, save any unsaved work, if possible. Press Alt+F4. Select Restart and click OK. If you cannot restart as described in the preceding steps, you can restart the computer by pressing Ctrl+Alt+Delete or by pressing the power switch for more than six seconds. Pressing Ctrl+Alt+Delete may result in the loss of changes made to files that are currently open. Contact the software publisher or designated provider for technical support. See For Answers to Your Software Questions for a list of phone numbers and Web addresses or see Read Me First . My DVD-ROM/CD-ROM drive tray does not open Make sure the computer is turned on. If the Eject button does not work, you can open the tray by inserting a straightened heavyweight paper clip into the emergency eject hole. When I click an application icon, a message such as "You must insert the application CD into your CD-ROM (DVD-ROM) drive" appears and the software does not start Some titles require specific files that are located on the application's DVD-ROM/CD-ROM. Insert the disc and try starting the program again. Check to make sure you inserted the DVD-ROM/CD-ROM with the label side facing up. My modem connection is slow The computer's modem uses K56flex technology/V.90. Many factors influence modem connection speed, including telephone line noise or compatibility with telephone equipment (such as fax machines or other modems). If you think your modem is not connecting properly to other computer-based modems, fax machines, or your Internet Service Provider, check the following: Have your phone company check that your phone line is free from any line noise. If your problem is fax-related, check that there are no problems with the fax machine you are calling. The modem that receives your call may be slower or may use a different communications protocol than your modem. If this is the case, the connection speed may be slower than expected. For optimum performance, ensure you are calling an Internet Service Provider number that is V.90-compliant. If you are having a problem connecting with your Internet Service Provider, check that the ISP is not experiencing technical problems. If you have a second phone line available, try connecting the modem to this line. My modem does not work Check that the phone line is plugged into the line jack. Page Check that the phone line is working. You can check the line by plugging in an ordinary phone and340 listening for a dial tone. Check that the phone number the program is dialing is correct. Verify that the software you are using is appropriately configured to recognize and interact with the Sony computer modem. Call the software publisher if you do not know how to configure the software to recognize the modem. All programs preinstalled by Sony are compatible. If you suspect your modem is not functioning, you can perform a simple test to find out. Click the My Computer icon on your desktop. Click Control Panel, and then click Modems. Click the Diagnostics tab and select COM3. Click More Info. If your modem is functioning, a More Info dialog box will display. If your modem is not functioning, an error message will appear. My microphone is too sensitive to background noise If you find there is too much background noise when you record sound, you should adjust the microphone gain by following these steps: 1. Right-click the speaker icon (Volume) in the lower-right Windows® task tray. 2. Click Open Volume Controls. The Volume Control screen appears. 3. In the Options menu, select Properties. The Properties screen appears. 4. Change the setting for "Adjust volume for" from Playback to Recording, and then click OK. 5. Click the Advanced button under Microphone Balance. The Advanced Controls for Microphone screen appears. 6. Deselect the check box for 1 Mic Gain (+20dB), then click the Close button. 7. Close the Recording Control window. My mouse does not work Check that the mouse is plugged into one of the PS/2® connectors on the keyboard. The other connector connects the keyboard to the computer. There may be dust or dirt inside the mouse mechanism. To clean the mouse, follow these steps: o Turn off your computer. See Shutting Down Your Computer for details. o Remove the mouse ball cover on the back of the mouse by turning the ring that covers the mouse ball clockwise. o Turn the mouse upright, and drop the mouse ball into your hand. o Using a piece of tape, remove any dust or dirt on the mouse ball and inside the mouse ball socket. o Return the mouse ball to the socket, and replace the mouse ball cover. Secure the cover by turning the ring counter-clockwise. I cannot find the Windows® taskbar Check that the taskbar is not hidden or shrunken. Use the mouse to point to the left, right, top, and bottom edges of the screen. See Read Me First for additional information on using your Sony computer. To Reach Sony For further assistance, call 1-888-4SONYPC (1-888-476-6972). Page 341 Specifications Model PCV-L630 Processor 600E MHz* Pentium® III Hard Disk Drive 17 GB Ultra DMA Standard SDRAM 128 MB PC-100 SDRAM, expandable to 256 MB Video RAM 8 MB SDRAM Graphics 2X AGP 3D graphics hardware acceleration (ATi Rage 128 Pro 4XL) Sound Capabilities High fidelity 3D PCI audio Aureal AU8810 Diskette Drive 3.5" 1.44 MB FDD DVD-ROM/CD-ROM Drive 4.8X (max.) DVD-ROM reading 24X (max.) CD-ROM reading** Modem K56flex technology/V.90 compatible data/fax modem Expansion Capabilities Two PCI slots Connection Capabilities (Front) PC card (Card bus support) USB port Microphone Headphone Memory Stick media slot i.LINK (4-pin) Connection Capabilities (Rear) USB port Modem line (RJ-11) Phone line (RJ-11) Parallel (printer) Serial port VGA monitor LCD display Line In Line Out Keyboard i.LINK (6-pin) Connection Capabilities (Keyboard) Mouse (PS/2-style) left and right connectors Supplied Accessories Stand (for vertical installation) Power cable Phone cable Keyboard cable PS/2 Wheel Mouse VAIO Smart Convertible Keyboard Spacers (for bottom of the system) Ferrite core Service 90-day limited express service*** Extendible to one year from original date of purchase upon registration Limited Warranty90-day parts/labor standard Extendible to one year from original date of purchase upon registration Power Requirements 130 watts maximum Dimensions CPU: 11.2"(w) x 3.6" (h) x 13.4" (d) (280 mm x 90 mm x 335 mm) Keyboard: 15.9" (w) x 1.8" (h) x 7.1" (d) (398 mm x 45 mm x 178 mm) Display: 16.1" (w) x 13.1" (h) x 6.9" (d) (403 mm x 327 mm x 172 mm) Weight CPU: 11.9 lbs. (5.4kg) Display: 7.05 lbs (3.2 kg) Keyboard: 2.9 lbs. (1.3kg) Operating Temperature 50º F to 95º F (+10º C to 35º C) * MHz denotes microprocessor internal clock speed; other factors may affect application performance. Page 342 GB means one billion bytes when referring to hard drive capacity. Accessible capacity may vary. **Data on a DVD-ROM is read at a variable transfer rate, ranging from 2X at the innermost track to 4.8X at the outermost track(the data transfer standard 1X rate is 1385 kbytes/s). The average data transfer rate is 3.6X(4986 kbytes/s). Data on a CD-ROM is read at a variable transfer rate, ranging from 10.5X at the innermost track to 24X at the outermost track(the data transfer standard 1X rate is 150 kbytes/s). The average data transfer is 18X(2700 kbytes/s). Maximum speed for faxing is 14.4 kbytes/s. Your modem is capable of downloading at 56 kbytes/s using K56flex technology or V.90. Your phone service, online service, or Internet Service Provider, however, may not support this technology or operate at this speed. ***Certain restrictions apply. Specifications are subject to change without notice. Page 343 Features For a complete description of the specifications of your Sony computer, see Specifications. i.LINK® (IEEE-1394): Two built-in i.LINK ports provide you with front and rear digital connection capability. The i.LINK name and logo identify a digital interface (IEEE-1394) for high speed communication. Exceptional performance: Your computer includes a fast Intel® processor and a V.90-compatible data/fax modem. Ergo-Angle Multimedia LCD display: With its exclusive dual-hinge pedestal, this 15" XGA TFT display provides twice the flexibility of other LCDs. Select the perfect viewing angle and enjoy the built-in Harman/Kardon® stereo speakers. AutoAlert E-mail Notification System: Custom software automatically downloads e-mail on a pre-set schedule via Microsoft® Outlook® Express. A light on the LCD display instantly lets you know when new mail is received. VAIO Smart convertible keyboard: The innovative palm rest converts to a keyboard cover for a sleek look when not in use. Six Programmable Power Keys let you launch any application with the push of a button; dual-sided mouse connections for left- or right- hand use. Sony Memory Stick® media slot: The next generation of digital media, smaller than a stick of gum. Easily delivers information from one Memory Stick-equipped electronic device to another, so you can transfer images, sounds, data and text between cameras, computers, and more. Compact components: Enjoy the small footprint and versatile setup options available by positioning the components in an arrangement of your choice. Sony audio and video quality: High-fidelity 3D audio system and high-powered 3D graphics (AGP) enable you to take advantage of today's advanced multimedia applications, games, and entertainment software. Preinstalled software titles: All the software on your computer is preinstalled, configured, and ready for you to use right out of the box. Microsoft® Windows® 98 Second Edition operating system: Your system includes the latest operating system from Microsoft. Communications: Access popular online services, browse the Internet, send faxes, and more. * Actual upload and download speeds may vary due to line conditions, ISP support, and government regulations. Unpacking Your Computer Computer and Supplied Accessories Page 344 Manuals Read Me First contains last-minute supplementary information and software support numbers. The VAIO Slimtop LCD Computer User Guide (this manual) contains features and specifications of your computer. It also includes information on the applications included with your system and how to contact software vendors, get started with your computer, and solve common problems. The VAIO VAIO® Consumer Information Guide contains safety and regulatory information, ergonomic considerations, information on help resources, and your computer's limited warranty statement. The Microsoft® Windows®98 Second Edition Getting Started manual explains how to use the basic features of the Windows® operating system. Recovery CDs System Recovery CD(s) - Enables you to reinstall software that shipped with your computer if it is corrupted or accidentally erased. For more information, see Using the System Recovery CD(s). Application Recovery CD(s) - Allows you to reinstall individual applications or device drivers if they are corrupted or accidentally erased. For more information, see Using the Application Recovery CD(s). Other Setting up your VAIO Slimtop LCD Computer (poster) Packet containing special product offers Software CDs Page 345 Microsoft® Word 2000 Setting Up Your VAIO Slimtop LCD Computer Locating Controls and Connectors Front Panel 1 Power switch and indicator light Turns on/off the computer and the display. The indicator light is green while the power is on and amber when the computer is in standby mode. 2 Floppy disk drive Reads/writes data from/to a 3.5-inch floppy disk. 3 Floppy disk eject button Ejects the floppy disk. 4 DVD-ROM drive Reads data from a DVD-ROM/CD-ROM. 5 DVD-ROM/CD-ROM eject button Ejects a DVD-ROM/CD-ROM. 6 Manual eject hole If the DVD-ROM/CD-ROM does not come out when you press the DVD-ROM/CD-ROM eject button, insert a thin, pointed object into this hole to eject the disc manually. 7 FD (Floppy disk drive) access indicator light Lights in green while reading/writing data from/to a floppy disk. 8 Disc (DVD-ROM drive) access indicator light Lights in amber while reading data from a DVD-ROM/CD-ROM. 9 HD (drive) access indicator light Lights in green while reading/writing data from/to the hard disk. 10 MIC (Microphone) connector* Connects a microphone (not supplied). 11 PHONES (Headphones) connector* Connects headphones (not supplied). 12 VOLUME control Page 346 Adjusts the volume of the headphones connected to the PHONES connector. Users should note that this does not control the volume of the integrated LCD speakers. 13 PC CARD slot A PC Card (also called a PCMCIA card) can be installed in this slot. PC cards enable you to add functionality to your system. MEMORY STICK media slot 14 Insert a Sony Memory Stick® card into this slot. See Using the Memory Stick® Media for details on using Memory Stick media. 15 i.LINK (4-pin) Connects a digital device such as a Sony Digital Handycam® Camcorder. 16 USB (Universal Serial Bus) connector Connects a USB device. * See Using a Headphone or Microphone for important information about connecting a microphone and headphone. Rear Panel 1 AC INPUT connector Connects the supplied power cord. 2 LINE jack Connects a phone cable to the wall jack. 3 EMPTY PCI SLOT (FILLED WITH ETHERNET CARD ON CUSTOM MODELS) For a PCI Add-On Card (not supplied). 4 TELEPHONE jack Connects the phone to the computer. 5 PRINTER connector Connects a parallel device, such as a printer or scanner. 6 SERIAL connector Connects a serial device, such as a digital still camera. 7 MONITOR connector Connects a standard CRT display. 8 USB (Universal Serial Bus) connector Connects a USB device. 9 LINE IN connector Connects an audio device. 10 LINE OUT connector Connects an audio device or an active speaker. 11 i.LINK (6-pin) Connects a digital device such as a Sony Digital Handycam® Camcorder. 12 LCD MONITOR connector Connects the LCD that comes with the VAIO Slimtop LCD computer. Note: Do not connect any display to this connector other than the LCD that is supplied with this system. Page 347 13 KEYBOARD connector Connects a keyboard. LCD 1 Power indicator light Light is green while the power is on. When the computer enters the standby mode, this indicator light turns amber. 2 Information LED Light turns red to alert the user to activities, such as the arrival of e-mail. See AutoAlert E-mail Notification System. 3 Adjusts 4 Adjusts Brightness control the brightness of the screen. Volume control the volume of the integrated speakers on the LCD display. Using the Wheel Mouse For information about the Wheel Mouse that connects to either side of your keyboard, see MouseWare Help. To access MouseWare Help, from the Start menu, point to Programs, MouseWare, and then click MouseWare Help. To set up the mouse for left-handed use: 1. Click the My Computer icon on your desktop. 2. Click Control Panel, and then click Mouse. The Mouse Properties dialog box appears. 3. In the Quick Setup tab, click Device Setup. 4. In the Device Setup Wizard dialog box, click Next. 5. Select the radio button next to "Left side of the keyboard." 6. Click Next three times, and then click Finish. 7. Click Apply. Using a Headphone or Microphone When you connect a microphone or headphone to your computer, attaching a ferrite core will reduce electrical interference. Attach the (supplied) ferrite core at the end of the headphone or microphone cable closest to the computer. Wrap the cable through the center of the ferrite core. The following illustration shows how to attach the ferrite core when you are using both a headphone and a microphone. Page 348 The LCD and keyboard cables already include a ferrite core. Do not remove the ferrite core from these cables. To adjust the height and viewing angle of the display Holding both sides of the display, push the display panel out and up, and then adjust the viewing angle. The LCD display is designed to maintain the best ergonomic viewing angle. Set the display height so that it does not touch the keyboard, and adjust the viewing angle approximately 27 degrees from eye level to the center of the screen. Attaching the Stand to the System Unit The main system unit can be oriented horizontally or vertically. If you place the system in a vertical position, you must attach the supplied stand to ensure stability. 1. Place the system unit on its right side, with the front of the system facing forward. 2. Insert the grooved side of the stand into the ventilation holes of the system so that the two screw holes are aligned and the stand's fins are at the rear of the unit. 3. Secure the stand to the unit with the supplied screw. Page 349 The stand keeps the system cool by allowing air to flow under it. If you choose to place the system unit in a vertical position, it is important to use the stand and to place the system unit on its left side, as in the illustration above; otherwise, the system may overheat. Registering Your Computer Take advantage of Sony's commitment to quality customer support and receive these benefits by registering your computer: Sony Customer Support--Talk to a Support Representative to troubleshoot problems you may be having with your computer. Limited warranty--Protect your investment. See Limited Warranty Statement in the VAIO® Consumer Information Guide for details. You must register your computer to extend the warranty from the initial 90-day warranty period to one year from the original date of purchase. Express Service--Provides a fast and direct return of your VAIO Slimtop Sony for service of your computer. LCD Computer to If you did not already register when you first turned on your computer, follow these steps to use the computer online registration service. 1. Click the registration icon on the VAIO desktop. 2. Enter the information requested on the first online registration form. Press the tab key to move from box to box. 3. Click the Next button to advance to the next form. 4. Complete the remaining forms by clicking the Next button each time you complete a form. The computer automatically transfers your registration information using your built-in modem and a toll-free telephone number or a local number. You may sign up for Internet access with a Sony preferred Internet Service Provider. VAIO Action Setup VAIO Action Setup manages the settings for your computer's Programmable Power Keys (PPK), Memory Stick® media, i.LINK interface, and internal timer. An overview of each of these functions is provided below. For more information on changing the settings using VAIO Action Setup, see the online VAIO Action Setup help files. To access the help files, from the Start menu, point to Programs/VAIO Action Setup/VAIO Action Setup Help. Programmable Power Keys Your Sony computer comes with technology that allows you to get to your favorite applications Page easily. Each Programmable Power Key (PPK) on your VAIO Smart convertible keyboard comes 350 programmed to launch a preset application with a single press of the key. If you wish, you can use the VAIO Action Setup software to change the Programmable Power Keys' preset functions. The Programmable Power Keys are located at the top of your keyboard, and are numbered P1 through P6. The keys work even when the computer is turned off. Pressing one of these keys turns on the computer and launches the preset application. The six Programmable Power Keys come to you preprogrammed to perform the functions listed in the table below. Key Function P1 (INTERNET) Starts Microsoft® Internet Explorer for Windows® 98. P2 (MAIL) Starts Microsoft® Outlook® Express P3 (WORK) Starts Microsoft® Word P4 (FINANCE) Starts Intuit® Quicken® Basic 2000. P5 (SETUP) Starts PPK Setup. P6 (HELP) Opens a menu of help options. Memory Stick You can use VAIO Action Setup to preset your computer to automatically launch an application when you insert a Memory Stick. For more information on Memory Stick media, see Using the Memory Stick® Media . Internal Timer The VAIO Action Setup software allows you to set your computer's internal timer to launch certain applications automatically. The timer can start applications even when the power is off. Some software applications take longer than others to launch. It is advisable to confirm in advance the amount of time your selected application takes to start. AutoAlert E-mail Notification System VAIO Action Setup also enables you to set up your computer to notify you with an Information LED when new mail arrives in your e-mail mailbox. The Information LED turns red to indicate that new e-mail has arrived. For this AutoAlert E-mail Notification System to work, you must use Microsoft® Outlook® Express as your default e-mail software, and you must have an Internet Service Provider with dial-up capabilities set up. As an alternative, you can program your AutoAlert E-mail Notification System to set the Information LED to turn on when it has successfully completed the task of dialing up and connecting to receive mail. In this case, the Information LED turns on to indicate that your e-mail account has been accessed successfully, regardless of whether or not you have mail; this works with Microsoft Outlook Express. The e-mail software you choose to use with PPK must be set as your default e-mail software. See LCD for an illustration showing the Information LED's location. AutoAlert E-mail Notification System Software Restrictions If you use software that uses a phone line The computer may not be able to disconnect the phone line due to communication and server conditions. Be sure to monitor the status of the software when running the AutoAlert E-mail Notification System, and manually disconnect the phone line if you notice a malfunction. Furthermore, when using the timer to start the software, it is advised that you set the computer to shut down or enter system standby mode after a certain length of time. This allows the computer to disconnect the phone line if the computer fails to disconnect the line normally. If you are using the timer to download e-mail automatically Page 351 It is advisable to set up your e-mail software to redial automatically if it does not connect the first time. It is also advisable to set the e-mail software to disconnect the phone line automatically when all mail has been downloaded. If you are using Microsoft® Outlook® Express When using the AutoAlert E-mail Notification System with Microsoft Outlook Express, it is advisable to select the Dial automatically setting in your Microsoft Outlook Express software. If you have not chosen this setting and wish to do so, start Outlook Express, click Tools, and then select Options. Select the check box "Automatically dial when checking for new messages." Click OK. Changing the Window Design of Sony Software To change the window design of Sony software 1. Click the Start button, point to Settings, and then click Control Panel. 2. Click UI Design Selector. 3. Click << or >> and select the desired design. 4. Click Apply. The "UI Design Selector" window design changes. The window design for your Sony software will match the "UI Design Selector" window. To try another selection, click << or >>. Then, click OK. The UI Design Selector closes and the window design of your Sony software window design displays. You may use the feature with UI Design Selector-compatible software only. Using the Memory Stick® Media Your Sony computer is designed to support the new Memory Stick recording media. The Memory Stick media is a small, versatile device that allows you to share data between various types of Sony equipment. When you use the card, your computer automatically launches Windows Explorer. This allows you to view the contents of the card. If the image files are created by a Sony digital camera or camcorder, you do not need the following steps. If you want to create a slide show that launches automatically when you insert a Memory Stick, follow these steps to transfer images from your hard drive to a Memory Stick. 1. Insert the Memory Stick into the appropriate slot. 2. Click the My Computer icon on the desktop. Page 352 3. Click the Removable Disk S: icon. 4. Create a new folder and name it "DCIM." 5. Open the DCIM folder and create a new folder named "100MSDCF." 6. Click the Start button, select VAIO, and then click PictureGear to launch the PictureGear application. 7. Select the digital images you want to save in your slide show. 8. From the PictureGear File menu, point to File Process, and then select Still Format Conversion. 9. Select Memory Stick as the Output Format. 10. Use the Browse button to select the DCIM/100MSDCF folder on the Removable Disk (S:) drive. 11. Name the file. The file name must begin with DSC (DSC0xxxx). The full file name without extension must have at least eight characters. The order in which your photos appear in your slide show will be determined by the number (xxxx) in the file name. Some examples of acceptable file names are DSC00001.jpg and DSC00002.jpg 12. Click OK to save the file. You can also add MPEG1 video files to your Slide Show by following the steps below. The order in which your video clips (MOV0xxxx files) appear in your Slide Show is determined by the number (xxxx) in the file name. 1. Insert the Memory Stick into the media slot. 2. Click the My Computer icon on the desktop. 3. Click the Removable Disk S: icon. 4. Create a new folder and name it "MSSONY." 5. Open the MSSONY folder and create a new folder named "MOML0001." 6. From the PictureGear File menu, point to File Process, and then select Still Format Conversion. 7. Copy the MPEG file into the MOML0001 folder. 8. Rename the MPEG file MOV0xxxx.mpg, where xxxx is any four-digit number. 9. To begin showing your slides, eject the Memory Stick and then reinsert it. The slide show will begin automatically. To protect data on Memory Stick media from accidental changes Memory Stick media contains a write-protect tab. The write-protect tab prevents accidental changes to information recorded on the Memory Stick media. When you slide the write-protect tab to the LOCK position, the Memory Stick is write-protected, which means you cannot delete, copy, or save information on the Memory Stick. When you slide the tab to the un-LOCK position, you can write to or modify the Memory Stick contents. To change the way the computer responds when a Memory Stick is inserted into the Memory Stick media slot Change the options on the Memory Stick tab in the PPK Setup software. Page 353 Using PC Cards This computer has a card bus PC card slot that supports a Type I or II PC card. To insert a PC card You do not need to shut down your computer when inserting a PC card. 1. Open the front panel. 2. Insert the PC card into the PC card slot until it clicks into position. When the card is completely inserted, the eject button pops out. If you cannot insert the card, do not forcibly insert it. In this case, make sure the card is not inserted upside-down or backward, and then reinsert the card into the slot carefully. See the manual that came with the PC card for details on using it. To close the front panel when the eject button is protruding, fold the button down onto the computer. To eject a PC card If you eject the PC card incorrectly, the system may not work correctly. 1. Click the Start button on the Windows® taskbar, click Settings, and then click Control Panel. 2. Click the PC Card icon. 3. Click the name of the card that you want to eject, and then click Stop. 4. When the message "You may safely remove this device" appears, click OK. 5. Push the PC card eject button on the front panel of the system unit. You may need to pull out the eject button before you can eject the card. Page 354 The card is ejected from the card connector. Remove the card by holding it by its edge and pulling it out carefully. Using the Standby Function When you are finished using your computer, you can put it in standby mode rather than turn it off completely. Putting the computer in standby mode allows you to return quickly to normal computer use. To put the computer in standby mode manually 1. Save your work and close any applications that are running. (You can leave Windows running.) 2. Press the (Standby) button on the top of the keyboard. The computer goes into standby mode. Alternatively, you can click the Start button on the Windows® taskbar, click Shut Down, select Standby, and then click OK. To let the computer go into standby mode automatically Click the My Computer icon on your desktop. Click Control Panel, and then click the Power Management icon. On the Power Schemes tab, select from the options in the Power schemes drop-down list. Then, choose settings for the power scheme you have selected. To save the settings under a name that is not offered in the Power schemes pulldown menu, choose your settings and then click Save As. Type in a name, and click OK. Click Apply to finalize your power settings. To resume from standby mode There are three ways to bring your computer back from the standby mode: press the space bar on your keyboard, press the left mouse button, or momentarily depress the power button on your computer. If the display does not return from standby when you press the (Standby) button, your system may be in video standby mode. Press the space bar on the keyboard to return from video standby. Standby Mode Indicators You can tell which mode the computer is in by the color of the power indicator light. Color Amber Green No color Mode Computer is in standby mode. Computer is out of standby mode, ready to use. Computer is turned off. In standby mode you may periodically hear the computer's fan turn on and off, depending on the room's temperature. This is normal functioning in standby mode. Page 355 Shutting Down Your Computer When you are ready to turn off your computer for an extended period of time, use the following procedure to shut down the computer. To avoid the potential loss of data, do not use the power switch to shut down the computer. To shut down your computer If you plan to shut down your computer for a short period of time, you may want to use standby mode instead. See Using the Standby Function. 1. Click the Start button on the Windows® taskbar to open the Start menu. 2. Click Shut Down to display the Shut Down Windows dialog box. 3. Select the Shut Down option. 4. Click OK to complete the shutdown process. Respond to any prompts about saving documents. 5. Wait for your computer to turn off automatically -- the power indicator light turns off. 6. Turn off any peripherals connected to your computer. The LCD display turns off automatically when the computer shuts down. You can also shut down your computer using the (Power) button on the keyboard. Pressing this button causes the system to perform a shutdown but does not give you any of the other options available on the Windows® Shut Down menu. About the Power Switch If your system "locks up" or "crashes," press and hold the power switch for four seconds to force your system to power off. You may need to repeat this procedure. See Locating Controls and Connectors for the power switch's location. Using the System Recovery CD(s) You can reinstall software titles that shipped with your computer if they are corrupted or accidentally erased. You may not need to recover the entire contents of your hard drive. If you experience a problem with your computer, reinstalling an individual device driver or software title may correct the problem. Use the Application Recovery CD(s) to reinstall individual applications or device drivers. See Using the Application Recovery CD(s). The System Recovery CD(s) contain a backup copy of all the software originally installed on your hard disk drive. They can be used only to recover the hard disk of the Sony computer you purchased. The System Recovery utility gives you three options: Full Restore without Format restores all the software titles that originally came with your computer without formatting the hard disk. Full Restore with Format formats the hard disk drive and then restores all the original software. If your hard drive is partitioned into C and D drives, the computer will offer you the option to reformat the drive into a single partition. Operating System Only (Windows 98® Restore with Format) formats the hard disk drive and Page 356 restores the Windows® operating system and the device drivers that shipped with your computer. This option is recommended for advanced users only. If you choose the Full Restore with Format or Operating System Only option, your hard disk will be formatted, which removes all the information on the hard disk drive. You will lose any software you have installed and any other files you have created since you started to use your computer. This means you will have to reinstall any applications that were not included with the computer when you purchased it. If you choose the Full Restore without Format option, you may need to reinstall applications that were not included with the computer when you purchased it. If you have any questions on using the System Recovery CD(s), contact Sony Customer Support. To use the System Recovery CD(s) You need to complete the Windows registration process when you use the System Recovery CD(s). 1. Insert the Sony System Recovery CD(s) in the DVD-ROM drive. The System Recovery utility boots from the DVD-ROM drive. It must be in the drive when you turn on the computer. 2. Shut down your computer as described in Shutting Down Your Computer. 3. Wait 30 seconds and turn on your computer. 4. Click OK to signify you have read and accept the Microsoft End-User License Agreement. 5. When the System Recovery menu appears, follow the on-screen instructions to complete the recovery process. Your system may include one or two System Recovery CDs. If you have two System Recovery CDs, insert the first CD to run the System Recovery program. You are prompted to insert the second CD once the information from the first CD has been installed. The recovery process takes 30 to 60 minutes to complete. Using the Application Recovery CD(s) The Application Recovery CD(s) allow you to reinstall individual applications and device drivers if they are corrupted or accidentally erased. Reinstalling an individual device driver or software title may correct a problem you are experiencing with your computer, and you may not need to recover the entire contents of your hard drive. If you do need to reinstall all the software titles that shipped with your computer, use the System Recovery CD(s). See Using the System Recovery CD(s). You must be in Windows to run the Application Recovery CD(s). The application will not run from DOS. If you have any questions on using the Application Recovery CD(s), contact Sony Customer Support. To use the Application Recovery CD(s) 1. Turn on your computer. If your computer is already on, close all applications. 2. When the Windows desktop appears, insert the Sony Application Recovery CD in the DVD-ROM drive. The Application Recovery utility loads automatically. 3. When the Application Recovery menu appears, follow the on-screen instructions to complete the recovery process. Your system may include one or two Application Recovery CDs. If you have two Application Recovery CDs, insert the first CD to run the Application Recovery program. You may be prompted to insert the second CD, depending on the application you wish to restore. Page 357 About the Software on Your Computer Your VAIO Slimtop computer is ready to help you work, play, learn, and communicate as soon as you turn it on. This section gives you an overview of the activities you can perform with your software titles. For support information, see For Answers to Your Software Questions . Adobe Acrobat® Reader Adobe Systems Incorporated Acrobat Reader software allows you to view, navigate, and print electronic documents in Adobe's Portable Document Format (PDF), an open file format that is intended to preserve the fidelity of documents created on all major computer platforms. Adobe PhotoDeluxe® Home Edition Adobe Systems Incorporated Create amazing photo effects with PhotoDeluxe. Without learning complex software, you can enhance, restore, and be creative with your photos. Includes built-in guided activities, stock photos, clip art, and templates to assist you. Adobe Premiere® LE Adobe Systems Incorporated Adobe Premiere LE offers an interface and editing tool for producing movies for video, multimedia, or the Web. View source clips and edited footage simultaneously in the monitor window. Create video clips up to three hours long with complete audio-video synchronization. America Online® America Online America Online is the world's most popular Internet online service. Stay in touch with family and friends with Easy-to-Use E-mail, manage your personal finances, get the latest news and sports scores, and chat with thousands of others who share your interests. AT&T WorldNet® Service AT&T Fast, reliable Internet access from AT&T WorldNet Service. AT&T WorldNet Service provides Web-based e-mail, a personalized start page from Excite, easy access to the Excite search engine, free Web pages, online and live agent technical support, instant messaging, and special shopping discounts at Market Square. CompuServe® 2000 CompuServe Interactive Services The all new CompuServe 2000 delivers a powerful tool for Internet users who want serious and timely information, in-depth research, and professional communities backed by state-of-the-art technologies, including high-speed access and powerful e-mail messaging. Digital Media Bar Sony Electronics Media Bar software is your all-in-one solution for audio/video playback. It handles all common computer multimedia formats, and controls selected Sony devices. Media Bar software encompasses audio/video library cataloging and playlist management, in addition to digital video quality control and effects features. DVgate Sony Electronics Connect a digital video camera recorder to the i.LINK connector and capture your own video clips. You can edit the clips from your video, add others, and combine clips into new movie segments. EarthLink TotalAccess EarthLink Network, Inc. Page 358 An Internet Service Provider that supplies access, information, and assistance to its customers, introducing them to the Internet. Member benefits include e-mail, newsgroups, a Personal Start Page, a free 6 MB web site, a member magazine, and 24-hour technical support. McAfee's VirusScan® Network Associates, Inc. Protect your computer from viruses. VirusScan can detect viruses from floppy disks, Internet downloads, e-mail attachments, intranets, shared files, CD-ROMs, and online services. Microsoft® Internet Explorer for Windows® 98 Microsoft Corporation Internet Explorer delivers the Web the way you want it. It's safe, easy to use, and you can personalize how you access the Web. Outlook Express and other tools in Internet Explorer also help you have a great experience when you are on the Web! Microsoft® Outlook® Express Microsoft Corporation Outlook Express, the messaging tool that takes your e-mail and newsgroup communications to new heights! Outlook Express is easy to set up and use, and provides you with secure, personalized, and complete features that make creating, sending, and reading your e-mail a more rich and dynamic experience. Microsoft® Word 2000 Microsoft Corporation Microsoft Word 2000 makes it easy to create common Web, e-mail, and print documents for use around the world. It embraces HTML as a first-class file format and extends Word's ease-of-use to the Web and e-mail. Word 2000 also extends that ease of use to international users, making it easy to create multilingual documents. Netscape Communicator® Netscape Communications Netscape Communicator is the all-in-one Internet tool that makes it easy to browse the Web, send Internet e-mail, chat, read newsgroups, and compose great Web documents. PictureGear Sony Electronics This image management software displays images from your hard drive, a Sony digital still camera, or a Sony Mavica® camera. The images appear in a convenient light-table format, so that you can easily view the contents of an entire folder. Prodigy Internet Prodigy Communications Corporation An Internet service that helps you find what you need online faster and smarter. Prodigy delivers powerful online content, such as sports scores, stock quotes, news, and easy access to Excite , plus a personal e-mail account and quality customer service, all at a competitive price. Quicken® Basic Intuit, Inc. Quicken is the fastest, easiest way to organize your finances. Quicken works just like your checkbook, so it's easy to learn and use. Quicken manages all of your finances, bank accounts, credit cards, investments, and loans. You can even pay your bills online. Smart Capture Sony Electronics Smart Capture is a fun new way to send multimedia messages via e-mail. Smart Capture manages the i.LINK connection between your computer and a Sony Digital Handycam® Camcorder or other Page 359 cameras that support the i.LINK interface. It allows you to capture and compress video or still images that you can save or share via e-mail. A smart solution to computer, digital audio/video, and network convergence. Smart Connect Sony Electronics Smart Connect allows you to use an i.LINK cable to connect your VAIO computer to another VAIO computer that supports Smart Connect. You can then use one computer to copy, delete, and edit files on the other computer. You can also print from a printer attached to either computer. Sound Forge® Sonic Foundry Sound Forge allows you to put powerful audio processing tools and effects to work on your desktop. Simply cut, copy, and paste your way to striking multimedia files for use in everything from Web pages to desktop presentations. VAIO Action Setup Sony Electronics VAIO Action Setup manages the settings for your computer's Programmable Power Keys (PPK), Memory Stick media, i.LINK interface, and internal timer. For more information, see VAIO Action Setup. WinFax® Basic Edition Symantec Corporation WinFax Basic Edition incorporates an easy-to-use interface that allows you to send and receive faxes easily. Upgrade to WinFax Pro to receive additional features. About Your Recovery CDs Application Recovery CD(s) Sony Electronics The Application Recovery CD program allows you to reinstall individual applications and device drivers. Use it to restore corrupted or accidentally erased files. System Recovery CD(s) Sony Electronics The System Recovery CD program allows you to restore the software titles that shipped with your computer if they become corrupted or are erased accidentally. It can be used only to restore the hard disk of the Sony computer you purchased. For Answers to Your Software Questions Acrobat® Reader, Adobe PhotoDeluxe® Home Edition (Adobe Systems Incorporated) Web site http://www.adobe.com/ phone 206-628-2746 (fee-based support) fax 206-628-5737 e-mail [email protected] hours M-F, 6 AM-5 PM PT America Online® (America Online) Web site phone hours http://www.aol.com/ 800-827-3338 7 days a week, 6 AM - 2 PM ET AT&T WorldNet® Service (AT&T) Web site phone e-mail http://www.att.net 800-400-1447 [email protected] Page 360 hours 7 days a week, 24 hours a day CompuServe® 2000 (CompuServe Interactive Services) Web site phone hours http://www.compuserve.com/ 800-848-8990 M-F, 8 AM - 1 AM ET, S-S 10 AM - 10 PM ET EarthLink TotalAccess Web site phone e-mail hours (EarthLink Network, Inc.) http://help.earthlink.net/techsupport/ 800-395-8410 [email protected] 7 days a week, 24 hours a day GTE Easy Sign-up (GTE Internet) phone hours 800-927-3000 7 days a week, 24 hours a day McAfee's VirusScan (Network Associates, Inc.) Web site phone e-mail hours http://support.mcafee.com 408-988-3832 [email protected] M - F 9 AM - 5 PM Central Time MindSpring Internet Desktop (MindSpring Enterprises, Inc.) Web site phone http://help.mindspring.com/support 800-719-4660 Quicken® Basic (Intuit Inc.) Web site phone hours http://www.intuit.com/support 900-555-4688 7 days a week, 24 hours a day Sound Forge® (Sonic Foundry) Web site http://www.sonicfoundry.com/support/ phone 608-256-5555 fax 608-256-7300 e-mail [email protected] hours M - F, 8 AM - 7 PM CT Windows® 98 Second Edition Operating System, Word® 2000, Internet Explorer 5, Outlook® Express (Microsoft Corporation) Web site phone hours 1 http://www.sony.com/pcsupport 888-4SONYPC (888-476-6972) 1 7 days a week, 24 hours a day Support from 1-888-4SONYPC is free of charge for 90 days after the original date of purchase. WinFax® Basic Edition (Symantec Corporation) Web site http://www.symantec.com/techsupp/ phone 800-798-0850 fax 800-554-4403 in North America 541-984-2490 outside North America Troubleshooting This section describes how to solve common problems you may encounter when using your computer. Many problems have simple solutions, so try these suggestions before you call Sony Customer Support. My computer does not start Check that the computer is plugged into a power source and that it is turned on. Check that the power light is lit on the front panel of the computer. Confirm that a diskette is not in the diskette drive (unless you are using a bootable diskette). Confirm that the power cord and all cables are connected firmly, as described on the color poster. Page 361 If you plugged the computer into a power strip or UPS, make sure the power strip or UPS is turned on and working. My computer or software program "locks up" Close the application that is currently "locked up" by pressing Ctrl+Alt+Delete. In the Close Program dialog box, scroll down until you locate "(Not responding)" next to an application. Select this application and click End Task. Windows attempts to close the application. If the attempt is unsuccessful, a second dialog box appears. Select End Task again. If you are unable to "unlock" the application, repeat the above steps but select Shut Down when the Close Program dialog box appears. If the above steps fail to "unlock" your computer, save any unsaved work, if possible. Press Alt+F4. Select Restart and click OK. If you cannot restart as described in the preceding steps, you can restart the computer by pressing Ctrl+Alt+Delete or by pressing the power switch for more than six seconds. Pressing Ctrl+Alt+Delete may result in the loss of changes made to files that are currently open. Contact the software publisher or designated provider for technical support. See For Answers to Your Software Questions for a list of phone numbers and Web addresses or see Read Me First . My DVD-ROM/CD-ROM drive tray does not open Make sure the computer is turned on. If the Eject button does not work, you can open the tray by inserting a straightened heavyweight paper clip into the emergency eject hole. When I click an application icon, a message such as "You must insert the application CD into your CD-ROM (DVD-ROM) drive" appears and the software does not start Some titles require specific files that are located on the application's DVD-ROM/CD-ROM. Insert the disc and try starting the program again. Check to make sure you inserted the DVD-ROM/CD-ROM with the label side facing up. My modem connection is slow The computer's modem uses K56flex technology/V.90. Many factors influence modem connection speed, including telephone line noise or compatibility with telephone equipment (such as fax machines or other modems). If you think your modem is not connecting properly to other computer-based modems, fax machines, or your Internet Service Provider, check the following: Have your phone company check that your phone line is free from any line noise. If your problem is fax-related, check that there are no problems with the fax machine you are calling. The modem that receives your call may be slower or may use a different communications protocol than your modem. If this is the case, the connection speed may be slower than expected. For optimum performance, ensure you are calling an Internet Service Provider number that is V.90-compliant. If you are having a problem connecting with your Internet Service Provider, check that the ISP is not experiencing technical problems. If you have a second phone line available, try connecting the modem to this line. My modem does not work Check that the phone line is plugged into the line jack. Page Check that the phone line is working. You can check the line by plugging in an ordinary phone and362 listening for a dial tone. Check that the phone number the program is dialing is correct. Verify that the software you are using is appropriately configured to recognize and interact with the Sony computer modem. Call the software publisher if you do not know how to configure the software to recognize the modem. All programs preinstalled by Sony are compatible. If you suspect your modem is not functioning, you can perform a simple test to find out. Click the My Computer icon on your desktop. Click Control Panel, and then click Modems. Click the Diagnostics tab and select COM3. Click More Info. If your modem is functioning, a More Info dialog box will display. If your modem is not functioning, an error message will appear. My microphone is too sensitive to background noise If you find there is too much background noise when you record sound, you should adjust the microphone gain by following these steps: 1. Right-click the speaker icon (Volume) in the lower-right Windows® task tray. 2. Click Open Volume Controls. The Volume Control screen appears. 3. In the Options menu, select Properties. The Properties screen appears. 4. Change the setting for "Adjust volume for" from Playback to Recording, and then click OK. 5. Click the Advanced button under Microphone Balance. The Advanced Controls for Microphone screen appears. 6. Deselect the check box for 1 Mic Gain (+20dB), then click the Close button. 7. Close the Recording Control window. My mouse does not work Check that the mouse is plugged into one of the PS/2® connectors on the keyboard. The other connector connects the keyboard to the computer. There may be dust or dirt inside the mouse mechanism. To clean the mouse, follow these steps: o Turn off your computer. See Shutting Down Your Computer for details. o Remove the mouse ball cover on the back of the mouse by turning the ring that covers the mouse ball clockwise. o Turn the mouse upright, and drop the mouse ball into your hand. o Using a piece of tape, remove any dust or dirt on the mouse ball and inside the mouse ball socket. o Return the mouse ball to the socket, and replace the mouse ball cover. Secure the cover by turning the ring counter-clockwise. I cannot find the Windows® taskbar Check that the taskbar is not hidden or shrunken. Use the mouse to point to the left, right, top, and bottom edges of the screen. See Read Me First for additional information on using your Sony computer. To Reach Sony For further assistance, call 1-888-4SONYPC (1-888-476-6972). Page 363 Specifications Model PCV-L630 Processor 600E MHz* Pentium® III Hard Disk Drive 17 GB Ultra DMA Standard SDRAM 128 MB PC-100 SDRAM, expandable to 256 MB Video RAM 8 MB SDRAM Graphics 2X AGP 3D graphics hardware acceleration (ATi Rage 128 Pro 4XL) Sound Capabilities High fidelity 3D PCI audio Aureal AU8810 Diskette Drive 3.5" 1.44 MB FDD DVD-ROM/CD-ROM Drive 4.8X (max.) DVD-ROM reading 24X (max.) CD-ROM reading** Modem K56flex technology/V.90 compatible data/fax modem Expansion Capabilities Two PCI slots Connection Capabilities (Front) PC card (Card bus support) USB port Microphone Headphone Memory Stick media slot i.LINK (4-pin) Connection Capabilities (Rear) USB port Modem line (RJ-11) Phone line (RJ-11) Parallel (printer) Serial port VGA monitor LCD display Line In Line Out Keyboard i.LINK (6-pin) Connection Capabilities (Keyboard) Mouse (PS/2-style) left and right connectors Supplied Accessories Stand (for vertical installation) Power cable Phone cable Keyboard cable PS/2 Wheel Mouse VAIO Smart Convertible Keyboard Spacers (for bottom of the system) Ferrite core Service 90-day limited express service*** Extendible to one year from original date of purchase upon registration Limited Warranty90-day parts/labor standard Extendible to one year from original date of purchase upon registration Power Requirements 130 watts maximum Dimensions CPU: 11.2"(w) x 3.6" (h) x 13.4" (d) (280 mm x 90 mm x 335 mm) Keyboard: 15.9" (w) x 1.8" (h) x 7.1" (d) (398 mm x 45 mm x 178 mm) Display: 16.1" (w) x 13.1" (h) x 6.9" (d) (403 mm x 327 mm x 172 mm) Weight CPU: 11.9 lbs. (5.4kg) Display: 7.05 lbs (3.2 kg) Keyboard: 2.9 lbs. (1.3kg) Operating Temperature 50º F to 95º F (+10º C to 35º C) * MHz denotes microprocessor internal clock speed; other factors may affect application performance. Page 364 GB means one billion bytes when referring to hard drive capacity. Accessible capacity may vary. **Data on a DVD-ROM is read at a variable transfer rate, ranging from 2X at the innermost track to 4.8X at the outermost track(the data transfer standard 1X rate is 1385 kbytes/s). The average data transfer rate is 3.6X(4986 kbytes/s). Data on a CD-ROM is read at a variable transfer rate, ranging from 10.5X at the innermost track to 24X at the outermost track(the data transfer standard 1X rate is 150 kbytes/s). The average data transfer is 18X(2700 kbytes/s). Maximum speed for faxing is 14.4 kbytes/s. Your modem is capable of downloading at 56 kbytes/s using K56flex technology or V.90. Your phone service, online service, or Internet Service Provider, however, may not support this technology or operate at this speed. ***Certain restrictions apply. Specifications are subject to change without notice. Page 365 Features For a complete description of the specifications of your Sony computer, see Specifications. i.LINK® (IEEE-1394): Two built-in i.LINK ports provide you with front and rear digital connection capability. The i.LINK name and logo identify a digital interface (IEEE-1394) for high speed communication. Exceptional performance: Your computer includes a fast Intel® processor and a V.90-compatible data/fax modem. Ergo-Angle Multimedia LCD display: With its exclusive dual-hinge pedestal, this 15" XGA TFT display provides twice the flexibility of other LCDs. Select the perfect viewing angle and enjoy the built-in Harman/Kardon® stereo speakers. AutoAlert E-mail Notification System: Custom software automatically downloads e-mail on a pre-set schedule via Microsoft® Outlook® Express. A light on the LCD display instantly lets you know when new mail is received. VAIO Smart convertible keyboard: The innovative palm rest converts to a keyboard cover for a sleek look when not in use. Six Programmable Power Keys let you launch any application with the push of a button; dual-sided mouse connections for left- or right- hand use. Sony Memory Stick® media slot: The next generation of digital media, smaller than a stick of gum. Easily delivers information from one Memory Stick-equipped electronic device to another, so you can transfer images, sounds, data and text between cameras, computers, and more. Compact components: Enjoy the small footprint and versatile setup options available by positioning the components in an arrangement of your choice. Sony audio and video quality: High-fidelity 3D audio system and high-powered 3D graphics (AGP) enable you to take advantage of today's advanced multimedia applications, games, and entertainment software. Preinstalled software titles: All the software on your computer is preinstalled, configured, and ready for you to use right out of the box. Microsoft® Windows® 98 Second Edition operating system: Your system includes the latest operating system from Microsoft. Communications: Access popular online services, browse the Internet, send faxes, and more. * Actual upload and download speeds may vary due to line conditions, ISP support, and government regulations. Unpacking Your Computer Computer and Supplied Accessories Page 366 Manuals Read Me First contains last-minute supplementary information and software support numbers. The VAIO Slimtop LCD Computer User Guide (this manual) contains features and specifications of your computer. It also includes information on the applications included with your system and how to contact software vendors, get started with your computer, and solve common problems. The VAIO VAIO® Consumer Information Guide contains safety and regulatory information, ergonomic considerations, information on help resources, and your computer's limited warranty statement. The Microsoft® Windows®98 Second Edition Getting Started manual explains how to use the basic features of the Windows® operating system. Recovery CDs System Recovery CD(s) - Enables you to reinstall software that shipped with your computer if it is corrupted or accidentally erased. For more information, see Using the System Recovery CD(s). Application Recovery CD(s) - Allows you to reinstall individual applications or device drivers if they are corrupted or accidentally erased. For more information, see Using the Application Recovery CD(s). Other Setting up your VAIO Slimtop LCD Computer (poster) Packet containing special product offers Software CDs Page 367 Microsoft® Word 2000 Setting Up Your VAIO Slimtop LCD Computer Locating Controls and Connectors Front Panel 1 Power switch and indicator light Turns on/off the computer and the display. The indicator light is green while the power is on and amber when the computer is in standby mode. 2 Floppy disk drive Reads/writes data from/to a 3.5-inch floppy disk. 3 Floppy disk eject button Ejects the floppy disk. 4 DVD-ROM drive Reads data from a DVD-ROM/CD-ROM. 5 DVD-ROM/CD-ROM eject button Ejects a DVD-ROM/CD-ROM. 6 Manual eject hole If the DVD-ROM/CD-ROM does not come out when you press the DVD-ROM/CD-ROM eject button, insert a thin, pointed object into this hole to eject the disc manually. 7 FD (Floppy disk drive) access indicator light Lights in green while reading/writing data from/to a floppy disk. 8 Disc (DVD-ROM drive) access indicator light Lights in amber while reading data from a DVD-ROM/CD-ROM. 9 HD (drive) access indicator light Lights in green while reading/writing data from/to the hard disk. 10 MIC (Microphone) connector* Connects a microphone (not supplied). 11 PHONES (Headphones) connector* Connects headphones (not supplied). 12 VOLUME control Page 368 Adjusts the volume of the headphones connected to the PHONES connector. Users should note that this does not control the volume of the integrated LCD speakers. 13 PC CARD slot A PC Card (also called a PCMCIA card) can be installed in this slot. PC cards enable you to add functionality to your system. MEMORY STICK media slot 14 Insert a Sony Memory Stick® card into this slot. See Using the Memory Stick® Media for details on using Memory Stick media. 15 i.LINK (4-pin) Connects a digital device such as a Sony Digital Handycam® Camcorder. 16 USB (Universal Serial Bus) connector Connects a USB device. * See Using a Headphone or Microphone for important information about connecting a microphone and headphone. Rear Panel 1 AC INPUT connector Connects the supplied power cord. 2 LINE jack Connects a phone cable to the wall jack. 3 EMPTY PCI SLOT (FILLED WITH ETHERNET CARD ON CUSTOM MODELS) For a PCI Add-On Card (not supplied). 4 TELEPHONE jack Connects the phone to the computer. 5 PRINTER connector Connects a parallel device, such as a printer or scanner. 6 SERIAL connector Connects a serial device, such as a digital still camera. 7 MONITOR connector Connects a standard CRT display. 8 USB (Universal Serial Bus) connector Connects a USB device. 9 LINE IN connector Connects an audio device. 10 LINE OUT connector Connects an audio device or an active speaker. 11 i.LINK (6-pin) Connects a digital device such as a Sony Digital Handycam® Camcorder. 12 LCD MONITOR connector Connects the LCD that comes with the VAIO Slimtop LCD computer. Note: Do not connect any display to this connector other than the LCD that is supplied with this system. Page 369 13 KEYBOARD connector Connects a keyboard. LCD 1 Power indicator light Light is green while the power is on. When the computer enters the standby mode, this indicator light turns amber. 2 Information LED Light turns red to alert the user to activities, such as the arrival of e-mail. See AutoAlert E-mail Notification System. 3 Adjusts 4 Adjusts Brightness control the brightness of the screen. Volume control the volume of the integrated speakers on the LCD display. Using the Wheel Mouse For information about the Wheel Mouse that connects to either side of your keyboard, see MouseWare Help. To access MouseWare Help, from the Start menu, point to Programs, MouseWare, and then click MouseWare Help. To set up the mouse for left-handed use: 1. Click the My Computer icon on your desktop. 2. Click Control Panel, and then click Mouse. The Mouse Properties dialog box appears. 3. In the Quick Setup tab, click Device Setup. 4. In the Device Setup Wizard dialog box, click Next. 5. Select the radio button next to "Left side of the keyboard." 6. Click Next three times, and then click Finish. 7. Click Apply. Using a Headphone or Microphone When you connect a microphone or headphone to your computer, attaching a ferrite core will reduce electrical interference. Attach the (supplied) ferrite core at the end of the headphone or microphone cable closest to the computer. Wrap the cable through the center of the ferrite core. The following illustration shows how to attach the ferrite core when you are using both a headphone and a microphone. Page 370 The LCD and keyboard cables already include a ferrite core. Do not remove the ferrite core from these cables. To adjust the height and viewing angle of the display Holding both sides of the display, push the display panel out and up, and then adjust the viewing angle. The LCD display is designed to maintain the best ergonomic viewing angle. Set the display height so that it does not touch the keyboard, and adjust the viewing angle approximately 27 degrees from eye level to the center of the screen. Attaching the Stand to the System Unit The main system unit can be oriented horizontally or vertically. If you place the system in a vertical position, you must attach the supplied stand to ensure stability. 1. Place the system unit on its right side, with the front of the system facing forward. 2. Insert the grooved side of the stand into the ventilation holes of the system so that the two screw holes are aligned and the stand's fins are at the rear of the unit. 3. Secure the stand to the unit with the supplied screw. Page 371 The stand keeps the system cool by allowing air to flow under it. If you choose to place the system unit in a vertical position, it is important to use the stand and to place the system unit on its left side, as in the illustration above; otherwise, the system may overheat. Registering Your Computer Take advantage of Sony's commitment to quality customer support and receive these benefits by registering your computer: Sony Customer Support--Talk to a Support Representative to troubleshoot problems you may be having with your computer. Limited warranty--Protect your investment. See Limited Warranty Statement in the VAIO® Consumer Information Guide for details. You must register your computer to extend the warranty from the initial 90-day warranty period to one year from the original date of purchase. Express Service--Provides a fast and direct return of your VAIO Slimtop Sony for service of your computer. LCD Computer to If you did not already register when you first turned on your computer, follow these steps to use the computer online registration service. 1. Click the registration icon on the VAIO desktop. 2. Enter the information requested on the first online registration form. Press the tab key to move from box to box. 3. Click the Next button to advance to the next form. 4. Complete the remaining forms by clicking the Next button each time you complete a form. The computer automatically transfers your registration information using your built-in modem and a toll-free telephone number or a local number. You may sign up for Internet access with a Sony preferred Internet Service Provider. VAIO Action Setup VAIO Action Setup manages the settings for your computer's Programmable Power Keys (PPK), Memory Stick® media, i.LINK interface, and internal timer. An overview of each of these functions is provided below. For more information on changing the settings using VAIO Action Setup, see the online VAIO Action Setup help files. To access the help files, from the Start menu, point to Programs/VAIO Action Setup/VAIO Action Setup Help. Programmable Power Keys Your Sony computer comes with technology that allows you to get to your favorite applications Page easily. Each Programmable Power Key (PPK) on your VAIO Smart convertible keyboard comes 372 programmed to launch a preset application with a single press of the key. If you wish, you can use the VAIO Action Setup software to change the Programmable Power Keys' preset functions. The Programmable Power Keys are located at the top of your keyboard, and are numbered P1 through P6. The keys work even when the computer is turned off. Pressing one of these keys turns on the computer and launches the preset application. The six Programmable Power Keys come to you preprogrammed to perform the functions listed in the table below. Key Function P1 (INTERNET) Starts Microsoft® Internet Explorer for Windows® 98. P2 (MAIL) Starts Microsoft® Outlook® Express P3 (WORK) Starts Microsoft® Word P4 (FINANCE) Starts Intuit® Quicken® Basic 2000. P5 (SETUP) Starts PPK Setup. P6 (HELP) Opens a menu of help options. Memory Stick You can use VAIO Action Setup to preset your computer to automatically launch an application when you insert a Memory Stick. For more information on Memory Stick media, see Using the Memory Stick® Media . Internal Timer The VAIO Action Setup software allows you to set your computer's internal timer to launch certain applications automatically. The timer can start applications even when the power is off. Some software applications take longer than others to launch. It is advisable to confirm in advance the amount of time your selected application takes to start. AutoAlert E-mail Notification System VAIO Action Setup also enables you to set up your computer to notify you with an Information LED when new mail arrives in your e-mail mailbox. The Information LED turns red to indicate that new e-mail has arrived. For this AutoAlert E-mail Notification System to work, you must use Microsoft® Outlook® Express as your default e-mail software, and you must have an Internet Service Provider with dial-up capabilities set up. As an alternative, you can program your AutoAlert E-mail Notification System to set the Information LED to turn on when it has successfully completed the task of dialing up and connecting to receive mail. In this case, the Information LED turns on to indicate that your e-mail account has been accessed successfully, regardless of whether or not you have mail; this works with Microsoft Outlook Express. The e-mail software you choose to use with PPK must be set as your default e-mail software. See LCD for an illustration showing the Information LED's location. AutoAlert E-mail Notification System Software Restrictions If you use software that uses a phone line The computer may not be able to disconnect the phone line due to communication and server conditions. Be sure to monitor the status of the software when running the AutoAlert E-mail Notification System, and manually disconnect the phone line if you notice a malfunction. Furthermore, when using the timer to start the software, it is advised that you set the computer to shut down or enter system standby mode after a certain length of time. This allows the computer to disconnect the phone line if the computer fails to disconnect the line normally. If you are using the timer to download e-mail automatically Page 373 It is advisable to set up your e-mail software to redial automatically if it does not connect the first time. It is also advisable to set the e-mail software to disconnect the phone line automatically when all mail has been downloaded. If you are using Microsoft® Outlook® Express When using the AutoAlert E-mail Notification System with Microsoft Outlook Express, it is advisable to select the Dial automatically setting in your Microsoft Outlook Express software. If you have not chosen this setting and wish to do so, start Outlook Express, click Tools, and then select Options. Select the check box "Automatically dial when checking for new messages." Click OK. Changing the Window Design of Sony Software To change the window design of Sony software 1. Click the Start button, point to Settings, and then click Control Panel. 2. Click UI Design Selector. 3. Click << or >> and select the desired design. 4. Click Apply. The "UI Design Selector" window design changes. The window design for your Sony software will match the "UI Design Selector" window. To try another selection, click << or >>. Then, click OK. The UI Design Selector closes and the window design of your Sony software window design displays. You may use the feature with UI Design Selector-compatible software only. Using the Memory Stick® Media Your Sony computer is designed to support the new Memory Stick recording media. The Memory Stick media is a small, versatile device that allows you to share data between various types of Sony equipment. When you use the card, your computer automatically launches Windows Explorer. This allows you to view the contents of the card. If the image files are created by a Sony digital camera or camcorder, you do not need the following steps. If you want to create a slide show that launches automatically when you insert a Memory Stick, follow these steps to transfer images from your hard drive to a Memory Stick. 1. Insert the Memory Stick into the appropriate slot. 2. Click the My Computer icon on the desktop. Page 374 3. Click the Removable Disk S: icon. 4. Create a new folder and name it "DCIM." 5. Open the DCIM folder and create a new folder named "100MSDCF." 6. Click the Start button, select VAIO, and then click PictureGear to launch the PictureGear application. 7. Select the digital images you want to save in your slide show. 8. From the PictureGear File menu, point to File Process, and then select Still Format Conversion. 9. Select Memory Stick as the Output Format. 10. Use the Browse button to select the DCIM/100MSDCF folder on the Removable Disk (S:) drive. 11. Name the file. The file name must begin with DSC (DSC0xxxx). The full file name without extension must have at least eight characters. The order in which your photos appear in your slide show will be determined by the number (xxxx) in the file name. Some examples of acceptable file names are DSC00001.jpg and DSC00002.jpg 12. Click OK to save the file. You can also add MPEG1 video files to your Slide Show by following the steps below. The order in which your video clips (MOV0xxxx files) appear in your Slide Show is determined by the number (xxxx) in the file name. 1. Insert the Memory Stick into the media slot. 2. Click the My Computer icon on the desktop. 3. Click the Removable Disk S: icon. 4. Create a new folder and name it "MSSONY." 5. Open the MSSONY folder and create a new folder named "MOML0001." 6. From the PictureGear File menu, point to File Process, and then select Still Format Conversion. 7. Copy the MPEG file into the MOML0001 folder. 8. Rename the MPEG file MOV0xxxx.mpg, where xxxx is any four-digit number. 9. To begin showing your slides, eject the Memory Stick and then reinsert it. The slide show will begin automatically. To protect data on Memory Stick media from accidental changes Memory Stick media contains a write-protect tab. The write-protect tab prevents accidental changes to information recorded on the Memory Stick media. When you slide the write-protect tab to the LOCK position, the Memory Stick is write-protected, which means you cannot delete, copy, or save information on the Memory Stick. When you slide the tab to the un-LOCK position, you can write to or modify the Memory Stick contents. To change the way the computer responds when a Memory Stick is inserted into the Memory Stick media slot Change the options on the Memory Stick tab in the PPK Setup software. Page 375 Using PC Cards This computer has a card bus PC card slot that supports a Type I or II PC card. To insert a PC card You do not need to shut down your computer when inserting a PC card. 1. Open the front panel. 2. Insert the PC card into the PC card slot until it clicks into position. When the card is completely inserted, the eject button pops out. If you cannot insert the card, do not forcibly insert it. In this case, make sure the card is not inserted upside-down or backward, and then reinsert the card into the slot carefully. See the manual that came with the PC card for details on using it. To close the front panel when the eject button is protruding, fold the button down onto the computer. To eject a PC card If you eject the PC card incorrectly, the system may not work correctly. 1. Click the Start button on the Windows® taskbar, click Settings, and then click Control Panel. 2. Click the PC Card icon. 3. Click the name of the card that you want to eject, and then click Stop. 4. When the message "You may safely remove this device" appears, click OK. 5. Push the PC card eject button on the front panel of the system unit. You may need to pull out the eject button before you can eject the card. Page 376 The card is ejected from the card connector. Remove the card by holding it by its edge and pulling it out carefully. Using the Standby Function When you are finished using your computer, you can put it in standby mode rather than turn it off completely. Putting the computer in standby mode allows you to return quickly to normal computer use. To put the computer in standby mode manually 1. Save your work and close any applications that are running. (You can leave Windows running.) 2. Press the (Standby) button on the top of the keyboard. The computer goes into standby mode. Alternatively, you can click the Start button on the Windows® taskbar, click Shut Down, select Standby, and then click OK. To let the computer go into standby mode automatically Click the My Computer icon on your desktop. Click Control Panel, and then click the Power Management icon. On the Power Schemes tab, select from the options in the Power schemes drop-down list. Then, choose settings for the power scheme you have selected. To save the settings under a name that is not offered in the Power schemes pulldown menu, choose your settings and then click Save As. Type in a name, and click OK. Click Apply to finalize your power settings. To resume from standby mode There are three ways to bring your computer back from the standby mode: press the space bar on your keyboard, press the left mouse button, or momentarily depress the power button on your computer. If the display does not return from standby when you press the (Standby) button, your system may be in video standby mode. Press the space bar on the keyboard to return from video standby. Standby Mode Indicators You can tell which mode the computer is in by the color of the power indicator light. Color Amber Green No color Mode Computer is in standby mode. Computer is out of standby mode, ready to use. Computer is turned off. In standby mode you may periodically hear the computer's fan turn on and off, depending on the room's temperature. This is normal functioning in standby mode. Page 377 Shutting Down Your Computer When you are ready to turn off your computer for an extended period of time, use the following procedure to shut down the computer. To avoid the potential loss of data, do not use the power switch to shut down the computer. To shut down your computer If you plan to shut down your computer for a short period of time, you may want to use standby mode instead. See Using the Standby Function. 1. Click the Start button on the Windows® taskbar to open the Start menu. 2. Click Shut Down to display the Shut Down Windows dialog box. 3. Select the Shut Down option. 4. Click OK to complete the shutdown process. Respond to any prompts about saving documents. 5. Wait for your computer to turn off automatically -- the power indicator light turns off. 6. Turn off any peripherals connected to your computer. The LCD display turns off automatically when the computer shuts down. You can also shut down your computer using the (Power) button on the keyboard. Pressing this button causes the system to perform a shutdown but does not give you any of the other options available on the Windows® Shut Down menu. About the Power Switch If your system "locks up" or "crashes," press and hold the power switch for four seconds to force your system to power off. You may need to repeat this procedure. See Locating Controls and Connectors for the power switch's location. Using the System Recovery CD(s) You can reinstall software titles that shipped with your computer if they are corrupted or accidentally erased. You may not need to recover the entire contents of your hard drive. If you experience a problem with your computer, reinstalling an individual device driver or software title may correct the problem. Use the Application Recovery CD(s) to reinstall individual applications or device drivers. See Using the Application Recovery CD(s). The System Recovery CD(s) contain a backup copy of all the software originally installed on your hard disk drive. They can be used only to recover the hard disk of the Sony computer you purchased. The System Recovery utility gives you three options: Full Restore without Format restores all the software titles that originally came with your computer without formatting the hard disk. Full Restore with Format formats the hard disk drive and then restores all the original software. If your hard drive is partitioned into C and D drives, the computer will offer you the option to reformat the drive into a single partition. Operating System Only (Windows 98® Restore with Format) formats the hard disk drive and Page 378 restores the Windows® operating system and the device drivers that shipped with your computer. This option is recommended for advanced users only. If you choose the Full Restore with Format or Operating System Only option, your hard disk will be formatted, which removes all the information on the hard disk drive. You will lose any software you have installed and any other files you have created since you started to use your computer. This means you will have to reinstall any applications that were not included with the computer when you purchased it. If you choose the Full Restore without Format option, you may need to reinstall applications that were not included with the computer when you purchased it. If you have any questions on using the System Recovery CD(s), contact Sony Customer Support. To use the System Recovery CD(s) You need to complete the Windows registration process when you use the System Recovery CD(s). 1. Insert the Sony System Recovery CD(s) in the DVD-ROM drive. The System Recovery utility boots from the DVD-ROM drive. It must be in the drive when you turn on the computer. 2. Shut down your computer as described in Shutting Down Your Computer. 3. Wait 30 seconds and turn on your computer. 4. Click OK to signify you have read and accept the Microsoft End-User License Agreement. 5. When the System Recovery menu appears, follow the on-screen instructions to complete the recovery process. Your system may include one or two System Recovery CDs. If you have two System Recovery CDs, insert the first CD to run the System Recovery program. You are prompted to insert the second CD once the information from the first CD has been installed. The recovery process takes 30 to 60 minutes to complete. Using the Application Recovery CD(s) The Application Recovery CD(s) allow you to reinstall individual applications and device drivers if they are corrupted or accidentally erased. Reinstalling an individual device driver or software title may correct a problem you are experiencing with your computer, and you may not need to recover the entire contents of your hard drive. If you do need to reinstall all the software titles that shipped with your computer, use the System Recovery CD(s). See Using the System Recovery CD(s). You must be in Windows to run the Application Recovery CD(s). The application will not run from DOS. If you have any questions on using the Application Recovery CD(s), contact Sony Customer Support. To use the Application Recovery CD(s) 1. Turn on your computer. If your computer is already on, close all applications. 2. When the Windows desktop appears, insert the Sony Application Recovery CD in the DVD-ROM drive. The Application Recovery utility loads automatically. 3. When the Application Recovery menu appears, follow the on-screen instructions to complete the recovery process. Your system may include one or two Application Recovery CDs. If you have two Application Recovery CDs, insert the first CD to run the Application Recovery program. You may be prompted to insert the second CD, depending on the application you wish to restore. Page 379 About the Software on Your Computer Your VAIO Slimtop computer is ready to help you work, play, learn, and communicate as soon as you turn it on. This section gives you an overview of the activities you can perform with your software titles. For support information, see For Answers to Your Software Questions . Adobe Acrobat® Reader Adobe Systems Incorporated Acrobat Reader software allows you to view, navigate, and print electronic documents in Adobe's Portable Document Format (PDF), an open file format that is intended to preserve the fidelity of documents created on all major computer platforms. Adobe PhotoDeluxe® Home Edition Adobe Systems Incorporated Create amazing photo effects with PhotoDeluxe. Without learning complex software, you can enhance, restore, and be creative with your photos. Includes built-in guided activities, stock photos, clip art, and templates to assist you. Adobe Premiere® LE Adobe Systems Incorporated Adobe Premiere LE offers an interface and editing tool for producing movies for video, multimedia, or the Web. View source clips and edited footage simultaneously in the monitor window. Create video clips up to three hours long with complete audio-video synchronization. America Online® America Online America Online is the world's most popular Internet online service. Stay in touch with family and friends with Easy-to-Use E-mail, manage your personal finances, get the latest news and sports scores, and chat with thousands of others who share your interests. AT&T WorldNet® Service AT&T Fast, reliable Internet access from AT&T WorldNet Service. AT&T WorldNet Service provides Web-based e-mail, a personalized start page from Excite, easy access to the Excite search engine, free Web pages, online and live agent technical support, instant messaging, and special shopping discounts at Market Square. CompuServe® 2000 CompuServe Interactive Services The all new CompuServe 2000 delivers a powerful tool for Internet users who want serious and timely information, in-depth research, and professional communities backed by state-of-the-art technologies, including high-speed access and powerful e-mail messaging. Digital Media Bar Sony Electronics Media Bar software is your all-in-one solution for audio/video playback. It handles all common computer multimedia formats, and controls selected Sony devices. Media Bar software encompasses audio/video library cataloging and playlist management, in addition to digital video quality control and effects features. DVgate Sony Electronics Connect a digital video camera recorder to the i.LINK connector and capture your own video clips. You can edit the clips from your video, add others, and combine clips into new movie segments. EarthLink TotalAccess EarthLink Network, Inc. Page 380 An Internet Service Provider that supplies access, information, and assistance to its customers, introducing them to the Internet. Member benefits include e-mail, newsgroups, a Personal Start Page, a free 6 MB web site, a member magazine, and 24-hour technical support. McAfee's VirusScan® Network Associates, Inc. Protect your computer from viruses. VirusScan can detect viruses from floppy disks, Internet downloads, e-mail attachments, intranets, shared files, CD-ROMs, and online services. Microsoft® Internet Explorer for Windows® 98 Microsoft Corporation Internet Explorer delivers the Web the way you want it. It's safe, easy to use, and you can personalize how you access the Web. Outlook Express and other tools in Internet Explorer also help you have a great experience when you are on the Web! Microsoft® Outlook® Express Microsoft Corporation Outlook Express, the messaging tool that takes your e-mail and newsgroup communications to new heights! Outlook Express is easy to set up and use, and provides you with secure, personalized, and complete features that make creating, sending, and reading your e-mail a more rich and dynamic experience. Microsoft® Word 2000 Microsoft Corporation Microsoft Word 2000 makes it easy to create common Web, e-mail, and print documents for use around the world. It embraces HTML as a first-class file format and extends Word's ease-of-use to the Web and e-mail. Word 2000 also extends that ease of use to international users, making it easy to create multilingual documents. Netscape Communicator® Netscape Communications Netscape Communicator is the all-in-one Internet tool that makes it easy to browse the Web, send Internet e-mail, chat, read newsgroups, and compose great Web documents. PictureGear Sony Electronics This image management software displays images from your hard drive, a Sony digital still camera, or a Sony Mavica® camera. The images appear in a convenient light-table format, so that you can easily view the contents of an entire folder. Prodigy Internet Prodigy Communications Corporation An Internet service that helps you find what you need online faster and smarter. Prodigy delivers powerful online content, such as sports scores, stock quotes, news, and easy access to Excite , plus a personal e-mail account and quality customer service, all at a competitive price. Quicken® Basic Intuit, Inc. Quicken is the fastest, easiest way to organize your finances. Quicken works just like your checkbook, so it's easy to learn and use. Quicken manages all of your finances, bank accounts, credit cards, investments, and loans. You can even pay your bills online. Smart Capture Sony Electronics Smart Capture is a fun new way to send multimedia messages via e-mail. Smart Capture manages the i.LINK connection between your computer and a Sony Digital Handycam® Camcorder or other Page 381 cameras that support the i.LINK interface. It allows you to capture and compress video or still images that you can save or share via e-mail. A smart solution to computer, digital audio/video, and network convergence. Smart Connect Sony Electronics Smart Connect allows you to use an i.LINK cable to connect your VAIO computer to another VAIO computer that supports Smart Connect. You can then use one computer to copy, delete, and edit files on the other computer. You can also print from a printer attached to either computer. Sound Forge® Sonic Foundry Sound Forge allows you to put powerful audio processing tools and effects to work on your desktop. Simply cut, copy, and paste your way to striking multimedia files for use in everything from Web pages to desktop presentations. VAIO Action Setup Sony Electronics VAIO Action Setup manages the settings for your computer's Programmable Power Keys (PPK), Memory Stick media, i.LINK interface, and internal timer. For more information, see VAIO Action Setup. WinFax® Basic Edition Symantec Corporation WinFax Basic Edition incorporates an easy-to-use interface that allows you to send and receive faxes easily. Upgrade to WinFax Pro to receive additional features. About Your Recovery CDs Application Recovery CD(s) Sony Electronics The Application Recovery CD program allows you to reinstall individual applications and device drivers. Use it to restore corrupted or accidentally erased files. System Recovery CD(s) Sony Electronics The System Recovery CD program allows you to restore the software titles that shipped with your computer if they become corrupted or are erased accidentally. It can be used only to restore the hard disk of the Sony computer you purchased. For Answers to Your Software Questions Acrobat® Reader, Adobe PhotoDeluxe® Home Edition (Adobe Systems Incorporated) Web site http://www.adobe.com/ phone 206-628-2746 (fee-based support) fax 206-628-5737 e-mail [email protected] hours M-F, 6 AM-5 PM PT America Online® (America Online) Web site phone hours http://www.aol.com/ 800-827-3338 7 days a week, 6 AM - 2 PM ET AT&T WorldNet® Service (AT&T) Web site phone e-mail http://www.att.net 800-400-1447 [email protected] Page 382 hours 7 days a week, 24 hours a day CompuServe® 2000 (CompuServe Interactive Services) Web site phone hours http://www.compuserve.com/ 800-848-8990 M-F, 8 AM - 1 AM ET, S-S 10 AM - 10 PM ET EarthLink TotalAccess Web site phone e-mail hours (EarthLink Network, Inc.) http://help.earthlink.net/techsupport/ 800-395-8410 [email protected] 7 days a week, 24 hours a day GTE Easy Sign-up (GTE Internet) phone hours 800-927-3000 7 days a week, 24 hours a day McAfee's VirusScan (Network Associates, Inc.) Web site phone e-mail hours http://support.mcafee.com 408-988-3832 [email protected] M - F 9 AM - 5 PM Central Time MindSpring Internet Desktop (MindSpring Enterprises, Inc.) Web site phone http://help.mindspring.com/support 800-719-4660 Quicken® Basic (Intuit Inc.) Web site phone hours http://www.intuit.com/support 900-555-4688 7 days a week, 24 hours a day Sound Forge® (Sonic Foundry) Web site http://www.sonicfoundry.com/support/ phone 608-256-5555 fax 608-256-7300 e-mail [email protected] hours M - F, 8 AM - 7 PM CT Windows® 98 Second Edition Operating System, Word® 2000, Internet Explorer 5, Outlook® Express (Microsoft Corporation) Web site phone hours 1 http://www.sony.com/pcsupport 888-4SONYPC (888-476-6972) 1 7 days a week, 24 hours a day Support from 1-888-4SONYPC is free of charge for 90 days after the original date of purchase. WinFax® Basic Edition (Symantec Corporation) Web site http://www.symantec.com/techsupp/ phone 800-798-0850 fax 800-554-4403 in North America 541-984-2490 outside North America Troubleshooting This section describes how to solve common problems you may encounter when using your computer. Many problems have simple solutions, so try these suggestions before you call Sony Customer Support. My computer does not start Check that the computer is plugged into a power source and that it is turned on. Check that the power light is lit on the front panel of the computer. Confirm that a diskette is not in the diskette drive (unless you are using a bootable diskette). Confirm that the power cord and all cables are connected firmly, as described on the color poster. Page 383 If you plugged the computer into a power strip or UPS, make sure the power strip or UPS is turned on and working. My computer or software program "locks up" Close the application that is currently "locked up" by pressing Ctrl+Alt+Delete. In the Close Program dialog box, scroll down until you locate "(Not responding)" next to an application. Select this application and click End Task. Windows attempts to close the application. If the attempt is unsuccessful, a second dialog box appears. Select End Task again. If you are unable to "unlock" the application, repeat the above steps but select Shut Down when the Close Program dialog box appears. If the above steps fail to "unlock" your computer, save any unsaved work, if possible. Press Alt+F4. Select Restart and click OK. If you cannot restart as described in the preceding steps, you can restart the computer by pressing Ctrl+Alt+Delete or by pressing the power switch for more than six seconds. Pressing Ctrl+Alt+Delete may result in the loss of changes made to files that are currently open. Contact the software publisher or designated provider for technical support. See For Answers to Your Software Questions for a list of phone numbers and Web addresses or see Read Me First . My DVD-ROM/CD-ROM drive tray does not open Make sure the computer is turned on. If the Eject button does not work, you can open the tray by inserting a straightened heavyweight paper clip into the emergency eject hole. When I click an application icon, a message such as "You must insert the application CD into your CD-ROM (DVD-ROM) drive" appears and the software does not start Some titles require specific files that are located on the application's DVD-ROM/CD-ROM. Insert the disc and try starting the program again. Check to make sure you inserted the DVD-ROM/CD-ROM with the label side facing up. My modem connection is slow The computer's modem uses K56flex technology/V.90. Many factors influence modem connection speed, including telephone line noise or compatibility with telephone equipment (such as fax machines or other modems). If you think your modem is not connecting properly to other computer-based modems, fax machines, or your Internet Service Provider, check the following: Have your phone company check that your phone line is free from any line noise. If your problem is fax-related, check that there are no problems with the fax machine you are calling. The modem that receives your call may be slower or may use a different communications protocol than your modem. If this is the case, the connection speed may be slower than expected. For optimum performance, ensure you are calling an Internet Service Provider number that is V.90-compliant. If you are having a problem connecting with your Internet Service Provider, check that the ISP is not experiencing technical problems. If you have a second phone line available, try connecting the modem to this line. My modem does not work Check that the phone line is plugged into the line jack. Page Check that the phone line is working. You can check the line by plugging in an ordinary phone and384 listening for a dial tone. Check that the phone number the program is dialing is correct. Verify that the software you are using is appropriately configured to recognize and interact with the Sony computer modem. Call the software publisher if you do not know how to configure the software to recognize the modem. All programs preinstalled by Sony are compatible. If you suspect your modem is not functioning, you can perform a simple test to find out. Click the My Computer icon on your desktop. Click Control Panel, and then click Modems. Click the Diagnostics tab and select COM3. Click More Info. If your modem is functioning, a More Info dialog box will display. If your modem is not functioning, an error message will appear. My microphone is too sensitive to background noise If you find there is too much background noise when you record sound, you should adjust the microphone gain by following these steps: 1. Right-click the speaker icon (Volume) in the lower-right Windows® task tray. 2. Click Open Volume Controls. The Volume Control screen appears. 3. In the Options menu, select Properties. The Properties screen appears. 4. Change the setting for "Adjust volume for" from Playback to Recording, and then click OK. 5. Click the Advanced button under Microphone Balance. The Advanced Controls for Microphone screen appears. 6. Deselect the check box for 1 Mic Gain (+20dB), then click the Close button. 7. Close the Recording Control window. My mouse does not work Check that the mouse is plugged into one of the PS/2® connectors on the keyboard. The other connector connects the keyboard to the computer. There may be dust or dirt inside the mouse mechanism. To clean the mouse, follow these steps: o Turn off your computer. See Shutting Down Your Computer for details. o Remove the mouse ball cover on the back of the mouse by turning the ring that covers the mouse ball clockwise. o Turn the mouse upright, and drop the mouse ball into your hand. o Using a piece of tape, remove any dust or dirt on the mouse ball and inside the mouse ball socket. o Return the mouse ball to the socket, and replace the mouse ball cover. Secure the cover by turning the ring counter-clockwise. I cannot find the Windows® taskbar Check that the taskbar is not hidden or shrunken. Use the mouse to point to the left, right, top, and bottom edges of the screen. See Read Me First for additional information on using your Sony computer. To Reach Sony For further assistance, call 1-888-4SONYPC (1-888-476-6972). Page 385 Specifications Model PCV-L630 Processor 600E MHz* Pentium® III Hard Disk Drive 17 GB Ultra DMA Standard SDRAM 128 MB PC-100 SDRAM, expandable to 256 MB Video RAM 8 MB SDRAM Graphics 2X AGP 3D graphics hardware acceleration (ATi Rage 128 Pro 4XL) Sound Capabilities High fidelity 3D PCI audio Aureal AU8810 Diskette Drive 3.5" 1.44 MB FDD DVD-ROM/CD-ROM Drive 4.8X (max.) DVD-ROM reading 24X (max.) CD-ROM reading** Modem K56flex technology/V.90 compatible data/fax modem Expansion Capabilities Two PCI slots Connection Capabilities (Front) PC card (Card bus support) USB port Microphone Headphone Memory Stick media slot i.LINK (4-pin) Connection Capabilities (Rear) USB port Modem line (RJ-11) Phone line (RJ-11) Parallel (printer) Serial port VGA monitor LCD display Line In Line Out Keyboard i.LINK (6-pin) Connection Capabilities (Keyboard) Mouse (PS/2-style) left and right connectors Supplied Accessories Stand (for vertical installation) Power cable Phone cable Keyboard cable PS/2 Wheel Mouse VAIO Smart Convertible Keyboard Spacers (for bottom of the system) Ferrite core Service 90-day limited express service*** Extendible to one year from original date of purchase upon registration Limited Warranty90-day parts/labor standard Extendible to one year from original date of purchase upon registration Power Requirements 130 watts maximum Dimensions CPU: 11.2"(w) x 3.6" (h) x 13.4" (d) (280 mm x 90 mm x 335 mm) Keyboard: 15.9" (w) x 1.8" (h) x 7.1" (d) (398 mm x 45 mm x 178 mm) Display: 16.1" (w) x 13.1" (h) x 6.9" (d) (403 mm x 327 mm x 172 mm) Weight CPU: 11.9 lbs. (5.4kg) Display: 7.05 lbs (3.2 kg) Keyboard: 2.9 lbs. (1.3kg) Operating Temperature 50º F to 95º F (+10º C to 35º C) * MHz denotes microprocessor internal clock speed; other factors may affect application performance. Page 386 GB means one billion bytes when referring to hard drive capacity. Accessible capacity may vary. **Data on a DVD-ROM is read at a variable transfer rate, ranging from 2X at the innermost track to 4.8X at the outermost track(the data transfer standard 1X rate is 1385 kbytes/s). The average data transfer rate is 3.6X(4986 kbytes/s). Data on a CD-ROM is read at a variable transfer rate, ranging from 10.5X at the innermost track to 24X at the outermost track(the data transfer standard 1X rate is 150 kbytes/s). The average data transfer is 18X(2700 kbytes/s). Maximum speed for faxing is 14.4 kbytes/s. Your modem is capable of downloading at 56 kbytes/s using K56flex technology or V.90. Your phone service, online service, or Internet Service Provider, however, may not support this technology or operate at this speed. ***Certain restrictions apply. Specifications are subject to change without notice. Page 387 Features For a complete description of the specifications of your Sony computer, see Specifications. i.LINK® (IEEE-1394): Two built-in i.LINK ports provide you with front and rear digital connection capability. The i.LINK name and logo identify a digital interface (IEEE-1394) for high speed communication. Exceptional performance: Your computer includes a fast Intel® processor and a V.90-compatible data/fax modem. Ergo-Angle Multimedia LCD display: With its exclusive dual-hinge pedestal, this 15" XGA TFT display provides twice the flexibility of other LCDs. Select the perfect viewing angle and enjoy the built-in Harman/Kardon® stereo speakers. AutoAlert E-mail Notification System: Custom software automatically downloads e-mail on a pre-set schedule via Microsoft® Outlook® Express. A light on the LCD display instantly lets you know when new mail is received. VAIO Smart convertible keyboard: The innovative palm rest converts to a keyboard cover for a sleek look when not in use. Six Programmable Power Keys let you launch any application with the push of a button; dual-sided mouse connections for left- or right- hand use. Sony Memory Stick® media slot: The next generation of digital media, smaller than a stick of gum. Easily delivers information from one Memory Stick-equipped electronic device to another, so you can transfer images, sounds, data and text between cameras, computers, and more. Compact components: Enjoy the small footprint and versatile setup options available by positioning the components in an arrangement of your choice. Sony audio and video quality: High-fidelity 3D audio system and high-powered 3D graphics (AGP) enable you to take advantage of today's advanced multimedia applications, games, and entertainment software. Preinstalled software titles: All the software on your computer is preinstalled, configured, and ready for you to use right out of the box. Microsoft® Windows® 98 Second Edition operating system: Your system includes the latest operating system from Microsoft. Communications: Access popular online services, browse the Internet, send faxes, and more. * Actual upload and download speeds may vary due to line conditions, ISP support, and government regulations. Unpacking Your Computer Computer and Supplied Accessories Page 388 Manuals Read Me First contains last-minute supplementary information and software support numbers. The VAIO Slimtop LCD Computer User Guide (this manual) contains features and specifications of your computer. It also includes information on the applications included with your system and how to contact software vendors, get started with your computer, and solve common problems. The VAIO VAIO® Consumer Information Guide contains safety and regulatory information, ergonomic considerations, information on help resources, and your computer's limited warranty statement. The Microsoft® Windows®98 Second Edition Getting Started manual explains how to use the basic features of the Windows® operating system. Recovery CDs System Recovery CD(s) - Enables you to reinstall software that shipped with your computer if it is corrupted or accidentally erased. For more information, see Using the System Recovery CD(s). Application Recovery CD(s) - Allows you to reinstall individual applications or device drivers if they are corrupted or accidentally erased. For more information, see Using the Application Recovery CD(s). Other Setting up your VAIO Slimtop LCD Computer (poster) Packet containing special product offers Software CDs Page 389 Microsoft® Word 2000 Setting Up Your VAIO Slimtop LCD Computer Locating Controls and Connectors Front Panel 1 Power switch and indicator light Turns on/off the computer and the display. The indicator light is green while the power is on and amber when the computer is in standby mode. 2 Floppy disk drive Reads/writes data from/to a 3.5-inch floppy disk. 3 Floppy disk eject button Ejects the floppy disk. 4 DVD-ROM drive Reads data from a DVD-ROM/CD-ROM. 5 DVD-ROM/CD-ROM eject button Ejects a DVD-ROM/CD-ROM. 6 Manual eject hole If the DVD-ROM/CD-ROM does not come out when you press the DVD-ROM/CD-ROM eject button, insert a thin, pointed object into this hole to eject the disc manually. 7 FD (Floppy disk drive) access indicator light Lights in green while reading/writing data from/to a floppy disk. 8 Disc (DVD-ROM drive) access indicator light Lights in amber while reading data from a DVD-ROM/CD-ROM. 9 HD (drive) access indicator light Lights in green while reading/writing data from/to the hard disk. 10 MIC (Microphone) connector* Connects a microphone (not supplied). 11 PHONES (Headphones) connector* Connects headphones (not supplied). 12 VOLUME control Page 390 Adjusts the volume of the headphones connected to the PHONES connector. Users should note that this does not control the volume of the integrated LCD speakers. 13 PC CARD slot A PC Card (also called a PCMCIA card) can be installed in this slot. PC cards enable you to add functionality to your system. MEMORY STICK media slot 14 Insert a Sony Memory Stick® card into this slot. See Using the Memory Stick® Media for details on using Memory Stick media. 15 i.LINK (4-pin) Connects a digital device such as a Sony Digital Handycam® Camcorder. 16 USB (Universal Serial Bus) connector Connects a USB device. * See Using a Headphone or Microphone for important information about connecting a microphone and headphone. Rear Panel 1 AC INPUT connector Connects the supplied power cord. 2 LINE jack Connects a phone cable to the wall jack. 3 EMPTY PCI SLOT (FILLED WITH ETHERNET CARD ON CUSTOM MODELS) For a PCI Add-On Card (not supplied). 4 TELEPHONE jack Connects the phone to the computer. 5 PRINTER connector Connects a parallel device, such as a printer or scanner. 6 SERIAL connector Connects a serial device, such as a digital still camera. 7 MONITOR connector Connects a standard CRT display. 8 USB (Universal Serial Bus) connector Connects a USB device. 9 LINE IN connector Connects an audio device. 10 LINE OUT connector Connects an audio device or an active speaker. 11 i.LINK (6-pin) Connects a digital device such as a Sony Digital Handycam® Camcorder. 12 LCD MONITOR connector Connects the LCD that comes with the VAIO Slimtop LCD computer. Note: Do not connect any display to this connector other than the LCD that is supplied with this system. Page 391 13 KEYBOARD connector Connects a keyboard. LCD 1 Power indicator light Light is green while the power is on. When the computer enters the standby mode, this indicator light turns amber. 2 Information LED Light turns red to alert the user to activities, such as the arrival of e-mail. See AutoAlert E-mail Notification System. 3 Adjusts 4 Adjusts Brightness control the brightness of the screen. Volume control the volume of the integrated speakers on the LCD display. Using the Wheel Mouse For information about the Wheel Mouse that connects to either side of your keyboard, see MouseWare Help. To access MouseWare Help, from the Start menu, point to Programs, MouseWare, and then click MouseWare Help. To set up the mouse for left-handed use: 1. Click the My Computer icon on your desktop. 2. Click Control Panel, and then click Mouse. The Mouse Properties dialog box appears. 3. In the Quick Setup tab, click Device Setup. 4. In the Device Setup Wizard dialog box, click Next. 5. Select the radio button next to "Left side of the keyboard." 6. Click Next three times, and then click Finish. 7. Click Apply. Using a Headphone or Microphone When you connect a microphone or headphone to your computer, attaching a ferrite core will reduce electrical interference. Attach the (supplied) ferrite core at the end of the headphone or microphone cable closest to the computer. Wrap the cable through the center of the ferrite core. The following illustration shows how to attach the ferrite core when you are using both a headphone and a microphone. Page 392 The LCD and keyboard cables already include a ferrite core. Do not remove the ferrite core from these cables. To adjust the height and viewing angle of the display Holding both sides of the display, push the display panel out and up, and then adjust the viewing angle. The LCD display is designed to maintain the best ergonomic viewing angle. Set the display height so that it does not touch the keyboard, and adjust the viewing angle approximately 27 degrees from eye level to the center of the screen. Attaching the Stand to the System Unit The main system unit can be oriented horizontally or vertically. If you place the system in a vertical position, you must attach the supplied stand to ensure stability. 1. Place the system unit on its right side, with the front of the system facing forward. 2. Insert the grooved side of the stand into the ventilation holes of the system so that the two screw holes are aligned and the stand's fins are at the rear of the unit. 3. Secure the stand to the unit with the supplied screw. Page 393 The stand keeps the system cool by allowing air to flow under it. If you choose to place the system unit in a vertical position, it is important to use the stand and to place the system unit on its left side, as in the illustration above; otherwise, the system may overheat. Registering Your Computer Take advantage of Sony's commitment to quality customer support and receive these benefits by registering your computer: Sony Customer Support--Talk to a Support Representative to troubleshoot problems you may be having with your computer. Limited warranty--Protect your investment. See Limited Warranty Statement in the VAIO® Consumer Information Guide for details. You must register your computer to extend the warranty from the initial 90-day warranty period to one year from the original date of purchase. Express Service--Provides a fast and direct return of your VAIO Slimtop Sony for service of your computer. LCD Computer to If you did not already register when you first turned on your computer, follow these steps to use the computer online registration service. 1. Click the registration icon on the VAIO desktop. 2. Enter the information requested on the first online registration form. Press the tab key to move from box to box. 3. Click the Next button to advance to the next form. 4. Complete the remaining forms by clicking the Next button each time you complete a form. The computer automatically transfers your registration information using your built-in modem and a toll-free telephone number or a local number. You may sign up for Internet access with a Sony preferred Internet Service Provider. VAIO Action Setup VAIO Action Setup manages the settings for your computer's Programmable Power Keys (PPK), Memory Stick® media, i.LINK interface, and internal timer. An overview of each of these functions is provided below. For more information on changing the settings using VAIO Action Setup, see the online VAIO Action Setup help files. To access the help files, from the Start menu, point to Programs/VAIO Action Setup/VAIO Action Setup Help. Programmable Power Keys Your Sony computer comes with technology that allows you to get to your favorite applications Page easily. Each Programmable Power Key (PPK) on your VAIO Smart convertible keyboard comes 394 programmed to launch a preset application with a single press of the key. If you wish, you can use the VAIO Action Setup software to change the Programmable Power Keys' preset functions. The Programmable Power Keys are located at the top of your keyboard, and are numbered P1 through P6. The keys work even when the computer is turned off. Pressing one of these keys turns on the computer and launches the preset application. The six Programmable Power Keys come to you preprogrammed to perform the functions listed in the table below. Key Function P1 (INTERNET) Starts Microsoft® Internet Explorer for Windows® 98. P2 (MAIL) Starts Microsoft® Outlook® Express P3 (WORK) Starts Microsoft® Word P4 (FINANCE) Starts Intuit® Quicken® Basic 2000. P5 (SETUP) Starts PPK Setup. P6 (HELP) Opens a menu of help options. Memory Stick You can use VAIO Action Setup to preset your computer to automatically launch an application when you insert a Memory Stick. For more information on Memory Stick media, see Using the Memory Stick® Media . Internal Timer The VAIO Action Setup software allows you to set your computer's internal timer to launch certain applications automatically. The timer can start applications even when the power is off. Some software applications take longer than others to launch. It is advisable to confirm in advance the amount of time your selected application takes to start. AutoAlert E-mail Notification System VAIO Action Setup also enables you to set up your computer to notify you with an Information LED when new mail arrives in your e-mail mailbox. The Information LED turns red to indicate that new e-mail has arrived. For this AutoAlert E-mail Notification System to work, you must use Microsoft® Outlook® Express as your default e-mail software, and you must have an Internet Service Provider with dial-up capabilities set up. As an alternative, you can program your AutoAlert E-mail Notification System to set the Information LED to turn on when it has successfully completed the task of dialing up and connecting to receive mail. In this case, the Information LED turns on to indicate that your e-mail account has been accessed successfully, regardless of whether or not you have mail; this works with Microsoft Outlook Express. The e-mail software you choose to use with PPK must be set as your default e-mail software. See LCD for an illustration showing the Information LED's location. AutoAlert E-mail Notification System Software Restrictions If you use software that uses a phone line The computer may not be able to disconnect the phone line due to communication and server conditions. Be sure to monitor the status of the software when running the AutoAlert E-mail Notification System, and manually disconnect the phone line if you notice a malfunction. Furthermore, when using the timer to start the software, it is advised that you set the computer to shut down or enter system standby mode after a certain length of time. This allows the computer to disconnect the phone line if the computer fails to disconnect the line normally. If you are using the timer to download e-mail automatically Page 395 It is advisable to set up your e-mail software to redial automatically if it does not connect the first time. It is also advisable to set the e-mail software to disconnect the phone line automatically when all mail has been downloaded. If you are using Microsoft® Outlook® Express When using the AutoAlert E-mail Notification System with Microsoft Outlook Express, it is advisable to select the Dial automatically setting in your Microsoft Outlook Express software. If you have not chosen this setting and wish to do so, start Outlook Express, click Tools, and then select Options. Select the check box "Automatically dial when checking for new messages." Click OK. Changing the Window Design of Sony Software To change the window design of Sony software 1. Click the Start button, point to Settings, and then click Control Panel. 2. Click UI Design Selector. 3. Click << or >> and select the desired design. 4. Click Apply. The "UI Design Selector" window design changes. The window design for your Sony software will match the "UI Design Selector" window. To try another selection, click << or >>. Then, click OK. The UI Design Selector closes and the window design of your Sony software window design displays. You may use the feature with UI Design Selector-compatible software only. Using the Memory Stick® Media Your Sony computer is designed to support the new Memory Stick recording media. The Memory Stick media is a small, versatile device that allows you to share data between various types of Sony equipment. When you use the card, your computer automatically launches Windows Explorer. This allows you to view the contents of the card. If the image files are created by a Sony digital camera or camcorder, you do not need the following steps. If you want to create a slide show that launches automatically when you insert a Memory Stick, follow these steps to transfer images from your hard drive to a Memory Stick. 1. Insert the Memory Stick into the appropriate slot. 2. Click the My Computer icon on the desktop. Page 396 3. Click the Removable Disk S: icon. 4. Create a new folder and name it "DCIM." 5. Open the DCIM folder and create a new folder named "100MSDCF." 6. Click the Start button, select VAIO, and then click PictureGear to launch the PictureGear application. 7. Select the digital images you want to save in your slide show. 8. From the PictureGear File menu, point to File Process, and then select Still Format Conversion. 9. Select Memory Stick as the Output Format. 10. Use the Browse button to select the DCIM/100MSDCF folder on the Removable Disk (S:) drive. 11. Name the file. The file name must begin with DSC (DSC0xxxx). The full file name without extension must have at least eight characters. The order in which your photos appear in your slide show will be determined by the number (xxxx) in the file name. Some examples of acceptable file names are DSC00001.jpg and DSC00002.jpg 12. Click OK to save the file. You can also add MPEG1 video files to your Slide Show by following the steps below. The order in which your video clips (MOV0xxxx files) appear in your Slide Show is determined by the number (xxxx) in the file name. 1. Insert the Memory Stick into the media slot. 2. Click the My Computer icon on the desktop. 3. Click the Removable Disk S: icon. 4. Create a new folder and name it "MSSONY." 5. Open the MSSONY folder and create a new folder named "MOML0001." 6. From the PictureGear File menu, point to File Process, and then select Still Format Conversion. 7. Copy the MPEG file into the MOML0001 folder. 8. Rename the MPEG file MOV0xxxx.mpg, where xxxx is any four-digit number. 9. To begin showing your slides, eject the Memory Stick and then reinsert it. The slide show will begin automatically. To protect data on Memory Stick media from accidental changes Memory Stick media contains a write-protect tab. The write-protect tab prevents accidental changes to information recorded on the Memory Stick media. When you slide the write-protect tab to the LOCK position, the Memory Stick is write-protected, which means you cannot delete, copy, or save information on the Memory Stick. When you slide the tab to the un-LOCK position, you can write to or modify the Memory Stick contents. To change the way the computer responds when a Memory Stick is inserted into the Memory Stick media slot Change the options on the Memory Stick tab in the PPK Setup software. Page 397 Using PC Cards This computer has a card bus PC card slot that supports a Type I or II PC card. To insert a PC card You do not need to shut down your computer when inserting a PC card. 1. Open the front panel. 2. Insert the PC card into the PC card slot until it clicks into position. When the card is completely inserted, the eject button pops out. If you cannot insert the card, do not forcibly insert it. In this case, make sure the card is not inserted upside-down or backward, and then reinsert the card into the slot carefully. See the manual that came with the PC card for details on using it. To close the front panel when the eject button is protruding, fold the button down onto the computer. To eject a PC card If you eject the PC card incorrectly, the system may not work correctly. 1. Click the Start button on the Windows® taskbar, click Settings, and then click Control Panel. 2. Click the PC Card icon. 3. Click the name of the card that you want to eject, and then click Stop. 4. When the message "You may safely remove this device" appears, click OK. 5. Push the PC card eject button on the front panel of the system unit. You may need to pull out the eject button before you can eject the card. Page 398 The card is ejected from the card connector. Remove the card by holding it by its edge and pulling it out carefully. Using the Standby Function When you are finished using your computer, you can put it in standby mode rather than turn it off completely. Putting the computer in standby mode allows you to return quickly to normal computer use. To put the computer in standby mode manually 1. Save your work and close any applications that are running. (You can leave Windows running.) 2. Press the (Standby) button on the top of the keyboard. The computer goes into standby mode. Alternatively, you can click the Start button on the Windows® taskbar, click Shut Down, select Standby, and then click OK. To let the computer go into standby mode automatically Click the My Computer icon on your desktop. Click Control Panel, and then click the Power Management icon. On the Power Schemes tab, select from the options in the Power schemes drop-down list. Then, choose settings for the power scheme you have selected. To save the settings under a name that is not offered in the Power schemes pulldown menu, choose your settings and then click Save As. Type in a name, and click OK. Click Apply to finalize your power settings. To resume from standby mode There are three ways to bring your computer back from the standby mode: press the space bar on your keyboard, press the left mouse button, or momentarily depress the power button on your computer. If the display does not return from standby when you press the (Standby) button, your system may be in video standby mode. Press the space bar on the keyboard to return from video standby. Standby Mode Indicators You can tell which mode the computer is in by the color of the power indicator light. Color Amber Green No color Mode Computer is in standby mode. Computer is out of standby mode, ready to use. Computer is turned off. In standby mode you may periodically hear the computer's fan turn on and off, depending on the room's temperature. This is normal functioning in standby mode. Page 399 Shutting Down Your Computer When you are ready to turn off your computer for an extended period of time, use the following procedure to shut down the computer. To avoid the potential loss of data, do not use the power switch to shut down the computer. To shut down your computer If you plan to shut down your computer for a short period of time, you may want to use standby mode instead. See Using the Standby Function. 1. Click the Start button on the Windows® taskbar to open the Start menu. 2. Click Shut Down to display the Shut Down Windows dialog box. 3. Select the Shut Down option. 4. Click OK to complete the shutdown process. Respond to any prompts about saving documents. 5. Wait for your computer to turn off automatically -- the power indicator light turns off. 6. Turn off any peripherals connected to your computer. The LCD display turns off automatically when the computer shuts down. You can also shut down your computer using the (Power) button on the keyboard. Pressing this button causes the system to perform a shutdown but does not give you any of the other options available on the Windows® Shut Down menu. About the Power Switch If your system "locks up" or "crashes," press and hold the power switch for four seconds to force your system to power off. You may need to repeat this procedure. See Locating Controls and Connectors for the power switch's location. Using the System Recovery CD(s) You can reinstall software titles that shipped with your computer if they are corrupted or accidentally erased. You may not need to recover the entire contents of your hard drive. If you experience a problem with your computer, reinstalling an individual device driver or software title may correct the problem. Use the Application Recovery CD(s) to reinstall individual applications or device drivers. See Using the Application Recovery CD(s). The System Recovery CD(s) contain a backup copy of all the software originally installed on your hard disk drive. They can be used only to recover the hard disk of the Sony computer you purchased. The System Recovery utility gives you three options: Full Restore without Format restores all the software titles that originally came with your computer without formatting the hard disk. Full Restore with Format formats the hard disk drive and then restores all the original software. If your hard drive is partitioned into C and D drives, the computer will offer you the option to reformat the drive into a single partition. Operating System Only (Windows 98® Restore with Format) formats the hard disk drive and Page 400 restores the Windows® operating system and the device drivers that shipped with your computer. This option is recommended for advanced users only. If you choose the Full Restore with Format or Operating System Only option, your hard disk will be formatted, which removes all the information on the hard disk drive. You will lose any software you have installed and any other files you have created since you started to use your computer. This means you will have to reinstall any applications that were not included with the computer when you purchased it. If you choose the Full Restore without Format option, you may need to reinstall applications that were not included with the computer when you purchased it. If you have any questions on using the System Recovery CD(s), contact Sony Customer Support. To use the System Recovery CD(s) You need to complete the Windows registration process when you use the System Recovery CD(s). 1. Insert the Sony System Recovery CD(s) in the DVD-ROM drive. The System Recovery utility boots from the DVD-ROM drive. It must be in the drive when you turn on the computer. 2. Shut down your computer as described in Shutting Down Your Computer. 3. Wait 30 seconds and turn on your computer. 4. Click OK to signify you have read and accept the Microsoft End-User License Agreement. 5. When the System Recovery menu appears, follow the on-screen instructions to complete the recovery process. Your system may include one or two System Recovery CDs. If you have two System Recovery CDs, insert the first CD to run the System Recovery program. You are prompted to insert the second CD once the information from the first CD has been installed. The recovery process takes 30 to 60 minutes to complete. Using the Application Recovery CD(s) The Application Recovery CD(s) allow you to reinstall individual applications and device drivers if they are corrupted or accidentally erased. Reinstalling an individual device driver or software title may correct a problem you are experiencing with your computer, and you may not need to recover the entire contents of your hard drive. If you do need to reinstall all the software titles that shipped with your computer, use the System Recovery CD(s). See Using the System Recovery CD(s). You must be in Windows to run the Application Recovery CD(s). The application will not run from DOS. If you have any questions on using the Application Recovery CD(s), contact Sony Customer Support. To use the Application Recovery CD(s) 1. Turn on your computer. If your computer is already on, close all applications. 2. When the Windows desktop appears, insert the Sony Application Recovery CD in the DVD-ROM drive. The Application Recovery utility loads automatically. 3. When the Application Recovery menu appears, follow the on-screen instructions to complete the recovery process. Your system may include one or two Application Recovery CDs. If you have two Application Recovery CDs, insert the first CD to run the Application Recovery program. You may be prompted to insert the second CD, depending on the application you wish to restore. Page 401 About the Software on Your Computer Your VAIO Slimtop computer is ready to help you work, play, learn, and communicate as soon as you turn it on. This section gives you an overview of the activities you can perform with your software titles. For support information, see For Answers to Your Software Questions . Adobe Acrobat® Reader Adobe Systems Incorporated Acrobat Reader software allows you to view, navigate, and print electronic documents in Adobe's Portable Document Format (PDF), an open file format that is intended to preserve the fidelity of documents created on all major computer platforms. Adobe PhotoDeluxe® Home Edition Adobe Systems Incorporated Create amazing photo effects with PhotoDeluxe. Without learning complex software, you can enhance, restore, and be creative with your photos. Includes built-in guided activities, stock photos, clip art, and templates to assist you. Adobe Premiere® LE Adobe Systems Incorporated Adobe Premiere LE offers an interface and editing tool for producing movies for video, multimedia, or the Web. View source clips and edited footage simultaneously in the monitor window. Create video clips up to three hours long with complete audio-video synchronization. America Online® America Online America Online is the world's most popular Internet online service. Stay in touch with family and friends with Easy-to-Use E-mail, manage your personal finances, get the latest news and sports scores, and chat with thousands of others who share your interests. AT&T WorldNet® Service AT&T Fast, reliable Internet access from AT&T WorldNet Service. AT&T WorldNet Service provides Web-based e-mail, a personalized start page from Excite, easy access to the Excite search engine, free Web pages, online and live agent technical support, instant messaging, and special shopping discounts at Market Square. CompuServe® 2000 CompuServe Interactive Services The all new CompuServe 2000 delivers a powerful tool for Internet users who want serious and timely information, in-depth research, and professional communities backed by state-of-the-art technologies, including high-speed access and powerful e-mail messaging. Digital Media Bar Sony Electronics Media Bar software is your all-in-one solution for audio/video playback. It handles all common computer multimedia formats, and controls selected Sony devices. Media Bar software encompasses audio/video library cataloging and playlist management, in addition to digital video quality control and effects features. DVgate Sony Electronics Connect a digital video camera recorder to the i.LINK connector and capture your own video clips. You can edit the clips from your video, add others, and combine clips into new movie segments. EarthLink TotalAccess EarthLink Network, Inc. Page 402 An Internet Service Provider that supplies access, information, and assistance to its customers, introducing them to the Internet. Member benefits include e-mail, newsgroups, a Personal Start Page, a free 6 MB web site, a member magazine, and 24-hour technical support. McAfee's VirusScan® Network Associates, Inc. Protect your computer from viruses. VirusScan can detect viruses from floppy disks, Internet downloads, e-mail attachments, intranets, shared files, CD-ROMs, and online services. Microsoft® Internet Explorer for Windows® 98 Microsoft Corporation Internet Explorer delivers the Web the way you want it. It's safe, easy to use, and you can personalize how you access the Web. Outlook Express and other tools in Internet Explorer also help you have a great experience when you are on the Web! Microsoft® Outlook® Express Microsoft Corporation Outlook Express, the messaging tool that takes your e-mail and newsgroup communications to new heights! Outlook Express is easy to set up and use, and provides you with secure, personalized, and complete features that make creating, sending, and reading your e-mail a more rich and dynamic experience. Microsoft® Word 2000 Microsoft Corporation Microsoft Word 2000 makes it easy to create common Web, e-mail, and print documents for use around the world. It embraces HTML as a first-class file format and extends Word's ease-of-use to the Web and e-mail. Word 2000 also extends that ease of use to international users, making it easy to create multilingual documents. Netscape Communicator® Netscape Communications Netscape Communicator is the all-in-one Internet tool that makes it easy to browse the Web, send Internet e-mail, chat, read newsgroups, and compose great Web documents. PictureGear Sony Electronics This image management software displays images from your hard drive, a Sony digital still camera, or a Sony Mavica® camera. The images appear in a convenient light-table format, so that you can easily view the contents of an entire folder. Prodigy Internet Prodigy Communications Corporation An Internet service that helps you find what you need online faster and smarter. Prodigy delivers powerful online content, such as sports scores, stock quotes, news, and easy access to Excite , plus a personal e-mail account and quality customer service, all at a competitive price. Quicken® Basic Intuit, Inc. Quicken is the fastest, easiest way to organize your finances. Quicken works just like your checkbook, so it's easy to learn and use. Quicken manages all of your finances, bank accounts, credit cards, investments, and loans. You can even pay your bills online. Smart Capture Sony Electronics Smart Capture is a fun new way to send multimedia messages via e-mail. Smart Capture manages the i.LINK connection between your computer and a Sony Digital Handycam® Camcorder or other Page 403 cameras that support the i.LINK interface. It allows you to capture and compress video or still images that you can save or share via e-mail. A smart solution to computer, digital audio/video, and network convergence. Smart Connect Sony Electronics Smart Connect allows you to use an i.LINK cable to connect your VAIO computer to another VAIO computer that supports Smart Connect. You can then use one computer to copy, delete, and edit files on the other computer. You can also print from a printer attached to either computer. Sound Forge® Sonic Foundry Sound Forge allows you to put powerful audio processing tools and effects to work on your desktop. Simply cut, copy, and paste your way to striking multimedia files for use in everything from Web pages to desktop presentations. VAIO Action Setup Sony Electronics VAIO Action Setup manages the settings for your computer's Programmable Power Keys (PPK), Memory Stick media, i.LINK interface, and internal timer. For more information, see VAIO Action Setup. WinFax® Basic Edition Symantec Corporation WinFax Basic Edition incorporates an easy-to-use interface that allows you to send and receive faxes easily. Upgrade to WinFax Pro to receive additional features. About Your Recovery CDs Application Recovery CD(s) Sony Electronics The Application Recovery CD program allows you to reinstall individual applications and device drivers. Use it to restore corrupted or accidentally erased files. System Recovery CD(s) Sony Electronics The System Recovery CD program allows you to restore the software titles that shipped with your computer if they become corrupted or are erased accidentally. It can be used only to restore the hard disk of the Sony computer you purchased. For Answers to Your Software Questions Acrobat® Reader, Adobe PhotoDeluxe® Home Edition (Adobe Systems Incorporated) Web site http://www.adobe.com/ phone 206-628-2746 (fee-based support) fax 206-628-5737 e-mail [email protected] hours M-F, 6 AM-5 PM PT America Online® (America Online) Web site phone hours http://www.aol.com/ 800-827-3338 7 days a week, 6 AM - 2 PM ET AT&T WorldNet® Service (AT&T) Web site phone e-mail http://www.att.net 800-400-1447 [email protected] Page 404 hours 7 days a week, 24 hours a day CompuServe® 2000 (CompuServe Interactive Services) Web site phone hours http://www.compuserve.com/ 800-848-8990 M-F, 8 AM - 1 AM ET, S-S 10 AM - 10 PM ET EarthLink TotalAccess Web site phone e-mail hours (EarthLink Network, Inc.) http://help.earthlink.net/techsupport/ 800-395-8410 [email protected] 7 days a week, 24 hours a day GTE Easy Sign-up (GTE Internet) phone hours 800-927-3000 7 days a week, 24 hours a day McAfee's VirusScan (Network Associates, Inc.) Web site phone e-mail hours http://support.mcafee.com 408-988-3832 [email protected] M - F 9 AM - 5 PM Central Time MindSpring Internet Desktop (MindSpring Enterprises, Inc.) Web site phone http://help.mindspring.com/support 800-719-4660 Quicken® Basic (Intuit Inc.) Web site phone hours http://www.intuit.com/support 900-555-4688 7 days a week, 24 hours a day Sound Forge® (Sonic Foundry) Web site http://www.sonicfoundry.com/support/ phone 608-256-5555 fax 608-256-7300 e-mail [email protected] hours M - F, 8 AM - 7 PM CT Windows® 98 Second Edition Operating System, Word® 2000, Internet Explorer 5, Outlook® Express (Microsoft Corporation) Web site phone hours 1 http://www.sony.com/pcsupport 888-4SONYPC (888-476-6972) 1 7 days a week, 24 hours a day Support from 1-888-4SONYPC is free of charge for 90 days after the original date of purchase. WinFax® Basic Edition (Symantec Corporation) Web site http://www.symantec.com/techsupp/ phone 800-798-0850 fax 800-554-4403 in North America 541-984-2490 outside North America Troubleshooting This section describes how to solve common problems you may encounter when using your computer. Many problems have simple solutions, so try these suggestions before you call Sony Customer Support. My computer does not start Check that the computer is plugged into a power source and that it is turned on. Check that the power light is lit on the front panel of the computer. Confirm that a diskette is not in the diskette drive (unless you are using a bootable diskette). Confirm that the power cord and all cables are connected firmly, as described on the color poster. Page 405 If you plugged the computer into a power strip or UPS, make sure the power strip or UPS is turned on and working. My computer or software program "locks up" Close the application that is currently "locked up" by pressing Ctrl+Alt+Delete. In the Close Program dialog box, scroll down until you locate "(Not responding)" next to an application. Select this application and click End Task. Windows attempts to close the application. If the attempt is unsuccessful, a second dialog box appears. Select End Task again. If you are unable to "unlock" the application, repeat the above steps but select Shut Down when the Close Program dialog box appears. If the above steps fail to "unlock" your computer, save any unsaved work, if possible. Press Alt+F4. Select Restart and click OK. If you cannot restart as described in the preceding steps, you can restart the computer by pressing Ctrl+Alt+Delete or by pressing the power switch for more than six seconds. Pressing Ctrl+Alt+Delete may result in the loss of changes made to files that are currently open. Contact the software publisher or designated provider for technical support. See For Answers to Your Software Questions for a list of phone numbers and Web addresses or see Read Me First . My DVD-ROM/CD-ROM drive tray does not open Make sure the computer is turned on. If the Eject button does not work, you can open the tray by inserting a straightened heavyweight paper clip into the emergency eject hole. When I click an application icon, a message such as "You must insert the application CD into your CD-ROM (DVD-ROM) drive" appears and the software does not start Some titles require specific files that are located on the application's DVD-ROM/CD-ROM. Insert the disc and try starting the program again. Check to make sure you inserted the DVD-ROM/CD-ROM with the label side facing up. My modem connection is slow The computer's modem uses K56flex technology/V.90. Many factors influence modem connection speed, including telephone line noise or compatibility with telephone equipment (such as fax machines or other modems). If you think your modem is not connecting properly to other computer-based modems, fax machines, or your Internet Service Provider, check the following: Have your phone company check that your phone line is free from any line noise. If your problem is fax-related, check that there are no problems with the fax machine you are calling. The modem that receives your call may be slower or may use a different communications protocol than your modem. If this is the case, the connection speed may be slower than expected. For optimum performance, ensure you are calling an Internet Service Provider number that is V.90-compliant. If you are having a problem connecting with your Internet Service Provider, check that the ISP is not experiencing technical problems. If you have a second phone line available, try connecting the modem to this line. My modem does not work Check that the phone line is plugged into the line jack. Page Check that the phone line is working. You can check the line by plugging in an ordinary phone and406 listening for a dial tone. Check that the phone number the program is dialing is correct. Verify that the software you are using is appropriately configured to recognize and interact with the Sony computer modem. Call the software publisher if you do not know how to configure the software to recognize the modem. All programs preinstalled by Sony are compatible. If you suspect your modem is not functioning, you can perform a simple test to find out. Click the My Computer icon on your desktop. Click Control Panel, and then click Modems. Click the Diagnostics tab and select COM3. Click More Info. If your modem is functioning, a More Info dialog box will display. If your modem is not functioning, an error message will appear. My microphone is too sensitive to background noise If you find there is too much background noise when you record sound, you should adjust the microphone gain by following these steps: 1. Right-click the speaker icon (Volume) in the lower-right Windows® task tray. 2. Click Open Volume Controls. The Volume Control screen appears. 3. In the Options menu, select Properties. The Properties screen appears. 4. Change the setting for "Adjust volume for" from Playback to Recording, and then click OK. 5. Click the Advanced button under Microphone Balance. The Advanced Controls for Microphone screen appears. 6. Deselect the check box for 1 Mic Gain (+20dB), then click the Close button. 7. Close the Recording Control window. My mouse does not work Check that the mouse is plugged into one of the PS/2® connectors on the keyboard. The other connector connects the keyboard to the computer. There may be dust or dirt inside the mouse mechanism. To clean the mouse, follow these steps: o Turn off your computer. See Shutting Down Your Computer for details. o Remove the mouse ball cover on the back of the mouse by turning the ring that covers the mouse ball clockwise. o Turn the mouse upright, and drop the mouse ball into your hand. o Using a piece of tape, remove any dust or dirt on the mouse ball and inside the mouse ball socket. o Return the mouse ball to the socket, and replace the mouse ball cover. Secure the cover by turning the ring counter-clockwise. I cannot find the Windows® taskbar Check that the taskbar is not hidden or shrunken. Use the mouse to point to the left, right, top, and bottom edges of the screen. See Read Me First for additional information on using your Sony computer. To Reach Sony For further assistance, call 1-888-4SONYPC (1-888-476-6972). Page 407 Specifications Model PCV-L630 Processor 600E MHz* Pentium® III Hard Disk Drive 17 GB Ultra DMA Standard SDRAM 128 MB PC-100 SDRAM, expandable to 256 MB Video RAM 8 MB SDRAM Graphics 2X AGP 3D graphics hardware acceleration (ATi Rage 128 Pro 4XL) Sound Capabilities High fidelity 3D PCI audio Aureal AU8810 Diskette Drive 3.5" 1.44 MB FDD DVD-ROM/CD-ROM Drive 4.8X (max.) DVD-ROM reading 24X (max.) CD-ROM reading** Modem K56flex technology/V.90 compatible data/fax modem Expansion Capabilities Two PCI slots Connection Capabilities (Front) PC card (Card bus support) USB port Microphone Headphone Memory Stick media slot i.LINK (4-pin) Connection Capabilities (Rear) USB port Modem line (RJ-11) Phone line (RJ-11) Parallel (printer) Serial port VGA monitor LCD display Line In Line Out Keyboard i.LINK (6-pin) Connection Capabilities (Keyboard) Mouse (PS/2-style) left and right connectors Supplied Accessories Stand (for vertical installation) Power cable Phone cable Keyboard cable PS/2 Wheel Mouse VAIO Smart Convertible Keyboard Spacers (for bottom of the system) Ferrite core Service 90-day limited express service*** Extendible to one year from original date of purchase upon registration Limited Warranty90-day parts/labor standard Extendible to one year from original date of purchase upon registration Power Requirements 130 watts maximum Dimensions CPU: 11.2"(w) x 3.6" (h) x 13.4" (d) (280 mm x 90 mm x 335 mm) Keyboard: 15.9" (w) x 1.8" (h) x 7.1" (d) (398 mm x 45 mm x 178 mm) Display: 16.1" (w) x 13.1" (h) x 6.9" (d) (403 mm x 327 mm x 172 mm) Weight CPU: 11.9 lbs. (5.4kg) Display: 7.05 lbs (3.2 kg) Keyboard: 2.9 lbs. (1.3kg) Operating Temperature 50º F to 95º F (+10º C to 35º C) * MHz denotes microprocessor internal clock speed; other factors may affect application performance. Page 408 GB means one billion bytes when referring to hard drive capacity. Accessible capacity may vary. **Data on a DVD-ROM is read at a variable transfer rate, ranging from 2X at the innermost track to 4.8X at the outermost track(the data transfer standard 1X rate is 1385 kbytes/s). The average data transfer rate is 3.6X(4986 kbytes/s). Data on a CD-ROM is read at a variable transfer rate, ranging from 10.5X at the innermost track to 24X at the outermost track(the data transfer standard 1X rate is 150 kbytes/s). The average data transfer is 18X(2700 kbytes/s). Maximum speed for faxing is 14.4 kbytes/s. Your modem is capable of downloading at 56 kbytes/s using K56flex technology or V.90. Your phone service, online service, or Internet Service Provider, however, may not support this technology or operate at this speed. ***Certain restrictions apply. Specifications are subject to change without notice. Page 409 Features For a complete description of the specifications of your Sony computer, see Specifications. i.LINK® (IEEE-1394): Two built-in i.LINK ports provide you with front and rear digital connection capability. The i.LINK name and logo identify a digital interface (IEEE-1394) for high speed communication. Exceptional performance: Your computer includes a fast Intel® processor and a V.90-compatible data/fax modem. Ergo-Angle Multimedia LCD display: With its exclusive dual-hinge pedestal, this 15" XGA TFT display provides twice the flexibility of other LCDs. Select the perfect viewing angle and enjoy the built-in Harman/Kardon® stereo speakers. AutoAlert E-mail Notification System: Custom software automatically downloads e-mail on a pre-set schedule via Microsoft® Outlook® Express. A light on the LCD display instantly lets you know when new mail is received. VAIO Smart convertible keyboard: The innovative palm rest converts to a keyboard cover for a sleek look when not in use. Six Programmable Power Keys let you launch any application with the push of a button; dual-sided mouse connections for left- or right- hand use. Sony Memory Stick® media slot: The next generation of digital media, smaller than a stick of gum. Easily delivers information from one Memory Stick-equipped electronic device to another, so you can transfer images, sounds, data and text between cameras, computers, and more. Compact components: Enjoy the small footprint and versatile setup options available by positioning the components in an arrangement of your choice. Sony audio and video quality: High-fidelity 3D audio system and high-powered 3D graphics (AGP) enable you to take advantage of today's advanced multimedia applications, games, and entertainment software. Preinstalled software titles: All the software on your computer is preinstalled, configured, and ready for you to use right out of the box. Microsoft® Windows® 98 Second Edition operating system: Your system includes the latest operating system from Microsoft. Communications: Access popular online services, browse the Internet, send faxes, and more. * Actual upload and download speeds may vary due to line conditions, ISP support, and government regulations. Unpacking Your Computer Computer and Supplied Accessories Page 410 Manuals Read Me First contains last-minute supplementary information and software support numbers. The VAIO Slimtop LCD Computer User Guide (this manual) contains features and specifications of your computer. It also includes information on the applications included with your system and how to contact software vendors, get started with your computer, and solve common problems. The VAIO VAIO® Consumer Information Guide contains safety and regulatory information, ergonomic considerations, information on help resources, and your computer's limited warranty statement. The Microsoft® Windows®98 Second Edition Getting Started manual explains how to use the basic features of the Windows® operating system. Recovery CDs System Recovery CD(s) - Enables you to reinstall software that shipped with your computer if it is corrupted or accidentally erased. For more information, see Using the System Recovery CD(s). Application Recovery CD(s) - Allows you to reinstall individual applications or device drivers if they are corrupted or accidentally erased. For more information, see Using the Application Recovery CD(s). Other Setting up your VAIO Slimtop LCD Computer (poster) Packet containing special product offers Software CDs Page 411 Microsoft® Word 2000 Setting Up Your VAIO Slimtop LCD Computer Locating Controls and Connectors Front Panel 1 Power switch and indicator light Turns on/off the computer and the display. The indicator light is green while the power is on and amber when the computer is in standby mode. 2 Floppy disk drive Reads/writes data from/to a 3.5-inch floppy disk. 3 Floppy disk eject button Ejects the floppy disk. 4 DVD-ROM drive Reads data from a DVD-ROM/CD-ROM. 5 DVD-ROM/CD-ROM eject button Ejects a DVD-ROM/CD-ROM. 6 Manual eject hole If the DVD-ROM/CD-ROM does not come out when you press the DVD-ROM/CD-ROM eject button, insert a thin, pointed object into this hole to eject the disc manually. 7 FD (Floppy disk drive) access indicator light Lights in green while reading/writing data from/to a floppy disk. 8 Disc (DVD-ROM drive) access indicator light Lights in amber while reading data from a DVD-ROM/CD-ROM. 9 HD (drive) access indicator light Lights in green while reading/writing data from/to the hard disk. 10 MIC (Microphone) connector* Connects a microphone (not supplied). 11 PHONES (Headphones) connector* Connects headphones (not supplied). 12 VOLUME control Page 412 Adjusts the volume of the headphones connected to the PHONES connector. Users should note that this does not control the volume of the integrated LCD speakers. 13 PC CARD slot A PC Card (also called a PCMCIA card) can be installed in this slot. PC cards enable you to add functionality to your system. MEMORY STICK media slot 14 Insert a Sony Memory Stick® card into this slot. See Using the Memory Stick® Media for details on using Memory Stick media. 15 i.LINK (4-pin) Connects a digital device such as a Sony Digital Handycam® Camcorder. 16 USB (Universal Serial Bus) connector Connects a USB device. * See Using a Headphone or Microphone for important information about connecting a microphone and headphone. Rear Panel 1 AC INPUT connector Connects the supplied power cord. 2 LINE jack Connects a phone cable to the wall jack. 3 EMPTY PCI SLOT (FILLED WITH ETHERNET CARD ON CUSTOM MODELS) For a PCI Add-On Card (not supplied). 4 TELEPHONE jack Connects the phone to the computer. 5 PRINTER connector Connects a parallel device, such as a printer or scanner. 6 SERIAL connector Connects a serial device, such as a digital still camera. 7 MONITOR connector Connects a standard CRT display. 8 USB (Universal Serial Bus) connector Connects a USB device. 9 LINE IN connector Connects an audio device. 10 LINE OUT connector Connects an audio device or an active speaker. 11 i.LINK (6-pin) Connects a digital device such as a Sony Digital Handycam® Camcorder. 12 LCD MONITOR connector Connects the LCD that comes with the VAIO Slimtop LCD computer. Note: Do not connect any display to this connector other than the LCD that is supplied with this system. Page 413 13 KEYBOARD connector Connects a keyboard. LCD 1 Power indicator light Light is green while the power is on. When the computer enters the standby mode, this indicator light turns amber. 2 Information LED Light turns red to alert the user to activities, such as the arrival of e-mail. See AutoAlert E-mail Notification System. 3 Adjusts 4 Adjusts Brightness control the brightness of the screen. Volume control the volume of the integrated speakers on the LCD display. Using the Wheel Mouse For information about the Wheel Mouse that connects to either side of your keyboard, see MouseWare Help. To access MouseWare Help, from the Start menu, point to Programs, MouseWare, and then click MouseWare Help. To set up the mouse for left-handed use: 1. Click the My Computer icon on your desktop. 2. Click Control Panel, and then click Mouse. The Mouse Properties dialog box appears. 3. In the Quick Setup tab, click Device Setup. 4. In the Device Setup Wizard dialog box, click Next. 5. Select the radio button next to "Left side of the keyboard." 6. Click Next three times, and then click Finish. 7. Click Apply. Using a Headphone or Microphone When you connect a microphone or headphone to your computer, attaching a ferrite core will reduce electrical interference. Attach the (supplied) ferrite core at the end of the headphone or microphone cable closest to the computer. Wrap the cable through the center of the ferrite core. The following illustration shows how to attach the ferrite core when you are using both a headphone and a microphone. Page 414 The LCD and keyboard cables already include a ferrite core. Do not remove the ferrite core from these cables. To adjust the height and viewing angle of the display Holding both sides of the display, push the display panel out and up, and then adjust the viewing angle. The LCD display is designed to maintain the best ergonomic viewing angle. Set the display height so that it does not touch the keyboard, and adjust the viewing angle approximately 27 degrees from eye level to the center of the screen. Attaching the Stand to the System Unit The main system unit can be oriented horizontally or vertically. If you place the system in a vertical position, you must attach the supplied stand to ensure stability. 1. Place the system unit on its right side, with the front of the system facing forward. 2. Insert the grooved side of the stand into the ventilation holes of the system so that the two screw holes are aligned and the stand's fins are at the rear of the unit. 3. Secure the stand to the unit with the supplied screw. Page 415 The stand keeps the system cool by allowing air to flow under it. If you choose to place the system unit in a vertical position, it is important to use the stand and to place the system unit on its left side, as in the illustration above; otherwise, the system may overheat. Registering Your Computer Take advantage of Sony's commitment to quality customer support and receive these benefits by registering your computer: Sony Customer Support--Talk to a Support Representative to troubleshoot problems you may be having with your computer. Limited warranty--Protect your investment. See Limited Warranty Statement in the VAIO® Consumer Information Guide for details. You must register your computer to extend the warranty from the initial 90-day warranty period to one year from the original date of purchase. Express Service--Provides a fast and direct return of your VAIO Slimtop Sony for service of your computer. LCD Computer to If you did not already register when you first turned on your computer, follow these steps to use the computer online registration service. 1. Click the registration icon on the VAIO desktop. 2. Enter the information requested on the first online registration form. Press the tab key to move from box to box. 3. Click the Next button to advance to the next form. 4. Complete the remaining forms by clicking the Next button each time you complete a form. The computer automatically transfers your registration information using your built-in modem and a toll-free telephone number or a local number. You may sign up for Internet access with a Sony preferred Internet Service Provider. VAIO Action Setup VAIO Action Setup manages the settings for your computer's Programmable Power Keys (PPK), Memory Stick® media, i.LINK interface, and internal timer. An overview of each of these functions is provided below. For more information on changing the settings using VAIO Action Setup, see the online VAIO Action Setup help files. To access the help files, from the Start menu, point to Programs/VAIO Action Setup/VAIO Action Setup Help. Programmable Power Keys Your Sony computer comes with technology that allows you to get to your favorite applications Page easily. Each Programmable Power Key (PPK) on your VAIO Smart convertible keyboard comes 416 programmed to launch a preset application with a single press of the key. If you wish, you can use the VAIO Action Setup software to change the Programmable Power Keys' preset functions. The Programmable Power Keys are located at the top of your keyboard, and are numbered P1 through P6. The keys work even when the computer is turned off. Pressing one of these keys turns on the computer and launches the preset application. The six Programmable Power Keys come to you preprogrammed to perform the functions listed in the table below. Key Function P1 (INTERNET) Starts Microsoft® Internet Explorer for Windows® 98. P2 (MAIL) Starts Microsoft® Outlook® Express P3 (WORK) Starts Microsoft® Word P4 (FINANCE) Starts Intuit® Quicken® Basic 2000. P5 (SETUP) Starts PPK Setup. P6 (HELP) Opens a menu of help options. Memory Stick You can use VAIO Action Setup to preset your computer to automatically launch an application when you insert a Memory Stick. For more information on Memory Stick media, see Using the Memory Stick® Media . Internal Timer The VAIO Action Setup software allows you to set your computer's internal timer to launch certain applications automatically. The timer can start applications even when the power is off. Some software applications take longer than others to launch. It is advisable to confirm in advance the amount of time your selected application takes to start. AutoAlert E-mail Notification System VAIO Action Setup also enables you to set up your computer to notify you with an Information LED when new mail arrives in your e-mail mailbox. The Information LED turns red to indicate that new e-mail has arrived. For this AutoAlert E-mail Notification System to work, you must use Microsoft® Outlook® Express as your default e-mail software, and you must have an Internet Service Provider with dial-up capabilities set up. As an alternative, you can program your AutoAlert E-mail Notification System to set the Information LED to turn on when it has successfully completed the task of dialing up and connecting to receive mail. In this case, the Information LED turns on to indicate that your e-mail account has been accessed successfully, regardless of whether or not you have mail; this works with Microsoft Outlook Express. The e-mail software you choose to use with PPK must be set as your default e-mail software. See LCD for an illustration showing the Information LED's location. AutoAlert E-mail Notification System Software Restrictions If you use software that uses a phone line The computer may not be able to disconnect the phone line due to communication and server conditions. Be sure to monitor the status of the software when running the AutoAlert E-mail Notification System, and manually disconnect the phone line if you notice a malfunction. Furthermore, when using the timer to start the software, it is advised that you set the computer to shut down or enter system standby mode after a certain length of time. This allows the computer to disconnect the phone line if the computer fails to disconnect the line normally. If you are using the timer to download e-mail automatically Page 417 It is advisable to set up your e-mail software to redial automatically if it does not connect the first time. It is also advisable to set the e-mail software to disconnect the phone line automatically when all mail has been downloaded. If you are using Microsoft® Outlook® Express When using the AutoAlert E-mail Notification System with Microsoft Outlook Express, it is advisable to select the Dial automatically setting in your Microsoft Outlook Express software. If you have not chosen this setting and wish to do so, start Outlook Express, click Tools, and then select Options. Select the check box "Automatically dial when checking for new messages." Click OK. Changing the Window Design of Sony Software To change the window design of Sony software 1. Click the Start button, point to Settings, and then click Control Panel. 2. Click UI Design Selector. 3. Click << or >> and select the desired design. 4. Click Apply. The "UI Design Selector" window design changes. The window design for your Sony software will match the "UI Design Selector" window. To try another selection, click << or >>. Then, click OK. The UI Design Selector closes and the window design of your Sony software window design displays. You may use the feature with UI Design Selector-compatible software only. Using the Memory Stick® Media Your Sony computer is designed to support the new Memory Stick recording media. The Memory Stick media is a small, versatile device that allows you to share data between various types of Sony equipment. When you use the card, your computer automatically launches Windows Explorer. This allows you to view the contents of the card. If the image files are created by a Sony digital camera or camcorder, you do not need the following steps. If you want to create a slide show that launches automatically when you insert a Memory Stick, follow these steps to transfer images from your hard drive to a Memory Stick. 1. Insert the Memory Stick into the appropriate slot. 2. Click the My Computer icon on the desktop. Page 418 3. Click the Removable Disk S: icon. 4. Create a new folder and name it "DCIM." 5. Open the DCIM folder and create a new folder named "100MSDCF." 6. Click the Start button, select VAIO, and then click PictureGear to launch the PictureGear application. 7. Select the digital images you want to save in your slide show. 8. From the PictureGear File menu, point to File Process, and then select Still Format Conversion. 9. Select Memory Stick as the Output Format. 10. Use the Browse button to select the DCIM/100MSDCF folder on the Removable Disk (S:) drive. 11. Name the file. The file name must begin with DSC (DSC0xxxx). The full file name without extension must have at least eight characters. The order in which your photos appear in your slide show will be determined by the number (xxxx) in the file name. Some examples of acceptable file names are DSC00001.jpg and DSC00002.jpg 12. Click OK to save the file. You can also add MPEG1 video files to your Slide Show by following the steps below. The order in which your video clips (MOV0xxxx files) appear in your Slide Show is determined by the number (xxxx) in the file name. 1. Insert the Memory Stick into the media slot. 2. Click the My Computer icon on the desktop. 3. Click the Removable Disk S: icon. 4. Create a new folder and name it "MSSONY." 5. Open the MSSONY folder and create a new folder named "MOML0001." 6. From the PictureGear File menu, point to File Process, and then select Still Format Conversion. 7. Copy the MPEG file into the MOML0001 folder. 8. Rename the MPEG file MOV0xxxx.mpg, where xxxx is any four-digit number. 9. To begin showing your slides, eject the Memory Stick and then reinsert it. The slide show will begin automatically. To protect data on Memory Stick media from accidental changes Memory Stick media contains a write-protect tab. The write-protect tab prevents accidental changes to information recorded on the Memory Stick media. When you slide the write-protect tab to the LOCK position, the Memory Stick is write-protected, which means you cannot delete, copy, or save information on the Memory Stick. When you slide the tab to the un-LOCK position, you can write to or modify the Memory Stick contents. To change the way the computer responds when a Memory Stick is inserted into the Memory Stick media slot Change the options on the Memory Stick tab in the PPK Setup software. Page 419 Using PC Cards This computer has a card bus PC card slot that supports a Type I or II PC card. To insert a PC card You do not need to shut down your computer when inserting a PC card. 1. Open the front panel. 2. Insert the PC card into the PC card slot until it clicks into position. When the card is completely inserted, the eject button pops out. If you cannot insert the card, do not forcibly insert it. In this case, make sure the card is not inserted upside-down or backward, and then reinsert the card into the slot carefully. See the manual that came with the PC card for details on using it. To close the front panel when the eject button is protruding, fold the button down onto the computer. To eject a PC card If you eject the PC card incorrectly, the system may not work correctly. 1. Click the Start button on the Windows® taskbar, click Settings, and then click Control Panel. 2. Click the PC Card icon. 3. Click the name of the card that you want to eject, and then click Stop. 4. When the message "You may safely remove this device" appears, click OK. 5. Push the PC card eject button on the front panel of the system unit. You may need to pull out the eject button before you can eject the card. Page 420 The card is ejected from the card connector. Remove the card by holding it by its edge and pulling it out carefully. Using the Standby Function When you are finished using your computer, you can put it in standby mode rather than turn it off completely. Putting the computer in standby mode allows you to return quickly to normal computer use. To put the computer in standby mode manually 1. Save your work and close any applications that are running. (You can leave Windows running.) 2. Press the (Standby) button on the top of the keyboard. The computer goes into standby mode. Alternatively, you can click the Start button on the Windows® taskbar, click Shut Down, select Standby, and then click OK. To let the computer go into standby mode automatically Click the My Computer icon on your desktop. Click Control Panel, and then click the Power Management icon. On the Power Schemes tab, select from the options in the Power schemes drop-down list. Then, choose settings for the power scheme you have selected. To save the settings under a name that is not offered in the Power schemes pulldown menu, choose your settings and then click Save As. Type in a name, and click OK. Click Apply to finalize your power settings. To resume from standby mode There are three ways to bring your computer back from the standby mode: press the space bar on your keyboard, press the left mouse button, or momentarily depress the power button on your computer. If the display does not return from standby when you press the (Standby) button, your system may be in video standby mode. Press the space bar on the keyboard to return from video standby. Standby Mode Indicators You can tell which mode the computer is in by the color of the power indicator light. Color Amber Green No color Mode Computer is in standby mode. Computer is out of standby mode, ready to use. Computer is turned off. In standby mode you may periodically hear the computer's fan turn on and off, depending on the room's temperature. This is normal functioning in standby mode. Page 421 Shutting Down Your Computer When you are ready to turn off your computer for an extended period of time, use the following procedure to shut down the computer. To avoid the potential loss of data, do not use the power switch to shut down the computer. To shut down your computer If you plan to shut down your computer for a short period of time, you may want to use standby mode instead. See Using the Standby Function. 1. Click the Start button on the Windows® taskbar to open the Start menu. 2. Click Shut Down to display the Shut Down Windows dialog box. 3. Select the Shut Down option. 4. Click OK to complete the shutdown process. Respond to any prompts about saving documents. 5. Wait for your computer to turn off automatically -- the power indicator light turns off. 6. Turn off any peripherals connected to your computer. The LCD display turns off automatically when the computer shuts down. You can also shut down your computer using the (Power) button on the keyboard. Pressing this button causes the system to perform a shutdown but does not give you any of the other options available on the Windows® Shut Down menu. About the Power Switch If your system "locks up" or "crashes," press and hold the power switch for four seconds to force your system to power off. You may need to repeat this procedure. See Locating Controls and Connectors for the power switch's location. Using the System Recovery CD(s) You can reinstall software titles that shipped with your computer if they are corrupted or accidentally erased. You may not need to recover the entire contents of your hard drive. If you experience a problem with your computer, reinstalling an individual device driver or software title may correct the problem. Use the Application Recovery CD(s) to reinstall individual applications or device drivers. See Using the Application Recovery CD(s). The System Recovery CD(s) contain a backup copy of all the software originally installed on your hard disk drive. They can be used only to recover the hard disk of the Sony computer you purchased. The System Recovery utility gives you three options: Full Restore without Format restores all the software titles that originally came with your computer without formatting the hard disk. Full Restore with Format formats the hard disk drive and then restores all the original software. If your hard drive is partitioned into C and D drives, the computer will offer you the option to reformat the drive into a single partition. Operating System Only (Windows 98® Restore with Format) formats the hard disk drive and Page 422 restores the Windows® operating system and the device drivers that shipped with your computer. This option is recommended for advanced users only. If you choose the Full Restore with Format or Operating System Only option, your hard disk will be formatted, which removes all the information on the hard disk drive. You will lose any software you have installed and any other files you have created since you started to use your computer. This means you will have to reinstall any applications that were not included with the computer when you purchased it. If you choose the Full Restore without Format option, you may need to reinstall applications that were not included with the computer when you purchased it. If you have any questions on using the System Recovery CD(s), contact Sony Customer Support. To use the System Recovery CD(s) You need to complete the Windows registration process when you use the System Recovery CD(s). 1. Insert the Sony System Recovery CD(s) in the DVD-ROM drive. The System Recovery utility boots from the DVD-ROM drive. It must be in the drive when you turn on the computer. 2. Shut down your computer as described in Shutting Down Your Computer. 3. Wait 30 seconds and turn on your computer. 4. Click OK to signify you have read and accept the Microsoft End-User License Agreement. 5. When the System Recovery menu appears, follow the on-screen instructions to complete the recovery process. Your system may include one or two System Recovery CDs. If you have two System Recovery CDs, insert the first CD to run the System Recovery program. You are prompted to insert the second CD once the information from the first CD has been installed. The recovery process takes 30 to 60 minutes to complete. Using the Application Recovery CD(s) The Application Recovery CD(s) allow you to reinstall individual applications and device drivers if they are corrupted or accidentally erased. Reinstalling an individual device driver or software title may correct a problem you are experiencing with your computer, and you may not need to recover the entire contents of your hard drive. If you do need to reinstall all the software titles that shipped with your computer, use the System Recovery CD(s). See Using the System Recovery CD(s). You must be in Windows to run the Application Recovery CD(s). The application will not run from DOS. If you have any questions on using the Application Recovery CD(s), contact Sony Customer Support. To use the Application Recovery CD(s) 1. Turn on your computer. If your computer is already on, close all applications. 2. When the Windows desktop appears, insert the Sony Application Recovery CD in the DVD-ROM drive. The Application Recovery utility loads automatically. 3. When the Application Recovery menu appears, follow the on-screen instructions to complete the recovery process. Your system may include one or two Application Recovery CDs. If you have two Application Recovery CDs, insert the first CD to run the Application Recovery program. You may be prompted to insert the second CD, depending on the application you wish to restore. Page 423 About the Software on Your Computer Your VAIO Slimtop computer is ready to help you work, play, learn, and communicate as soon as you turn it on. This section gives you an overview of the activities you can perform with your software titles. For support information, see For Answers to Your Software Questions . Adobe Acrobat® Reader Adobe Systems Incorporated Acrobat Reader software allows you to view, navigate, and print electronic documents in Adobe's Portable Document Format (PDF), an open file format that is intended to preserve the fidelity of documents created on all major computer platforms. Adobe PhotoDeluxe® Home Edition Adobe Systems Incorporated Create amazing photo effects with PhotoDeluxe. Without learning complex software, you can enhance, restore, and be creative with your photos. Includes built-in guided activities, stock photos, clip art, and templates to assist you. Adobe Premiere® LE Adobe Systems Incorporated Adobe Premiere LE offers an interface and editing tool for producing movies for video, multimedia, or the Web. View source clips and edited footage simultaneously in the monitor window. Create video clips up to three hours long with complete audio-video synchronization. America Online® America Online America Online is the world's most popular Internet online service. Stay in touch with family and friends with Easy-to-Use E-mail, manage your personal finances, get the latest news and sports scores, and chat with thousands of others who share your interests. AT&T WorldNet® Service AT&T Fast, reliable Internet access from AT&T WorldNet Service. AT&T WorldNet Service provides Web-based e-mail, a personalized start page from Excite, easy access to the Excite search engine, free Web pages, online and live agent technical support, instant messaging, and special shopping discounts at Market Square. CompuServe® 2000 CompuServe Interactive Services The all new CompuServe 2000 delivers a powerful tool for Internet users who want serious and timely information, in-depth research, and professional communities backed by state-of-the-art technologies, including high-speed access and powerful e-mail messaging. Digital Media Bar Sony Electronics Media Bar software is your all-in-one solution for audio/video playback. It handles all common computer multimedia formats, and controls selected Sony devices. Media Bar software encompasses audio/video library cataloging and playlist management, in addition to digital video quality control and effects features. DVgate Sony Electronics Connect a digital video camera recorder to the i.LINK connector and capture your own video clips. You can edit the clips from your video, add others, and combine clips into new movie segments. EarthLink TotalAccess EarthLink Network, Inc. Page 424 An Internet Service Provider that supplies access, information, and assistance to its customers, introducing them to the Internet. Member benefits include e-mail, newsgroups, a Personal Start Page, a free 6 MB web site, a member magazine, and 24-hour technical support. McAfee's VirusScan® Network Associates, Inc. Protect your computer from viruses. VirusScan can detect viruses from floppy disks, Internet downloads, e-mail attachments, intranets, shared files, CD-ROMs, and online services. Microsoft® Internet Explorer for Windows® 98 Microsoft Corporation Internet Explorer delivers the Web the way you want it. It's safe, easy to use, and you can personalize how you access the Web. Outlook Express and other tools in Internet Explorer also help you have a great experience when you are on the Web! Microsoft® Outlook® Express Microsoft Corporation Outlook Express, the messaging tool that takes your e-mail and newsgroup communications to new heights! Outlook Express is easy to set up and use, and provides you with secure, personalized, and complete features that make creating, sending, and reading your e-mail a more rich and dynamic experience. Microsoft® Word 2000 Microsoft Corporation Microsoft Word 2000 makes it easy to create common Web, e-mail, and print documents for use around the world. It embraces HTML as a first-class file format and extends Word's ease-of-use to the Web and e-mail. Word 2000 also extends that ease of use to international users, making it easy to create multilingual documents. Netscape Communicator® Netscape Communications Netscape Communicator is the all-in-one Internet tool that makes it easy to browse the Web, send Internet e-mail, chat, read newsgroups, and compose great Web documents. PictureGear Sony Electronics This image management software displays images from your hard drive, a Sony digital still camera, or a Sony Mavica® camera. The images appear in a convenient light-table format, so that you can easily view the contents of an entire folder. Prodigy Internet Prodigy Communications Corporation An Internet service that helps you find what you need online faster and smarter. Prodigy delivers powerful online content, such as sports scores, stock quotes, news, and easy access to Excite , plus a personal e-mail account and quality customer service, all at a competitive price. Quicken® Basic Intuit, Inc. Quicken is the fastest, easiest way to organize your finances. Quicken works just like your checkbook, so it's easy to learn and use. Quicken manages all of your finances, bank accounts, credit cards, investments, and loans. You can even pay your bills online. Smart Capture Sony Electronics Smart Capture is a fun new way to send multimedia messages via e-mail. Smart Capture manages the i.LINK connection between your computer and a Sony Digital Handycam® Camcorder or other Page 425 cameras that support the i.LINK interface. It allows you to capture and compress video or still images that you can save or share via e-mail. A smart solution to computer, digital audio/video, and network convergence. Smart Connect Sony Electronics Smart Connect allows you to use an i.LINK cable to connect your VAIO computer to another VAIO computer that supports Smart Connect. You can then use one computer to copy, delete, and edit files on the other computer. You can also print from a printer attached to either computer. Sound Forge® Sonic Foundry Sound Forge allows you to put powerful audio processing tools and effects to work on your desktop. Simply cut, copy, and paste your way to striking multimedia files for use in everything from Web pages to desktop presentations. VAIO Action Setup Sony Electronics VAIO Action Setup manages the settings for your computer's Programmable Power Keys (PPK), Memory Stick media, i.LINK interface, and internal timer. For more information, see VAIO Action Setup. WinFax® Basic Edition Symantec Corporation WinFax Basic Edition incorporates an easy-to-use interface that allows you to send and receive faxes easily. Upgrade to WinFax Pro to receive additional features. About Your Recovery CDs Application Recovery CD(s) Sony Electronics The Application Recovery CD program allows you to reinstall individual applications and device drivers. Use it to restore corrupted or accidentally erased files. System Recovery CD(s) Sony Electronics The System Recovery CD program allows you to restore the software titles that shipped with your computer if they become corrupted or are erased accidentally. It can be used only to restore the hard disk of the Sony computer you purchased. For Answers to Your Software Questions Acrobat® Reader, Adobe PhotoDeluxe® Home Edition (Adobe Systems Incorporated) Web site http://www.adobe.com/ phone 206-628-2746 (fee-based support) fax 206-628-5737 e-mail [email protected] hours M-F, 6 AM-5 PM PT America Online® (America Online) Web site phone hours http://www.aol.com/ 800-827-3338 7 days a week, 6 AM - 2 PM ET AT&T WorldNet® Service (AT&T) Web site phone e-mail http://www.att.net 800-400-1447 [email protected] Page 426 hours 7 days a week, 24 hours a day CompuServe® 2000 (CompuServe Interactive Services) Web site phone hours http://www.compuserve.com/ 800-848-8990 M-F, 8 AM - 1 AM ET, S-S 10 AM - 10 PM ET EarthLink TotalAccess Web site phone e-mail hours (EarthLink Network, Inc.) http://help.earthlink.net/techsupport/ 800-395-8410 [email protected] 7 days a week, 24 hours a day GTE Easy Sign-up (GTE Internet) phone hours 800-927-3000 7 days a week, 24 hours a day McAfee's VirusScan (Network Associates, Inc.) Web site phone e-mail hours http://support.mcafee.com 408-988-3832 [email protected] M - F 9 AM - 5 PM Central Time MindSpring Internet Desktop (MindSpring Enterprises, Inc.) Web site phone http://help.mindspring.com/support 800-719-4660 Quicken® Basic (Intuit Inc.) Web site phone hours http://www.intuit.com/support 900-555-4688 7 days a week, 24 hours a day Sound Forge® (Sonic Foundry) Web site http://www.sonicfoundry.com/support/ phone 608-256-5555 fax 608-256-7300 e-mail [email protected] hours M - F, 8 AM - 7 PM CT Windows® 98 Second Edition Operating System, Word® 2000, Internet Explorer 5, Outlook® Express (Microsoft Corporation) Web site phone hours 1 http://www.sony.com/pcsupport 888-4SONYPC (888-476-6972) 1 7 days a week, 24 hours a day Support from 1-888-4SONYPC is free of charge for 90 days after the original date of purchase. WinFax® Basic Edition (Symantec Corporation) Web site http://www.symantec.com/techsupp/ phone 800-798-0850 fax 800-554-4403 in North America 541-984-2490 outside North America Troubleshooting This section describes how to solve common problems you may encounter when using your computer. Many problems have simple solutions, so try these suggestions before you call Sony Customer Support. My computer does not start Check that the computer is plugged into a power source and that it is turned on. Check that the power light is lit on the front panel of the computer. Confirm that a diskette is not in the diskette drive (unless you are using a bootable diskette). Confirm that the power cord and all cables are connected firmly, as described on the color poster. Page 427 If you plugged the computer into a power strip or UPS, make sure the power strip or UPS is turned on and working. My computer or software program "locks up" Close the application that is currently "locked up" by pressing Ctrl+Alt+Delete. In the Close Program dialog box, scroll down until you locate "(Not responding)" next to an application. Select this application and click End Task. Windows attempts to close the application. If the attempt is unsuccessful, a second dialog box appears. Select End Task again. If you are unable to "unlock" the application, repeat the above steps but select Shut Down when the Close Program dialog box appears. If the above steps fail to "unlock" your computer, save any unsaved work, if possible. Press Alt+F4. Select Restart and click OK. If you cannot restart as described in the preceding steps, you can restart the computer by pressing Ctrl+Alt+Delete or by pressing the power switch for more than six seconds. Pressing Ctrl+Alt+Delete may result in the loss of changes made to files that are currently open. Contact the software publisher or designated provider for technical support. See For Answers to Your Software Questions for a list of phone numbers and Web addresses or see Read Me First . My DVD-ROM/CD-ROM drive tray does not open Make sure the computer is turned on. If the Eject button does not work, you can open the tray by inserting a straightened heavyweight paper clip into the emergency eject hole. When I click an application icon, a message such as "You must insert the application CD into your CD-ROM (DVD-ROM) drive" appears and the software does not start Some titles require specific files that are located on the application's DVD-ROM/CD-ROM. Insert the disc and try starting the program again. Check to make sure you inserted the DVD-ROM/CD-ROM with the label side facing up. My modem connection is slow The computer's modem uses K56flex technology/V.90. Many factors influence modem connection speed, including telephone line noise or compatibility with telephone equipment (such as fax machines or other modems). If you think your modem is not connecting properly to other computer-based modems, fax machines, or your Internet Service Provider, check the following: Have your phone company check that your phone line is free from any line noise. If your problem is fax-related, check that there are no problems with the fax machine you are calling. The modem that receives your call may be slower or may use a different communications protocol than your modem. If this is the case, the connection speed may be slower than expected. For optimum performance, ensure you are calling an Internet Service Provider number that is V.90-compliant. If you are having a problem connecting with your Internet Service Provider, check that the ISP is not experiencing technical problems. If you have a second phone line available, try connecting the modem to this line. My modem does not work Check that the phone line is plugged into the line jack. Page Check that the phone line is working. You can check the line by plugging in an ordinary phone and428 listening for a dial tone. Check that the phone number the program is dialing is correct. Verify that the software you are using is appropriately configured to recognize and interact with the Sony computer modem. Call the software publisher if you do not know how to configure the software to recognize the modem. All programs preinstalled by Sony are compatible. If you suspect your modem is not functioning, you can perform a simple test to find out. Click the My Computer icon on your desktop. Click Control Panel, and then click Modems. Click the Diagnostics tab and select COM3. Click More Info. If your modem is functioning, a More Info dialog box will display. If your modem is not functioning, an error message will appear. My microphone is too sensitive to background noise If you find there is too much background noise when you record sound, you should adjust the microphone gain by following these steps: 1. Right-click the speaker icon (Volume) in the lower-right Windows® task tray. 2. Click Open Volume Controls. The Volume Control screen appears. 3. In the Options menu, select Properties. The Properties screen appears. 4. Change the setting for "Adjust volume for" from Playback to Recording, and then click OK. 5. Click the Advanced button under Microphone Balance. The Advanced Controls for Microphone screen appears. 6. Deselect the check box for 1 Mic Gain (+20dB), then click the Close button. 7. Close the Recording Control window. My mouse does not work Check that the mouse is plugged into one of the PS/2® connectors on the keyboard. The other connector connects the keyboard to the computer. There may be dust or dirt inside the mouse mechanism. To clean the mouse, follow these steps: o Turn off your computer. See Shutting Down Your Computer for details. o Remove the mouse ball cover on the back of the mouse by turning the ring that covers the mouse ball clockwise. o Turn the mouse upright, and drop the mouse ball into your hand. o Using a piece of tape, remove any dust or dirt on the mouse ball and inside the mouse ball socket. o Return the mouse ball to the socket, and replace the mouse ball cover. Secure the cover by turning the ring counter-clockwise. I cannot find the Windows® taskbar Check that the taskbar is not hidden or shrunken. Use the mouse to point to the left, right, top, and bottom edges of the screen. See Read Me First for additional information on using your Sony computer. To Reach Sony For further assistance, call 1-888-4SONYPC (1-888-476-6972). Page 429 Specifications Model PCV-L630 Processor 600E MHz* Pentium® III Hard Disk Drive 17 GB Ultra DMA Standard SDRAM 128 MB PC-100 SDRAM, expandable to 256 MB Video RAM 8 MB SDRAM Graphics 2X AGP 3D graphics hardware acceleration (ATi Rage 128 Pro 4XL) Sound Capabilities High fidelity 3D PCI audio Aureal AU8810 Diskette Drive 3.5" 1.44 MB FDD DVD-ROM/CD-ROM Drive 4.8X (max.) DVD-ROM reading 24X (max.) CD-ROM reading** Modem K56flex technology/V.90 compatible data/fax modem Expansion Capabilities Two PCI slots Connection Capabilities (Front) PC card (Card bus support) USB port Microphone Headphone Memory Stick media slot i.LINK (4-pin) Connection Capabilities (Rear) USB port Modem line (RJ-11) Phone line (RJ-11) Parallel (printer) Serial port VGA monitor LCD display Line In Line Out Keyboard i.LINK (6-pin) Connection Capabilities (Keyboard) Mouse (PS/2-style) left and right connectors Supplied Accessories Stand (for vertical installation) Power cable Phone cable Keyboard cable PS/2 Wheel Mouse VAIO Smart Convertible Keyboard Spacers (for bottom of the system) Ferrite core Service 90-day limited express service*** Extendible to one year from original date of purchase upon registration Limited Warranty90-day parts/labor standard Extendible to one year from original date of purchase upon registration Power Requirements 130 watts maximum Dimensions CPU: 11.2"(w) x 3.6" (h) x 13.4" (d) (280 mm x 90 mm x 335 mm) Keyboard: 15.9" (w) x 1.8" (h) x 7.1" (d) (398 mm x 45 mm x 178 mm) Display: 16.1" (w) x 13.1" (h) x 6.9" (d) (403 mm x 327 mm x 172 mm) Weight CPU: 11.9 lbs. (5.4kg) Display: 7.05 lbs (3.2 kg) Keyboard: 2.9 lbs. (1.3kg) Operating Temperature 50º F to 95º F (+10º C to 35º C) * MHz denotes microprocessor internal clock speed; other factors may affect application performance. Page 430 GB means one billion bytes when referring to hard drive capacity. Accessible capacity may vary. **Data on a DVD-ROM is read at a variable transfer rate, ranging from 2X at the innermost track to 4.8X at the outermost track(the data transfer standard 1X rate is 1385 kbytes/s). The average data transfer rate is 3.6X(4986 kbytes/s). Data on a CD-ROM is read at a variable transfer rate, ranging from 10.5X at the innermost track to 24X at the outermost track(the data transfer standard 1X rate is 150 kbytes/s). The average data transfer is 18X(2700 kbytes/s). Maximum speed for faxing is 14.4 kbytes/s. Your modem is capable of downloading at 56 kbytes/s using K56flex technology or V.90. Your phone service, online service, or Internet Service Provider, however, may not support this technology or operate at this speed. ***Certain restrictions apply. Specifications are subject to change without notice. Page 431 Features For a complete description of the specifications of your Sony computer, see Specifications. i.LINK® (IEEE-1394): Two built-in i.LINK ports provide you with front and rear digital connection capability. The i.LINK name and logo identify a digital interface (IEEE-1394) for high speed communication. Exceptional performance: Your computer includes a fast Intel® processor and a V.90-compatible data/fax modem. Ergo-Angle Multimedia LCD display: With its exclusive dual-hinge pedestal, this 15" XGA TFT display provides twice the flexibility of other LCDs. Select the perfect viewing angle and enjoy the built-in Harman/Kardon® stereo speakers. AutoAlert E-mail Notification System: Custom software automatically downloads e-mail on a pre-set schedule via Microsoft® Outlook® Express. A light on the LCD display instantly lets you know when new mail is received. VAIO Smart convertible keyboard: The innovative palm rest converts to a keyboard cover for a sleek look when not in use. Six Programmable Power Keys let you launch any application with the push of a button; dual-sided mouse connections for left- or right- hand use. Sony Memory Stick® media slot: The next generation of digital media, smaller than a stick of gum. Easily delivers information from one Memory Stick-equipped electronic device to another, so you can transfer images, sounds, data and text between cameras, computers, and more. Compact components: Enjoy the small footprint and versatile setup options available by positioning the components in an arrangement of your choice. Sony audio and video quality: High-fidelity 3D audio system and high-powered 3D graphics (AGP) enable you to take advantage of today's advanced multimedia applications, games, and entertainment software. Preinstalled software titles: All the software on your computer is preinstalled, configured, and ready for you to use right out of the box. Microsoft® Windows® 98 Second Edition operating system: Your system includes the latest operating system from Microsoft. Communications: Access popular online services, browse the Internet, send faxes, and more. * Actual upload and download speeds may vary due to line conditions, ISP support, and government regulations. Unpacking Your Computer Computer and Supplied Accessories Page 432 Manuals Read Me First contains last-minute supplementary information and software support numbers. The VAIO Slimtop LCD Computer User Guide (this manual) contains features and specifications of your computer. It also includes information on the applications included with your system and how to contact software vendors, get started with your computer, and solve common problems. The VAIO VAIO® Consumer Information Guide contains safety and regulatory information, ergonomic considerations, information on help resources, and your computer's limited warranty statement. The Microsoft® Windows®98 Second Edition Getting Started manual explains how to use the basic features of the Windows® operating system. Recovery CDs System Recovery CD(s) - Enables you to reinstall software that shipped with your computer if it is corrupted or accidentally erased. For more information, see Using the System Recovery CD(s). Application Recovery CD(s) - Allows you to reinstall individual applications or device drivers if they are corrupted or accidentally erased. For more information, see Using the Application Recovery CD(s). Other Setting up your VAIO Slimtop LCD Computer (poster) Packet containing special product offers Software CDs Page 433 Microsoft® Word 2000 Setting Up Your VAIO Slimtop LCD Computer Locating Controls and Connectors Front Panel 1 Power switch and indicator light Turns on/off the computer and the display. The indicator light is green while the power is on and amber when the computer is in standby mode. 2 Floppy disk drive Reads/writes data from/to a 3.5-inch floppy disk. 3 Floppy disk eject button Ejects the floppy disk. 4 DVD-ROM drive Reads data from a DVD-ROM/CD-ROM. 5 DVD-ROM/CD-ROM eject button Ejects a DVD-ROM/CD-ROM. 6 Manual eject hole If the DVD-ROM/CD-ROM does not come out when you press the DVD-ROM/CD-ROM eject button, insert a thin, pointed object into this hole to eject the disc manually. 7 FD (Floppy disk drive) access indicator light Lights in green while reading/writing data from/to a floppy disk. 8 Disc (DVD-ROM drive) access indicator light Lights in amber while reading data from a DVD-ROM/CD-ROM. 9 HD (drive) access indicator light Lights in green while reading/writing data from/to the hard disk. 10 MIC (Microphone) connector* Connects a microphone (not supplied). 11 PHONES (Headphones) connector* Connects headphones (not supplied). 12 VOLUME control Page 434 Adjusts the volume of the headphones connected to the PHONES connector. Users should note that this does not control the volume of the integrated LCD speakers. 13 PC CARD slot A PC Card (also called a PCMCIA card) can be installed in this slot. PC cards enable you to add functionality to your system. MEMORY STICK media slot 14 Insert a Sony Memory Stick® card into this slot. See Using the Memory Stick® Media for details on using Memory Stick media. 15 i.LINK (4-pin) Connects a digital device such as a Sony Digital Handycam® Camcorder. 16 USB (Universal Serial Bus) connector Connects a USB device. * See Using a Headphone or Microphone for important information about connecting a microphone and headphone. Rear Panel 1 AC INPUT connector Connects the supplied power cord. 2 LINE jack Connects a phone cable to the wall jack. 3 EMPTY PCI SLOT (FILLED WITH ETHERNET CARD ON CUSTOM MODELS) For a PCI Add-On Card (not supplied). 4 TELEPHONE jack Connects the phone to the computer. 5 PRINTER connector Connects a parallel device, such as a printer or scanner. 6 SERIAL connector Connects a serial device, such as a digital still camera. 7 MONITOR connector Connects a standard CRT display. 8 USB (Universal Serial Bus) connector Connects a USB device. 9 LINE IN connector Connects an audio device. 10 LINE OUT connector Connects an audio device or an active speaker. 11 i.LINK (6-pin) Connects a digital device such as a Sony Digital Handycam® Camcorder. 12 LCD MONITOR connector Connects the LCD that comes with the VAIO Slimtop LCD computer. Note: Do not connect any display to this connector other than the LCD that is supplied with this system. Page 435 13 KEYBOARD connector Connects a keyboard. LCD 1 Power indicator light Light is green while the power is on. When the computer enters the standby mode, this indicator light turns amber. 2 Information LED Light turns red to alert the user to activities, such as the arrival of e-mail. See AutoAlert E-mail Notification System. 3 Adjusts 4 Adjusts Brightness control the brightness of the screen. Volume control the volume of the integrated speakers on the LCD display. Using the Wheel Mouse For information about the Wheel Mouse that connects to either side of your keyboard, see MouseWare Help. To access MouseWare Help, from the Start menu, point to Programs, MouseWare, and then click MouseWare Help. To set up the mouse for left-handed use: 1. Click the My Computer icon on your desktop. 2. Click Control Panel, and then click Mouse. The Mouse Properties dialog box appears. 3. In the Quick Setup tab, click Device Setup. 4. In the Device Setup Wizard dialog box, click Next. 5. Select the radio button next to "Left side of the keyboard." 6. Click Next three times, and then click Finish. 7. Click Apply. Using a Headphone or Microphone When you connect a microphone or headphone to your computer, attaching a ferrite core will reduce electrical interference. Attach the (supplied) ferrite core at the end of the headphone or microphone cable closest to the computer. Wrap the cable through the center of the ferrite core. The following illustration shows how to attach the ferrite core when you are using both a headphone and a microphone. Page 436 The LCD and keyboard cables already include a ferrite core. Do not remove the ferrite core from these cables. To adjust the height and viewing angle of the display Holding both sides of the display, push the display panel out and up, and then adjust the viewing angle. The LCD display is designed to maintain the best ergonomic viewing angle. Set the display height so that it does not touch the keyboard, and adjust the viewing angle approximately 27 degrees from eye level to the center of the screen. Attaching the Stand to the System Unit The main system unit can be oriented horizontally or vertically. If you place the system in a vertical position, you must attach the supplied stand to ensure stability. 1. Place the system unit on its right side, with the front of the system facing forward. 2. Insert the grooved side of the stand into the ventilation holes of the system so that the two screw holes are aligned and the stand's fins are at the rear of the unit. 3. Secure the stand to the unit with the supplied screw. Page 437 The stand keeps the system cool by allowing air to flow under it. If you choose to place the system unit in a vertical position, it is important to use the stand and to place the system unit on its left side, as in the illustration above; otherwise, the system may overheat. Registering Your Computer Take advantage of Sony's commitment to quality customer support and receive these benefits by registering your computer: Sony Customer Support--Talk to a Support Representative to troubleshoot problems you may be having with your computer. Limited warranty--Protect your investment. See Limited Warranty Statement in the VAIO® Consumer Information Guide for details. You must register your computer to extend the warranty from the initial 90-day warranty period to one year from the original date of purchase. Express Service--Provides a fast and direct return of your VAIO Slimtop Sony for service of your computer. LCD Computer to If you did not already register when you first turned on your computer, follow these steps to use the computer online registration service. 1. Click the registration icon on the VAIO desktop. 2. Enter the information requested on the first online registration form. Press the tab key to move from box to box. 3. Click the Next button to advance to the next form. 4. Complete the remaining forms by clicking the Next button each time you complete a form. The computer automatically transfers your registration information using your built-in modem and a toll-free telephone number or a local number. You may sign up for Internet access with a Sony preferred Internet Service Provider. VAIO Action Setup VAIO Action Setup manages the settings for your computer's Programmable Power Keys (PPK), Memory Stick® media, i.LINK interface, and internal timer. An overview of each of these functions is provided below. For more information on changing the settings using VAIO Action Setup, see the online VAIO Action Setup help files. To access the help files, from the Start menu, point to Programs/VAIO Action Setup/VAIO Action Setup Help. Programmable Power Keys Your Sony computer comes with technology that allows you to get to your favorite applications Page easily. Each Programmable Power Key (PPK) on your VAIO Smart convertible keyboard comes 438 programmed to launch a preset application with a single press of the key. If you wish, you can use the VAIO Action Setup software to change the Programmable Power Keys' preset functions. The Programmable Power Keys are located at the top of your keyboard, and are numbered P1 through P6. The keys work even when the computer is turned off. Pressing one of these keys turns on the computer and launches the preset application. The six Programmable Power Keys come to you preprogrammed to perform the functions listed in the table below. Key Function P1 (INTERNET) Starts Microsoft® Internet Explorer for Windows® 98. P2 (MAIL) Starts Microsoft® Outlook® Express P3 (WORK) Starts Microsoft® Word P4 (FINANCE) Starts Intuit® Quicken® Basic 2000. P5 (SETUP) Starts PPK Setup. P6 (HELP) Opens a menu of help options. Memory Stick You can use VAIO Action Setup to preset your computer to automatically launch an application when you insert a Memory Stick. For more information on Memory Stick media, see Using the Memory Stick® Media . Internal Timer The VAIO Action Setup software allows you to set your computer's internal timer to launch certain applications automatically. The timer can start applications even when the power is off. Some software applications take longer than others to launch. It is advisable to confirm in advance the amount of time your selected application takes to start. AutoAlert E-mail Notification System VAIO Action Setup also enables you to set up your computer to notify you with an Information LED when new mail arrives in your e-mail mailbox. The Information LED turns red to indicate that new e-mail has arrived. For this AutoAlert E-mail Notification System to work, you must use Microsoft® Outlook® Express as your default e-mail software, and you must have an Internet Service Provider with dial-up capabilities set up. As an alternative, you can program your AutoAlert E-mail Notification System to set the Information LED to turn on when it has successfully completed the task of dialing up and connecting to receive mail. In this case, the Information LED turns on to indicate that your e-mail account has been accessed successfully, regardless of whether or not you have mail; this works with Microsoft Outlook Express. The e-mail software you choose to use with PPK must be set as your default e-mail software. See LCD for an illustration showing the Information LED's location. AutoAlert E-mail Notification System Software Restrictions If you use software that uses a phone line The computer may not be able to disconnect the phone line due to communication and server conditions. Be sure to monitor the status of the software when running the AutoAlert E-mail Notification System, and manually disconnect the phone line if you notice a malfunction. Furthermore, when using the timer to start the software, it is advised that you set the computer to shut down or enter system standby mode after a certain length of time. This allows the computer to disconnect the phone line if the computer fails to disconnect the line normally. If you are using the timer to download e-mail automatically Page 439 It is advisable to set up your e-mail software to redial automatically if it does not connect the first time. It is also advisable to set the e-mail software to disconnect the phone line automatically when all mail has been downloaded. If you are using Microsoft® Outlook® Express When using the AutoAlert E-mail Notification System with Microsoft Outlook Express, it is advisable to select the Dial automatically setting in your Microsoft Outlook Express software. If you have not chosen this setting and wish to do so, start Outlook Express, click Tools, and then select Options. Select the check box "Automatically dial when checking for new messages." Click OK. Changing the Window Design of Sony Software To change the window design of Sony software 1. Click the Start button, point to Settings, and then click Control Panel. 2. Click UI Design Selector. 3. Click << or >> and select the desired design. 4. Click Apply. The "UI Design Selector" window design changes. The window design for your Sony software will match the "UI Design Selector" window. To try another selection, click << or >>. Then, click OK. The UI Design Selector closes and the window design of your Sony software window design displays. You may use the feature with UI Design Selector-compatible software only. Using the Memory Stick® Media Your Sony computer is designed to support the new Memory Stick recording media. The Memory Stick media is a small, versatile device that allows you to share data between various types of Sony equipment. When you use the card, your computer automatically launches Windows Explorer. This allows you to view the contents of the card. If the image files are created by a Sony digital camera or camcorder, you do not need the following steps. If you want to create a slide show that launches automatically when you insert a Memory Stick, follow these steps to transfer images from your hard drive to a Memory Stick. 1. Insert the Memory Stick into the appropriate slot. 2. Click the My Computer icon on the desktop. Page 440 3. Click the Removable Disk S: icon. 4. Create a new folder and name it "DCIM." 5. Open the DCIM folder and create a new folder named "100MSDCF." 6. Click the Start button, select VAIO, and then click PictureGear to launch the PictureGear application. 7. Select the digital images you want to save in your slide show. 8. From the PictureGear File menu, point to File Process, and then select Still Format Conversion. 9. Select Memory Stick as the Output Format. 10. Use the Browse button to select the DCIM/100MSDCF folder on the Removable Disk (S:) drive. 11. Name the file. The file name must begin with DSC (DSC0xxxx). The full file name without extension must have at least eight characters. The order in which your photos appear in your slide show will be determined by the number (xxxx) in the file name. Some examples of acceptable file names are DSC00001.jpg and DSC00002.jpg 12. Click OK to save the file. You can also add MPEG1 video files to your Slide Show by following the steps below. The order in which your video clips (MOV0xxxx files) appear in your Slide Show is determined by the number (xxxx) in the file name. 1. Insert the Memory Stick into the media slot. 2. Click the My Computer icon on the desktop. 3. Click the Removable Disk S: icon. 4. Create a new folder and name it "MSSONY." 5. Open the MSSONY folder and create a new folder named "MOML0001." 6. From the PictureGear File menu, point to File Process, and then select Still Format Conversion. 7. Copy the MPEG file into the MOML0001 folder. 8. Rename the MPEG file MOV0xxxx.mpg, where xxxx is any four-digit number. 9. To begin showing your slides, eject the Memory Stick and then reinsert it. The slide show will begin automatically. To protect data on Memory Stick media from accidental changes Memory Stick media contains a write-protect tab. The write-protect tab prevents accidental changes to information recorded on the Memory Stick media. When you slide the write-protect tab to the LOCK position, the Memory Stick is write-protected, which means you cannot delete, copy, or save information on the Memory Stick. When you slide the tab to the un-LOCK position, you can write to or modify the Memory Stick contents. To change the way the computer responds when a Memory Stick is inserted into the Memory Stick media slot Change the options on the Memory Stick tab in the PPK Setup software. Page 441 Using PC Cards This computer has a card bus PC card slot that supports a Type I or II PC card. To insert a PC card You do not need to shut down your computer when inserting a PC card. 1. Open the front panel. 2. Insert the PC card into the PC card slot until it clicks into position. When the card is completely inserted, the eject button pops out. If you cannot insert the card, do not forcibly insert it. In this case, make sure the card is not inserted upside-down or backward, and then reinsert the card into the slot carefully. See the manual that came with the PC card for details on using it. To close the front panel when the eject button is protruding, fold the button down onto the computer. To eject a PC card If you eject the PC card incorrectly, the system may not work correctly. 1. Click the Start button on the Windows® taskbar, click Settings, and then click Control Panel. 2. Click the PC Card icon. 3. Click the name of the card that you want to eject, and then click Stop. 4. When the message "You may safely remove this device" appears, click OK. 5. Push the PC card eject button on the front panel of the system unit. You may need to pull out the eject button before you can eject the card. Page 442 The card is ejected from the card connector. Remove the card by holding it by its edge and pulling it out carefully. Using the Standby Function When you are finished using your computer, you can put it in standby mode rather than turn it off completely. Putting the computer in standby mode allows you to return quickly to normal computer use. To put the computer in standby mode manually 1. Save your work and close any applications that are running. (You can leave Windows running.) 2. Press the (Standby) button on the top of the keyboard. The computer goes into standby mode. Alternatively, you can click the Start button on the Windows® taskbar, click Shut Down, select Standby, and then click OK. To let the computer go into standby mode automatically Click the My Computer icon on your desktop. Click Control Panel, and then click the Power Management icon. On the Power Schemes tab, select from the options in the Power schemes drop-down list. Then, choose settings for the power scheme you have selected. To save the settings under a name that is not offered in the Power schemes pulldown menu, choose your settings and then click Save As. Type in a name, and click OK. Click Apply to finalize your power settings. To resume from standby mode There are three ways to bring your computer back from the standby mode: press the space bar on your keyboard, press the left mouse button, or momentarily depress the power button on your computer. If the display does not return from standby when you press the (Standby) button, your system may be in video standby mode. Press the space bar on the keyboard to return from video standby. Standby Mode Indicators You can tell which mode the computer is in by the color of the power indicator light. Color Amber Green No color Mode Computer is in standby mode. Computer is out of standby mode, ready to use. Computer is turned off. In standby mode you may periodically hear the computer's fan turn on and off, depending on the room's temperature. This is normal functioning in standby mode. Page 443 Shutting Down Your Computer When you are ready to turn off your computer for an extended period of time, use the following procedure to shut down the computer. To avoid the potential loss of data, do not use the power switch to shut down the computer. To shut down your computer If you plan to shut down your computer for a short period of time, you may want to use standby mode instead. See Using the Standby Function. 1. Click the Start button on the Windows® taskbar to open the Start menu. 2. Click Shut Down to display the Shut Down Windows dialog box. 3. Select the Shut Down option. 4. Click OK to complete the shutdown process. Respond to any prompts about saving documents. 5. Wait for your computer to turn off automatically -- the power indicator light turns off. 6. Turn off any peripherals connected to your computer. The LCD display turns off automatically when the computer shuts down. You can also shut down your computer using the (Power) button on the keyboard. Pressing this button causes the system to perform a shutdown but does not give you any of the other options available on the Windows® Shut Down menu. About the Power Switch If your system "locks up" or "crashes," press and hold the power switch for four seconds to force your system to power off. You may need to repeat this procedure. See Locating Controls and Connectors for the power switch's location. Using the System Recovery CD(s) You can reinstall software titles that shipped with your computer if they are corrupted or accidentally erased. You may not need to recover the entire contents of your hard drive. If you experience a problem with your computer, reinstalling an individual device driver or software title may correct the problem. Use the Application Recovery CD(s) to reinstall individual applications or device drivers. See Using the Application Recovery CD(s). The System Recovery CD(s) contain a backup copy of all the software originally installed on your hard disk drive. They can be used only to recover the hard disk of the Sony computer you purchased. The System Recovery utility gives you three options: Full Restore without Format restores all the software titles that originally came with your computer without formatting the hard disk. Full Restore with Format formats the hard disk drive and then restores all the original software. If your hard drive is partitioned into C and D drives, the computer will offer you the option to reformat the drive into a single partition. Operating System Only (Windows 98® Restore with Format) formats the hard disk drive and Page 444 restores the Windows® operating system and the device drivers that shipped with your computer. This option is recommended for advanced users only. If you choose the Full Restore with Format or Operating System Only option, your hard disk will be formatted, which removes all the information on the hard disk drive. You will lose any software you have installed and any other files you have created since you started to use your computer. This means you will have to reinstall any applications that were not included with the computer when you purchased it. If you choose the Full Restore without Format option, you may need to reinstall applications that were not included with the computer when you purchased it. If you have any questions on using the System Recovery CD(s), contact Sony Customer Support. To use the System Recovery CD(s) You need to complete the Windows registration process when you use the System Recovery CD(s). 1. Insert the Sony System Recovery CD(s) in the DVD-ROM drive. The System Recovery utility boots from the DVD-ROM drive. It must be in the drive when you turn on the computer. 2. Shut down your computer as described in Shutting Down Your Computer. 3. Wait 30 seconds and turn on your computer. 4. Click OK to signify you have read and accept the Microsoft End-User License Agreement. 5. When the System Recovery menu appears, follow the on-screen instructions to complete the recovery process. Your system may include one or two System Recovery CDs. If you have two System Recovery CDs, insert the first CD to run the System Recovery program. You are prompted to insert the second CD once the information from the first CD has been installed. The recovery process takes 30 to 60 minutes to complete. Using the Application Recovery CD(s) The Application Recovery CD(s) allow you to reinstall individual applications and device drivers if they are corrupted or accidentally erased. Reinstalling an individual device driver or software title may correct a problem you are experiencing with your computer, and you may not need to recover the entire contents of your hard drive. If you do need to reinstall all the software titles that shipped with your computer, use the System Recovery CD(s). See Using the System Recovery CD(s). You must be in Windows to run the Application Recovery CD(s). The application will not run from DOS. If you have any questions on using the Application Recovery CD(s), contact Sony Customer Support. To use the Application Recovery CD(s) 1. Turn on your computer. If your computer is already on, close all applications. 2. When the Windows desktop appears, insert the Sony Application Recovery CD in the DVD-ROM drive. The Application Recovery utility loads automatically. 3. When the Application Recovery menu appears, follow the on-screen instructions to complete the recovery process. Your system may include one or two Application Recovery CDs. If you have two Application Recovery CDs, insert the first CD to run the Application Recovery program. You may be prompted to insert the second CD, depending on the application you wish to restore. Page 445 About the Software on Your Computer Your VAIO Slimtop computer is ready to help you work, play, learn, and communicate as soon as you turn it on. This section gives you an overview of the activities you can perform with your software titles. For support information, see For Answers to Your Software Questions . Adobe Acrobat® Reader Adobe Systems Incorporated Acrobat Reader software allows you to view, navigate, and print electronic documents in Adobe's Portable Document Format (PDF), an open file format that is intended to preserve the fidelity of documents created on all major computer platforms. Adobe PhotoDeluxe® Home Edition Adobe Systems Incorporated Create amazing photo effects with PhotoDeluxe. Without learning complex software, you can enhance, restore, and be creative with your photos. Includes built-in guided activities, stock photos, clip art, and templates to assist you. Adobe Premiere® LE Adobe Systems Incorporated Adobe Premiere LE offers an interface and editing tool for producing movies for video, multimedia, or the Web. View source clips and edited footage simultaneously in the monitor window. Create video clips up to three hours long with complete audio-video synchronization. America Online® America Online America Online is the world's most popular Internet online service. Stay in touch with family and friends with Easy-to-Use E-mail, manage your personal finances, get the latest news and sports scores, and chat with thousands of others who share your interests. AT&T WorldNet® Service AT&T Fast, reliable Internet access from AT&T WorldNet Service. AT&T WorldNet Service provides Web-based e-mail, a personalized start page from Excite, easy access to the Excite search engine, free Web pages, online and live agent technical support, instant messaging, and special shopping discounts at Market Square. CompuServe® 2000 CompuServe Interactive Services The all new CompuServe 2000 delivers a powerful tool for Internet users who want serious and timely information, in-depth research, and professional communities backed by state-of-the-art technologies, including high-speed access and powerful e-mail messaging. Digital Media Bar Sony Electronics Media Bar software is your all-in-one solution for audio/video playback. It handles all common computer multimedia formats, and controls selected Sony devices. Media Bar software encompasses audio/video library cataloging and playlist management, in addition to digital video quality control and effects features. DVgate Sony Electronics Connect a digital video camera recorder to the i.LINK connector and capture your own video clips. You can edit the clips from your video, add others, and combine clips into new movie segments. EarthLink TotalAccess EarthLink Network, Inc. Page 446 An Internet Service Provider that supplies access, information, and assistance to its customers, introducing them to the Internet. Member benefits include e-mail, newsgroups, a Personal Start Page, a free 6 MB web site, a member magazine, and 24-hour technical support. McAfee's VirusScan® Network Associates, Inc. Protect your computer from viruses. VirusScan can detect viruses from floppy disks, Internet downloads, e-mail attachments, intranets, shared files, CD-ROMs, and online services. Microsoft® Internet Explorer for Windows® 98 Microsoft Corporation Internet Explorer delivers the Web the way you want it. It's safe, easy to use, and you can personalize how you access the Web. Outlook Express and other tools in Internet Explorer also help you have a great experience when you are on the Web! Microsoft® Outlook® Express Microsoft Corporation Outlook Express, the messaging tool that takes your e-mail and newsgroup communications to new heights! Outlook Express is easy to set up and use, and provides you with secure, personalized, and complete features that make creating, sending, and reading your e-mail a more rich and dynamic experience. Microsoft® Word 2000 Microsoft Corporation Microsoft Word 2000 makes it easy to create common Web, e-mail, and print documents for use around the world. It embraces HTML as a first-class file format and extends Word's ease-of-use to the Web and e-mail. Word 2000 also extends that ease of use to international users, making it easy to create multilingual documents. Netscape Communicator® Netscape Communications Netscape Communicator is the all-in-one Internet tool that makes it easy to browse the Web, send Internet e-mail, chat, read newsgroups, and compose great Web documents. PictureGear Sony Electronics This image management software displays images from your hard drive, a Sony digital still camera, or a Sony Mavica® camera. The images appear in a convenient light-table format, so that you can easily view the contents of an entire folder. Prodigy Internet Prodigy Communications Corporation An Internet service that helps you find what you need online faster and smarter. Prodigy delivers powerful online content, such as sports scores, stock quotes, news, and easy access to Excite , plus a personal e-mail account and quality customer service, all at a competitive price. Quicken® Basic Intuit, Inc. Quicken is the fastest, easiest way to organize your finances. Quicken works just like your checkbook, so it's easy to learn and use. Quicken manages all of your finances, bank accounts, credit cards, investments, and loans. You can even pay your bills online. Smart Capture Sony Electronics Smart Capture is a fun new way to send multimedia messages via e-mail. Smart Capture manages the i.LINK connection between your computer and a Sony Digital Handycam® Camcorder or other Page 447 cameras that support the i.LINK interface. It allows you to capture and compress video or still images that you can save or share via e-mail. A smart solution to computer, digital audio/video, and network convergence. Smart Connect Sony Electronics Smart Connect allows you to use an i.LINK cable to connect your VAIO computer to another VAIO computer that supports Smart Connect. You can then use one computer to copy, delete, and edit files on the other computer. You can also print from a printer attached to either computer. Sound Forge® Sonic Foundry Sound Forge allows you to put powerful audio processing tools and effects to work on your desktop. Simply cut, copy, and paste your way to striking multimedia files for use in everything from Web pages to desktop presentations. VAIO Action Setup Sony Electronics VAIO Action Setup manages the settings for your computer's Programmable Power Keys (PPK), Memory Stick media, i.LINK interface, and internal timer. For more information, see VAIO Action Setup. WinFax® Basic Edition Symantec Corporation WinFax Basic Edition incorporates an easy-to-use interface that allows you to send and receive faxes easily. Upgrade to WinFax Pro to receive additional features. About Your Recovery CDs Application Recovery CD(s) Sony Electronics The Application Recovery CD program allows you to reinstall individual applications and device drivers. Use it to restore corrupted or accidentally erased files. System Recovery CD(s) Sony Electronics The System Recovery CD program allows you to restore the software titles that shipped with your computer if they become corrupted or are erased accidentally. It can be used only to restore the hard disk of the Sony computer you purchased. For Answers to Your Software Questions Acrobat® Reader, Adobe PhotoDeluxe® Home Edition (Adobe Systems Incorporated) Web site http://www.adobe.com/ phone 206-628-2746 (fee-based support) fax 206-628-5737 e-mail [email protected] hours M-F, 6 AM-5 PM PT America Online® (America Online) Web site phone hours http://www.aol.com/ 800-827-3338 7 days a week, 6 AM - 2 PM ET AT&T WorldNet® Service (AT&T) Web site phone e-mail http://www.att.net 800-400-1447 [email protected] Page 448 hours 7 days a week, 24 hours a day CompuServe® 2000 (CompuServe Interactive Services) Web site phone hours http://www.compuserve.com/ 800-848-8990 M-F, 8 AM - 1 AM ET, S-S 10 AM - 10 PM ET EarthLink TotalAccess Web site phone e-mail hours (EarthLink Network, Inc.) http://help.earthlink.net/techsupport/ 800-395-8410 [email protected] 7 days a week, 24 hours a day GTE Easy Sign-up (GTE Internet) phone hours 800-927-3000 7 days a week, 24 hours a day McAfee's VirusScan (Network Associates, Inc.) Web site phone e-mail hours http://support.mcafee.com 408-988-3832 [email protected] M - F 9 AM - 5 PM Central Time MindSpring Internet Desktop (MindSpring Enterprises, Inc.) Web site phone http://help.mindspring.com/support 800-719-4660 Quicken® Basic (Intuit Inc.) Web site phone hours http://www.intuit.com/support 900-555-4688 7 days a week, 24 hours a day Sound Forge® (Sonic Foundry) Web site http://www.sonicfoundry.com/support/ phone 608-256-5555 fax 608-256-7300 e-mail [email protected] hours M - F, 8 AM - 7 PM CT Windows® 98 Second Edition Operating System, Word® 2000, Internet Explorer 5, Outlook® Express (Microsoft Corporation) Web site phone hours 1 http://www.sony.com/pcsupport 888-4SONYPC (888-476-6972) 1 7 days a week, 24 hours a day Support from 1-888-4SONYPC is free of charge for 90 days after the original date of purchase. WinFax® Basic Edition (Symantec Corporation) Web site http://www.symantec.com/techsupp/ phone 800-798-0850 fax 800-554-4403 in North America 541-984-2490 outside North America Troubleshooting This section describes how to solve common problems you may encounter when using your computer. Many problems have simple solutions, so try these suggestions before you call Sony Customer Support. My computer does not start Check that the computer is plugged into a power source and that it is turned on. Check that the power light is lit on the front panel of the computer. Confirm that a diskette is not in the diskette drive (unless you are using a bootable diskette). Confirm that the power cord and all cables are connected firmly, as described on the color poster. Page 449 If you plugged the computer into a power strip or UPS, make sure the power strip or UPS is turned on and working. My computer or software program "locks up" Close the application that is currently "locked up" by pressing Ctrl+Alt+Delete. In the Close Program dialog box, scroll down until you locate "(Not responding)" next to an application. Select this application and click End Task. Windows attempts to close the application. If the attempt is unsuccessful, a second dialog box appears. Select End Task again. If you are unable to "unlock" the application, repeat the above steps but select Shut Down when the Close Program dialog box appears. If the above steps fail to "unlock" your computer, save any unsaved work, if possible. Press Alt+F4. Select Restart and click OK. If you cannot restart as described in the preceding steps, you can restart the computer by pressing Ctrl+Alt+Delete or by pressing the power switch for more than six seconds. Pressing Ctrl+Alt+Delete may result in the loss of changes made to files that are currently open. Contact the software publisher or designated provider for technical support. See For Answers to Your Software Questions for a list of phone numbers and Web addresses or see Read Me First . My DVD-ROM/CD-ROM drive tray does not open Make sure the computer is turned on. If the Eject button does not work, you can open the tray by inserting a straightened heavyweight paper clip into the emergency eject hole. When I click an application icon, a message such as "You must insert the application CD into your CD-ROM (DVD-ROM) drive" appears and the software does not start Some titles require specific files that are located on the application's DVD-ROM/CD-ROM. Insert the disc and try starting the program again. Check to make sure you inserted the DVD-ROM/CD-ROM with the label side facing up. My modem connection is slow The computer's modem uses K56flex technology/V.90. Many factors influence modem connection speed, including telephone line noise or compatibility with telephone equipment (such as fax machines or other modems). If you think your modem is not connecting properly to other computer-based modems, fax machines, or your Internet Service Provider, check the following: Have your phone company check that your phone line is free from any line noise. If your problem is fax-related, check that there are no problems with the fax machine you are calling. The modem that receives your call may be slower or may use a different communications protocol than your modem. If this is the case, the connection speed may be slower than expected. For optimum performance, ensure you are calling an Internet Service Provider number that is V.90-compliant. If you are having a problem connecting with your Internet Service Provider, check that the ISP is not experiencing technical problems. If you have a second phone line available, try connecting the modem to this line. My modem does not work Check that the phone line is plugged into the line jack. Page Check that the phone line is working. You can check the line by plugging in an ordinary phone and450 listening for a dial tone. Check that the phone number the program is dialing is correct. Verify that the software you are using is appropriately configured to recognize and interact with the Sony computer modem. Call the software publisher if you do not know how to configure the software to recognize the modem. All programs preinstalled by Sony are compatible. If you suspect your modem is not functioning, you can perform a simple test to find out. Click the My Computer icon on your desktop. Click Control Panel, and then click Modems. Click the Diagnostics tab and select COM3. Click More Info. If your modem is functioning, a More Info dialog box will display. If your modem is not functioning, an error message will appear. My microphone is too sensitive to background noise If you find there is too much background noise when you record sound, you should adjust the microphone gain by following these steps: 1. Right-click the speaker icon (Volume) in the lower-right Windows® task tray. 2. Click Open Volume Controls. The Volume Control screen appears. 3. In the Options menu, select Properties. The Properties screen appears. 4. Change the setting for "Adjust volume for" from Playback to Recording, and then click OK. 5. Click the Advanced button under Microphone Balance. The Advanced Controls for Microphone screen appears. 6. Deselect the check box for 1 Mic Gain (+20dB), then click the Close button. 7. Close the Recording Control window. My mouse does not work Check that the mouse is plugged into one of the PS/2® connectors on the keyboard. The other connector connects the keyboard to the computer. There may be dust or dirt inside the mouse mechanism. To clean the mouse, follow these steps: o Turn off your computer. See Shutting Down Your Computer for details. o Remove the mouse ball cover on the back of the mouse by turning the ring that covers the mouse ball clockwise. o Turn the mouse upright, and drop the mouse ball into your hand. o Using a piece of tape, remove any dust or dirt on the mouse ball and inside the mouse ball socket. o Return the mouse ball to the socket, and replace the mouse ball cover. Secure the cover by turning the ring counter-clockwise. I cannot find the Windows® taskbar Check that the taskbar is not hidden or shrunken. Use the mouse to point to the left, right, top, and bottom edges of the screen. See Read Me First for additional information on using your Sony computer. To Reach Sony For further assistance, call 1-888-4SONYPC (1-888-476-6972). Page 451 Specifications Model PCV-L630 Processor 600E MHz* Pentium® III Hard Disk Drive 17 GB Ultra DMA Standard SDRAM 128 MB PC-100 SDRAM, expandable to 256 MB Video RAM 8 MB SDRAM Graphics 2X AGP 3D graphics hardware acceleration (ATi Rage 128 Pro 4XL) Sound Capabilities High fidelity 3D PCI audio Aureal AU8810 Diskette Drive 3.5" 1.44 MB FDD DVD-ROM/CD-ROM Drive 4.8X (max.) DVD-ROM reading 24X (max.) CD-ROM reading** Modem K56flex technology/V.90 compatible data/fax modem Expansion Capabilities Two PCI slots Connection Capabilities (Front) PC card (Card bus support) USB port Microphone Headphone Memory Stick media slot i.LINK (4-pin) Connection Capabilities (Rear) USB port Modem line (RJ-11) Phone line (RJ-11) Parallel (printer) Serial port VGA monitor LCD display Line In Line Out Keyboard i.LINK (6-pin) Connection Capabilities (Keyboard) Mouse (PS/2-style) left and right connectors Supplied Accessories Stand (for vertical installation) Power cable Phone cable Keyboard cable PS/2 Wheel Mouse VAIO Smart Convertible Keyboard Spacers (for bottom of the system) Ferrite core Service 90-day limited express service*** Extendible to one year from original date of purchase upon registration Limited Warranty90-day parts/labor standard Extendible to one year from original date of purchase upon registration Power Requirements 130 watts maximum Dimensions CPU: 11.2"(w) x 3.6" (h) x 13.4" (d) (280 mm x 90 mm x 335 mm) Keyboard: 15.9" (w) x 1.8" (h) x 7.1" (d) (398 mm x 45 mm x 178 mm) Display: 16.1" (w) x 13.1" (h) x 6.9" (d) (403 mm x 327 mm x 172 mm) Weight CPU: 11.9 lbs. (5.4kg) Display: 7.05 lbs (3.2 kg) Keyboard: 2.9 lbs. (1.3kg) Operating Temperature 50º F to 95º F (+10º C to 35º C) * MHz denotes microprocessor internal clock speed; other factors may affect application performance. Page 452 GB means one billion bytes when referring to hard drive capacity. Accessible capacity may vary. **Data on a DVD-ROM is read at a variable transfer rate, ranging from 2X at the innermost track to 4.8X at the outermost track(the data transfer standard 1X rate is 1385 kbytes/s). The average data transfer rate is 3.6X(4986 kbytes/s). Data on a CD-ROM is read at a variable transfer rate, ranging from 10.5X at the innermost track to 24X at the outermost track(the data transfer standard 1X rate is 150 kbytes/s). The average data transfer is 18X(2700 kbytes/s). Maximum speed for faxing is 14.4 kbytes/s. Your modem is capable of downloading at 56 kbytes/s using K56flex technology or V.90. Your phone service, online service, or Internet Service Provider, however, may not support this technology or operate at this speed. ***Certain restrictions apply. Specifications are subject to change without notice. Page 453 Features For a complete description of the specifications of your Sony computer, see Specifications. i.LINK® (IEEE-1394): Two built-in i.LINK ports provide you with front and rear digital connection capability. The i.LINK name and logo identify a digital interface (IEEE-1394) for high speed communication. Exceptional performance: Your computer includes a fast Intel® processor and a V.90-compatible data/fax modem. Ergo-Angle Multimedia LCD display: With its exclusive dual-hinge pedestal, this 15" XGA TFT display provides twice the flexibility of other LCDs. Select the perfect viewing angle and enjoy the built-in Harman/Kardon® stereo speakers. AutoAlert E-mail Notification System: Custom software automatically downloads e-mail on a pre-set schedule via Microsoft® Outlook® Express. A light on the LCD display instantly lets you know when new mail is received. VAIO Smart convertible keyboard: The innovative palm rest converts to a keyboard cover for a sleek look when not in use. Six Programmable Power Keys let you launch any application with the push of a button; dual-sided mouse connections for left- or right- hand use. Sony Memory Stick® media slot: The next generation of digital media, smaller than a stick of gum. Easily delivers information from one Memory Stick-equipped electronic device to another, so you can transfer images, sounds, data and text between cameras, computers, and more. Compact components: Enjoy the small footprint and versatile setup options available by positioning the components in an arrangement of your choice. Sony audio and video quality: High-fidelity 3D audio system and high-powered 3D graphics (AGP) enable you to take advantage of today's advanced multimedia applications, games, and entertainment software. Preinstalled software titles: All the software on your computer is preinstalled, configured, and ready for you to use right out of the box. Microsoft® Windows® 98 Second Edition operating system: Your system includes the latest operating system from Microsoft. Communications: Access popular online services, browse the Internet, send faxes, and more. * Actual upload and download speeds may vary due to line conditions, ISP support, and government regulations. Unpacking Your Computer Computer and Supplied Accessories Page 454 Manuals Read Me First contains last-minute supplementary information and software support numbers. The VAIO Slimtop LCD Computer User Guide (this manual) contains features and specifications of your computer. It also includes information on the applications included with your system and how to contact software vendors, get started with your computer, and solve common problems. The VAIO VAIO® Consumer Information Guide contains safety and regulatory information, ergonomic considerations, information on help resources, and your computer's limited warranty statement. The Microsoft® Windows®98 Second Edition Getting Started manual explains how to use the basic features of the Windows® operating system. Recovery CDs System Recovery CD(s) - Enables you to reinstall software that shipped with your computer if it is corrupted or accidentally erased. For more information, see Using the System Recovery CD(s). Application Recovery CD(s) - Allows you to reinstall individual applications or device drivers if they are corrupted or accidentally erased. For more information, see Using the Application Recovery CD(s). Other Setting up your VAIO Slimtop LCD Computer (poster) Packet containing special product offers Software CDs Page 455 Microsoft® Word 2000 Setting Up Your VAIO Slimtop LCD Computer Locating Controls and Connectors Front Panel 1 Power switch and indicator light Turns on/off the computer and the display. The indicator light is green while the power is on and amber when the computer is in standby mode. 2 Floppy disk drive Reads/writes data from/to a 3.5-inch floppy disk. 3 Floppy disk eject button Ejects the floppy disk. 4 DVD-ROM drive Reads data from a DVD-ROM/CD-ROM. 5 DVD-ROM/CD-ROM eject button Ejects a DVD-ROM/CD-ROM. 6 Manual eject hole If the DVD-ROM/CD-ROM does not come out when you press the DVD-ROM/CD-ROM eject button, insert a thin, pointed object into this hole to eject the disc manually. 7 FD (Floppy disk drive) access indicator light Lights in green while reading/writing data from/to a floppy disk. 8 Disc (DVD-ROM drive) access indicator light Lights in amber while reading data from a DVD-ROM/CD-ROM. 9 HD (drive) access indicator light Lights in green while reading/writing data from/to the hard disk. 10 MIC (Microphone) connector* Connects a microphone (not supplied). 11 PHONES (Headphones) connector* Connects headphones (not supplied). 12 VOLUME control Page 456 Adjusts the volume of the headphones connected to the PHONES connector. Users should note that this does not control the volume of the integrated LCD speakers. 13 PC CARD slot A PC Card (also called a PCMCIA card) can be installed in this slot. PC cards enable you to add functionality to your system. MEMORY STICK media slot 14 Insert a Sony Memory Stick® card into this slot. See Using the Memory Stick® Media for details on using Memory Stick media. 15 i.LINK (4-pin) Connects a digital device such as a Sony Digital Handycam® Camcorder. 16 USB (Universal Serial Bus) connector Connects a USB device. * See Using a Headphone or Microphone for important information about connecting a microphone and headphone. Rear Panel 1 AC INPUT connector Connects the supplied power cord. 2 LINE jack Connects a phone cable to the wall jack. 3 EMPTY PCI SLOT (FILLED WITH ETHERNET CARD ON CUSTOM MODELS) For a PCI Add-On Card (not supplied). 4 TELEPHONE jack Connects the phone to the computer. 5 PRINTER connector Connects a parallel device, such as a printer or scanner. 6 SERIAL connector Connects a serial device, such as a digital still camera. 7 MONITOR connector Connects a standard CRT display. 8 USB (Universal Serial Bus) connector Connects a USB device. 9 LINE IN connector Connects an audio device. 10 LINE OUT connector Connects an audio device or an active speaker. 11 i.LINK (6-pin) Connects a digital device such as a Sony Digital Handycam® Camcorder. 12 LCD MONITOR connector Connects the LCD that comes with the VAIO Slimtop LCD computer. Note: Do not connect any display to this connector other than the LCD that is supplied with this system. Page 457 13 KEYBOARD connector Connects a keyboard. LCD 1 Power indicator light Light is green while the power is on. When the computer enters the standby mode, this indicator light turns amber. 2 Information LED Light turns red to alert the user to activities, such as the arrival of e-mail. See AutoAlert E-mail Notification System. 3 Adjusts 4 Adjusts Brightness control the brightness of the screen. Volume control the volume of the integrated speakers on the LCD display. Using the Wheel Mouse For information about the Wheel Mouse that connects to either side of your keyboard, see MouseWare Help. To access MouseWare Help, from the Start menu, point to Programs, MouseWare, and then click MouseWare Help. To set up the mouse for left-handed use: 1. Click the My Computer icon on your desktop. 2. Click Control Panel, and then click Mouse. The Mouse Properties dialog box appears. 3. In the Quick Setup tab, click Device Setup. 4. In the Device Setup Wizard dialog box, click Next. 5. Select the radio button next to "Left side of the keyboard." 6. Click Next three times, and then click Finish. 7. Click Apply. Using a Headphone or Microphone When you connect a microphone or headphone to your computer, attaching a ferrite core will reduce electrical interference. Attach the (supplied) ferrite core at the end of the headphone or microphone cable closest to the computer. Wrap the cable through the center of the ferrite core. The following illustration shows how to attach the ferrite core when you are using both a headphone and a microphone. Page 458 The LCD and keyboard cables already include a ferrite core. Do not remove the ferrite core from these cables. To adjust the height and viewing angle of the display Holding both sides of the display, push the display panel out and up, and then adjust the viewing angle. The LCD display is designed to maintain the best ergonomic viewing angle. Set the display height so that it does not touch the keyboard, and adjust the viewing angle approximately 27 degrees from eye level to the center of the screen. Attaching the Stand to the System Unit The main system unit can be oriented horizontally or vertically. If you place the system in a vertical position, you must attach the supplied stand to ensure stability. 1. Place the system unit on its right side, with the front of the system facing forward. 2. Insert the grooved side of the stand into the ventilation holes of the system so that the two screw holes are aligned and the stand's fins are at the rear of the unit. 3. Secure the stand to the unit with the supplied screw. Page 459 The stand keeps the system cool by allowing air to flow under it. If you choose to place the system unit in a vertical position, it is important to use the stand and to place the system unit on its left side, as in the illustration above; otherwise, the system may overheat. Registering Your Computer Take advantage of Sony's commitment to quality customer support and receive these benefits by registering your computer: Sony Customer Support--Talk to a Support Representative to troubleshoot problems you may be having with your computer. Limited warranty--Protect your investment. See Limited Warranty Statement in the VAIO® Consumer Information Guide for details. You must register your computer to extend the warranty from the initial 90-day warranty period to one year from the original date of purchase. Express Service--Provides a fast and direct return of your VAIO Slimtop Sony for service of your computer. LCD Computer to If you did not already register when you first turned on your computer, follow these steps to use the computer online registration service. 1. Click the registration icon on the VAIO desktop. 2. Enter the information requested on the first online registration form. Press the tab key to move from box to box. 3. Click the Next button to advance to the next form. 4. Complete the remaining forms by clicking the Next button each time you complete a form. The computer automatically transfers your registration information using your built-in modem and a toll-free telephone number or a local number. You may sign up for Internet access with a Sony preferred Internet Service Provider. VAIO Action Setup VAIO Action Setup manages the settings for your computer's Programmable Power Keys (PPK), Memory Stick® media, i.LINK interface, and internal timer. An overview of each of these functions is provided below. For more information on changing the settings using VAIO Action Setup, see the online VAIO Action Setup help files. To access the help files, from the Start menu, point to Programs/VAIO Action Setup/VAIO Action Setup Help. Programmable Power Keys Your Sony computer comes with technology that allows you to get to your favorite applications Page easily. Each Programmable Power Key (PPK) on your VAIO Smart convertible keyboard comes 460 programmed to launch a preset application with a single press of the key. If you wish, you can use the VAIO Action Setup software to change the Programmable Power Keys' preset functions. The Programmable Power Keys are located at the top of your keyboard, and are numbered P1 through P6. The keys work even when the computer is turned off. Pressing one of these keys turns on the computer and launches the preset application. The six Programmable Power Keys come to you preprogrammed to perform the functions listed in the table below. Key Function P1 (INTERNET) Starts Microsoft® Internet Explorer for Windows® 98. P2 (MAIL) Starts Microsoft® Outlook® Express P3 (WORK) Starts Microsoft® Word P4 (FINANCE) Starts Intuit® Quicken® Basic 2000. P5 (SETUP) Starts PPK Setup. P6 (HELP) Opens a menu of help options. Memory Stick You can use VAIO Action Setup to preset your computer to automatically launch an application when you insert a Memory Stick. For more information on Memory Stick media, see Using the Memory Stick® Media . Internal Timer The VAIO Action Setup software allows you to set your computer's internal timer to launch certain applications automatically. The timer can start applications even when the power is off. Some software applications take longer than others to launch. It is advisable to confirm in advance the amount of time your selected application takes to start. AutoAlert E-mail Notification System VAIO Action Setup also enables you to set up your computer to notify you with an Information LED when new mail arrives in your e-mail mailbox. The Information LED turns red to indicate that new e-mail has arrived. For this AutoAlert E-mail Notification System to work, you must use Microsoft® Outlook® Express as your default e-mail software, and you must have an Internet Service Provider with dial-up capabilities set up. As an alternative, you can program your AutoAlert E-mail Notification System to set the Information LED to turn on when it has successfully completed the task of dialing up and connecting to receive mail. In this case, the Information LED turns on to indicate that your e-mail account has been accessed successfully, regardless of whether or not you have mail; this works with Microsoft Outlook Express. The e-mail software you choose to use with PPK must be set as your default e-mail software. See LCD for an illustration showing the Information LED's location. AutoAlert E-mail Notification System Software Restrictions If you use software that uses a phone line The computer may not be able to disconnect the phone line due to communication and server conditions. Be sure to monitor the status of the software when running the AutoAlert E-mail Notification System, and manually disconnect the phone line if you notice a malfunction. Furthermore, when using the timer to start the software, it is advised that you set the computer to shut down or enter system standby mode after a certain length of time. This allows the computer to disconnect the phone line if the computer fails to disconnect the line normally. If you are using the timer to download e-mail automatically Page 461 It is advisable to set up your e-mail software to redial automatically if it does not connect the first time. It is also advisable to set the e-mail software to disconnect the phone line automatically when all mail has been downloaded. If you are using Microsoft® Outlook® Express When using the AutoAlert E-mail Notification System with Microsoft Outlook Express, it is advisable to select the Dial automatically setting in your Microsoft Outlook Express software. If you have not chosen this setting and wish to do so, start Outlook Express, click Tools, and then select Options. Select the check box "Automatically dial when checking for new messages." Click OK. Changing the Window Design of Sony Software To change the window design of Sony software 1. Click the Start button, point to Settings, and then click Control Panel. 2. Click UI Design Selector. 3. Click << or >> and select the desired design. 4. Click Apply. The "UI Design Selector" window design changes. The window design for your Sony software will match the "UI Design Selector" window. To try another selection, click << or >>. Then, click OK. The UI Design Selector closes and the window design of your Sony software window design displays. You may use the feature with UI Design Selector-compatible software only. Using the Memory Stick® Media Your Sony computer is designed to support the new Memory Stick recording media. The Memory Stick media is a small, versatile device that allows you to share data between various types of Sony equipment. When you use the card, your computer automatically launches Windows Explorer. This allows you to view the contents of the card. If the image files are created by a Sony digital camera or camcorder, you do not need the following steps. If you want to create a slide show that launches automatically when you insert a Memory Stick, follow these steps to transfer images from your hard drive to a Memory Stick. 1. Insert the Memory Stick into the appropriate slot. 2. Click the My Computer icon on the desktop. Page 462 3. Click the Removable Disk S: icon. 4. Create a new folder and name it "DCIM." 5. Open the DCIM folder and create a new folder named "100MSDCF." 6. Click the Start button, select VAIO, and then click PictureGear to launch the PictureGear application. 7. Select the digital images you want to save in your slide show. 8. From the PictureGear File menu, point to File Process, and then select Still Format Conversion. 9. Select Memory Stick as the Output Format. 10. Use the Browse button to select the DCIM/100MSDCF folder on the Removable Disk (S:) drive. 11. Name the file. The file name must begin with DSC (DSC0xxxx). The full file name without extension must have at least eight characters. The order in which your photos appear in your slide show will be determined by the number (xxxx) in the file name. Some examples of acceptable file names are DSC00001.jpg and DSC00002.jpg 12. Click OK to save the file. You can also add MPEG1 video files to your Slide Show by following the steps below. The order in which your video clips (MOV0xxxx files) appear in your Slide Show is determined by the number (xxxx) in the file name. 1. Insert the Memory Stick into the media slot. 2. Click the My Computer icon on the desktop. 3. Click the Removable Disk S: icon. 4. Create a new folder and name it "MSSONY." 5. Open the MSSONY folder and create a new folder named "MOML0001." 6. From the PictureGear File menu, point to File Process, and then select Still Format Conversion. 7. Copy the MPEG file into the MOML0001 folder. 8. Rename the MPEG file MOV0xxxx.mpg, where xxxx is any four-digit number. 9. To begin showing your slides, eject the Memory Stick and then reinsert it. The slide show will begin automatically. To protect data on Memory Stick media from accidental changes Memory Stick media contains a write-protect tab. The write-protect tab prevents accidental changes to information recorded on the Memory Stick media. When you slide the write-protect tab to the LOCK position, the Memory Stick is write-protected, which means you cannot delete, copy, or save information on the Memory Stick. When you slide the tab to the un-LOCK position, you can write to or modify the Memory Stick contents. To change the way the computer responds when a Memory Stick is inserted into the Memory Stick media slot Change the options on the Memory Stick tab in the PPK Setup software. Page 463 Using PC Cards This computer has a card bus PC card slot that supports a Type I or II PC card. To insert a PC card You do not need to shut down your computer when inserting a PC card. 1. Open the front panel. 2. Insert the PC card into the PC card slot until it clicks into position. When the card is completely inserted, the eject button pops out. If you cannot insert the card, do not forcibly insert it. In this case, make sure the card is not inserted upside-down or backward, and then reinsert the card into the slot carefully. See the manual that came with the PC card for details on using it. To close the front panel when the eject button is protruding, fold the button down onto the computer. To eject a PC card If you eject the PC card incorrectly, the system may not work correctly. 1. Click the Start button on the Windows® taskbar, click Settings, and then click Control Panel. 2. Click the PC Card icon. 3. Click the name of the card that you want to eject, and then click Stop. 4. When the message "You may safely remove this device" appears, click OK. 5. Push the PC card eject button on the front panel of the system unit. You may need to pull out the eject button before you can eject the card. Page 464 The card is ejected from the card connector. Remove the card by holding it by its edge and pulling it out carefully. Using the Standby Function When you are finished using your computer, you can put it in standby mode rather than turn it off completely. Putting the computer in standby mode allows you to return quickly to normal computer use. To put the computer in standby mode manually 1. Save your work and close any applications that are running. (You can leave Windows running.) 2. Press the (Standby) button on the top of the keyboard. The computer goes into standby mode. Alternatively, you can click the Start button on the Windows® taskbar, click Shut Down, select Standby, and then click OK. To let the computer go into standby mode automatically Click the My Computer icon on your desktop. Click Control Panel, and then click the Power Management icon. On the Power Schemes tab, select from the options in the Power schemes drop-down list. Then, choose settings for the power scheme you have selected. To save the settings under a name that is not offered in the Power schemes pulldown menu, choose your settings and then click Save As. Type in a name, and click OK. Click Apply to finalize your power settings. To resume from standby mode There are three ways to bring your computer back from the standby mode: press the space bar on your keyboard, press the left mouse button, or momentarily depress the power button on your computer. If the display does not return from standby when you press the (Standby) button, your system may be in video standby mode. Press the space bar on the keyboard to return from video standby. Standby Mode Indicators You can tell which mode the computer is in by the color of the power indicator light. Color Amber Green No color Mode Computer is in standby mode. Computer is out of standby mode, ready to use. Computer is turned off. In standby mode you may periodically hear the computer's fan turn on and off, depending on the room's temperature. This is normal functioning in standby mode. Page 465 Shutting Down Your Computer When you are ready to turn off your computer for an extended period of time, use the following procedure to shut down the computer. To avoid the potential loss of data, do not use the power switch to shut down the computer. To shut down your computer If you plan to shut down your computer for a short period of time, you may want to use standby mode instead. See Using the Standby Function. 1. Click the Start button on the Windows® taskbar to open the Start menu. 2. Click Shut Down to display the Shut Down Windows dialog box. 3. Select the Shut Down option. 4. Click OK to complete the shutdown process. Respond to any prompts about saving documents. 5. Wait for your computer to turn off automatically -- the power indicator light turns off. 6. Turn off any peripherals connected to your computer. The LCD display turns off automatically when the computer shuts down. You can also shut down your computer using the (Power) button on the keyboard. Pressing this button causes the system to perform a shutdown but does not give you any of the other options available on the Windows® Shut Down menu. About the Power Switch If your system "locks up" or "crashes," press and hold the power switch for four seconds to force your system to power off. You may need to repeat this procedure. See Locating Controls and Connectors for the power switch's location. Using the System Recovery CD(s) You can reinstall software titles that shipped with your computer if they are corrupted or accidentally erased. You may not need to recover the entire contents of your hard drive. If you experience a problem with your computer, reinstalling an individual device driver or software title may correct the problem. Use the Application Recovery CD(s) to reinstall individual applications or device drivers. See Using the Application Recovery CD(s). The System Recovery CD(s) contain a backup copy of all the software originally installed on your hard disk drive. They can be used only to recover the hard disk of the Sony computer you purchased. The System Recovery utility gives you three options: Full Restore without Format restores all the software titles that originally came with your computer without formatting the hard disk. Full Restore with Format formats the hard disk drive and then restores all the original software. If your hard drive is partitioned into C and D drives, the computer will offer you the option to reformat the drive into a single partition. Operating System Only (Windows 98® Restore with Format) formats the hard disk drive and Page 466 restores the Windows® operating system and the device drivers that shipped with your computer. This option is recommended for advanced users only. If you choose the Full Restore with Format or Operating System Only option, your hard disk will be formatted, which removes all the information on the hard disk drive. You will lose any software you have installed and any other files you have created since you started to use your computer. This means you will have to reinstall any applications that were not included with the computer when you purchased it. If you choose the Full Restore without Format option, you may need to reinstall applications that were not included with the computer when you purchased it. If you have any questions on using the System Recovery CD(s), contact Sony Customer Support. To use the System Recovery CD(s) You need to complete the Windows registration process when you use the System Recovery CD(s). 1. Insert the Sony System Recovery CD(s) in the DVD-ROM drive. The System Recovery utility boots from the DVD-ROM drive. It must be in the drive when you turn on the computer. 2. Shut down your computer as described in Shutting Down Your Computer. 3. Wait 30 seconds and turn on your computer. 4. Click OK to signify you have read and accept the Microsoft End-User License Agreement. 5. When the System Recovery menu appears, follow the on-screen instructions to complete the recovery process. Your system may include one or two System Recovery CDs. If you have two System Recovery CDs, insert the first CD to run the System Recovery program. You are prompted to insert the second CD once the information from the first CD has been installed. The recovery process takes 30 to 60 minutes to complete. Using the Application Recovery CD(s) The Application Recovery CD(s) allow you to reinstall individual applications and device drivers if they are corrupted or accidentally erased. Reinstalling an individual device driver or software title may correct a problem you are experiencing with your computer, and you may not need to recover the entire contents of your hard drive. If you do need to reinstall all the software titles that shipped with your computer, use the System Recovery CD(s). See Using the System Recovery CD(s). You must be in Windows to run the Application Recovery CD(s). The application will not run from DOS. If you have any questions on using the Application Recovery CD(s), contact Sony Customer Support. To use the Application Recovery CD(s) 1. Turn on your computer. If your computer is already on, close all applications. 2. When the Windows desktop appears, insert the Sony Application Recovery CD in the DVD-ROM drive. The Application Recovery utility loads automatically. 3. When the Application Recovery menu appears, follow the on-screen instructions to complete the recovery process. Your system may include one or two Application Recovery CDs. If you have two Application Recovery CDs, insert the first CD to run the Application Recovery program. You may be prompted to insert the second CD, depending on the application you wish to restore. Page 467 About the Software on Your Computer Your VAIO Slimtop computer is ready to help you work, play, learn, and communicate as soon as you turn it on. This section gives you an overview of the activities you can perform with your software titles. For support information, see For Answers to Your Software Questions . Adobe Acrobat® Reader Adobe Systems Incorporated Acrobat Reader software allows you to view, navigate, and print electronic documents in Adobe's Portable Document Format (PDF), an open file format that is intended to preserve the fidelity of documents created on all major computer platforms. Adobe PhotoDeluxe® Home Edition Adobe Systems Incorporated Create amazing photo effects with PhotoDeluxe. Without learning complex software, you can enhance, restore, and be creative with your photos. Includes built-in guided activities, stock photos, clip art, and templates to assist you. Adobe Premiere® LE Adobe Systems Incorporated Adobe Premiere LE offers an interface and editing tool for producing movies for video, multimedia, or the Web. View source clips and edited footage simultaneously in the monitor window. Create video clips up to three hours long with complete audio-video synchronization. America Online® America Online America Online is the world's most popular Internet online service. Stay in touch with family and friends with Easy-to-Use E-mail, manage your personal finances, get the latest news and sports scores, and chat with thousands of others who share your interests. AT&T WorldNet® Service AT&T Fast, reliable Internet access from AT&T WorldNet Service. AT&T WorldNet Service provides Web-based e-mail, a personalized start page from Excite, easy access to the Excite search engine, free Web pages, online and live agent technical support, instant messaging, and special shopping discounts at Market Square. CompuServe® 2000 CompuServe Interactive Services The all new CompuServe 2000 delivers a powerful tool for Internet users who want serious and timely information, in-depth research, and professional communities backed by state-of-the-art technologies, including high-speed access and powerful e-mail messaging. Digital Media Bar Sony Electronics Media Bar software is your all-in-one solution for audio/video playback. It handles all common computer multimedia formats, and controls selected Sony devices. Media Bar software encompasses audio/video library cataloging and playlist management, in addition to digital video quality control and effects features. DVgate Sony Electronics Connect a digital video camera recorder to the i.LINK connector and capture your own video clips. You can edit the clips from your video, add others, and combine clips into new movie segments. EarthLink TotalAccess EarthLink Network, Inc. Page 468 An Internet Service Provider that supplies access, information, and assistance to its customers, introducing them to the Internet. Member benefits include e-mail, newsgroups, a Personal Start Page, a free 6 MB web site, a member magazine, and 24-hour technical support. McAfee's VirusScan® Network Associates, Inc. Protect your computer from viruses. VirusScan can detect viruses from floppy disks, Internet downloads, e-mail attachments, intranets, shared files, CD-ROMs, and online services. Microsoft® Internet Explorer for Windows® 98 Microsoft Corporation Internet Explorer delivers the Web the way you want it. It's safe, easy to use, and you can personalize how you access the Web. Outlook Express and other tools in Internet Explorer also help you have a great experience when you are on the Web! Microsoft® Outlook® Express Microsoft Corporation Outlook Express, the messaging tool that takes your e-mail and newsgroup communications to new heights! Outlook Express is easy to set up and use, and provides you with secure, personalized, and complete features that make creating, sending, and reading your e-mail a more rich and dynamic experience. Microsoft® Word 2000 Microsoft Corporation Microsoft Word 2000 makes it easy to create common Web, e-mail, and print documents for use around the world. It embraces HTML as a first-class file format and extends Word's ease-of-use to the Web and e-mail. Word 2000 also extends that ease of use to international users, making it easy to create multilingual documents. Netscape Communicator® Netscape Communications Netscape Communicator is the all-in-one Internet tool that makes it easy to browse the Web, send Internet e-mail, chat, read newsgroups, and compose great Web documents. PictureGear Sony Electronics This image management software displays images from your hard drive, a Sony digital still camera, or a Sony Mavica® camera. The images appear in a convenient light-table format, so that you can easily view the contents of an entire folder. Prodigy Internet Prodigy Communications Corporation An Internet service that helps you find what you need online faster and smarter. Prodigy delivers powerful online content, such as sports scores, stock quotes, news, and easy access to Excite , plus a personal e-mail account and quality customer service, all at a competitive price. Quicken® Basic Intuit, Inc. Quicken is the fastest, easiest way to organize your finances. Quicken works just like your checkbook, so it's easy to learn and use. Quicken manages all of your finances, bank accounts, credit cards, investments, and loans. You can even pay your bills online. Smart Capture Sony Electronics Smart Capture is a fun new way to send multimedia messages via e-mail. Smart Capture manages the i.LINK connection between your computer and a Sony Digital Handycam® Camcorder or other Page 469 cameras that support the i.LINK interface. It allows you to capture and compress video or still images that you can save or share via e-mail. A smart solution to computer, digital audio/video, and network convergence. Smart Connect Sony Electronics Smart Connect allows you to use an i.LINK cable to connect your VAIO computer to another VAIO computer that supports Smart Connect. You can then use one computer to copy, delete, and edit files on the other computer. You can also print from a printer attached to either computer. Sound Forge® Sonic Foundry Sound Forge allows you to put powerful audio processing tools and effects to work on your desktop. Simply cut, copy, and paste your way to striking multimedia files for use in everything from Web pages to desktop presentations. VAIO Action Setup Sony Electronics VAIO Action Setup manages the settings for your computer's Programmable Power Keys (PPK), Memory Stick media, i.LINK interface, and internal timer. For more information, see VAIO Action Setup. WinFax® Basic Edition Symantec Corporation WinFax Basic Edition incorporates an easy-to-use interface that allows you to send and receive faxes easily. Upgrade to WinFax Pro to receive additional features. About Your Recovery CDs Application Recovery CD(s) Sony Electronics The Application Recovery CD program allows you to reinstall individual applications and device drivers. Use it to restore corrupted or accidentally erased files. System Recovery CD(s) Sony Electronics The System Recovery CD program allows you to restore the software titles that shipped with your computer if they become corrupted or are erased accidentally. It can be used only to restore the hard disk of the Sony computer you purchased. For Answers to Your Software Questions Acrobat® Reader, Adobe PhotoDeluxe® Home Edition (Adobe Systems Incorporated) Web site http://www.adobe.com/ phone 206-628-2746 (fee-based support) fax 206-628-5737 e-mail [email protected] hours M-F, 6 AM-5 PM PT America Online® (America Online) Web site phone hours http://www.aol.com/ 800-827-3338 7 days a week, 6 AM - 2 PM ET AT&T WorldNet® Service (AT&T) Web site phone e-mail http://www.att.net 800-400-1447 [email protected] Page 470 hours 7 days a week, 24 hours a day CompuServe® 2000 (CompuServe Interactive Services) Web site phone hours http://www.compuserve.com/ 800-848-8990 M-F, 8 AM - 1 AM ET, S-S 10 AM - 10 PM ET EarthLink TotalAccess Web site phone e-mail hours (EarthLink Network, Inc.) http://help.earthlink.net/techsupport/ 800-395-8410 [email protected] 7 days a week, 24 hours a day GTE Easy Sign-up (GTE Internet) phone hours 800-927-3000 7 days a week, 24 hours a day McAfee's VirusScan (Network Associates, Inc.) Web site phone e-mail hours http://support.mcafee.com 408-988-3832 [email protected] M - F 9 AM - 5 PM Central Time MindSpring Internet Desktop (MindSpring Enterprises, Inc.) Web site phone http://help.mindspring.com/support 800-719-4660 Quicken® Basic (Intuit Inc.) Web site phone hours http://www.intuit.com/support 900-555-4688 7 days a week, 24 hours a day Sound Forge® (Sonic Foundry) Web site http://www.sonicfoundry.com/support/ phone 608-256-5555 fax 608-256-7300 e-mail [email protected] hours M - F, 8 AM - 7 PM CT Windows® 98 Second Edition Operating System, Word® 2000, Internet Explorer 5, Outlook® Express (Microsoft Corporation) Web site phone hours 1 http://www.sony.com/pcsupport 888-4SONYPC (888-476-6972) 1 7 days a week, 24 hours a day Support from 1-888-4SONYPC is free of charge for 90 days after the original date of purchase. WinFax® Basic Edition (Symantec Corporation) Web site http://www.symantec.com/techsupp/ phone 800-798-0850 fax 800-554-4403 in North America 541-984-2490 outside North America Troubleshooting This section describes how to solve common problems you may encounter when using your computer. Many problems have simple solutions, so try these suggestions before you call Sony Customer Support. My computer does not start Check that the computer is plugged into a power source and that it is turned on. Check that the power light is lit on the front panel of the computer. Confirm that a diskette is not in the diskette drive (unless you are using a bootable diskette). Confirm that the power cord and all cables are connected firmly, as described on the color poster. Page 471 If you plugged the computer into a power strip or UPS, make sure the power strip or UPS is turned on and working. My computer or software program "locks up" Close the application that is currently "locked up" by pressing Ctrl+Alt+Delete. In the Close Program dialog box, scroll down until you locate "(Not responding)" next to an application. Select this application and click End Task. Windows attempts to close the application. If the attempt is unsuccessful, a second dialog box appears. Select End Task again. If you are unable to "unlock" the application, repeat the above steps but select Shut Down when the Close Program dialog box appears. If the above steps fail to "unlock" your computer, save any unsaved work, if possible. Press Alt+F4. Select Restart and click OK. If you cannot restart as described in the preceding steps, you can restart the computer by pressing Ctrl+Alt+Delete or by pressing the power switch for more than six seconds. Pressing Ctrl+Alt+Delete may result in the loss of changes made to files that are currently open. Contact the software publisher or designated provider for technical support. See For Answers to Your Software Questions for a list of phone numbers and Web addresses or see Read Me First . My DVD-ROM/CD-ROM drive tray does not open Make sure the computer is turned on. If the Eject button does not work, you can open the tray by inserting a straightened heavyweight paper clip into the emergency eject hole. When I click an application icon, a message such as "You must insert the application CD into your CD-ROM (DVD-ROM) drive" appears and the software does not start Some titles require specific files that are located on the application's DVD-ROM/CD-ROM. Insert the disc and try starting the program again. Check to make sure you inserted the DVD-ROM/CD-ROM with the label side facing up. My modem connection is slow The computer's modem uses K56flex technology/V.90. Many factors influence modem connection speed, including telephone line noise or compatibility with telephone equipment (such as fax machines or other modems). If you think your modem is not connecting properly to other computer-based modems, fax machines, or your Internet Service Provider, check the following: Have your phone company check that your phone line is free from any line noise. If your problem is fax-related, check that there are no problems with the fax machine you are calling. The modem that receives your call may be slower or may use a different communications protocol than your modem. If this is the case, the connection speed may be slower than expected. For optimum performance, ensure you are calling an Internet Service Provider number that is V.90-compliant. If you are having a problem connecting with your Internet Service Provider, check that the ISP is not experiencing technical problems. If you have a second phone line available, try connecting the modem to this line. My modem does not work Check that the phone line is plugged into the line jack. Page Check that the phone line is working. You can check the line by plugging in an ordinary phone and472 listening for a dial tone. Check that the phone number the program is dialing is correct. Verify that the software you are using is appropriately configured to recognize and interact with the Sony computer modem. Call the software publisher if you do not know how to configure the software to recognize the modem. All programs preinstalled by Sony are compatible. If you suspect your modem is not functioning, you can perform a simple test to find out. Click the My Computer icon on your desktop. Click Control Panel, and then click Modems. Click the Diagnostics tab and select COM3. Click More Info. If your modem is functioning, a More Info dialog box will display. If your modem is not functioning, an error message will appear. My microphone is too sensitive to background noise If you find there is too much background noise when you record sound, you should adjust the microphone gain by following these steps: 1. Right-click the speaker icon (Volume) in the lower-right Windows® task tray. 2. Click Open Volume Controls. The Volume Control screen appears. 3. In the Options menu, select Properties. The Properties screen appears. 4. Change the setting for "Adjust volume for" from Playback to Recording, and then click OK. 5. Click the Advanced button under Microphone Balance. The Advanced Controls for Microphone screen appears. 6. Deselect the check box for 1 Mic Gain (+20dB), then click the Close button. 7. Close the Recording Control window. My mouse does not work Check that the mouse is plugged into one of the PS/2® connectors on the keyboard. The other connector connects the keyboard to the computer. There may be dust or dirt inside the mouse mechanism. To clean the mouse, follow these steps: o Turn off your computer. See Shutting Down Your Computer for details. o Remove the mouse ball cover on the back of the mouse by turning the ring that covers the mouse ball clockwise. o Turn the mouse upright, and drop the mouse ball into your hand. o Using a piece of tape, remove any dust or dirt on the mouse ball and inside the mouse ball socket. o Return the mouse ball to the socket, and replace the mouse ball cover. Secure the cover by turning the ring counter-clockwise. I cannot find the Windows® taskbar Check that the taskbar is not hidden or shrunken. Use the mouse to point to the left, right, top, and bottom edges of the screen. See Read Me First for additional information on using your Sony computer. To Reach Sony For further assistance, call 1-888-4SONYPC (1-888-476-6972). Page 473 Specifications Model PCV-L630 Processor 600E MHz* Pentium® III Hard Disk Drive 17 GB Ultra DMA Standard SDRAM 128 MB PC-100 SDRAM, expandable to 256 MB Video RAM 8 MB SDRAM Graphics 2X AGP 3D graphics hardware acceleration (ATi Rage 128 Pro 4XL) Sound Capabilities High fidelity 3D PCI audio Aureal AU8810 Diskette Drive 3.5" 1.44 MB FDD DVD-ROM/CD-ROM Drive 4.8X (max.) DVD-ROM reading 24X (max.) CD-ROM reading** Modem K56flex technology/V.90 compatible data/fax modem Expansion Capabilities Two PCI slots Connection Capabilities (Front) PC card (Card bus support) USB port Microphone Headphone Memory Stick media slot i.LINK (4-pin) Connection Capabilities (Rear) USB port Modem line (RJ-11) Phone line (RJ-11) Parallel (printer) Serial port VGA monitor LCD display Line In Line Out Keyboard i.LINK (6-pin) Connection Capabilities (Keyboard) Mouse (PS/2-style) left and right connectors Supplied Accessories Stand (for vertical installation) Power cable Phone cable Keyboard cable PS/2 Wheel Mouse VAIO Smart Convertible Keyboard Spacers (for bottom of the system) Ferrite core Service 90-day limited express service*** Extendible to one year from original da