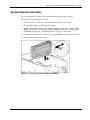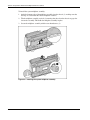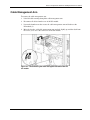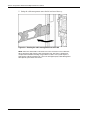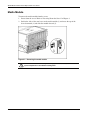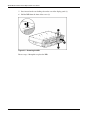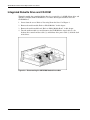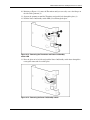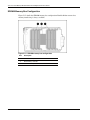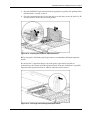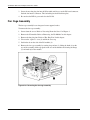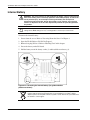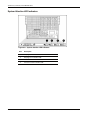
1
HP ProLiant DL760 Generation 2 Server
Maintenance and Service Guide
February 2004 (Third Edition)
Part Number 201262-003
© Copyright 2003, 2004 Hewlett-Packard Development Company, L.P.
The information contained herein is subject to change without notice. The only warranties for HP products and
services are set forth in the express warranty statements accompanying such products and services. Nothing herein
should be construed as constituting an additional warranty. HP shall not be liable for technical or editorial errors
or omissions contained herein.
Microsoft, Windows, and Windows NT are U.S. registered trademarks of Microsoft Corporation. Intel, Pentium,
and Itanium are trademarks or registered trademarks of Intel Corporation or its subsidiaries in the United States
and other countries. UNIX is a registered trademark of The Open Group. Linux is a U.S. registered trademark of
Linus Torvalds.
HP ProLiant DL760 Generation 2 Server Maintenance and Service Guide
February 2004 (Third Edition)
Part Number 201262-003
Contents
About This Guide
Audience Assumptions............................................................................................................................... vii
Technician Notes........................................................................................................................................ vii
Where to Go for Additional Help.............................................................................................................. viii
Integrated Management Log ............................................................................................................... viii
Telephone Numbers ............................................................................................................................ viii
Chapter 1
Illustrated Parts Catalog
System Chassis .......................................................................................................................................... 1-2
Media Module ........................................................................................................................................... 1-4
Processor and Memory Module................................................................................................................. 1-6
I/O Module ................................................................................................................................................ 1-8
Miscellaneous.......................................................................................................................................... 1-10
Chapter 2
Service Preparation
Safety Considerations................................................................................................................................ 2-1
Electrostatic Discharge Information ................................................................................................... 2-1
Rack Warnings and Precautions ......................................................................................................... 2-2
Server Warnings and Precautions ....................................................................................................... 2-2
Server Modules.......................................................................................................................................... 2-4
Preparation Procedures.............................................................................................................................. 2-7
System Interconnect LEDs ................................................................................................................. 2-8
Hot-Plug Procedures ........................................................................................................................... 2-8
Non-Hot-Plug Procedures................................................................................................................... 2-8
Power-On Self-Test .......................................................................................................................... 2-11
Re-entering the Server Serial Number .................................................................................................... 2-15
Chapter 3
Chassis Components Removal and Replacement Procedures
I/O Lid ....................................................................................................................................................... 3-1
Hot-Plug Power Supply............................................................................................................................. 3-2
System Midplane Assembly ...................................................................................................................... 3-5
Cable Management Arm ........................................................................................................................... 3-7
HP ProLiant DL760 Generation 2 Server Maintenance and Service Guide
iii
Contents
Chapter 4
Media Module Removal and Replacement Procedures
Media Module............................................................................................................................................4-2
Media Module Bezel..................................................................................................................................4-4
Integrated Management Display ................................................................................................................4-5
Hot-Plug Hard Drives ................................................................................................................................4-7
Hard Drive Blank ................................................................................................................................4-7
Hot-Plug Hard Drive Replacement Guidelines ...................................................................................4-8
Integrated Diskette Drive and CD-ROM .................................................................................................4-10
Media Module Cable Routing Diagram...................................................................................................4-12
Power On/Standby Switch Assembly................................................................................................4-13
Chapter 5
Processor and Memory Module Removal and Replacement Procedures
Shipping Screws.........................................................................................................................................5-1
Security Screw ...........................................................................................................................................5-2
Processor and Memory Module .................................................................................................................5-3
Processor Boards and Processors...............................................................................................................5-5
Identifying ...........................................................................................................................................5-5
Removing Processor Boards and Processors.......................................................................................5-6
Memory Cartridge....................................................................................................................................5-10
Identifying .........................................................................................................................................5-10
Removing the Memory Cartridge......................................................................................................5-11
Opening the Memory Cartridge.........................................................................................................5-12
DIMM Overview .....................................................................................................................................5-12
Identifying .........................................................................................................................................5-13
SDRAM Memory Bus Configuration ...............................................................................................5-14
Installing DIMMs into the Cartridge.................................................................................................5-15
Memory Riser Board................................................................................................................................5-17
Chapter 6
I/O Module Removal and Replacement Procedures
I/O Module.................................................................................................................................................6-1
Removing the Cable Management Arm: .............................................................................................6-1
Removing the I/O Module...................................................................................................................6-4
I/O Expansion Boards ................................................................................................................................6-6
Locating the I/O Expansion Slots........................................................................................................6-6
I/O Expansion Slot Cover....................................................................................................................6-7
Non-Hot Plug Expansion Boards ........................................................................................................6-8
PCI Hot Plug I/O Expansion Boards .................................................................................................6-10
PCI Hot Plug LED Indicators............................................................................................................6-12
PCI Hot Plug Operating System Support ..........................................................................................6-13
Adding PCI Hot Plug Expansion Boards ..........................................................................................6-14
Removing or Replacing a PCI Hot Plug Expansion Board ...............................................................6-16
Hot-Plug Fans ..........................................................................................................................................6-18
Fan Cage Assembly .................................................................................................................................6-20
11-slot Hot-Plug Basket...........................................................................................................................6-22
Internal Battery ........................................................................................................................................6-24
iv
HP ProLiant DL760 Generation 2 Server Maintenance and Service Guide
Contents
Chapter 7
Diagnostic Tools
Diagnostic Tools Utility Overview ........................................................................................................... 7-2
For More Information................................................................................................................................ 7-4
Chapter 8
Connectors, Switches, and LED Indicators
Connectors................................................................................................................................................. 8-1
Rear Connectors.................................................................................................................................. 8-1
I/O Board Components ....................................................................................................................... 8-2
Host Board .......................................................................................................................................... 8-3
Switches..................................................................................................................................................... 8-4
LED Indicators .......................................................................................................................................... 8-5
System Power LED Indicator ............................................................................................................. 8-6
Auxiliary Power LED Indicator.......................................................................................................... 8-6
System Interconnect LED Indicators .................................................................................................. 8-7
System Attention LED Indicators ....................................................................................................... 8-8
Hot-Plug SCSI Hard Drive LED Indicators........................................................................................ 8-9
Power Supply LED Indicators .......................................................................................................... 8-11
Hot-Plug Fan LED Indicators ........................................................................................................... 8-12
PCI Hot Plug LED Indicators ........................................................................................................... 8-13
Memory Cartridge LED Indicators ................................................................................................... 8-15
Chapter 9
Physical, Operating, and Performance Specifications
Server Specifications ................................................................................................................................. 9-2
Power Supply Specifications..................................................................................................................... 9-3
Dual Inline Memory Module (DIMM) Specifications .............................................................................. 9-4
1.44-MB Diskette Drive Specifications .................................................................................................... 9-4
DVD-ROM Drive Specifications .............................................................................................................. 9-5
24X Max IDE CD-ROM Drive Specifications.......................................................................................... 9-7
Hot-Plug U320 SCSI Hard Drives ............................................................................................................ 9-9
Hot-Plug Ultra3 SCSI Hard Drives ......................................................................................................... 9-10
Smart Array 5i Controller Specifications ................................................................................................ 9-11
NC7770 PCI-X Gigabit Server Adapter Specifications .......................................................................... 9-12
NC7170 Dual Port PCI-X Gigabit Server Adapter Specifications.......................................................... 9-13
Index
HP ProLiant DL760 Generation 2 Server Maintenance and Service Guide
v
About This Guide
This maintenance and service guide can be used for reference when servicing the HP
ProLiant DL760 Generation 2 server.
WARNING: To reduce the risk of personal injury from electric shock and hazardous
energy levels, only authorized service technicians should attempt to repair this
equipment. Improper repairs can create conditions that are hazardous.
Audience Assumptions
This guide is for service technicians. HP assumes you are qualified in the servicing of
computer equipment and trained in recognizing hazard in products with hazardous energy
levels and are familiar with weight and stability precautions for rack installations.
Technician Notes
WARNING: Only authorized technicians trained by HP should attempt to repair this
equipment. All troubleshooting and repair procedures are detailed to allow only
subassembly/module-level repair. Because of the complexity of the individual boards
and subassemblies, no one should attempt to make repairs at the component level or
to make modifications to any printed wiring board. Improper repairs can create a safety
hazard.
WARNING: To reduce the risk of personal injury from electric shock and hazardous
energy levels, do not exceed the level of repairs specified in these procedures.
Because of the complexity of the individual boards and subassemblies, do not attempt
to make repairs at the component level or to make modifications to any printed wiring
board. Improper repairs can create conditions that are hazardous.
WARNING: To reduce the risk of electric shock or damage to the equipment:
•
Disconnect power from the system by unplugging all power cords from the power
supplies.
•
Do not disable the power cord grounding plug. The grounding plug is an important
safety feature.
•
Plug the power cord into a grounded (earthed) electrical outlet that is easily
accessible at all times.
HP ProLiant DL760 Generation 2 Server Maintenance and Service Guide
vii
About This Guide
CAUTION: To properly ventilate the system, you must provide at least 7.6 cm (3.0 in.) of
clearance at the front and back of the server.
CAUTION: The computer is designed to be electrically grounded (earthed). To ensure proper
operation, plug the AC power cord into a properly grounded AC outlet only.
NOTE: Any indications of component replacement or printed wiring board modifications may void any
warranty.
Where to Go for Additional Help
In addition to this guide, the following information sources are available:
•
User documentation
•
Service Quick Reference Guide
•
Service training guides
•
Service advisories and bulletins
•
QuickFind information services
•
Insight Manager software
Integrated Management Log
The server includes an integrated, nonvolatile management log that contains fault and
management information. The contents of the Integrated Management Log (IML) can be
viewed with Insight Manager.
Telephone Numbers
For the name of the nearest HP authorized reseller:
•
In the United States, call 1-800-345-1518.
•
In Canada, call 1-800-263-5868.
For HP technical support:
•
In the United States and Canada, call 1-800-652-6672.
•
Outside the United States and Canada, refer to
www.hp.com
viii
HP ProLiant DL760 Generation 2 Server Maintenance and Service Guide
1
Illustrated Parts Catalog
This chapter provides the illustrated parts breakdown and a spare parts list for the
HP ProLiant DL760 server. Refer to the table following each illustration for the names of
referenced spare parts.
HP ProLiant DL760 Generation 2 Server Maintenance and Service Guide
1-1
Illustrated Parts Catalog
System Chassis
Figure 1-1: System chassis exploded view
1-2
HP ProLiant DL760 Generation 2 Server Maintenance and Service Guide
Illustrated Parts Catalog
Table 1-1: System Chassis Spare Parts List
Item
Description
Spare Part Number
System Chassis
1 System
2 I/O
3
chassis
lid
122214-001
Processor and memory module (without processors)
4 Media
module
Heatsink
278466-001
319945-001
*
Ramp*
Memory module bezel*
5
I/O module with PCI-X I/O board
339661-001
System Components
6
Hot-plug power supply 1150 W
122235-001
7
System midplane assembly
316747-001
*Not shown
HP ProLiant DL760 Generation 2 Server Maintenance and Service Guide
1-3
Illustrated Parts Catalog
Media Module
Figure 1-2: Media module exploded view
1-4
HP ProLiant DL760 Generation 2 Server Maintenance and Service Guide
Illustrated Parts Catalog
Table 1-2: Media Module Spare Parts List
Item
Description
Spare Part Number
Media Module Components
1 Media
module
319945-001
a) Drive tray module*
b) Drive cage assembly*
c) Media module bezel
2
IMD with cable, panel, LED
271930-001
3
Power switch assembly with LED
122233-001
Mass Storage
4
Wide Ultra3 hard drive with tray, 18.2-GB, 1-inch, 10000 rpm
152190-001
Wide Ultra3 hard drive with tray, 36.4-GB, 1-inch, 10000 rpm*
177986-001
Wide Ultra3 hard drive with tray, 18.2-GB, 1-inch, 15000 rpm*
189395-001
U320 Universal hard drive with tray, 36.4-GB, 1-inch, 10000 rpm
289041-001
U320 Universal hard drive with tray, 72.8-GB, 1-inch, 10000 rpm
289042-001
U320 Universal hard drive with tray, 146.8-GB, 1-inch, 10000 rpm
289044-001
U320 Universal hard drive with tray, 18.2-GB, 1-inch, 15000 rpm
289240-001
U320 Universal hard drive with tray, 36.4-GB, 1-inch, 15000 rpm
289241-001
U320 Universal hard drive with tray, 72.8-GB, 1-inch, 15000 rpm
289243-001
5
LVDS 1-inch hard drive blank
313046-001
6
1.44-MB diskette drive
233409-001
7 CD-ROM
8 DVD
drive
drive*
263243-001
339811-001
356326-001
*Not shown
HP ProLiant DL760 Generation 2 Server Maintenance and Service Guide
1-5
Illustrated Parts Catalog
Processor and Memory Module
Figure 1-3: Processor and memory module exploded view
1-6
HP ProLiant DL760 Generation 2 Server Maintenance and Service Guide
Illustrated Parts Catalog
Table 1-3: Processor and Memory Module Spare Parts List
Item
Description
Spare Part Number
Processor and Memory Module Components
1
Processor and memory module
278466-001
2 Processor
board
314379-001
3 Processor
cover
320104-001
4
Processor board air baffle and label
323754-001
5
Memory riser board
278467-001
Processors
6
Processor (1.5 GHz with 1-MB cache), clip, and heatsink
319952-001
Processor (2.0 GHz with 1-MB cache), clip, and heatsink*
327839-001
Processor (2.0 GHz with 2-MB cache), clip, and heatsink*
319953-001
Processor (2.2 GHz with 2-MB cache), clip, and heatsink*
352311-001
Processor (2.5 GHz with 1-MB cache), clip, and heatsink*
327840-001
Processor (2.7 GHz with 2-MB cache), clip, and heatsink*
352312-001
Processor (2.8 GHz with 2-MB cache), clip, and heatsink*
327841-001
Processor (3.0 GHz with 4-MB cache), clip, and heatsink*
352313-001
7
Hot-plug memory cartridge
278470-001
8
Memory module, 256MB, PC133, 128Mb, ECC SDRAM DIMM
159377-001
Memory module, 512MB, PC133, 256Mb, ECC SDRAM DIMM*
177628-001
Memory module, 1GB, PC133, 256Mb, LP, ECC SDRAM DIMM*
321851-001
Memory module, 2GB, PC133, 512Mb, ECC SDRAM DIMM*
321852-001
Memory
*Not shown
HP ProLiant DL760 Generation 2 Server Maintenance and Service Guide
1-7
Illustrated Parts Catalog
I/O Module
Figure 1-4: I/O module exploded view
1-8
HP ProLiant DL760 Generation 2 Server Maintenance and Service Guide
Illustrated Parts Catalog
Table 1-4: I/O Module Spare Parts List
Item
Description
Spare Part Number
I/O Module Components
1 I/O
module
278457-001
a) PCI-X I/O board
b) PCI-X Hot Plug switch board cable
2 Array
enabler board
122232-001
3
Hot-plug 11-slot basket with dividers (quantity 10) and puller assembly
(quantity 10)
323753-001
4
NC7770 PCI-X Gigabit Server Adapter 10/100/1000 TX UTP NIC
284848-001
NC7170 Dual Port PCI-X Gigabit Server Adapter*
313586-001
5 Hot-plu
g fan
278469-001
6
PCI-X Hot Plug switch board kit
278463-001
7
Remote Insight Lights-Out Edition II (RILOE)*
232386-001
8
SCSI cable board*
146447-003
Miscellaneous
9 SCSI
cable*
278470-001
*Not shown
HP ProLiant DL760 Generation 2 Server Maintenance and Service Guide
1-9
Illustrated Parts Catalog
Miscellaneous
Table 1-5: Miscellaneous Spare Parts List
Item
Description
1 Miscell
Spare Part Number
aneous plastics*
278460-001
a) Cover, rack rail
b) Retainer, cardguide, double
c) Retain er, cardguide
d) Gear, ejector, processor/memory riser
e) Guide, card, processor
f) Guide, fan, left
g) Guide, fan, right
h) Plenum, fan cage
i) PCA, SW/LED 11-slot hot-plug PCI
j) Cover, cartridge
k) Bezel, top memory cage
l) Hot-plug 11-slot basket with dividers (quantity 10) and puller assemblies
(qua ntity 10)
m) Fiber Optic SISI LED
n) Processor memory ejector kit
o) Air ramp, host PCA
p) Air ramp, F8
q) Light pipe, plate
r) Light pipe, SISI
s) Light pipe, DIMM
continued
1-10
HP ProLiant DL760 Generation 2 Server Maintenance and Service Guide
Illustrated Parts Catalog
Table 1-5: Miscellaneous Spare Parts List continued
Item
2
Description
Lever ejector kit, miscellaneous*
Spare Part Number
278461-001
Lever, memory cartridge
Latch, memory cartridge
Lever, processor PCA
Spring, processor board / memory riser board and right lever
Latch, processor board / memory riser board
Lever, ejector, memory riser board
Spring, memory cartridge, ZINC
b) Ejector, right, I/O drawer
c) Ejector, left, I/O drawer
Assembly, ejector, drive cage, right, graphite
Assembly, ejector, drive cage, left, graphite
Gear, ejector, processor board / memory riser board
Assembly, PCI, latch and base, CBN, HP (quantity 5)
Ejector, right, processor drawer
Ejector, left, processor drawer
3
Heatsink, F8 chipset*
278472-001
4
Spares, rail kit*
339977-001
5 Return
6
kit*
Ethernet loopback RJ-45*
123189-001
317465-001
7 Internal
battery*
175115-001
8 Country
kit*
152406-001
9
Integrated Management Display
340405-001
*Not shown
HP ProLiant DL760 Generation 2 Server Maintenance and Service Guide
1-11
2
Service Preparation
Safety Considerations
Before performing service procedures, review the following safety information.
Electrostatic Discharge Information
A discharge of static electricity can damage static-sensitive devices or microcircuitry. Proper
packaging and grounding techniques are necessary precautions to prevent damage. To
prevent electrostatic damage, observe the following precautions:
•
Transport products in static-safe containers, such as conductive tubes, bags, or boxes.
•
Keep electrostatic-sensitive parts in their containers until they arrive at static-free
stations.
•
Cover workstations with approved static-dissipating material. Use a wrist strap connected
to the work surface and properly grounded tools and equipment.
•
Keep the work area free of nonconductive materials, such as ordinary plastic assembly
aids and foam packing.
•
Make sure you are always properly grounded when touching a static-sensitive component
or assembly.
•
Avoid touching pins, leads, or circuitry.
•
Always place drives PCB assembly-side down.
•
Use conductive field service tools.
HP ProLiant DL760 Generation 2 Server Maintenance and Service Guide
2-1
Service Preparation
Rack Warnings and Precautions
WARNING: To reduce the risk of personal injury or damage to the equipment, be sure
that:
•
The leveling jacks are extended to the floor.
•
The full weight of the rack rests on the leveling jacks.
•
The stabilizers are attached to the rack if it is a single-rack installation.
•
The racks are coupled in multiple-rack installations.
•
Only one component is extended at a time. A rack may become unstable if more
than one component is extended for any reason.
CAUTION: Always begin by mounting the heaviest item on the bottom of the rack. Continue
to populate the rack from the bottom to the top.
Server Warnings and Precautions
WARNING: The ProLiant DL760 G2 server weighs 73 kilograms (161 pounds) when
fully assembled. To reduce the risk of personal injury or damage to the equipment:
63-73 kg
140-161 lb
•
Observe local health and safety requirements and guidelines for manual material
handling.
•
Obtain adequate assistance to lift and stabilize the product during installation or
removal.
•
Remove all modules and power supplies to reduce the overall weight of the
product.
WARNING: To reduce the risk of personal injury from electric shock and hazardous
energy levels, only authorized service technicians should attempt to repair this
equipment. Improper repairs could create hazardous conditions.
WARNING: To reduce the risk of personal injury from hazardous energy or damage to
the equipment when working on energized servers:
•
Remove all watches, rings, and any other loose-fitting jewelry.
•
Do not use conductive tools inside the server that could bridge live parts.
WARNING: To reduce the risk of electric shock or damage to the equipment:
2-2
•
Do not disable the power cord grounding plug. The grounding plug is an important
safety feature.
•
Plug the power cord into a grounded electrical outlet that is easily accessible at all
times.
•
Install the power supply before connecting the power cord to the power supply.
•
Unplug the power cord before removing the power supply from the server.
•
If the system has multiple power supplies, disconnect power from the system by
unplugging all power cords from the power supplies.
HP ProLiant DL760 Generation 2 Server Maintenance and Service Guide
Service Preparation
WARNING: To reduce the risk of personal injury from hot surfaces, allow the internal
system components to cool before touching them.
CAUTION: Because the ProLiant DL760 G2 server does not have safety interlocks, it is
possible for a unit to be operated without the cover and air baffles properly installed. This
could cause thermal damage in the system and could void the warranty. The rack-mountable
ProLiant DL760 G2 server should always be operated with the system unit cover on. Proper
cooling cannot be achieved if the system unit cover is removed for extended periods of time.
CAUTION: Protect the server from power fluctuations and temporary interruptions with a
regulating uninterruptible power supply (UPS). This device protects the hardware from
damage caused by power surges and voltage spikes and keeps the system in operation
during a power failure.
HP ProLiant DL760 Generation 2 Server Maintenance and Service Guide
2-3
Service Preparation
Server Modules
In the ProLiant DL760 G2 server, options and accessories are easily accessed through a
sliding I/O lid and three removable modules: the media module, processor and memory
module, and the I/O module. Refer to Figure 2-1, Figure 2-2, and Figure 2-3 for identification
of these modules and other components.
Figure 2-1: Front modules
Item
1
Description
Processor and memory module
2 Media
2-4
module
HP ProLiant DL760 Generation 2 Server Maintenance and Service Guide
Service Preparation
Figure 2-2: Front module components
Item
Description
1
Processor area and air intake
2
Hot-plug hard drives
3
IDE CD-ROM drive
4
1.44-MB diskette drive
5
Integrated Management Display (IMD)
6
Hot Plug RAID Memory cartridge
HP ProLiant DL760 Generation 2 Server Maintenance and Service Guide
2-5
Service Preparation
Figure 2-3: Rear components
Item
Description
1
I/O module with system fans
2
Hot-plug power supply #1
3
Hot-plug power supply #2
For details on cable connections, refer to Chapter 6, “Cabling the S erver” in the HP ProLiant
DL760 Generation 2 Server User Guide.
2-6
HP ProLiant DL760 Generation 2 Server Maintenance and Service Guide
Service Preparation
Table 2-1: Module and Bay Components and Access describes the contents of the modules
and how to access the components.
Table 2-1: Module and Bay Components and Access
Module
Contents
Access Method
I/O module with system fans
PCI Hot Plug expansion slots
Slide the I/O lid toward the
front of the server.
Configuration switches
Slide the I/O lid toward the
front of the server.
Fans 1 and 2
Slide the I/O lid toward the
front of the server.
Processor (CPU) sockets
Remove the Processor and
Memory Module and the
processor board.
Memory (DIMMs)
Remove the memory cartridge.
CD-ROM/
Diskette/IMD
Access directly at the front of
the server.
Hot-plug hard drives
Access directly at the front of
the server.
Processor and memory
module
Media module
Preparation Procedures
To access some components and perform certain service procedures, you must do one or
more of the following:
•
Extend the server from the rack.
If you are performing service procedures in an HP rack or third-party rack cabinet, you
can user the locking feature of the rack rails to support the server and gain access to
internal components.
•
Power down the server.
If you must remove a server from a rack or a non-hot-plug component from a server,
power down the server.
•
Remove the server from the rack.
If the rack environment, cabling configuration, or the server location in the rack creates
awkward conditions, remove the server from the rack.
To service the ProLiant DL760 G2 server, you might need the following:
•
Flat-blade screwdriver (4 millimeter)
•
Torx T-15 screwdriver
•
Phillips screwdriver
•
HP SmartStart CD:
HP ProLiant DL760 Generation 2 Server Maintenance and Service Guide
2-7
Service Preparation
—
Drive Array Advanced Diagnostics (DAAD) software
—
Array Diagnostics Utility (ADU) software
— ROM-Based
Inspect
— ROM-Based
Diagnostics
System Interconnect LEDs
The system interconnect LEDs on the ProLiant DL760 G2 server provide a closed-loop
checking mechanism for verifying proper component mating and interconnections between
critical server components. LEDs on the I/O lid provide visual assistance in isolating
components to check if the server will not power up due to a component or module that is not
fully installed. If a status indicator light is on, reseat the component represented by the
indicator. Refer to the hood labels for component location. Refer to Chapter 8 for more
information.
Hot-Plug Procedures
You can perform some service procedures without powering down the server. Before
performing hot-plug procedures, observe the following guidelines:
•
For hot-plug fan procedures, ensure that the fan zone is fully populated.
•
For hot-plug power supply procedures, ensure that a redundant power supply is installed
and connected to a power source.
•
For hot-plug drive procedures, determine whether the drive is part of an array. For more
information, refer to the “Hot Plug SCSI Hard Drive Replacement Guidelines” in the HP
Servers Troubleshooting Guide.
•
For hot-plug expansion board procedures, ensure that the proper drivers for the PCI Hot
Plug functionality are installed. For more information, refer to the HP ProLiant DL760
Generation 2 Server User Guide.
The access panels can be removed while the server is powered on without causing a system
shutdown. When the server is in standby mode, portions of the power supply, auxiliary power
(+5V), and some internal circuitry remain active.
Non-Hot-Plug Procedures
You must power down the server to perform non-hot-plug procedures.
WARNING: To reduce the risk of electric shock or damage to the equipment,
disconnect power from the server by unplugging all power cords from either the
electrical outlet or the server. In systems with multiple power supplies, you must
disconnect all the power cords to completely remove power from the system.
IMPORTANT: It is necessary to be knowledgeable about electrostatic discharge information before
conducting the preparation procedures. For electrostatic discharge information, refer to “Electrostatic
Discharge Information” in this chapter.
2-8
HP ProLiant DL760 Generation 2 Server Maintenance and Service Guide
Service Preparation
Powering Down the Server
The system power in the ProLiant DL760 G2 server does not shut off completely with the
front panel Power On/Standby switch. The two switch modes are on and standby, rather than
on and off. The Standby position removes power from most of the electronics and the drives,
but portions of the power supply, the IMD, the system interlock circuitry, and some internal
circuitry remain active. To completely remove all power from the system, you must
disconnect all power cords from the server.
WARNING: To reduce the risk of electric shock or damage to the equipment,
disconnect power from the server by unplugging all power cords from either the
electrical outlet or the server.
To power off the server:
1. Back up the server data.
2. Shut down the operating system as directed by the operating system instructions. If the
server is in a rack, press the UID button.
3. Press the Power On/Standby switch (2) to standby. This action places the server in
standby, thereby disabling the main power supply output and providing auxiliary power
(+ 5V) to the server. Standby does not disable main output power.
4. Be sure that the system power LED (1) on the front panel, near the Power On/Standby
switch, becomes dark and fan noise abates.
5. Disconnect all power cords from the server to disable power to the server.
Figure 2-4: System power LED and Power On/Standby switch
For some removal and replacement procedures, you must remove the server from the rack
and place it on a sturdy table or workbench. Refer to the HP ProLiant DL760 Generation 2
Server User Guide for further instructions.
HP ProLiant DL760 Generation 2 Server Maintenance and Service Guide
2-9
Service Preparation
Powering Up the Server
When you power up the server, it should go through the following sequence. Record any
discrepancies and any error messages that occur. Be sure that the server is safely installed in
an adequate environment before powering up for the first time.
Be sure that power is supplied to each power supply on the back of the server. The IMD is
illuminated if the machine has power.
1. Turn on the machine by pressing the Power On/Standby switch.
2. Check the system power LED:
—
The system power LED (1) as shown in Figure 2-4, should blink to indicate that the
system is trying to power up. If the LED does not blink when the power button is
pressed, then either one of the system components is improperly installed, or there is
no main power applied to the system power supplies.
—
If the system power LED is amber or if the interconnect check lights are illuminated,
check the system interconnect status indicators (located on the top of the server). For
more information, refer to the “System I nterconnect LEDs” section of this chapter.
—
The system power LED will blink every one to two seconds between a power-down
and power-up condition or immediately after applying power to the system. This
action indicates that the Power/On Standby switch has been pressed and that the
system will power up momentarily.
3. Check the power supplies on the back of the server. The following settings indicate that
the power switch is on and the power supply is in a “power-on del ay” mode:
—
Top LED begins blinking (green)
—
Bottom LED is on (solid green)
If the power supply top LED does not begin blinking (the server will not power up), refer
to the “System Interconnect LEDs” section in this chapter.
When the top LED illuminates solid green, listen for the fans to start.
4. Check the hard drive and CD-ROM drive LEDs on the front of the server. The hard drive
and CD-ROM drive LEDs should blink. If the LEDs do not light, verify that the hard
drives are fully installed in the system and the array bypass is initialized.
5. Check the memory cartridge LEDs. The memory cartridge attention and power LEDs
will illuminate solid and then go out in sequence beginning with memory cartridge 1 and
ending with memory cartridge 5 (left to right cartridge 1, 2, 3, 4, 5).
6. Check the DIMM status LEDs. The DIMM status LEDs for each cartridge will illuminate
solid and then go out in sequence beginning with cartridge 1 and ending with cartridge 5
(left to right cartridge 1, 2, 3, 4, 5).
2-10
HP ProLiant DL760 Generation 2 Server Maintenance and Service Guide
Service Preparation
7. Watch for memory system initialization. Memory system initializes as the memory
cartridge power LEDs on all five memory cartridges begin blinking. After the memory
system is initialized, all memory cartridges power LEDs will illuminate solid.
8. The server begins the Power-On Self-Test (POST) sequence. The Integrated Management
Display (IMD) displays each step of the POST sequence.
Power-On Self-Test
As the POST process continues during server power-up:
1. Check for the IMD messages about the following:
a. Server name
b. LCD firmware
c. System initialization
d. PCI auto configuration
e. Video
f.
Processors
2. Check the IMD video initialization message. If there is a monitor connected, refer to the
HP initialization screen.
3. Check the IMD memory test message. The monitor displays the memory initialization,
memory detected, and redundant memory.
4. Check the IMD processors message. The monitor displays the number, speed, and cache
size of the processors.
5. Check for IMD messages about the following:
a. Diskette drive
b. Option ROM
c. SCSI devices
HP ProLiant DL760 Generation 2 Server Maintenance and Service Guide
2-11
Service Preparation
6. Check the monitor for ROM family and date. The system briefly displays the F1 prompt
to open the Memory Configuration Manager.
Figure 2-5: System F1 prompt
2-12
HP ProLiant DL760 Generation 2 Server Maintenance and Service Guide
Service Preparation
7. Press the F1 key to enter the Memory Configuration Manager. This ROM-based tool
(shown in Figure 2-6) is used to examine and upgrade the server memory configuration.
Figure 2-6: Memory Configuration Manager
8. Check the monitor for processor initialization information. Each processor is listed as it
initializes.
9. Check the monitor for controller information. The system briefly displays the F8 prompt
after each controller POSTs to open the Option ROM Configuration for Arrays (ORCA).
HP ProLiant DL760 Generation 2 Server Maintenance and Service Guide
2-13
Service Preparation
10. The system briefly displays the F9 and F10 prompts.
Figure 2-7: System prompts
11. Press the F9 key to start the ROM-Based Setup Utility (RBSU) or the F10 key to open
the System Maintenance Menu (SMM).
12. Be sure that each green PCI Hot Plug LED is illuminated for each PCI/PCI-X I/O
expansion slot (viewable from inside and outside the chassis). To check the inside LEDs,
open the I/O lid. If any LEDs are not on, power down the server and be sure that the
following statements are true:
2-14
—
Each slot has an expansion board or a slot cover.
—
Each slot release lever is closed.
—
The expansion boards are properly seated. If necessary, try removing and reseating
the boards.
—
The PCI Hot Plug interface board cables are properly connected to the I/O board.
—
The PCI Hot Plug interface boards are properly seated on the rear I/O panel of the
chassis.
HP ProLiant DL760 Generation 2 Server Maintenance and Service Guide
Service Preparation
Re-entering the Server Serial Number
After you replace the server I/O module or clear the NVRAM, you must re-enter the server
serial number through RBSU. To re-enter the serial number:
1. During the server startup sequence, press the F9 key to access RBSU.
2. Select the System Options menu.
3. Select Serial Number. The following warning is displayed:
WARNING! WARNING! WARNING! The serial number is loaded into the
system during the manufacturing process and should NOT be
modified. This option should ONLY be used by qualified service
personnel. This value should always match the serial number
sticker located on the chassis.
Press the Enter key to clear the warning.
4. Enter the serial number and press the Enter key.
5. Press the Escape key to close the menu.
6. Press the Escape key to exit RBSU.
7. Press the F10 key to confirm exiting RBSU. The server will automatically reboot.
HP ProLiant DL760 Generation 2 Server Maintenance and Service Guide
2-15
3
Chassis Components Removal and Replacement
Procedures
I/O Lid
WARNING: To reduce the risk of personal injury from hot surfaces, allow the internal
system components to cool before touching them.
CAUTION: When the server is powered on, the access panel must be installed for proper
system cooling. Otherwise, component stress and permanent equipment damage may result.
Open the I/O lid to access the PCI Hot Plug expansion slots, system fans, and configuration
switches.
To open the I/O lid:
1. Unlock the top latch security screw (1) and then pull the latch forward (2).
2. Slide the I/O lid toward the front of the server (3).
Figure 3-1: Opening the I/O lid
HP ProLiant DL760 Generation 2 Server Maintenance and Service Guide
3-1
Chassis Components Removal and Replacement Procedures
To remove the I/O lid:
1. Remove the processor and memory module. Refer to Chapter 5.
2. Slide the I/O lid out of the front of the server.
Figure 3-2: Removing the I/O lid
NOTE: HP recommends leaving the I/O lid locked during normal use.
Hot-Plug Power Supply
The ProLiant DL760 G2 server ships with two hot-plug power supplies. The system power in
the ProLiant DL760 G2 server does not have to be shut off to replace one of the power
supplies.
WARNING: To reduce the risk of electric shock or damage to the equipment:
3-2
•
Install the power supply before connecting the power cord to it.
•
Unplug the power cord before removing the power supply from the server.
•
Disconnect power from the server by unplugging all power cords from either the
electrical outlet or the server.
•
Keep the work area free of nonconductive materials, such as ordinary plastic
assembly aids and foam packing.
HP ProLiant DL760 Generation 2 Server Maintenance and Service Guide
Chassis Components Removal and Replacement Procedures
To estimate the power requirements for a specific server configuration, use the ProLiant
DL760 Generation 2 server Power Calculator located on the HP ActiveAnswers Online
Solutions website:
activeanswers.hp.com
1. Select System Configurator under Tools.
2. Click Select Product Family and select ProLiant Servers.
3. From the list, select ProLiant DL760 G2 Server.
The subsequent Web pages contain information and a link to the ProLiant DL760 Generation
2 server Power Calculator.
To replace a hot-plug power supply with the system power on:
1. Remove the power cord from the power supply to replace and release the power cord
clamp.
Figure 3-3: Removing the power cord
HP ProLiant DL760 Generation 2 Server Maintenance and Service Guide
3-3
Chassis Components Removal and Replacement Procedures
2. Squeeze upward on the release tab in the middle of the power supply handle (1).
3. Rotate the power supply handle down (2) and slide the power supply out of the chassis
(3) as shown in Figure 3-4.
IMPORTANT: Use only the power supply part number for the ProLiant DL760 G2 server. Power
supplies from other servers will not fit.
IMPORTANT: When you remove the power supply, a spring-loaded trap door closes to block the
opening. This door preserves the air path required to cool the internal components of the server.
Figure 3-4: Removing a hot-plug power supply
Reverse steps 1 through 3 to replace the hot-plug power supply.
3-4
HP ProLiant DL760 Generation 2 Server Maintenance and Service Guide
Chassis Components Removal and Replacement Procedures
System Midplane Assembly
The system midplane assembly is the board to which the power supply connects.
To remove the system midplane assembly:
1. Power down the server. Refer to “Pow ering Down the Server” in Chapter 2.
2. Open the I/O lid. Refer to “I/O Lid” in this chapter.
3. Remove and disconnect all modules and power supplies. Refer to the sections, “Media
Module” in C hapter 4, “Pro cessor and Memory Module” in Chapter 5, “Removing the
I/O Module” in Chapter 6, “and “Hot-Plug Power Su pply” in t his chapter.
4. Loosen the two thumbscrews securing the system midplane assembly to the chassis (1).
5. Remove the board from the chassis (2).
Figure 3-5: Removing the system midplane assembly
HP ProLiant DL760 Generation 2 Server Maintenance and Service Guide
3-5
Chassis Components Removal and Replacement Procedures
To install the system midplane assembly:
1. Angle the bottom edge of the midplane assembly into the chassis (1), making sure that
the edge is seated under the chassis midplane retainers.
2. Tilt the midplane assembly vertical (2) unsuring that the tab on the chassis engages the
slot on the assembly. This holds the midplane assembly in place.
3. Secure the midplane assembly with the two thumbscrews (3).
Figure 3-6: Installing the system midplane assembly
3-6
HP ProLiant DL760 Generation 2 Server Maintenance and Service Guide
Chassis Components Removal and Replacement Procedures
Cable Management Arm
To remove the cable management arm:
1. Label all cables running through the cable management arm.
2. Disconnect all cables from the rear of the I/O module.
3. Loosen the thumbscrew that secures the cable management arm and bracket to the
I/O module (1).
4. Move the bracket, with cable management arm attached, slightly up and then back from
the server (2) to access the cam levers on the I/O module.
Figure 3-7: Disconnecting the cable management bracket from the
I/O module
HP ProLiant DL760 Generation 2 Server Maintenance and Service Guide
3-7
Chassis Components Removal and Replacement Procedures
5. Swing the cable management arm to the left and out of the way.
Figure 3-8: Rotating the cable management arm to the left
NOTE: When the cable bundle on the back of the server exceeds 2 inches in diameter,
HP has designed a high-capacity cable management arm. This option is designed for
complex rack installations including a large number of cables. If the system requires a
high-capacity cable management arm, refer to the HP High-Capacity Cable Management
Arm option kit, part number 124711-B21.
3-8
HP ProLiant DL760 Generation 2 Server Maintenance and Service Guide
4
Media Module Removal and Replacement Procedures
Mass storage in the ProLiant DL760 G2 server is located in the media module. The media
module is capable of configuring a maximum of four 1-inch hot-plug Wide Ultra2 or
Wide Ultra3 SCSI hard drives. The media module supports two non-hot-plug media drive
bays:
•
One third-height drive bay occupied by a 1.44-MB diskette drive
•
One third-height drive bay occupied by a 24X Max (or higher) IDE CD-ROM drive
CAUTION: Removable media blank bezels and hot-plug drive cage blanking panels must be
installed over unused mass storage and removable media device bays to maintain proper
airflow.
HP ProLiant DL760 Generation 2 Server Maintenance and Service Guide
4-1
Media Module Removal and Replacement Procedures
Media Module
To remove the media module from the server:
1. Power down the server. Refer to “Pow ering Down the Server” in Chapter 2.
2. Push in the sides of the cam levers on the media module (1) and rotate the top of the
levers downward (2) and slide the module forward (3).
Figure 4-1: Removing the media module
WARNING: To reduce the risk of personal injury from hot surfaces, allow the internal
system components to cool before touching them.
4-2
HP ProLiant DL760 Generation 2 Server Maintenance and Service Guide
Media Module Removal and Replacement Procedures
3. Pull the media module out of the chassis until it contacts the module stop latch (1).
4. Press in the module stop latches, and then pull the module out of the chassis (2).
Figure 4-2: Media module opened to stops
Reverse steps 2 through 4 to reinstall the module.
IMPORTANT: Check the System Interconnect status LEDs to ensure that the module is properly
seated. Refer to “System Interconnect LED Indicators” in Chapter 8.
HP ProLiant DL760 Generation 2 Server Maintenance and Service Guide
4-3
Media Module Removal and Replacement Procedures
Media Module Bezel
To remove the media module bezel:
1. Power down the server. Refer to “Pow ering Down the Server” in Chapter 2.
2. Remove the media module from the server chassis. Refer to “Media Module” in this
chapter.
3. Remove the four screws securing the bezel to the module.
4. Lift up and pull the bezel away from the chassis.
Figure 4-3: Removing the bezel from the media module
Reverse steps 1 through 4 to replace the media module bezel.
4-4
HP ProLiant DL760 Generation 2 Server Maintenance and Service Guide
Media Module Removal and Replacement Procedures
Integrated Management Display
To remove the IMD:
1. Power down the server. Refer to “Pow ering Down the Server” in Chapter 2.
2. Remove the media module. Refer to “Media Modul e” in this chapter.
3. Remove the bezel. Refer to “Med ia Module Bezel” in this chapter.
4. Turn the media module over and disconnect the IMD cable from the media backplane
board. Refer to “Media Module Cable R outing Diagram” in this chapter.
Figure 4-4: Removing the IMD cable
HP ProLiant DL760 Generation 2 Server Maintenance and Service Guide
4-5
Media Module Removal and Replacement Procedures
5. Press inward on the two locking tabs on the rear of the display panel (1).
6. Pull the IMD from the front of the server (2).
Figure 4-5: Removing the IMD
Reverse steps 1 through 6 to replace the IMD.
4-6
HP ProLiant DL760 Generation 2 Server Maintenance and Service Guide
Media Module Removal and Replacement Procedures
Hot-Plug Hard Drives
Hard Drive Blank
To remove a hard drive blank from a hard drive bay:
1. Push the side of the retaining clip inward (1).
2. Pull the hard drive blank from the bay (2).
Figure 4-6: Removing a hard drive blank
Reverse steps 1 and 2 to replace a hard drive blank.
HP ProLiant DL760 Generation 2 Server Maintenance and Service Guide
4-7
Media Module Removal and Replacement Procedures
Hot-Plug Hard Drive Replacement Guidelines
You should be able to hot-plug a drive during normal activity. Be aware, however, that
replacing a hot-pluggable disk drive will affect system performance and fault tolerance.
NOTE: Depending upon the configuration, both a drive failure and the subsequent rebuild process will
cause storage subsystem performance degradation. For example, the replacement of a single drive on
an array with 50 logical drives will have less impact than if the array has only three logical drives.
Advanced Data Guarding
When a disk drive is hot-plugged, although the system is functionally operational, the disk
subsystem might no longer be fault tolerant. Fault tolerance will be lost until the removed
drive is subsequently replaced and the rebuild operation is completed. This procedure takes
several hours, even if the system is not busy while the rebuild is in progress. If another drive
in the array should incur an error during the period when fault tolerance is unavailable, a fatal
system error could result. If another drive fails during this period, the entire array contents
will be lost.
IMPORTANT: Perform disk drive replacement during low activity periods whenever possible. In
addition, a current valid backup of the logical drives in the array of the drive being replaced should be
available even if the drive replacement is being made during server downtime.
When replacing hot-plug hard drives in a fault-tolerant configuration, you must follow these
guidelines:
•
Never remove more than one drive at a time. When a drive is replaced, the controller
uses data from the other drives in the array to reconstruct data on the replacement drive.
If more than one drive is removed, a complete data set is not available to reconstruct data
on the replacement drive.
•
Never remove a working drive when another drive has failed. Drives failed by the
controller are indicated by the amber Drive Failure LED on the drive tray. Permanent
data loss will occur if a working drive is removed while a failed drive is being replaced.
•
Never remove a drive while another drive is being rebuilt. A drive’s Online LED
flashes green while it is being rebuilt. A replaced drive is restored from data stored on the
other drives.
•
Never turn a disk enclosure off while the initiator or controller is powered on or
active. Doing so can cause the initiator or controller to mark the drives as “f ailed.” This
action can result in permanent data loss.
•
If a drive is replaced while the system is off, rebuilding the replaced drive might be
necessary. Follow the instructions on the screen or the instructions outlined in the system
reference guide.
CAUTION: During the boot prompt, pressing the F2 key will cause permanent data loss to
the entire logical drive. Press the F2 key only if all of the drives have been replaced or if
complete data loss is required.
4-8
HP ProLiant DL760 Generation 2 Server Maintenance and Service Guide
Media Module Removal and Replacement Procedures
NOTE: When a drive configured for fault tolerance is replaced, the replacement drive automatically
begins restoring when it is installed. When restoring a drive, the Online LED blinks green. The LED
continues to flash until the drive is completely restored.
Removing a Hot-Plug Hard Drive
To remove a hot-plug hard drive:
1. Push the tab to unlock the drive (1).
2. Rotate the hot-plug drive ejector lever outward (2).
3. Pull the hot-plug drive from the drive bay (3).
Figure 4-7: Removing a hot-plug hard drive
Reverse steps 1 through 3 to replace a hot-plug hard drive.
HP ProLiant DL760 Generation 2 Server Maintenance and Service Guide
4-9
Media Module Removal and Replacement Procedures
Integrated Diskette Drive and CD-ROM
The media module has a one third-height drive bay occupied by a 1.44-MB diskette drive and
24X Max (or higher) IDE CD-ROM drive. To remove the integrated diskette drive and
CD-ROM drive:
1. Power down the server. Refer to “Pow ering Down the Server” in Chapter 2.
2. Remove the media module. Refer to “Media Modul e” in this chapter.
3. Remove the media module bezel. Refer to “Media Module Bezel” in this chapter.
4. Turn the media module over and disconnect the CD-ROM drive signal cable (1), the
diskette drive control and data cable (2), and diskette drive power cable (3) from the back
of the drives.
Figure 4-8: Disconnecting the CD-ROM/diskette drive cables
4-10
HP ProLiant DL760 Generation 2 Server Maintenance and Service Guide
Media Module Removal and Replacement Procedures
5. Remove the tray screw located on the front of the media module.
6. Slide out the diskette drive/CD-ROM tray.
Figure 4-9: Removing the integrated diskette drive and CD-ROM
drive
Reverse steps 1 through 4 to replace the integrated diskette drive and CD-ROM drive.
HP ProLiant DL760 Generation 2 Server Maintenance and Service Guide
4-11
Media Module Removal and Replacement Procedures
Media Module Cable Routing Diagram
Figure 4-10: Media module cable routing
Item
1
CD-ROM drive signal cable
2
Diskette drive control and data cable
3
Diskette drive power cable
4 IMD
5
4-12
Description
cable
Power switch/LED/ambient air temperature sensor
cable
HP ProLiant DL760 Generation 2 Server Maintenance and Service Guide
Media Module Removal and Replacement Procedures
Power On/Standby Switch Assembly
To remove the Power On/Standby switch assembly:
1. Power down the server. Refer to “Power ing Down the Server ” in Chapter 2.
2. Remove the media module. Refer to “Media Modul e” in this chapter.
3. Remove the media module bezel. Refer to “Media Module Bezel” in this chapter.
4. Turn the media module upside down.
5. Unplug the IMD cable from the media backplane board. Refer to “Media Module Cable
Routing Diagram” in this chapter.
6. Remove the IMD. Refer to “Integrated Management Display” in this chapter.
7. Disconnect the Power On/Standby switch connector from the media backplane board (1).
Refer to “Media Module C able Routing Diagram” in this chapter.
8. Loosen the thumbscrew that secures the power switch plate to the media backplane
board (2).
Figure 4-11: Unplugging the power switch cable and loosening the
thumbscrew
HP ProLiant DL760 Generation 2 Server Maintenance and Service Guide
4-13
Media Module Removal and Replacement Procedures
9. Remove the power switch plate from the media module.
Figure 4-12: Removing the power switch plate from the media
module
NOTE: The switch plate has three components visible from the front of the assembled server. Because
the media module is inverted for this procedure, the components are shown reversed.
4-14
HP ProLiant DL760 Generation 2 Server Maintenance and Service Guide
Media Module Removal and Replacement Procedures
10. Referring to Figure 4-13, rotate the Thermistor until you can easily access the flanges on
the side of the grommet (1).
11. Squeeze the grommet around the Thermistor and push it back through the plate (2).
12. Push the Power On/Standby switch LED (3) back through the plate.
Figure 4-13: Removing the Thermistor and Power On/Standby
switch LED
13. Place the plate on its left side and push the Power On/Standby switch down through the
rectangular cutout and clear of the plate.
Figure 4-14: Removing the Power On/Standby switch
HP ProLiant DL760 Generation 2 Server Maintenance and Service Guide
4-15
Media Module Removal and Replacement Procedures
To reinstall the Power On/Standby switch assembly:
1. Place the power switch plate on its left side and push the Power On/Standby switch up
through the rectangular cutout to its original position.
2. Line up the keyhole-shaped cutouts on the power switch plate with the spools in the right
wall of the media module.
3. Slide the plate back into the media module until the hole in the back of the power switch
plate lines up with the thumbscrew.
4. Tighten the thumbscrew.
5. Push the Power On/Standby switch LED through the power switch plate to its original
position.
6. Push the Thermistor through the power switch plate.
7. Rotate the Thermistor to its original position.
8. Reverse steps 1 through 7 of the removal procedure.
4-16
HP ProLiant DL760 Generation 2 Server Maintenance and Service Guide
5
Processor and Memory Module Removal and
Replacement Procedures
Shipping Screws
To prevent damage to the processor and memory module during shipping, the server ships
with a shipping screw installed on each side of the chassis. These screws must be removed
and the processor and memory module properly seated and secured in the chassis before
powering up the server.
CAUTION: To prevent damage to the processor and memory module during shipping, both
shipping screws must be installed.
1. Remove the left and right shipping screws. The shipping screws may look like (1) or (2)
in the following figure.
Figure 5-1: Shipping screws
2. Rotate the module release levers downward.
3. Slide the module into the chassis until the levers begin to rotate.
4. Then push the levers upward until they snap into place.
HP ProLiant DL760 Generation 2 Server Maintenance and Service Guide
5-1
Processor and Memory Module Removal and Replacement Procedures
Security Screw
The server has a top latch security screw as shown in Figure 5-2. The screw prevents access
to the processor and memory module and I/O module. Tighten the security screw to increase
the security of the server in a rack.
1. Open the I/O lid. Refer to “I/O Lid” in Chapter 3.
2. Tighten the security screw.
Figure 5-2: Tightening the security screw
5-2
HP ProLiant DL760 Generation 2 Server Maintenance and Service Guide
Processor and Memory Module Removal and Replacement Procedures
Processor and Memory Module
WARNING: The processor and memory module weighs more than 16 kg (35 lbs). HP
recommends either removing ALL of the memory cartridges before handling the
module or having two people handling the module together.
CAUTION: Do not attempt to remove the processor and memory module while power is
applied to the system. The module is not hot-pluggable. Immediate system shutdown and
data loss will occur.
To remove the processor and memory module:
1. Power down the server. Refer to “Pow ering Down the Server” in Chapter 2.
2. Push in the sides of the cam levers on the processor and memory module (1) and rotate
the top of the levers downward (2), as shown in Figure 5-3.
3. Pull the processor and memory module out of the chassis until the module encounters the
module stop latches (3).
Figure 5-3: Opening the processor and memory module
HP ProLiant DL760 Generation 2 Server Maintenance and Service Guide
5-3
Processor and Memory Module Removal and Replacement Procedures
4. Press the module stop latches in (4) and pull the module out of the chassis (5), as shown
in Figure 5-4.
Figure 5-4: Removing the processor and memory module
WARNING: To reduce the risk of personal injury from hot surfaces, allow the internal
system components to cool before touching them.
NOTE: The I/O lid labels, processor board cover, and memory cartridge covers also provide
instructions about installing processors and DIMMs.
To reassemble the server, slide the module in until the cam levers begin to rotate. Then push
the cam levers shut until they snap into place.
5-4
HP ProLiant DL760 Generation 2 Server Maintenance and Service Guide
Processor and Memory Module Removal and Replacement Procedures
Processor Boards and Processors
Identifying
The ProLiant DL760 G2 server is capable of supporting up to eight Intel® Xeon processors
MP and is shipped with four or eight processors already installed. The ProLiant DL760 G2
server supports two processor boards located in the left side of the processor and memory
module.
Figure 5-5: Processor boards
Table 5-1: Processor Boards
Item
Description
1
Processor board in processor board slot 1
2
Processor board in processor board slot 2
The ProLiant DL760 G2 server supports four or eight Intel Xeon processors MP.
•
All processors must be the same speed, cache size, and stepping.
•
Processor 1 must always be installed to properly terminate the processor bus.
NOTE: Stepping refers to the processor revision.
NOTE: If the server has one processor board (four processors), processor board slot 2 is populated
with a processor board air baffle. This baffle must be removed if you are upgrading to eight processors.
Refer to the HP ProLiant DL760 Generation 2 Server User Guide for upgrade instructions.
HP ProLiant DL760 Generation 2 Server Maintenance and Service Guide
5-5
Processor and Memory Module Removal and Replacement Procedures
Figure 5-6: Processors
Table 5-2: Processors
Item
Description
1
Intel Xeon processor MP in socket 1
2
Intel Xeon processor MP in socket 2
3
Intel Xeon processor MP in socket 3
4
Intel Xeon processor MP in socket 4
Removing Processor Boards and Processors
WARNING: The processor and memory module weighs more than 16 kg (35 lbs). HP
recommends either removing ALL of the memory cartridges before handling the
module or having two people handling the module together.
1. Power down the server. Refer to “Pow ering Down the Server” in Chapter 2.
WARNING: To reduce the risk of personal injury from hot surfaces, allow the internal
system components to cool before touching them.
2. Remove the processor and memory module. Refer to “Processor an d Memory Module” in
this chapter.
5-6
HP ProLiant DL760 Generation 2 Server Maintenance and Service Guide
Processor and Memory Module Removal and Replacement Procedures
3. Push the lever latch forward to release the processor board lever (1).
4. Lift the processor board lever up (2), and lift the processor board out of the module (3).
Figure 5-7: Removing the processor board
HP ProLiant DL760 Generation 2 Server Maintenance and Service Guide
5-7
Processor and Memory Module Removal and Replacement Procedures
5. Push in the four tabs on the sides of the processor board cover (1) and then lift the cover
off the processor board (2).
Figure 5-8: Removing the processor board cover
6. Turn over the processor board to access the processor clips.
7. Lift the processor clip to unlock the clip (1) and then slide it forward and up to
remove it from the processor board (2).
Figure 5-9: Removing the processor clip
5-8
HP ProLiant DL760 Generation 2 Server Maintenance and Service Guide
Processor and Memory Module Removal and Replacement Procedures
8. Open the processor release lever (1) and remove the processor (2).
NOTE: The processor locking lever now swings from 15 to 135 degrees. Previous generations of
processor sockets required lever movement of only 0 to 90 degrees.
Figure 5-10: Removing the processor
Reverse steps 1through 8 to install a processor and the processor board.
CAUTION: Fully open the processor locking lever before installing a processor. Open
the processor locking lever completely (until it stops) and ensure the alignment pins are in
place. Though the processor may appear to be seated properly when the lever is partially
open and the processor is placed in the socket, the lever must be fully opened to 150 degrees
for the processor to be inserted properly in the socket. If the processor is improperly seated,
damage can occur to the processor and/or system board.
NOTE: Processor board 2 need not be installed for the server to run.
9. Turn on the server. If the system does not power up, verify that the System Interconnect
LED indicators are normal. Refer to “System Interconnect LED Indicators” in Chapter 8.
10. Verify that the processor was installed correctly. Check the processor frequency, cache
size, and socket location by reviewing the POST messages on the system console or
processor information listed under the System Information Menu of the IMD. For more
information, refer to the HP ProLiant DL760 Generation 2 Server User Guide.
HP ProLiant DL760 Generation 2 Server Maintenance and Service Guide
5-9
Processor and Memory Module Removal and Replacement Procedures
Memory Cartridge
Identifying
The following figure shows the various components of the memory cartridges.
Figure 5-11: Memory cartridge components
Item
5-10
Component
1 Cartridg
e lock
2 Cartridg
e latch
3 Cartridg
e lever
4
Cartridge power LED
5
Cartridge attention LED
HP ProLiant DL760 Generation 2 Server Maintenance and Service Guide
Processor and Memory Module Removal and Replacement Procedures
Removing the Memory Cartridge
To remove a memory cartridge from the ProLiant DL760 G2 server, complete the following
steps:
1. Unlock the memory cartridge by rotating the cartridge lock counterclockwise (1).
IMPORTANT: If the memory cartridge is not required for continued operation (with at least four other
memory cartridges installed, online, and error free), the memory cartridge power LED will turn off.
IMPORTANT: If the cartridge is required for continued operation, an audible caution alarm will sound
and the memory cartridge attention LED indicator will blink until the cartridge is locked again.
2. Verify that the cartridge power LED is off.
CAUTION: Do not remove a memory cartridge if the cartridge power LED indicator is blinking
or is solid green. The system will halt.
3. Push the lever latch upward to release the memory cartridge lever (2).
4. Pull the memory cartridge lever down (3).
5. Slide the cartridge out of the processor and memory module (4).
CAUTION: Do not leave a memory cartridge out of its slot for more than two minutes to
ensure proper airflow and cooling.
Figure 5-12: Removing the memory cartridge
CAUTION: Inspect the memory cartridge for bent pins before reinstalling it. Do not “drop” the
cartridge into the cage.
HP ProLiant DL760 Generation 2 Server Maintenance and Service Guide
5-11
Processor and Memory Module Removal and Replacement Procedures
Opening the Memory Cartridge
To gain access to the DIMMs, open the memory cartridge cover:
1. Squeeze the lock tabs together at the end of the cartridge opposite the lock lever (1).
2. Tilt the cartridge cover up until it latches in the up position to access the DIMMs (2).
Figure 5-13: Opening the memory cartridge
DIMM Overview
The ProLiant DL760 G2 server has four memory bank pairs, each consisting of 10 DIMMs
installed across the five memory cartridges. The server supports up to 40 GB of Hot Plug
RAID memory.
5-12
HP ProLiant DL760 Generation 2 Server Maintenance and Service Guide
Processor and Memory Module Removal and Replacement Procedures
Identifying
Figure 5-14 and Table 5-3 detail the DIMM socket locations on the memory cartridge.
Figure 5-14: DIMM socket location
Table 5-3: DIMM Socket Location
Item
Description
Bank
1
DIMM socket 1
DIMM bank 1
2
DIMM socket 2
DIMM bank 2
3
DIMM socket 3
DIMM bank 3
4
DIMM socket 4
DIMM bank 4
5
DIMM socket 5
DIMM bank 5
6
DIMM socket 6
DIMM bank 6
7
DIMM socket 7
DIMM bank 7
8
DIMM socket 8
DIMM bank 8
Bank pair for
interleaving
Bank pair for
interleaving
Bank pair for
interleaving
Bank pair for
interleaving
HP ProLiant DL760 Generation 2 Server Maintenance and Service Guide
5-13
Processor and Memory Module Removal and Replacement Procedures
SDRAM Memory Bus Configuration
Figure 5-15 details the SDRAM memory bus configuration. Bank definition ensures that
memory interleaving is always available.
Figure 5-15: SDRAM memory bus configuration
Item
5-14
Description
1
SDRAM memory bus 1
2
Dual memory controller
3
SDRAM memory bus 0
HP ProLiant DL760 Generation 2 Server Maintenance and Service Guide
Processor and Memory Module Removal and Replacement Procedures
Installing DIMMs into the Cartridge
CAUTION: When handling a memory module, be careful not to touch any of the contacts.
Doing so may damage the module.
NOTE: Be sure that memory modules are installed in the proper orientation. The modules are keyed to
ensure that they are installed correctly in the memory socket. Refer to the system documentation for
details.
NOTE: Be sure that the DIMMs are installed in bank pairs and in proper bank pair order.
(1+2, then 3+4, then 5+6, and then 7+8).
To install DIMMs into the memory cartridge:
1. Slide each DIMM into the appropriate socket on the memory bus (1).
2. Secure the DIMM by lifting the locking levers into place (2).
Figure 5-16: Installing DIMMs into the memory cartridge
HP ProLiant DL760 Generation 2 Server Maintenance and Service Guide
5-15
Processor and Memory Module Removal and Replacement Procedures
3. Rotate all of the DIMM socket levers inward prior to closing the cartridge cover.
4. Close the memory cartridge cover.
5. Insert the memory cartridge in the server and secure it in place by lifting the cartridge
ejector lever.
CAUTION: Inspect the memory cartridge for bent pins before reinstalling it. Do not “drop” the
cartridge into the cage.
6. Lock the memory cartridge in place by rotating the cartridge lock switch clockwise.
7. Verify the cartridge is online.
NOTE: Refer to the HP ProLiant DL760 Generation 2 Server User Guide, for more information on
installing DIMMs
5-16
HP ProLiant DL760 Generation 2 Server Maintenance and Service Guide
Memory Riser Board
Processor and Memory Module Removal and Replacement Procedures
To remove the memory riser board:
1. Remove the processor and memory module. Refer to “Removing t he Processor and
Memory Module” in this chapter.
2. Remove all of the memory cartridges. Refer to “Removing the Memory Cartridge” in this
chapter.
3. Push down the lever latch to release the memory riser board (1).
4. Pull up the memory riser board lever (2).
5. Slide the memory riser board up (3) and out (4) from the processor and memory module.
Figure 5-17: Removing the memory riser board
To install the memory riser board reverse steps 1 through 5.
HP ProLiant DL760 Generation 2 Server Maintenance and Service Guide
6
I/O Module Removal and Replacement Procedures
I/O Module
The I/O module is located at the rear of the server. Remove it to replace or service
non-hot-plug components or to access other components in the I/O module.
IMPORTANT: You must re-enter the server serial number through RBSU after you replace the I/O
module. Refer to the “Re-entering the Server Serial Number” section in Chapter 2.
Removing the Cable Management Arm:
To remove the cable management arm:
1. Label all cables running through the cable management arm.
2. Disconnect all cables from the rear of the I/O module.
3. Loosen thumbscrew that secures the cable management arm and bracket to the I/O
module (1).
4. Move the bracket, with cable management arm attached, slightly up and then back from
the server (2) so that it is possible to access the cam levers on the I/O module.
HP ProLiant DL760 Generation 2 Server Maintenance and Service Guide
6-1
I/O Module Removal and Replacement Procedures
Figure 6-1: Disconnecting the cable management bracket from the
I/O module
6-2
HP ProLiant DL760 Generation 2 Server Maintenance and Service Guide
I/O Module Removal and Replacement Procedures
5. Swing the cable management arm to the left and out of the way.
Figure 6-2: Rotating the cable management arm to the left
HP ProLiant DL760 Generation 2 Server Maintenance and Service Guide
6-3
I/O Module Removal and Replacement Procedures
Removing the I/O Module
To remove the I/O module::
1. Power down the server. Refer to “Powering Do wn the Server” in Chapter 2. If the server
is rack mounted, the cable management arm must be removed. Refer to “Removing the
Cable Management Arm” in this chapter.
2. Label and remove the cables from the back of the I/O module.
3. Open the I/O lid. Refer to “I/O Lid” in Chapter 3.
4. Loosen the security screw, if necessary. Refer to “Se curity Screw” in Chapter 5.
5. Push in on the sides of the stop latches on the I/O module (1) and rotate the cam levers
downward (2).
6. Pull the I/O module out of the chassis until it catches on the module stop latch (3).
Figure 6-3: Releasing the I/O module
6-4
HP ProLiant DL760 Generation 2 Server Maintenance and Service Guide
I/O Module Removal and Replacement Procedures
7. To completely remove the I/O module from the chassis, press in on the module stop
latches (1), and pull the module out of the chassis (2).
Figure 6-4: Removing the I/O module
Reverse steps 1 through 7 to reinstall the I/O module in the server.
HP ProLiant DL760 Generation 2 Server Maintenance and Service Guide
6-5
I/O Module Removal and Replacement Procedures
I/O Expansion Boards
Locating the I/O Expansion Slots
The I/O expansion slots are located in the I/O module and are accessed by opening the I/O lid
as described in “I/O Lid” in Chapter 3. The I/O expansion slots are distributed among one
primary PCI bus and five separate peer PCI-X buses.
WARNING: To reduce the risk of personal injury from hot surfaces, allow the internal
system components to cool before touching them.
Figure 6-5: Top view of I/O slots
Table 6-1: I/O Expansion Slots
Slot
Description
Slots 1 and 2
Bus 19—supports PCI-X expansion boards at 100 MHz and 66 MHz or PCI
expansion boards at 66 MHz and 33 MHz; it is keyed for 3.3 V signaling.
Slots 3 and 4
Bus 15—supports PCI-X expansion boards at 100 MHz and 66 MHz or PCI
expansion boards at 66 MHz and 33 MHz; it is keyed for 3.3 V signaling.
Slots 5 and 6
Bus 11—supports PCI-X expansion boards at 100 MHz and 66 MHz or PCI
expansion boards at 66 MHz and 33 MHz; it is keyed for 3.3 V signaling.
Slots 7 and 8
Bus 7—supports PCI-X expansion boards at 100 MHz and 66 MHz or PCI
expansion boards at 66 MHz and 33 MHz; it is keyed for 3.3 V signaling.
Slot 9
Bus 0—supports PCI expansion boards at 33 MHz; it is keyed for 5 V signaling.
Slots 10 and 11
Bus 3—supports PCI-X expansion boards at 100 MHz and 66 MHz or PCI
expansion boards at 66 MHz and 33 MHz; it is keyed for 3.3 V signaling.
Note: The operating system detects PCI devices in the following slot order:
9-10-11-7-8-5-6-3-4-1-2.
6-6
HP ProLiant DL760 Generation 2 Server Maintenance and Service Guide
I/O Module Removal and Replacement Procedures
IMPORTANT: If any of the I/O expansion slots require inspection, remove the 11-slot hot-plug basket.
Refer to “11-slot Hot-Plug Basket” in this chapter for removal instructions.
The I/O expansion slots are distributed among one primary PCI bus and five separate PCI-X
peer buses.
NOTE: Each PCI-X bus will automatically configure to run in the most advanced mode (PCI-X or PCI)
and the highest frequency supported by all expansion boards installed in the slots on the bus.
NOTE: The ProLiant DL760 G2 server ships with a Network Interface Controller (NIC) preinstalled
in slot 11.
I/O Expansion Slot Cover
To remove the I/O expansion slot cover:
1. Press down on the top of the expansion slot release lever (1) and push the lever up (2).
2. Remove the expansion slot cover (3).
Figure 6-6: Removing the I/O expansion slot cover
Reverse steps 1 and 2 to replace the I/O expansion slot cover.
HP ProLiant DL760 Generation 2 Server Maintenance and Service Guide
6-7
I/O Module Removal and Replacement Procedures
Non-Hot Plug Expansion Boards
CAUTION: Do not open the slot release lever unless the green PCI Hot Plug LED indicator is
off. System power down and subsequent data loss could occur.
To remove a non-hot plug expansion board:
1. Power down the server. Refer to “Pow ering Down the Server” in Chapter 2.
2. Slide the server out of the rack.
3. Open the I/O lid. Refer to “I/O Lid” in Chapter 3.
4. Remove any expansion board I/O cables as appropriate.
5. Press down on the top of the expansion slot release lever (1) and push the lever up (2).
6. Unseat the expansion board by pulling up on the plastic tab (3) and lift the board out of
the server (4). For full-length boards, take care to not force the board out of the slot
keeper. Refer to Figure 6-9.
IMPORTANT: If you are only removing the expansion board, install an expansion slot cover in the slot.
Figure 6-7: Removing a Non-Hot Plug Expansion board
6-8
HP ProLiant DL760 Generation 2 Server Maintenance and Service Guide
I/O Module Removal and Replacement Procedures
To replace a non-hot plug expansion board:
1. Insert the PCI/PCI-X expansion board into the appropriate expansion slot (1), pushing
firmly until the board is securely seated.
2. Close the expansion slot release lever from the rear of the unit to secure the board (2).
Make sure that the lever latches into the closed position.
Figure 6-8: Inserting the PCI/PCI-X expansion board
3. Connect the expansion board I/O cable as appropriate.
HP has designed a self-latching slot keeper feature to accommodate full-length expansion
boards.
Be sure that the V-shaped slot keeper tabs on the plastic expansion board guide are positioned
over the forward end of the expansion board. Using the slot keepers is especially important
when expansion boards are added or when the server is moved.
HP ProLiant DL760 Generation 2 Server Maintenance and Service Guide
6-9
I/O Module Removal and Replacement Procedures
Figure 6-9: Full-length self-latching slot keeper feature
4. Close the I/O lid and slide the server into the rack.
5. Power up the server. Refer to “Pow ering Up the Server” in Chapter 2.
6. If necessary, run the ROM-Based Setup Utility, as described in the HP ProLiant DL760
Generation 2 Server User Guide.
NOTE: Refer to the HP QuickSpecs for the ProLiant DL760 G2 servers at www.hp.com for a list of
supported I/O expansion boards.
NOTE: Each PCI-X bus will automatically configure to run in the most advanced mode (PCI-X or PCI)
and the highest frequency supported by all expansion boards installed in the slots on the bus.
PCI Hot Plug I/O Expansion Boards
The ProLiant DL760 G2 server supports PCI Hot Plug. PCI Hot Plug and the operating
system of the server work together to allow the following hot-plug actions:
6-10
•
Hot-replace—Allows you to replace a failed expansion board with an identical
expansion board without powering down the server.
•
Hot-add—Allows you to install new PCI/PCI-X expansion boards in previously empty
slots without powering down the server under some operating systems.
•
Hot-upgrade—Allows you to replace an expansion board with a different expansion
board without powering down the server.
HP ProLiant DL760 Generation 2 Server Maintenance and Service Guide
I/O Module Removal and Replacement Procedures
PCI Hot Plug is backward-compatible, although system components fit into one of two
categories: hot-plug aware or non-hot-plug aware. The following three components are
required in the server for complete PCI Hot Plug capability:
•
PCI Hot Plug system hardware (available in this server)
•
Operating system with PCI Hot Plug support (support levels vary)
•
PCI Hot Plug device drivers (available from operating system vendors, the HP
SmartStart CD, HP website, and some individual hardware vendors)
WARNING: To reduce the risk of personal injury from hazardous energy or damage to
the equipment when working on energized servers:
•
Remove all watches, rings, and any other loose-fitting jewelry.
•
Avoid the use of conductive tools that could bridge live parts.
IMPORTANT: If any of the three required components are not hot-plug aware, the system is fully
functional but is not PCI Hot Plug-capable.
HP ProLiant DL760 Generation 2 Server Maintenance and Service Guide
6-11
I/O Module Removal and Replacement Procedures
PCI Hot Plug LED Indicators
The PCI Hot Plug amber (1) and green (2) LEDs (shown in the following figure for one slot)
provide a visual reference of the status of each slot. The LEDs are viewed from the rear of the
server as shown in Figure 6-10 or by opening the I/O lid as shown in Figure 6-11.
Figure 6-10: PCI Hot Plug LEDs from rear of the server
A description and slot status for the PCI Hot Plug LEDs and button as shown in Figure 6-11
are provided in Table 6-2.
Figure 6-11: PCI Hot Plug LEDs in the I/O module
6-12
HP ProLiant DL760 Generation 2 Server Maintenance and Service Guide
I/O Module Removal and Replacement Procedures
Table 6-2: PCI Hot Plug LEDs and Button
Amber LED
1
OK to
Open
Slot Condition and Status
Off
Slot does not require attention.
On
Slot requires attention. There might be a problem with the
slot, the PCI board, or the driver. Check the green LED
before opening the slot.
Refer to the IML and/or the PCI Hot Plug software
application for a description of the problem indicated.
Green LED
2
Slot Condition and Status
On
No
Power is applied to the slot.
Blinking
No
Power to the slot is being turned off or on. This process
might take several minutes. Do not open the slot release
lever until the green LED is completely off.
Off
Yes
You can replace or remove the board in this slot only.
PCI Hot Plug
Button
3
OK to
Open
Each PCI Hot Plug button is used to activate or deactivate its associated
PCI Hot Plug slot. Activating or deactivating a PCI Hot Plug slot can also
be accomplished through the operating system PCI Hot Plug software
application. For more information about the PCI Hot Plug software
application, refer to the “PCI Hot Plug Operating System Support”
section.
PCI Hot Plug Operating System Support
Software support is an integral part of PCI Hot Plug. HP, in partnership with Microsoft,
Novell, and SCO/Caldera UNIX, has developed PCI Hot Plug software support for each
operating system.
You can use either the PCI Hot Plug button on the server or the operating systems’ PCI Hot
Plug software to control the PCI Hot Plug slots. You can use the software to indicate that you
want to replace an expansion board in the hot-plug slot or configure a board that you have
already added to the system. The PCI Hot Plug software also allows you to enable or disable
specific system slots.
For more information, refer to the HP ProLiant DL760 Generation 2 Server User Guide.
HP ProLiant DL760 Generation 2 Server Maintenance and Service Guide
6-13
I/O Module Removal and Replacement Procedures
Adding PCI Hot Plug Expansion Boards
The PCI/PCI-X slots of the ProLiant DL760 G2 I/O board are hot-plug-capable and support a
variety of industry-standard expansion boards.
NOTE: For a list of supported I/O expansion boards, refer to the HP QuickSpecs for the HP ProLiant
DL760 G2 servers:
www.hp.com
Refer to Figure 6-10, Figure 6-11, and Table 6-2 for definitions of the PCI Hot Plug LEDs.
To add a PCI/PCI-X expansion board into PCI Hot Plug slots 1 through 11:
1. Open the I/O lid.
2. If the PCI Hot Plug green LED is on, power down the slot by pressing the PCI Hot Plug
button corresponding to the slot or by using a PCI Hot Plug software application. Wait
until the green LED is off.
CAUTION: To avoid system power-down and subsequent data loss, do not open the slot
release lever unless the green PCI Hot Plug LED of the slot is off.
NOTE: The PCI Hot Plug Button allows you to press the button again within five seconds of the first
press to cancel the action.
3. Press on the top of the appropriate expansion slot release lever (1) and open the lever
toward the rear of the expansion slot (2).
4. Remove the expansion slot cover (3).
Figure 6-12: Preparing the hot-plug expansion slot for installation
6-14
HP ProLiant DL760 Generation 2 Server Maintenance and Service Guide
I/O Module Removal and Replacement Procedures
5. Insert the PCI/PCI-X expansion board into the appropriate expansion slot, pushing firmly
until the board is securely seated (1).
6. Close the expansion slot release lever from the rear of the unit to secure the board (2). Be
sure that the lever latches into the closed position.
Figure 6-13: Inserting the PCI/PCI-X expansion board
HP has designed a self-latching slot-keeper feature to accommodate full-length expansion
boards.
Be sure that the V-shaped slot-keeper tabs on the plastic expansion board guide are
positioned over the forward end of the expansion board. Using the slot-keepers is especially
important when expansion boards are added or when the server is moved.
Figure 6-14: Full-length self-latching slot-keeper feature
HP ProLiant DL760 Generation 2 Server Maintenance and Service Guide
6-15
I/O Module Removal and Replacement Procedures
7. Properly connect the expansion board I/O cable.
8. Activate power to the slot through the PCI Hot Plug software application or by pressing
the PCI Hot Plug Button above the corresponding I/O expansion slot.
Figure 6-15: Activating the PCI Hot Plug Button
9. Check the amber and green LEDs for slot status. The green LED will flash during the
power-up transition and will remain lit when the power-up process is complete. For
details about PCI Hot Plug LEDs, refer to “PCI Hot Plug LED Indicators” in this chapter.
10. Close the I/O lid.
Removing or Replacing a PCI Hot Plug Expansion Board
To remove or replace a PCI Hot Plug expansion board:
1. Open the I/O lid of the server.
2. Use the PCI Hot Plug Button or software application to notify the system to turn off
power to the slot. Pushing the PCI Hot Plug button notifies the system to shut down
operation of this expansion board; lifting the lever actually powers down the expansion
slot. The green LED will flash during the power down transition and will turn off when
the power down process is complete. For more information about PCI Hot Plug LEDs,
refer to “PCI Hot Plug LED Indicators” earlier in this chapter.
CAUTION: To avoid system power-down and subsequent data loss, do not open the slot
release lever unless the green PCI Hot Plug LED of the slot is off.
3. Disconnect the cables to the PCI/PCI-X board when the green LED of the slot is off.
6-16
HP ProLiant DL760 Generation 2 Server Maintenance and Service Guide
I/O Module Removal and Replacement Procedures
4. Press on the top of the appropriate expansion slot release lever (1) and open the lever
toward the rear of the expansion slot (2).
5. Unseat the expansion board by pulling up on the plastic tab (3) and lift the board out of
the server (4).
Figure 6-16: Removing an I/O expansion board
6. If you are only removing the board, install an expansion slot cover. Close the slot release
lever. Be sure that the lever latches into the closed position.
7. If you are replacing the board, install the new I/O expansion board.
8. Close the slot release lever. Be sure that the lever latches into the closed position.
9. Reconnect any I/O cables to the new board.
10. Return power to the slot through the PCI Hot Plug button or software application. The
green LED will flash during the power-up transition and will turn on when the power-up
is complete. For more information about PCI Hot Plug LEDs, refer to “PCI Hot Plug
LED Indicators” earli er in this chapter.
11. Close the I/O lid.
HP ProLiant DL760 Generation 2 Server Maintenance and Service Guide
6-17
I/O Module Removal and Replacement Procedures
Hot-Plug Fans
The ProLiant DL760 G2 server ships with two hot-plug fans. Fan 1 is closest to the rear of
the server. Each fan has LEDs that indicate the status of the fan:
•
Green LED (1)—Fan is installed and working properly.
•
Amber LED (2)—The fan needs attention or is not ins talled.
Figure 6-17: Hot-plug fan LEDs
CAUTION: Never remove both hot-plug fans while the server is powered up. Overheating
and damage to the hardware could result. If the appropriate software drivers are installed, the
operating system software will initiate a power shutdown.
NOTE: The hot-plug fan LEDs are not part of the fan housing. Figure 6-17 shows the LEDs as if the
fan were installed in the server.
The ProLiant DL760 G2 server comes equipped with fan attention LEDs located on the front
of the server as shown in Figure 6-18.
6-18
HP ProLiant DL760 Generation 2 Server Maintenance and Service Guide
I/O Module Removal and Replacement Procedures
Figure 6-18: Hot-Plug Fan Attention LEDs
Item
Component
1
Hot-plug fan 1 attention LED
2
Hot-plug fan 2 attention LED
To replace the hot-plug fan:
1. Open the I/O lid.
2. Squeeze the locking latch with your fingers (1) and lift the failed hot-plug fan out of the
I/O module (2).
Figure 6-19: Removing hot-plug fan 2
HP ProLiant DL760 Generation 2 Server Maintenance and Service Guide
6-19
I/O Module Removal and Replacement Procedures
3. Lower the new hot-plug fan into the I/O module until it rests on the I/O board connector.
Push the fan into the connector. The fan locking latch will lock into place.
4. Be sure that the LED is green and close the I/O lid.
Fan Cage Assembly
The fan cage assembly has an integrated center support bracket.
To remove the fan cage assembly:
1. Power down the server. Refer to “Pow ering Down the Server” in Chapter 2.
2. Remove the I/O module. Refer to “Removing the I/O Module” in t his chapter.
3. Remove the hot-plug fans. Refer to “Hot -Plug Fans” in this chapter.
4. Unscrew the “captive” s crew (1) and lift the screw up.
5. Push in the tab on the side of the I/O module (2).
6. Remove the fan cage assembly by rotating it up and out (3), lifting the hook (4) on the
rear of the assembly off the top spool on the rear of the module and clearing the flange
(5) and notch (6) of the module.
Figure 6-20: Removing the fan cage assembly
6-20
HP ProLiant DL760 Generation 2 Server Maintenance and Service Guide
I/O Module Removal and Replacement Procedures
To replace the fan cage assembly:
1. Fit the top hook on the rear assembly of the respective top module spool.
2. Rotate the assembly down to fit the bottom assembly flange under the bottom spool.
a. Be sure the tab is inside the module.
b. Line up the captive screw with the hole on the module center wall.
c. Fit the notch on the bottom of the assembly over the respective module spool.
3. Tighten the captive screw.
HP ProLiant DL760 Generation 2 Server Maintenance and Service Guide
6-21
I/O Module Removal and Replacement Procedures
11-slot Hot-Plug Basket
To remove the 11-slot hot-plug basket:
1. Power down the server. Refer to “Pow ering Down the Server” in Chapter 2.
2. Open the I/O lid. Refer to “I/O Lid” in Chapter 3.
3. Remove all installed expansion boards in slots 1 through 11. Refer to “Non-Hot Plug
Expansion Boards” in this chapter.
4. Open the lever next to the array enabler board (1) and remove the board (2).
Figure 6-21: Removing the array enabler board
6-22
HP ProLiant DL760 Generation 2 Server Maintenance and Service Guide
I/O Module Removal and Replacement Procedures
5. Remove the screws securing the hot-plug basket to the chassis (1).
6. Depress the two tabs at the Slot 1 side of the I/O module( 2).
7. Remove the hot-plug basket from the I/O module (3).
Figure 6-22: Removing the 11-slot hot-plug basket
Reverse steps 1 through 7 to replace the 11-slot hot-plug basket.
HP ProLiant DL760 Generation 2 Server Maintenance and Service Guide
6-23
I/O Module Removal and Replacement Procedures
Internal Battery
WARNING: The server contains an internal lithium cell battery. There is risk of fire and
burns if the battery pack is incorrectly replaced or not handled properly. To reduce the
risk of personal injury, do not attempt to recharge the battery. Do not expose to
temperatures higher than 60°C. Do not disassemble, crush, puncture, short external
contacts, or dispose of in fire or water. Replace only with the HP spare designated for
this product.
CAUTION: Replace the lithium battery within 15 minutes of removal to avoid the loss of BIOS
settings. Once BIOS settings are lost, a reconfiguration is necessary to restore them.
To remove the internal battery:
1. Power down the server. Refer to “Pow ering Down the Server” in Chapter 2.
2. Open the I/O lid. Refer to “I/O Lid” in Chapter 3.
3. Remove hot-plug I/O fan 2. Refer to “Hot-Plug Fans” in this chapter.
4. Locate the battery on the I/O board.
5. Pull the battery out of the battery socket (1) and install the new battery (2).
Figure 6-23: Removing the internal battery (fan guide and other
plastics not shown)
CAUTION: Batteries, battery packs, and accumulators should not be disposed of
together with the general household waste. To forward them to recycling or proper
disposal, please use the public collection system or return them to HP, your authorized
HP Partners, or their agents.
6-24
HP ProLiant DL760 Generation 2 Server Maintenance and Service Guide
7
Diagnostic Tools
This chapter provides an overview of the software and firmware diagnostic tools available for
the HP ProLiant DL760 G2 server.
HP ProLiant DL760 Generation 2 Server Maintenance and Service Guide
7-1
Diagnostic Tools
Diagnostic Tools Utility Overview
The following utilities were developed to assist in diagnosing problems, testing the hardware,
and monitoring and managing HP server hardware.
Table 7-1: Diagnostic Tools
Tool
What it is
How to run it
Enterprise Diagnostics LX 32
Utility
This utility assists in testing and verifying
the operation of HP hardware. If problems
are found, Diagnostics isolates failures
down to a replaceable part, whenever
possible.
Diagnostics and utilities are located
on the system partition of the
hard drive and must be accessed
when a system configuration error is
detected during POST. For a
complete list of POST error
messages, refer to the HP Servers
Troubleshooting Guide.
System Maintenance Menu
The System Maintenance Menu has the
option to run the following utilities:
The System Maintenance Menu can
be opened by pressing the F10 key at
the end of system boot, just prior to
the operating system loading from the
hard disk. For more information refer
to the HP ProLiant DL760 Generation
2 User Guide.
•
Setup Utility—Runs the ROM-Based
Setup Utility.
•
ROM-Based Inspect Utility—Runs
the embedded inspection utility. Use
this utility to view system information
and save it to a file on a diskette.
•
ROM-Based Diagnostic Utility—
Runs the embedded ROM Diagnostic
Utility. This utility includes the
Memory Diagnostic, CPU Diagnostic,
and Boot Disk Diagnostic tests.
Insight Manager 7
This client/server application remotely
manages HP hardware in a network
environment. It reports hardware fault
conditions (both failure and prefailure) and
collects data for reporting and graphing.
For more information, refer to the
Management CD and the Insight
Manager User Guide.
Survey Utility
This online information-gathering agent
runs on servers, gathering critical
hardware and software information from
various sources. It is a utility for servers
running Windows NT or NetWare.
Install the Survey Utility from
SmartStart, the Integration
Maintenance Utility, or the
Management CD.
If a significant change occurs between
data gathering intervals, previous
information is marked, and the survey text
file is overwritten to reflect the latest
configuration and changes since last
configuration. This process creates a
historical record of change events for
server hardware and software.
continued
7-2
HP ProLiant DL760 Generation 2 Server Maintenance and Service Guide
Diagnostic Tools
Table 7-1: Diagnostic Tools continued
Tool
What it is
How to run it
ROM-based Setup Utility
The RBSU allows you to change the
system configuration settings from the
initial startup of the system. Specifically, it
provides:
On an unconfigured server, powering
up the server causes RBSU to run
automatically.
•
“Virtual Presence” allowing a system
administrator to use the Remote
Lights-Out Edition to remotely access
and configure the system in a totally
unattended fashion.
•
The ability to immediately save
settings.
•
Selection of operating system. It also
allows configuration of system
specific options such as COM ports
and LPT ports, standard boot order,
and NUMLOCK.
•
Viewing of installed PCI devices and
the ability to configure IRQ (interrupt)
settings for each installed PCI device.
•
Viewing and changing of the system
date and time.
•
Viewing and setting of configuration
options for Automatic Server
Recovery (ASR).
•
The ability to set or change the server
passwords.
•
Setting or customization of the server
asset tag and the text that will be
displayed on the IMD.
•
Setting of advanced options such as
MPS/APIC Mode, Hot-plug
Reservation, and CPU Correction
Marking.
•
Selection of the language for RBSU
(English, French, Italian, German,
Spanish, or Japanese).
On an already configured server,
pressing F9 when prompted after
restarting the server will cause the
RBSU to run.
continued
HP ProLiant DL760 Generation 2 Server Maintenance and Service Guide
7-3
Diagnostic Tools
Table 7-1: Diagnostic Tools continued
Tool
What it is
How to run it
Array Diagnostics Utility
(ADU)
ADU is a Windows-based tool designed to
run on all HP systems that support HP
array controllers. The two main functions
of ADU are:
Use the information provided in the
ADU.
•
To collect all possible information
about the array controllers in the
system.
•
To generate a list of detected
problems.
For a complete list of ADU error
messages, refer to the HP Servers
Troubleshooting Guide.
This tool is available for all HP servers
covered by this guide.
Drive Array Advanced
Diagnostics (DAAD)
Integrated Management Log
(IML)
The predecessor to ADU, DAAD is a
DOS-based tool for HP servers with Smart
Array Controllers. DAAD collects
information about the array controllers in
the system and offers a list of detected
problems.
For a list of HP servers still supported
by this tool, visit the HP website:
IML is a log of system events, such as
system failures or nonfatal error
conditions. View events in the Integrated
Management Log from within:
The Integrated Management Log
requires HP operating systemdependent drivers. Refer to the
Support Software CD for instructions
on installing the appropriate drivers.
•
Insight Manager
•
Survey Utility
•
Operating system-specific IML utilities
Power-On Self Test
A diagnostic testing sequence run by the
server when power is turned on. POST will
determine if the server hardware
components are properly working.
Automatic Server Recovery
(ASR-2)
ASR-2 is a feature of HP Systems Health
Driver. If a server failure extends beyond a
set time, the system reboots and attempts
to recover.
www.hp.com
For a list of POST error messages,
refer to the HP Servers
Troubleshooting Guide.
For More Information
For detailed information about each of these diagnostic tools, refer to the HP Servers
Troubleshooting Guide.
For detailed information on troubleshooting the ProLiant DL760 G2 server, refer to the
HP ProLiant DL760 Generation 2 Server User Guide.
For detailed information about the RBSU, refer to the ROM-Based Setup Utility User Guide
on the Documentation CD.
7-4
HP ProLiant DL760 Generation 2 Server Maintenance and Service Guide
8
Connectors, Switches, and LED Indicators
Connectors
This section contains graphics and tables that show the connector locations on the I/O board
and processor board of the HP ProLiant DL760 G2 server.
Rear Connectors
Figure 8-1: Rear I/O board connectors
Item
1
Description
External Ultra2 tape port connector
2 Vide
o connector
3 Keyboard
4 Mouse
5 Serial
connector
connector
port
HP ProLiant DL760 Generation 2 Server Maintenance and Service Guide
8-1
Connectors, Switches, and LED Indicators
I/O Board Components
Figure 8-2: I/O board components
Table 8-1: I/O Board Components
Item
Description
1, 2
Bus 19 (slots 1 and 2)
64-bit/100-MHz/3-V PCI-X Hot Plug
14
3, 4
Bus 15 (slots 3 and 4)
64-bit/100-MHz/3-V PCI-X Hot Plug
15 Boot
5, 6
Bus 11 (slots 5 and 6)
64-bit/100-MHz/3-V PCI-X Hot Plug
16
I/O board configuration switches
(SW1)
7, 8
Bus 7 (slots 7 and 8)
64-bit/100-MHz/3-V PCI-X Hot Plug
17
Hot-plug Fan 2 assembly connector
Bus 0 (slot 9)
64-bit/100-MHz/3-V PCI Hot Plug
18 NVRAM
10, 11
Bus 3 (slots 10 and 11)
64-bit/100-MHz/3-V PCI-X Hot Plug
19
Remote Insight Lights-Out Edition II
cable connector
12
PCI Hot Plug board cable connector
20
Integrated Smart Array 5i controller
13
Non-Maskable Interrupt (NMI) switch
21
Array Enabler board connectors
9
Item
Description
Hot-plug Fan 1 assembly connector
block
battery
NOTE: The operating system detects PCI devices in the following slot order:
9-10-11-7-8-5-6-3-4-1-2.
8-2
HP ProLiant DL760 Generation 2 Server Maintenance and Service Guide
Connectors, Switches, and LED Indicators
Host Board
Figure 8-3: Host board connectors
Item
Description
1I
2
C write-protect header (if not installed, unit is write
protected)
2
Processor board 1 connector
3
Processor board 2 connector
4
Hot spare boot (HSB) disable (if jumper is installed, the
HSB is disabled)
5
Memory riser board connector
HP ProLiant DL760 Generation 2 Server Maintenance and Service Guide
8-3
Connectors, Switches, and LED Indicators
Switches
This section contains graphics and tables showing switch locations and settings on the
processor board.
The I/O board configuration switchbank (SW1) is located on the I/O board. Figure 8-4
describes the function of each switch.
Figure 8-4: I/O board switchbank (default settings shown)
Table 8-2: I/O Board Configuration Switch Settings (SW1)
Switch
Function
S1 On-boar
S2 Config
Enable
Disable
Default
d video
OFF
ON
OFF
uration lock
ON
OFF
OFF
-
-
OFF
ON
OFF
OFF
OFF
ON
OFF
ON
OFF
OFF
S3 Rack-mount
S4
S5 Boot
S6
Diskette boot override
password
Clear NVRAM *
* You must re-enter the server serial number through RBSU after you clear NVRAM. Refer to the
“Re-entering the Server Serial Number” section in Chapter 2.
8-4
HP ProLiant DL760 Generation 2 Server Maintenance and Service Guide
Connectors, Switches, and LED Indicators
LED Indicators
Status LEDs are located on the front, back, and inside of the server. These LEDs
communicate the current status of varying aspects of the server’s components and operations,
thus aiding you in diagnosing problems. The following ProLiant DL760 G2 server LEDs are
explained in this chapter.
•
System Power LED—Located on the server above the power butto n
•
Server auxiliary power LED—Locat ed on the I/O board
•
System interconnect LEDs—Located on the top of the server
•
System attention LEDs—Located on the front left side of the server
•
Hot-plug SCSI hard drive LEDs—Loca ted on the front of each hard drive
•
Power supply LEDs—Located on the rear of the server
•
Hot-plug fan LEDs—Loca ted on each fan, inside the server
•
PCI Hot Plug LEDs—Located on the rear of the server and inside th e I/O module
•
Memory cartridge LEDs— Located on the memory cartridges
•
DIMM status LEDs—Located on the fro nt under the memory cartridges
HP ProLiant DL760 Generation 2 Server Maintenance and Service Guide
8-5
Connectors, Switches, and LED Indicators
System Power LED Indicator
Figure 8-5 shows the location of the system power LED (1).
Figure 8-5: System Power LED
Auxiliary Power LED Indicator
Figure 8-6 shows the location of the auxiliary power LED (1) on the I/O board.
Figure 8-6: Auxiliary power LED
8-6
HP ProLiant DL760 Generation 2 Server Maintenance and Service Guide
Connectors, Switches, and LED Indicators
System Interconnect LED Indicators
To prevent damage to critical system components, the ProLiant DL760 G2 server will not
power up if it detects that certain components are not installed or are installed incorrectly.
The system interconnect LEDs provided with ProLiant DL760 G2 servers provide a
closed-loop checking mechanism for verifying proper component mating and
interconnections between critical server components. LEDs inside the sliding top cover
provide visual assistance in isolating components to check if the server will not power up due
to a component or module that is not fully installed. If a status indicator light is on, reseat the
component represented by the indicator. Refer to the hood labels for component location.
IMPORTANT: To check system interconnect status LEDs, place the server in Standby with the power
supplies plugged in.
Figure 8-7: System interconnect LEDs
Item
Description
1
I/O module interconnect
2
Processor and memory module interconnect
3
Processor board 1 interconnect
4
Processor board 2 interconnect
5
Memory riser board interconnect
6
Media module interconnect
7
SCSI backplane 1 interconnect
8
SCSI backplane 2 interconnect
9
Interconnect check light
HP ProLiant DL760 Generation 2 Server Maintenance and Service Guide
8-7
Connectors, Switches, and LED Indicators
System Attention LED Indicators
Figure 8-8: System attention LED indicators
Item
8-8
Description
1
Hot-plug Fan 1 attention LED
2
Hot-plug Fan 2 attention LED
3
Processor board 1 attention LED
4
Processor board 2 attention LED
HP ProLiant DL760 Generation 2 Server Maintenance and Service Guide
Connectors, Switches, and LED Indicators
Hot-Plug SCSI Hard Drive LED Indicators
The hot-plug SCSI hard drive LEDs, located on each physical drive, are visible on the front
of the server or external storage unit. They provide: (1) Activity, (2) Power/Online, and (3)
Fault status for each corresponding drive when configured as a part of an array and attached
to a powered-on controller. Their behavior can vary, depending on the status of other drives
in the array.
Figure 8-9: Hot-plug SCSI hard drive LEDs
HP ProLiant DL760 Generation 2 Server Maintenance and Service Guide
8-9
Connectors, Switches, and LED Indicators
Figure 8-10: SCSI hard drive LEDs
8-10
HP ProLiant DL760 Generation 2 Server Maintenance and Service Guide
Connectors, Switches, and LED Indicators
Power Supply LED Indicators
Each power supply has status and AC power LEDs. Refer to Figure 8-11 and Table 8-3 for a
detailed description of both indicators.
Figure 8-11: Power supply LEDs
Table 8-3: Power Supply LEDs
Item
Condition
Green Normal
1 Status
2 AC Power
Meaning
operation.
Green/Amber alternating
Power supply failed to restart after a prolonged fault.
Green blinking
Power supply will restart within 20 seconds.
Amber
Fault detected in this power supply.
Amber blinking
Power supply failed self-test.
Off
System is in standby mode, or interlocks are disabled.
Green
AC power is connected to this power supply.
Off
No AC power is connected to this power supply.
HP ProLiant DL760 Generation 2 Server Maintenance and Service Guide
8-11
Connectors, Switches, and LED Indicators
Hot-Plug Fan LED Indicators
The ProLiant DL760 G2 server ships with two hot-plug fans. Fan 1 is closest to the rear of
the server. Each fan has LEDs that indicate the following fan statuses:
•
Green LED (1)—Fan is installed and working properly.
•
Amber LED (2)—The fan needs attention or is not ins talled.
Figure 8-12: Hot-plug fan LEDs
CAUTION: Never remove both hot-plug fans while the server is powered up.
Overheating and damage to hardware could result. If the appropriate HP software
drivers are installed, the operating system software will initiate a power shutdown if
overheated.
NOTE: The hot-plug fan LEDs are not part of the fan housing. Figure 8-12 shows the LEDs as if the fan
were installed in the server.
8-12
HP ProLiant DL760 Generation 2 Server Maintenance and Service Guide
Connectors, Switches, and LED Indicators
PCI Hot Plug LED Indicators
The PCI Hot Plug amber (1) and green (2) LEDs (shown in the following figure for one slot)
provide a visual reference of each slot’s status. The LEDs are viewed from the rear of the
server, as shown in Figure 8-13, or by opening the I/O lid, as shown in Figure 8-14.
Figure 8-13: PCI Hot Plug LEDs from rear of the server
Figure 8-14: PCI Hot Plug LEDs in the I/O module
A description and slot status for the PCI Hot Plug LEDs and button, as shown in Figure 8-14,
are provided in Table 8-4.
HP ProLiant DL760 Generation 2 Server Maintenance and Service Guide
8-13
Connectors, Switches, and LED Indicators
Table 8-4: PCI Hot Plug LEDs and Button
Amber LED
1
OK to
Open
Slot Condition and Status
Off
Slot does not require attention.
On
Slot requires attention. There could be a problem with the
slot, the PCI board, or the driver. Check the green LED
before opening the slot.
Refer to the IML and/or the PCI Hot Plug software
application for a description of the problem indicated.
Green LED
2
8-14
Slot Condition and Status
On
No
Power is applied to the slot.
Blinking
No
Power to the slot is being turned off or on. This process
could take several minutes. Do not open the slot release
lever until the green LED is completely off.
Off
Yes
You can replace or remove the board in this slot only.
PCI Hot Plug
Button
3
OK to
Open
Each PCI Hot Plug button is used to activate or deactivate its associated
PCI Hot Plug slot. Activating or deactivating a PCI Hot Plug slot can also
be accomplished through the operating system PCI Hot Plug software
application. For more information about the PCI Hot Plug software
application, refer to the “PCI Hot Plug Operating System Support”
section.
HP ProLiant DL760 Generation 2 Server Maintenance and Service Guide
Connectors, Switches, and LED Indicators
Memory Cartridge LED Indicators
The ProLiant DL760 G2 server has LEDs for each of the memory cartridges. These LEDs are
used to determine the status of memory installed in the server.
Figure 8-15: Memory cartridge LEDs
Table 8-5: Memory Cartridge LEDs
Item
LED Indicator
LED Icon
1
Cartridge 1 DIMM status LED
12345678
2
Cartridge 2 DIMM status LED
12345678
3
Cartridge 3 DIMM status LED
12345678
4
Cartridge 4 DIMM status LED
12345678
5
Cartridge 5 DIMM status LED
12345678
6
Cartridge power LED
7
Cartridge attention LED
Note: These LEDs are backlit through icon lenses. An icon only appears
when the LED is illuminated.
HP ProLiant DL760 Generation 2 Server Maintenance and Service Guide
8-15
9
Physical, Operating, and Performance Specifications
This section provides physical, operating, and performance specifications for the following
components of the HP ProLiant DL760 G2 server:
•
Server
•
Power supply
•
Dual inline memory module (DIMM)
•
1.44-MB diskette drive
•
24X Max (or higher) IDE CD-ROM drive (low profile)
•
Hot-pluggable Wide Ultra3 and U320 SCSI hard drives
•
Smart Array 5i Controller
•
NC7770 PCI-X Gigabit Server Adapter
HP ProLiant DL760 Generation 2 Server Maintenance and Service Guide
9-1
Physical, Operating, and Performance Specifications
Server Specifications
Table 9-1: HP ProLiant DL760 G2 Server Specifications
Dimensions
Height
30.5 cm/12.0 in
Depth
68.5 cm/27.0 in
Width
44.5 cm/17.5 in
Weight (no drives and two power supplies)
52.3 kg /140 lb
Input Requirements (per power supply)
Low Range/High Range
Rated Input Voltage
100 to 120 V/200 to 240 V
Rated Input Frequency
50 to 60 Hz/50 to 60 Hz
Rated Input Current
8 A/10 A
Power Supply Output Power (per power supply)
Low Range/High Range
Rated Steady-State Power
500 W/1150 W
Maximum Peak Power
549 W/1150 W
Temperature Range
Operating
10° to 35° C (50° to 95° F)*
Shipping
-30° to 60° C (-22° to 122° F)
Relative Humidity (noncondensing)
Operating
10% to 90%
Nonoperating
5% to 90%
Maximum Wet Bulb Temperature
38.7° C (101.7° F)
o
* Altitude derating: C/1000 ft to 10,000 feet.
9-2
HP ProLiant DL760 Generation 2 Server Maintenance and Service Guide
Physical, Operating, and Performance Specifications
Power Supply Specifications
Table 9-2: Power Supply Specifications
General specifications
Full output rating
To 40° C and 1,525 m (to 104° F and 5,000 ft)
To 32° C and 3,050 m (to 90° F and 10,000 ft) (derate linearly)
Minimum load
1.0 A on + 5 V output
1.0 A on + 12 V output
0.5 A on + 3.3 V output
Ambient temperature range
Operating
10° to 40° C (50° to 104° F)
Storage
-40° to 65° C (-40° to 149° F)
Input specifications
Low Range/High Range
Nominal line voltage
100 to 120 VAC/200 to 240 VAC
Range input line
90 to 132 VAC/180 to 265 VAC
Frequency range
47 to 63 Hz/47 to 63 Hz
Power factor
0.95/0.95
Input power
500 W @ 110 V/1150 W @ 220 V
Input current
8 A at 100 VAC/10 A at 200 VAC
Inrush current
<70 A at 132 VAC (cold start)/< 35 A at 265 VAC (cold start)
Holdup time
20 ms from zero crossing at 120 VAC/20 ms from zero
crossing at 120 VAC
Dielectric voltage withstand
Input to output
3000 VAC per minute/3000 VAC per minute
Input to ground
1500 VAC per minute/1500 VAC per minute
Input transient susceptibility
Common and differential mode
(superimposed on AC line)
2500 V, 10 µs pulse
Differential mode
20% step change in AC input voltage
HP ProLiant DL760 Generation 2 Server Maintenance and Service Guide
9-3
Physical, Operating, and Performance Specifications
Dual Inline Memory Module (DIMM) Specifications
Table 9-3: DIMM Specifications
Size
256 MB, 512 MB, or 1 GB
Speed
60 ns or faster
Upgrade requirement
Bank of two DIMMs; must be same type, size, speed, and manufacturer
Type
Buffered ECC protected DIMMs; SDRAM
1.44-MB Diskette Drive Specifications
Table 9-4: Diskette Drive Specifications
Size 3.5
in
LED indicators (front panel)
Green
Read/write capacity per diskette (high/low
density)
1.44 MB/720 KB
Drives supported
1
Drive height
1/3
Drive rotation
300 rpm
Transfer rate bits per sec (high/low)
500/250 K
Bytes per sector
512
Sectors per track (high/low)
18/9
Tracks per side (high/low)
80/80
Access times
9-4
Track-to-track (high/low)
6 ms/3 ms
Average (high/low)
174 ms/94 ms
Settling time
15 ms
Latency average (high/low)
100 ms/83 ms
Cylinders (high/low)
80/80
Read/write heads
2
HP ProLiant DL760 Generation 2 Server Maintenance and Service Guide
Physical, Operating, and Performance Specifications
DVD-ROM Drive Specifications
Table 9-5: DVD-ROM Drive Specifications
Dimensions
Height
4.29 cm (1.69 in)
Width
15.0 cm (5.75 in)
Depth
20.8 cm (8.19 in)
Weight
1200 g (2.66 lb)
Operating conditions
Temperature
5° to 45° C (41° to 113° F)
Humidity
10% to 80%
Applicable disk
CD-ROM (mode 1 and 2), CD-DA, CD-XA (mode 2, form 1 and 2),
photo CD (single-session and multi-session), mixed mode (audio
and data combined)
Capacity
550 MB (mode 1, 12 cm)
640 MB (mode 2, 12 cm)
Block size
2048, 1024 bytes (mode 1)
2340, 2336, 1024 bytes (mode 2)
2352 bytes (CD-DA)
2328 bytes (CD-XA)
Diameter
12 cm, 8 cm (4.7 in, 3.15 in)
Rotational speed
4200 rpm maximum
Center hole thickness
15 mm (0.6 in)
Track pitch
1.6 µm
Data transfer rate
Sustained
150 KB/s (single)
Variable
1200-3600 KB/s (8X to 24X)
Data transfer method
32-bit bus master PCI
Access times (typical)
Full stroke
200 ms
Random
100 ms
Cache/buffer 128
KB
Startup time (typical)
>7s
Stop time
>4s
Audio output level
Line out
0.7 VRMS at 47 Ohms
Headphone
0.6 VRMS at 32 Ohms (maximum width)
continued
HP ProLiant DL760 Generation 2 Server Maintenance and Service Guide
9-5
Physical, Operating, and Performance Specifications
Table 9-5: DVD-ROM Drive Specifications continued
Laser parameters
Type
Semiconductor laser GaA1As
Wave length
780 +/- 25 nm
Divergence angle
53.5° +/- 1.5°
Output power
0.14 mW
Interface IDE
9-6
(ATAPI)
HP ProLiant DL760 Generation 2 Server Maintenance and Service Guide
Physical, Operating, and Performance Specifications
24X Max IDE CD-ROM Drive Specifications
Table 9-6: 24X Max IDE CD-ROM Drive Specifications
Dimensions
Height
4.29 cm (1.69 in)
Width
15.0 cm (5.75 in)
Depth
20.8 cm (8.19 in)
Weight
1200 g (2.66 lb)
Operating conditions
Temperature
5° to 45° C (41° to 113° F)
Humidity
10% to 80%
Applicable disk
CD-ROM (mode 1 and 2), CD-DA, CD-XA (mode 2, form 1 and 2),
photo CD (single-session and multi-session), mixed mode (audio
and data combined)
Capacity
550 MB (mode 1, 12 cm)
640 MB (mode 2, 12 cm)
Block size
2048, 1024 bytes (mode 1)
2340, 2336, 1024 bytes (mode 2)
2352 bytes (CD-DA)
2328 bytes (CD-XA)
Diameter
12 cm, 8 cm (4.7 in., 3.15 in.)
Rotational speed
4200 rpm maximum
Center hole thickness
15 mm (0.6 in.)
Track pitch
1.6 µm
Data transfer rate
Sustained
150 KB/s (single)
Variable
1200-3600 KB/s (8X to 24X)
Data transfer method
32-bit bus master PCI
Access times (typical)
Full stroke
200 ms
Random
100 ms
Cache/buffer 128
KB
Startup time (typical)
>7s
Stop time
>4s
continued
HP ProLiant DL760 Generation 2 Server Maintenance and Service Guide
9-7
Physical, Operating, and Performance Specifications
Table 9-6: 24X Max IDE CD-ROM Drive Specifications continued
Audio output level
Line out
0.7 VRMS at 47 Ohms
Headphone
0.6 VRMS at 32 Ohms (maximum width)
Laser parameters
Type
Semiconductor laser GaA1As
Wave length
780 +/- 25 nm
Divergence angle
53.5° +/- 1.5°
Output power
0.14 mW
Interface IDE
9-8
(ATAPI)
HP ProLiant DL760 Generation 2 Server Maintenance and Service Guide
Physical, Operating, and Performance Specifications
Hot-Plug U320 SCSI Hard Drives
Table 9-7: Hot-Plug U320 SCSI Hard Drives
36.4-GB
72.8-GB
146.8-GB
18.2-GB
36.4-GB
72.8-GB
Capacity
36419.3 MB
72839.1 MB
146815.7 MB
18209.3 MB
36419.3 MB
72839.1 MB
Height
1.0 in
1.0 in
1.0 in
1.0 in
1.0 in
1.0 in
Size
3.5 in
3.5 in
3.5 in
3.5 in
3.5 in
3.5 in
Interface W
ideUltra320
SCSI
WideUltra320
SCSI
Wide-Ultra
320
SCSI
WideUltra320
SCSI
WideUltra320
SCSI
WideUltra320
SCSI
Transfer rate
320 MB/s
320 MB/s
320 MB/s
320 MB/s
320 MB/s
320 MB/s
Seek time (typical, including setting)
Single track
0.55 ms
0.55 ms
0.55 ms
0.40 ms
0.40 ms
0.40 ms
Average
4.90 ms
4.90 ms
4.90 ms
3.80 ms
3.80 ms
3.80 ms
Full stroke
9.20 ms
9.20 ms
9.20 ms
6.70 ms
6.70 ms
6.70 ms
10,000 rpm
10,000 rpm
10,000 rpm
15,000 rpm
15,000 rpm
15,000 rpm
512
512
512
Rotational
speed
Physical configuration
Bytes/Sector
512 512 512
Logical
blocks
71,131,999 142,2
Operating
temperature
5° to 55° C
(41° to
131° F)
63,999
5° to 55° C
(41° to
131° F)
286,749,487 17,77
5° to 55° C
(41° to
131° F)
3,524
5° to 55° C
(41° to
131°F)
HP ProLiant DL760 Generation 2 Server Maintenance and Service Guide
35,565,080 142,2
5° to 55° C
(41° to
131° F)
63,999
5° to 55° C
(41° to
131° F)
9-9
Physical, Operating, and Performance Specifications
Hot-Plug Ultra3 SCSI Hard Drives
Table 9-8: Hot-Plug Ultra3 SCSI Hard Drives
18.2-GB
36.4-GB
18.2-GB
Capacity
18209.3 MB
36419.3
18209.3 MB
Height
1.0 in
1.0 in
1.0 in
Size
3.5 in
3.5 in
3.5 in
Wide-Ultra3 SCSI
Wide-Ultra3 SCSI
160 MB/s
160 MB/s
Interface W
Transfer rate
ide-Ultra3 SCSI
160 MB/s
Seek time (typical, including setting)
Single track
0.8 ms
0.9 ms
0.7 ms
Average
5.2 ms
5.7 ms
3.9 ms
Full stroke
12.0 ms
12.0 ms
12.0 ms
10,000 rpm
10,000 rpm
15,000 rpm
Rotational speed
Physical configuration
Bytes/sector
512 512 512
Logical blocks
35,565,080 17,77
Operating temperature
9-10
10° to 35° C
(50° to 95° F)
3,524 35,56
10° to 35° C
(50° to 95° F)
5,080
10° to 35° C
(50° to 95° F)
HP ProLiant DL760 Generation 2 Server Maintenance and Service Guide
Physical, Operating, and Performance Specifications
Smart Array 5i Controller Specifications
Table 9-9: Smart Array 5i Controller Specifications
Temperature range
Operating
10° to 35° C (50° to 95° F)
Shipping
-30° to 60° C (-22° to 140° F)
Relative humidity range (noncondensing)
Operating
20% to 80%
Nonoperating
5% to 90%
Maximum drives supported
4
Logical drives supported
32
Simultaneous drive transfer channels
2
Data transfer method
32/64-bit PCI bus master interface
Total transfer rate
320 MB/s (160 MB/s per channel)
SCSI electrical interface
Low-voltage differential (LVD) and single-ended
PCI bus transfer rate (maximum)
160 MB/s
SCSI port connectors (internal/external)
68-pin Wide SCSI/VHDCI connector
Protocol
Wide Ultra2 and Wide Ultra3 SCSI
SCSI electrical interface
Low-voltage differential
Software upgradeable firmware
Yes
Read cache
32 MB
Reliability features
Online capacity expansion
Yes
Logical drive capacity extension
Yes
Online RAID level migration
Yes
Online stripe size migration
Yes
Automatic data recovery
Yes
Distributed data guarding (RAID 5)
Yes
Data guarding (RAID 4)
No
Data mirroring (RAID 1)
Yes
Drive striping (RAID 0, 0 + 1)
Yes
HP ProLiant DL760 Generation 2 Server Maintenance and Service Guide
9-11
Physical, Operating, and Performance Specifications
NC7770 PCI-X Gigabit Server Adapter Specifications
Table 9-10: NC7770 PCI-X Gigabit Server Adapter Specifications
Network interface
10Base-T/100Base-TX
Compatibility
IEEE 802.3i, 802.3u, 802.3x, 802.3ab, 802.3ad compliant
PCI-X 1.0, PCI 2.2, ACPI v1.1a
Data path
64/133 MHz, compatible with 64/100, 64/66, 66/33, and
32/33
Bus architecture
PCI-X bus mastering, compatible with existing PCI bus
architecture
Network transfer rate
10Base-T (half-duplex), 10Base-2
10 Mbps
10Base-T (full-duplex)
20 Mbps
100Base-TX (half-duplex)
100 Mbps
100Base-TX (full-duplex)
200 Mbps
1000Base-TX (half-duplex)
1000 Mbps
1000Base-TX (full-duplex)
2000 Mbps
Connector RJ-45
9-12
I/O address and interrupt
Automatic configuration
Cable support
Category 5 or higher UTP; up to 100 m (328 ft)
Operating system driver support
Microsoft Windows Server 2003
Microsoft Windows 2000
Microsoft Windows NT 4.0
Caldera OpenUnix 8
Linux
HP ProLiant DL760 Generation 2 Server Maintenance and Service Guide
Physical, Operating, and Performance Specifications
NC7170 Dual Port PCI-X Gigabit Server Adapter Specifications
Table 9-11: NC7170 Dual Port PCI-X Gigabit Server Adapter Specifications
Network interface
10/100/1000 base-T
Compatibility
IEEE 802.3, 802.3u, 802.3x, 802.3ab, 802.3ad (static
mode configuration only), 802.1p, 802.1Q, PCI-X 1.0, PCI
2.2, ACPI v1.1a
Data path
64-bit/133MHz, compatible with 64/100, 64/44, 64/33,
32/33
Bus architecture
PCI-X bus mastering, compatible with existing PCI bus
architecture
Bus Connector
Two RJ-45
Cable support
Category 5 or higher UTP; up to 100 m (328 ft)
Operating system driver support
Microsoft Windows Server 2003
Microsoft Windows 2000
Novell NetWare 4.x, 5.x, 6.x Server
Linux - selected Red Hat and SuSE distributions
SCO OpenUnix 8 and OpenServer 5
MS-DOS Client for unattended installation
HP ProLiant DL760 Generation 2 Server Maintenance and Service Guide
9-13
Index
1
11-slot hot-plug basket 6-22
A
ADU (Array Diagnostics Utility)
location 2-8
overview 7-4
Advanced Data Guarding 4-8
Array Diagnostics Utility (ADU)
location 2-8
overview 7-4
array enabler board
part number 1-9
removing 6-22
auxiliary power LED indicator 8-6
B
battery
part number 1-11
removing/replacing 6-24
bezels, media module removing/replacing 4-4
blanking panels, hard drives 1-5, 4-7
boards
array enabler 6-22
host board connectors 8-3
I/O connectors 8-2
I/O switches 8-4
memory 1-7
PCI Hot Plug 1-9
processor, part numbers 1-7
brackets, cable management arm 6-1
C
CD-ROM drives
location 4-1
removing 4-10
specifications 9-7
chassis, part number 1-3
component-level repairs vii
connectors
host board 8-3
I/O board 8-2
processor boards 8-3
rear panel 8-1
controllers
Fast Ethernet 9-12, 9-13
Smart Array 9-11
country kit 1-11
D
DAAD (Drive Array Advanced Diagnostics)
location 2-8
overview 7-4
diagnostic tools
location 2-8
overview 7-2
DIMMs (Dual Inline Memory Modules), part
numbers 1-7
diskette drives
integrated 4-10
location 4-1
specifications 9-4
Drive Array Advanced Diagnostics (DAAD)
location 2-8
overview 7-4
Dual Inline Memory Modules (DIMMs), part
numbers 1-7
DVD-ROM drive
specifications 9-5
cable management arm, removing 6-1
cables
CD-ROM drive signal 4-12
diskette drive control and data 4-12
diskette drive power 4-12
IMD 4-12
power switch/LED/ambient air temperature
sensor 4-12
HP ProLiant DL760 Generation 2 Server Maintenance and Service Guide
Index-1
Index
E
electrostatic discharge (ESD) 2-1
Enterprise Diagnostics LX 32 Utility 7-2
ESD (electrostatic discharge) 2-1
Ethernet controllers 9-12, 9-13
Ethernet loopback RJ-45 1-11
F
F2 key 4-8
fan cage assemblies
I/O module 1-9
removing/replacing 6-20
fans
LED indicators 8-12
replacing 6-18
Fast Ethernet Controller 9-12, 9-13
fault tolerance 4-9
G
grounding viii
grounding plug vii
grounding procedures 2-1, 2-2
H
hard drives
blanks 4-7
LED indicators 8-9
part numbers 1-5
removing/replacing 4-9
help resources viii
hot plug power supplies 3-2
Hot Plug RAID Memory cartridge LED
indicators 8-15
hot surfaces 5-6
hot-plug components
11-slot hot-plug basket 6-22
fans 6-18, 8-12
hard drives 8-9
power supplies 1-3
HP authorized reseller viii
I
I/O components
board connector locations 8-2
expansion slots 6-7
switches 8-4
I/O expansion boards
installing 6-10
locating I/O expansion slots 6-6
Index-2
I/O lid
opening 3-1
part number 1-3
I/O module
accessing 2-7
exploded view 1-8
part numbers 1-3
removing/replacing 6-4
illustrated parts catalog 1-1
IMD (Integrated Management Display) 4-5
IML (Integrated Management Log) 7-4
Insight Manager 7-2
installing
I/O expansion boards 6-10
PCI Hot Plug expansion boards 6-14
power supplies 3-2
processors 5-5
SDRAM DIMMs 5-15
internal battery 6-24
L
LED indicators
auxiliary power 8-6
fans 6-18, 8-12
Hot Plug RAID Memory 8-15
overview 8-5
PCI Hot Plug 6-12, 8-13
power supply 8-11
SCSI hard drives 8-9
system attention 8-8
system interconnect status 8-7
system power 8-6
LVDS hard drive blank 1-5
M
media module
accessing 2-7
contents 4-1
exploded view 1-4
part numbers 1-3
removing/replacing 4-2
memory cartridge LED indicators 8-15
memory riser board 5-17
memory, part numbers 1-7
midplane assembly, removing/replacing 3-5
modules
access methods 2-7
media 4-1
processor and memory 5-3
HP ProLiant DL760 Generation 2 Server Maintenance and Service Guide
Index
N
NC7170 Fast Ethernet Controller 9-13
NC7770 Fast Ethernet Controller 9-12
O
operating systems, PCI Hot Plug support 6-13
P
part numbers, system chassis 1-3
parts catalog, illustrated 1-1
PCI Hot Plug expansion boards
adding 6-14
installing 6-10
LED indicators 6-12, 8-13
operating system support 6-13
removing/replacing 6-16
PCI Hot Plug, accessing 3-1
PCI/PCI-X expansion boards, adding 6-14
POST (Power-On Self-Test) See Power-On SelfTest (POST)
power and power supplies
auxiliary power LED 8-6
LED indicators 8-11
system power LED 8-6
Power On/Standby switch
power switch assembly with LED part
number 1-5
removing/replacing assembly 4-13
power supplies
hot plug 3-2
part number 1-3
specifications 9-3
Power-On Self-Test (POST), power-up process 2-11
processor and memory module
accessing 2-7
exploded view 1-6
part numbers 1-3
removing 5-4
removing/replacing 5-3
processors
accessing 5-4
part numbers 1-7
processor board connectors to host board 8-3
R
racks, removing I/O module 3-7, 6-1
rear panel configuration 8-1
removing
cable management arm 6-1
hard drives 4-8
I/O module 6-4
processor and memory module 5-4
replacing components, hot-plug SCSI hard
drives 4-8
requirements, PCI Hot Plug 6-11
return kit, part number 1-11
ROM-based Setup Utility (RBSU) 7-3
S
SDRAM DIMMs
installing 5-15
memory bus configuration 5-14
part numbers 1-7
SDRAM memory bus configuration 5-14
security screw 5-2
serial number, re-entering 2-15
Smart Array Controller specifications 9-11
SmartStart, utilities 2-7
software required for service procedures 2-7
specifications
CD-ROM drives 9-7
DIMMs 9-4
diskette drives 9-4
DVD-ROM drive 9-5
Fast Ethernet Controller 9-12, 9-13
power supplies 9-3
Smart Array Controller 9-11
system unit 9-2
U320 SCSI hard drives 9-9
Wide Ultra3 SCSI hard drives 9-10
static electricity 2-1
storage of parts 2-1
Survey Utility 7-2
switches, I/O board 8-4
system attention LED indicators 8-8
system components, part numbers 1-3
system interconnect LED indicators 8-7
system midplane assembly, removing/replacing 3-5
system power LED indicator 8-6
system unit specifications 9-2
T
technician notes vii
telephone numbers viii
tools required for service procedures 2-7
transporting parts 2-1
HP ProLiant DL760 Generation 2 Server Maintenance and Service Guide
Index-3
Index
U
W
U320 SCSI hard drives specifications 9-9
utilities
overview 7-2
required 2-8
warnings
electrical safety 2-2
hot surfaces 5-4
warranty viii
Wide Ultra3 SCSI hard drives
part numbers 1-5
specifications 9-10
wrist strap, using 2-1
V
ventilation clearances viii
Index-4
HP ProLiant DL760 Generation 2 Server Maintenance and Service Guide